Harsper HP-500VP PDP TV User Manual
Harsper Co., Ltd. PDP TV
UserManual.wiki
>
Harsper
>
HP 500VP User Manual
Users Manual
Navigation menu
Upload a User Manual
Namespaces
Wiki Guide
HTML
PDF
Info
Views
User Manual
Discussion / Help
Navigation
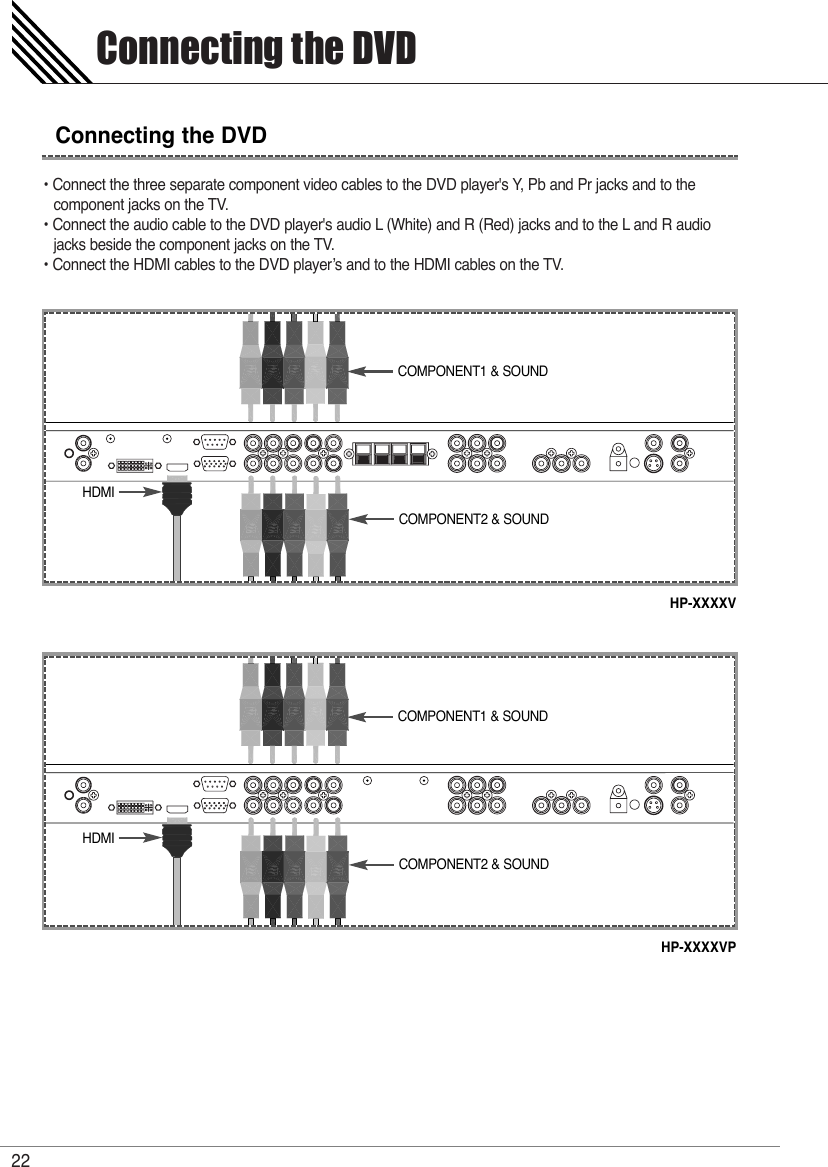
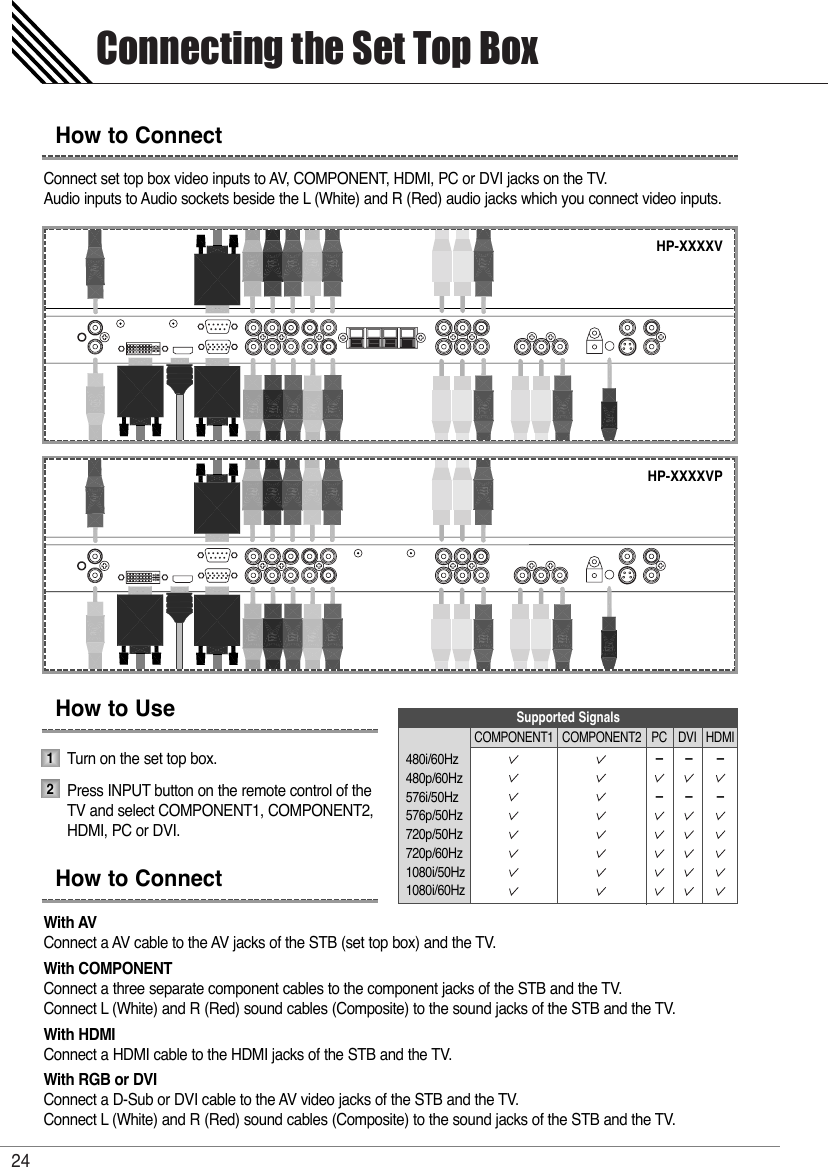
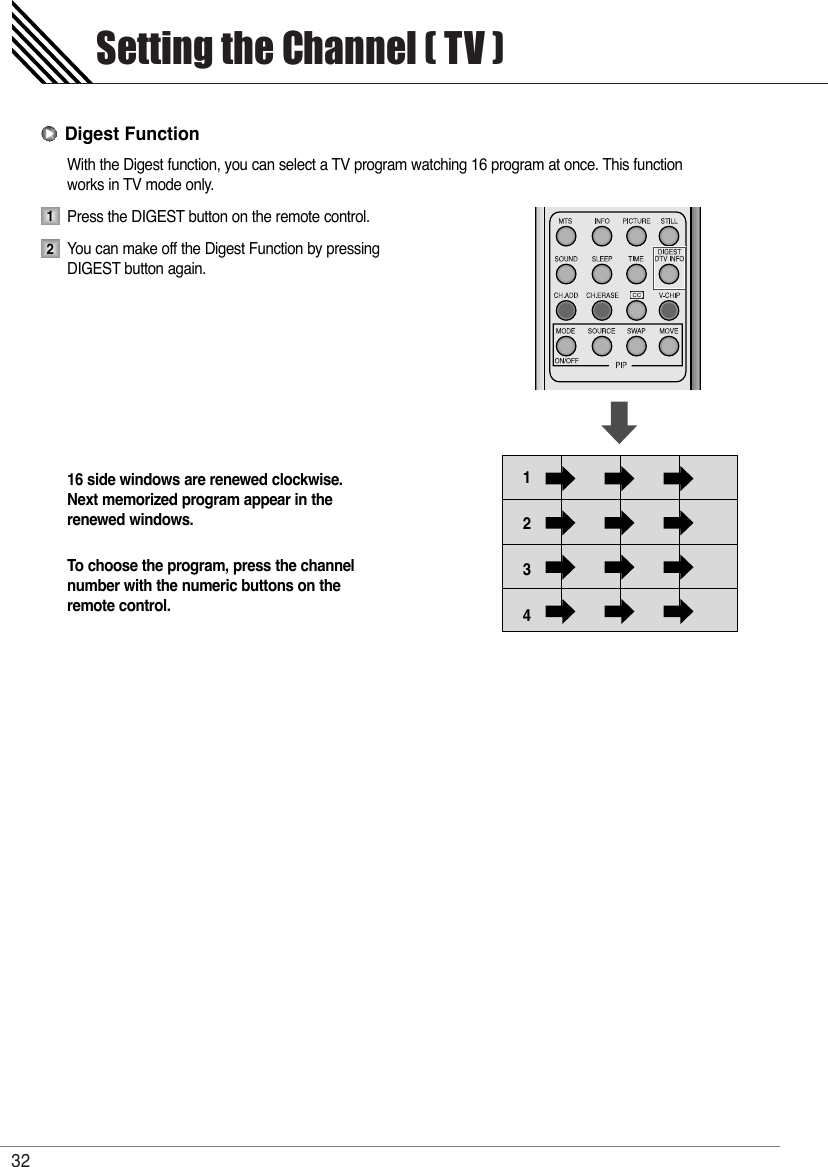
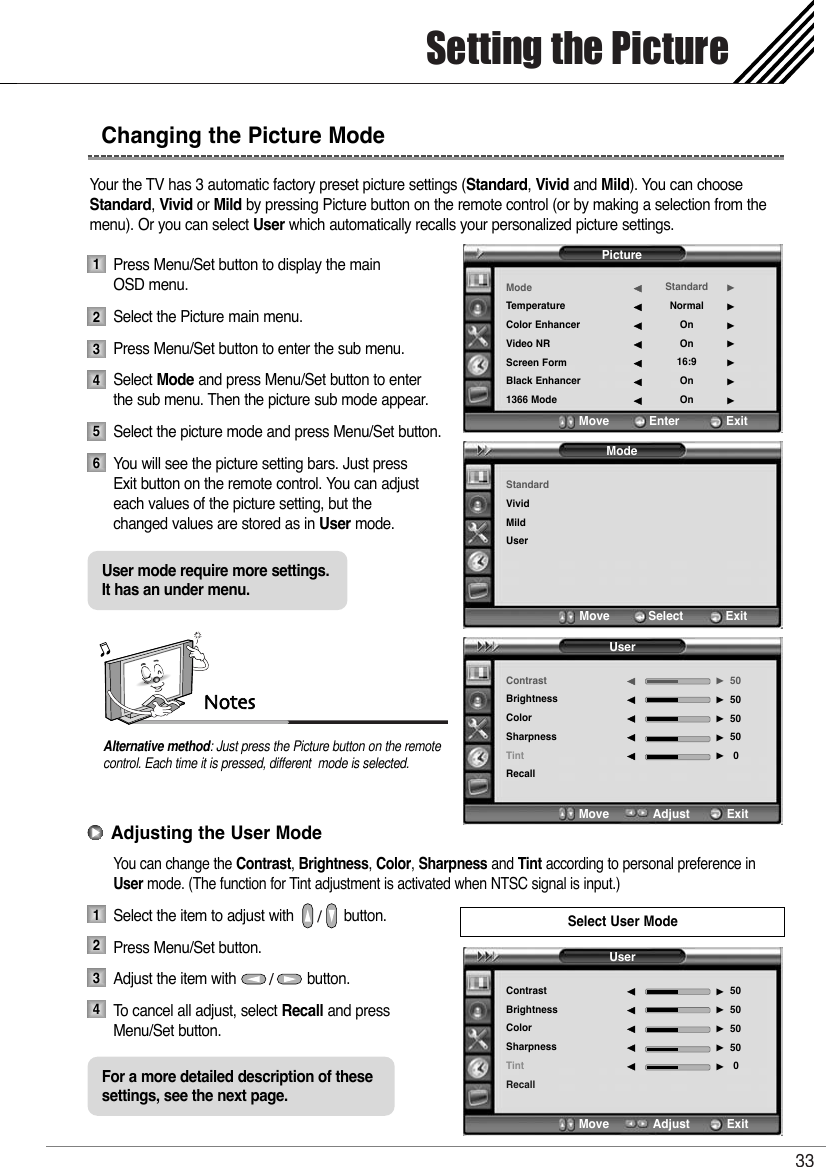
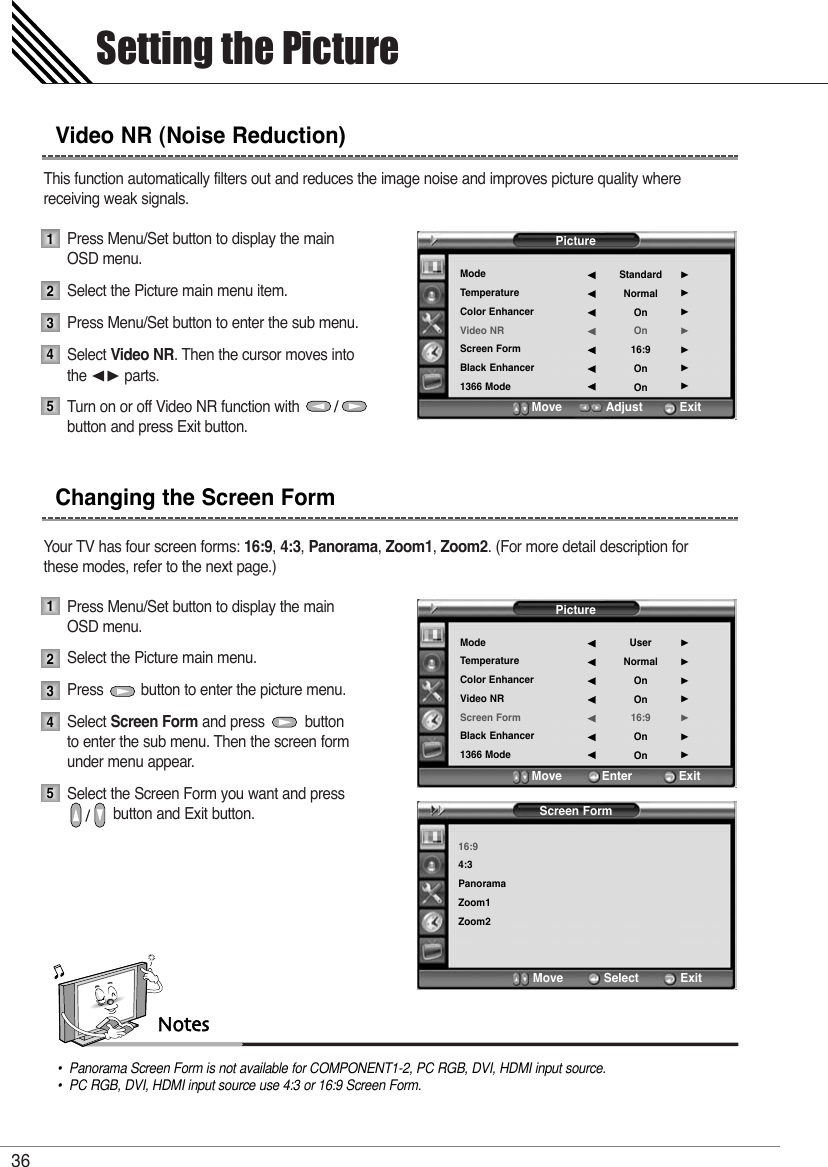
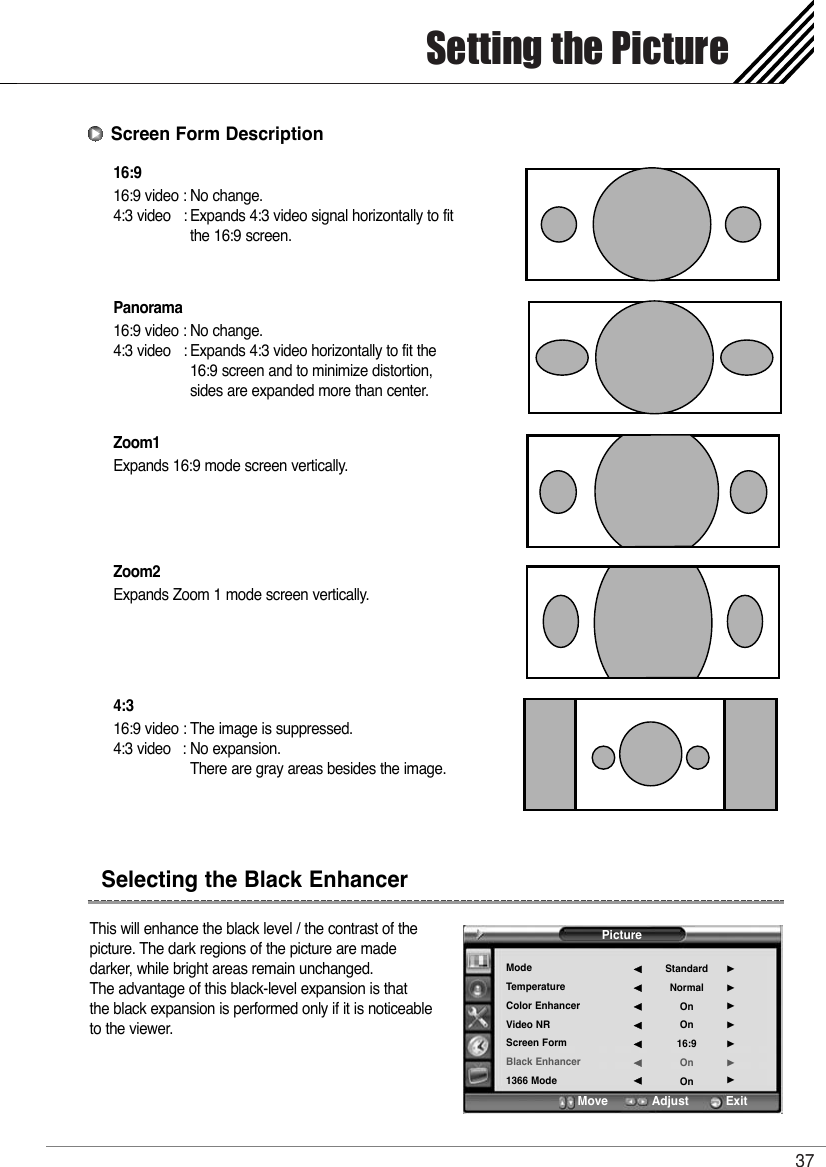
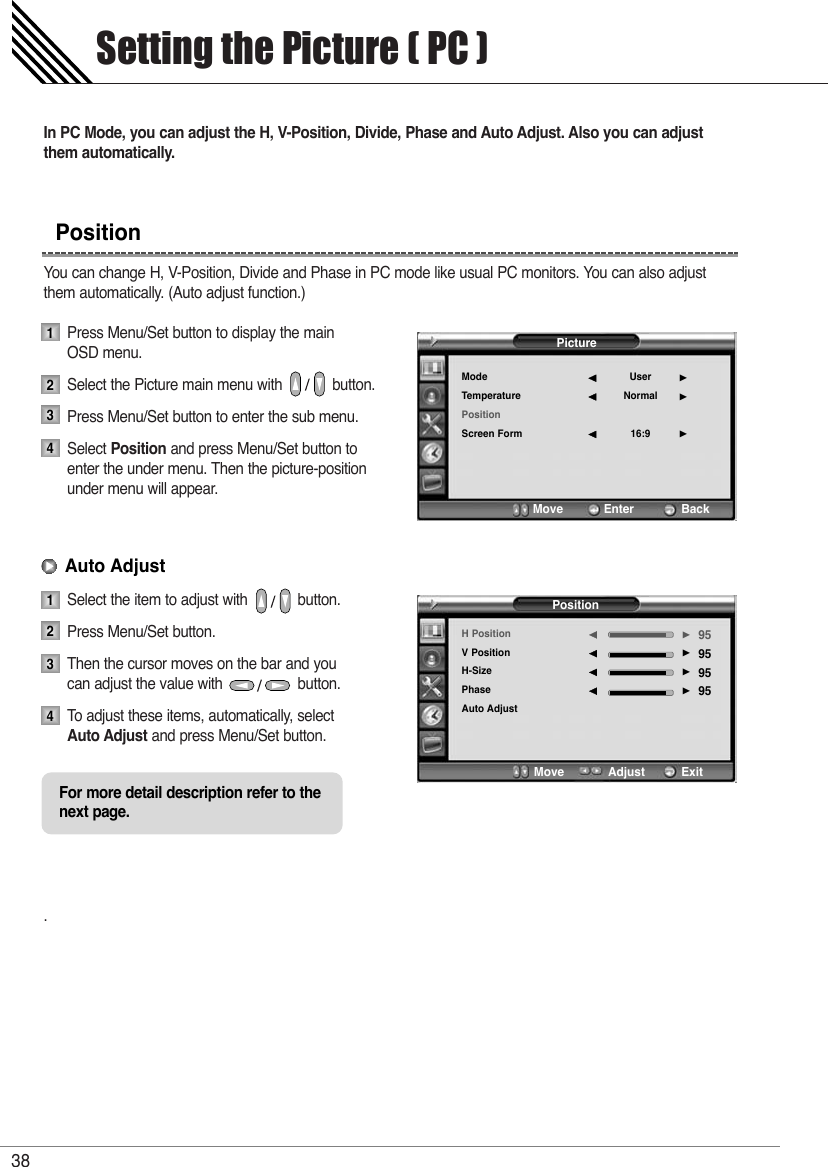
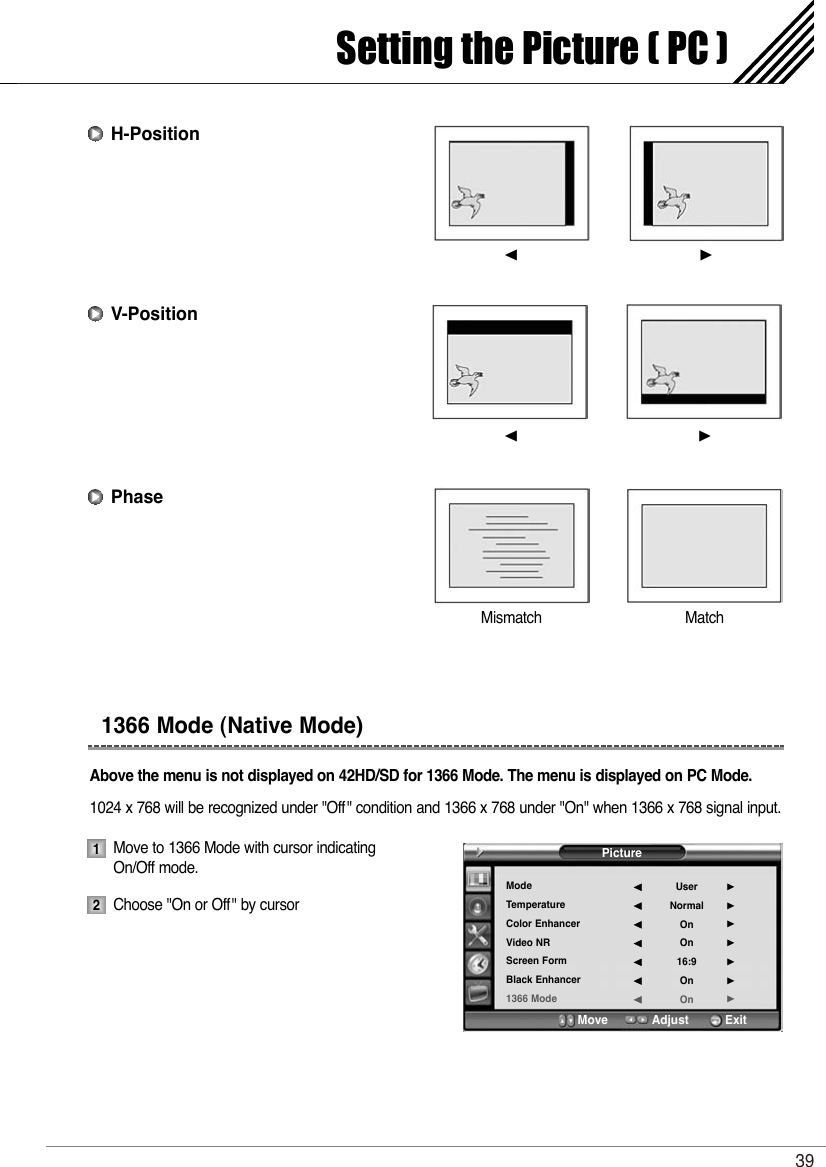
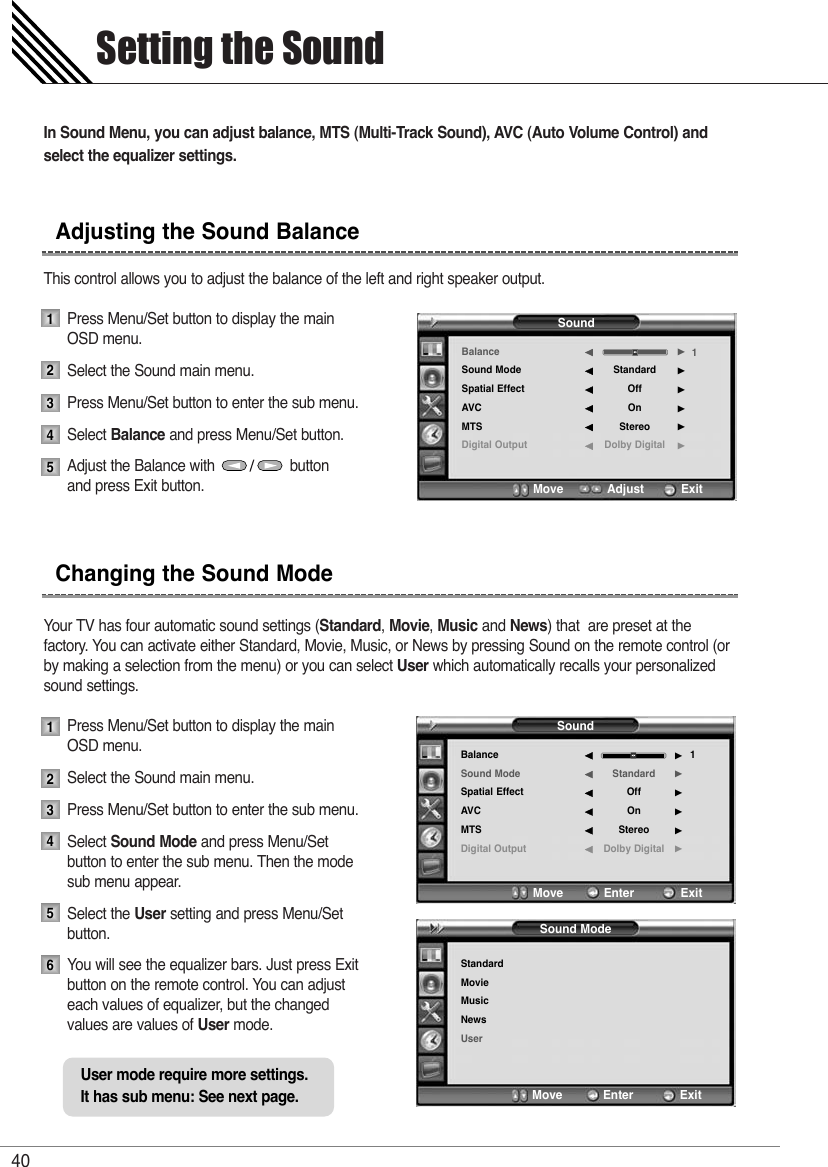
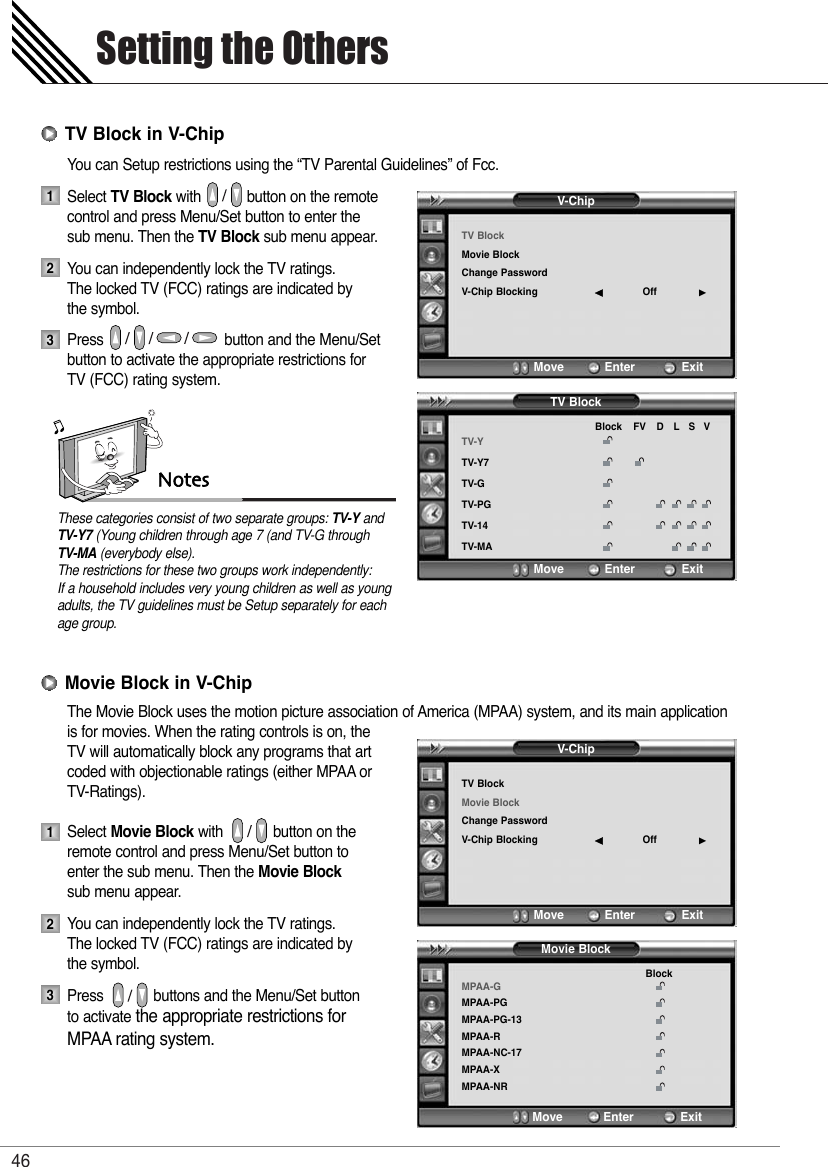
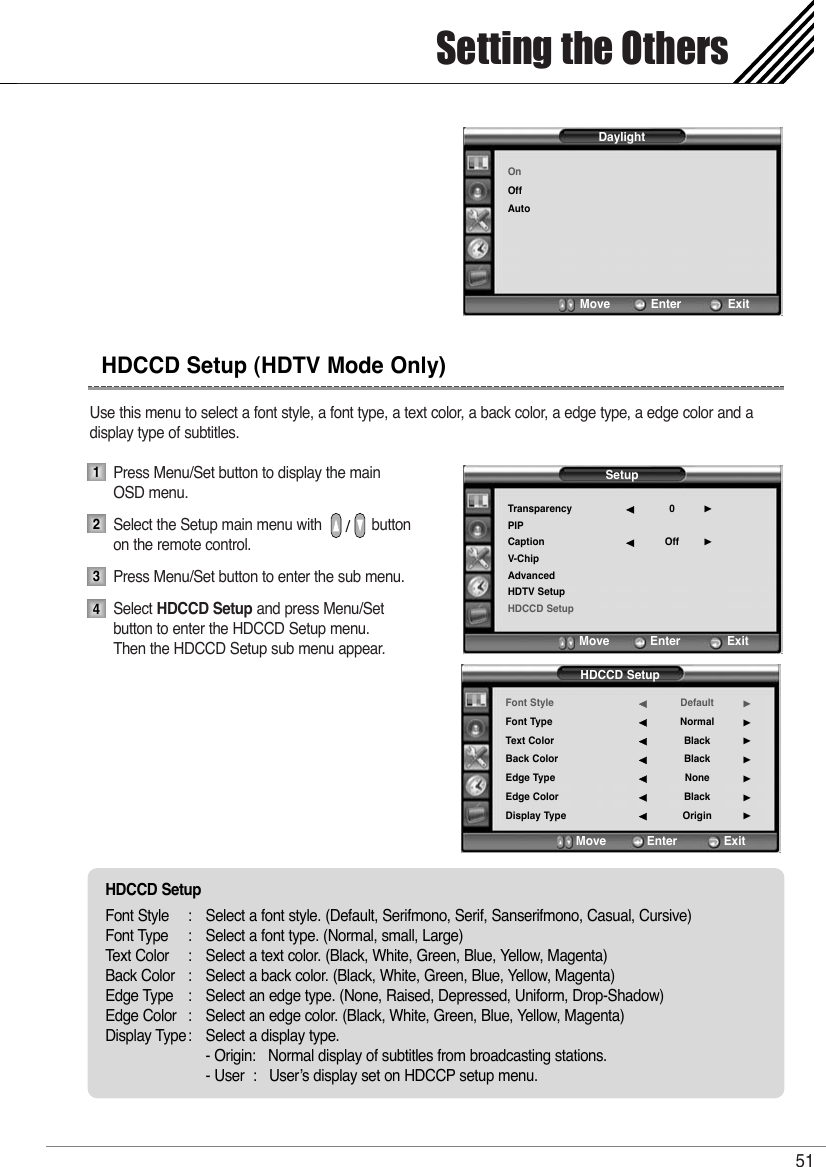
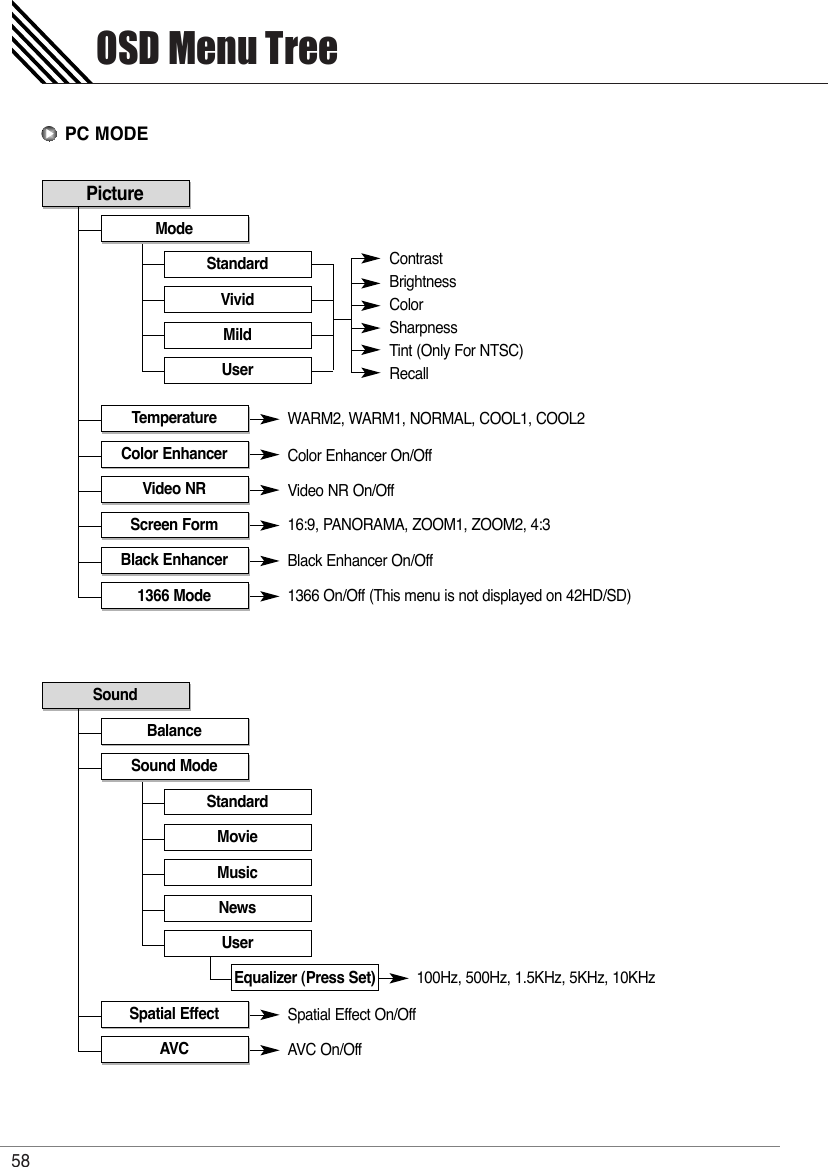
![Contents1Caution .......................................................................................................................................................... 3Important Safety Instructions .................................................................................................................... 4Precaution ..................................................................................................................................................... 5Viewing the Control Panel .......................................................................................................................... 10Viewing the Connecting Panel .................................................................................................................. 11Viewing the Remote Control ...................................................................................................................... 13Button Description ................................................................................................................................ 13PIP (Picture in Picture) ......................................................................................................................... 14Loading the Batteries ........................................................................................................................... 16Table Stand Installation (Optional) ........................................................................................................... 17Speaker Installation (Optional) .................................................................................................................. 19Connecting the TV Cable ........................................................................................................................... 20Connecting the VCR .................................................................................................................................... 21Connecting the DVD .................................................................................................................................... 22Connecting the Set Top Box ...................................................................................................................... 24Connecting the PC [ D-Sub & DVI ] .......................................................................................................... 25Displayable TV Specification ..................................................................................................................... 26Basic Operation ........................................................................................................................................... 27OSD Menu Structure ................................................................................................................................... 28Choosing the Channel Type ...................................................................................................................... 29Storing Channels Automatically ............................................................................................................... 29Adding or Deleting the Channels ............................................................................................................. 30Fine Tuning the Channel Reception ......................................................................................................... 30Editing the Channels .................................................................................................................................. 31Digest Function ..................................................................................................................................... 32Changing the Picture Mode ....................................................................................................................... 33Adjusting the User Mode ..................................................................................................................... 33Changing the Color Temperature ............................................................................................................. 35Changing the Color Enhancer ................................................................................................................... 35Video NR (Noise Reduction) ...................................................................................................................... 36Changing the Screen Form ........................................................................................................................ 36Selecting the Black Enhancer ................................................................................................................... 37Position .......................................................................................................................................................... 38Auto Adjust ............................................................................................................................................ 381366 Mode (Native Mode) ........................................................................................................................... 39Adjusting the Sound Balance .................................................................................................................... 40Changing the Sound Mode ........................................................................................................................ 40User Adjust ................................................................................................................................................... 41ForewordOverviewInstallationConnectionsChannel ControlPicture ControlSound Control](https://usermanual.wiki/Harsper/HP-500VP/User-Guide-676338-Page-3.png)
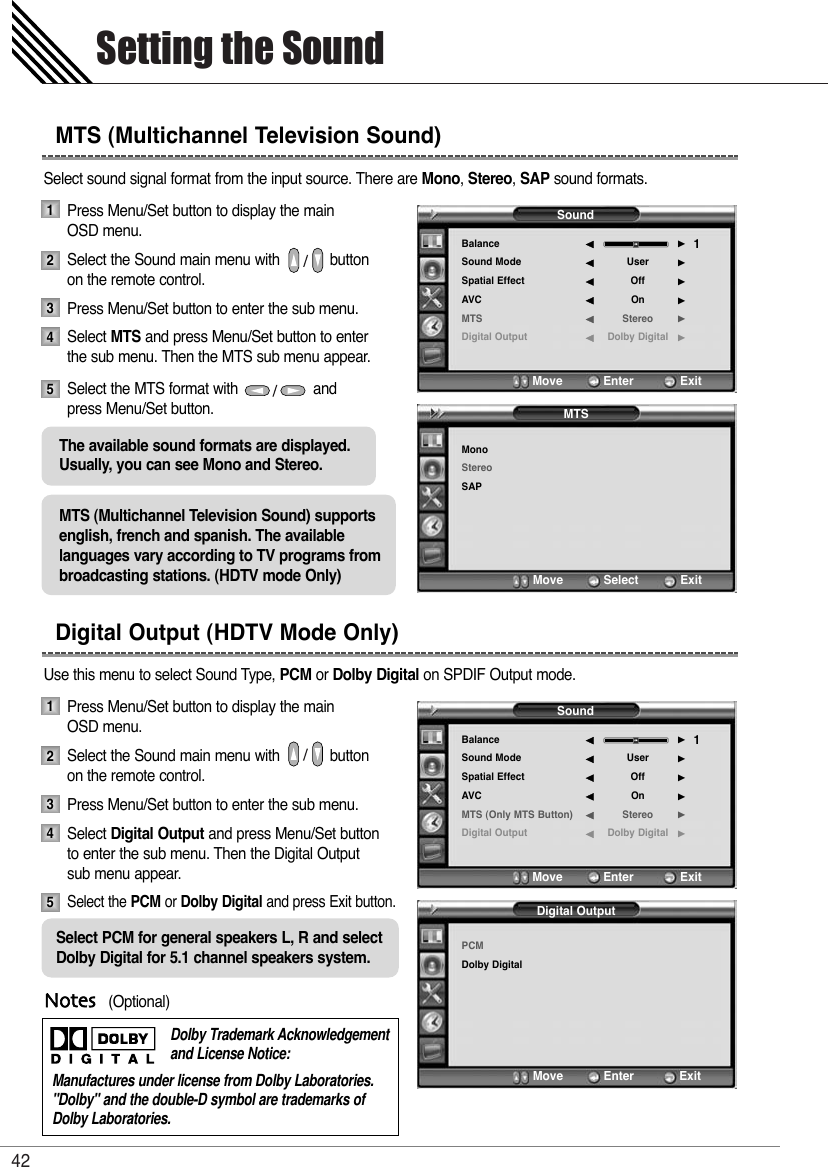
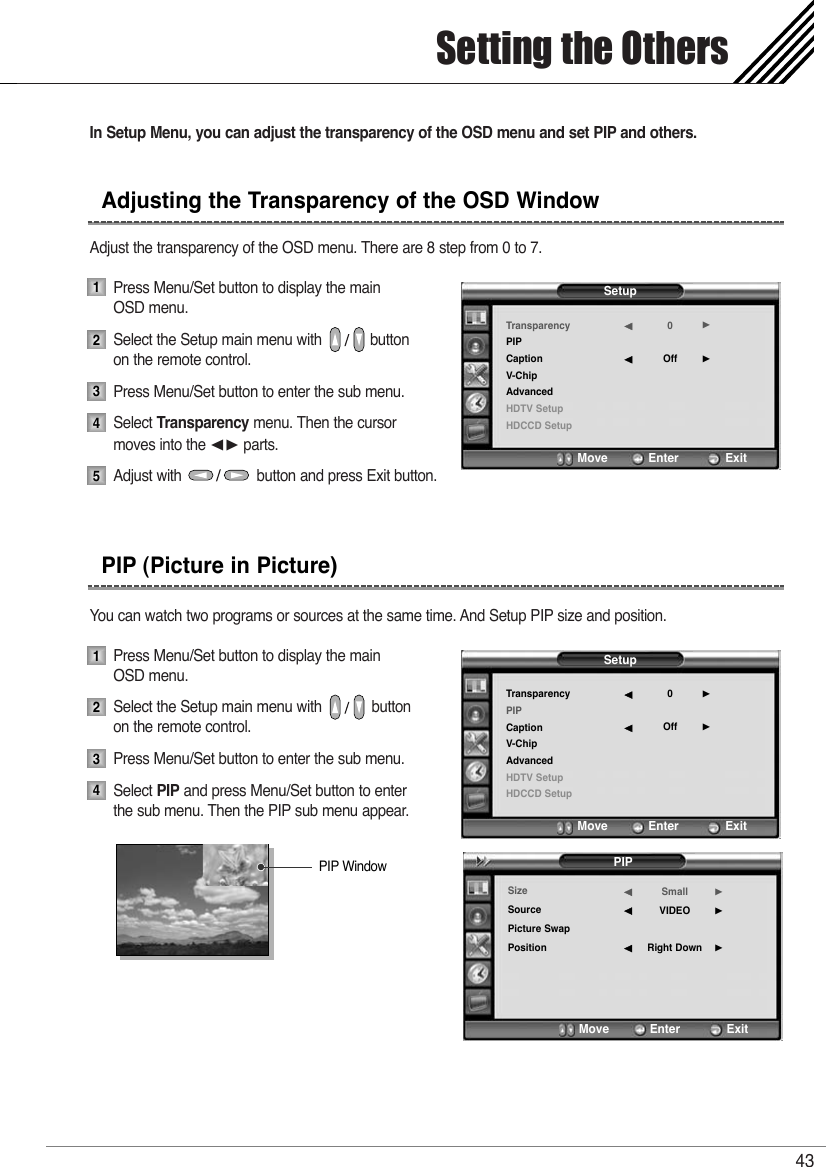
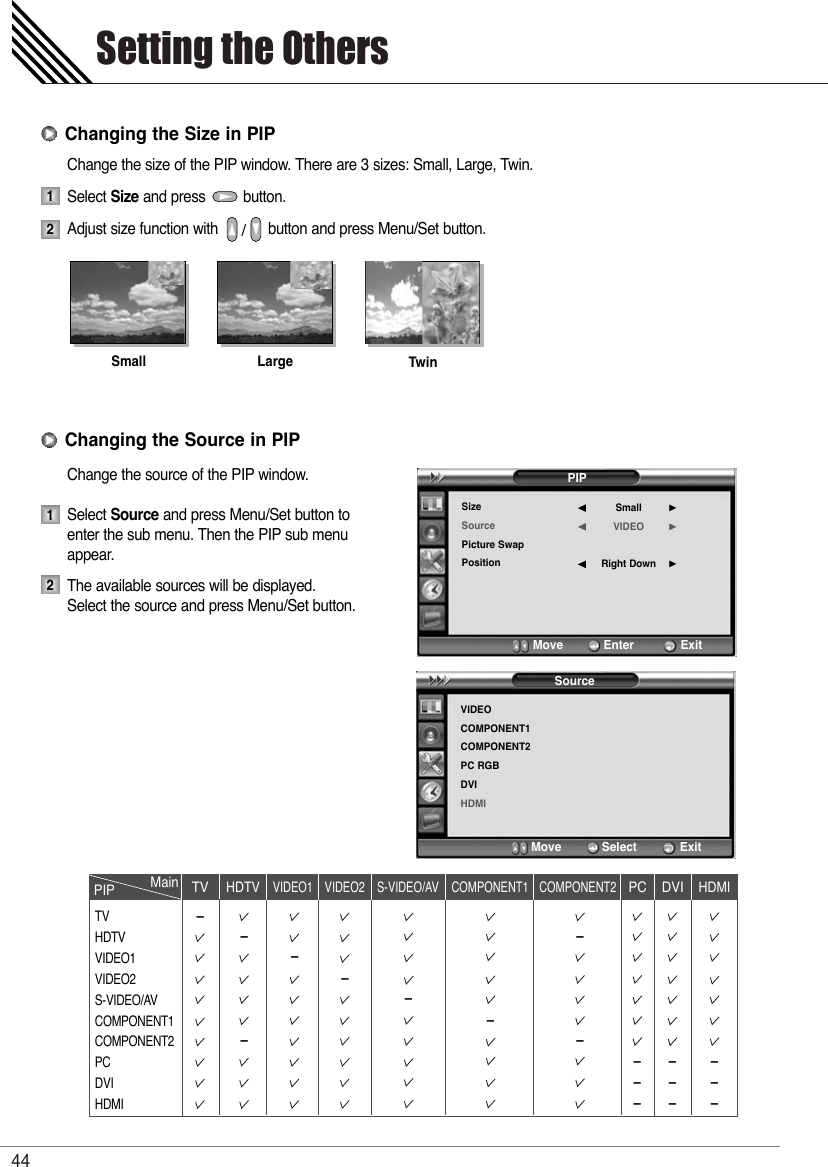
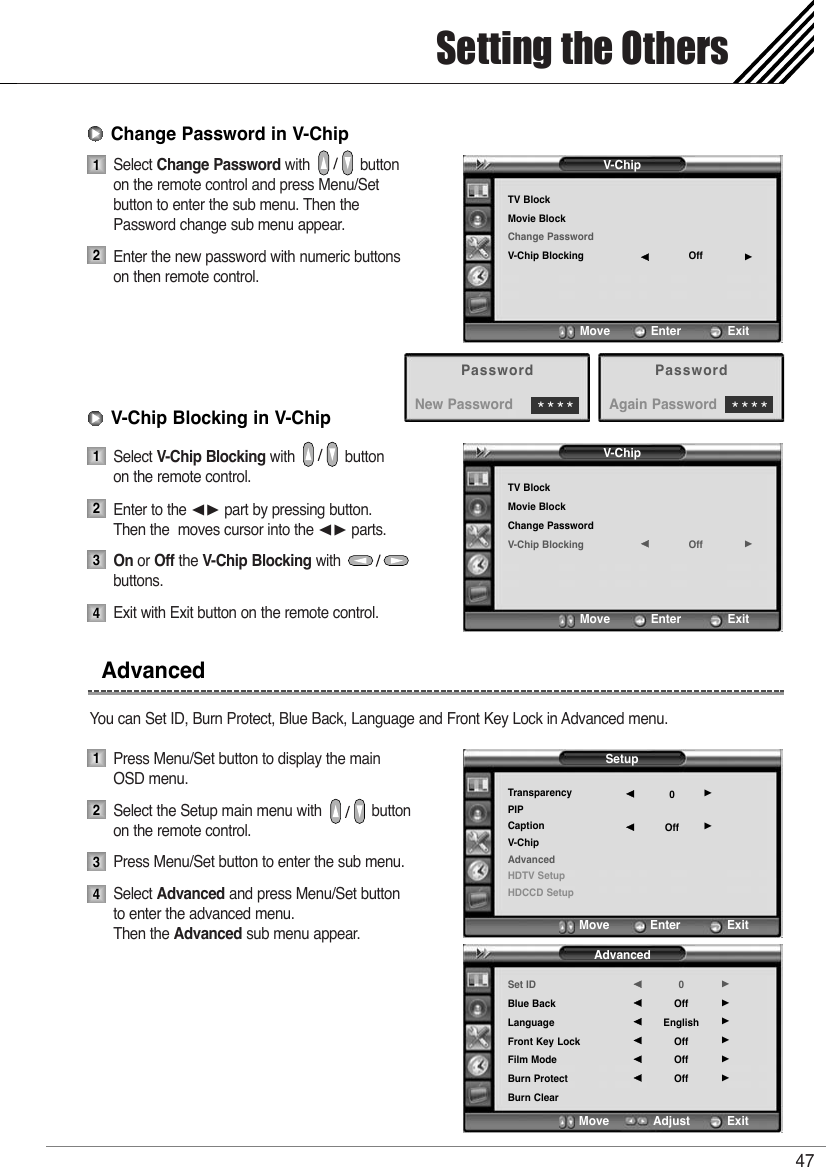
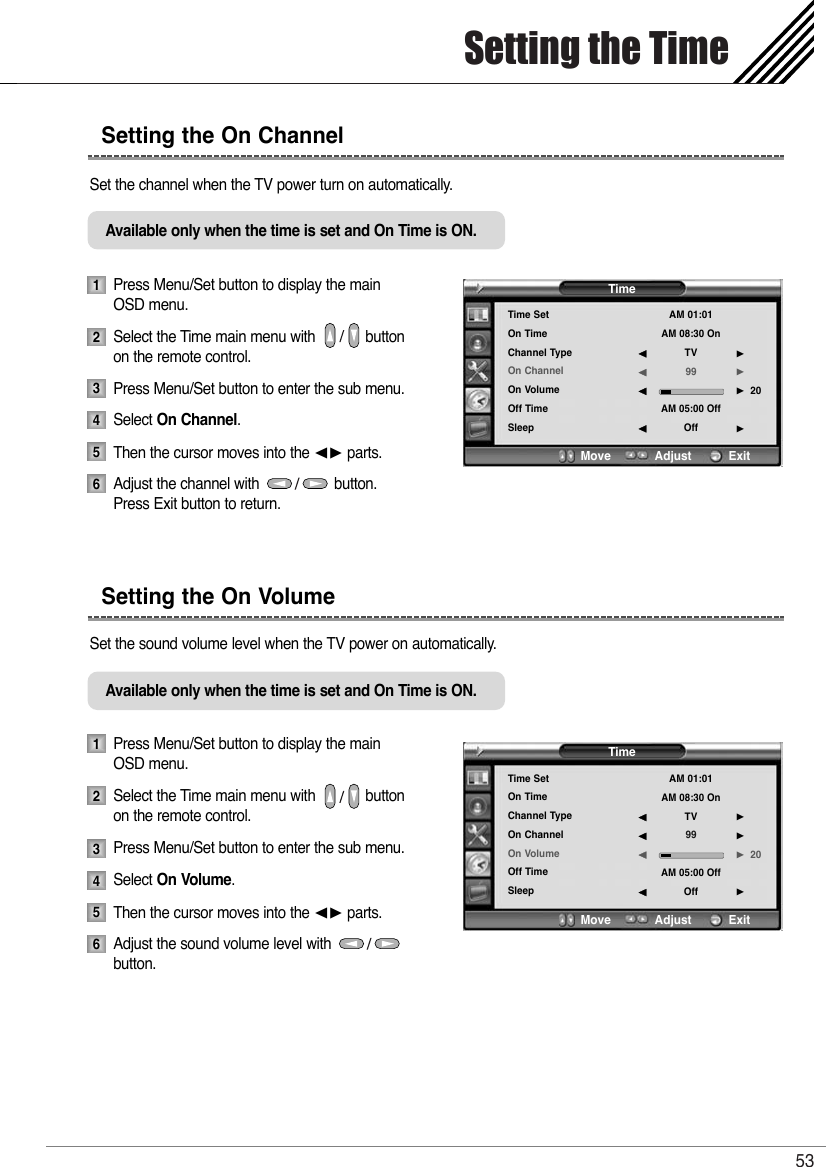
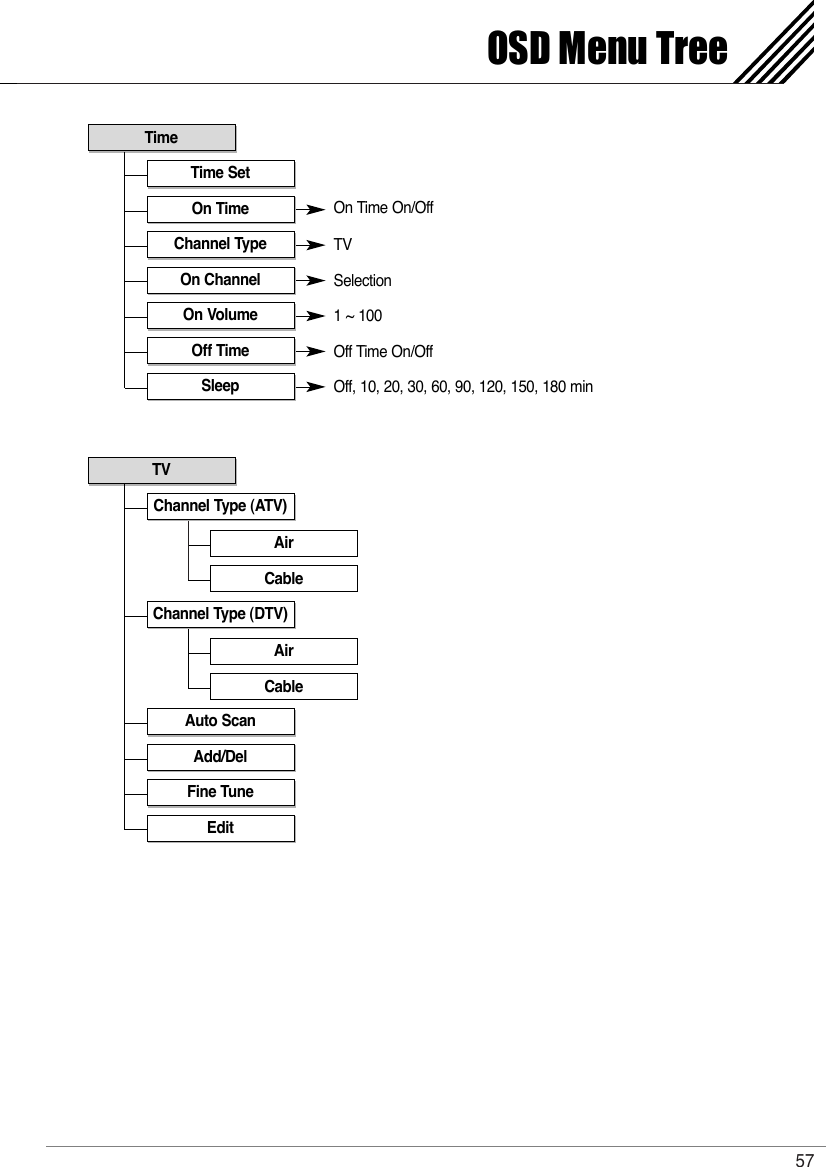
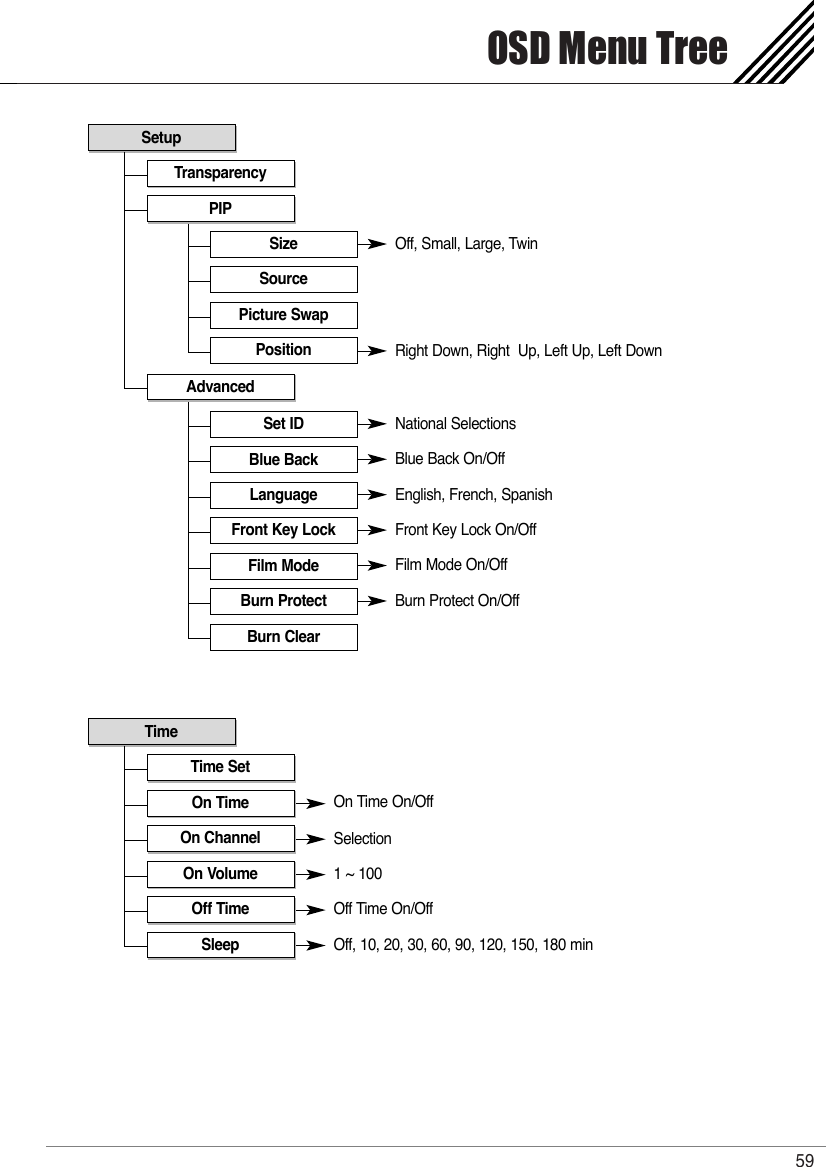
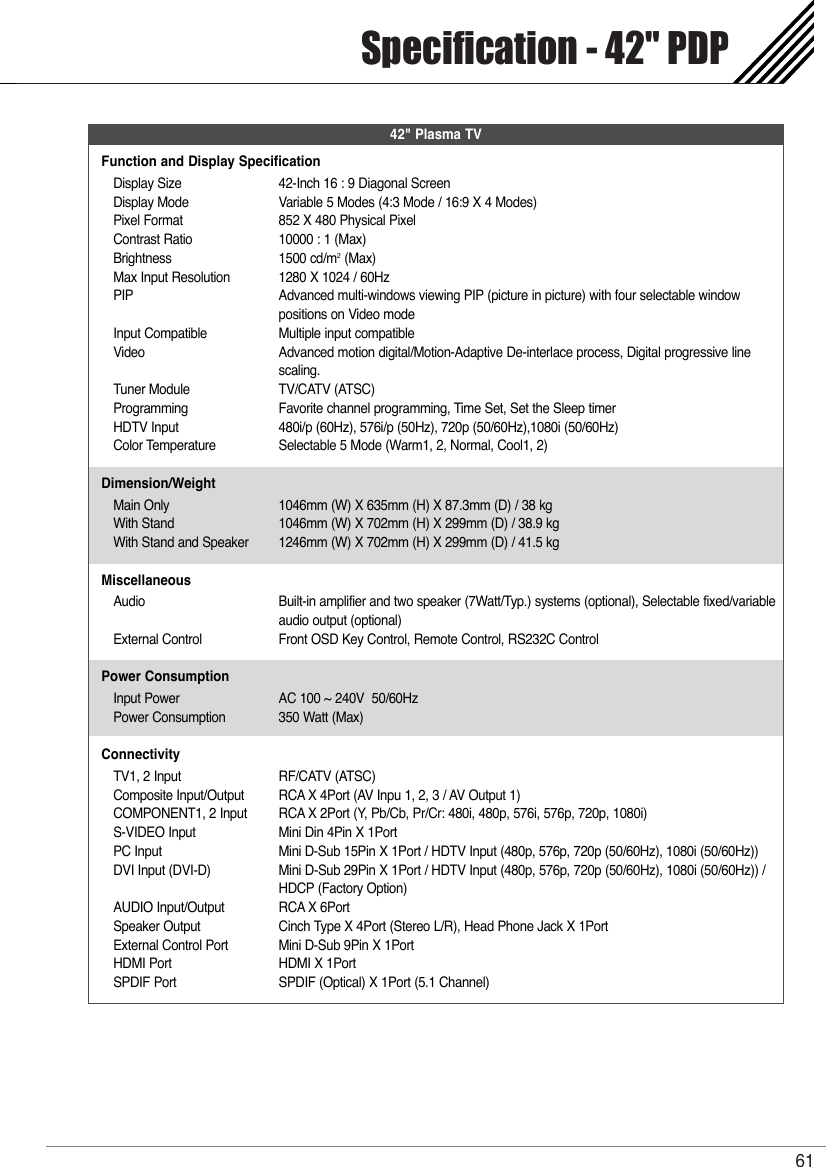
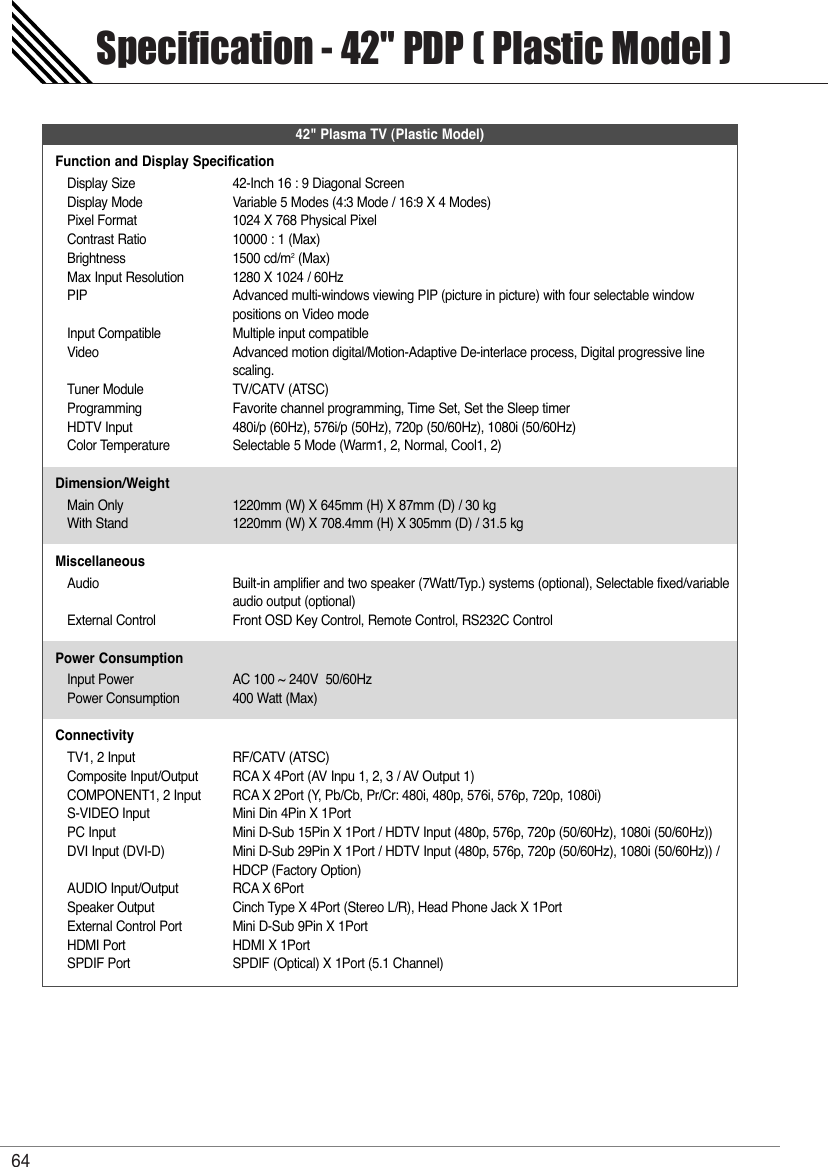
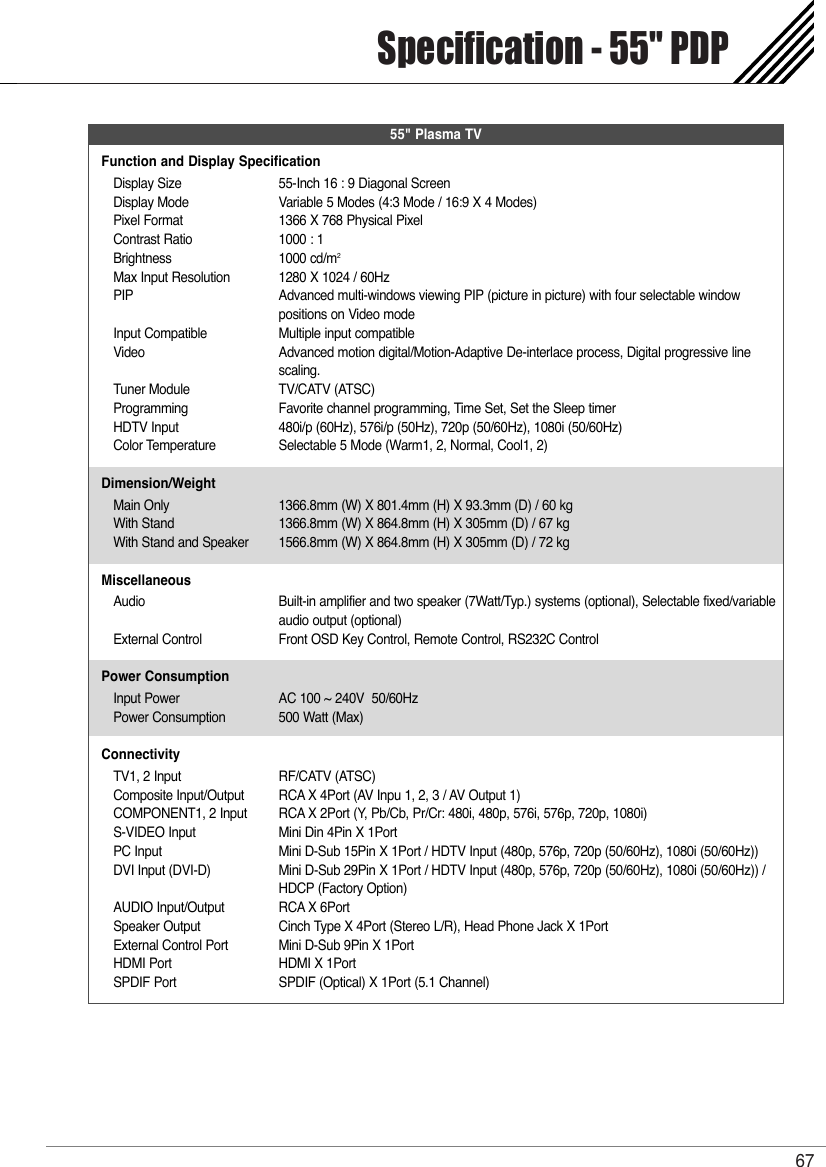
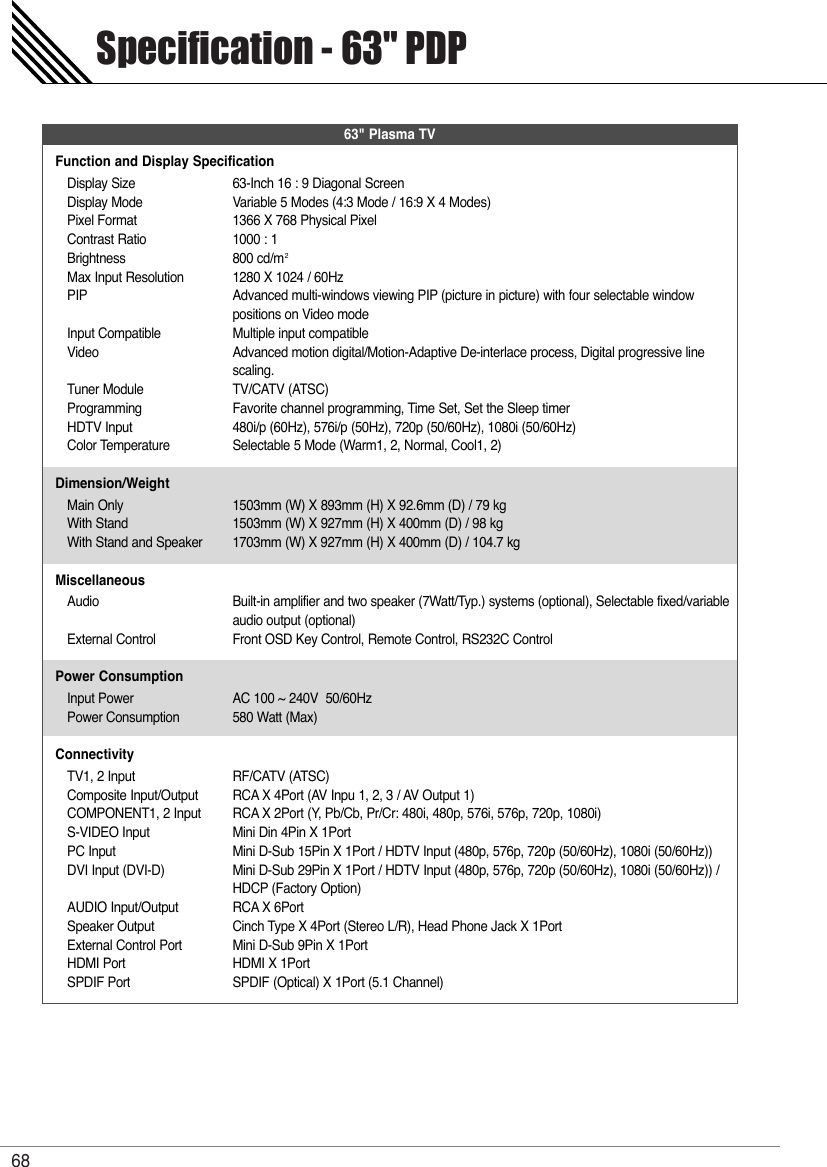
![Spatial Effect ................................................................................................................................................. 41AVC (Auto Volume Control) ....................................................................................................................... 41MTS (Multichannel Television Sound) .................................................................................................... 42Digital Output (HDTV Mode Only) ............................................................................................................ 42Adjusting the Transparency of the OSD Window .................................................................................. 43PIP (Picture in Picture) ................................................................................................................................43Changing the Size in PIP ..................................................................................................................... 44Changing the Source in PIP ................................................................................................................ 44Picture Swap in PIP (Picture in Picture) .............................................................................................. 45Position in PIP ....................................................................................................................................... 45V-Chip (TV Parental Guidelines) ................................................................................................................ 45TV Block in V-Chip ............................................................................................................................... 46Movie Block in V-Chip .......................................................................................................................... 46Change Password in V-Chip................................................................................................................. 47V-Chip Blocking in V-Chip .................................................................................................................... 47Advanced ...................................................................................................................................................... 47Set ID in Advanced ............................................................................................................................... 48Blue Back in Advanced ........................................................................................................................ 48Language in Advanced ........................................................................................................................ 48Front Key Lock in Advanced ................................................................................................................ 48Film Mode ............................................................................................................................................ 49Burn Protect in Advanced .................................................................................................................... 49Burn Clear in Advanced ...................................................................................................................... 49HDTV Setup (HDTV Mode) ......................................................................................................................... 50Time Zone in HDTV Setup (HDTV Mode) ......................................................................................... 50Daylight in HDTV Setup (HDTV Mode) ............................................................................................. 50HDCCD Setup (HDTV Mode Only) ............................................................................................................ 51Setting the Current Time ............................................................................................................................ 52Setting the On Time ..................................................................................................................................... 52Setting the On Channel .............................................................................................................................. 53Setting the On Volume ................................................................................................................................53Setting the Off Time .................................................................................................................................... 54Setting the Sleep Timer .............................................................................................................................. 54Specification-42" PDP ................................................................................................................................. 61Specification-42" PDP [Plastic Model] ...................................................................................................... 62Specification-42" PDP ................................................................................................................................. 63Specification-42" PDP [Plastic Model] ..................................................................................................... 64Specification-50" PDP ................................................................................................................................. 65Specification-50" PDP [Plastic Model] ...................................................................................................... 66Specification-55" PDP ................................................................................................................................. 67Specification-63" PDP ................................................................................................................................. 68Contents2Sound ControlOthers ControlTime SettingOSD Menu Tree .............................................................................................................. 55Troubleshooting............................................................................................................. 60Specification](https://usermanual.wiki/Harsper/HP-500VP/User-Guide-676338-Page-4.png)