HiTeC Digital Audio HDA-DXM7120 7.1 CHANNEL DIGITAL SOUNDCARD User Manual FCC060103 hwp
HiTeC Digital Audio, Inc. 7.1 CHANNEL DIGITAL SOUNDCARD FCC060103 hwp
UserManual.wiki
>
HiTeC Digital Audio
>
HDA DXM7120 User Manual
users manual
Navigation menu
Upload a User Manual
Namespaces
Wiki Guide
HTML
PDF
Info
Views
User Manual
Discussion / Help
Navigation

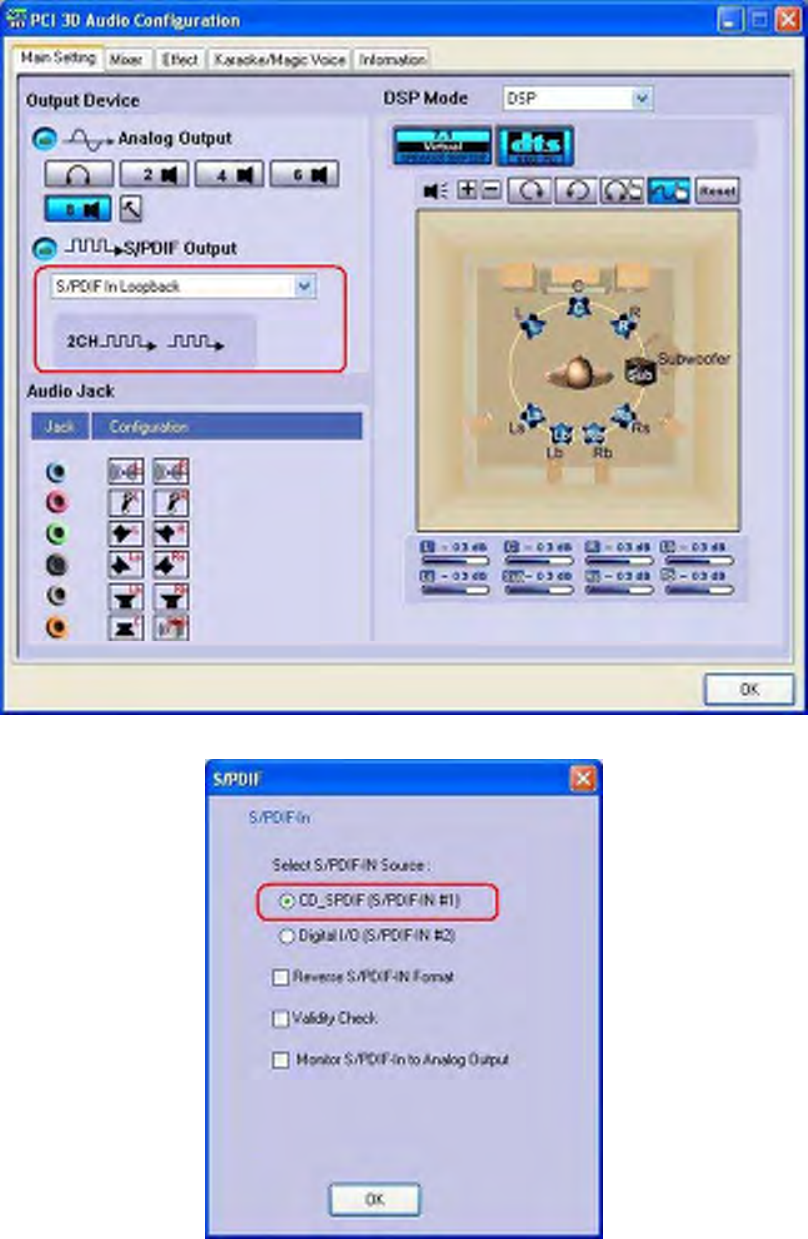
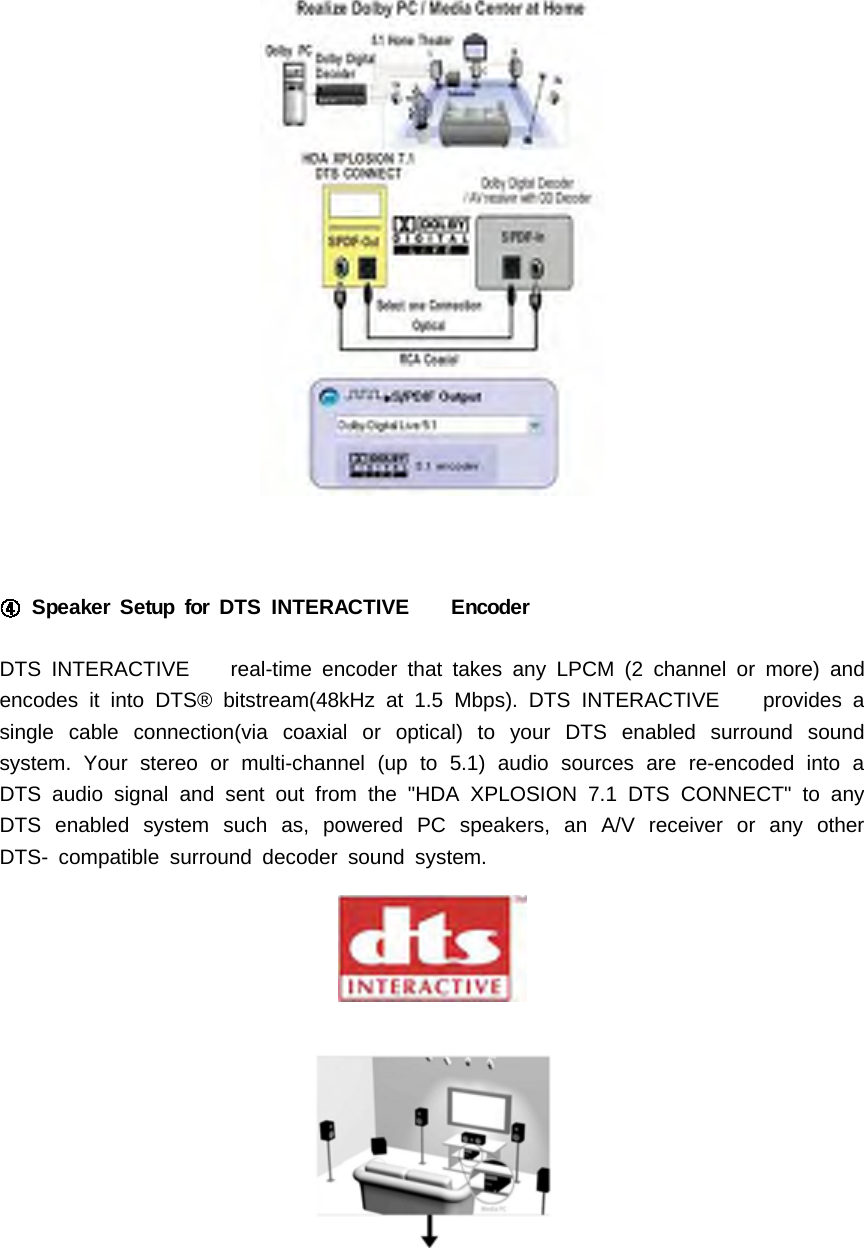
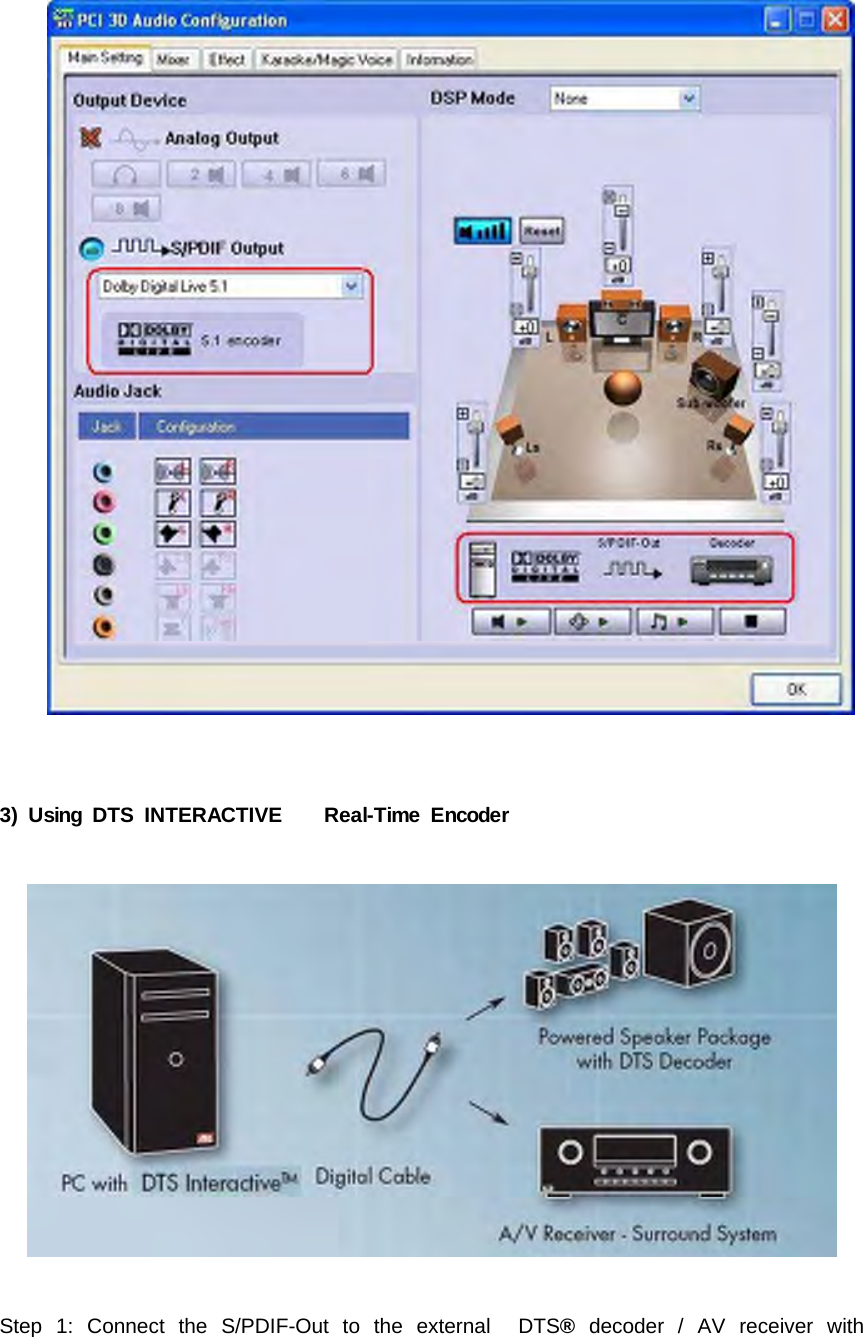
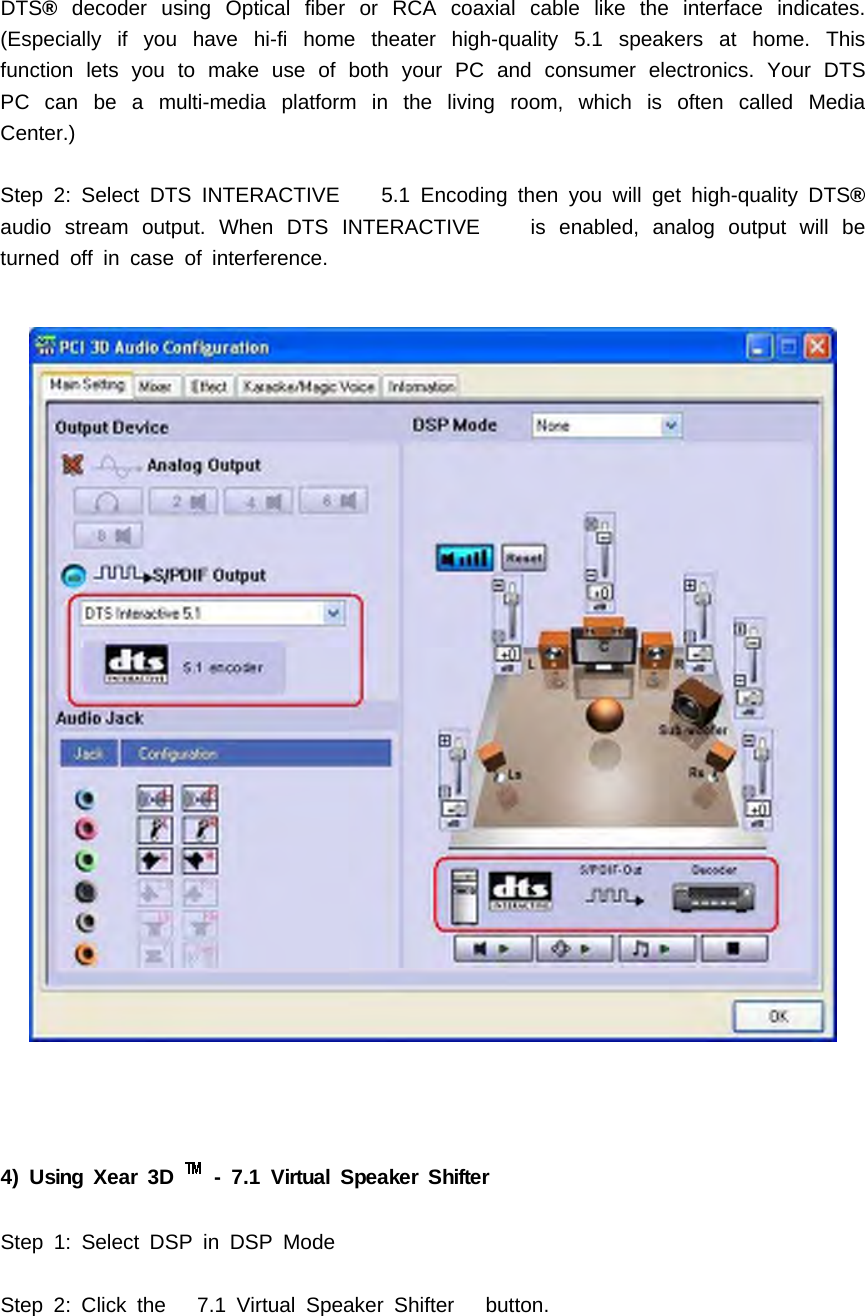
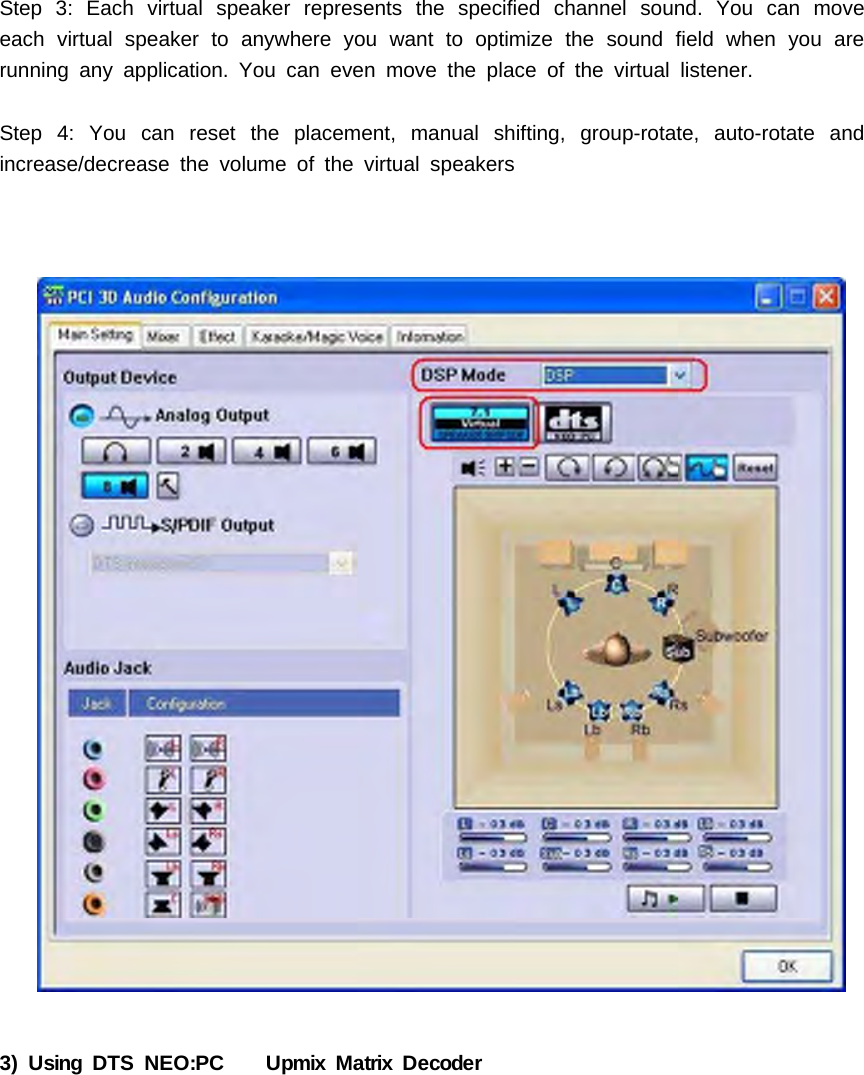
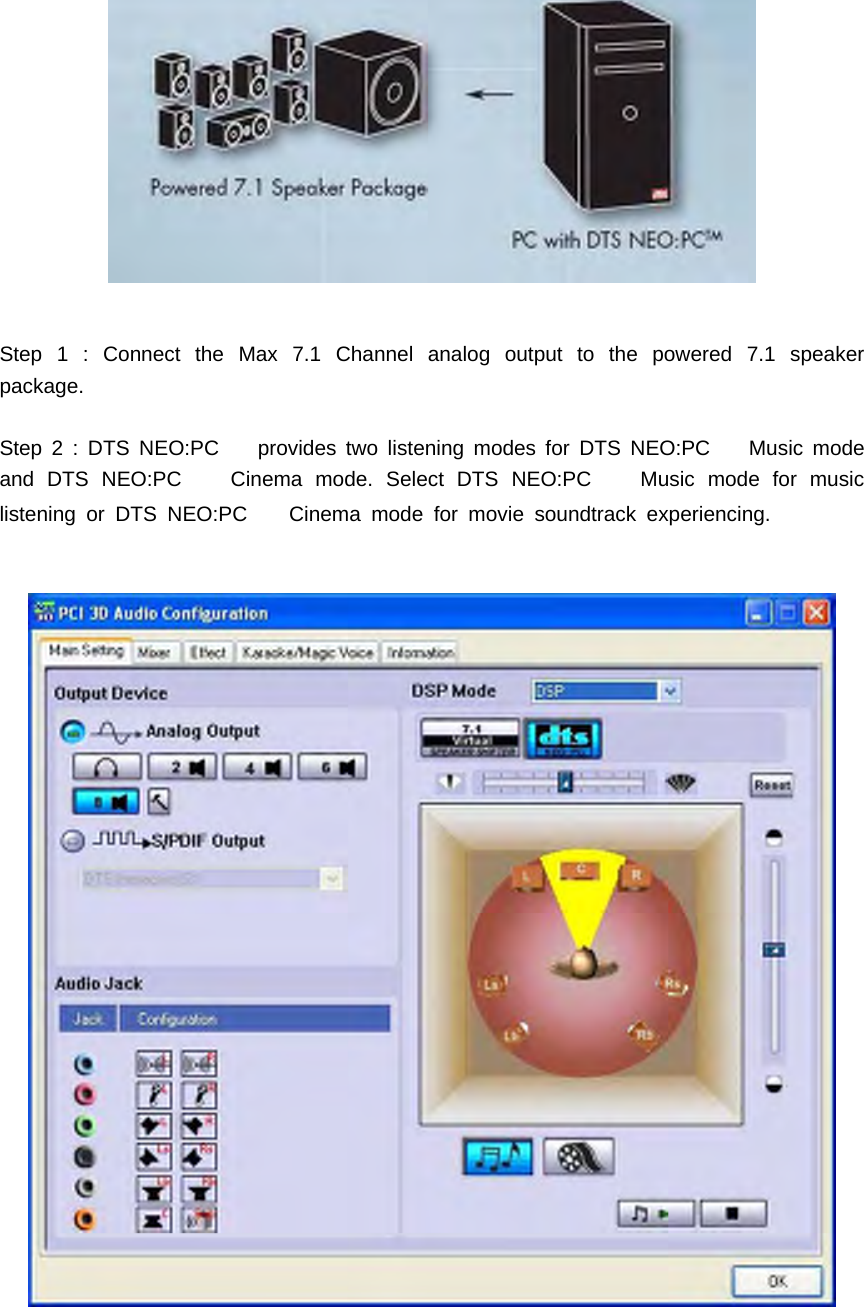
![DTS INTERACTIVE : A real-time encoder that takes any LPCM (2 channel ormore) and encodes it into DTS® bitstream(48kHz at 1.5 Mbps). DTS INTERACTIVEprovides a single cable connection(via coaxial or optical) to your DTS enabled surroundsound system. Your stereo or multi-channel (up to 5.1) audio sources are re-encodedinto a DTS audio signal and sent out from the "HDA XPLOSION 7.1 DTS CONNECT"to any DTS enabled system such as, powered PC speakers, an A/V receiver or anyother DTS- compatible surround decoder sound system. The installation process issimple and eliminates the clutter, tangles, and cost of multiple analog cables.DTS NEO:PC : : An up-mix matrix technology that turns any 2 channel audio into7.1 surround sound. You can turn your stereo audio (WMA, MP3, CD, and more!) intoa convincing multichannel audio experience. Borrowing from DTS® NEO:6 technologythat provides you with surround sound from stereo sources in high-end home theatreproducts, NEO:PC is optimized for your personal computer and is the perfectcompaniontoDTSINTERACTIVE .DVD Playback with full 5.1 speaker and 7.1 speaker surround sound usingPowerDVD, WinDVD software decoding application. (with DD 5.1, DTS 5.1, DD-EX6.1/7.1, DTS-ES 6.1/7.1 decoding )MP3 playback with Directsound hardware acceleration function on multichannelspeakers (4, 5.1, 7.1 speakers)Supports Game Surround Sound API such as Sensaura CRL3D HRTF 3D positionalsound enhancement with multi-drive 7.1, EnvironmentFX, ZoomFX, MacroFX. A3D 1.0, EAX 1.0, 2.0 (powered by Sensaura),Direct Sound 3D SWCoaxial, Optical S/PDIF output for playback of pure PCM digital audio at resolutionsof 16bit/44.1kHz, 16bit.48kHz, 24bit/96kHz sampling rates.Onboard COAXIAL RCA connector, OPTICAL Toslink trasmitter for high qualityDigital OutputSPDIF output allows pass-through of Non-PCM Dolby® Digital and DTS® stream toexternal DD/DTS decoder and A/V receivers in Windows®98SE/ME/2000/XP/Server2003.Supports 44.1kHz / 48kHz / 96kHz S/PDIF Input with HDA X-10 Digital Inputextension board [Digital I/O (SPDIF-IN #2)]Supports CD S/PDIF Input (SPDIF-IN #1) via CD_SPDIF 2pin connectorAdopt large capacity positeive./negative regulators and 6pcs of DUAL DIP TYPEOPAMP, Special two OPAMP controlled preamp circuits on board provides increasedMIC input gain and improvement of SNR quality.Anti-Pop control Circuit using high perfomance audio muting transistor](https://usermanual.wiki/HiTeC-Digital-Audio/HDA-DXM7120/User-Guide-620534-Page-9.png)


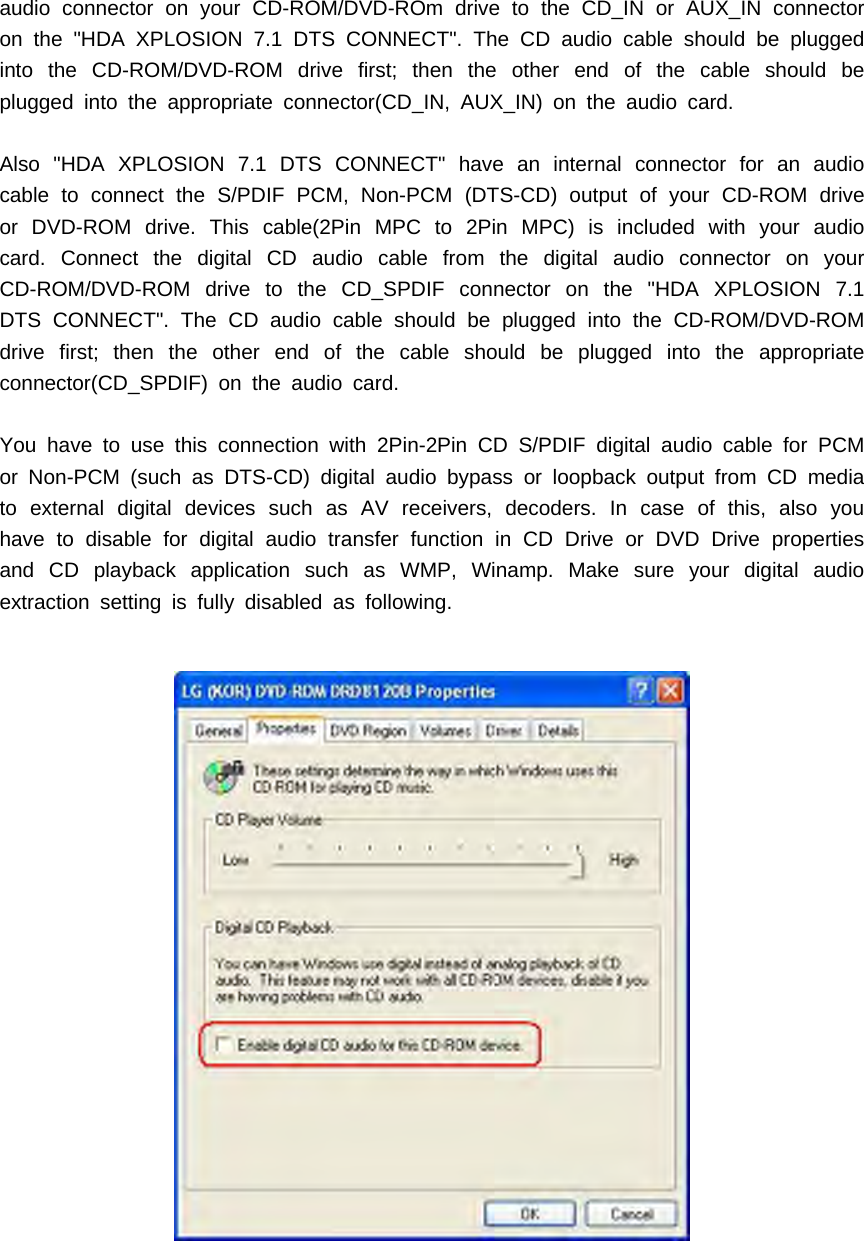
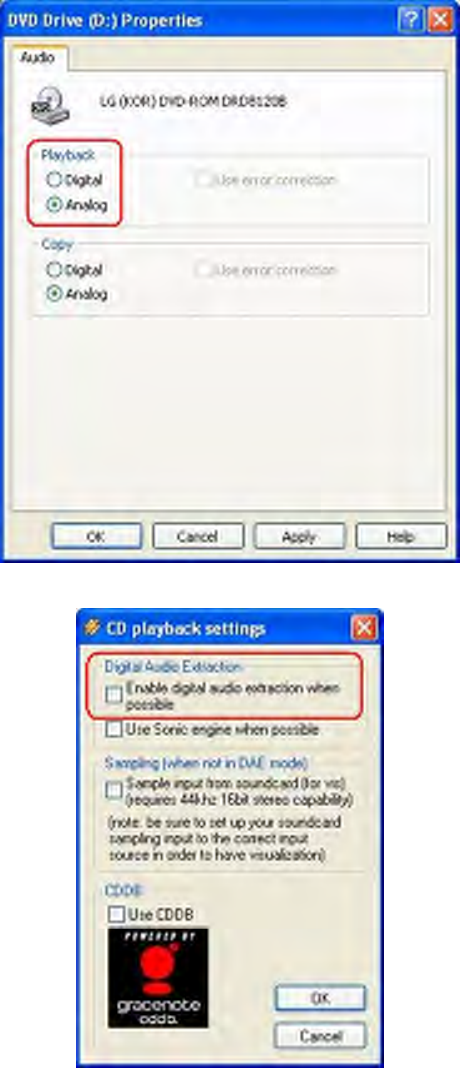
![You need to also check Windows Media Player setting is in digital playback mode. Goto [Tools=>Options=>Devices=>DVD Drive or CD Drive=>Playback-Digital]. You will seethe following window.](https://usermanual.wiki/HiTeC-Digital-Audio/HDA-DXM7120/User-Guide-620534-Page-21.png)

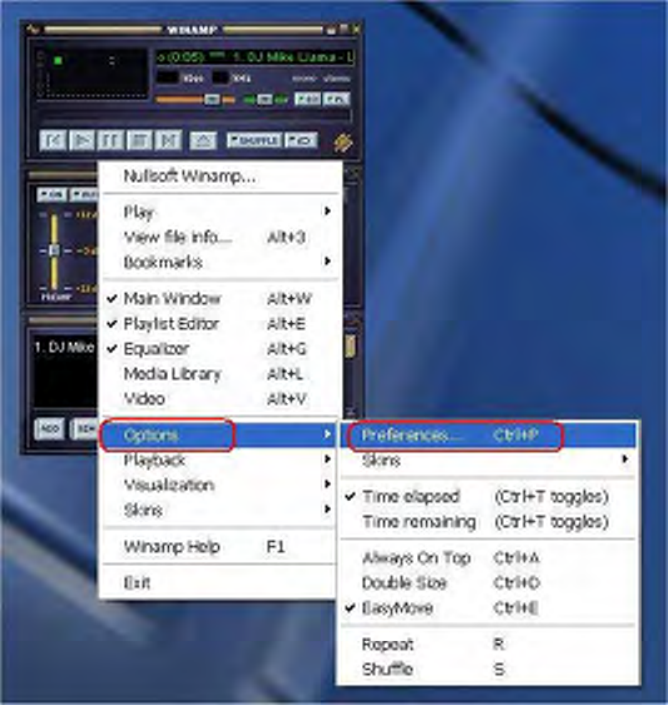
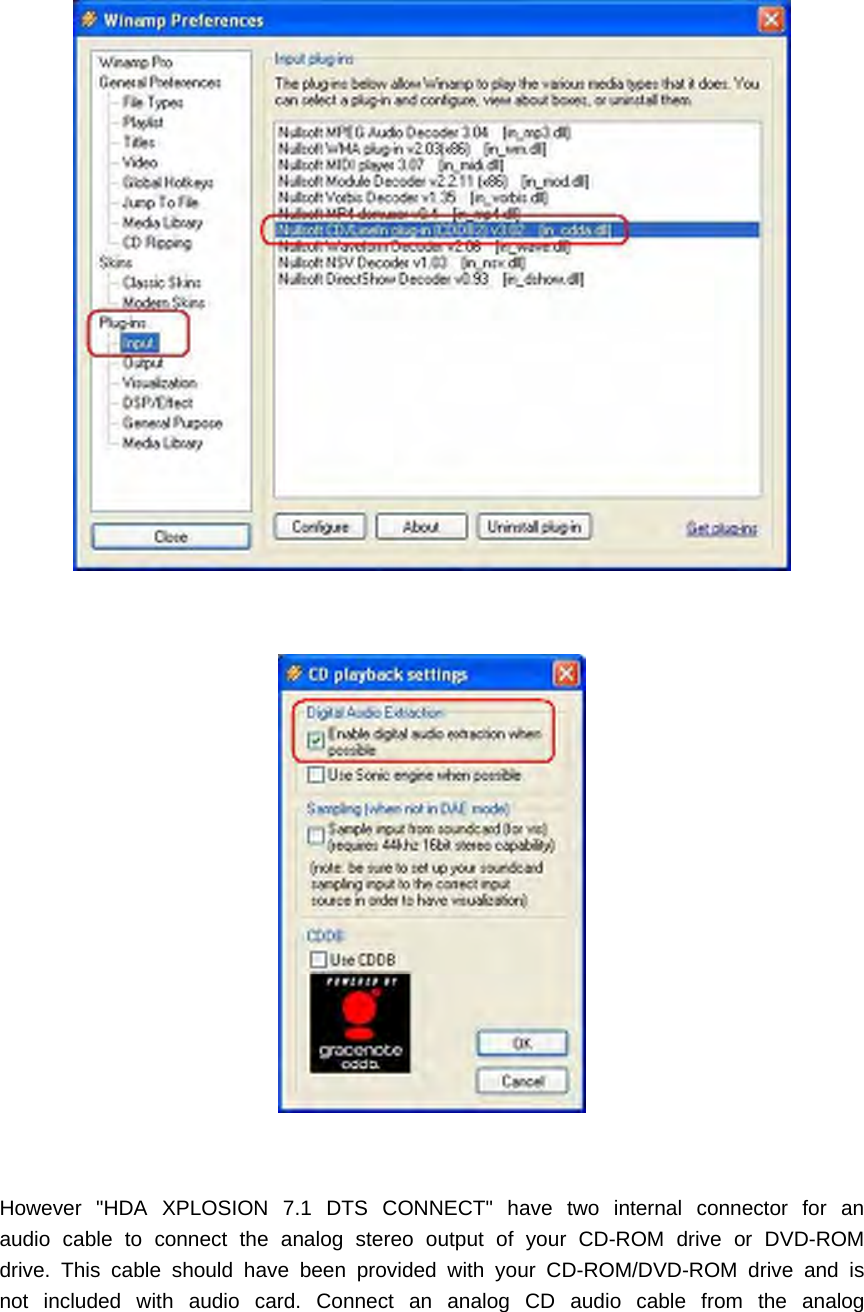
![Also you need to also check Winamp Player setting is in digital playback mode. Go to[Options=>Preferences=>Plug-ins=>Input=>Nullsoft CD/LineIn plug-in(CDDB2)=> SelectEnable digital audio extraction when possible]. You will see the following window.](https://usermanual.wiki/HiTeC-Digital-Audio/HDA-DXM7120/User-Guide-620534-Page-23.png)