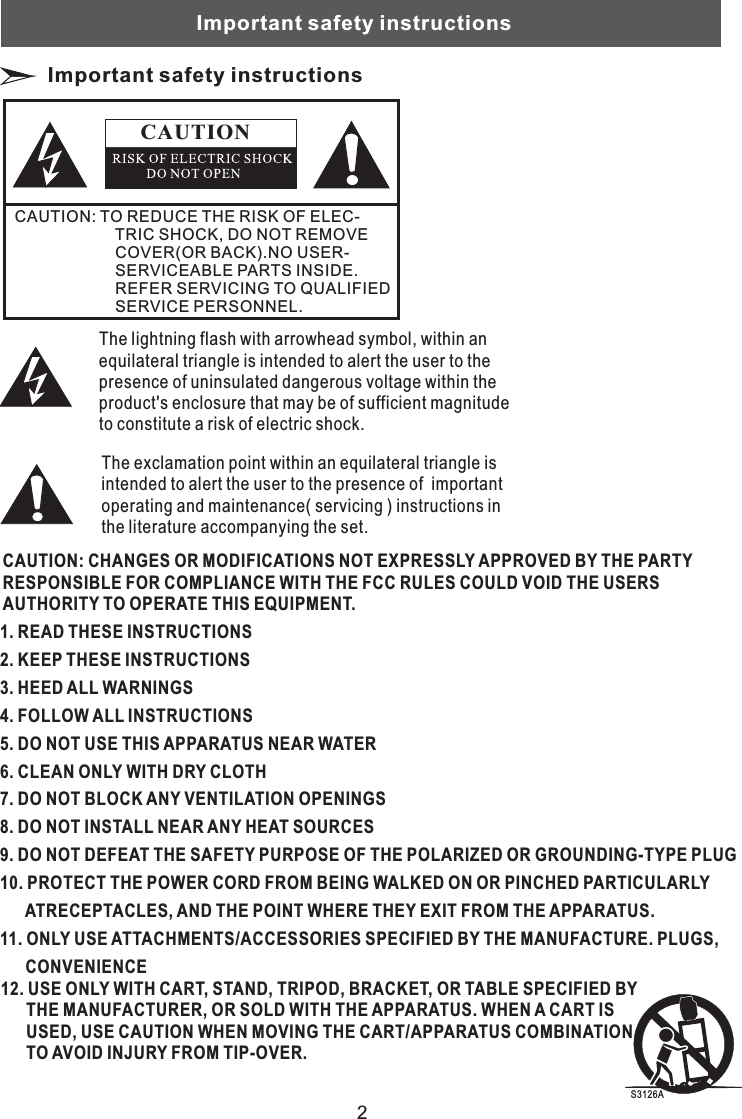
Hisense Electric LCDC0001 LCD TV User Manual
Hisense Electric Co., Ltd. LCD TV Users Manual
UserManual.wiki
>
Hisense Electric
>
LCDC0001 User Manual
Users Manual
Navigation menu
Upload a User Manual
Namespaces
Wiki Guide
HTML
PDF
Info
Views
User Manual
Discussion / Help
Navigation
![Basic operations141. Press [CH ] button on the remote control, you can change the channels.(Press [VOL ]button to raise or lower the volume).2. Press [CH ]button on the front panel of the TV set, you can also change the channels.(Press [VOL ] button to raise or lower the volume).3. Press the numeric buttons on the remote control to display the corresponding channels.Note:Changing the channels can also be achieved by directly pressing the programme No. If you wantto choose the programme No. from 1 to 9, press the numeric buttons directly. If you want to selecta programme No. that double-digit or three-figure, the time between twice pressing the numbersshould not be more than 3 seconds.//Changing Channels/ Volume//Select input sourceChange picture modeChange sound modeStill pictureMute soundSet sleep timerChoose the current input signal of the main picture. First press [Source] button to display the signalinputs. Press [ ]button to select the source you wanted to enter, then press [ ] buttonto confirm.//OKIt can be set as Normal, Vivid, Sports, Movie, Game and User. This mode achieves a certain imagedisplay effect by setting the brightness, contrast and color etc.It can be set as Normal, Rock, Jazz, Classic, Pop and User. This mode achieves a special soundeffect by setting equalizer.Press [Still] button that moving picture will become a still one.Press [Mute] button to turn the sound off, press this button again to turn the sound back on. Thisfunction is used to switch off sound temporarily.It can set the TV to let it enter into the Standby state automatically, Press this button repeatedly toselect the proper sleeping clock mode, and the clock tells you the remaining time before the TVenters Standby state.](https://usermanual.wiki/Hisense-Electric/LCDC0001/User-Guide-1248443-Page-15.png)
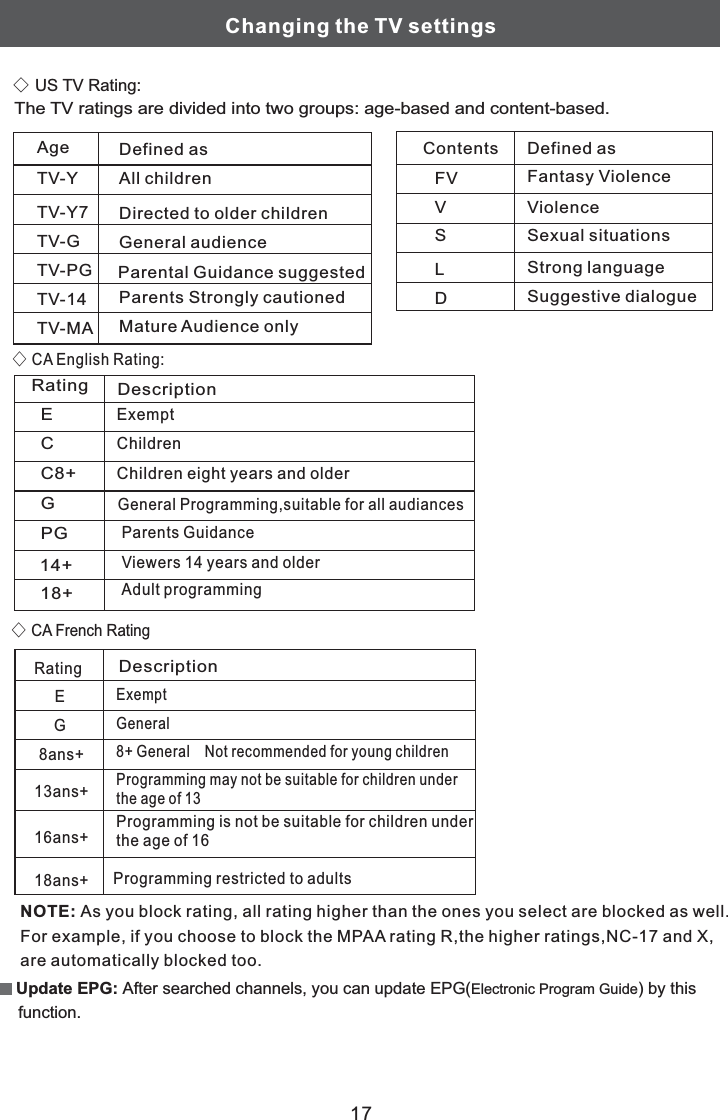
![1 Press Menu button to display the main menu.2 Press button to select TV item.3 Press [ OK] button to enter TV menu.4 Press [ button to select the option, press[//OK] button to enter or press [ button to exit.5.When you are finished, press the Menu button to closethe menu.[]]]///ExitThe options are:Show the caption or not. It includes:Closed Caption:P:◇◇◇◇Closed Caption: Show the caption or not. When you choose ”CC Mute”, the caption showsonly in mute mode.Analog CC Mode: Set the caption mode of analog program.Digital CC Mode: Set the caption mode of digital program.User-define Style: Set the caption style by yourself. such as color and font etc.Select source of tuner.Searches the channels automatically.The Motion Picture Association of America (MPAA) uses a rating system to qualify motion picturecontent. Television broadcasters employ a rating system to qualify the content of televisonprograms as well. The MPAA and TV ratings allow you to block out programming above therating limits you determine.Tuner Source:Auto Scan:arental ControlWhen you first use this function, you can set the password and the passwordis effective since then. Only you input this password, you can continue to the next operation.TVSelect:Enter:Return:Exit:Closed CaptionTuner SourceAuto ScanParental ControlUpdate EPGAirNoOK Exit Menu◇US MPAA Rating:Rating Defined asGPGPG-13RNC-17XNRGeneral audienceParental Guidance suggestedParents strongly cautionedRestrictedNo one 17 and under admittedAdult audience onlyNot ratedChanging the TV settings16TV settings](https://usermanual.wiki/Hisense-Electric/LCDC0001/User-Guide-1248443-Page-17.png)
![The options are:Increases the brightness to add more light to dark areas of the picture. Decreasesthe brightness to add more dark to light areas of picture.Increases the picture level to adjust the white areas of the picture. Decreases thepicture level to adjust the black areas of the picture.Adjusts the intensity of the color.Increases the sharpness level to show cleaner and cleaner image. Decreases thelevel to show a smoother picture.Selects the color temperature. You can select Neutral, or .Reset the parameters above to default settings.Brightness:Contrast:Saturation:Sharpness:Color Temperature:Video Reset:Set the type of picture.Adjusts the wareLength of the color.Cool WarmPreset Mode:Hue:NOTE: Only “Preset Mode” set to “user”, the Brightness, Contrast, Saturation, Hue,Sharpness can be adjusted. when you adjust them to a proper number, then press OKbutton you can exit to the upper menu.PictureSelect:Enter:Return:Exit:Preset ModeBrightnessContrastSaturationHueSharpnessBacklightColor TemperatureVideo ResetUser50505048206NeutralNoOK Exit Menu18Changing the TV settingsPicture settings1 Press Menu button to display the main menu.2 Press button to select Picture item.3 Press [ ] button to enter menu.4 Press [ button to select the option, press[ ] button to enter or press [ button to adjustthe option.5.When you are finished, press the Menu button to closethe menu.[]OK Picture]OK ]/////](https://usermanual.wiki/Hisense-Electric/LCDC0001/User-Guide-1248443-Page-19.png)
![Sound settingSound settingAudio settingsThe options are:Adjusts the volume from the left and right speakers.On/Off the virtual Surround function.Balance:Virtual Surround:Selects the sound mode. You can select Mono, Stereo, or SAP(Second Audio Program).Show the current digital audio.Sets the style of audio output. For example, when you select “Internal”, the audiooutput only by internal speaker.Selects the audio mode, When you select “User” mode, you can weaken orenlarge the sound of the main frequency points.MTS:Digital Audio:Speaker:Audio Setting:19Changing the TV settingsPower settingsThe option is:This is a good function for a computer monitor. When DPMS is on, the computerwill control the screen on or off. For example, the item set to “5 Mins”, computer has no signalfor 5 minutes continually, the screen will be switched off. If the computer is activated, the screenalso is activated.DPMS Mode:if1 Press Menu button to display the main menu.2 Press button to select Audio item.3 Press [ ] button to enter menu.4 Press [ button to select the option, press[ ] button to enter or press [ button to adjustthe option.5.When you are finished, press the Menu button to closethe menu.[]OK Audio]OK ]/////1 Press Menu button to display the main menu.2 Press button to select Power item.3 Press [ ] button to enter menu.4 Press [ button to select the option, press[ ] button to enter or press [ button to adjustthe option.5.When you are finished, press the Menu button to closethe menu.[]OK Power]OK ]/////AudioSelect:Enter:Return:Exit:MTSDigital AudioSpeakerBalanceAudio SettingVirtual SurroundMonoBoth0OK Exit MenuPowerSelect:Enter:Return:Exit:DPMS ModeSleepTV ON/OFF TimePower ModeOffE.SaverOK Exit Menu](https://usermanual.wiki/Hisense-Electric/LCDC0001/User-Guide-1248443-Page-20.png)
![20Changing the TV settingsFunction settingsThe options are:Sets the menu language.You can select the picture size which best corresponds to your viewing requirements.Language:Aspect Ratio:The function works with Aspect Ratio = Zoom1 or Zoom2. It allows users toadjust the vertical position of video display.Sets the display time of OSD.Sets the transparency of OSD.Sets Clock Update, Time Zone and Daylight Saving.Clock Update: When you set Clock Update “Automatically”, the time on the TV is received fromthe digital TV signal.Time Zone: Selects time zone of your location.Daylight Saving: This function allows users to enable or disable the Daylight Saving Time function.Zoom V-Position:OSD Timeout:Transparency:Date&Timer:Input Source Labeling:◇◇◇Name the input source.1 Press Menu button to display the main menu.2 Press button to select Function item.3 Press [ ] button to enter menu.4 Press [ button to select the option, press[ ] button to enter or press [ button to adjustthe option.5.When you are finished, press the Menu button to closethe menu.[]OK Function]OK ]/////SettingSelect:Enter:Return:Exit:LanguageAspect RatioZoom V-PositionOSD TimeoutTransparencyDate & TimeInput Source LabelingFull ScreenEnglishOff00OK Exit MenuAdjusts the TV ON/OFF time.Auto Synchronization: Auto adjusts the system time in DTV mode only.Date/Time: Sets the date/time by number buttons.Power On Timer: When select “on”, sets the TV ON time by number buttons.Power Off Timer: When select “on”, sets the TV OFF time by number buttons.Adjusts saving mode. E. Saver mode will be more energy-efficient.TV ON/OFF Time:Power Mode:◇◇◇◇Changing the TV settingsPower settings](https://usermanual.wiki/Hisense-Electric/LCDC0001/User-Guide-1248443-Page-21.png)
![Changing the TV settingsHotel menu settings21The options are:Sets hotel mode. Only it was set to “On” state, the items below are available.Sets the initial state when you turn on the TV.ON VOLUME: Sets the initial volume only the item is “On” state.ON VOLUME VALUE: Sets the initial volume when you turn on the TV.ON SOURCE: Sets the initial source when you turn on the TV.ON CHANNEL: Switches on channel setting. Only be used when [ON SOURCE] is TV.ON CHANNEL NUMBER: Sets the initial channel number when you turn on the TV. Only beused when [ON CHANNEL] is “On”.LOGO: Set the logo when you turn on the TV.POWER ON: Available options are ON/STANDBY/LAST, Which are switching on, standby andstaying at last status.BASIC SETTING: If it is set to [On], after AC/DC switching on, picture mode and sound modeare set to [standard], zoom mode is set to [full screen], and volume is set to [20].Lock some functions.KB LOCK: TV Keyboard lock setting. If it is set to [On], all keyboards can not be used.Search LOCK: Channel searching lock setting. If it is set to [On], channels can not be searchedor changed menu function can not be used.USER SAVE LOCK: If it is set to [Off], Customer adjusting on picture mode, sound mode andother functions are not saving to EEPROM. System will reset to the status before adjustingafter restart.SUBMENU LOCK: If it is set to [On], Customer can only enter the basic picture function menu(such as brightness, sharpness and color) and Lock Setting menu. Further picture/soundfunctions and channel searching menu can not be entered. Meanwhile relevant buttons suchas Sound Mode, Sleep, Zoom on the remote control are not in use.INPUT SELECTION: Locks some source individually by selecting the pop up sub-menu.Thesource can not be accessed after locking.HOTEL MODE:TV ON SETTING:FUNCTION LOCK:◇◇◇◇◇◇◇◇◇◇◇◇◇1 Press Menu button to display the main menu.2 Press button to select Audio item.3 Press [ ] button to enter menu.4 Press [ button to select Balance option, press[ button to adjust it to 0. and press 5 4 8buttons to enter hotel menu.5When you are finished, press the Menu button to closethe menu.、、[]OK Audio]]Press [ OK] button to enter or press [ ] button toadjust the option.6//////Hotel SettingsSelect:Enter:Return:Exit:HOTEL MODETV ON SETTINGFUNCTION LOCKMAX VOLUMEMIN VOLUMEAUTO STANDBYCHANNEL SETTINGRSR ENABLESET SSIDCLONEOn1000OnNoREAD OUTOK Exit Menu](https://usermanual.wiki/Hisense-Electric/LCDC0001/User-Guide-1248443-Page-22.png)
![MAX VOLUME:MIN VOLUME:AUTO STANDBY:CHANNEL SETTING:RSR ENABLE:SET SSID(Session Identification):CLONE:Note: When Use the clone function, the equipment (U disk, etc.) must be connected to theUSB interface.Sets the maximum volume.Sets the minimum volume.If it setted to [On], the TV will auto standby if no input signal for 15 minutes.Sets and edits channels.TUNER SOURCE: Selects source of tuner, including CABLE, HRC, IRC, AIR.AUTO SCAN: Searches the channels automatically.PROGRAM GUIDE EDIT: Edit the channels, Including:Rename the channel: PSkip the channel: Press Green button to select skip function; press Red button to confirm. Ifyou want to cancel skip, select this channel and press Green button; press Red button toconfirm.Delete the channel: Press Blue button to select delete function, and then press Red button toconfirm.Copy the channel: Press Yellow button to select copy function. Then press button tomove to the desired position and press Red button to confirm.Swap the channels: If you want to change the order of the programs, press [ ] button; press[ ] button to move to the desired position, and then press [ ] button to confirm.If it setted to [On], activate “Virtual Surround” function.The SSID is provided by the PPV system provider. Thissession identification information must be forwarded to the Pro:Idiom device (Hotel TV) to enabledecryption. The SSID is used each time an encrypted channel is tuned and it must contain 20bytes of information.CLONE feature, you can copy the state of the machine to another machine.Operation is as follows: First insert U disk, and then enter HOTEL MENU, select READ OUT , theYES option is OK to confirm the next point , after the completion of READ OUT action.At this point the previous U-disk into the state of the machine need to be copied into the HOTELMENU, select WRITE IN , the YES option is OK to confirm the next point, after the completion ofWRITE IN action, the whole auto-CLONE completed after rebooting.◇◇◇◆◆◆◆◆ress Red button to change the name of the selected channel. Press[ button to adjust the token of the name. Press Red button to confirm or Green button tocancel.[/]/]/Changing the TV settingsHotel menu settings22](https://usermanual.wiki/Hisense-Electric/LCDC0001/User-Guide-1248443-Page-23.png)