Hisense Electric PADP0004 Sero 7+ User Manual
Hisense Electric Co., Ltd. Sero 7+ Users Manual
UserManual.wiki
>
Hisense Electric
>
PADP0004 User Manual
Users Manual
Navigation menu
Upload a User Manual
Namespaces
Wiki Guide
HTML
PDF
Info
Views
User Manual
Discussion / Help
Navigation
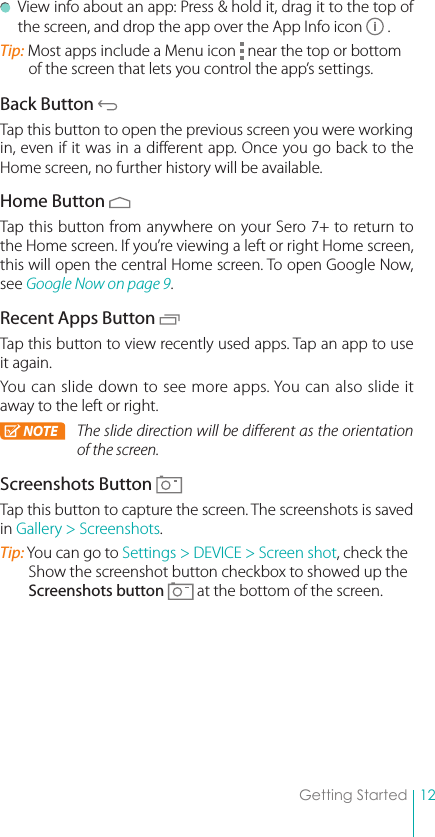
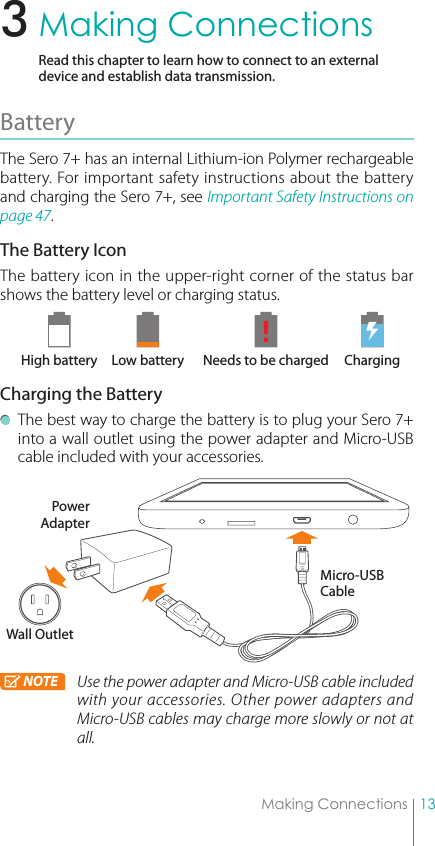
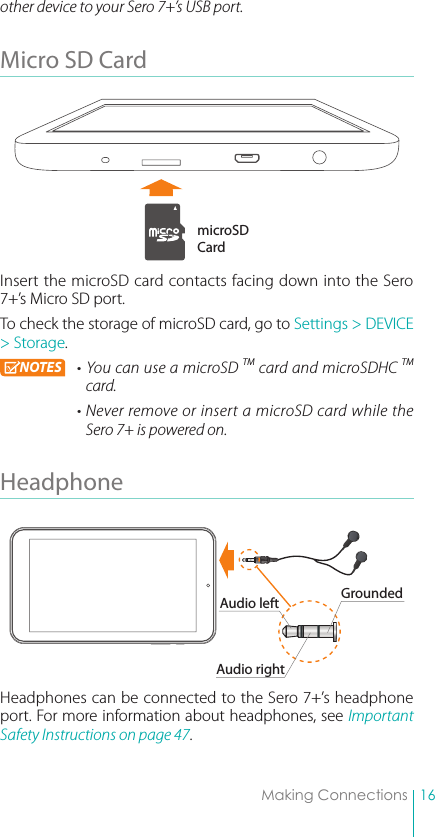
![14Making Connections The Sero 7+ also charges slowly when you connect it to the USB port on your computer. The battery may drain instead of charge when the battery usage is large.Check the Level and Details of BatteryYou can check the percentage of battery in Quick Settings, or you can go to Settings > DEVICE > Battery to check the details of battery. Tap a graph for more details. The list at the bottom of the screen shows the breakdown of battery usage for individual apps and services. Extend the Life of BatteryYou can extend your battery’s life between charges by turning off features that you don’t need. You can also monitor how apps and system resources consume battery power. If you aren’t using Wi-Fi, you can turn it off. Turn down screen brightness and set a shorter screen timeout: Settings > DEVICE > Display. If you don’t need it, turn off automatic syncing for all apps: Settings > ACCOUNTS > Google > [Google account-name]. This means you need to sync manually to collect messages, email, and other recent information, and won’t receive notifications when updates occur.Micro-USB You can use the included Micro-USB cable to connect the Sero 7+’s Micro-USB port to your computer’s USB port. To change your Sero 7+’s USB connection options, go to Settings > DEVICE > Storage > Menu icon > USB computer connection. You can select the Sero 7+ is connected as MTP or PTP.Connect to a Windows ComputerYou can connect your Sero 7+ to a Windows computer and transfer music, pictures, and other files in both directions. This connection uses the MTP protocol, which is supported by most recent versions of Windows.](https://usermanual.wiki/Hisense-Electric/PADP0004/User-Guide-2329395-Page-15.png)

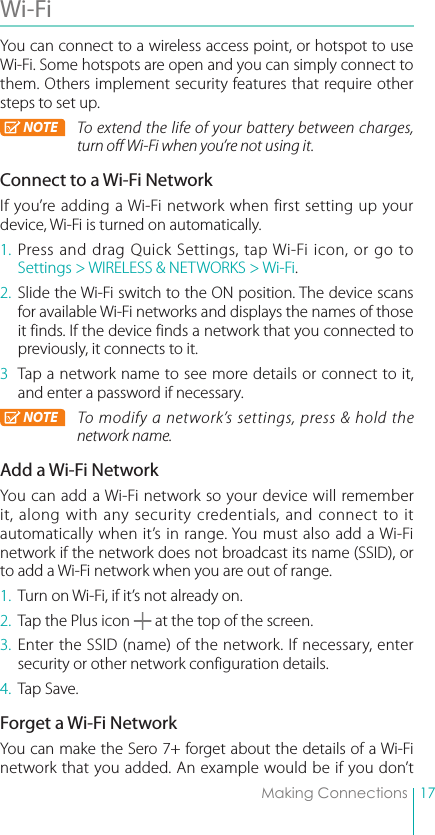
![18Making Connectionswant the Sero 7+ to connect to it automatically or if it is a network that you no longer use.To forget a Wi-Fi network, go to Settings > WIRELESS & NETWORKS > Wi-Fi > [the network name] > Forget.Advanced Wi-Fi SettingsTo set the Advanced Wi-Fi, go to Settings > WIRELESS & NETWORKS > Wi-Fi > Menu icon > Advanced . Network notification - By default, when Wi-Fi is on, you receive notification in the Status bar when your device detects an open Wi-Fi network. Uncheck this option to turn off notification. Keep Wi-Fi on during sleep - To select whether to put the Sero 7+ in sleep mode when it’s connected to Wi-Fi. Scanning always available - Check to scan for networks even when Wi-Fi is turned off. Wi-Fi optimization - By default, when Wi-Fi is on the battery usage is optimized. MAC address - The Media Access Control (MAC) address of your device when connected to a Wi-Fi network. IP address - The Internet Protocol (IP) address assigned to the device by the Wi-Fi network you are connected to (unless you used the IP settings to assign it a static IP address).Configure Proxy Settings for a Wi-Fi NetworkSome network administrators require you to connect to internal or external network resources via a proxy server. By default, the Wi-Fi networks you add are not configured to connect via a proxy, but you can change that for each Wi-Fi network you’ve added.1. Press & hold a network in the list of Wi-Fi networks you’ve added.2. Tap Modify network in the dialog that opens.3. Select Show advanced options.4. If the network has no proxy settings, tap None under Proxy Settings, then tap Manual in the menu that opens.](https://usermanual.wiki/Hisense-Electric/PADP0004/User-Guide-2329395-Page-19.png)

![37Using Basic Features and Functionalitiesfrom your system administrator about the service to which the account connects. For example, you may need to know the account’s domain or server address.1. Go to Settings > ACCOUNTS > Add account.2. Tap the kind of account to add.3. Follow the on-screen instructions.4. Most accounts require a username and password, but the details depend on the kind of account and the configuration of the service you’re connecting to.When you’re finished, the account is added in one of two places: Google Accounts show up under Settings > ACCOUNTS > Google. Other accounts show up under Settings > ACCOUNTS on the main Settings screen.Remove an AccountYou can remove any account and all information associated with it from your Sero 7+, including email, contacts, settings, and so on. To remove a Google account, go to Settings > ACCOUNTS > Google > [account-name] > Menu icon > Remove account. For any other type of account, go to Settings > ACCOUNTS > [account - type] > [account - name] and look for the Remove option.Syncing Configure Sync OptionsYou can configure synchronization options for any of your apps. You can also decide what kinds of data to synchronize for each account.For some accounts, syncing is two-way; changes that you make to the information on your Sero 7+ are made to the copy of that information on the web. Your Google Account](https://usermanual.wiki/Hisense-Electric/PADP0004/User-Guide-2329395-Page-38.png)