Honeywell 7300-2011B Wireless Handheld computer User Manual 7300 Revb
Honeywell International Inc Wireless Handheld computer 7300 Revb
UserManual.wiki
>
Honeywell
>
7300-2011B User Manual
>
chapter 6 to 10
Contents
1.
chaper 1 to 5
2.
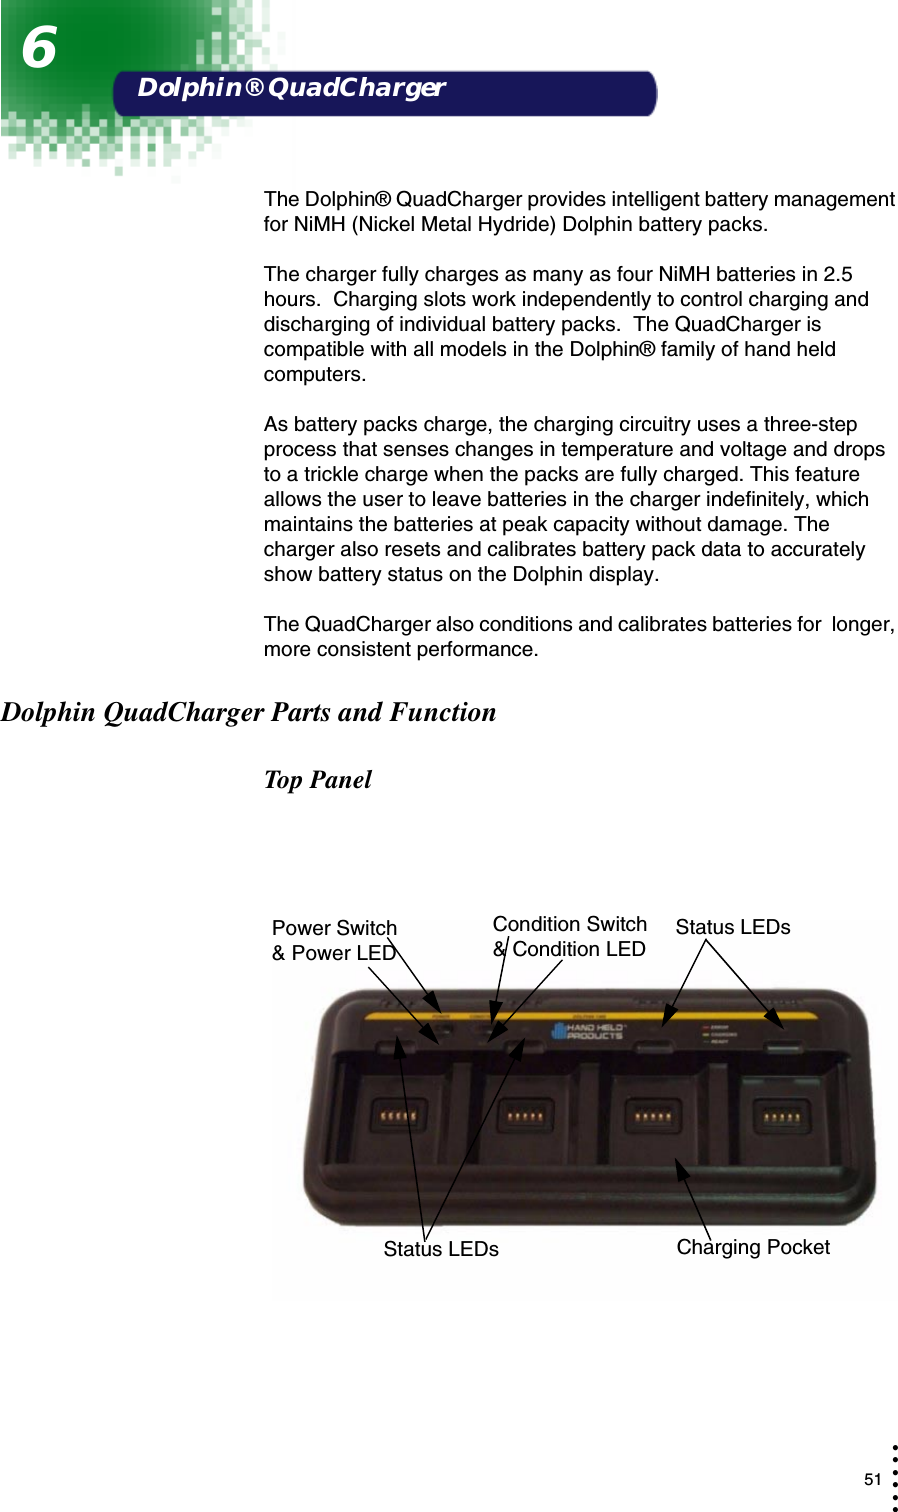
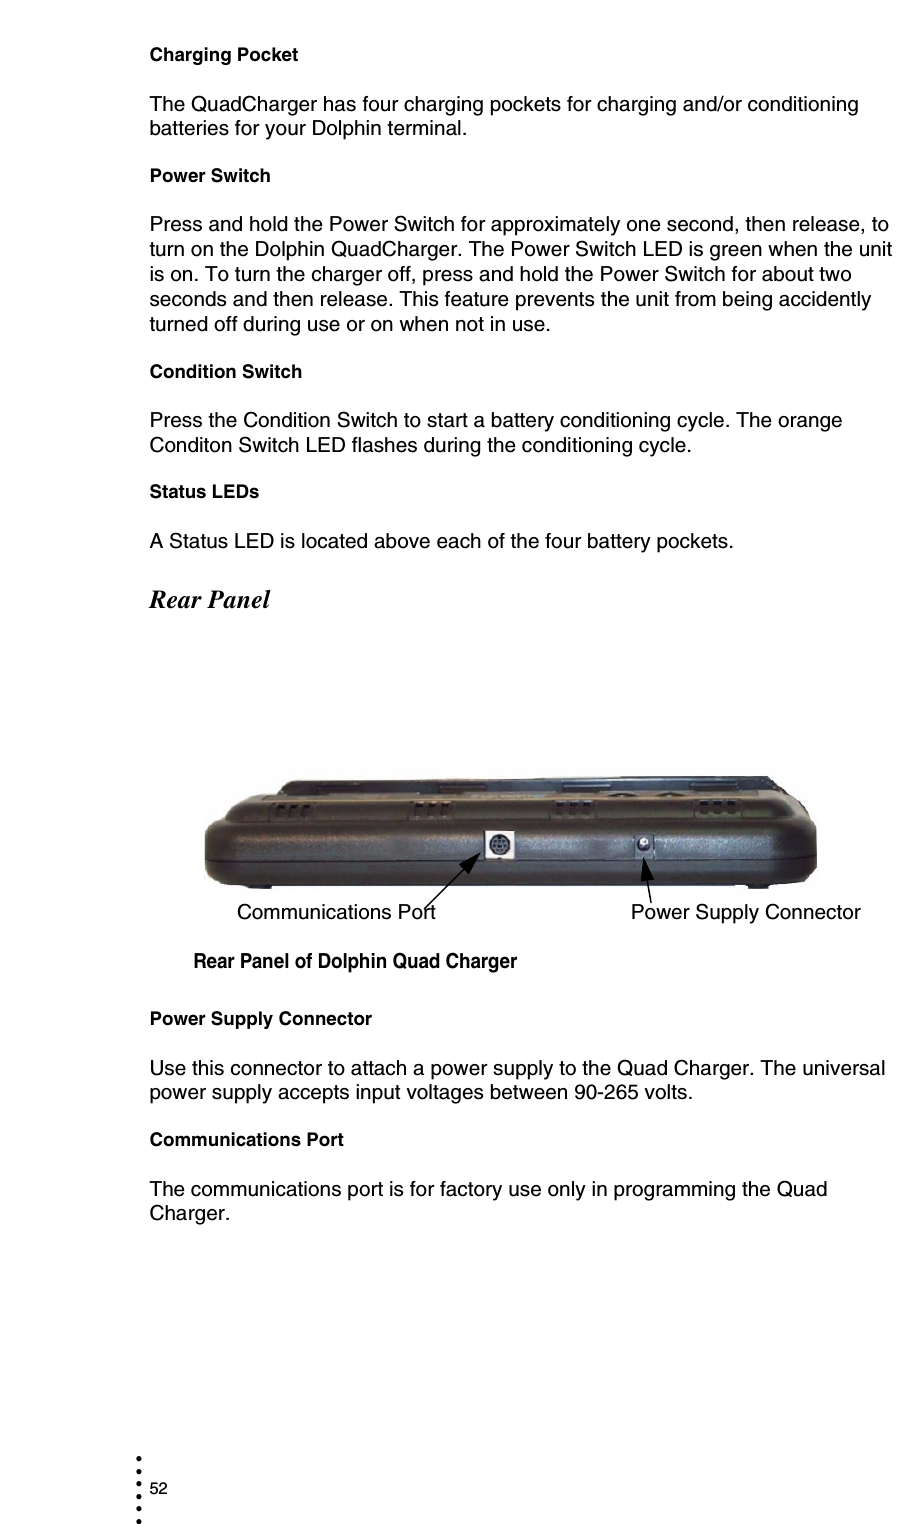
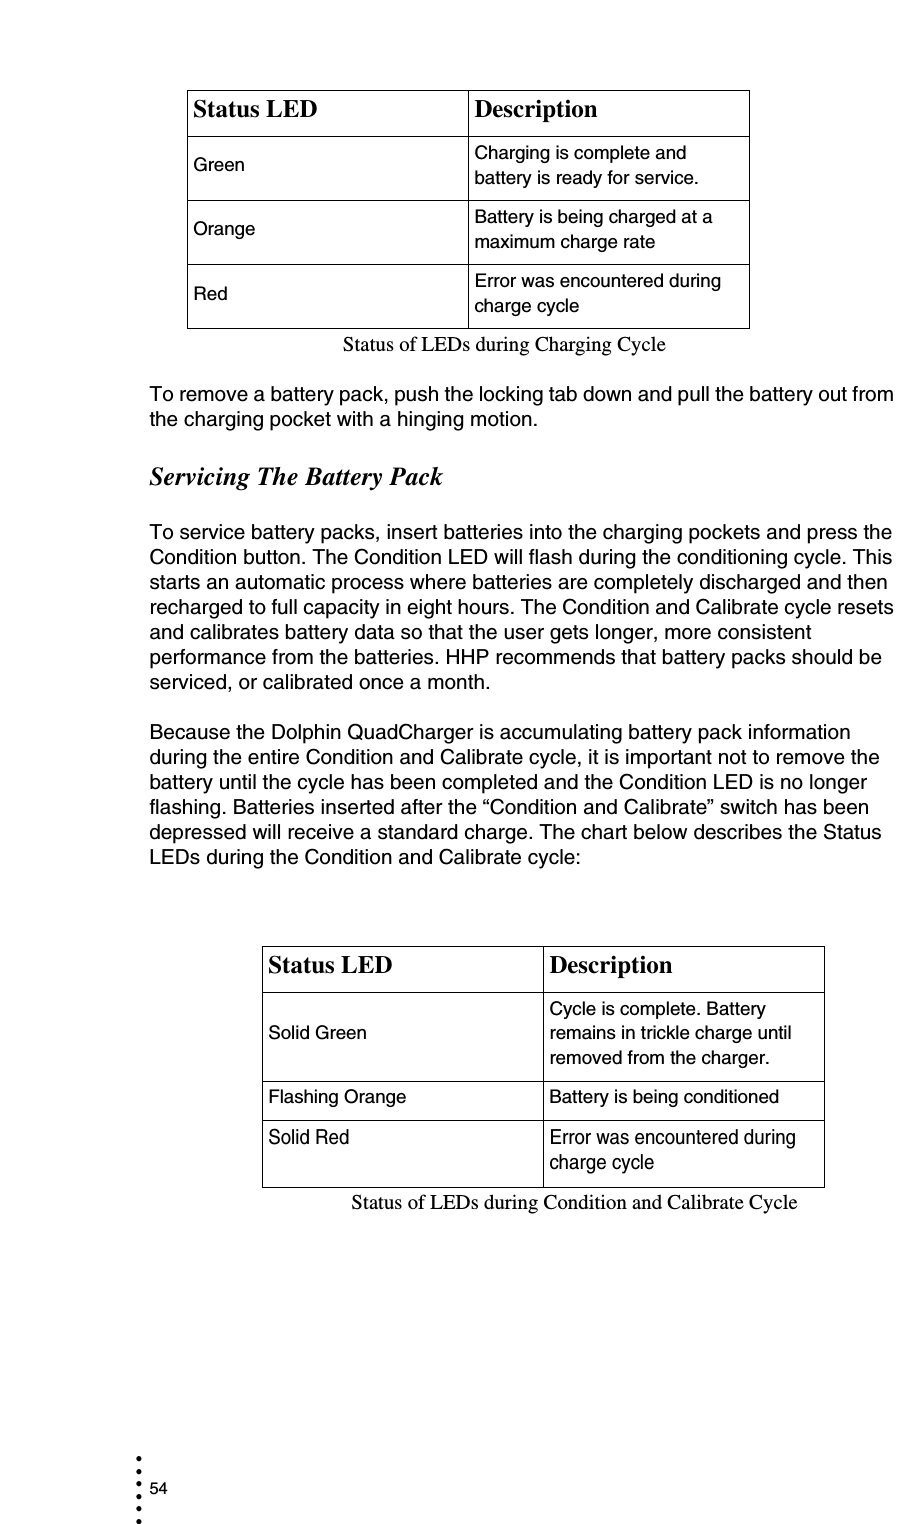
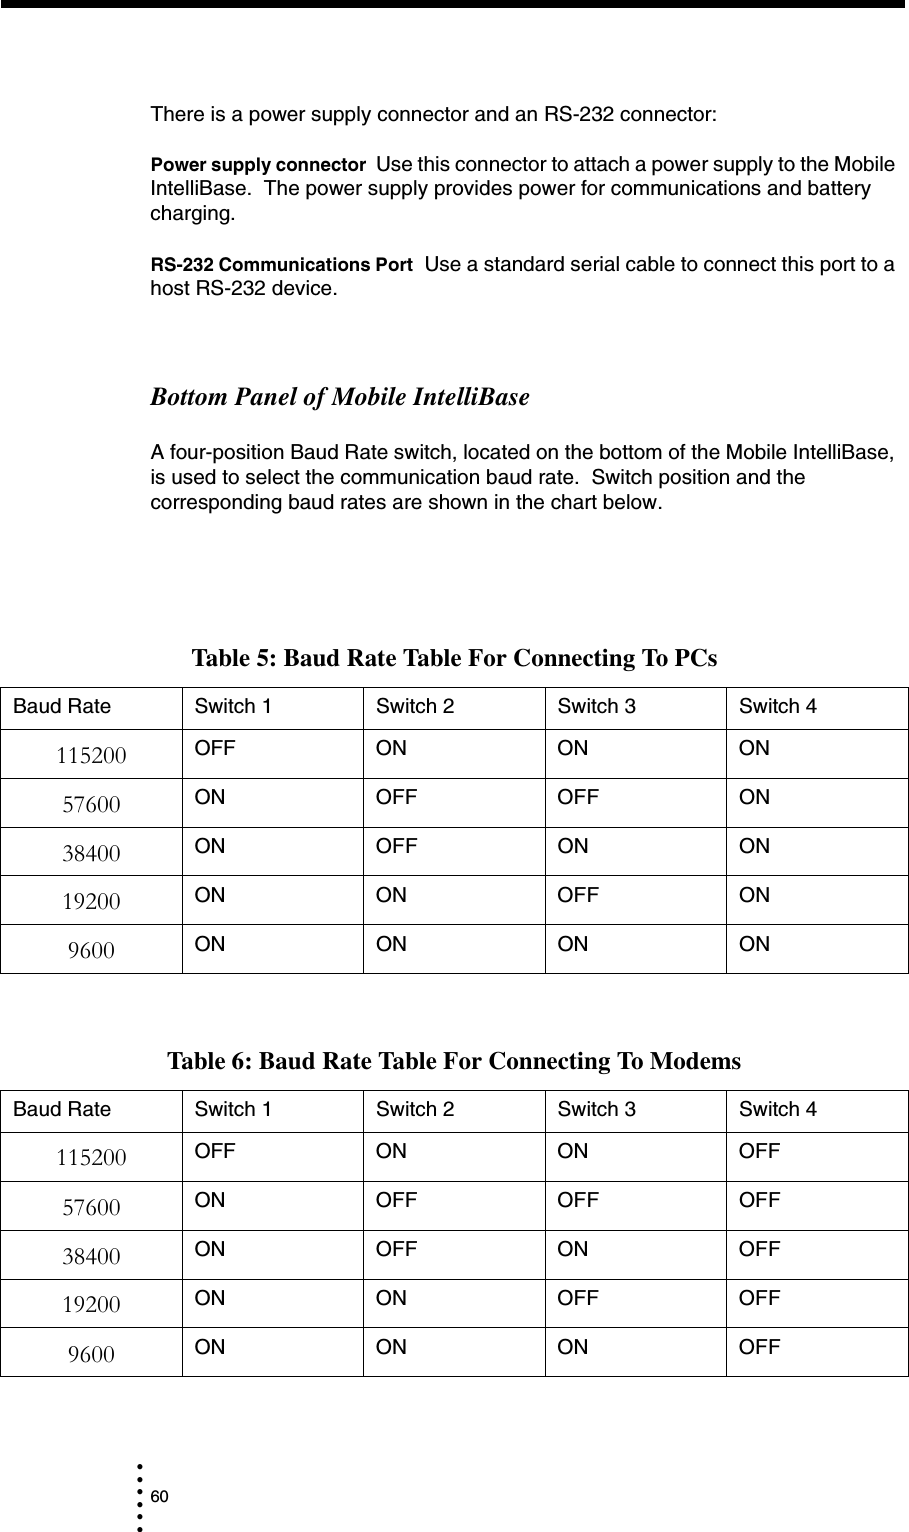
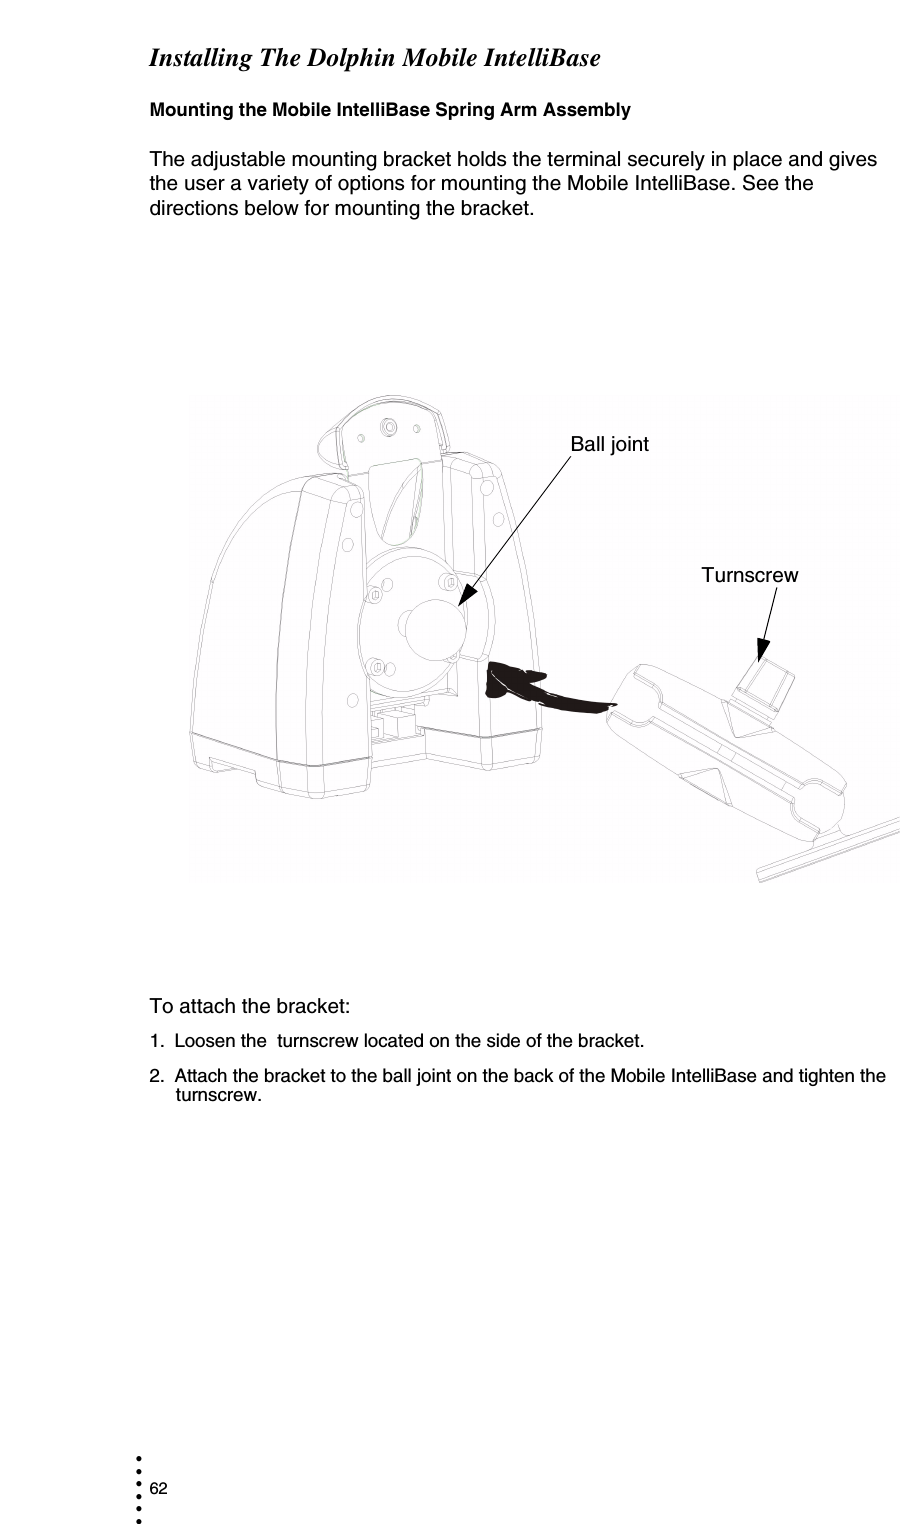
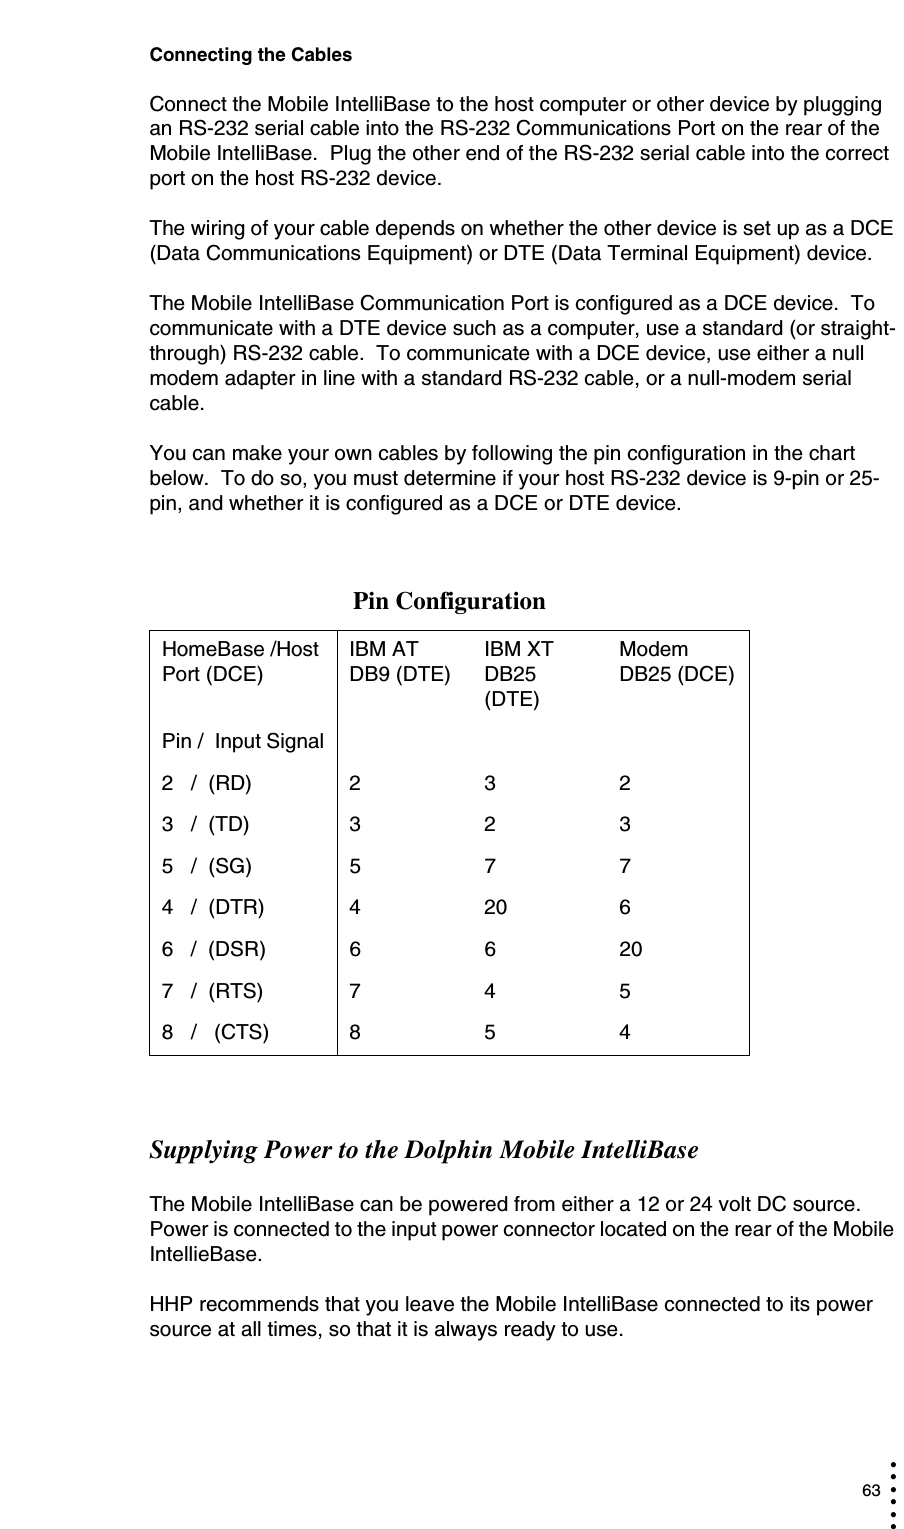
chapter 6 to 10
3.
ch 1 updated with RF exposure statement
chapter 6 to 10
Navigation menu
Upload a User Manual
Namespaces
Wiki Guide
HTML
PDF
Info
Views
User Manual
Discussion / Help
Navigation