Honeywell 7400-352 Wireless Hand Held Computer/ Bar Code Scanner User Manual Manual
Honeywell International Inc Wireless Hand Held Computer/ Bar Code Scanner Manual
UserManual.wiki
>
Honeywell
>
7400 352 User Manual
Manual
Navigation menu
Upload a User Manual
Namespaces
Wiki Guide
HTML
PDF
Info
Views
User Manual
Discussion / Help
Navigation


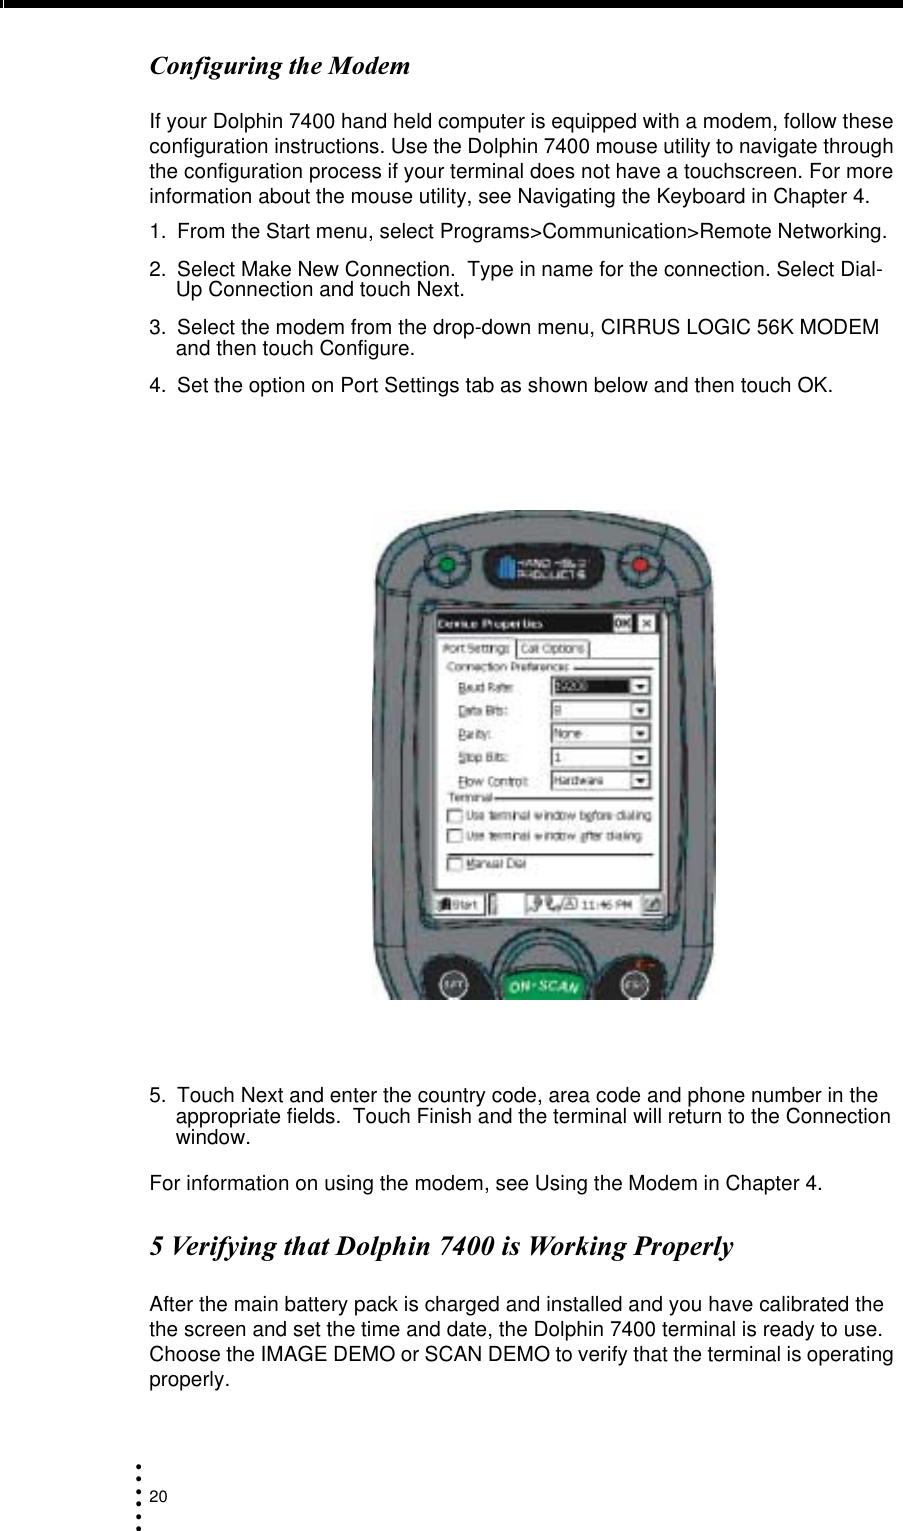
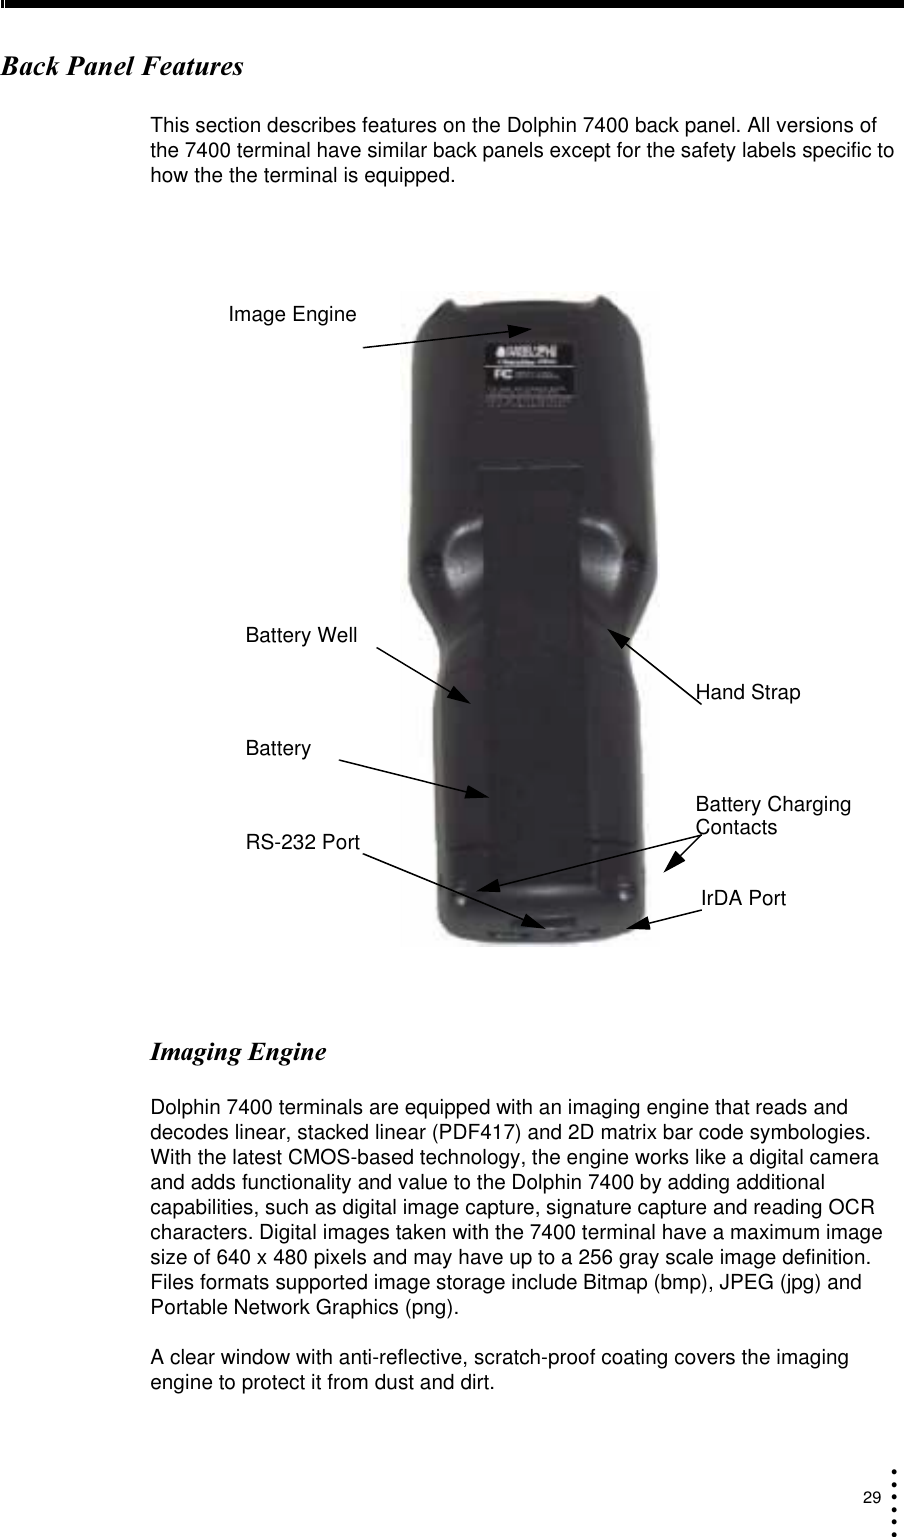
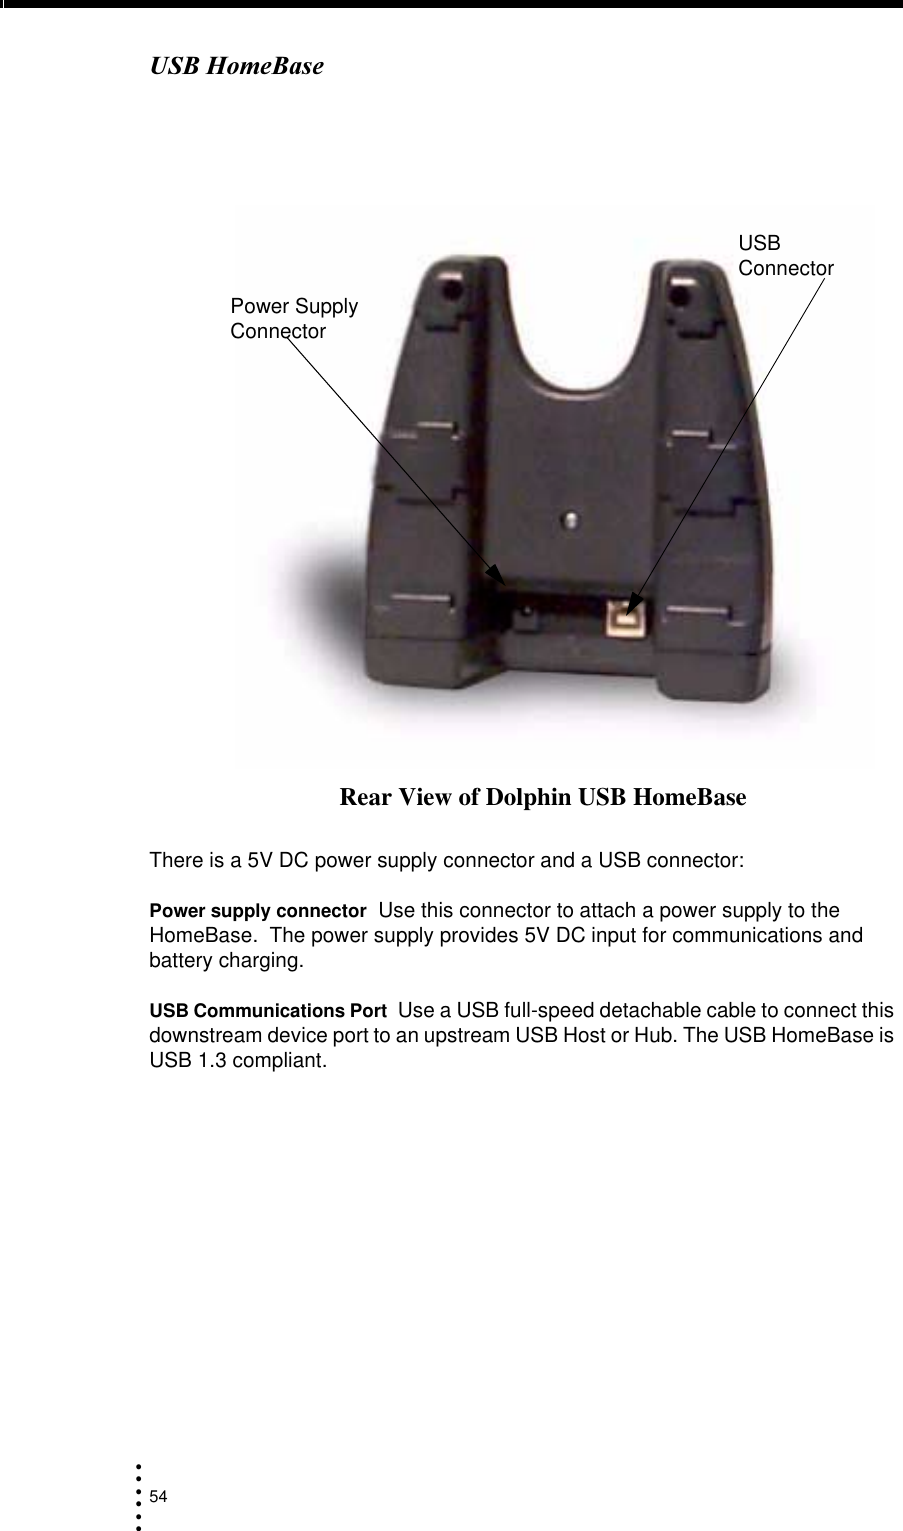
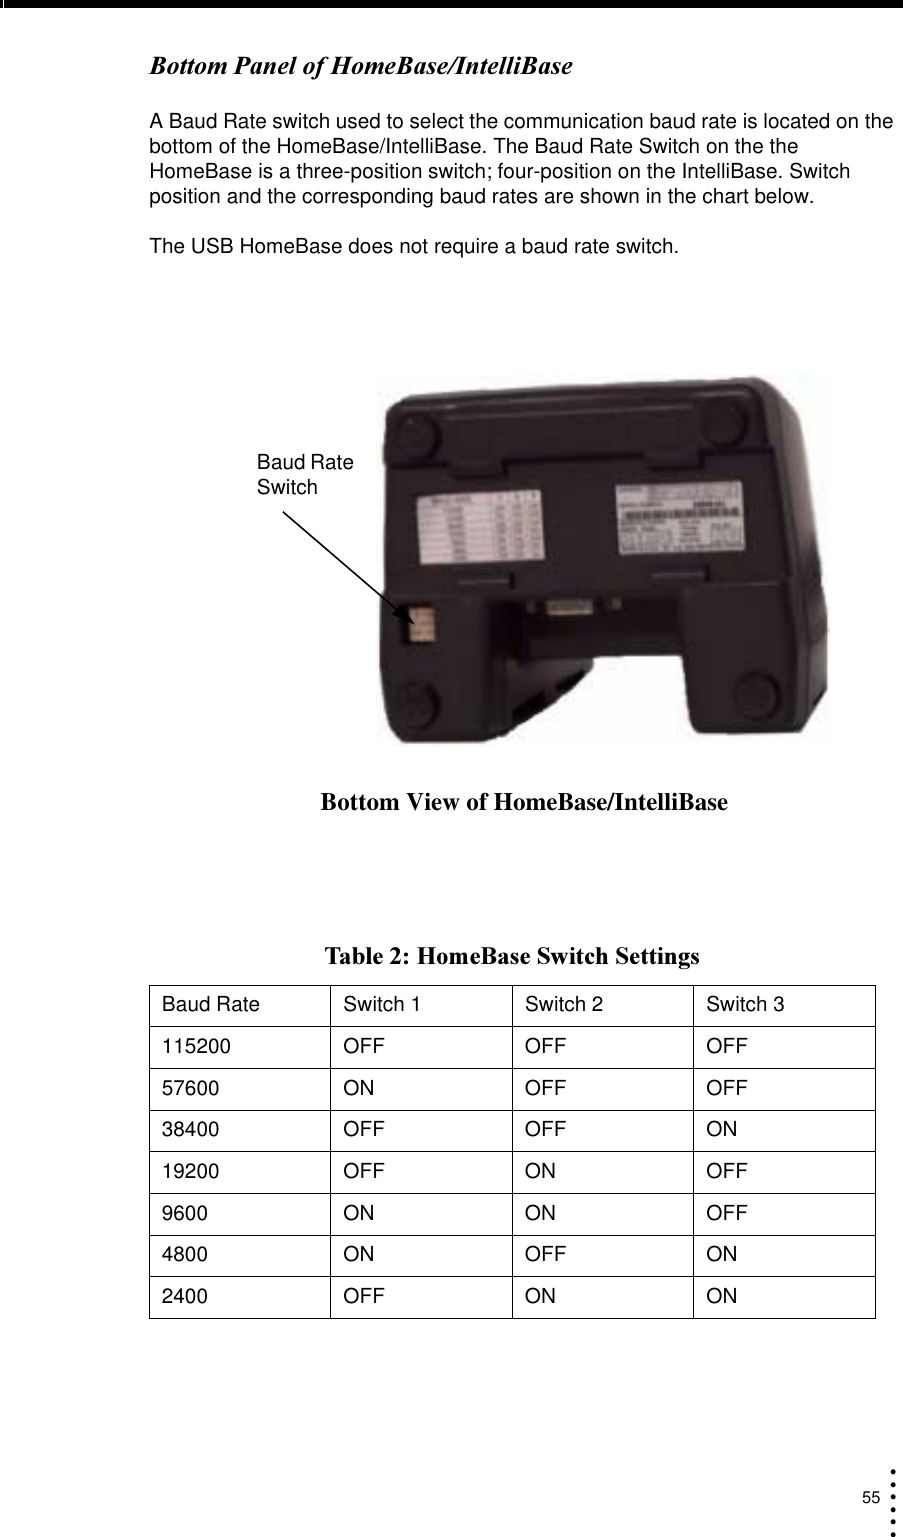
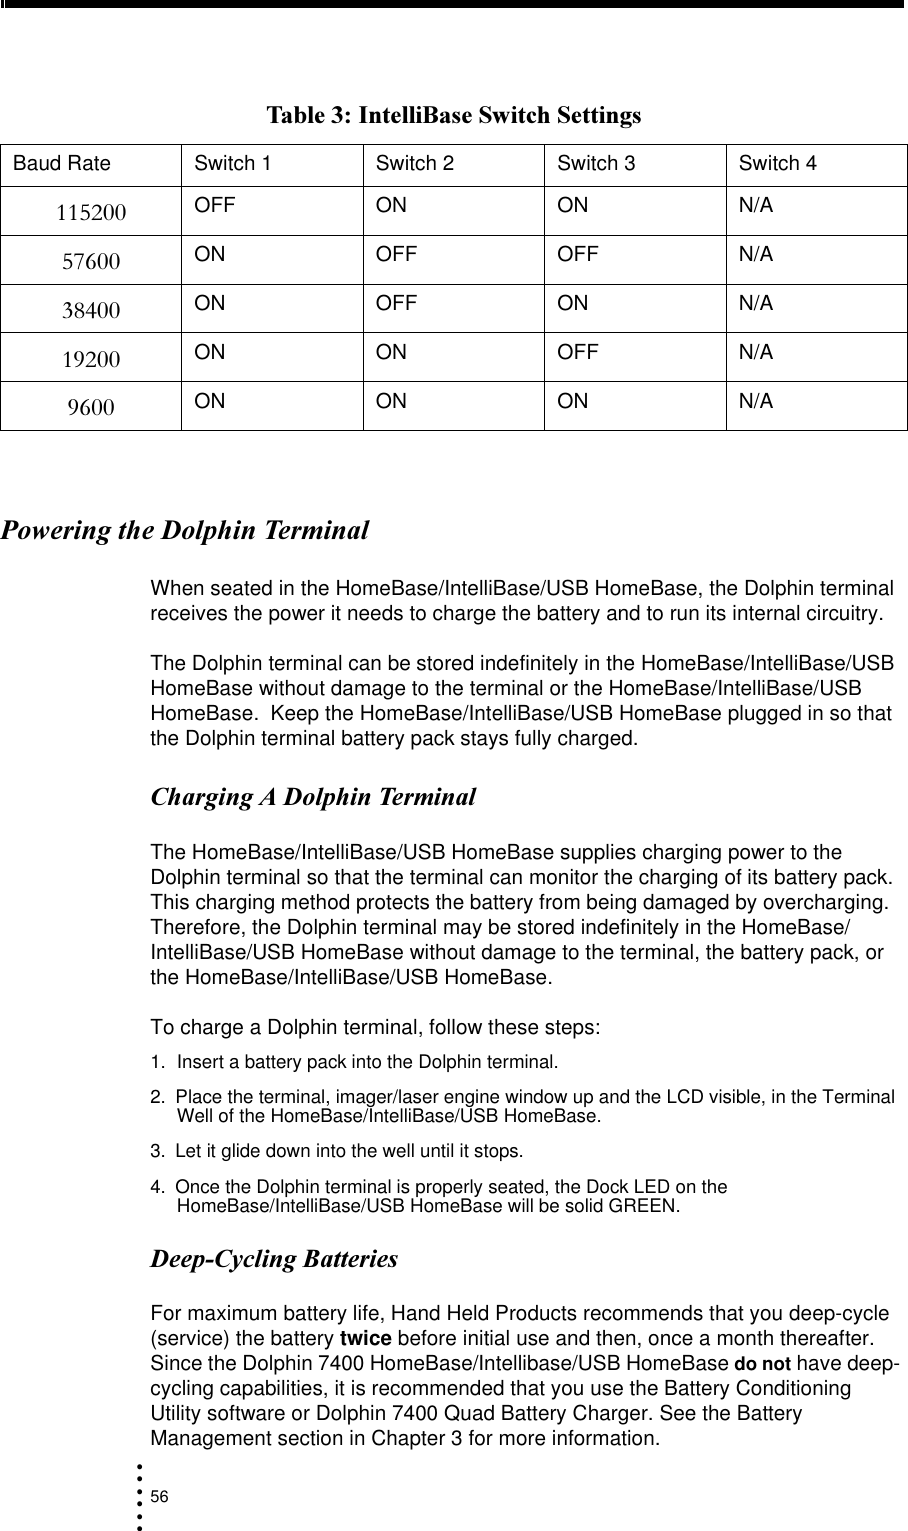
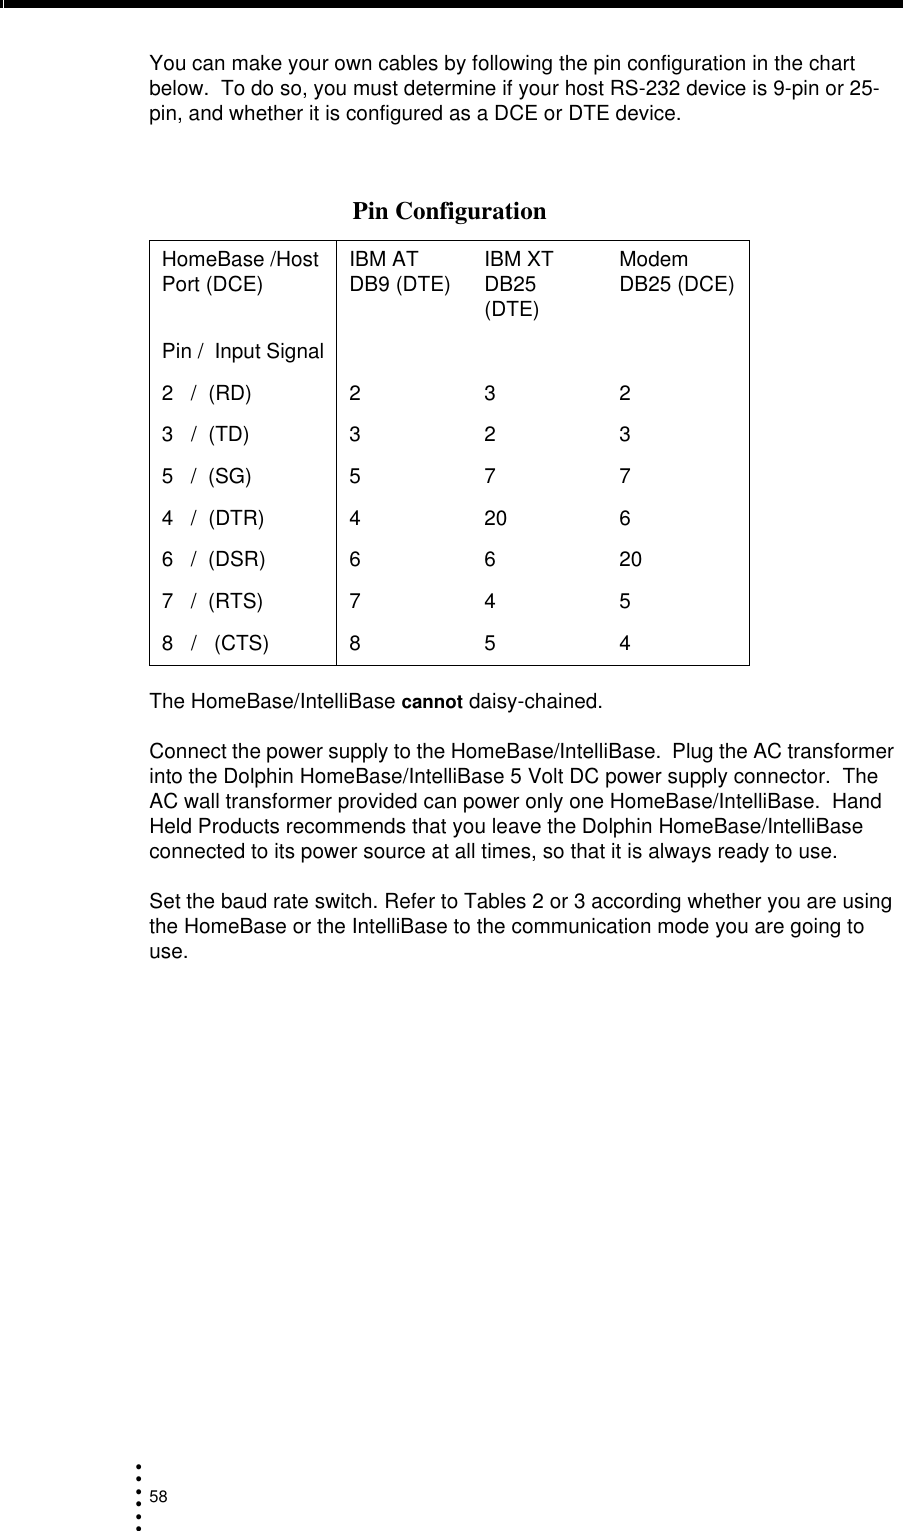
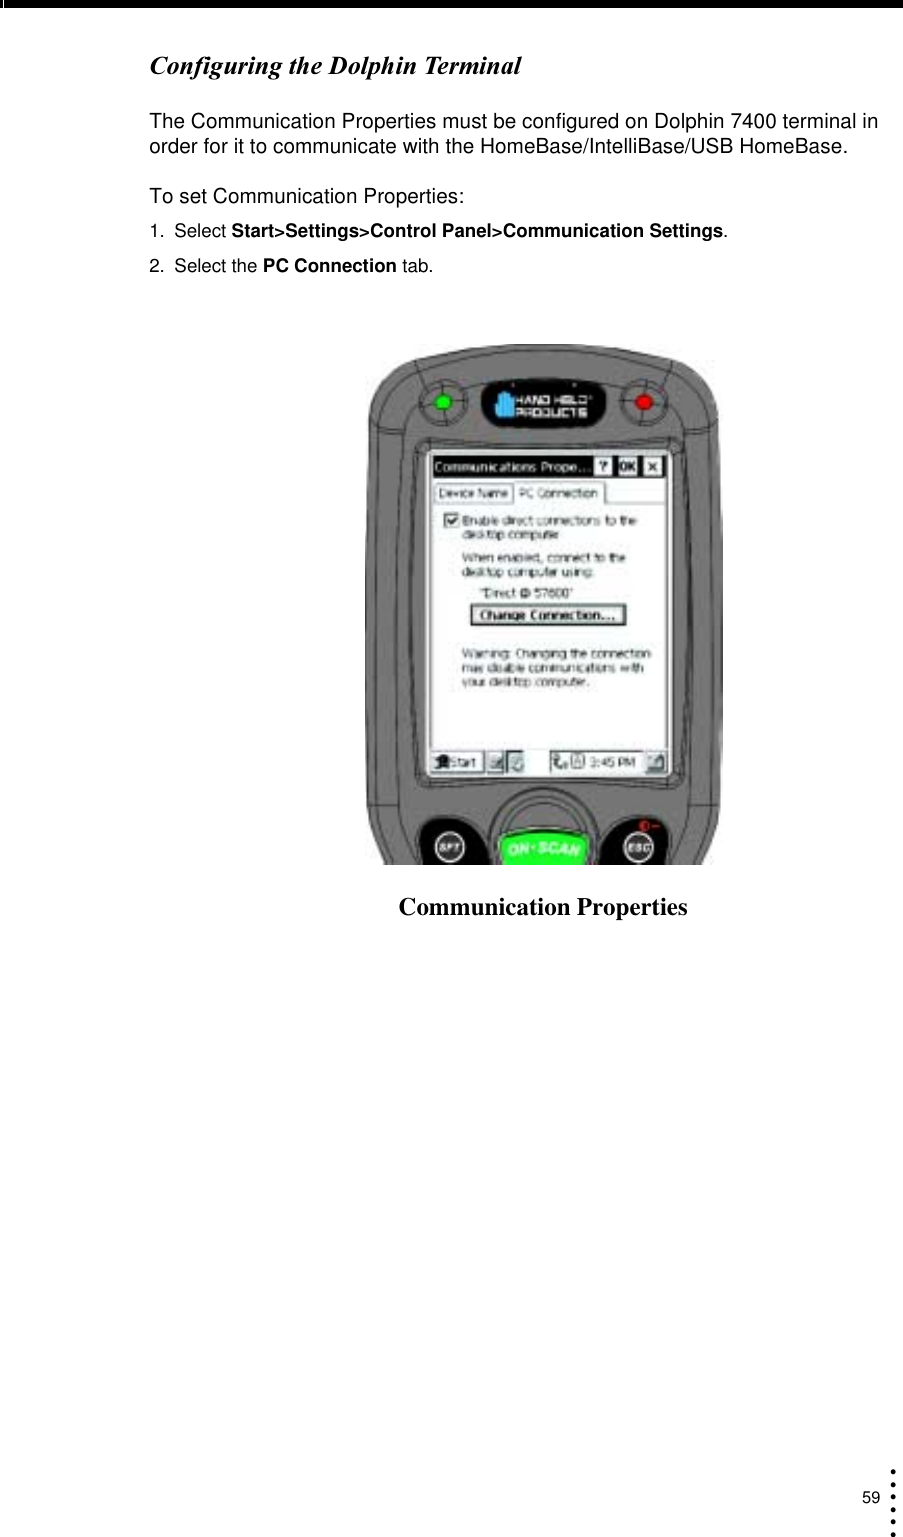
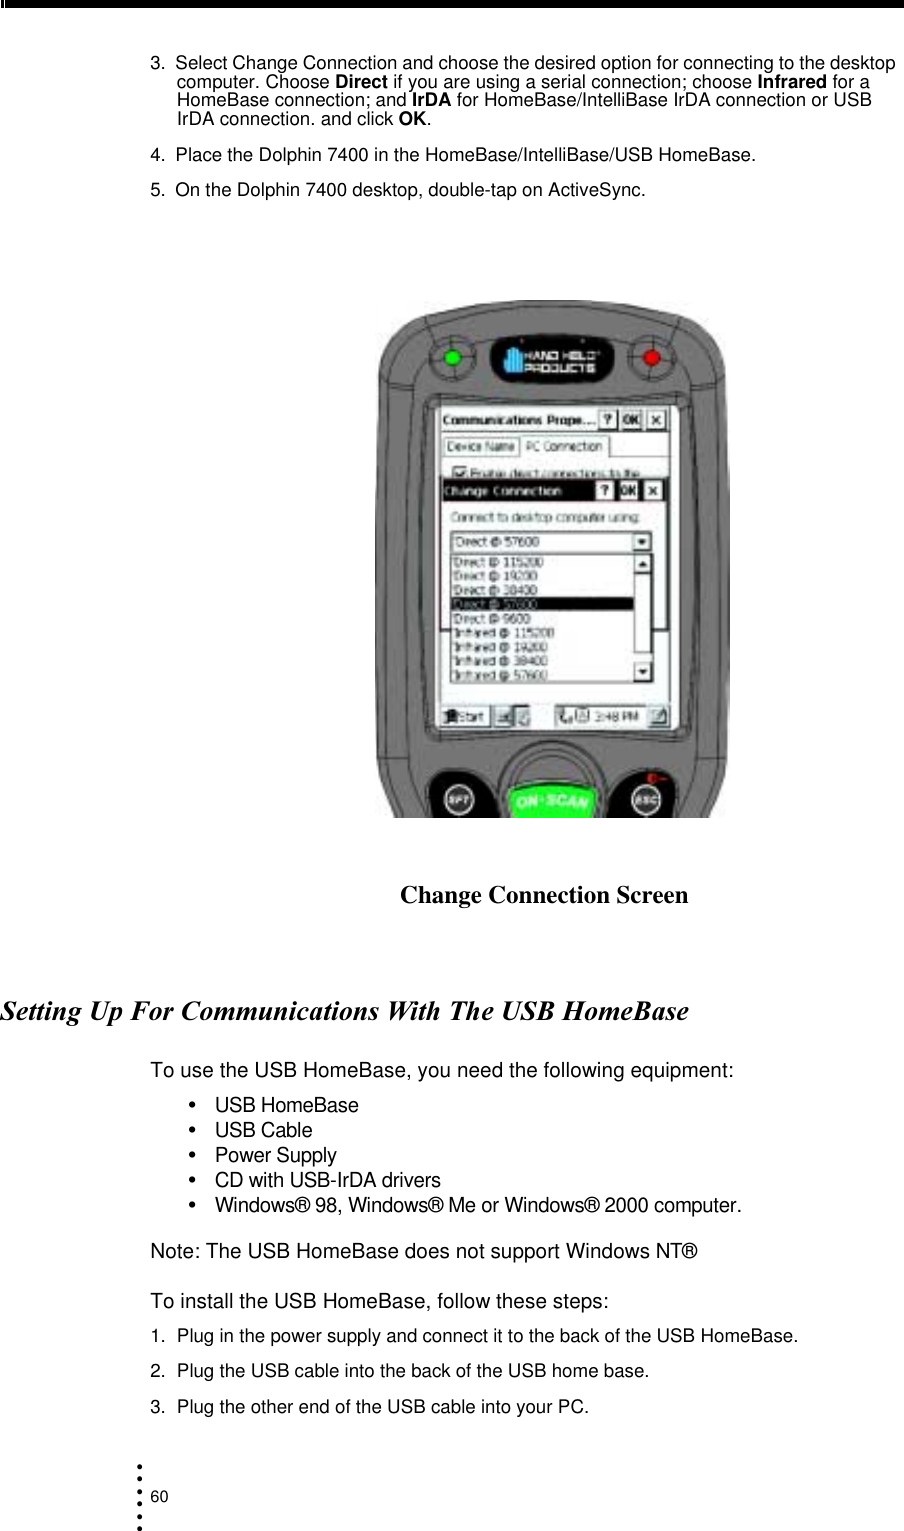
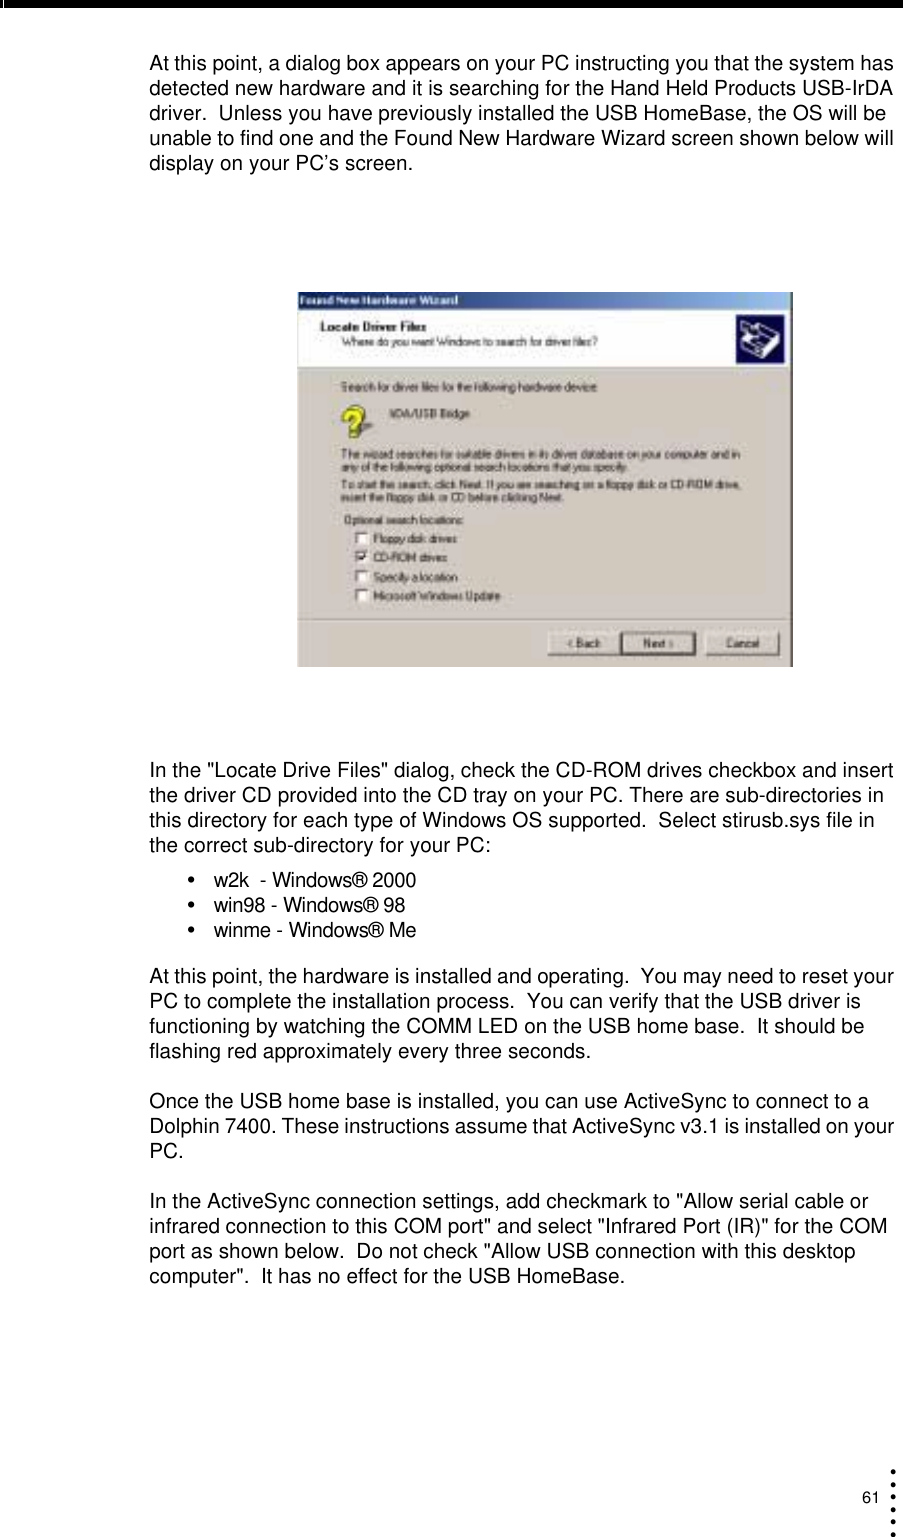
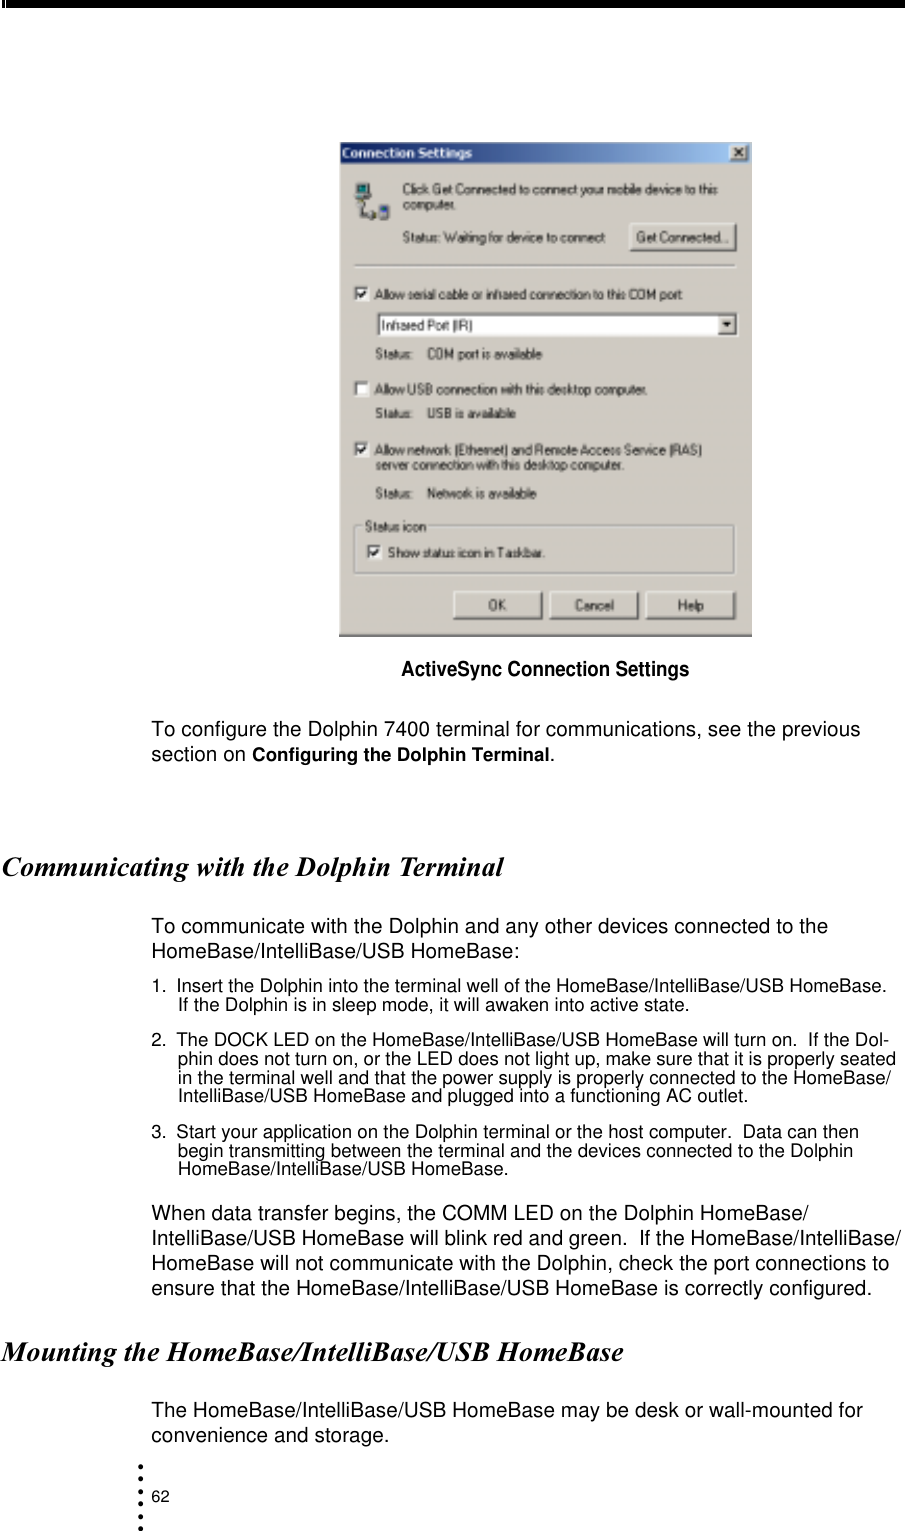
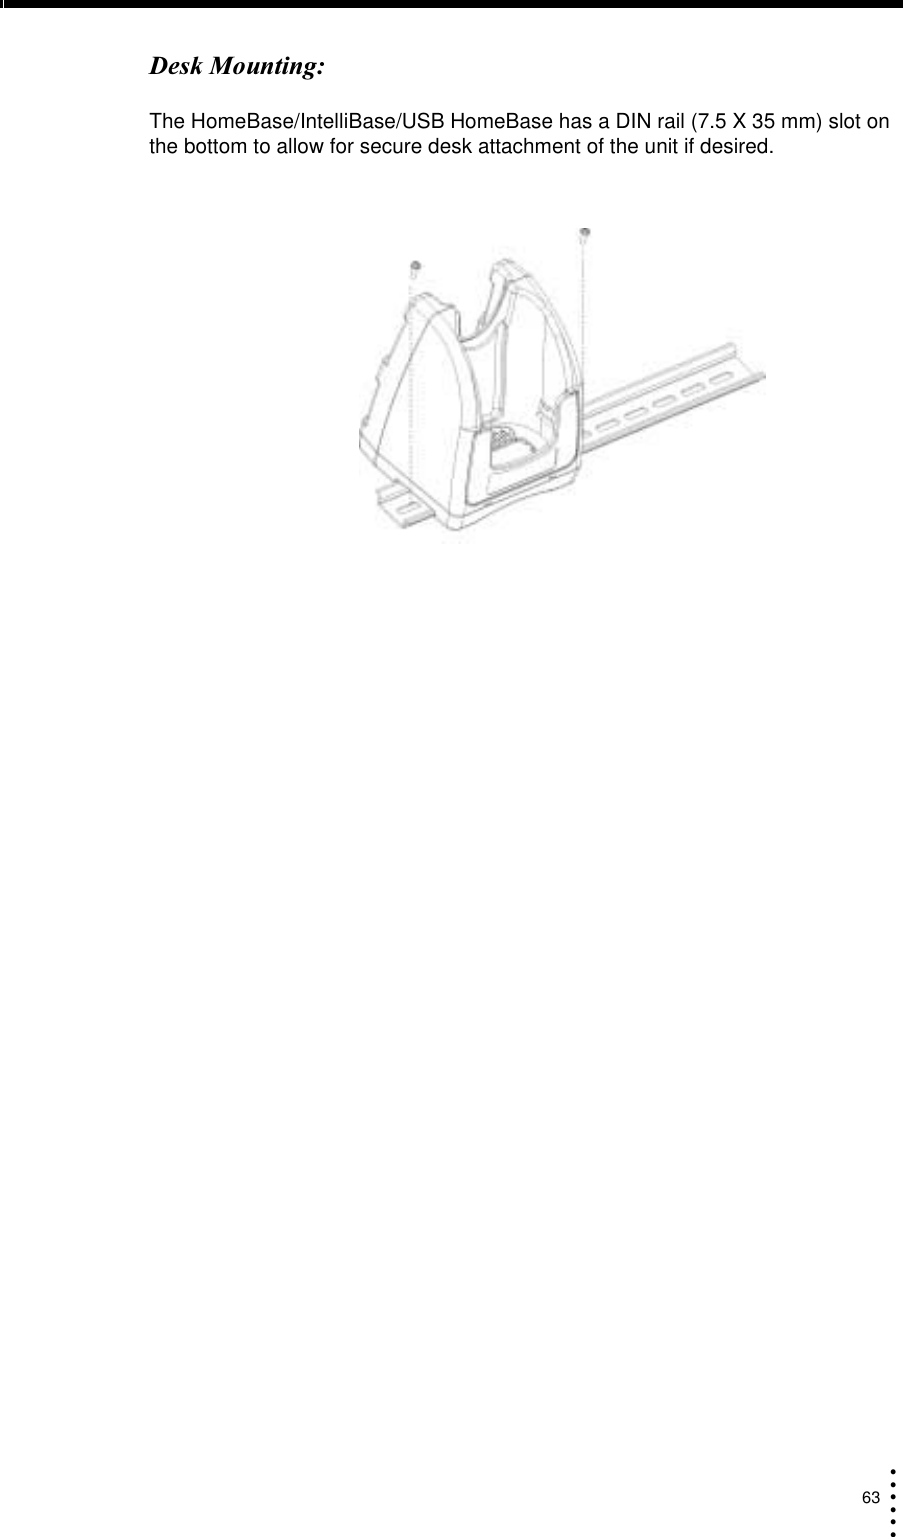
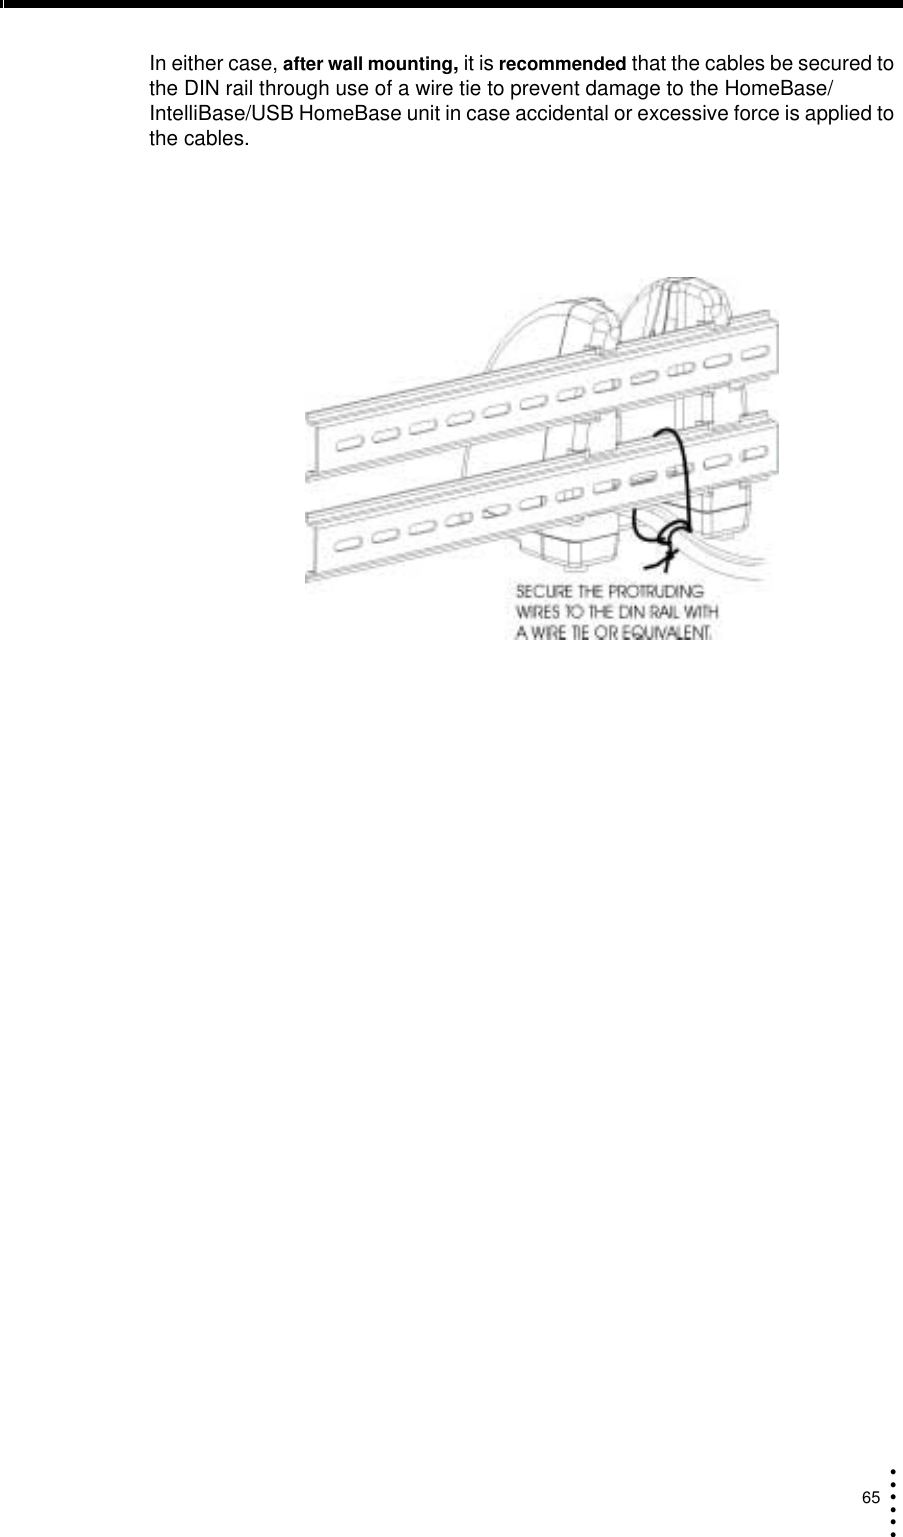
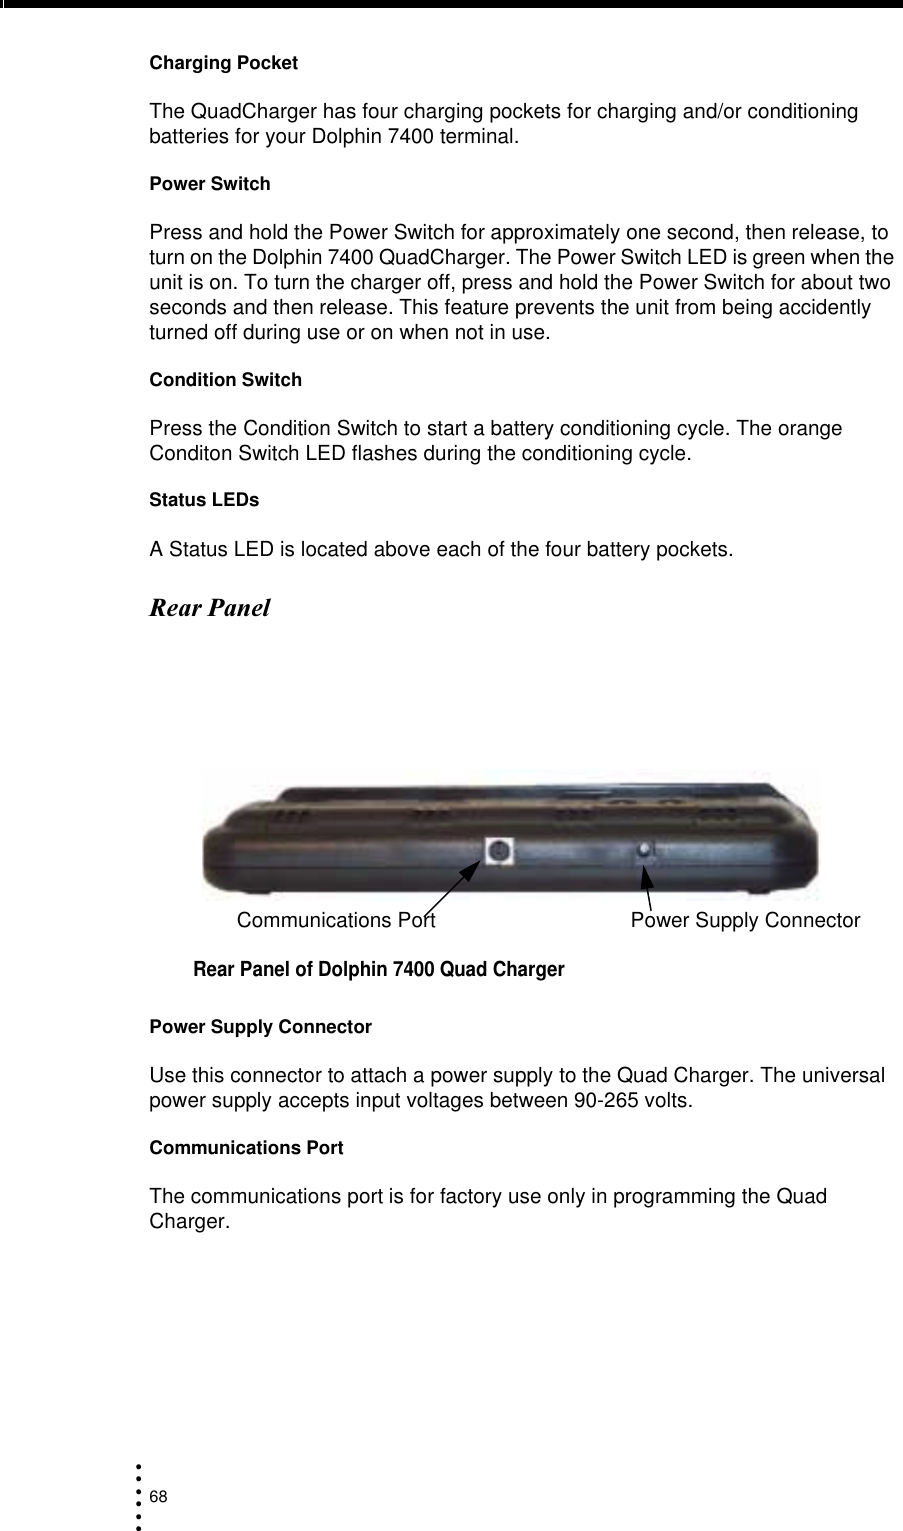
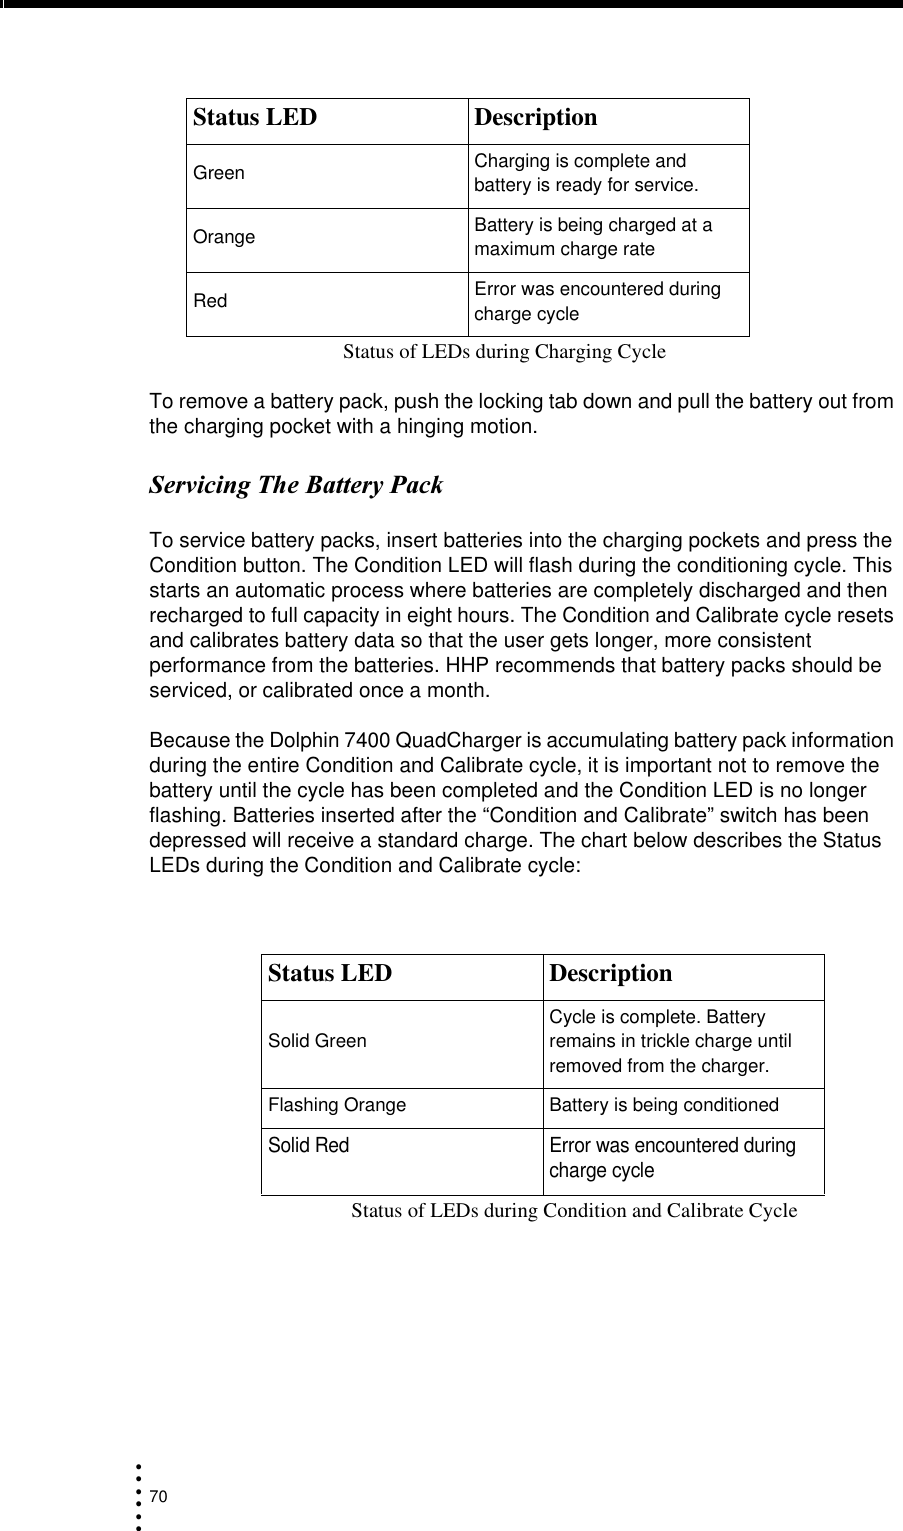
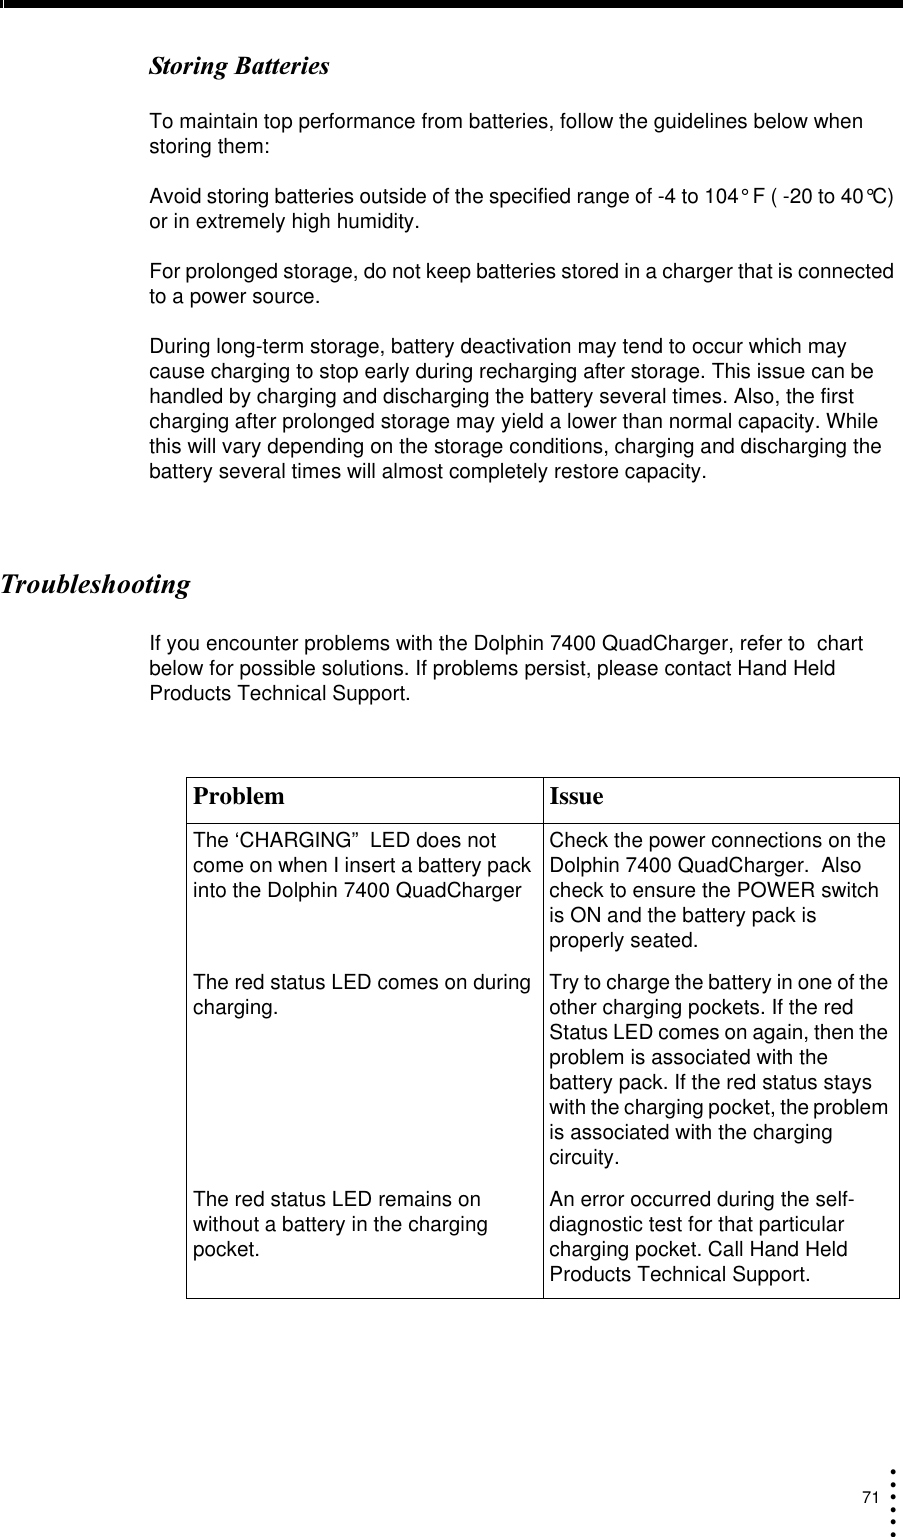
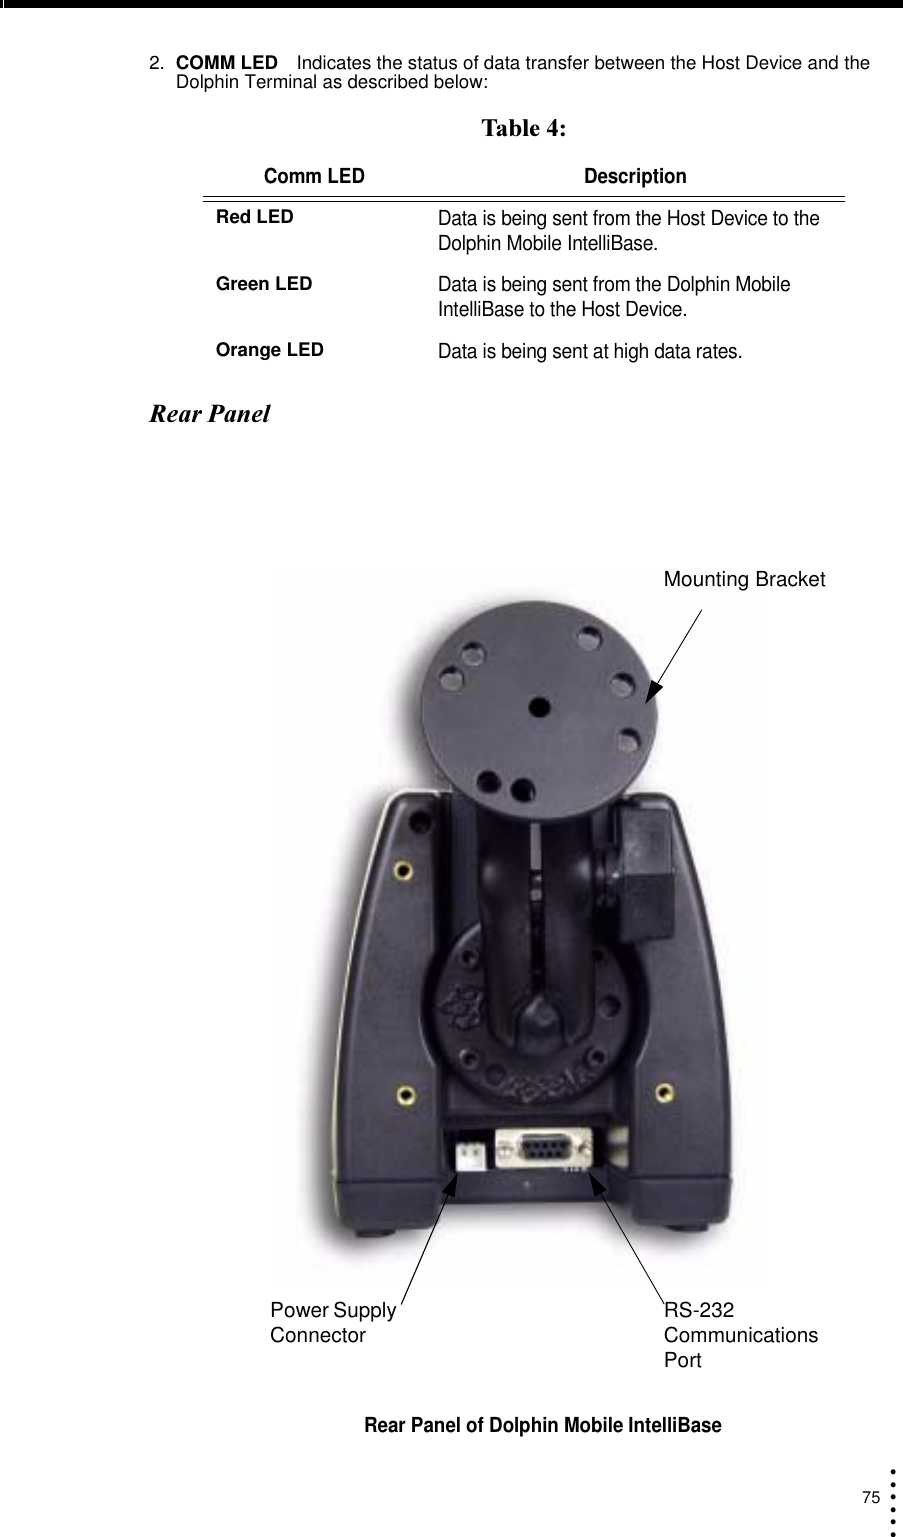
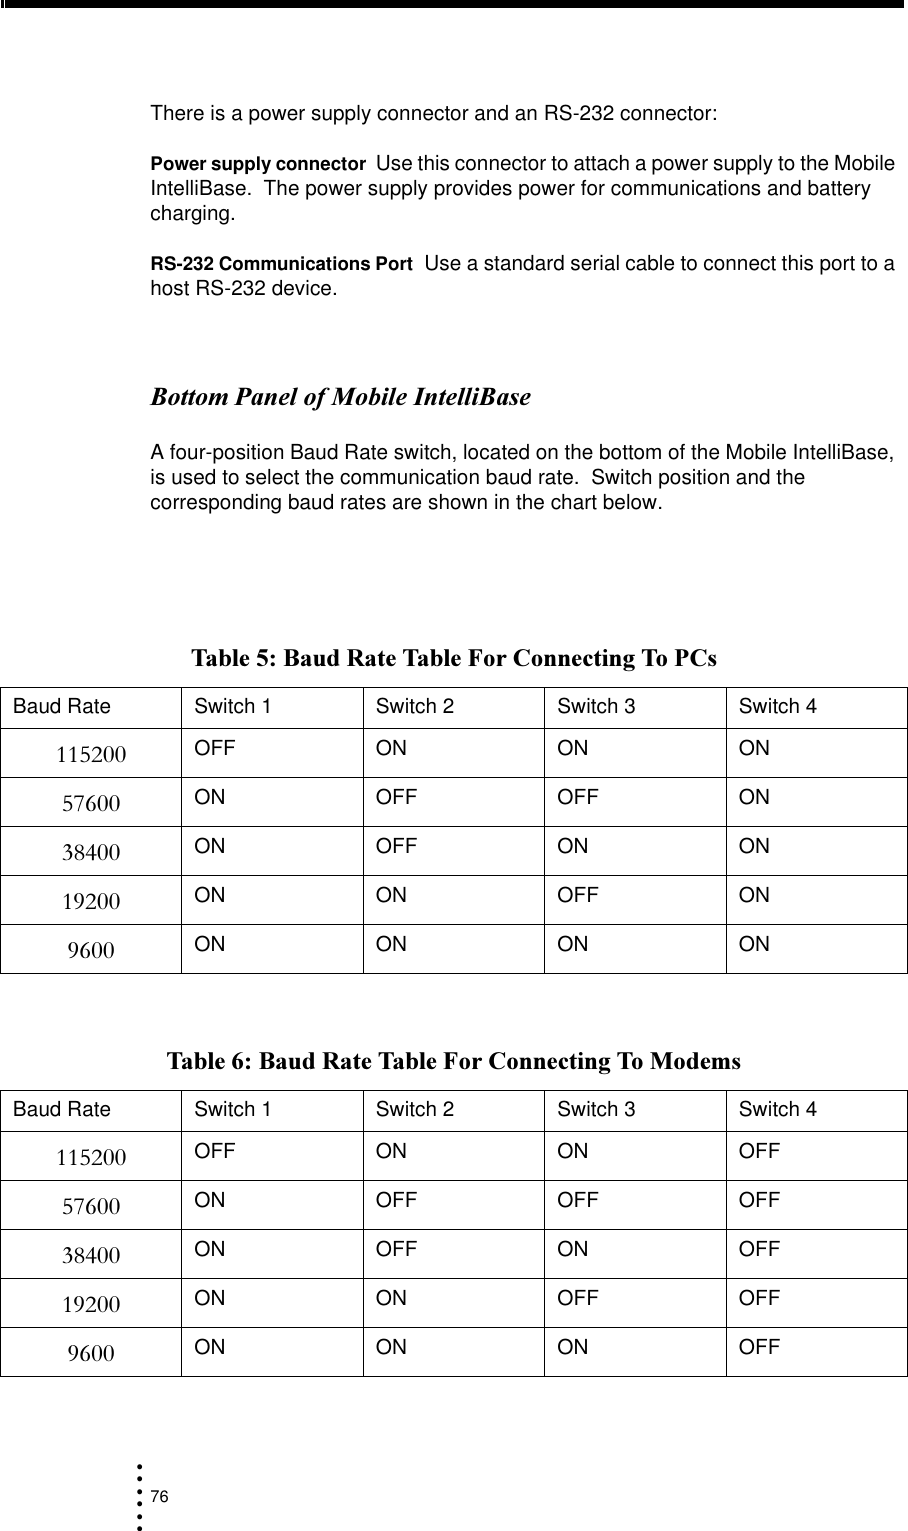
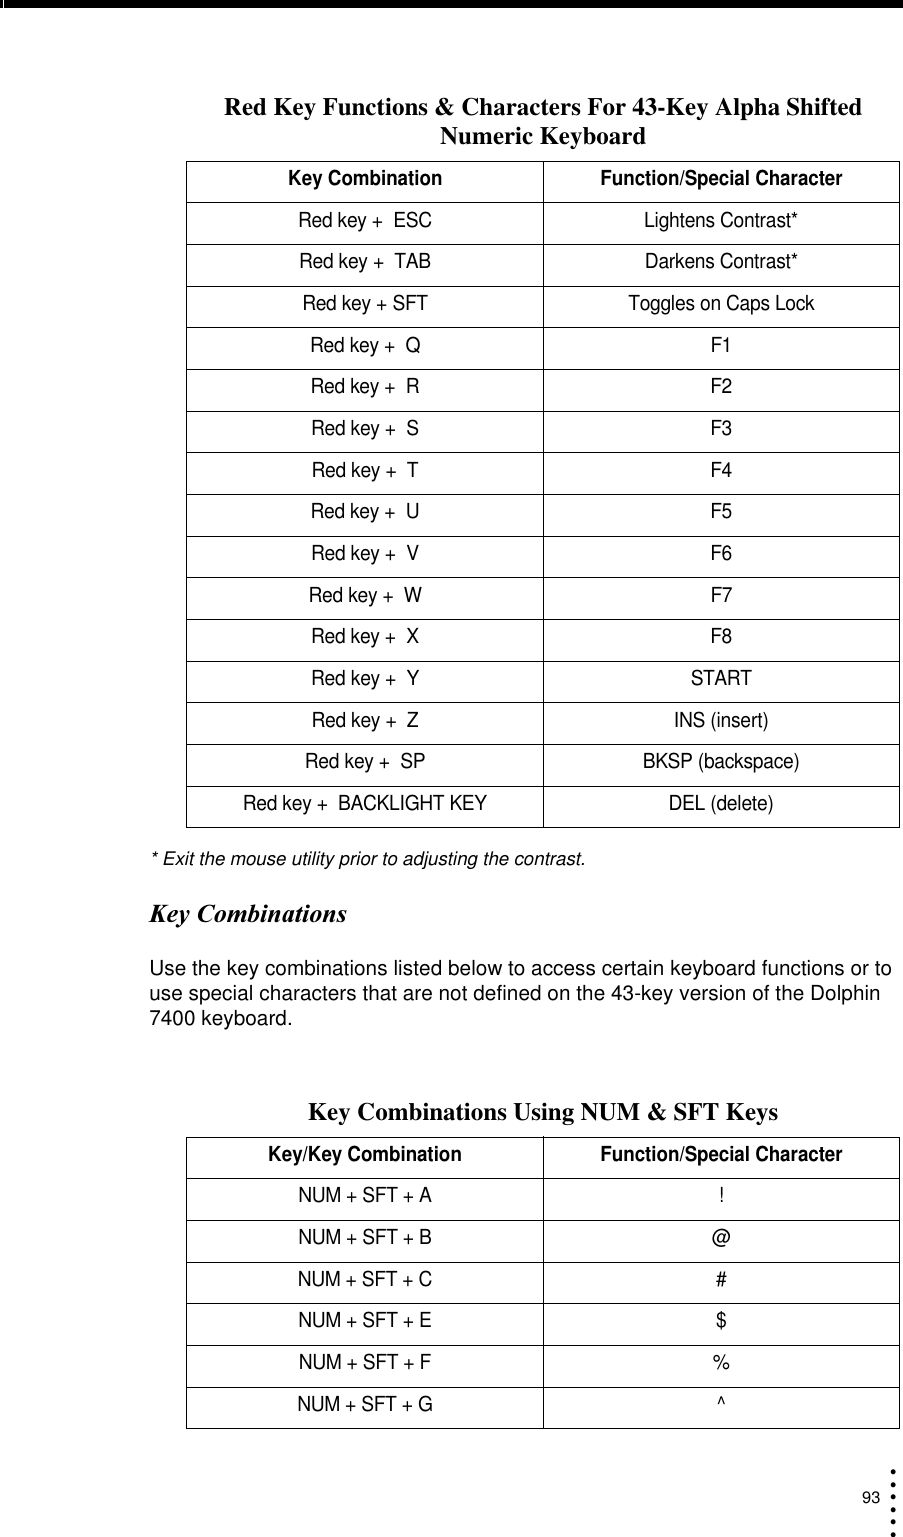
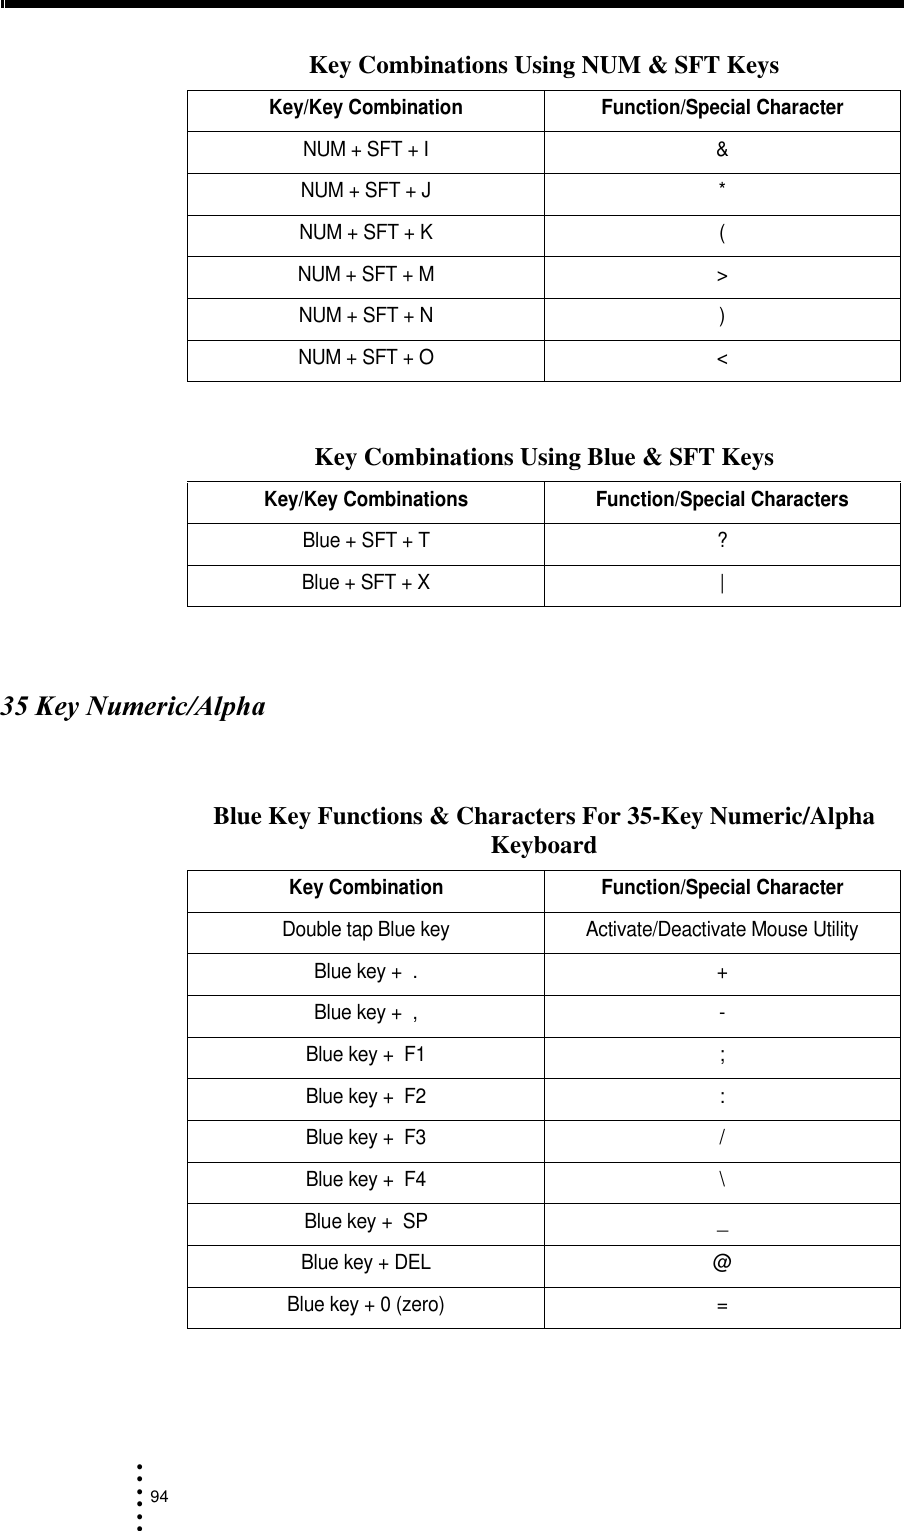
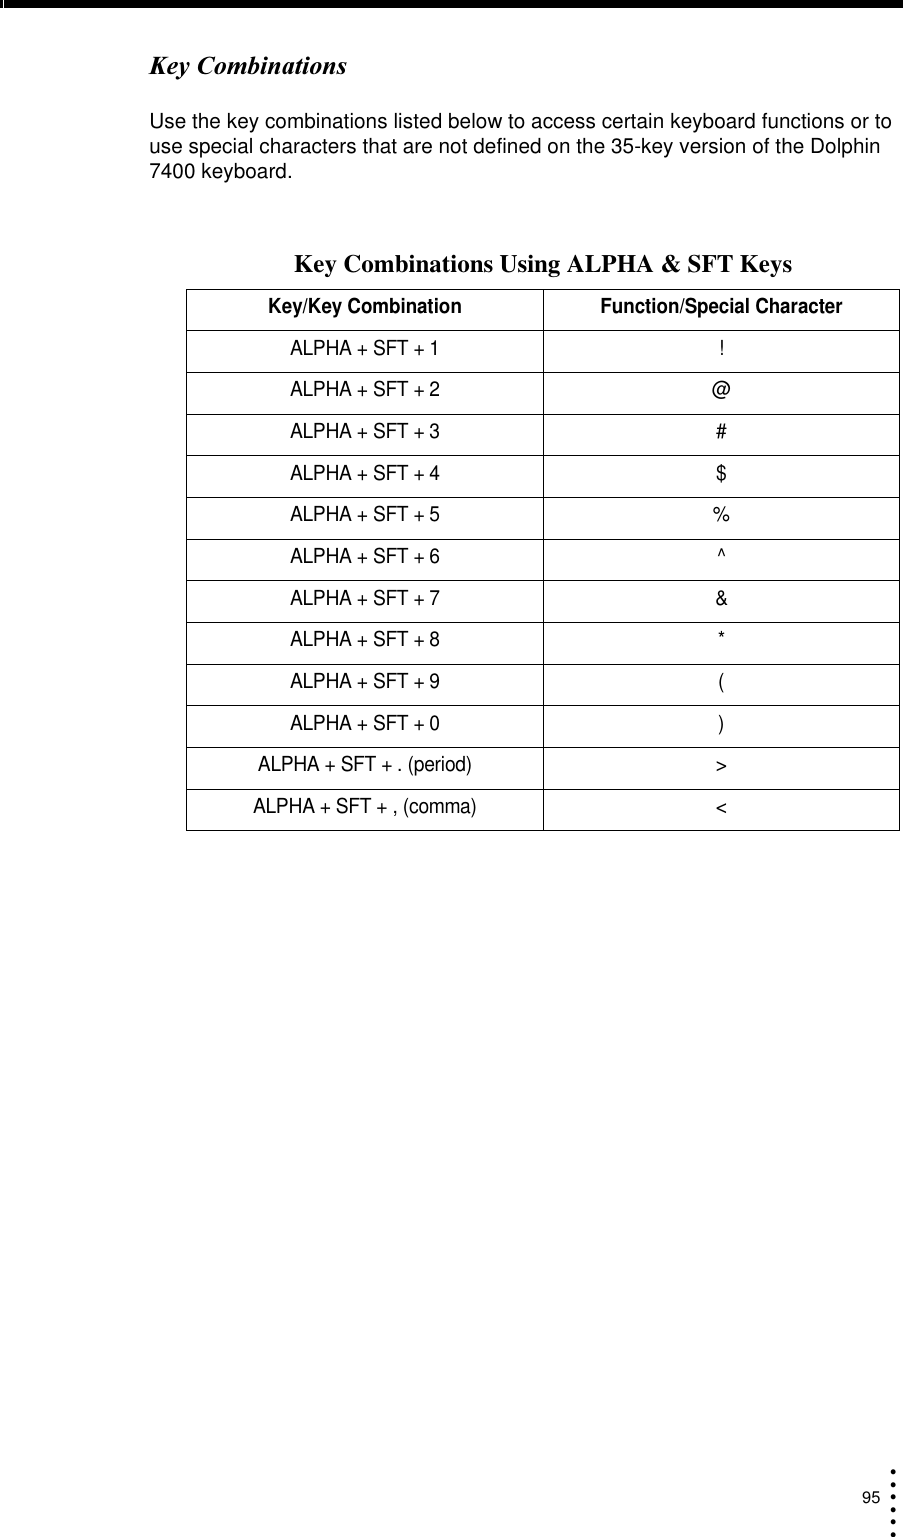
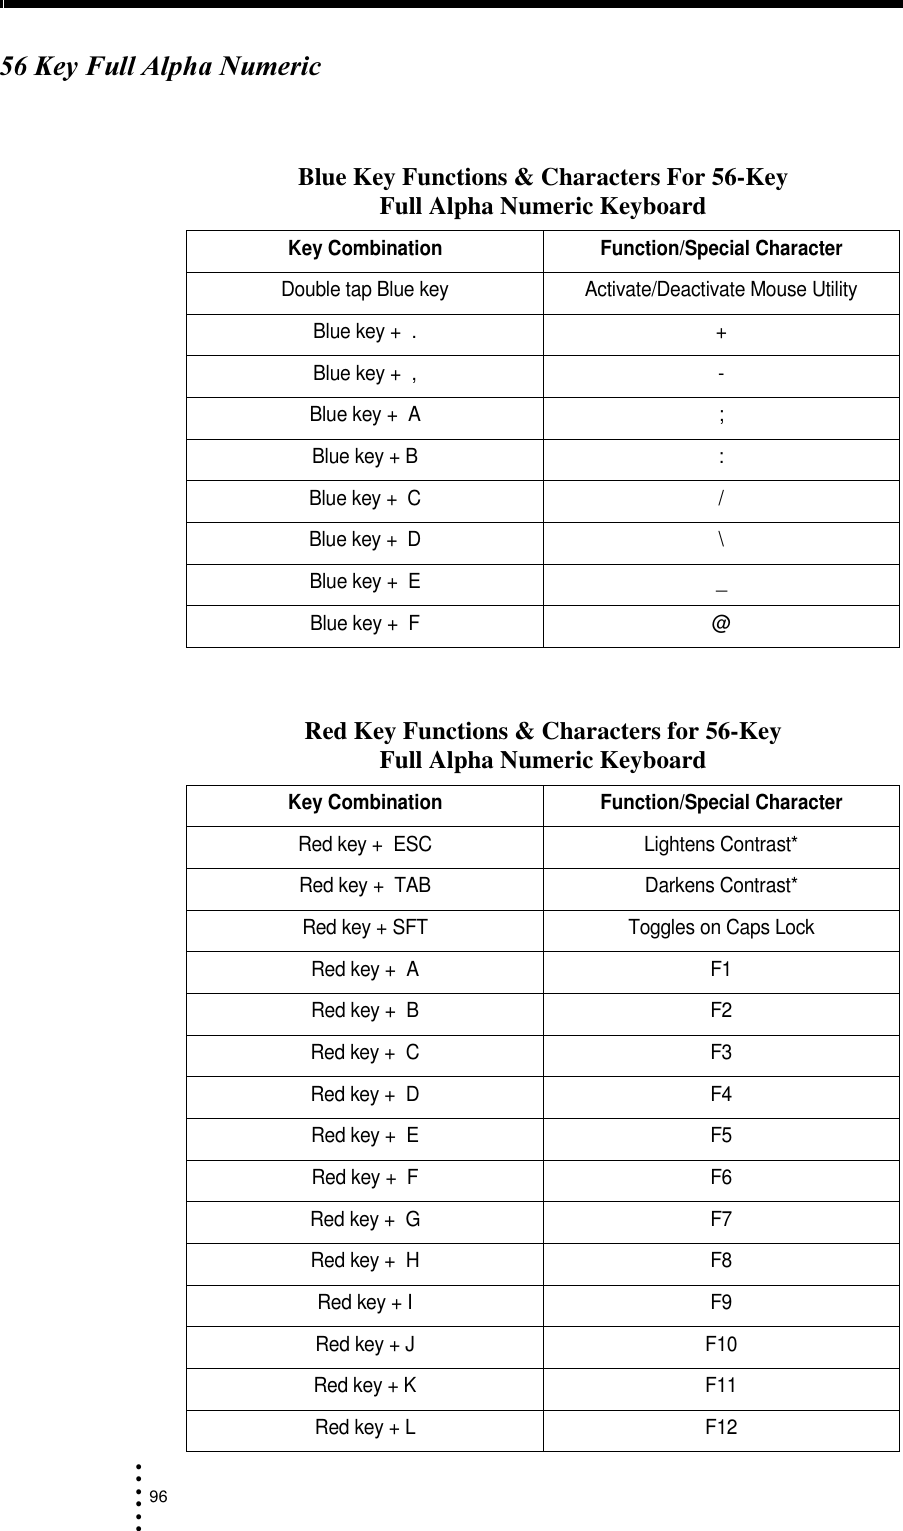
![15• • • •••3) !""#Follow these steps to begin using your Dolphin 7400 terminal.1. Unpack and check the terminal and documentation.2. Charge the main battery pack and internal back-up battery. 3. Turn the Dolphin on. 4. Calibrate the screen, set the date/time, and user information. 5. Verify that your Dolphin 7400 terminal is working properly.43-$$-$Inspect the package to see that the following standard items and accessories (if ordered) are included in the standard Dolphin 7400 kit:•Dolphin 7400 hand held computer/bar code scanner•Battery (2700 mAh, Nickel Metal Hydride [NiMH])•Dolphin 7400 HomeBase•RS-232 Serial Cable•AC-DC Power Adapter for Dolphin Terminal/HomeBase•Dolphin 7400 Software Development Kit & User’s Guide CD-ROMNote: Be sure to keep the original packaging in the event that the Dolphin terminal or HomeBase should need to be returned for service.($))2-WARNINGUse only 2700 mAh NiMH battery packs provided by Hand Held Products. The use of any other battery pack in the Dolphin terminal will void your warranty and may result in damage to the Dolphin terminal or battery.The terminal’s NiMH battery is shipped discharged of all power so you must charge it before using it for the first time. To charge the main battery pack:1. Place the main battery pack in the Dolphin 7400 terminal.2. Place the terminal in the terminal well of the Dolphin HomeBase™. Time to Charge: 3.5 hours for the main battery; 8 hours for the back-up batteryAs the main battery pack charges, the internal back-up battery also charges. For the initial charging cycle, it is recommended that the terminal be charged for approximately 8 hours to allow adequate charging time for the back-up battery. Not doing so may result in the terminal becoming unstable should the unit lose power and the back-up battery is required. The back-up battery maintains the RAM and clock when the NiMH main battery pack is discharged or removed from the terminal. For maximum battery life, you must service, or deep cycle, the main battery pack twice before initial use. It is also recommended that you service the battery once per month. Refer to the section on Battery Management in Chapter 3 for further information.](https://usermanual.wiki/Honeywell/7400-352/User-Guide-229814-Page-15.png)