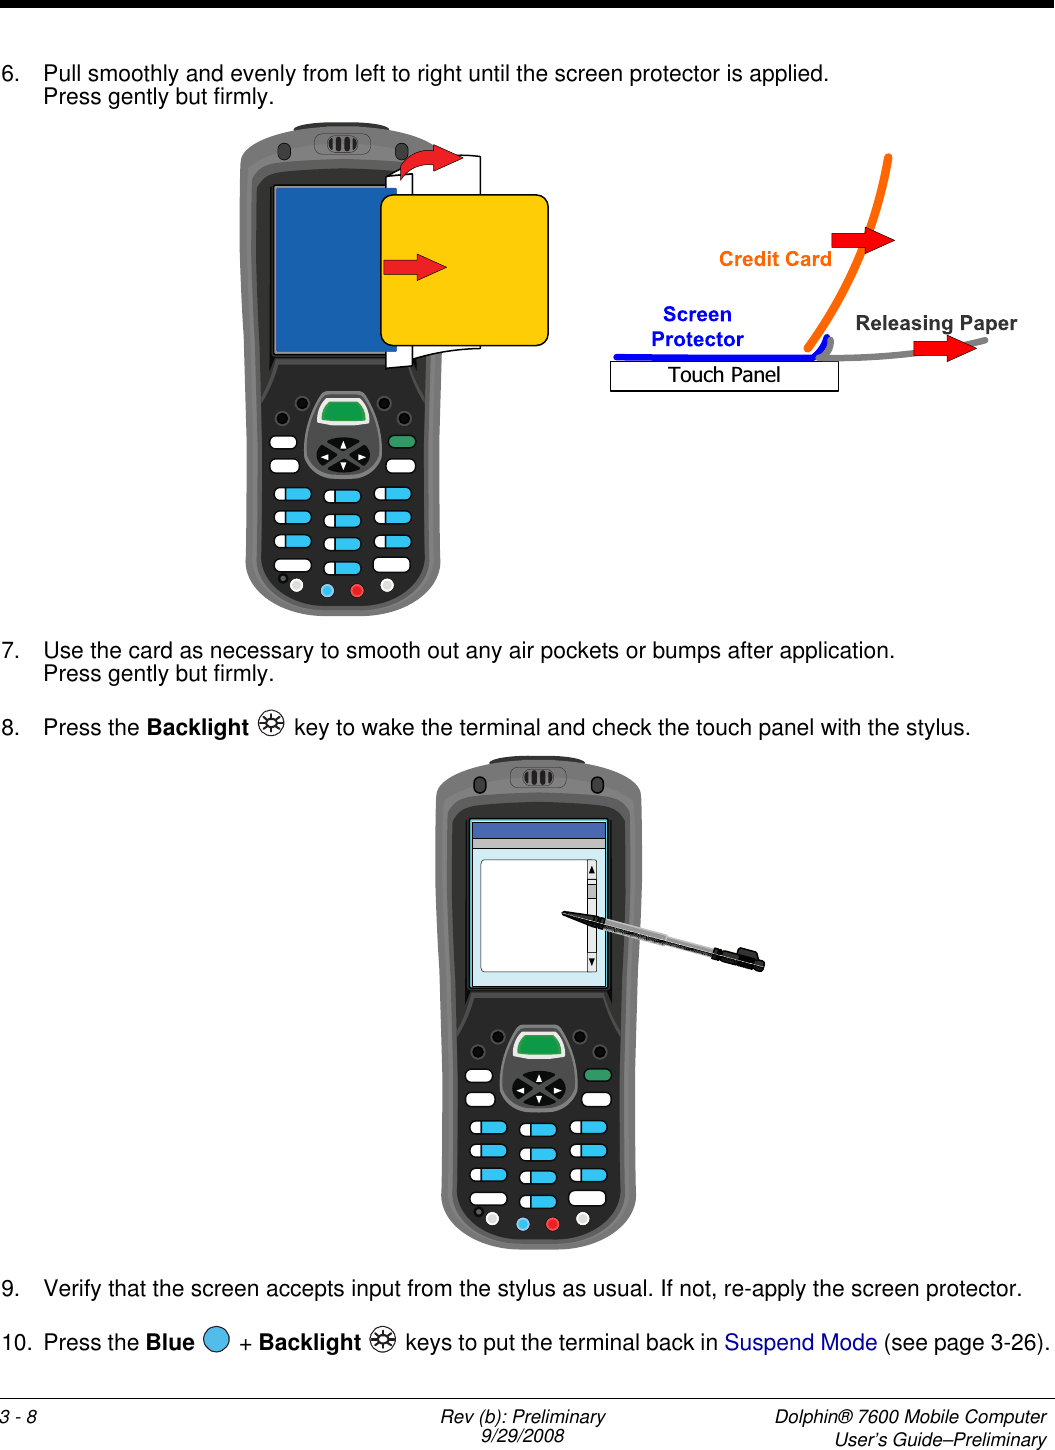
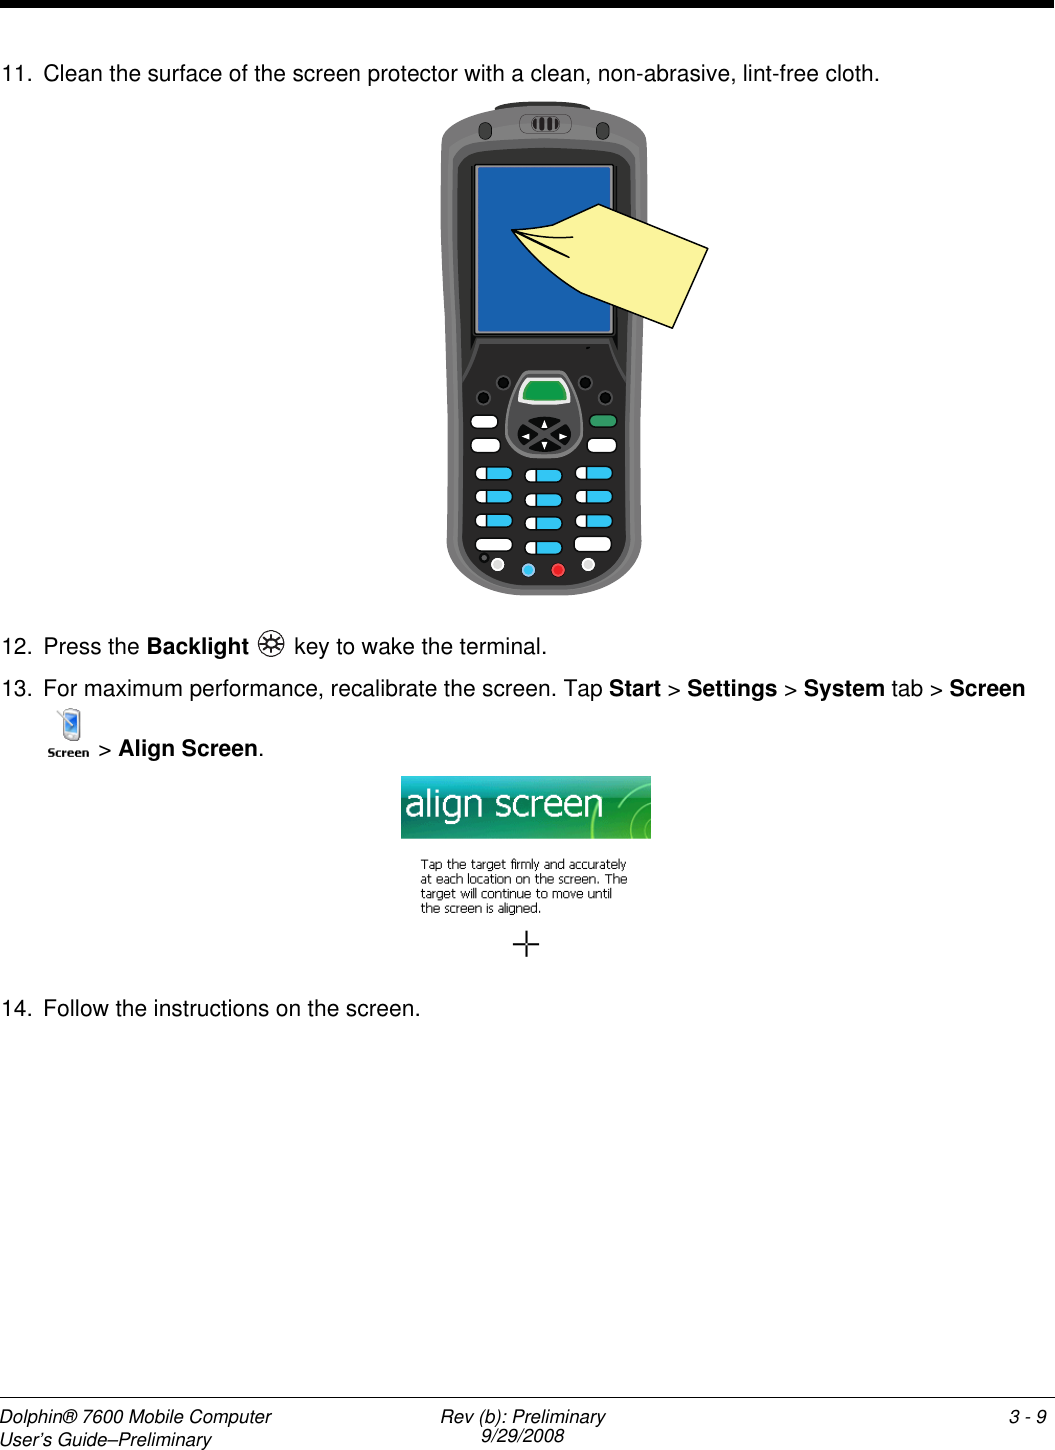
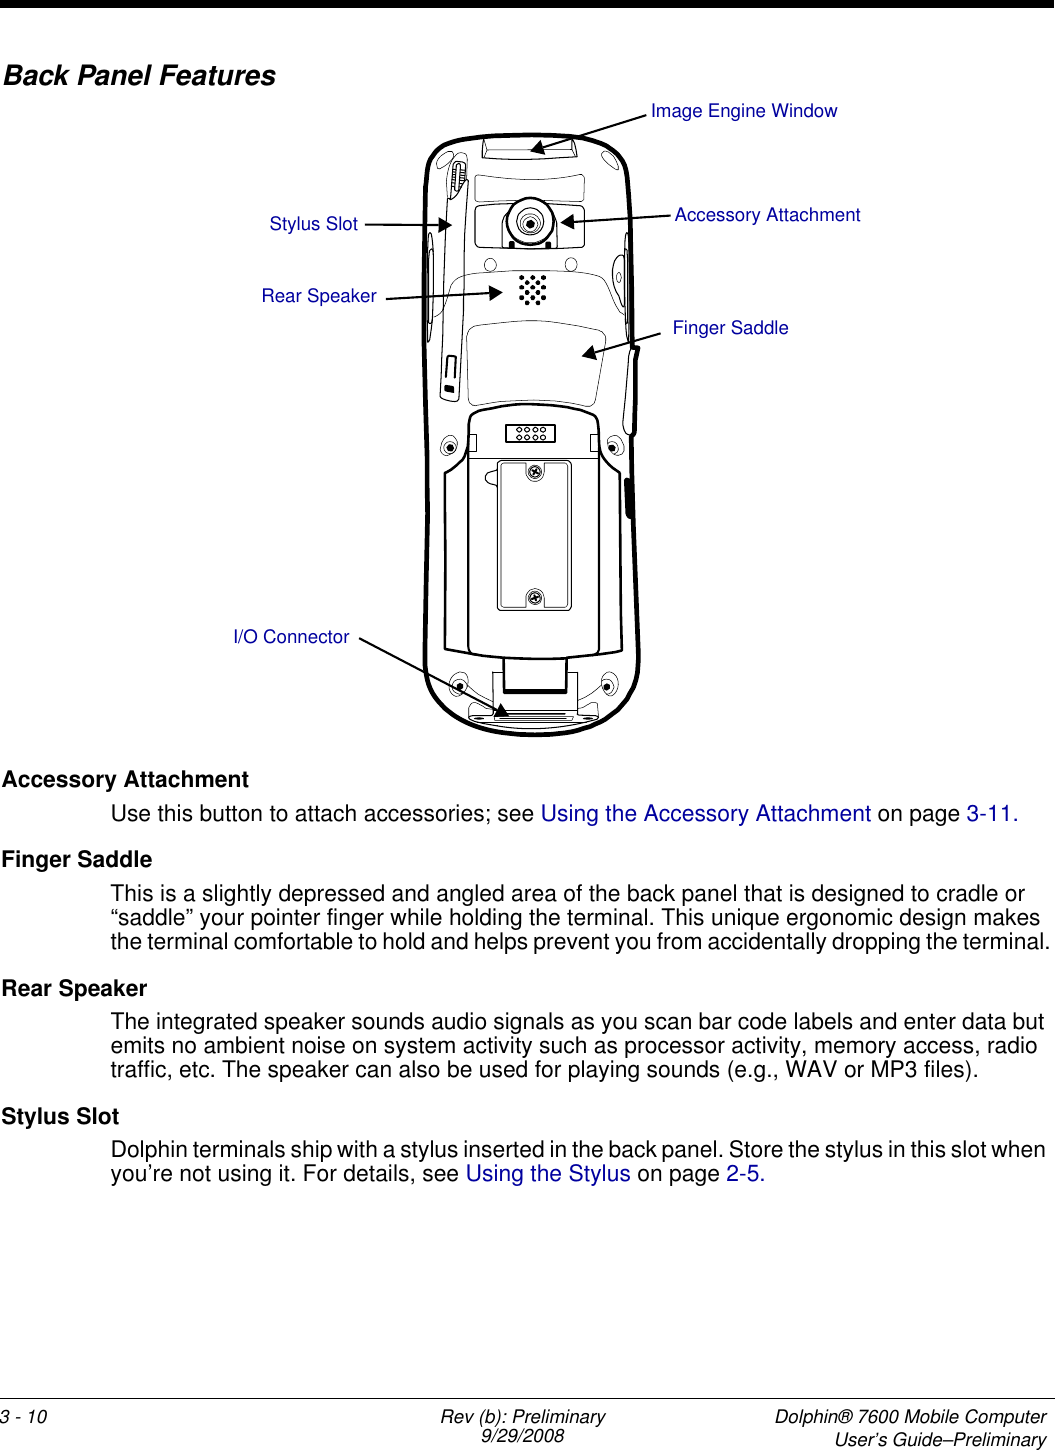
Honeywell 760005 Handheld Computer with BT User Manual Dolphin 7600 WM6 User s Guide Rev A
Honeywell International Inc Handheld Computer with BT Dolphin 7600 WM6 User s Guide Rev A
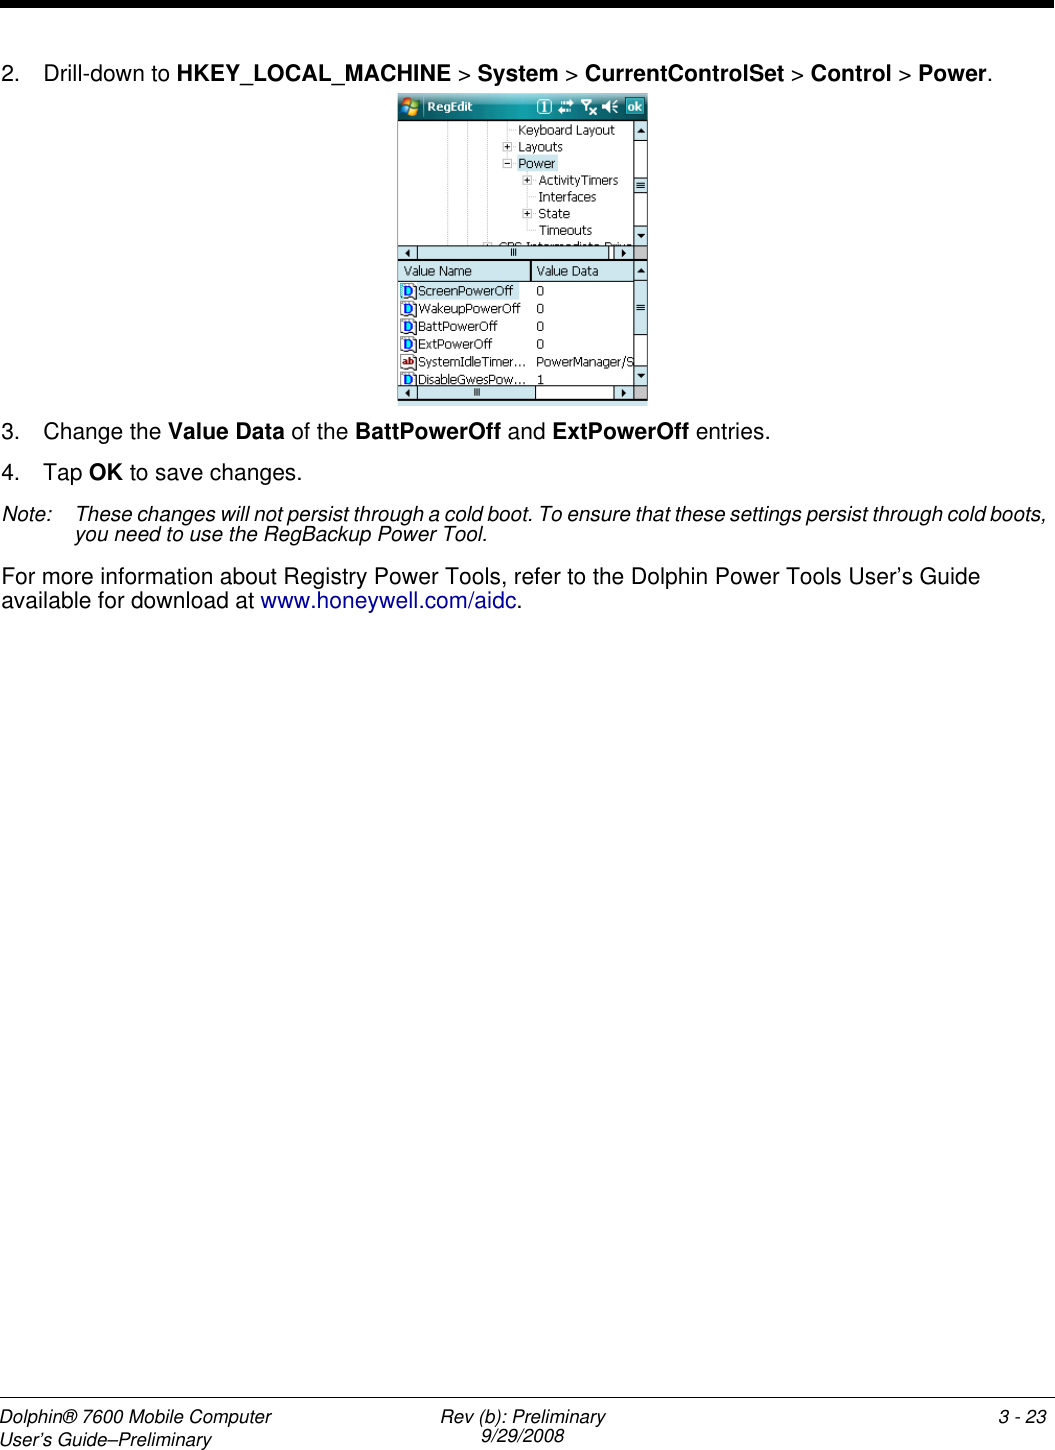
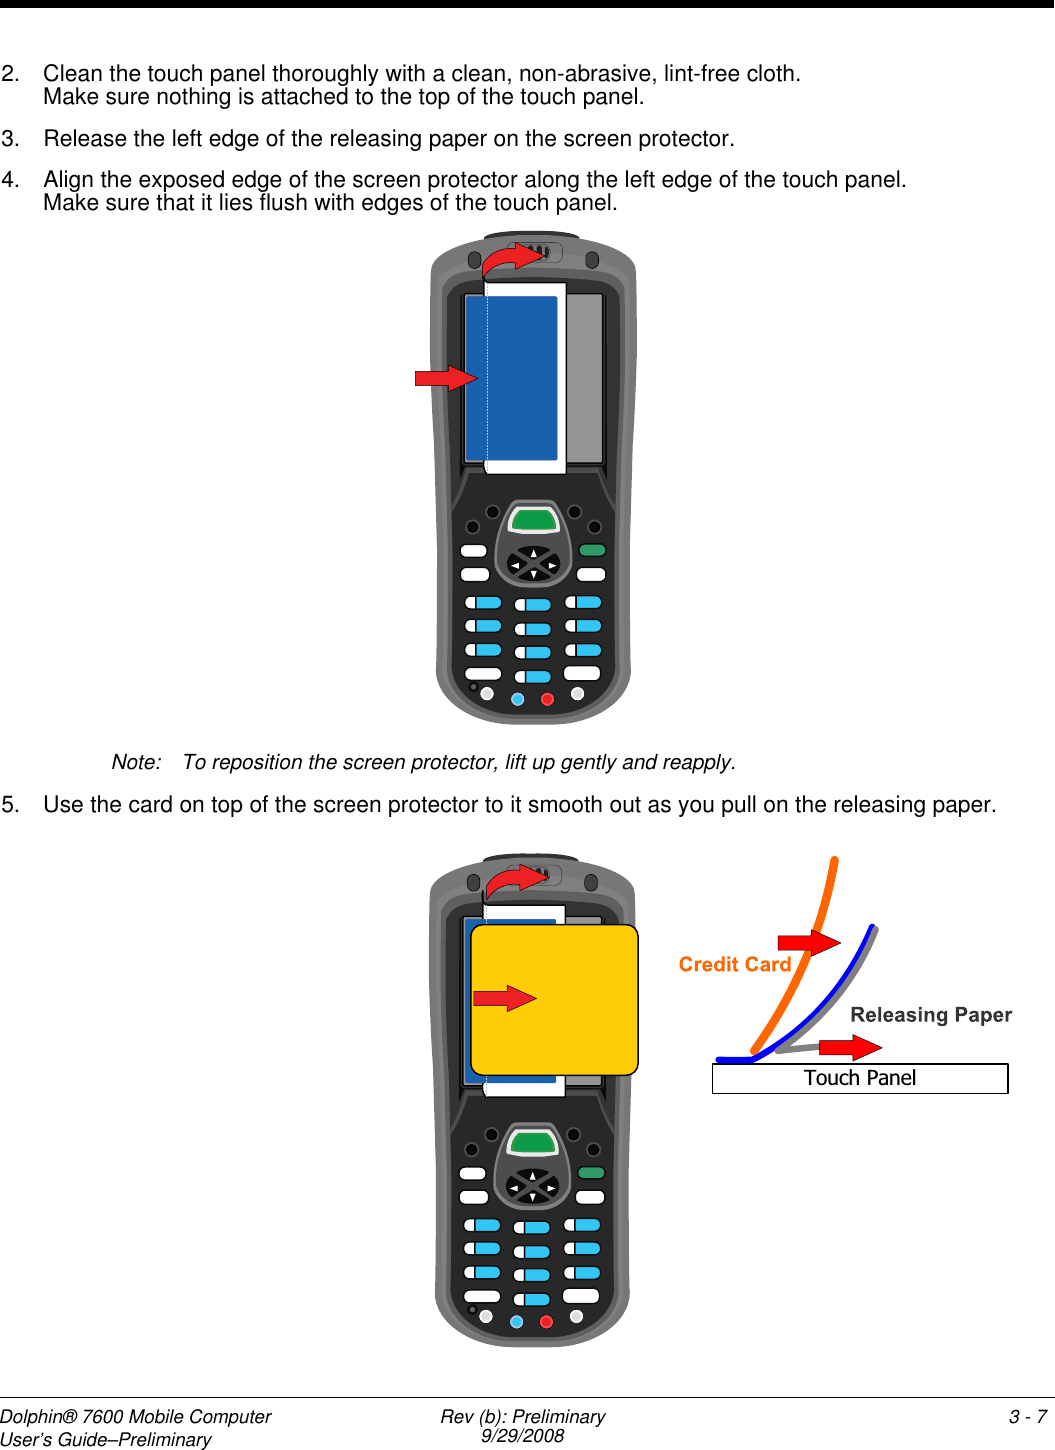
UserManual.wiki
>
Honeywell
>
760005 User Manual
User Manual
Navigation menu
Upload a User Manual
Namespaces
Wiki Guide
HTML
PDF
Info
Views
User Manual
Discussion / Help
Navigation
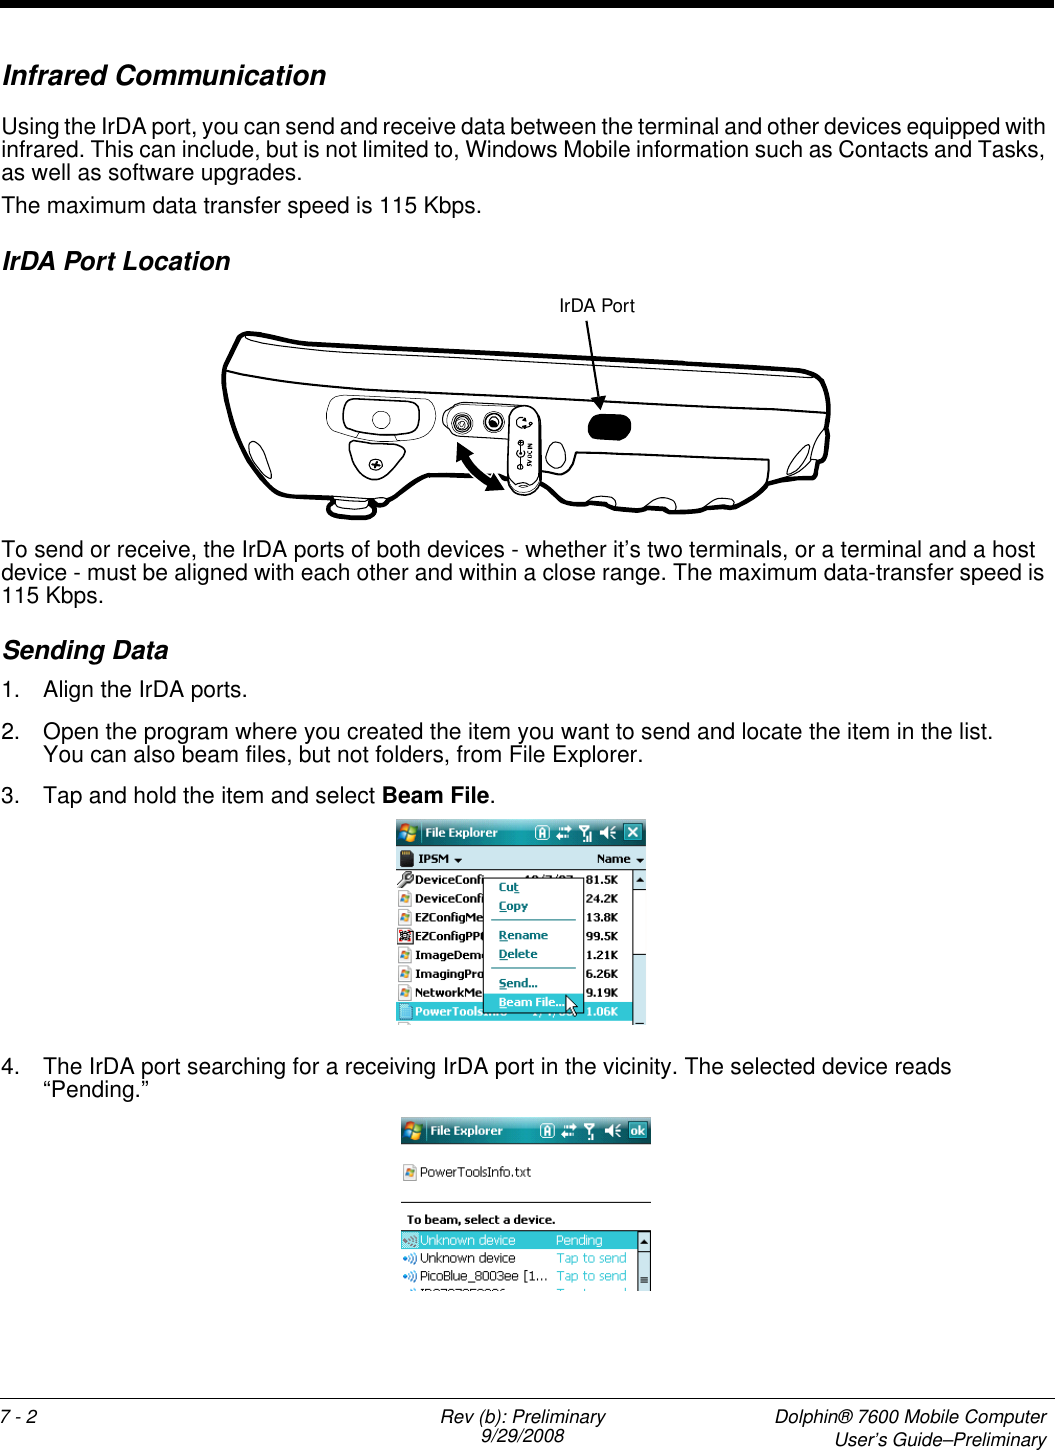
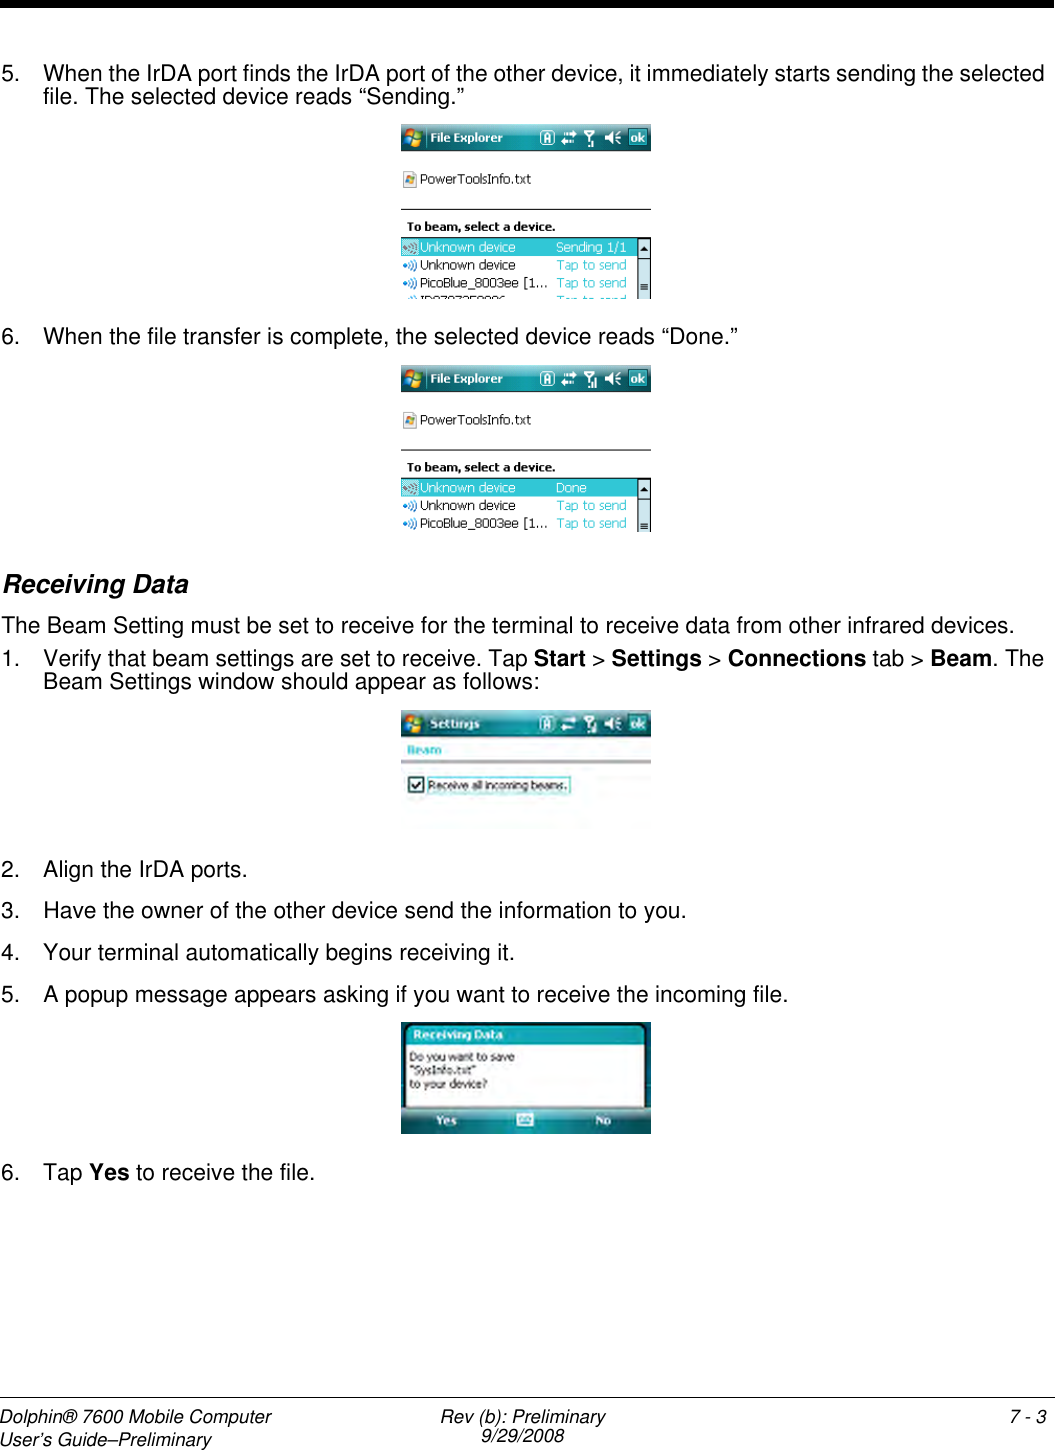
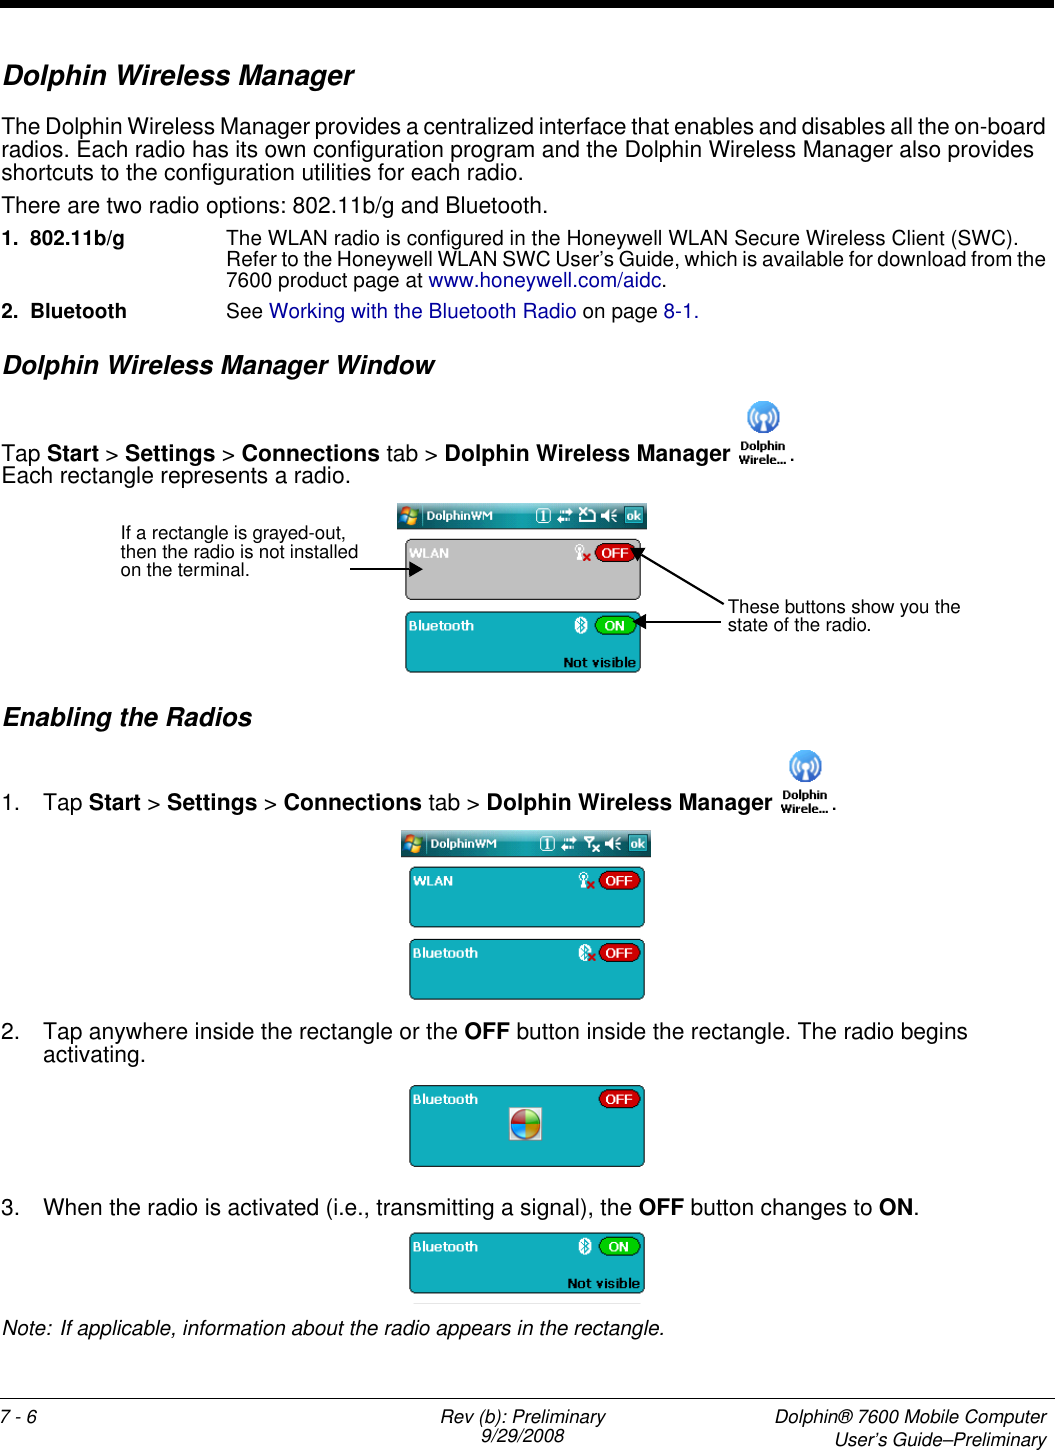
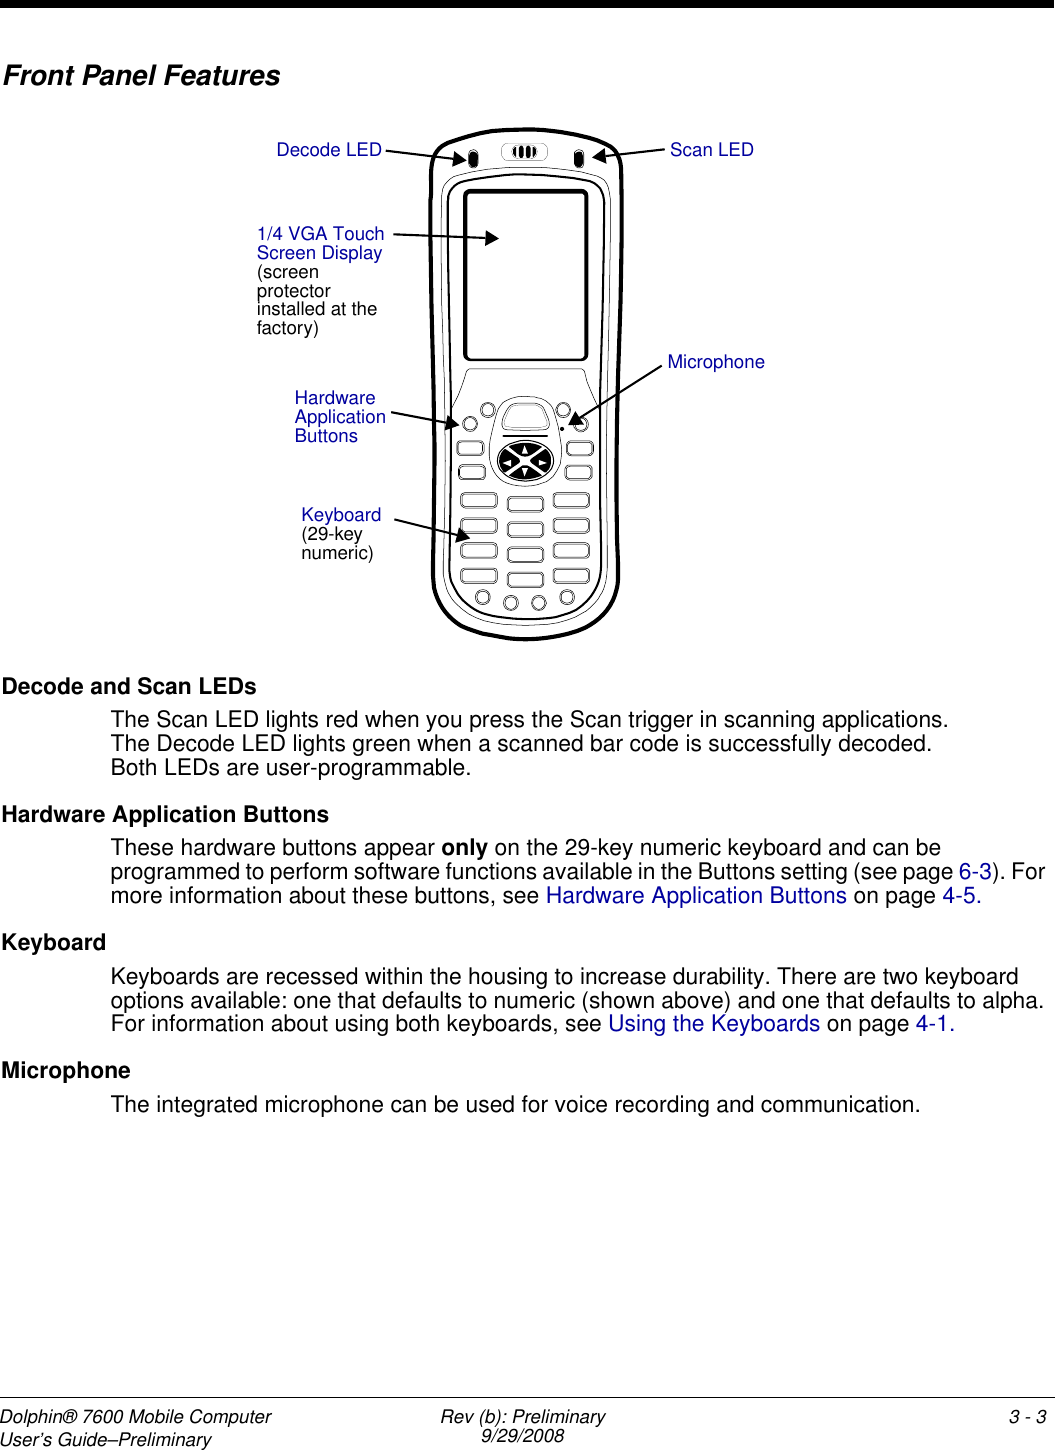
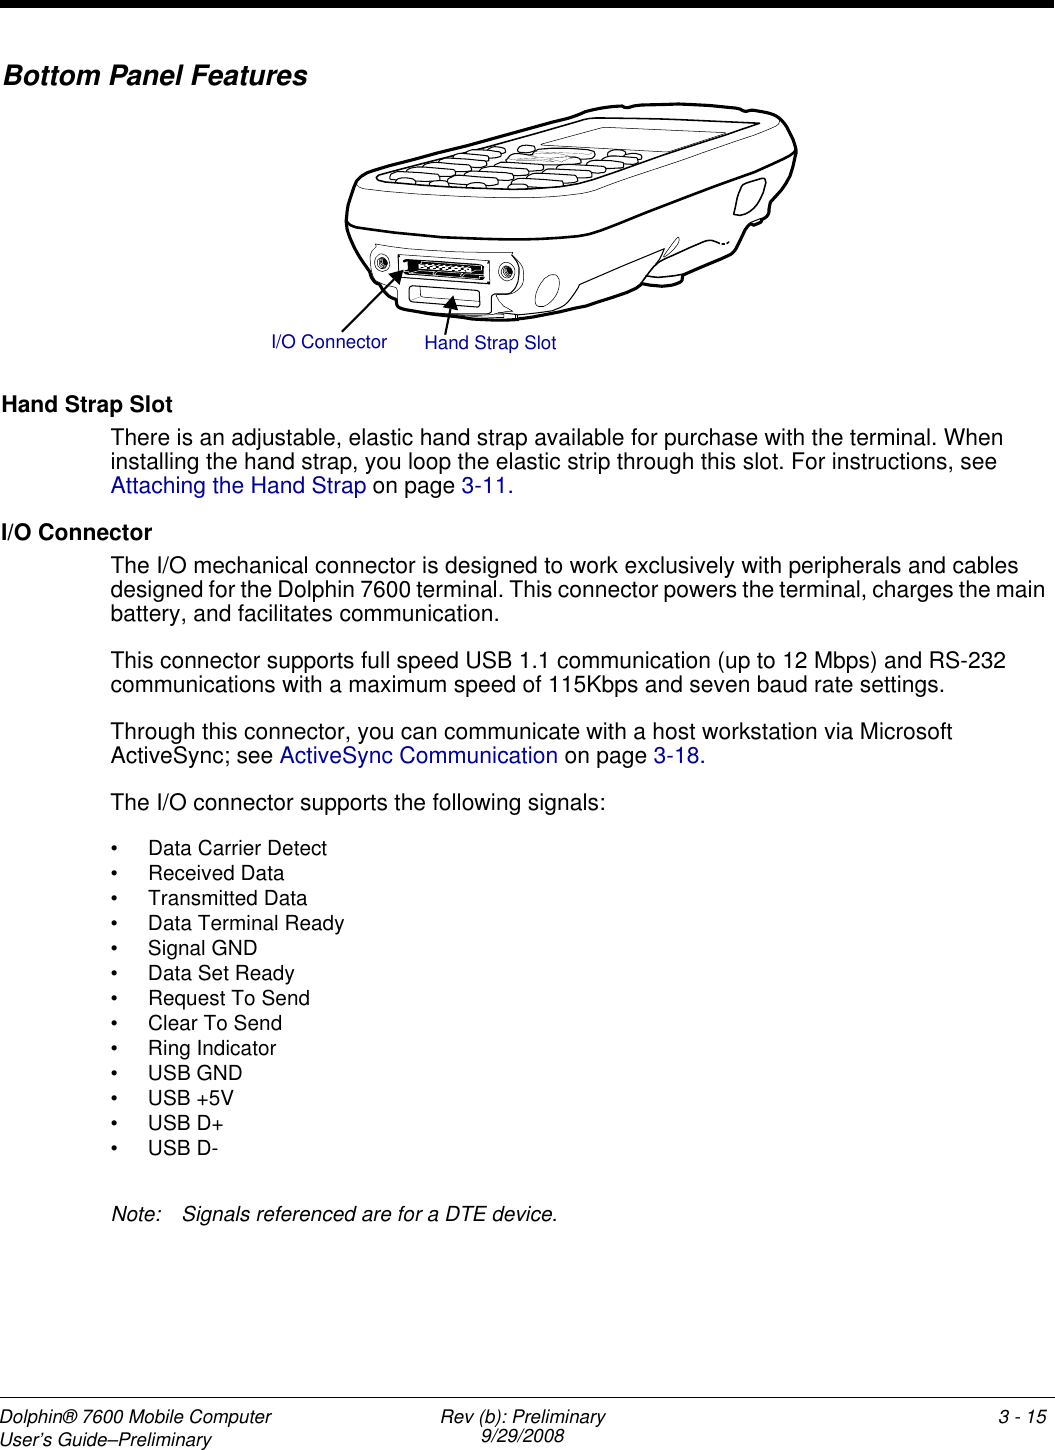
![1 - 2 Rev (b): Preliminary9/29/2008 Dolphin® 7600 Mobile ComputerUser’s Guide–PreliminaryApprovals by Country R&TTE Compliance Statement—802.11b/g and/or BluetoothDolphin RF terminals are in conformity with all essential requirements of the R&TTE Directive (1999/5/EC). This product is marked with [Certified Notified Body Number] in accordance with the Class II product requirements specified in the R&TTE Directive. In addition, this product complies to 2006/95/EC Low Voltage Directive when supplied with the recommended power supply. Honeywell shall not be liable for use of our product with equipment (i.e., power supplies, personal computers, etc.) that is not CE marked and does not comply with the Low Voltage Directive.The equipment is intended for use throughout the European Community; PAN European Frequency Range: 2.402–2.480 GHz. Restrictions for use in France are as follows: • Indoor use: Maximum power (EIRP*) of 100 mW for the entire 2.400–2.4835 GHz • Outdoor use: Maximum power (EIRP*) of 100 mW for the 2.400–2.454 GHz band & maximum power (EIRP*) of 10 mW for the 2.454–2.483 MGHz band.For further information, please contact:Hand Held Products BV, a wholly owned subsidiary of Honeywell International Inc.Nijverheidsweg 95627 BT EindhovenThe NetherlandsCountry Safety EMC & RadioU.S.A. UL60950-1 (CB Scheme) FCC Part 15, Subpart C, 15.247FCC Part 15, Subpart BFCC Part 22HFCC Part 24HFCC SAR OET 65 Supplement CCanada cUL60950 ICES-003 (Class B)RSS 132RSS 133European Community/CE EN60950-1:2000EN60825-1:1994 + A11 + A2IEC60825-1EN 300328-1/2EN55022:1998+A1:2000+A2:2003EN55024:1998+A1:2001+A2:2003EN301 511EN301 489-1/-7EN301 489-17EN61000-3-2:2000EN61000-3-3:1995+A1-2001EN60360 June 2001EN50361 June 2001EN50371 June 2001](https://usermanual.wiki/Honeywell/760005/User-Guide-1017767-Page-8.png)
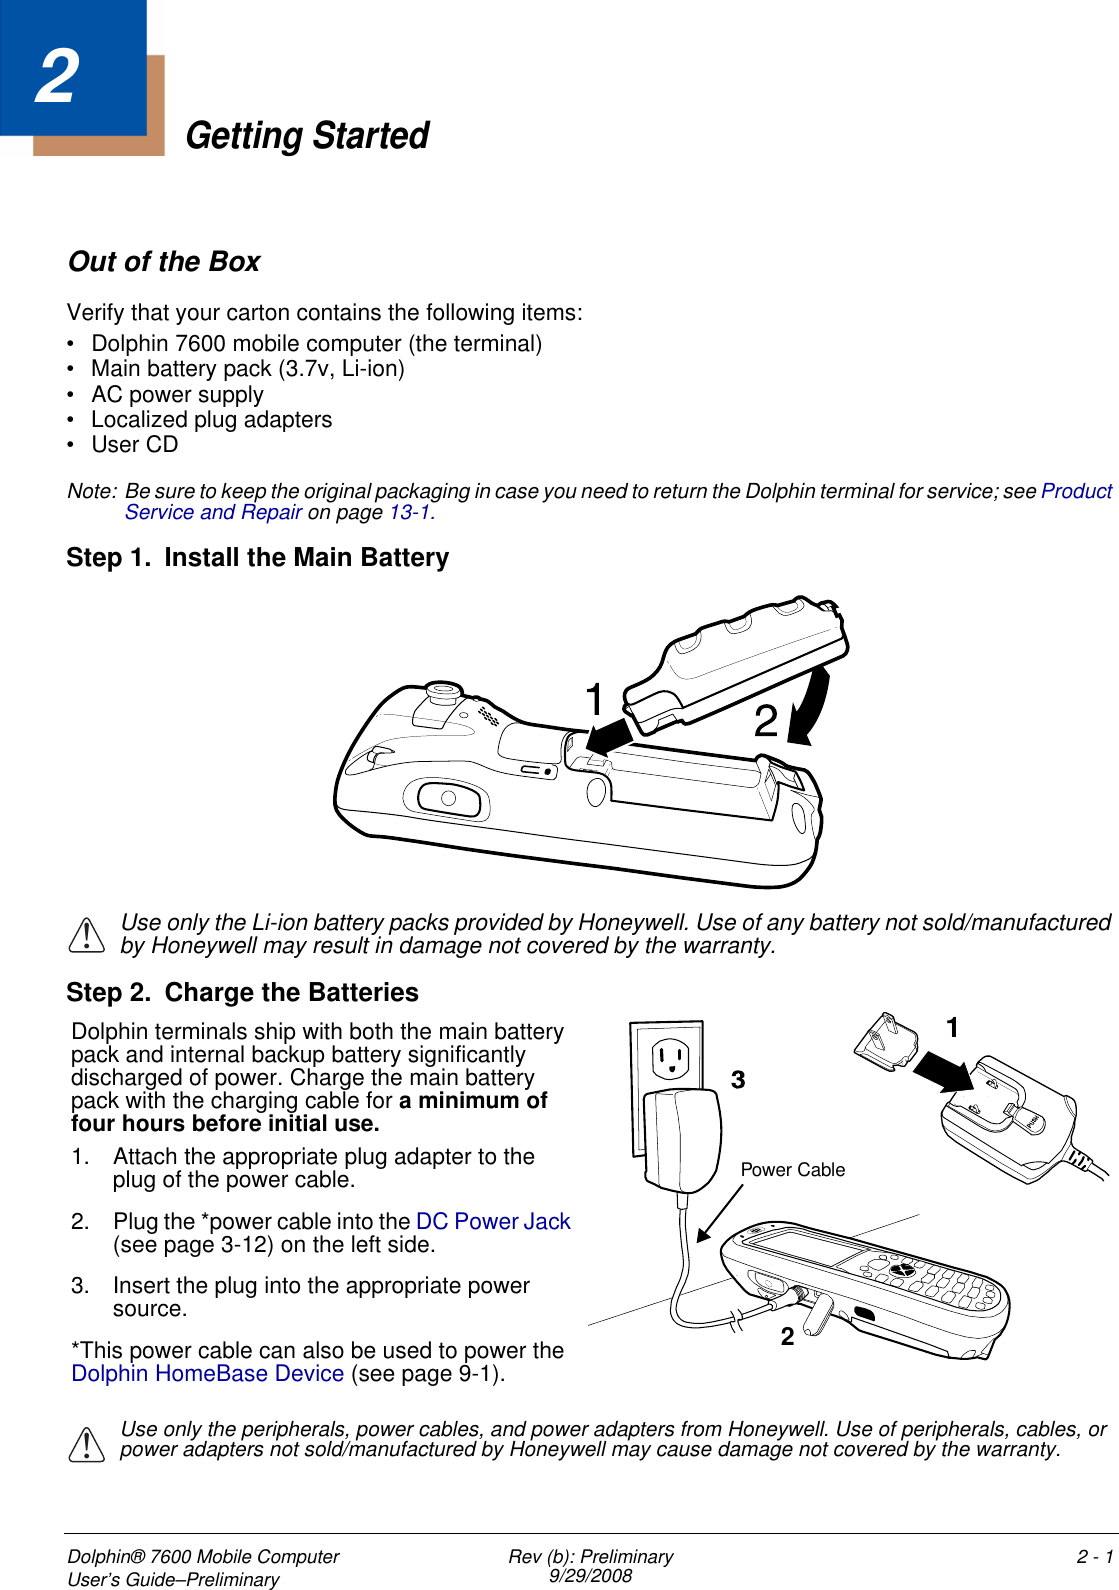
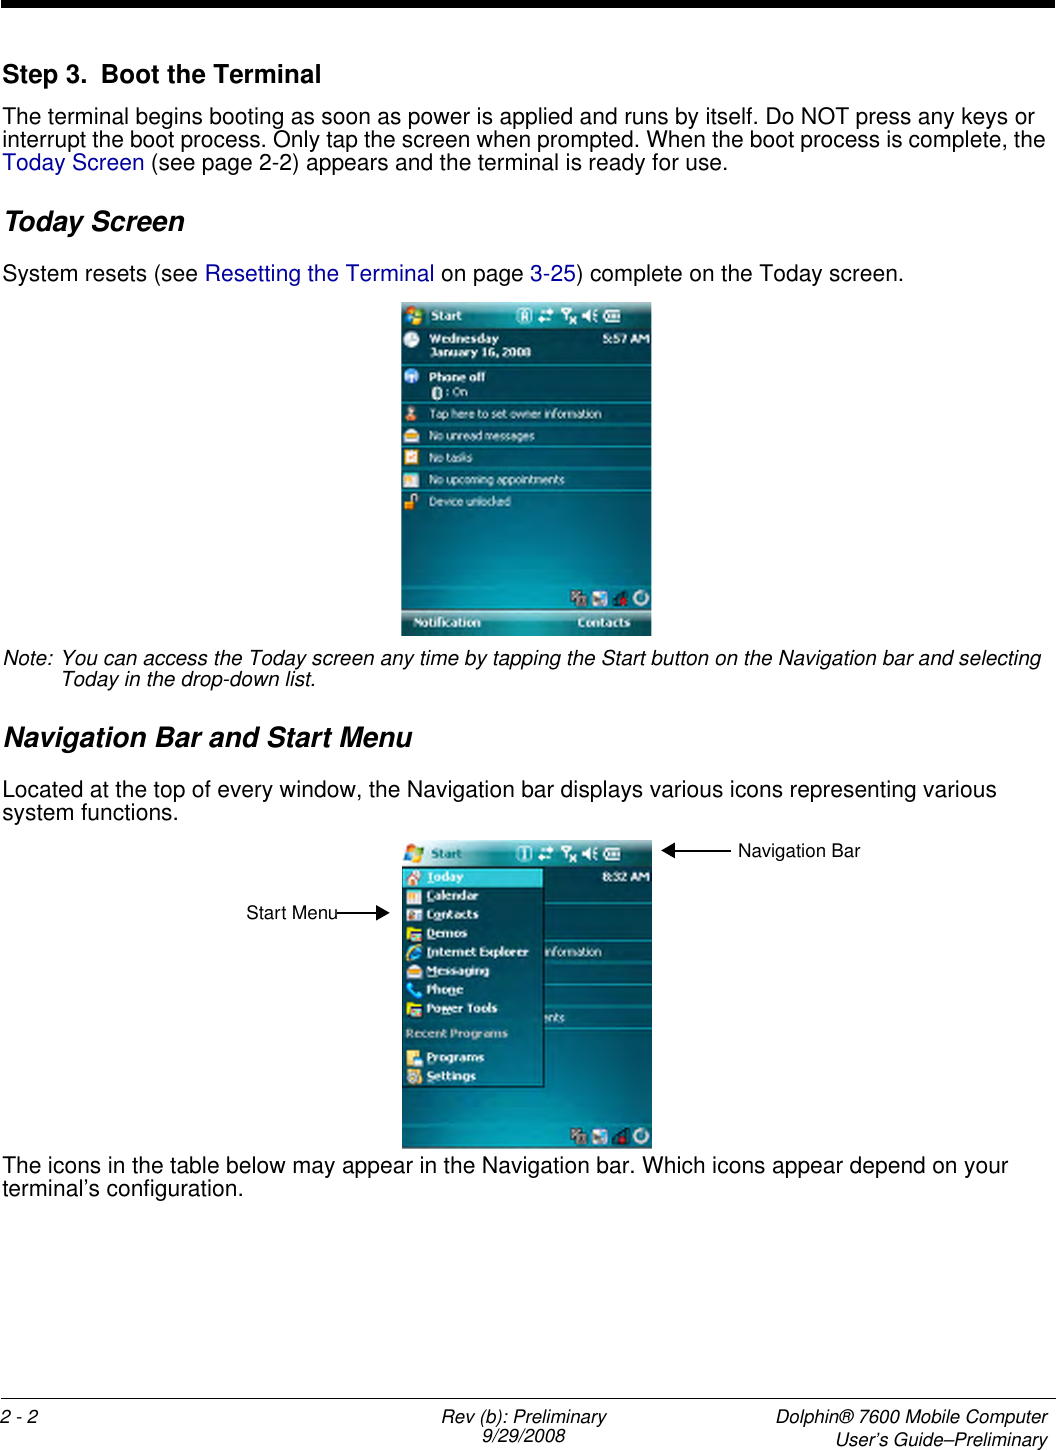


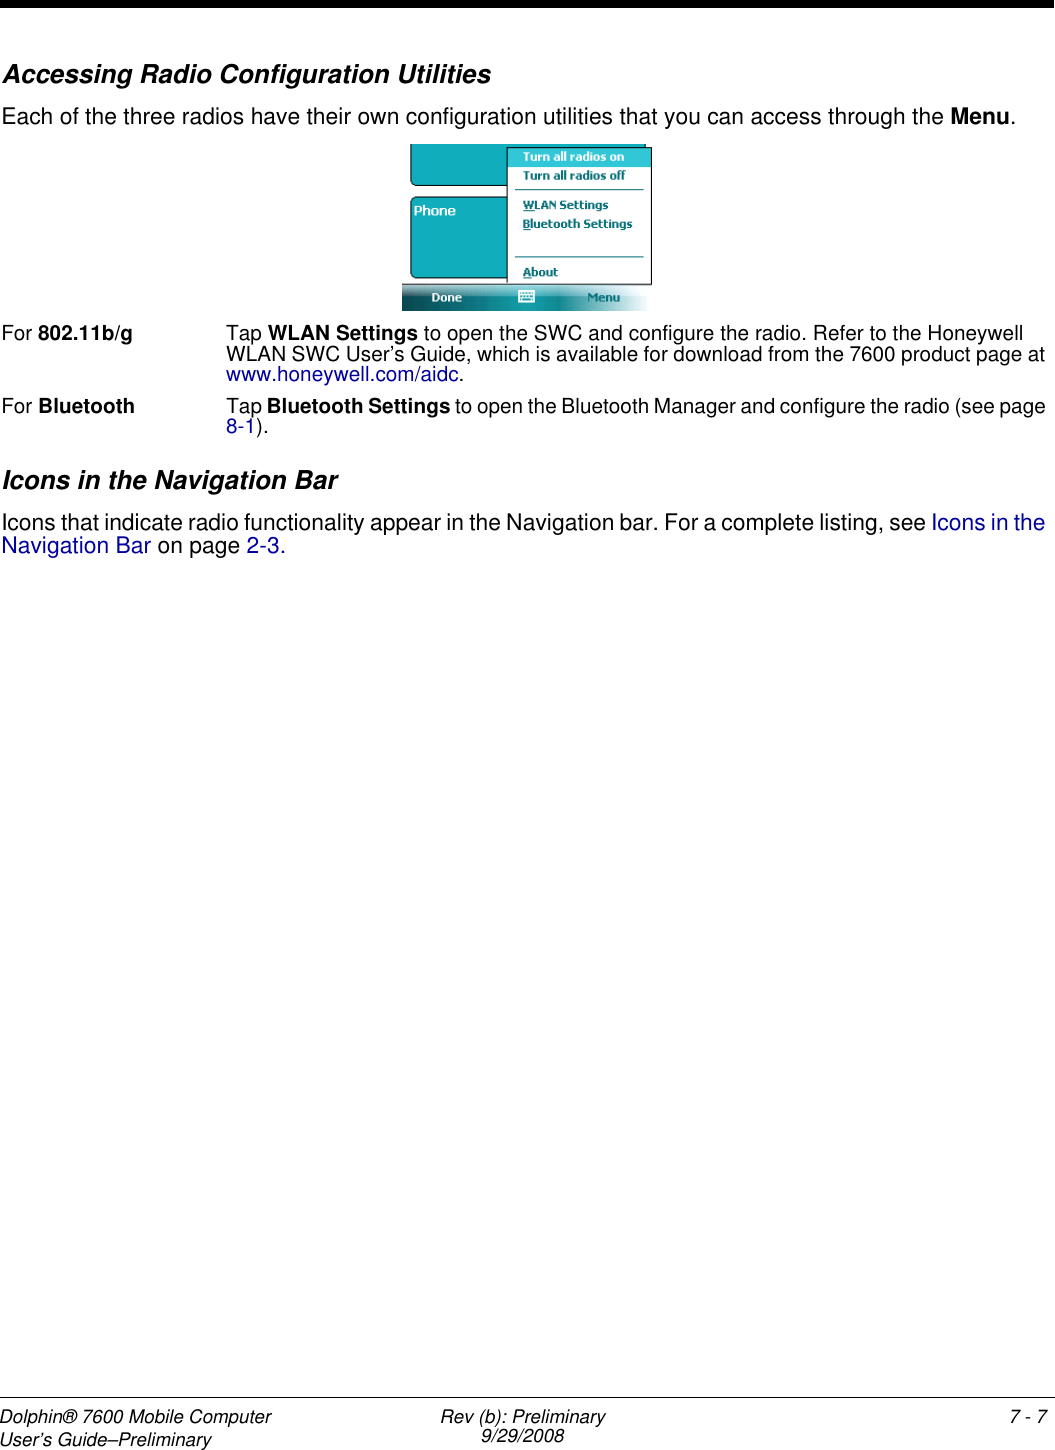
![3 - 22 Rev (b): Preliminary9/29/2008 Dolphin® 7600 Mobile ComputerUser’s Guide–Preliminary• Replace defective batteries immediately; using a defective battery could damage the Dolphin terminal.• Never throw a used battery in the trash. It contains heavy metals and should be recycled according to local guidelines. • Don’t use a battery in any other manner outside its intended use in Dolphin terminals and peripherals. • Don’t short-circuit a battery or throw it into a fire; it can explode and cause severe personal injury.• Excessive discharge damages a battery. Recharge the battery when your terminal indicates low battery power.• If you observe that the battery is physically damaged in some way, please send it to Honeywell or an authorized Honeywell service center for inspection.• Although your battery can be recharged many times, it will eventually be depleted. Replace it after the battery is unable to hold an adequate charge.• If you are not sure the battery or charger is working properly, please send it to Honeywell or an authorized Honeywell service center for inspection.Managing Main Battery PowerData and files saved on the Dolphin terminal may be stored in RAM memory; therefore, maintain a continuous power supply to the terminal to help prevent data loss. When you remove a battery pack, insert another charged battery pack in the Dolphin. If the main battery pack is low, insert the terminal into a charging peripheral to power the terminal and begin recharging the battery.Note: If the main battery is low and the terminal is in suspend mode, pressing the SCAN button does not wake the Dolphin terminal; you must replace the discharged battery with a fully charged battery.Default Critical and Low Battery PointsDolphin terminals are programmed to display warnings when the battery reaches critical and low battery points. The following registry entry sets both warning points: [HKEY_LOCAL_MACHINE\System\CurrentControlSet\Control\Power] There are two DWORD values in this registry entry: LowBatt and CriticalBatt. The default values for these entries are as follows:LowBatt=19 (25%)This sets the Low Battery point to 25% (19 hex=25 decimal). When the battery hits the percentage charge specified here, the user is notified by this icon in the Navigation bar . If the main battery is low and the terminal is in suspend mode, pressing the SCAN or Power button won’t wake the Dolphin terminal; you must replace the discharged battery with a battery charged over 25% mark before you can resume terminal operation.CriticalBatt=a (10%)This sets the Critical Battery point to 10% (a hex= 0 decimal). When the battery hits the percentage charge specified here, the user is notified by this icon in the Navigation bar . Note: Warnings do not appear when the terminal is on external power.Setting Critical and Low Battery PointsDevelopers can re-reset the default battery points in the RegEdit Power Tool. 1. Tap Start > Power Tools > RegEdit.](https://usermanual.wiki/Honeywell/760005/User-Guide-1017767-Page-38.png)