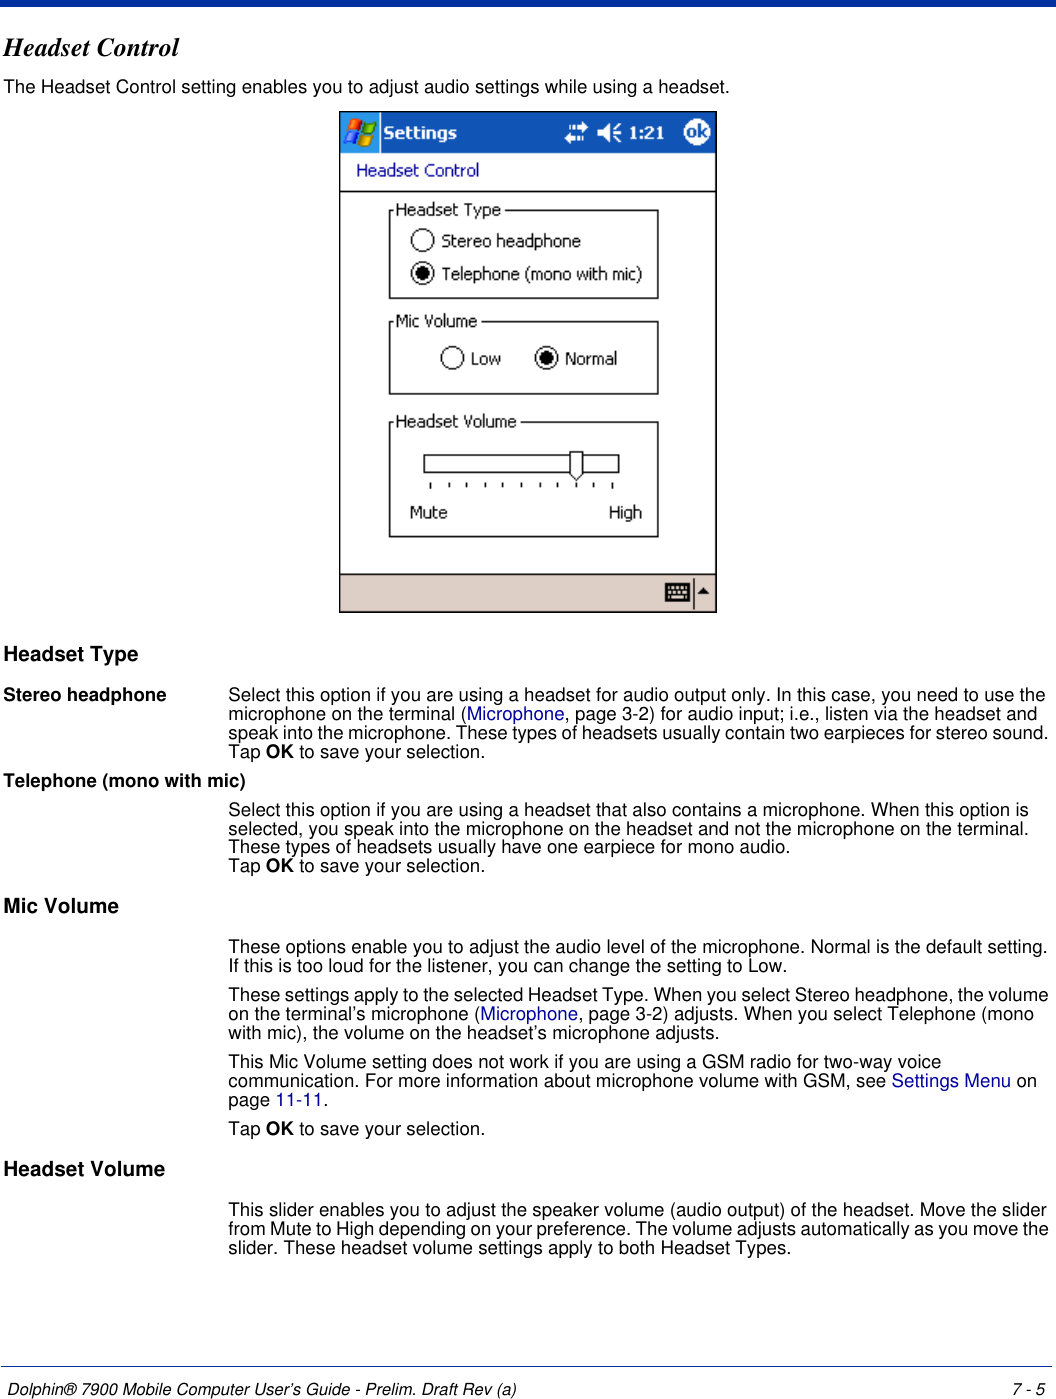
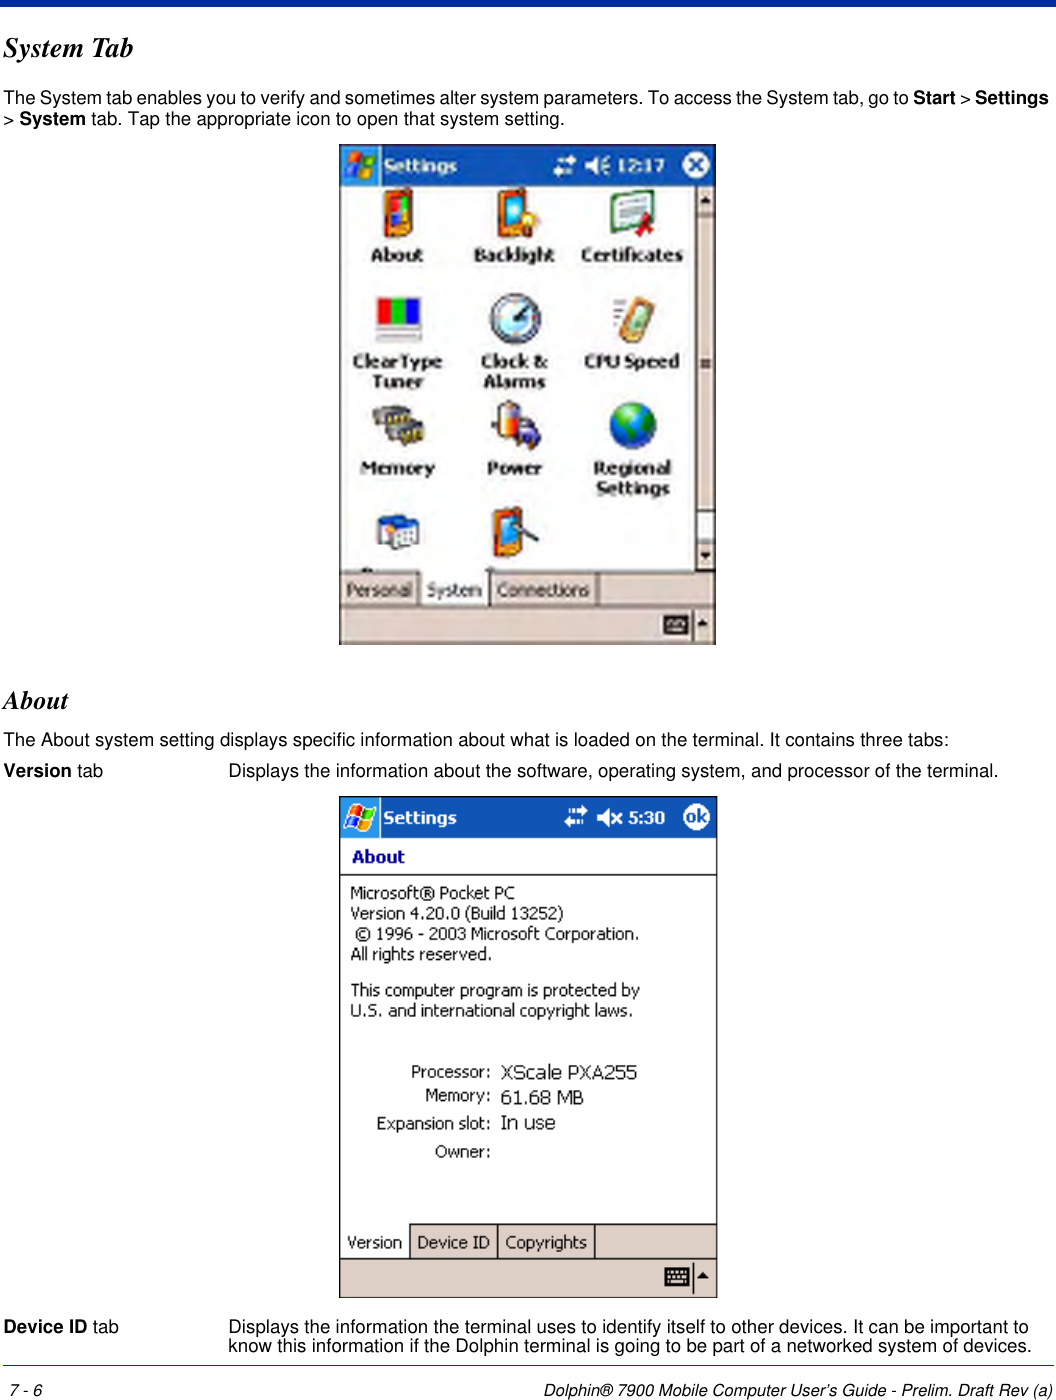
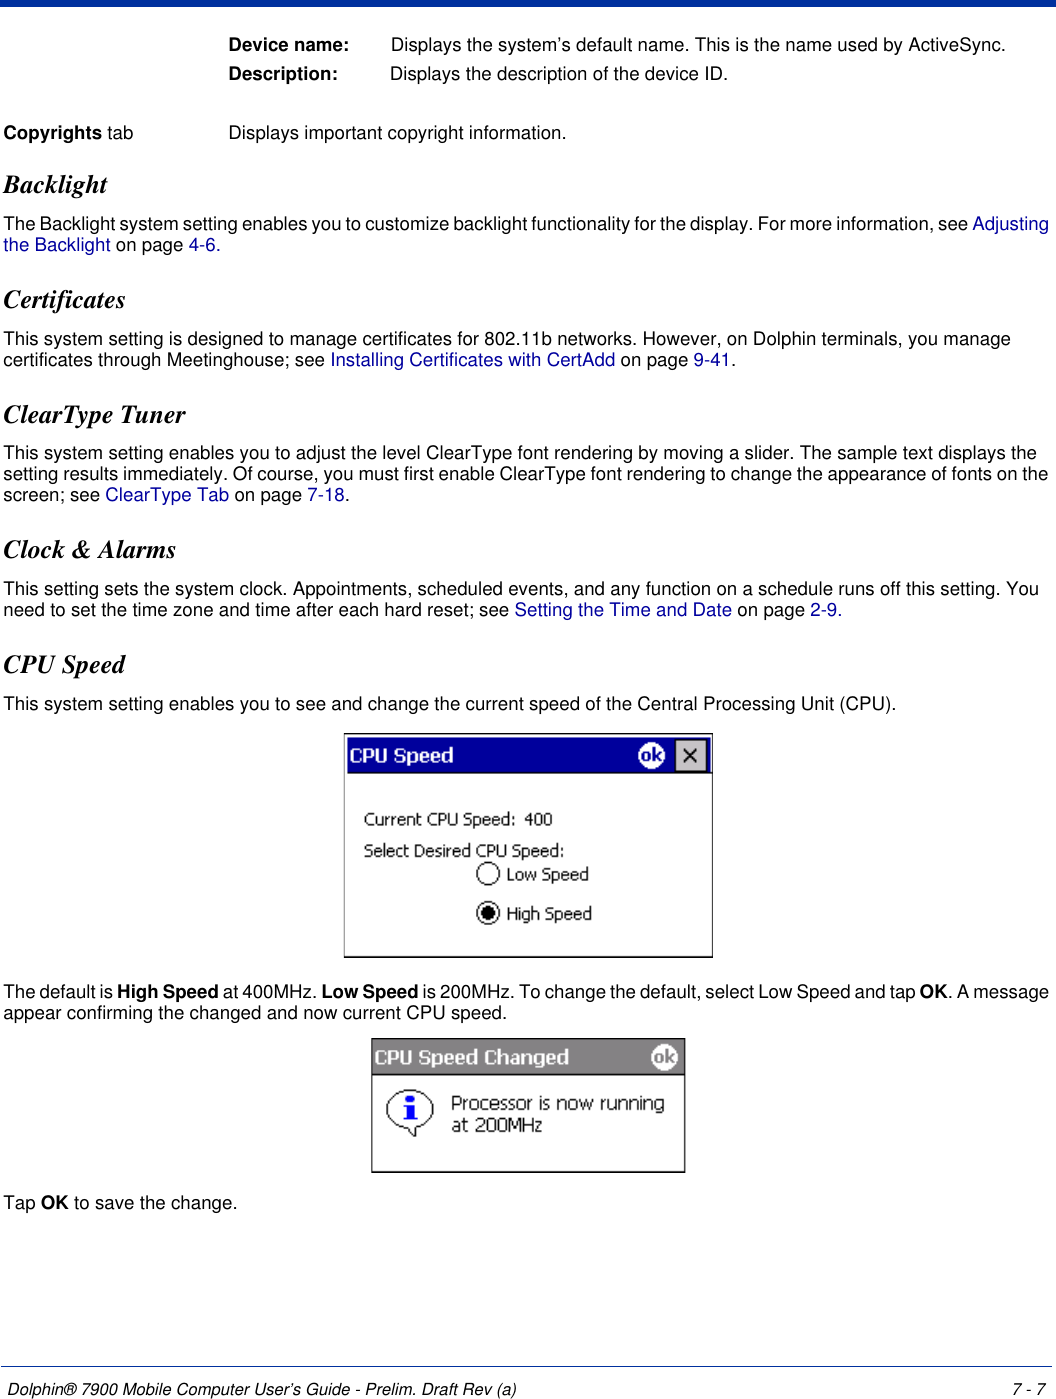
Honeywell 7900L0P Hand held PC with WLAN and BT User Manual
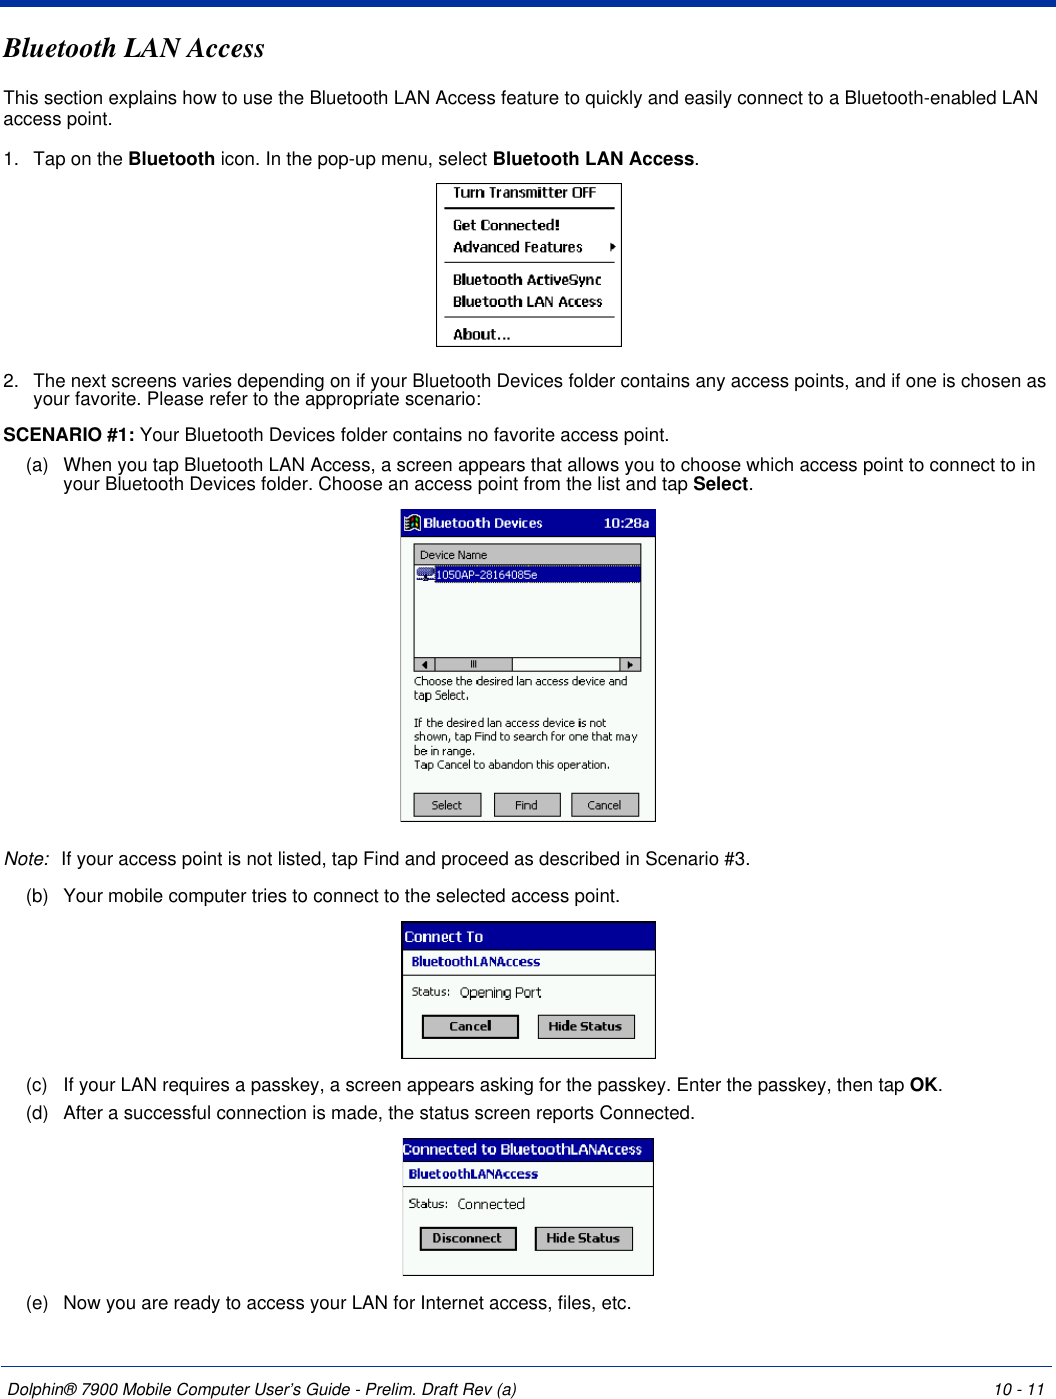
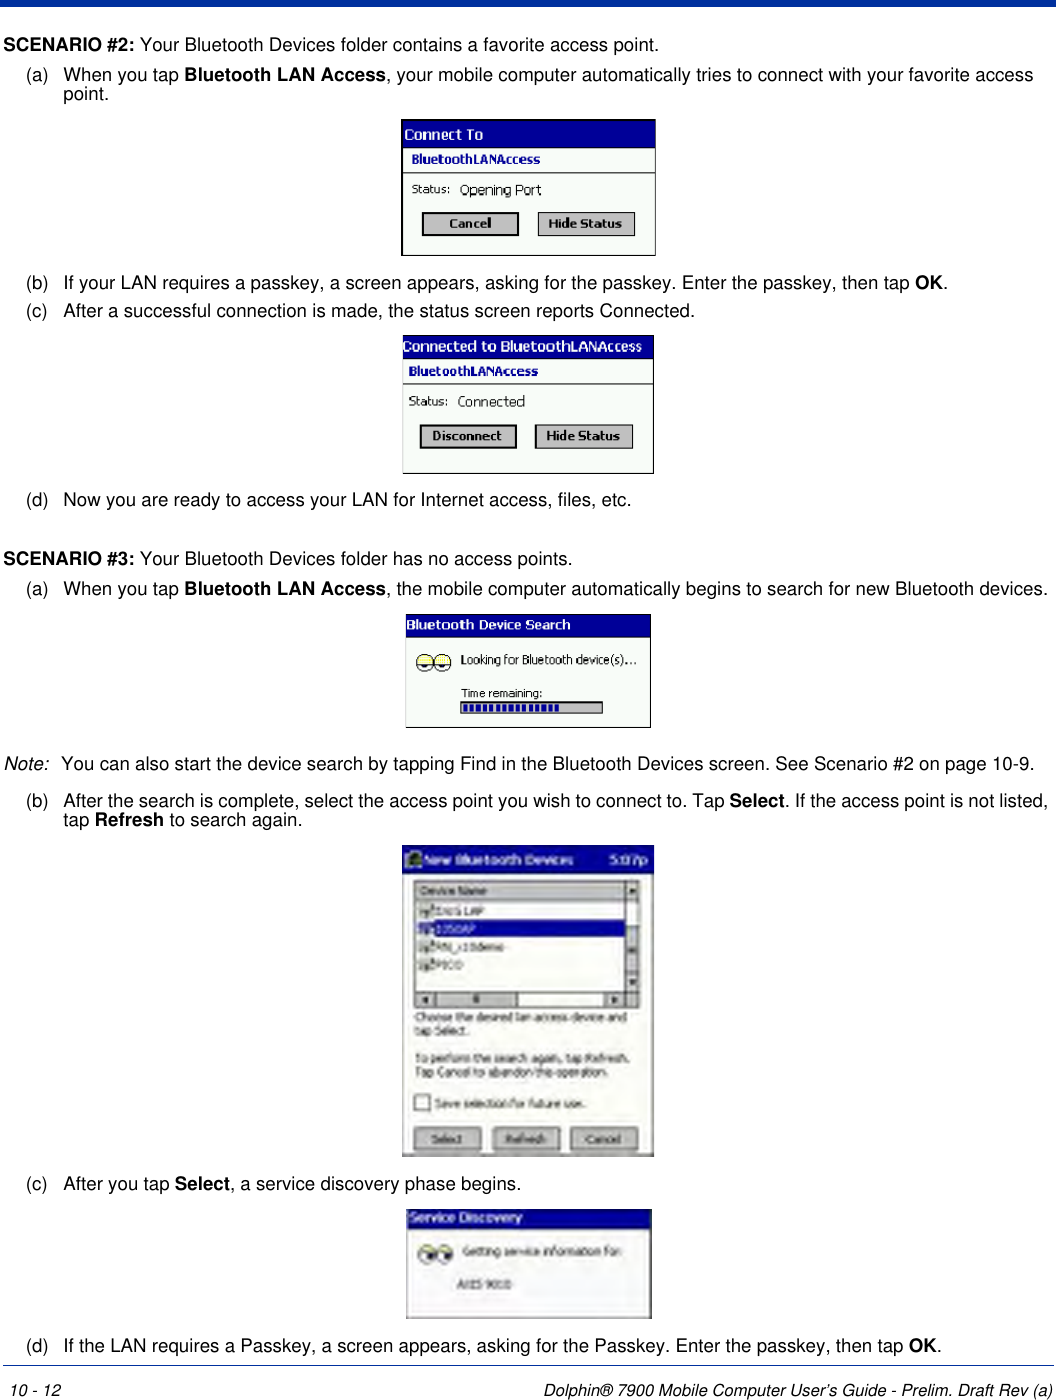
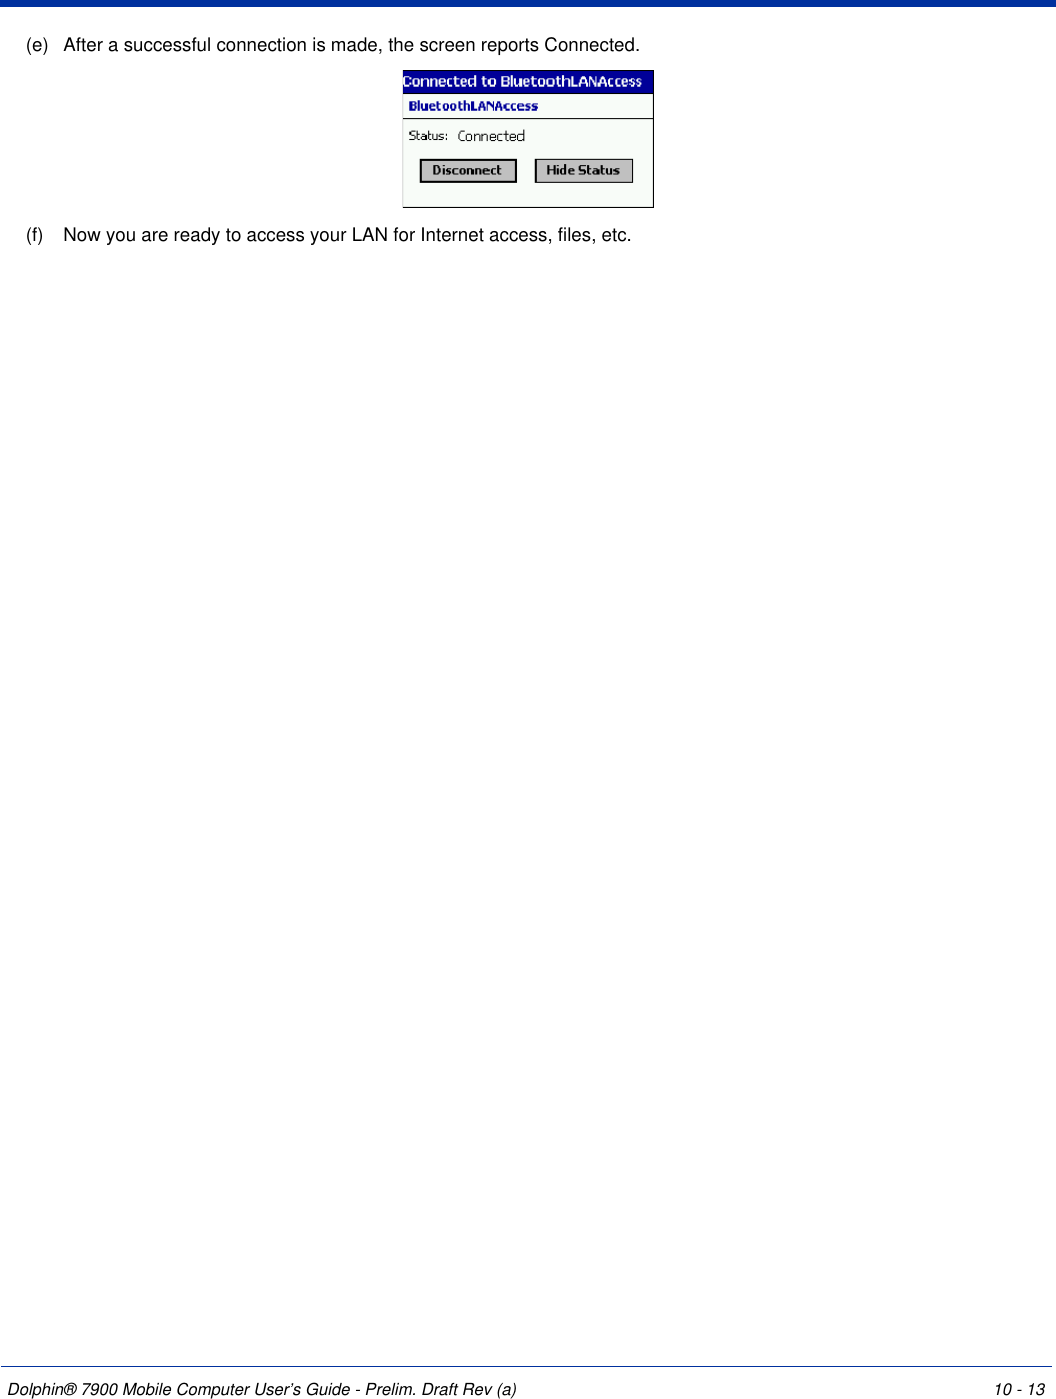
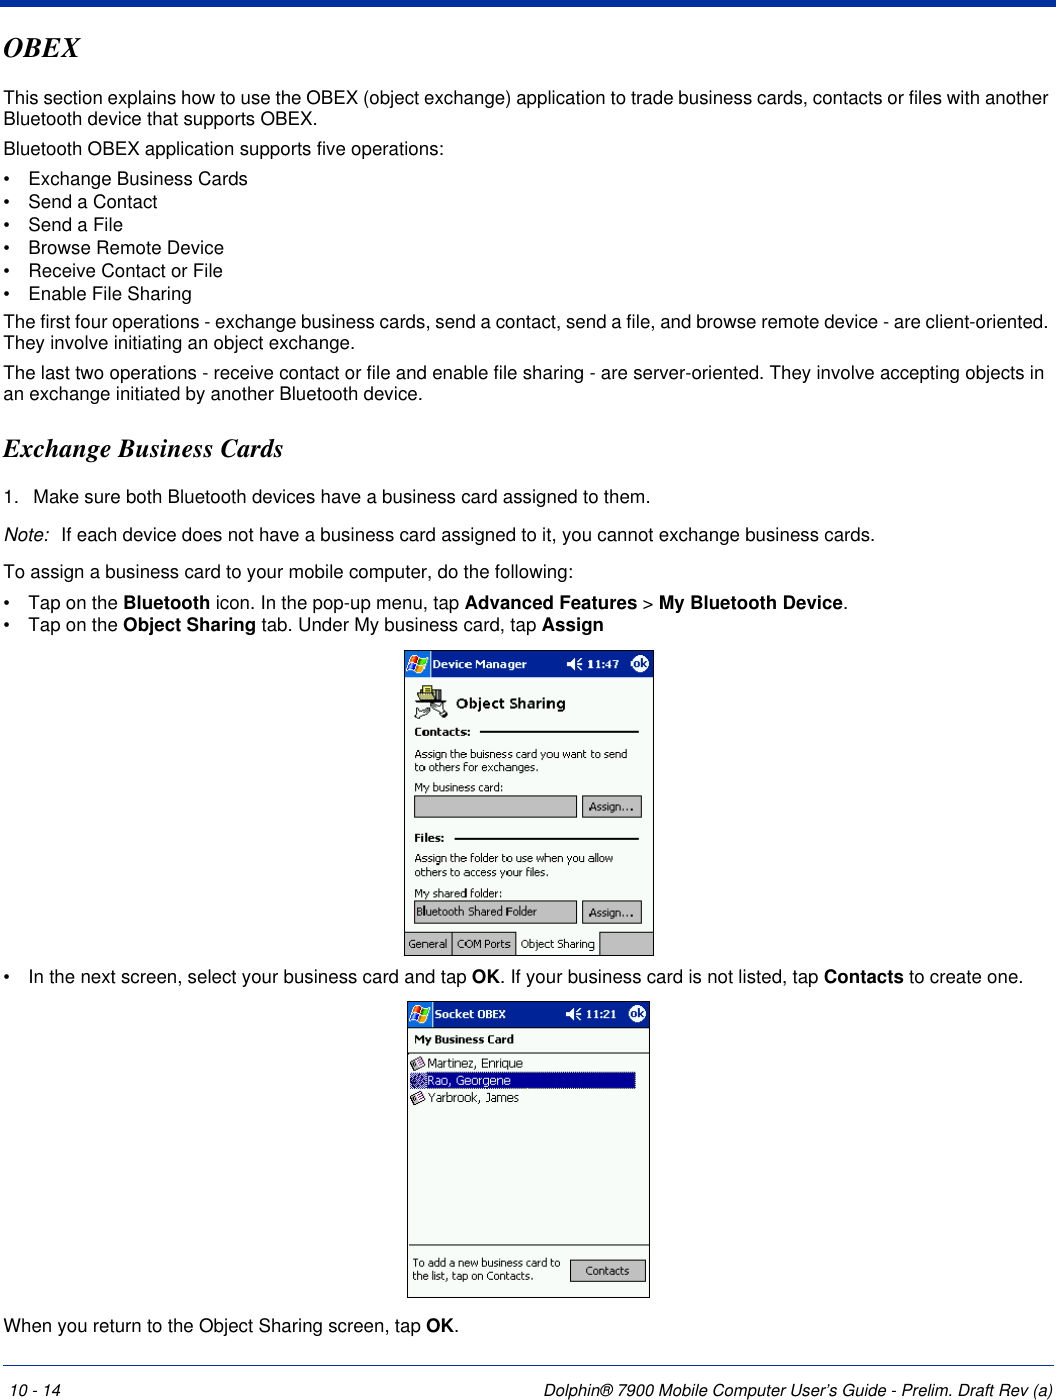
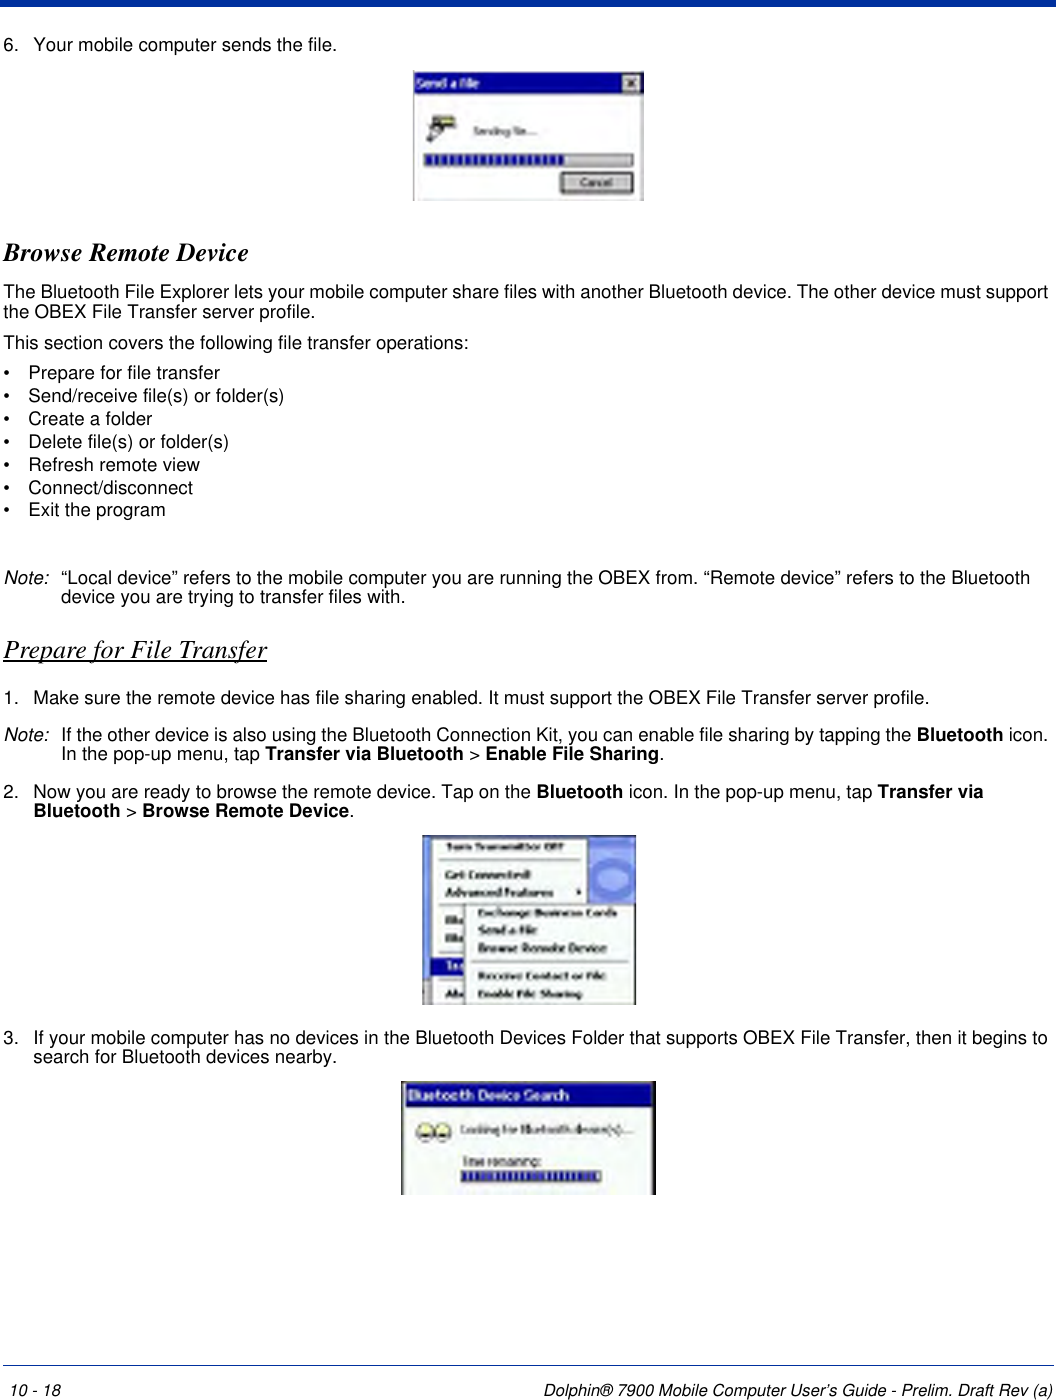
Honeywell International Inc Hand held PC with WLAN and BT
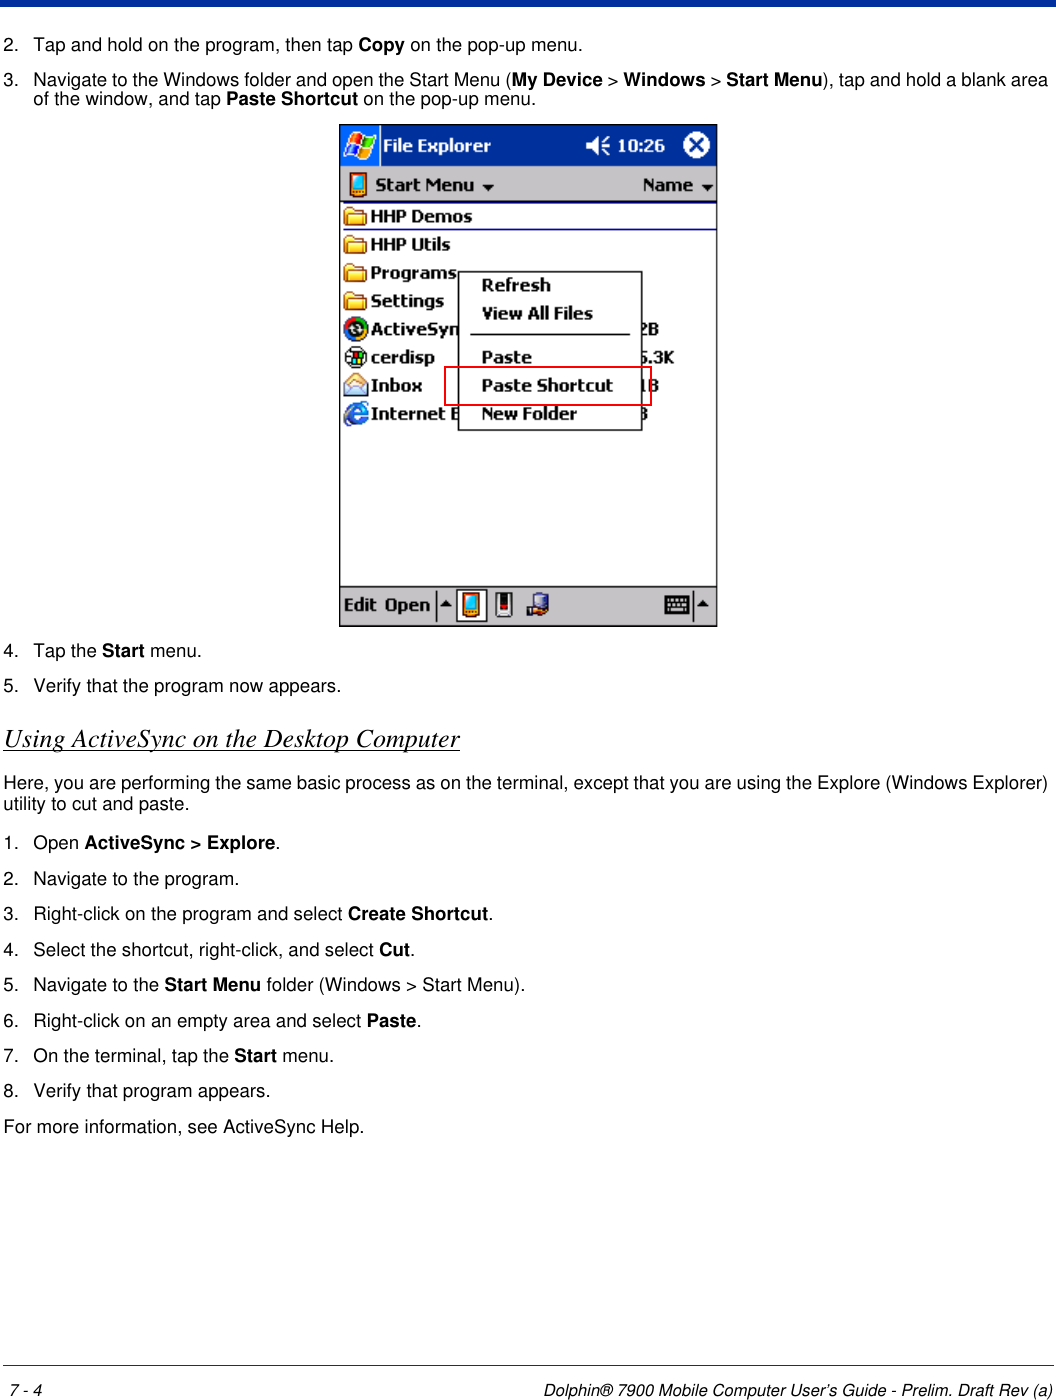
UserManual.wiki
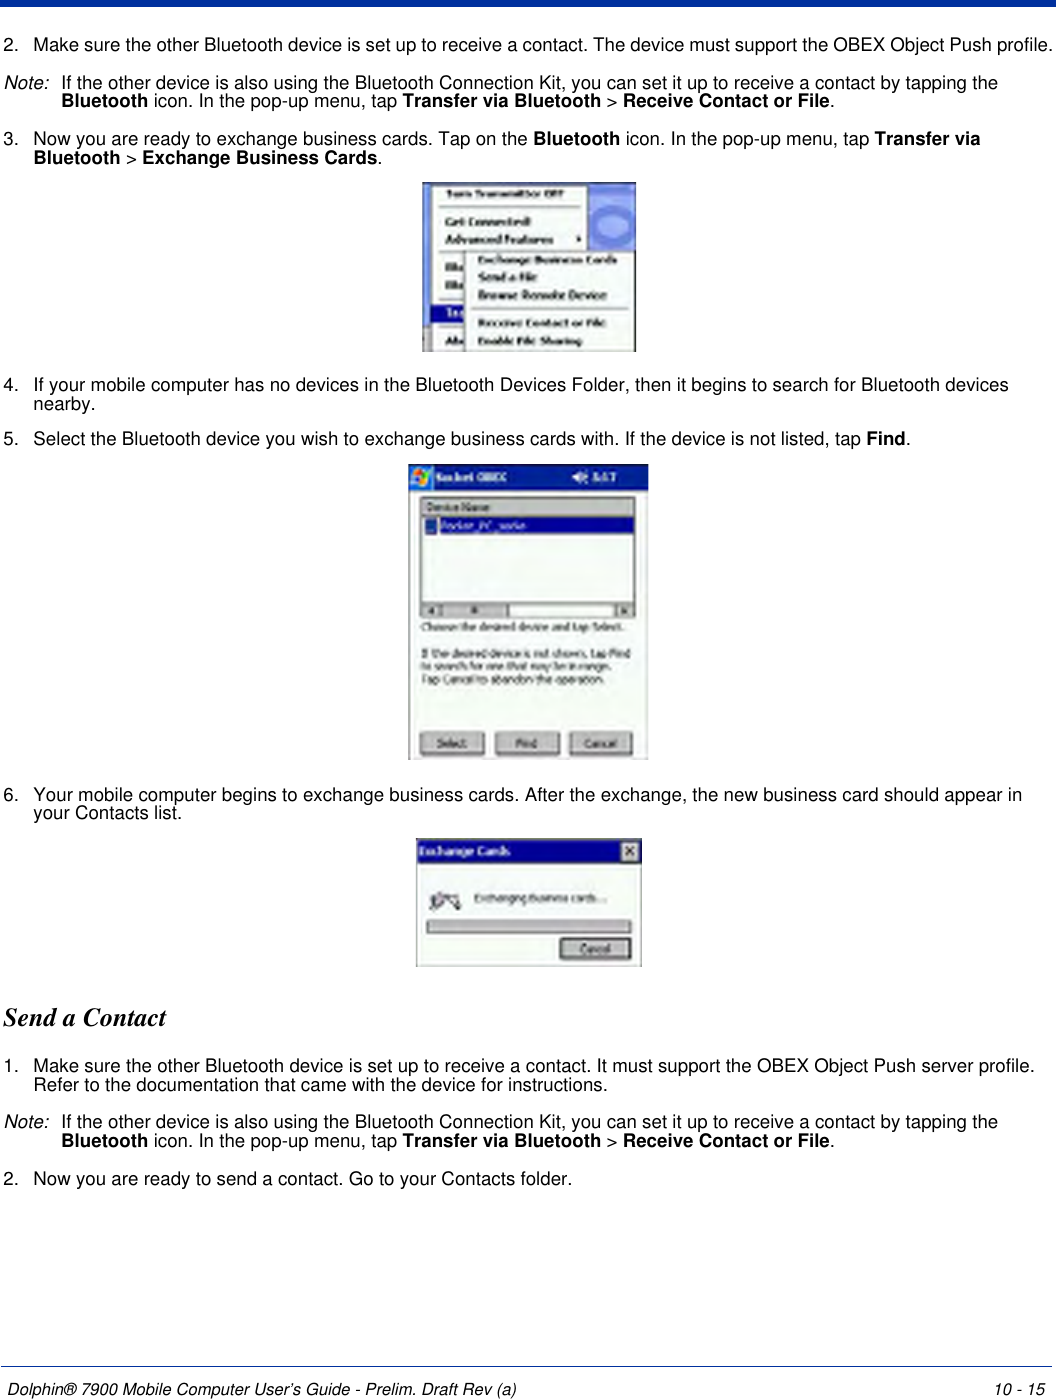
>
Honeywell
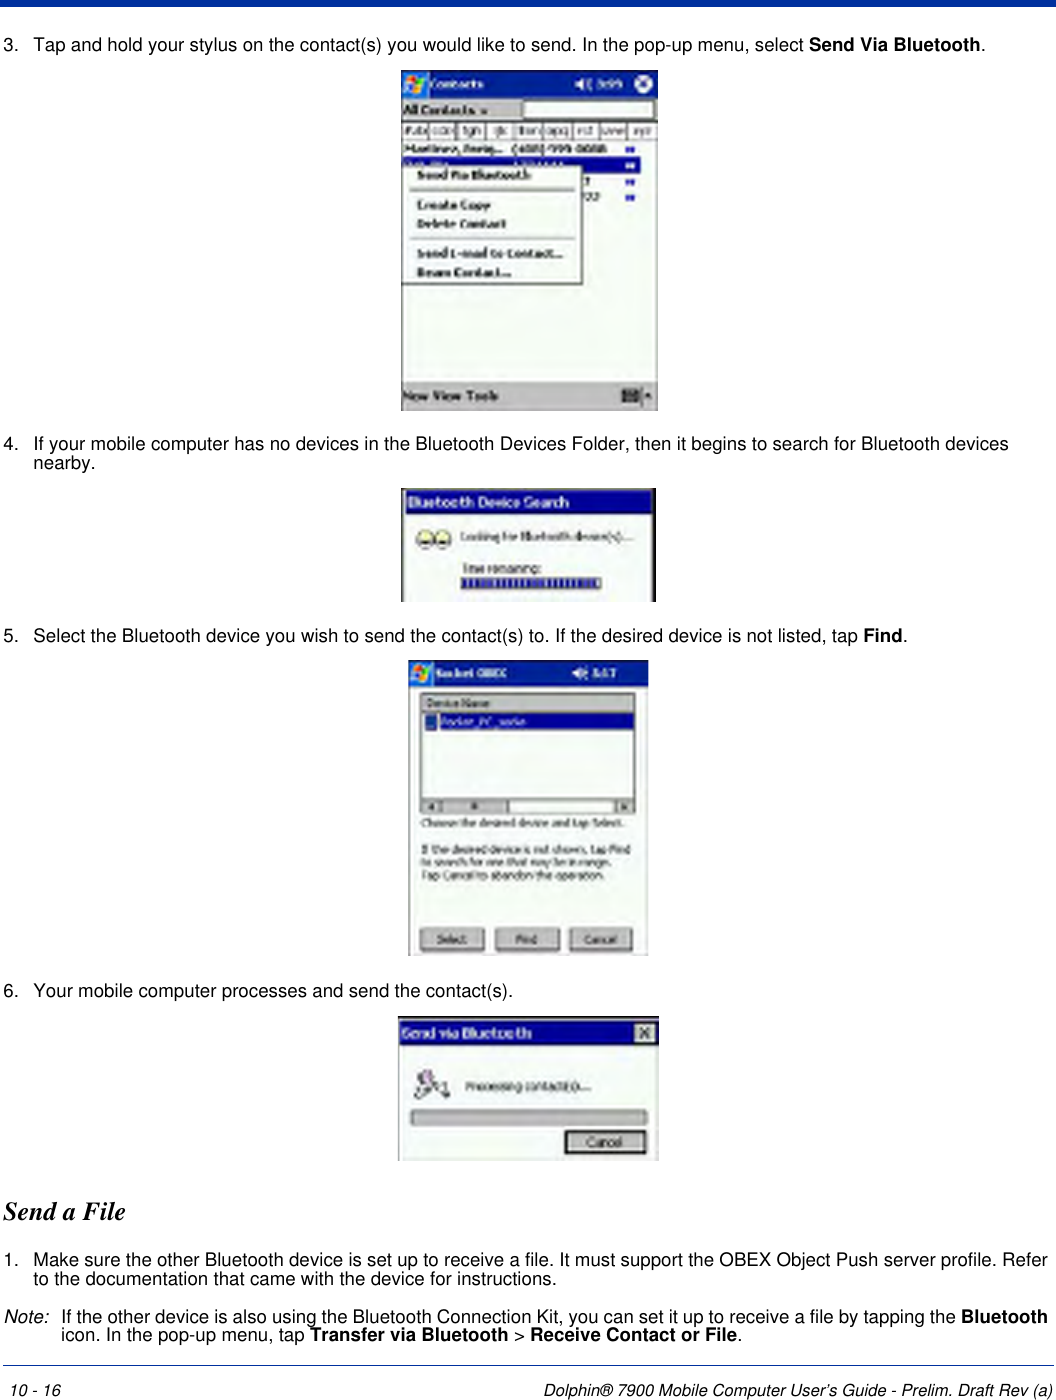
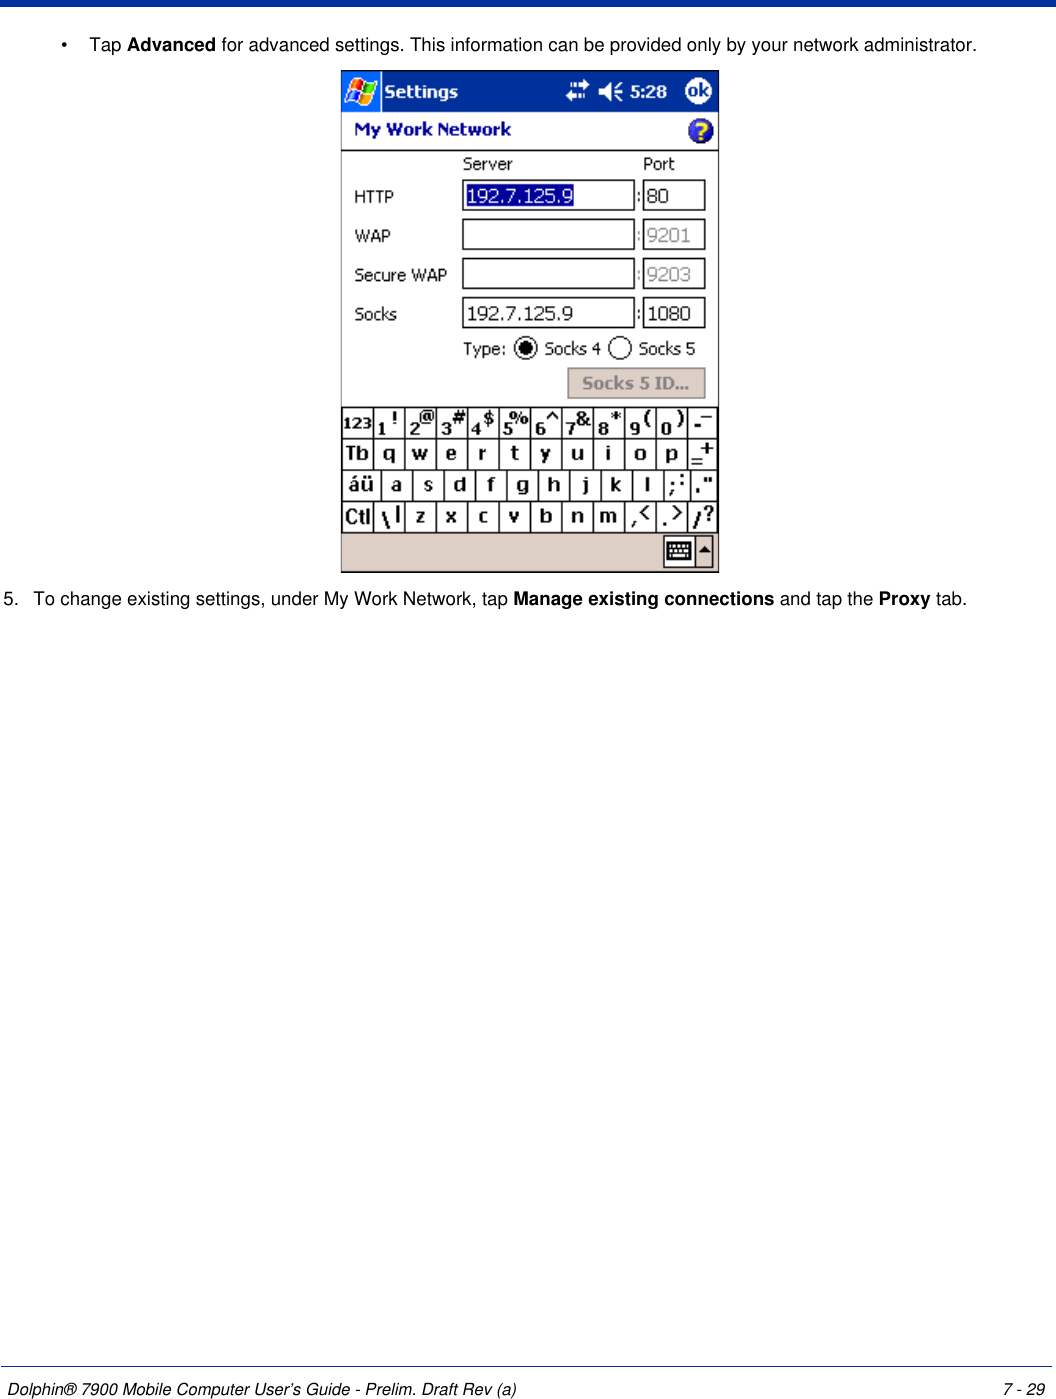
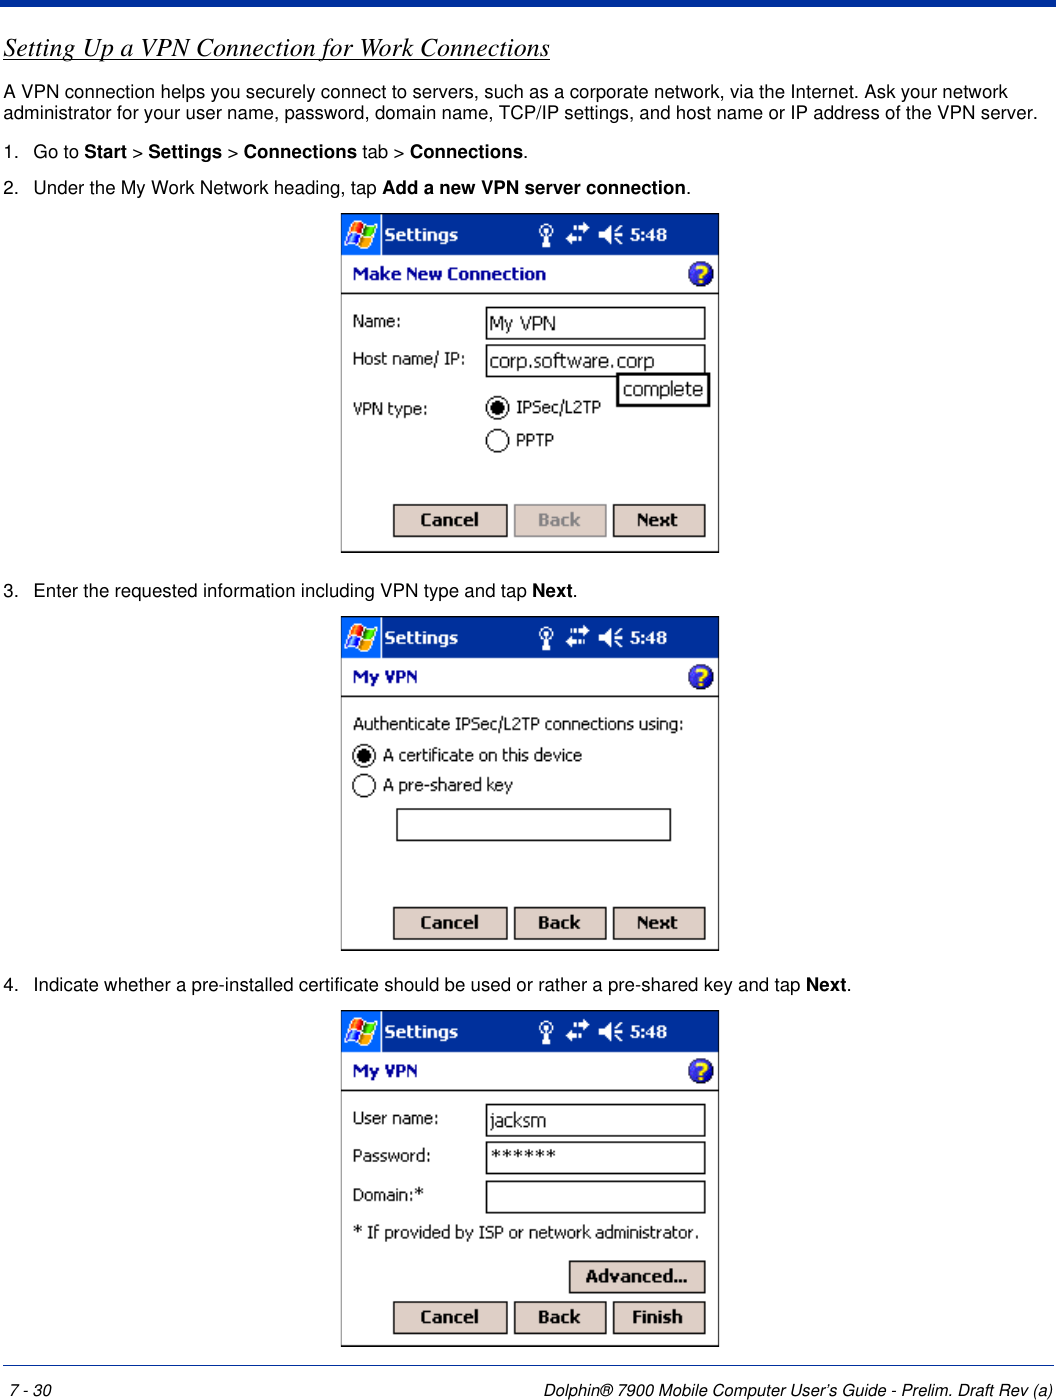
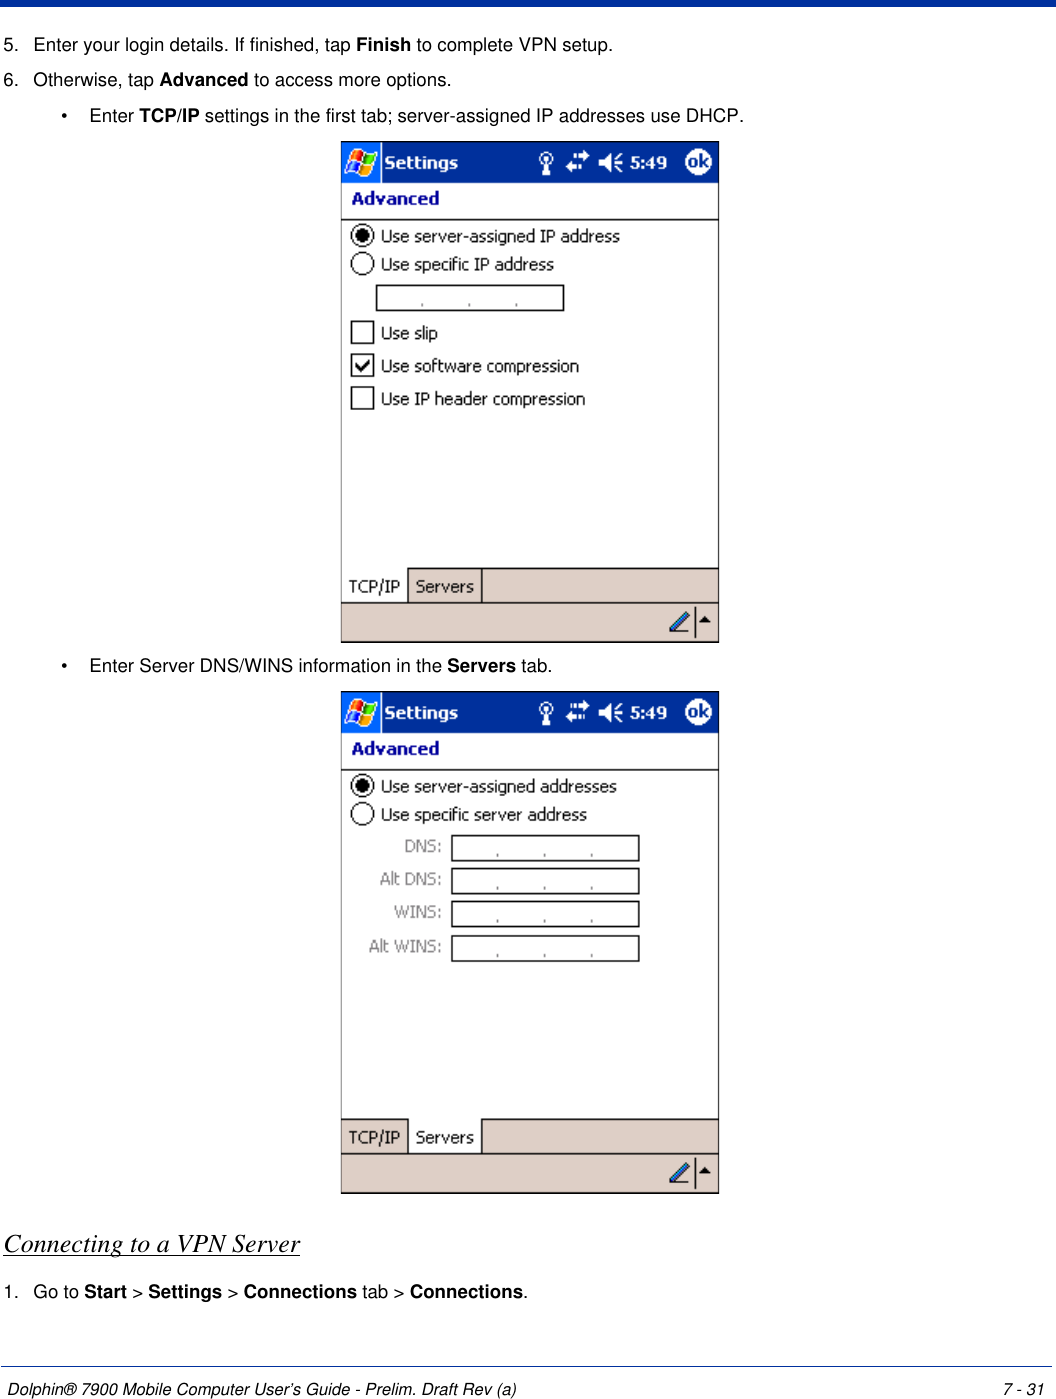
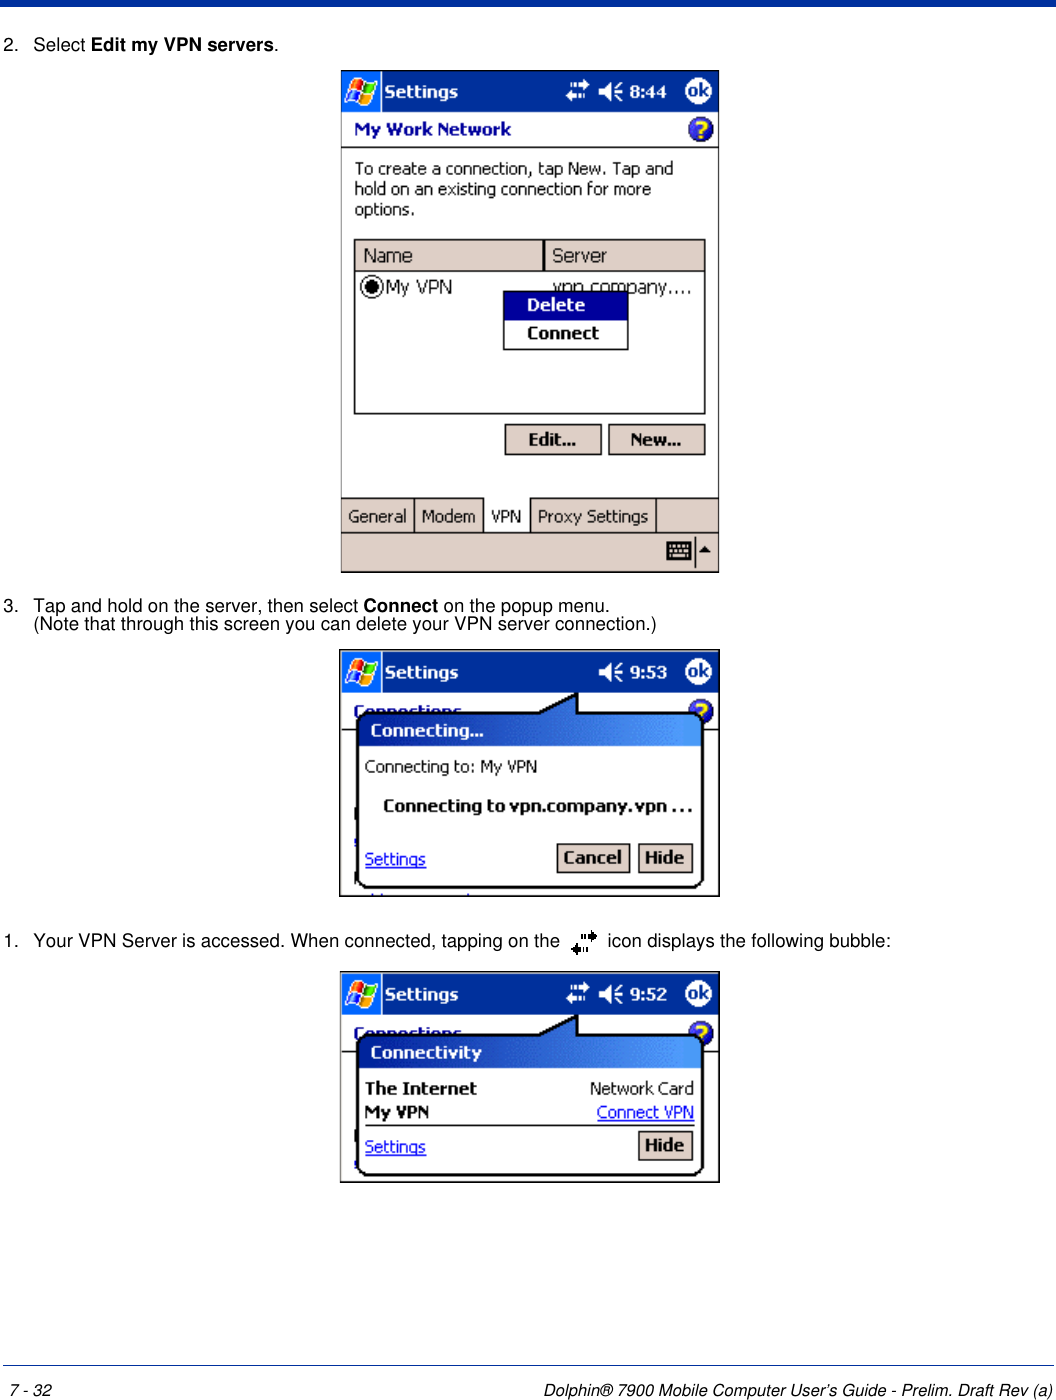
>
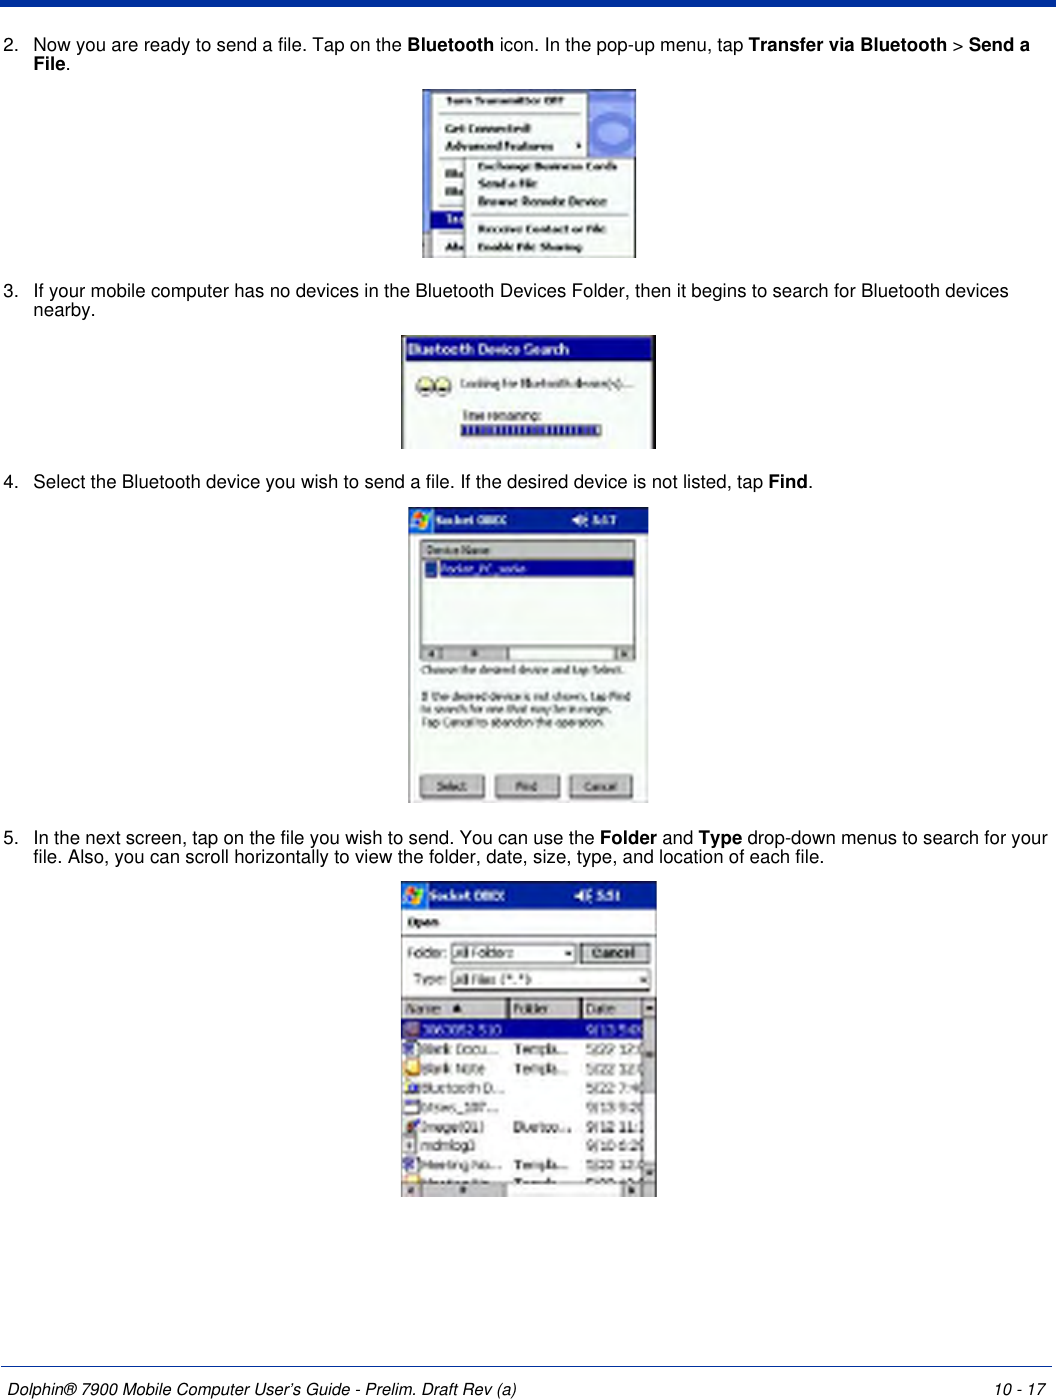
7900L0P User Manual
>
User Guide Part 1
Contents
1.
User Guide Part 1
2.
User Guide part 2
3.
User Guide Part 2
User Guide Part 1
Navigation menu
Upload a User Manual
Namespaces
Wiki Guide
HTML
PDF
Info
Views
User Manual
Discussion / Help
Navigation


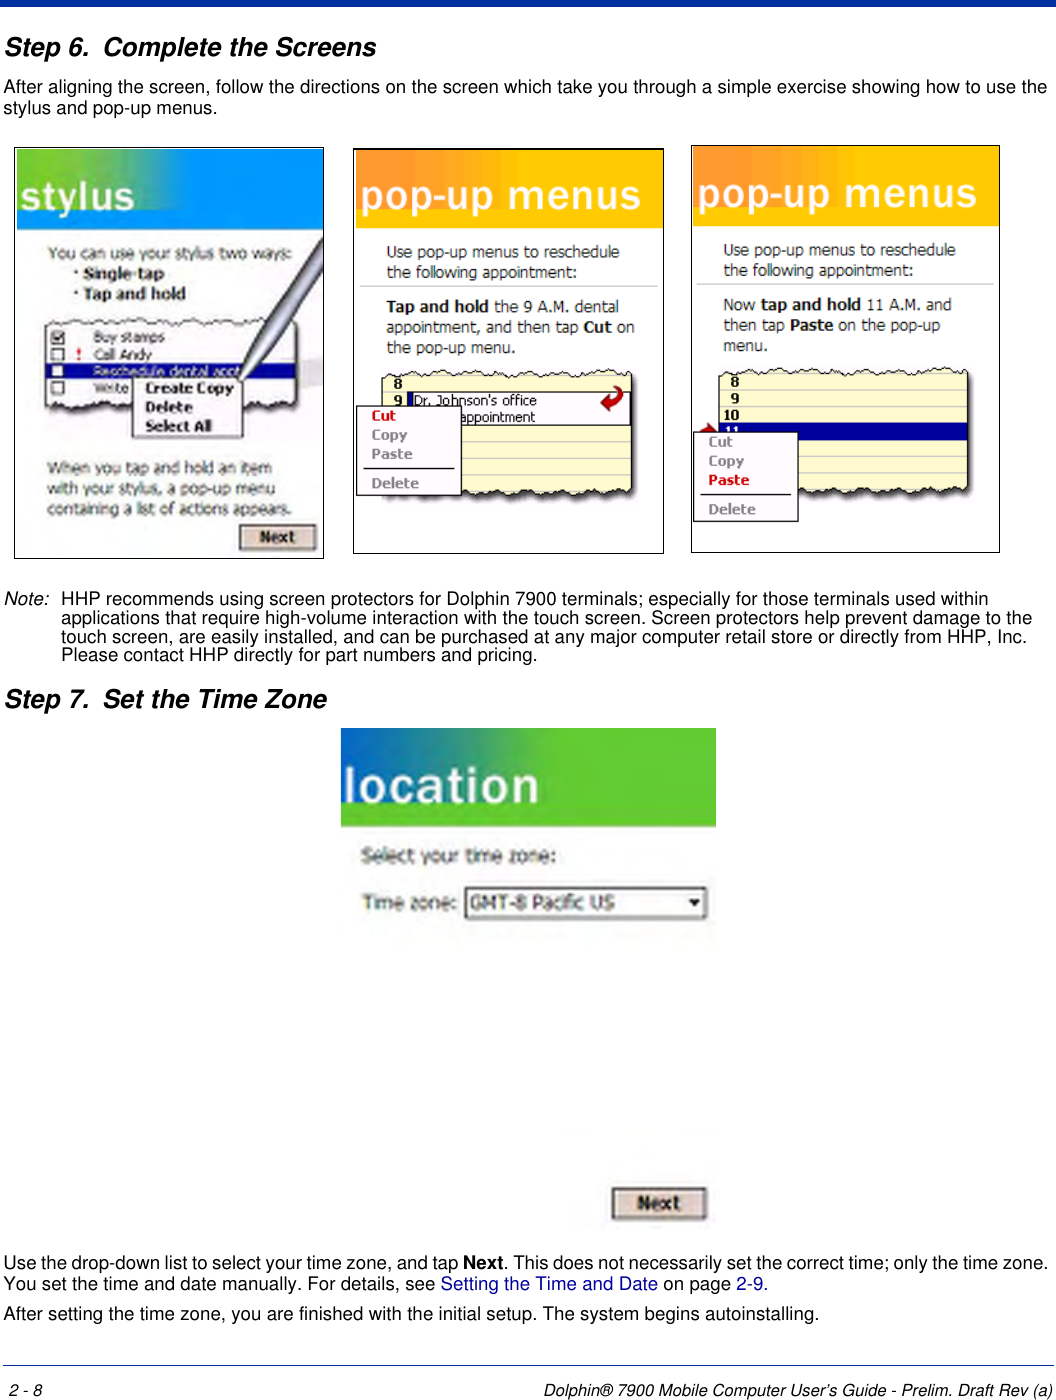


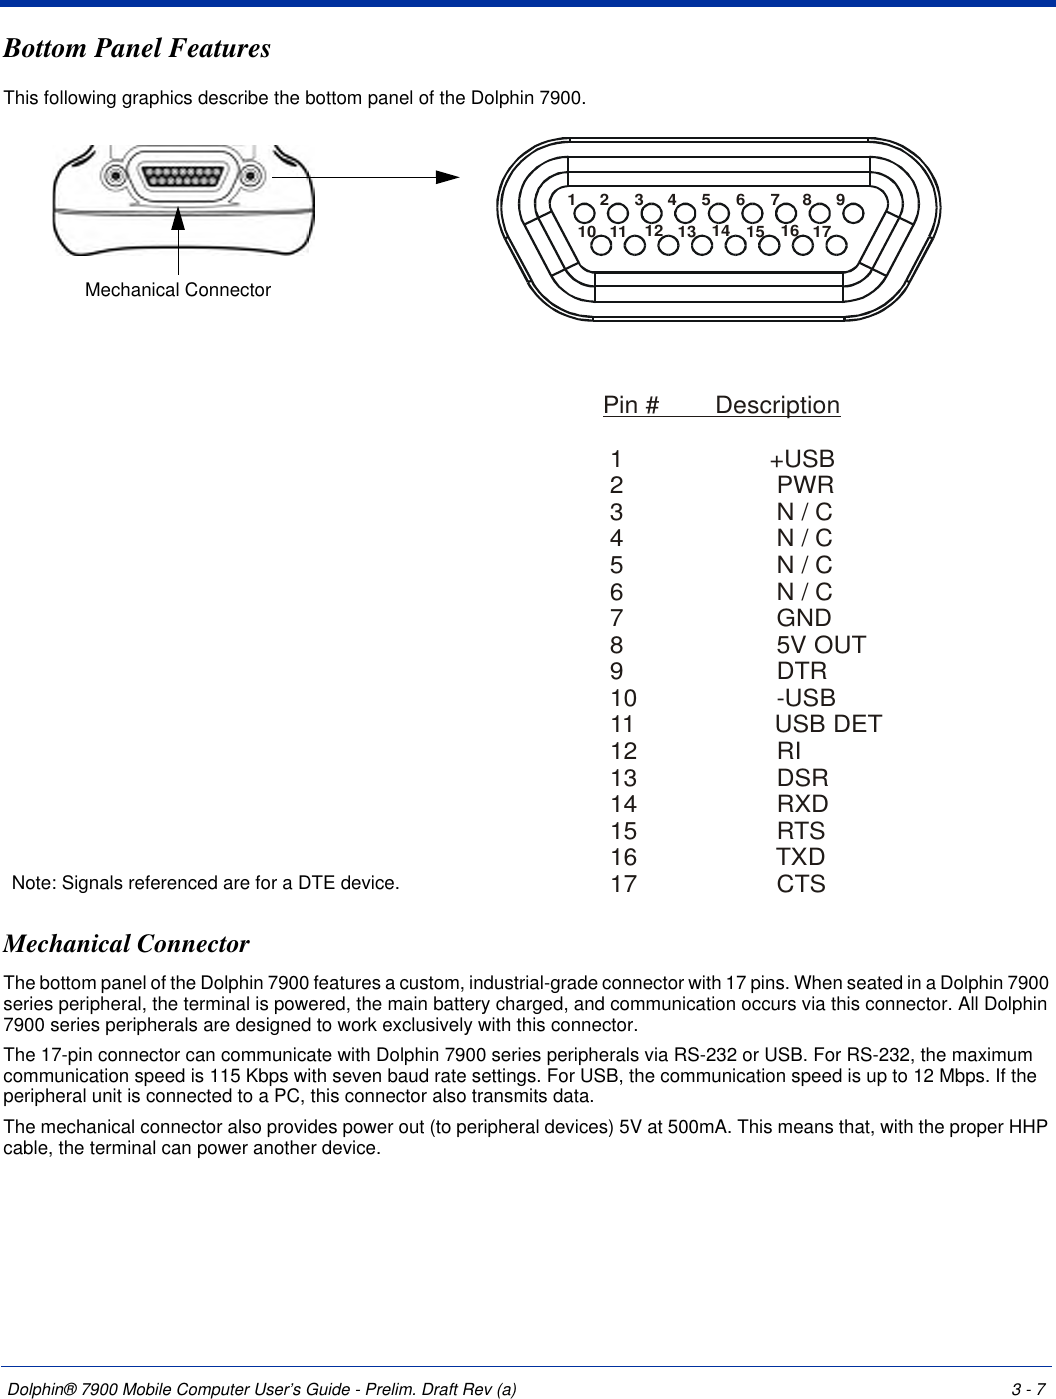
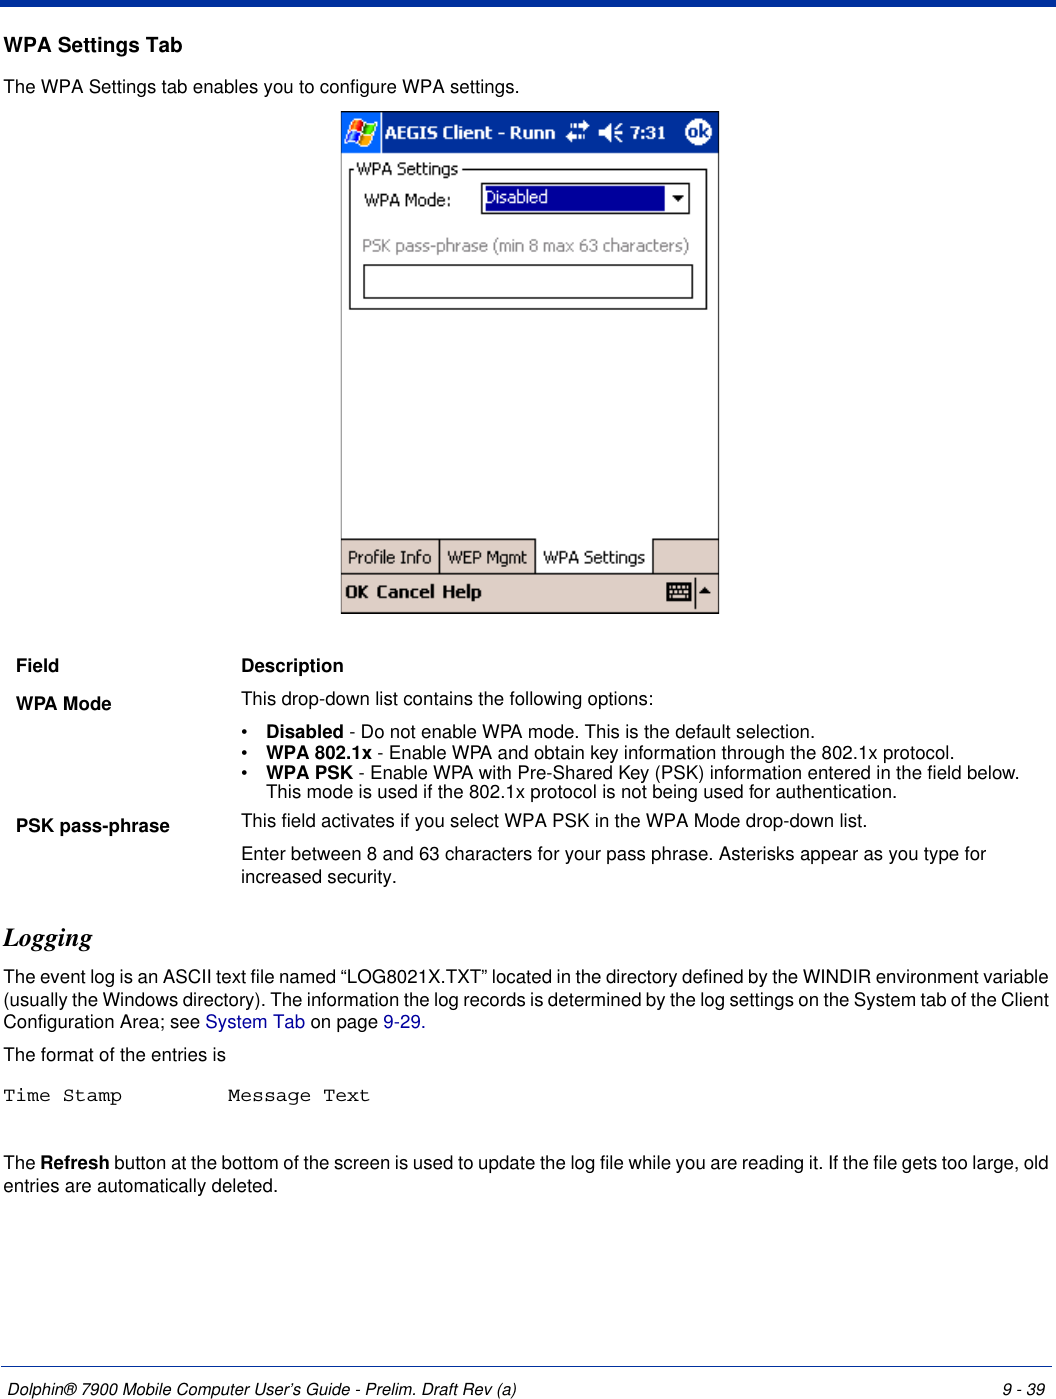
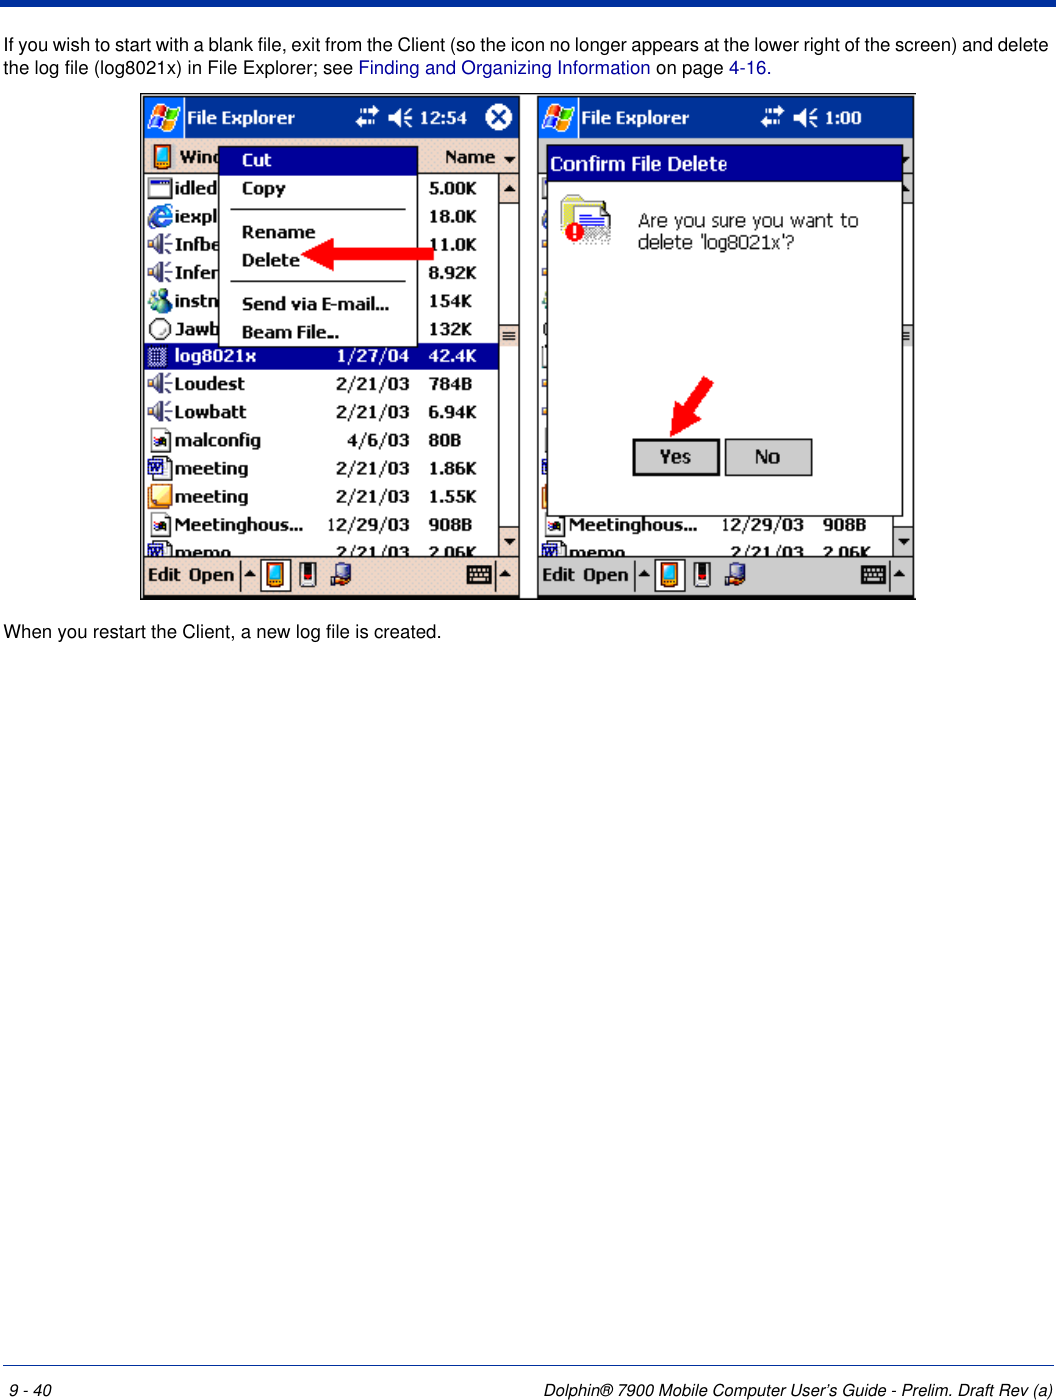
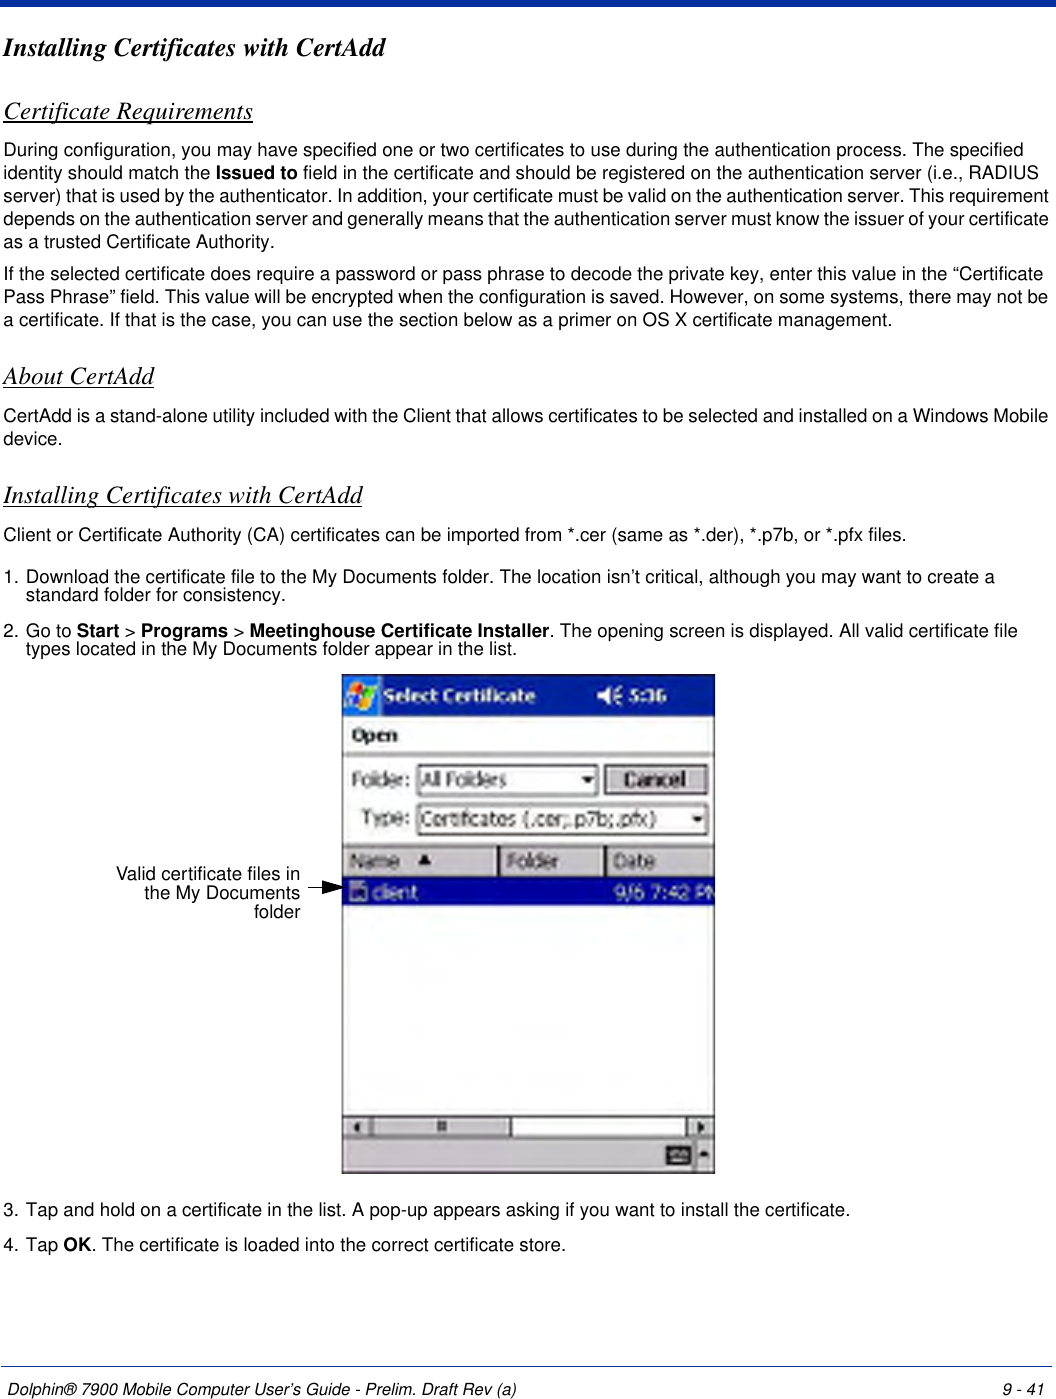
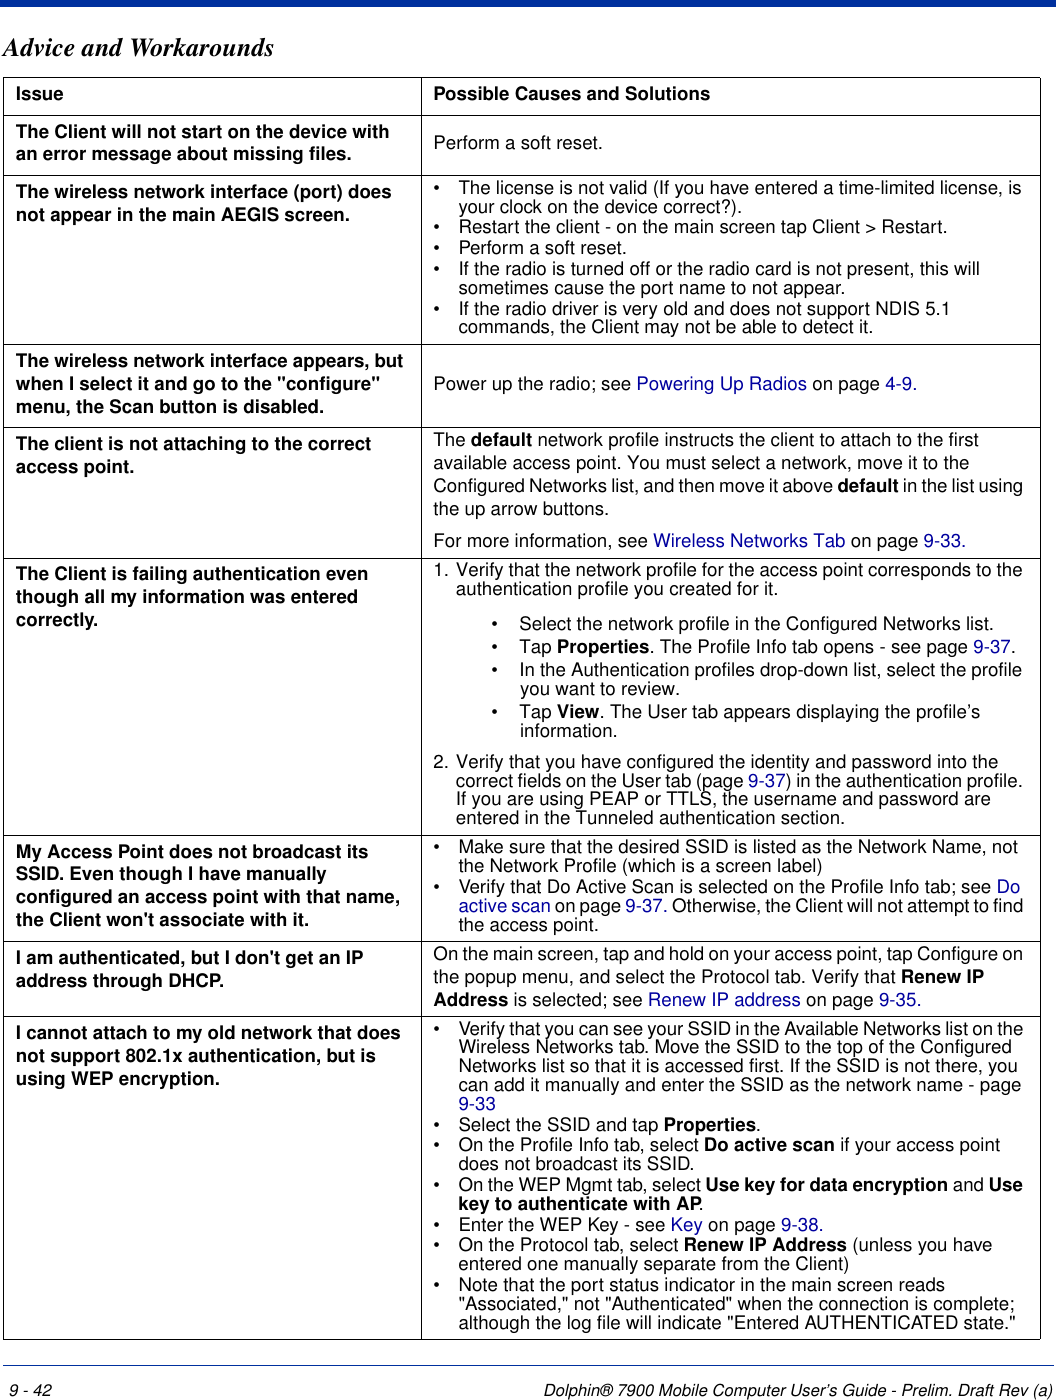
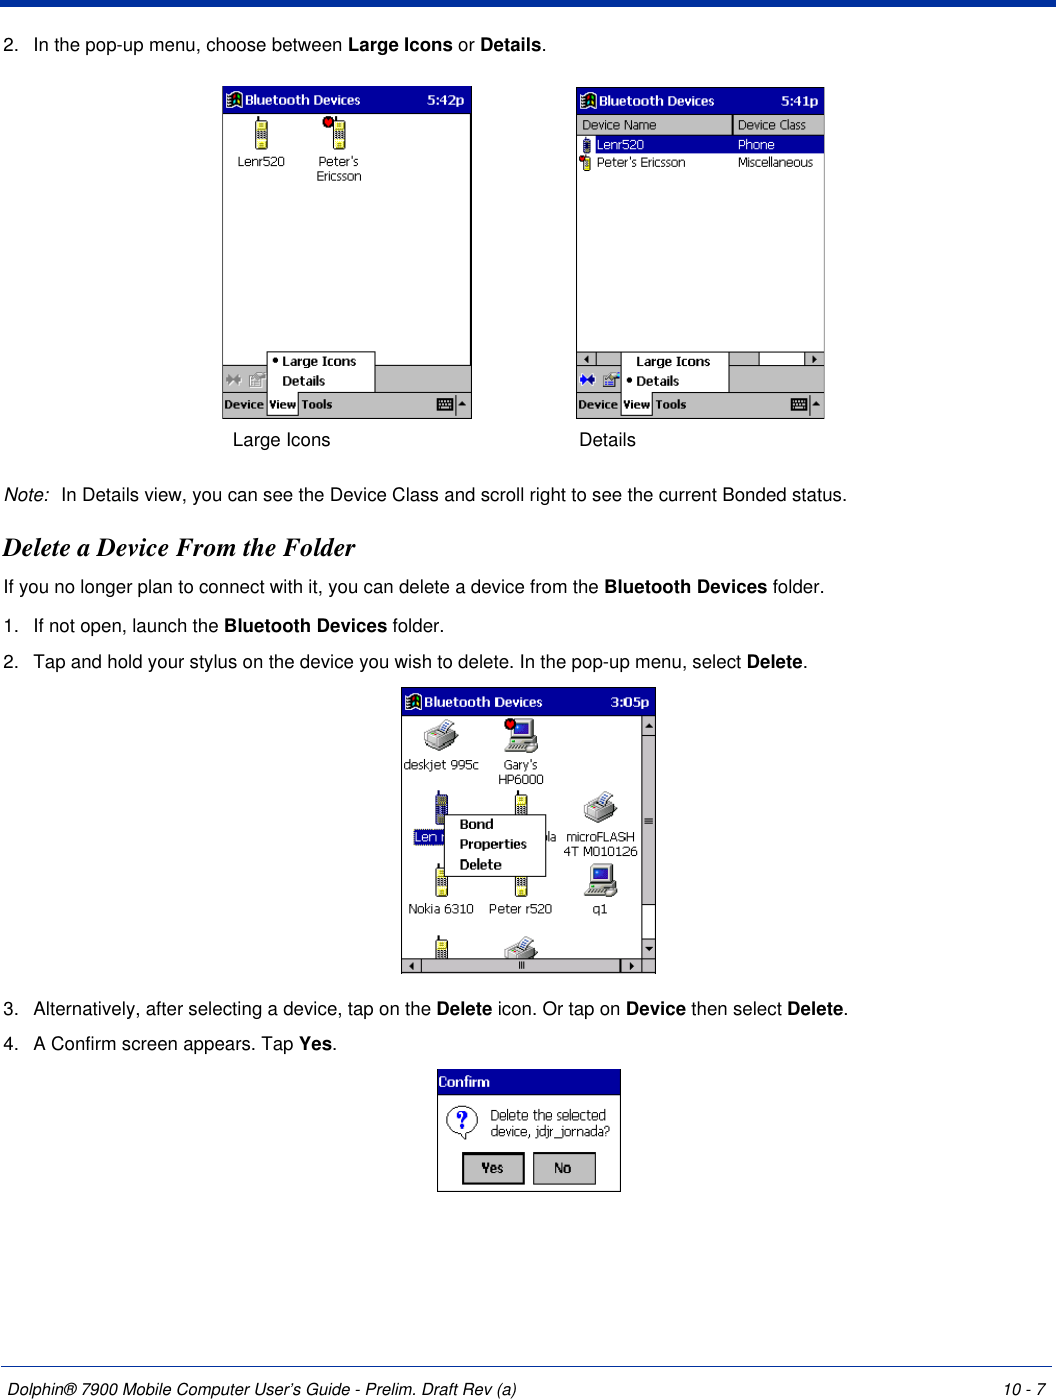
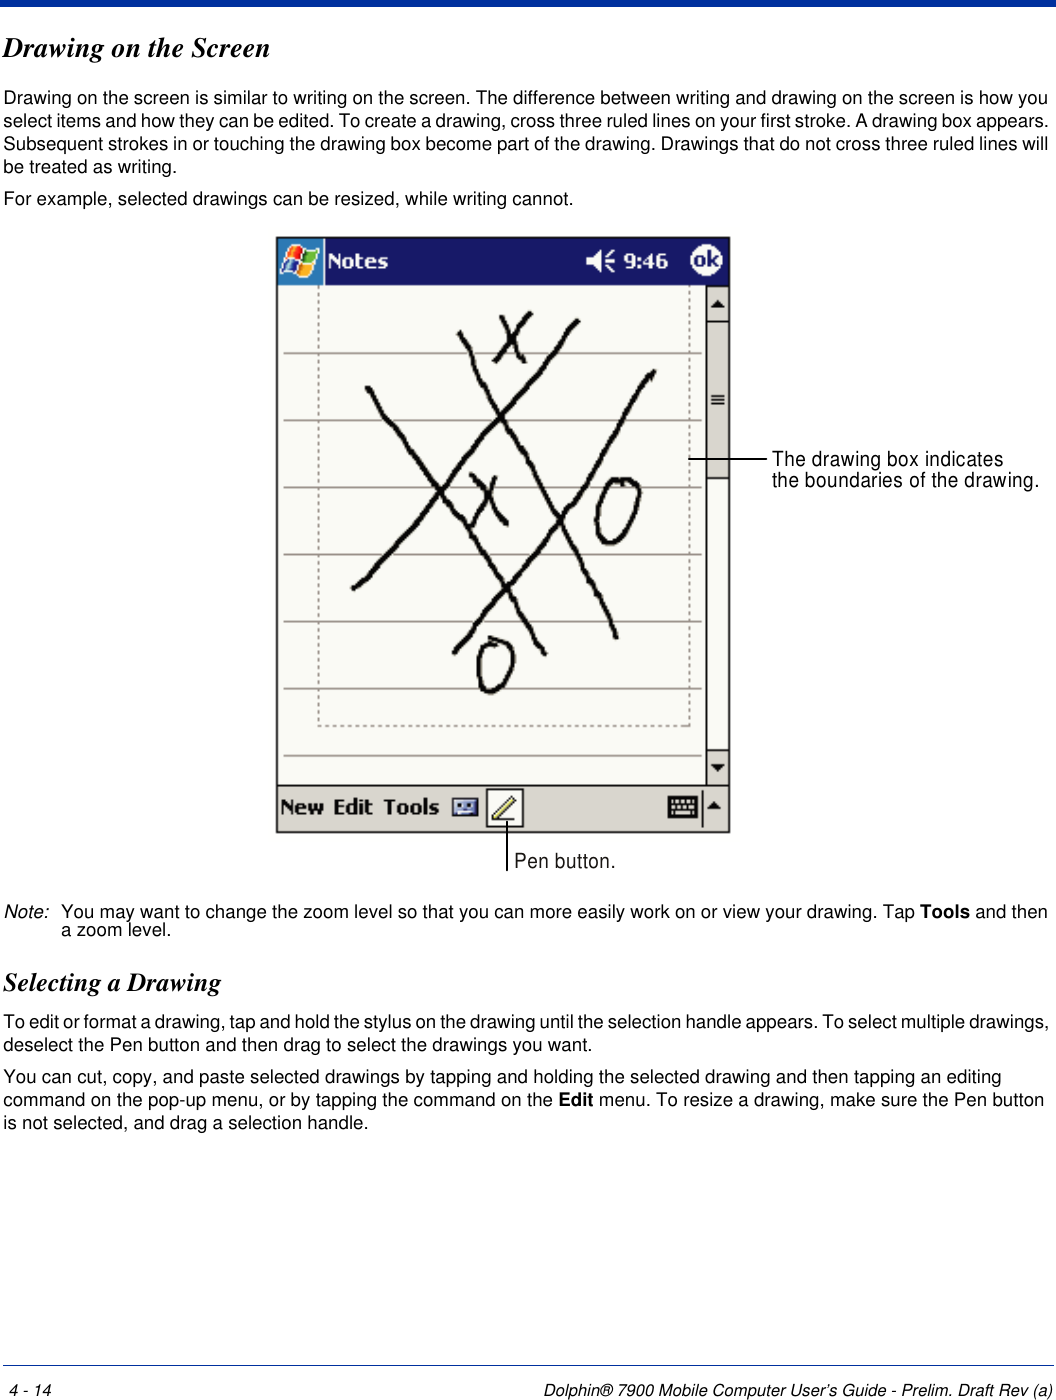
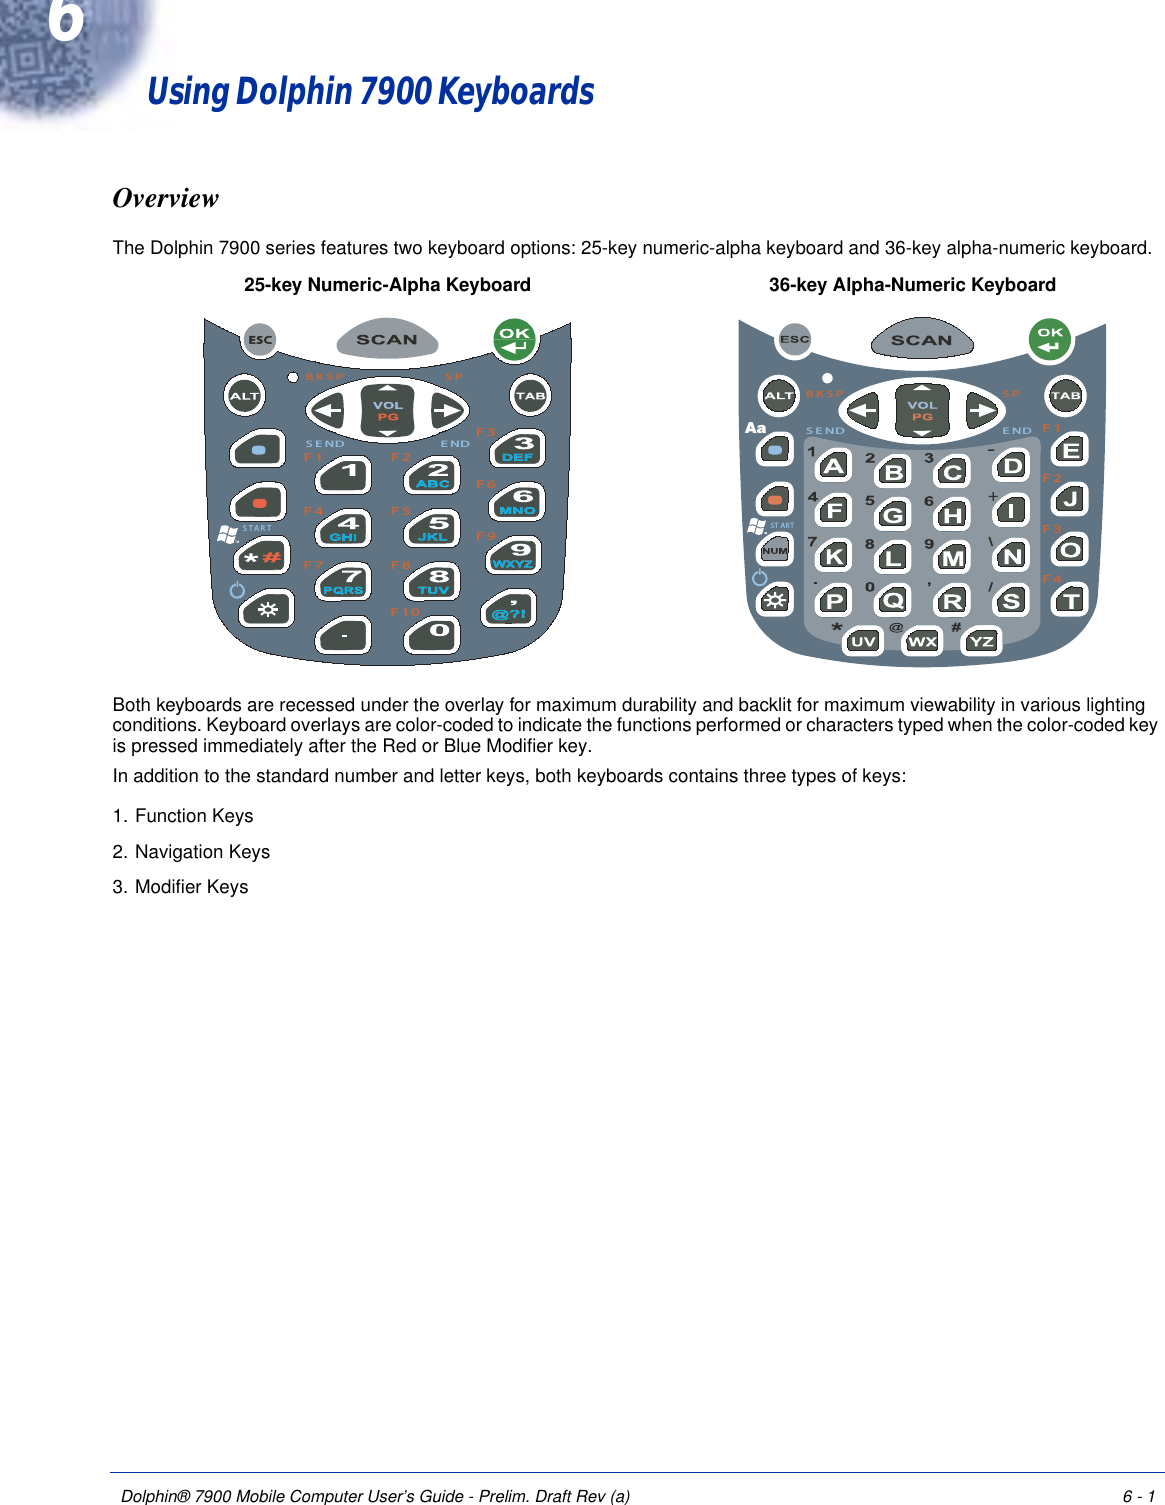
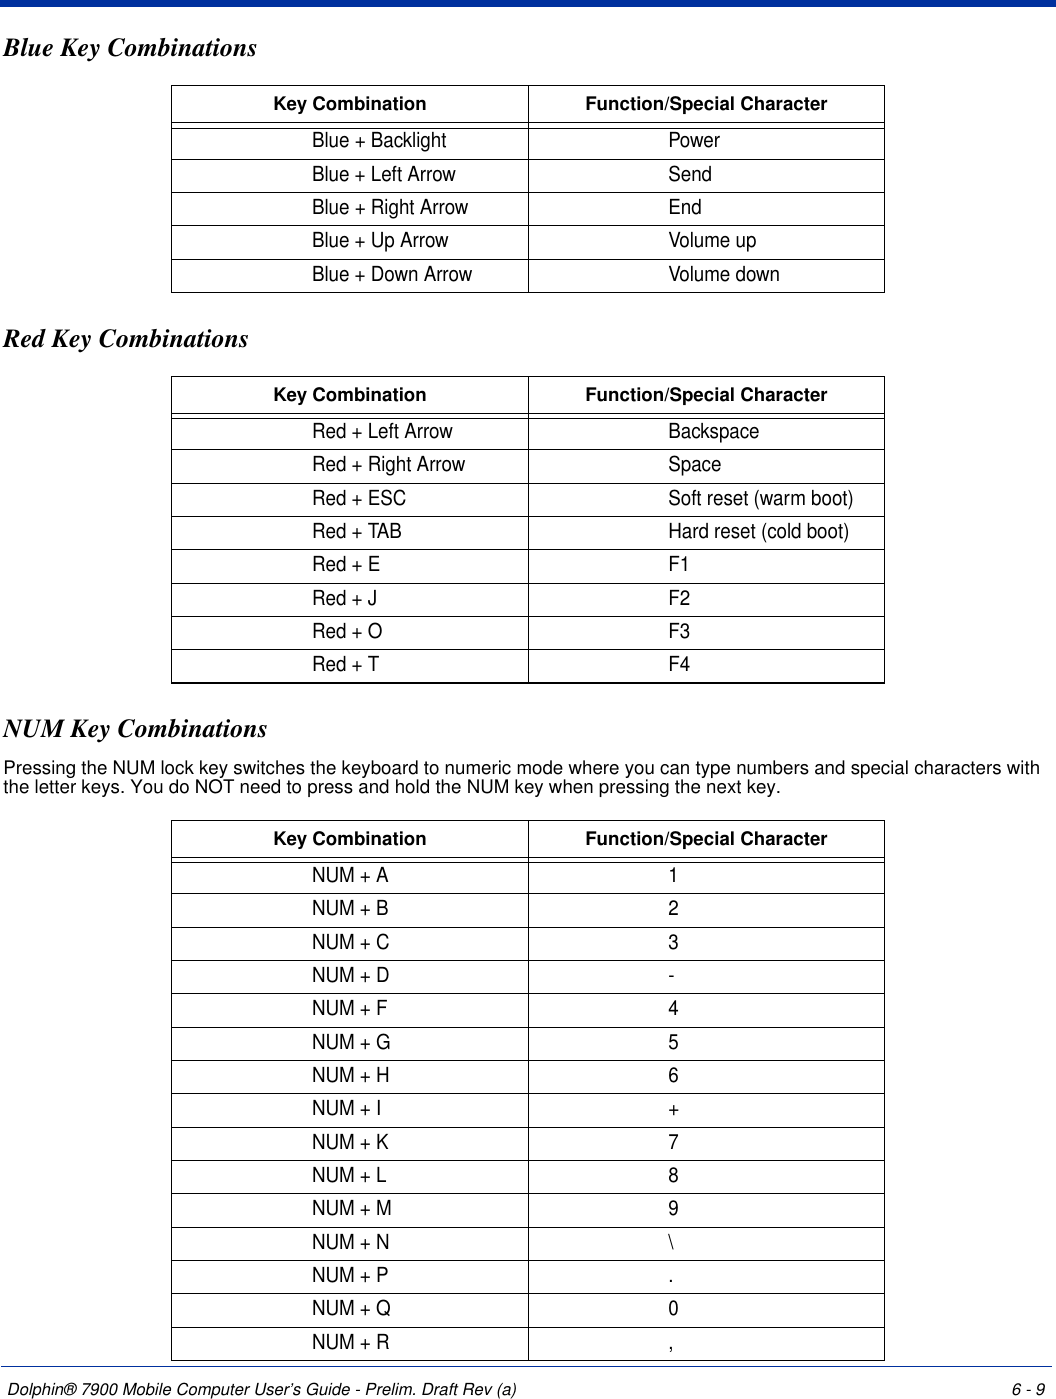
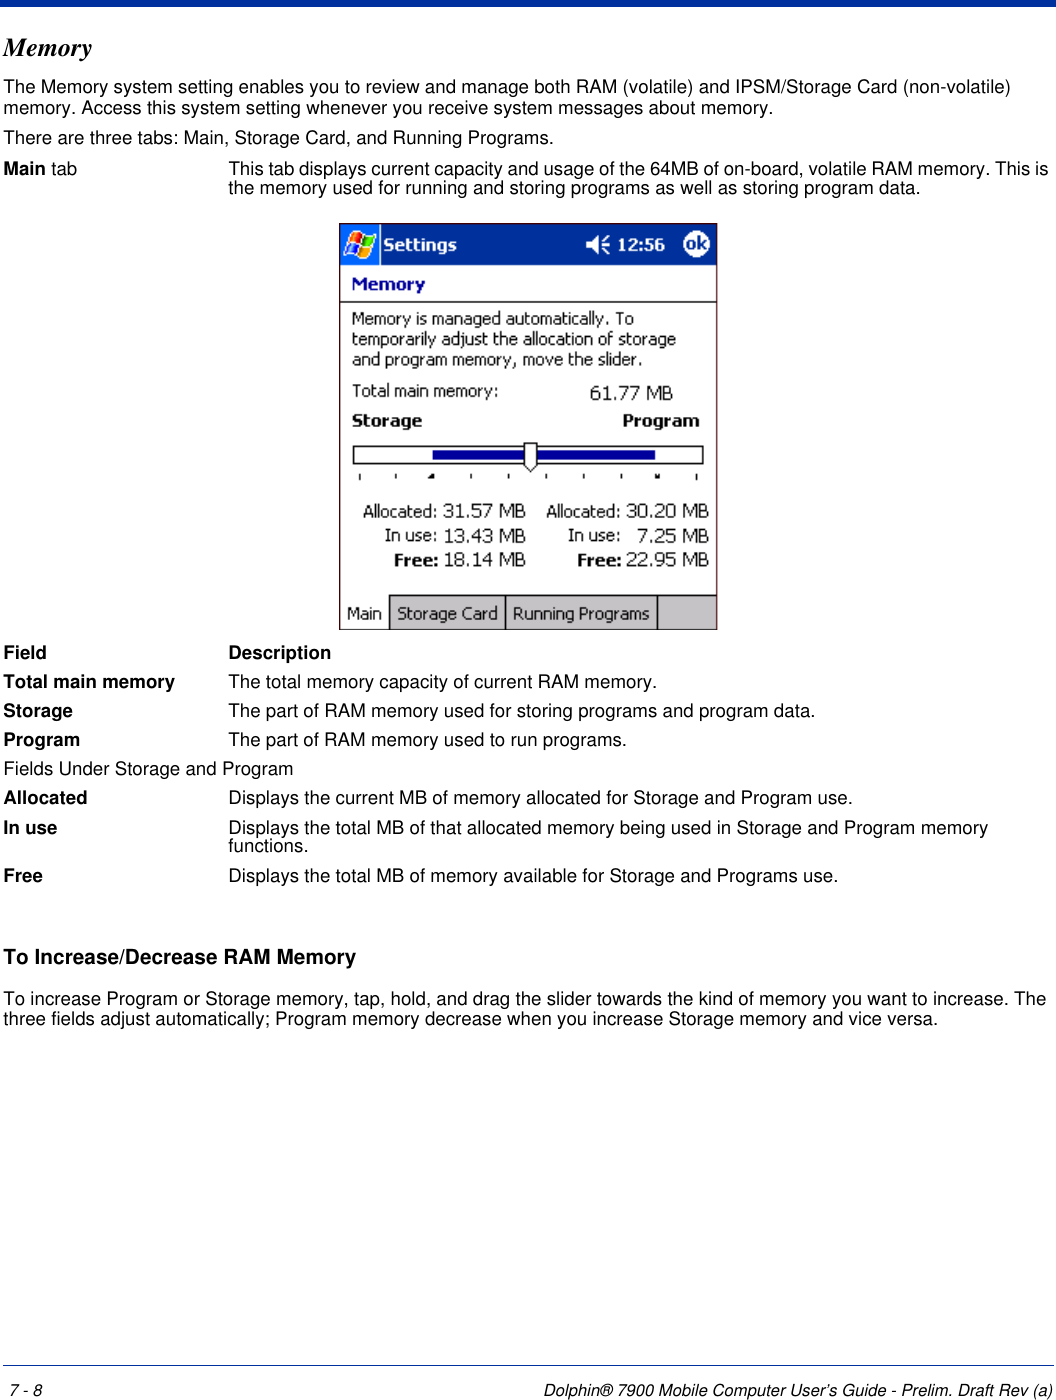
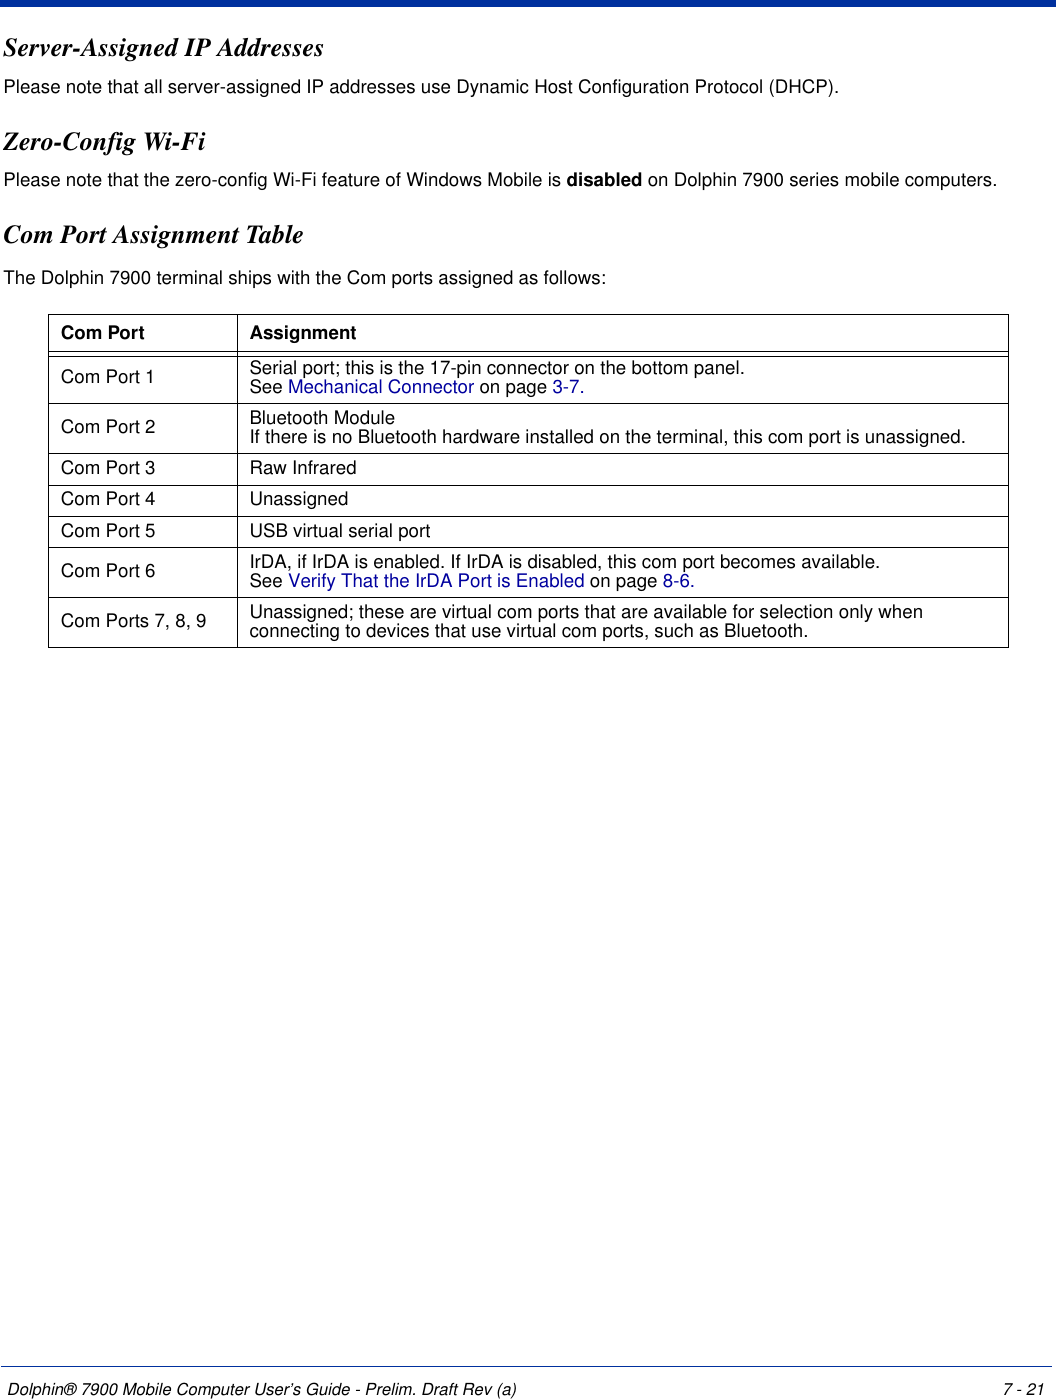
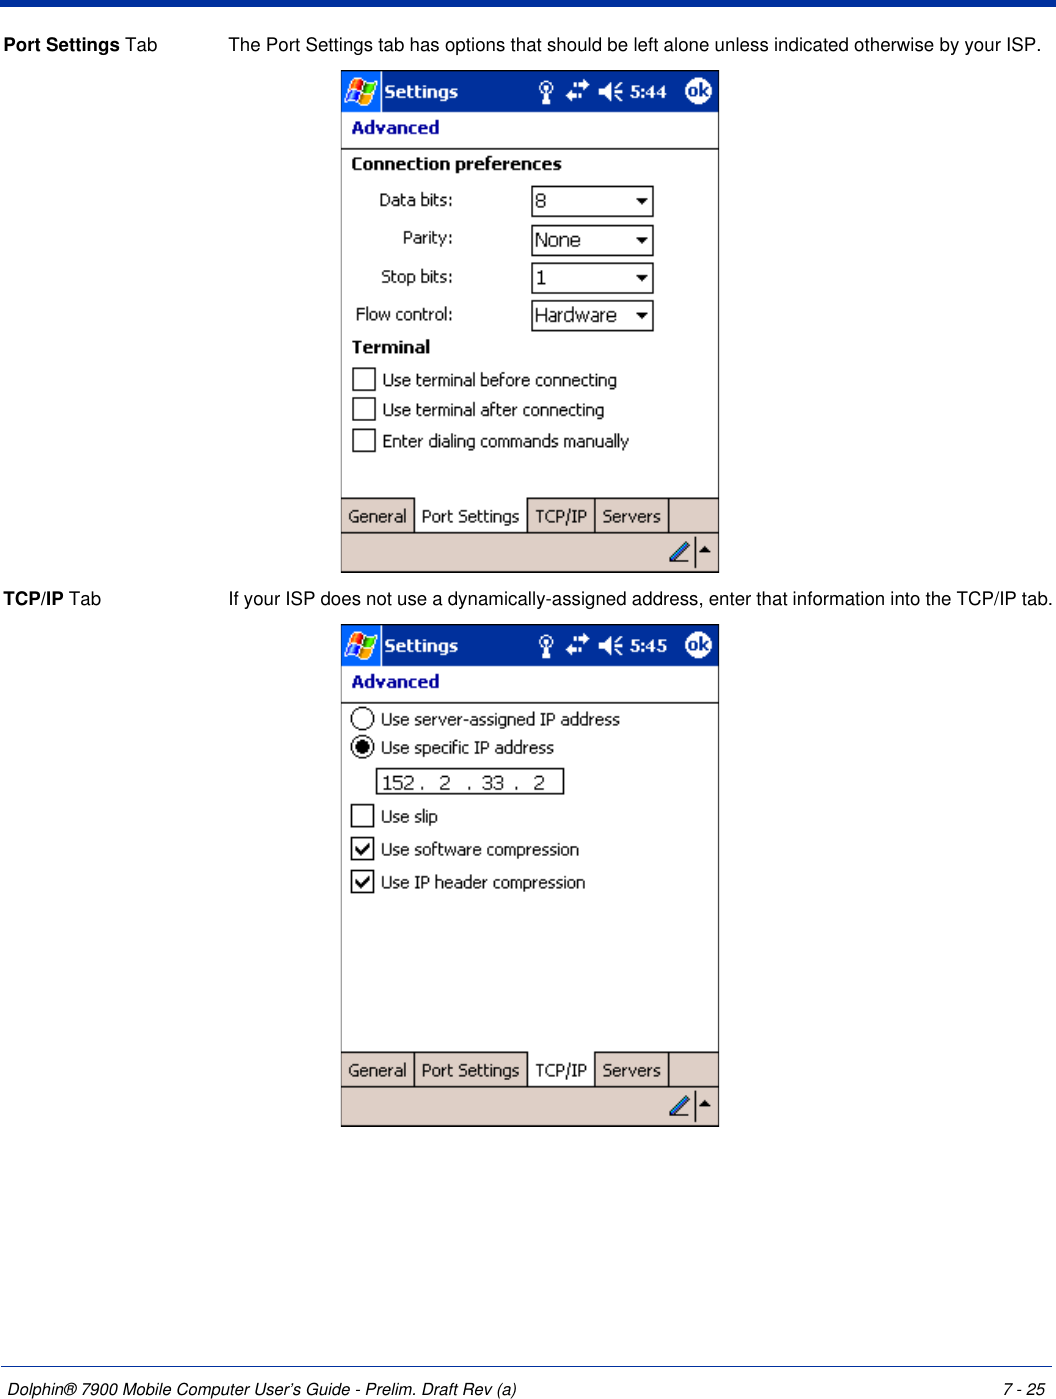
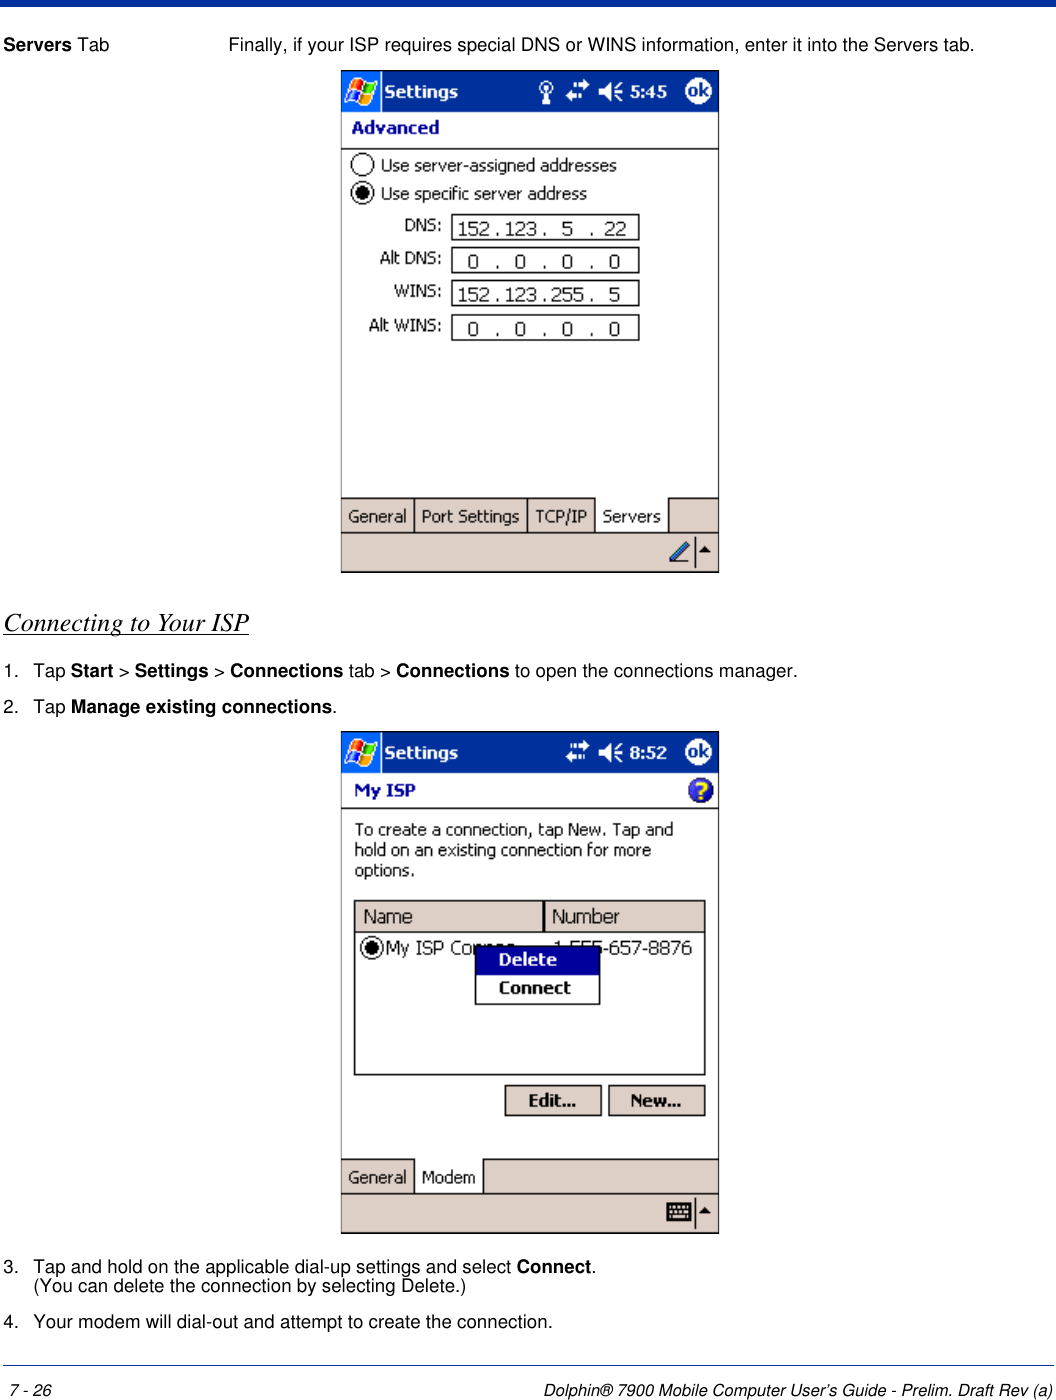
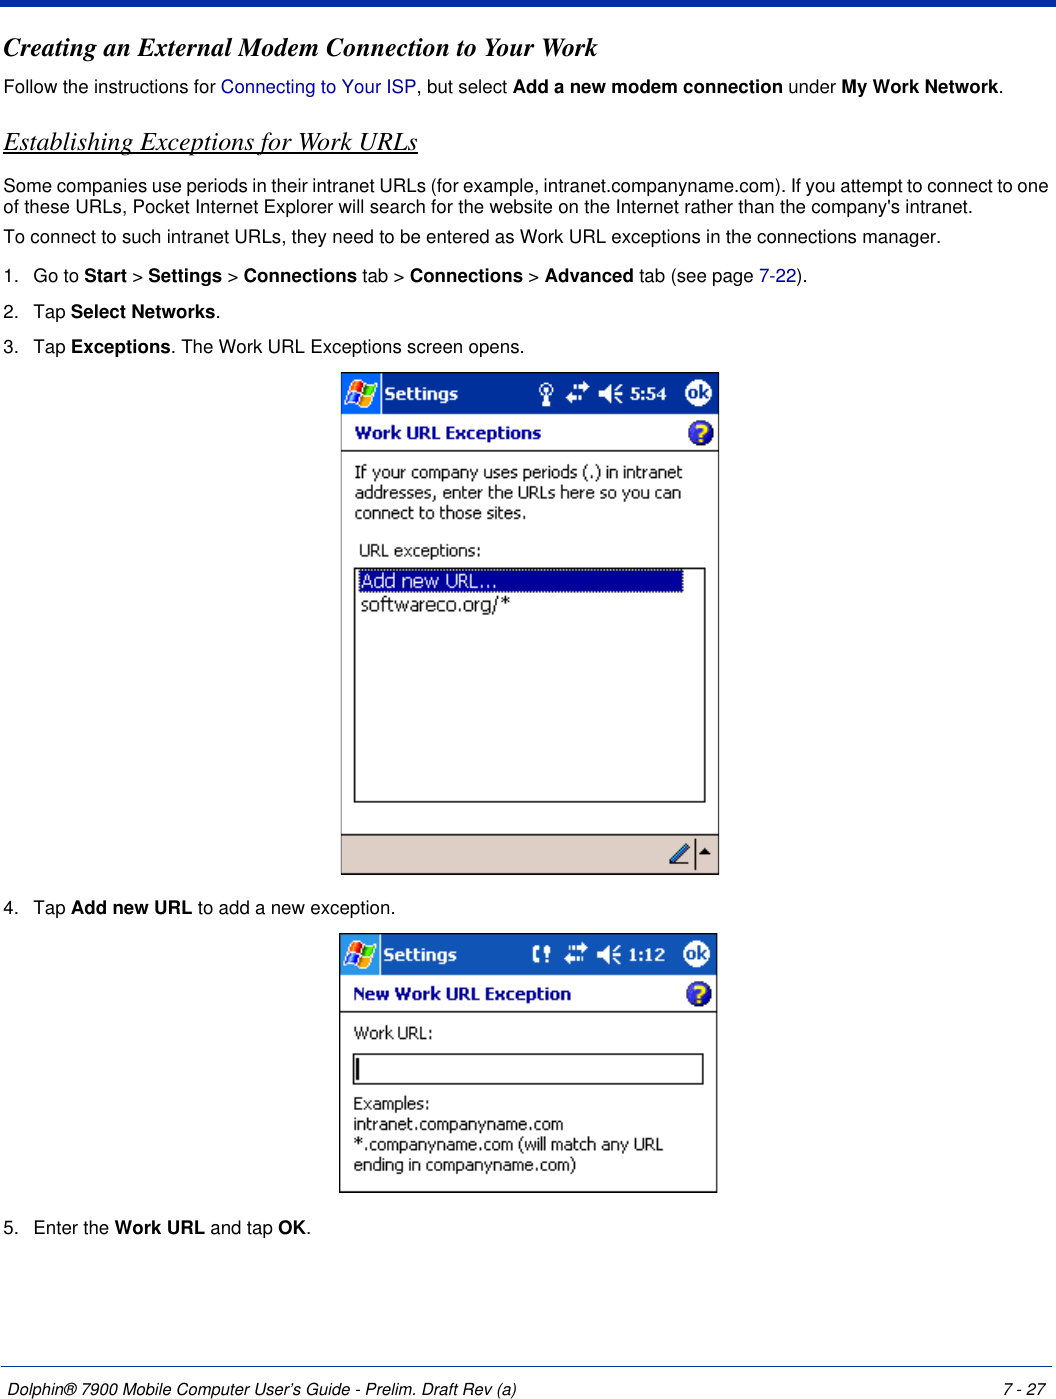
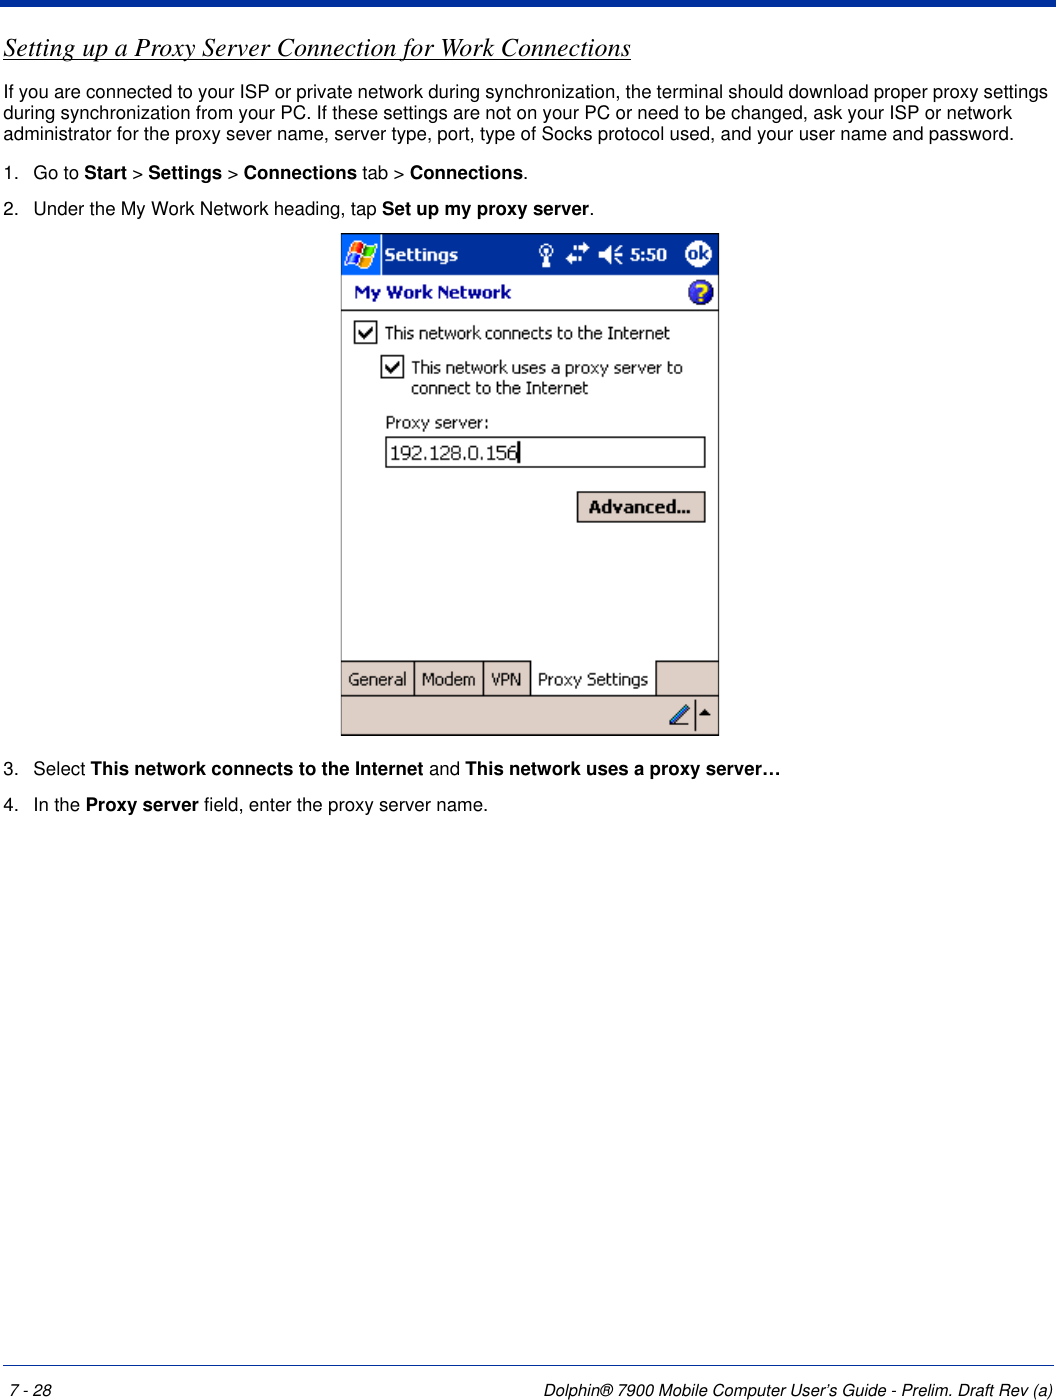
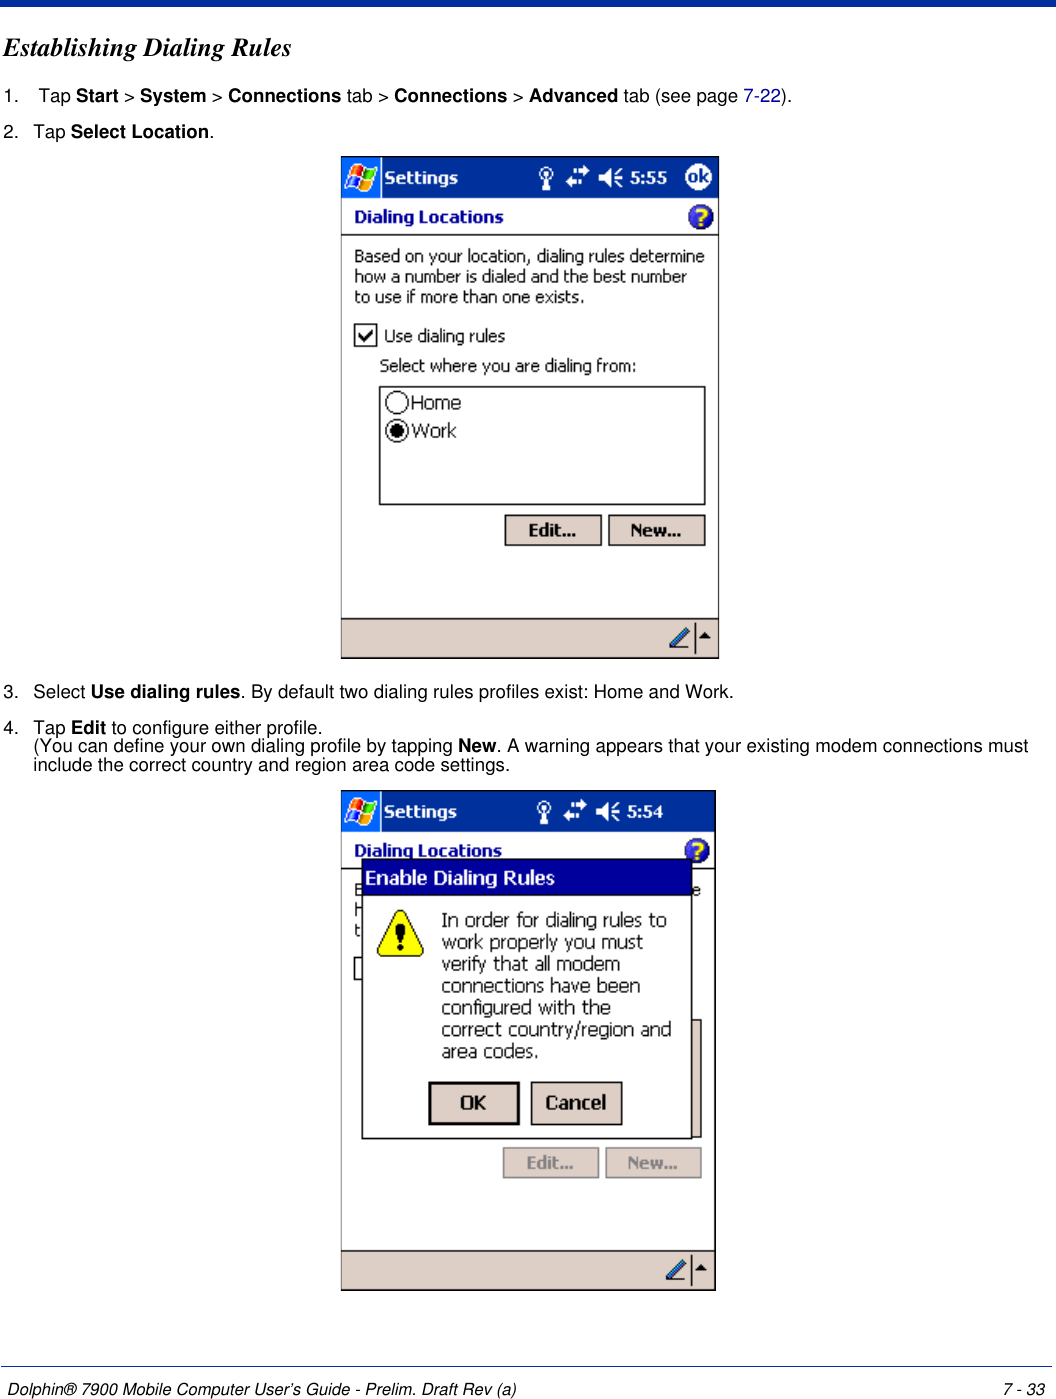
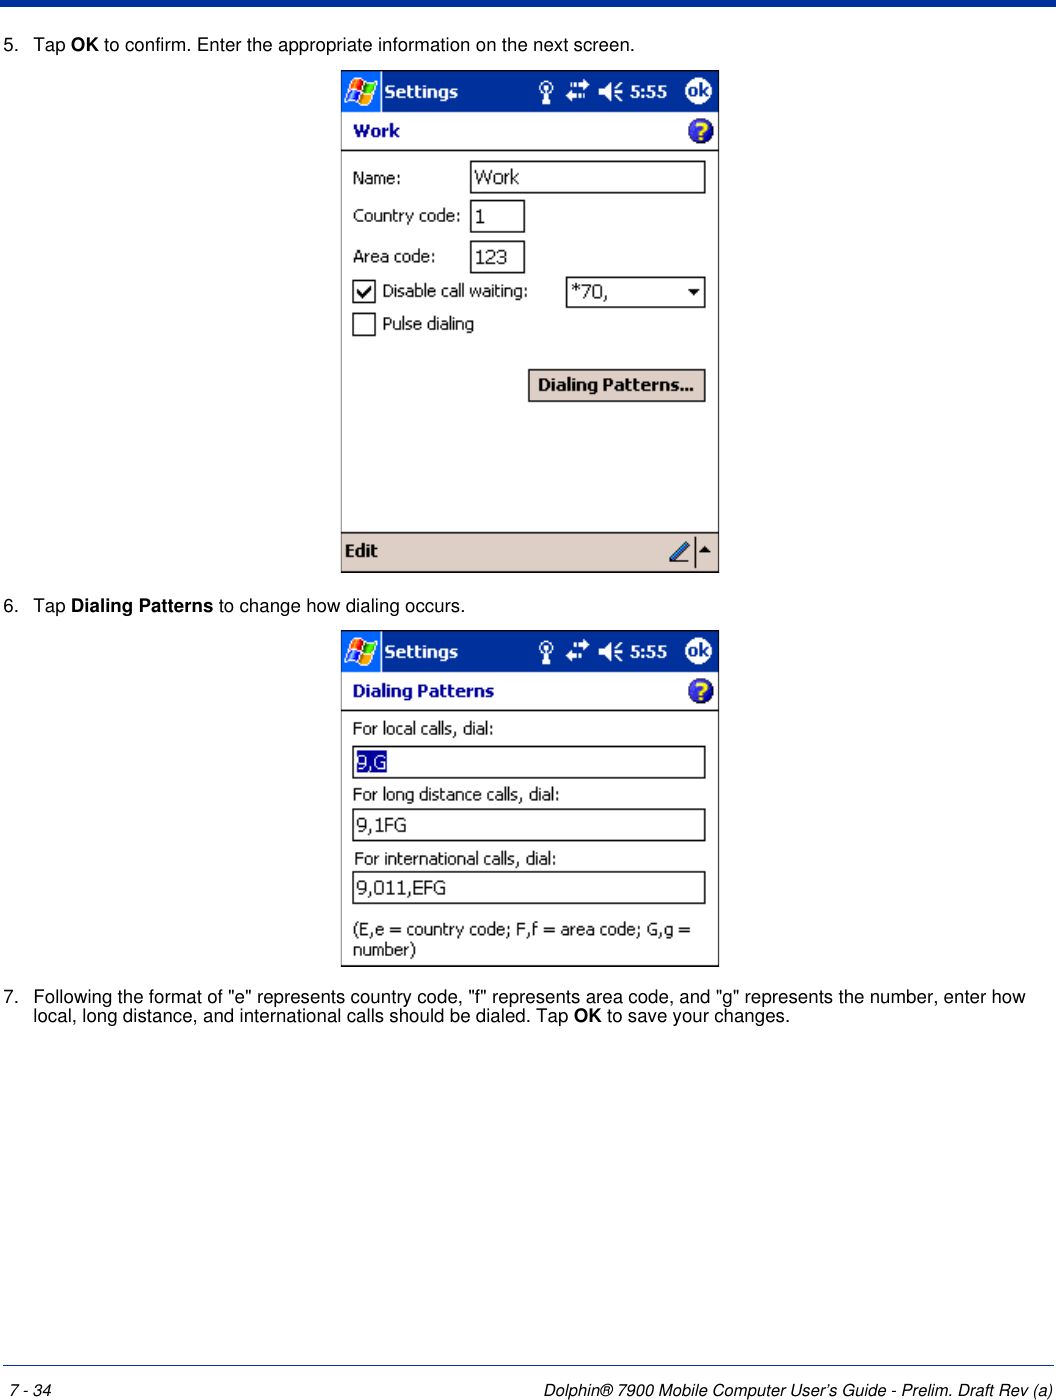
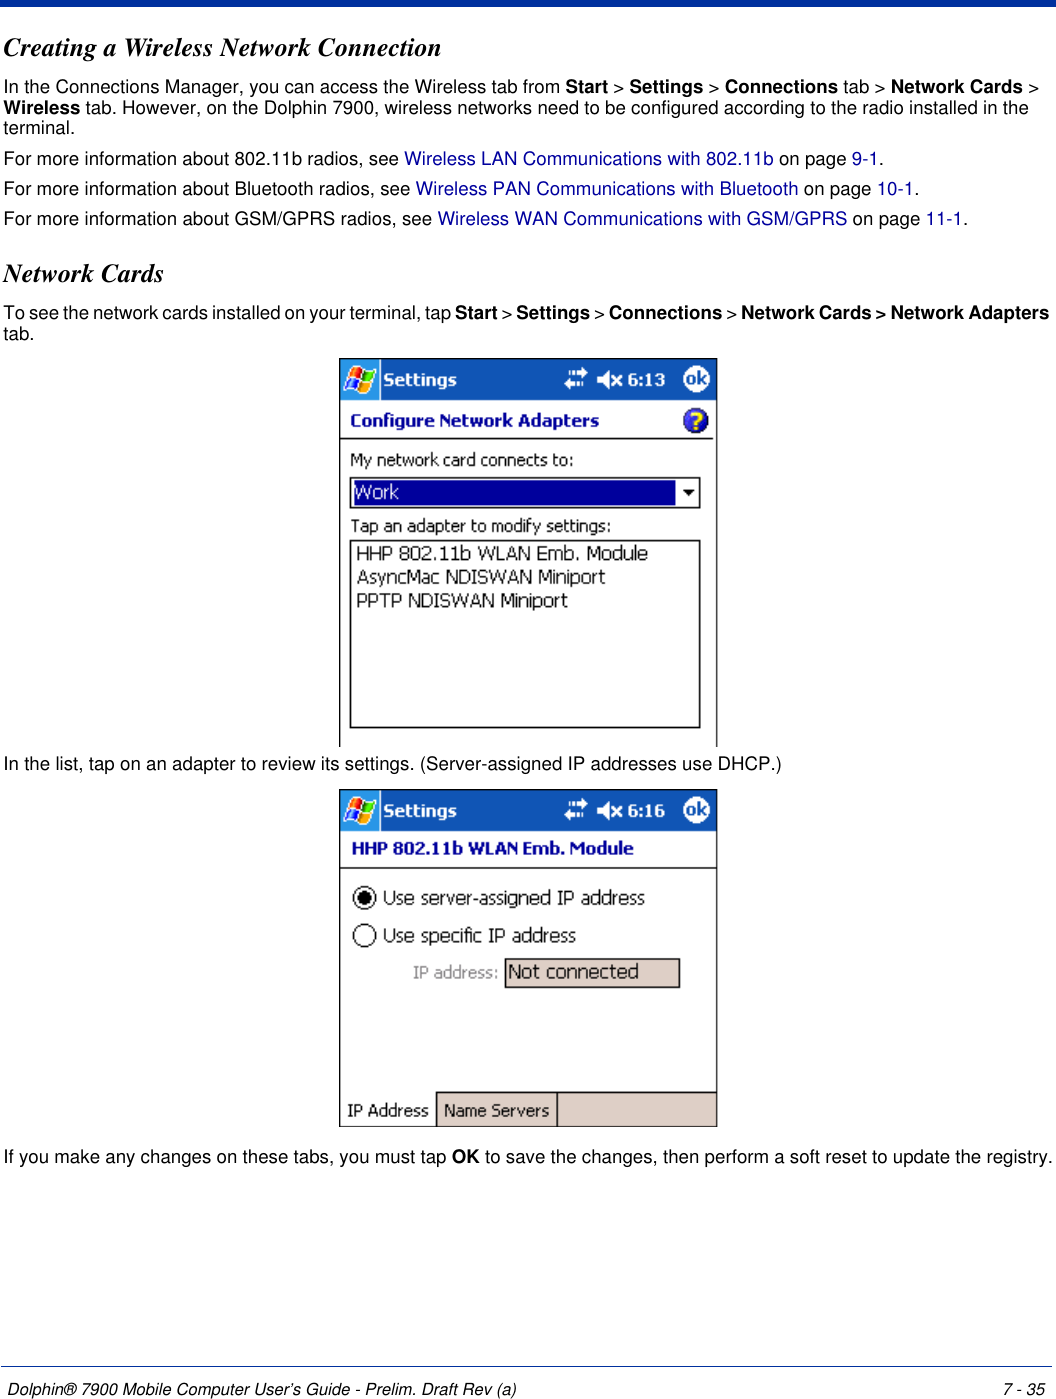
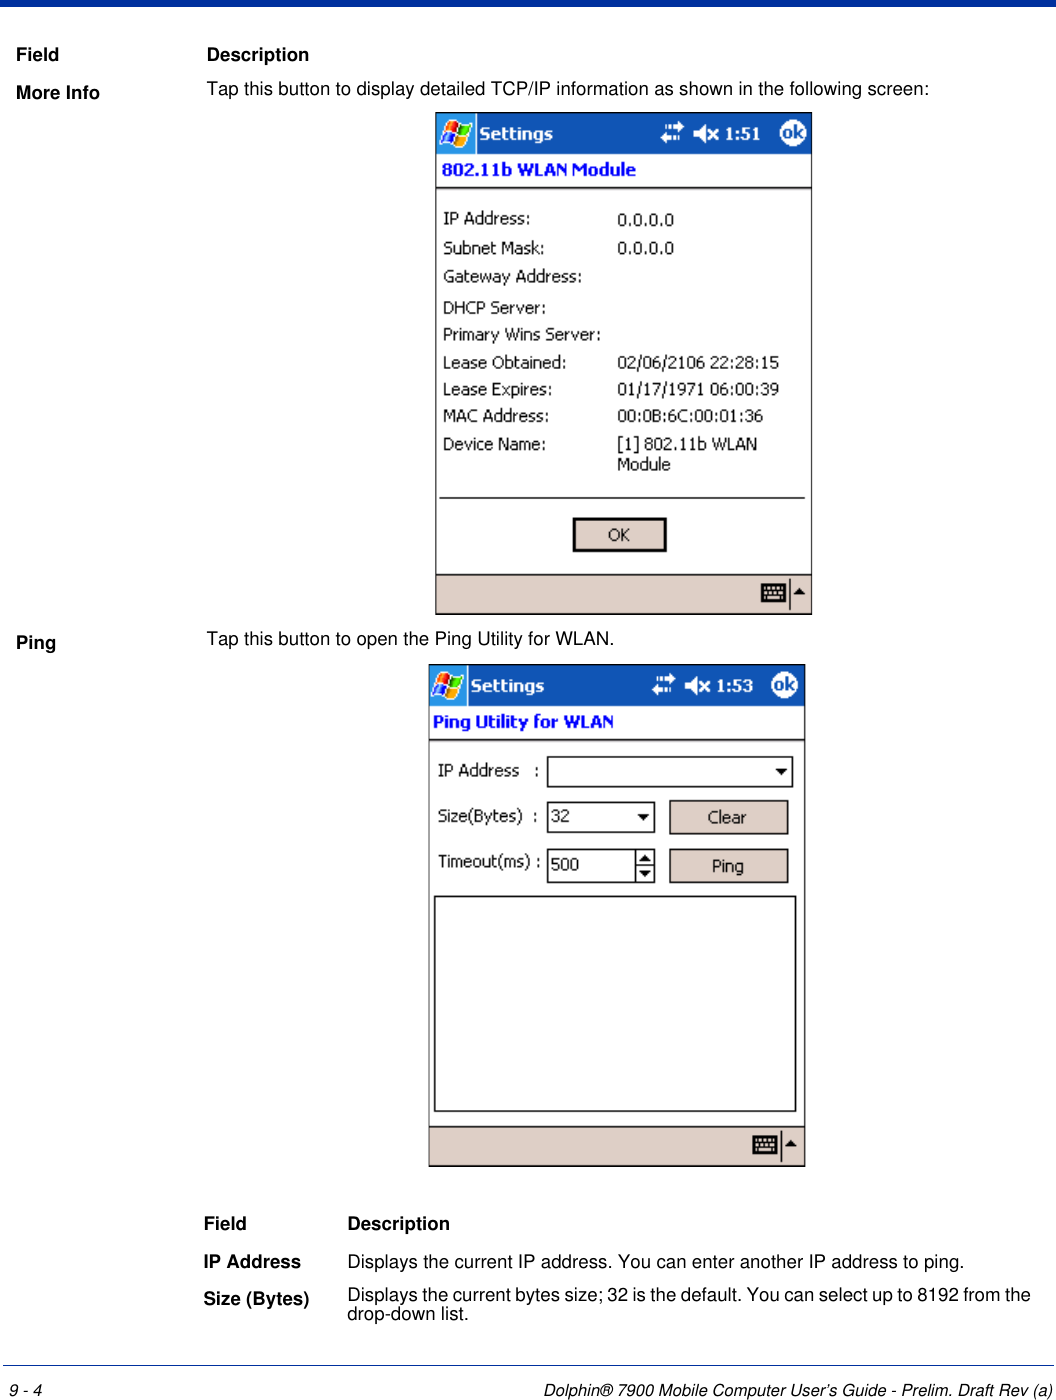
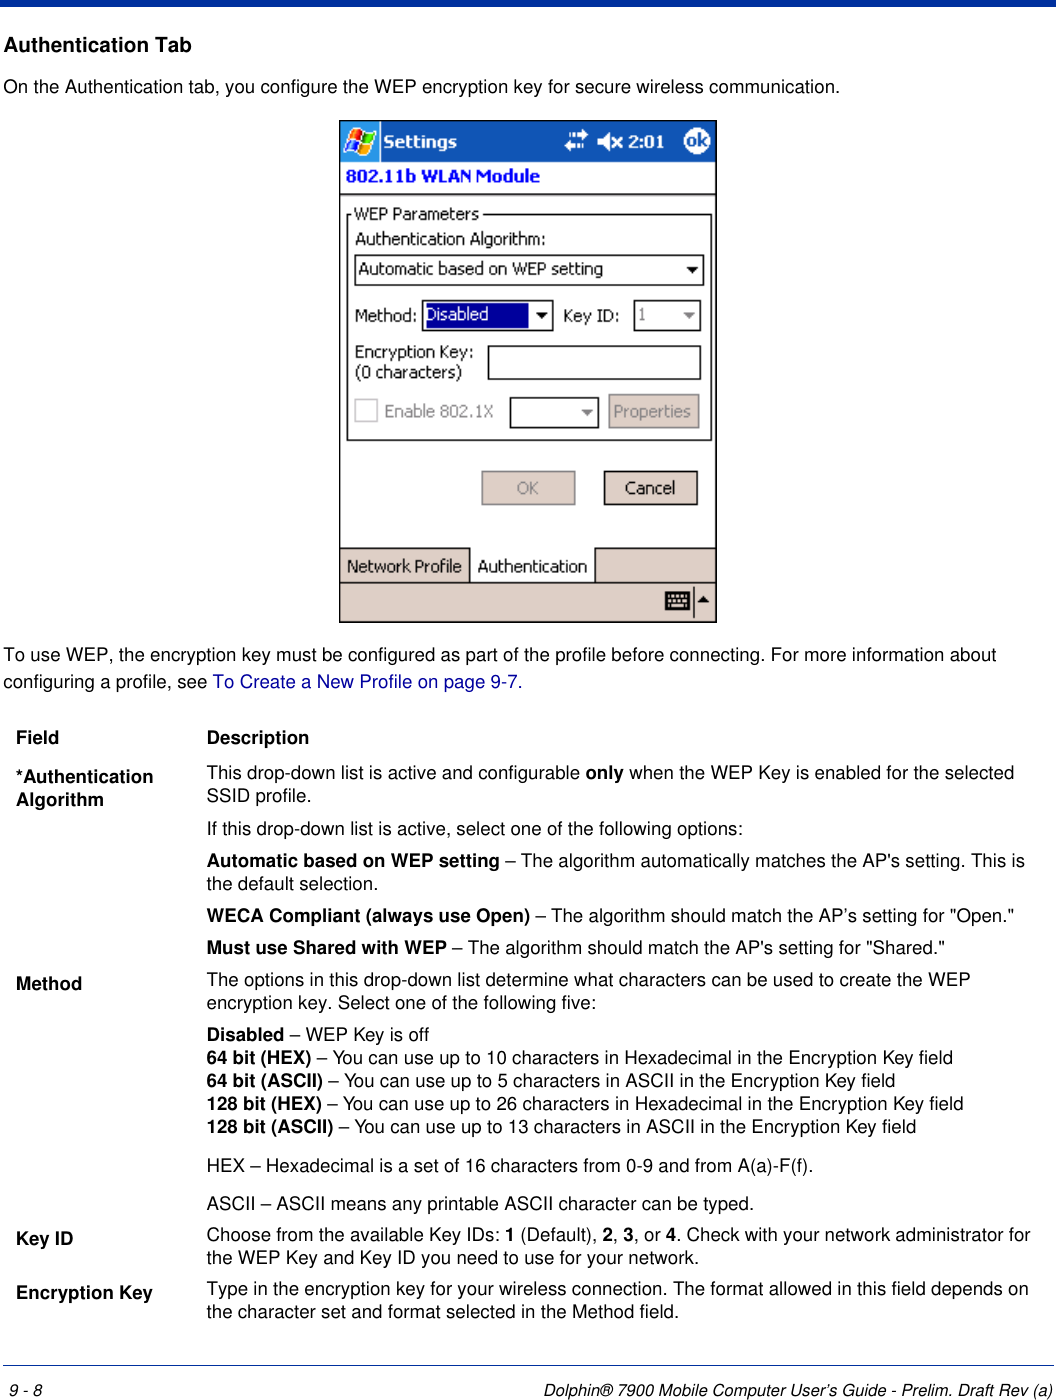
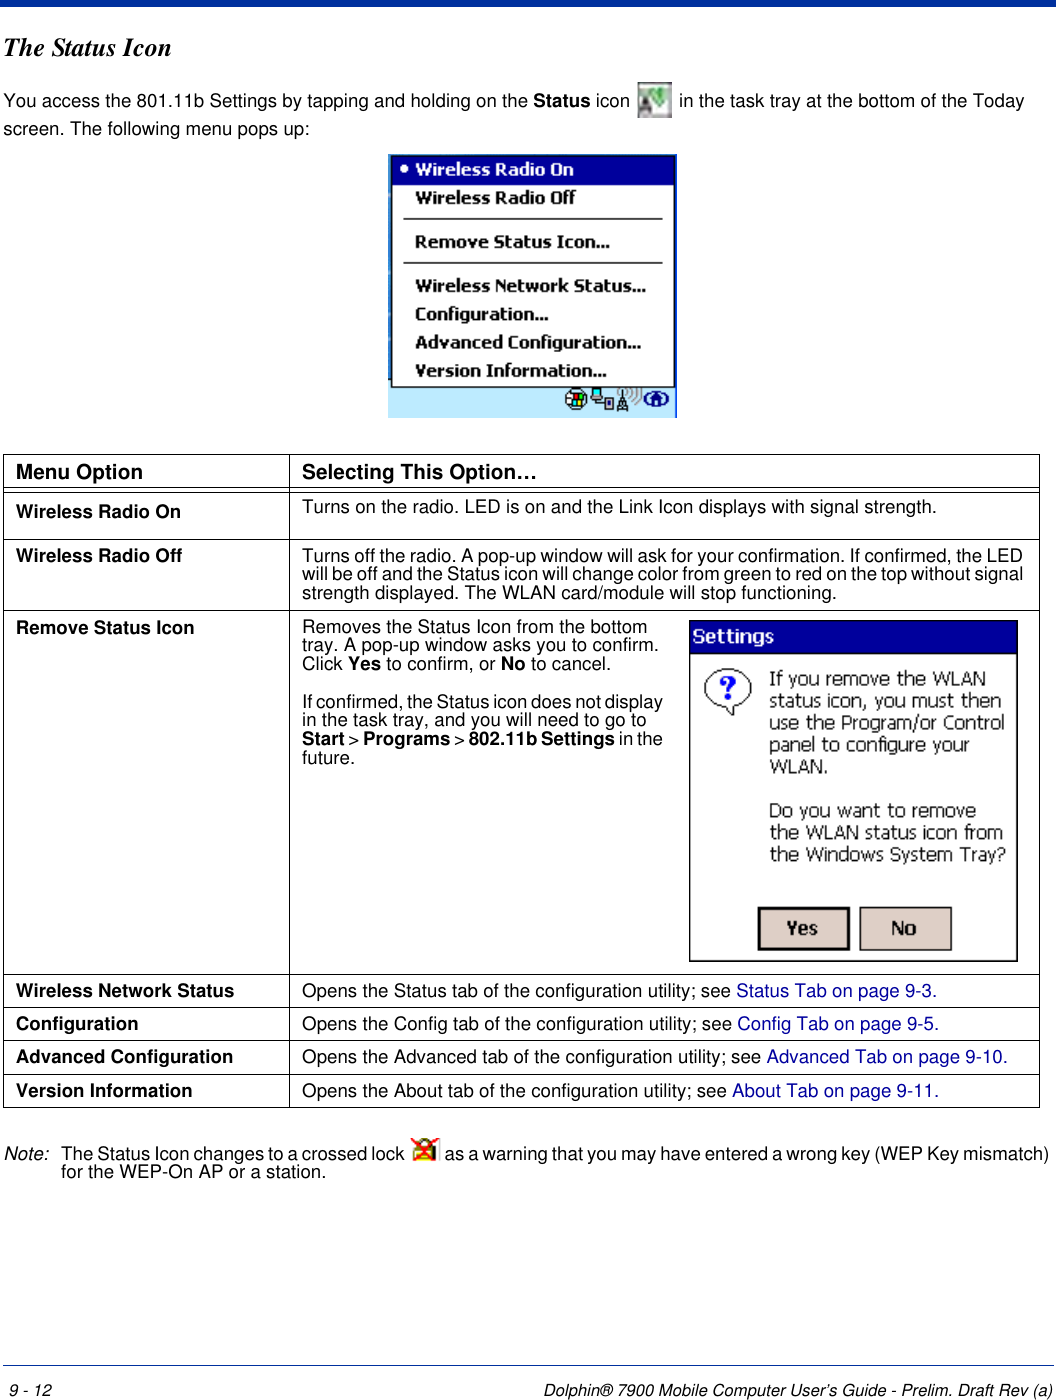
![Dolphin® 7900 Mobile Computer User’s Guide - Prelim. Draft Rev (a) 3 - 9Managing Battery PowerData and files saved on the Dolphin 7900 terminal may be stored in RAM; therefore, maintain a continuous power supply to the terminal to help prevent data loss. Letting the backup battery become fully discharged causes the terminal to lose all data in RAM. The internal battery discharges prematurely if there is not at least a partially charged battery in the terminal. When you remove a battery pack, insert another charged battery pack in the Dolphin. If the main battery is low and the terminal is in suspend mode, pressing the SCAN or Power button will not wake the Dolphin 7900 terminal; you must replace the discharged battery with a fully charged battery.Default Low and Critical Battery PointsThe navigation bar at the top of the screen displays battery warning icons when the main battery reaches a low and critical battery points. For details about these warning icons, see Status Icons on page 4-15. If the navigation bar does not contain a warning icon, then the battery is adequately charged. The Dolphin 7900 ships with default low and critical battery points already programmed in the registry. The registry contains two DWORD settings in the [HKEY_LOCAL_MACHINE\System\CurrentControlSet\Control\Power] entry:“LowBatt”=19 (25%)This sets the Low battery point to 25 percent (19 hex = 25 decimal). The low battery setting is the point at which the user is notified that the battery is low. The user is notified only once for a low battery.“CriticalBatt”=a (10%)This sets the Critical Battery point to 10 percent (a hex = 10 decimal). The critical battery setting is the point at which the customer is warned that the battery charge is very low. This warning is posted every 3 minutes until the situation is corrected.Note: Warnings do not appear when the terminal is on external power.Setting Critical and Low Battery PointsDevelopers can re-reset the default battery points in the RegEdit utility under HHP Utils. Tap Start > HHP Utils > RegEdit. In the RegEdit utility, drill-down to HKEY_LOCAL_MACHINE > System > CurrentControlSet > Control > Power. The Battery Points appear in the list.Tap the Value Name to change the Value Data. You can reset the Value Data from 0 (no warning) to 99 (would nearly always warn). Tap OK to save changes.](https://usermanual.wiki/Honeywell/7900L0P.User-Guide-Part-1/User-Guide-480383-Page-39.png)


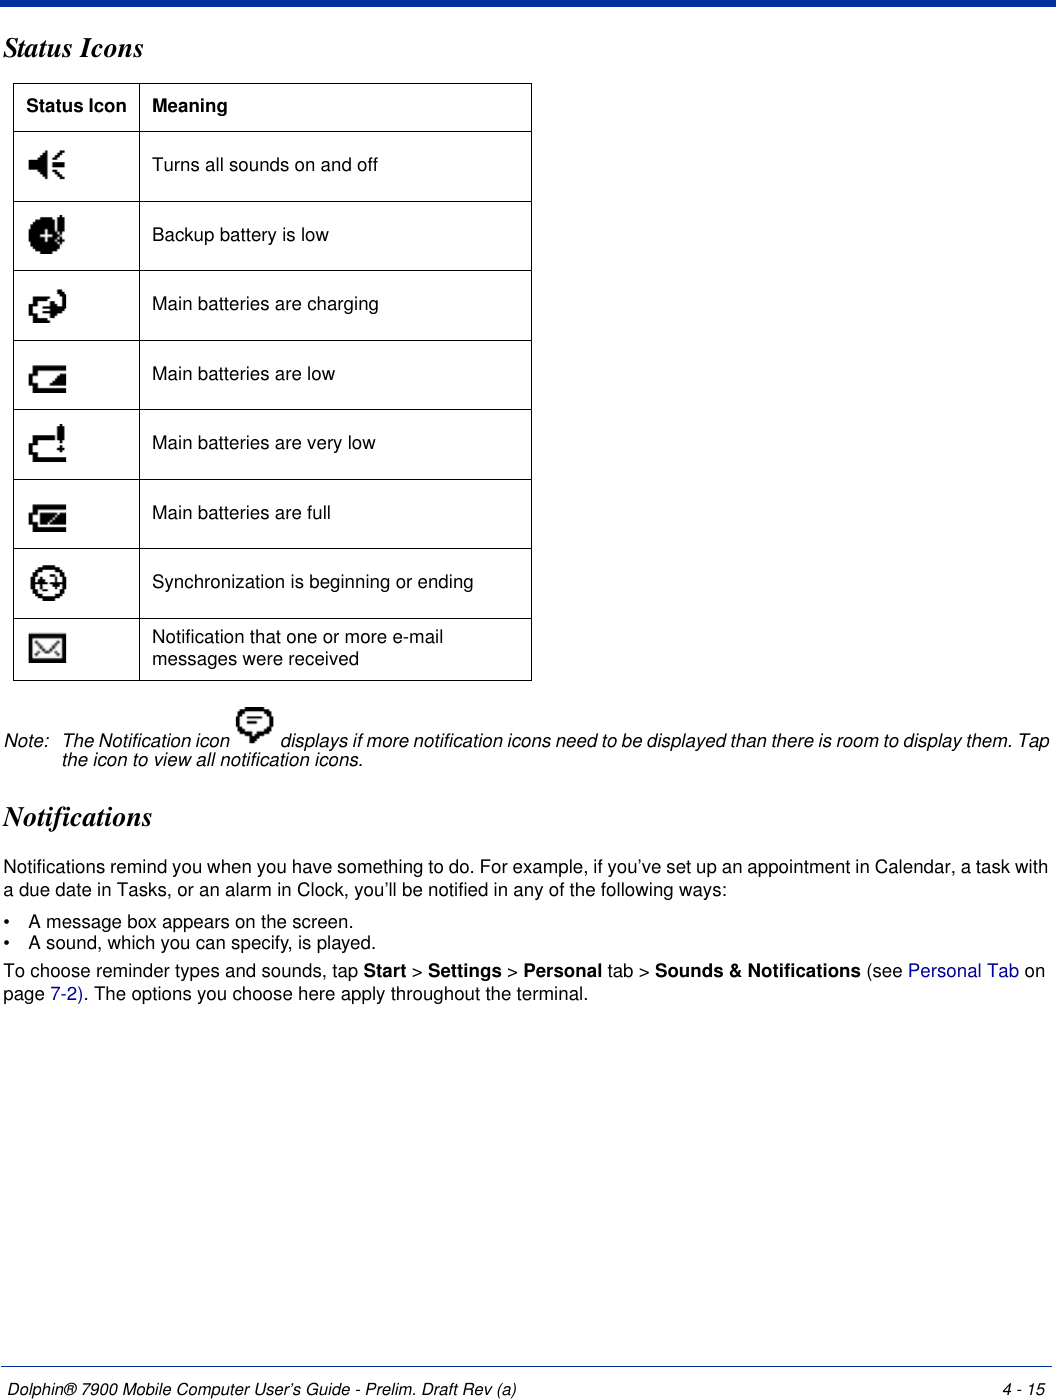

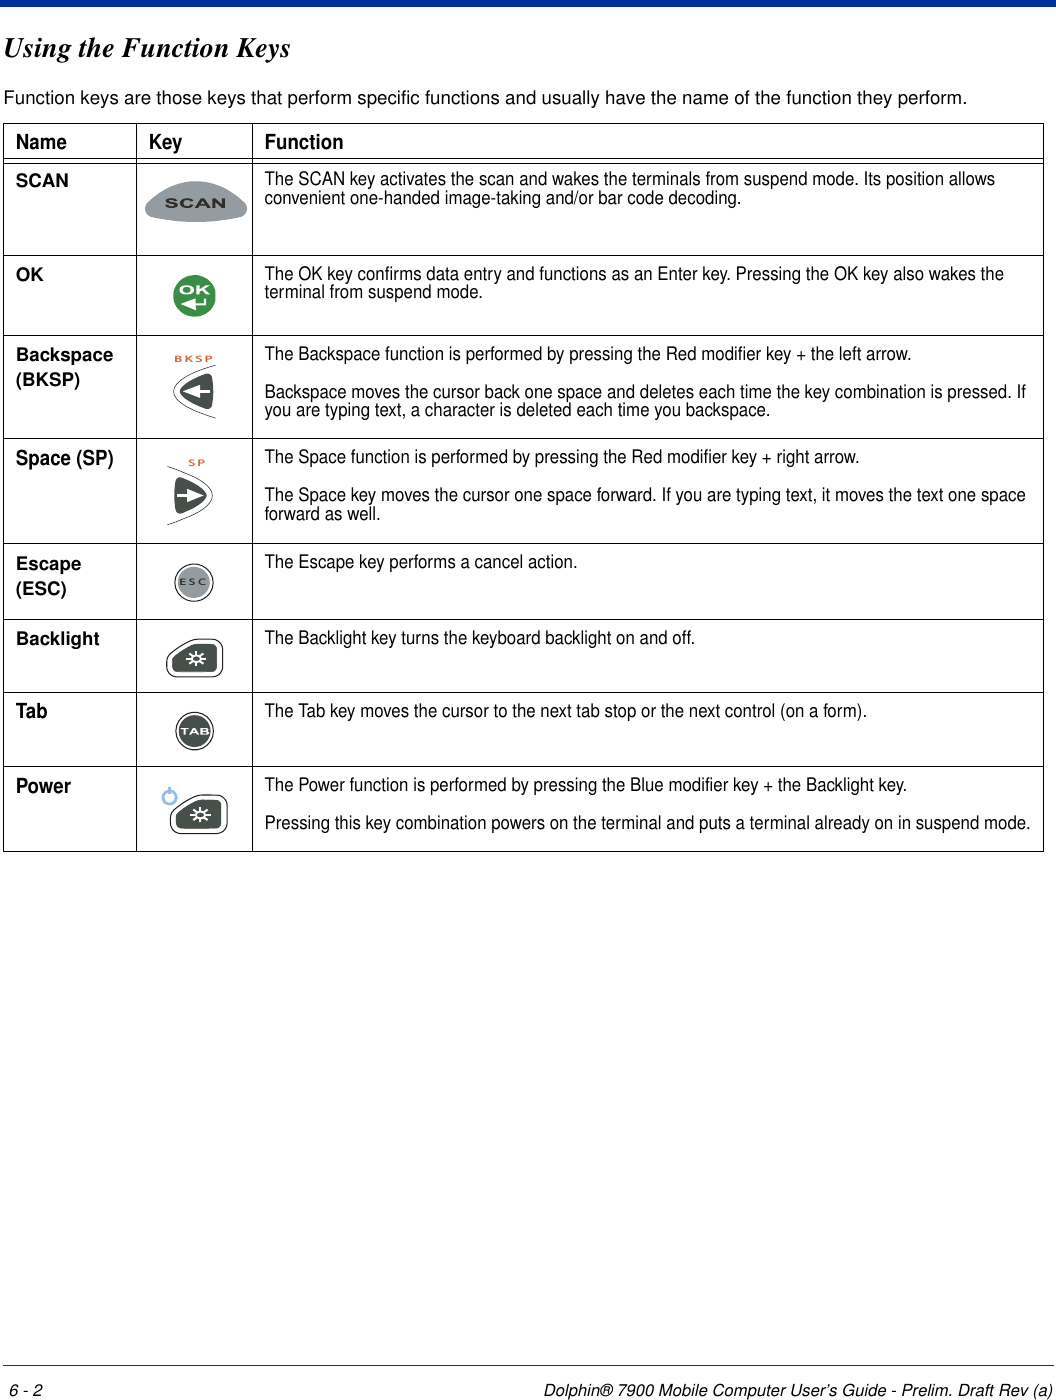
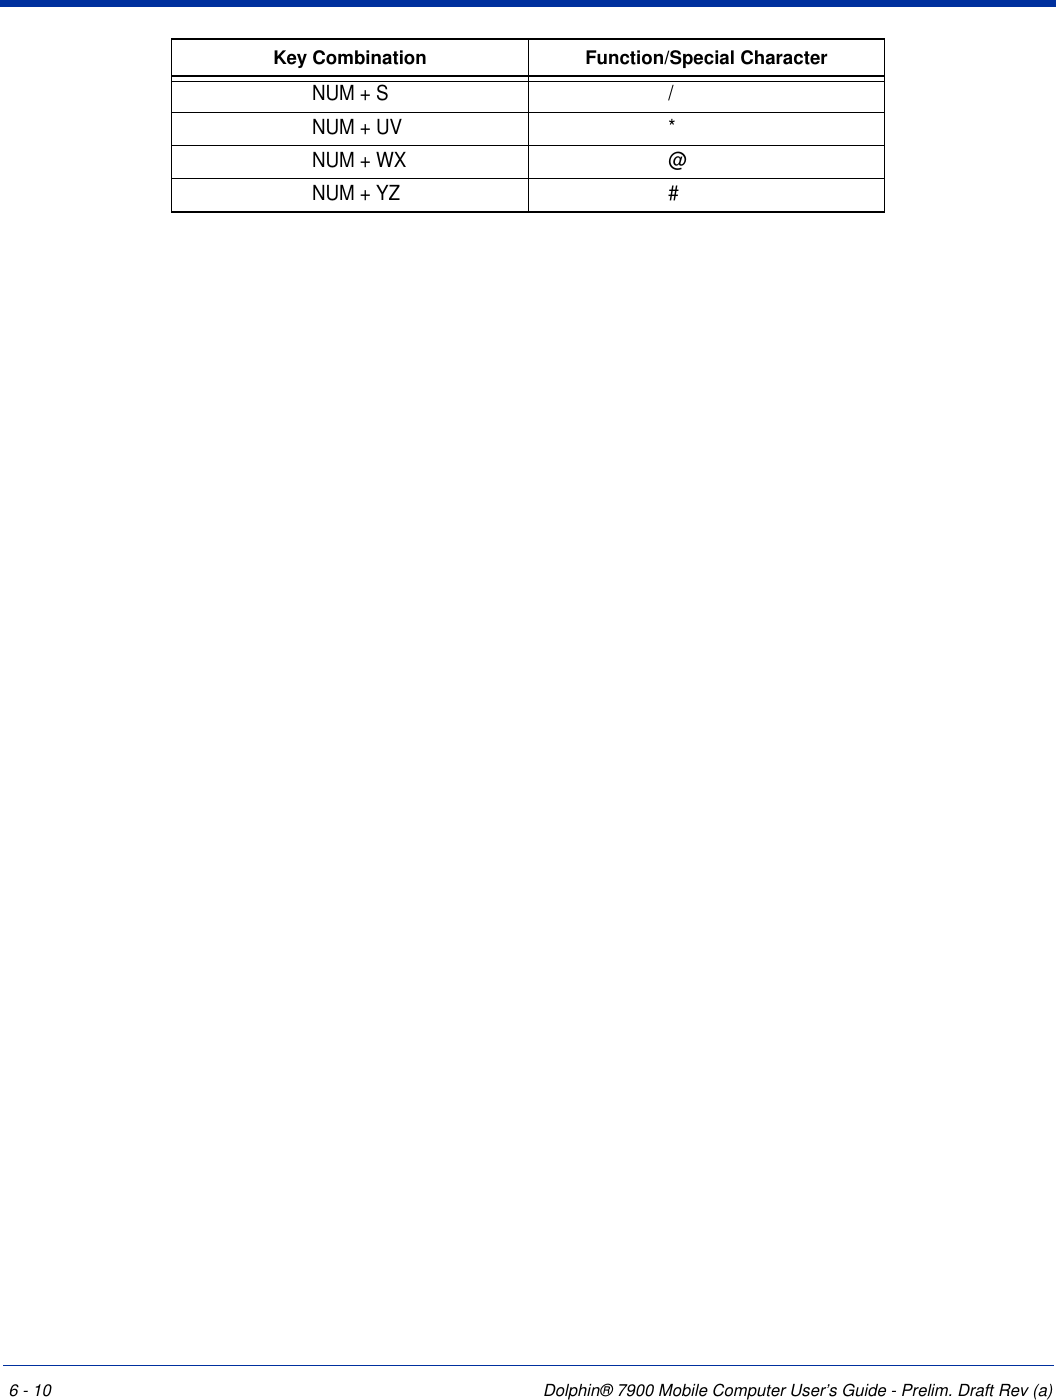

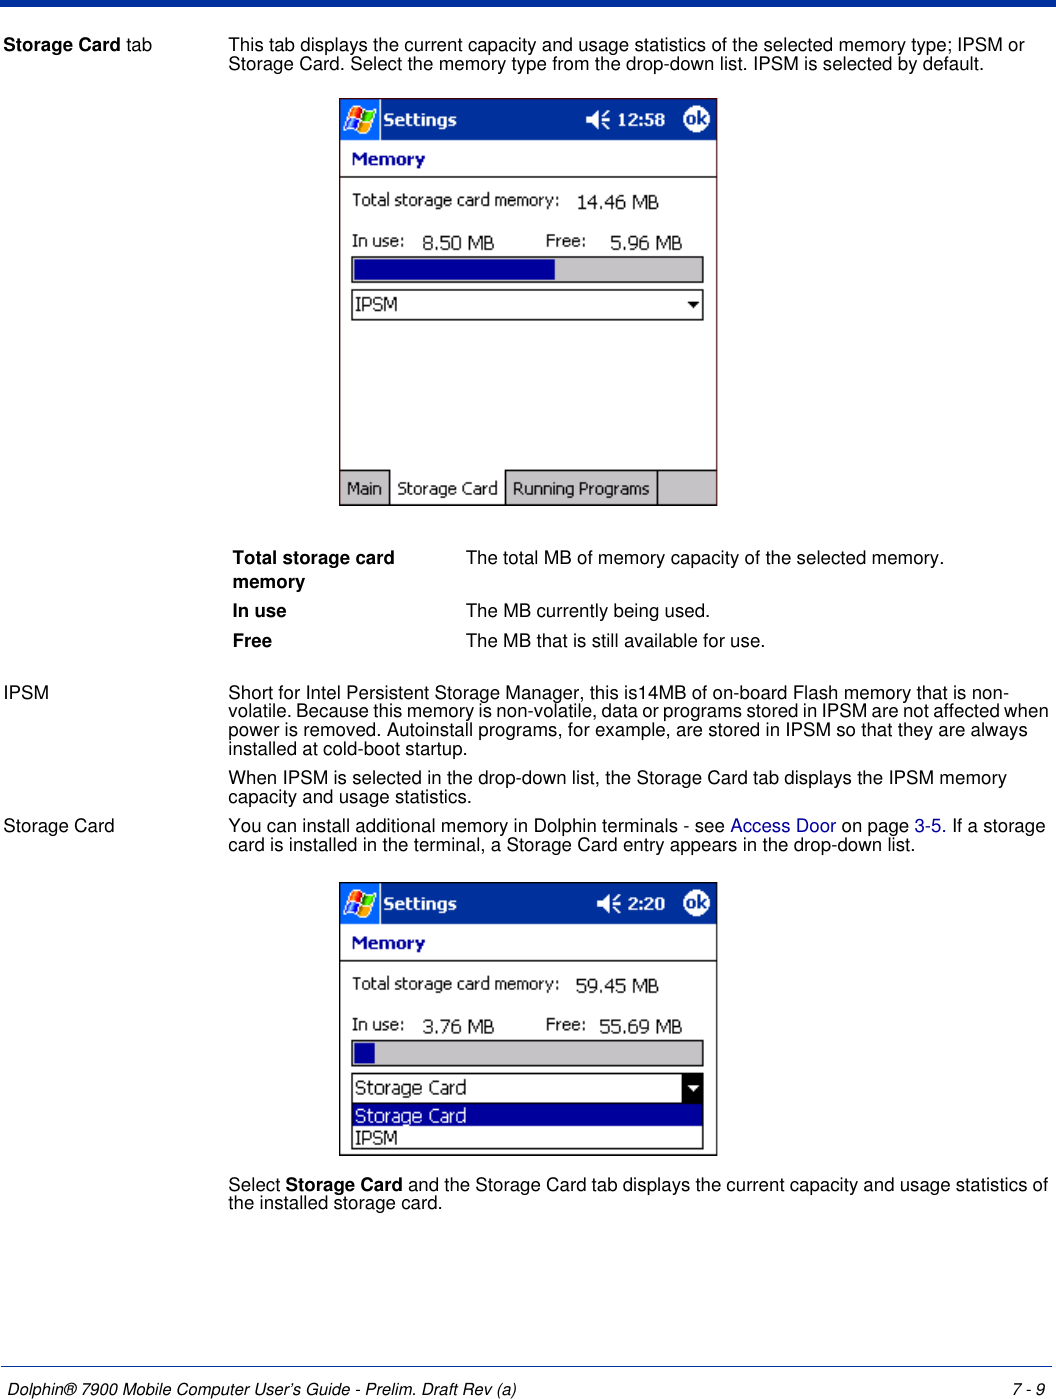

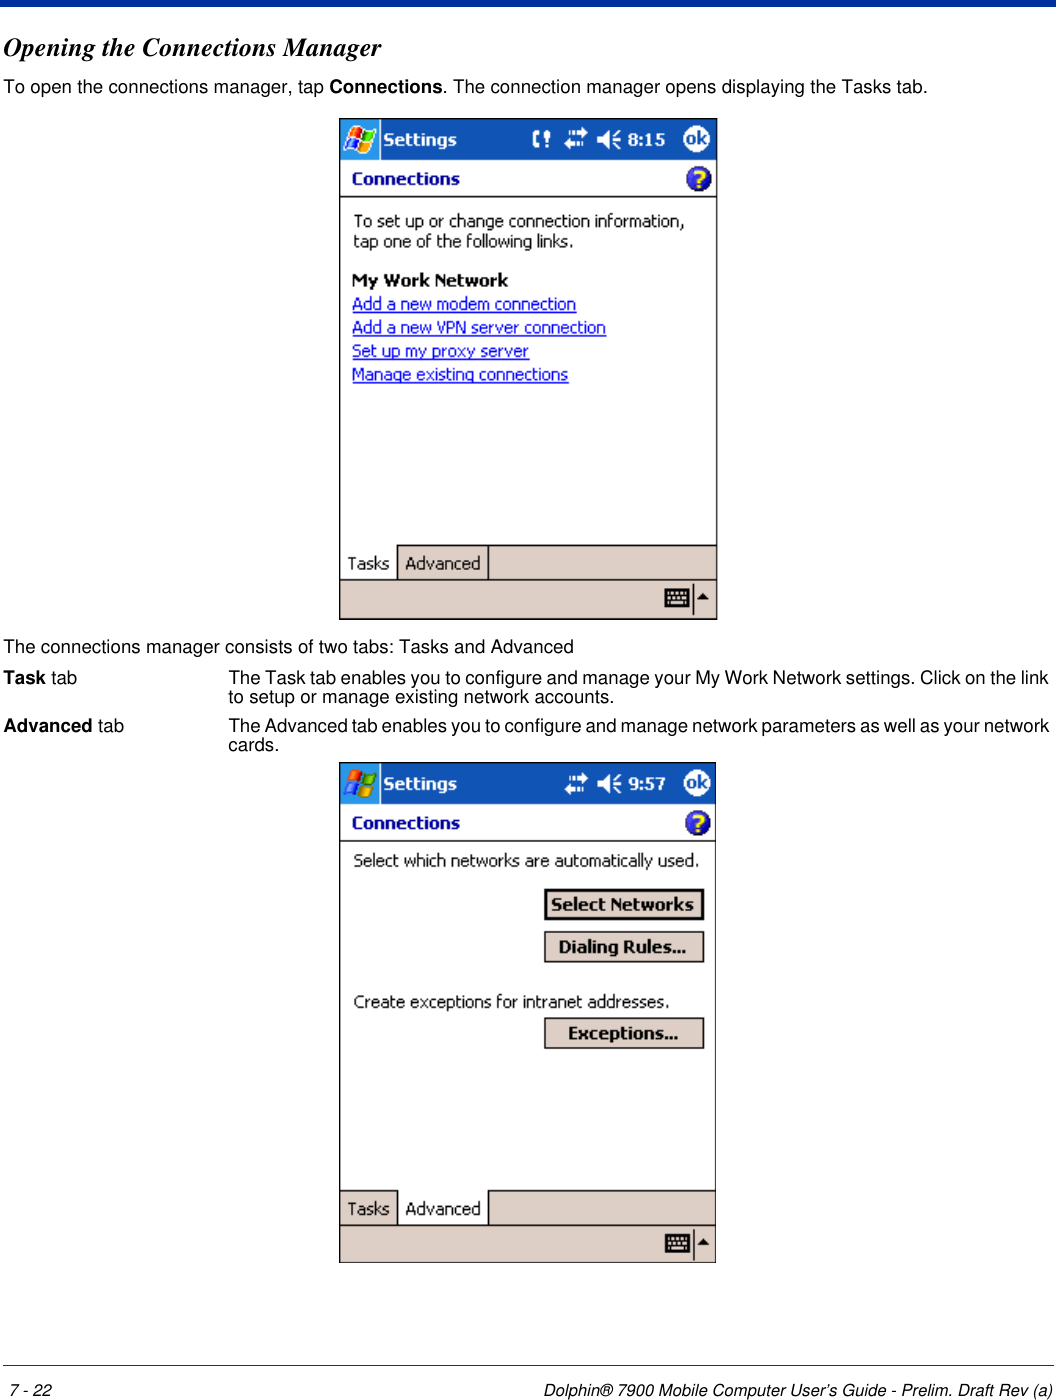

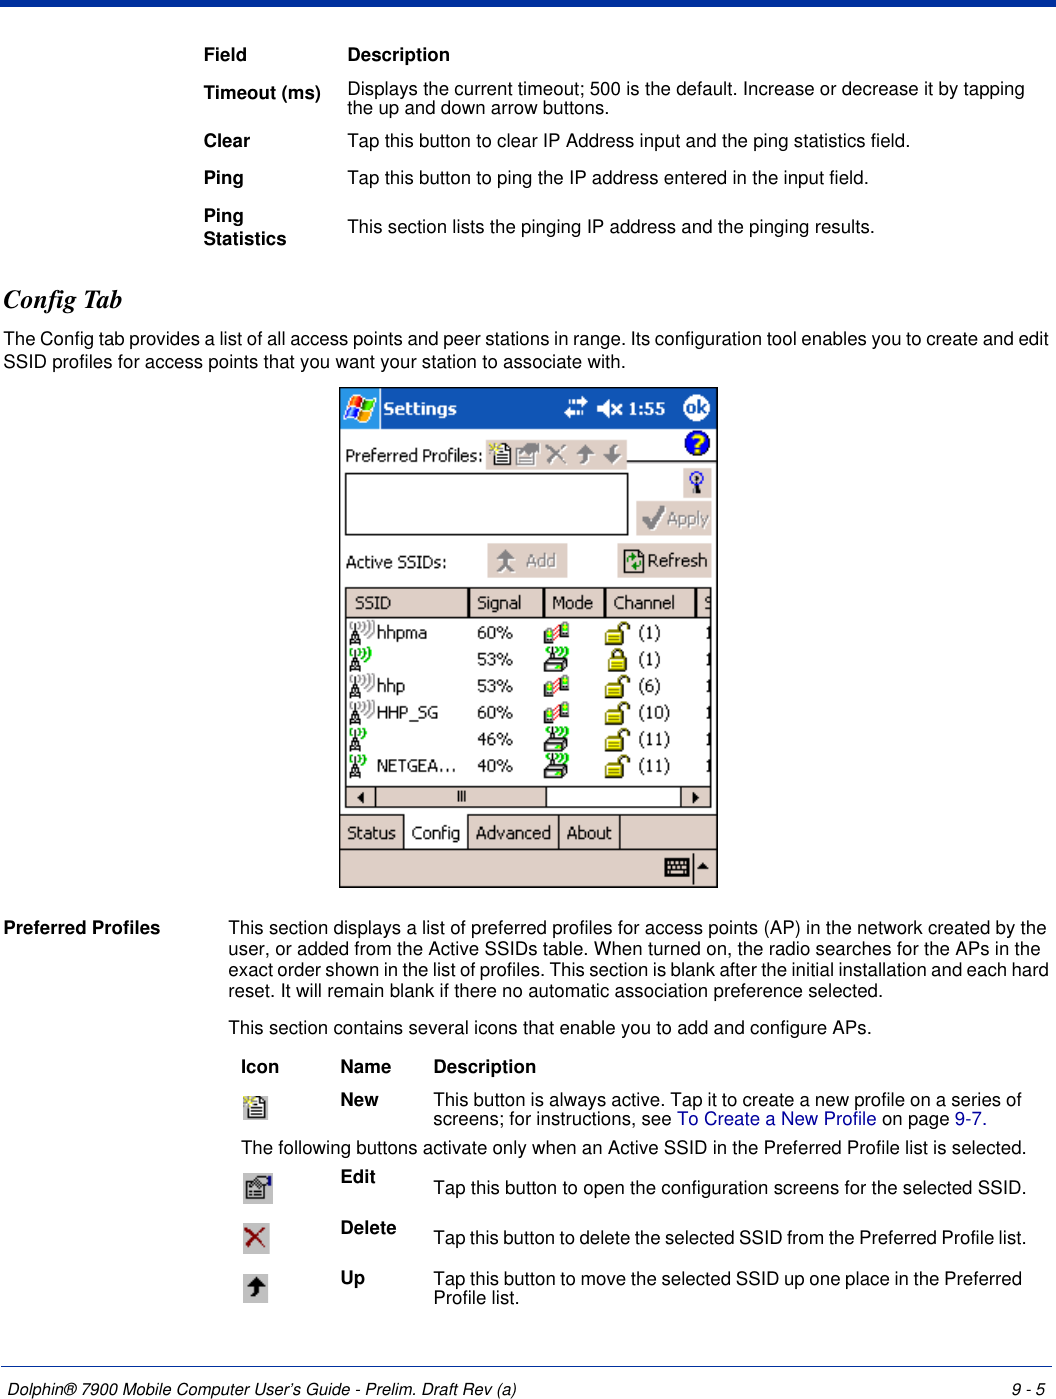
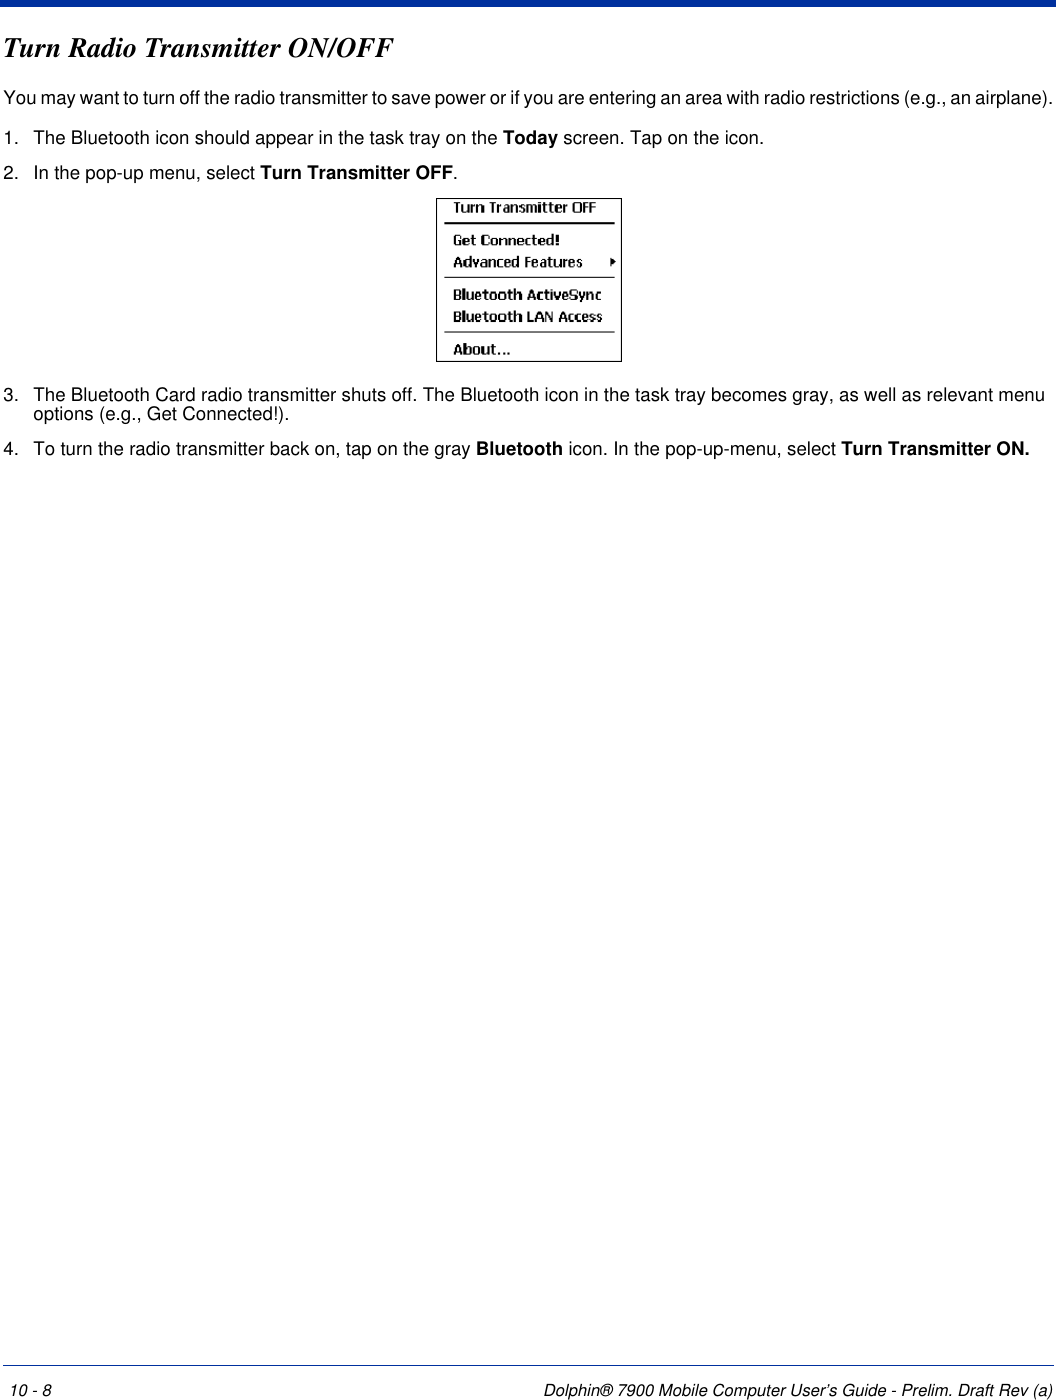
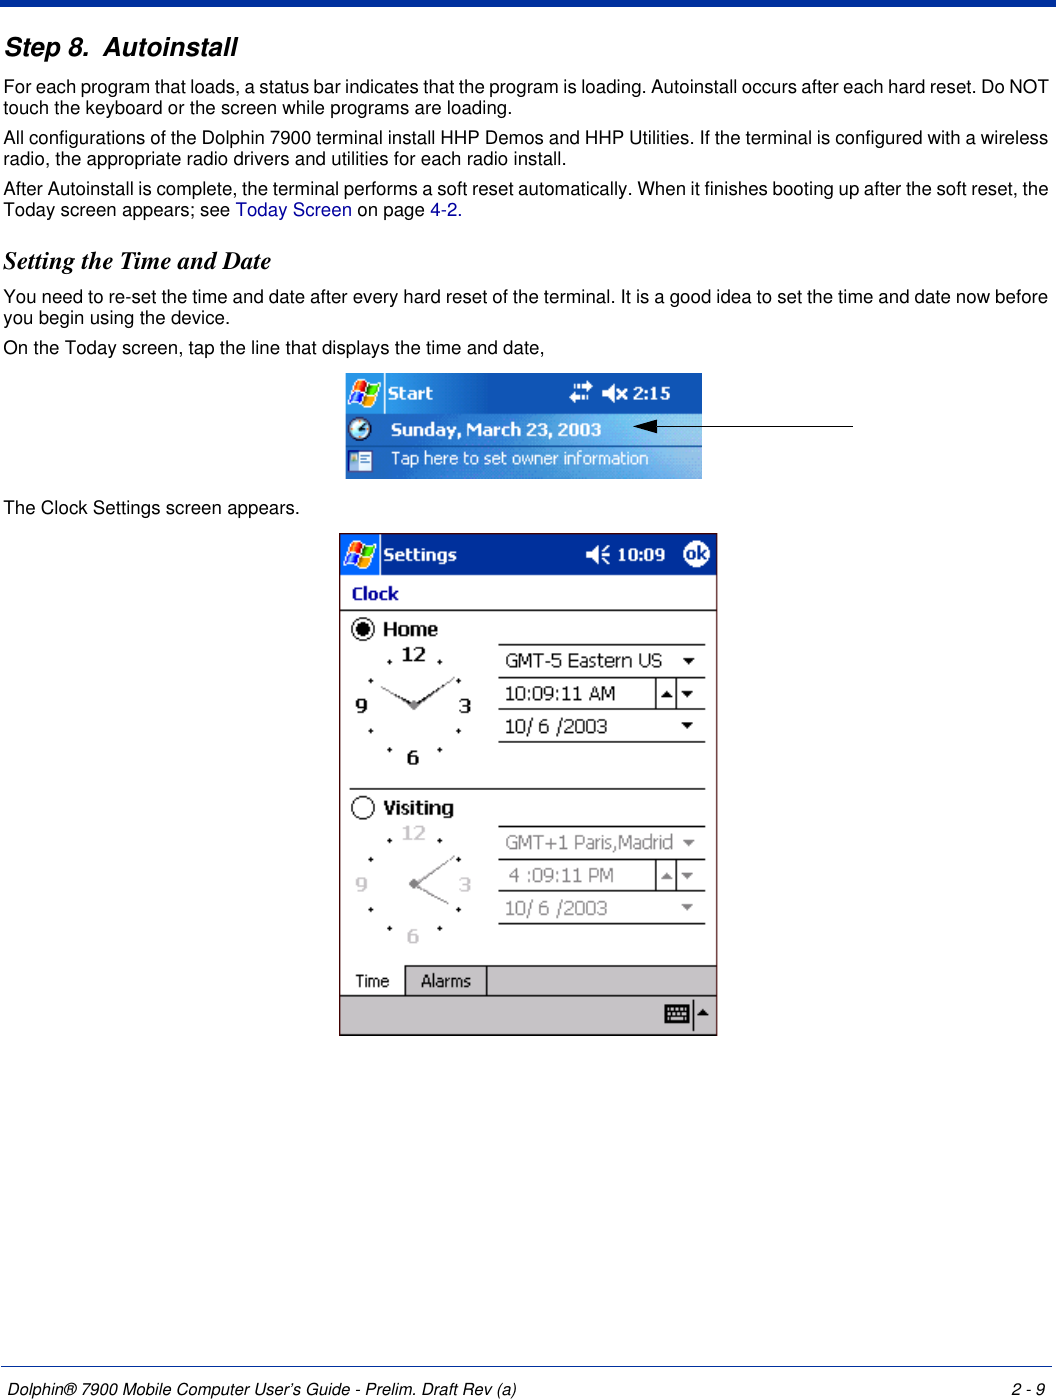
![Dolphin® 7900 Mobile Computer User’s Guide - Prelim. Draft Rev (a) 9 - 13802.11b Wireless Security SupplementAEGIS Client® offers the most comprehensive IEEE 802.1X supplicant for securing wired and wireless networks. The Client is a standards-based implementation of IEEE 802.1X and can be configured to work with almost any network equipment - wired or wireless - that supports the 802.1X authentication standard. The Client is interoperable with 802.1X-capable wireless access points and authentication servers including Microsoft's IAS and Cisco's ACS.The Client solves the problem of key distribution in wireless LANs by using public key authentication and encryption between Wireless Access Points (WAP) and roaming stations to exchange dynamic Wired Equivalent Privacy (WEP) keys. In addition, network managers can control 802.1X user profiles from a centralized RADIUS server or, in the case of TTLS, from a RADIUS Diameter or other AAA servers. The Client supports both wireless (802.11a/b/g) and Ethernet interfaces. System RequirementsYou need the following equipment and software to run AEGIS Client software:• A computer with a network interface card and/or wireless network interface card installed that support the NDIS 5.1 standard for 802.11 WLAN object identifiers (OID). The AEGIS Client software installation routine expects to find your computer’s wireless card properly installed, even if it isn’t connected to a network. If the card isn’t in the computer, the installation program can’t make the proper program and protocol associations. Be sure your wireless card is installed!• The appropriate version of the AEGIS Client software package for your operating system. Contact HHP for the correct version for your company.Platforms SupportedThere are several versions of AEGIS Client software for computers using a wide variety of operating systems. Specific capabilities of a particular version of AEGIS Client may vary according to the operating system. This is due to varying levels of support for different EAP types by manufacturers. Drivers for some types of network hardware and operating system combinations don’t support as many EAP types as others combinations.The following platforms are supported:• Windows Mobile Software 2003 [OS version "Pocket PC Version 4.20.1081 (Build 13100)"]• Pocket PC 2002 [OS version "Pocket PC Version 3.0.11171 (Build 11178)"]• CE.NET 4.1 [OS version "CE .NET Version 4.10 (Build 908)"]• CE.NET 4.2 [OS version "CE .NET Version 4.20 (Build 1088)"] Note: Verify the operating system version by tapping Start > Settings > System tab > About. 802.1X Supplicant Protocol Support Support for the Extensible Authentication Protocol (EAP) - RFC 2284Supported authentication methods are as follows: • CHAP/MD5 - RFC 1994 • EAP TLS Authentication Protocol - RFC 2716 • EAP Tunneled TLS (TTLS) - Internet Draft February 2002 • Cisco LEAP and PEAP• Microsoft PEAP Tested against the following servers:• Funk Odyssey 3.2 using TLS, LEAP and TTLS • AEGIS Client 1.1.4 using MD5, TLS, TTLS, LEAP and PEAP • Cisco ACS 3.2 using MD5, TLS, LEAP and PEAP If you are using one of these authentication methodologies, you need to configure your 802.11b connection here, NOT through HHP WLAN Settings. However, if you want to set the AP Search Threshold above the default setting of Low Density, you do need to change that setting in HHP WLAN Settings; for details, see Network Profile Tab on page 9-7.!](https://usermanual.wiki/Honeywell/7900L0P.User-Guide-Part-1/User-Guide-480383-Page-133.png)
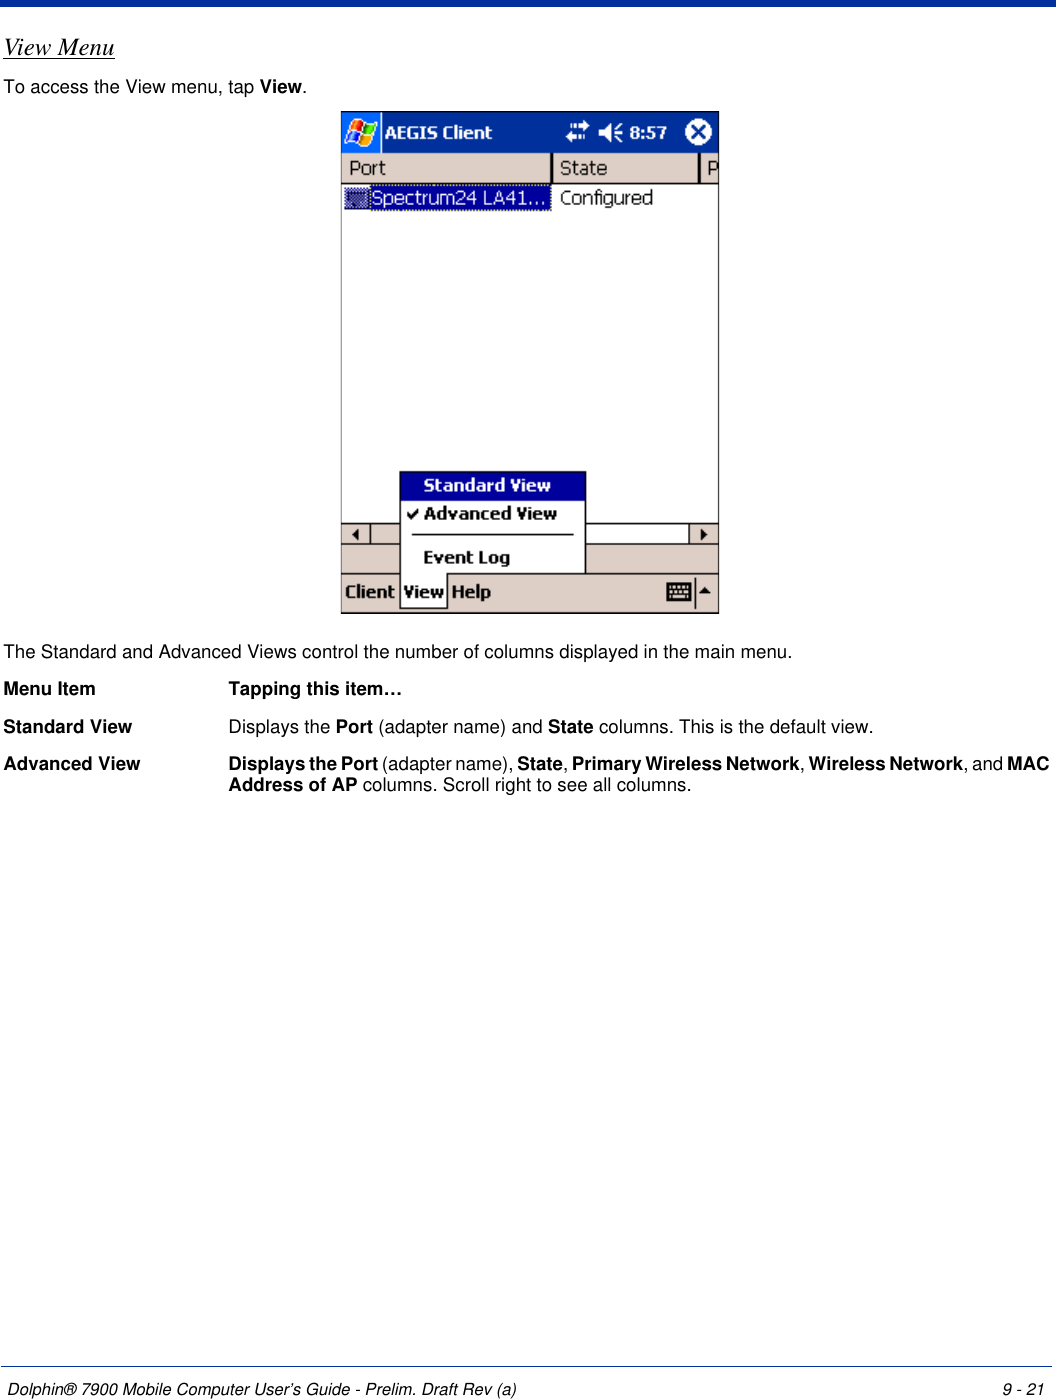
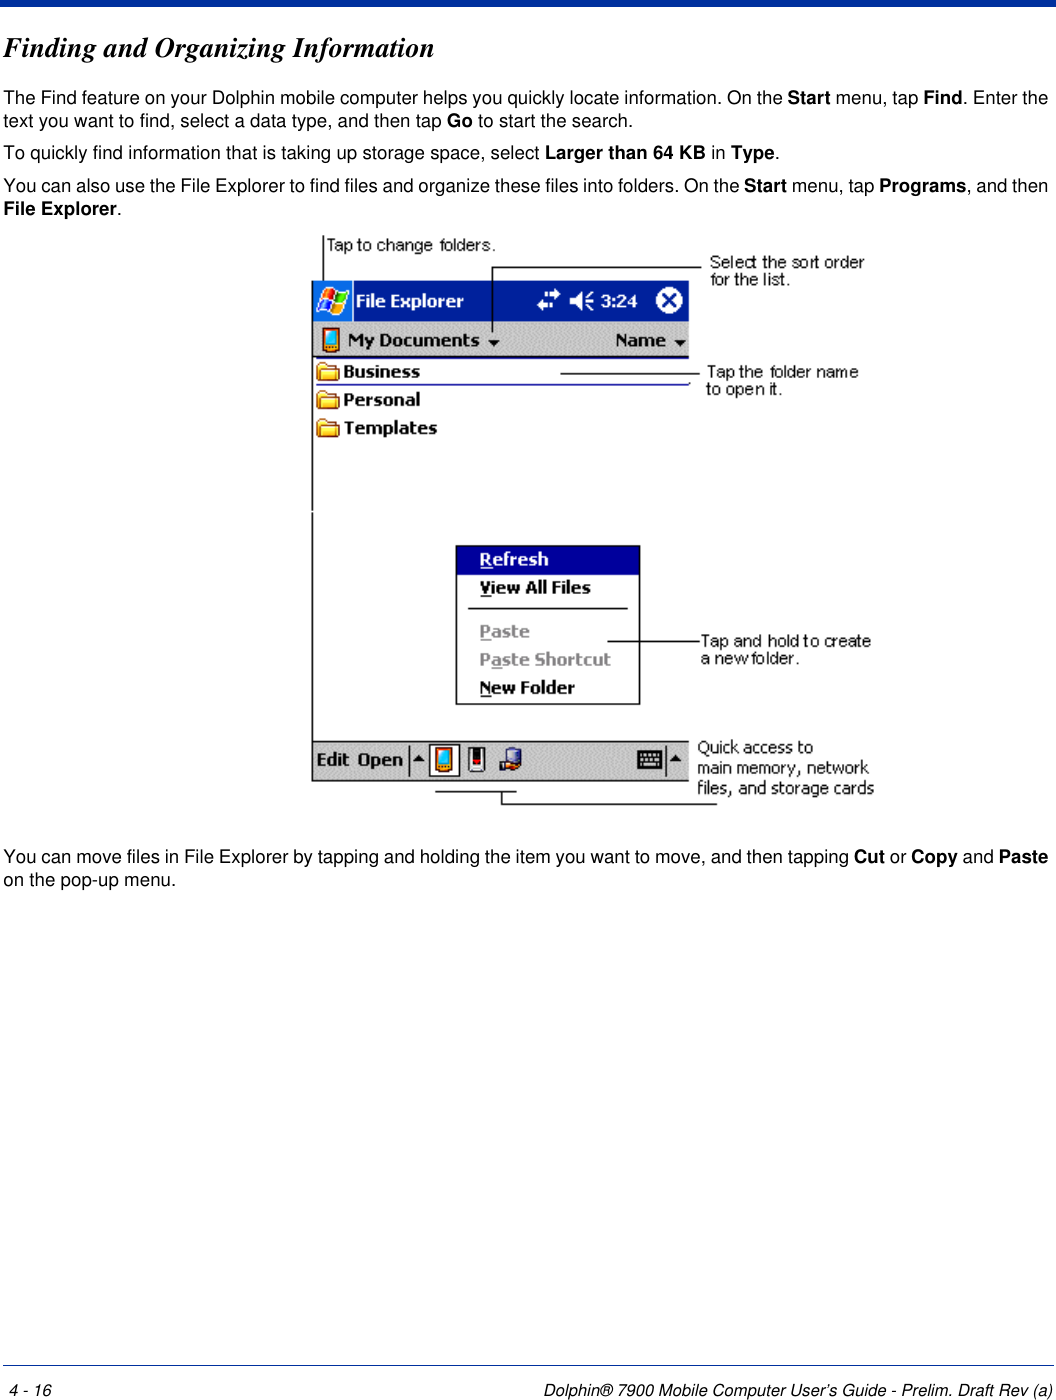
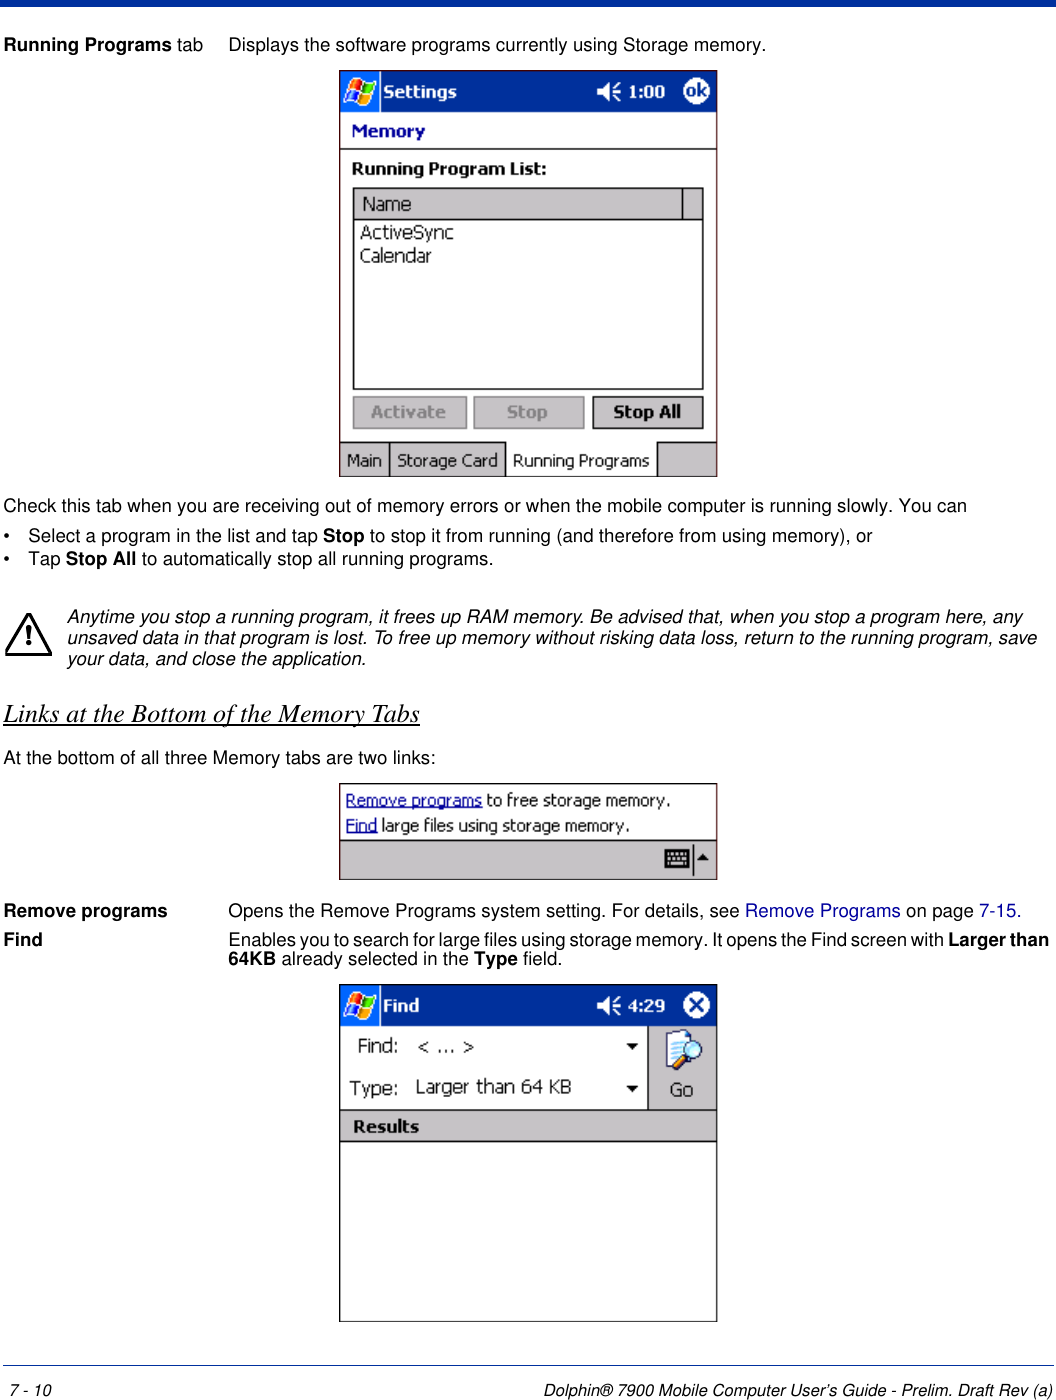
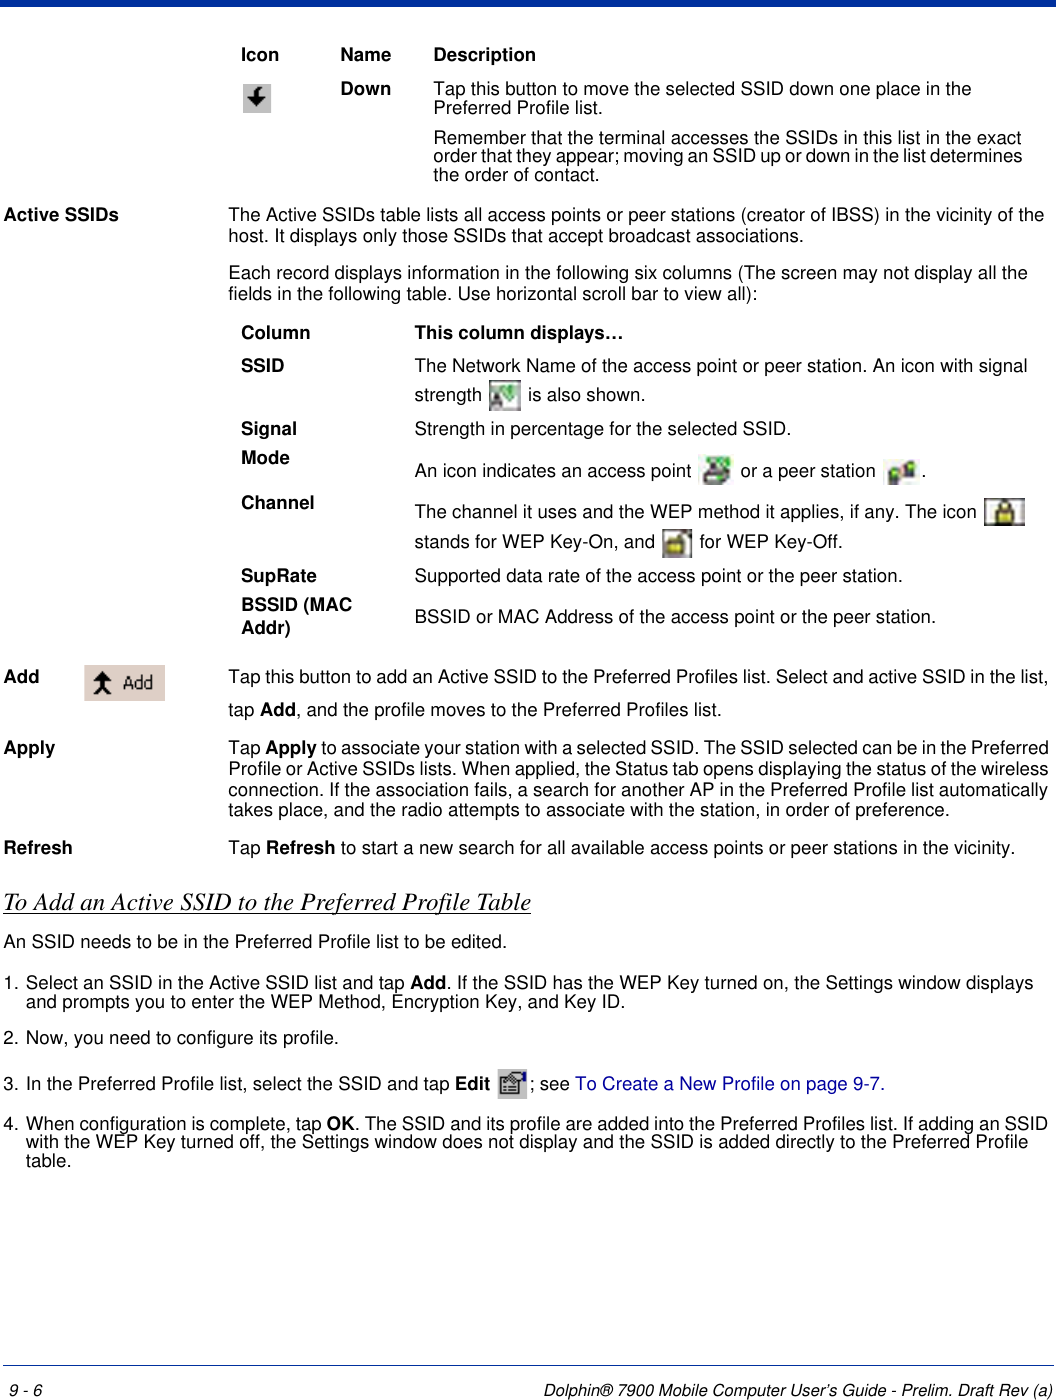
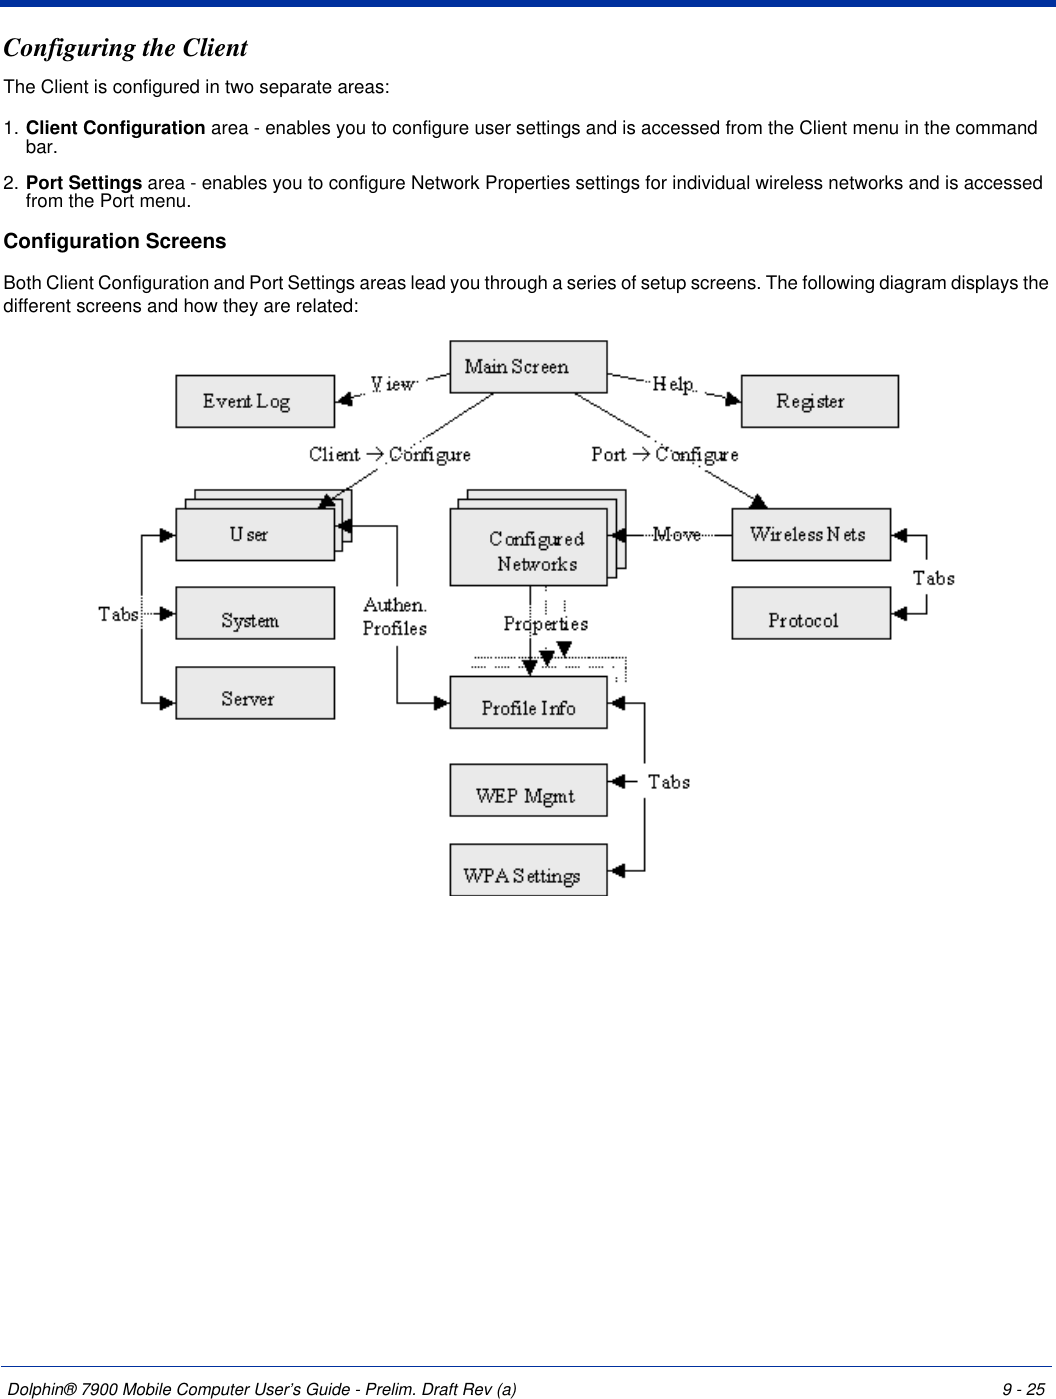
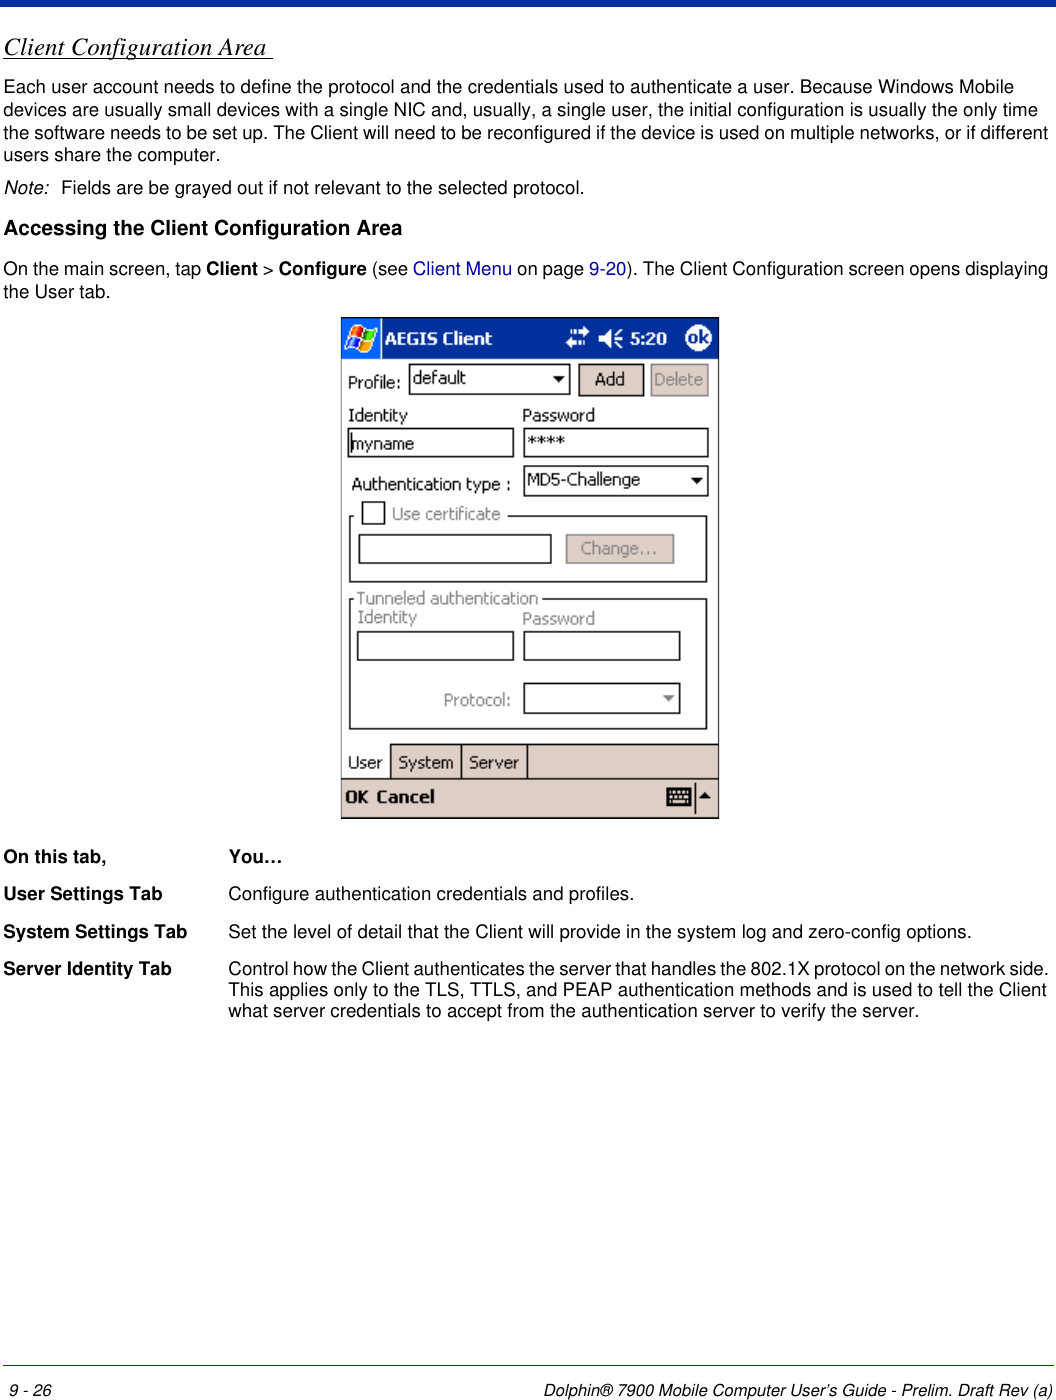
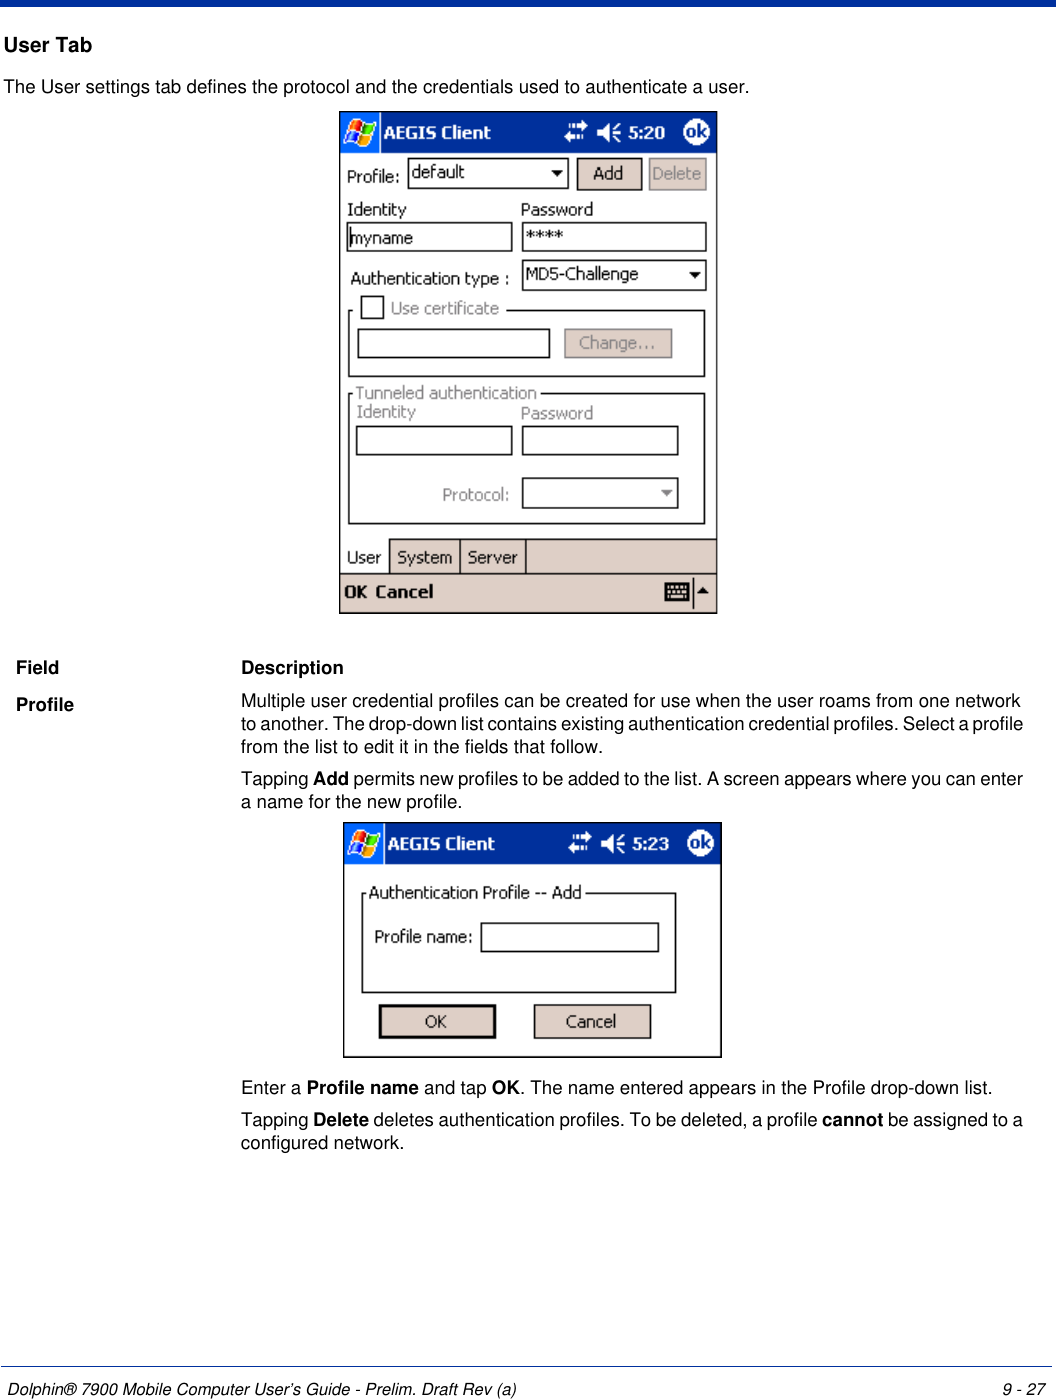
![9 - 22 Dolphin® 7900 Mobile Computer User’s Guide - Prelim. Draft Rev (a)Event Log The Event Log is a text file that contains status information from the logging function. Each entry is listed sequentially with a time stamp and a text message. Tap Refresh to retrieve the most current information and display it in the log immediately. Tap Close to return to the main screen. For more information about logging, [INSERT CROSS-X]Help MenuTapping Help opens the help menu. Select Online Help to access online help. Select About to review software version information.](https://usermanual.wiki/Honeywell/7900L0P.User-Guide-Part-1/User-Guide-480383-Page-142.png)
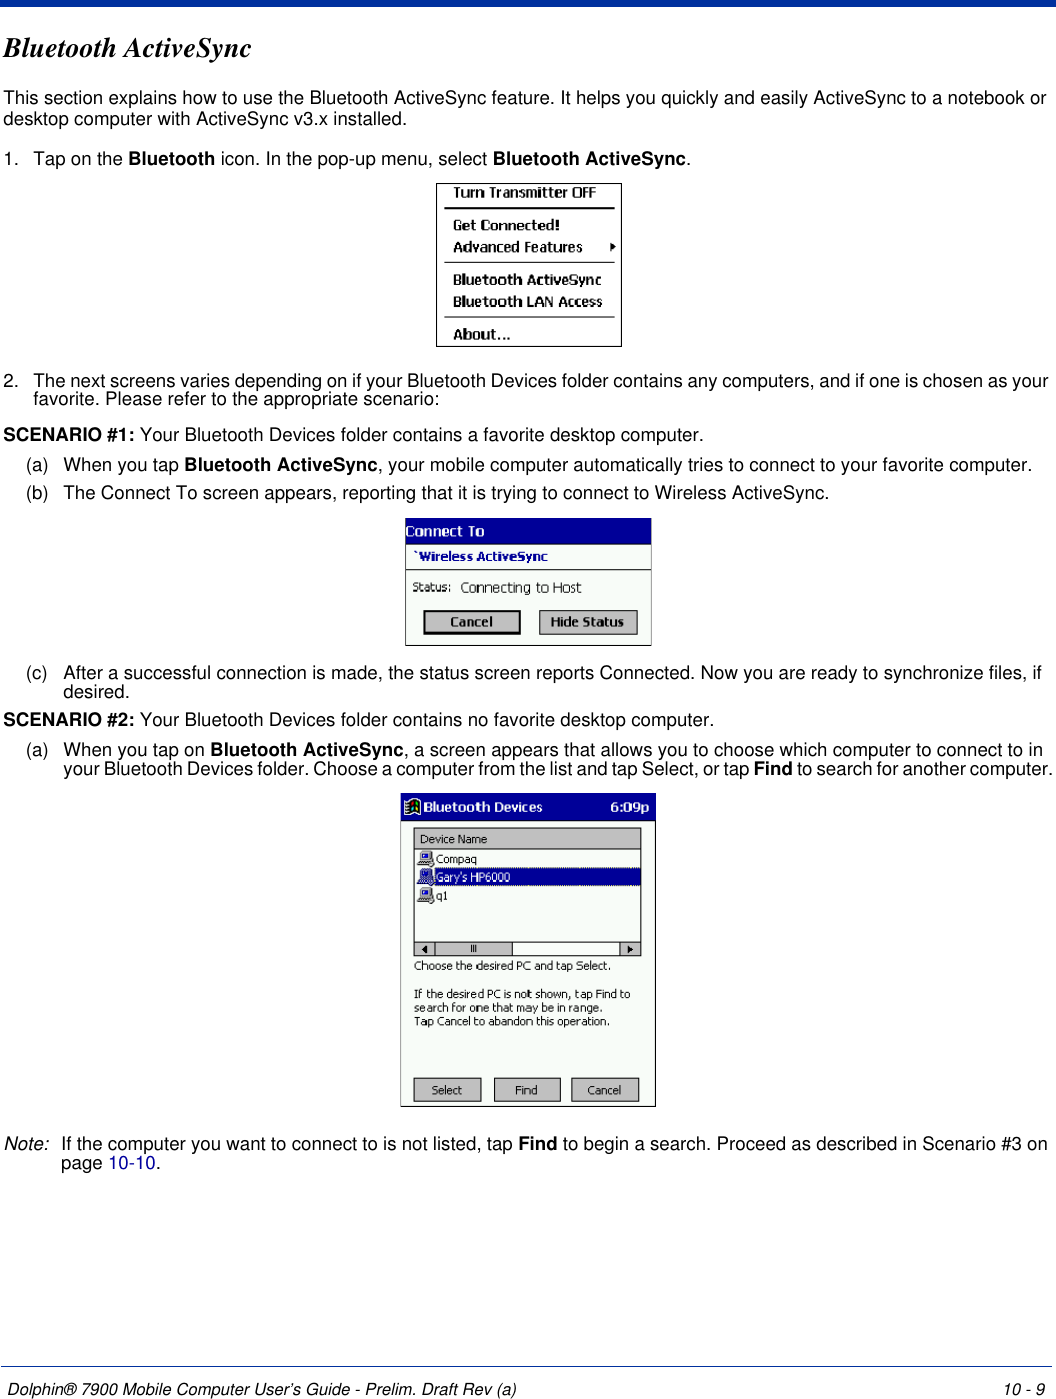
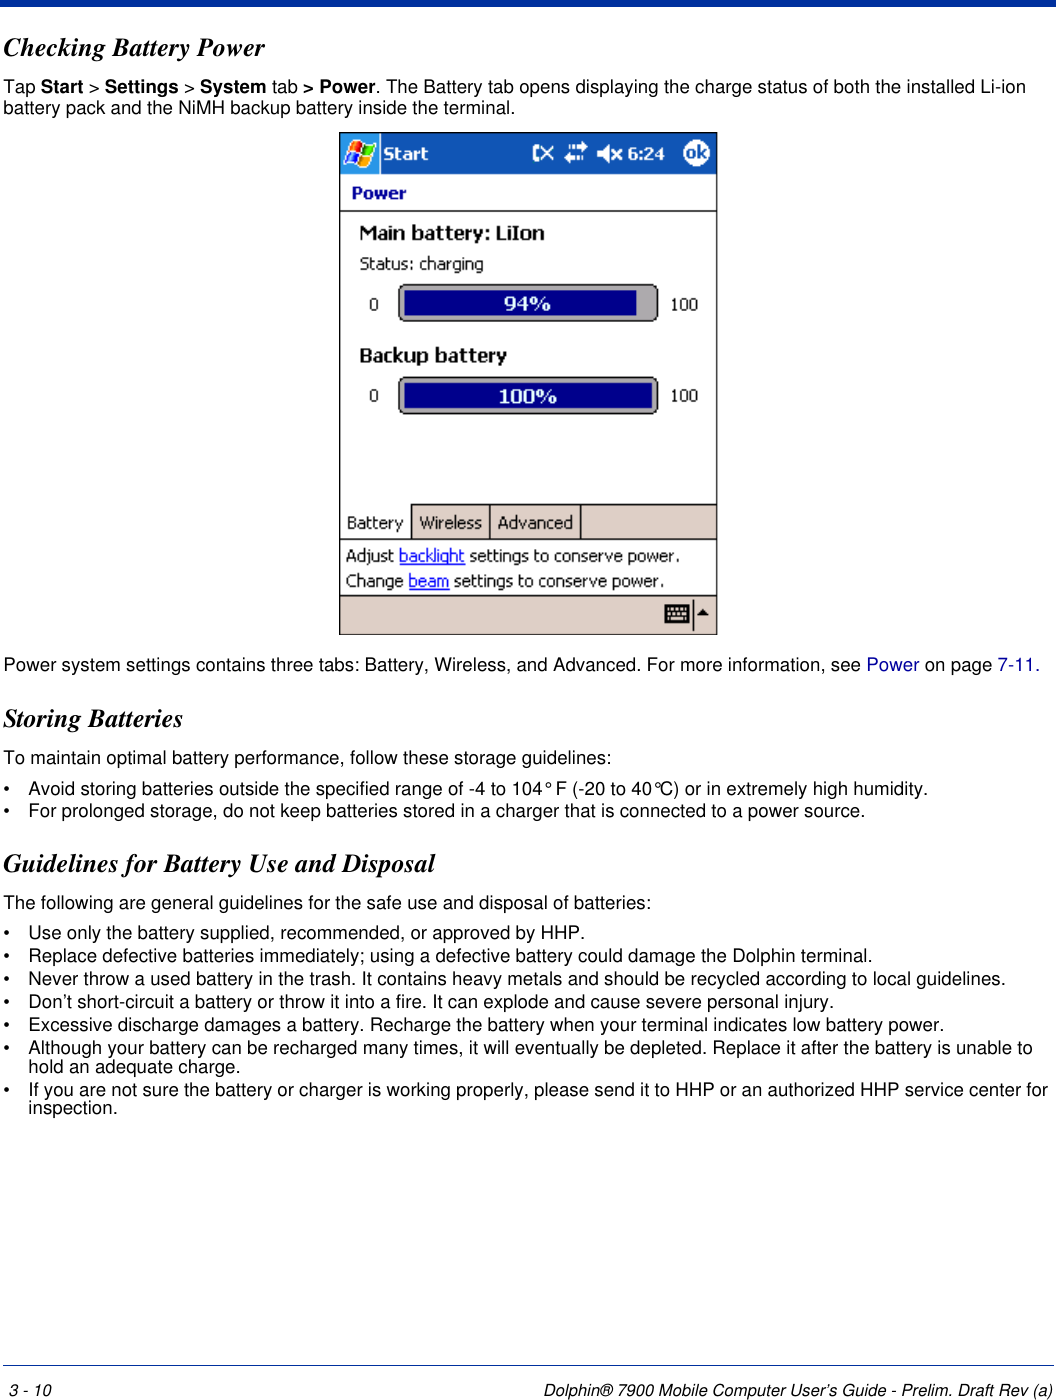
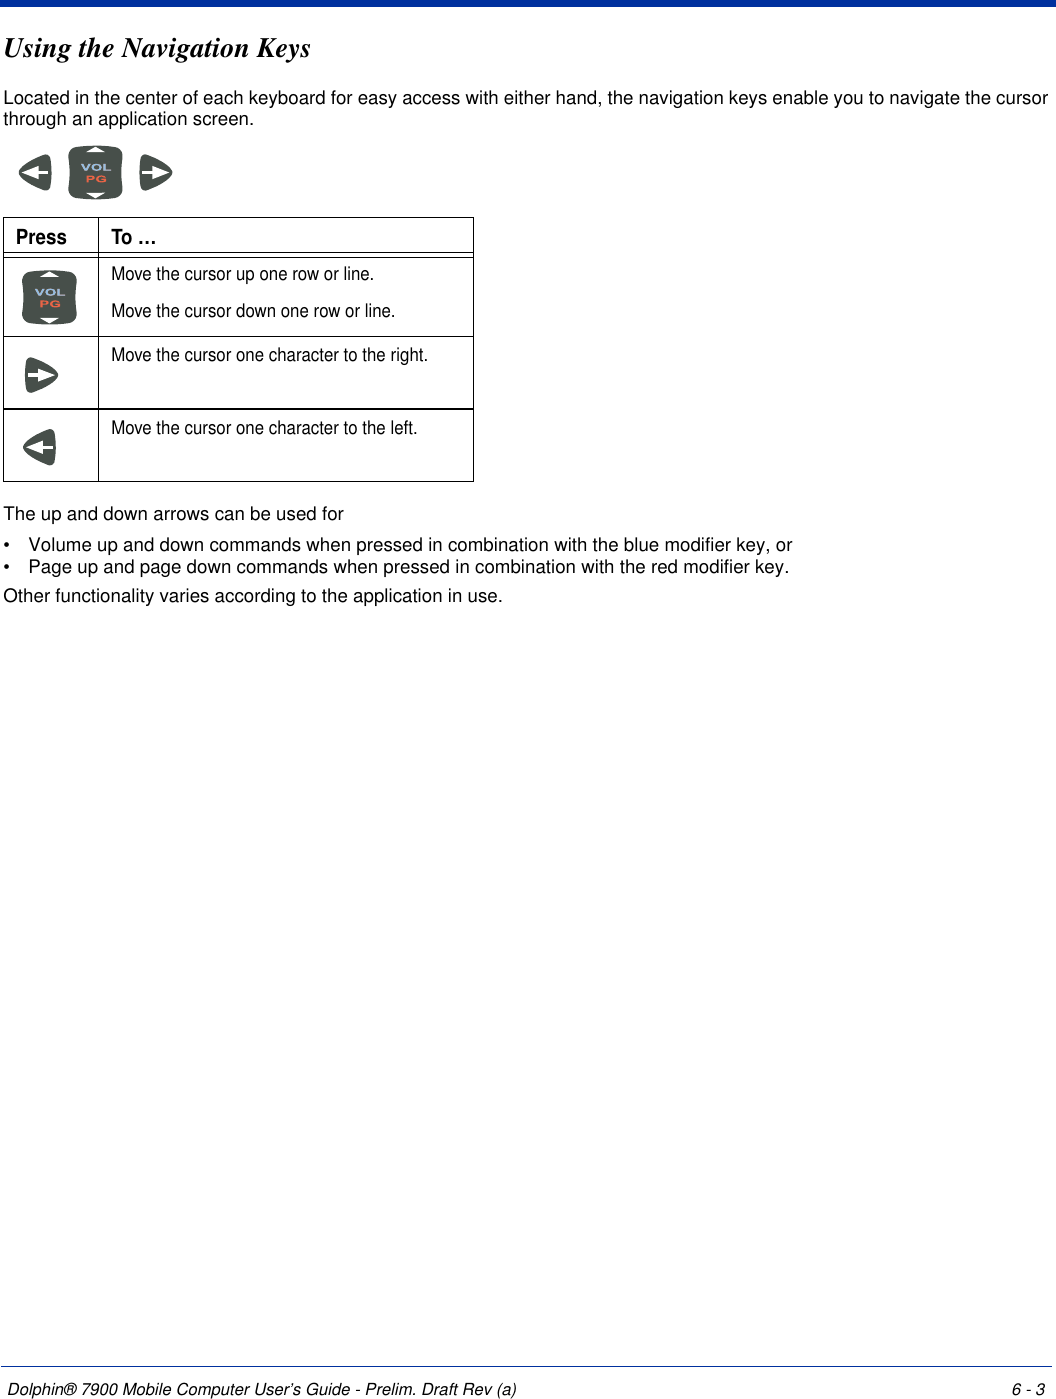
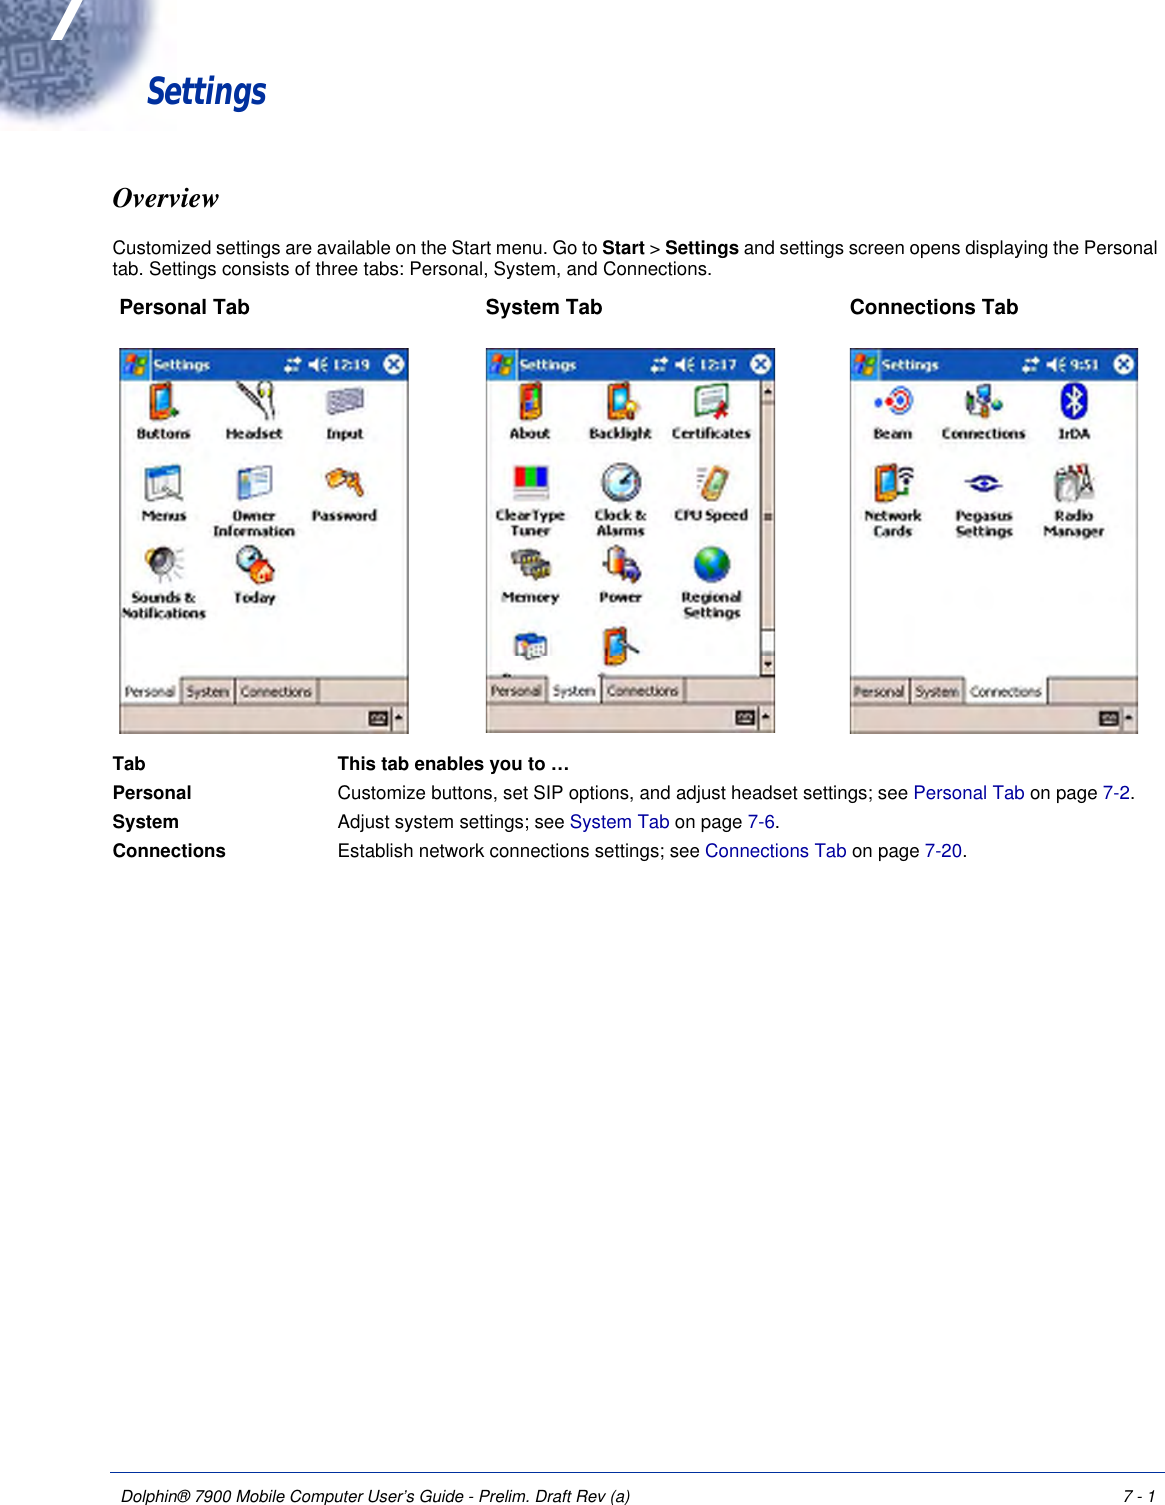
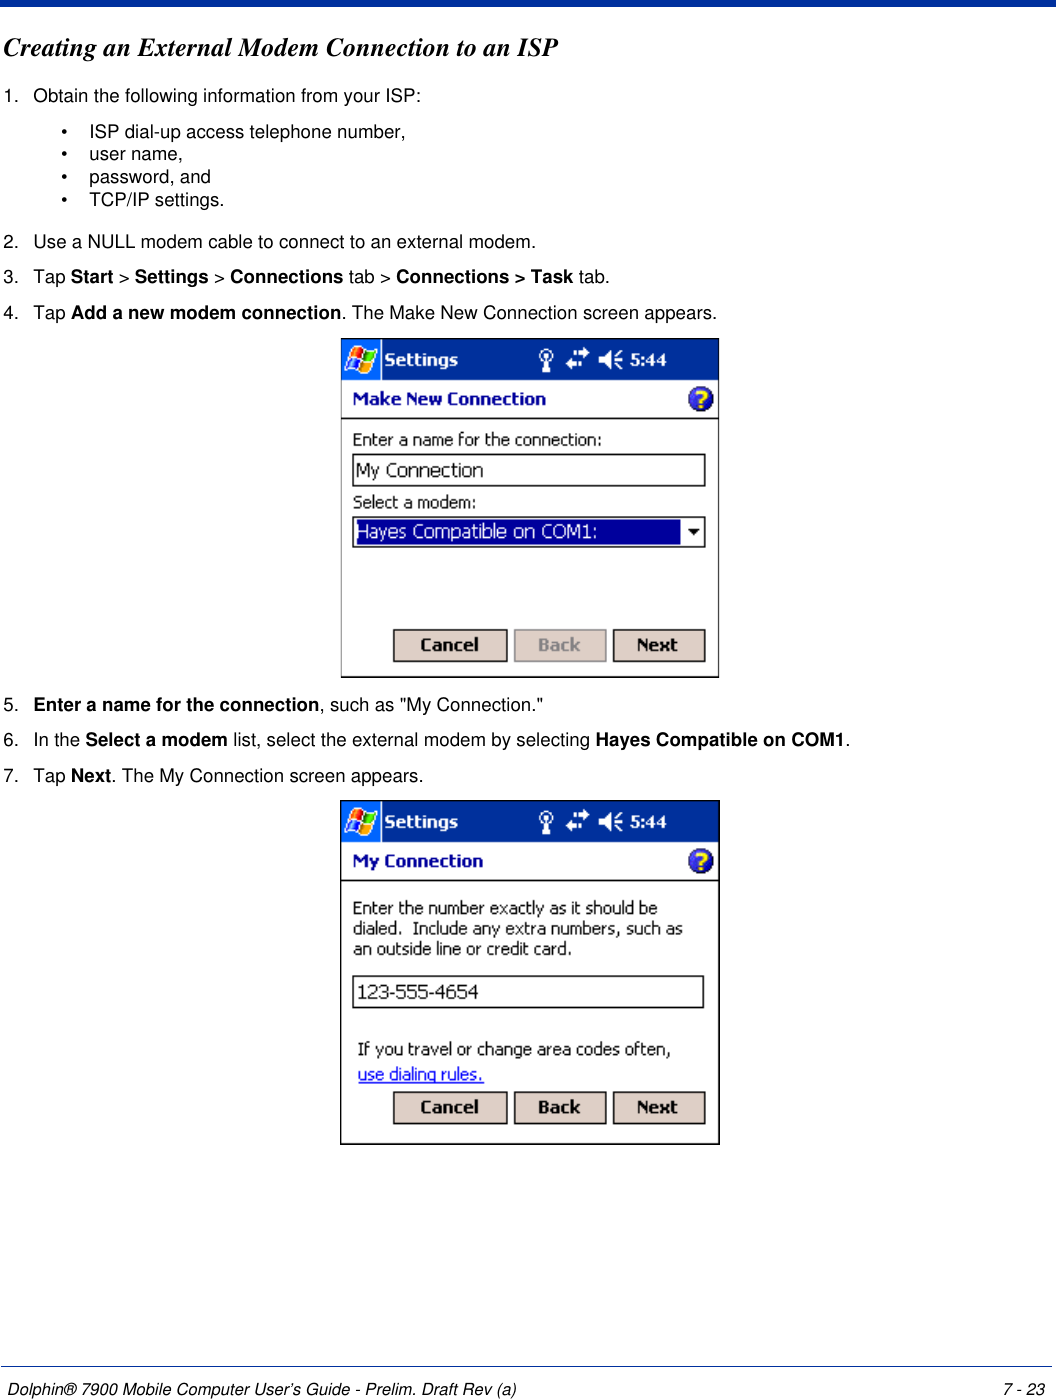
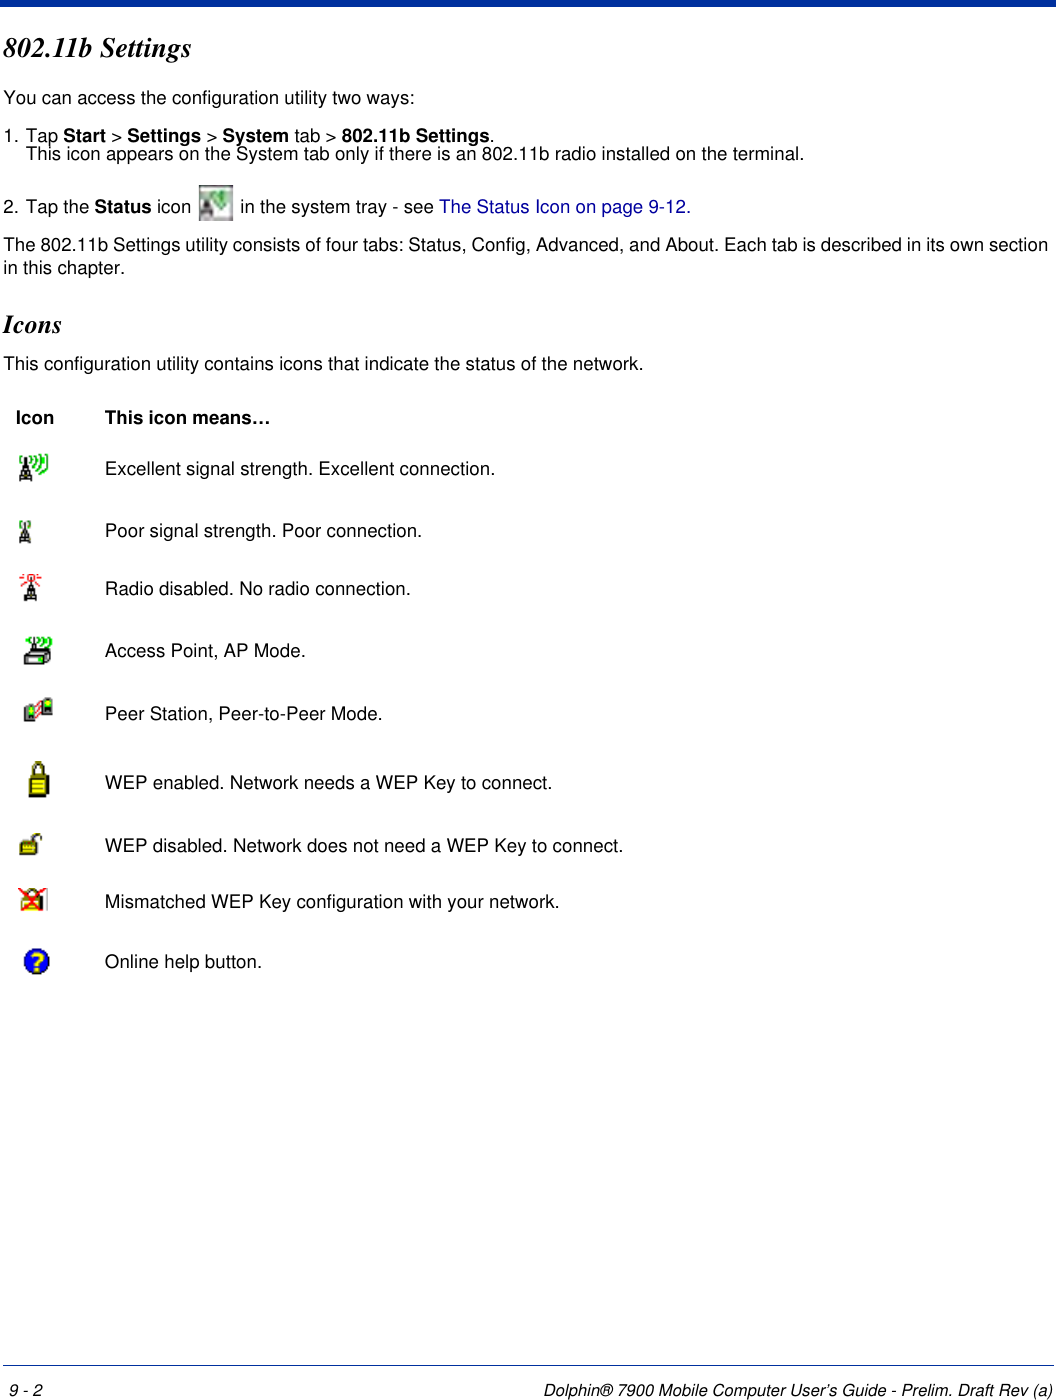
![Dolphin® 7900 Mobile Computer User’s Guide - Prelim. Draft Rev (a) 9 - 23Status BarThe status bar is displayed at the bottom of the main screen and indicates the connection status between the network card and the access point.The status bar displays one of the following depending on the status of connectivity:• “Not Associated”• “AP : [Name of the SSID] MAC : [MAC address].”Status Bar](https://usermanual.wiki/Honeywell/7900L0P.User-Guide-Part-1/User-Guide-480383-Page-143.png)
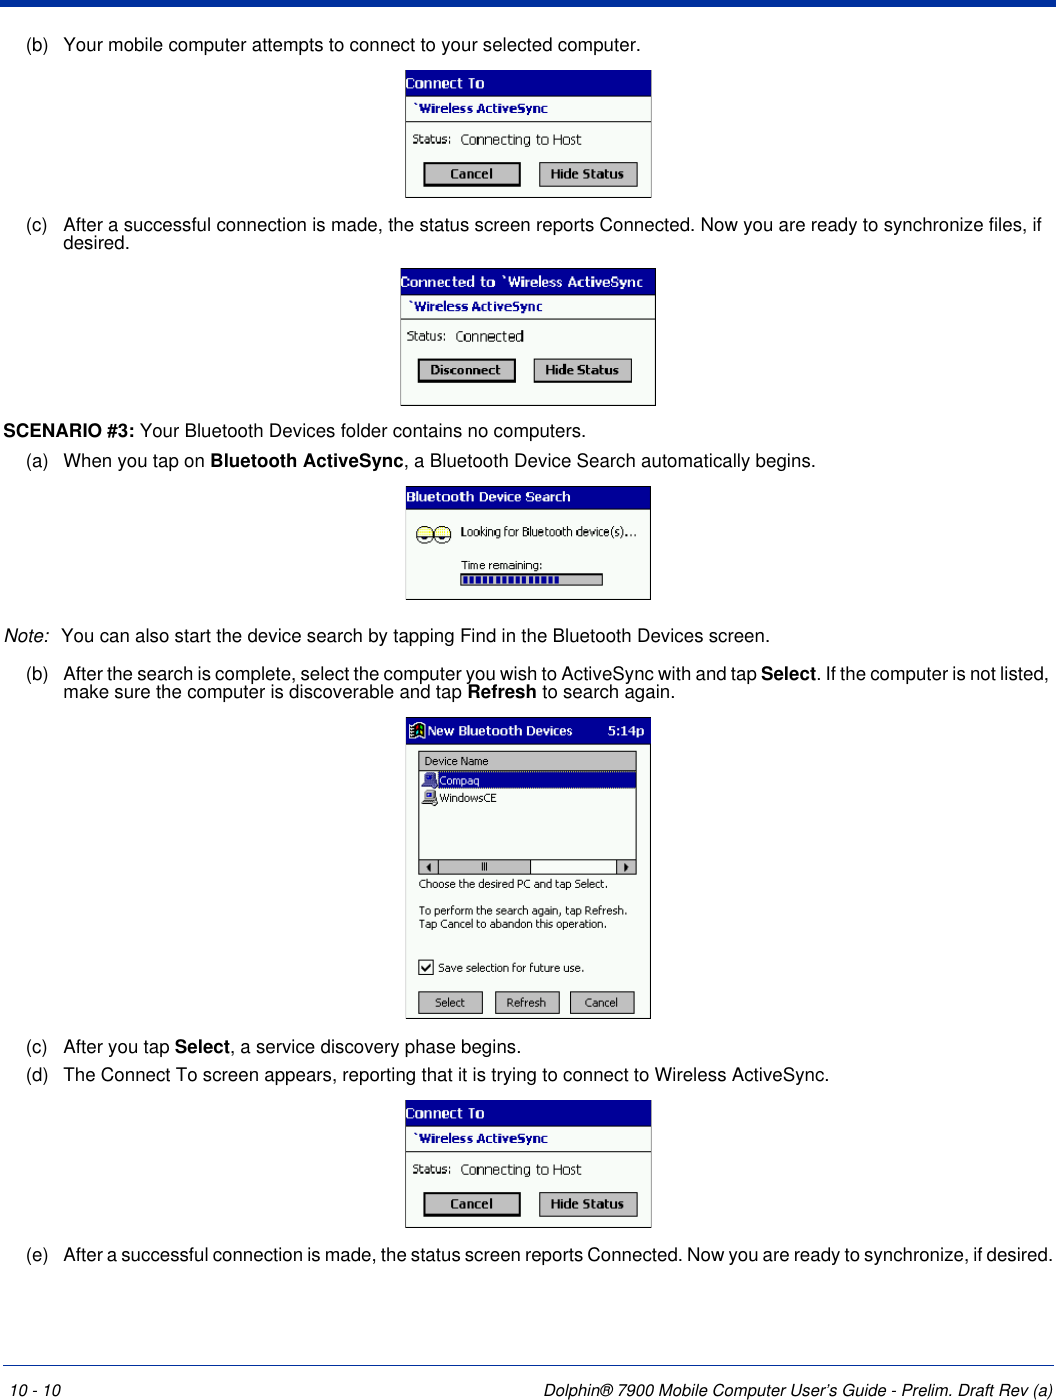
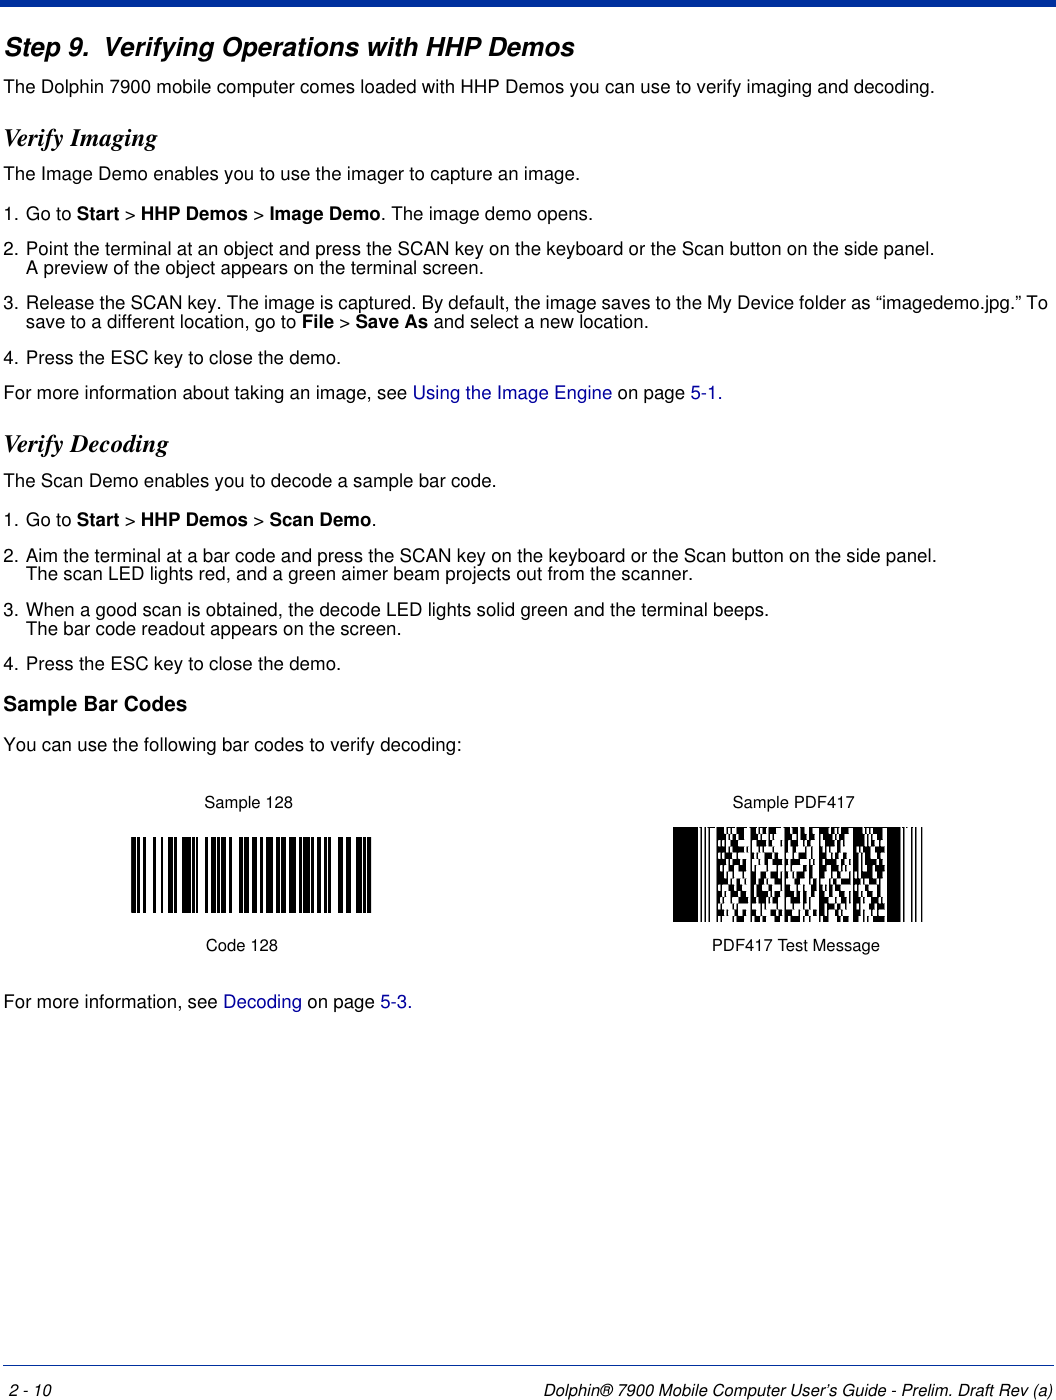
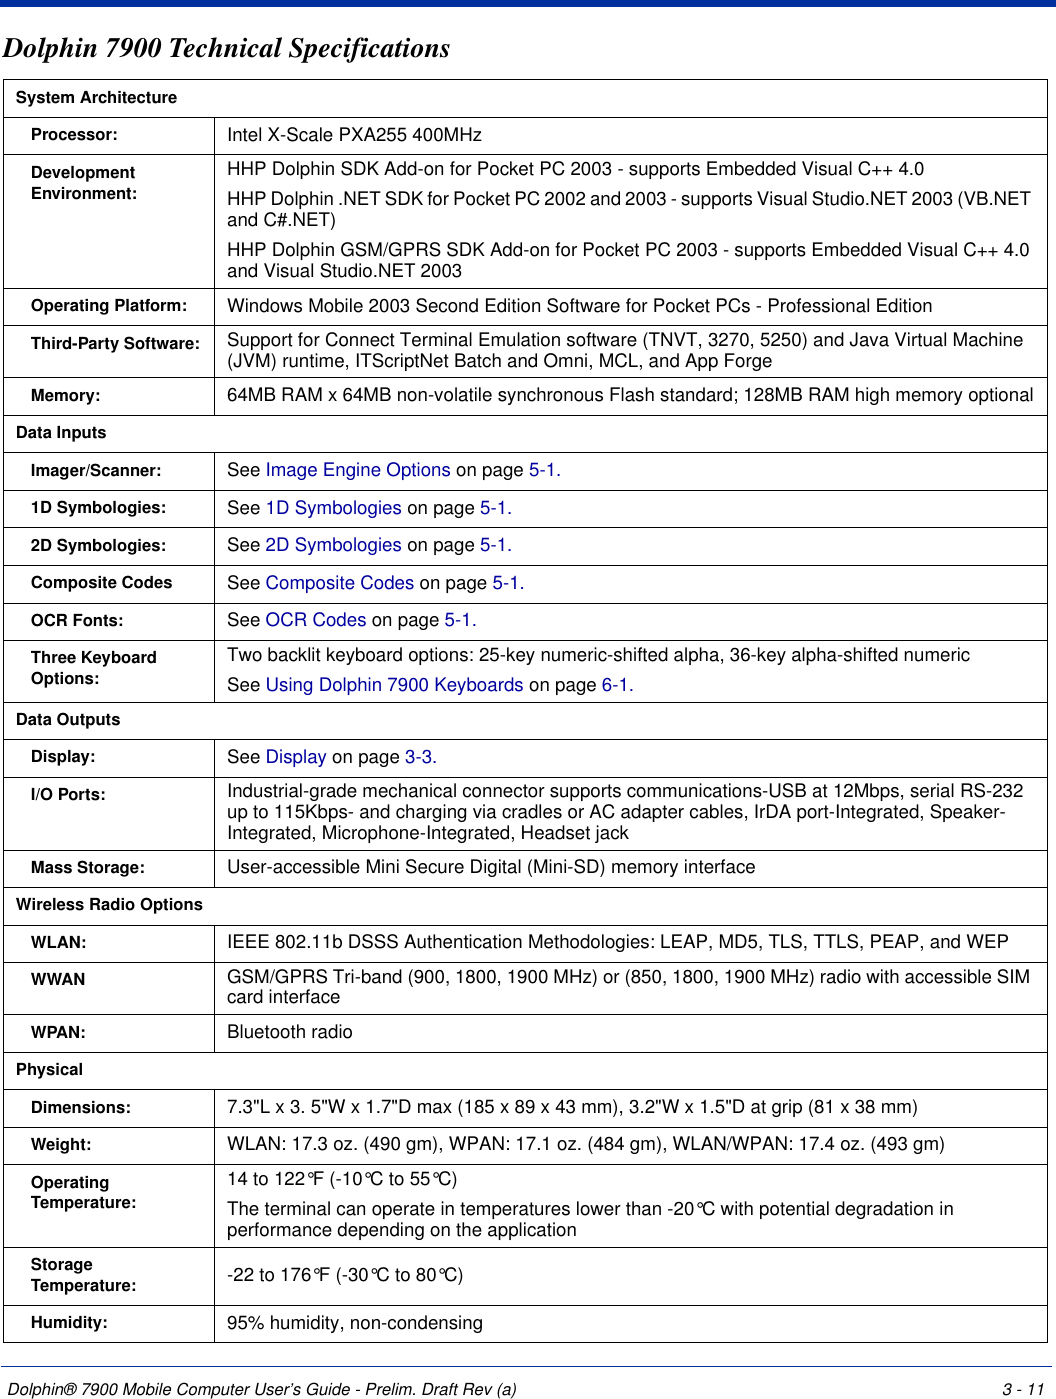
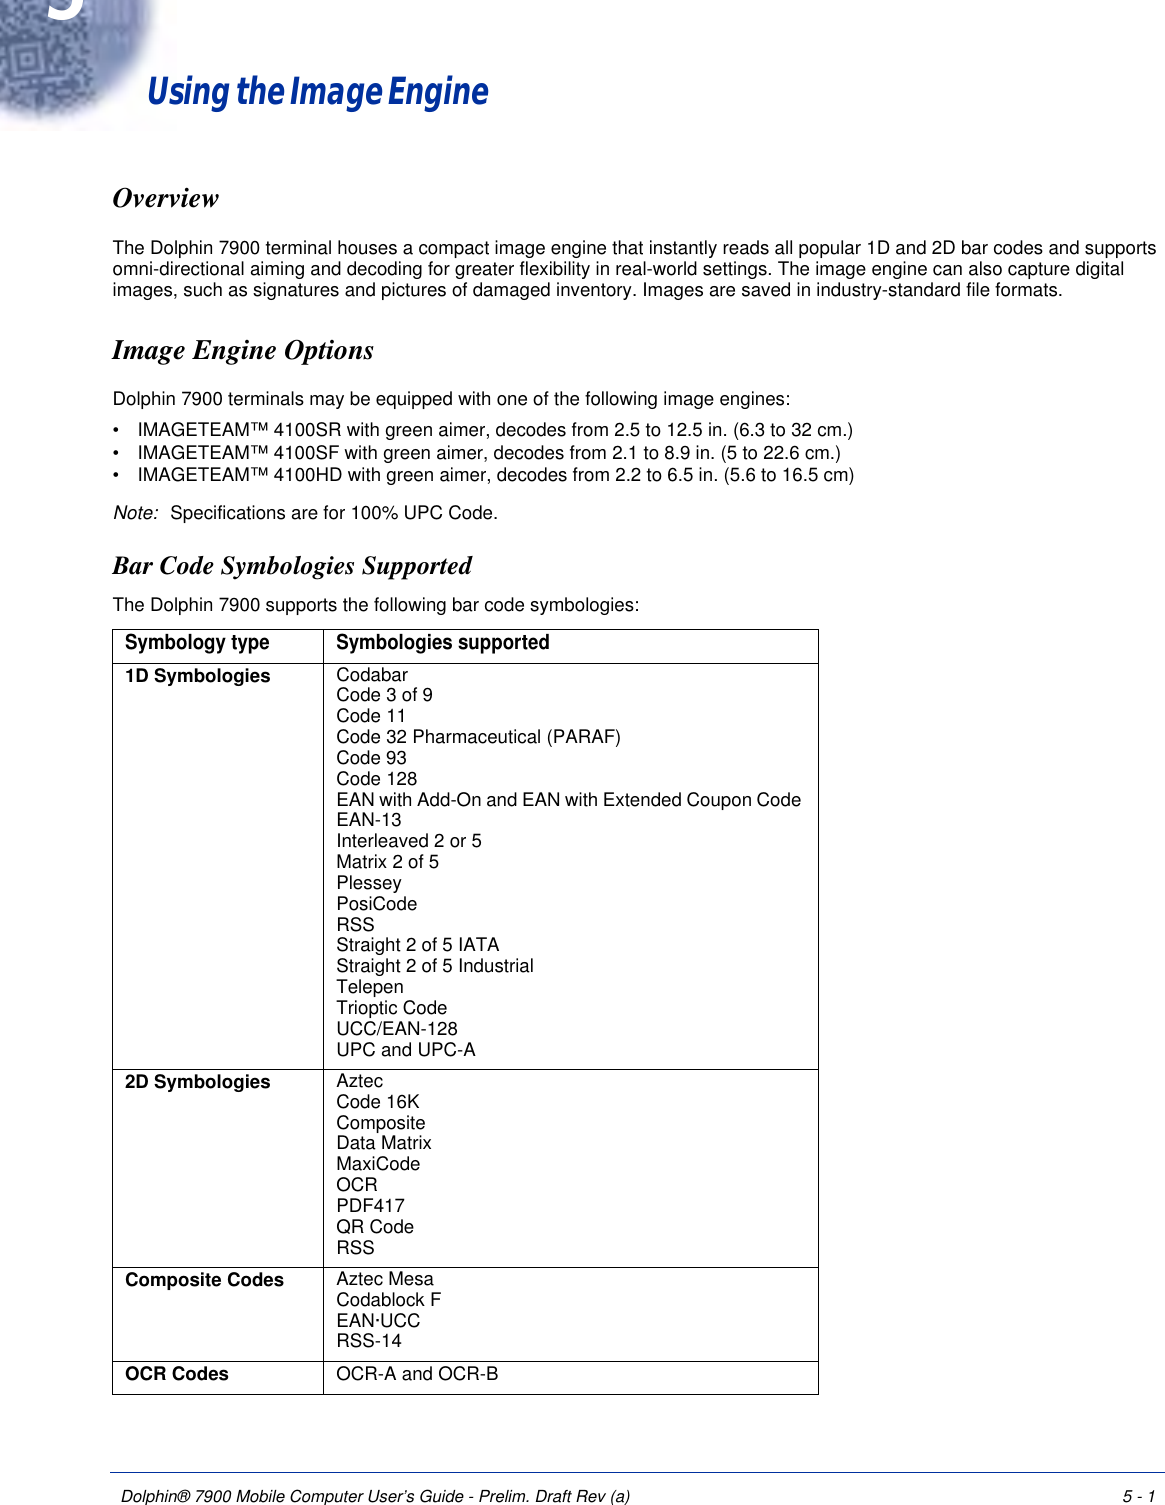
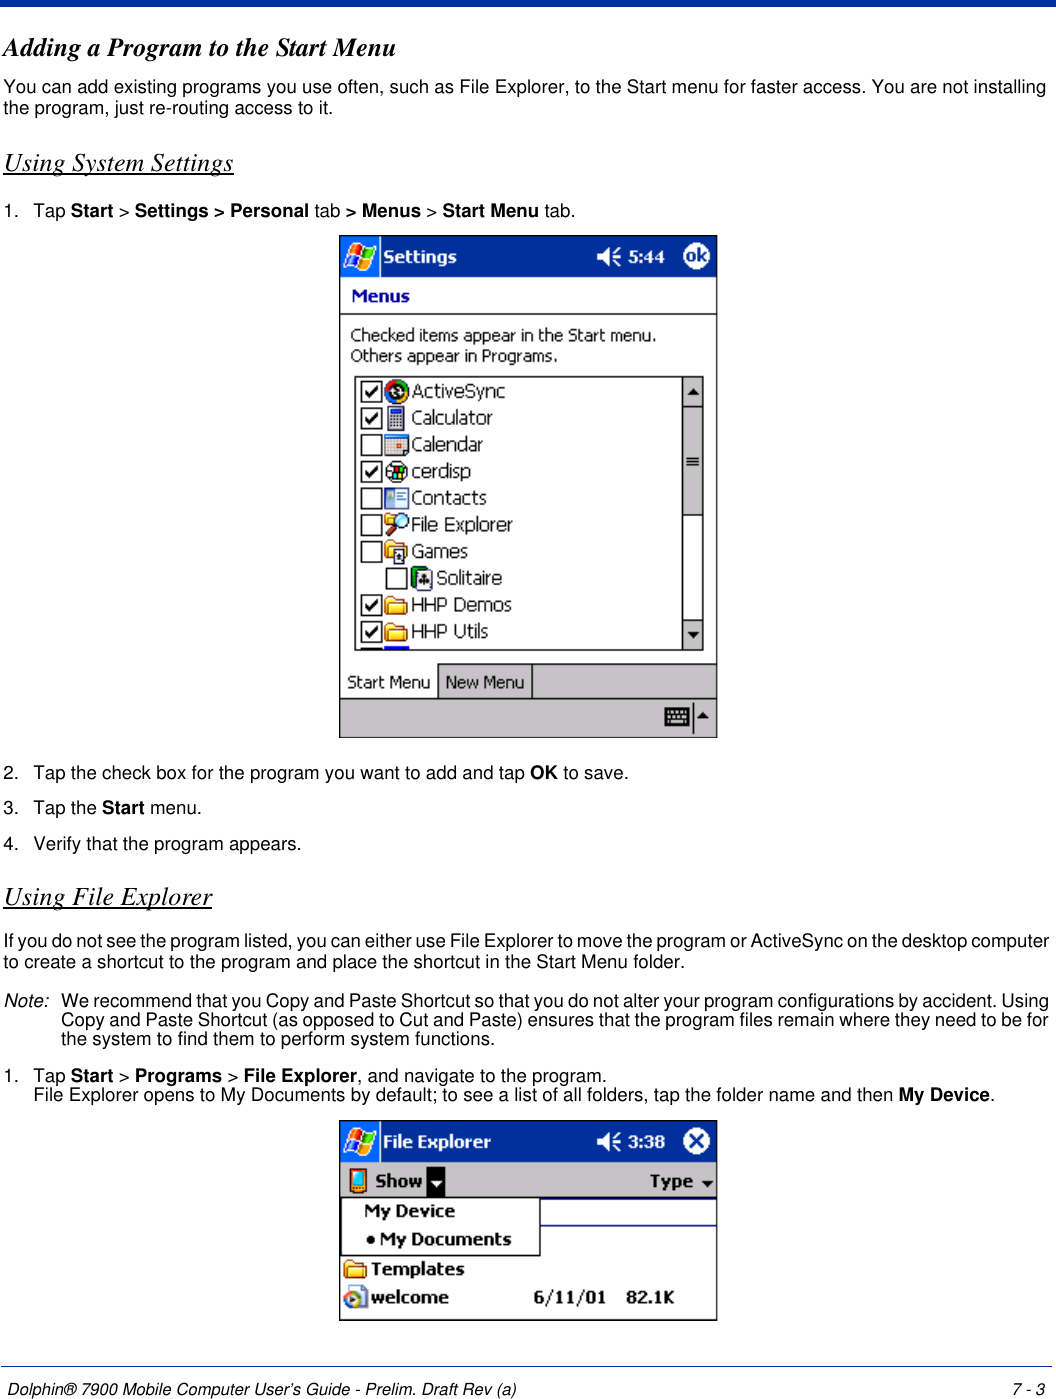
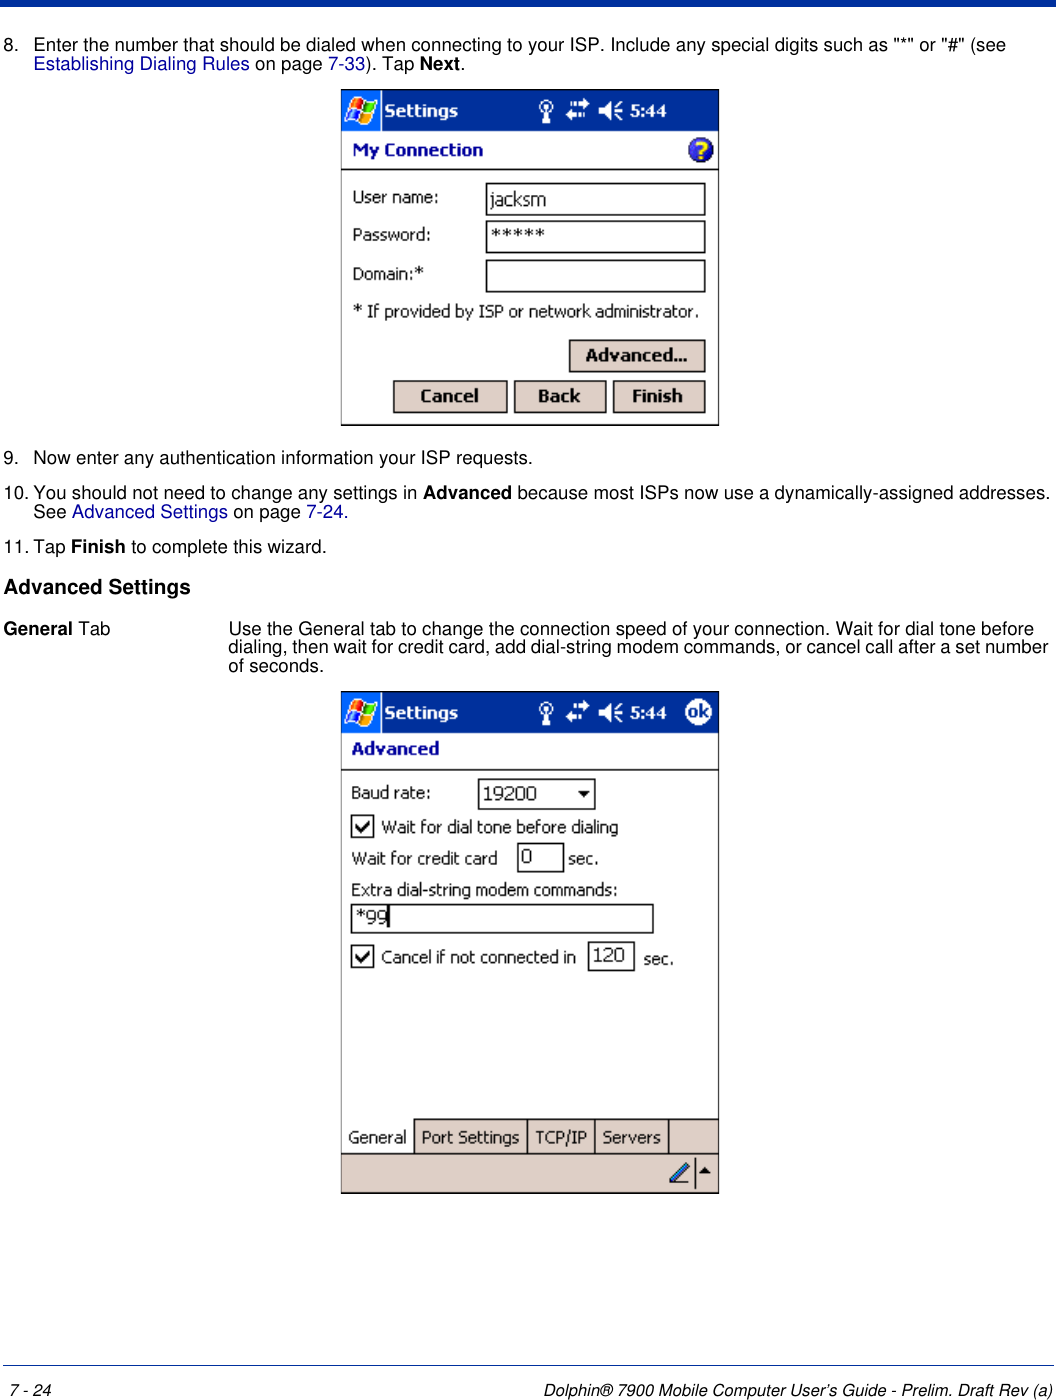
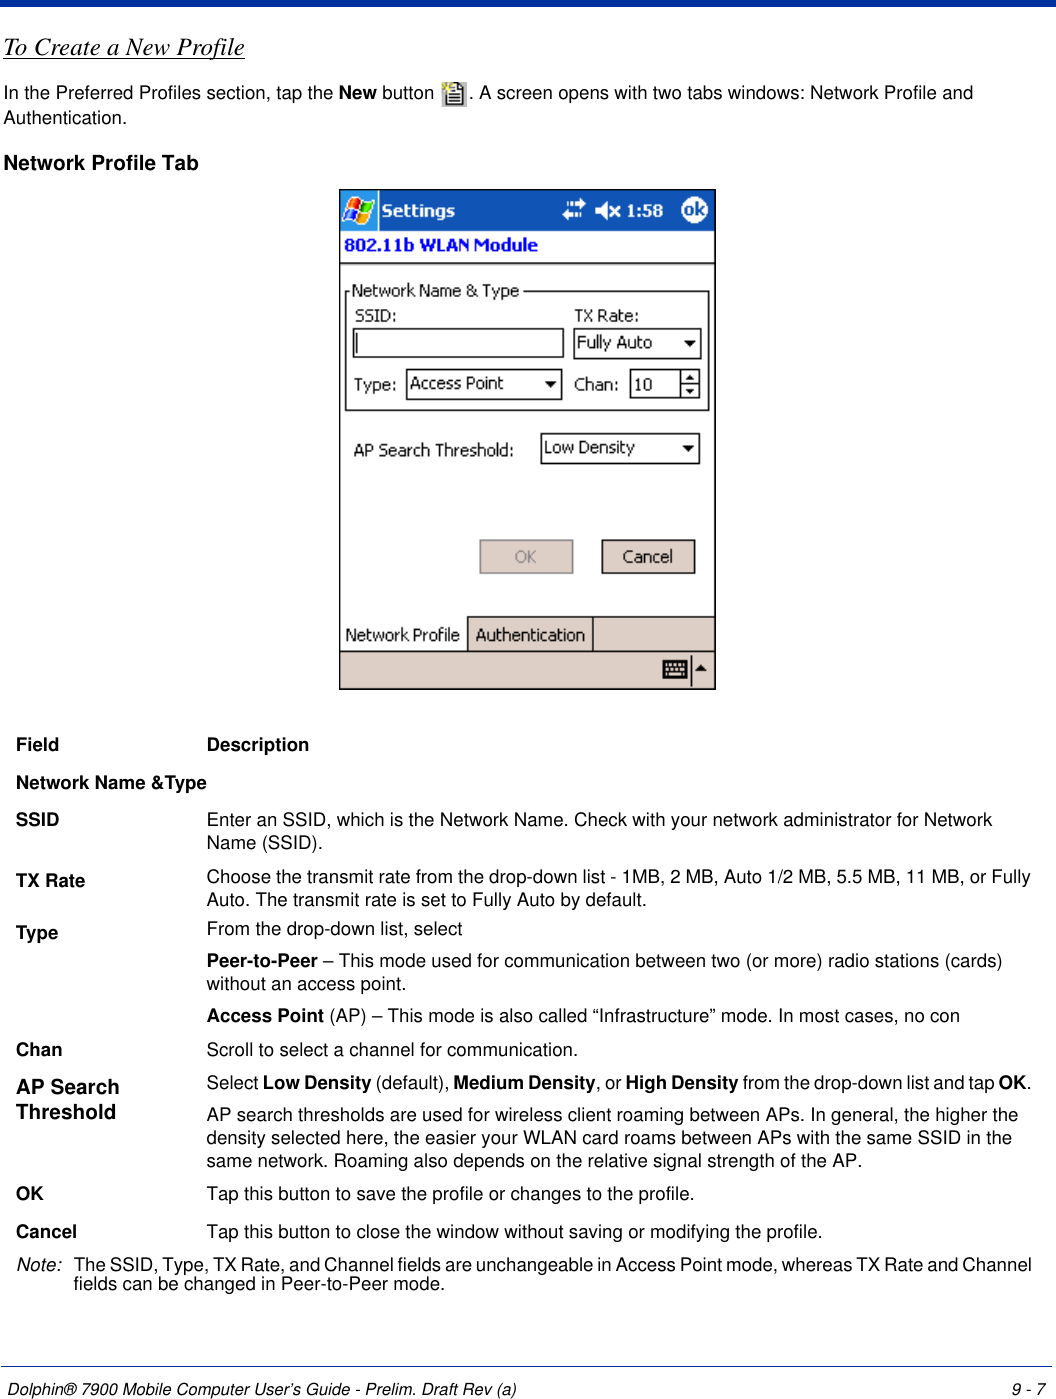
![9 - 24 Dolphin® 7900 Mobile Computer User’s Guide - Prelim. Draft Rev (a)Port MenuOn the main screen, tapping on a port opens a popup menu that allows the port to be enabled or disabled, configured, or deleted.The port menu enables you to use 802.1X authentication, change the port configuration, or remove it from the port list. If there are no entries in the Port list, follow the advice in the troubleshooting section to resolve the problem. The Port menu options are:Enable and Disable These commands enable or disable 802.1X authentication on the port. The port should be enabled before the protocol is started. Enabling a port is not the same as starting it (see Client Menu on page 9-20); however, both actions are required for the Client to work. Configure Opens the port configuration screen. For details [CROSS X TO PORT SETTINGS SECTION]Delete Removes an adapter from the port list. An unused port may be deleted from the port list. The radio card must not be in the device or the radio must be turned off. Ports appear in the list only when the 802.1X protocol binds to the adapter. The protocol binds to the adapter when the adapter is in the device and the Client software is installed, or Install Protocol is selected from the Client menu (see Client Menu on page 9-20).](https://usermanual.wiki/Honeywell/7900L0P.User-Guide-Part-1/User-Guide-480383-Page-144.png)
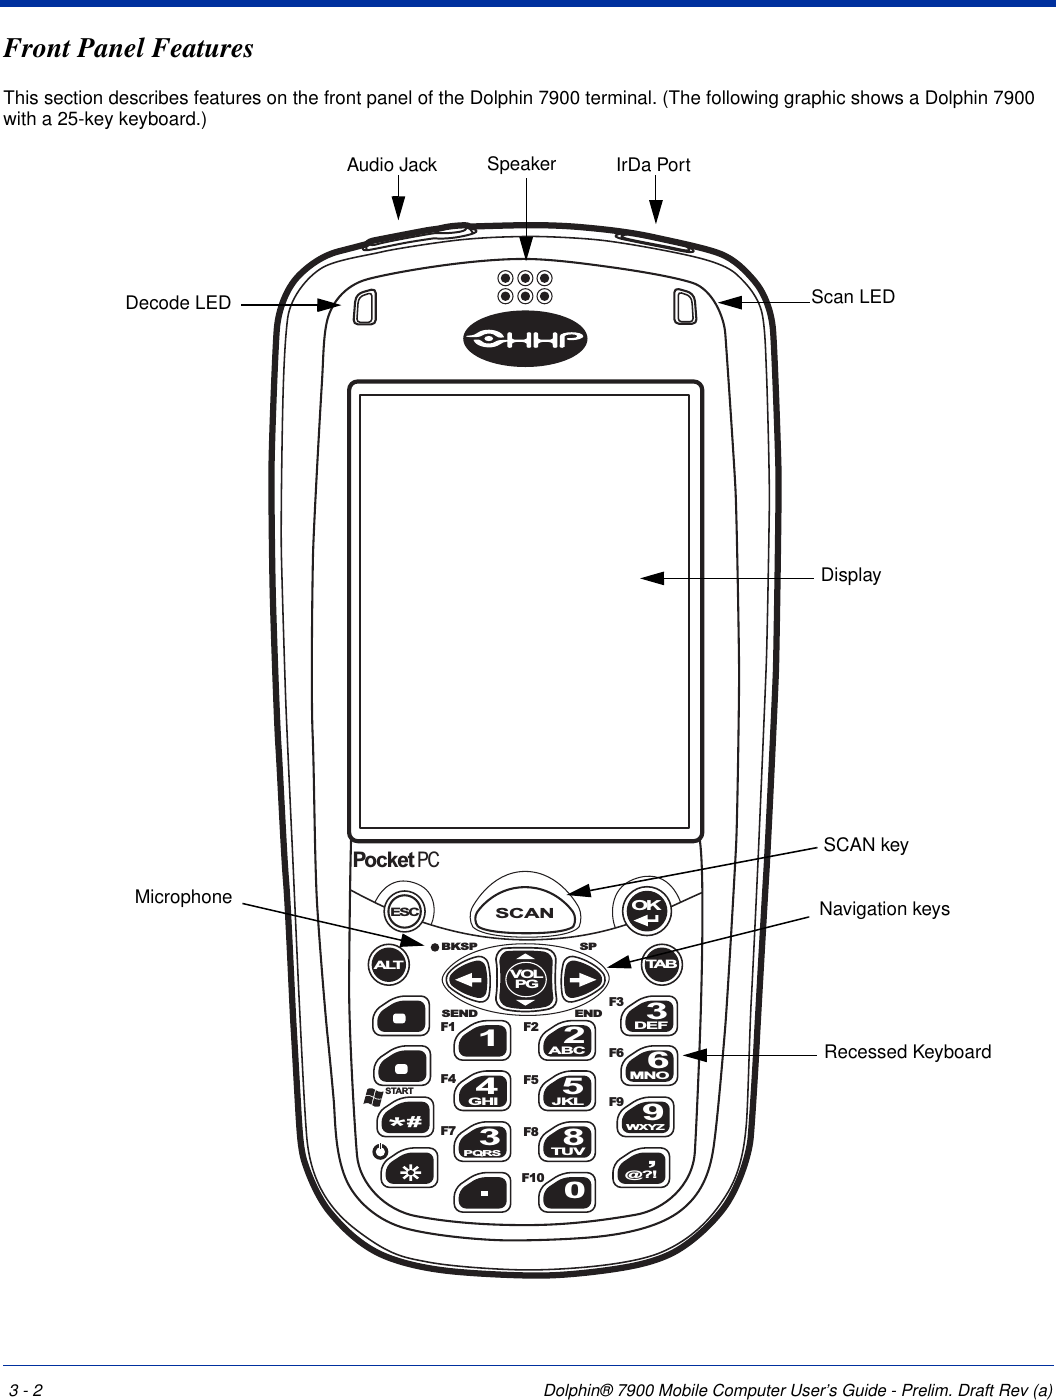
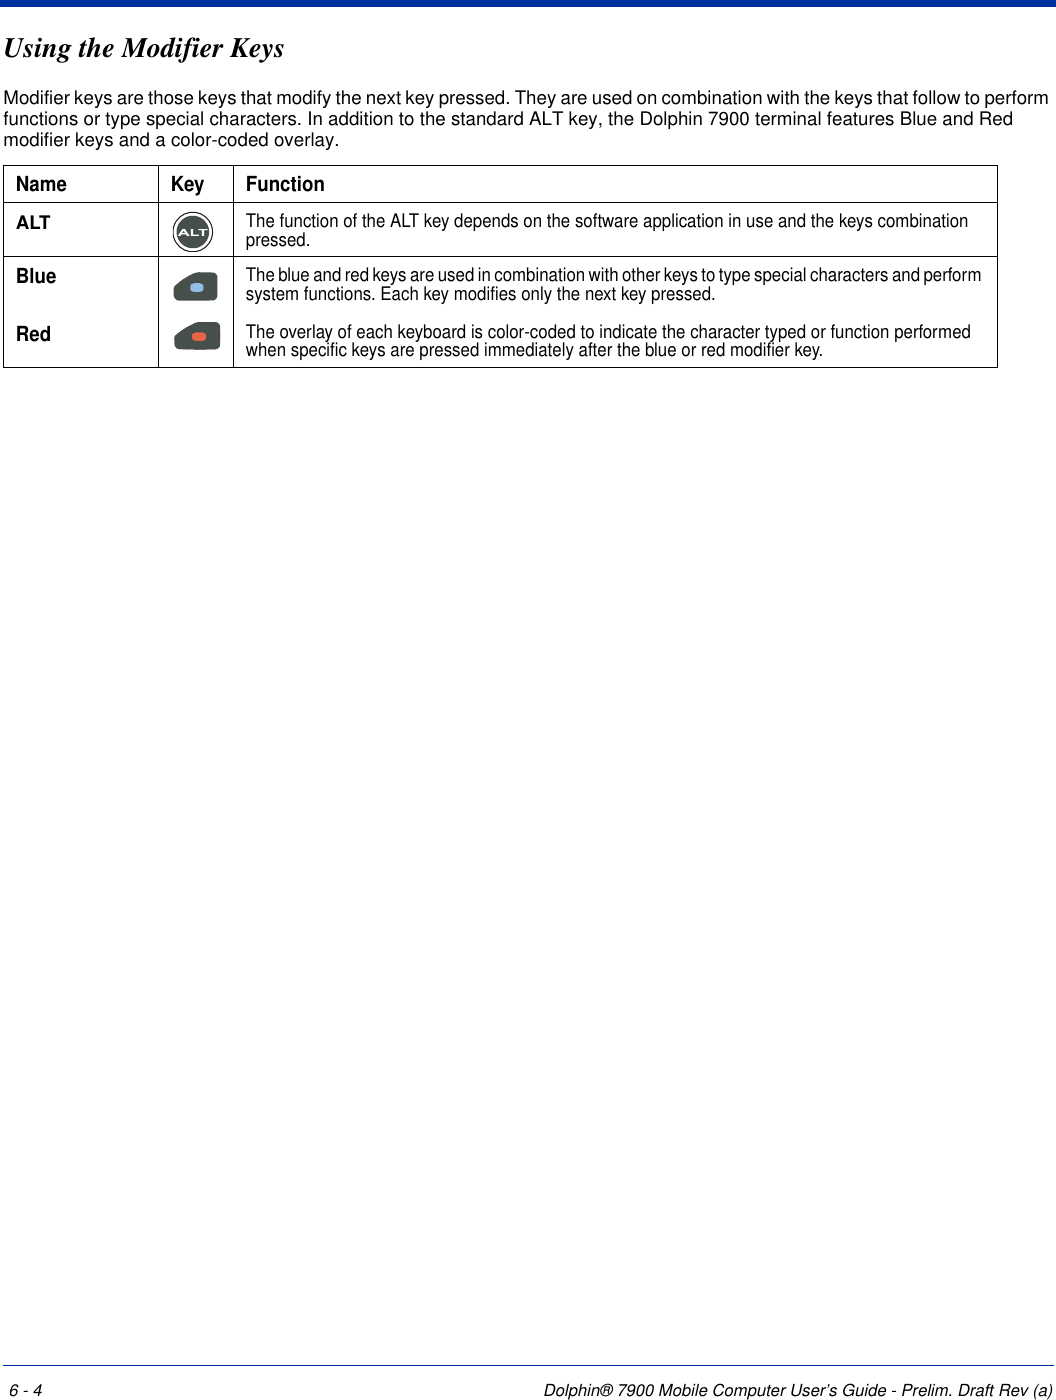
![Dolphin® 7900 Mobile Computer User’s Guide - Prelim. Draft Rev (a) 9 - 29System TabThe System Settings tab controls logging and the port manger timeout period.Password The password used for the tunneled authentication protocol specified. It may contain up to 63 ASCII characters and is case-sensitive. Asterisks appear instead of characters for enhanced security.Protocol This parameter specifies the authentication protocol operating within the secure tunnel. The following protocols are currently supported for TTLS: EAP-MD5, CHAP, PAP, MS-CHAP and MS-CHAP-V2. The following protocols are currently supported for PEAP: EAP-MS-CHAP-V2, TLS/Smartcard, and Generic Token Card (EAP-GTC).Field DescriptionLog Level These settings control the detail of the log messages generated by the Client. Each level is cumulative. By default, all errors, warnings, and information events are logged. Each entry records a severity code (of one [debug message] to four [error] asterisks), a time stamp, and a message.Errors - only the most severe conditions are logged.Warnings - less severe conditions are logged.Information - all errors, warnings, and information events are logged. This is the default setting.Debugging - creates a log message each time the Client detects or reacts to an event. Be advised that log entries fill memory quickly if the Debugging level is chosen. Do not use the Debugging option for a significant length of time because most internal operations generate messages.Defaults Tap this button to return log settings to the default settings.Field Description](https://usermanual.wiki/Honeywell/7900L0P.User-Guide-Part-1/User-Guide-480383-Page-149.png)