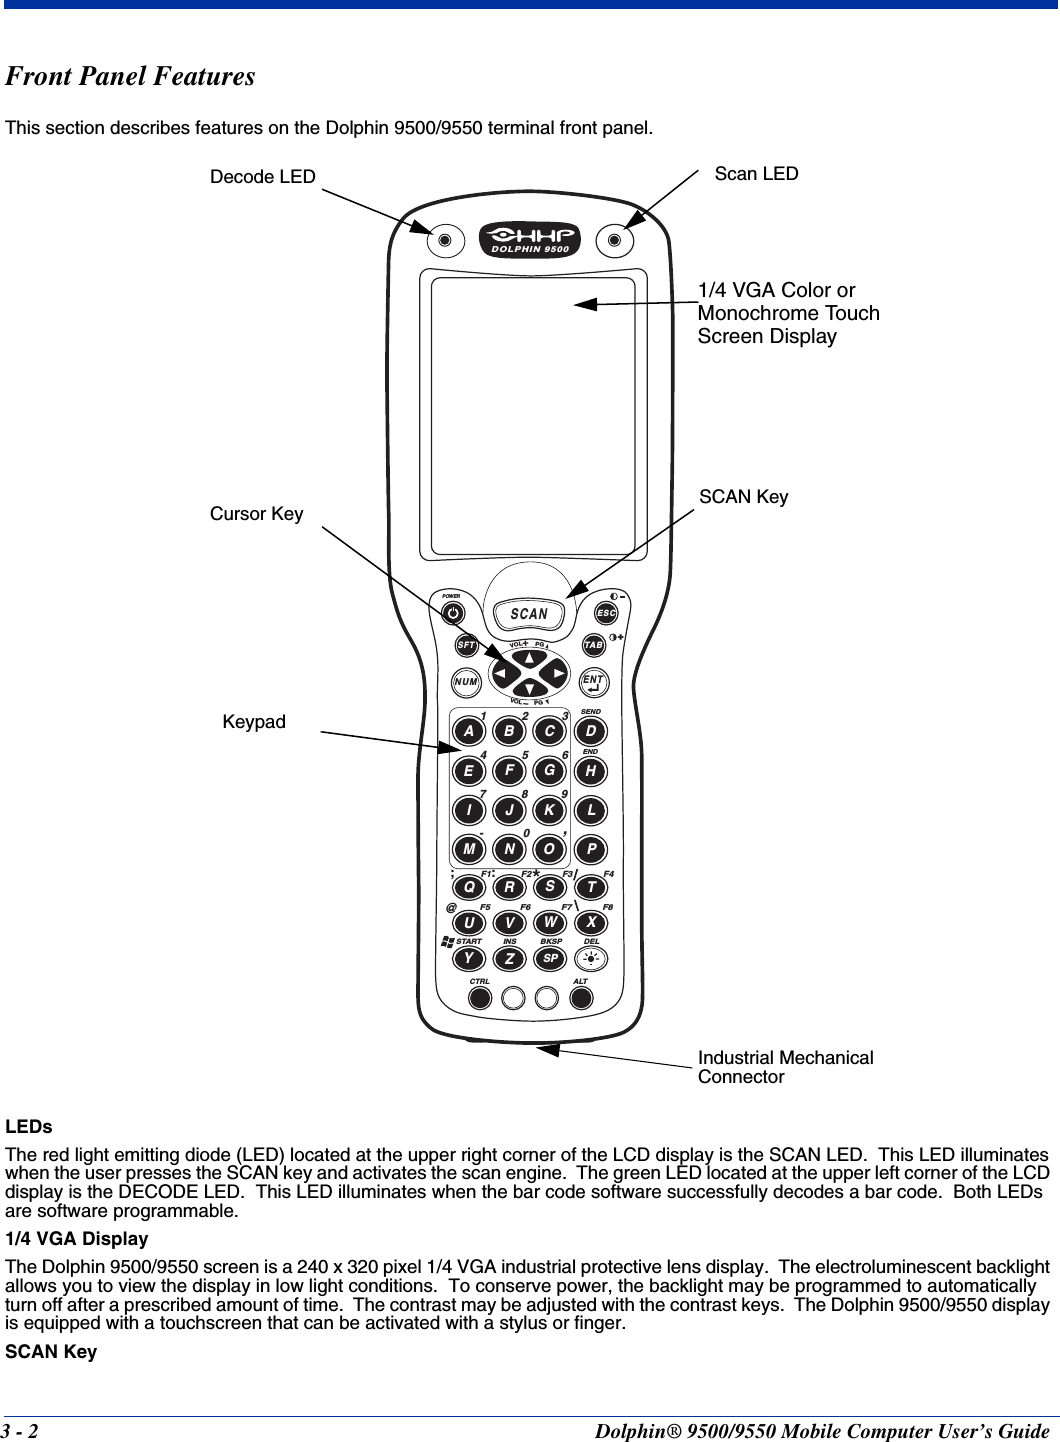
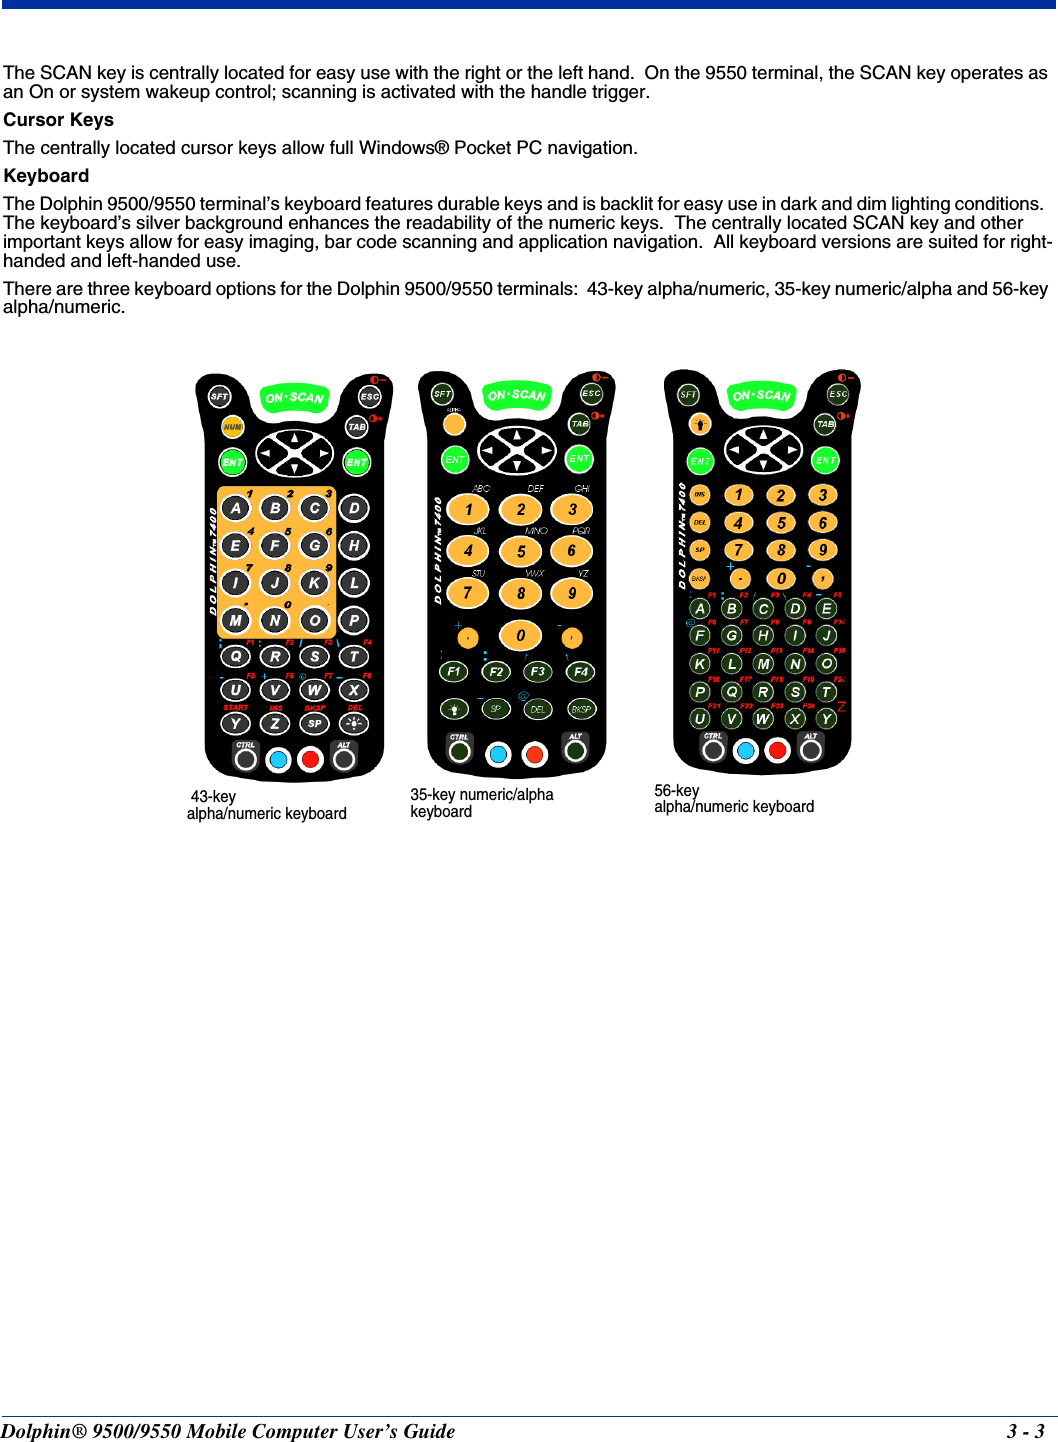
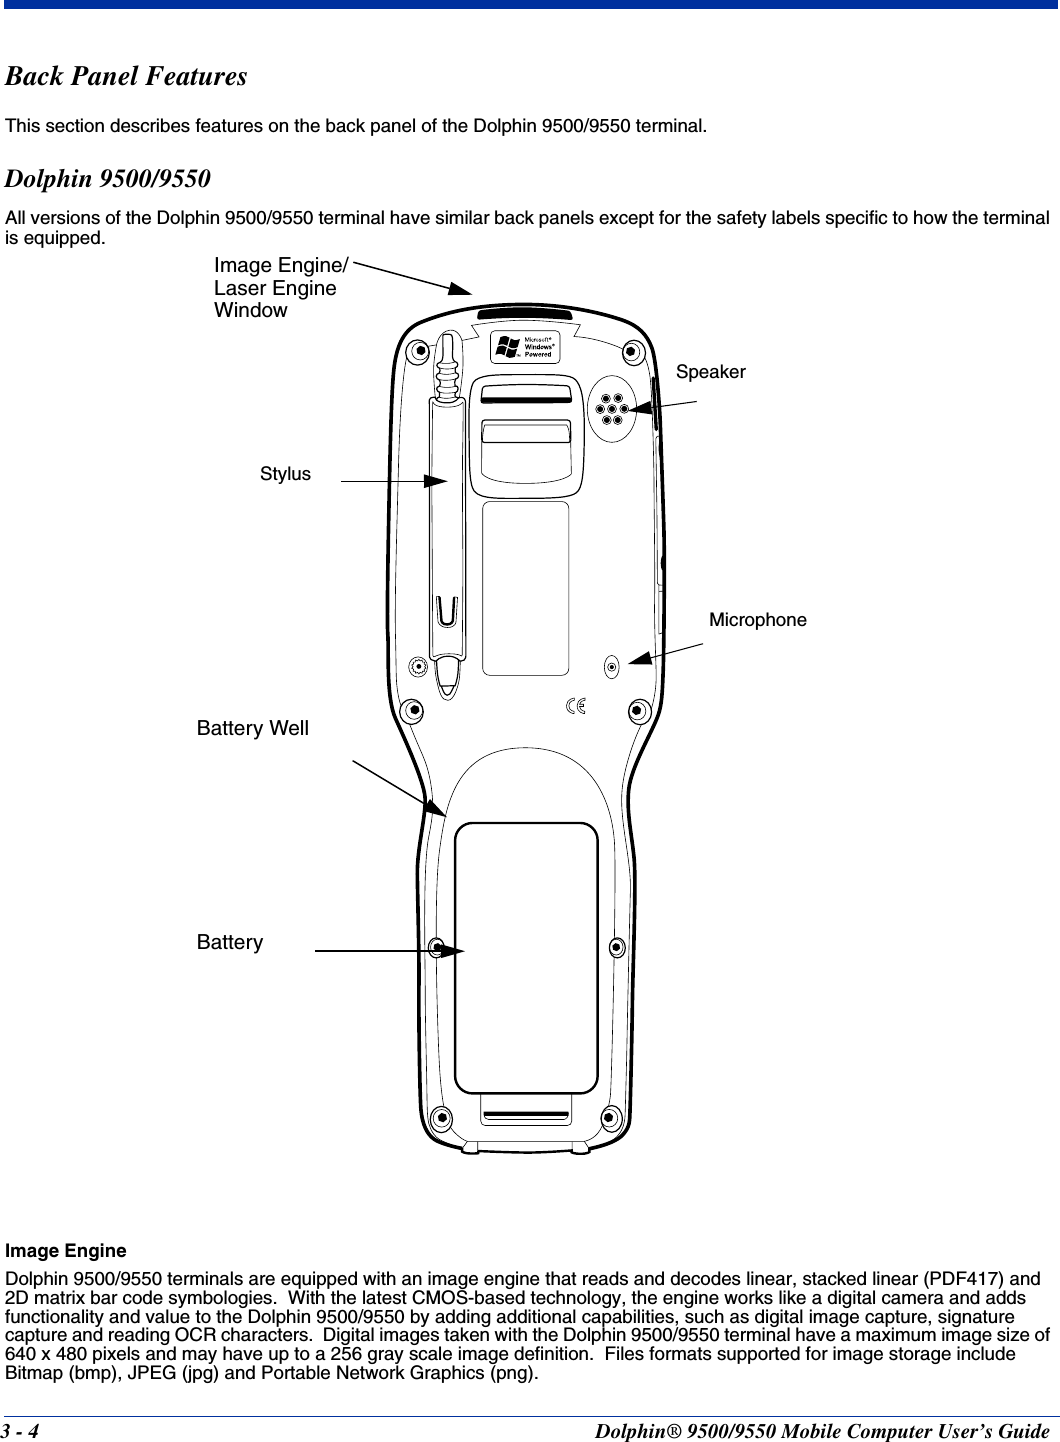
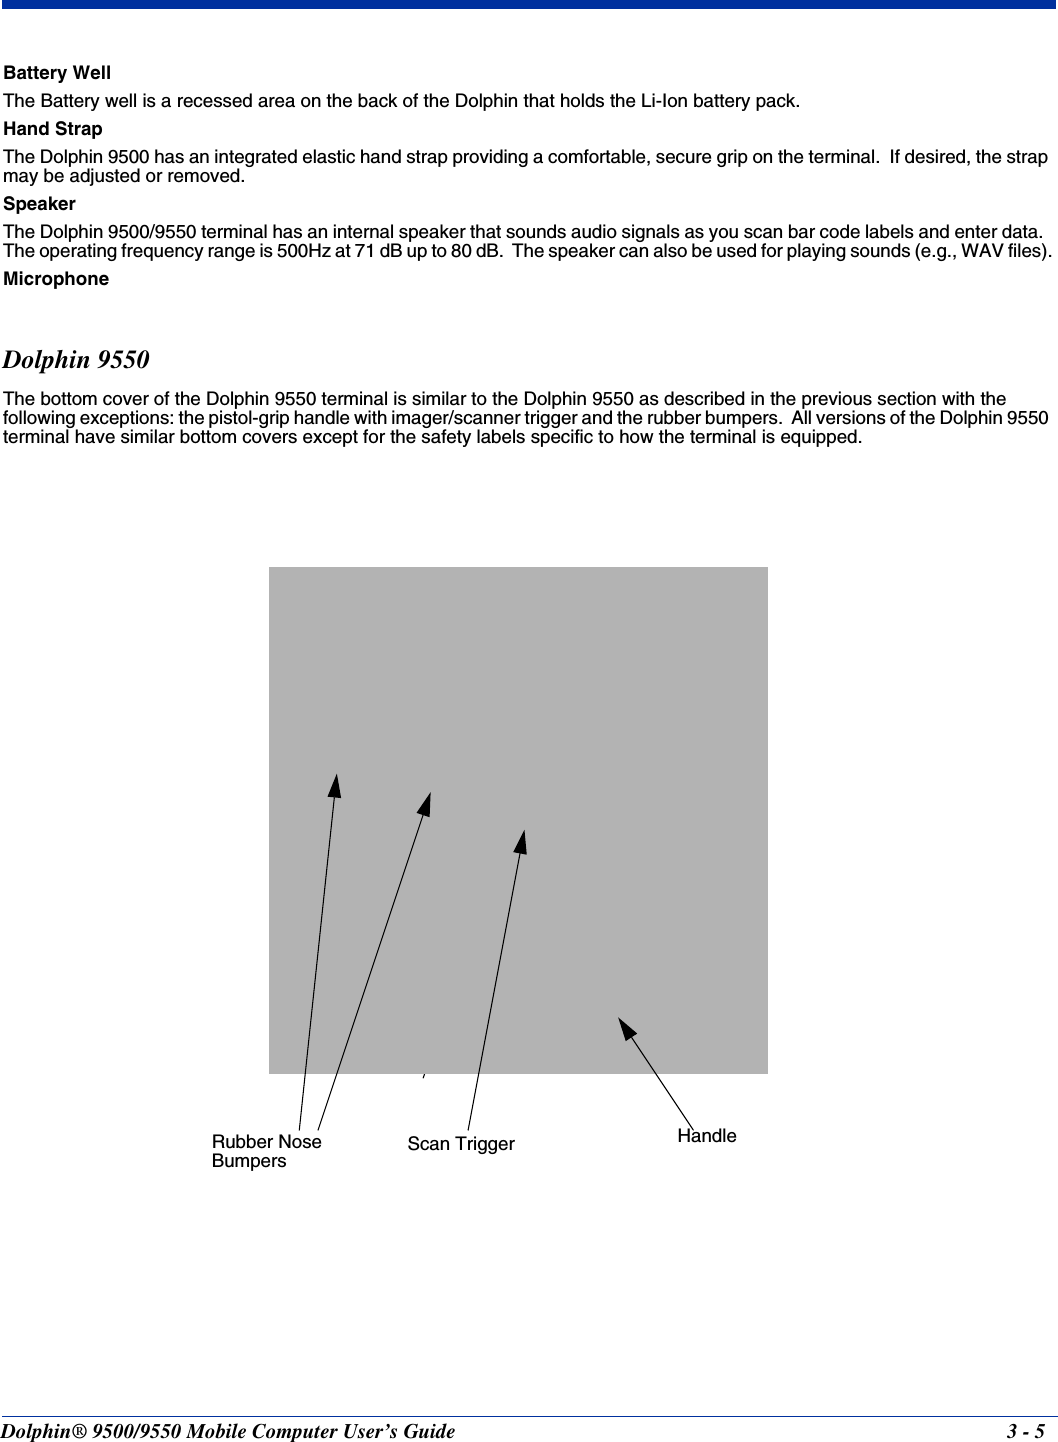
Honeywell 950003 Hand Held Computer with a 802.11b radio User Manual 9500PPC Reva
Honeywell International Inc Hand Held Computer with a 802.11b radio 9500PPC Reva
UserManual.wiki
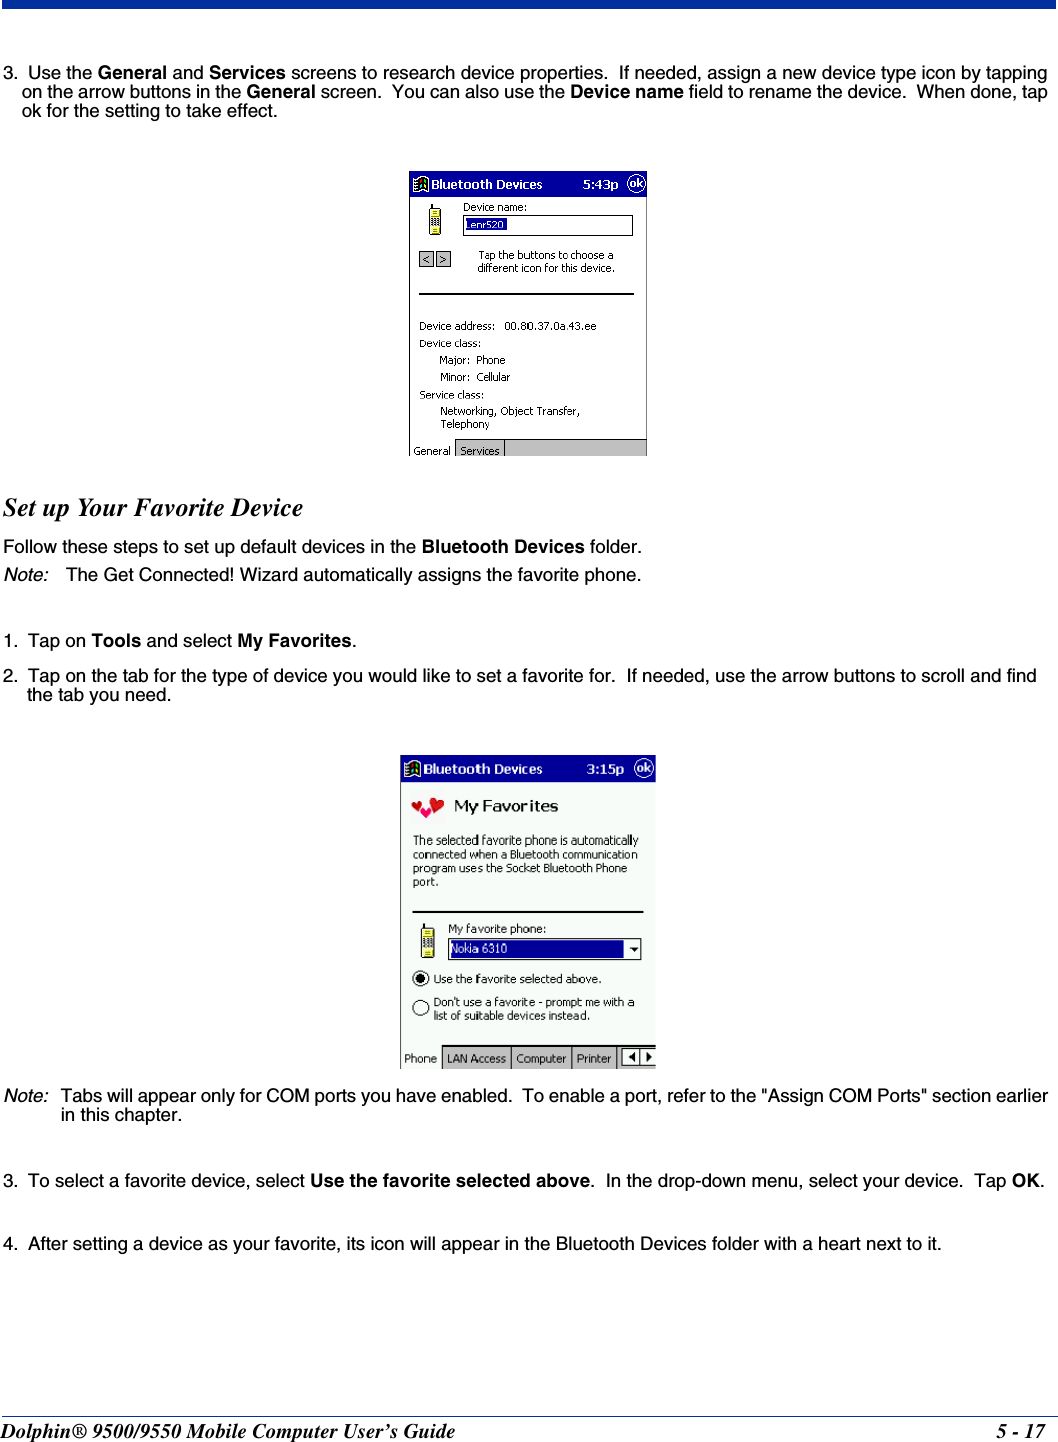
>
Honeywell
>
950003 User Manual
>
part one
Contents
1.
part one
2.
part two
part one
Navigation menu
Upload a User Manual
Namespaces
Wiki Guide
HTML
PDF
Info
Views
User Manual
Discussion / Help
Navigation


![Dolphin® 9500/9550 Mobile Computer User’s Guide 3 - 9Note: Data and programs stored in FLASH remain safe even if the internal backup battery fails. However, you must reset the real-time clock using the Pocket PC Time and Date function.Follow these guidelines to maximize the life of the Dolphin’s backup battery:• Keep a charged Li-Ion battery pack in the Dolphin. The internal battery will prematurely discharge if there is not at least a partially charged battery in the terminal.• Put the Dolphin in the HomeBase connected to power when the terminal is not in use. Main Battery PackThe 7.4V, 14.8 watt hour Lithium Ion (Li-Ion) battery pack is the primary power source for the Dolphin. The Li-Ion battery is designed to operate in a temperature range of -10 to 50°C (14 to 122°F). For maximum performance, charge the batteries between 10 and 35°C (50 and 95°F).Managing Battery PowerData and files saved on the Dolphin 9500/9550 terminal may be stored in RAM, so it is important to maintain a continuous power supply to the terminal. When the main battery pack becomes low, the Low Battery Charge icon will appear in the notification tray at the top of the screen. The Critical icon will appear when the battery is critically low. There is also a Low Battery icon that will appear when the back-up battery is low.Letting the back-up battery become fully discharged will cause the terminal to lose all data in RAM. Therefore, you should keep a charged battery pack in the Dolphin at all times to conserve the internal back-up battery. When you remove a battery pack, insert another charged pack in the Dolphin. The internal battery will prematurely discharge if there is not at least a partially charged battery in the terminal. The battery status indicator displays in the notification tray when the battery is low or critically low. If there is no indicator, the battery is adequately charged.If the main battery is low and the terminal is in suspend mode, pressing the SCAN or Power button will not wake up the Dolphin 9500/9550 terminal; you must replace the discharged battery with a fully charged battery.Setting Critical and Low Battery PointsThe Dolphin 9500/9550 may be programmed to display warnings when the battery reaches critical and low battery points. There are two entries defined in the registry. The specific settings are:[HKEY_LOCAL_MACHINE\System\CurrentControlSet\Control\Power]"CriticalBatt"=dword:a"LowBatt"=dword:19"CriticalBatt"=dword:F This sets the Critical Battery point to 15 percent (a hex = 15 decimal). The critical battery is the point at which the customer is warned that the battery charge is very low. This warning will be posted every 3 minutes until the situation is corrected."LowBatt"=dword:19This sets the Low battery point to 25 percent (19 hex = 25 decimal). The low battery setting is the point at which the user is alerted that the battery is low. The user is notified only once for a low battery.These are the default values. Developers can set these parameters from 0 (no warning at all) to 99 (would nearly always warn). The warnings do not appear when the terminal is on external power.Checking Battery PowerThe Battery Status screen displays information about current battery status and allows you to set options that can conserve battery power.To open the Battery Status screen:1. Select Start>Settings>System>Power. 2. Select your preferences.3. Tap OK to save the changes and exit.](https://usermanual.wiki/Honeywell/950003.part-one/User-Guide-349548-Page-33.png)