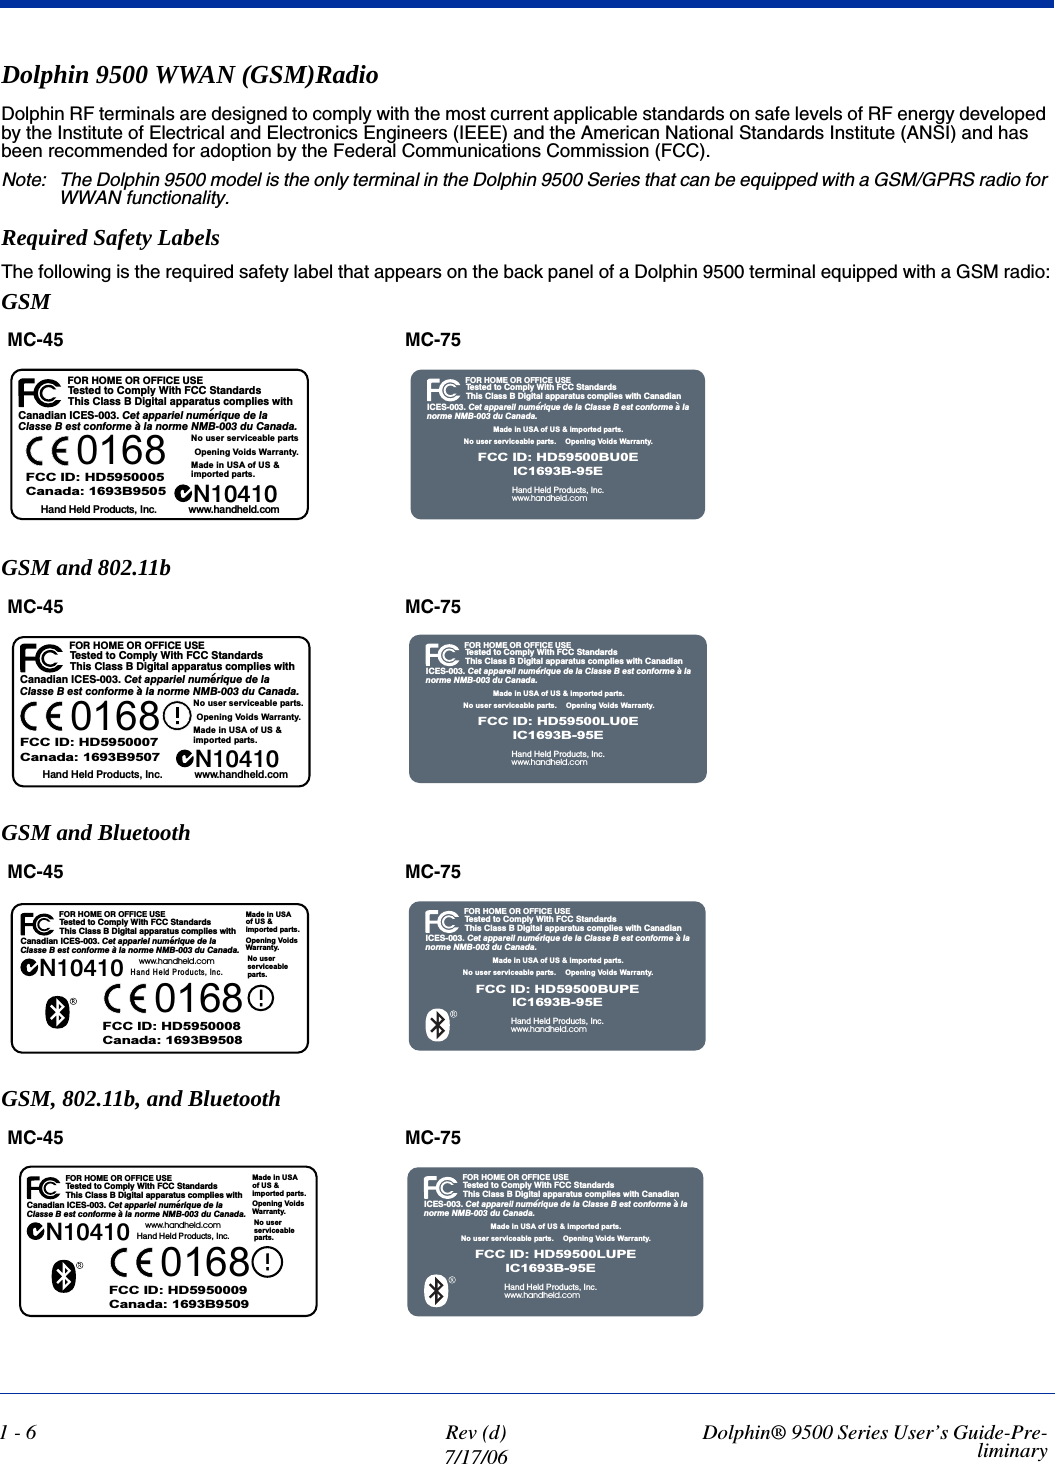
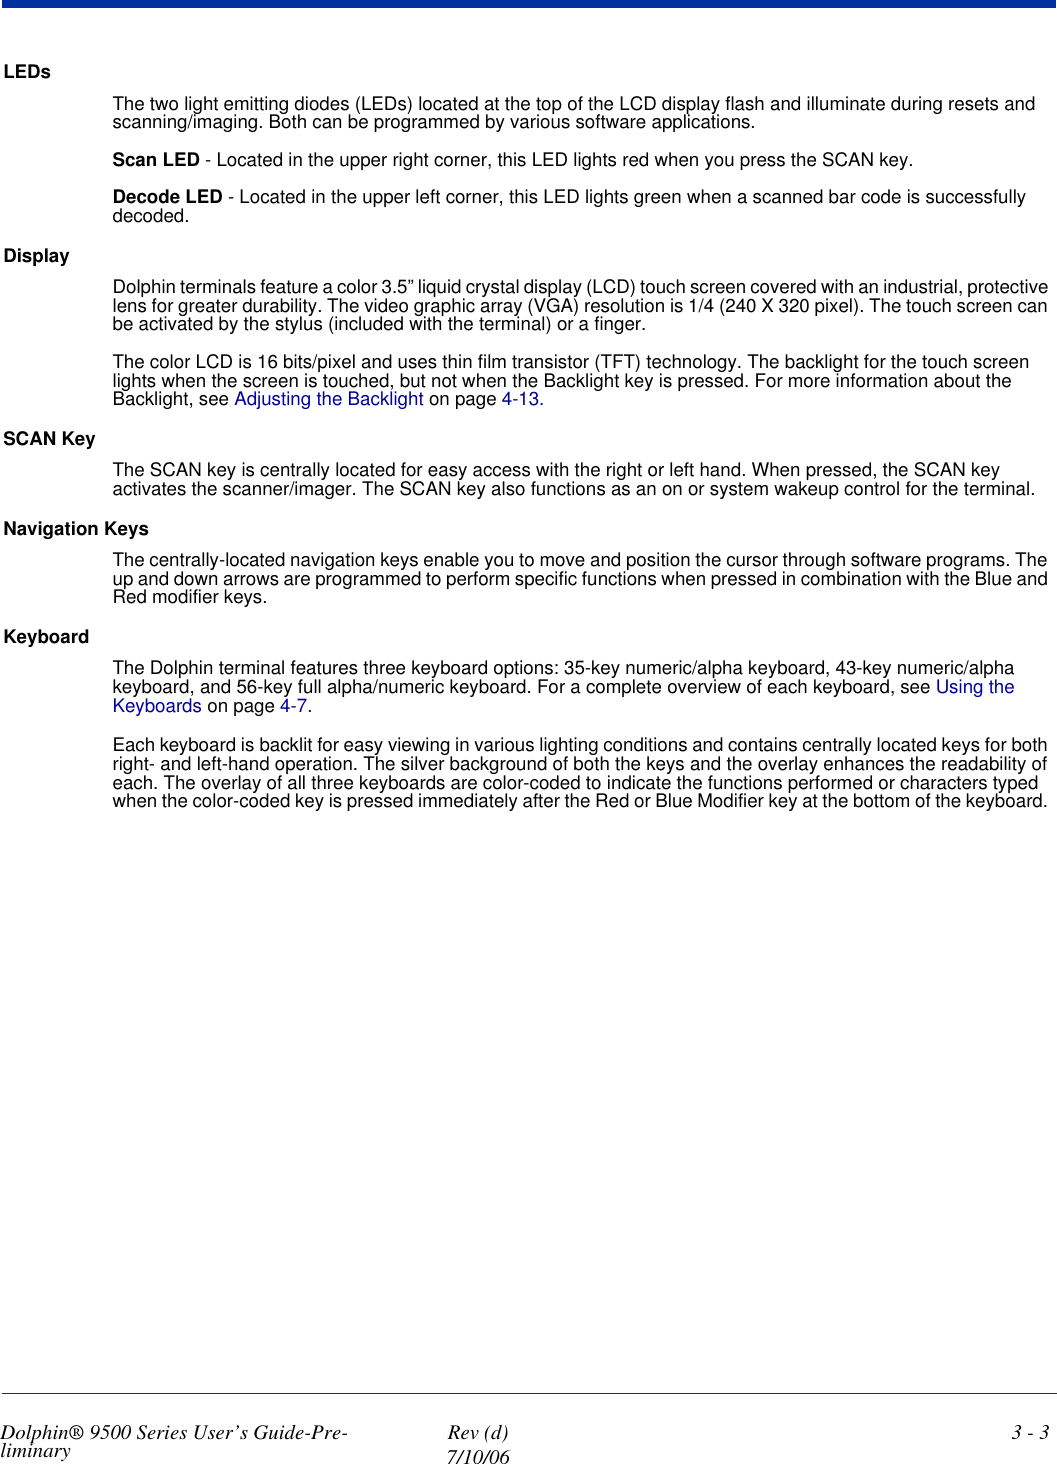
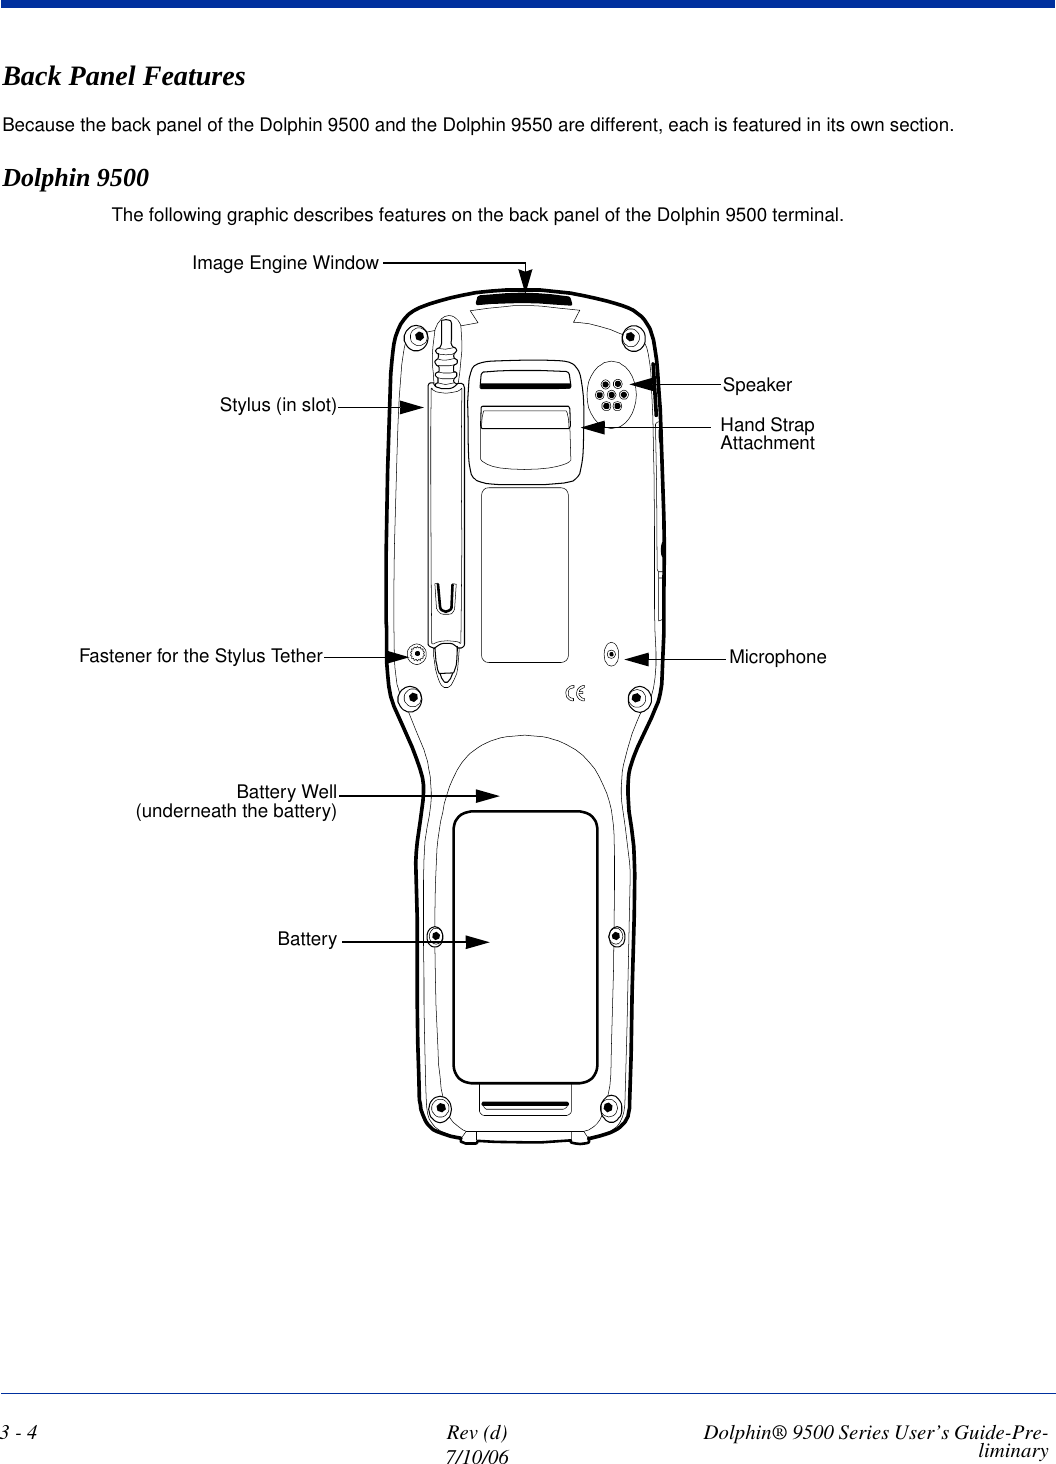
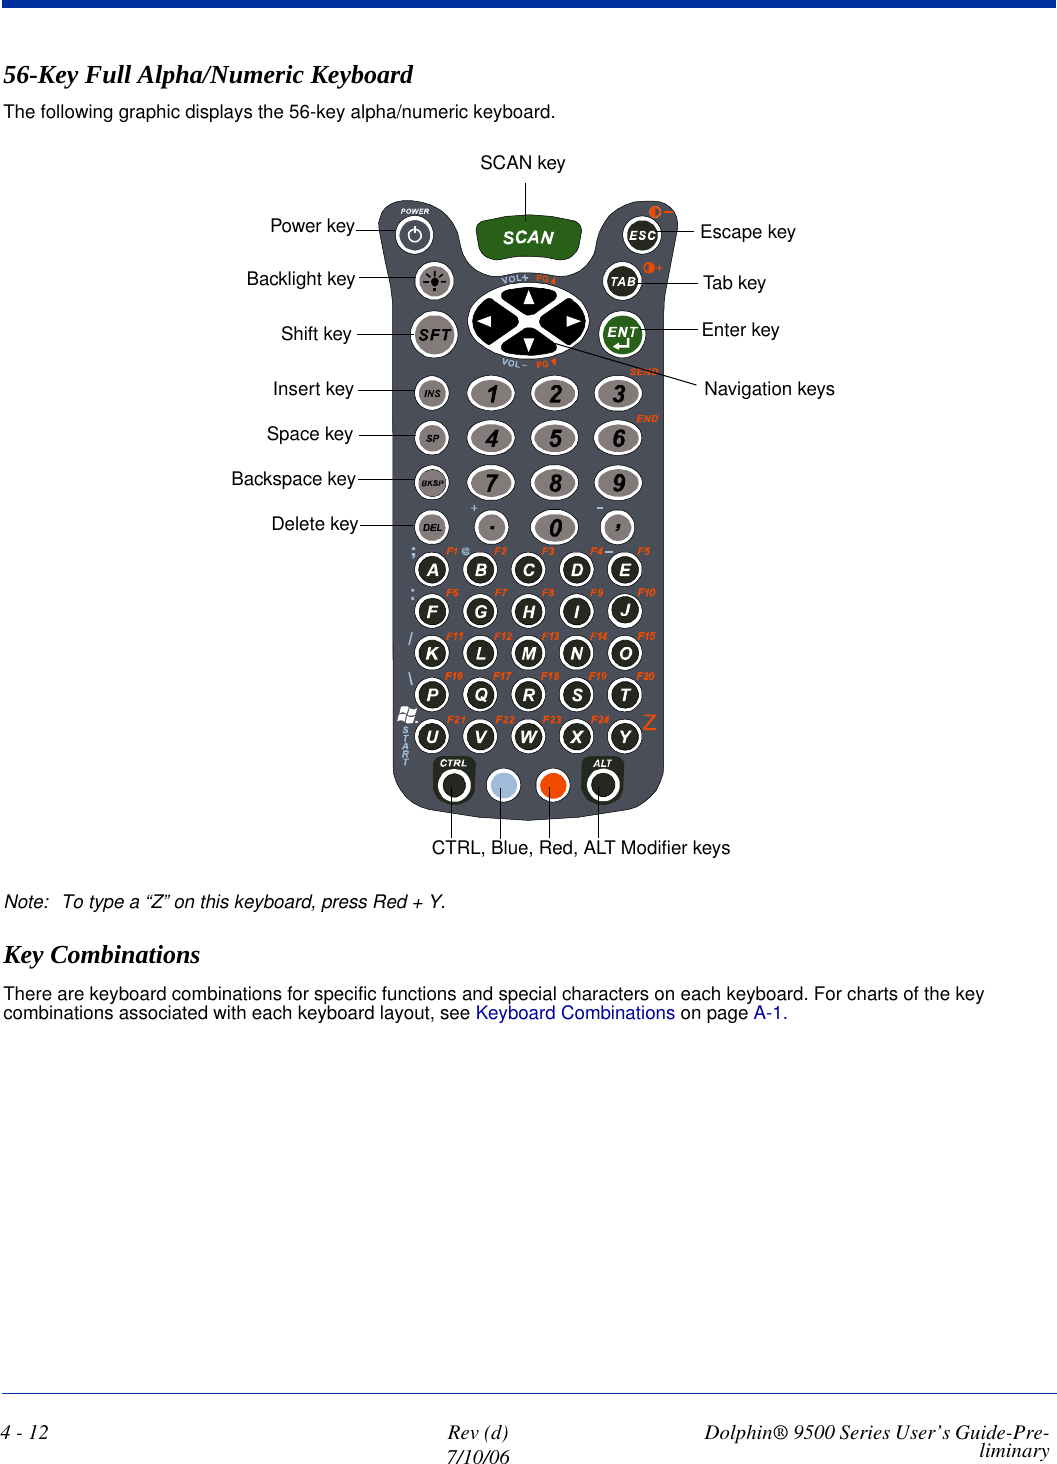
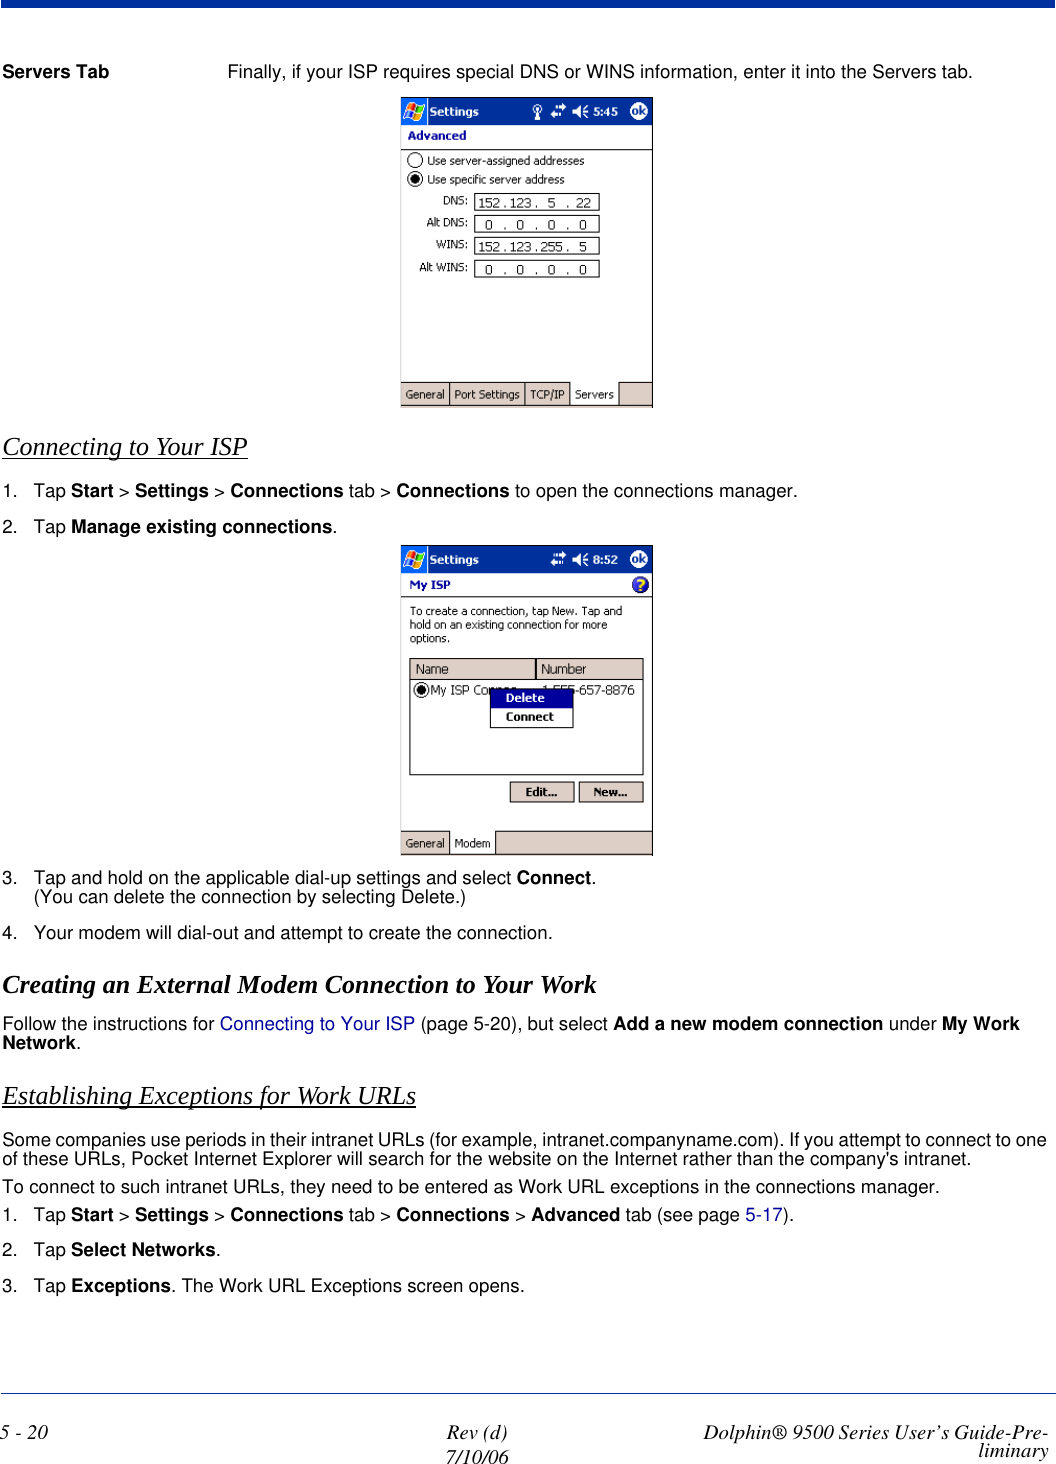
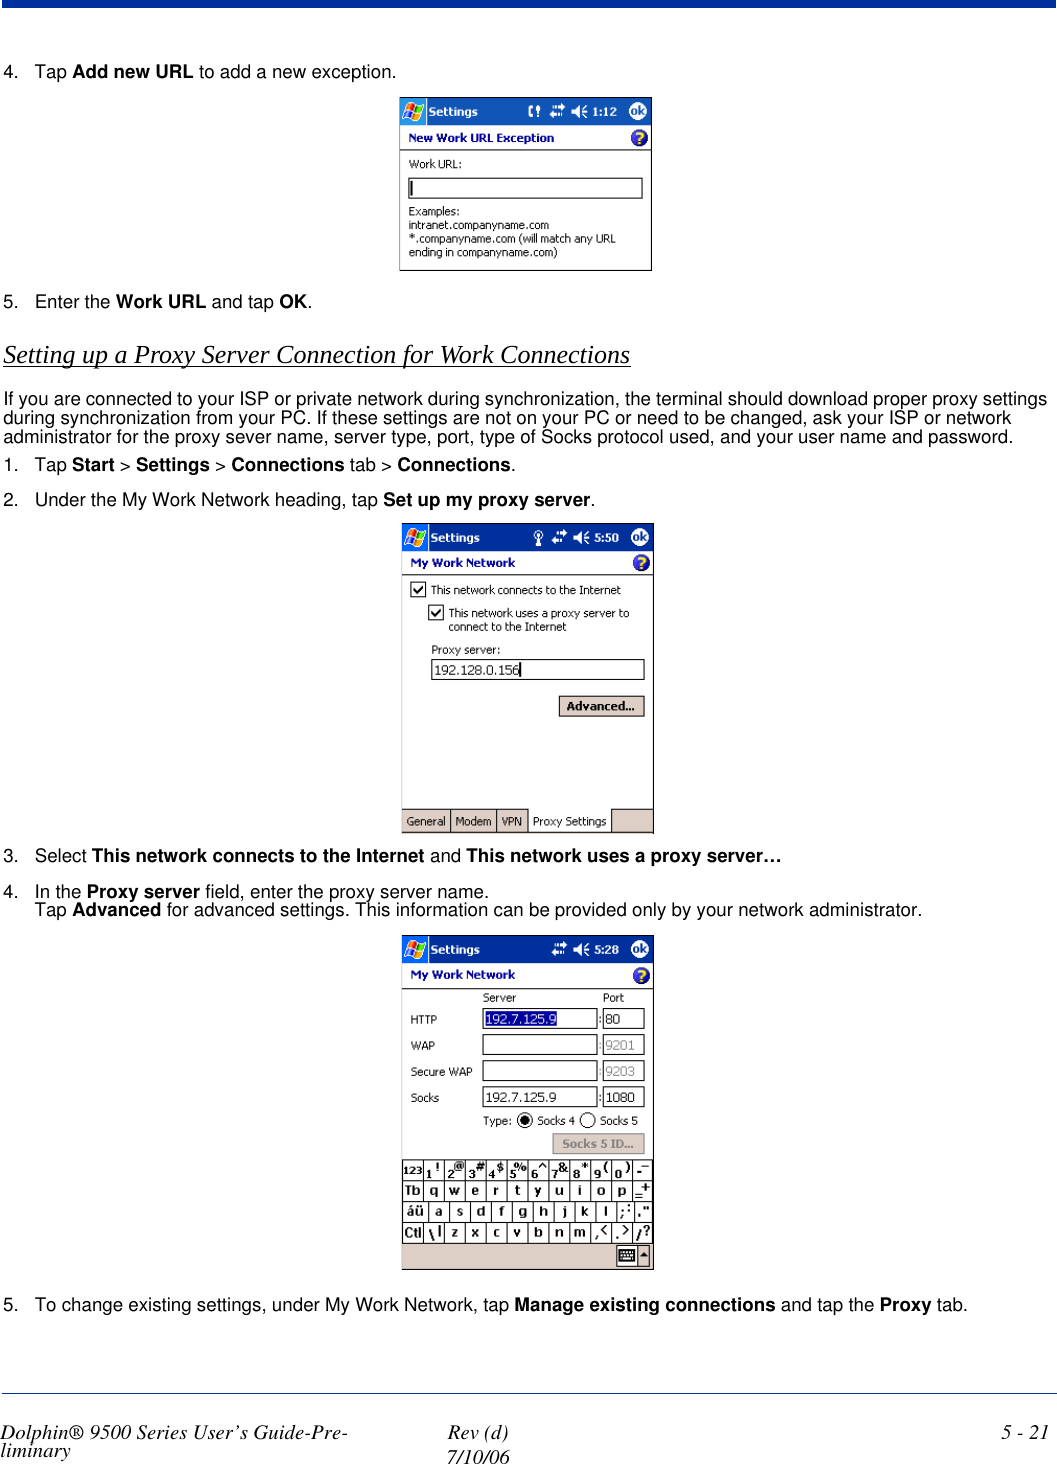
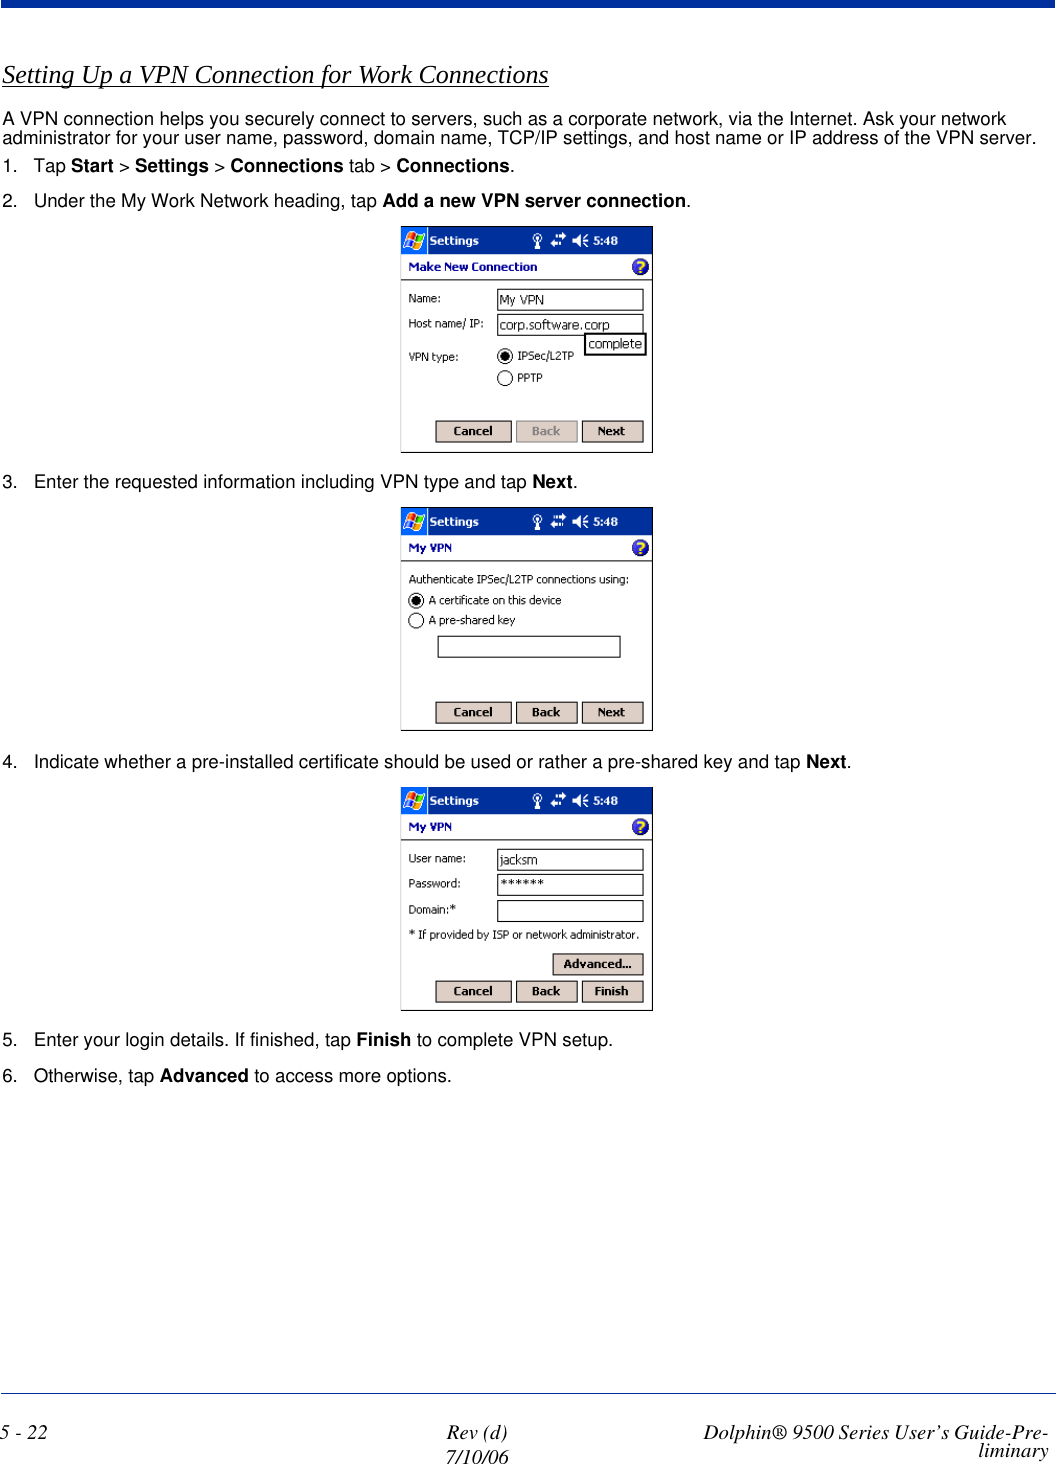
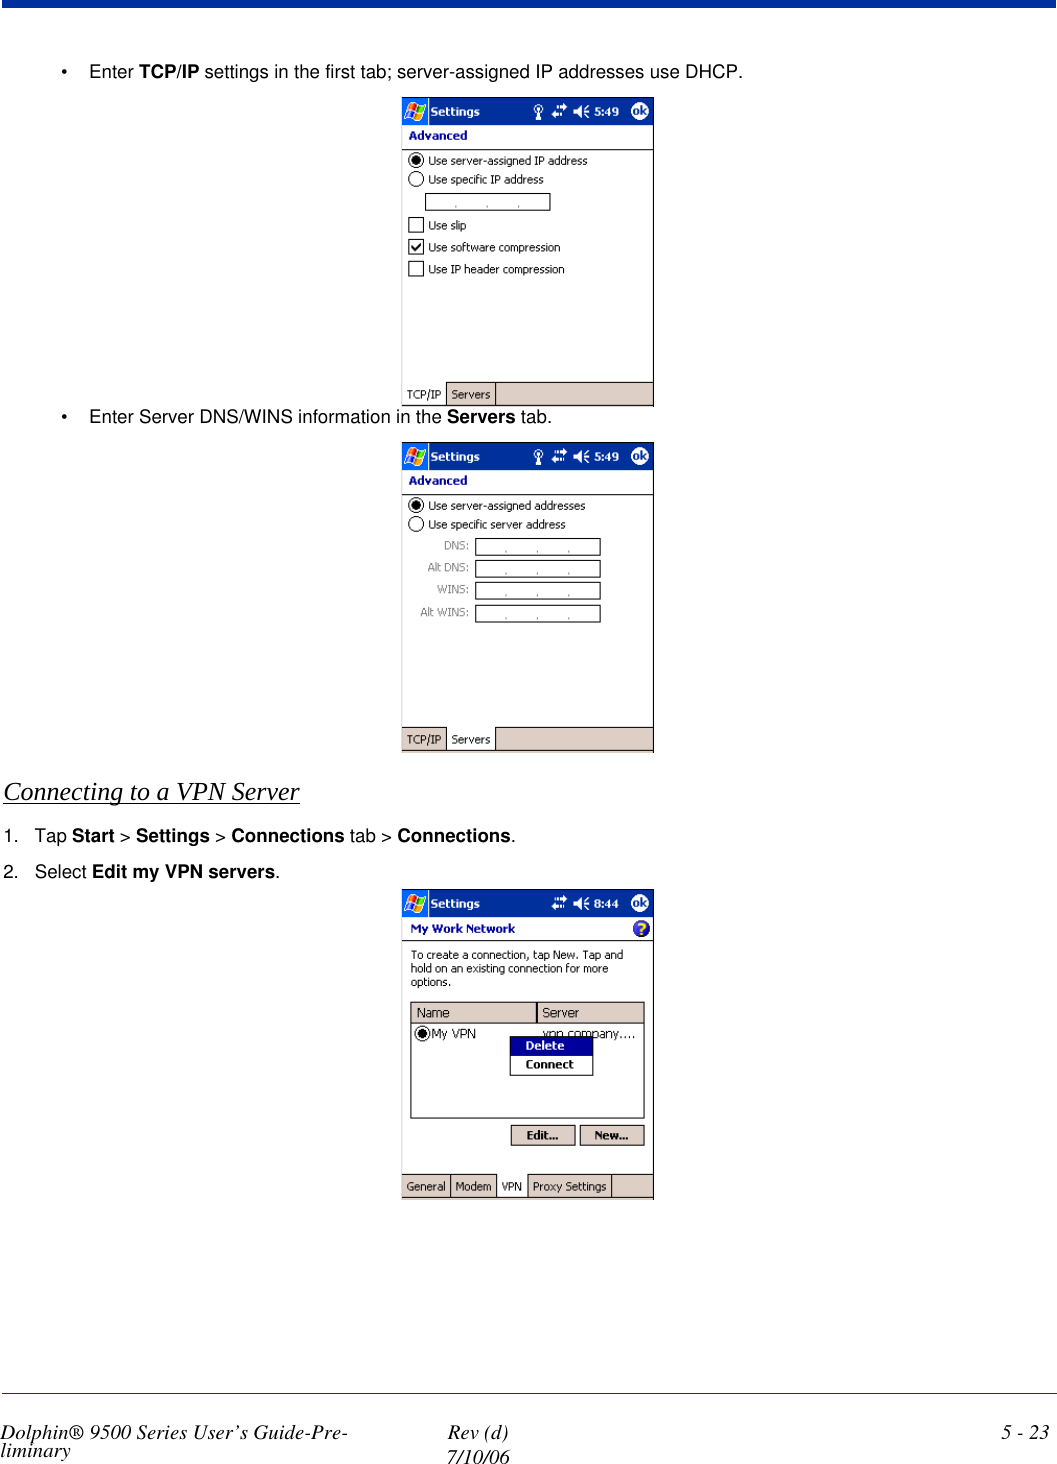
Honeywell 9500LUPE Handheld PC with GSM, WLAN and BT transmitter User Manual Chapter 1 Intro
Honeywell International Inc Handheld PC with GSM, WLAN and BT transmitter Chapter 1 Intro
Contents
- 1. User Manual Part 1
- 2. User Manual Part 2
- 3. Revised User Manual Part 1
- 4. Revised User Manual Part 2
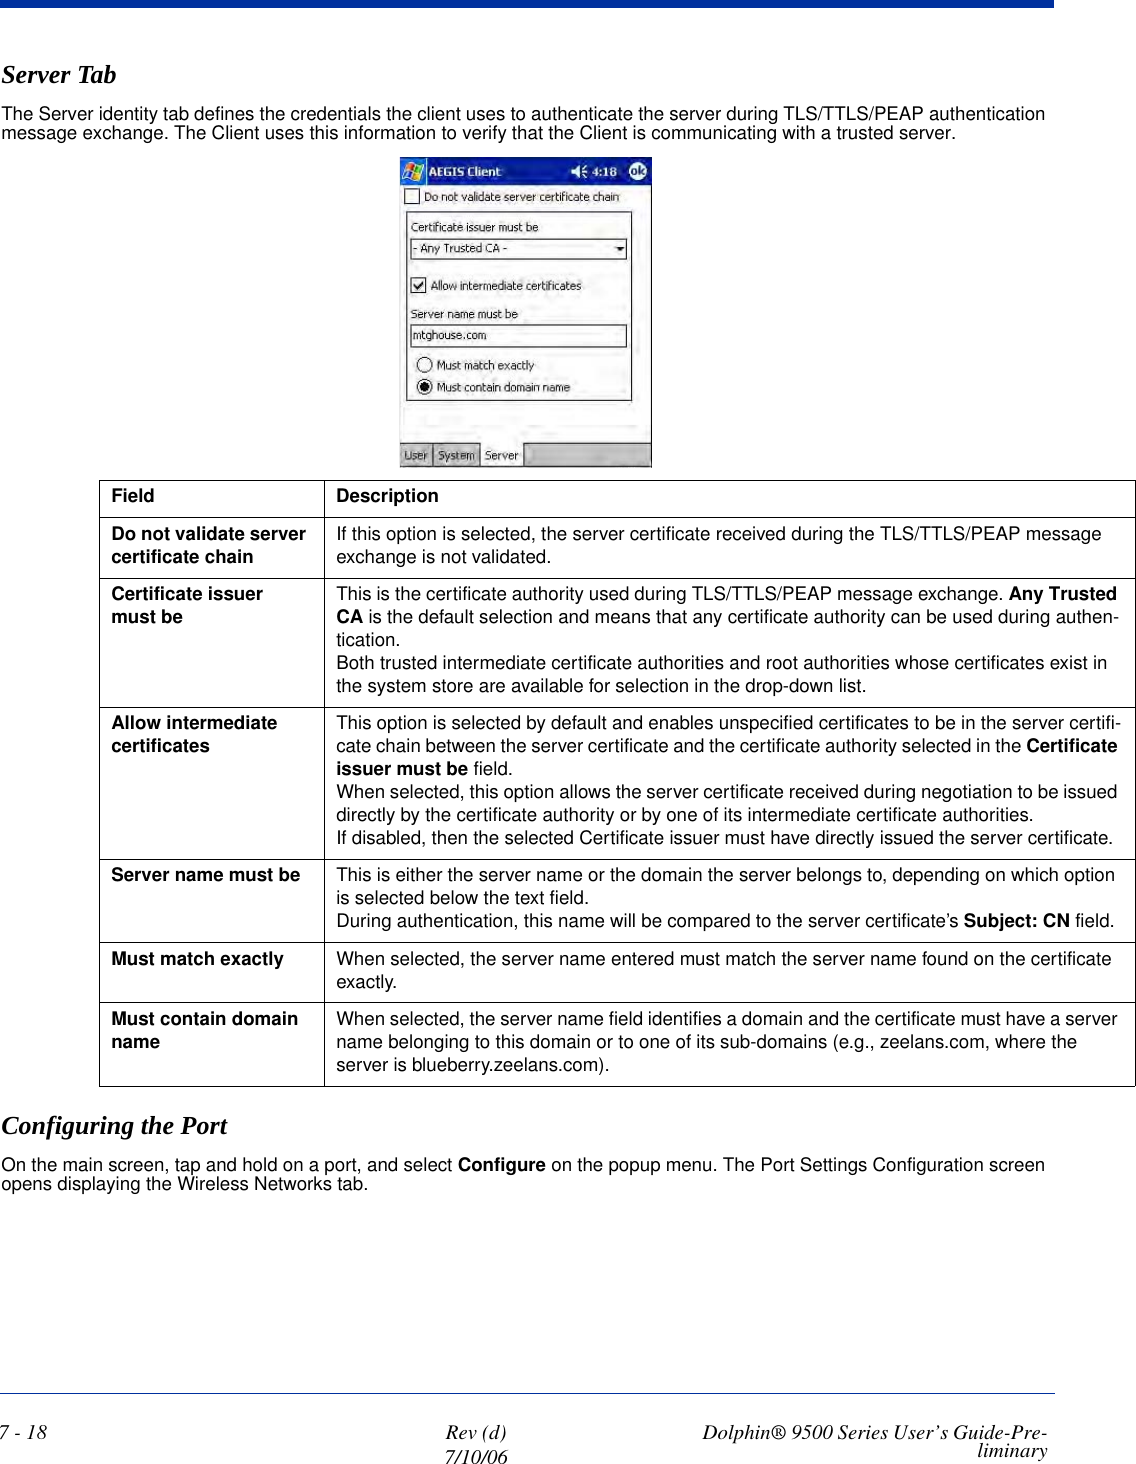
User Manual Part 1

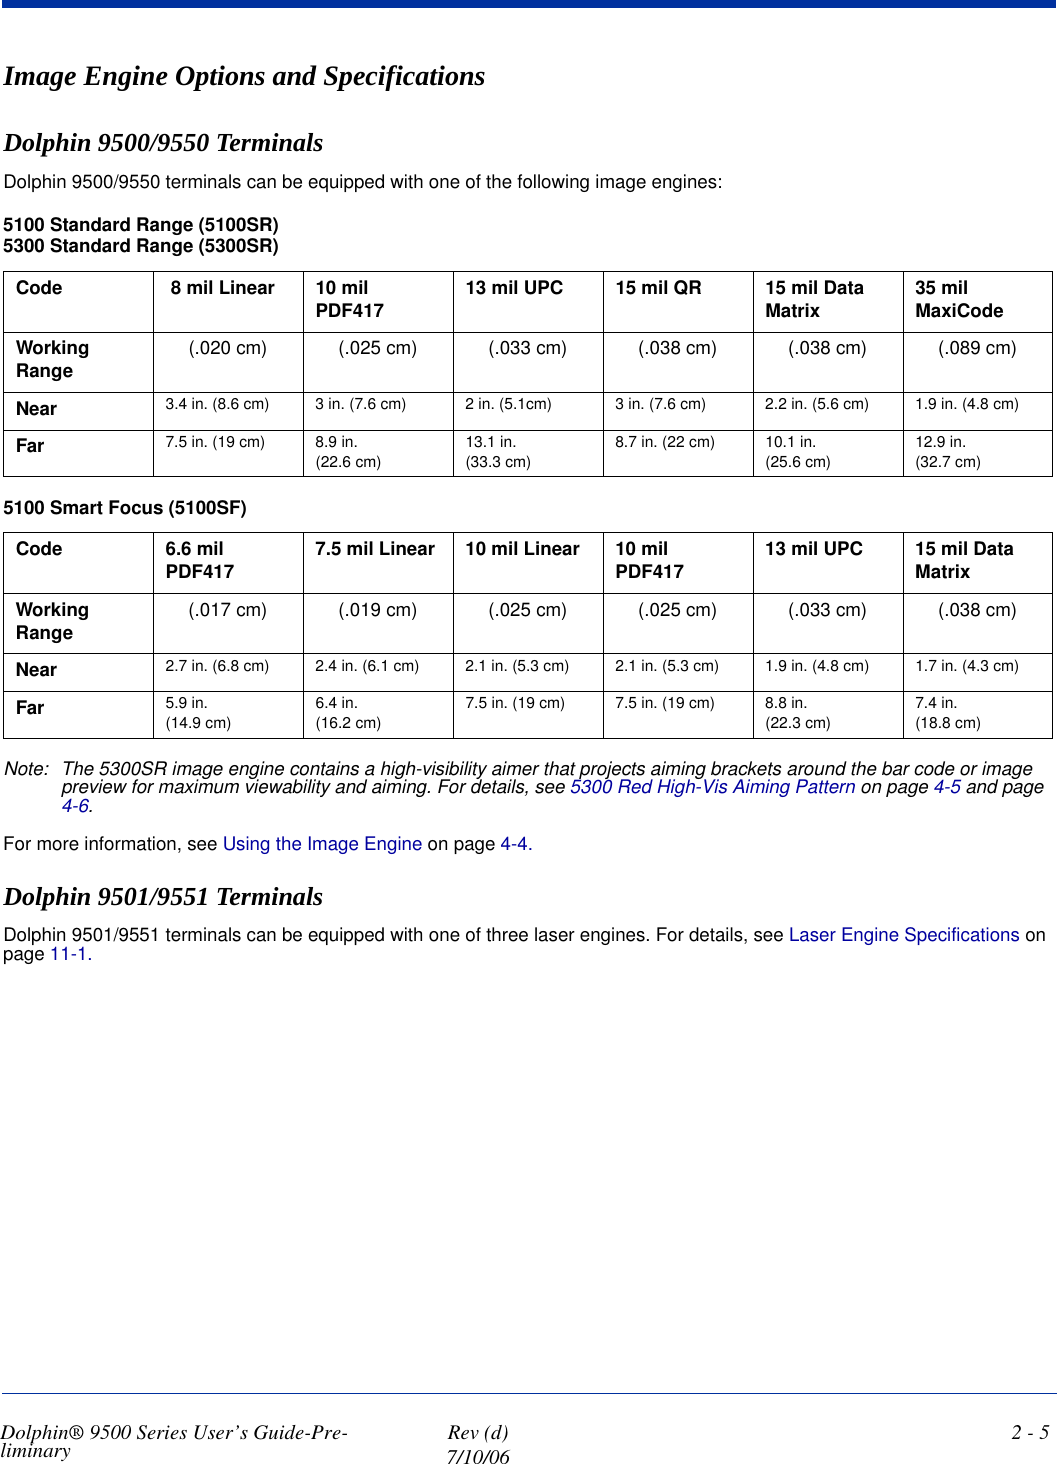


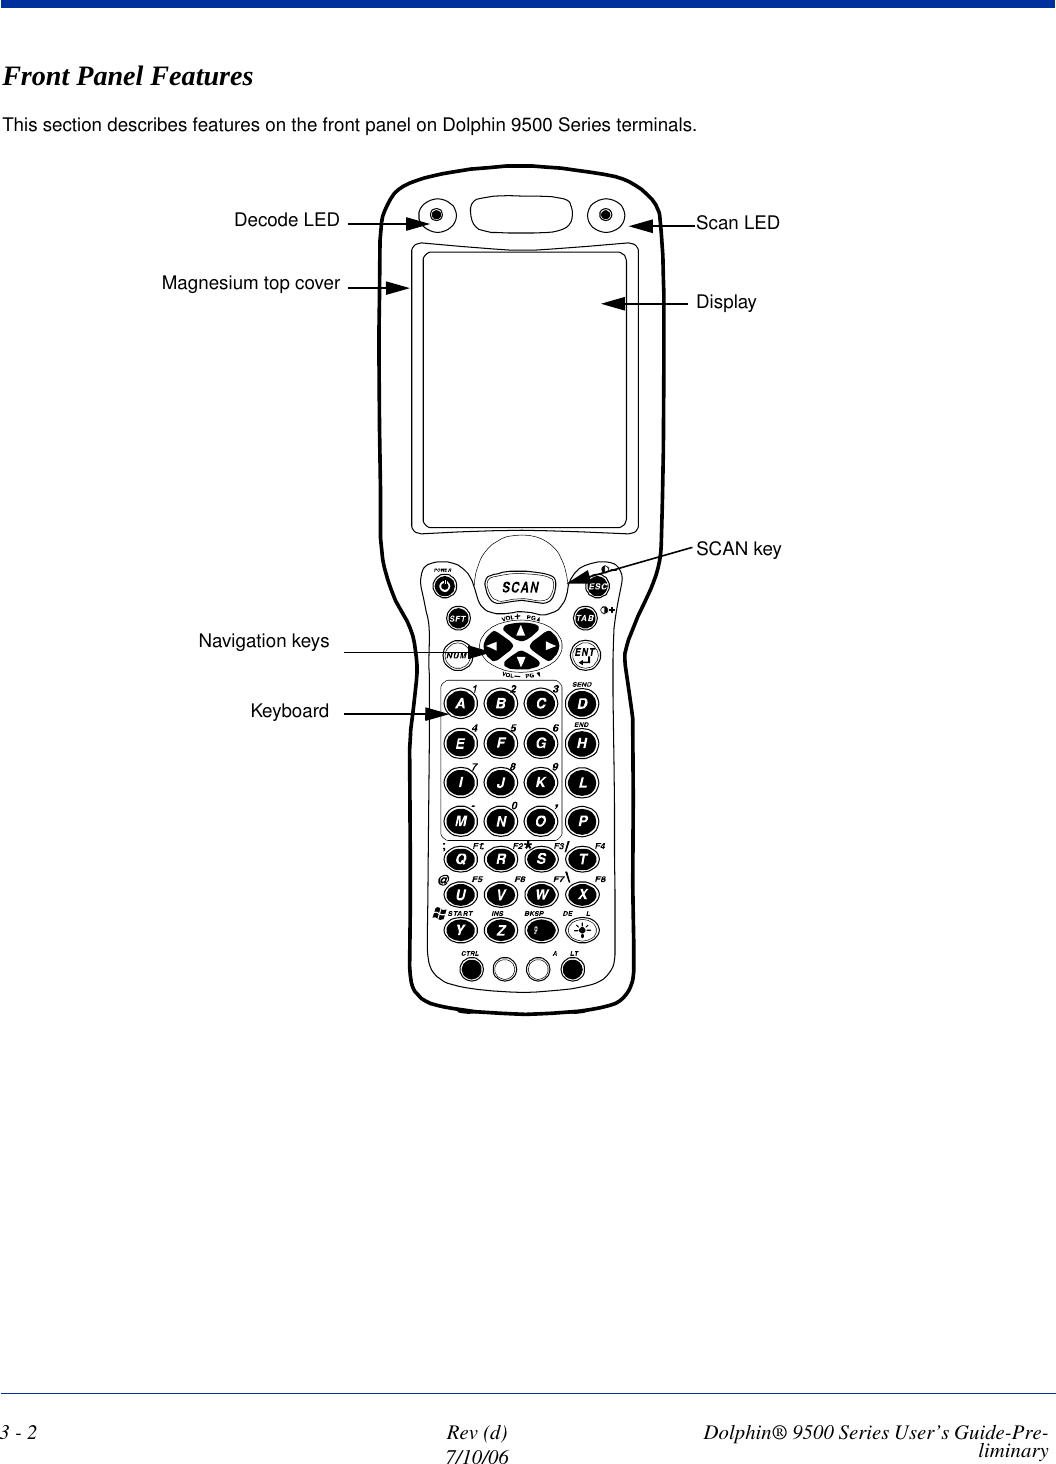
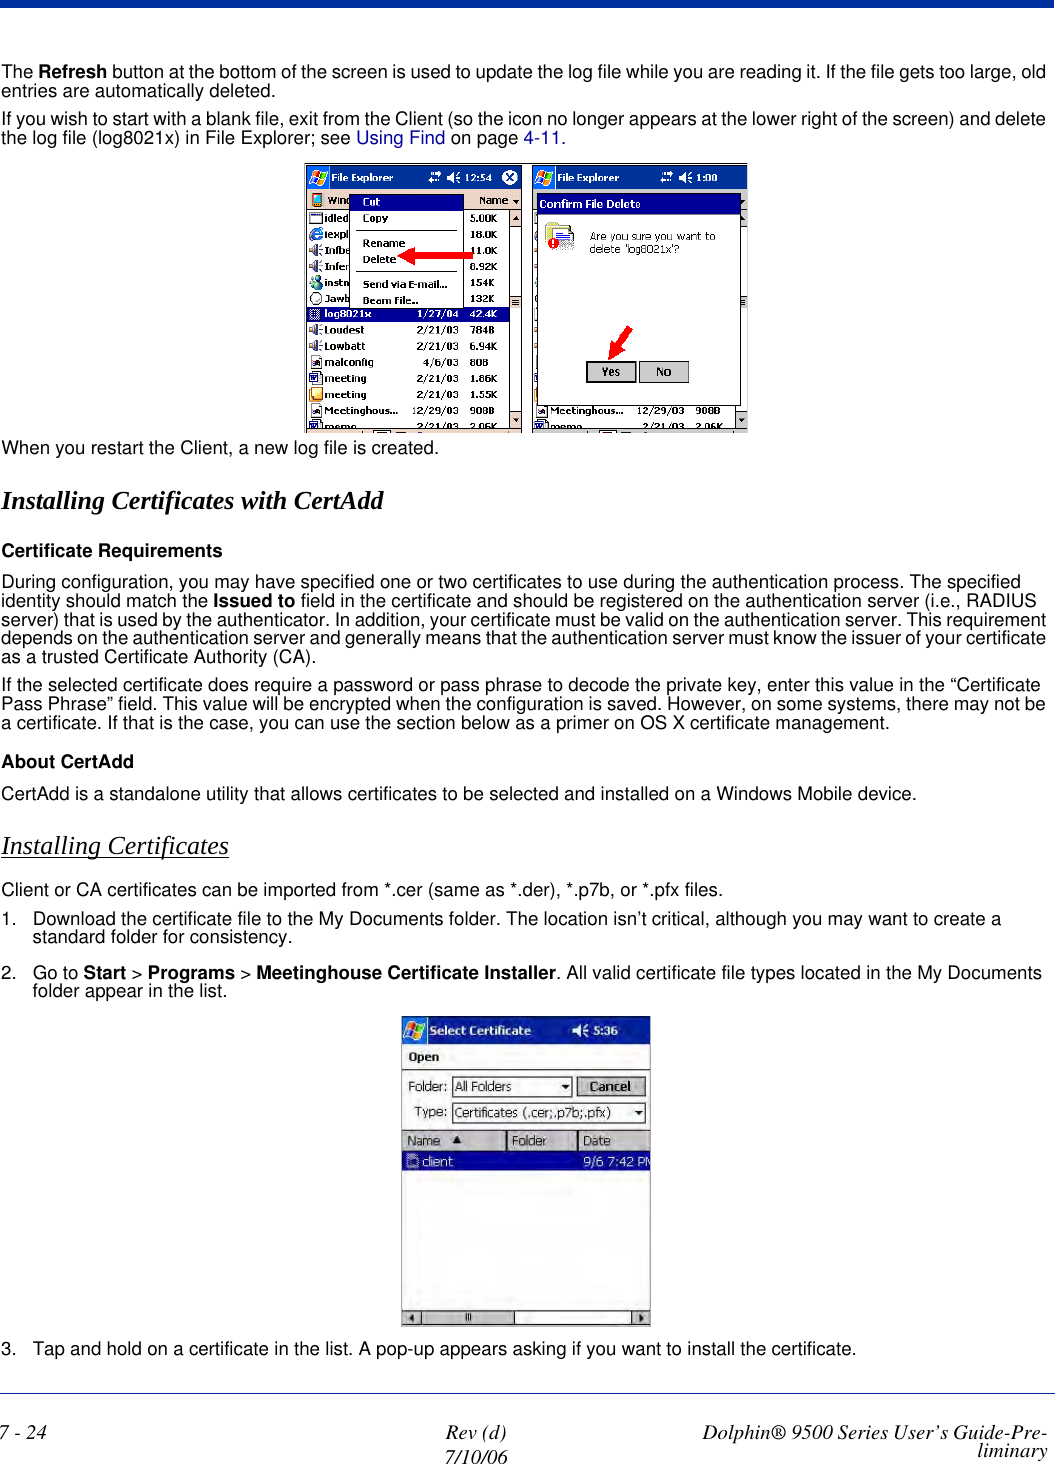
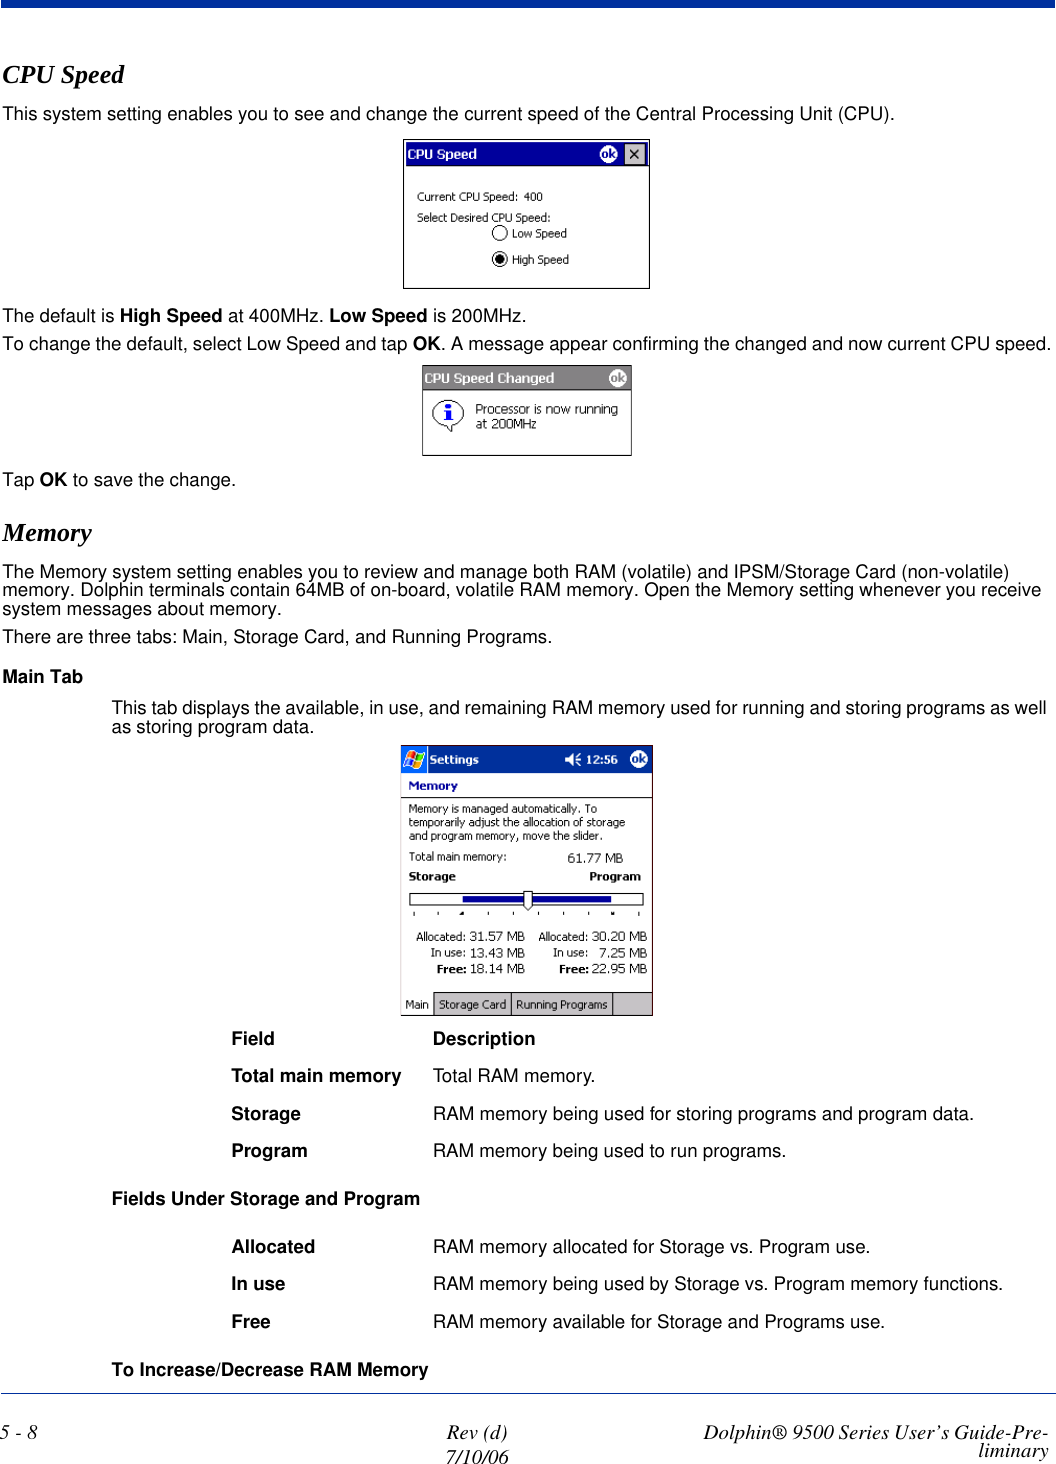
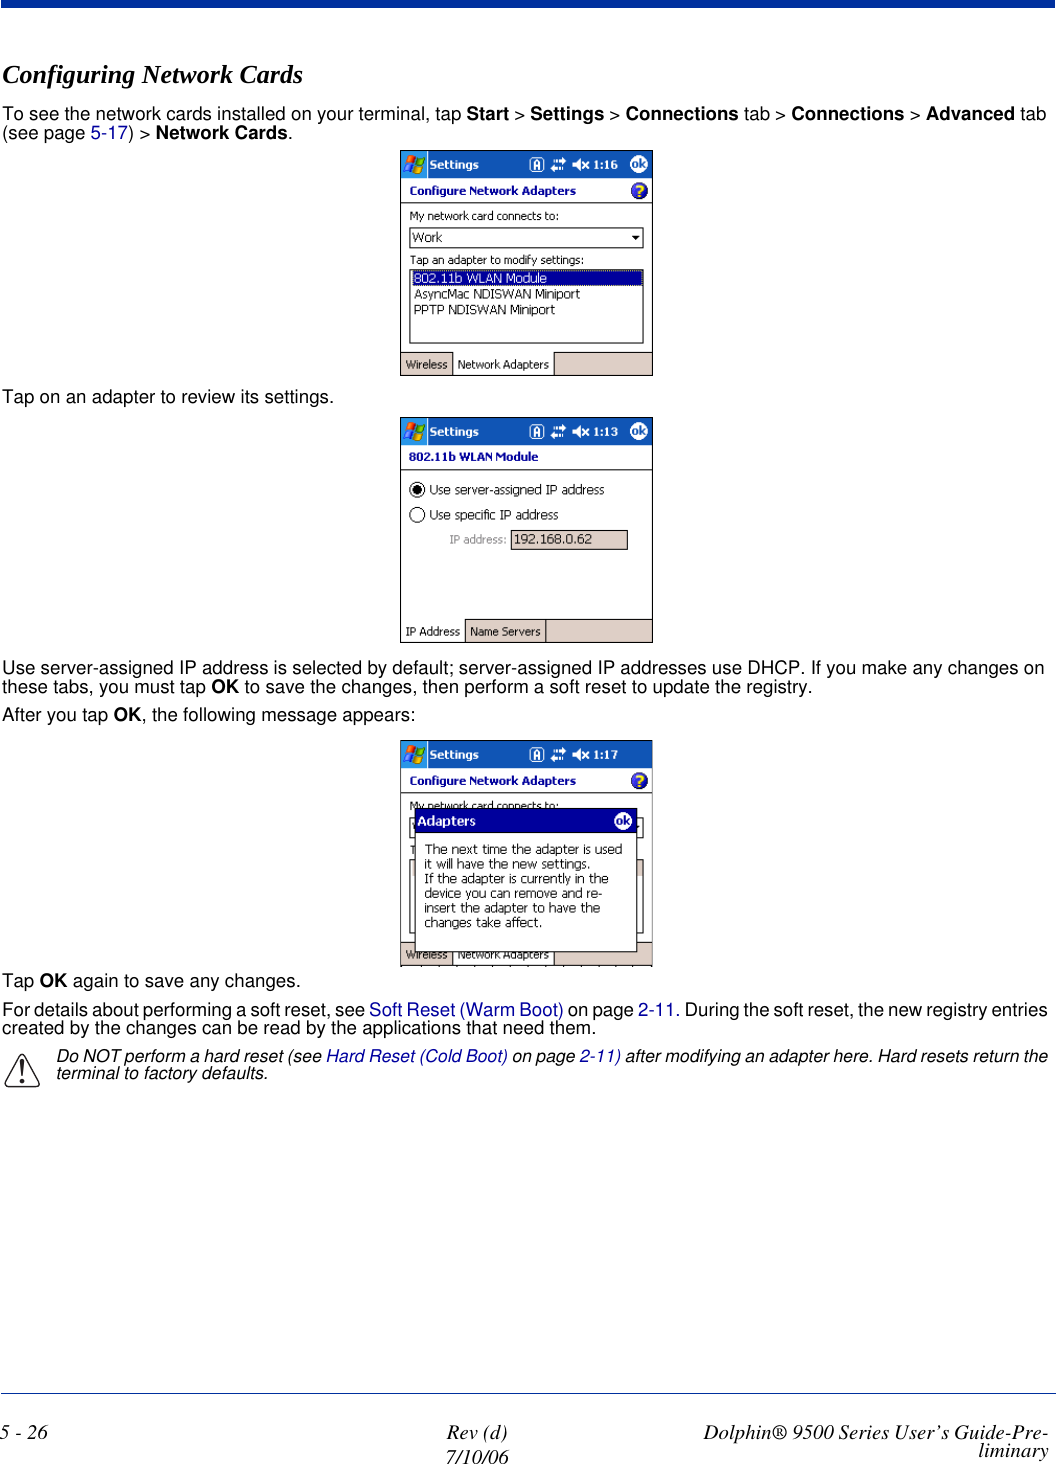
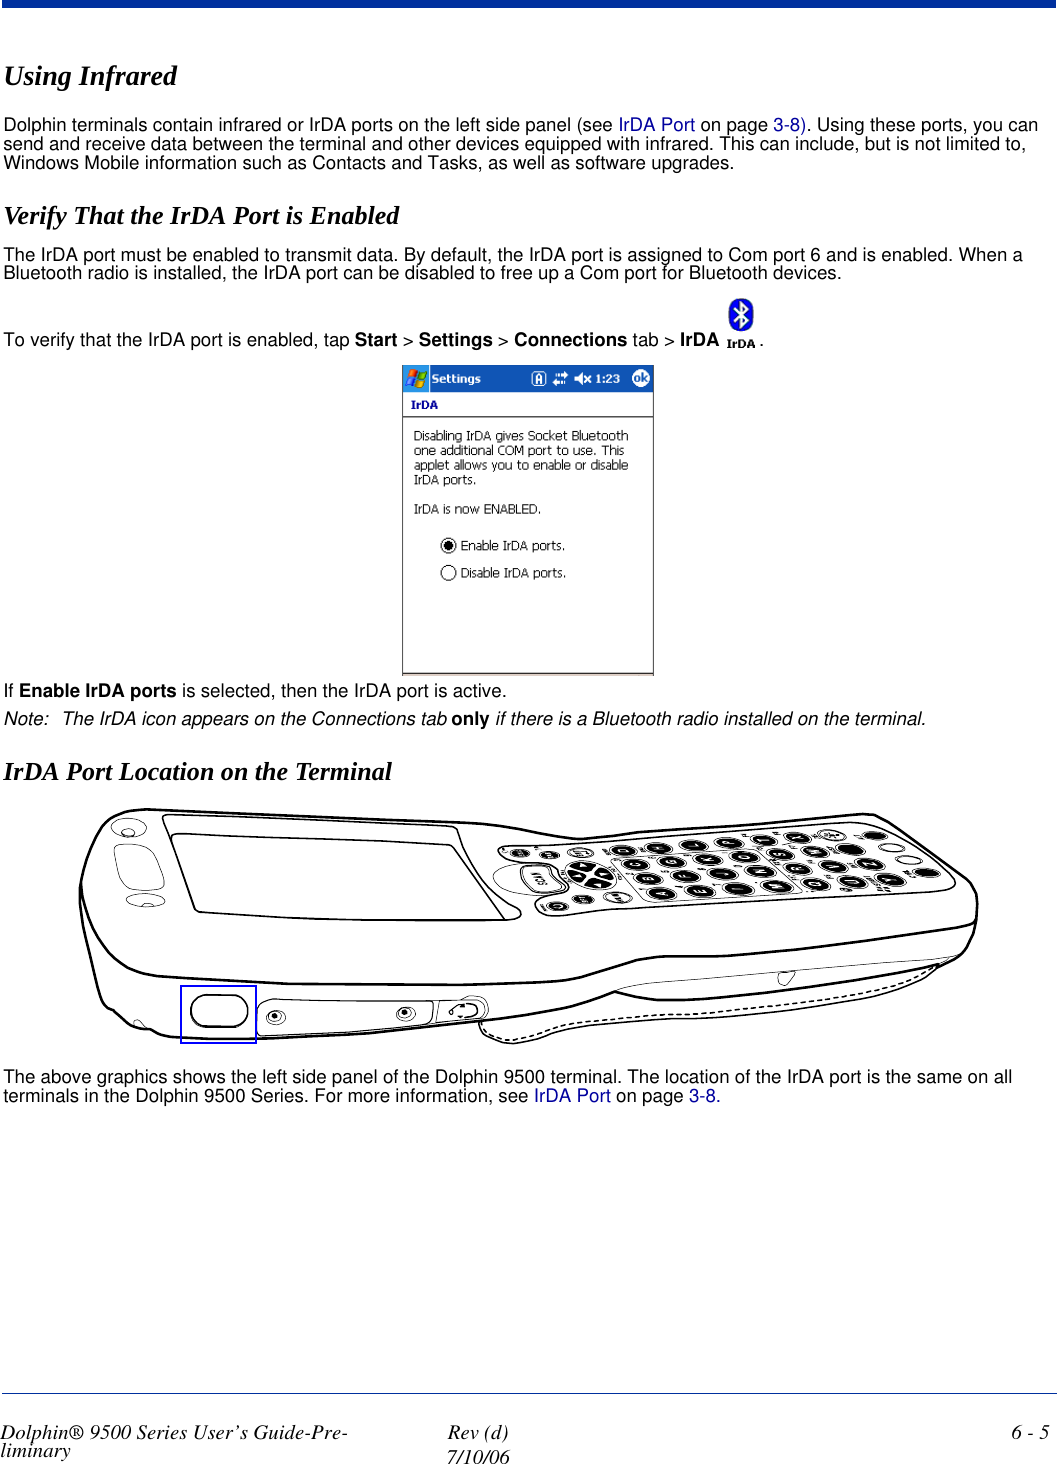
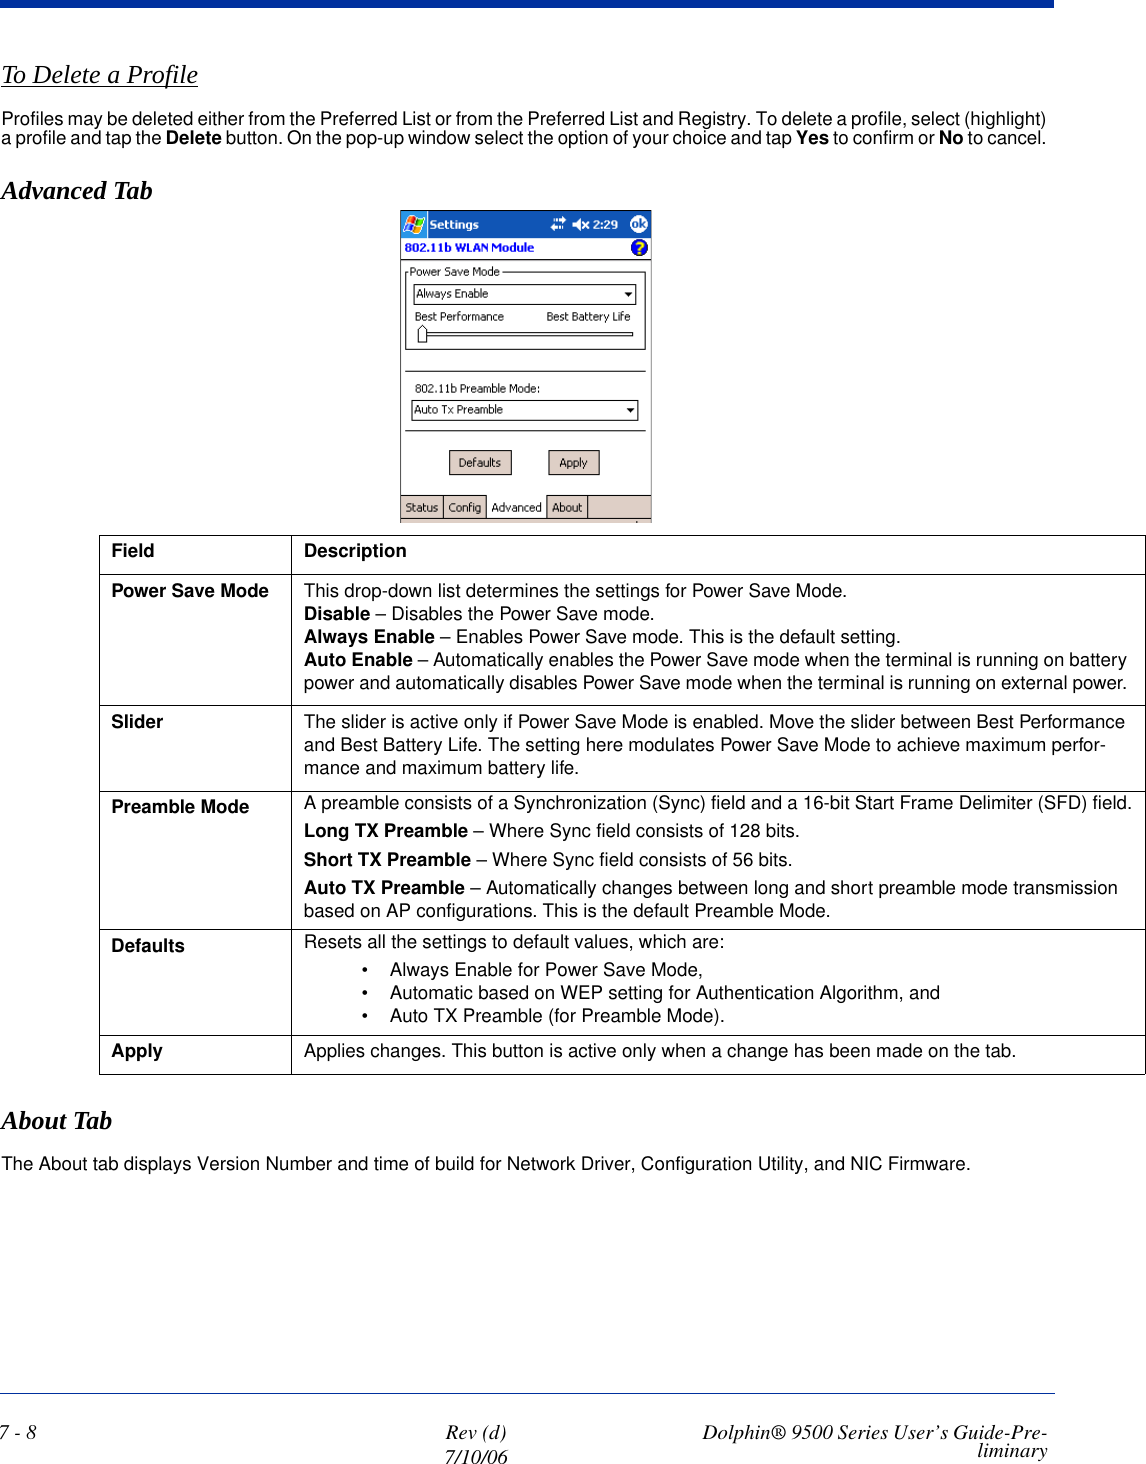
![Dolphin® 9500 Series User’s Guide-Pre-liminary Rev (d)7/10/063 - 9Bottom Panel FeaturesMechanical ConnectorThe bottom panel features a custom, industrial-grade connector with 17 pins. When seated in a Dolphin 9500 Series peripheral, the terminal is powered, the main battery charged, and communication occurs via this connector. All Dolphin 9500 Series peripherals are designed to work exclusively with this connector.The 17-pin connector can communicate with Dolphin 9500 Series peripherals via RS-232 or USB. For RS-232, the maximum communication speed is 115 Kbps with seven baud rate settings. For USB, the communication speed is up to 12 Mbps. If the peripheral unit is connected to a PC, this connector also transmits data. Powering OutThe mechanical connector also provides power out (to peripheral devices) 5V at 500mA. This means that, with the proper Hand Held Products’ cable, the terminal can power another device. By default, power out is disabled. To enable power out, alter the registry as follows: [HKEY_LOCAL_MACHINE\Drivers\BuiltIn\Serial4]Conn5Venable=1Dolphin 9501 and Dolphin 9551See Dolphin 9501 and Dolphin 9551 on page 11-1.Mechanical ConnectorHand Strap ClipNote: Signals referenced are for a DTE device.](https://usermanual.wiki/Honeywell/9500LUPE.User-Manual-Part-1/User-Guide-682938-Page-31.png)
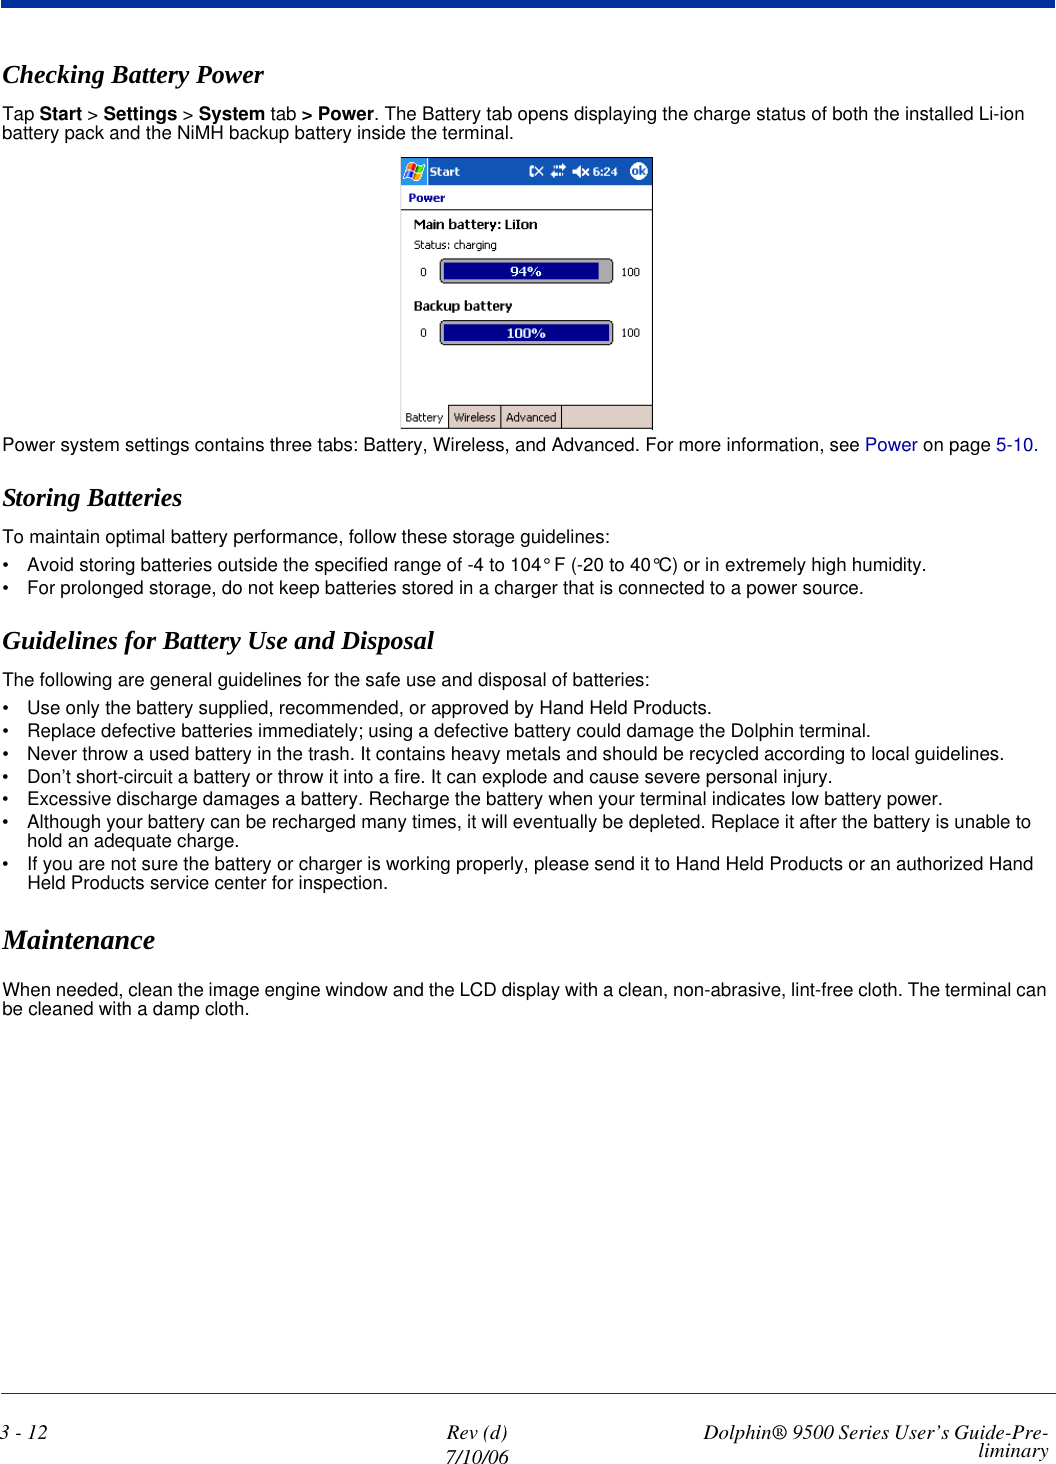
![Dolphin® 9500 Series User’s Guide-Pre-liminary Rev (d)7/10/063 - 11Managing Battery PowerData and files saved on Dolphin terminals may be stored in RAM memory, which does not persist through a hard reset. Therefore, to help prevent data loss, maintain a continuous power supply to the terminal. Letting the backup battery become fully discharged causes the terminal to lose all data in RAM. Therefore, you should keep a charged battery pack in the Dolphin at all times. The internal battery discharges prematurely if there is not at least a partially charged battery in the terminal. When you remove a battery pack, insert another charged battery pack in the Dolphin. Status NotificationsWhen the main battery pack becomes low, the Low Battery Charge icon appears in the Navigation bar. When the battery is critically low, the Critical icon appears. There is also a Low Battery icon that appears when the backup battery is low. If there is no indicator, the battery is adequately charged. For details about these icons, see Status Icons on page 4-20.If the main battery is low and the terminal is in suspend mode, pressing the SCAN or Power button does not wake the Dolphin terminal; you must replace the discharged battery with a fully charged battery.Default Critical and Low Battery PointsDolphin terminals are programmed to display warnings when the battery reaches critical and low battery points. There are two DWORD value registry entries [HKEY_LOCAL_MACHINE\System\CurrentControlSet\Control\Power] that allow these warning points to be customized:“CriticalBatt”=a (10%) This sets the Critical Battery point to 10 percent (a hex= 0 decimal). The critical battery setting is the point at which the customer is warned that the battery charge is very low. This warning is posted every 3 minutes until the situation is corrected.“LowBatt”=19 (25%) This sets the Low Battery point to 25 percent (19 hex=25 decimal). The low battery setting is the point at which the user is notified that the battery is low. The user is notified only once for a low battery.Setting Critical and Low Battery PointsDevelopers can reset these parameters in the registry from 0 (no warning) to 99 (would nearly always warn). Warnings do not appear when the terminal is on external power.You can review and set these battery points in the RegEdit Power Tool. 1. Tap Start > Power Tools > RegEdit. 2. Drill-down to HKEY_LOCAL_MACHINE > System > CurrentControlSet > Control > Power.3. Tap the Value Name to change the Value Data. You can reset the Value Data from 0 (no warning) to 99 (would nearly always warn). 4. Tap OK to save changes.For more information about the RegEdit Power Tool, refer to the Dolphin Power Tools User’s Guide available for download at www.handheld.com.](https://usermanual.wiki/Honeywell/9500LUPE.User-Manual-Part-1/User-Guide-682938-Page-33.png)


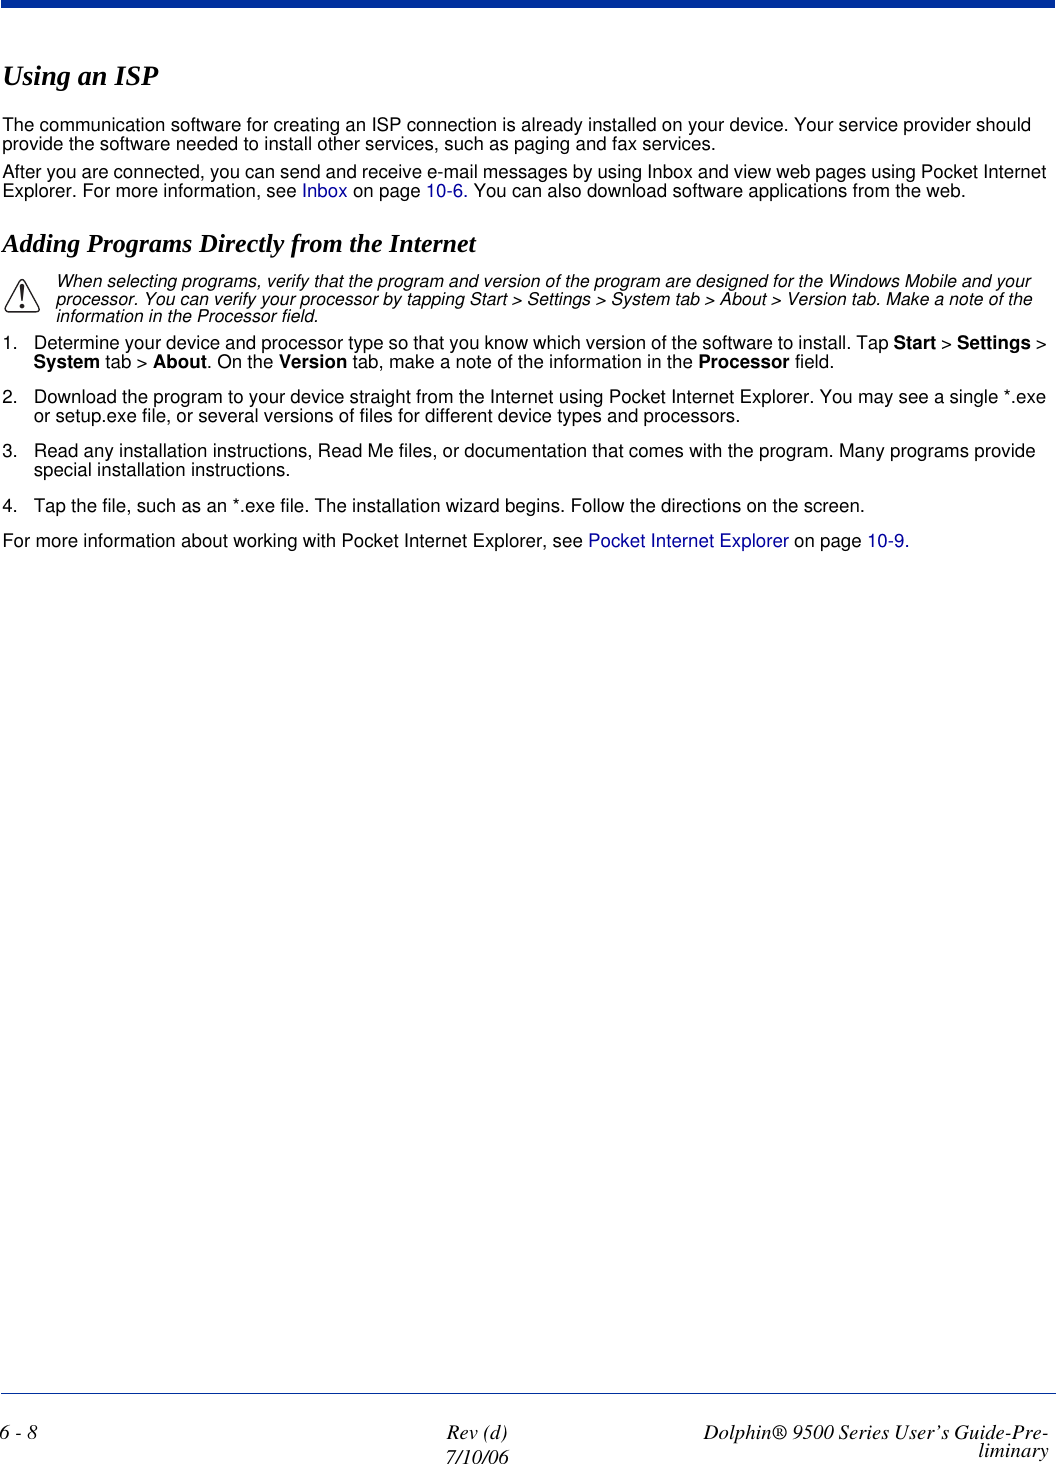


![Dolphin® 9500 Series User’s Guide-Pre-liminary Rev (d)7/10/067 - 13Help MenuTapping Help opens the help menu. Select Online Help to access online help. Select About to review software version information.Status BarThe status bar at the bottom of the main screen indicates the connection status between the network card and the AP.The status bar displays one of the following depending on the status of connectivity:• “Not Associated”• “AP : [Name of the SSID] MAC : [MAC address].”Each entry is listed sequentially with a time stamp and a text message. Tap Refresh to query the log again. Tap Close to return to the main screen.Menu Item DescriptionStatus Bar](https://usermanual.wiki/Honeywell/9500LUPE.User-Manual-Part-1/User-Guide-682938-Page-107.png)
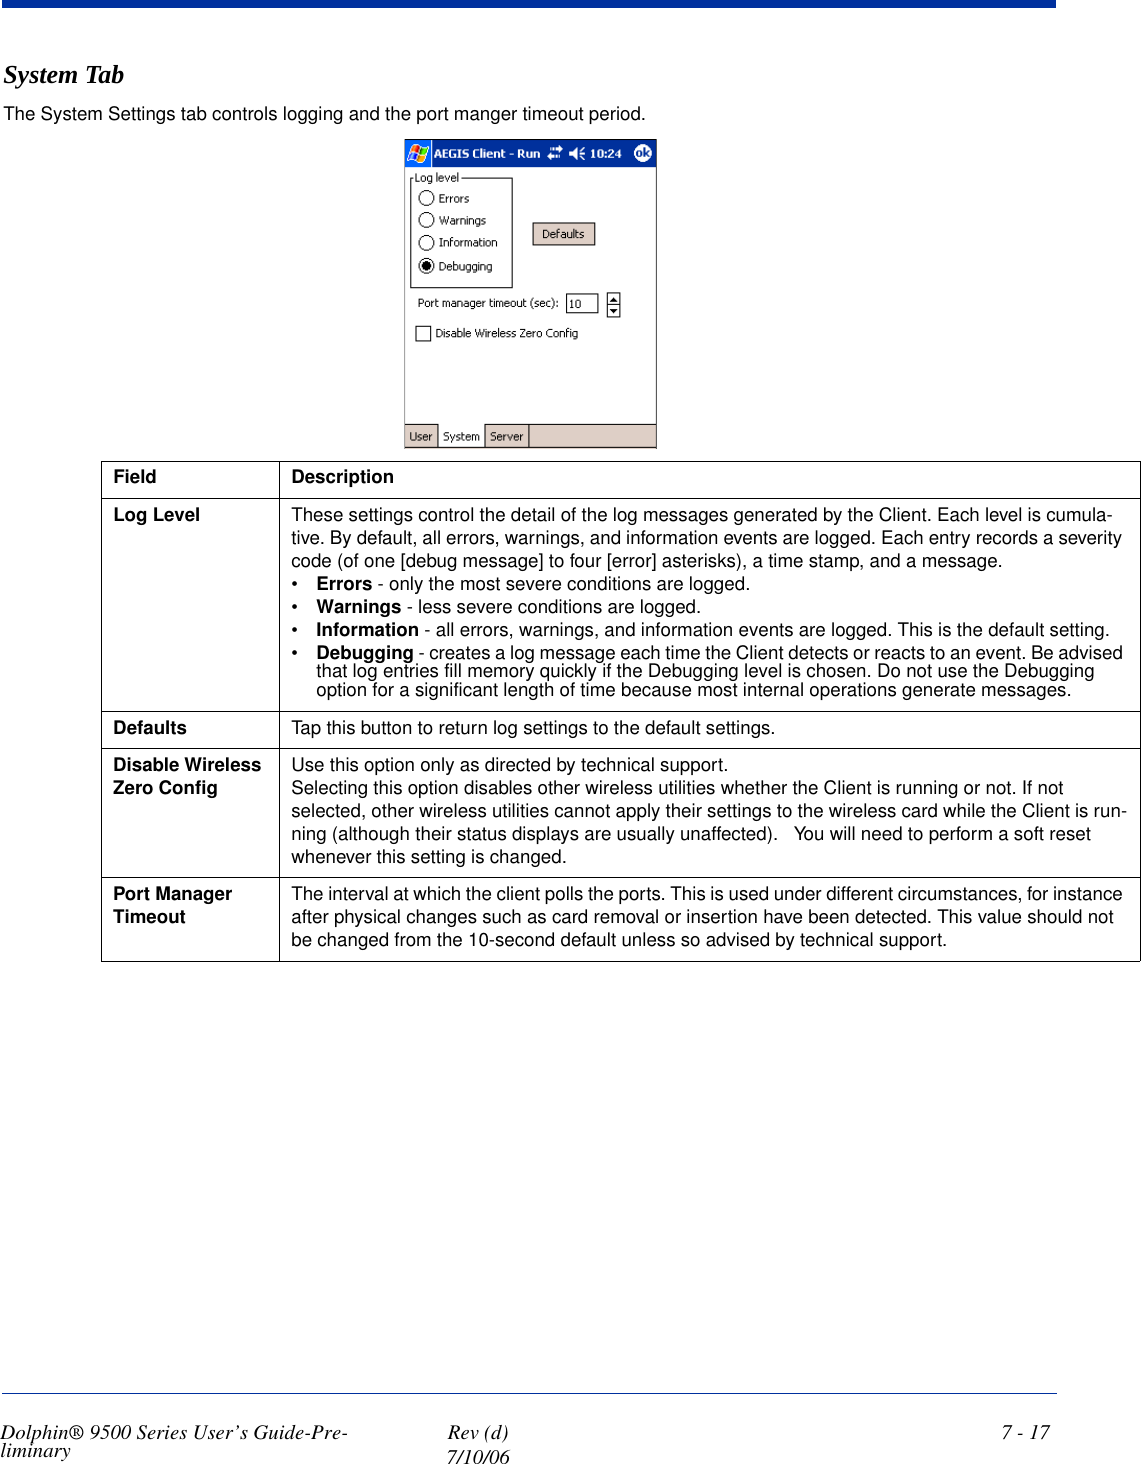
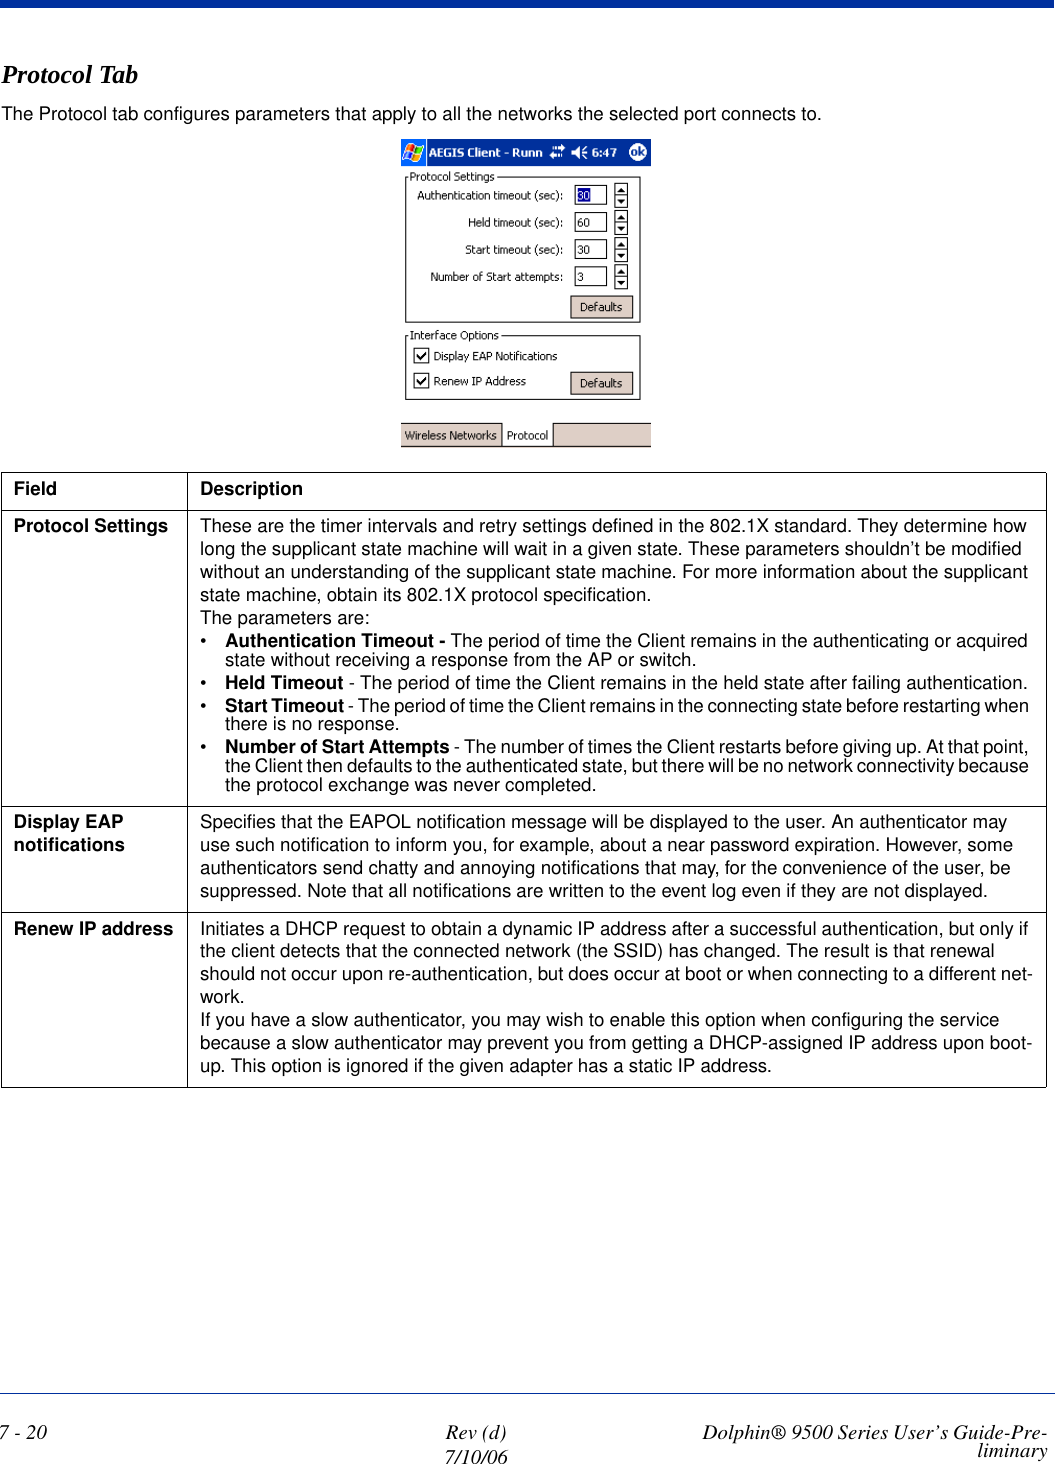
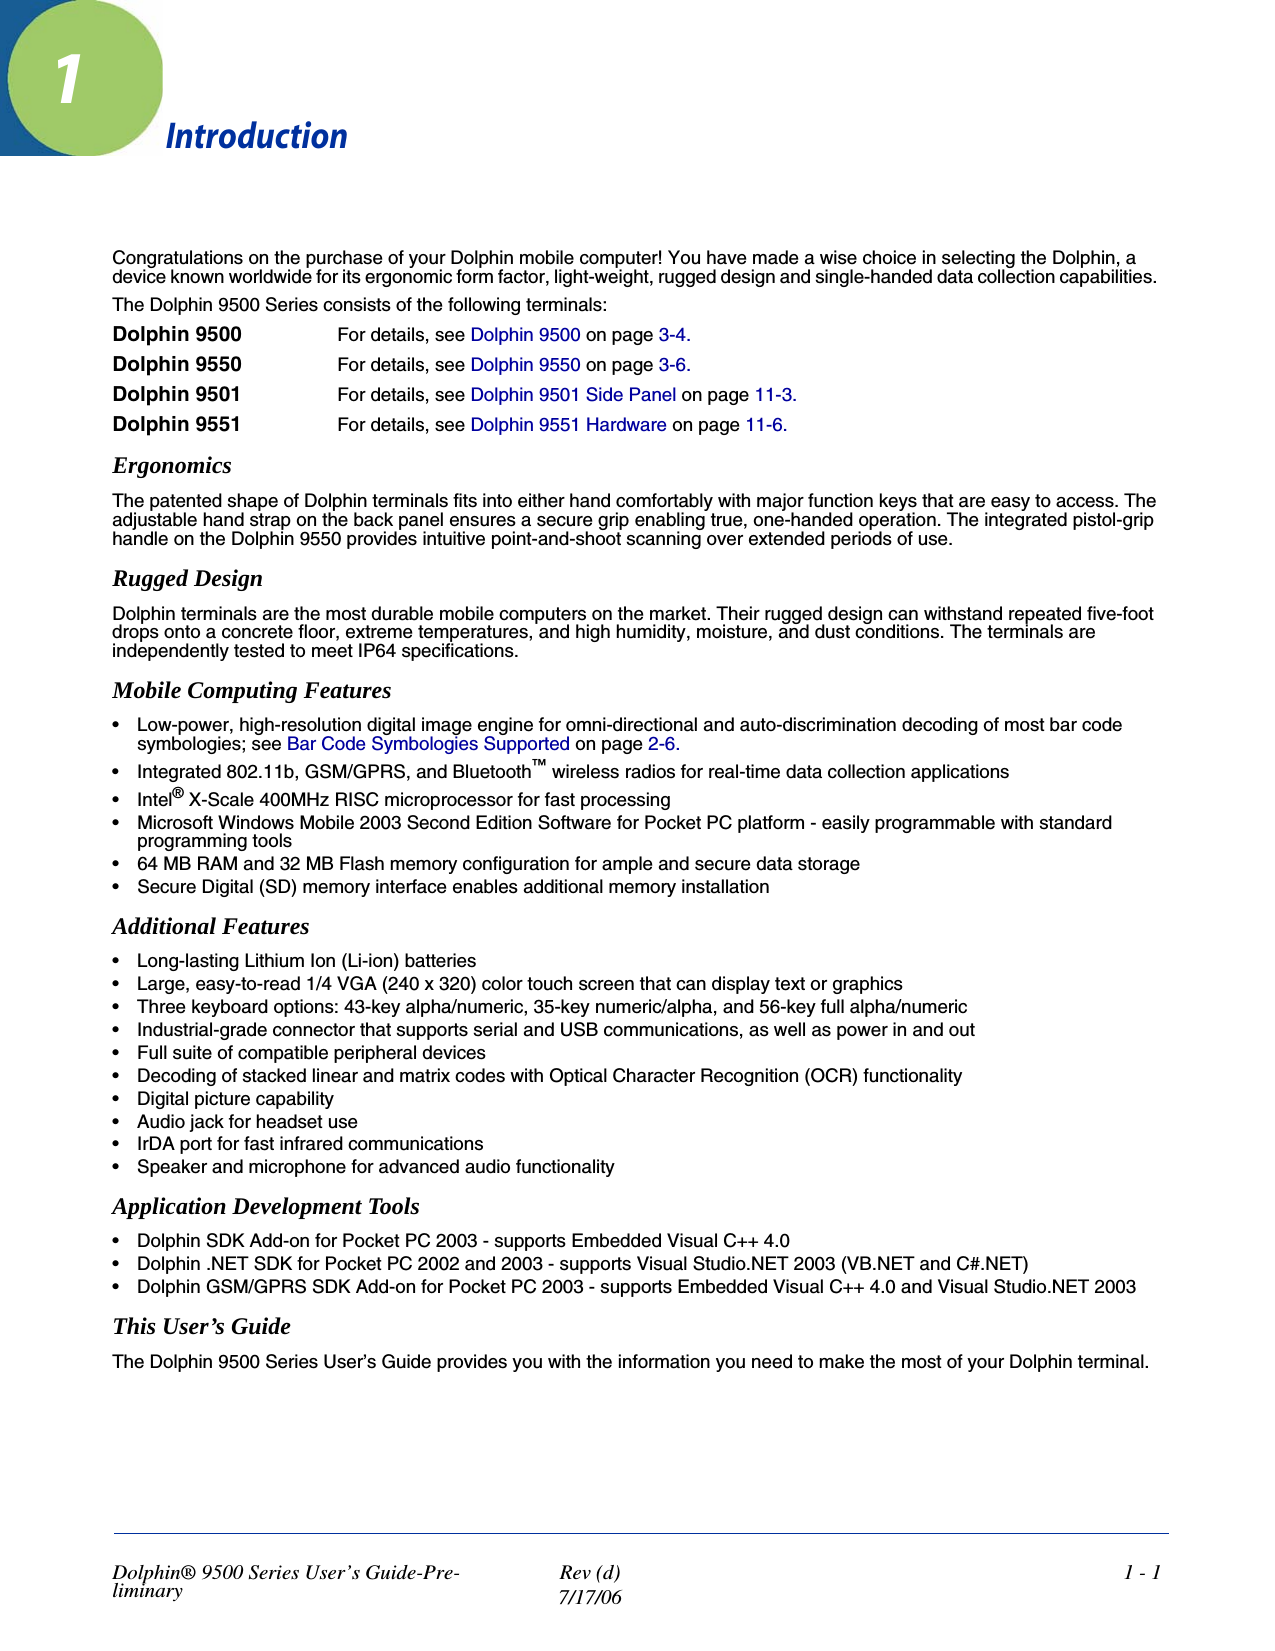
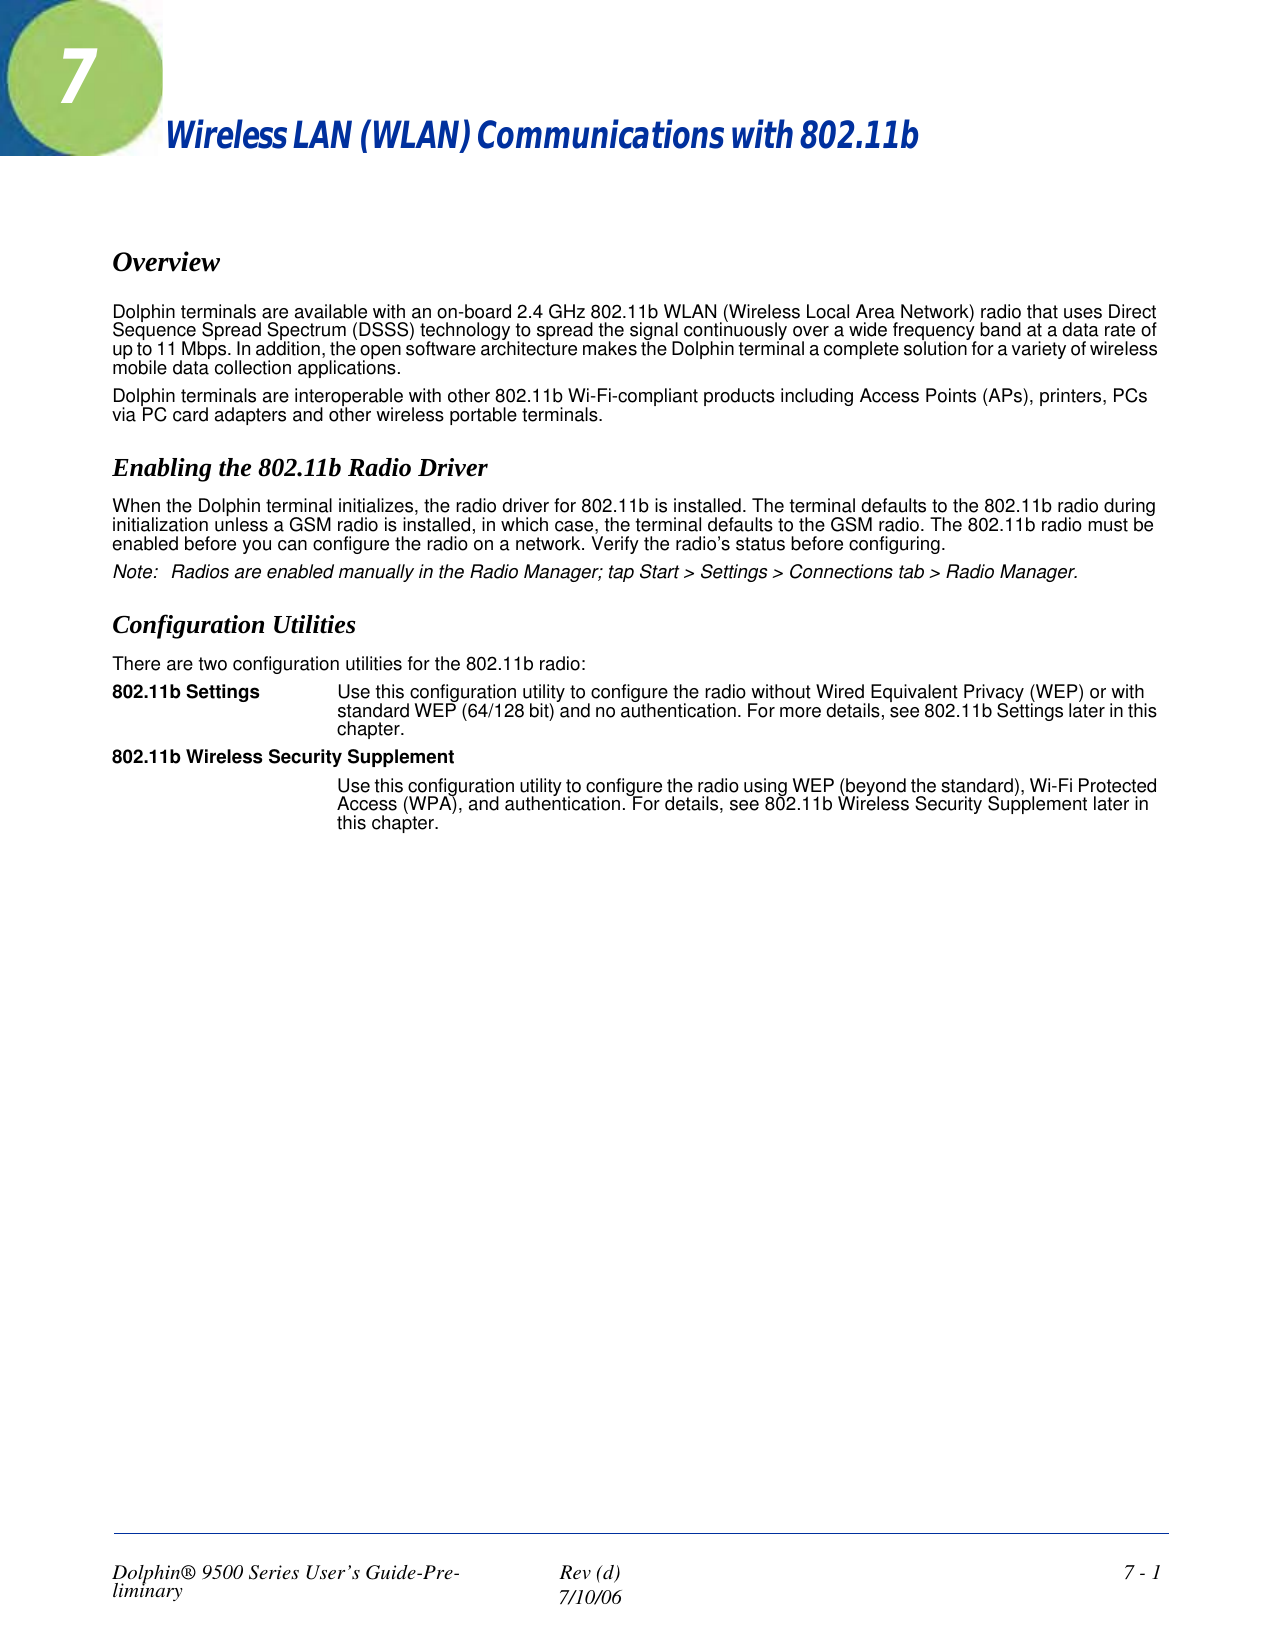
![Dolphin® 9500 Series User’s Guide-Pre-liminary Rev (d)7/10/067 - 17System TabThe System Settings tab controls logging and the port manger timeout period.Field DescriptionLog Level These settings control the detail of the log messages generated by the Client. Each level is cumula-tive. By default, all errors, warnings, and information events are logged. Each entry records a severity code (of one [debug message] to four [error] asterisks), a time stamp, and a message.•Errors - only the most severe conditions are logged.•Warnings - less severe conditions are logged.•Information - all errors, warnings, and information events are logged. This is the default setting.•Debugging - creates a log message each time the Client detects or reacts to an event. Be advised that log entries fill memory quickly if the Debugging level is chosen. Do not use the Debugging option for a significant length of time because most internal operations generate messages.Defaults Tap this button to return log settings to the default settings.Disable Wireless Zero Config Use this option only as directed by technical support.Selecting this option disables other wireless utilities whether the Client is running or not. If not selected, other wireless utilities cannot apply their settings to the wireless card while the Client is run-ning (although their status displays are usually unaffected). You will need to perform a soft reset whenever this setting is changed. Port Manager Timeout The interval at which the client polls the ports. This is used under different circumstances, for instance after physical changes such as card removal or insertion have been detected. This value should not be changed from the 10-second default unless so advised by technical support.](https://usermanual.wiki/Honeywell/9500LUPE.User-Manual-Part-1/User-Guide-682938-Page-111.png)