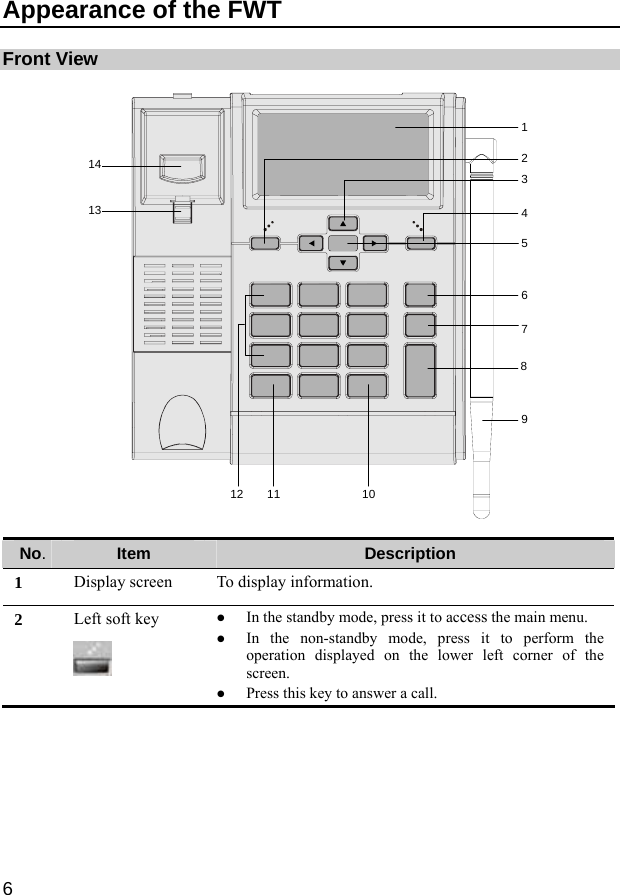
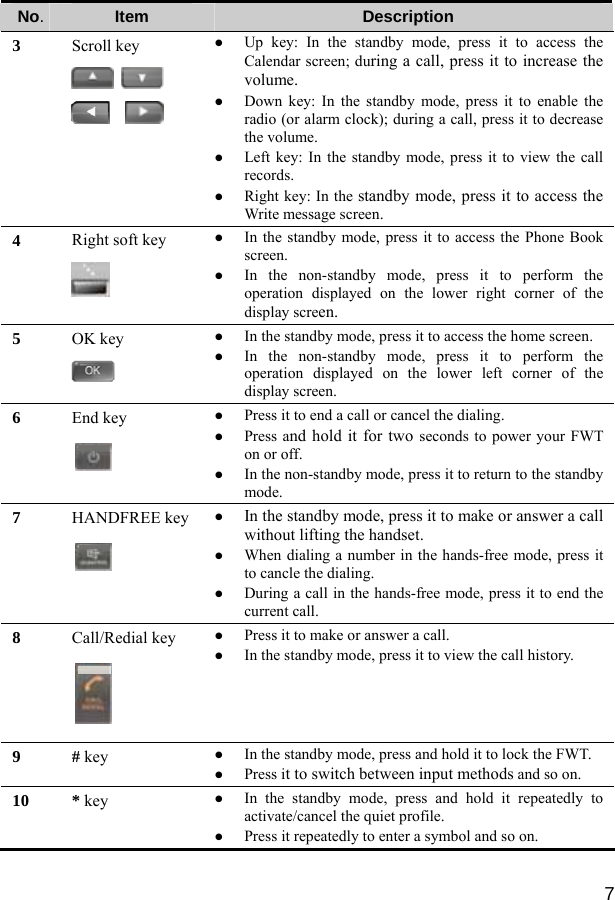
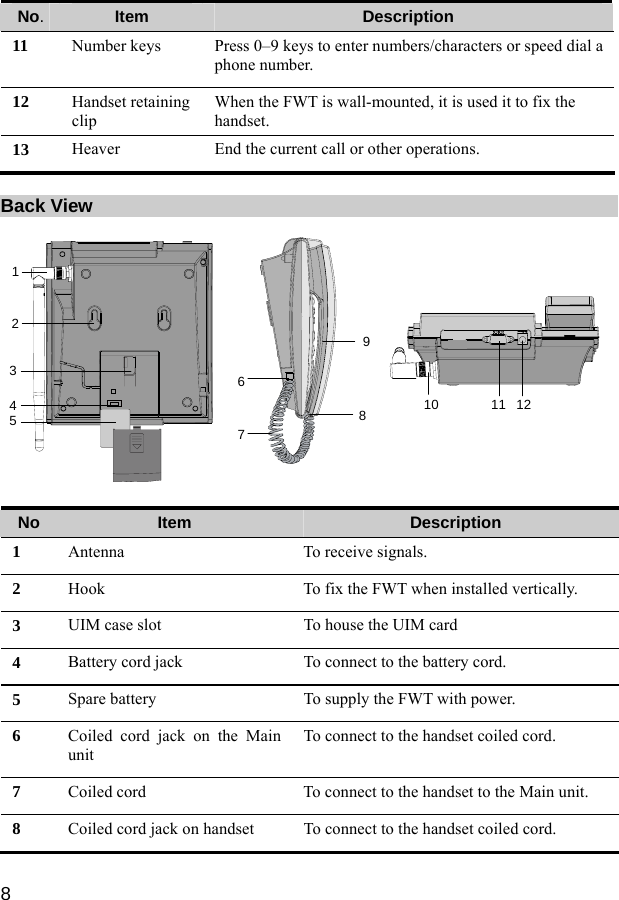
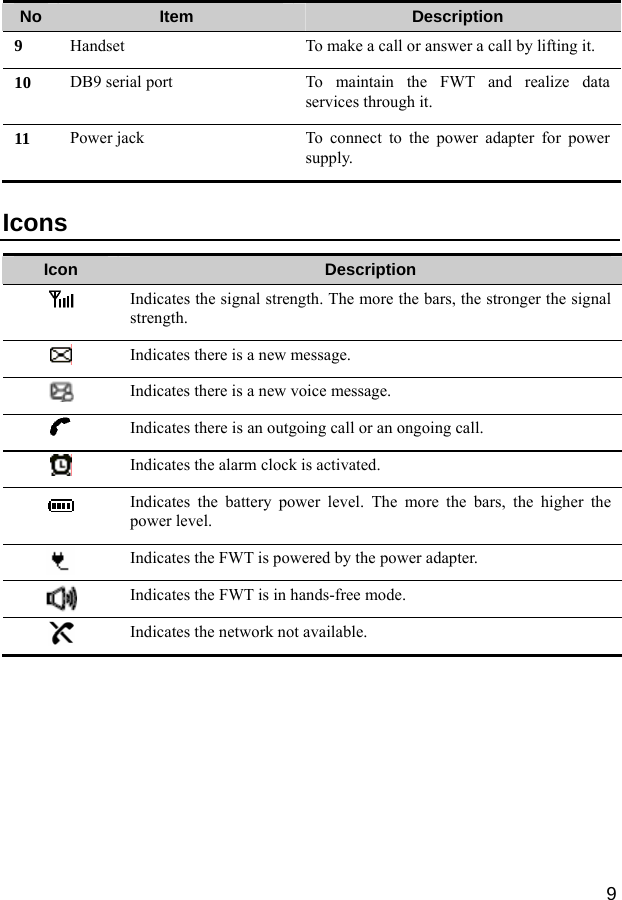
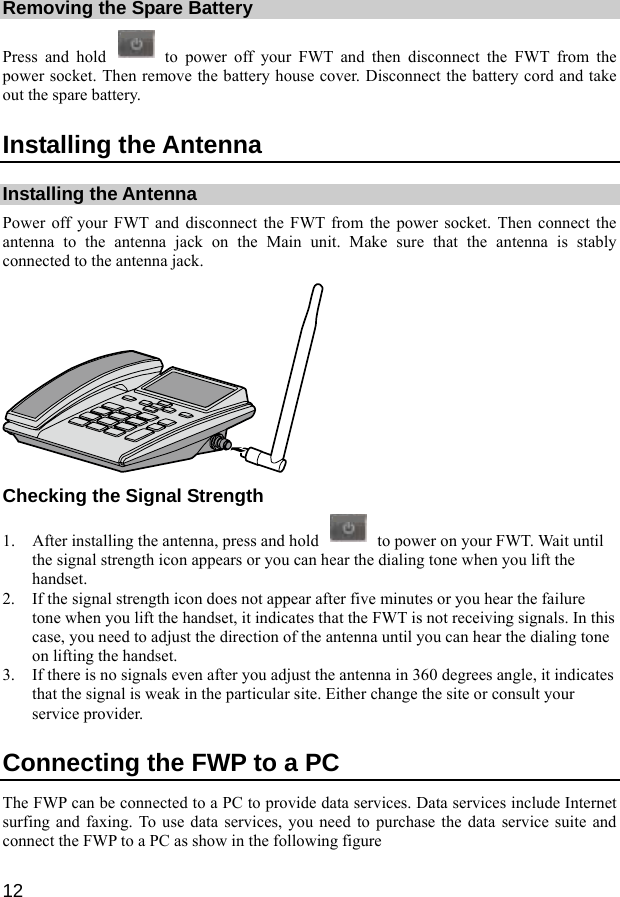
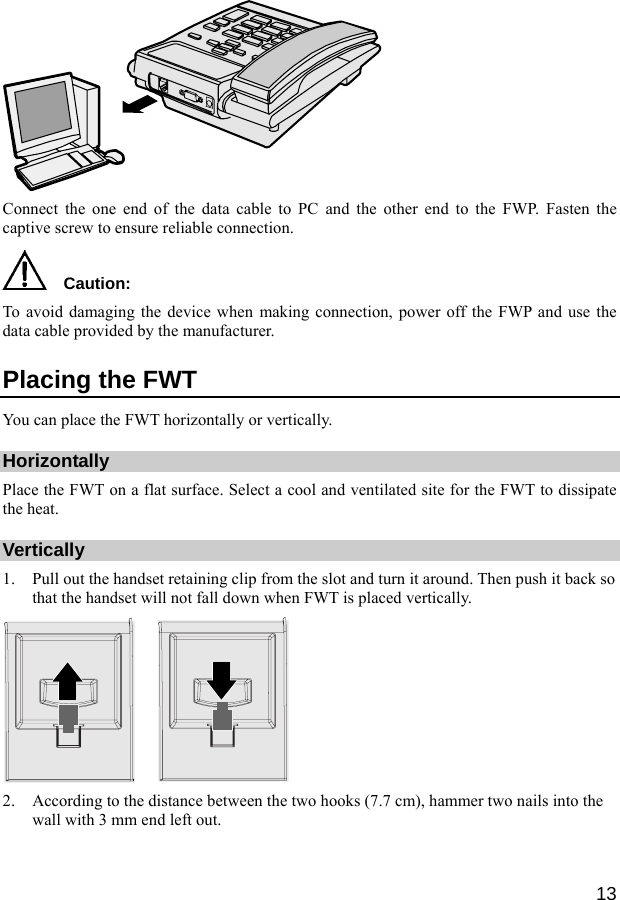
Huawei Technologies ETS2259 Fixed Wireless Terminal User Manual
Huawei Technologies Co.,Ltd Fixed Wireless Terminal
UserManual.wiki
>
Huawei Technologies
>
ETS2259 User Manual
Users Manual
Navigation menu
Upload a User Manual
Namespaces
Wiki Guide
HTML
PDF
Info
Views
User Manual
Discussion / Help
Navigation


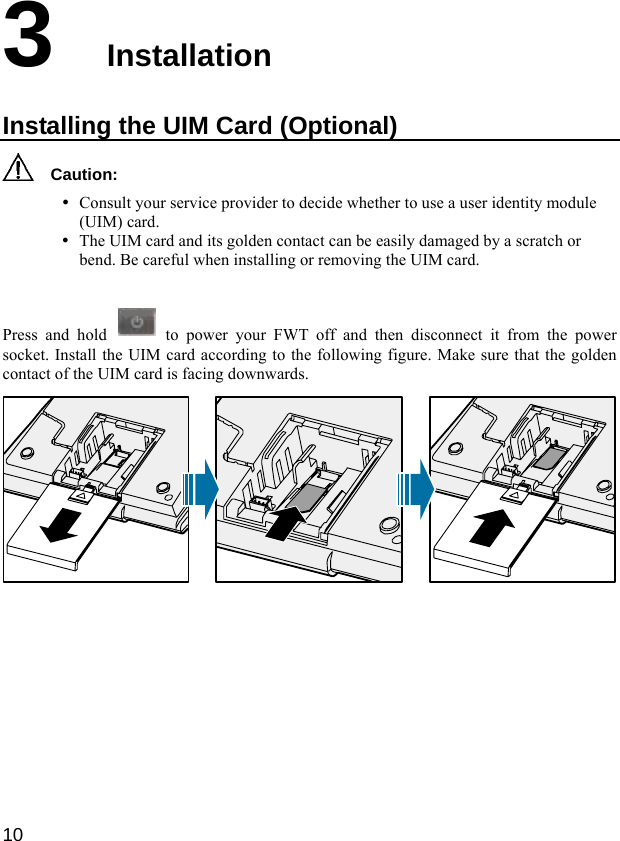


![29 Shortcut Key Settings The FWT provides shortcut keys for your convenience. Note: In the standby mode, the default shortcut key settings are shown as follows: y : press it to access the Calendar screen; during a call, press it to increase the volume. y : press it to enable the radio (or alarm clock); during a call, press it to decrease the volume. y : press it to view the call records. y : press it to access the Write message screen. 1. In the standby mode, Select Menu> Settings> Phone Settings> Shortcut to set the shortcut keys. 2. Press / // to set the corresponding shortcut keys. y Press [Select] to select one of the following shortcut key options: Disable, Message Edit, Message Inbox, Radio, Lunar Date, Calculator, Volume Setting, Message Menu, Alarm, Schedule, Stopwatch, World Clock, Gallery, Line Game, Smash Game, Profile, Voice Message, Phone Book, and Call History. Profile Settings Your FWT provides three profiles. You can activate or customize a profile. Selecting a Profile 1. In the standby mode, select Menu > Profiles. 2. Press the Up/Down key to scroll up or down the profiles: General and Quiet. 3. Press (Select) and select Set to activate the profile. Note: In the standby mode, press and hold the * key to activate the quiet mode. Press and hold the * key again to restore the FWT to the previous mode. Editing a Profile 1. In the standby mode, select Menu > Profiles. 2. Press the Up/Down key to scroll up or down the profiles: General and Quiet. 3. Press (Select) and select Edit to edit a profile. You can set the following items:](https://usermanual.wiki/Huawei-Technologies/ETS2259/User-Guide-896328-Page-33.png)