Huawei Technologies U9201L LTE/HSPA+/HSUPA/HSDPA/UMTS/GSM/GPRS/EDGE Mobile Phone with WLAN and BT User Manual user guide
Huawei Technologies Co.,Ltd LTE/HSPA+/HSUPA/HSDPA/UMTS/GSM/GPRS/EDGE Mobile Phone with WLAN and BT user guide
Contents
- 1. User Manual Part 1
- 2. User Manual Part 2
- 3. User Manual Part 3
- 4. User Manual Part 4
User Manual Part 3
46
• You cannot share your phone’s data connection via
USB tethering
and access its microSD card as a mass
storage device at the same time.
• Using
USB tethering
will incur data traffic charges.
For details, contact your network operator.
1. On the Home screen, touch >
Settings
.
2. In the
WIRELESS & NETWORKS
section, touch
More…
>
Tethering & portable hotspot
.
3. Select the
USB tethering
check box to share your phone's
data connection with your PC. You can now access the
Internet from the PC.
Sharing Your Phone’s Data Connection as a
Portable Wi-Fi Hotspot
1. On the Home screen, touch >
Settings
.
2. In the
WIRELESS & NETWORKS
section, touch
More…
>
Tethering & portable hotspot
.
3. Select the
Portable Wi-Fi hotspot
check box to share your
mobile network.
To change the Wi-Fi hotspot's name or secure it, touch
Configure Wi-Fi hotspot
.

47
Controlling Data Usage
With
Data usage
, you can set a data usage cycle and the
mobile data limit for this period. You will be notified when data
usage reaches the set limit. You can also query the data usage
within a certain period or by a certain application.
On the Home screen, touch >
Settings
>
Data usage
to
configure the data usage settings:
2
6
4
3
1
5
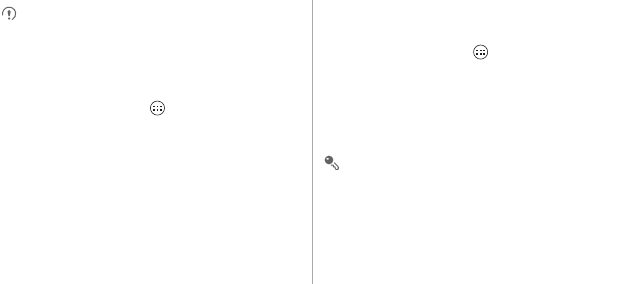
48
On the data usage settings screen, touch to display the
options menu and you can:
• Turn on data roaming: Select the
Data roaming
check box.
• Prevent background mobile data traffic: Select the
Restrict
background data
check box.
1Touch
Mobile Data
to turn on or off the mobile data
function. The mobile data function must be turned on
to configure data control and query data usage.
2Select the
Set mobile data limit
check box. When
data traffic reaches the preset limit, your phone's
mobile data connection will be disabled.
3
Touch the scroll arrow beside
Data usage cycle
,
then
Change cycle...
. After setting the data usage
cycle, touch
Set
.
4
Drag the red line to set a data usage limit or the
orange line to set a warning limit. When data traffic
reaches the yellow line, you will be notified; when
data traffic reaches the red line, your phone's mobile
networks data connection will be disabled.
5Scroll the white time axis to view data usage within a
certain period.
6 Touch an application to check its data usage.

49
• View Wi-Fi data usage: Select the
Show Wi-Fi usage
check
box, and a
WI-FI
tab is displayed. Touch to tab to view Wi-Fi
data usage.
Bluetooth
Your phone supports Bluetooth, which allows you to transfer
data to and from paired Bluetooth devices.
When using Bluetooth, stay within 10 meters (33 feet) of other
Bluetooth devices. Note that obstacles such as walls or other
electronic equipment may block or interfere with your Bluetooth
connection.
Turning On Bluetooth
1. On the Home screen, touch >
Settings
.
2. In the
WIRELESS & NETWORKS
section, touch the switch
on the right of
Bluetooth
, and a Bluetooth icon will be
displayed on the notification bar.
3. Touch
Bluetooth
, and your device's Bluetooth name is
displayed on the screen. Touch the device name and set
your device to be visible to other Bluetooth devices.
To change your device's name, touch >
Rename phone
, then
Rename
.
Scanning for and Pairing with Another Bluetooth
Device
To pair your phone with another Bluetooth device for data
transmission:
1. Check that the Bluetooth function is enabled on your phone.
50
2. On the Home screen, touch >
Settings
.
3. In the
WIRELESS & NETWORKS
section, touch
Bluetooth
. Your phone will then scan for other Bluetooth
devices within range.
4. From the list of the Bluetooth devices searched, choose the
device you want to connect, and then follow the onscreen
information to pair.
To disconnect from the Bluetooth device, in the
PAIRED
DEVICES
section touch >
Unpair
.
Transferring a File via Bluetooth
Using Bluetooth you can share pictures, videos, and audio files
stored in the
File Manager
with your friends.
1. Touch and hold the file you want to transfer, and then choose
Share
>
Bluetooth
from the displayed options menu.
2. From the detected Bluetooth device list, select the desired
device.
DLNA
Digital Living Network Alliance (DLNA) enables users using the
same Wi-Fi network to share multimedia files easily.
Before using the DLNA function, ensure that your device and
other DLNA devices have connected to the same Wi-Fi
network and DLNA is enabled on all devices.
Touch >
DLNA
to display the
DLNA
screen. You can then
share pictures, videos, and audio files with other DLNA devices,
as well as view and download the multimedia files shared by
other DLNA devices.
51
Email/Gmail
Email
With
Email
, you can easily send and receive emails.
Adding an Email Account
When using the Email application for the first time, set up an
email account as follows: (Note that a data connection is
required to send and receive emails).
1. On the Home screen, touch >
Email
.
2. Touch
Others
to enter an email address and password, then
touch
Next
.
3. Follow the onscreen instructions to configure the account
settings.
Configure the email account based on the instructions provided
by your email service provider. For specific settings, access the
website of your email service provider.
4. Touch
Next
, and the
Inbox
of the newly configured email
account will be displayed.
After creating your initial email account, touch >
Settings
>
ADD ANCOUNT
on the
Inbox
screen to add more email
accounts.
Switching Between Accounts
On the
Inbox
screen, touch the email address bar at the top of
the screen, and select an email account from the displayed
52
email account list. The selected account's
Inbox
is then
displayed by default.
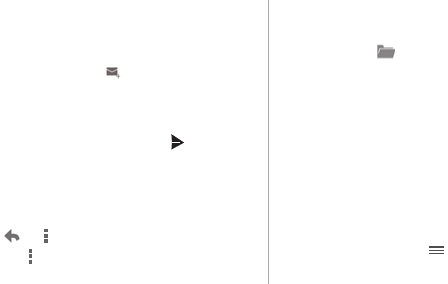
Creating and Sending an Email
1. On the
Inbox
screen, touch .
2. In the
To
field, enter the recipient's email address.
3. Enter the email subject, and then compose your email.
4. When the email is ready to be sent, touch to send the
email.
Replying to and Forwarding an Email
1. In your
Inbox
, touch the email you want to reply to.
2. Touch or >
Reply all
to reply to the email. You can
also touch >
Forward
to forward the email.
Viewing an Email
In your
Inbox
, touch the email you want to view.
You can also touch to view more folders.
Saving an Email Attachment
1. In your
Inbox
, touch the email you want to view.
2. Touch the
Attachment
tab to display the attachment.
3. Touch
SAVE
to download the attachment.
By default, downloaded files are saved to the
Download
folder
in the phone memory. To change the default storage location,
choose
Settings
>
Storage
>
Default storage location
.
Deleting an Email Account
1. On the
Inbox
screen, touch >
Settings
to display the
account settings screen.
53
2. Touch the account you want to delete.
3. From the displayed menu, choose
Remove account
>
OK
.
Customizing Email Account Settings
1. On the
Inbox
screen, touch >
Settings
to display the
account settings screen.
2. Touch the account you want to customize.
3. Change the required account settings, such as
DATA
USAGE
,
NOTIFICATION SETTINGS
, and
SERVER
SETTINGS
.
Gmail
Gmail
is Google's web-based email service. When you first set
up your phone, you may have to set it up to use an existing
Gmail
account or create an account. The first time you open
Gmail
on your phone, the
Inbox
screen is displayed.
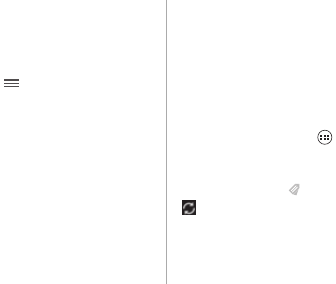
Opening Gmail
On the Home screen, touch >
Gmail
. The email list is
displayed. Any emails you keep on your phone will be stored in
your
Inbox
folder.
In the email list, touch to change an email's label, or touch
to refresh your emails.
54
Switching Between Accounts
1. From the email list, touch the current account name to display
the account list.
2. Touch the account that contains the email(s) you want to
read.
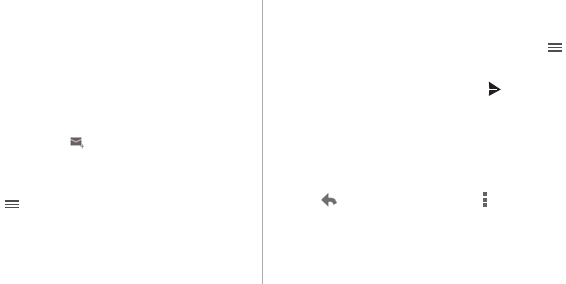
Creating and Sending an Email
1. In the email list, touch .
2. In the
To
field, enter recipients' email addresses.
If you want to copy or blind copy the email to other recipients,
touch , then
Add Cc/Bcc
.
3. Enter the email subject, and then write your email in the
composition field.
If you want to send an attachment with the email, touch ,
then
Attach file
to select the file to be attached.
4. When the email is ready to be sent, touch to send the
email.
Replying to and Forwarding an Email
1. In the email list, touch the email that you want to reply to or
forward.
2. Touch to reply. You can also touch , then
Reply all
or
Forward
.
3. Do one of the following:
55
• If you touched or selected
Reply all
, add message
content.
• If you selected
Forward
, enter the recipients' email
addresses and add message content as required.
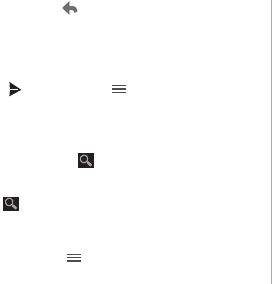
4. Touch to send, or touch >
Save draft
to save the
email as a draft.
Searching for an Email
1. In the email list, touch .
2. Enter appropriate keywords in the search box, and then
touch .
Customizing Your Gmail Settings
In the email list, touch >
Settings
to customize your
Gmail
settings.
56
Managing Applications
Using Play Store
Android
Play Store
provides direct access to applications and
games can be downloaded and installed on your phone.
To open the
Play Store
, on the Home screen, touch >
Play Store
.
When you open
Play Store
for the first time, the
Google Play
Terms of Service
window will appear. Touch
Accept
to
continue.
Installing an Application from Play Store
1. Open the
Play Store
application.
2. Touch a category, then the application you want to download.
3. On the application details screen, read any relevant
information about the application, including its cost, rating,
and user comments.
4. To install the application, touch
Download
or
Install
, then
Accept & download
.
5. To check the progress of a download, open the notification
panel. Most applications are installed within seconds. To
cancel a download, touch the cross sign
X
.
After the application has been downloaded and installed on
your phone, the content download icon appears in the
notification bar.
• You can search for a desired application in
Play Store
by touching .
57
• On the application details screen, touch to share
the application.
Uninstalling an Application from Your Phone
1. On the
Play Store
screen, touch >
My apps
to view
your downloaded applications.
2. Touch the application you want to uninstall, and then touch
Uninstall
.
3. When prompted, touch
OK
to remove the application from
your phone.
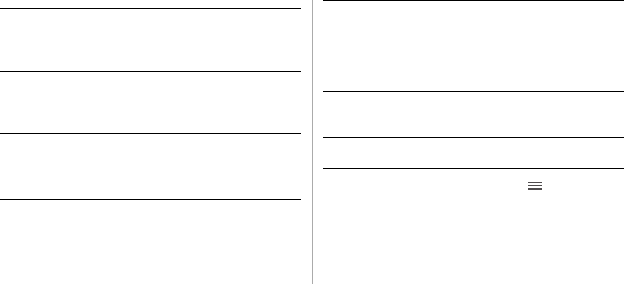
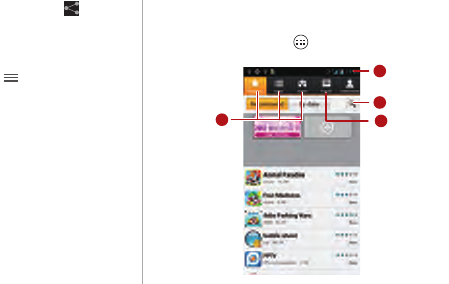
Hispace
Hispace enables you to access Huawei's application store,
from where you can download content such as applications,
games, ebooks, images, ringtones, and music. You can also
browse, update, or remove downloaded content.
On the Home screen, touch >
Hispace
.
1
2
3
4
58
You can find the content downloaded from
Hispace
in
Download
.
Installing an Application from Hispace
1. In
Hispace
, touch the application you want to download to
display its details.
2. Touch
Download
to start downloading the application. You
can check the progress bar on the notification panel, or touch
Cancel
to cancel the download.
3. Once the download is complete, the application will be
installed on your phone automatically.
Uninstalling an Application from Hispace
1. On the
Hispace
screen, touch
UserCenter
>
My
downloads
, then
Apps
or
Games
to display an application
list.
2. Touch an installed application, then touch
Uninstall
to
uninstall it.
1Log in to the user center. Browse saved and
downloaded content, as well as content to be
updated.
2 Search for content.
3 Touch to download pictures, ringtones, and music.
4Touch a tab to download corresponding
applications, games, or ebooks.
59
Installing an Application from a
microSD Card
Using
AppInstaller
, you can install an application stored on a
microSD card.
To install an application that was not downloaded from Android
Play Store
, touch >
Settings
>
Security
from the Home
screen, and then select the
Unknown sources
check box
before installation.
1. From the Home screen, touch >
AppInstaller
. Your
phone will automatically search the microSD card and
display all applications stored on it.
2. Select the application you want to install from the application
list.
Touch , then
Select all
or
Deselect all
to select or deselect
all applications.
3. Touch >
Install
to install the selected application.
Viewing and Uninstalling
Applications
1. On the Home screen, touch >
Settings
>
Apps
>
ALL
to view the application list.
2. Touch an application to view its details.
3. To uninstall the application, touch
Uninstall
and follow the
onscreen instructions.
60
In the application list, touch >
Sort by size
to re-arrange
the applications by size.
61
Huawei Cloud+
Huawei Cloud+ provides a network drive, the Hispace
application, Phone Finder, contact synchronization, and data
backup, and various functions such as file sharing. Simply
register a Huawei Cloud+ account to use all these functions.
Cloud+ Settings
On the Home screen, touch >
Cloud+ Settings
to set
your Cloud+ settings as follows:
• To set your basic information, and associate your Cloud+
account with your email address and your phone, touch
Basic information
.
• To automatically synchronize data such as contacts to the
server, touch
Sync settings
.
• To allow you to log in to the Huawei Cloud+ portal to locate
your phone, or retrieve or erase data if your phone has been
lost, enable
Phone Finder
.
• To let your applications synchronize, send, or receive data
automatically and at any time, enable
Push server
.
• To reset your Cloud+ password, touch
Change password
.
• To quit Cloud+, touch
Log out
.
Security Guard
Security Guard
is integrated with your phone to provide
security functions including: blocking calls and messages;
encrypting messages, calls, and files, Password Safe; and
querying home locations of incoming calls. No charges are
incurred by the use of this application.
62
On the Home screen, touch >
Security Guard
for the
following options:
• To view calls and messages that have been blocked, touch
Blocking logs
.
• To view or edit the
BLACKLIST
and
WHITELIST
, touch
Blacklist and whitelist
. Based on your blocking settings,
your phone blocks calls and messages from contacts on the
blacklist or accepts only calls and messages from contacts
on the whitelist.
• To define your private contacts and view records of
messages and calls from or to them, touch
Privacy center
.
• To securely record and encrypt your account IDs and
passwords, for example, for online banking accounts and
email accounts, touch
Password safe
:
• To encrypt or decrypt files, touch
File encryption
.
• To specify whether to enable or disable the privacy protection
and blocking functions, go to >
Settings
>
Enable
service
.
• To specify whether to enable or disable
Enable service at
phone startup
, go to
>
Settings
>
Enable service at
phone startup
.
Phone Finder
Phone Finder
enables you to locate your phone, and to
retrieve or erase data should your phone become lost.
On the Home screen, touch >
Cloud+ Settings
>
Phone
Finder
, and select the
Phone Finder
check box. When you
registered for the phone finder service, log in to
www.hicloud.com with your Huawei Cloud+ account details to
do any of the following using
Phone Finder
.
63
• Locking your phone: You can set a phone lock to protect your
phone from unauthorized use. If the phone lock is already
enabled, enter your password to unlock the phone.
• Backing up or erasing data on your phone: You can back up
or erase data such as your contacts from your phone. The
backed up data will be stored on the server.
• Displaying a message: Enter a text message and set it to be
displayed on your phone when your phone is lost.
• Locating your phone: Locate your phone using its GPS
function.
• Call forwarding: Set all incoming calls to be forwarded to a
phone number.
• Message forwarding
:
Set all incoming messages to be
forwarded to a phone number.
For details of
Phone Finder
, visit: http://www.hicloud.com.
Synchronizing Contacts
You can synchronize only contacts saved in your phone
memory to the server.
1. On the Home screen, touch >
Cloud+ Settings
>
Sync
settings
.
2. Select the
Auto-sync
check box.
3. Select the
Sync contacts
check box to start synchronizing.
64
Cloud Backup
The cloud backup function enables you to back up data to the
cloud server and restore the backup data to your phone.
1. On the Home screen, touch >
All Backup
>
Cloud
Services
.
2. Touch
Data backup
.
3. In the
FILE NAME
field, enter the file name; in
BACKUP
CONTENTS
, select the data you want to back up; touch
BACKUP
to back up the selected data to the server. During
backup, you can touch
Cancel
to cancel the operation.
To restore backup data from the server to your phone, touch
Data restore
. To delete the backup data, touch
File manager
.

65
Browser
Browsing a Web Page
1. On the Home screen, touch >
Browser
to launch the
browser.
2. Enter a website address in the address box at the top.
• Touch to view the thumbnails of all web pages
currently open, from where you can switch between
pages.
• Touch
+
to open a new browser window.
Managing Bookmarks
Adding a Bookmark
1. Launch the browser, and go to the web page you want to
save as a bookmark.
2. Touch >
Save to bookmarks
.
3. Enter the bookmark name, and then touch
OK
.
Opening a Bookmark
1. In a browser window, touch in the upper right corner.
2. Touch and select the bookmark of the web page you
want to open.
On the
BOOKMARKS
screen, you can also touch the
HISTORY
tab to view the pages you have visited or touch the

66
SAVED PAGES
tab to view saved pages.
Setting the Home Page
1. In a browser window, touch >
Settings
>
General
>
Set
homepage
.
2. Select one page from the list, or touch
other
to enter the URL
of the desired homepage, and then touch
OK
.
Customizing Browser Settings
To customize your browser setting, in a browser window, touch
>
Settings
.
67
Maps
Maps
enables you to find your current location, view real-time
traffic conditions (depending on availability in your area), and
get detailed directions to your destinations. You can view
satellite images, traffic maps, or other kinds of maps of your
current or other locations.
Enabling the Location Service
Enable the location service before using
Maps
to find your
location or search for places of interest.
1. On the Home screen, touch >
Settings
.
2. Touch
Location services
.
3. Select the
Google's location service
,
GPS satellites
, and
Location & Google search
check boxes.
Opening Maps
On the Home screen, touch >
Maps
.
Searching for Places of Interest
1. On the map, touch .
2. Enter appropriate keywords in the search box, and then
touch the search icon.
3. The search results are displayed. Touch a place you are
interested in. The Maps application will shows its location on
the map.
68
Getting Directions
1. When viewing a map, touch .
2. Enter your start point in the first text box and your destination
in the second.
3. Touch the icon for driving, public transit, or walking directions.
4. Touch
GET DIRECTIONS
. Directions are displayed in a list.
5. Touch a direction in the list to show it on the map.
6. When you finish viewing or following the directions, touch
>
GET DIRECTIONS
to reset the map.
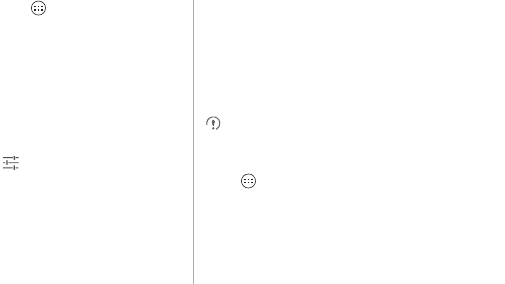
69
Capturing Photos and
Videos
Your phone supports various capture modes and picture
effects, with which you can take a photo, record a video, and
share the photos and videos.
Camera
On the Home screen touch >
Camera
to activate the
camera. You can then take a picture.
On the viewfinder screen, touch to exit the camera.
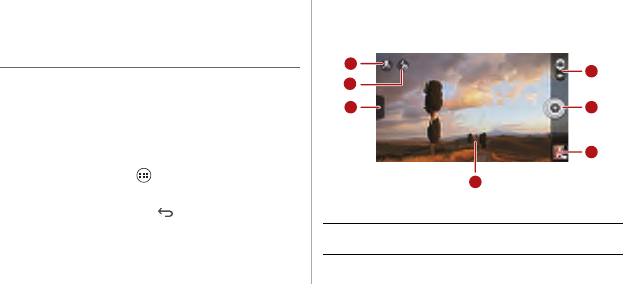
Camera Mode
1 Switch between camera and video capture modes.
71
2
3
4
5
6
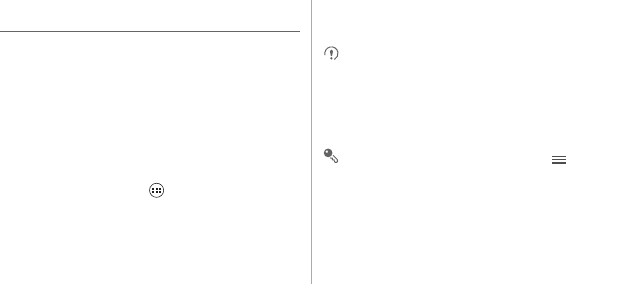
70
2
• Touch to take a photo.
• Touch and hold to focus the camera, and then release
your finger to take a photo.
3Thumbnail of the previous shot. Touch to view the
photos you just took.
4Viewfinder screen. Touch anywhere to focus the
camera.
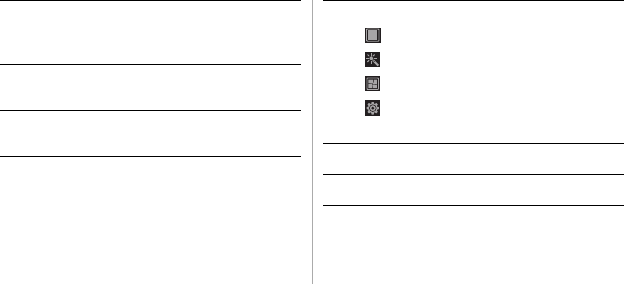
5
Touch to display the options menu as follows:
• : Switch the picture mode.
• : Select a filtering mode.
• : Select a picture effect.
• : Set the scene mode, the while balance, ISO,
and more.
6 Set the flash mode.
7 Switch between the front and rear cameras.