Huion Animation Technology DWH69 Graphic Tablet (Pen Tablet) User Manual Manual
Shenzhen Huion Animation Technology Co.,ltd. Graphic Tablet (Pen Tablet) Manual
UserManual.wiki
>
Huion Animation Technology
>
DWH69 User Manual
Manual
Navigation menu
Upload a User Manual
Namespaces
Wiki Guide
HTML
PDF
Info
Views
User Manual
Discussion / Help
Navigation

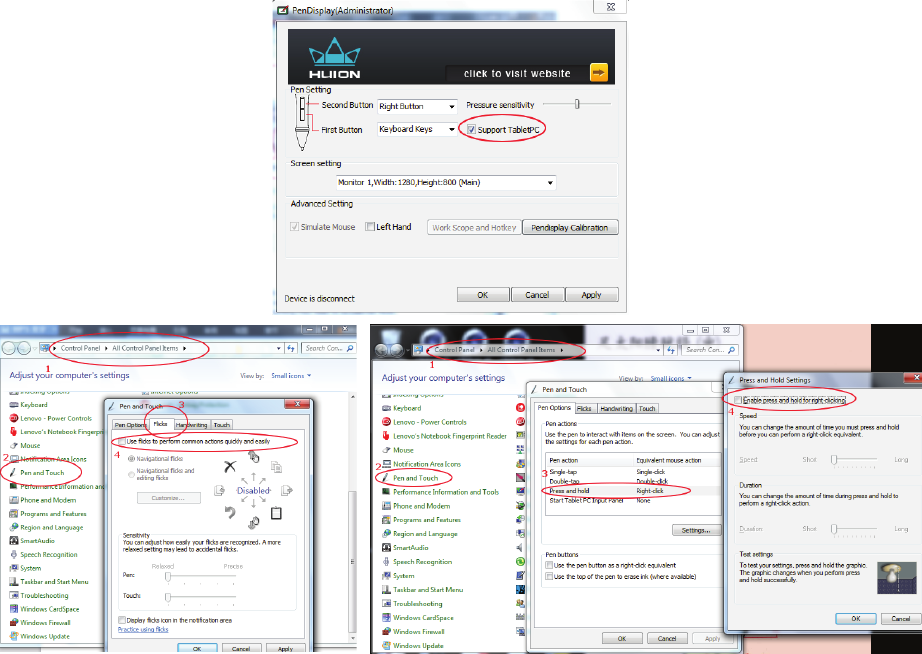
![23. System RequirementsWindows Vista / Windows 7 / Windows 8 / Windows 8.1 / Windows 104. Installing the Driver Software on WindowsPlease close all painting software and antivirus software before driver installation.For Windows Vista / Windows 7 / Windows 8 / Windows 8.1 / Windows 10 operating systems:(1) Insert the Driver CD intoa CD-ROM drive and wait for the main installation screen to appear.(2) The main installation screen will appear automatically; if not, you can manually start the installation- Open [My Computer] [CD/DVD Rom] -click on the [Setup] program.(3) When installing the driver, follow the installation instructions on screen.5. Hardware InstallationOnce the driver installation is finished, connect the tablet with USB interface into a PC.You will then see a small tablet icon appearing in the system tray (normally at thelower right corner of the screen.)If the USB cable is disconnected, there will apprear a iconto represent the tablet is disable](https://usermanual.wiki/Huion-Animation-Technology/DWH69/User-Guide-2693723-Page-5.png)