Humax AGC-3220YF CAR AUDIO User Manual AGC 3220YF REVx
Humax Automotive Co., Ltd. CAR AUDIO AGC 3220YF REVx
UserManual.wiki
>
Humax
>
AGC 3220YF User Manual
User Manual
Navigation menu
Upload a User Manual
Namespaces
Wiki Guide
HTML
PDF
Info
Views
User Manual
Discussion / Help
Navigation
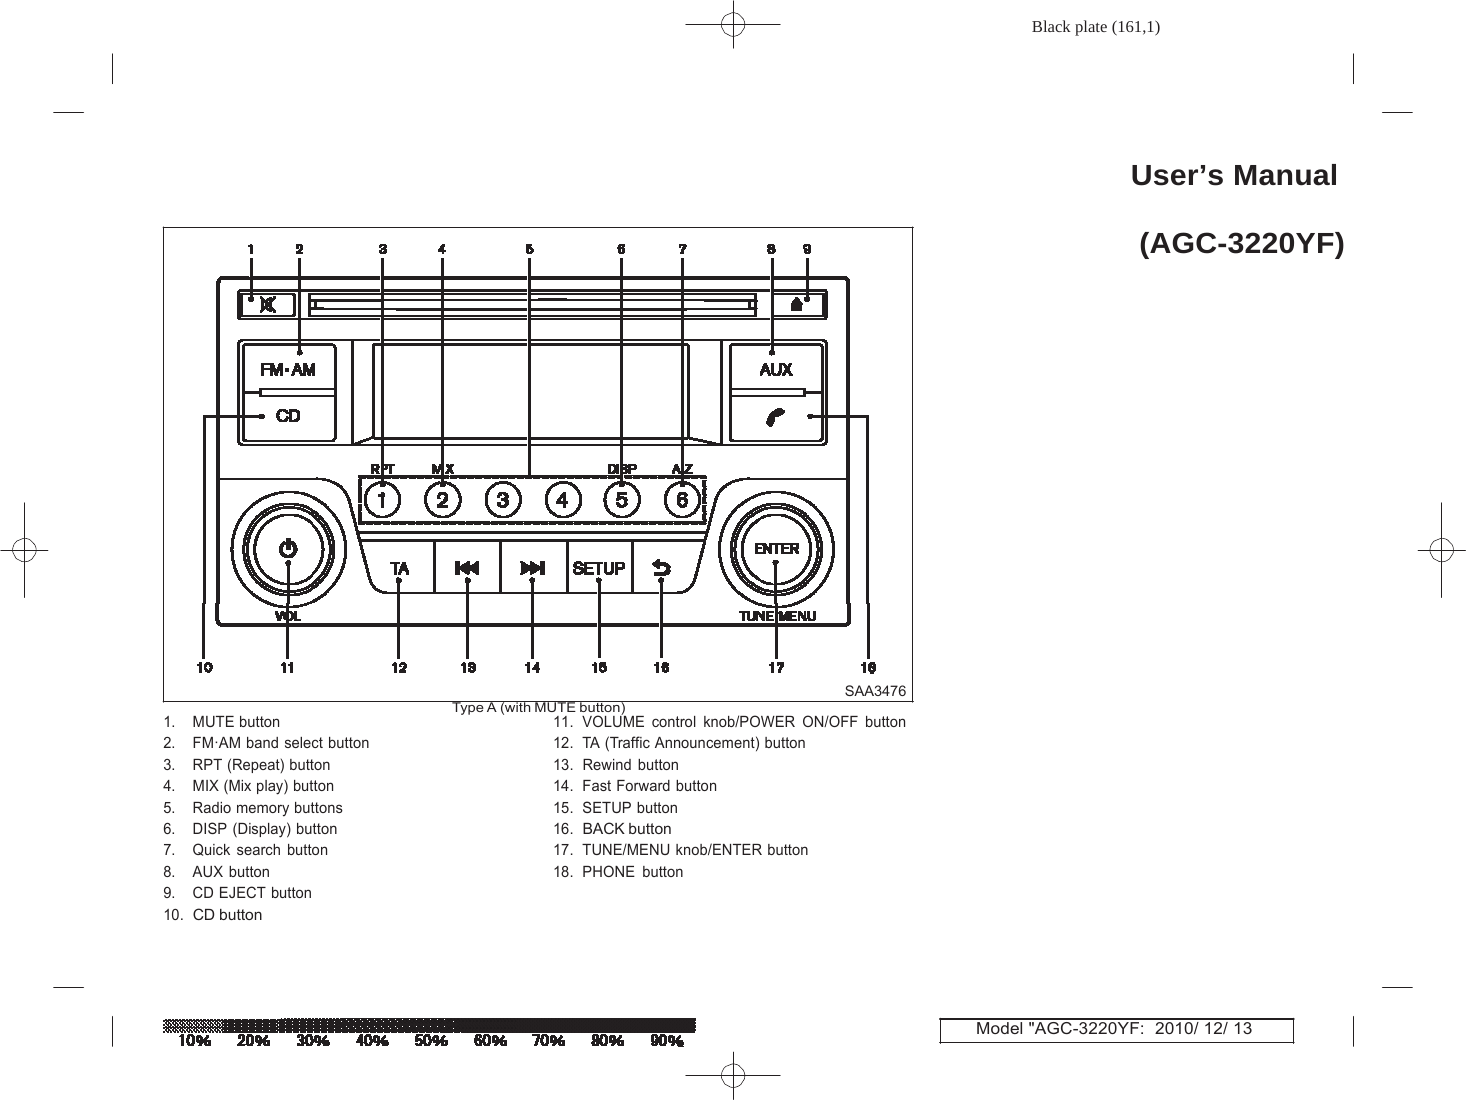
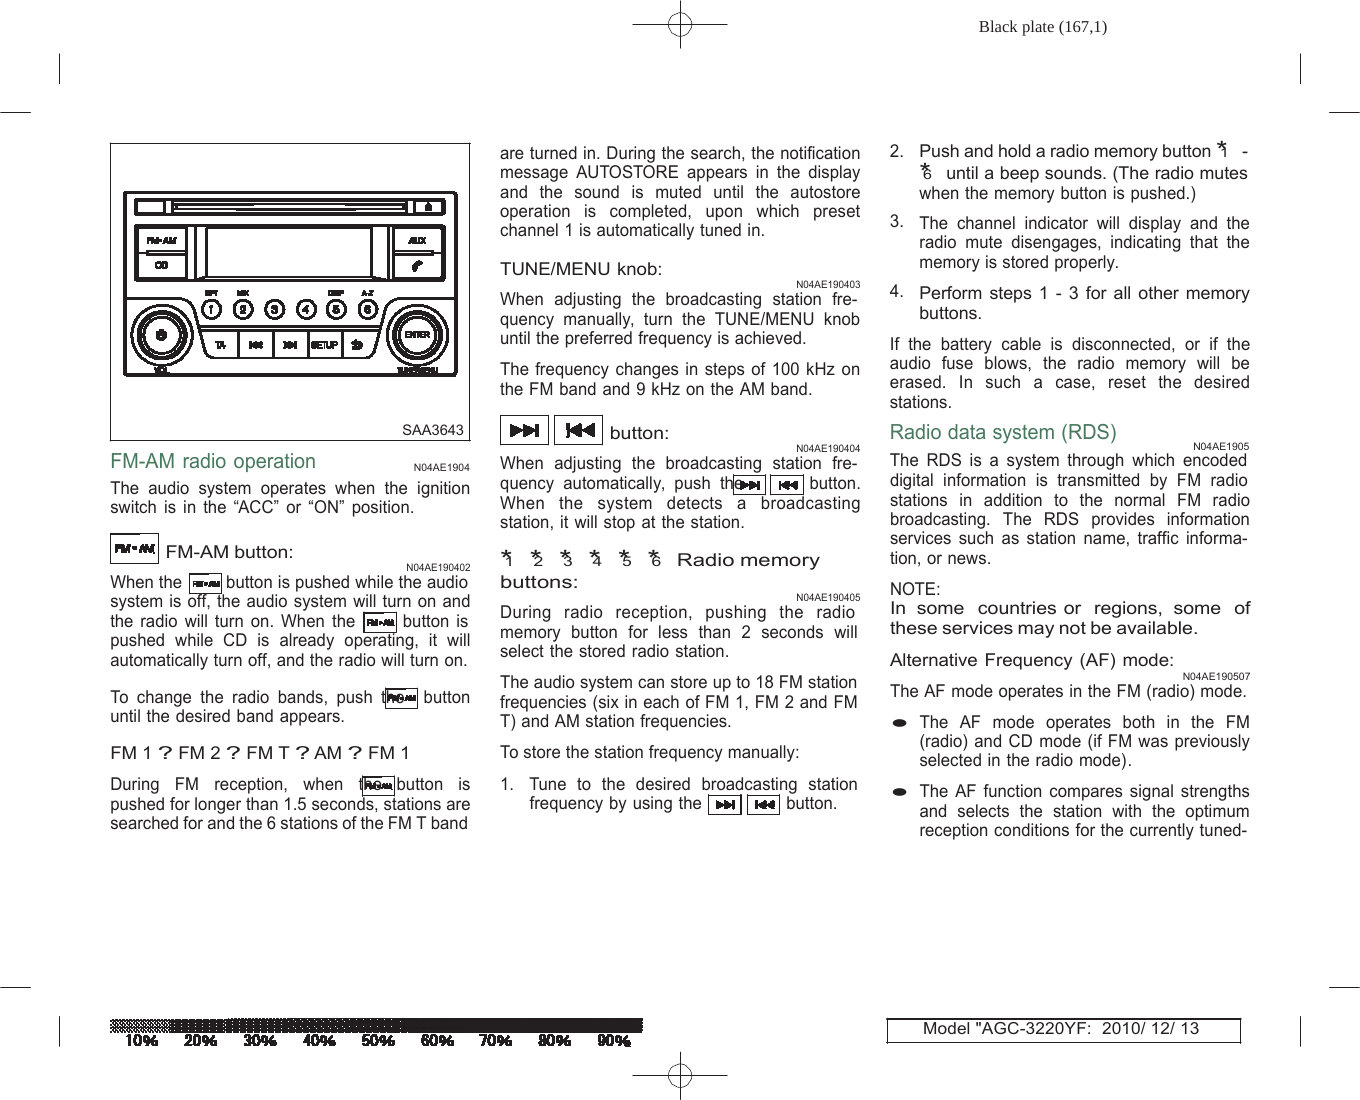
![Black plate (165,1)Model "AGC-3220YF: 2010/ 12/ 13 brightness between the daytime and nighttime modes. Mute button (for Type A): N04AE190209 Push the MUTE button to mute the audio system, and MUTE appears on the display. To unmute, use any one of the following options: — Push the MUTE button again. — Turn the MENU/VOL dial. ● The audio unit will automatically detect if a CD containing MP3/WMA files is inserted, and [MP3CD] will be indi- cated. ● An error notification message will be displayed when inserting an incompa- tible disc type (e.g. DVD), or if the player cannot read the CD. Eject the disc and insert another disc. List view: — Push the CD or FM·AM button. — Push the AUX button. AUX button: N04AE190216 CD player operation SAA3643 N04AE1903 N04AE190327 While the track is being played, push either the ENTER or BACK button to display the available tracks in a listed view mode. To select a track from the list, or a track to start listening to, turn the MENU select knob then push ENTER. Push the AUX button to play a compatible device when it is connected. The audio system operates when the ignition switch is in the “ACC” or “ON” position. Quick search: N04AE190328 Loading: N04AE190301 In the list view mode, a quick search can be performed to find a track from the list. Push the Insert a CD into the slot with the label side facing up. The CD will be guided automatically into the slot and will start playing. After loading the disc, track information will be displayed. CAUTION: Do not force the CD into the slot. This could damage the player. A-Z *6 (Quick search) button, turn the MENU select knob dial to the first alphabetic letter of the song title and then push ENTER. When found, a list of the available songs will be displayed. Select, and push ENTER to play the preferred track. CD button: After loading the CD, the number of tracks and the playtime will appear on the display. NOTE: ● The CD player accepts normal audio CDs or CDs containing MP3/WMA files. N04AE190312 When the button is pushed while the audio system is off and a CD is loaded, the audio system will turn on and a CD will start playing automatically. If the radio or AUX source mode is already playing, it will automatically turn off and the CD will start playing.](https://usermanual.wiki/Humax/AGC-3220YF/User-Guide-2035993-Page-5.png)