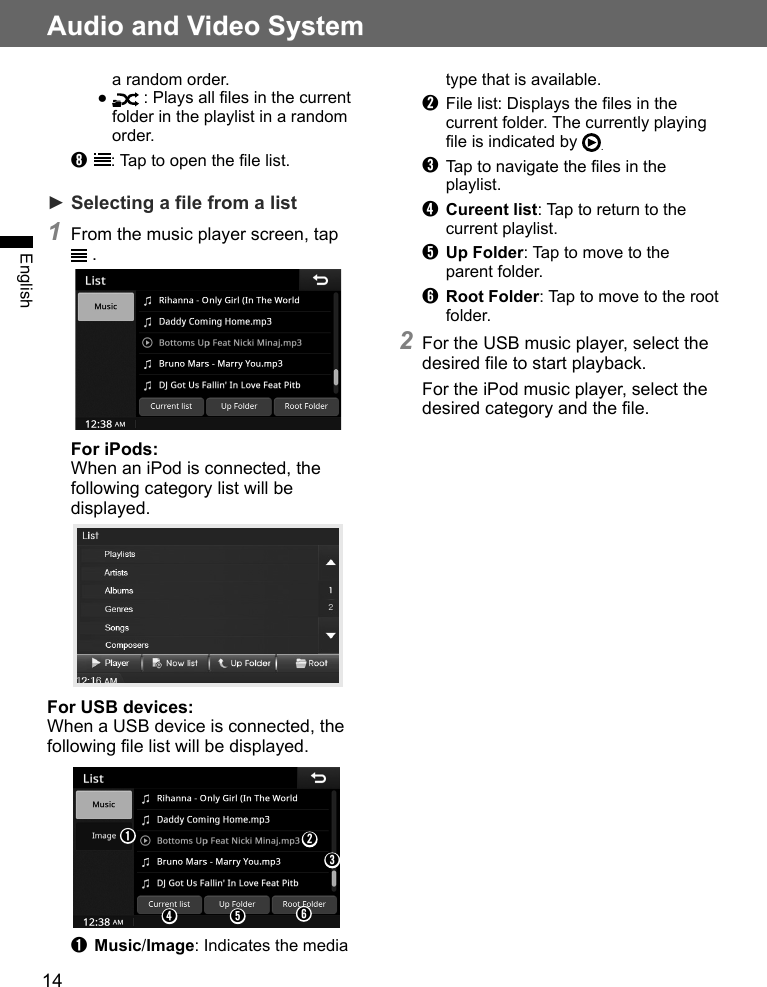
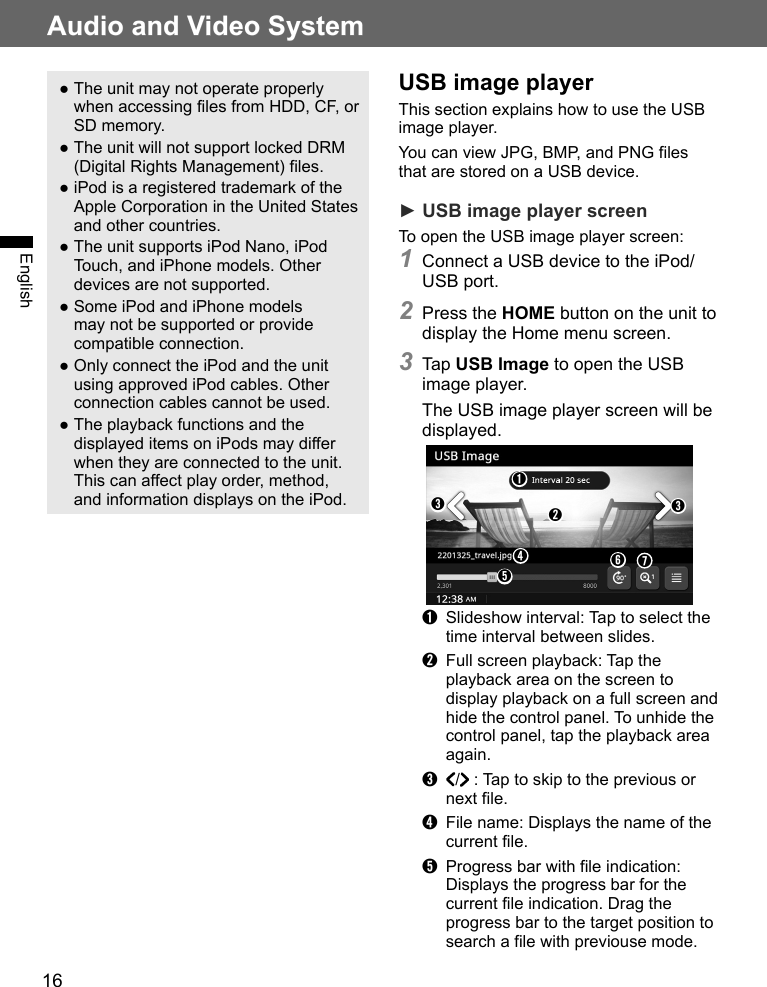
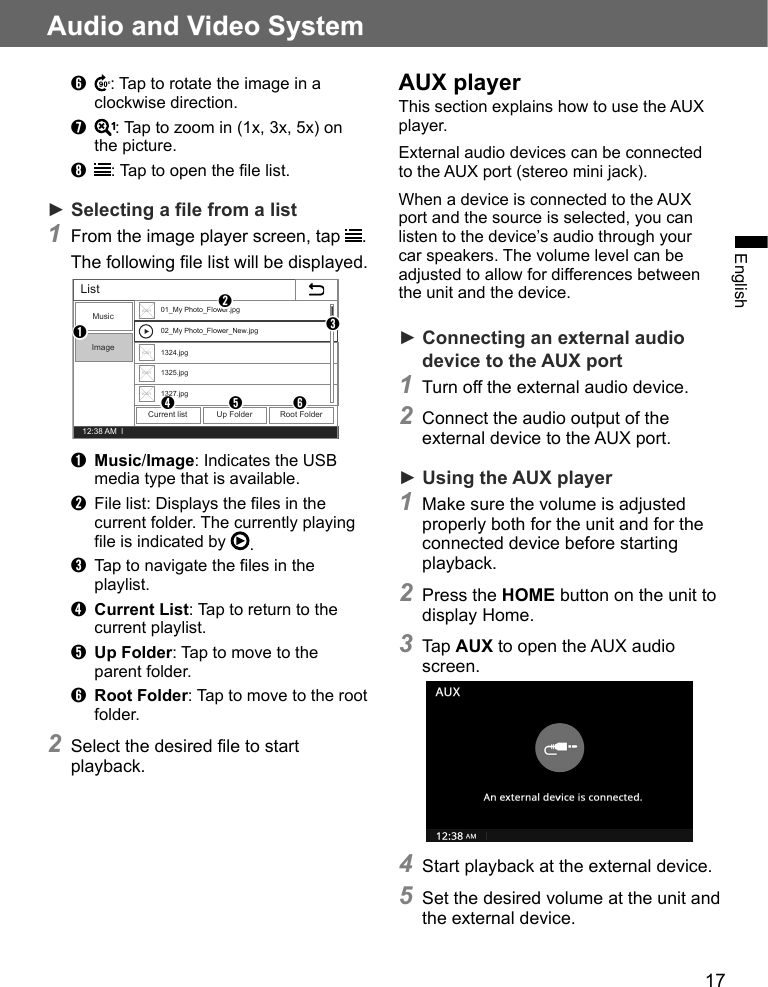
Humax HAGM4001 Car Audio User Manual
Humax Automotive Co., Ltd. Car Audio
UserManual.wiki
>
Humax
>
HAGM4001 User Manual
User Manual
Navigation menu
Upload a User Manual
Namespaces
Wiki Guide
HTML
PDF
Info
Views
User Manual
Discussion / Help
Navigation

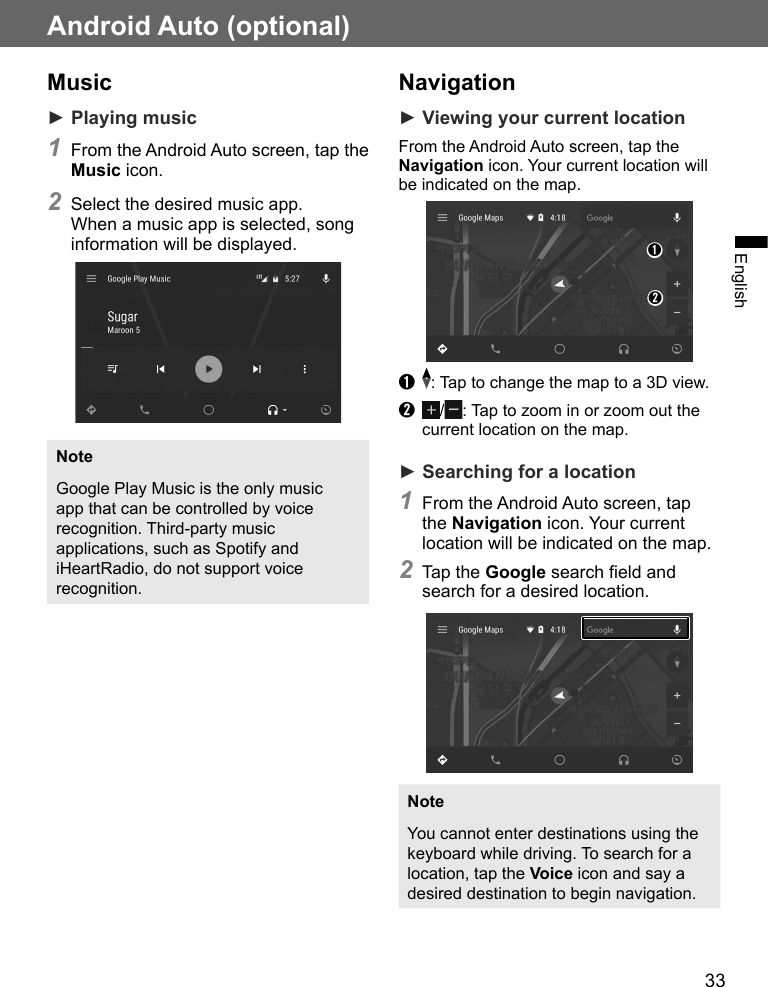
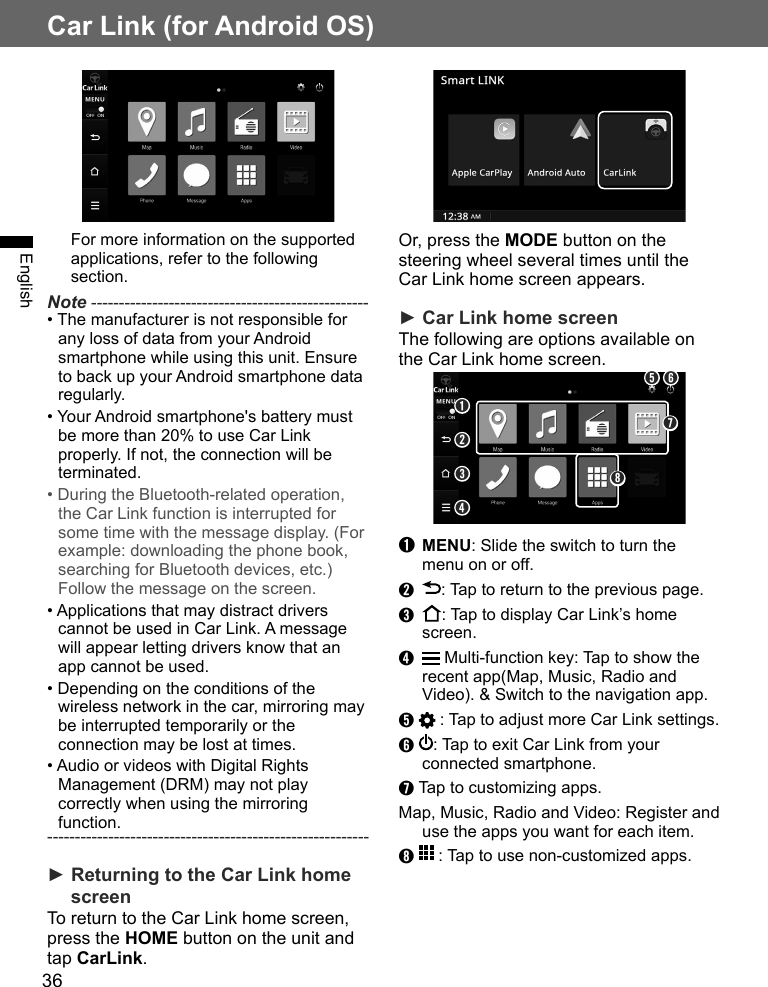
![35EnglishCar Link (for Android OS)3 Tap Connect to car audio/GPS navigator to turn your mobile hotspot.To set your smartphone to automatically connect to the unit for future access, tap the checkbox next to Automatically connect from now on.4 Check the hotspot ID and password given on the smartphone's screen.5 Press the LINK button on the unit and tap CarLink to search for your smartphone’s hotspot.Read the caution carefully and then tap [Agree].6 Tap your smartphone's hotspot from the list of detected hotspots.To refresh the network list, tap .7 Enter the password for the hotspot and tap OK.To save the password, tap the checkbox next to Save.8 When the unit successfully connected to your smartphone, select one of supported applications.](https://usermanual.wiki/Humax/HAGM4001/User-Guide-3437589-Page-37.png)