Hunter Douglas Window Fashions RC4U4 This is a remote control for blinds and shades User Manual
Hunter Douglas Window Fashions This is a remote control for blinds and shades
User Manual

© 2017 Hunter Douglas. All rights reserved. All trademarks used herein are the
property of Hunter Douglas or their respective owners. 5110540123 5/17
Pow erView
®
Motorization
REM OTE CONTROL GUIDE
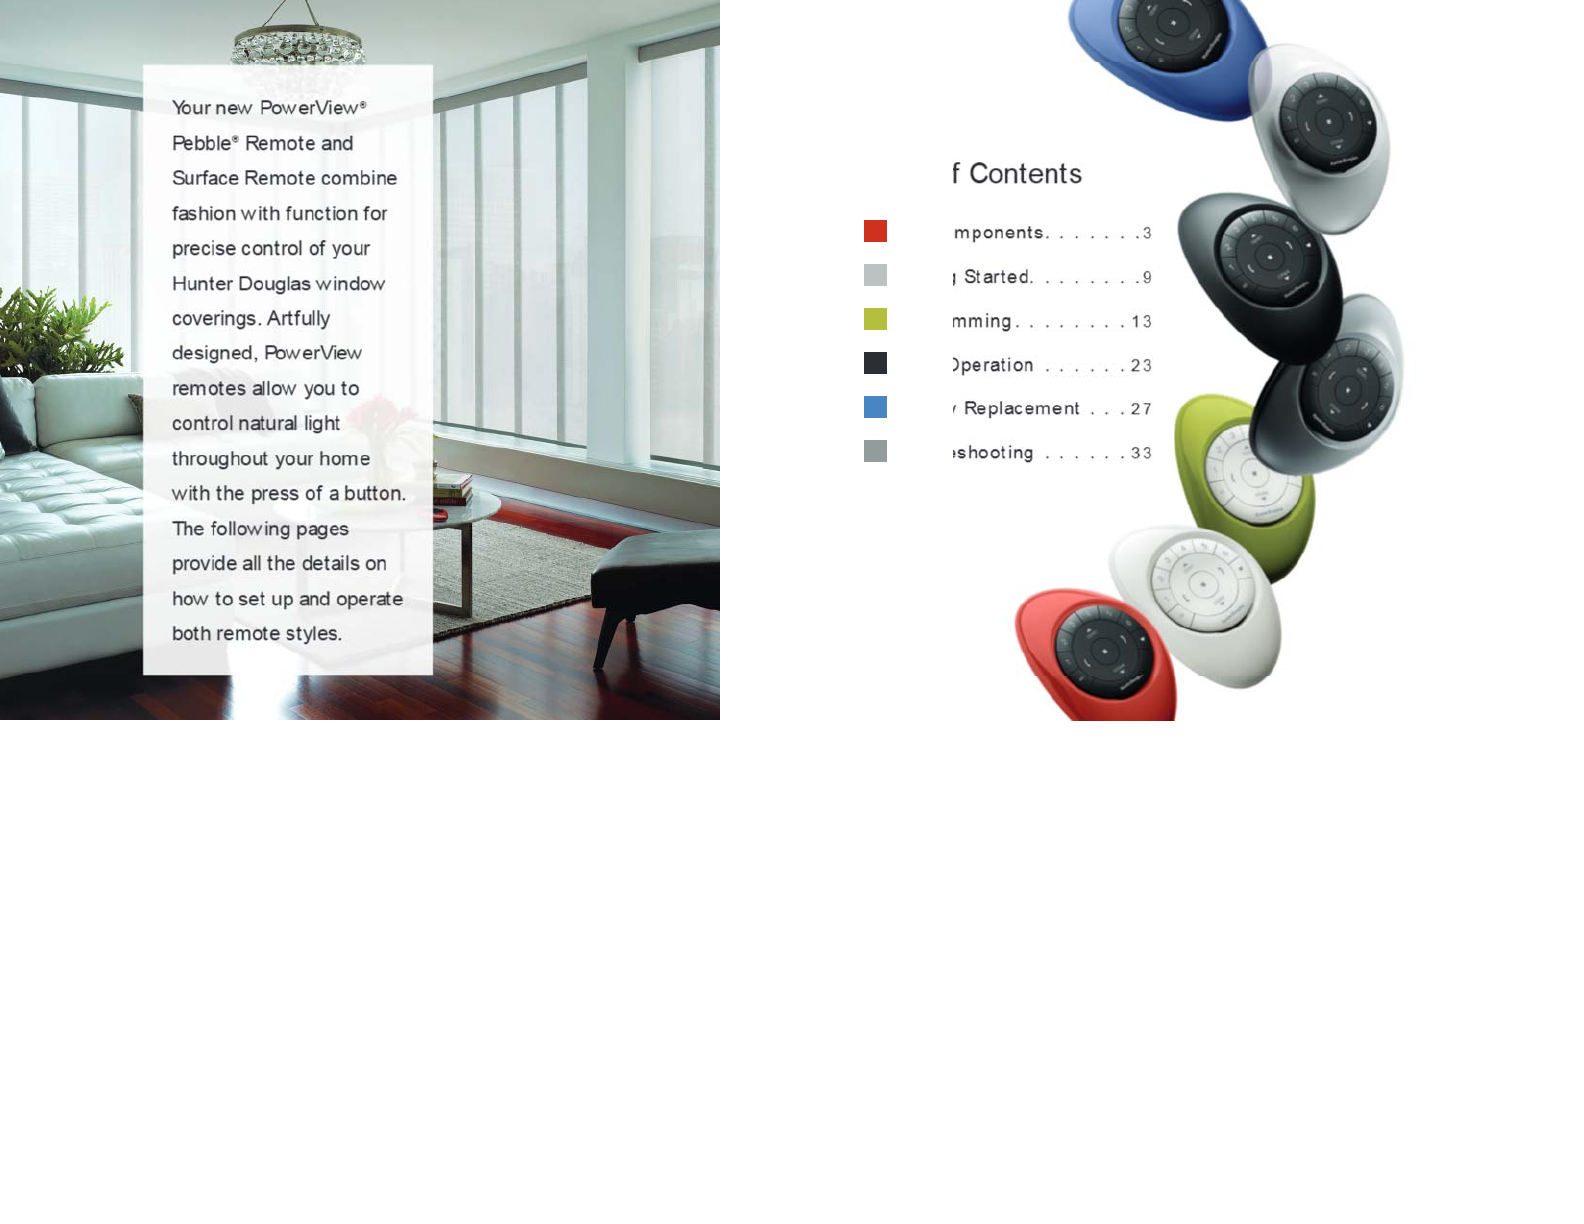
Table of Contents
Key Components . . . . . . . 3
Getting St arted. . . . . . . . 9
Programm ing . . . . . . . . 13
Basic Operat ion . . . . . . 23
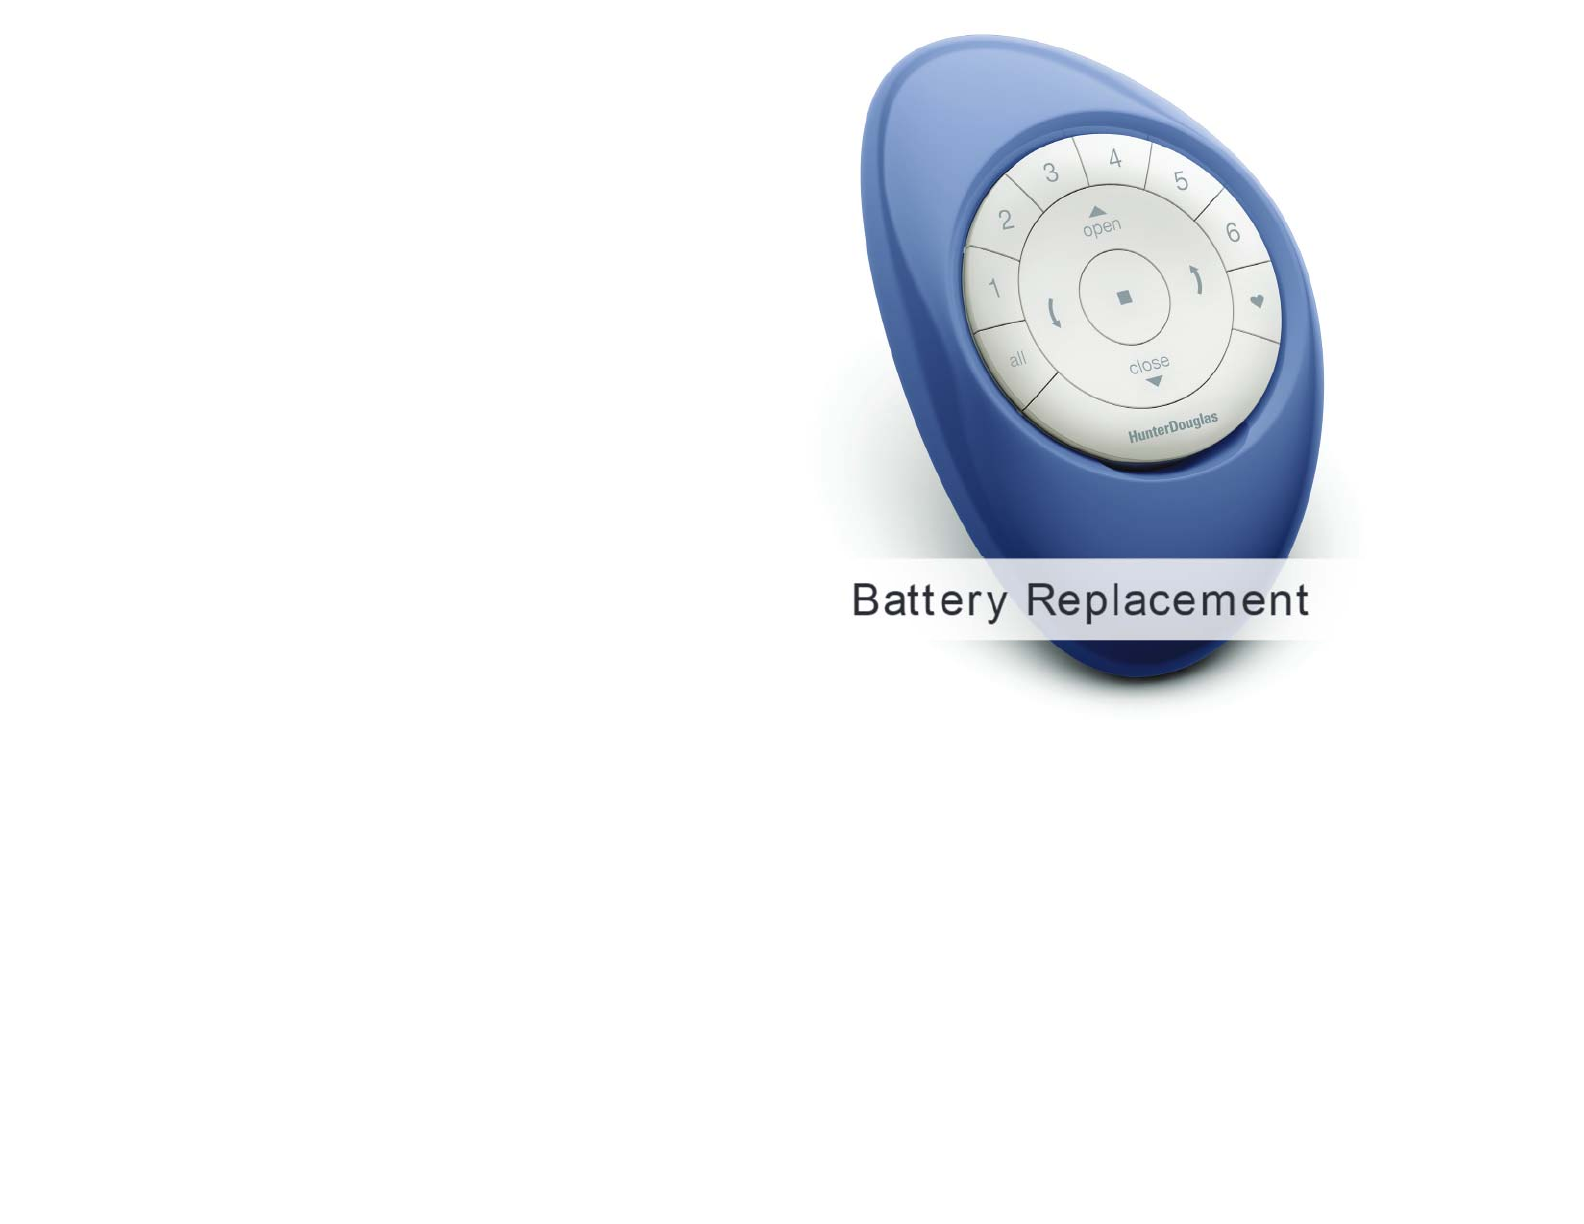
Batt ery Replacem ent . . . 27
Troubleshooting . . . . . .
33
Skyline® Gliding Window Panels
3
54
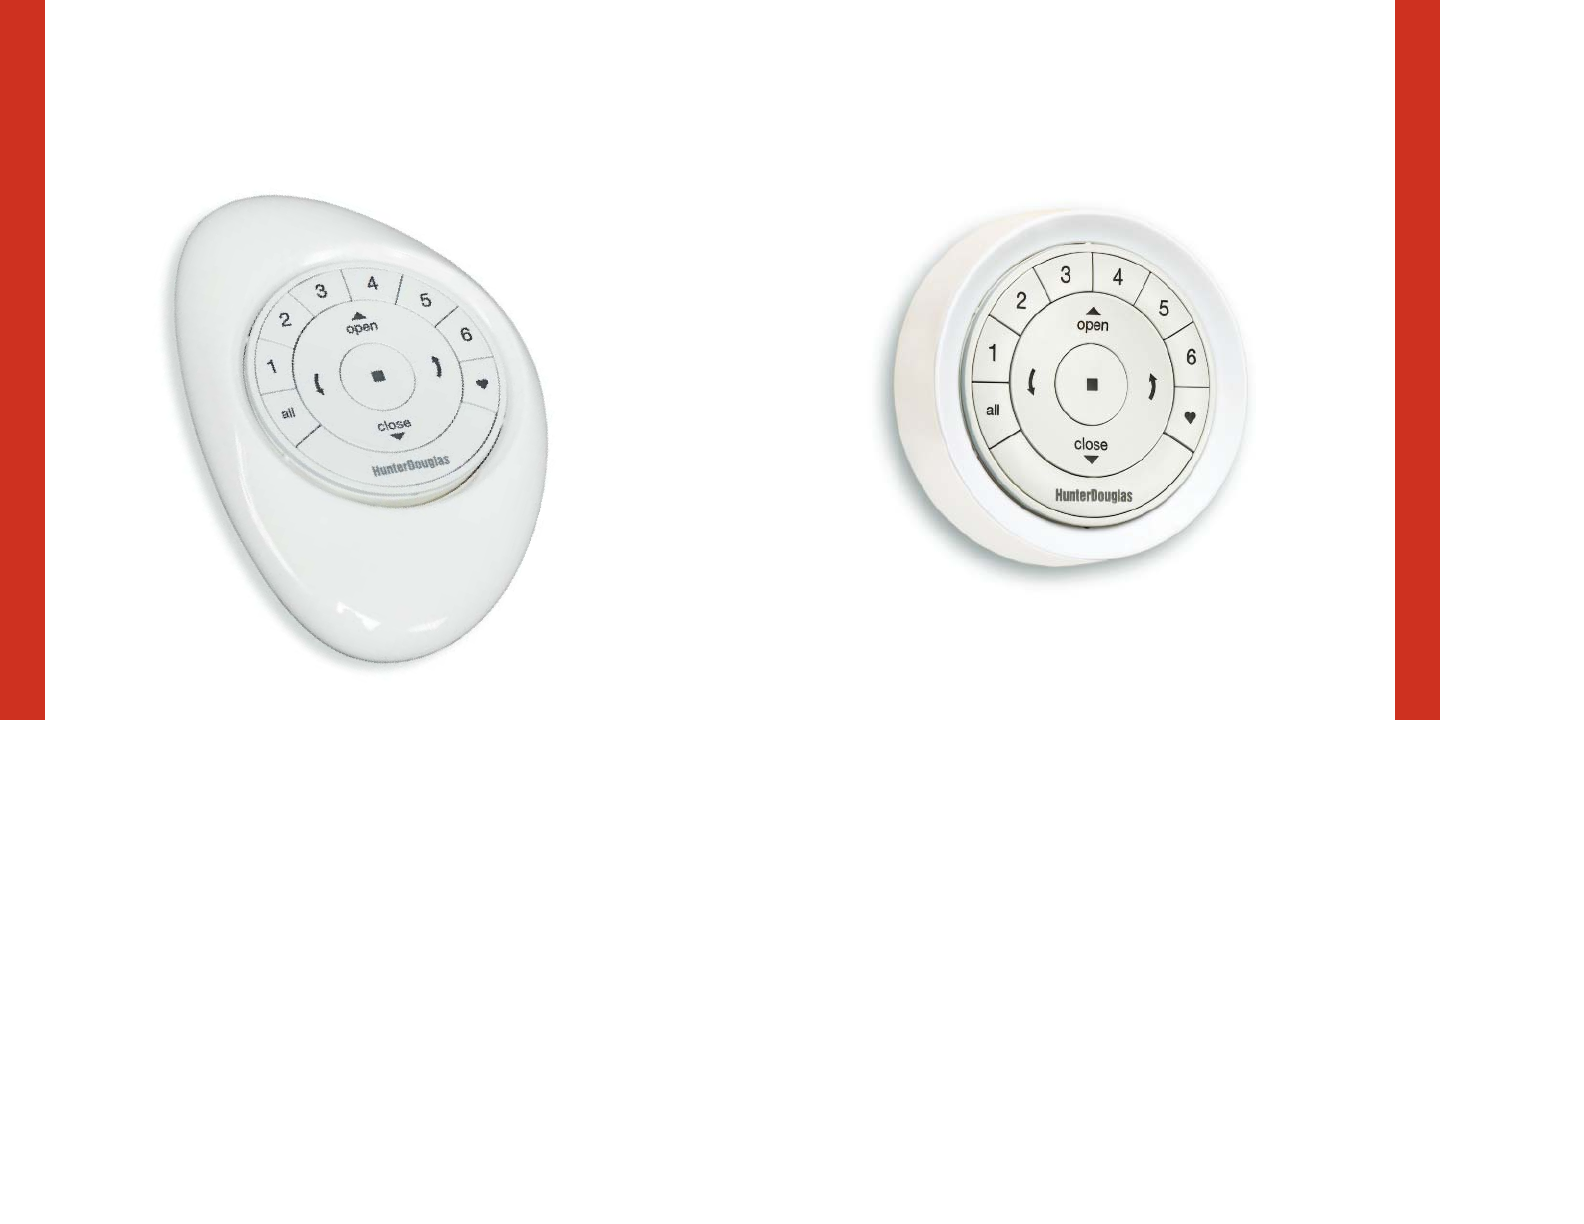
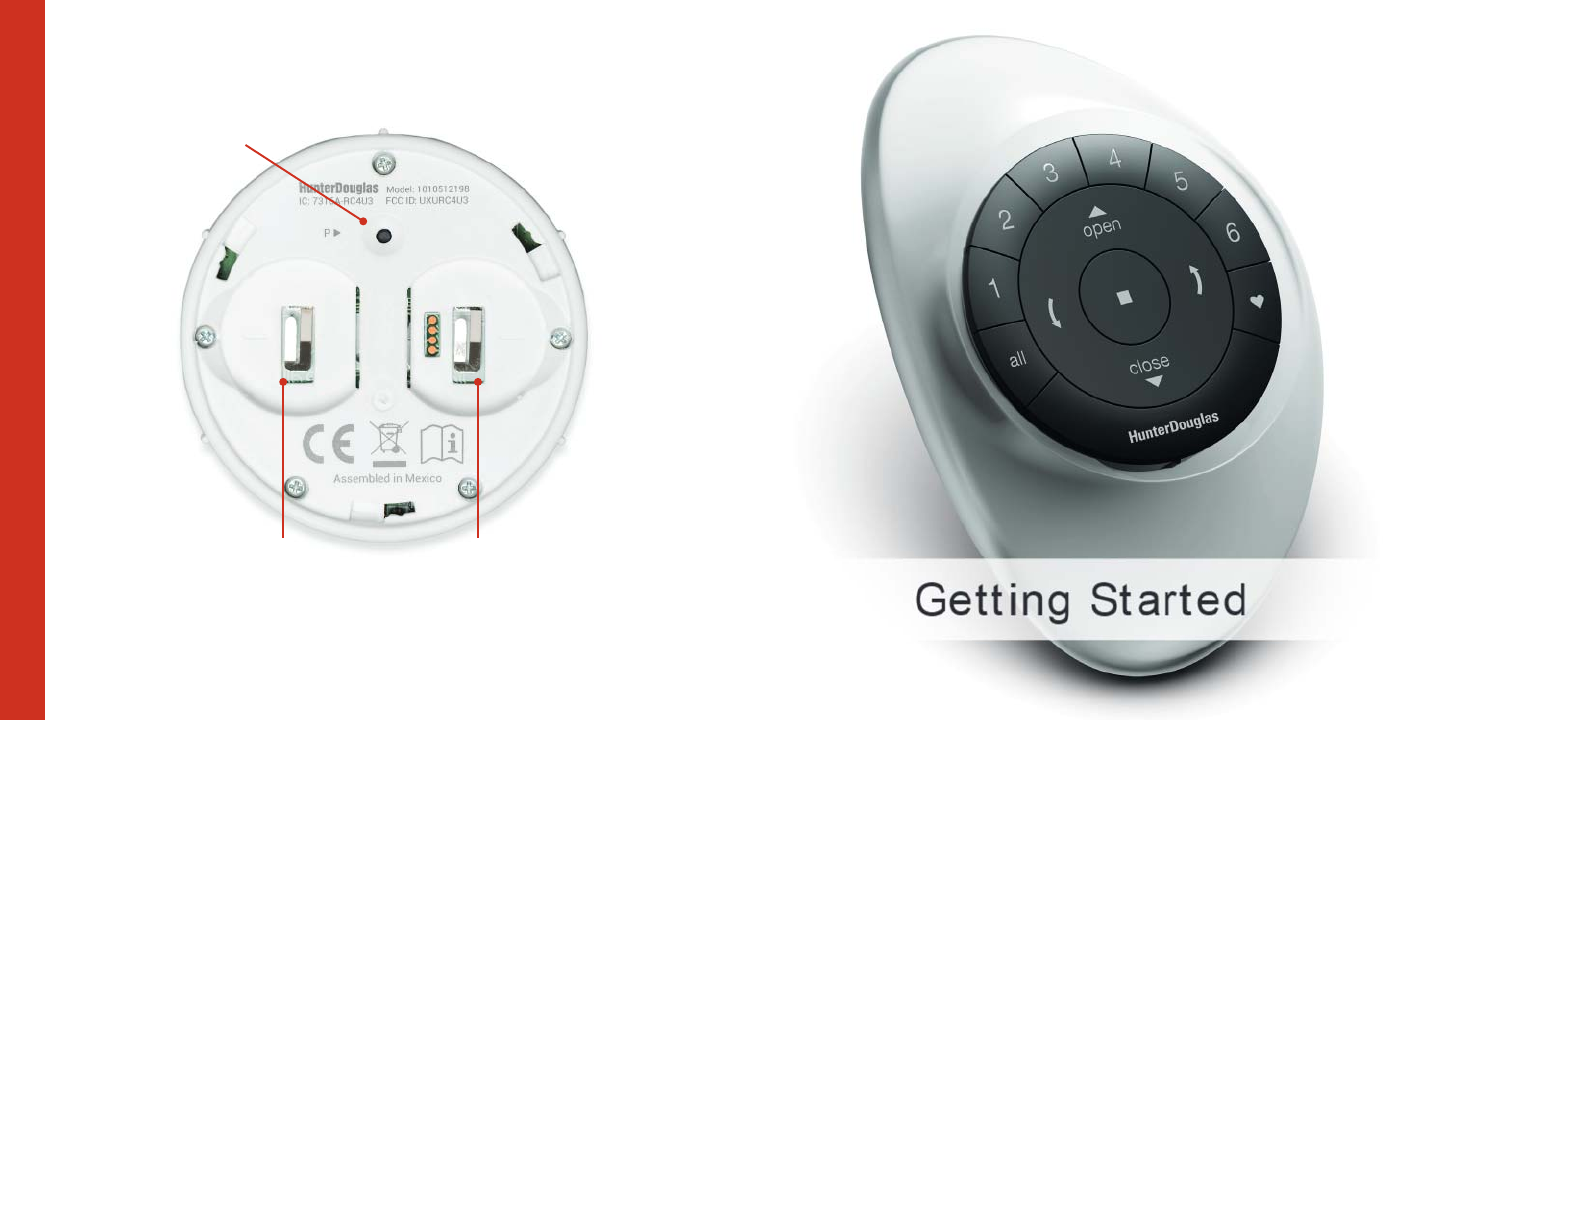
POWERVIEW ® SURFACE REM OTE
The sleek PowerView ® Surface is wall-mounted so you know
your remote is always right w here you left it.
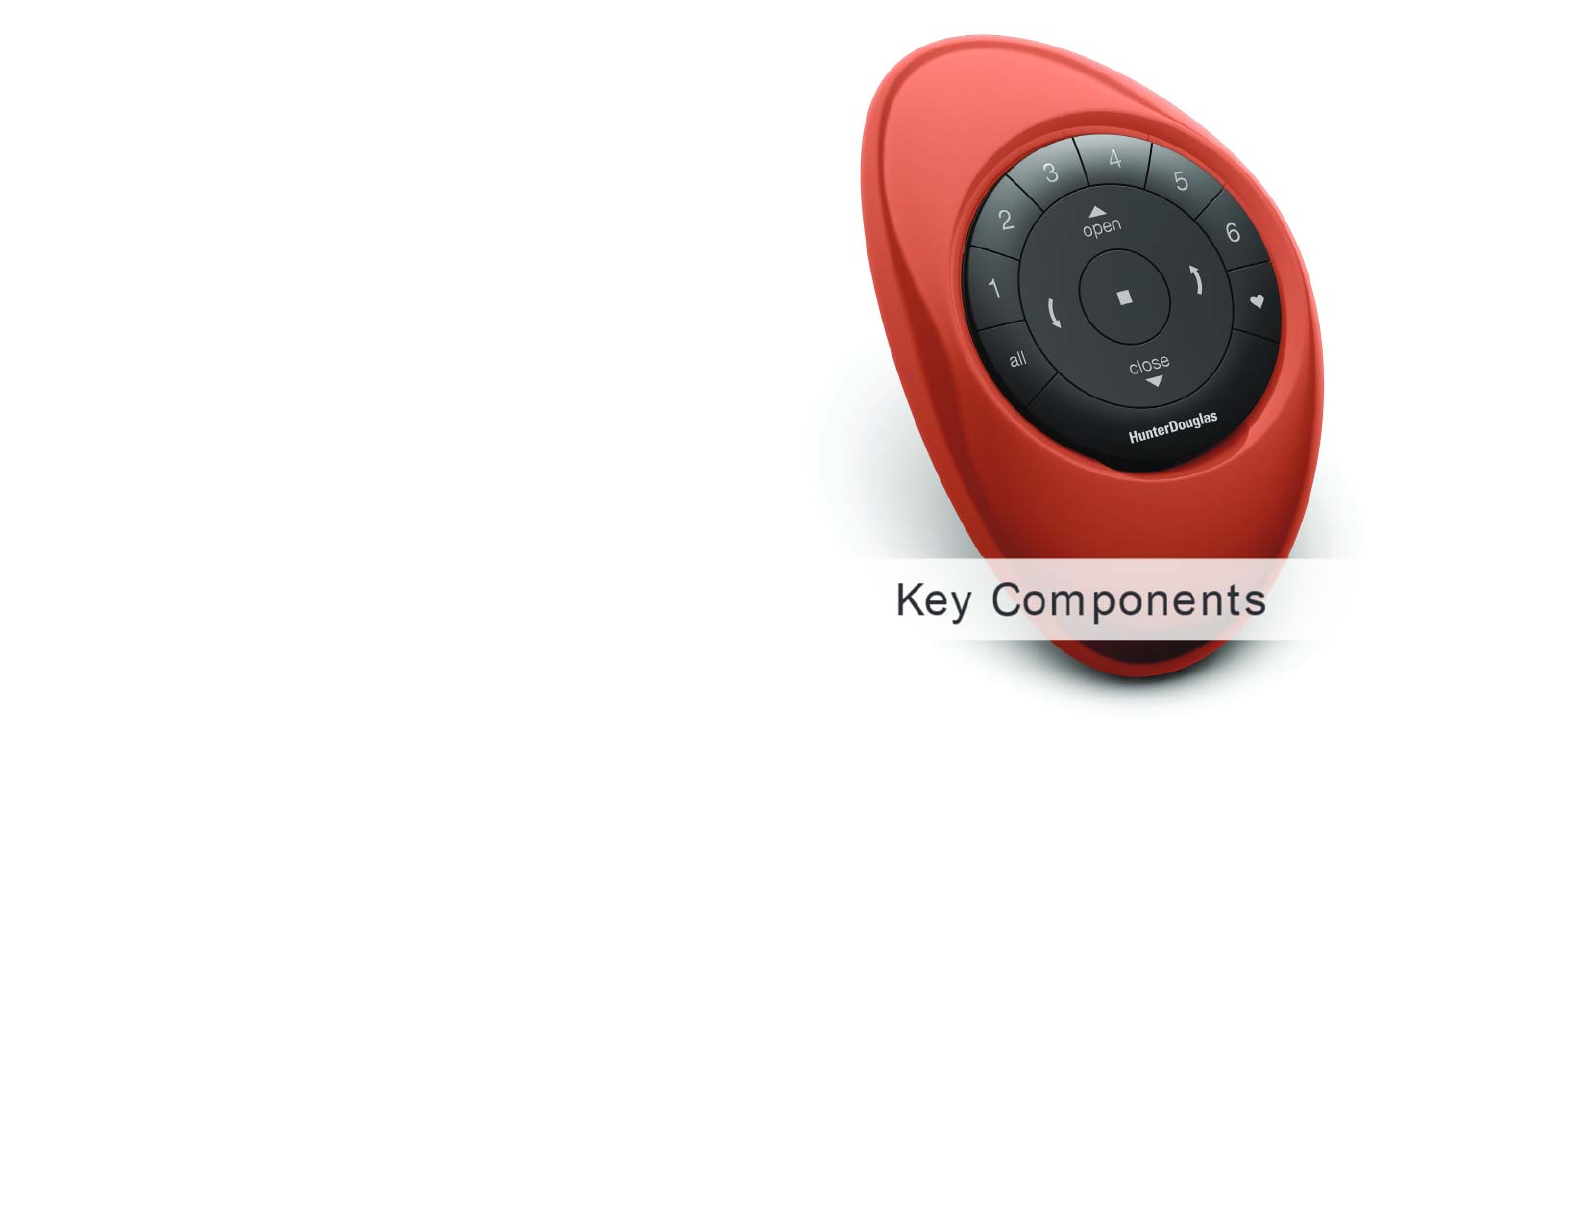
KEY COM PONENTS
KEY COM PONENTS
POWERVIEW ® PEBBLE® REM OTE
Ergonomically designed, the PowerView® Pebb l e®
hand-held remote is available in ten on-trend colors
to complement your home décor.
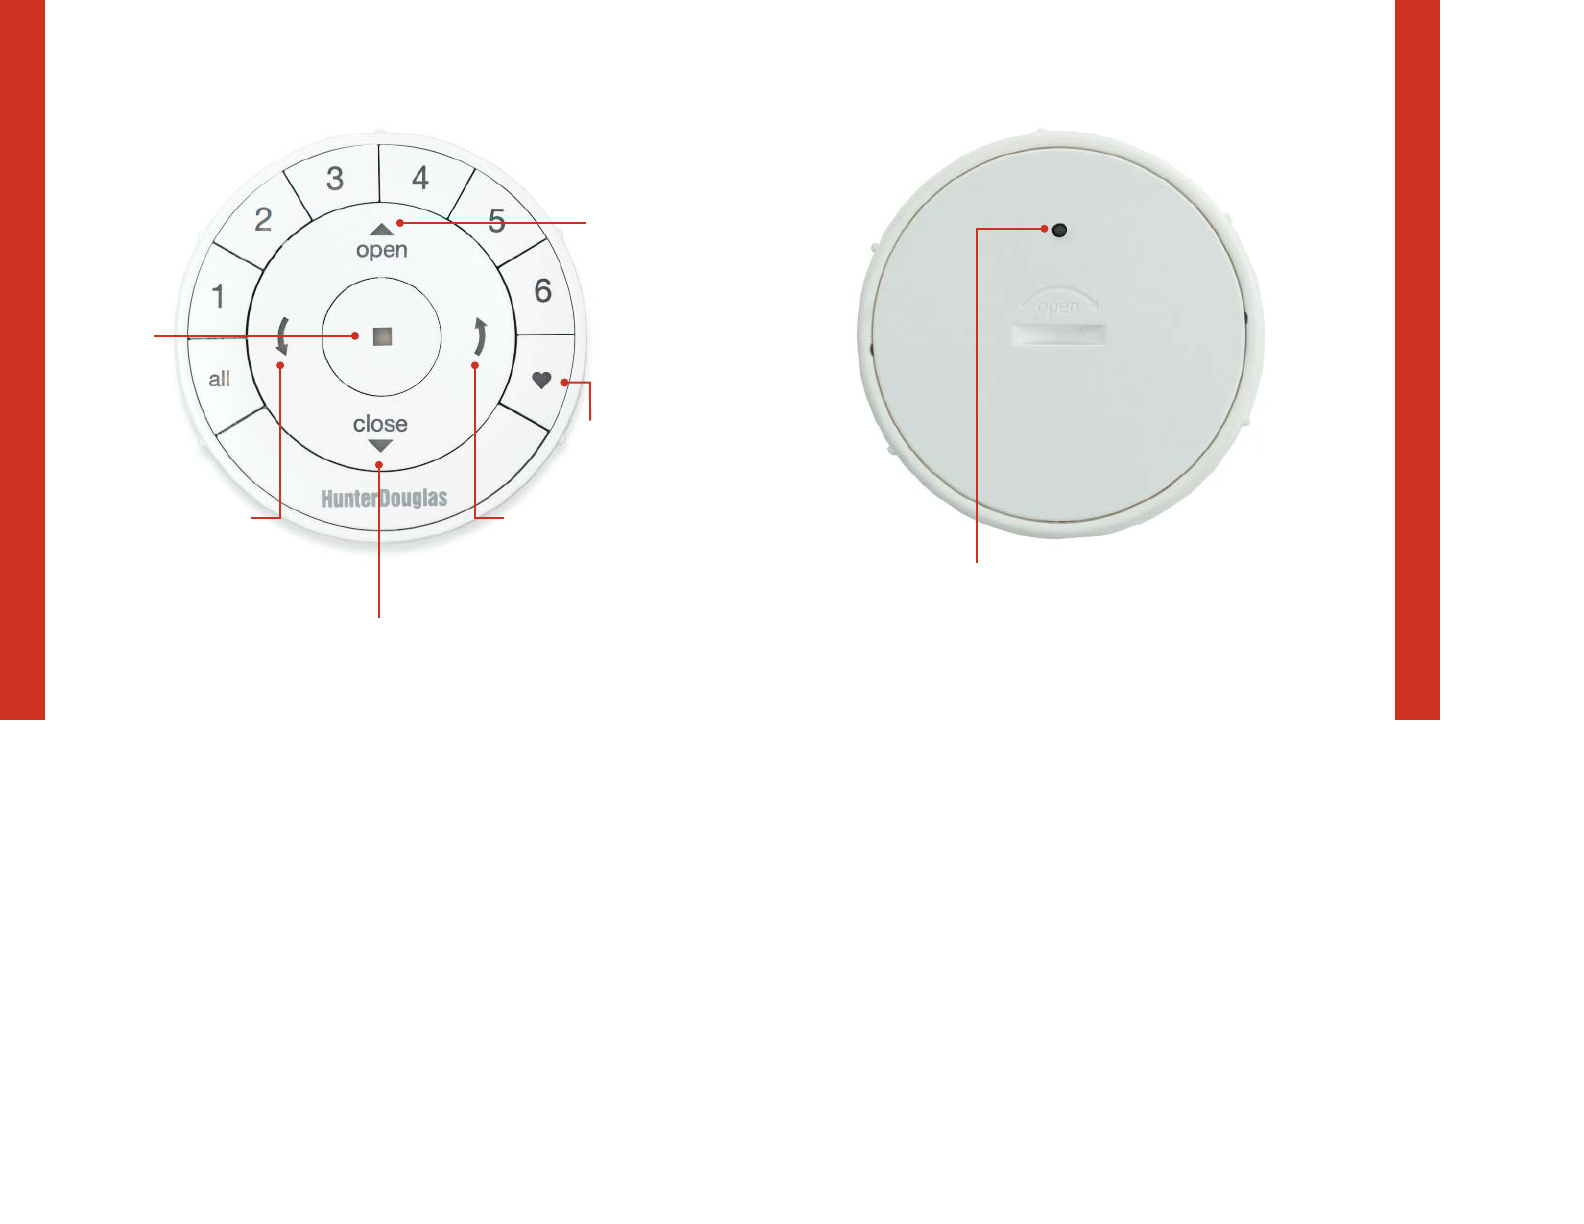
REM OTE M ODULE FRONT
RIGHT ARROW
Function varies
with shade type.
LEFT A RROW
Function varies
with shade type.
FA V O RI T E
Shade position
STOP
Press and
hold for
program
mode.
7
GROUP 1
GROUP 2
GROUP 3 GROUP 4
GROUP 5
GROUP 6
6
REM OTE M ODULE BACK
CLOSE
OPEN
KEY COM PONENTS
KEY COM PONENTS
PROGRAM MING ACCESS
9
REM OTE M ODULE (BACK COVER REM OVED)
BATTERY
COMPA RTMENT
3V CR 2032
BATTERY
COMPA RTMENT
3V CR 2032
PROGRAM MING
8
KEY COM PONENTS
IMPORTANT: The PowerView ® Remote will not operate a
window covering until the w indow covering has been added
to a GROUP.
Getting started
First, activate the remote by pulling both plastic tabs from the
back battery compartment.
NOTE: If placing the remote module into a Pewter or Clear
Frost Pebble®, ensure the provided color insert is seated at the
bottom of the Pebble cutout.
10
GETTING STARTED
GETTING STARTED
11
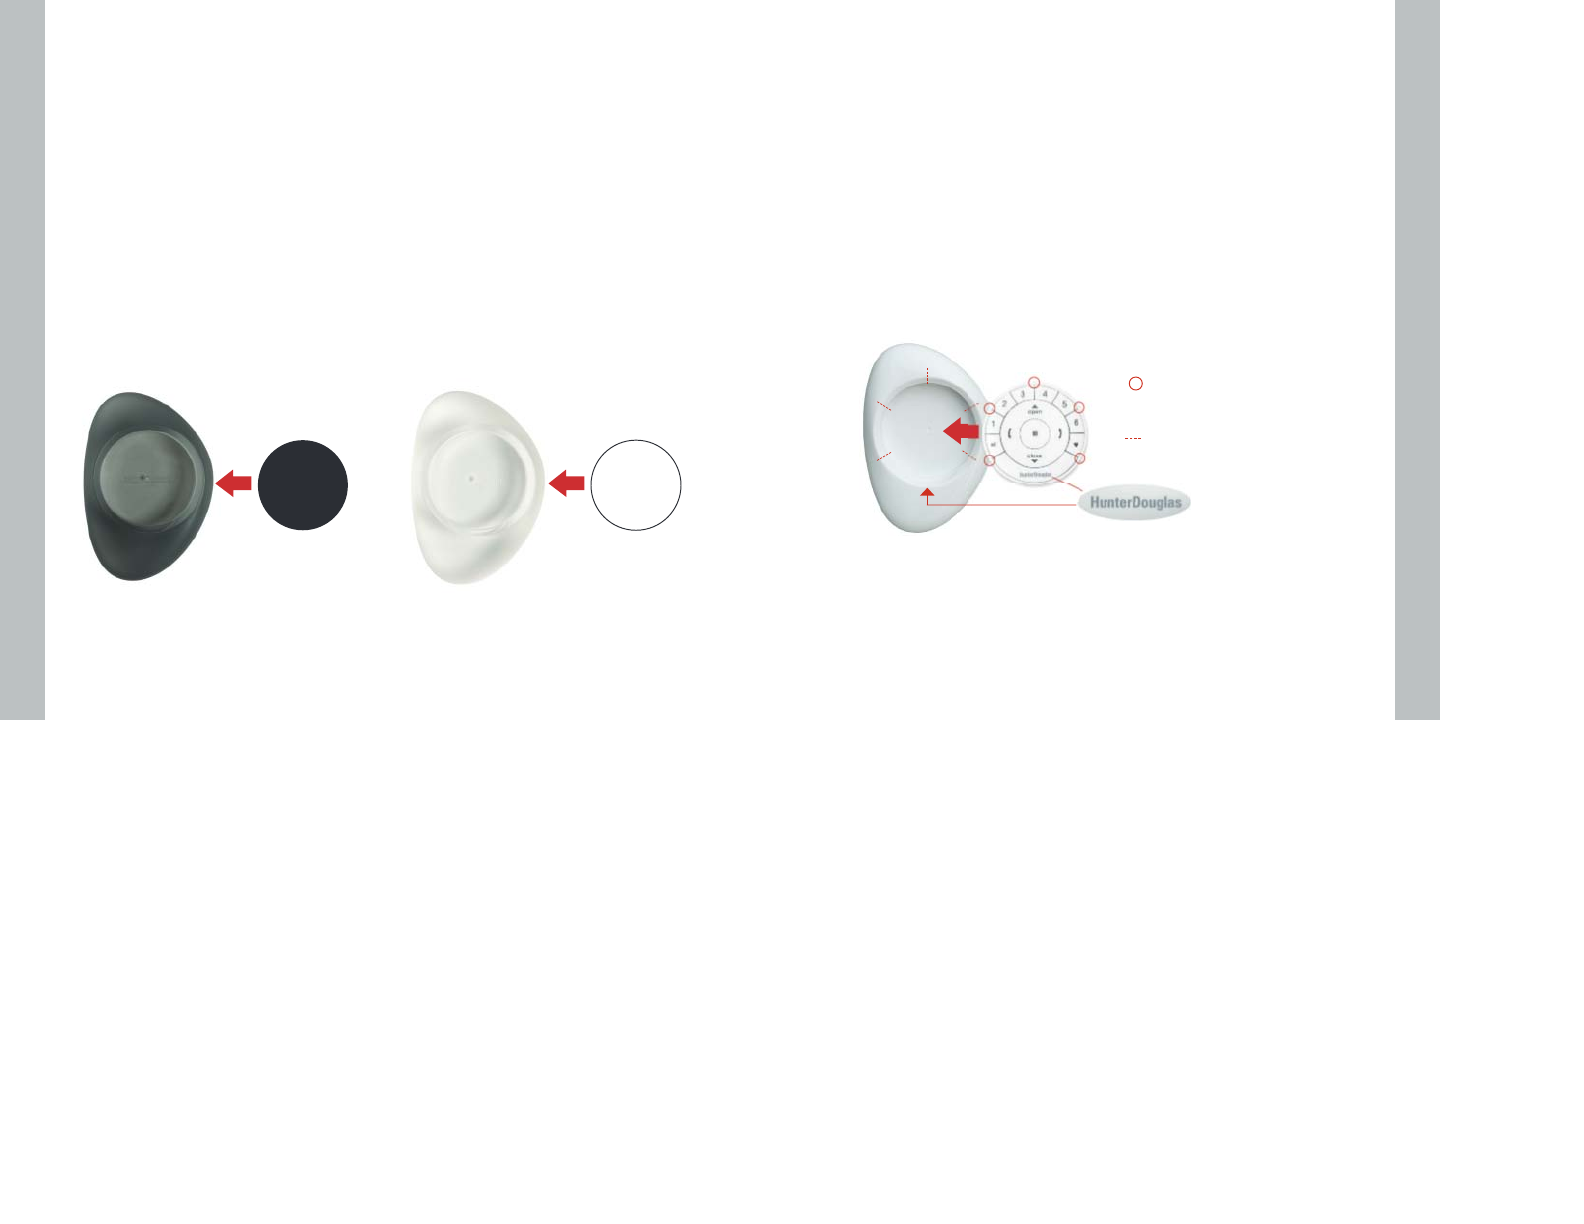
Inserting the remote module into the PowerView® Pebble® (hand-held):
1. Center the Hunter Douglas logo on the remote module
above the indentation on the bottom rim of the Pebble.
2. Align the ribs on the remote module with the grooves on
the Pebble.
3. Gently push the remote module into the Pebble until it
is snug.
Ribs on remote
to be aligned
with the
grooves on
the Pebble.
Center logo
1312
GETTING STARTED
Mounting the PowerView ® Surface:
1. Choose a location to mount the Surface.
2. Orient the Surface mounting plate so that the Hunter Douglas
logo is horizontal and level. Mark screw holes.
3. If you are mounting the Surface onto drywall, use a
7
/32" drill bit to drill pilot holes. Tap drywall anchors into
the pilot holes until the ange of the anchor is ush
with the drywall.
4. If you are mounting the Surface onto wood, use a
3/32" drill bit to drill the screw holes.
5. Attach the Surface mounting plate using the screws provided.
6. Align the Surface ring with its mounting plate and tw ist
the Surface ring clockwise to lock it in place.
Inserting the remote module in the Surface:
1. Align the ribs on the remote module w ith the grooves
on the Surface.
2. Gently push the remote module into the Surface until
it is snug.
Ribs on
remote to be
aligned w ith
the
grooves on
the Pebble.
Center logo

IMPORTANT: If you have multiple remotes, please follow
the steps below to pair all remotes to the same PowerView®
Netw ork. If you only have one remote, please refer to page 19
for additional programming steps.
Pairing additional remote(s) to the
Po w e rV iew ® Sh ade Netw ork
Follow these steps to pair remotes to the same PowerView
Shade Netw ork. All rem otes in a home should be paired to
the same network. This allows for easy installation of additional
control options, such as the PowerView Hub and PowerView
Repeaters. Remotes paired to the same network will be able
to operate the speci c window coverings they are assigned to.
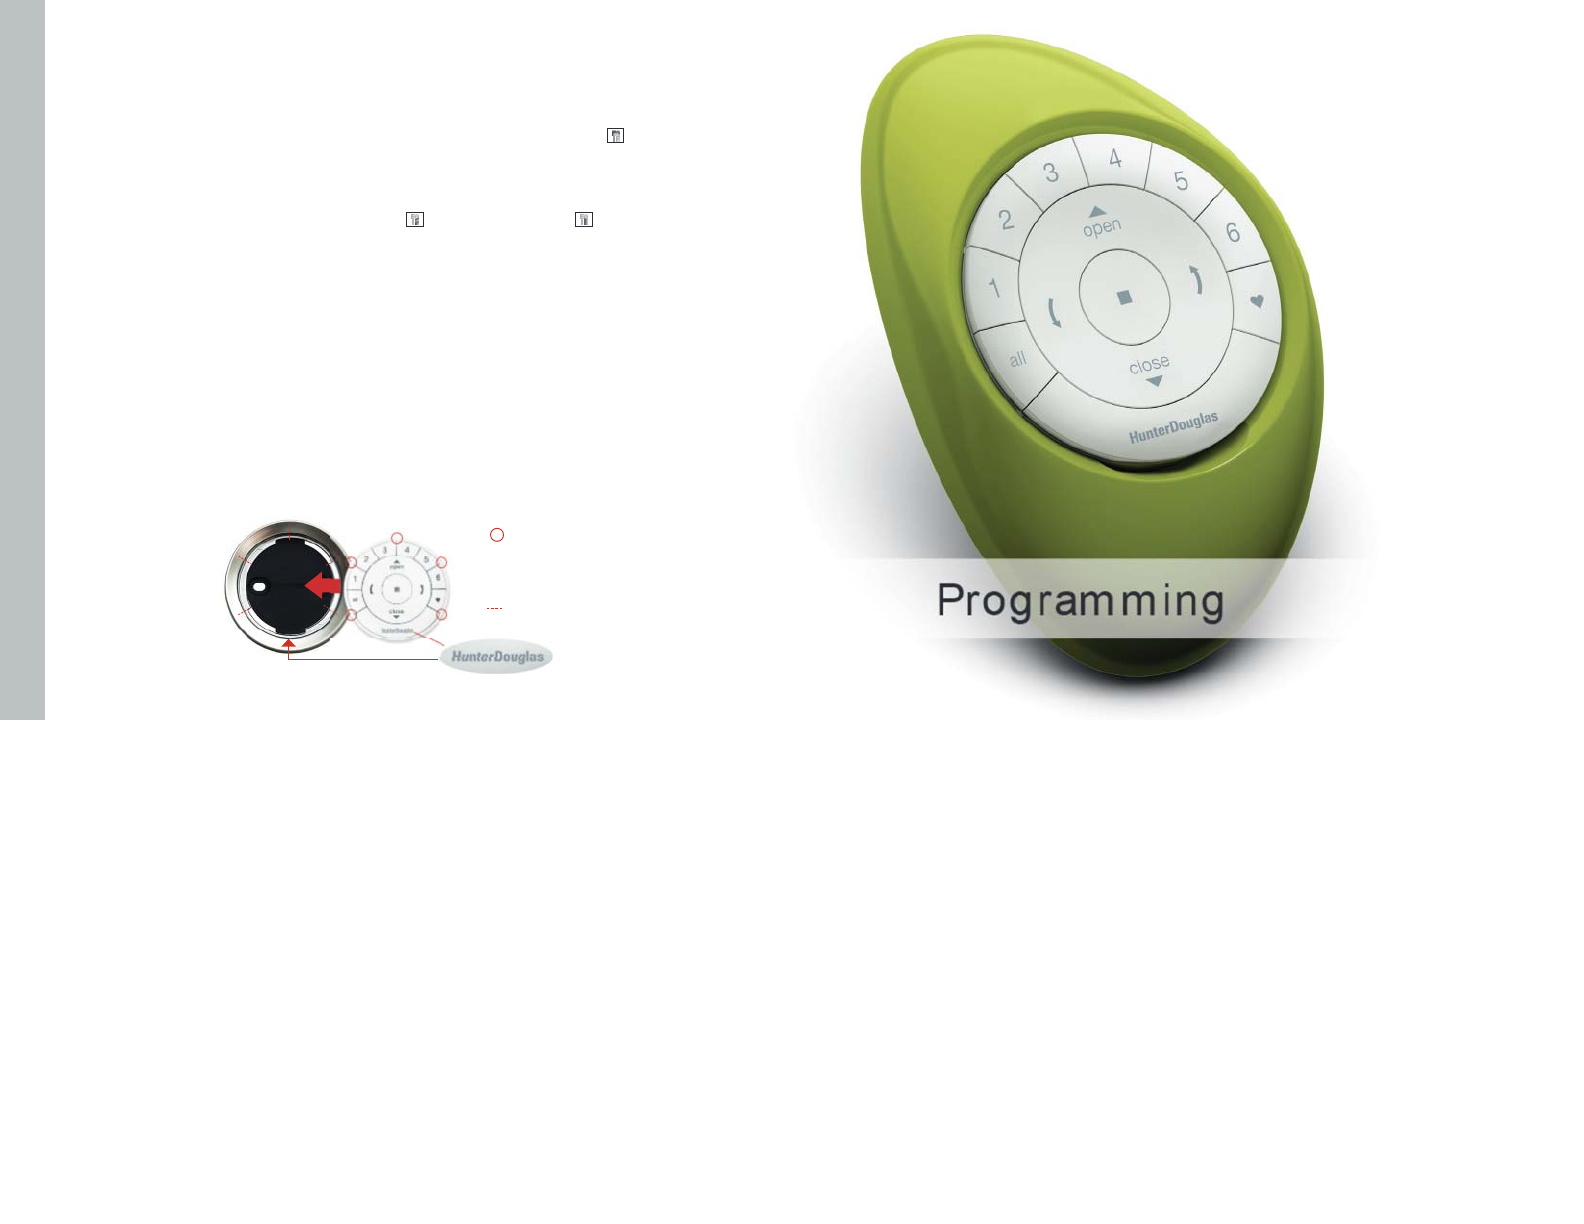
1. Locate the programming access on the back cover of
the remote module.
2. Using a paper clip, press and hold the recessed P button
for 6 seconds.
NOTE: The Group Numbers (1– 6) w ill ash tw ice on the
PRESS of the reset button followed by three times at
6 seconds.
3. Press and hold STOP on the remote, until the indicator
buttons blink. The remote is now in program mode.
4. Press and hold the STOP button on the new remote
while pressing and releasing STOP on the original remote.
5. The backlit GROUP buttons on the new remote w ill ash
tw ice to indicate the remote has been paired to the
PowerView Shade Network.
6. Press and hold STOP on the remote, until the indicator
lights stop blinking to exit program mode.
15
Pairing Po w erView ® Repeaters
to a rem ote created Pow erView
Shade Netw ork
Repeaters extend the range of the radio frequency (RF)
signal emitted by the PowerView® Pebble® Remote, the
PowerView Surface, or the PowerView Hub when used with
the PowerView App.
1. PLUG the Repeat er Kit into an electrical outlet .
2. Press and hold STOP on the PowerView Pebble
Remote, until the indicator lights blink. The remote
is now in program mode.
Hold the remote within 3 feet of the Repeater to
complete Step 3.
3. Press STOP on the remote. The Repeater is now
paired to the PowerView Shade Netw ork.
4. Press and hold STOP on the remote, until the
indicator lights stop blinking to exit program mode.
14
PROGRAM M ING
PROGRAM M ING

Pairin g rem o t e(s) t o a Po w erV iew ® Hub
created PowerView Shade Network
A Hub previously paired to an existing remote created
Pow erVi ew ® Shade Netw ork or that had created its own
network during setup, can have additional Pebble® or Surface
remotes paired to it, even if the remotes are introduced after
the initial Hub setup. The repeater’s green light will ash,
whenever it repeats a command sent by a device on the
same PowerView Shade Network.
1. Locate the programming access on the back cover of
the remote module.
2. Using a paper clip, press and hold the recessed P button
for 6 seconds.
NOTE: The Group Numbers (1–6) w ill ash twice on
the PRESS of t he reset butt on follow ed by three tim es
at 6 seconds.
3. Hold the remote module within approximately
12 inches of the Hub.
Com plete Steps 4 and 5 at the sam e t ime.
4. Press and hold the STOP button on the remote module.
5. Press and hold the P button on the back of the Hub
for approximately three seconds.
NOTE: The Group Numbers (1–6) w ill ash to indicate
that the remote module has been paired to the
PowerView Shade Network.
17
Creating a Duplicate Rem ote
A duplicate remote will operate the same set of w indow
coverings and GROUPS as the original remote.
1. Locate the programming access on the back cover of
the remote module.
2. Using a paper clip, press and hold the recessed P button
for 6 seconds.
NOTE: The Group Numbers (1–6) will ash tw ice on the
PRESS of the reset button followed by three times at
6 seconds.
3. Press and hold STOP on the original remote, until
the indicator lights blink. The remote is now in
program mode.
4. While pressing and holding ALL on the new remote,
press and release STOP on the original remote.
5. The backlit GROUP buttons on the duplicate remote
will ash twice to indicate all of the information from
the original remote has been copied.
6. Press and hold STOP on the original remote, until
the indicator lights stop blinking to exit program mode.
16
PROGRAM M ING
PROGRAM M ING

Deactivating the rem ote’s auto-w ake
feature
The auto-wake feature activates the backlights on the remote,
whenever the remote is handled. This feature is useful for
immediately seeing which shade GROUP buttons were activated
last, but deactivating this feature will help to conserve battery
life. When the auto-wake feature is deactivated, press STOP to
wake the remote and see which group buttons are active.
1. Press and hold the GROUP 6 button on the remote for
approximately 6 seconds.
2. The GROUP numbers (1– 6) will blink once to indicate
the auto-wake feature has been disabled.
Reactivating a remote’s auto-w ake
feature
1. Press and hold the GROUP 6 button on the remote for
approximately 6 seconds.
2. The GROUP numbers (1– 6) w ill blink twice to indicate
the auto-wake feature has been enabled.
1918
NOTE: It is recommended that only similar window coverings
be included in a GROUP because of differences in product
features and operation. When a window covering is added to
a GROUP for t he rst time, it is also added to the PowerView®
Shade Network that links w indow coverings and devices together.
A GROUP can be a single w indow covering or multiple
window coverings. There are six unique assignable GROUPS
to use on each remote. A window covering may be assigned
to more than one GROUP.
Join a w indow covering to a GROUP
1. Press and hold STOP on the remote, until the
indicator lights blink. The remote is now in program mode.
2. Press the desired GROUP number (1– 6) on the
remote. The backlit GROUP number w ill ash t o show
it is selected.
3. Press and hold the manual control button on the
window covering.
4. While continuing to press the manual button, press
OPEN on the remote. The window covering w ill
move slightly to indicate it has been joined to the
GROUP. Release the manual control button.
5. Press and hold STOP on the remote, until the
indicator lights stop blinking to exit program mode.
PROGRAM M ING
PROGRAM M ING

2120
PROGRAM M ING
PROGRAM M ING
Rem ove a w indow covering from
a GROUP
1. Press and hold STOP on the remote, until the
indicator lights blink. The remote is now in program mode.
2. Press the desired GROUP number (1– 6) on the
remote.The backlit GROUP number will ash t o show
it is selected.
3. Press and hold the manual control button on the
window covering.
4. While continuing to press the manual button, press
CLOSE on the remote. The window covering will
move slightly to indicate it has been removed from
the GROUP. Release the manual control button.
5. Press and hold STOP on the remote, until the
indicator lights stop blinking to exit program mode.
Set a FAVORITE position
Each w indow covering has one FAVORITE position, w hich is
set at 50% open by default. Setting a new FAVORITE position
overw rites any previous setting.
1. Open or close the window covering to the desired position.
2. Press and hold STOP on the remote, until the indicator
lights blink. The remote is now in program mode.
3. Press and hold the manual control button on the
window covering.
4. While continuing to press the manual control button,
press ♥ FAVORITE on the remote. The window
covering w ill move slightly to indicate it has set this
window covering position as your FAVORITE. Release
the manual control button.
5. Press and hold STOP on the remote, until the
indicator lights stop blinking to exit program mode.
Resetting w indow covering programming
This reset erases Network information stored in the window
covering, including GROUP assignments, preventing any input
device from operating the window covering. Its primary use is during
installation to correct GROUP and Netw ork assignments. This reset
does not affect travel limits.
1. Press and hold the manual control button for 12 seconds.
The window covering will move slightly once after 6 seconds,
then again after 12 seconds. Release the button.
2. Refer to “ Join a w indow covering to a GROUP” on
page 19 to program the w indow covering to a group.
22
PROGRAM M ING
W hat’s the Difference?
Paired rem ote Cloned rem ote
Same Pow erView ® Shade
Network I.D. as original remote.
Same Pow erView Shade
Netw ork I.D. as original remote.
Can be programmed differently
from original remote.
An exact duplicate of
original remote.
Can control a different set
of w indow coverings and/or
different GROUPS.
Must control the same set
of w indow coverings and/or
GROUPS.
23

Once the window coverings have been joined to a GROUP or
multiple GROUPS, the remote is ready to operate the w indow
covering(s). M ultiple window coverings can be operated at the
same time.
NOTE: Some PowerView® w indow treatments offer variable
operation from the basic operation listed here. For full instructions
on how to operate your PowerView w indow treatment, please
consult the IOC that came w ith your window treatment.
Basic Operation
1. To wake up the remote, simply pick it up or press
STOP. The last GROUP(S) selected w ill be
highlighted and active.
2. Press ALL or GROUP 1– 6 button(s) to select speci c
window covering(s) to operate. Selected GROUP button(s)
will light to show they are selected.
a. Multiple GROUP buttons may be selected at the
same time.
b. To d e s e l e c t a GR O U P, press the GROUP button again.
The backlit GROUP button w ill go out.
3. Press OPEN to open the selected w indow covering(s).
4. Press CLOSE to close the selected w indow covering(s).
25
5. For window covering(s) w ith vanes or a middle rail*,
press the RIGHT ARROW to close the window
covering and open the vanes, rotate the vanes to
the right, or fully raise the middle rail.
6. For window covering(s) w ith vanes or a middle rail,
press the LEFT ARROW to close the vanes, rotate
the vanes to the left, or fully lower the middle rail.
a. NOTE: Single-function w indow coverings will not
operate by pressing the ARROW buttons.
7. Press STOP to stop window covering/vane movement
anywhere along its travel.
8. While a window covering is in motion, press the opposite
of its motion ( OPEN or CLOSE) to reverse direction.
9. Press ♥ FAVORITE to send selected window covering(s)
to your preset FAVORITE position.
* Applies to Top-Dow n/Bottom-Up and Duolite™ w indow coverings only.
The bottom rail on Top-Dow n/Bottom-Up window coverings operates
using the OPEN and CLOSE commands.
24
BASIC OPERATION
BASIC OPERATION
27
Replacing batteries in the rem ote
Replacing the batteries in the remote module will not cause the
loss of any w indow covering programming, including GROUPS
and FAVORITE. The remote uses two CR 2032 batteries.
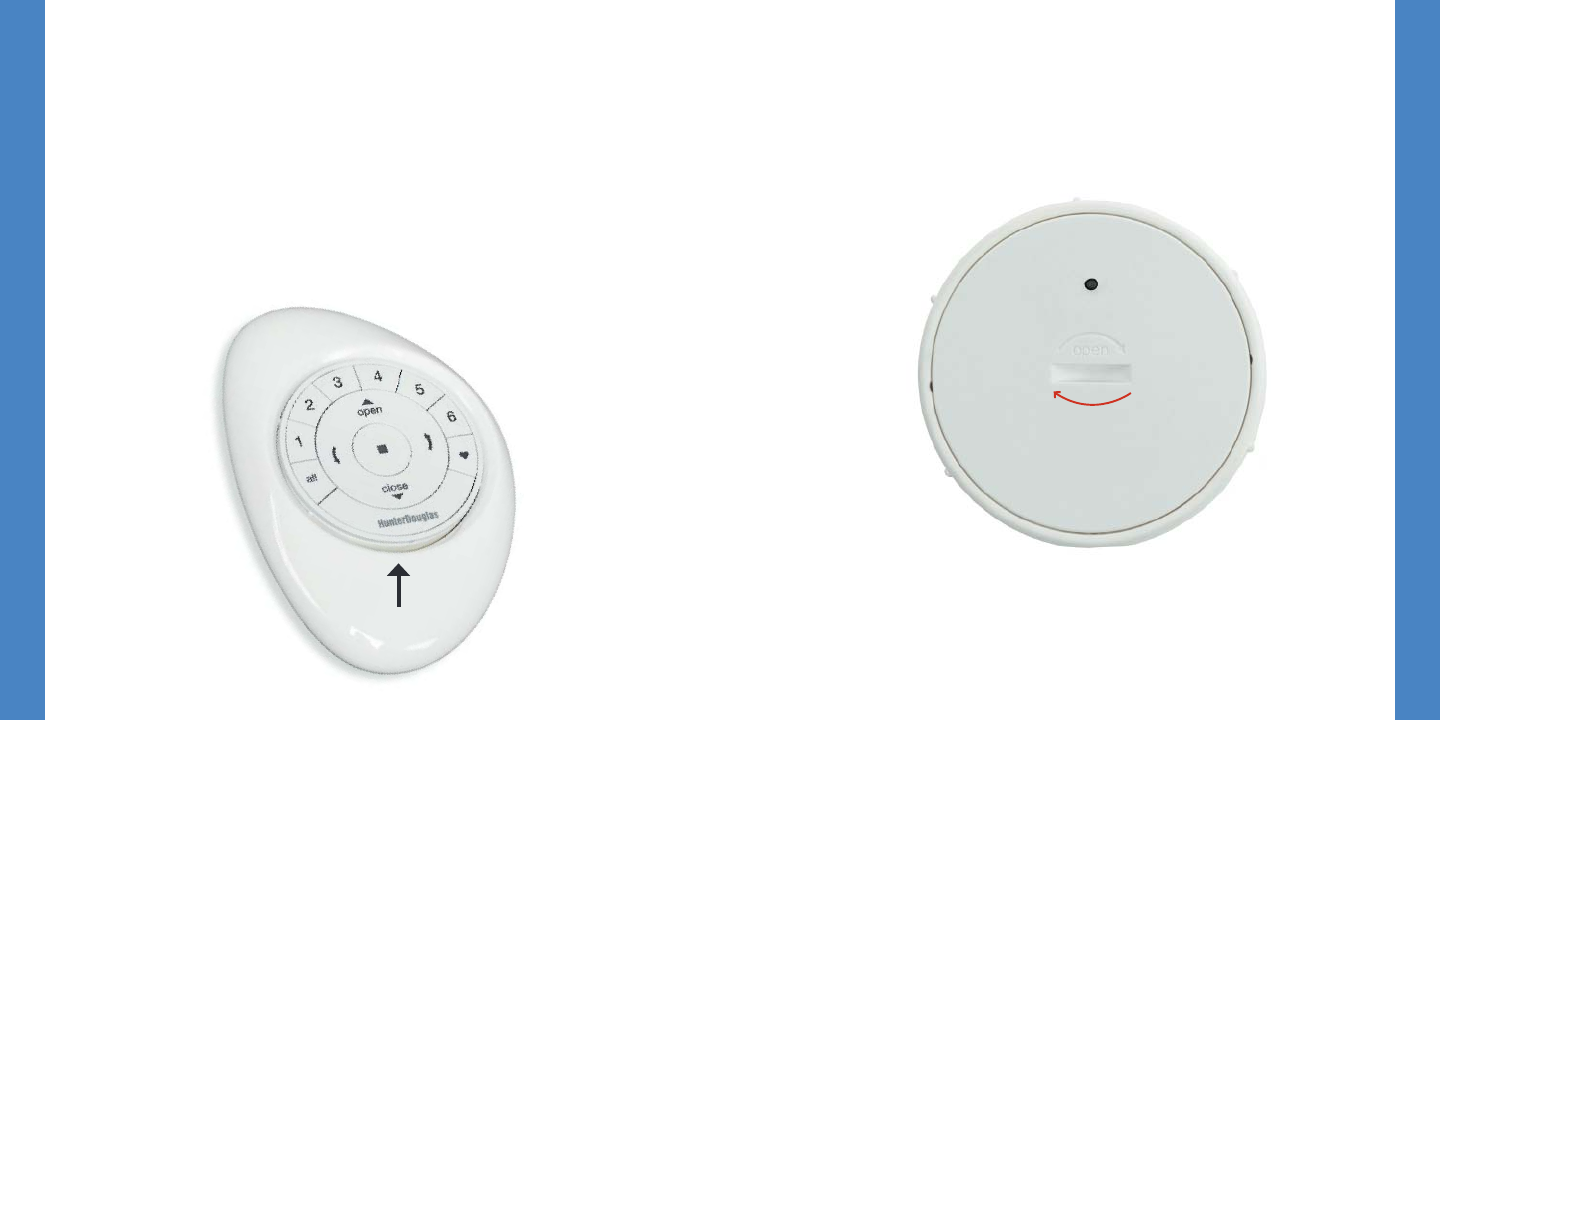
1. For the Pebble® Remote, slide your thumb in the
indentation, gently lift and remove the remote module
from the Pebble. For the Surface Remote, remove the
Surface from its mounting plate by tw isting the Surface
counter-clockwise. Push the remote module out from
the back of the Surface.
2. Rotate the back cover of the remote module
clockw ise to unlock.
3. Remove the back cover from the remote
module.
2928
BATTERY REPLACEM ENT
BATTERY REPLACEM ENT
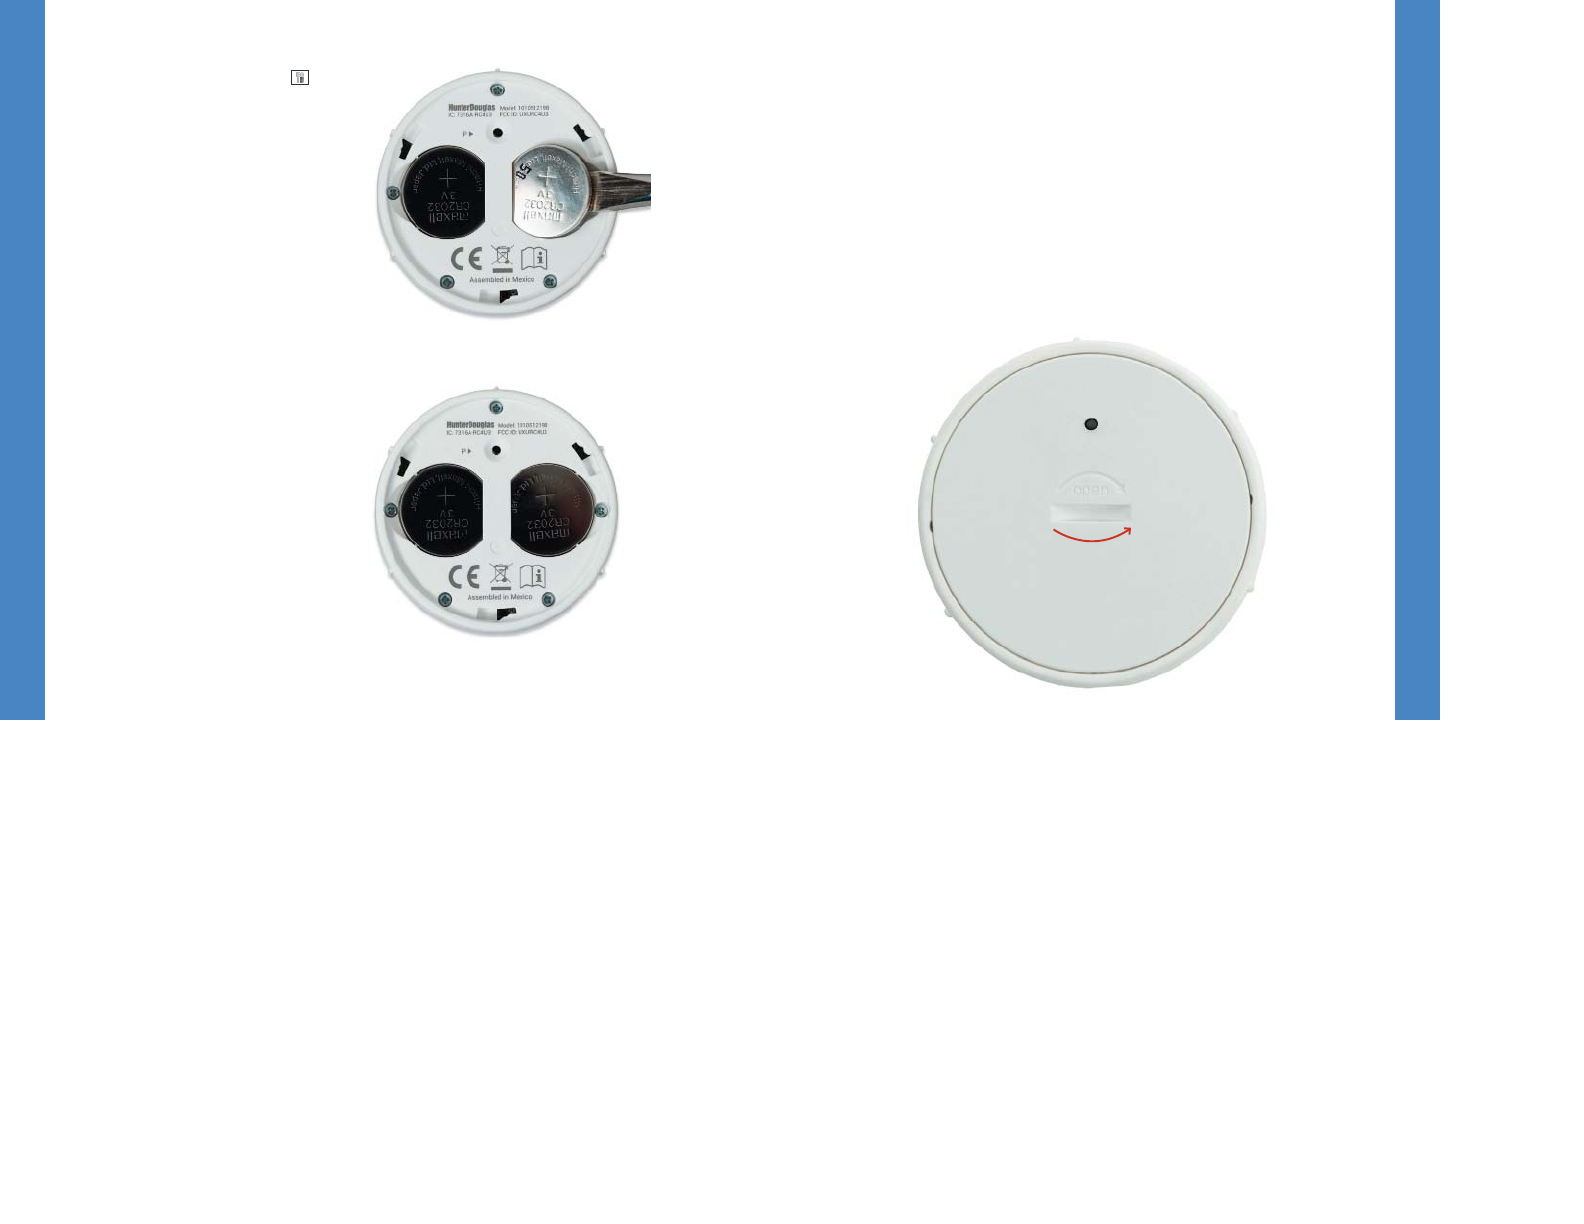
4. Using a nger or small
screwdriver, gently lift
and remove the
old batteries.
5. Insert new batteries,
making sure each
is snug.
30 31
6. Align and replace the back cover onto the
backside of the remote module.
7. Rotate the back cover counter-clockw ise to
lock the back cover in place.
NOTE: Once the back cover is in place,
ensure the programming access point is
aligned with the recessed P button.
8. Align the ribs on the remote module w ith
the grooves on the Pebble® or the Surface.
9. Gently push the remote module into the
Pebble or the Surface until it is snug.
BATTERY REPLACEM ENT
BATTERY REPLACEM ENT
33
W hat is a Pow erView ® Shade Netw ork ?
The Pow erView ® Shade Network is a unique radio frequency that
allows PowerView Motorization devices to communicate w ith each
other w ithin a home. All PowerView devices within a home should
be added to the same PowerView Shade Network. This allows for
easy installation of additional control options, such as the PowerView
Hub, PowerView Repeaters and PowerView Scene Controllers.
Additionally, Remotes joined to the same PowerView Shade Network
will be able to operate all w indow coverings in the PowerView Shade
Network as desired.
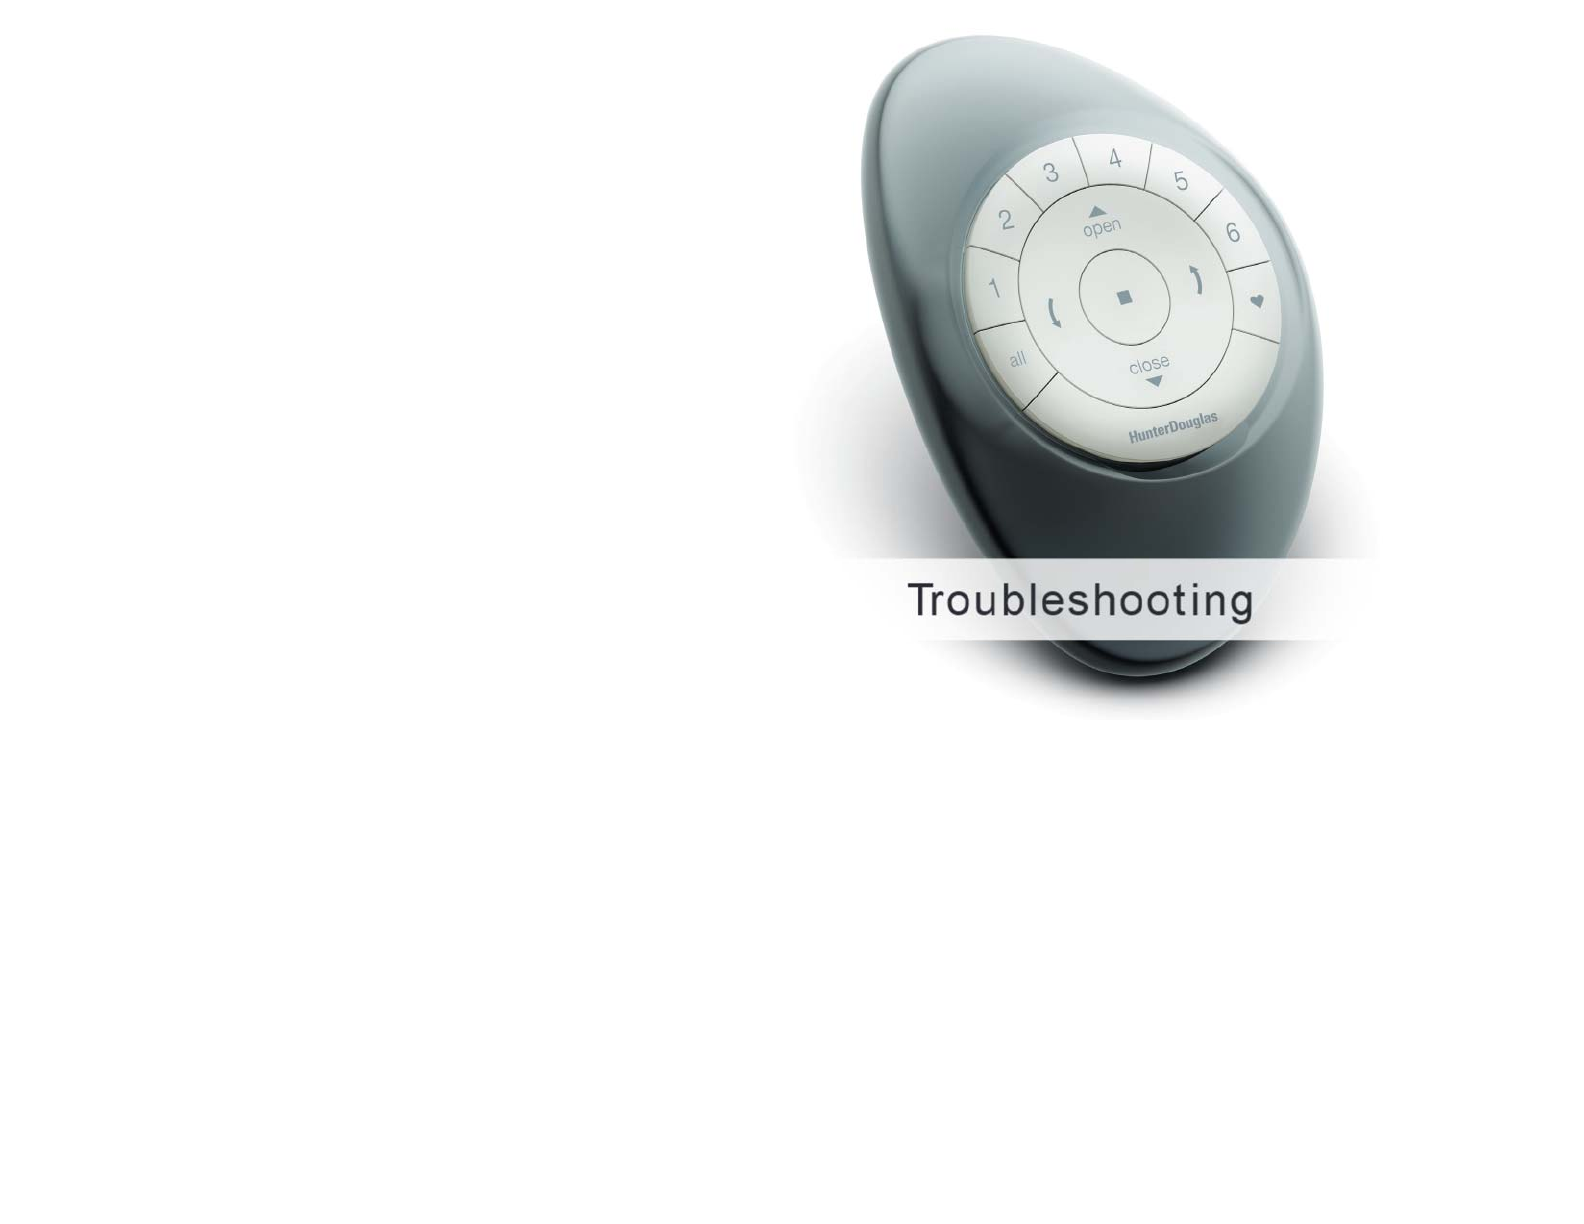
Troubleshooting
1. None of the backlit buttons illuminate on my remote when
I press the buttons.
• Check to make sure the batteries are inserted properly and
are new.
• Join an existing PowerView Shade Network with the remote.
2. I programmed my window covering to work from two different
remotes. The w indow covering works w ell w ith the second
remote, but will no longer respond to the rst remote.
• Check to make sure the batteries in both remotes are
inserted properly and are new.
• All PowerView remotes w ithin a home need to be included
in the same PowerView Shade Network. Refer to “ Pairing
additional remote(s) to the PowerView Shade Network” on
page 14.
35
TROUBLESHOOTING
34
TROUBLESHOOTING
3. My window covering does not respond w hen I press
OPEN or CLOSE.
• M ake sure that there is pow er to the w indow covering
and that the window covering functions properly by
pressing the manual control button on the window
covering.
• M ake sure the correct GROUP number or ALL has
been selected before pressing OPEN or CLOSE.
Active GROUP buttons will be backlit.
• Add the window covering(s) to a GROUP on the remote.
Refer to “ Join a w indow covering to a GROUP” on
page 19.
4. My window covering operates w hen I press OPEN
or CLOSE, but not w hen I press either of the arrow
buttons.
• The arrow buttons are for operating Top-Down/Bottom-Up
shades, Duolite™ shades, and shadings or sheers with
operable vanes only. Refer to the product’s Installation,
Operation, and Care instructions for proper operation.
• If the window covering is a Top-Dow n/Bottom-Up shade,
a Duolite shade, or a shading or sheer with operable
vanes, reset the travel limits on the window covering.
Press and hold the manual button on the w indow
covering for 6 seconds, until it jogs. The window covering
will then run an auto-calibration sequence.
37
U.S. Radi o Frequency FCC Compli ance
Thi s device compl ies wi th Part 15 of t he FCC Rul es. Operat ion i s subject to t he f oll owi ng two condi ti ons:
(1) Thi s devi ce may not cause harmf ul i nterf erence, and
(2) Thi s device must accept any int erf erence recei ved, incl uding i nt erference t hat may cause undesired operat ion.
Thi s equi pment has been test ed and found t o comply wit h the l imit s for a Cl ass B di git al devi ce, pursuant t o Part 15 of t he FCC Rules. These l imit s are designed
to provi de reasonable prot ecti on against harmful int erf erence in a resi denti al i nst al lat ion. This equi pment generat es, uses and can radi at e radio f requency
energy and, i f not inst all ed and used in accordance wi th t he inst ructi ons, may cause harmful int erf erence to radio communi cati ons. However, t here is no
guarantee t hat i nt erference wi l l not occur in a parti cular i nstal lat ion. If t hi s equipment does cause harmful i nterf erence t o radi o or t el evi si on recepti on, whi ch
can be det ermined by t urning t he equipment of f and on, t he user is encouraged t o try t o correct the i nterf erence by one or more of the f oll owi ng measures:
• Reori ent or rel ocat e t he receivi ng antenna.
• Increase the separat ion bet ween t he equipment and recei ver.
• Connect the equi pment i nto an out let on a circui t di ff erent f rom that to whi ch the recei ver i s connect ed.
• Consult t he dealer or an experi enced radi o/ TV t echnici an f or hel p.
Any changes or modi cat ions not expressl y approved by the part y responsi ble f or compl iance coul d void t he user’s aut horit y to operate t he equipment.
Industry Canada
Under Industry Canada regulat ions, thi s radio t ransmit ter may onl y operate usi ng an ant enna of a t ype and maxi mum (or l esser) gai n approved for t he
transmit ter by Indust ry Canada. To reduce pot enti al radi o i nt erf erence to other users, the ant enna type and it s gain shoul d be so chosen that t he equival ent
isot ropical ly radi ated power (e.i.r.p.) i s not more than that necessary for successf ul communi cati on.
Thi s device compl ies wi th Indust ry Canada l icence-exempt RSS standard(s). Operati on is subj ect to t he fol lowi ng two condi ti ons: (1) t his devi ce may not cause
int erference, and (2) t his devi ce must accept any int erf erence, i ncludi ng i nterference t hat may cause undesired operat ion of the devi ce.
Class B Digital Device Notice
Thi s Class B digi tal apparatus compli es wit h Canadian ICES-003, RSS-Gen and RSS-210.
Industrie Canada
Conformément à l a réglementat ion d’ Indust rie Canada, l e présent émet teur radi o peut f oncti onner avec une antenne d’ un type et d’ un gain maximal (ou
inf érieur) approuvé pour l’ émet teur par Indust ri e Canada. Dans le but de réduire l es risques de broui ll age radi oélect ri que à l ’i ntent ion des aut res uti li sateurs,
il faut choisi r l e type d’ antenne et son gai n de sorte que la pui ssance isot rope rayonnée équi valent e (p.i .r.e.) ne dépasse pas l’ int ensi t é nécessai re à
l’ établ issement d’ une communicat ion sat isf aisant e.
Le présent appareil est conf orme aux CNR d’ Industri e Canada appli cables aux apparei ls radio exempt s de li cence. L’ exploi tat ion est autori sée aux deux
condi t i ons sui vantes : (1) l ’appareil ne doit pas produi re de broui ll age, et (2) l ’ uti li sateur de l ’apparei l doi t accept er tout broui ll age radi oélect ri que subi , même
si l e brouil lage est suscepti ble d’ en compromet t re l e fonct ionnement.
Appareil Numérique de Classe B – Avis
Cet appareil numéri que de classe B est conforme à l a norme NMB-003, CNR-Gen et CNR-210 du Canada.
CAN ICES-3 (B)/ NMB-3(B)
European Conformi ty
We, t he undersi gned,
Hunt er Dougl as Window Fashions
One Duet te Way, Broom el d, CO 80020, USA
Hunt er Dougl as Europe B.V.
Piekst raat 2, 3071 EL Rot terdam, The Netherl ands
certi fy and decl are under our sole responsi bil it y that the PowerVi ew® Remot e Control conf orms wit h the essent i al requirements of the EMC direct ive
2004/ 108/EC and R&TTE directi ve 1999/ 5/ EC.
A copy of t he ori ginal declarat ion of conformi ty may be found at w ww .hunter douglas.com/ RFc ert i cations.