Hytera Communications EPRADGU1 Professional Radio Access Device User Manual
Hytera Communications Corporation Limited Professional Radio Access Device
User manual
Preface
Thanks for your favor in our product. This manual provides guidance for you to use the product.
This manual is applicable to the following product:
E-PRAD(G)

Icon Conventions
The following icons are available through this manual:
Caution: Indicates situations that could cause data loss or equipment damage.
Note: Indicates references that can further describe the related topics.
Copyright Information
Hytera is the trademark or registered trademark of Hytera Communications Corporation Limited (the
Company) in the People's Republic of China (PRC) and/or other countries or areas. The Company retains
the ownership of its trademarks and product names. All other trademarks and/or product names that may
be used in this manual are properties of their respective owners.
The product described in this manual may include the Company's computer programs stored in memory or
other media. Laws in PRC and/or other countries or areas protect the exclusive rights of the Company with
respect to its computer programs. The purchase of this product shall not be deemed to grant, either directly
or by implication, any rights to the purchaser regarding the Company's computer programs. The
Company's computer programs may not be copied, modified, distributed, decompiled, or
reverse-engineered in any manner without the prior written consent of the Company.
Disclaimer
The Company endeavors to achieve the accuracy and completeness of this manual, but no warranty of
accuracy or reliability is given. All the specifications and designs are subject to change without notice due
to continuous technological development. No part of this manual may be copied, modified, translated, or
distributed in any manner without the prior written consent of the Company.
We do not guarantee, for any particular purpose, the accuracy, validity, timeliness, legitimacy or
completeness of the third-party products and contents involved in this manual.
If you have any suggestions or would like to receive more information, please visit our website at:
http://www.hytera.com.
FCC Regulations
Federal Communication Commission (FCC) requires that all radio communication products should meet
the requirements set forth in the above standards before they can be marketed in the U.S, and the
manufacturer shall post a RF label on the product to inform users of operational instructions, so as to
enhance their occupational health against exposure to RF energy.
FCC Statement
This equipment has been tested and found to comply with the limits for a Class B digital device, pursuant to
must be at least 40cm away from human body.
part 15 of FCC Rules. These limits are designed to provide reasonable protection against harmful
interference in a residential installation. This equipment generates and can radiate radio frequency energy.
If not installed and used in accordance with the instructions, it may cause harmful interference to radio
communications. However, there is no guarantee that interference will not occur in a particular installation.
Verification of harmful interference by this equipment to radio or television reception can be determined by
turning it off and then on. The user is encouraged to try to correct the interference by one or more of the
following measures:
Reorient or relocate the receiving antenna. Increase the separation between the equipment and receiver.
Connect the equipment into an outlet on a different circuit to that of the receiver's outlet.
Consult the dealer or an experienced radio/TV technician for help.
Operation is subject to the following two conditions:
This device may not cause harmful interference.
This device must accept any interference received, including interference that may cause undesired
operation.
Note: Changes or modifications to this unit not expressly approved by the party responsible for compliance
could void the user's authority to operate the equipment.
Operational Instructions and Training Guidelines
To ensure optimal performance and compliance with the occupational/controlled environment RF energy
exposure limits in the above standards and guidelines, users should transmit not more than 50% of the
time and always adhere to the following procedures:
Antenna gain must not exceed 3.5dBi.
The antenna must be installed complying with the requirements of manufacturer or supplier, and it
Compliance with RF Exposure Standards
Hytera's radio complies with the following RF energy exposure standards and guidelines:
United States Federal Communications Commission, Code of Federal Regulations; 47 CFR § 1.1307,
1.1310 and 2.1091
American National Standards Institute (ANSI) / Institute of Electrical and Electronic Engineers (IEEE)
C95. 1:2005; Canada RSS102 Issue 5 March 2015
Institute of Electrical and Electronic Engineers (IEEE) C95.1:2005 Edition
stance 40cm between the antenna &
ISEDC Statement
This device complies with Innovation, Science and Economic Development Canada Compliance
license-exempt RSS standard(s). Operation is subject to the following two conditions:
This device may not cause harmful interference.
This device must accept any interference received, including interference that may cause undesired
operation.
Le présent appareil est conforme aux CNR d'Industrie Canada applicables aux appareils radio exempts de
licence. L'exploitation est autorisée aux deux conditions suivantes: (1) l'appareil ne doit pas produire de
brouillage, et (2) l'utilisateur de l'appareil doit accepter tout brouillage radioélectrique subi, même si le
brouillage est susceptible d'en compromettre le fonctionnement
ISEDC Radiation Exposure Statement:
This device must be restricted to work related operations in an Occupational/Controlled RF exposure
Environment.
This equipment should be installed and operated with minimum di
your body.
ISEDC exposition aux radiations:
Ce dispositif doit être limité aux opérations liées au travail dans un environnement d'exposition RF
professionnel/contrôlé.
Cet équipement doit être installé et distance entre le antenne et votre
corps.
EU Regulatory Conformance
As certified by the qualified laboratory, the product is in compliance with the essential requirements and
other relevant provisions of the Directive:
2014/53/EU
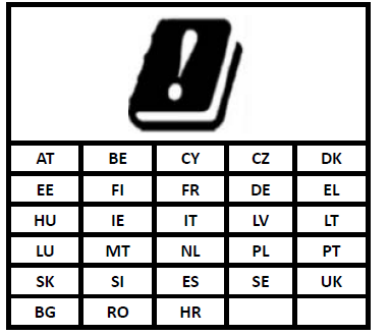
Please note that the above information is applicable to EU countries only.
The maximum antenna gain is 3.5dBi, which is calculated in the EIRP. The distance from observation point
to the antenna is 50cm.
utilisé avec un minimum de 40cm de
Restrict use warning:
i
Contents
1. Packing List ........................................................................................................................................... 1
2. Product Overview .................................................................................................................................. 1
3. Installation ............................................................................................................................................. 3
4. Basic Operations ................................................................................................................................... 3
4.1 Powering on ....................................................................................................................................... 3
4.2 Powering off ....................................................................................................................................... 3
4.3 Establishing GSM Link ....................................................................................................................... 3
4.4 Switching Mode ................................................................................................................................. 3
5. Troubleshooting .................................................................................................................................... 4
6. Care and Cleaning ................................................................................................................................. 6
7. Optional Accessories ............................................................................................................................ 6
8. Warranty ................................................................................................................................................. 6
1900MHz public network
Connects to 850MHz /
1
1. Packing List
Please unpack carefully and check that all items listed below are received. If any item is missing or
damaged, please contact us or your dealer.
Name Qty. Name Qty.
Main unit 1 AC power cord 1
RF cable 1 DC power cord 1
Network cable 1 User manual 1
GSM antenna 1 DMR antenna 1
Note
Pictures listed in this manual are for reference only.
2. Product Overview
No. Component Description
1 Public network
antenna interface antenna.
2 SIM card interface Receives SIM card.
3 Debug interface Reserved
4 Ethernet port 10 MHz/100 MHz adaptive network port, used for program update, log
output and connection to center.
5 Private network
antenna interface
Connects to private network antenna. The antenna frequency band is
subject to actual situation.
6 DC power inlet Provides 13.6V±15%(5A) DC power.
7 AC power inlet Provides 100–240 V (0.7A)AC power.
8 Power switch The switch has three positions: AC, OFF, and DC (from up to down
respectively).
9 Type button After the device is powered on, press this button to select the mode. For
2
No. Component Description
details, see 4.4
10 RESET button Press this button to restart the device.
11 CONFIG button
Press and hold this button for 3s to restore the factory settings.
Press and hold this button and power on the device to enter the private
network programming mode.
12 LED indicator For details, see the following table.
13 Programming port
Connects to the programming cable for device programming or upgrade
(connection to the palm microphone is not supported).
14
Operating
Temperature
Range
-20~50℃
The LED indicators are described in the following table.
Icon Color Status Description
RUN Green
Flashing slowly The device works properly.
Flashing quickly The device is updating the program.
On GSM link is established successfully (the device is in test
mode when the RUN, RX and TX are on at the same time).
ALM Red
On DMR network component malfunctions.
Off DMR network component works properly.

3
Icon Color Status Description
RX Green On The device is receiving data of the private network. re
TX Red On The device is transmitting data of the private network.
Green On Indicates the GSM signal strength. More bars indicate
stronger signal.
3. Installation
You only need to correctly connect cables to E-PRAD(G) before using it.
4. Basic Operations
4.1 Powering on
Toggle the power switch to the "AC" or "DC" position.
4.2 Powering off
Toggle the power switch to the "OFF" position.
4.3 Establishing GSM Link
The E-PRAD(G) is able to establish a GSM link. Do as follows:
1. Insert the SIM card.
2. Power the device on and check indicators' color.
If RUN indicator is on and ALM indicator is off, it indicates that GSM link is established successfully.
More signal bars indicate stronger signal.
4.4 Switching Mode
Press TYPE to select the operation mode of the device access according to actual situation.

4
0: PDT or DMR digital conventional, for interconnection between private and public networks,
determined before leaving the factory
1: analog conventional, for interconnection between private and public networks
2: MPT trunking, for interconnection between private and public networks
3: PDT or DMR digital trunking, for interconnection between private and public networks, determined
before leaving the factory
4: PDT or DMR digital conventional, for interconnection between private network and center,
determined before leaving the factory
5: analog conventional, for interconnection between private network and center
6: MPT trunking, for interconnection between private network and center
7: PDT or DMR digital trunking, for interconnection between private network and center, determined
before leaving the factory
C: 2G, for interconnection between public network and center
5. Troubleshooting
Phenomena Possible Cause Solution
Programming
fails.
E-PRAD(G) is not in the
programming mode.
Press and hold TYPE, and start E-PRAD(G). Release
TYPE when RUN indicator is on. TX and RX indicators are
on at the same time, indicating that E-PRAD(G) enters the
programming mode.
GSM link
cannot be
established.
GSM signal is poor.
If GMS signal bars are off, check whether public network
antenna is connected. If it is connected but GSM signal is
still poor, you are advised to move the public network
antenna or device to an open area. Tests show that the
drop rate is relatively high when the number of signal bars
is 3 or less (in this case, the BS has a signal strength of
about -75dBm)
E-PRAD(G) has
already been
connected to other
devices.
If RUN indicator is on, GSM connection is established. In
this case, stop ongoing communication or restart the
device.
GSM whitelist feature is
enabled.
Add the number of calling device to the whitelist.
When the auto-call feature is enabled, the E-PRAD(G)

5
Phenomena Possible Cause Solution
cannot answer any incoming call and can only call the
preset number.
Stand-alone
Network
Management
System cannot
access the
device.
The PC on which the
Standalone Network
Management System
runs and device are not
on the same network
segment
Change the PC IP address to the same network segment
as the device IP address.
The device IP address is "192.168.40.110" by default. You
can press and hold CONFIG button to restore the factory
settings.
Voice
communication
fails when GSM
network is
connected.
The device frequency is
inconsistent with the
portable radio
frequency.
Set the device frequency to be consistent with the portable
radio frequency.
In the PDT/DMR mode,
interconnection group
call number of the
device is inconsistent
with that of the portable
radio.
Set the group call number of the device to be consistent
with that of the portable radio.
The device’s vocoder is
inconsistent with the
portable radio’s
vocoder.
Set the device’s vocoder to be consistent with the portable
radio’s vocoder.
In the PDT/DMR or
MPT trunking mode,
private network
registration fails.
Check device parameters to ensure that the device
registers with the PDT/DMR or MPT trunking system
successfully.
In the conventional
mode, channels are
configured incorrectly.
The channel 1 of area 1 must be set to digital channel, and
channel 2 of area 2 must be set to analog channel.
In private network
settings, whitelist
feature is enabled.
Add the group call number of the calling portable radio to
the whitelist.
6
Phenomena Possible Cause Solution
ALM indicator is
on.
Trunking system
registration fails. Check whether device parameters are correctly configured.
The device is not
supplied with power
properly.
Send the device back for repair.
If the above solutions cannot solve your problems, or you may have some other queries, please contact us
or your local dealer for more technical support.
6. Care and Cleaning
To guarantee optimum performance as well as a long service life of the product, please follow the tips
below.
Product Care
Do not pierce or scrape the product.
Keep the product away from substances that can corrode the circuitry.
Product Cleaning
Caution
Cut off the power supply before cleaning.
Clean up the dust and fine particles on the product surface and charging piece with a clean and dry
lint-free cloth or a brush regularly.
Use a non-woven cloth with neutral cleanser to clean the device after long-time use. Do not use
chemical preparations such as stain removers, alcohol, sprays or oil preparations, so as to avoid
potential damage on the surface.
Make sure the product is completely dry before use.
7. Optional Accessories
Contact your local dealer for the optional accessories of the product.
Caution
Use the accessories specified by the Company only; otherwise, we shall not be liable for any losses
or damages arising out of the use of any unauthorized accessories.
8. Warranty
For Hytera products, if any defects arise in material or manufacturing process under normal operation and
maintenance, you can enjoy warranty service stipulated in the contact from the purchase date on.