Hyundai Digital Technology PANSAT700HC Digital Satellite Receiver User Manual
Hyundai Digital Technology Co., Ltd. Digital Satellite Receiver Users Manual
Users Manual

FCC ID: PZ8PANSAT700HC
Report No: E02.0502.FCC.259N
Test of issue: May 02, 2002
Appendix F. User’s Manual
ETL Inc.
#584 Sangwhal-ri,
Kanam-myon, Yoju-kun,
Kyounggi-do, 469-880,Korea.
1 of 1
Hyundai Digital Technology Co., Ltd.
Digital Satellite Receiver
Model : PANSAT 700HC
1
1. Introduction 2
1.1. Overview
1.2. Main Features
2. Safety/Precautions 3
2.1. Safety
2.2. Precautions
3. Check Point before Use 5
3.1. Accessories
3.2. The Satellite dish
4. Controls/Functions 6
4.1. Front Panel
4.2. Rear Panel
4.3. Remote Controller
5. Using Remote Controller 12
5.1. Batteries
5.2. Range Of Operation
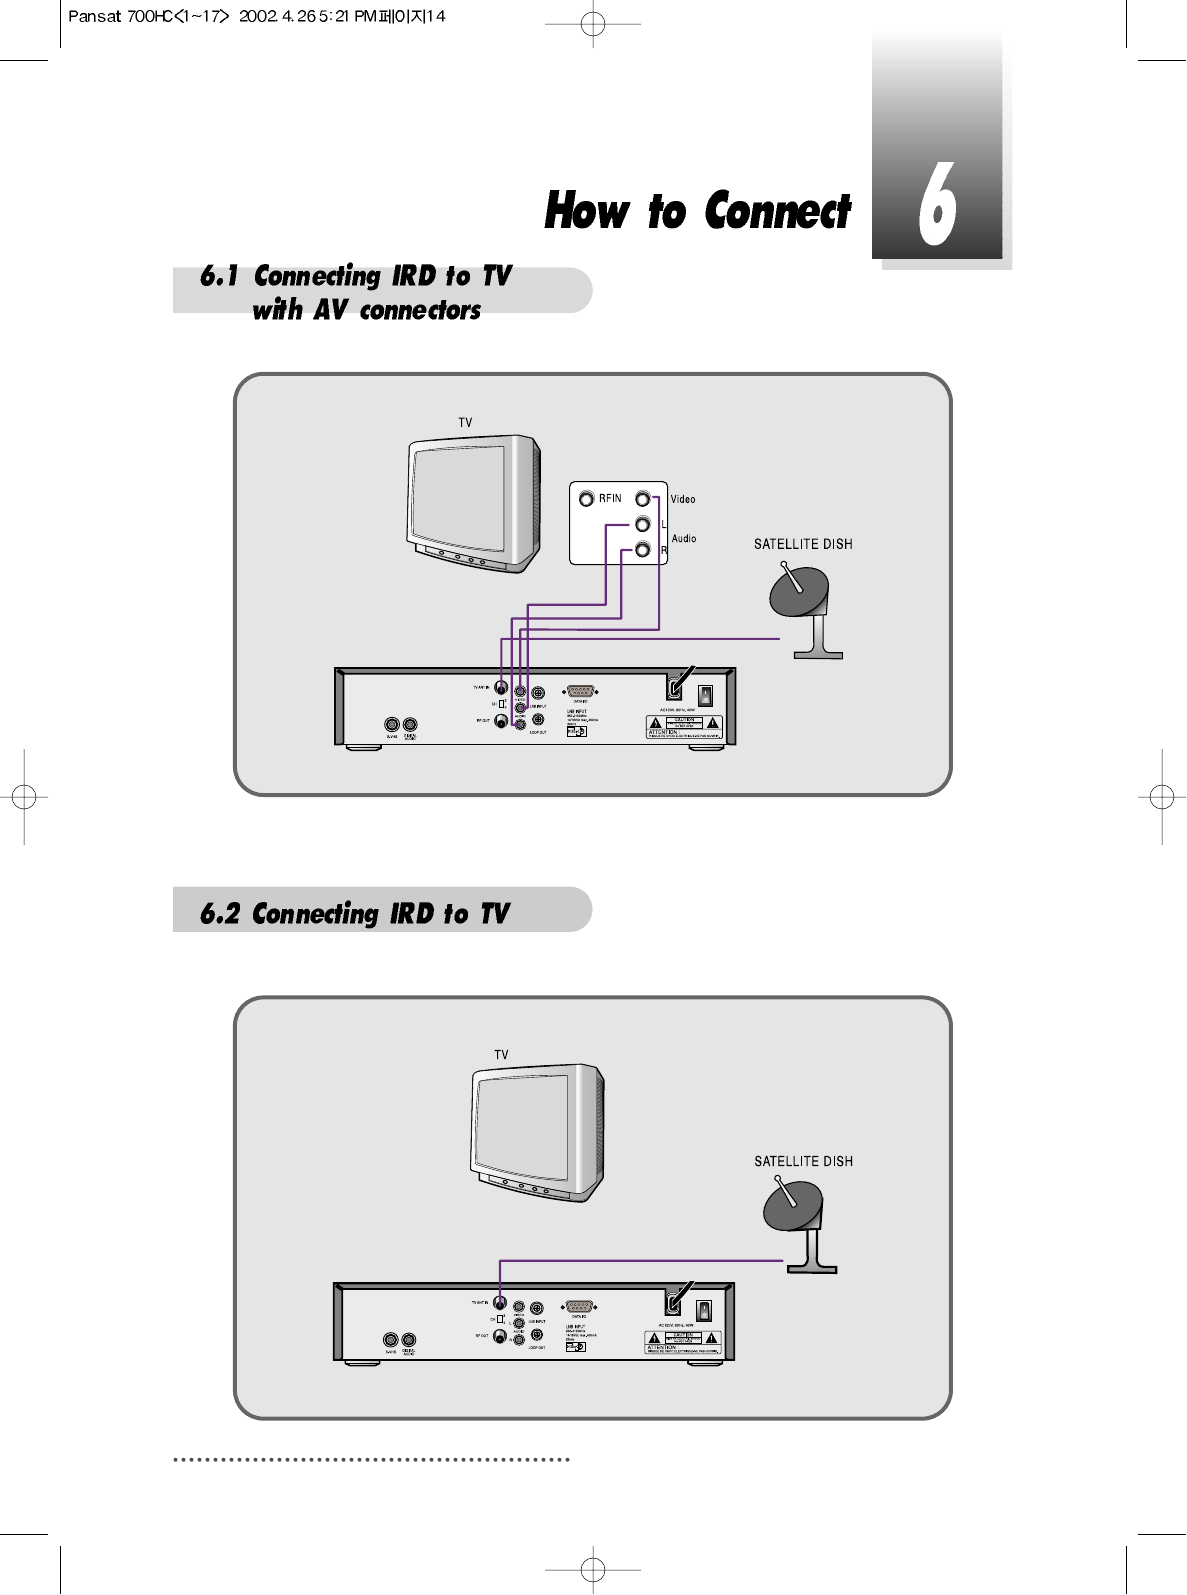
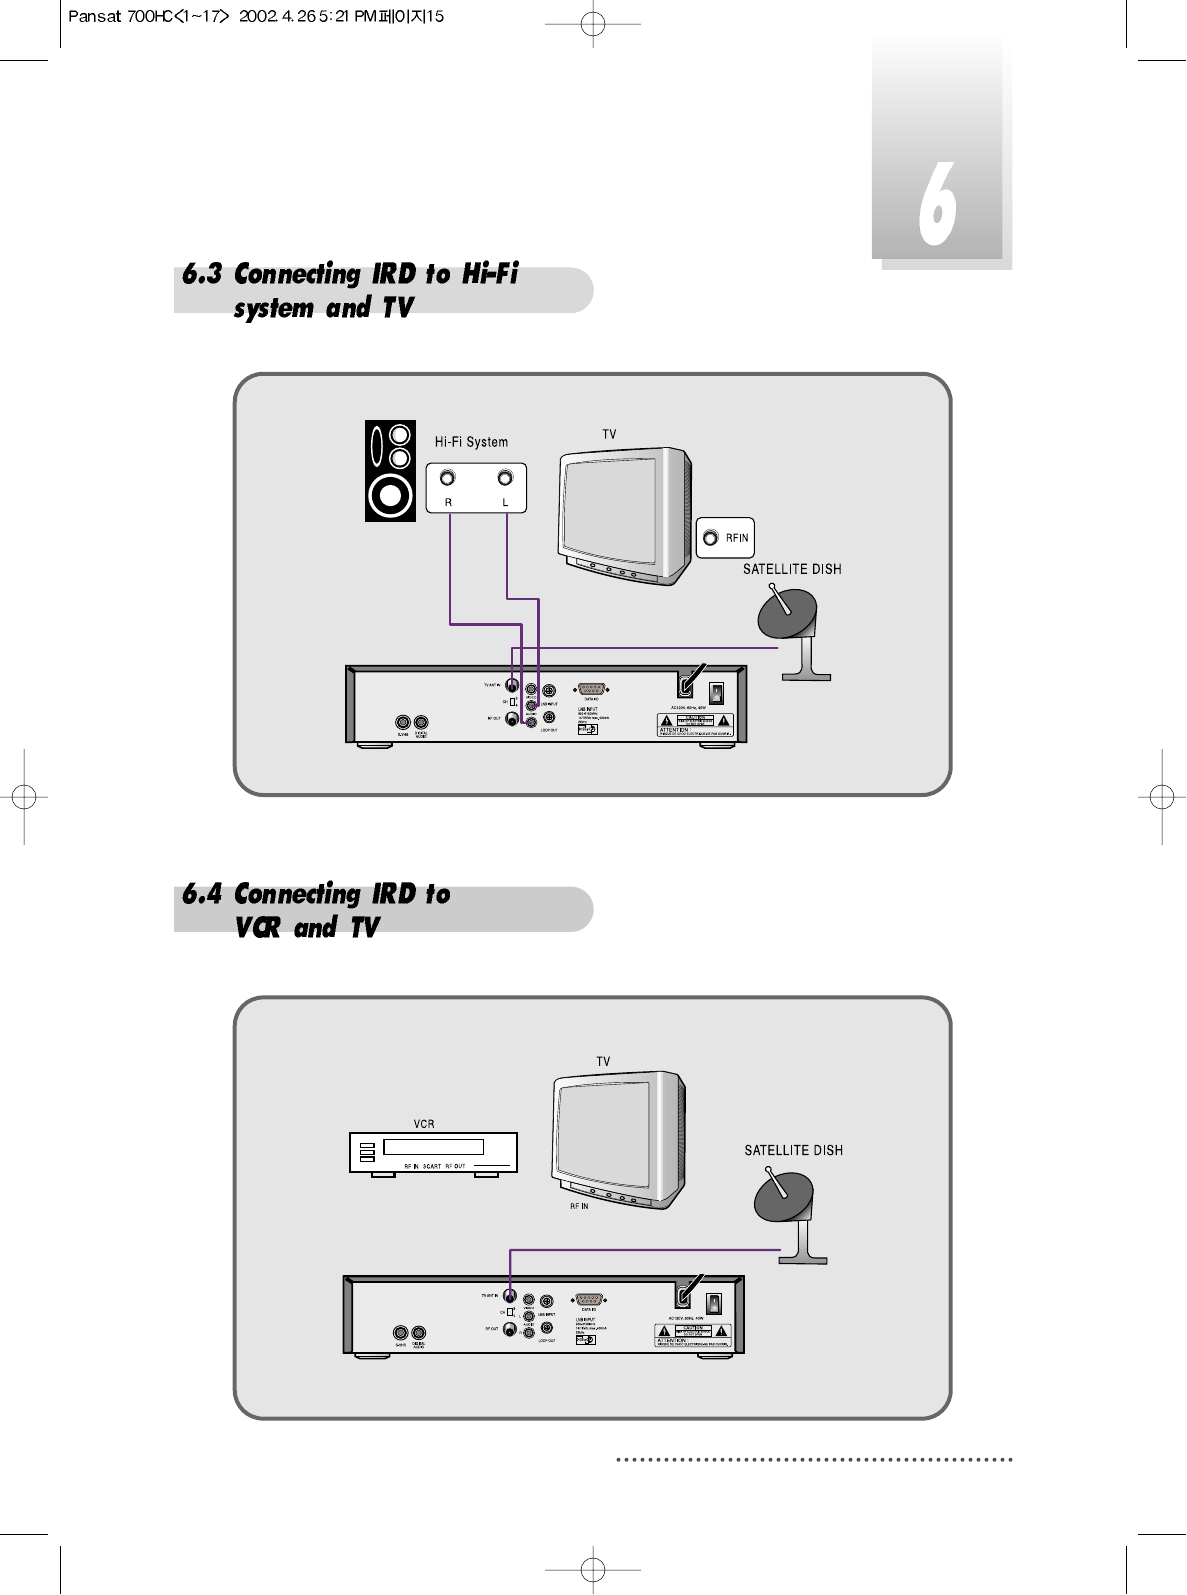
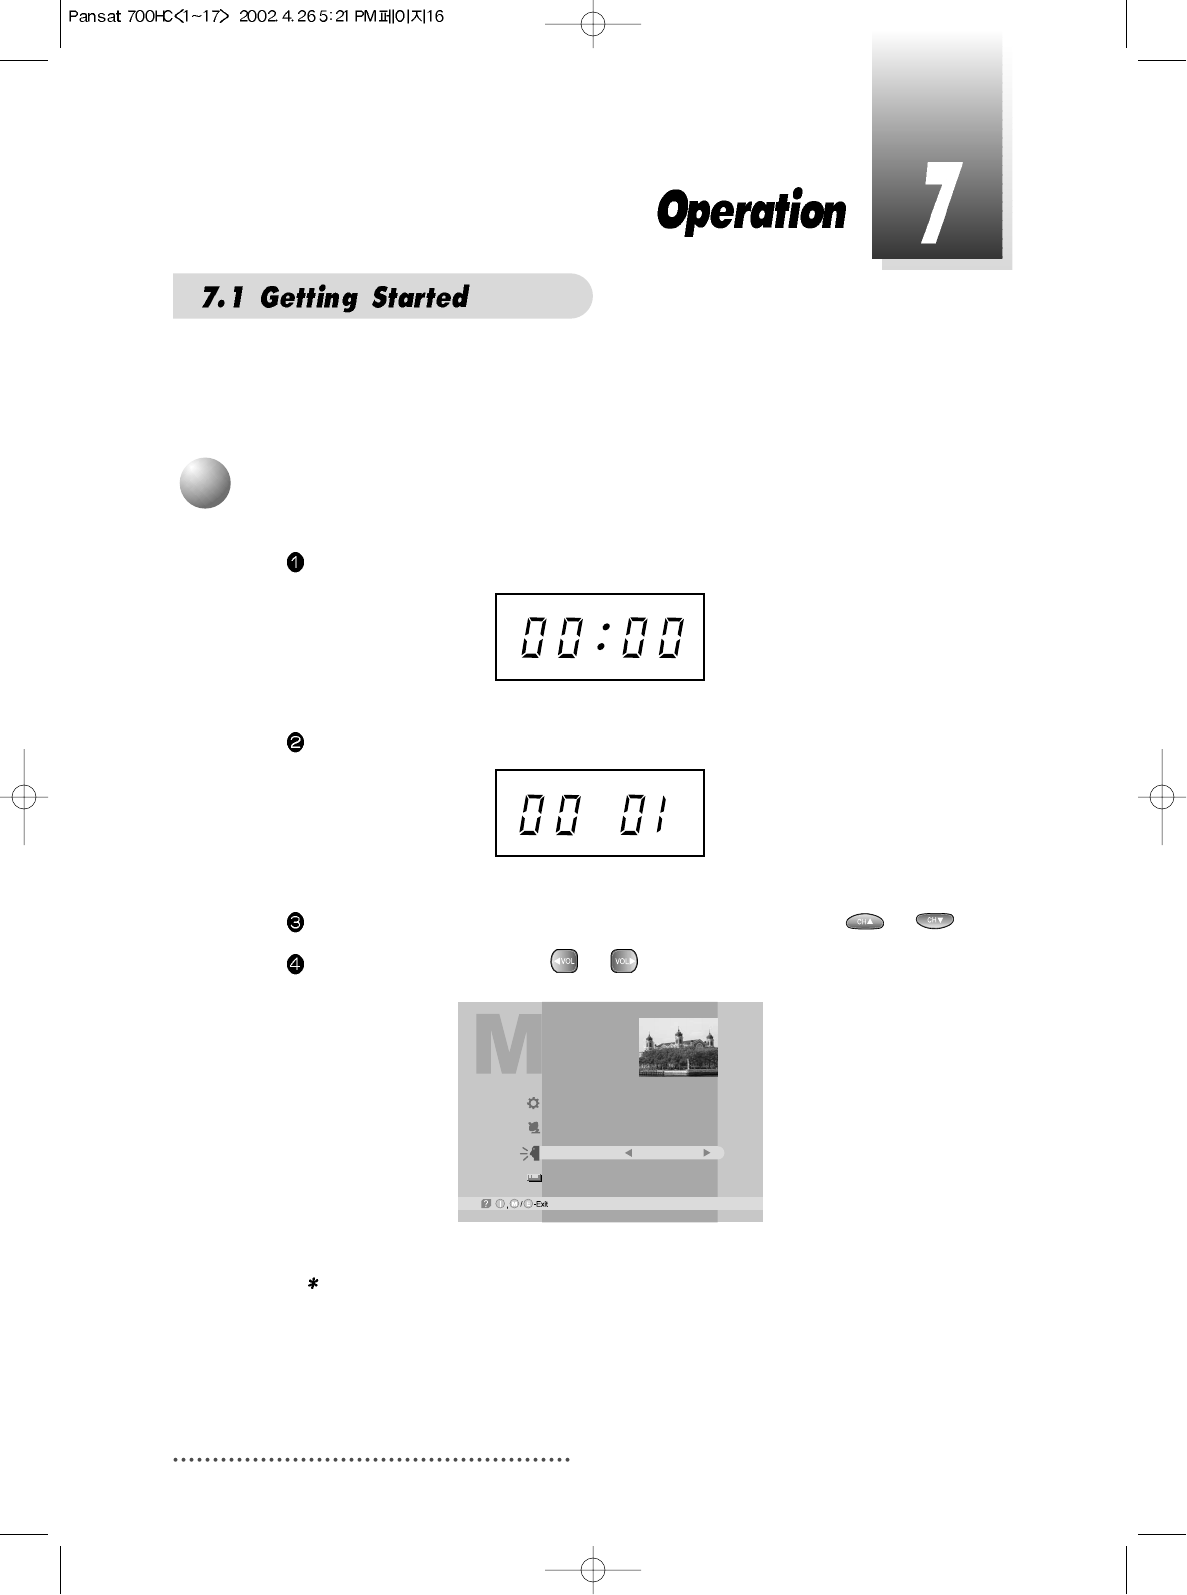
6. How to Connect 14
7. Operation 16
7.1. Getting Started
7.2. Channel Editing
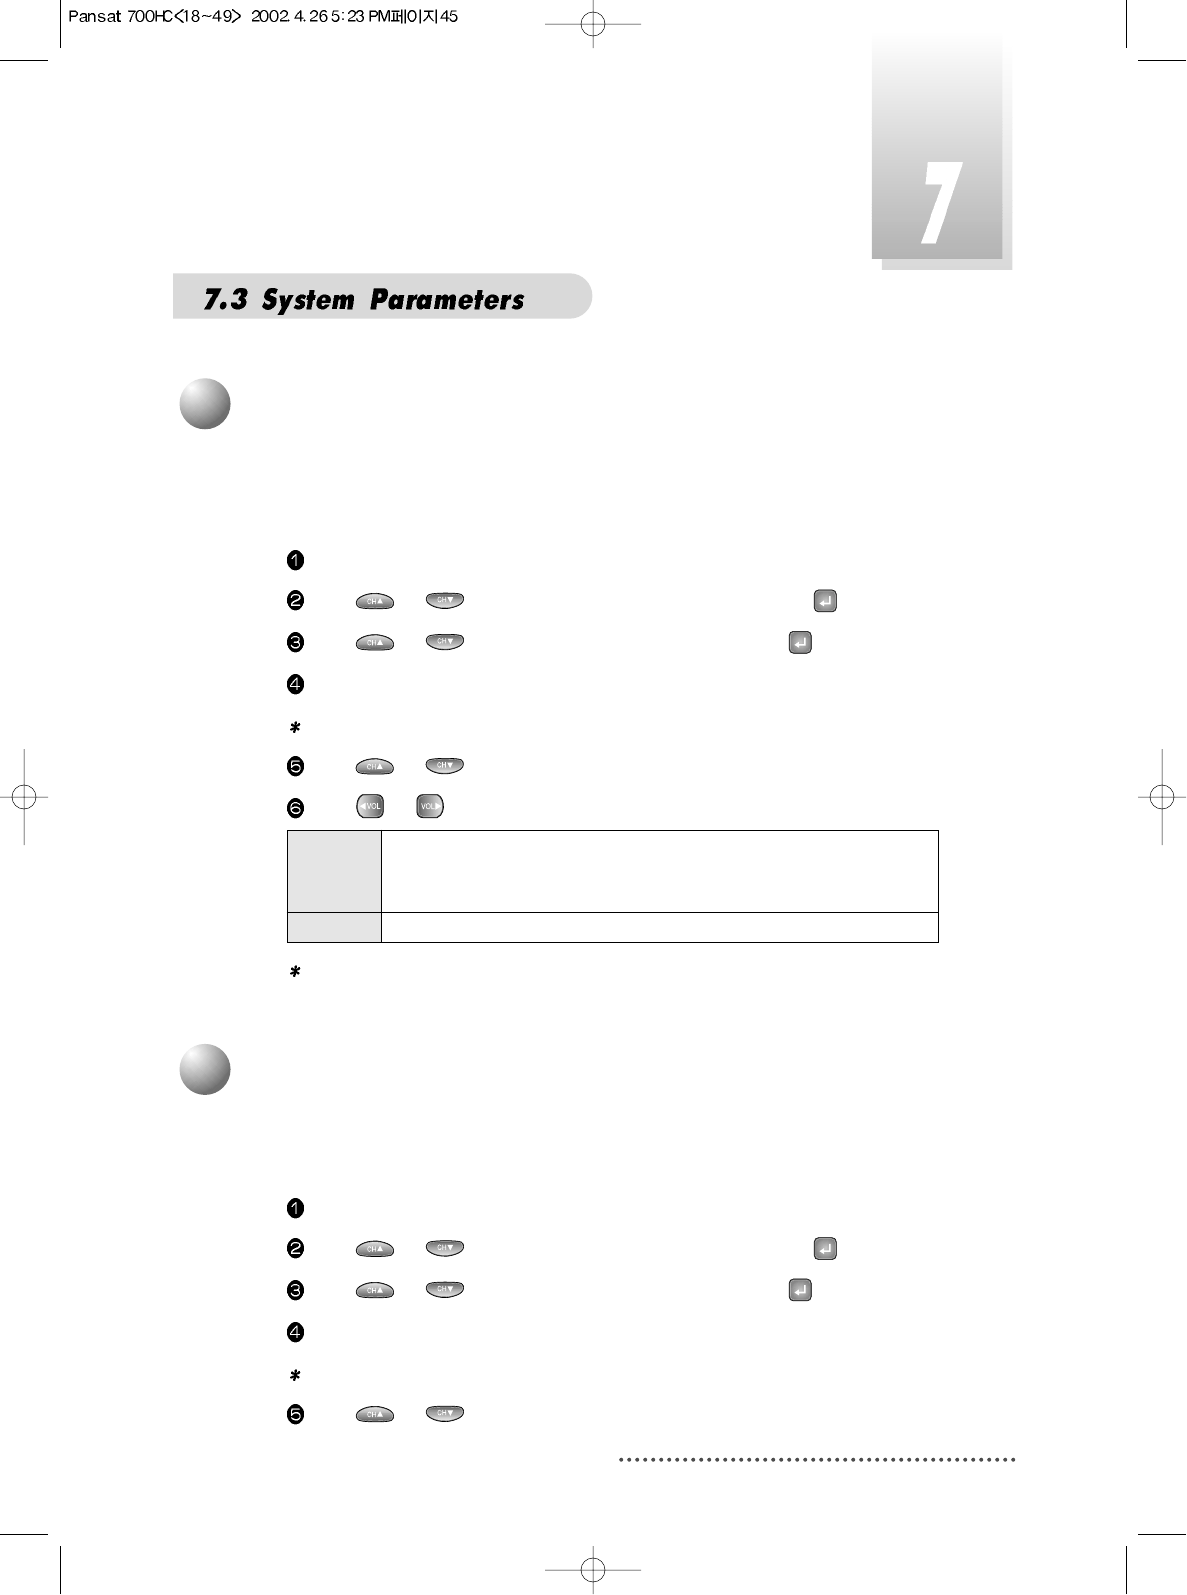
7.3. System Parameters
7.4. Transponder
7.5. Factory Set
7.6. Other Function on Remote Control
8. Hard Disk Operation 66
8.1. Recording
8.2. Playing
8.3. Delete Programs
8.4. Lock Programs
8.5. Skip Play
8.6. Split Operation
8.7. Trick Play Controls without OSD
9. Conditional Access 76
10. Trouble Shooting 78
11. Specifications 79
DiSEqC is a trademark of EUTELSAT.
2
This Common Interface is your “Window to the World” giving you the opportunity to
enjoy scrambled programs. Enjoy the rich choice of more than 4,000 different
channels, broadcasting a large range of culture, sports, cinema, news, events, etc.
This receiver is a technical masterpiece, assembled with the highest qualified
electronic parts.
Fully compliant with MPEG-2 and DVB standards
Integrated COMMON INTERFACE
Multi-access with twin card reader for CI
User friendly operating Menu and On-Screen Graphic Menu
Easy to use EPG(Electronic Program Guide) on screen
Age protection lock function
Tele-text encoding
Manual PID control
Software downloading via RS-232C connector
DiSEqC 1.2 compatible
Hard Disk Functions
3
Be sure to read the user's manual
before starting the operation of the
unit.
Never open the cover. It is very
dangerous to touch the inside of the
unit due to possible electric shock.
When you do not use this unit for a
long time, make sure that power
cord is pulled out from the outlet.
Also do not use a damaged power
cord as it may cause fire or electric
shock.
Do not touch the power cord with
wet hands as it may cause electric
shock.
A professional installation is
required.
If reception is interrupted, contact
your local service centre.
Place the unit in a well ventilated
and no-heat environment.

4
When installing the unit
Install the unit horizontally. An
uneven installation may cause the
unit to be damaged.
Do not put heavy items such as a TV
on the unit. That may cause the unit
to be damaged.
Moving the unit to a hot area from a
cold one will cause condensation.
Do not operate the unit for one or two
hours or until it has dried completely.
Where it is subject to vibrations
Where it is exposed to direct sunlight
Where there is humidity
Where the temperature is too high or
too low.
Where there is no ventilation
Do not install the unit:
5
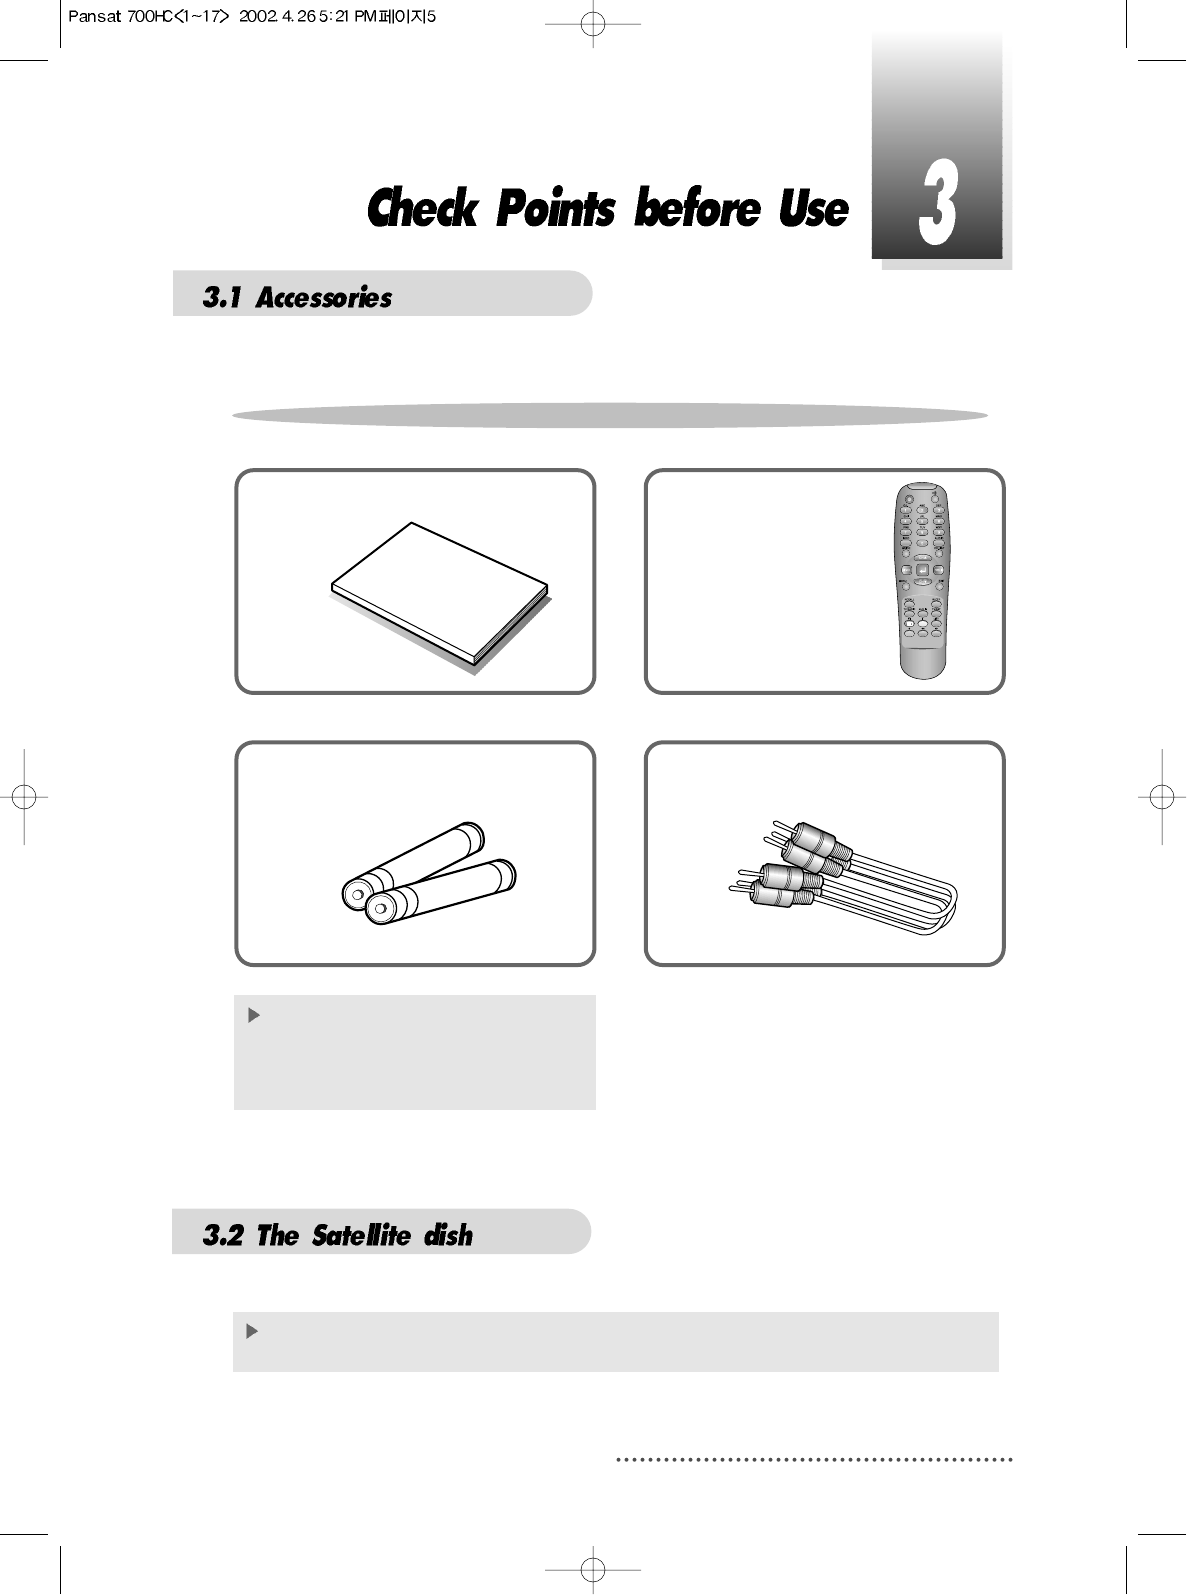
User's manual : 1
User's manual
Remote control : 1
Batteries (AAA type) : 2 RCA video/audio cable : 1
If any accessories listed above are
missing, contact the sales
representative where you
purchased this unit.
This unit is working with DiSEqC 1.2 on a compatible antenna positioner.
Ask your dealer for information.
Accessories of the Unit
Your dish should be properly installed and azimuth and elevation must be precisely set up.
6
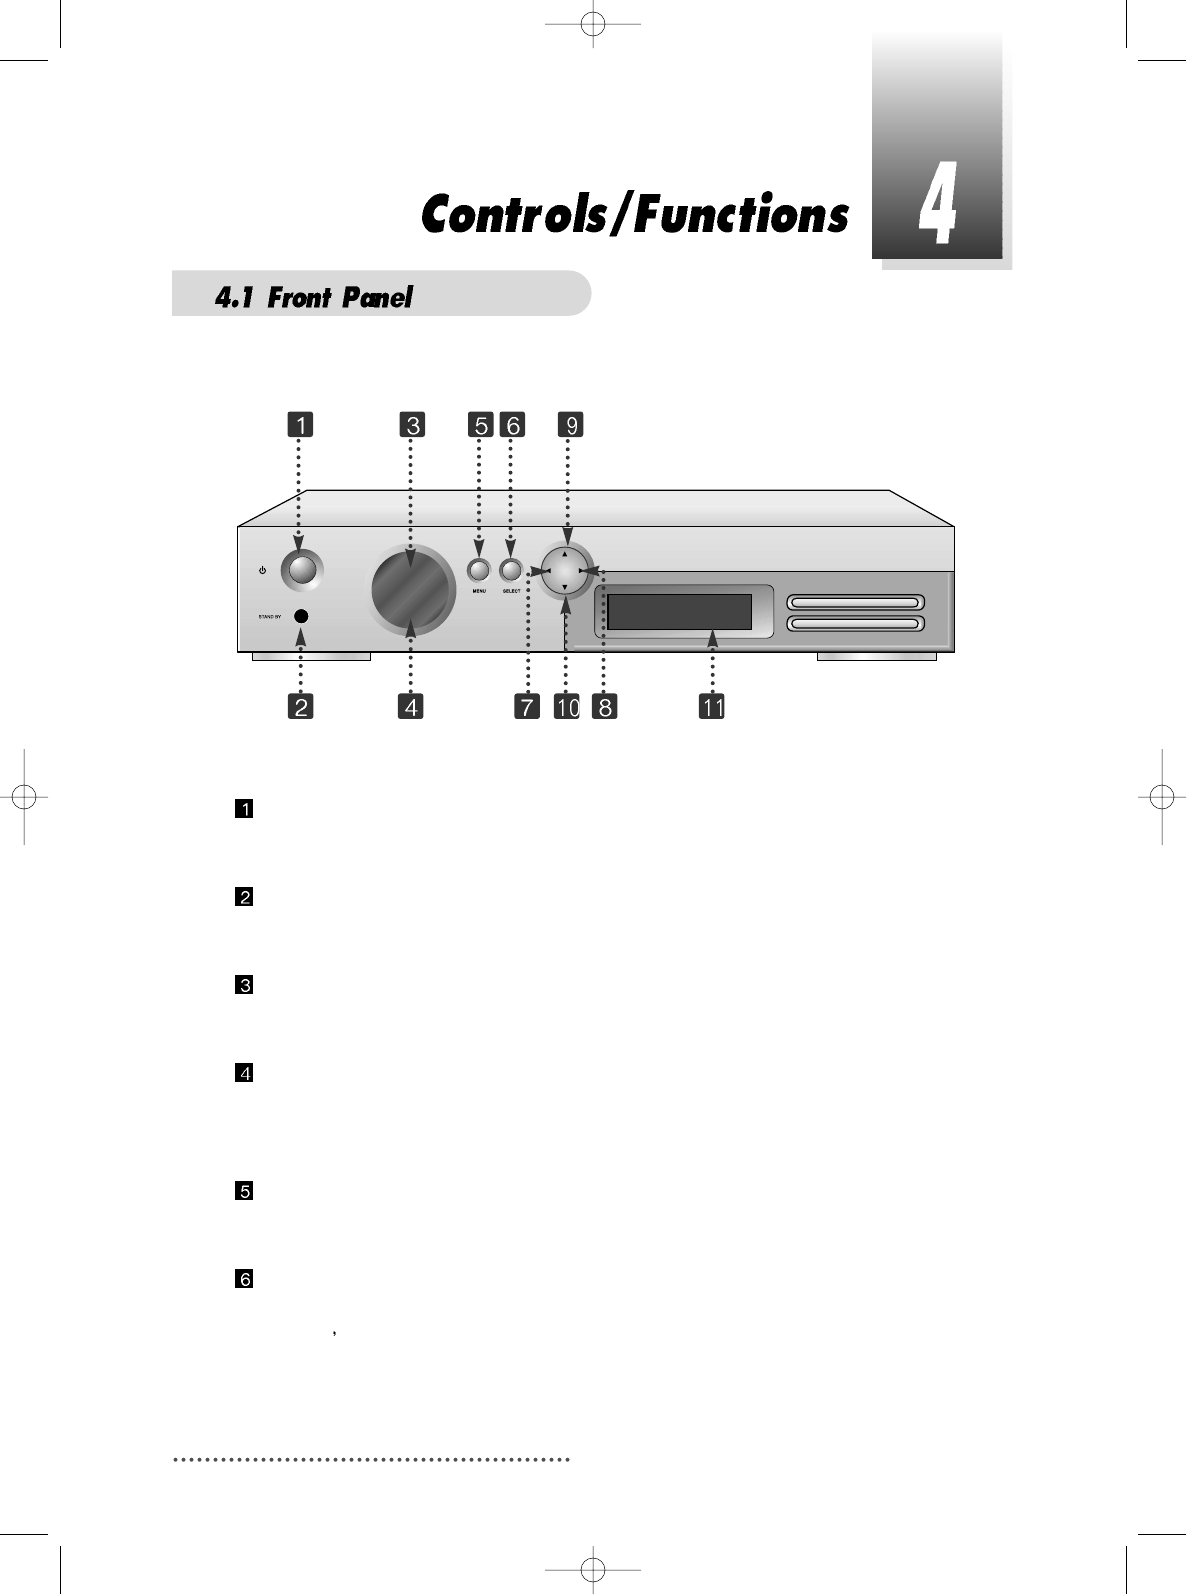
Power
To switch the receiver in “standby” mode or in power on mode.
Standby/Power on Indication light
Flashing red in “standby” and no light in power on mode.
Remote Sensor
Receives the infrared signal from remote control.
Channel Display(4 Digit)
- When you connect the power line of the receiver, the current time is displayed.
- After programming, the program number or name is displayed.
Menu
To launch or terminate the menu application.
Select
To activate a highlighted item or go to next level on hypertext menu or confirm
the user s action.
7
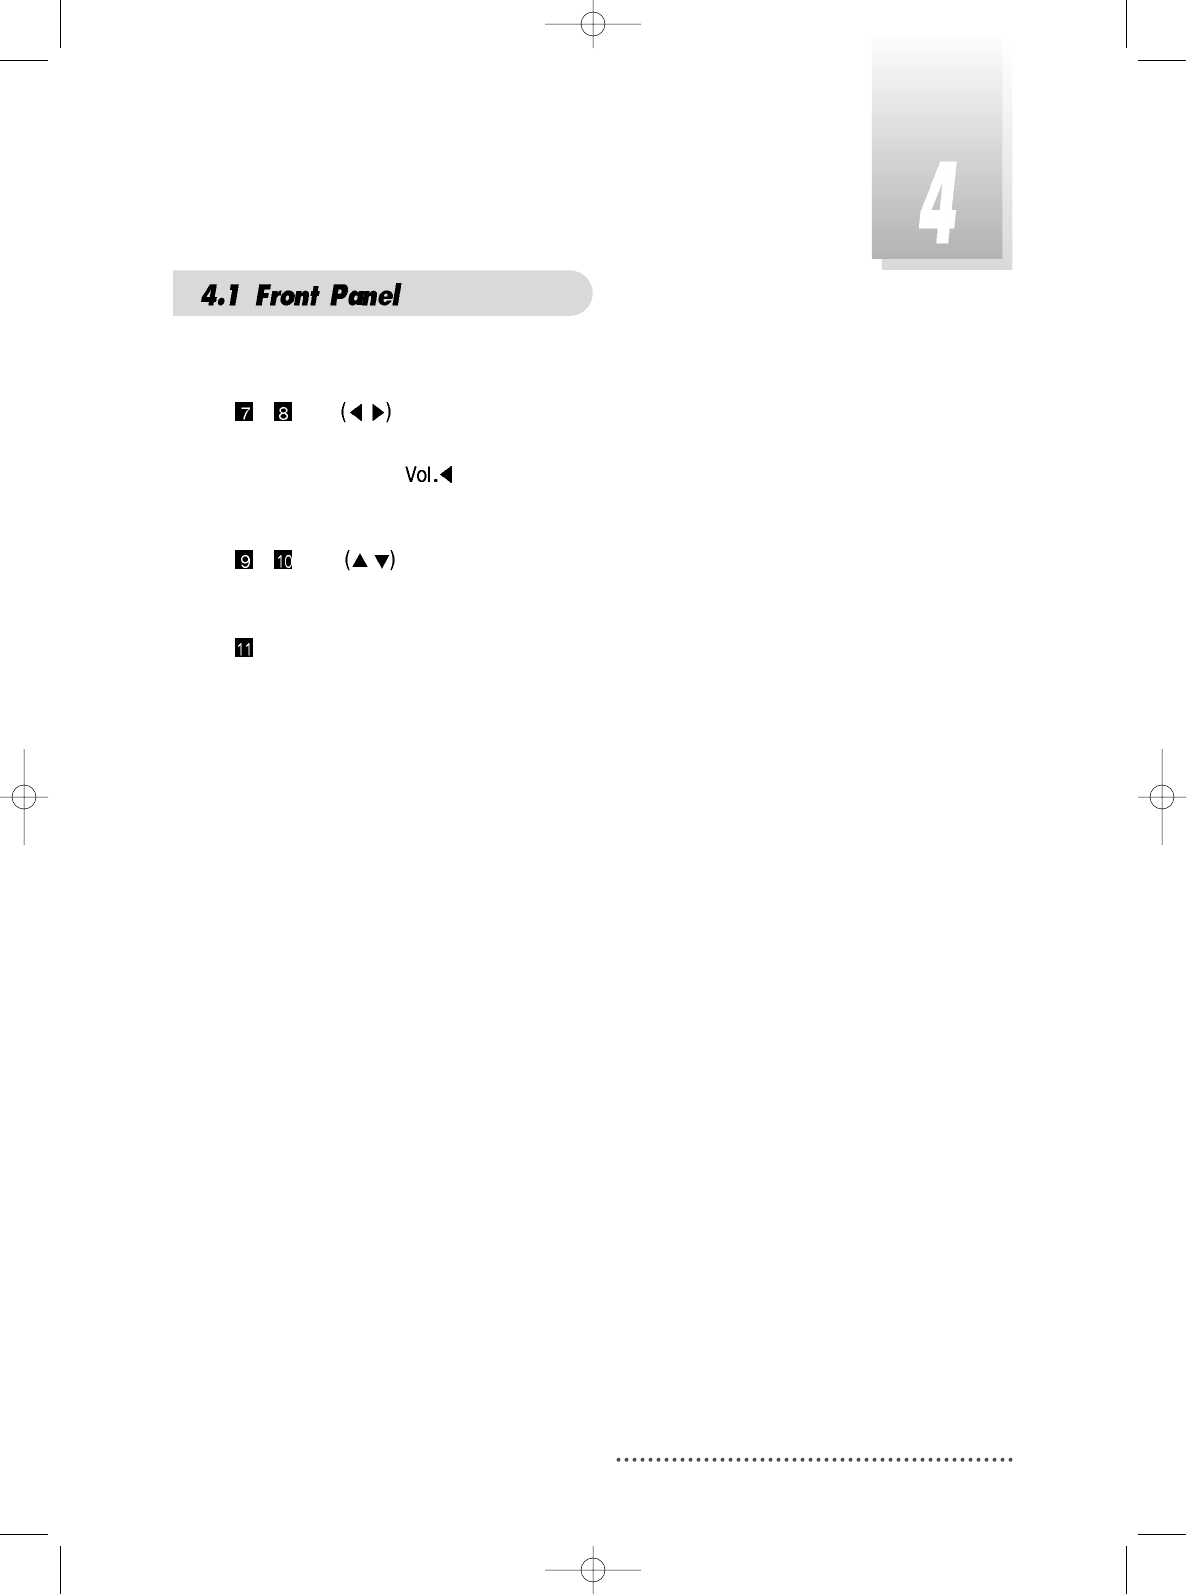
- Vol. /
To adjust the volume level or change the value of an item with preprogrammed
values. The Key can be used as a backspace to cancel the numerical
input.
- CH. /
To change channel or cursor position on the application screen.
Slot A, B
PCMCIA-module : provided by a broadcaster for watching scrambled programs.
Smart Card Slot
Smart Card : provided by a broadcaster for watching IRDETO scrambled
programs.
8
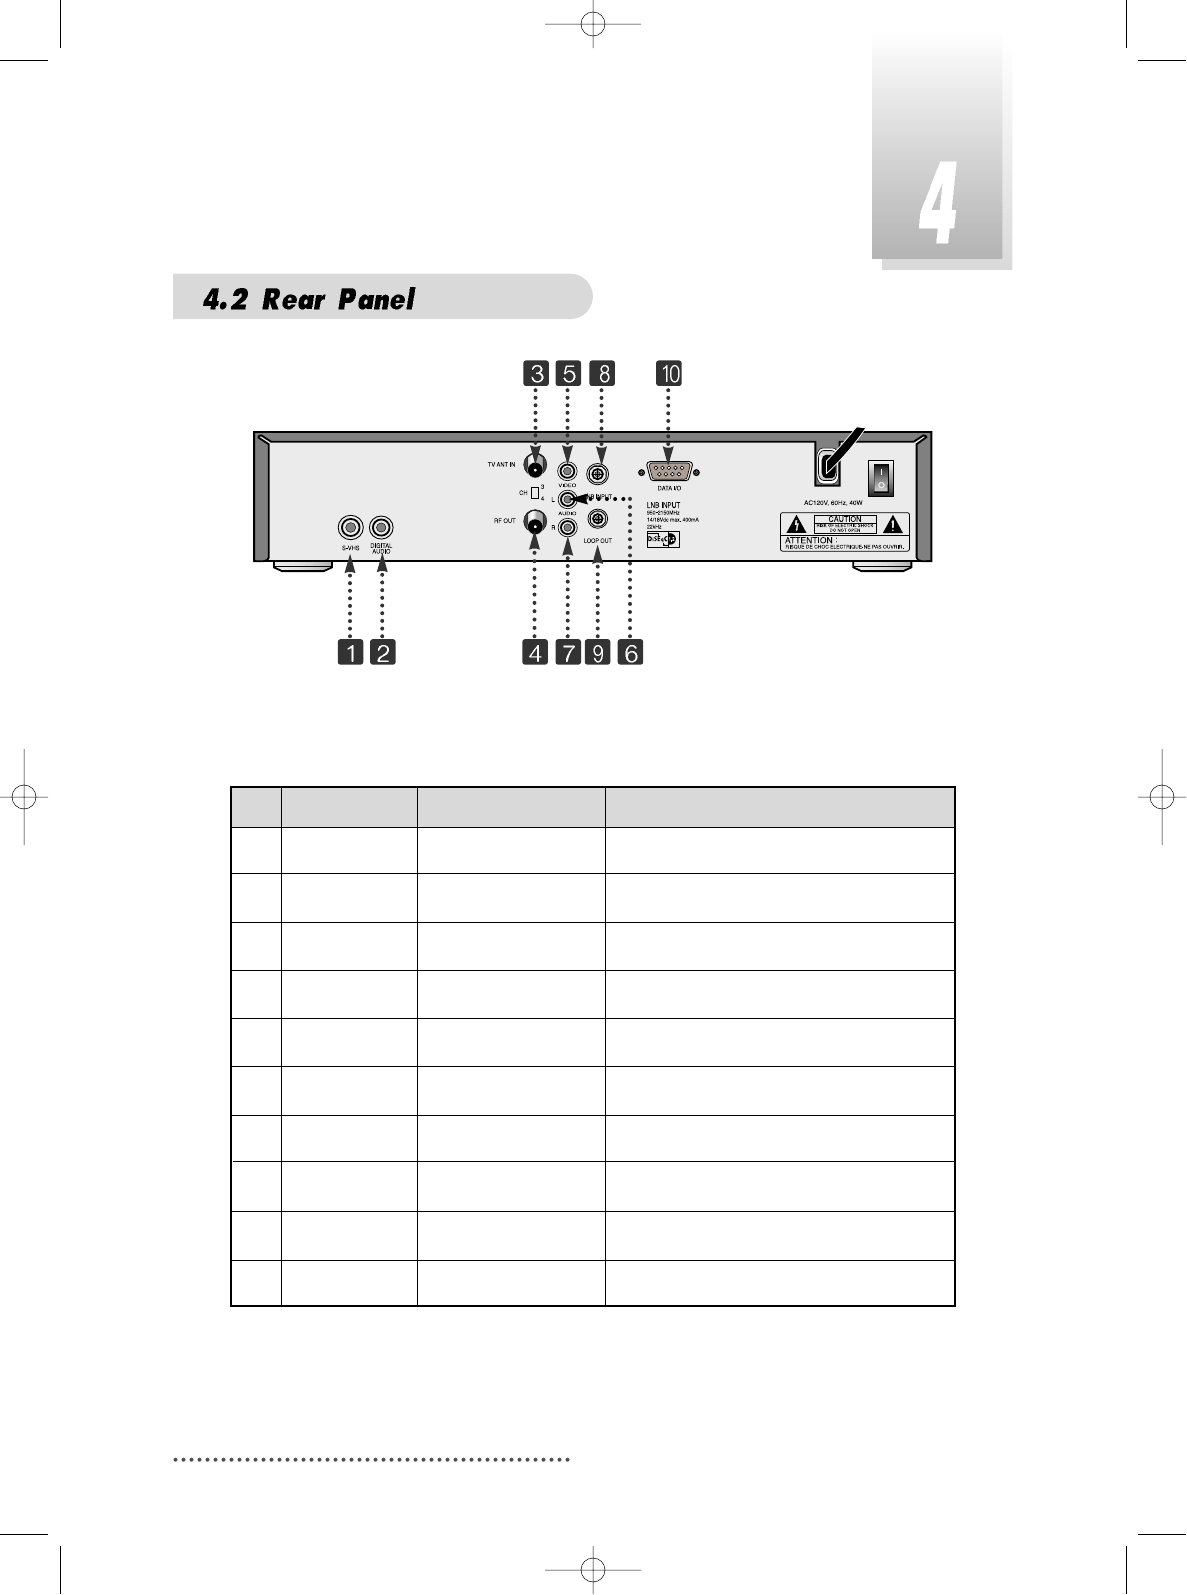
No. Name Connector Function
1. S-VHS Output to VCR or TV.
2. Digital Audio RCA cinch Digital Audio Output
3. TV ANT IN IEC 169-2 female Input from terrestrial antenna.
4. RF OUT IEC 169-2 male Output to TV.
5. VIDEO RCA cinch Composite video output.
6. AUDIO L RCA cinch Left audio output.
7. AUDIO R RCA cinch Right audio output.
8. LNB INPUT IEC 169-24 female IF input from LNB to digital tuner.
9. LOOP OUT IEC 169-24 female IF loop-through output from digital tuner.
10. DATA I/O DB-9 Low speed serial port.
9
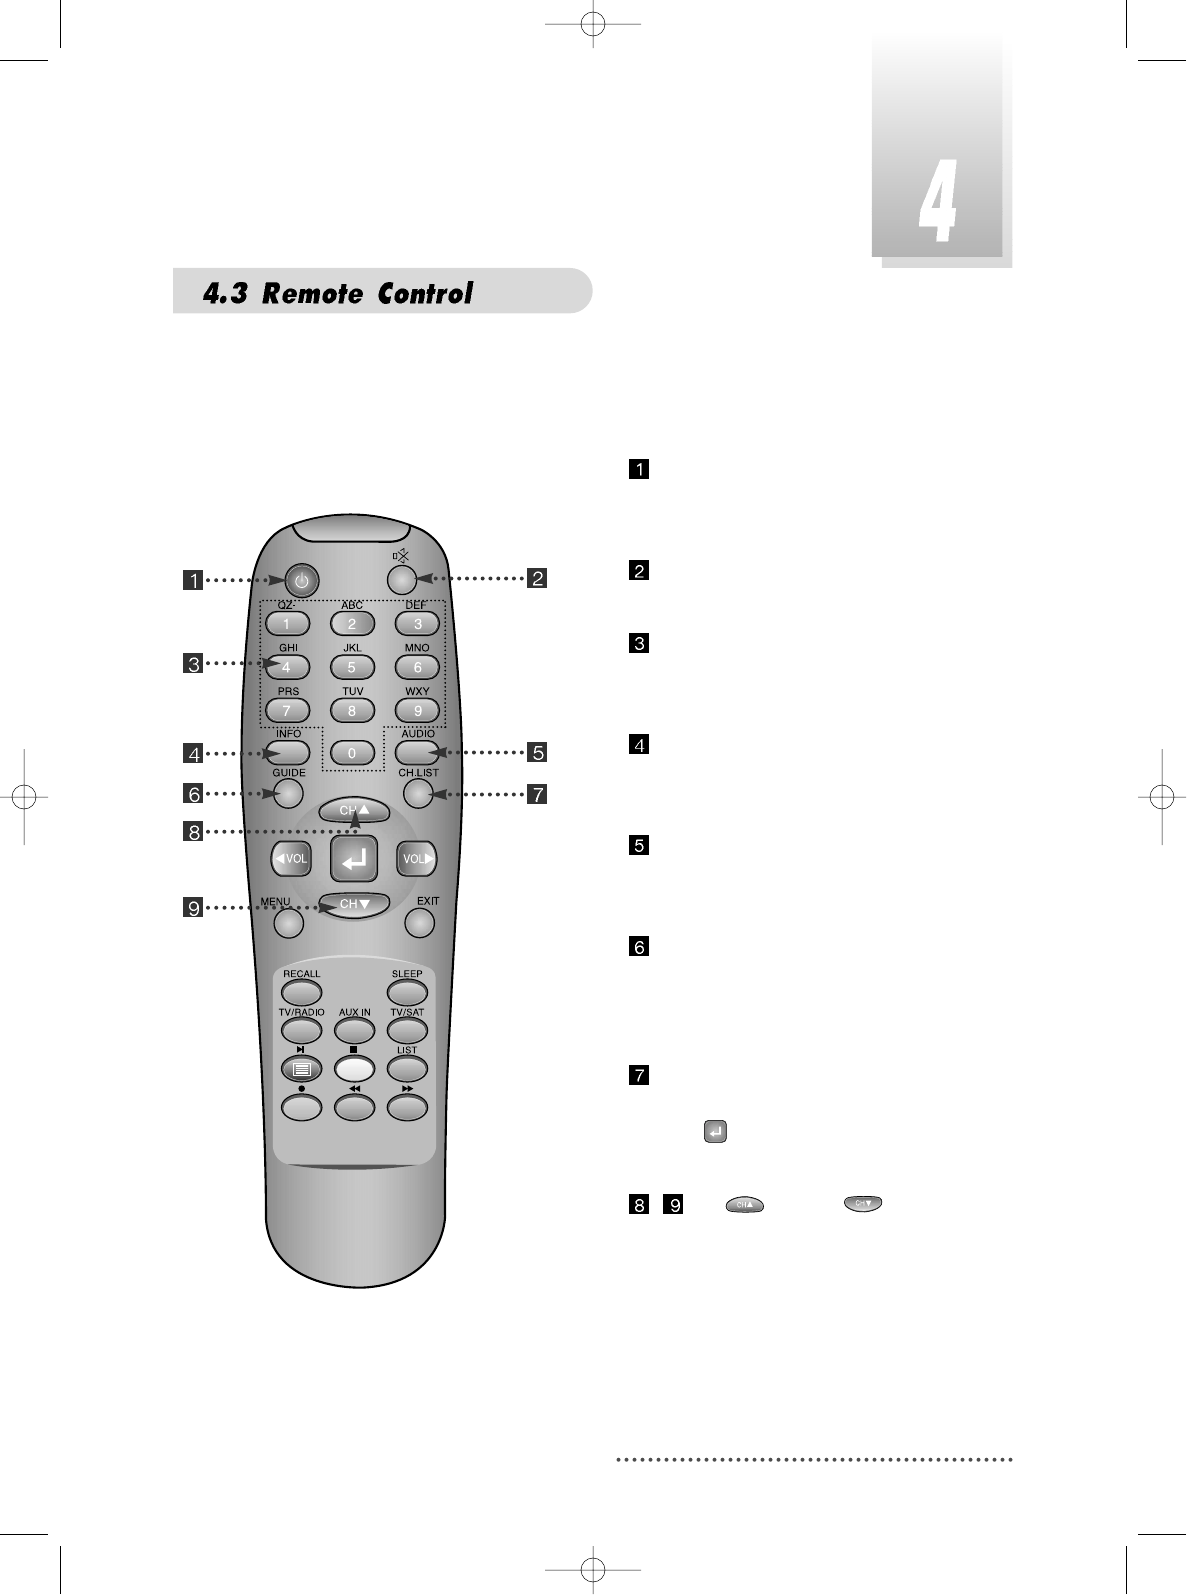
POWER :
To switch into ‘standby’ or ‘power on’
mode.
MUTE :
To turn the sound on/off.
Numeric Keys(0-9) :
To select channels and input of
channel numbers or characters.
INFO. :
To display the information of the
current channel.
AUDIO :
To change the audio track, stereo-
mono mode.
GUIDE :
(EPG : Electronic Program Guide)
To watch program information. Press
once more to return to normal mode.
CH LIST :
To watch the channel list.
Press to confirm or press EXIT to
return to previous chosen channel.
-Up & Down :
To change the value of a selected
item with preprogrammed values
in menu.
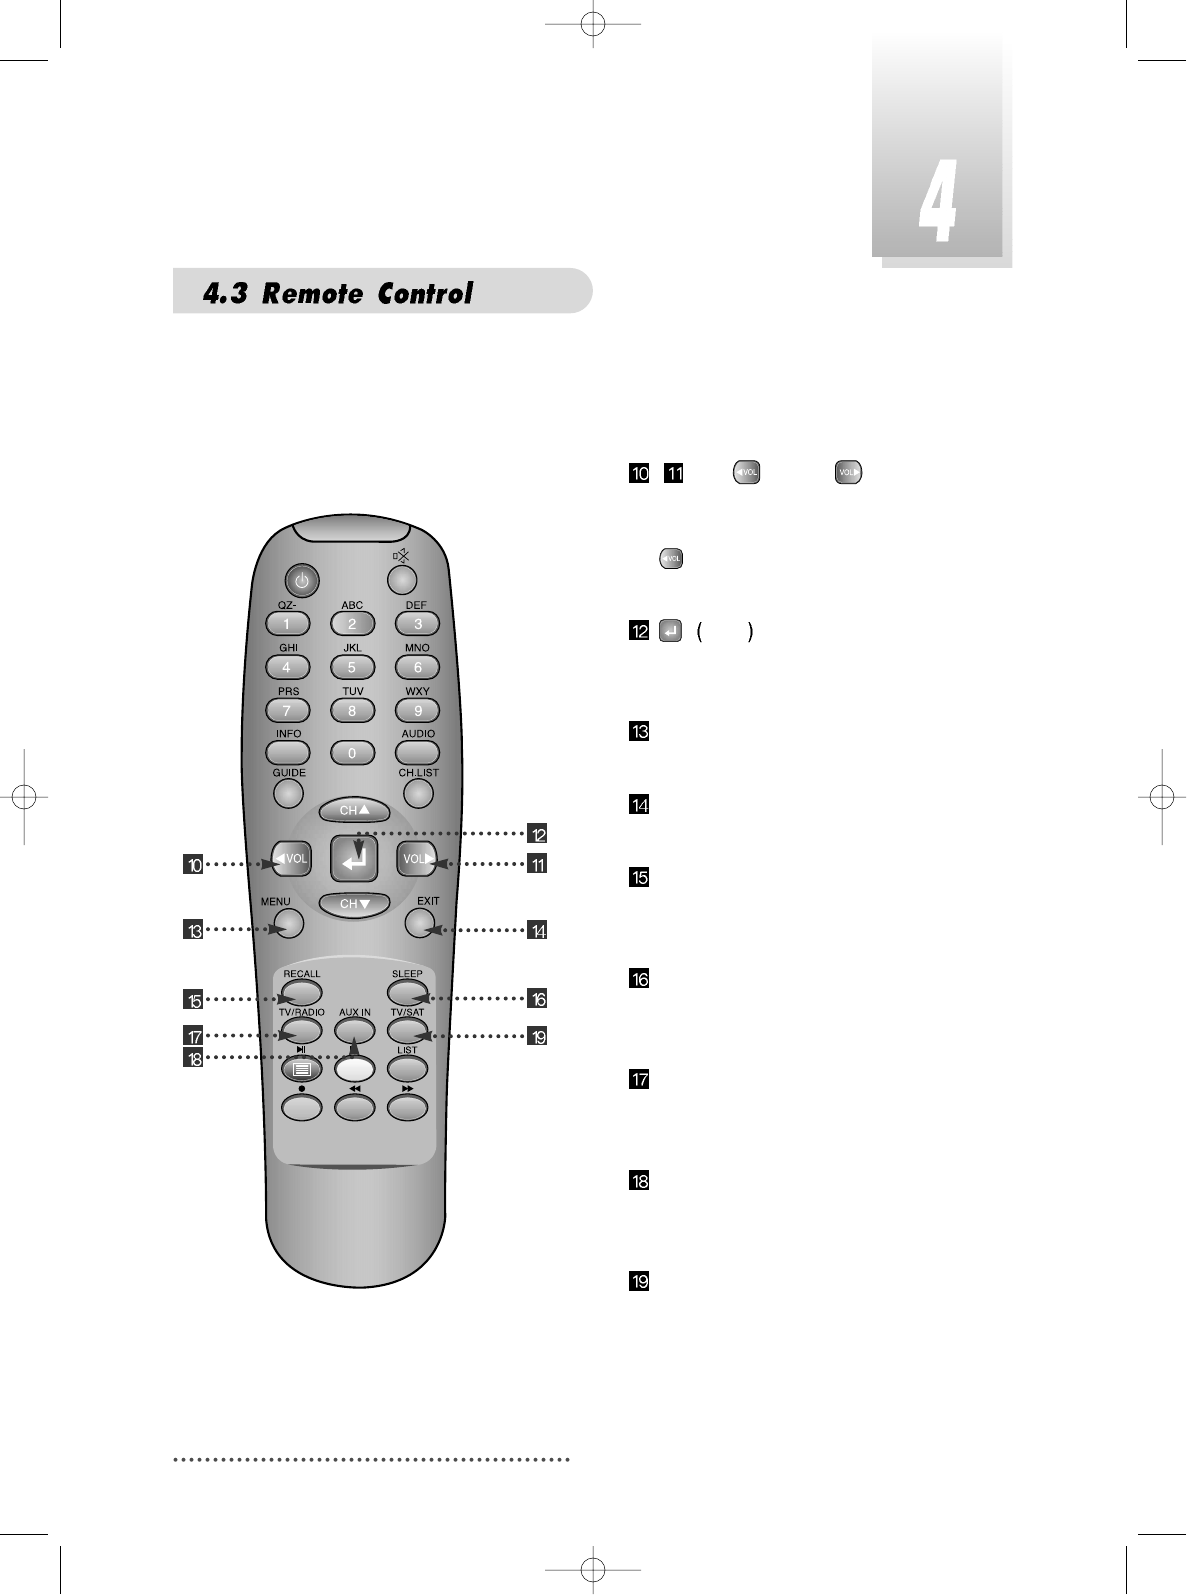
10
-Left & Right :
To move the cursor up and down in
menu.
can be used as a backspace
to cancel the numerical input.
ENTER :
To select an item or to confirm a menu.
Pause function.
MENU :
To enter/exit the main menu.
EXIT :
To return to previous status or menu.
RECALL :
To return to the previous chosen
channel.
SLEEP :
To switch off the receiver automatically
after between 30 and 150 minutes.
TV/RADIO :
To switch between the TV and radio
channels.
AUX IN :
To select the output mode of scart
connector.
TV/SAT :
To toggle the TV output source
between the satellite input and
UHF/VHF antenna input. If your receiver
has no 'TV ANT IN' terminal in the rear
panel, this key may not work.
11
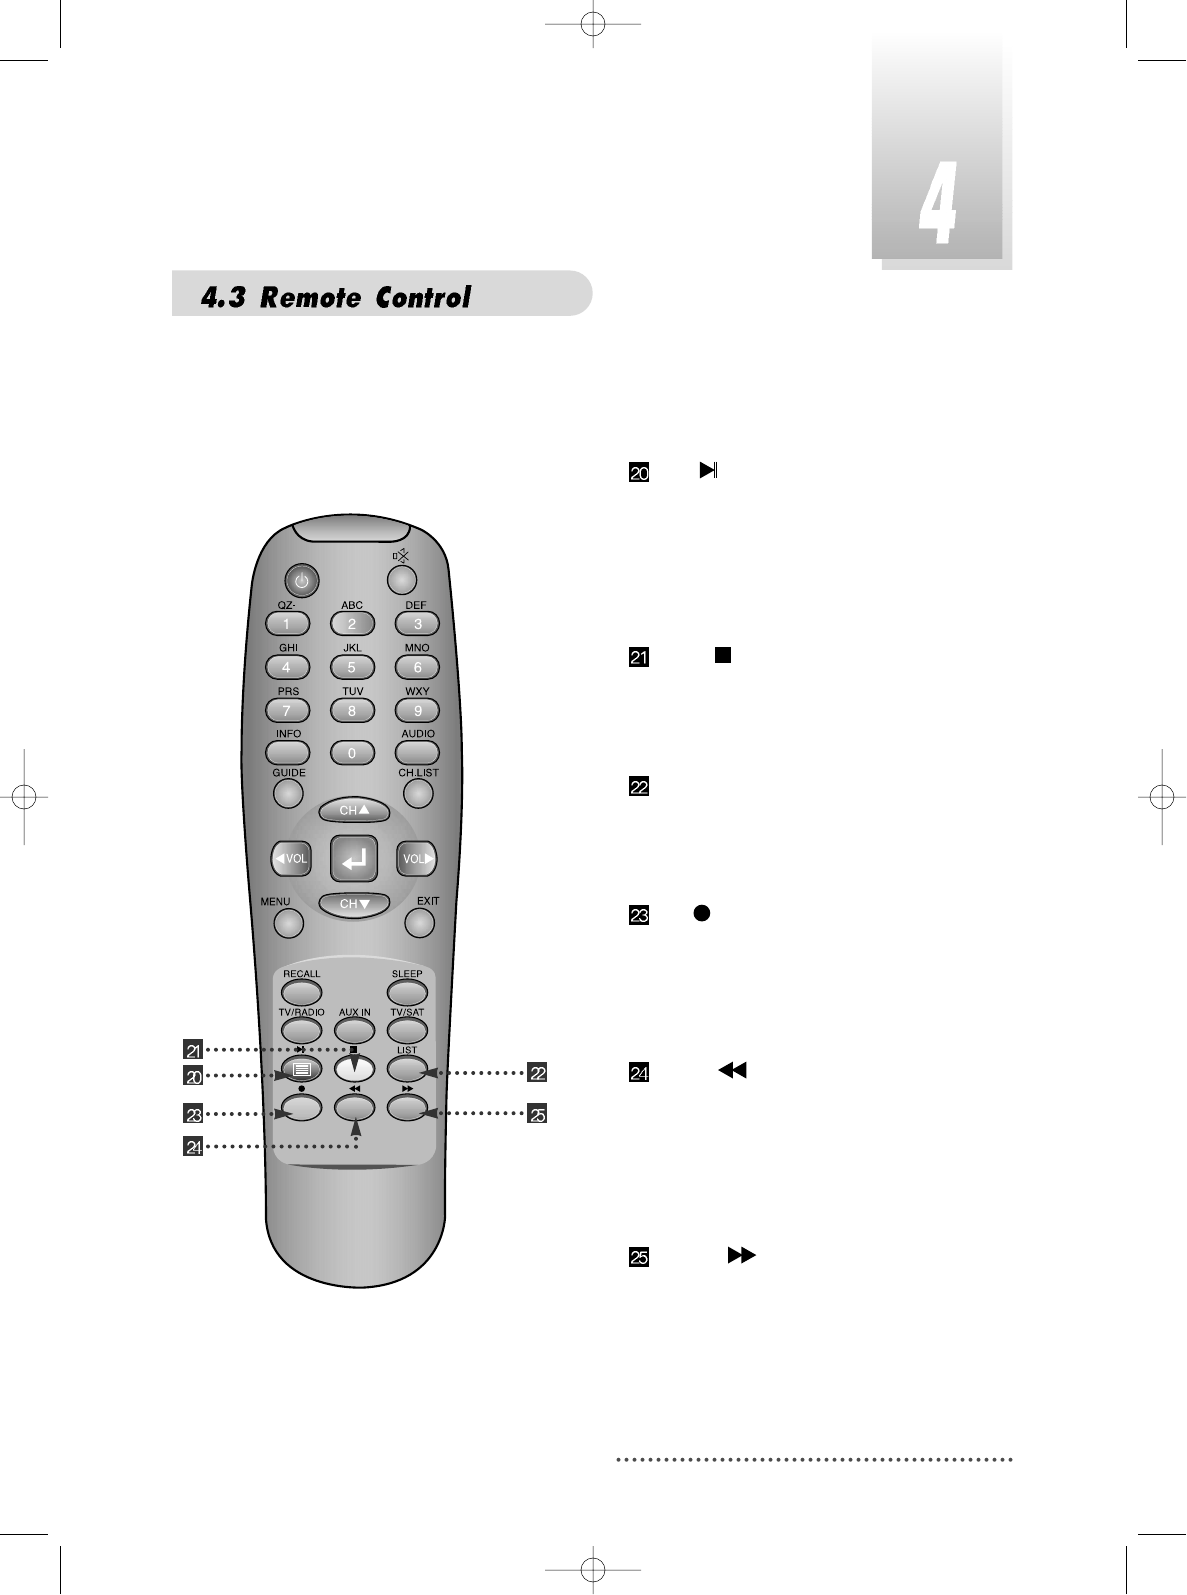
BLUE :
To delete a channel from the Channel
List menu. To show extended program
information in the EPG menu. To see
Teletext Service Data. To play or pause
the stored programs on HD.
IVORY :
To add a new channel to the Channel
List menu. To stop the played programs
on HD.
ORANGE(LIST) :
To see variant channel lists for user's
convenience in the Channel List menu. To
watch the list of stored programs on HD.
RED :
To setup favorite channel lists in the
Channel List menu. To record the
program on to HD. To delete the stored
programs on HD or set skip points.
GREEN :
To lock channel in the Channel List
menu. To show current/next program
information in the EPG menu. To play
the stored programs on HD with fast
forward mode.
YELLOW :
To move a channel to other position in
the Channel List menu. To show
program schedule information in the
EPG menu. To play the stored programs
on HD with fast reverse mode.
12
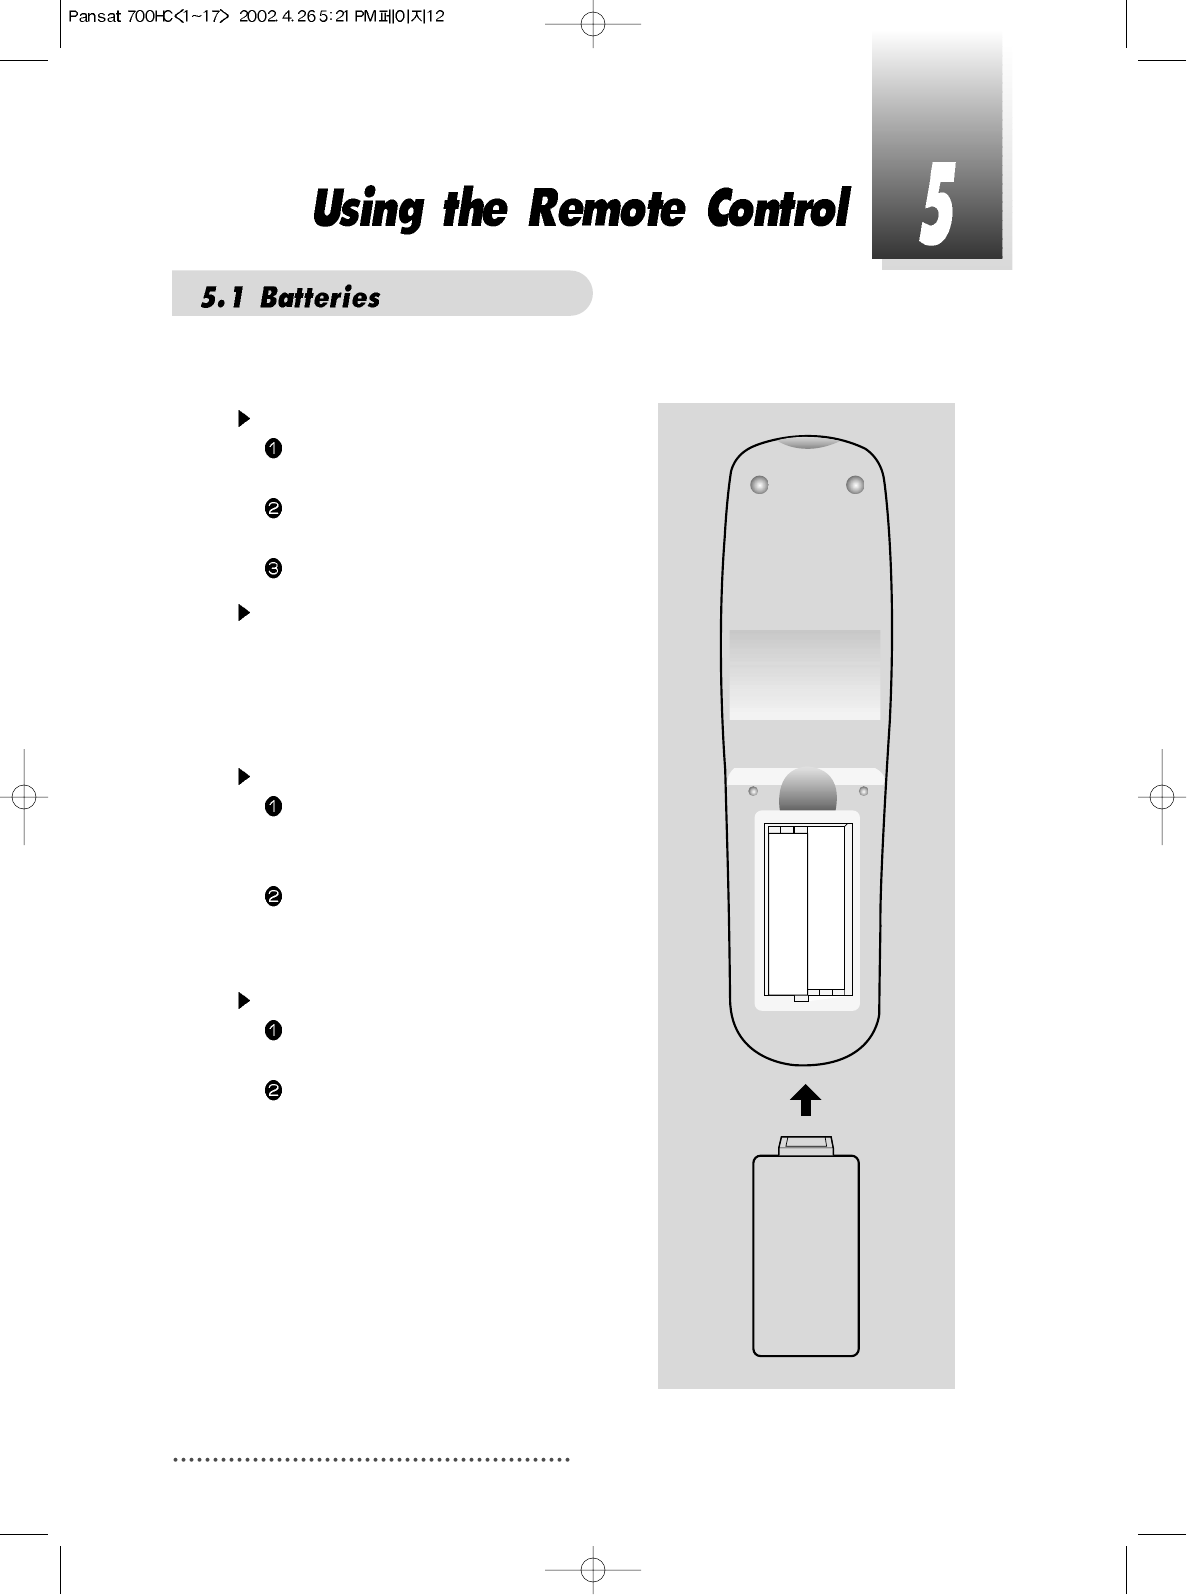
How to insert a battery
Open the cover at the top of the rear
side of the remote control.
Insert two AAA type batteries(1.5V) to be
aligned with appropriate +/- polarity.
Close the cover completely.
When to replace a battery
If the operational range of remote control
is getting smaller, it indicates batteries are
almost consumed.
Replace both batteries together.
How to replace a battery
Check +/- polarities and insert batteries
to be aligned with appropriate +/-
polarity.
Even if old and new batteries are the
same in size, do not use batteries with
different characteristics.
Accident prevention
Do not recharge, heat or disassemble
the battery. Do not cross +/- polarities.
If remote controller is not going to be
used for a long time, take the batteries
out.
13
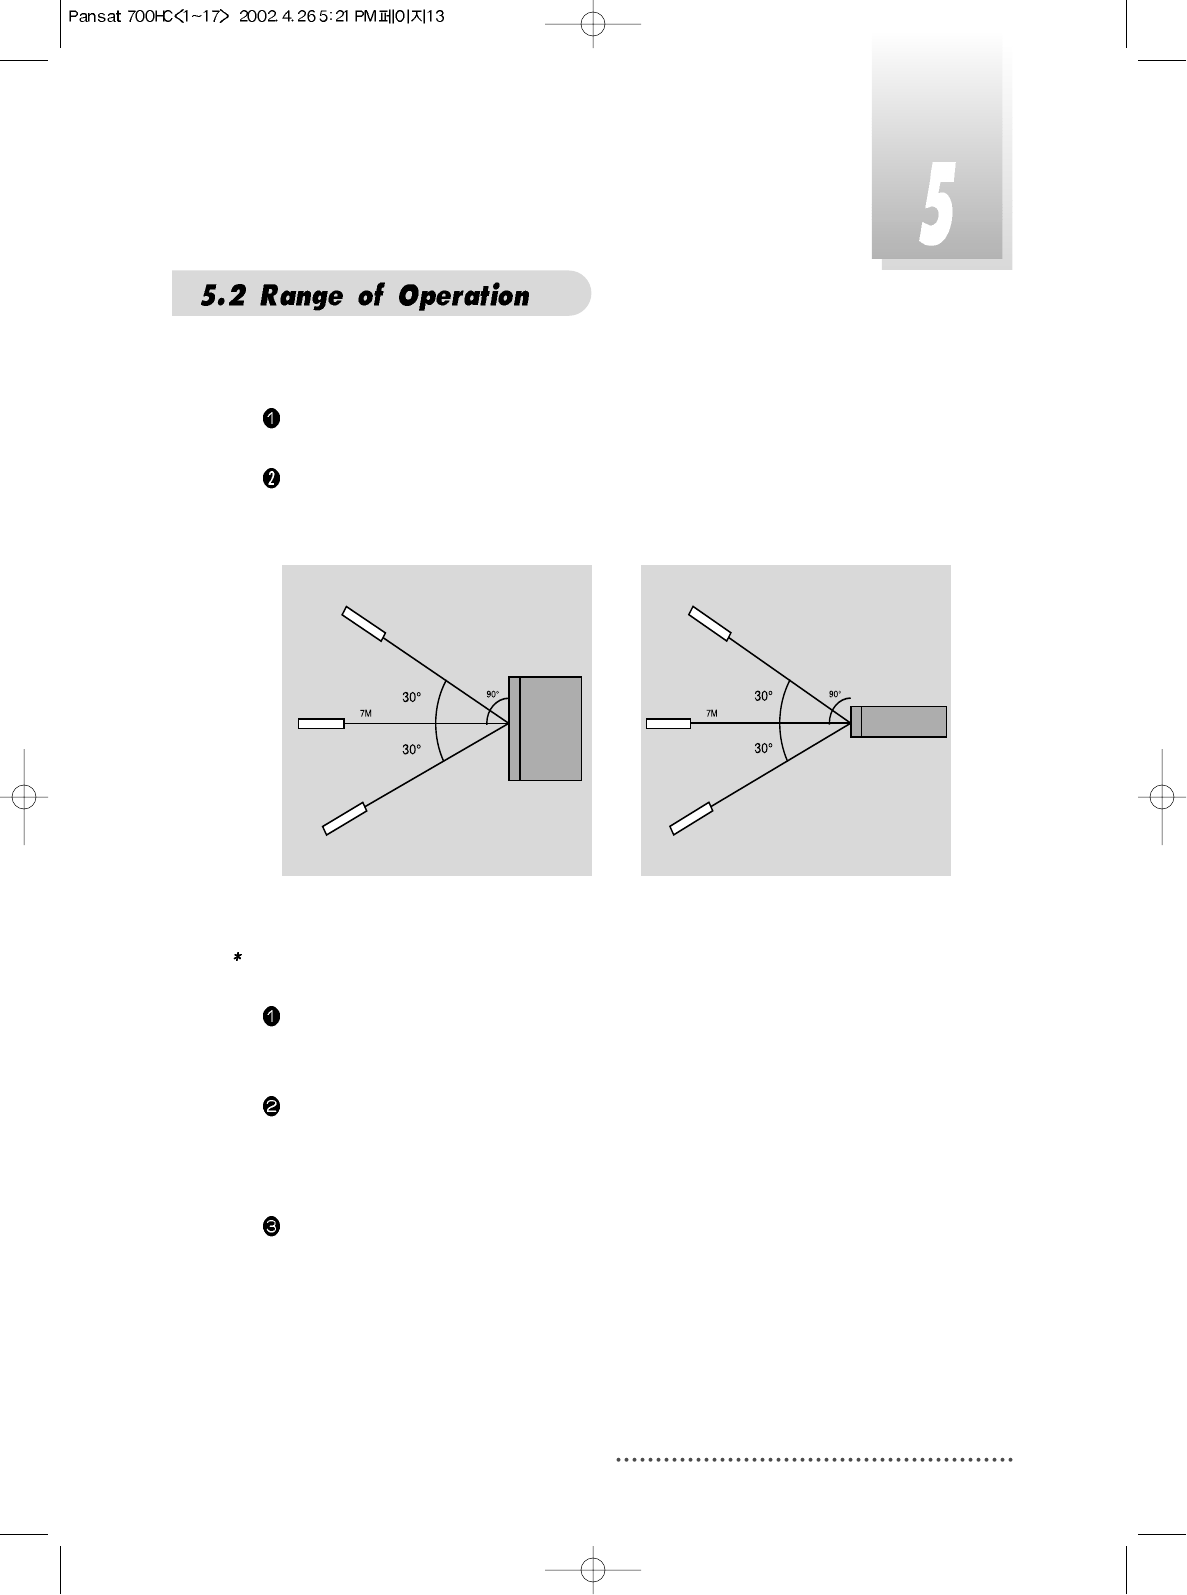
The remote controller can be detected by the receiver within an angle of 30
degrees to the left or right.
The transmission distance of the remote control is 7m in direct line of sight.
Notes
When the remote control is not operative
Replace batteries with new ones and check AC power plug on the receiver.
Abnormal operation
Disturbance from peripheral devices might occur. Ensure that other products
which might cause interference are placed further away from the receiver.
Notes for handling
If exposed to heat or water, the main body and the remote control may be
damaged, so be careful.
14
15
16
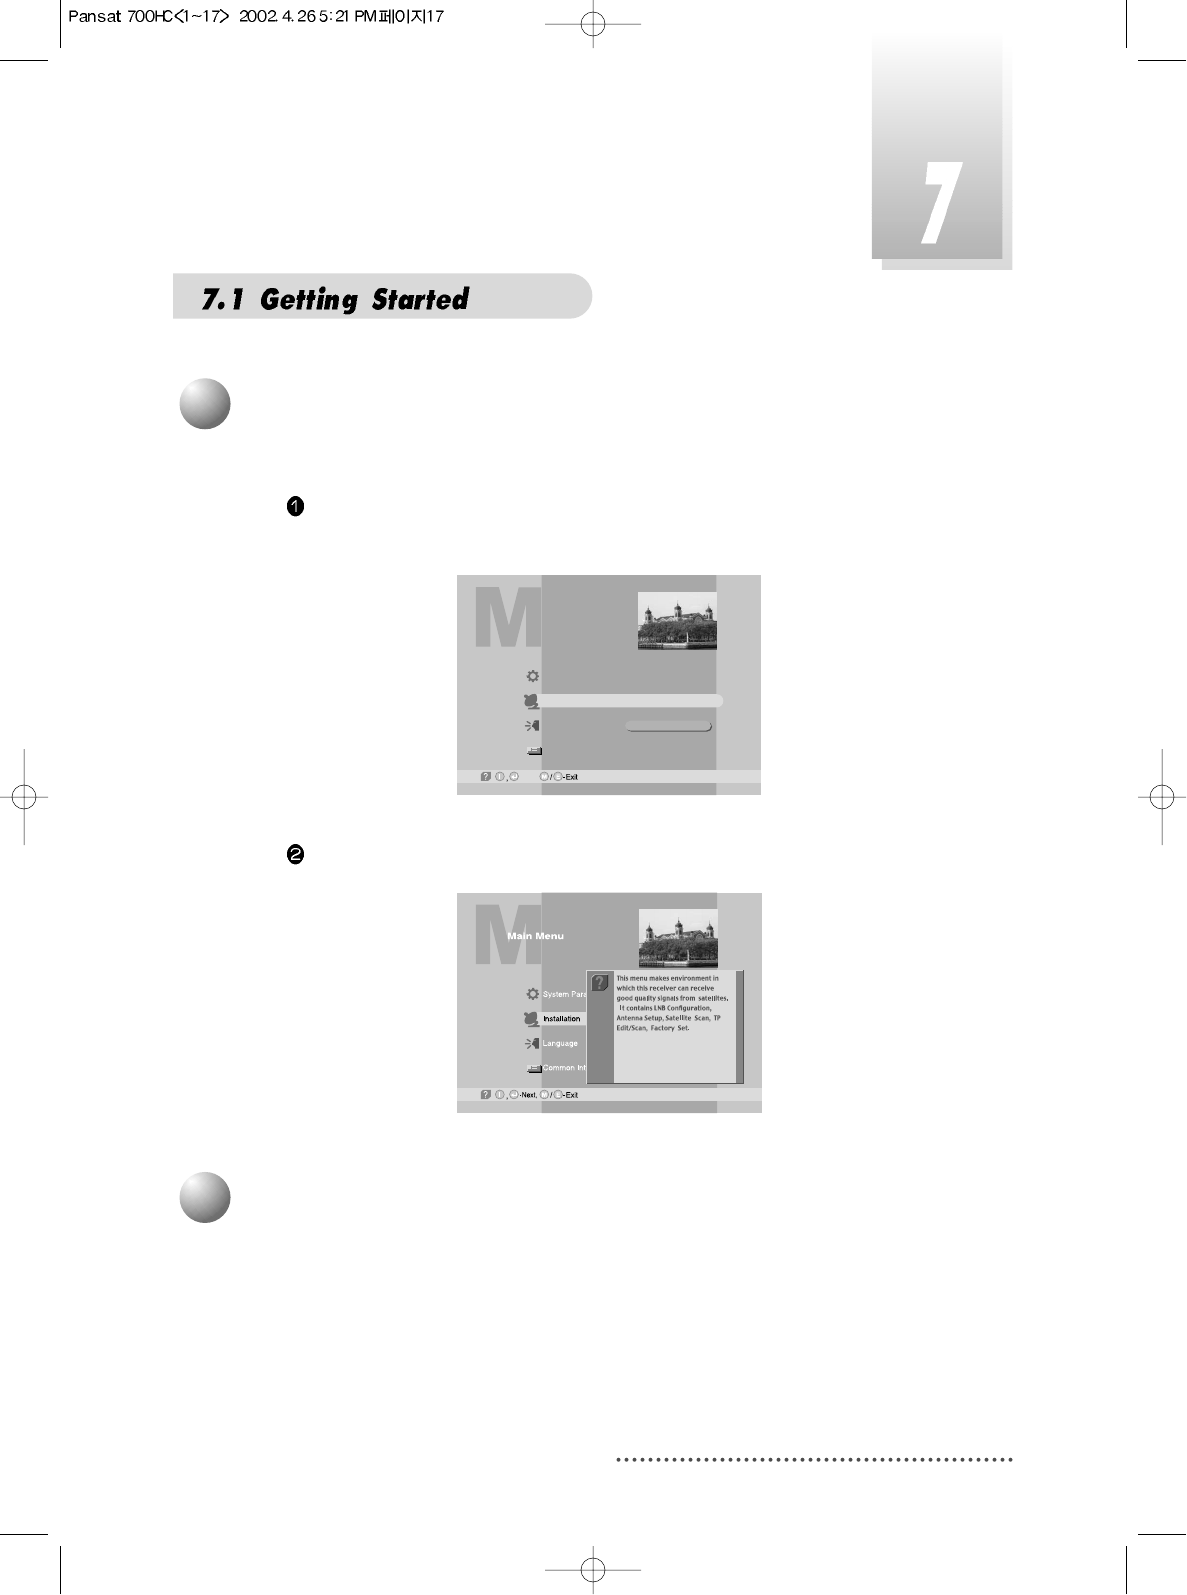
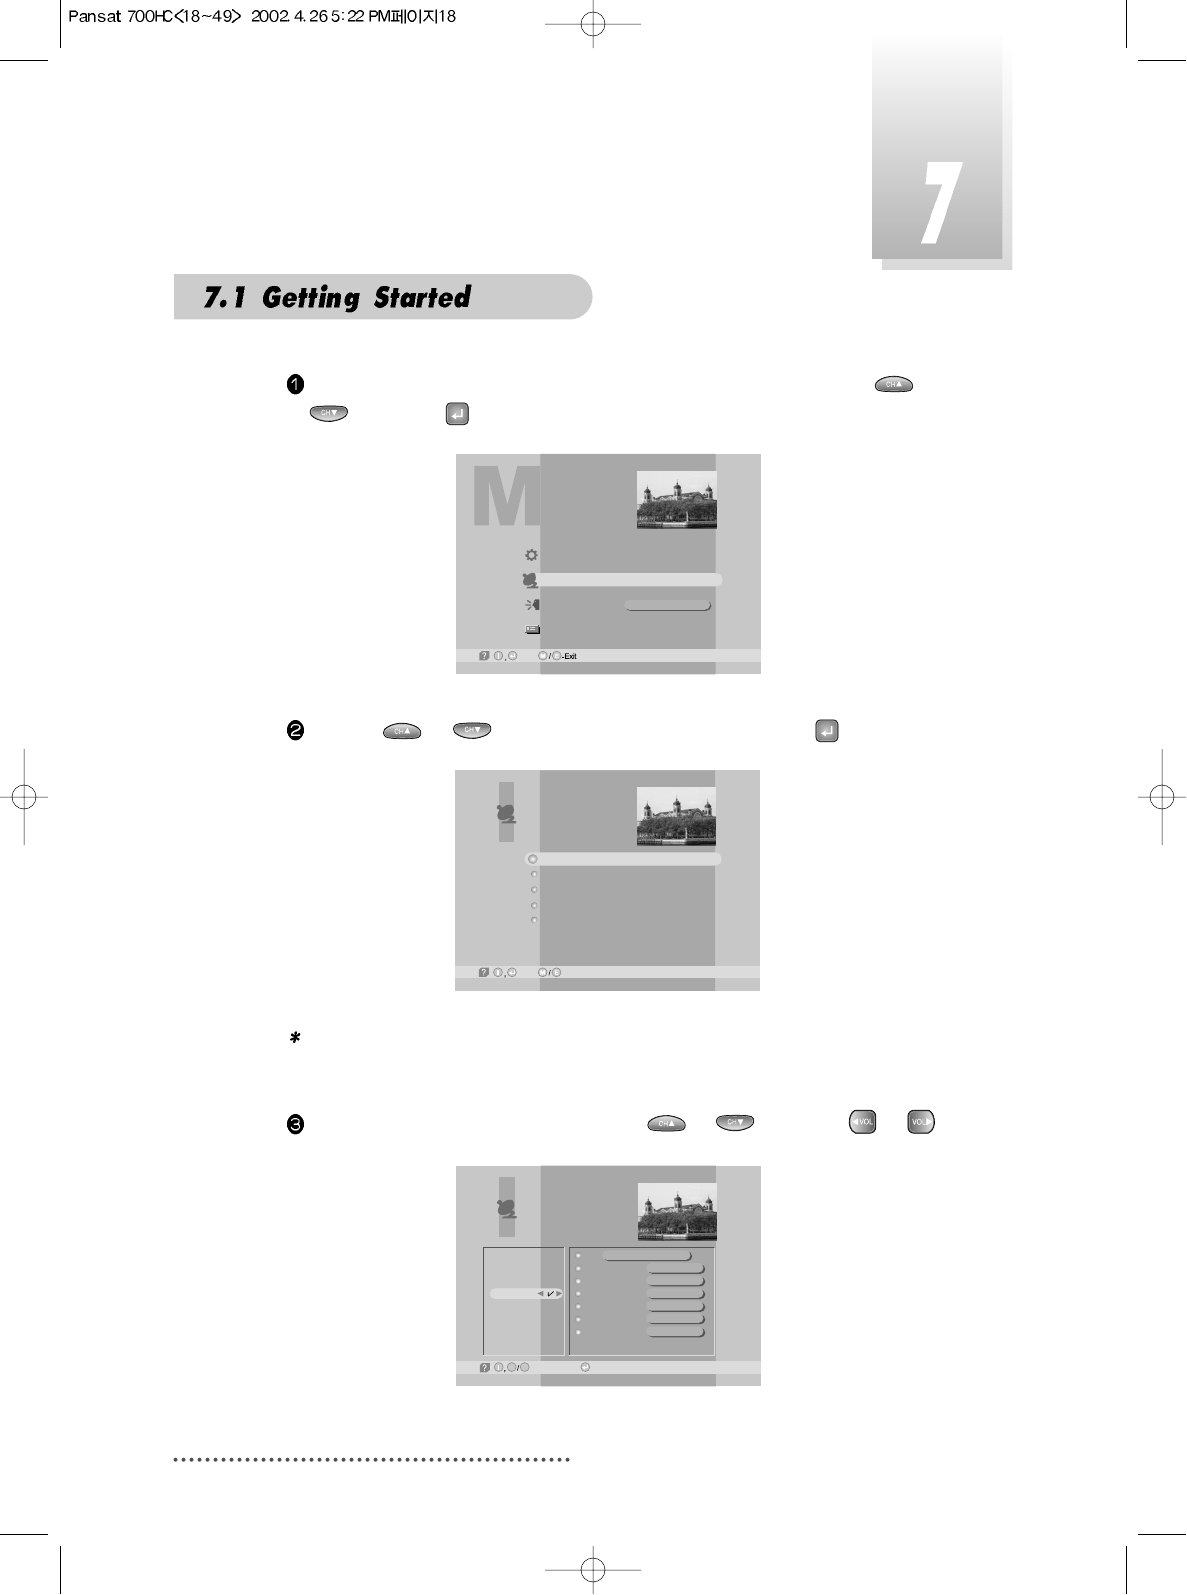
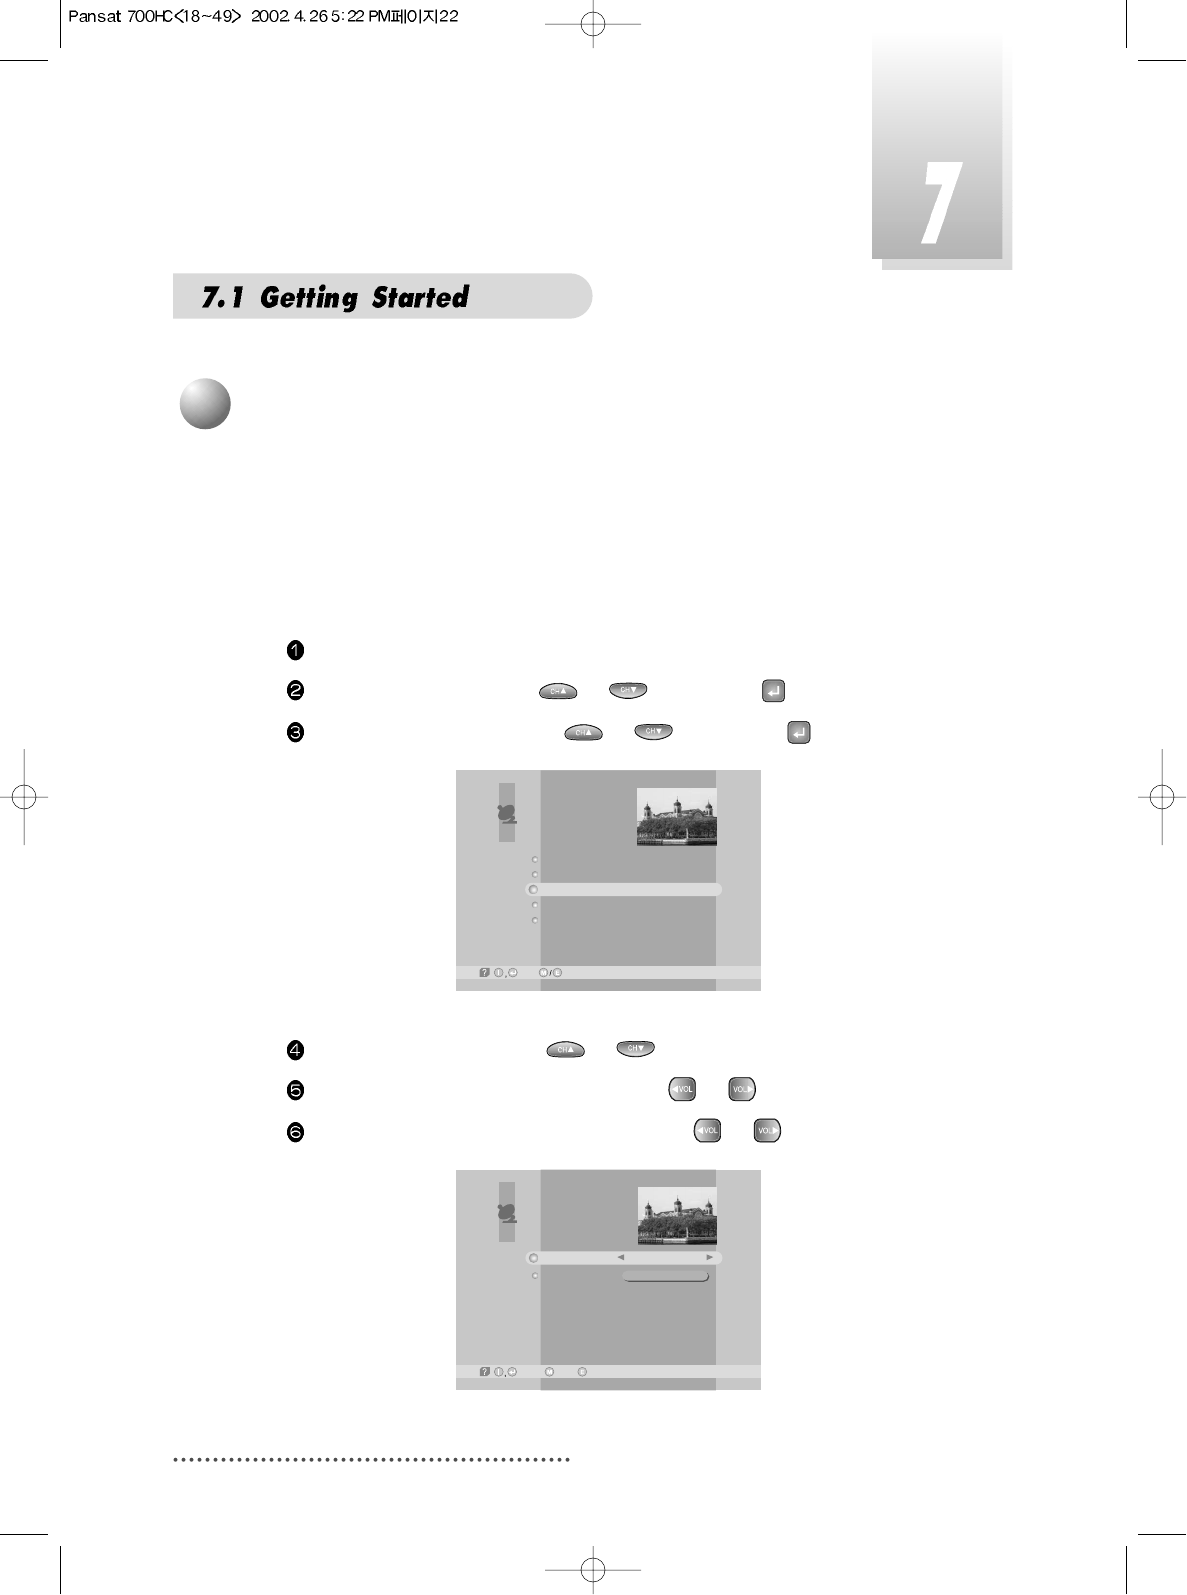
After your receiver is powered up, proceed with installation as follows:
When you plug in AC power, the following will be displayed on the front.
Press POWER on remocon, the LED number will be displayed as follows;
Press MENU key and position cursor on 'Language' column with or .
Select language you want with or .
Screen
Note : Languages displayed in 'Language' column are supported by your
receiver.
Main Menu
System Parameters
Installation
Language
Common Interface
English
1
Menu Language Setting
17
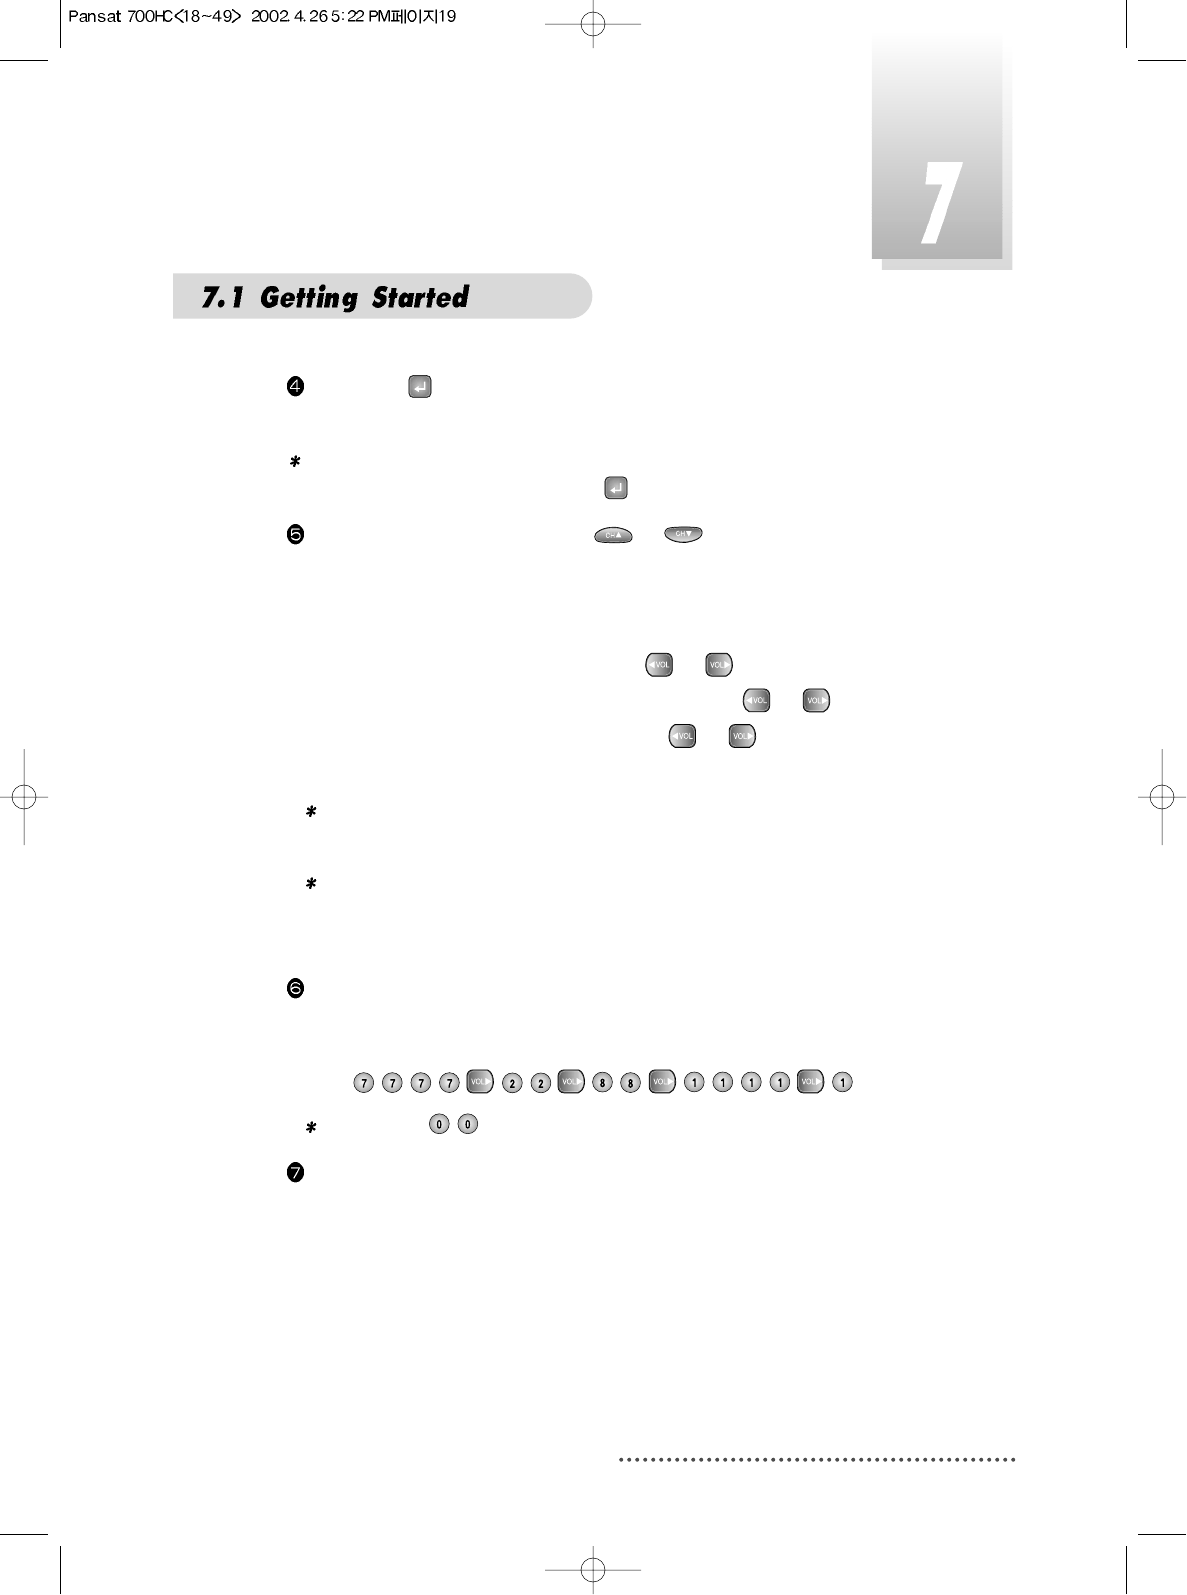
If you want to know how to use current part in the menu, use 'help' function.
Select a content in the menu.
For example, if you want to know about the installation menu, select installation.
Screen
Press INFO. Then you can see the help window of the selected content.
Screen
2
Help
Since your receiver has the basic data of most satellites and channels, you
can receive programs just by plugging in. But, according to the status of your
antenna setup, you may have to modify the basic data of satellites and / or
channels.
When you need to modify the data, proceed as follows ;
3
Satellite Setting
Main Menu
System Parameters
Installation
Language
Common Interface
English
-Next,
18
Position
High L.O.
Low L.O.
Power
0/22KHz
DiSEqC
LNB Configuration
AsiaSat 2
000.0
5,150 GHz
0 GHz
ON
0 KHz
----
-Page Up/Down, -Edit
G L
Amos
Thor
PAS 4
AsiaSat 2
USER1
USER2
USER3
USER4
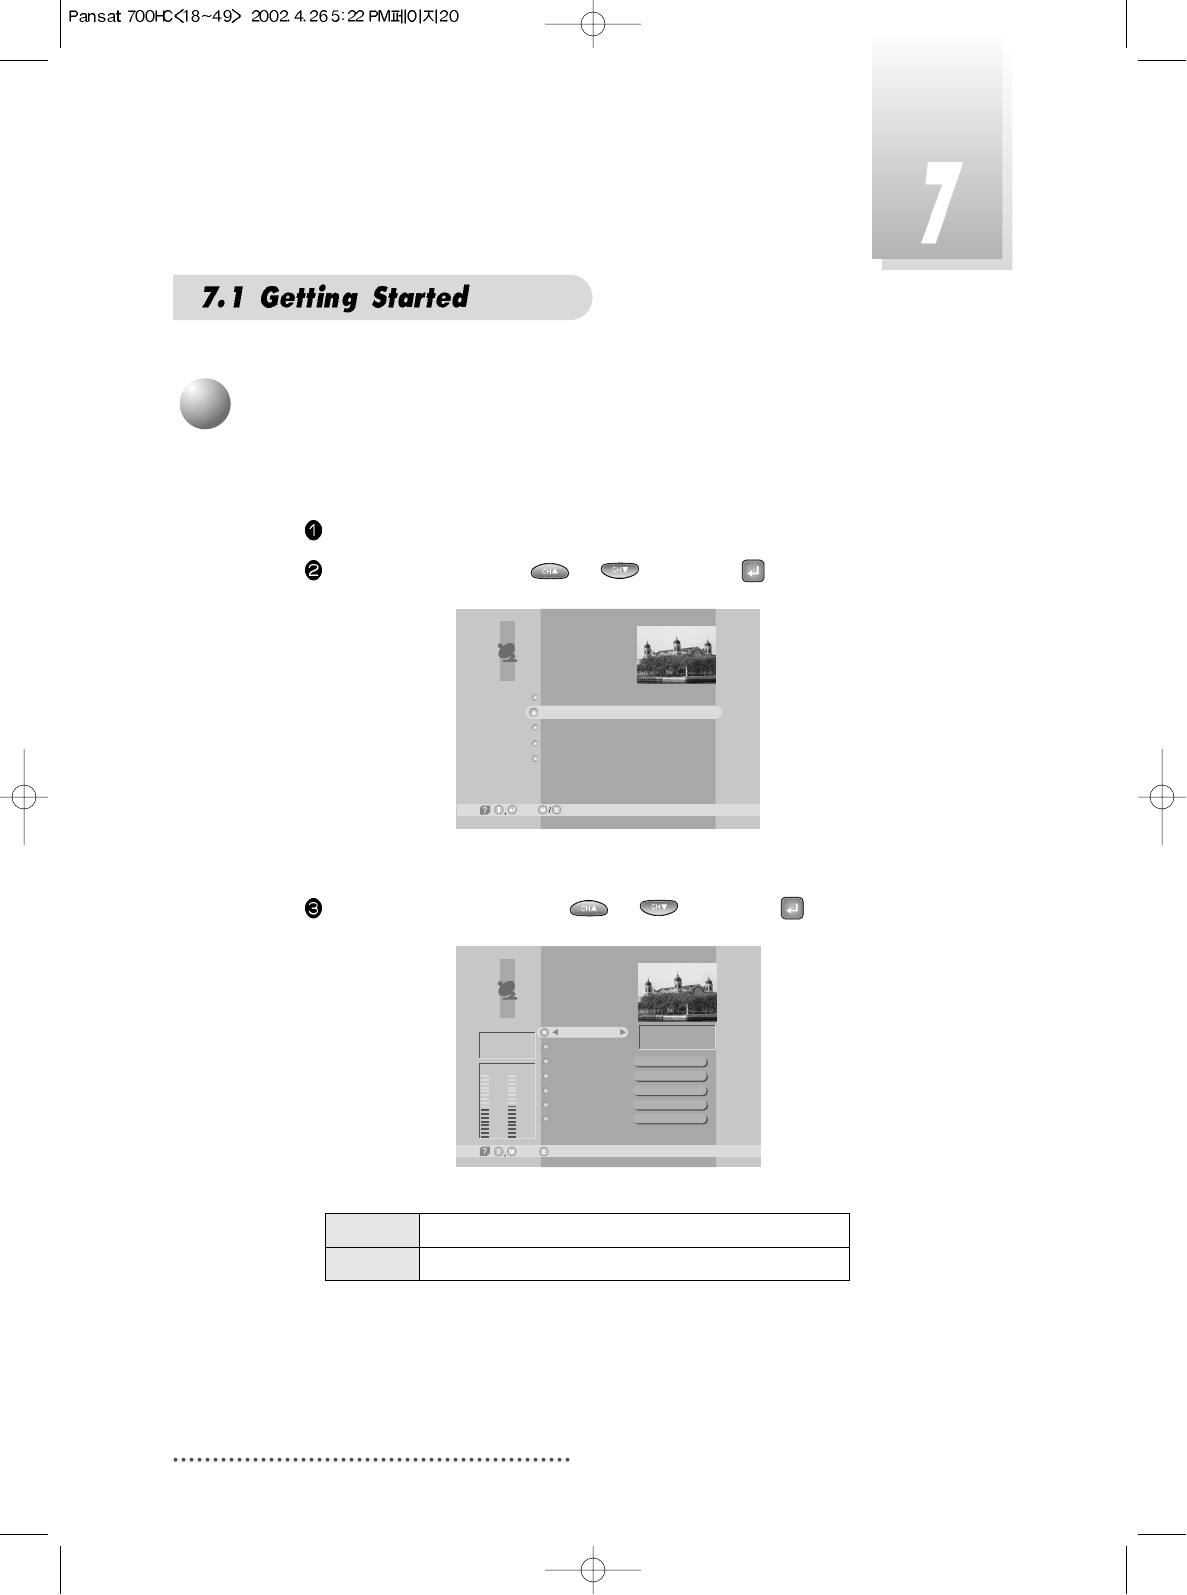
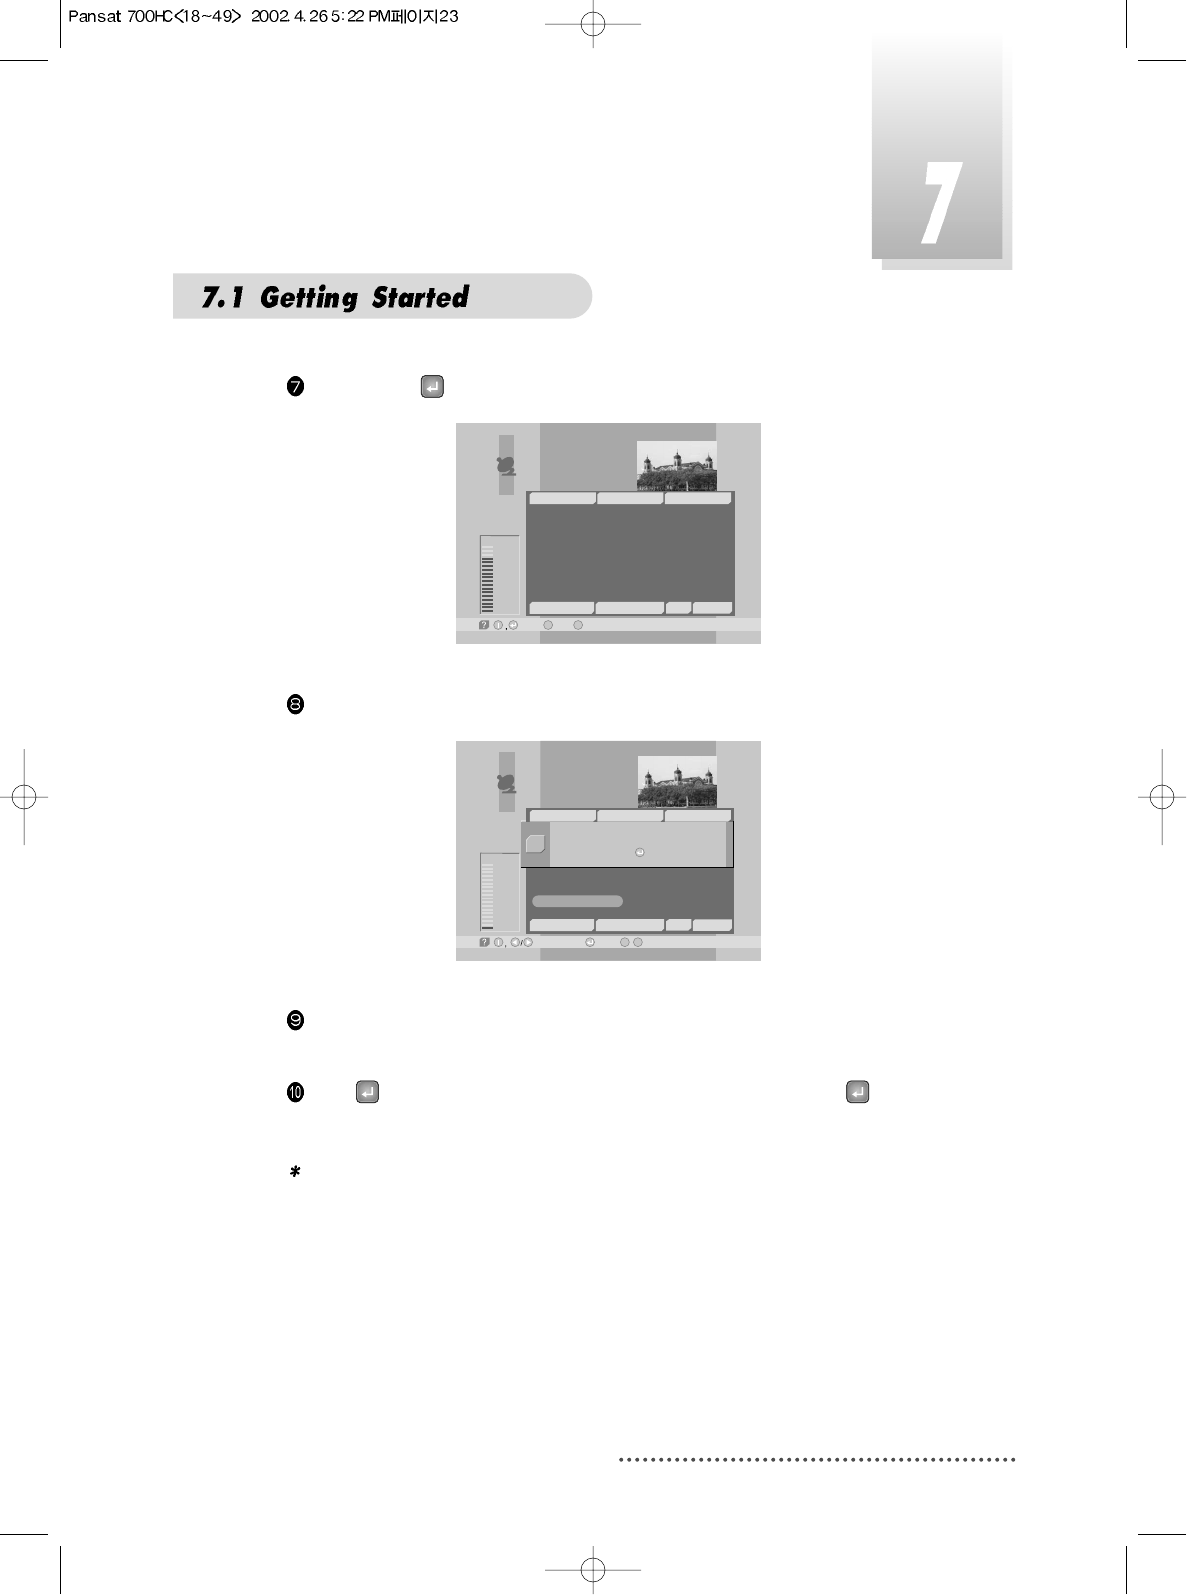
Press MENU key and position the cursor on Installation column with or
and press .
Screen
By using or , select ‘LNB Configuration’ and press .
Screen
Note : Enter 4-Digit password if need arise.
The default password is ‘0000’
Select the Satellite you want to add with or and press or .
Screen
Main Menu
System Parameters
Installation
Language
Common Interface
English
-Next,
LNB Configuration
Antenna Setup
Satellite Scan
TP Edit/Scan
Factory Set
Installation
-Next, -Prev.
19
If you press , the selected Satellite will be added and the cursor will
move to right window for detailed installation.
Note : If you just want to edit the data of the satellite which is already con-
tained in the receiver, press after you select the satellite.
Select item you want to edit with or and change each parame-
ter.
- Position : You can input the longitude of the satellite with numeric keys.
- High L.O. / Low L.O. : Enter LNB oscillator frequency with numeric keys.
- Power : Set LNB power ON or OFF with or .
- 0/22KHz : Set the path of 0/22KHz switch box with or .
- DiseqC : Set the path of DiSEqC box with or .
If you do not use the switch box, set as “---” .
Note : When you change each parameter, you need to know exact
parameter of LNB to modify L.O.(local oscillator) frequency.
Note : When you change each parameter, you need to understand envi-
ronment of connecting the receiver and antenna in order for you to
set 22KHz and DiSEqC properly.
When necessary, you can change a satellite name as you wish.
You can enter alphabetic characters with the numeric keys.
For example, if you want to enter 'SAT-1',
Press .
Note : Press for space.
After the installation procedure, press EXIT key or MENU key to store your
entered data.
20
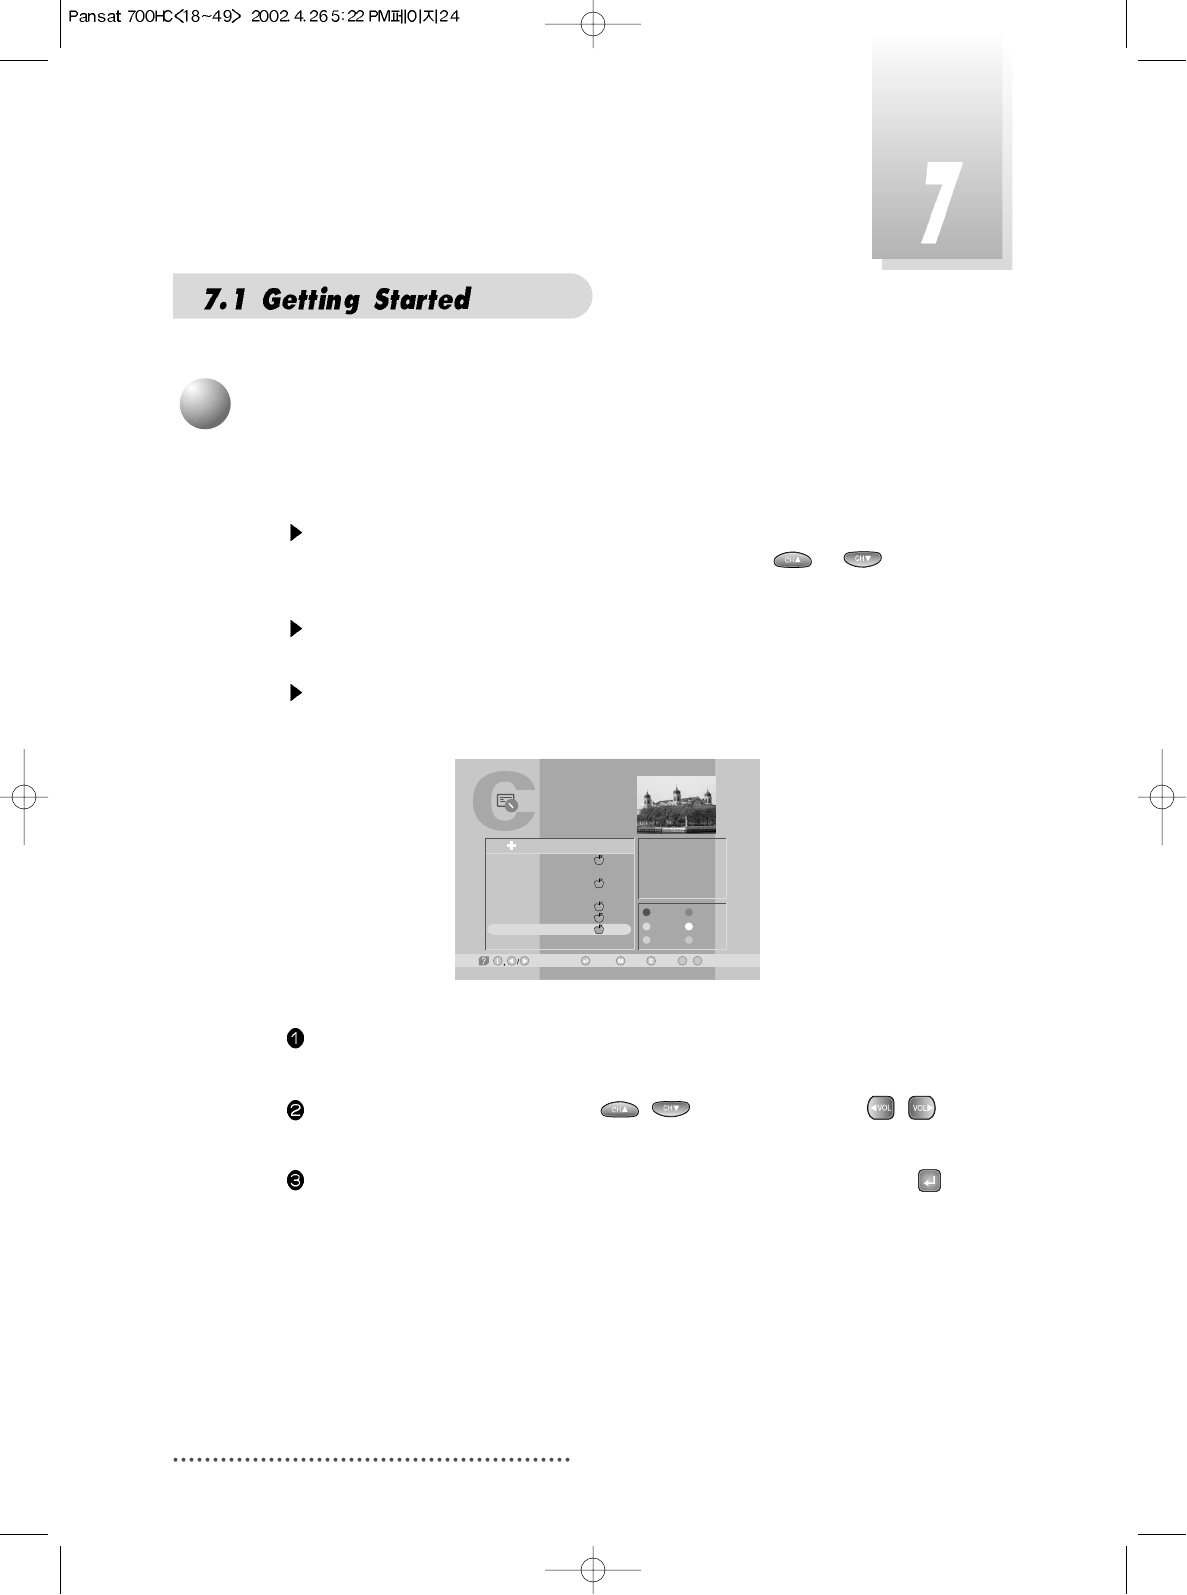
Select ‘Antenna Setup’ with or and press .
Screen
Antenna Setup
-Prev.-Main,
Motor / Goto 0
Move / Save
Set Limit
My longitudo
My latitudo
Off
Stop
Disable
000.0
00.0
O
O
O
ASIA3
[7] 3,710 GHz
Vertical - 14V
3,300 MSPS
Tuner Lock
FEC
Level
47% 51%
Qual.
3/4
Level Indicating selected satellite signal strength level
Quality Indicating signal to noise ratio
You need to position your antenna correctly for reception of the best signal.
Press MENU key.
Select ‘Installation’ with or , and press .
Screen
4
Antenna Setup
LNB Configuration
Antenna Setup
Satellite Scan
TP Edit/Scan
Factory Set
Installation
-Next, -Prev.
21
Select the satellite you want with or .
Press to move to TP section and select the TP you want with or
.
When the satellite and the TP are selected, you can check the reception
status of the satellite signal. If the reception signal status is bad, adjust
antenna to get the following result.
Tuner Lock
FEC 1/2, 2/3, 3/4, 5/6 or 7/8
Level over 30%
Quality over 10%
DiSEqC 1.2 Positioner Setting
- Motor/Goto 0
Determine the kind of Motor & whether or not controlling it by using
or .
If you press , DiSEqc Motor will move toward Zero Equator.
- Move/Save
Motor moves to West & East direction.
- Set Limit
Determine the value of Limit of Motor.
If you select , the value of Limit will be changed.
- My longitude/My latitude
You can use this item when STAB is setted on 'Motor/Goto 0'.
Determine your longitude & latitude at present.
'East/West' is changed by using or .
On Using DiSEqC Motor.
Off Not using DiSEqC Motor.
STAB
Using the specific Motor supplied by Stab company.
Determine the longitude of the satellite on LNB
Configuration Menu. If the longitude of the satellite
on LNB Configuration Menu is setted, user must input
the longitude about your position at present
22
After finishing ‘Antenna Setup’, execute a ‘Satellite Scan’.
Then you can get all channels in the pre-programmed TPs. This func-
tion can also be used to get the latest channel data while receiver is
in use. Through this function, the receiver searches for all the avail-
able channels and saves them in the memory.
Press MENU key.
Select ‘Installation’ with
or
, and press .
Select ‘Satellite Scan’ with
or
, and press .
Screen
Select ‘Scan Mode’ with
or
.
Select the scan mode you want with
or
.
Select the satellite name you want with
or
.
Screen
5
Satellite Scan
LNB Configuration
Antenna Setup
Satellite Scan
TP Edit/Scan
Factory Set
Installation
-Next, -Prev.
Satellite Scan
-Select, -Prev.-Main,
Free+Scrambled
AsiaSat 2
Scan Mode
Satellite Name
23
If you press
, the selected satellites will be scanned.
Screen
While scanning, you can see the following menu on the screen.
Screen
After the scanning process, the first channel of the last scanned TP will be
displayed on the back screen.
Press to finish the process. Then select a channel and press to
watch a program or press MENU key or EXIT key.
Note : Now you have completed all steps needed for watching programs.
If you could not see the program after finishing these procedures,
please contact your engineer or representative.
Satellite Scan
-Select, -Main,
M
-Prev.
E
Good
84%
TV: 2 Scanning:10% Radio: 0
33
34
35
36
37
38
39
17
18
19
20
21
22
SATLINK 972 2
APTN1 + 442074
NMTV
Guangdong 2
Hunan 2
Hubei 1
Hubei 2
DW 9
RDP ANTENA 1
RDP ESPECIAL
NN
¥xÆWaN¥
<<
TWN
¥@uØ1/2Auø USA
AsiaSat 2 [4] 3,720 GHz Hor. 4,420
~
~
Satellite Scan
-Watch, /
M
-Prev.
E
Bad
1%
-Page Up/Down,
TV: 39 Scanning:10% Radio: 22
17
18
19
20
21
22
DW 9
RDP ANTENA 1
RDP ESPECIAL
NN
¥xÆW
a
N¥
<<
TWN
¥@uØ1/2Auø USA
AsiaSat 2 [28] 3,960 GHz Hor. 30,000
~
~
33
34
35
36
37
38
39
SATLINK 972 2
APTN1 + 442074
NMTV
Guangdong 2
Hunan 2
Hubei 1
Hubei 2
Satellite scan is done.
Press Key.
Q
24
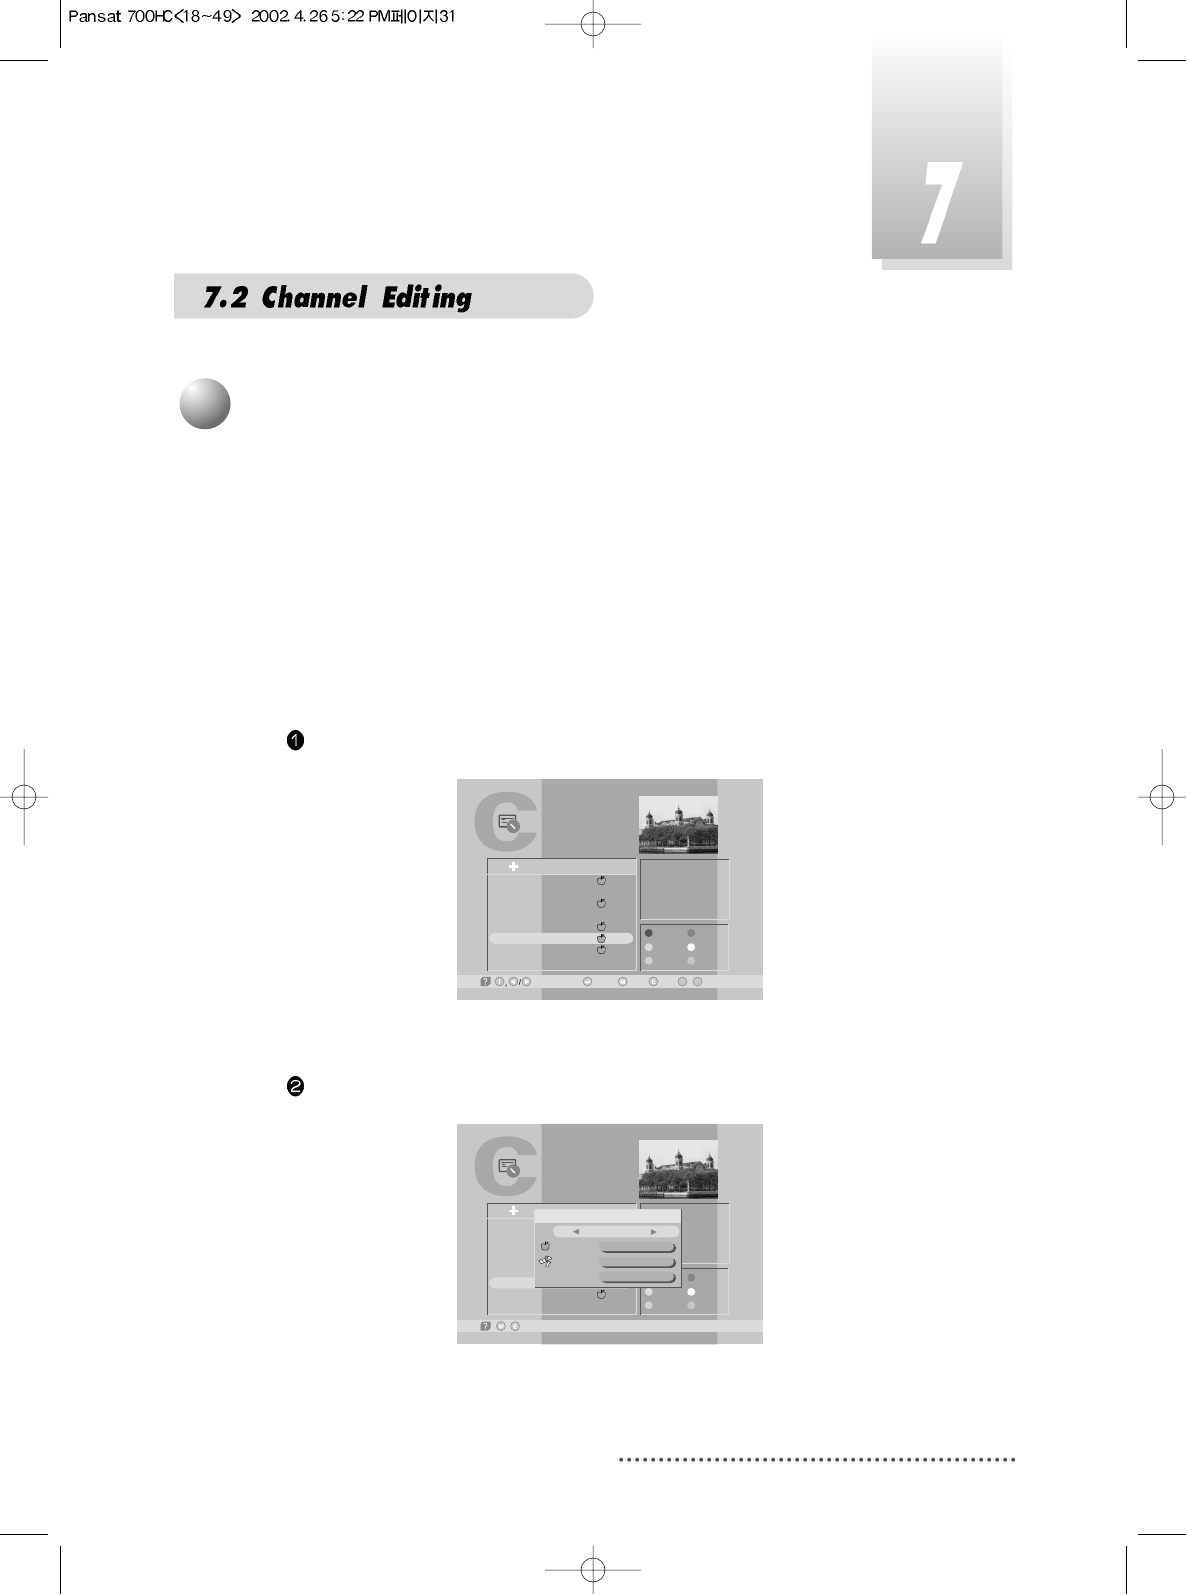
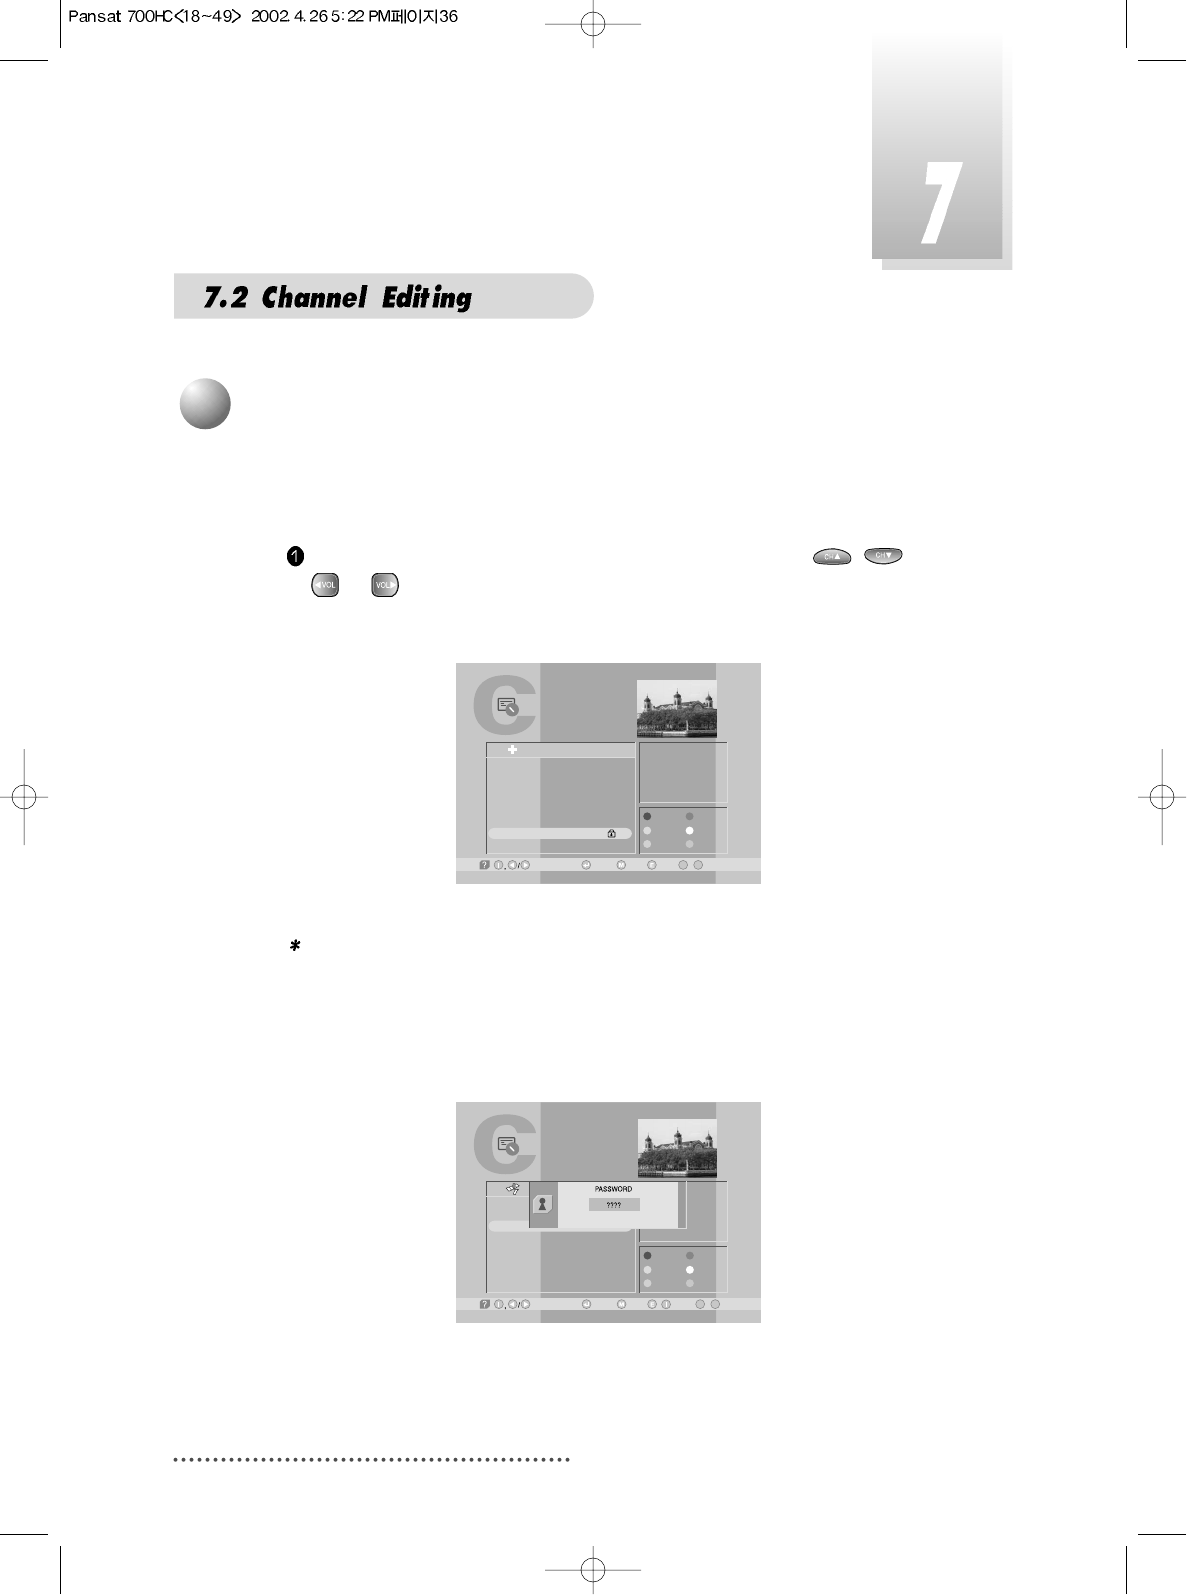
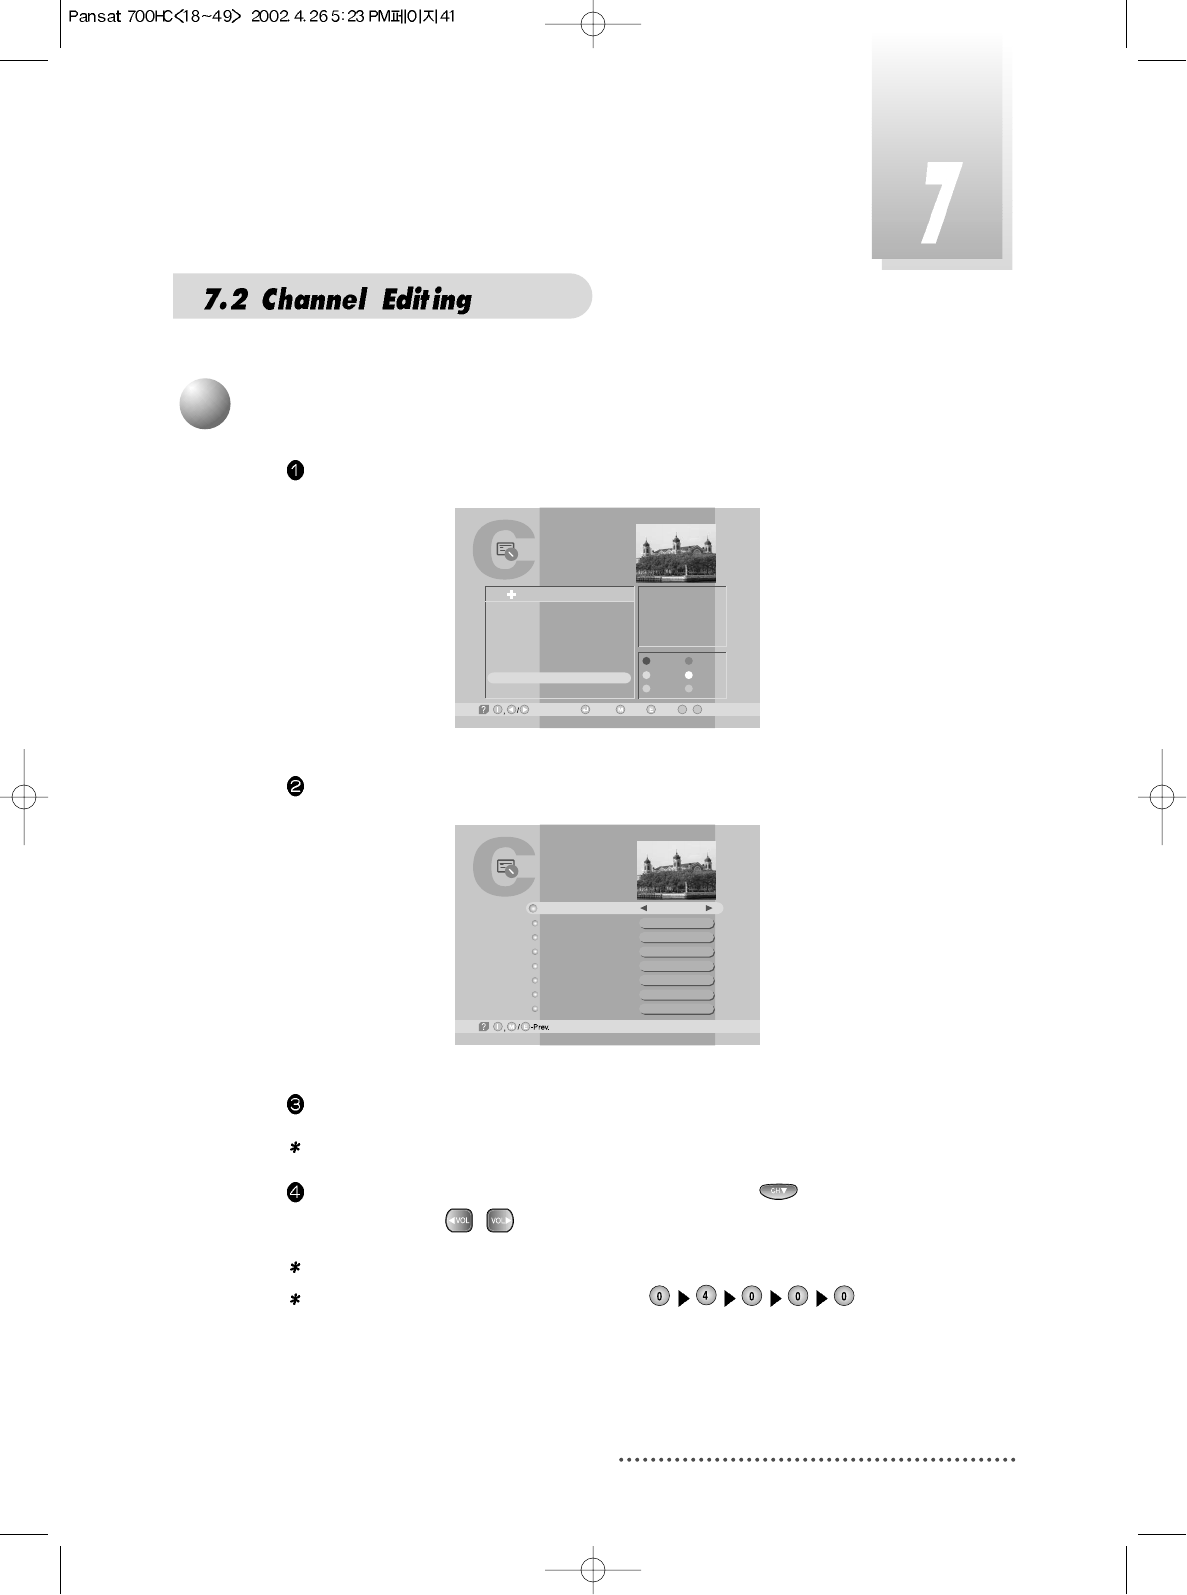
You can change the current channel to any other channel you want.
If you do not know the channel name, or you want to select a channel
at random, you can navigate between channels with or (CH.
Up/Down) till you find the channel you want.
If you know the channel number, enter the number and wait 5 seconds
for the channel to change.
If you know the channel name, press CH LIST key then channel list will
pop-up.
Screen
In the right section, detailed information of the selected channel will be
displayed.(Name of satellite, frequency, symbol rate, etc.)
Select the channel you want with / (scroll up/down) or /
(page up/down).
When the scroll bar is positioned on the channel you want to see, press .
TV Channel List
-Watch, -EXIT, ~ -Move
09
-Main,-Page Up/Down,
1
2
3
4
5
6
7
8
Fujian 1
DIGITL VID
ANHUI TV
NMCHTV
Guangdong 1
Hunan 1
DWtv
MCM
AsiaSat 2
[24] 4,000 GHz
Horizontal-18V
28,123 MSPS
Deutsche Well
FAV.
LOCK
MOVE
DEL
ADD
MODE
All List
6
Select Channel
25
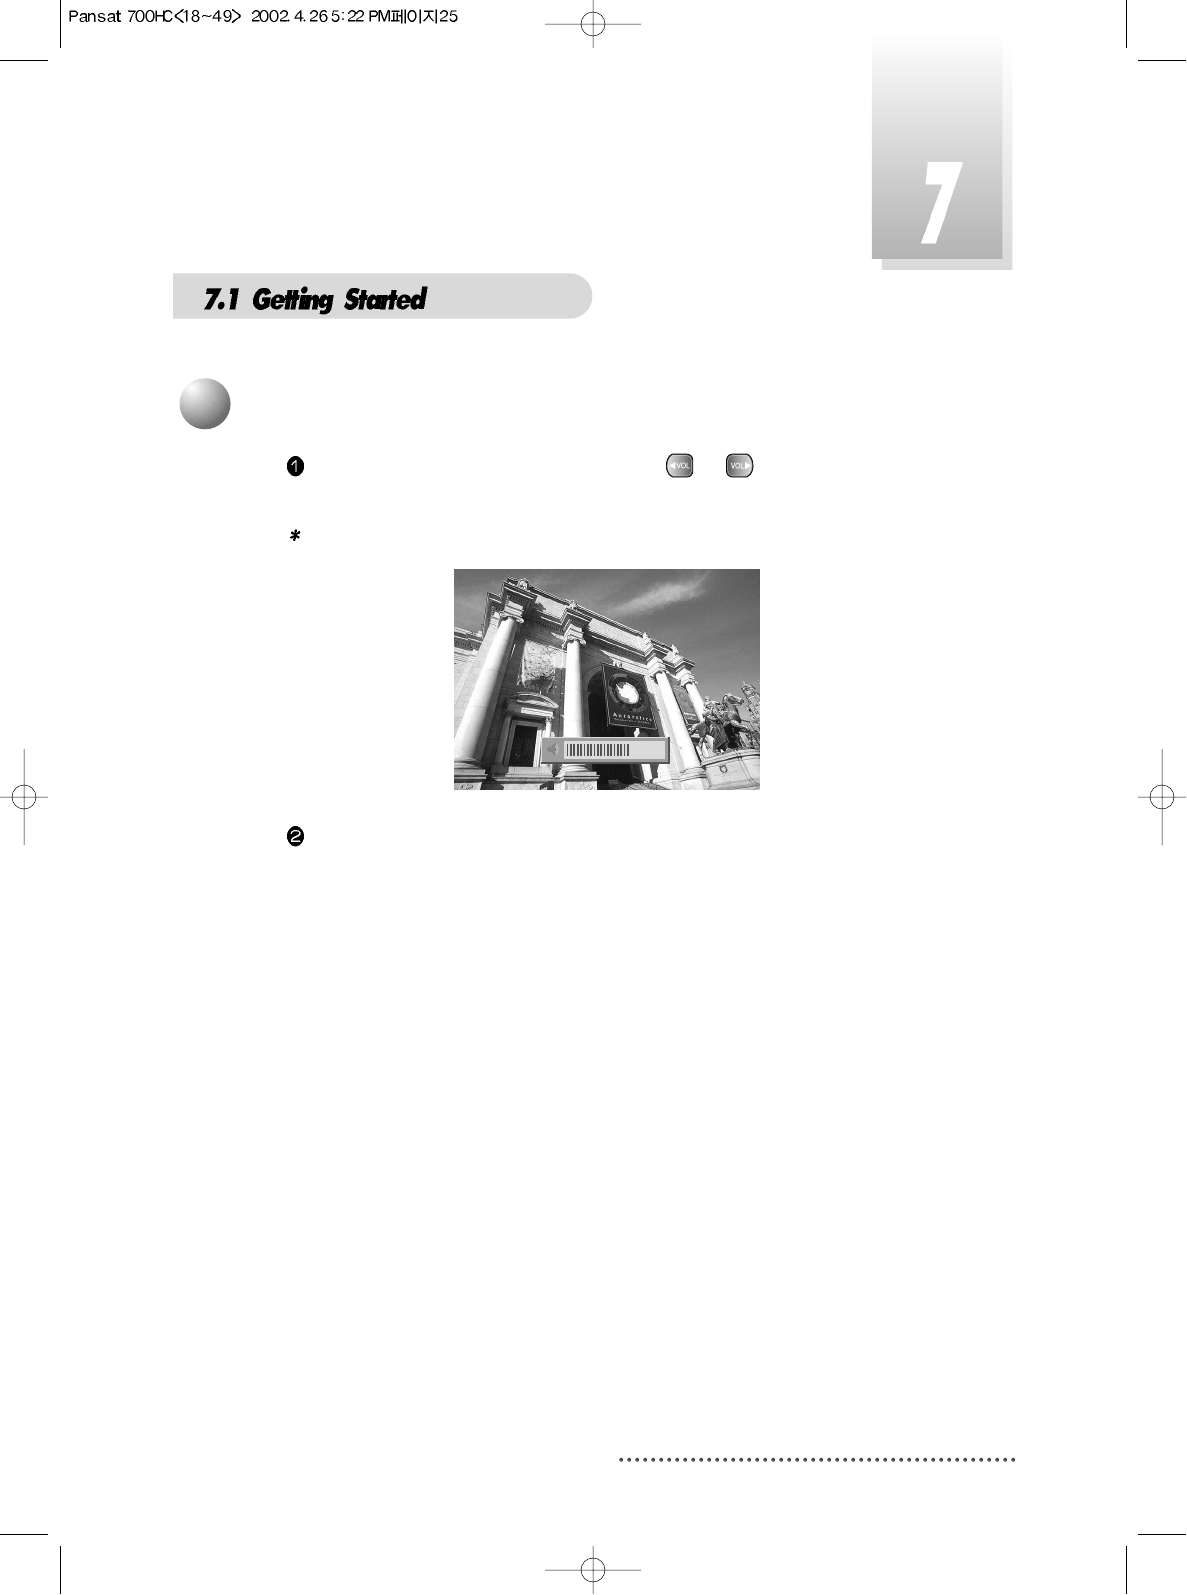
While you are watching a program, press or to control volume of
the current channel.
Note : You can configure volume of each channel differently.
Screen
When necessary, press MUTE key to remove the sound of the program tem-
porarily.
Then, your receiver goes into mute condition and the volume bar will
become red. Press MUTE key again to turn the sound on.
7
Volume Control

26
You can set up favorite channel lists as you want.
For example, if you want to set favorite channel lists as following.
Favorite1 : 7 DWtv, 6 Hunan1
Favorite2 : 1 Fujian1
Favorite3 : 3 ANHUI TV, 5 Guangdong1
Firstly, set favorite1 channels.
Press CH.LIST.
Select 'DWtv' channel with / or / .
Screen
Press RED.
Screen
TV Channel List
-Watch, -EXIT, ~ -Move
09
-Main,-Page Up/Down,
1
2
3
4
5
6
7
8
Fujian 1
DIGITL VID
ANHUI TV
NMCHTV
Guangdong 1
Hunan 1
DWtv
MCM
AsiaSat 2
[24] 4,000 GHz
Horizontal-18V
28,123 MSPS
Deutsche Well
FAV.
LOCK
MOVE
DEL
ADD
MODE
All List
TV Channel List
-Select, -Exit/
1
2
3
4
5
6
7
8
Fujian 1
DIGITL VID
ANHUI TV
NMCHTV
Guangdong 1
Hunan 1
DWtv
MCM
AsiaSat 2
[24] 4,000 GHz
Horizontal-18V
28,123 MSPS
Deutsche Well
FAV.
LOCK
MOVE
DEL
ADD
MODE
All List Favorite State
Favorite 1
Favorite 2
Favorite 3
Favorite 4
Favorite 5
1
Favorite Channel
27
Select favorite1 with / and Press .
Screen
Do the same for the 'Hunan 1' channel.
Screen
TV Channel List
-Select, -Exit/
1
2
3
4
5
6
7
8
Fujian 1
DIGITL VID
ANHUI TV
NMCHTV
Guangdong 1
Hunan 1
DWtv
MCM
AsiaSat 2
[24] 4,847 GHz
Horizontal-18V
28,123 MSPS
Dban
FAV.
LOCK
MOVE
DEL
ADD
MODE
All List Favorite State
Favorite 1
Favorite 2
Favorite 3
Favorite 4
Favorite 5
Rename.
TV Channel List
1
2
3
4
5
6
7
8
Fujian 1
DIGITL VID
ANHUI TV
NMCHTV
Guangdong 1
Hunan 1
DWtv
MCM
AsiaSat 2
[24] 4,000 GHz
Horizontal-18V
28,123 MSPS
Deutsche Well
FAV.
LOCK
MOVE
DEL
ADD
MODE
All List
-Watch, -Exit, ~ -Move
09
-Main,-Page Up/Down,
TV Channel List
1
2
3
4
5
6
7
8
Fujian 1
DIGITL VID
ANHUI TV
NMCHTV
Guangdong 1
Hunan 1
DWtv
MCM
AsiaSat 2
[20] 3,847 GHz
Horizontal-18V
4,420 MSPS
Hunan
FAV.
LOCK
MOVE
DEL
ADD
MODE
All List
-Watch, -Exit, ~ -Move
09
-Main,-Page Up/Down,
28
Press RED.
Screen
Press .
Screen
Favorite1 ~ Favorite5 are default name. Users can rename them for their
convenience. If you want to rename 'Favorite1' (for example 'Drama').
Press RED.
Screen
TV Channel List
-Select, -Exit/
1
2
3
4
5
6
7
8
Fujian 1
DIGITL VID
ANHUI TV
NMCHTV
Guangdong 1
Hunan 1
DWtv
MCM
AsiaSat 2
[24] 4,847 GHz
Horizontal-18V
28,123 MSPS
Dban
FAV.
LOCK
MOVE
DEL
ADD
MODE
All List Favorite State
Favorite 1
Favorite 2
Favorite 3
Favorite 4
Favorite 5
Rename.
TV Channel List
1
2
3
4
5
6
7
8
Fujian 1
DIGITL VID
ANHUI TV
NMCHTV
Guangdong 1
Hunan 1
DWtv
MCM
AsiaSat 2
[24] 4,000 GHz
Horizontal-18V
28,123 MSPS
Deutsche Well
FAV.
LOCK
MOVE
DEL
ADD
MODE
All List
-Watch, -Exit, ~ -Move
09
-Main,-Page Up/Down,
TV Channel List
-Select, -Exit/
1
2
3
4
5
6
7
8
Fujian 1
DIGITL VID
ANHUI TV
NMCHTV
Guangdong 1
Hunan 1
DWtv
MCM
AsiaSat 2
[24] 4,000 GHz
Horizontal-18V
28,123 MSPS
Deutsche Well
FAV.
LOCK
MOVE
DEL
ADD
MODE
All List Favorite State
Favorite 1
Favorite 2
Favorite 3
Favorite 4
Favorite 5
Rename.
29
Select ‘Favorite 1’ with / .
Screen
Press IVORY.
Scree
TV Channel List
-Select, -Exit/
1
2
3
4
5
6
7
8
Fujian 1
DIGITL VID
ANHUI TV
NMCHTV
Guangdong 1
Hunan 1
DWtv
MCM
AsiaSat 2
[24] 4,847 GHz
Horizontal-18V
28,123 MSPS
Dban
FAV.
LOCK
MOVE
DEL
ADD
MODE
All List Favorite State
Favorite 1
Favorite 2
Favorite 3
Favorite 4
Favorite 5
Rename.
TV Channel List
-Select, -Exit/
1
2
3
4
5
6
7
8
Fujian 1
DIGITL VID
ANHUI TV
NMCHTV
Guangdong 1
Hunan 1
DWtv
MCM
AsiaSat 2
[24] 4,830 GHz
Horizontal-18V
28,123 MSPS
HTV1
FAV.
LOCK
MOVE
DEL
ADD
MODE
All List Favorite State
Rename.
Favorite 1
Favorite 2
Favorite 3
Favorite 4
Favorite 5
TV/SAT LED
Power ON Power OFF
ON TV ANT IN signal will be out.
OFF Decoded signal will be out TV ANT IN signal will be out.
through RF.
30
Screen
Press MENU, EXIT or to finish the process.
You have finished favorite1 channel setting.
With similar way, you can set favorite2 ~ favorite5 channel list.
You can use these favorite channel lists by using ORANGE key.
Refer to the next section for detail.
TV Channel List
-Select, -Exit//
1
2
3
4
5
6
7
8
Fujian 1
DIGITL VID
ANHUI TV
NMCHTV
Guangdong 1
Hunan 1
DWtv
MCM
AsiaSat 2
[24] 4,000 GHz
Horizontal-18V
28,123 MSPS
he Well
FAV.
LOCK
MOVE
DEL
ADD
MODE
All List Favorite State
Rename.
DRAMA
Favorite 2
Favorite 3
Favorite 4
Favorite 5
31
Using this function, you can see variant channel lists which may enable you to
edit and select channels more conveniently.
If you have set up favorite channel lists as the previous section, you can use
them as following.
Press CH.LIST.
Screen
Press ORANGE.
Screen
TV Channel List
-Watch, -Exit, ~ -Move
09
-Main,-Page Up/Down,
1
2
3
4
5
6
7
8
Fujian 1
DIGITL VID
ANHUI TV
NMCHTV
Guangdong 1
Hunan 1
DWtv
MCM
AsiaSat 2
[20] 3,847 GHz
Horizontal-18V
4,420 MSPS
Hunan
FAV.
LOCK
MOVE
DEL
ADD
MODE
All List
TV Channel List
-Exit/
1
2
3
4
5
6
7
8
Fujian 1
DIGITL VID
ANHUI TV
NMCHTV
Guangdong 1
Hunan 1
DWtv
MCM
AsiaSat 2
[20] 3,847 GHz
Horizontal-18V
4,420 MSPS
Hunan
FAV.
LOCK
MOVE
DEL
ADD
MODE
All List
A
B
Channel List Mode
Favorite
Satellite
Alphabet
Favorite 1
AsiaSat 2
A
Free+Scrambled
2
Channel List Mode
Favorite Mode

32
You can see 'Channel List Mode' window. Select 'Favorite' with /
and select 'Favorite1' with or .
Screen
Press .
Screen
You can see only favorite1 channels are listed. With similar way, you can see
favorite2 ~ favorite5 channel list.
If you want to return to all channel list (all channels of the selected satellite),
press ORANGE and select 'Satellite' with / and press .
Screen
TV Channel List
-Watch, -Exit, ~ -Move
09
-Main,-Page Up/Down,
AsiaSat 2
[20] 3,847 GHz
Horizontal-18V
4,420 MSPS
Hunan
FAV.
LOCK
MOVE
DEL
ADD
MODE
6
7
Hunan 1
DWtv
Favorite 1
1
TV Channel List
-Exit/
AsiaSat 2
[24] 4,000 GHz
Horizontal-18V
28,123 MSPS
Deutsche Well
FAV.
LOCK
MOVE
DEL
ADD
MODE
2
7
DIGITL VID
DWtv
D
A
B
A
B
Channel List Mode
Favorite
Satellite
Alphabet
Favorite 1
AsiaSat 2
D
Free+Scrambled
TV Channel List
-Exit/
1
2
3
4
5
6
7
8
Fujian 1
DIGITL VID
ANHUI TV
NMCHTV
Guangdong 1
Hunan 1
DWtv
MCM
AsiaSat 2
[20] 3,847 GHz
Horizontal-18V
4,420 MSPS
Hunan
FAV.
LOCK
MOVE
DEL
ADD
MODE
All List
A
B
Channel List Mode
Favorite
Satellite
Alphabet
Favorite 1
AsiaSat 2
A
Free+Scrambled
33
Using this function, you can see the channel list which have same initial. This function is
useful when you search specific channel among the list of thousands channels.
For example, if you want to see the channel lists which start with 'D'.
Press ORANGE in the channel list and select 'Alphabet' with / .
Screen
Select 'D' with / .
Screen
TV Channel List
-Exit/
1
2
3
4
5
6
7
8
Fujian 1
DIGITL VID
ANHUI TV
NMCHTV
Guangdong 1
Hunan 1
DWtv
MCM
AsiaSat 2
[20] 3,000 GHz
Horizontal-18V
4,420 MSPS
Hunan
FAV.
LOCK
MOVE
DEL
ADD
MODE
All List
A
B
Channel List Mode
Favorite
Satellite
Alphabet
Favorite 1
AsiaSat 2
A
Free+Scrambled
TV Channel List
-Exit/
1
2
3
4
5
6
7
8
Fujian 1
DIGITL VID
ANHUI TV
NMCHTV
Guangdong 1
Hunan 1
DWtv
MCM
AsiaSat 2
[20] 3,000 GHz
Horizontal-18V
4,420 MSPS
Deutsche Well
FAV.
LOCK
MOVE
DEL
ADD
MODE
All List
A
B
Channel List Mode
Favorite
Satellite
Alphabet
Favorite 1
AsiaSat 2
D
Free+Scrambled
Alphabet Mode
Press .
Screen
You can see the channel list where all channels have initial 'D'.
TV Channel List
-Watch, -Exit, ~ -Move
09
-Main,-Page Up/Down,
AsiaSat 2
[24] 4,000 GHz
Horizontal-18V
28,123 MSPS
Deutsche Well
FAV.
LOCK
MOVE
DEL
ADD
MODE
2
7
DIGITL VID
DWtv
D
A
B
34
Press ORANGE in the channel list and select first line with / .
Select 'Free only' with / .
Screen
Select 'Favorite' or 'Satellite' or 'Alphabet' and press . You can see only
the selected 'free' channel list.
TV Channel List
-Exit/
1
2
3
4
5
6
7
8
Fujian 1
DIGITL VID
ANHUI TV
NMCHTV
Guangdong 1
Hunan 1
DWtv
MCM
AsiaSat 2
[20] 3,000 GHz
Horizontal-18V
4,420 MSPS
Hunan
FAV.
LOCK
MOVE
DEL
ADD
MODE
All List
A
B
Channel List Mode
Favorite
Satellite
Alphabet
Favorite 1
AsiaSat 2
A
Free+Scrambled
Free only Mode
Press ORANGE in the channel list and select first line with / .
Select 'Free+ Scrambled' with / .
Screen
TV Channel List
-Exit/
1
2
3
4
5
6
7
8
Fujian 1
DIGITL VID
ANHUI TV
NMCHTV
Guangdong 1
Hunan 1
DWtv
MCM
AsiaSat 2
[20] 3,20 GHz
Horizontal-18V
4,420 MSPS
Dian
FAV.
LOCK
MOVE
DEL
ADD
MODE
All List
A
B
Channel List Mode
Favorite
Satellite
Alphabet
DRAMA
AsiaSat 2
A
Free+Scrambled
Free + Scrambled Mode
35
By using this function, you can see all channel list of the selected satellite.
Press ORANGE and select ‘Satellite’ item with / .
Screen
Press / to select a satellite and press .
TV Channel List
-Exit/
AsiaSat 2
[24] 4,000 GHz
Horizontal-18V
28,123 MSPS
Deutsche Well
FAV.
LOCK
MOVE
DEL
ADD
MODE
2
7
DIGITL VID
DWtv
D
A
B
A
B
Channel List Mode
Favorite
Satellite
Alphabet
Favorite 1
AsiaSat 2
D
Free+Scrambled
Satellite Mode
Select 'Favorite' or 'Satellite' or 'Alphabet' and press . You can see the
selected free and scrambled channel list.
Screen
Note : 'Scrambled' channel can be shown only with CI (Common Interface)
model and CAS (Conditional Access System) model.
'Free' channel can be shown with all (FTA(Free To Air) and CI and
CAS) model.
TV Channel List
-Watch, -Exit, ~ -Move
09
-Main,-Page Up/Down,
1
2
3
4
5
6
7
8
Fujian 1
DIGITL VID
ANHUI TV
NMCHTV
Guangdong 1
Hunan 1
DWtv
MCM
AsiaSat 2
[24] 4,000 GHz
Horizontal-18V
28,123 MSPS
Deutsche Well
FAV.
LOCK
MOVE
DEL
ADD
MODE
All List
36
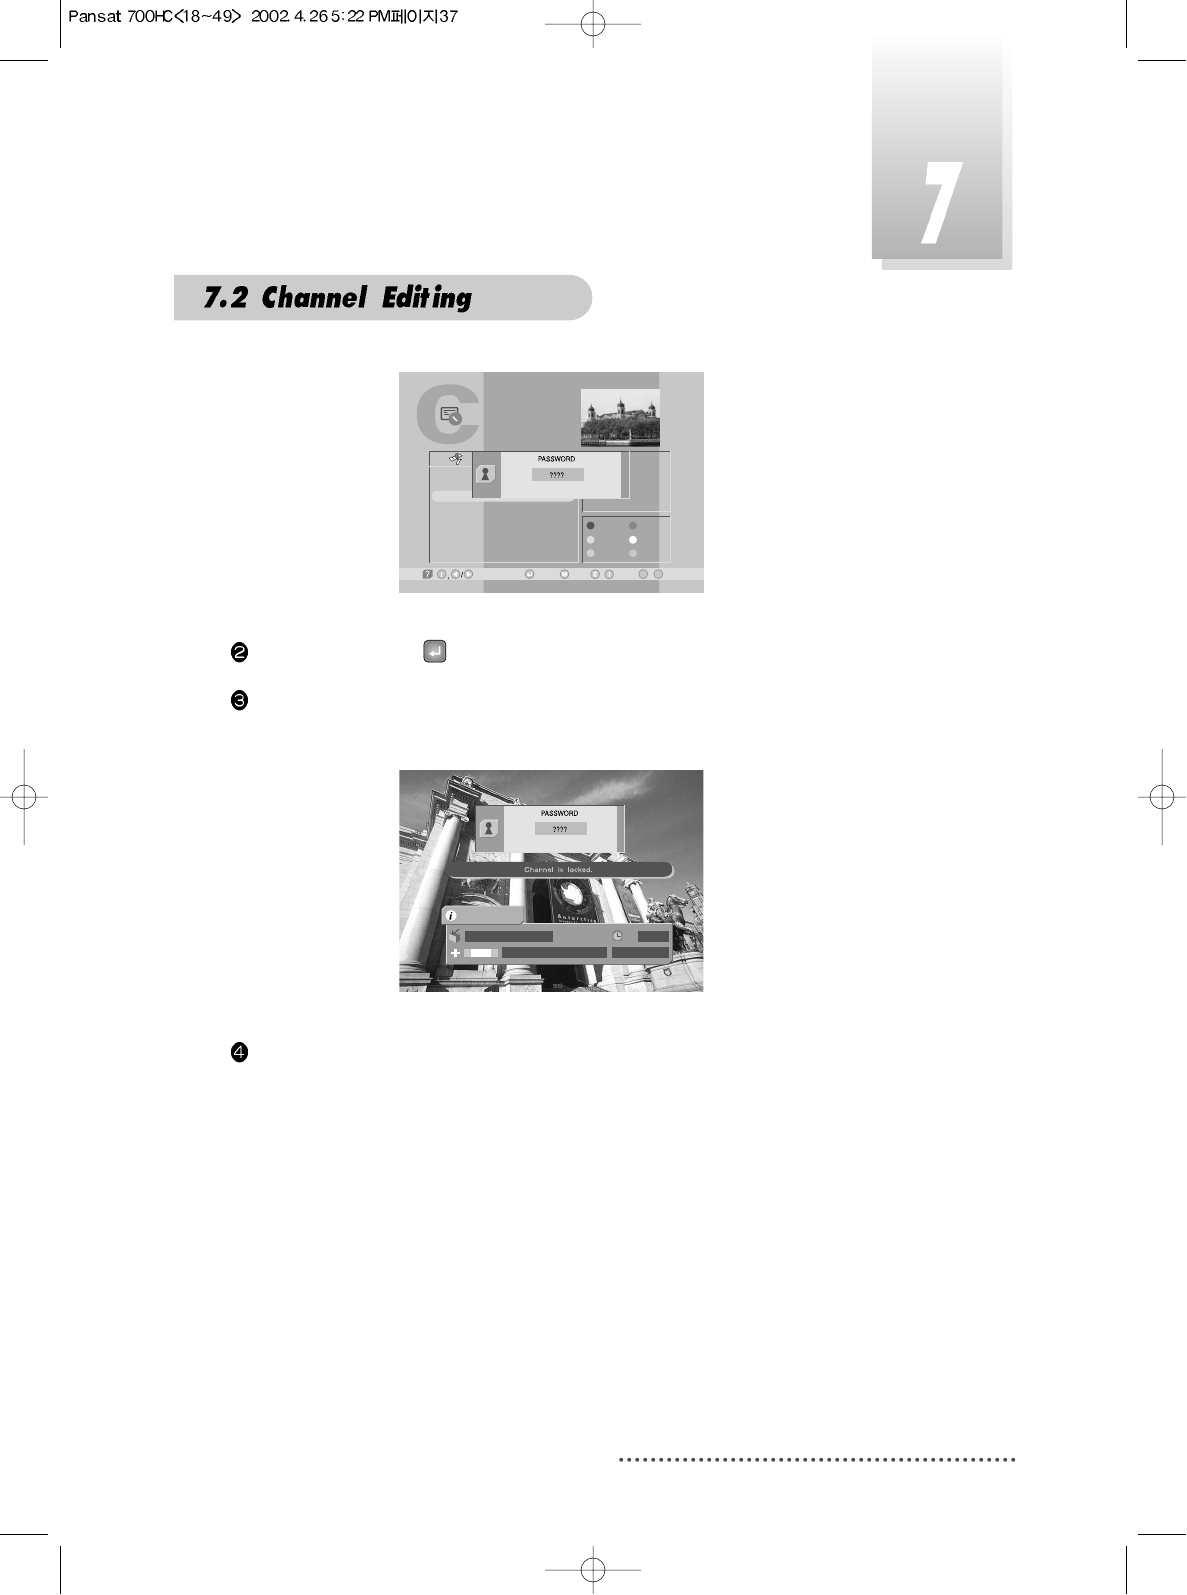
This menu enables you to prevent children from viewing programs unsuitable
for their age.
Press CH.LIST and Select the channel you want to lock with / or
or and press GREEN.
Then the selected channel is locked.
Screen
Note : If ‘password' window is risen as following picture, enter password with
numeric keys (default password is' 0000'). Then you can lock the
channel. If you don't want this window, change ‘Parental Control' set
up in the ‘System Parameters' menu. Refer to the ‘Parental control' in
‘System parameters' in this manual for detail.
Screen
3
Lock Channel
TV Channel List
-Watch, / -EXIT, ~ -Move
09
-Main,-Page Up/Down,
1
2
3
4
5
6
7
8
Fujian 1
NMCHTV
RAI
Guangdong 1
Hunan 1
MCM
DWtv
TVE
AsiaSat 2
[24] 4,000 GHz
Horizontal-18V
28,123 MSPS
Deutsche Well
FAV.
LOCK
MOVE
DEL
ADD
MODE
All List
TV Channel List
-Watch, -EXIT, ~ -Move
09
-Main,-Page Up/Down,
1
2
3
4
5
6
7
8
Fujian 1
DIGITL VID
ANHUI TV
NMCHTV
Guangdong 1
Hunan 1
DWtv
MCM
AsiaSat 2
[24] 4,000 GHz
Horizontal-18V
28,123 MSPS
Deutsche Well
FAV.
LOCK
MOVE
DEL
ADD
MODE
All List
37
Screen
Press MENU,EXIT or to finish the process.
Without entering your password, you cannot watch a locked channel's pro-
gram.
Screen
If you want to cancel the channel lock, go to the channel list and select the
channel and press GREEN.
TV Channel List
-Watch, / -EXIT, ~ -Move
09
-Main,-Page Up/Down,
1
2
3
4
5
6
7
8
Fujian 1
NMCHTV
RAI
Guangdong 1
Hunan 1
MCM
DWtv
TVE
AsiaSat 2
[24] 4,000 GHz
Horizontal-18V
28,123 MSPS
Deutsche Well
FAV.
LOCK
MOVE
DEL
ADD
MODE
All List
<< Authorized! >>
7 DWtv 14:14
13:56 ~ 14:26In Focus
(((
(((
1/?
AsiaSat 2
38
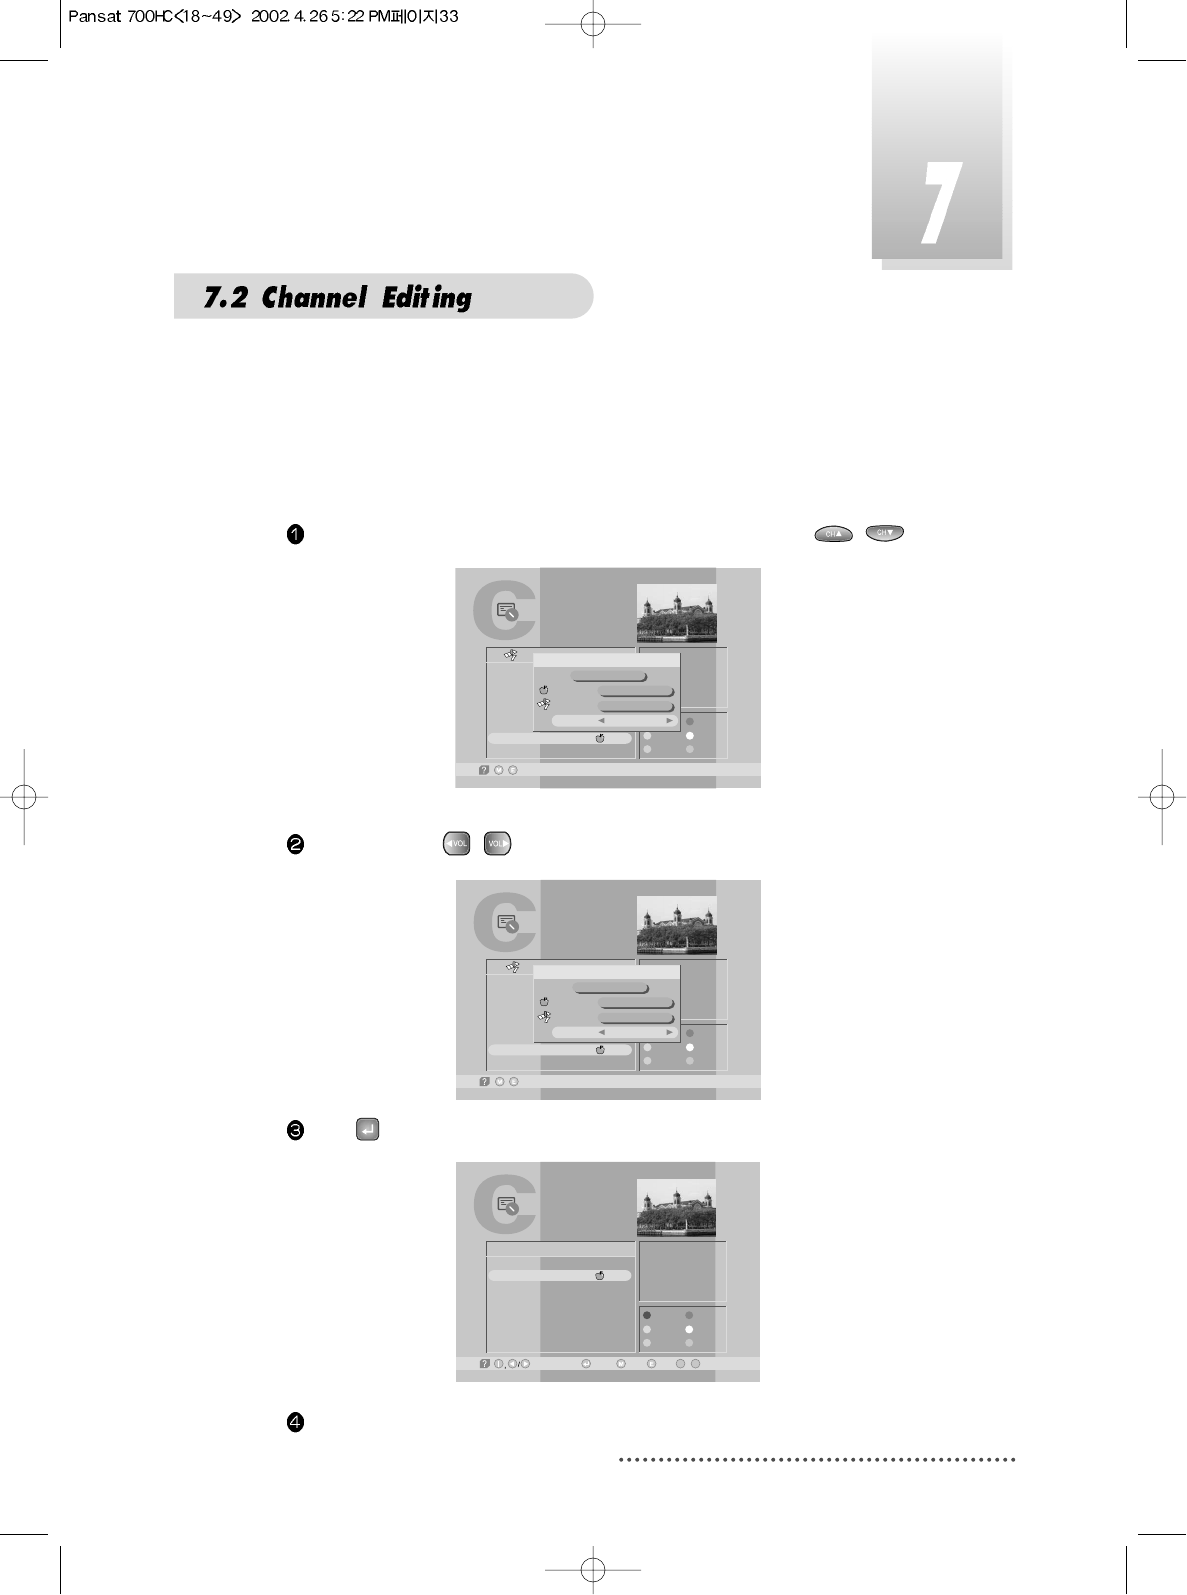
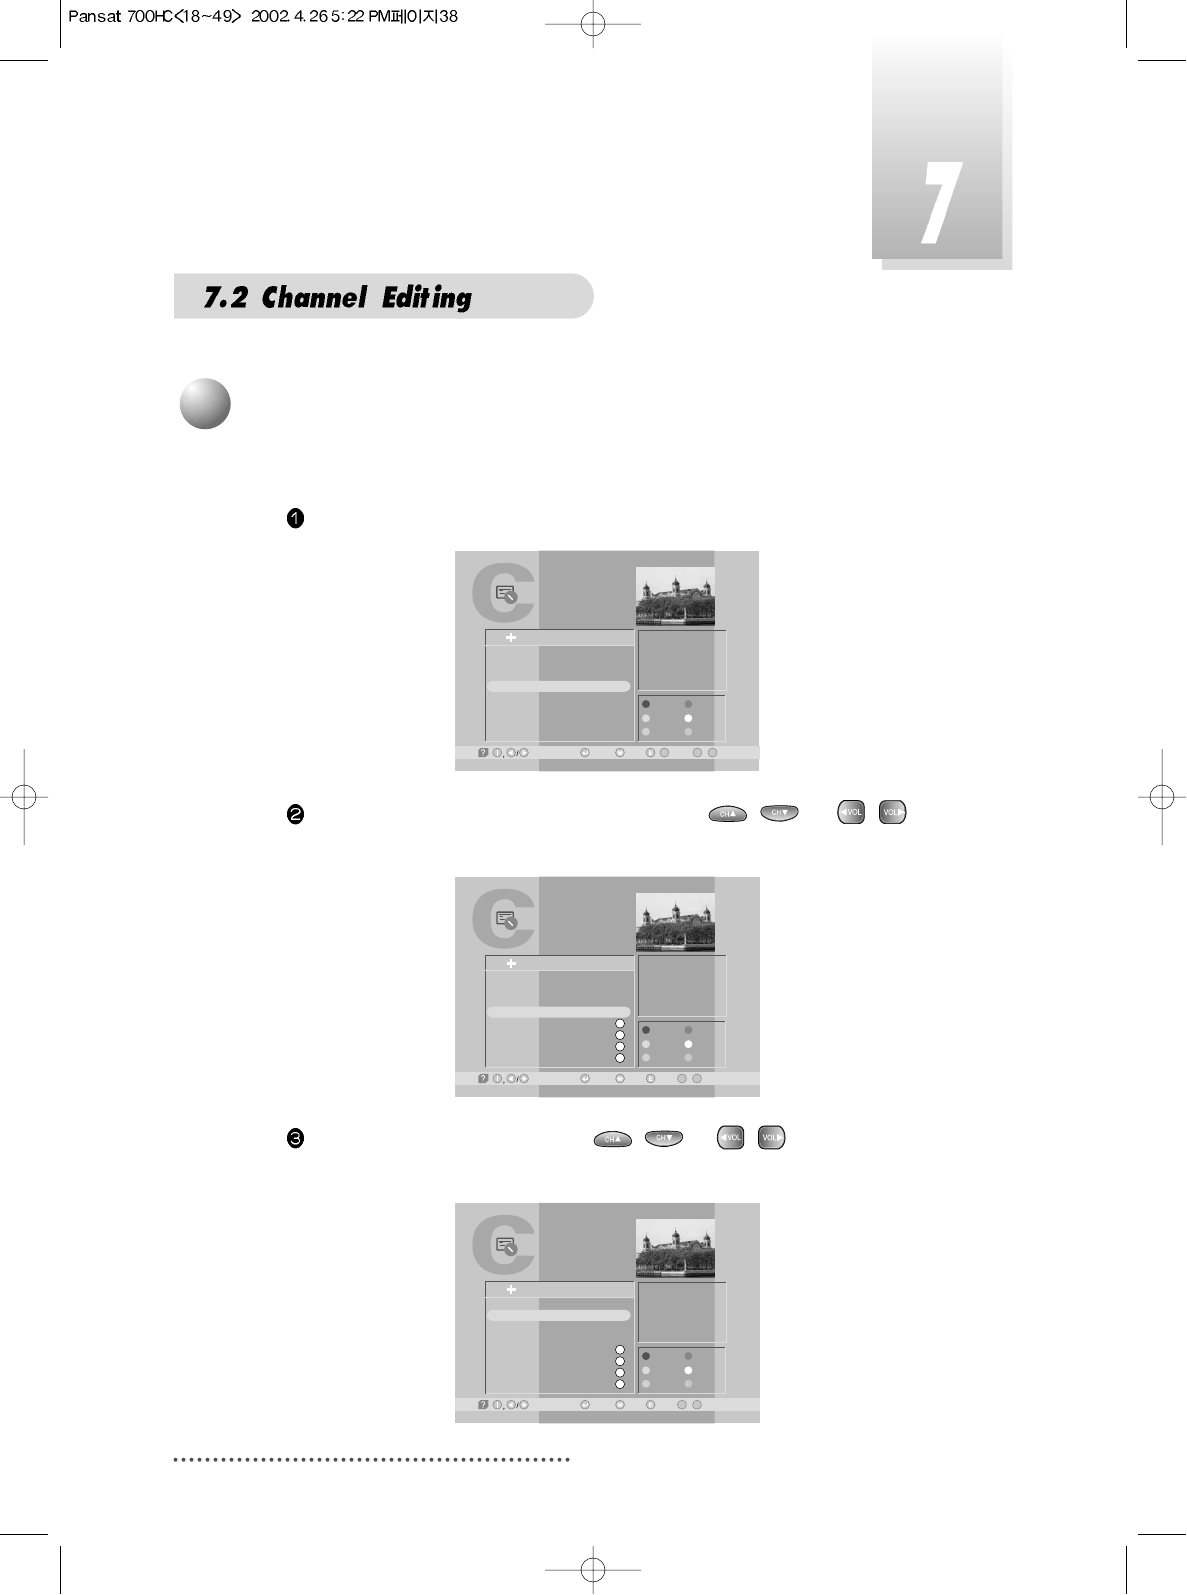
You can organize the number or sequence of the channels.
Press CH.LIST.
Screen
Select the channel you want to move with / or / and
press YELLOW.
Screen
Move the selected channel with / or / to the position you
want.
Screen
TV Channel List
-Watch, / -EXIT, ~ -Move
0
L
9
-Main,-Page Up/Down,
17
18
19
20
21
22
23
24
Jiangxi 1
Jiangxi 2
LNTV
WNS MEA LON
SATLINK 972 2
APTN1 +442074
NMTV
Guangdong 1
AsiaSat 2
[9] 3,773 GHz
Horizontal-18V
5,632 MSPS
Reuters Londo
FAV.
LOCK
MOVE
DEL
ADD
MODE
All List
TV Channel List
-Watch, -EXIT, ~ -Move
09
-Main,-Page Up/Down,
9
10
11
12
13
14
15
16
RAI Internati
TVE
TV5-Asia
RTPi
uØoH-u1/4Ö¥x CS
ªFËê>>Ú¥x ET
«DoZ¥x USTV-I
oé¥>>¥x JET
AsiaSat 2
[24] 4,000 GHz
Horizontal-18V
28,123 MSPS
Deutsche Well
FAV.
LOCK
MOVE
DEL
ADD
MODE
All List
S
S
S
S
TV Channel List
-Watch, -EXIT, ~ -Move
09
-Main,-Page Up/Down,
9
12
11
12
13
14
15
16
RAI Internati
RTPi
TV5-Asia
RTPi
uØoH-u1/4Ö¥x CS
ªFËê>>Ú¥x ET
«DoZ¥x USTV-I
oé¥>>¥x JET
AsiaSat 2
[24] 4,000 GHz
Horizontal-18V
28,123 MSPS
Deutsche Well
FAV.
LOCK
MOVE
DEL
ADD
MODE
All List
S
S
S
S
4
Channel Order Setting

39
Press YELLOW.
Screen
Press MENU,EXIT or to finish the process.
TV Channel List
-Watch, -EXIT, ~ -Move
09
-Main,-Page Up/Down,
9
10
11
12
13
14
15
16
RAI Internati
RTPi
TVE
TV5-Asia
uØoH-u1/4Ö¥x CS
ªFËê>>Ú¥x ET
«DoZ¥x USTV-I
oé¥>>¥x JET
AsiaSat 2
[24] 4,000 GHz
Horizontal-18V
28,123 MSPS
Deutsche Well
FAV.
LOCK
MOVE
DEL
ADD
MODE
All List
S
S
S
S
5
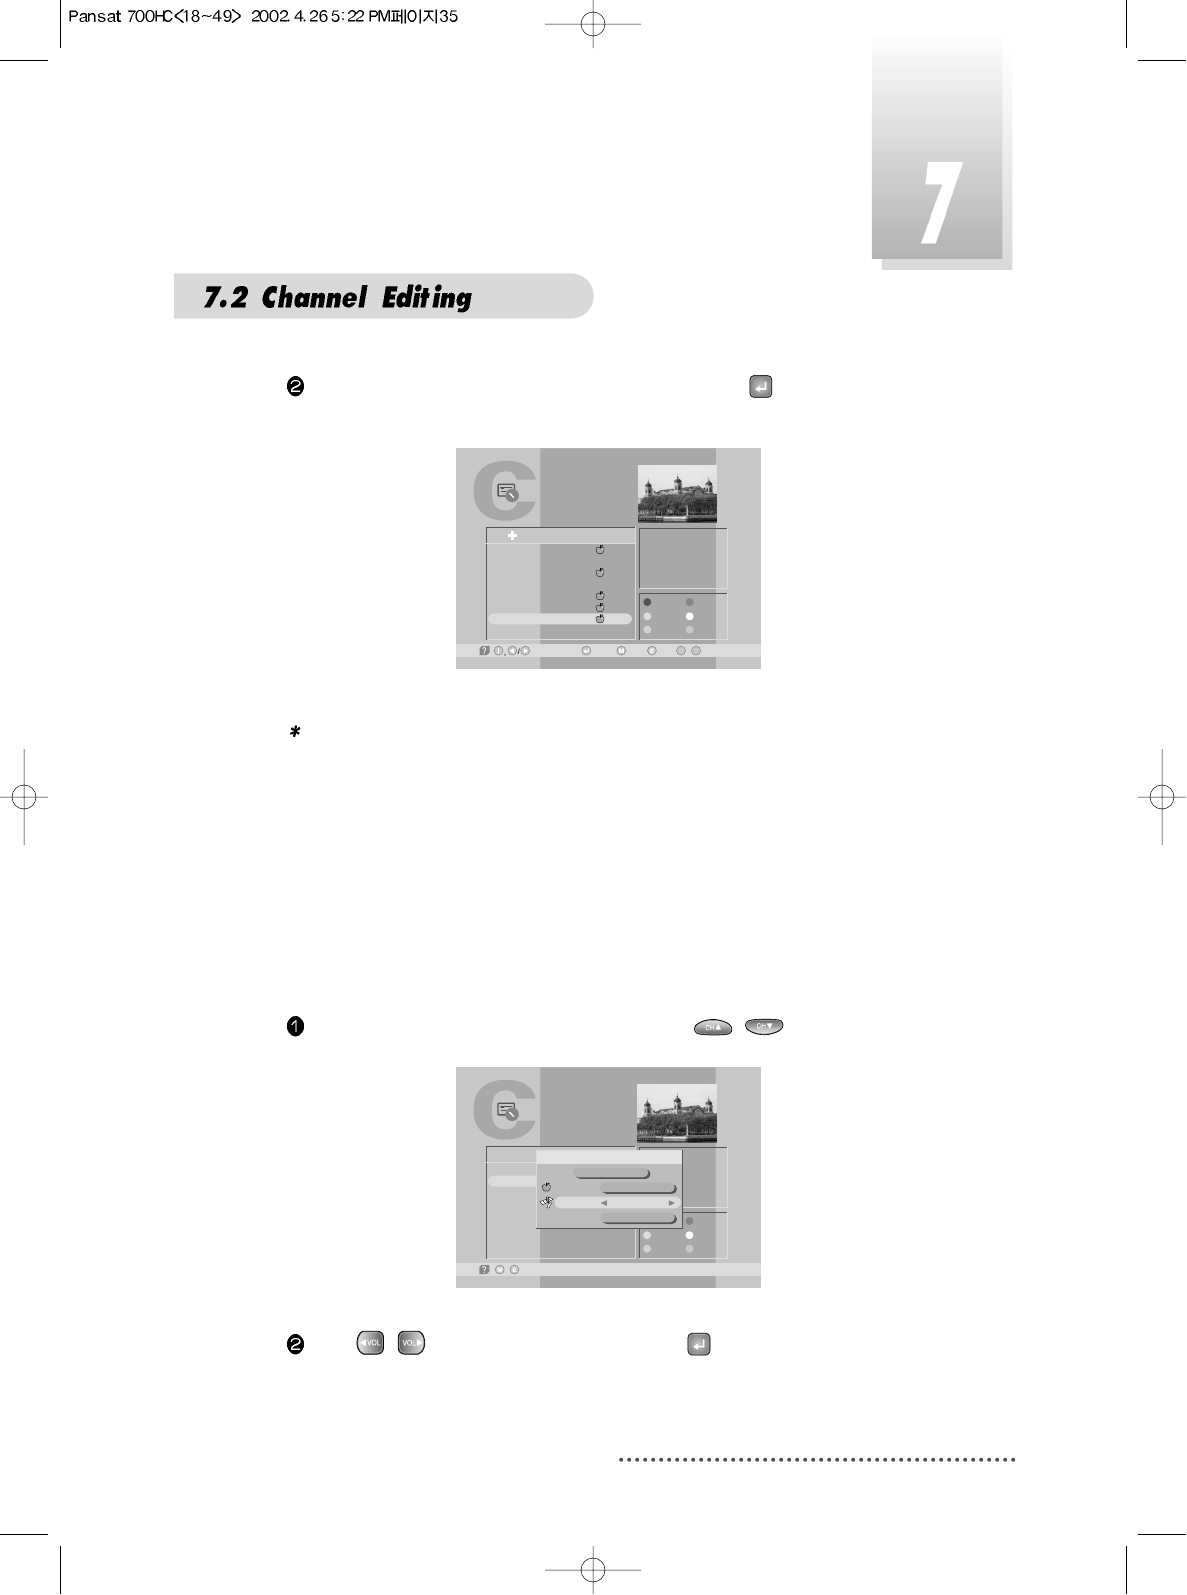
Delete Channel
You can delete channels from the channel list.
Press CH.LIST and select the channel you want to remove with /
or / .
Screen
TV Channel List
-Watch, -Exit,/ ~ -Move
0
L9
-Main,-Page Up/Down,
9
10
11
12
13
14
15
16
TVE
TV5 - Asia
Hubei 1
Hubei 2
RAI Internati
Fujian 2
Jiangxi 1
Jiangxi 2
AsiaSat 2
[3] 3,713 GHz
Horizontal-18V
4,420 MSPS
Hubei
FAV.
LOCK
MOVE
DEL
ADD
MODE
All List
40
Press BLUE.
Note : If ‘password' window is risen as following picture, enter password with
numeric keys (default password is' 0000'). Then you can delete the
channel. If you don't want this window, change ‘Parental Control' set
up in the ‘System Parameters' menu. Refer to the 'Parental control' in
System parameters' in this manual for detail.
Screen
Then, you need to confirm the deletion. If you definitely want to delete,
press . If not, press EXIT.
Screen
Note: Please be careful when you delete channel(s).
Press MENU, EXIT or to finish the process.
TV Channel List
-Watch, -Exit,/ ~ -Move
0
L9
-Main,-Page Up/Down,
9
10
11
12
13
14
15
16
TVE
TV5 - Asia
Hubei 1
Hubei 2
RAI Internati
Fujian 2
Jiangxi 1
Jiangxi 2
AsiaSat 2
[3] 3,713 GHz
Horizontal-18V
4,420 MSPS
Hubei
FAV.
LOCK
MOVE
DEL
ADD
MODE
PASSWORD
????
TV Channel List
-Watch, -Exit,/ ~ -Move
0
L9
-Main,-Page Up/Down,
9
10
11
12
13
14
15
16
TVE
TV5 - Asia
Hubei 1
Hubei 2
RAI Internati
Fujian 2
Jiangxi 1
Jiangxi 2
AsiaSat 2
[3] 3,713 GHz
Horizontal-18V
4,420 MSPS
Hubei
FAV.
LOCK
MOVE
DEL
ADD
MODE
All List Do you want to delete this channel?
Yes / No
Q
41
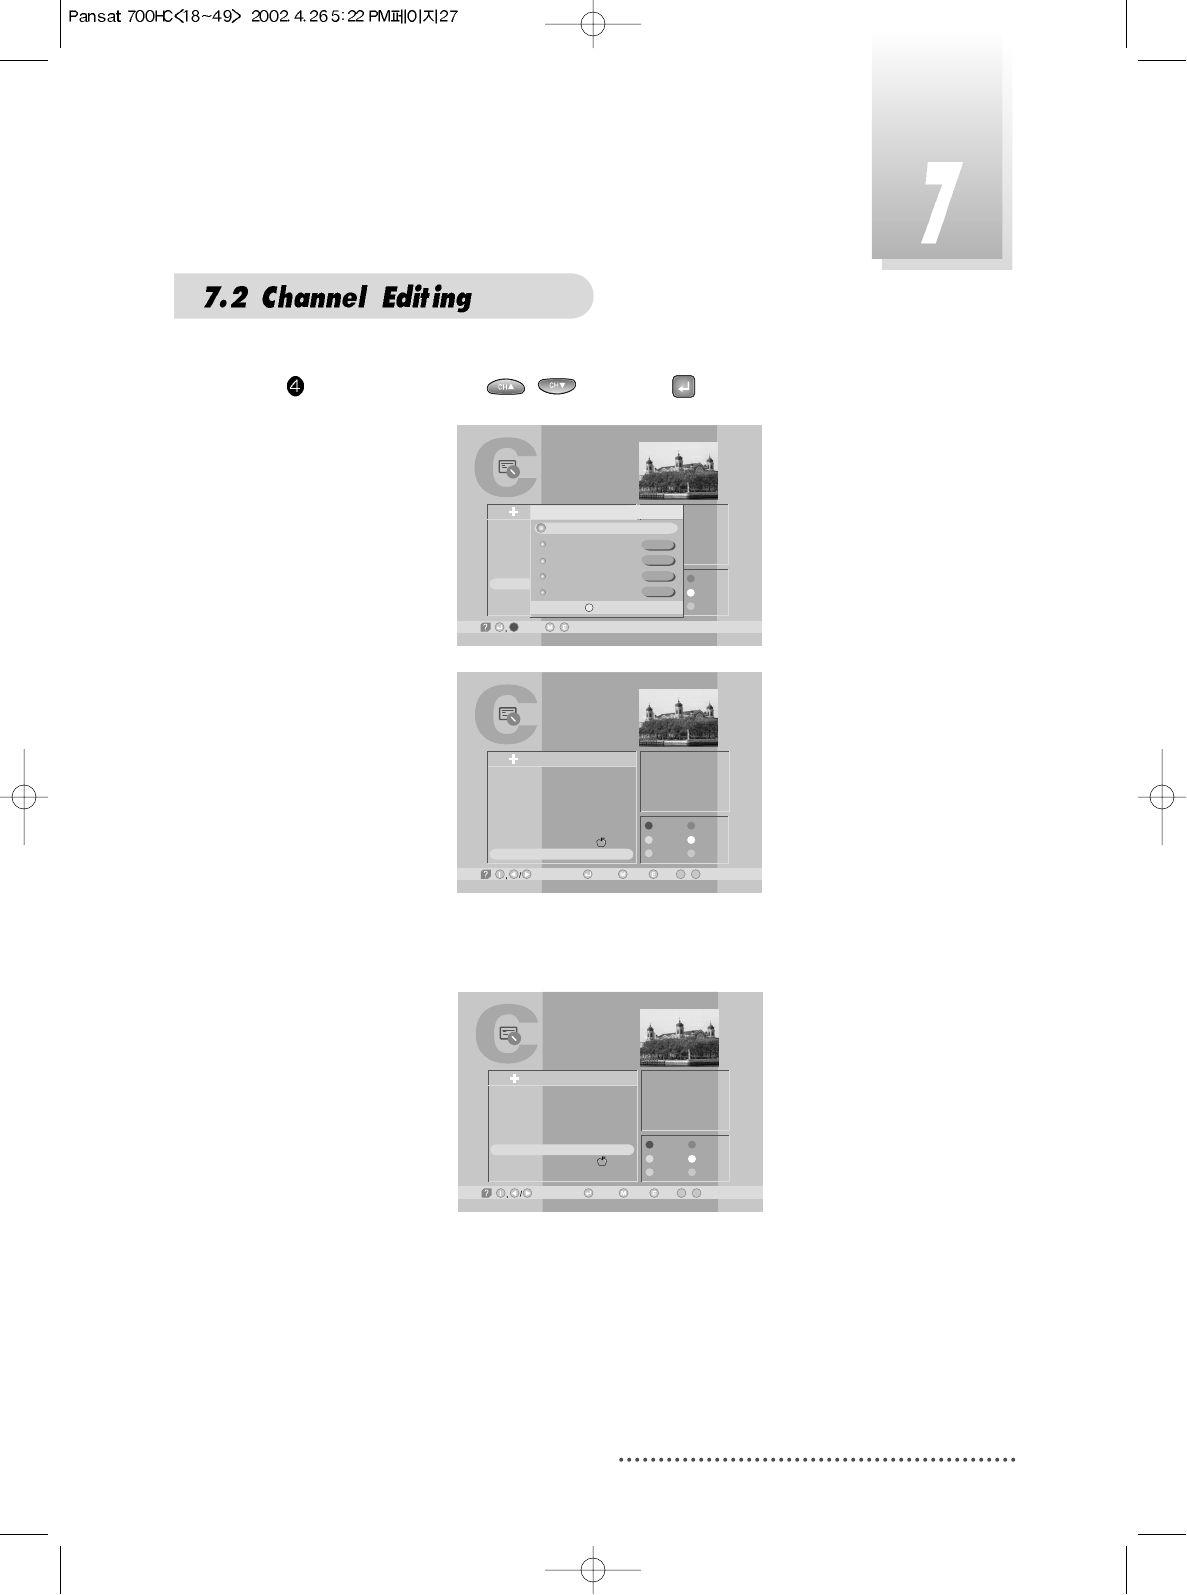
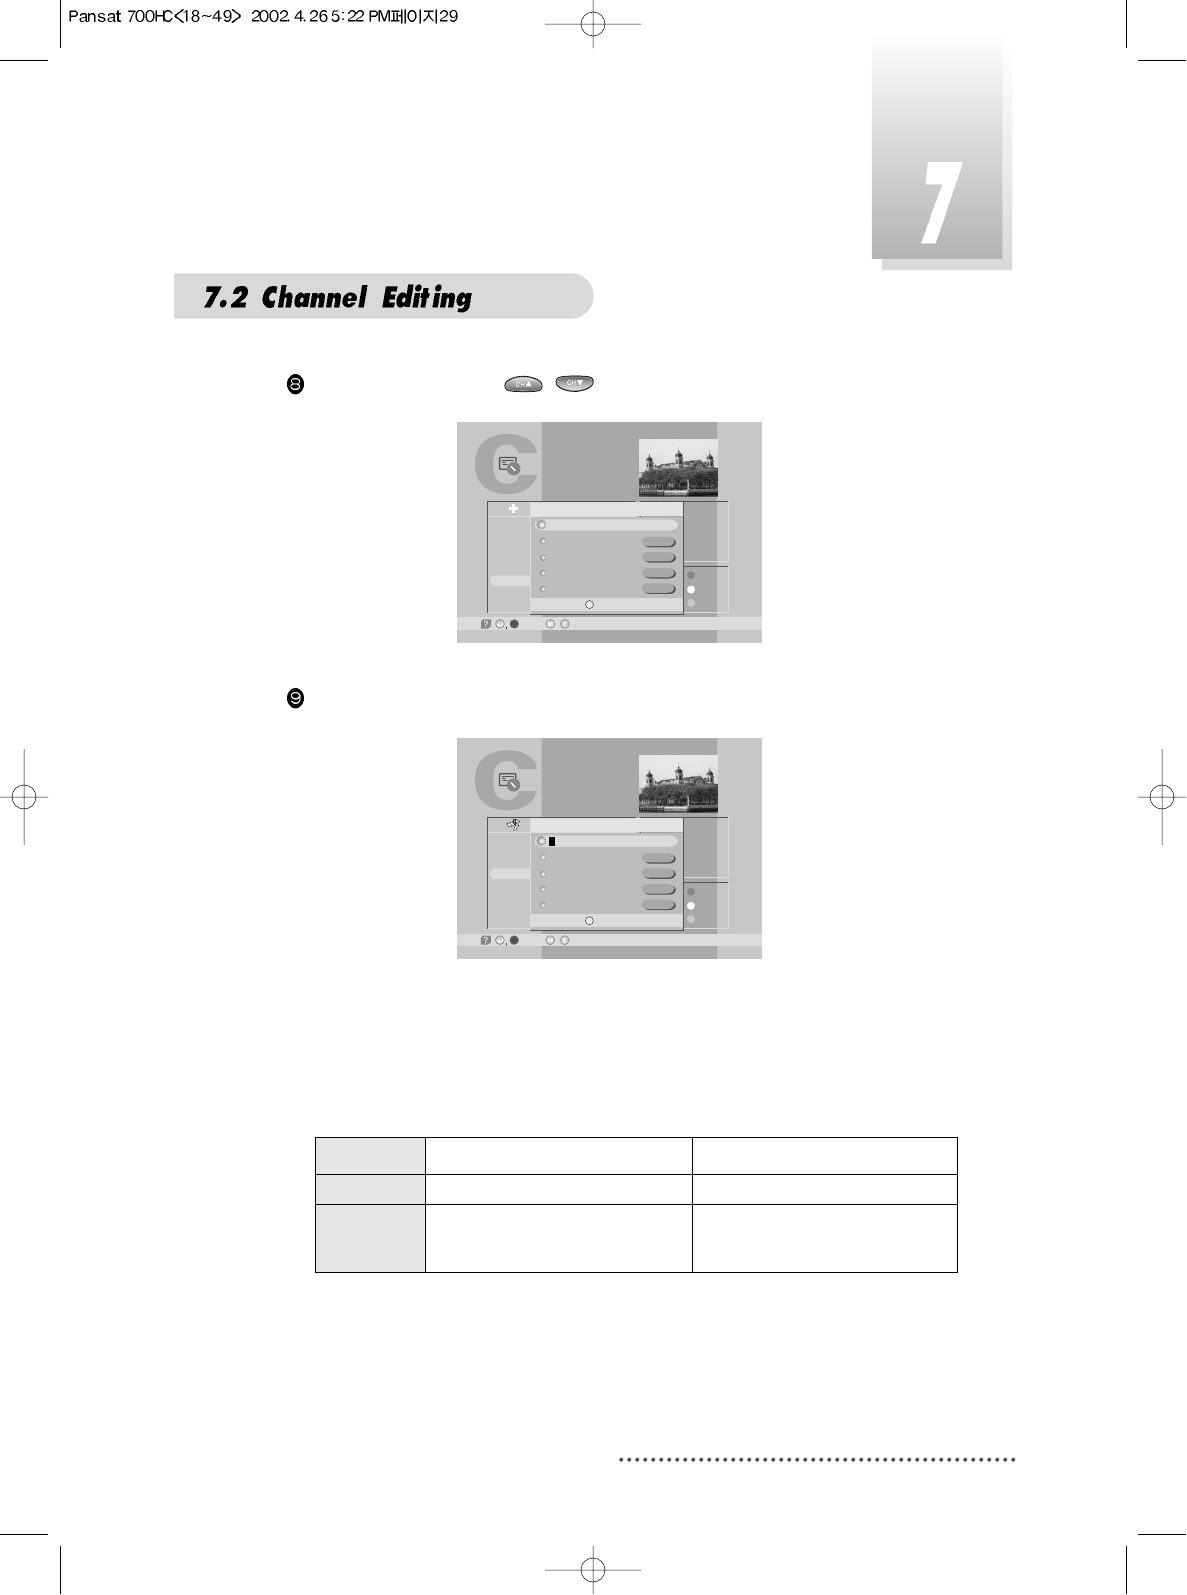
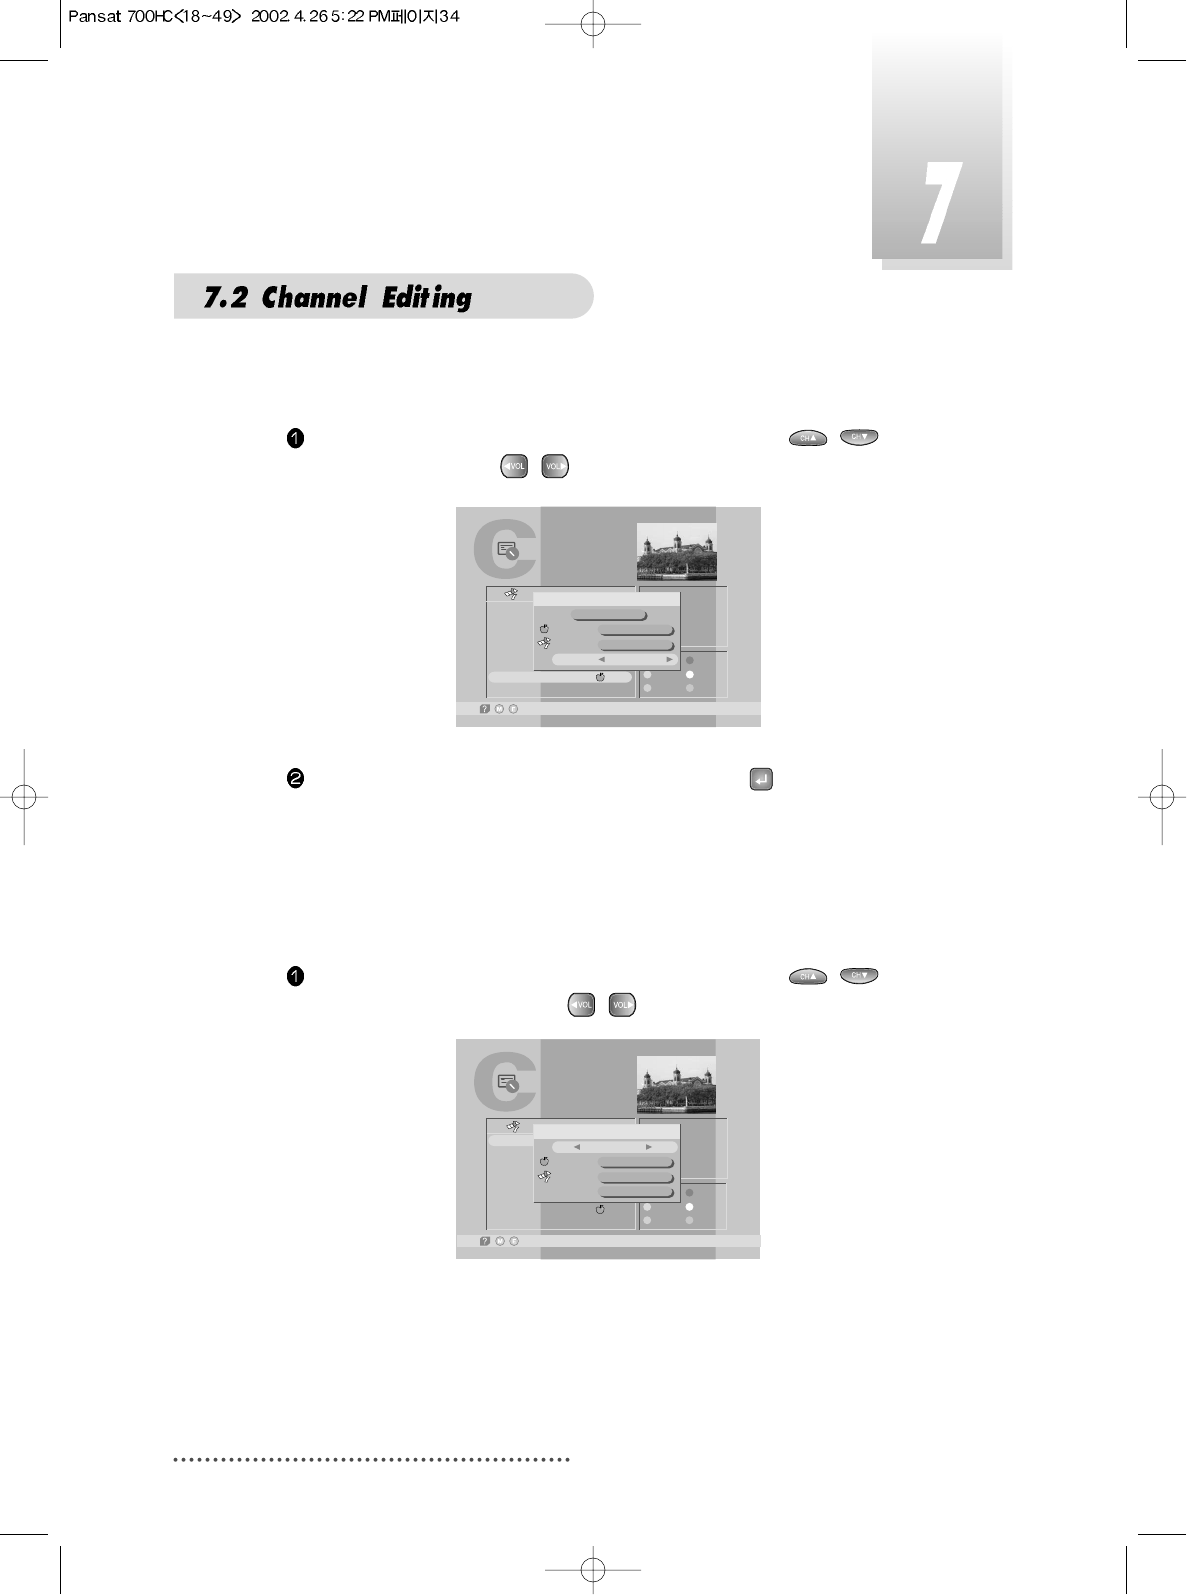
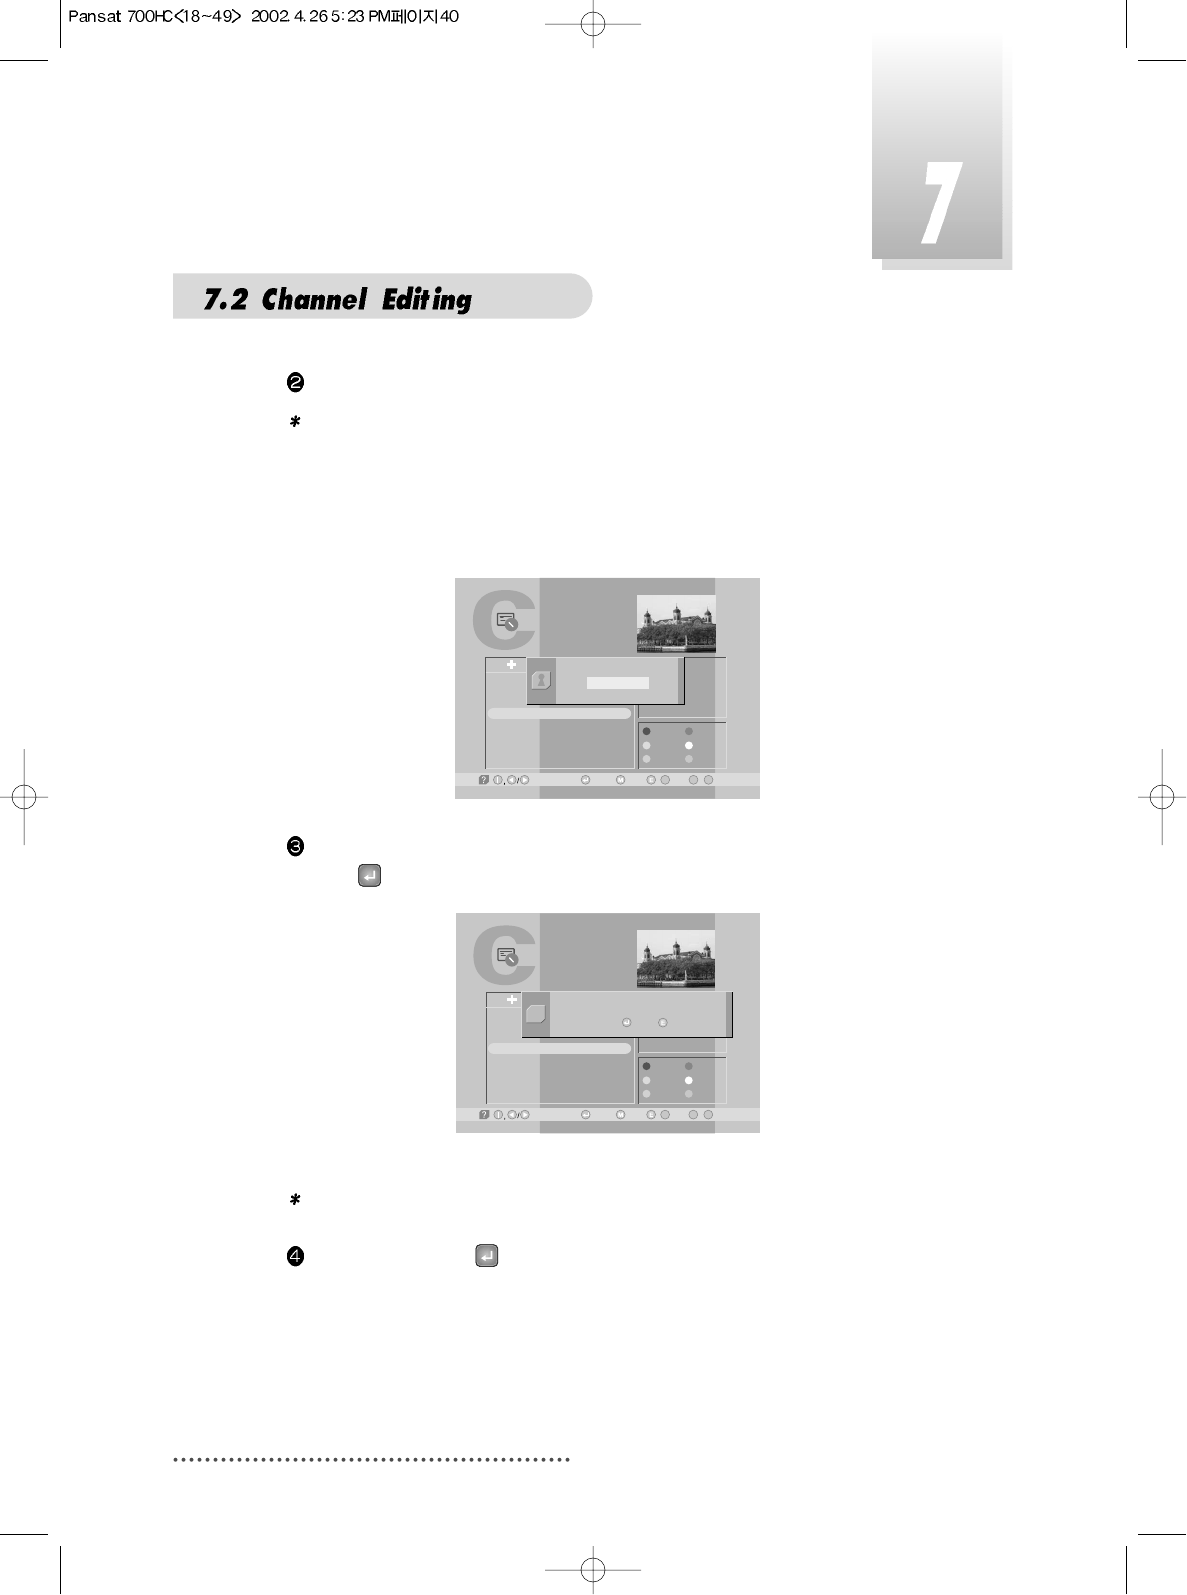
Press CH.LIST.
Screen
Press Ivory.
Screen
Select a satellite into which you want to add your new channel.
Note : You can only select satellites which you set in ‘Installation’ menu.
Move to 'TP Frequency' section (column) by pressing and change
frequency with / or enter frequency with numeric keys.
Note : TP frequency consists of 5 digits ending with GHz.
For example : TP Frequency 4.000GHz is
6
Add Channel
TV Channel List
-Watch, -EXIT, ~ -Move
09
-Main,-Page Up/Down,
1
2
3
4
5
6
7
8
Fujian 1
DIGITL VID
ANHUI TV
NMCHTV
Guangdong 1
Hunan 1
DWtv
MCM
AsiaSat 2
[24] 4,000 GHz
Horizontal-18V
28,123 MSPS
Deutsche Well
FAV.
LOCK
MOVE
DEL
ADD
MODE
All List
Add Digital Channel
AsiaSat 2
[24] 4,000 GHz
Horizontal-18V
28,123 MSPS
DWtv
2305
2306
2304
Satellite Name
TP Frequency
Polarization
Symbol Rate
CH. Name
Video PID
Audio PID
PCR PID
42
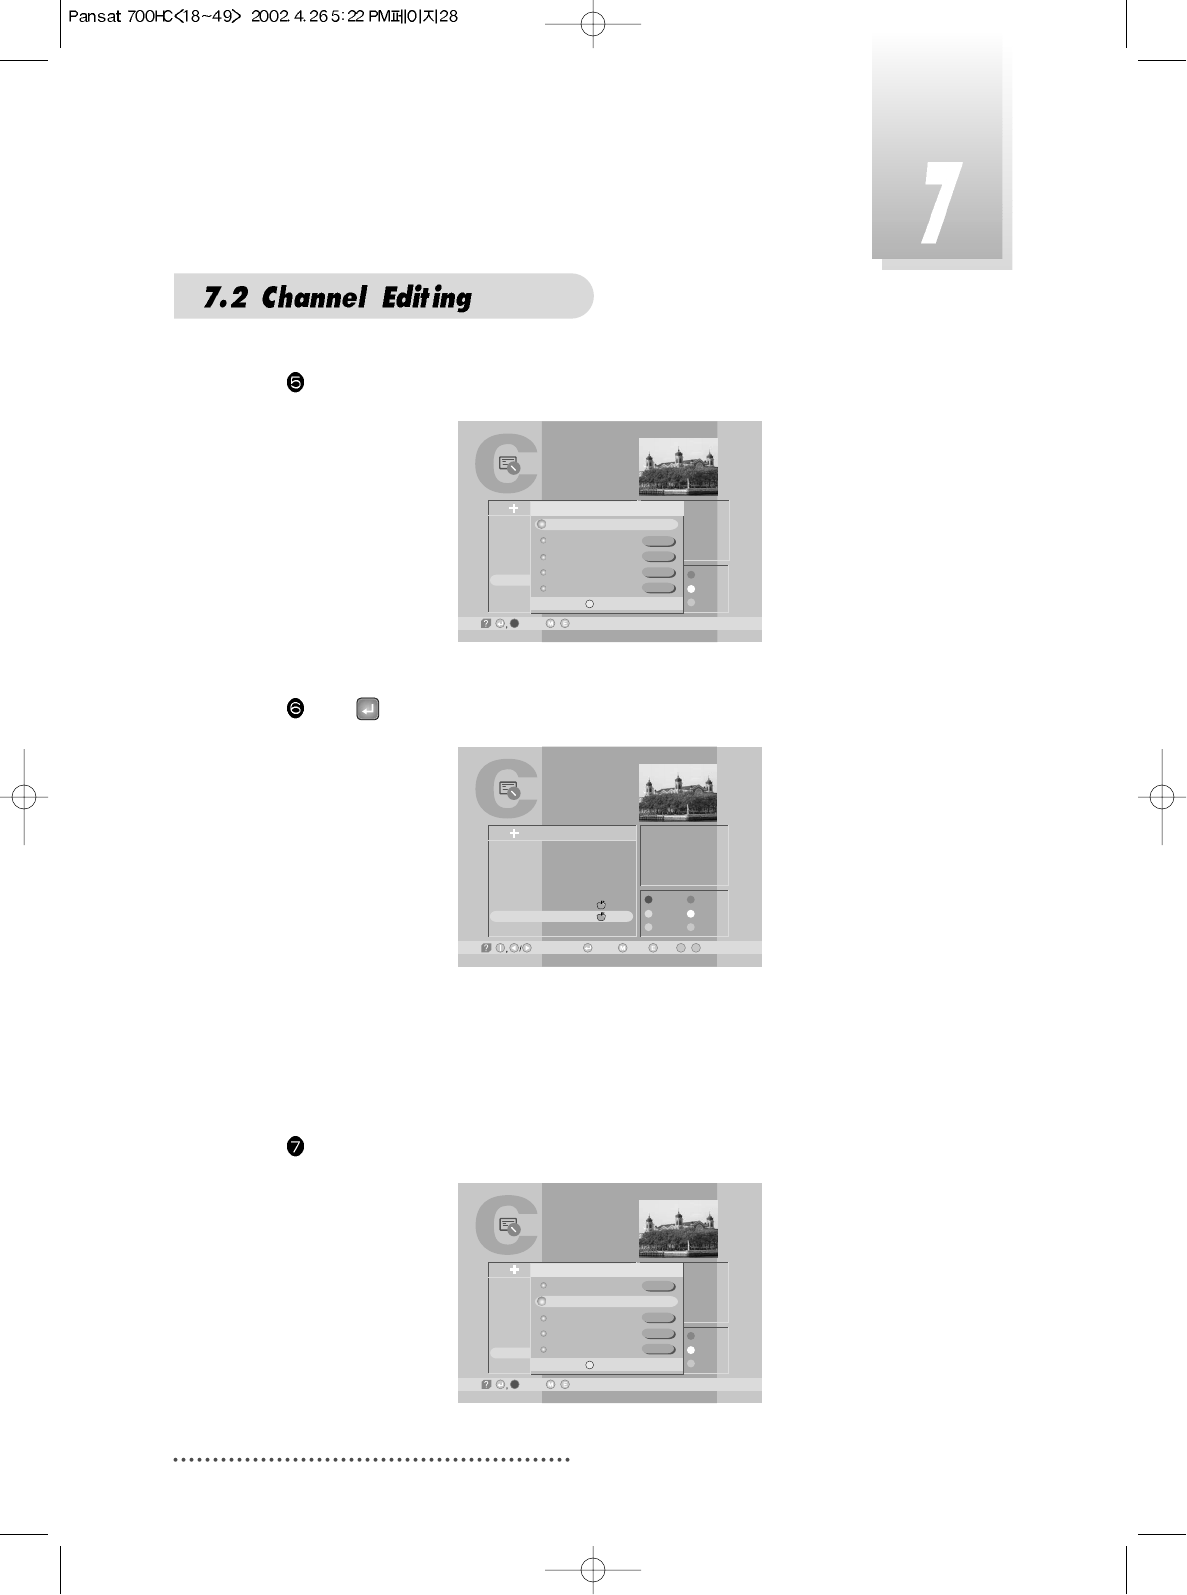
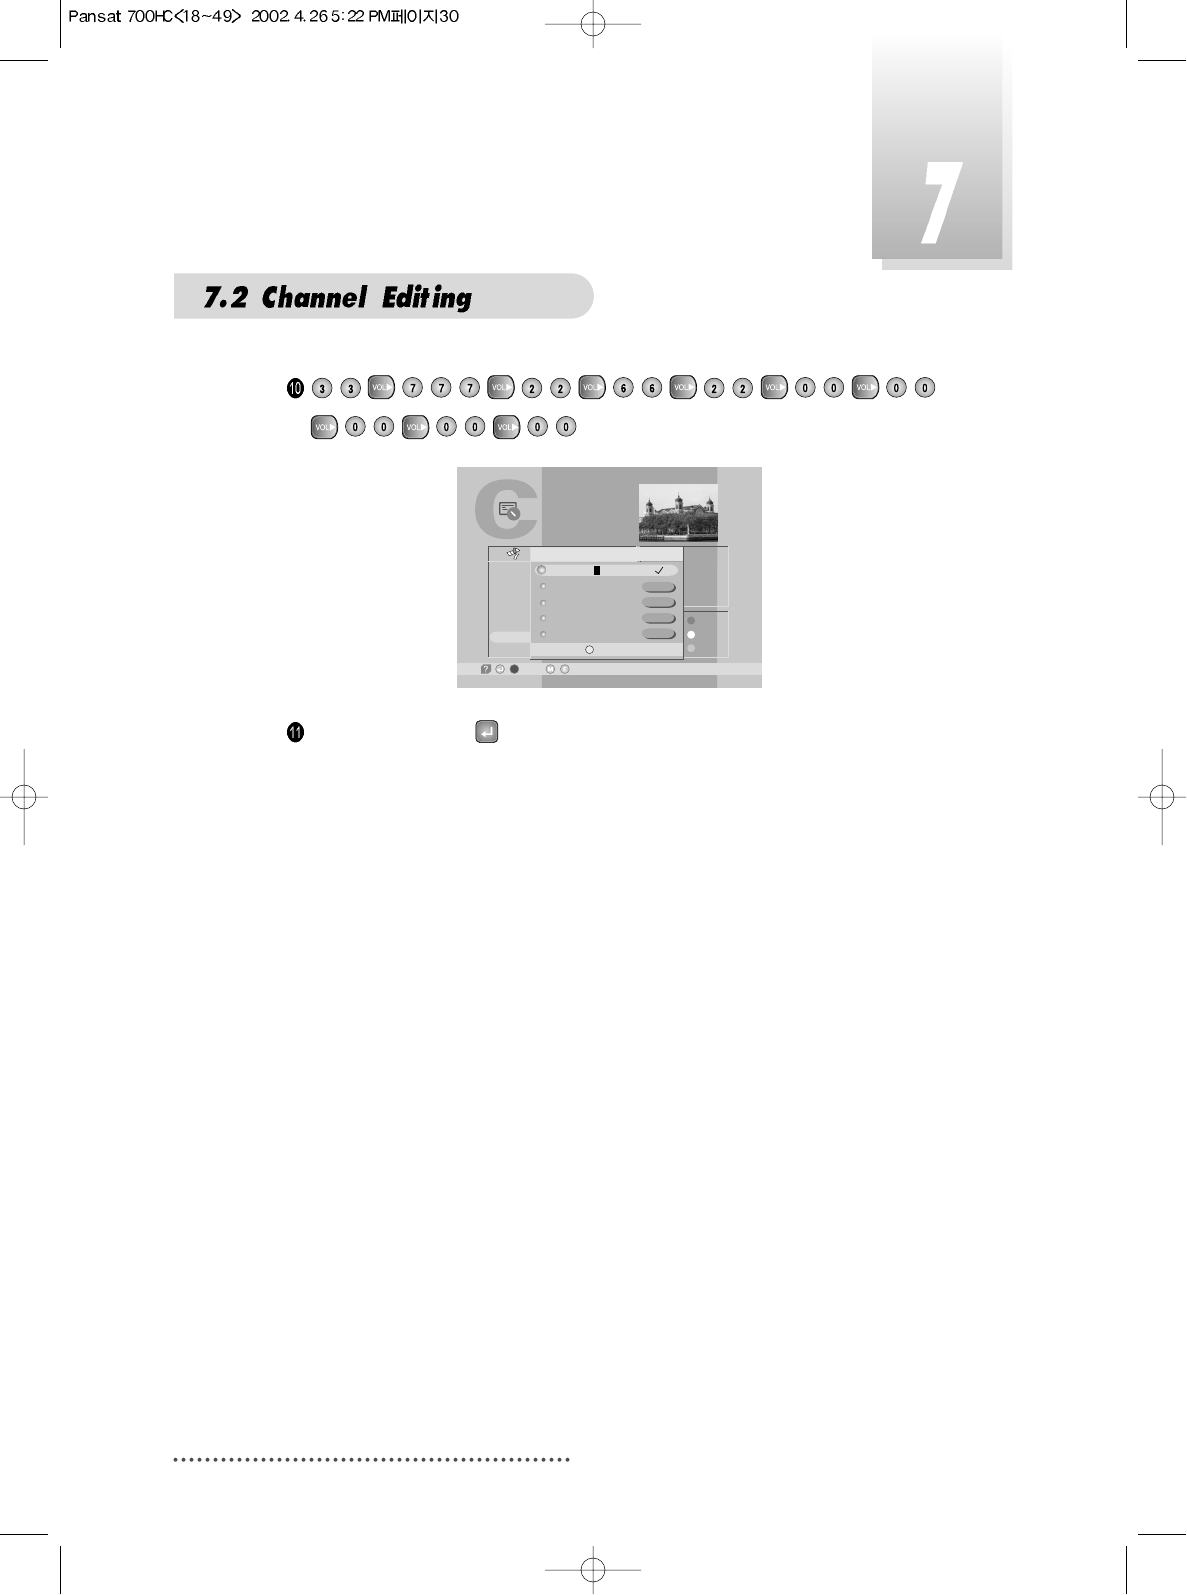
Move to 'Polarization' by pressing and select Horizontal or Vertical
with or .
Note : Please check whether LNB Power is ON in ‘Installation’ menu
Move to 'Symbol Rate' by pressing and enter the Symbol Rate value
with numeric keys.
Move to 'CH. Name' by pressing and enter the alphabetic characters
with numeric keys.
For example : if you want to enter SAT-1,
Note : Press for space
Move to 'VIDEO PID' by pressing key and enter the proper value with
numeric keys.
Move to 'AUDIO PID' by pressing key and enter the proper value with
numeric keys.
Move to 'PCR PID' by pressing key and enter the value between
0000~8192 with numeric keys.
Note : The above mentioned TP Frequency, Symbol Rate, VIDEO PID, AUDIO
PID, PCR PID are very important for optimal satellite signal reception.
We recommend you get professional advice where available. You
cannot setup ‘VIDEO PID’ for RADIO channels.
43
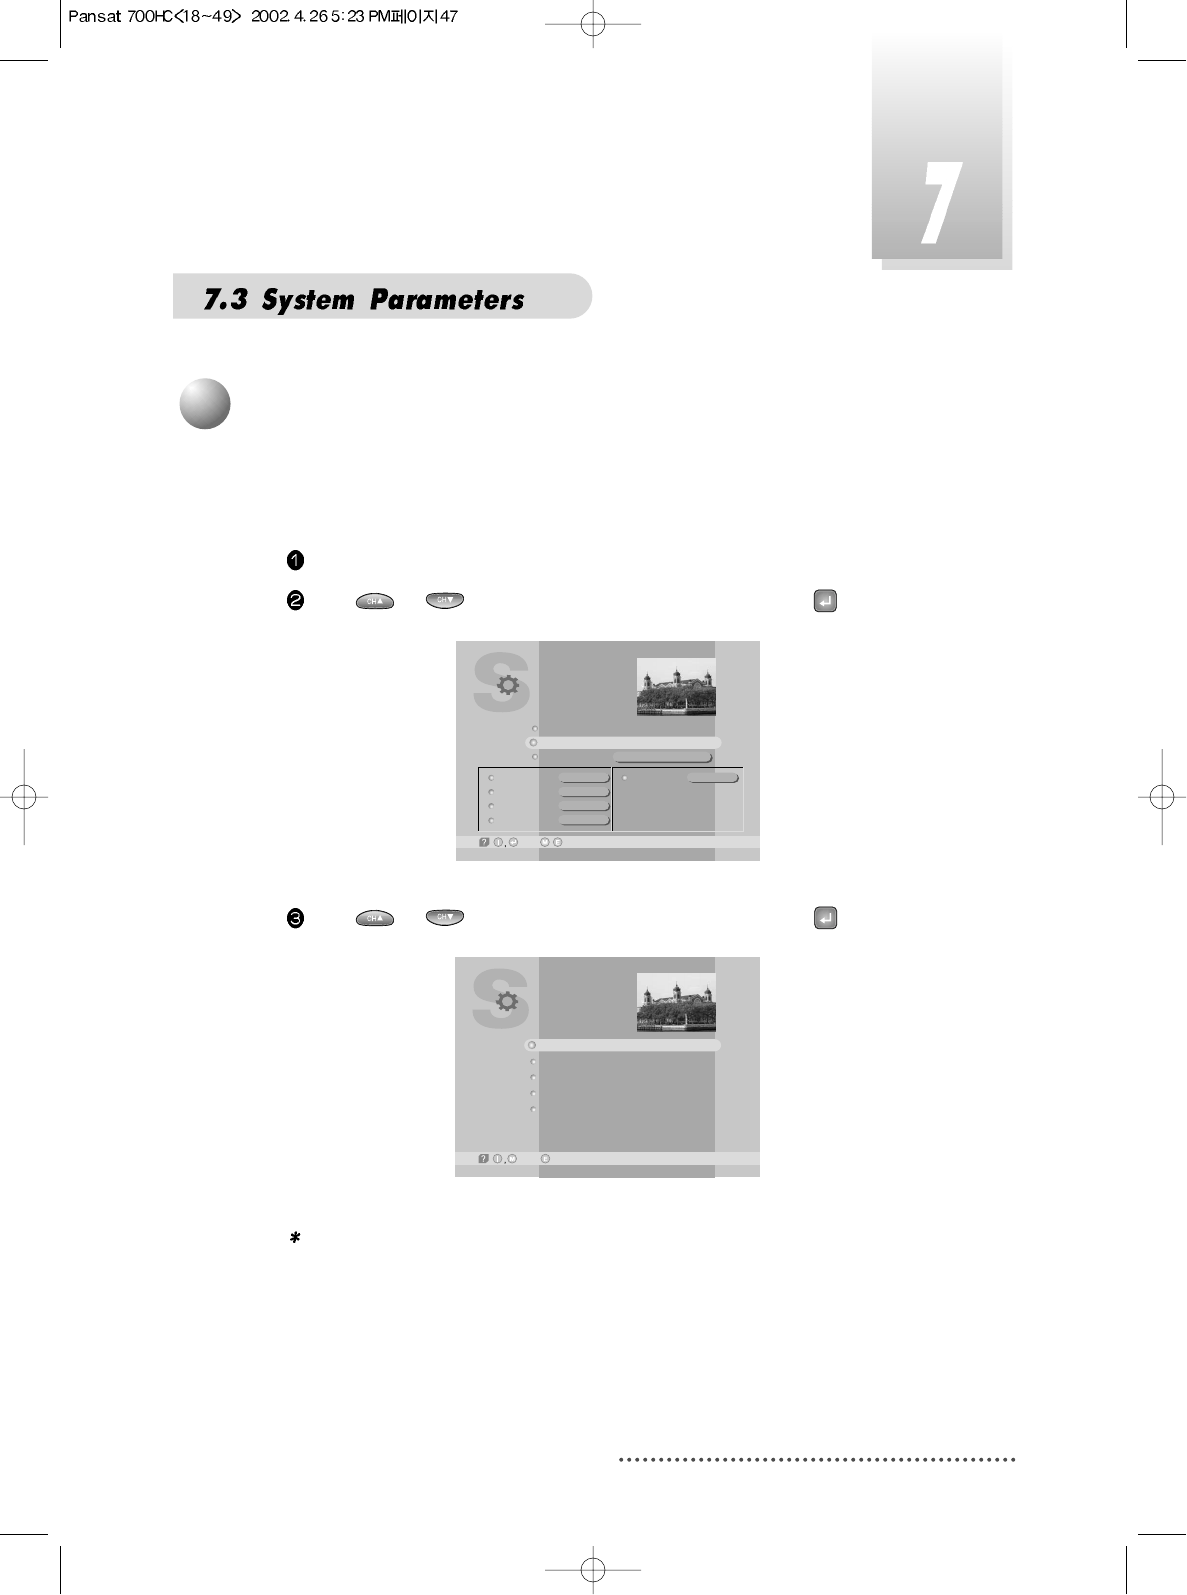
This sub-menu allows you to set the age for parental locking and protect
children from viewing programs unsuitable for their age.
Press MENU key.
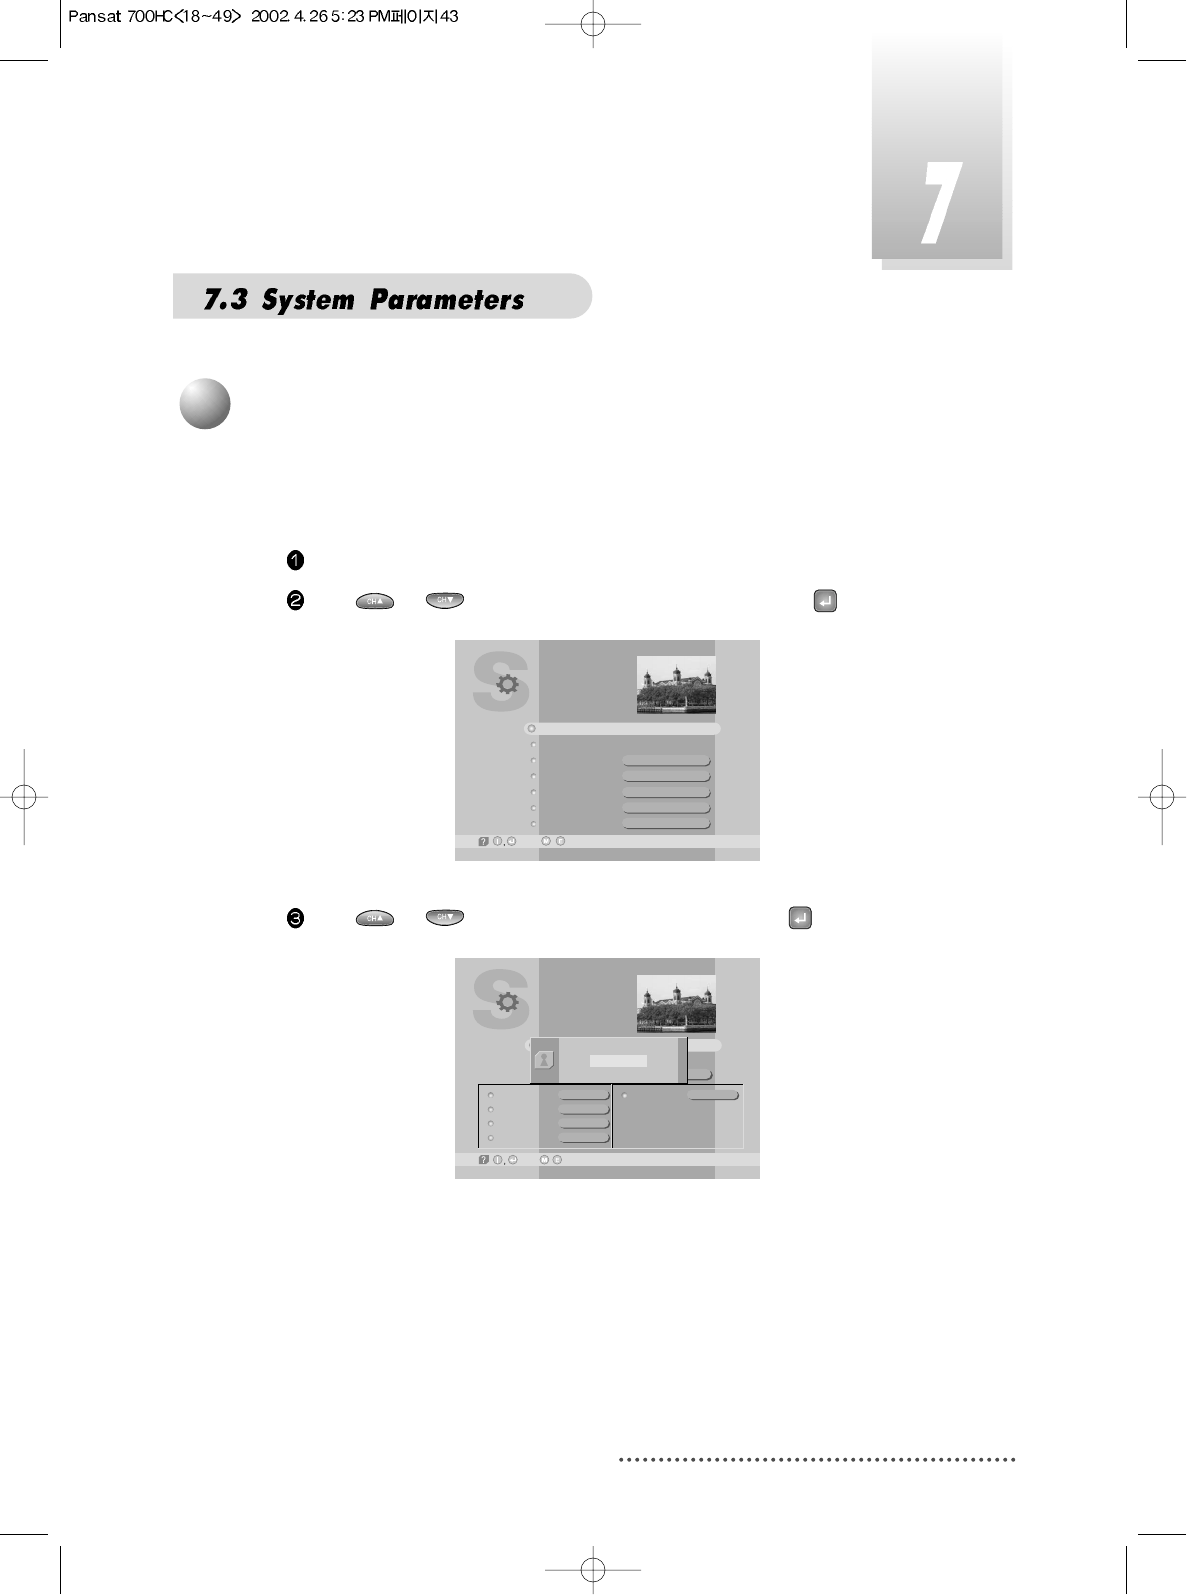
Press or to select 'System Parameters' and press .
Screen
Press or to select 'Parental Control' and press .
Screen
System Parameters
-Prev./
Parental Control
System Information
Local time/Timer
DL Saving
TV Type
Aspect Ratio
Screen
dd/mm/yyyy hh:mm
No
MULTI
4×3
P/S
-Next,
DL Saving
TV Type
Aspect Ratio
Screen
A/V Mode
System Parameters
-Next, -Prev./
Y/CNo
PAL
4X3
P/S
Parental Control
System Information
Local time/Timer 19/06/2001 11:57
PASSWORD
????
1
Setting Age Restrictions
44
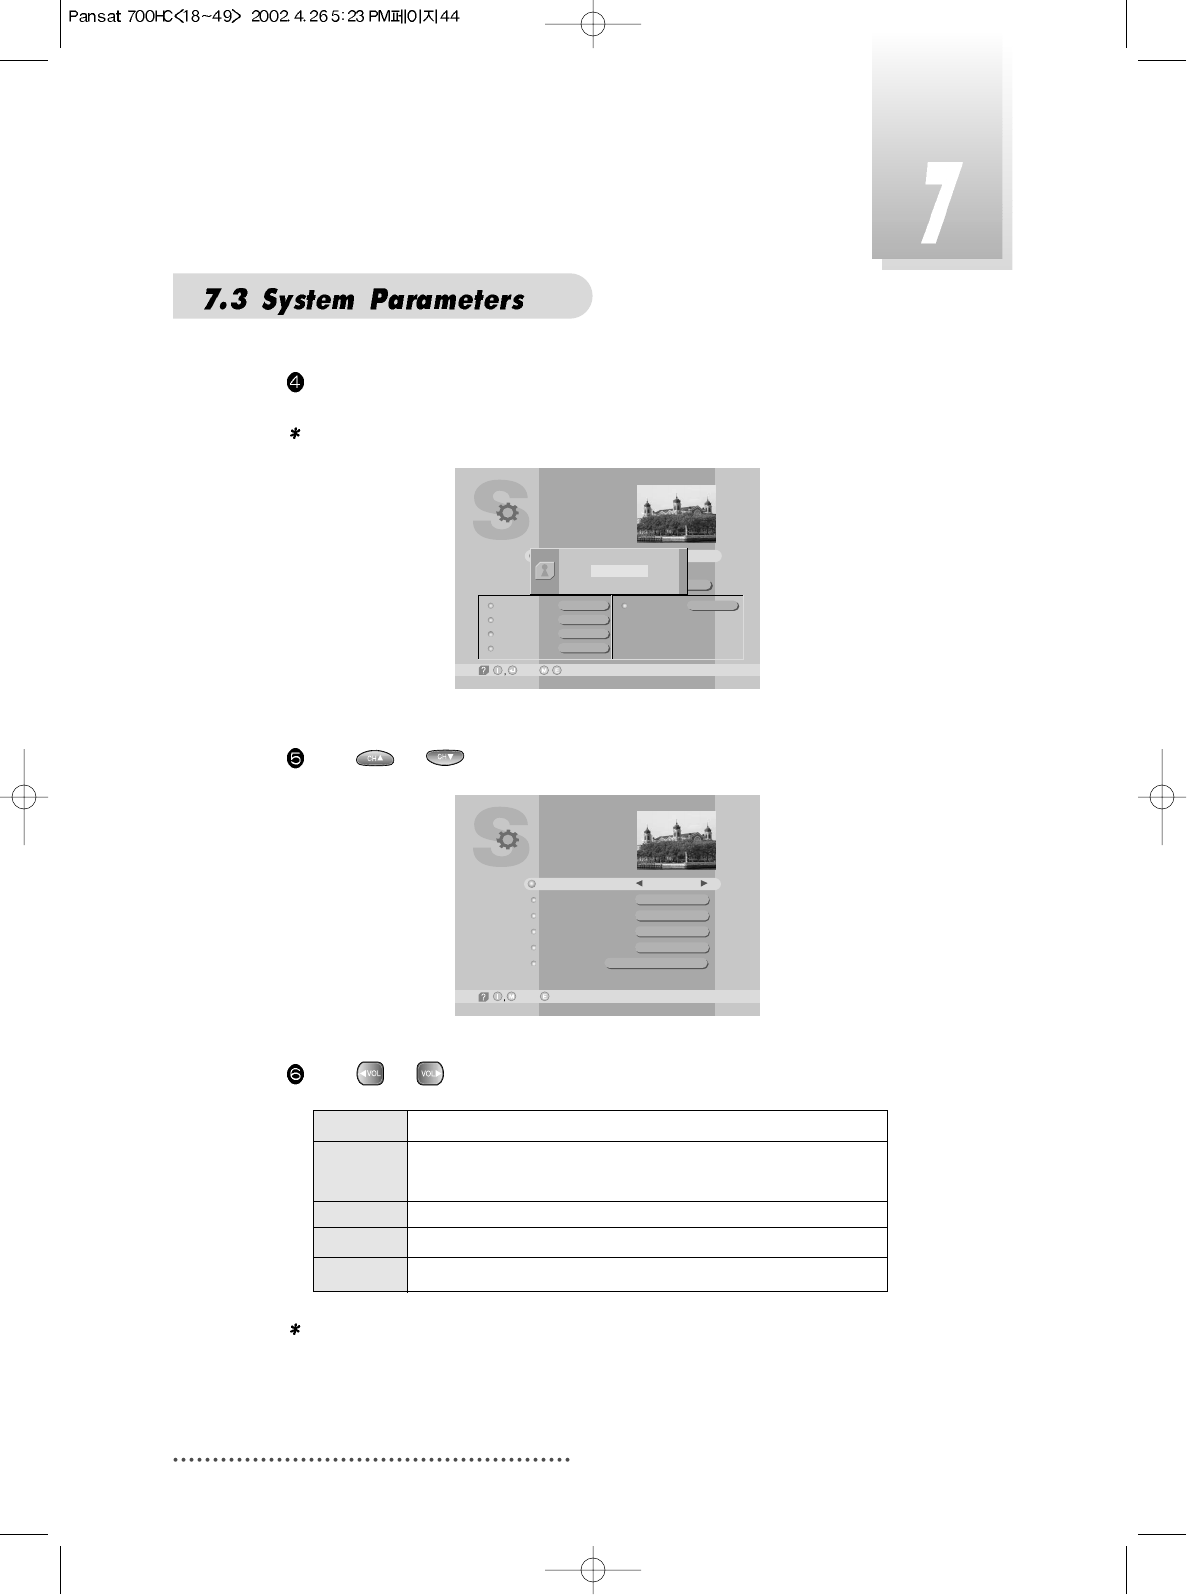
Enter 4-digit password.
Note : The default password is '0000'
Screen
Press or to select ‘Age Limit’.
Screen
Press or to select age you want.
Note : ’Age limit’ can be applicable only for the signal which carries age
limit information.
None No age limit
8Without entering password, programs are restricted to
those who are over 8 years old.
12 over 12 years old.
15 over 15 years old.
18 over 18 years old.
DL Saving
TV Type
Aspect Ratio
Screen
A/V Mode
System Parameters
-Next, -Prev./
Y/CNo
PAL
4X3
P/S
Parental Control
System Information
Local time/Timer 19/06/2001 11:58
PASSWORD
<< Authorized! >>
****
Parental Control
-Prev.-Main,
Age Limit
Lock Channel Editing
Lock Installation
New Password
Verify Password
Personal
None
No
No
????
????
*****
45
You can set SECURITY CHECK to protect your current installation from being
changed (location shift, deletion, adding etc.) or modifying of installed data.
Press MENU key
Press or to select 'System Parameters' and press .
Press or to select 'Parental Control' and press .
Enter 4-digit password.
Note : The default password is '0000'
Press or to select ‘Lock channel Editing’, or ‘Lock Installation’.
Press or to select ‘Yes’, or ‘No’.
Note : Your receiver is pre-set as 'No'.
You can change your password.
Press MENU key.
Press or to select 'System Parameters' and press .
Press or to select 'Parental Control' and press .
Enter 4-digit password.
Note : The default password is '0000'
Press or to select ‘New Password’.
Yes When you process with ‘Channel Editing’ or ‘Installation’ of Main
Menu, your receiver will ask for password. If you enter wrong
password, you cannot proceed further.
No You do not enter password during your processing.
2
Security Check
3
Password Changing
46
Press ~ numeric numbers to enter new password.
Press ~ numeric numbers again to verify the new password.
Note : When you forget your new password, please consult the shop where
you bought the receiver or the nearest dealer.
You can enter your personal information, such as your name and address, etc.
Press MENU key.
Press or to select 'System Parameters' and press .
Press or to select 'Parental Control' and press .
Enter 4-digit password.
Note : The default password is '0000'
Press or to select ‘Personal’.
Press ~ numeric numbers to enter new personal information.
For example: If you want to enter 'WELCOME',
Note :
1. Maximum 32 letters can be entered.
2. Your entered personal information will be displayed on the TV screen
as Welcome Window when you power on your receiver.
3. Initial information is ‘ ’.
4. After purchasing the receiver, if information other than that which you
entered is displayed, please consult the shop where you bought it.
5. Personal Information does not affect your viewing in any way.
4
Personal Information Setting
47
You can check the current information about your receiver such as receiver’s
software and hardware version or manufacturing date.
Press MENU key.
Press or to select 'System Parameters' and press .
Screen
Press or to select 'System Information' and press .
Screen
Note : This information is necessary when you download new software or
you need to repair the receiver.
DL Saving
TV Type
Aspect Ratio
Screen
A/V Mode
System Parameters
-Next, -Prev./
Y/CNo
PAL
4X3
P/S
Parental Control
System Information
Local time/Timer 18/07/2001 16:39
System Information
-Prev.-Main,
Product Name
Hardware Version
Software Version
Channel List
Last Update
Pansat 700HC
5
System Information

48
You can pre-set the on/off time of your receiver.
During your absence, you can record programs on your VCR.
Press MENU key.
Press or to select ‘System Parameters’, and press .
Screen
Press or to select ‘Local Time/Timer’, and press .
Note : Without the local time setting, this ‘TIMER’ function does not work.
Screen
Press or to select ‘Timer #(number)’ you want to set and press .
determine 'CH. Type' by selecting 'TV' or 'RADIO' with or .
6
Setting Timer (Automatic power On/Off)
DL Saving
TV Type
Aspect Ratio
Screen
A/V Mode
System Parameters
-Next,~ -Edit,
09 -Prev./
Y/CNo
PAL
4X3
P/S
Parental Control
System Information
Local time/Timer 18/07/2001 16:40
CH. Type
CH. Number
CH. Name
Start Time
Stop Time
Status
HD record
TV
1
Fujian 1
18/07/2001 16:42
18/07/2001 17:42
No
ON
18/07/2001 16:40
Timer
-Edit, -Prev.-Main,
Timer #1
Timer #2
Timer #3
Timer #4
Timer #5
Timer #6
Timer #7
49
Select 'CH. Number' with or and enter channel number with
numeric keys or with or .
Select ‘Start Time’ for your receiver power-on.
For example : For 1st of February in the year of 2000, 7:30 P.M.,
Enter in sequence
Select ‘Stop Time’ by pressing .
Enter power off time in the same way as you entered ‘Start Time’
Select ‘Status’ and set ‘Once/Daily/Weekly/No’ with or .
Select ‘HD record’ and set ‘ON’ with or if you want to record auto
matically.
Note : 1. Without ‘STATUS’ being actuated (ON), Timer does not work.
2. If Prior time than current is entered, Timer does not work.
3. You can pre-set 14 TIMERs simultaneously. Regardless of number of
TIMER, Timer will work in sequence of time sequence.
4. Remocon Key doesn’t work while VCR recording.(While HDD
recording, remocon key works)
You can adjust current local time when summer time is applicable.
Press MENU key.
Press or to select ‘System Parameters’, and press .
Press or to select ‘DL Saving’.
Press or to select ‘Yes’ or ‘No’ .
Note : Without current local time setting, this menu cannot be
processed.
Yes Set for daylight saving function activated
The current time automatically moves one hour ahead
No Set for daylight saving function deactivated
The current time automatically moves on hour behind
7
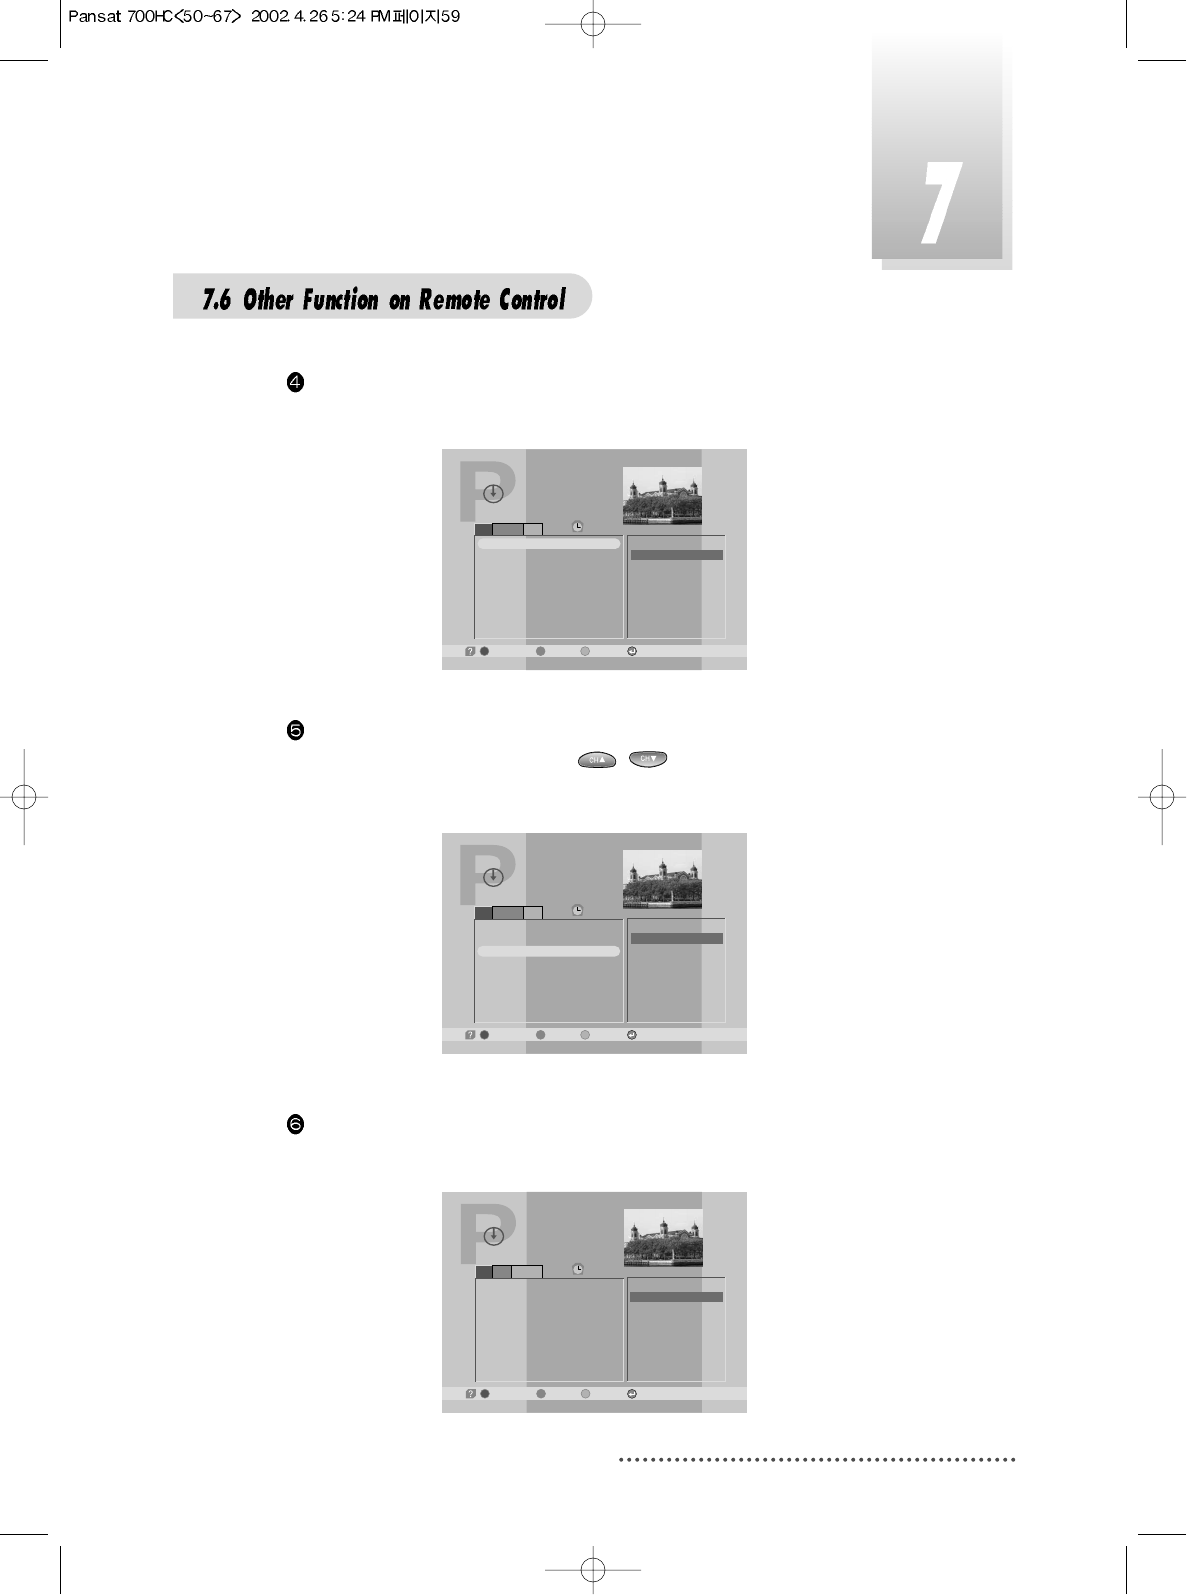
Setting Day Light Saving Time (Summer Time)
68
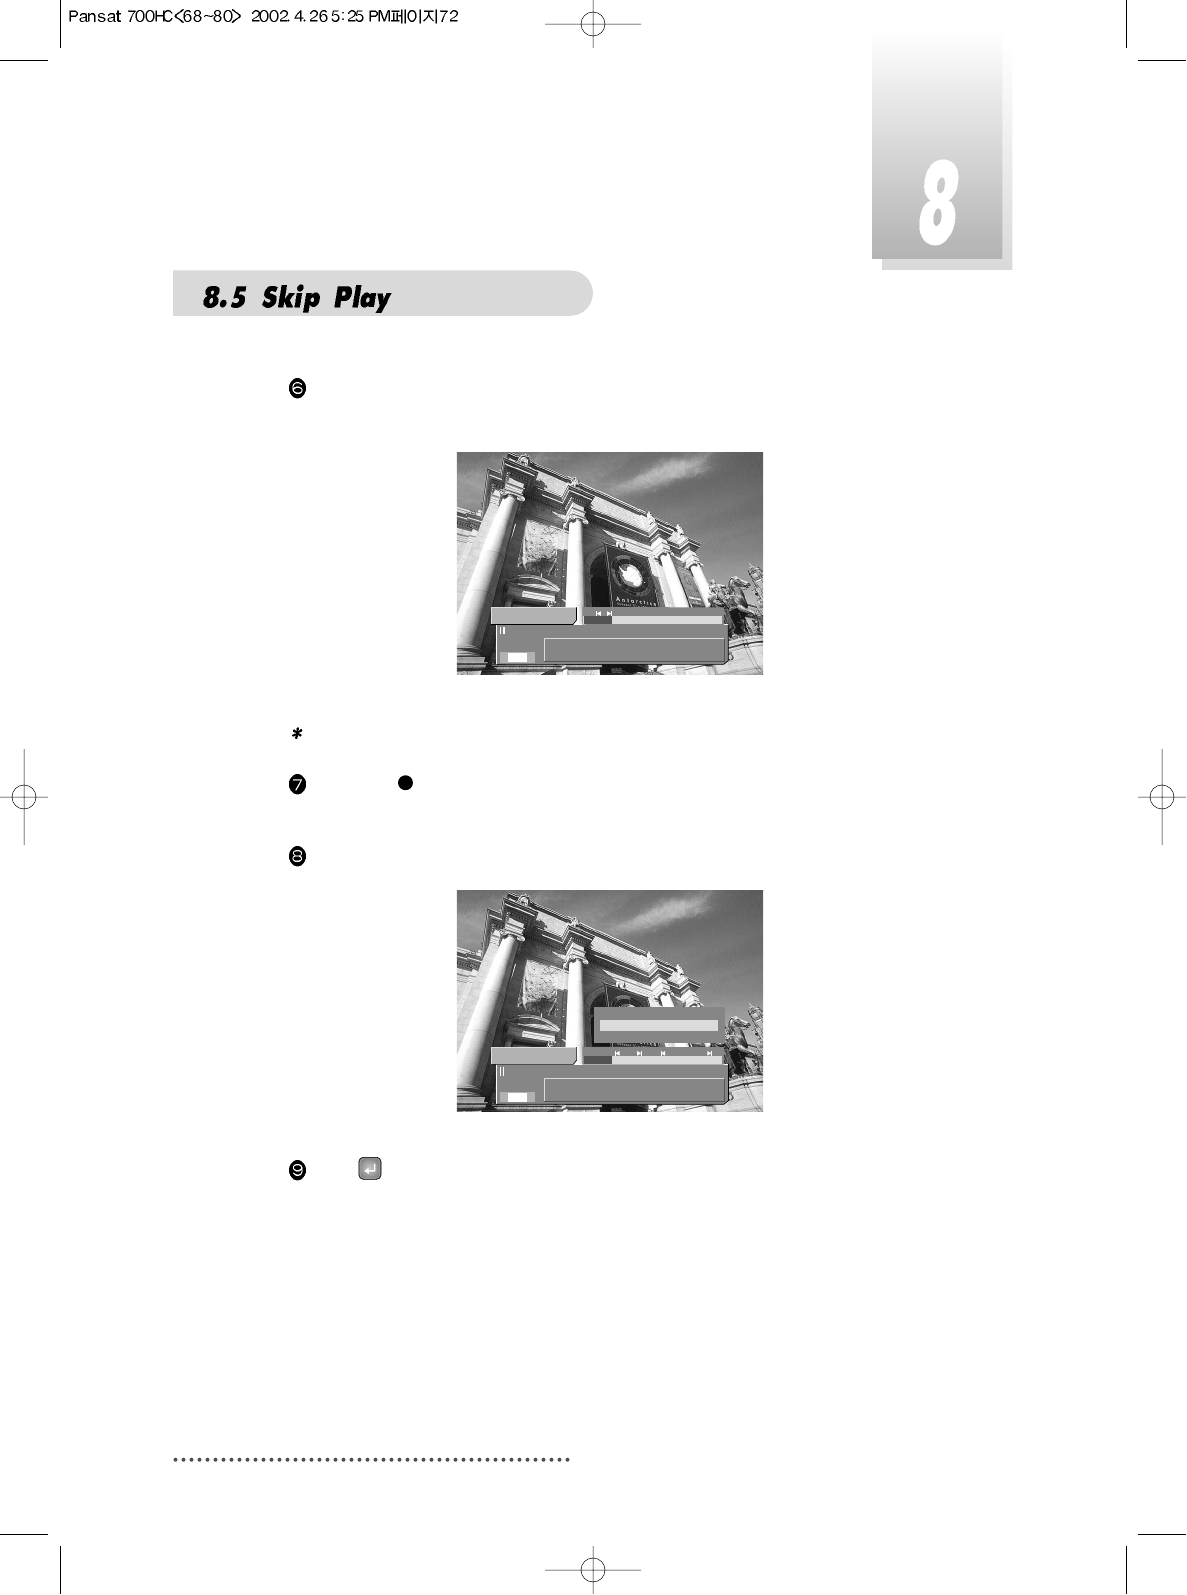
For using trick play mode, you must press or INFO key then HD-Information
Bar will pop-up.
Screen
Trick Play Mode : Pause, Jump, Fast Forward, Fast Reverse, Resume.
- Pause Press BLUE .
- Jump Press BLUE .
Press YELLOW or GREEN .
Press BLUE .
- Fast Foeward Press YELLOW .
- Fast Reverse Press GREEN .
- Stop Press IVORY .
5 CH 22 - Indua
00:05:04 / 00:24:53
CH 22 - Indus
2 Ch
(((
(((
S
2
Trick Play Controls
HD Playing HD Paused
YELLOW Fast Forward Jump Forward
GREEN Fast Reverse Jump Backward
BLUE Pause Resume
IVORY Stop Stop
INFO or Info On/Off Info On/Off
69
You can delete any program in HD-Program Guide menu.
Press ORANGE(LIST) key then HD-Program Guide menu will pop-up.
In HD-Program Guide, select a program with or .
Press RED( ) key to delete the program then Delete dialog menu will pop-
up.
Screen
Press to delete the program or EXIT key to void.
Note : For deleting any stored program, you must stop both playing and
recording.
HD-Program Guide
-Delete, -Satellite Mode
11:52
00:01
00:03
00:01
00:01
00:25
Title
Play time 00:03
28/08/2001 11:22
Free 37.3 GB (95.6%)
CH 23 - Indus
Play Type
1
2
3
4
5
Default Event
CH 23 - Indus
CH 25 - DBN24
RAI Internati
CH 22 - Indus
/ /-Wotoh,
Do you want to delete this ?
Yes /
Q
No E
70
If you want to lock any program, enter the advanced menu by pressing
MENU key with HD- Information Bar.
After locking a program, you must enter the password for playing the pro-
gram.
Start playing a program.
Press then HD-Information Bar will pop-up.
Press MENU key, the advanced menu will pop-up.
Screen
Select ‘LOCK’ using or .
Press , LOCK enable or disable will be setted with Yes or No.
Note : The password for playing a stored program is the same password for
any other lock operation.
1 SABe TV Netwo
00:00:16 / 00:01:10
Default Event
2 Ch
(((
(((
S
Lock
Clear skip points
Split take
Yes
71
You can set the part you don’t want to play, such as advertise ments.
The skip part consists of start and end points.
In all, 10 skip points are available.
Select a program with or , and press to play in HD-Program
Guide menu.
Start playing and search the start point of skip play you want using trick play
controls.
Press RED( ) key to set the start point.
Screen
Temperary start point will be displayed with a red pointer on the Bar.
Press RED( ) key to set the end point you want.
5 CH 22 - Indus
00:06:03 / 00:24:53
CH 22 - Indus
2 Ch
(((
(((
S
72
Then a proper pair of start and end points will be displayed with yellow
pointers on the Bar.
Screen
Note : To try setting on improper pair will be rejected.
Press RED( ) key at the position between start and end points, then the
skip-point will be removed.
Press MENU key and select ‘Clear skip points’.
Screen
Press , to remove all skip points.
5 CH 22 - Indus
00:06:03 / 00:24:53
CH 22 - Indus
2 Ch
(((
(((
S
5 CH 22 - Indus
00:07:06 / 00:24:53
CH 22 - Indus
2 Ch
(((
(((
S
Lock
Clear skip points
Split take
No
73
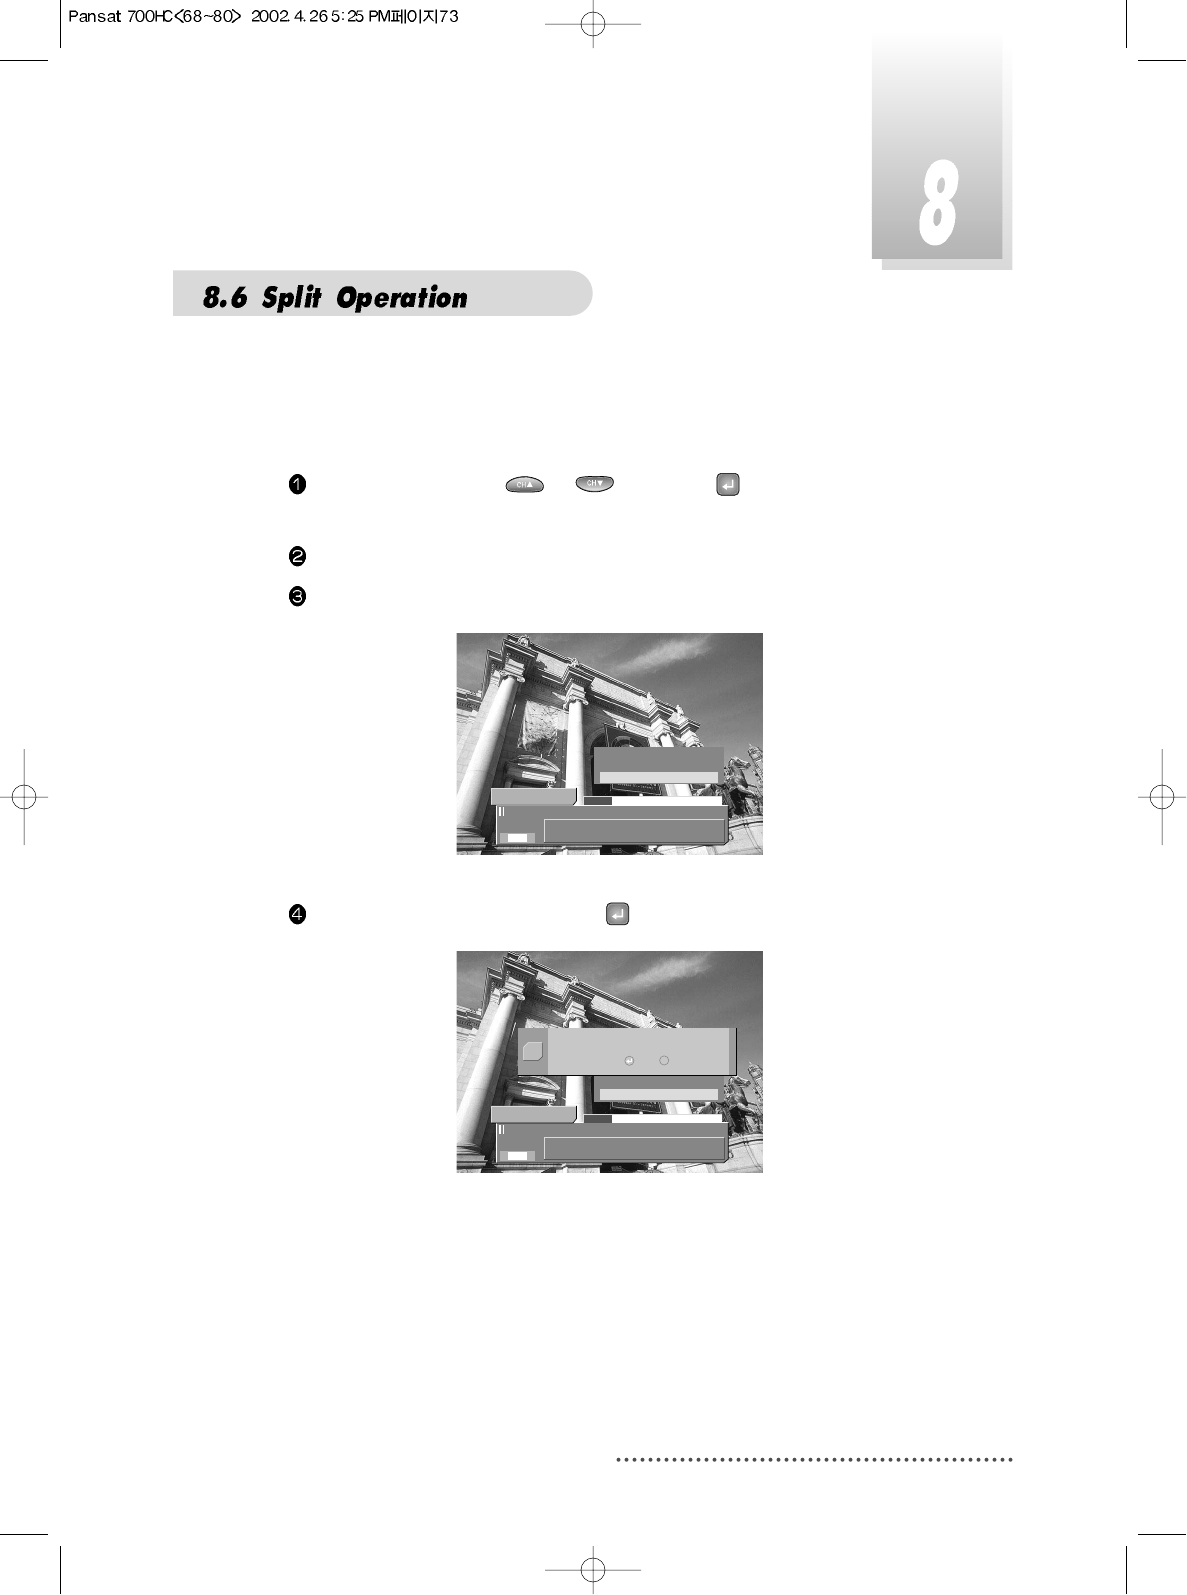
You can split a program in two programs.
The operation takes a few minutes to complete splitting.
Select a program with or , and press to play in HD-Program
Guide menu.
Search the split point you want using trick play controls.
Press MENU key, then the advanced menu will pop-up.
Screen
Select ‘Split take’ menu and press , then Split take dialog will pop-up.
Screen
4 CH 22 - Indus
00:05:06 / 00:23:12
CH 22 - Indus
2 Ch
(((
(((
S
Lock
Clear skip points
Split take
No
4 CH 22 - Indus
00:05:06 / 00:23:12
CH 22 - Indus
2 Ch
(((
(((
S
Lock
Clear skip points
Split take
No
Split this program in two ?
Yes /
Q
No E
74
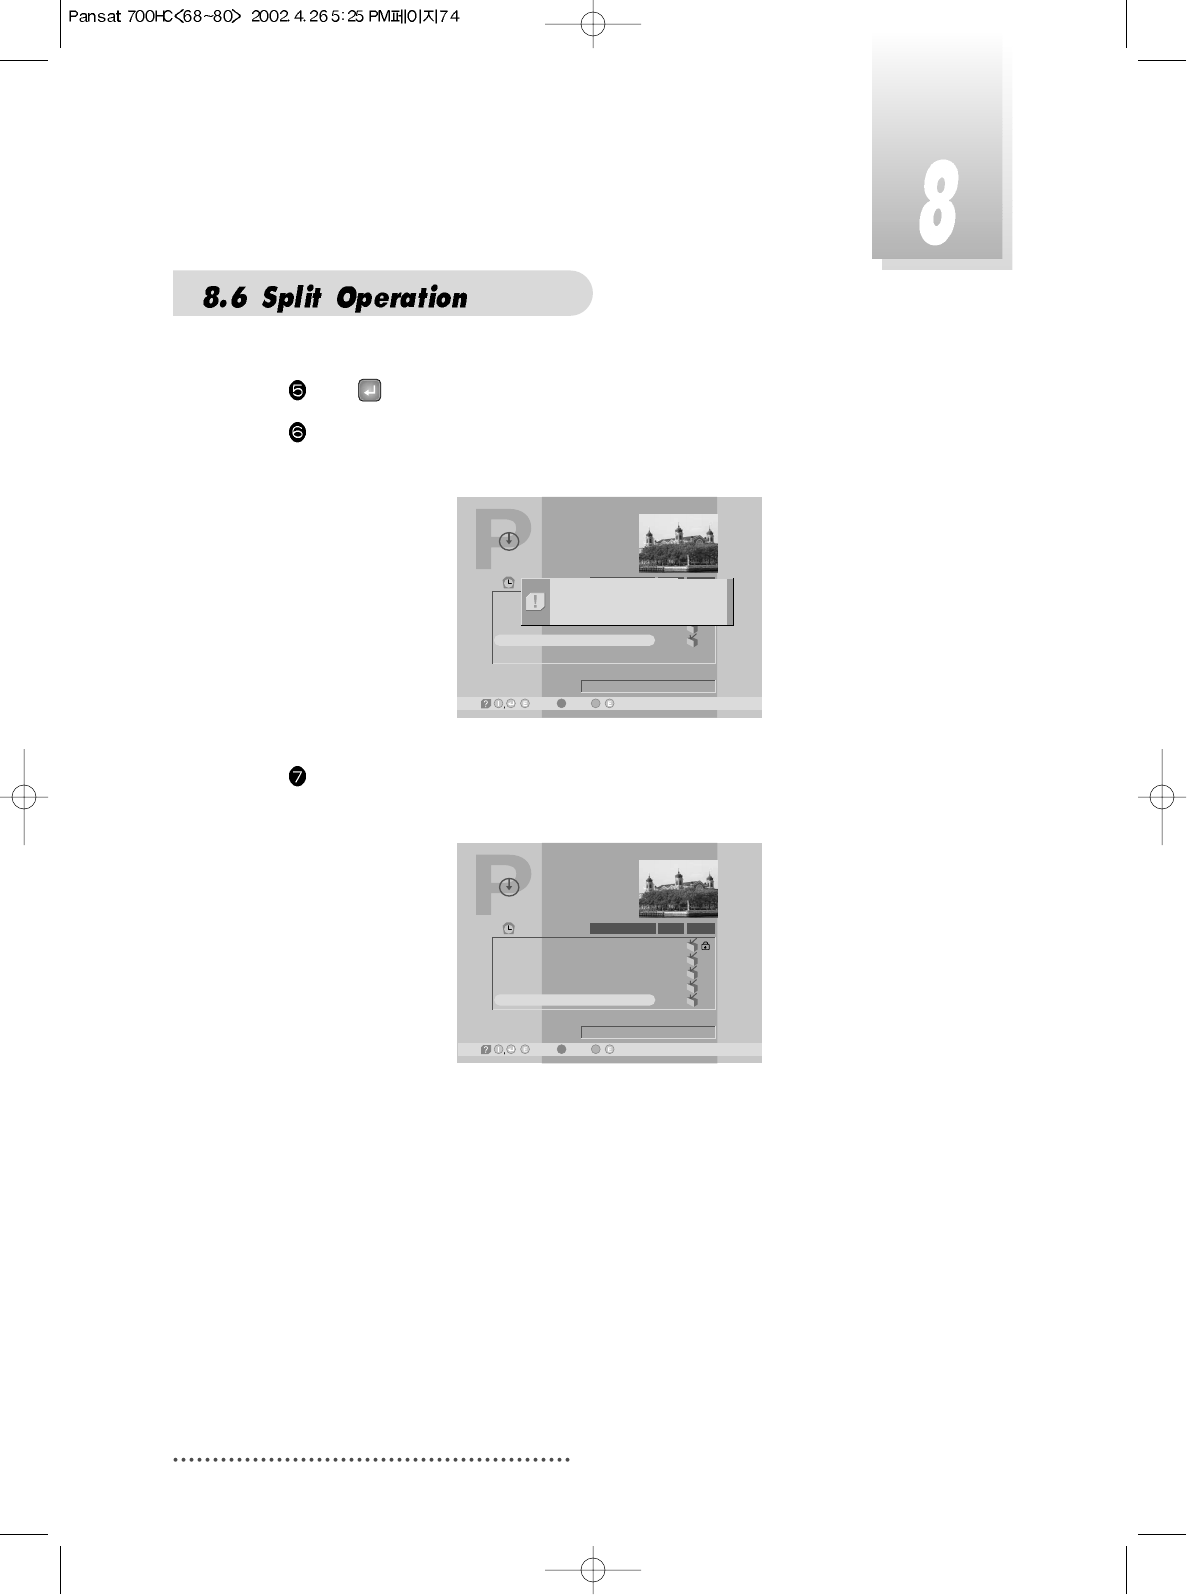
Press to start splitting or EXIT key to void.
If split operation starts, the progress window will pop-up and you can see
the status of process.
Screen
After splitting, HD-Program Guide menu will pop-up and splitted program
will be selected.
Screen
HD-Program Guide
-Delete, -Satellite Mode
12:00
00:01
00:01
00:01
00:23
Title
Play time 00:23
28/08/2001 11:27
Free 37.7 GB (96.6%)
CH 22 - Indus
Play Type
1
2
3
4
Default Event
CH 25 - DBN 24
RAI Internati
CH 22 - Indus
/ /-Wotoh,
Now splitting program
42%
HD-Program Guide
-Delete, -Satellite Mode
12:00
00:01
00:01
00:01
00:05
00:18
Title
Play time 00:10
28/08/2001 11:27
Free 37.5 GB (96.1%)
CH 22 - Indus
Play Type
1
2
3
4
5
Default Event
CH 25 - DBN 24
RAI Internati
CH 22 - Indus
CH 22 - Indus
/ /-Wotoh,
75
You can use trick play controls without HD-Information Bar.
Small yellow icon will be displayed for trick play controls.
Additional play control is available in this mode.
This function is activated at pause state using GREEN( ) / YELLOW( ).
and make the sequence played step by step.
Select a program with or , and press to play in HD-Program
Guide menu.
Press INFO or to turn off HD-Information Bar.
Press BLUE( ),GREEN( ) or YELLOW( ) to start controlling trick play
without any OSD.
You can control trick play while yellow icons are displayed.
Besides, you can control step by step play with GREEN( ) / YELLOW( )
while pause state.
Note : You can not control jump play without HD-Information Bar.
76
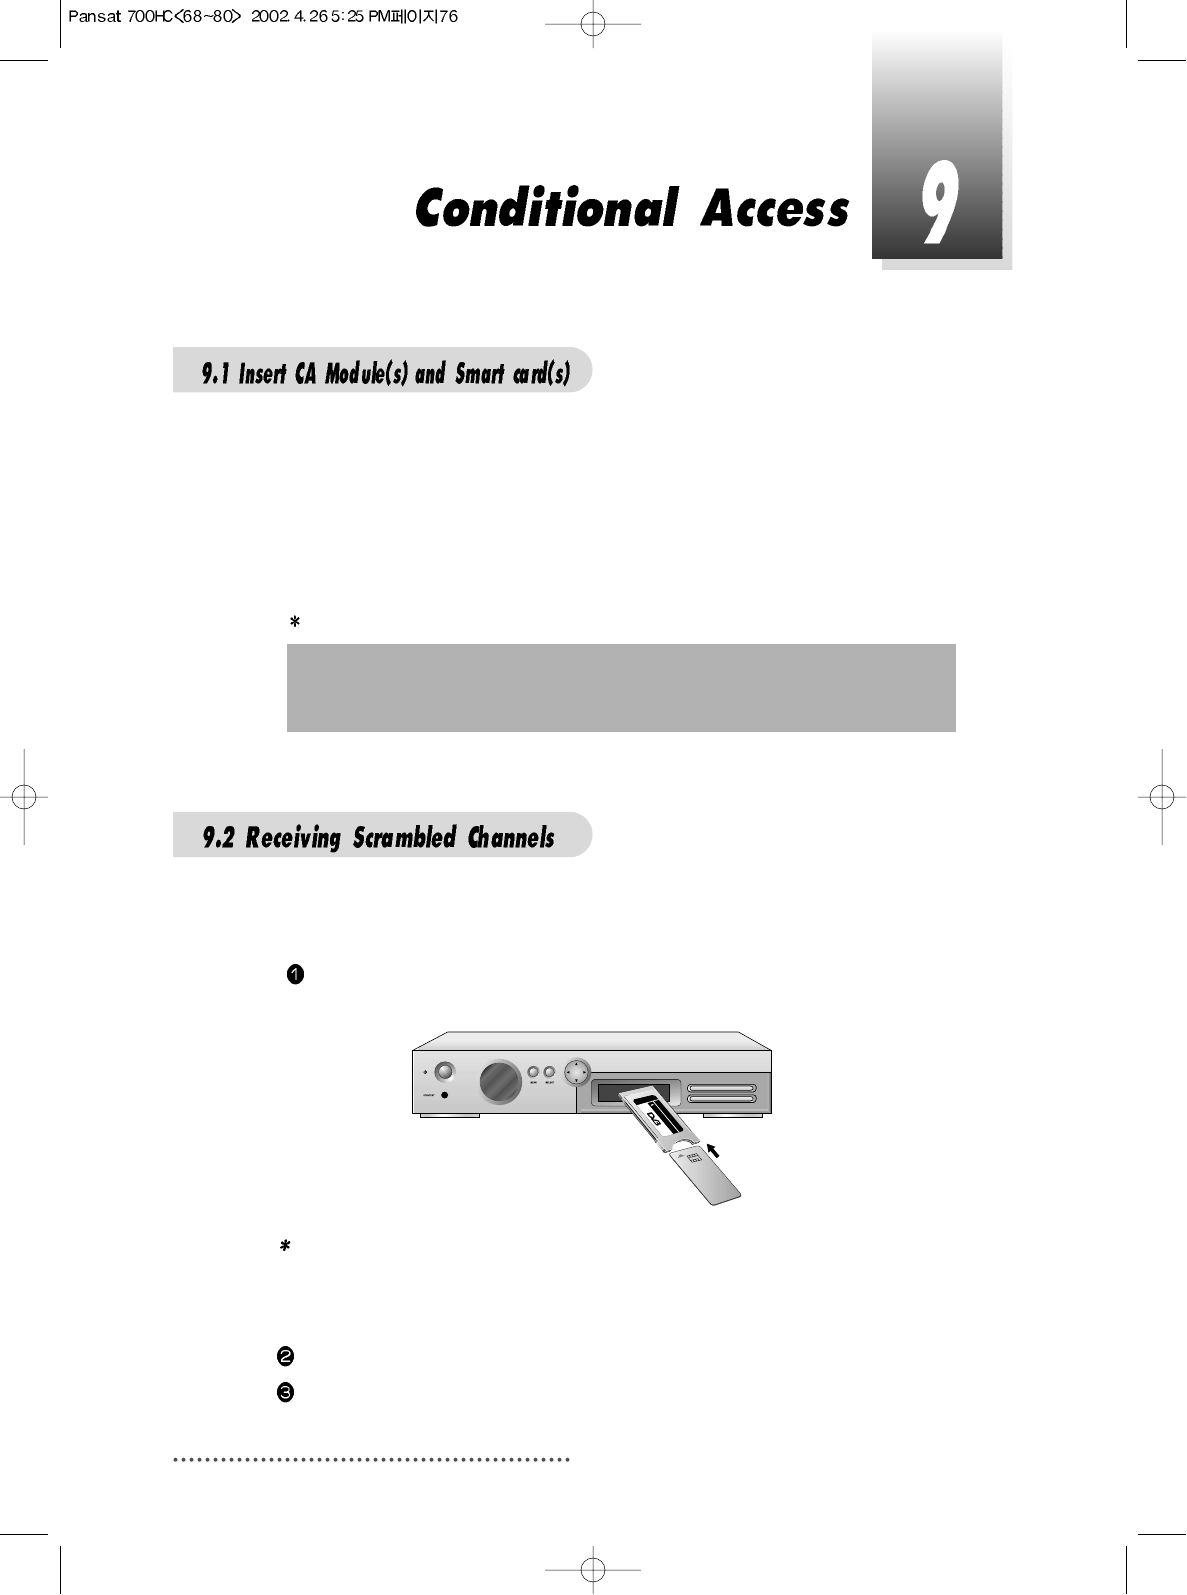
To receive pay-TV channels you need a CA Module and a Smart card from
the service provider (program distributor) of your preference. If you are sub-
scribing to services from more than one service provider, you need to change
different smart card or even different CA Modules.
Since a smart card is connected to a single service provider, a limited range of
channels will be available. Without the CA Module and the smart card, you
can watch only ‘Free-to-Air’ programs.
PIN-Code
Note : 1. Insert the CAM fully into the slot so that the arrow marked on the
CAM faces upwards and inwards.
2. Insert the smart card fully into the CAM so that the micro chip
(gold color) faces upwards and inwards.
The message of ‘CAM Initializing’will appear on the screen.
After the message ‘CAM Initializing’has disappeared, you can select the
channel you want.
The card is loaded with a 4-digit code, a so-called PIN code (Personal
Identification Number). Normally the PIN code is ‘0000’ or ‘1234’. The PIN
code is necessary for the future extra service offered by the service provider.
With a DVB COMMON INTERFACE compatible CAM (Conditional Access
Module) and a Smart card, you can receive relevant scrambled channels
and/or encrypted channels.
Insert a CAM into one slot of your receiver.
(You can insert two CAMs at the same time)
77
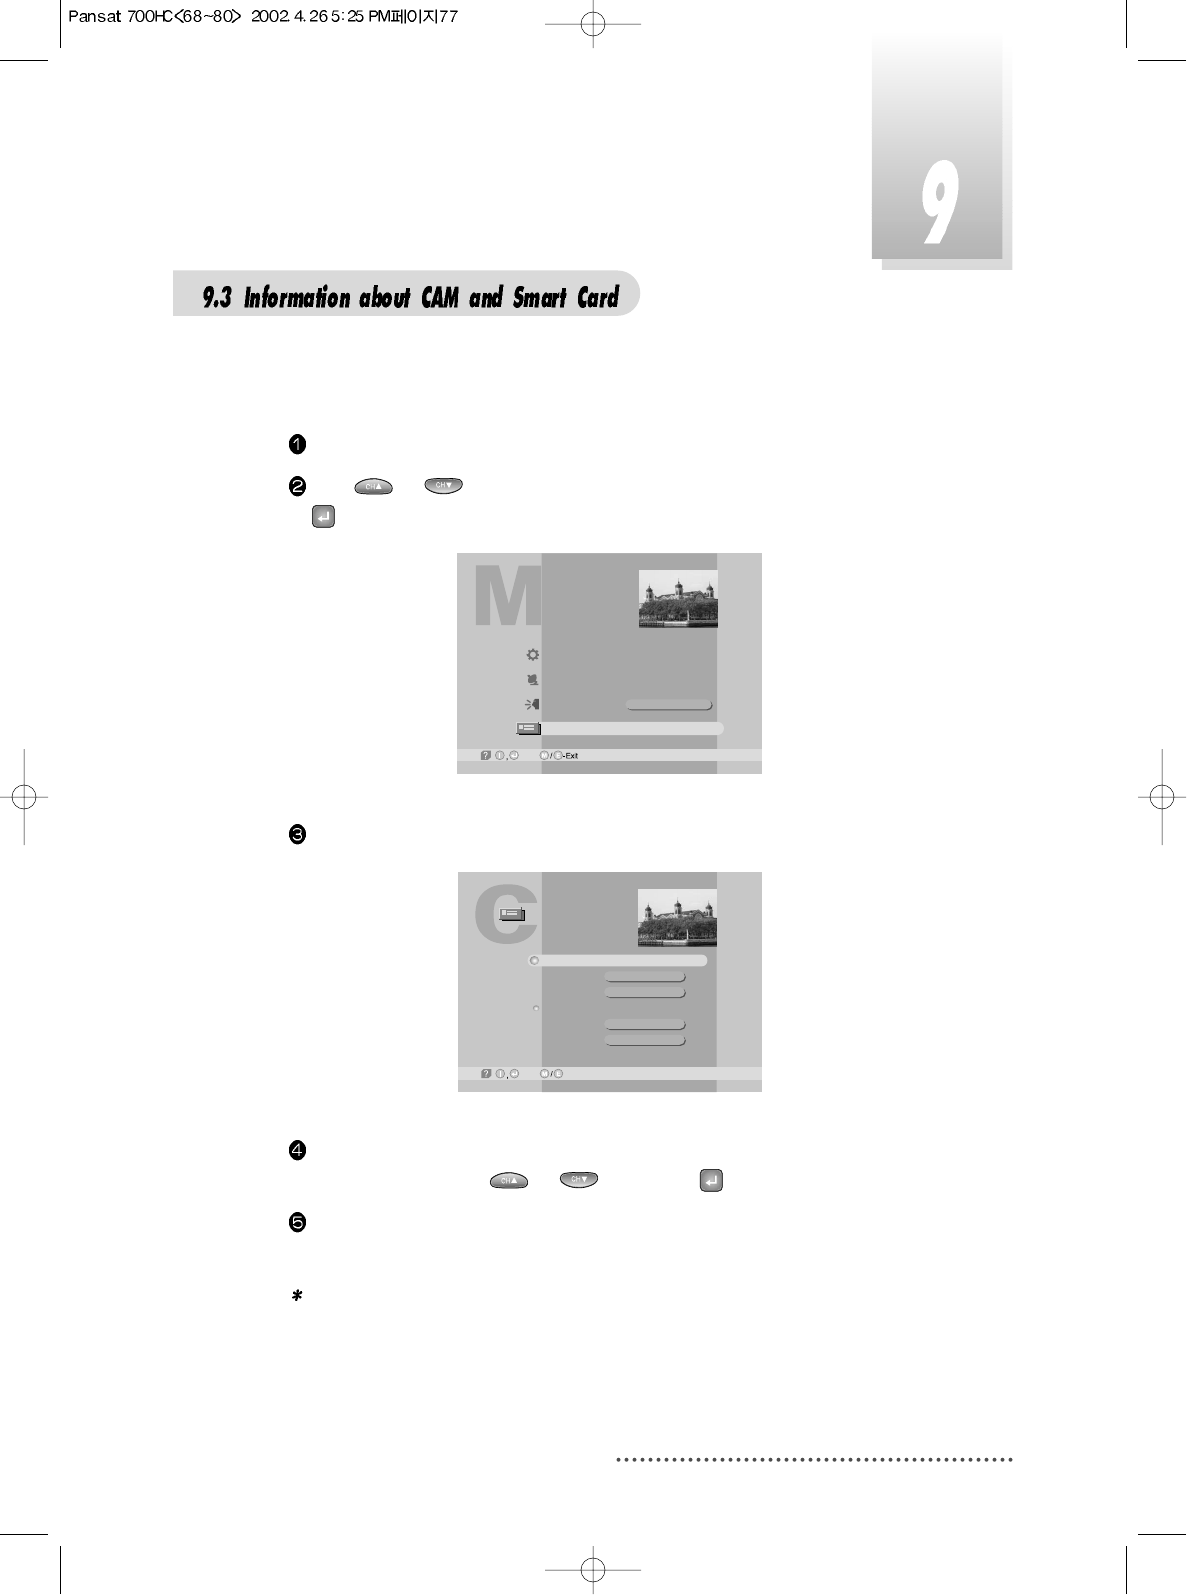
You can check the status of CAM and smart card inserted in their slots.
Press MENU key.
Press or , and select the Common Interface you want, then press
.
Screen
Brief information on selected CAM will be displayed.
Screen
If you want detailed information on the selected CAM select slot number 1
or slot number 2 with or and press .
Proceed with further instructions displayed on the screen, depending on
the CAM in use.
Note : Further detailed information is not mentioned in this manual since the
information depends on CAM and smart cards.
-Next, -Prev.
Common Interface
DVB_CI_V1.00
Viaccess
Not available
Not available
Slot #1
Version
Provider
Slot #2
Version
Provider
Main Menu
System Parameters
Installation
Language
Common Interface
English
-Next,
78
Remedy
Connect power cord properly into
the power socket.
Connect two terminals correctly
with scart cable or RCA or RF cable.
Connect the antenna cable cor-
rectly.
Adjust the direction of antenna.
Check the cable connections,
LNB and other equipment connect-
ed between the LNB and the
receiver or adjust the antenna.
Type the setting value correctly.
Use TV of same mode.
Use the NTSC/PAL converter con-
nected to the receiver and TV.
Change the batteries.
Switch off the light.
Aim the remote control at the
receiver.
Possible causes
AC power cord disconnected.
Wrong connection of the
video/audio output to TV input
terminal.
Wrong connection of satellite
antenna cable.
Wrong direction of satellite
antenna.
No signal or weak signal.
Wrong setting of channel infor-
mation in MENU screen.
Your TV mode is different from
satellite broadcasting mode.
Battery exhausted.
Fluorescent light interfering
with the remote controller
Remote controller is incorrectly
aimed.
Problem
LED on front panel
does not light.
No Picture or sound.
Black-and-white
screen or V-Hold.
The remote con-
troller is not working.
There may be various reasons for the abnormal operation of the unit. Therefore, if the
unit does not work properly, check it according to the procedures shown in the table
below :
79
IEC 169-24, female
950MHz 2150MHz
-65dBm 25dBm
14/18V, max 400mA
22KHz
Ver 1.2 & Ver 1.0 Compatible
QPSK
4Msps 45Msps
Auto conversion
32bit processor (50MHz)
4Mbyte
2Mbyte
2Kbyte
Main Proflie @ Main Level
up to 15M bits/s
720 X 576, 720 X 480
NTSC, PAL
4:3, 16:9
Mono, Dual mono, Stereo, Joint Stereo
32, 44.1 and 48 KHz
9pin D-sub male, Max 115K bps
Fully DVB compliant
Connector
Frequency range
Signal level
LNB supply
LNB switch control
DiSEqC
Front end
Symbol rate
SCPC and MCPC Capable
Spectral inversion
Processor
SDRAM
FLASH
EEPROM
MPEG 2
Data Rate
Resolution
Video format
Aspec Ratio
DVB compliant
MPEG 1 layer 1 & 2
Type
Sampling rates
Connector
System
capabilities
LNB/Tuner input
Demodulator
System resource
Video Decoder
Teletext
MPEG Audio
Serial data interface
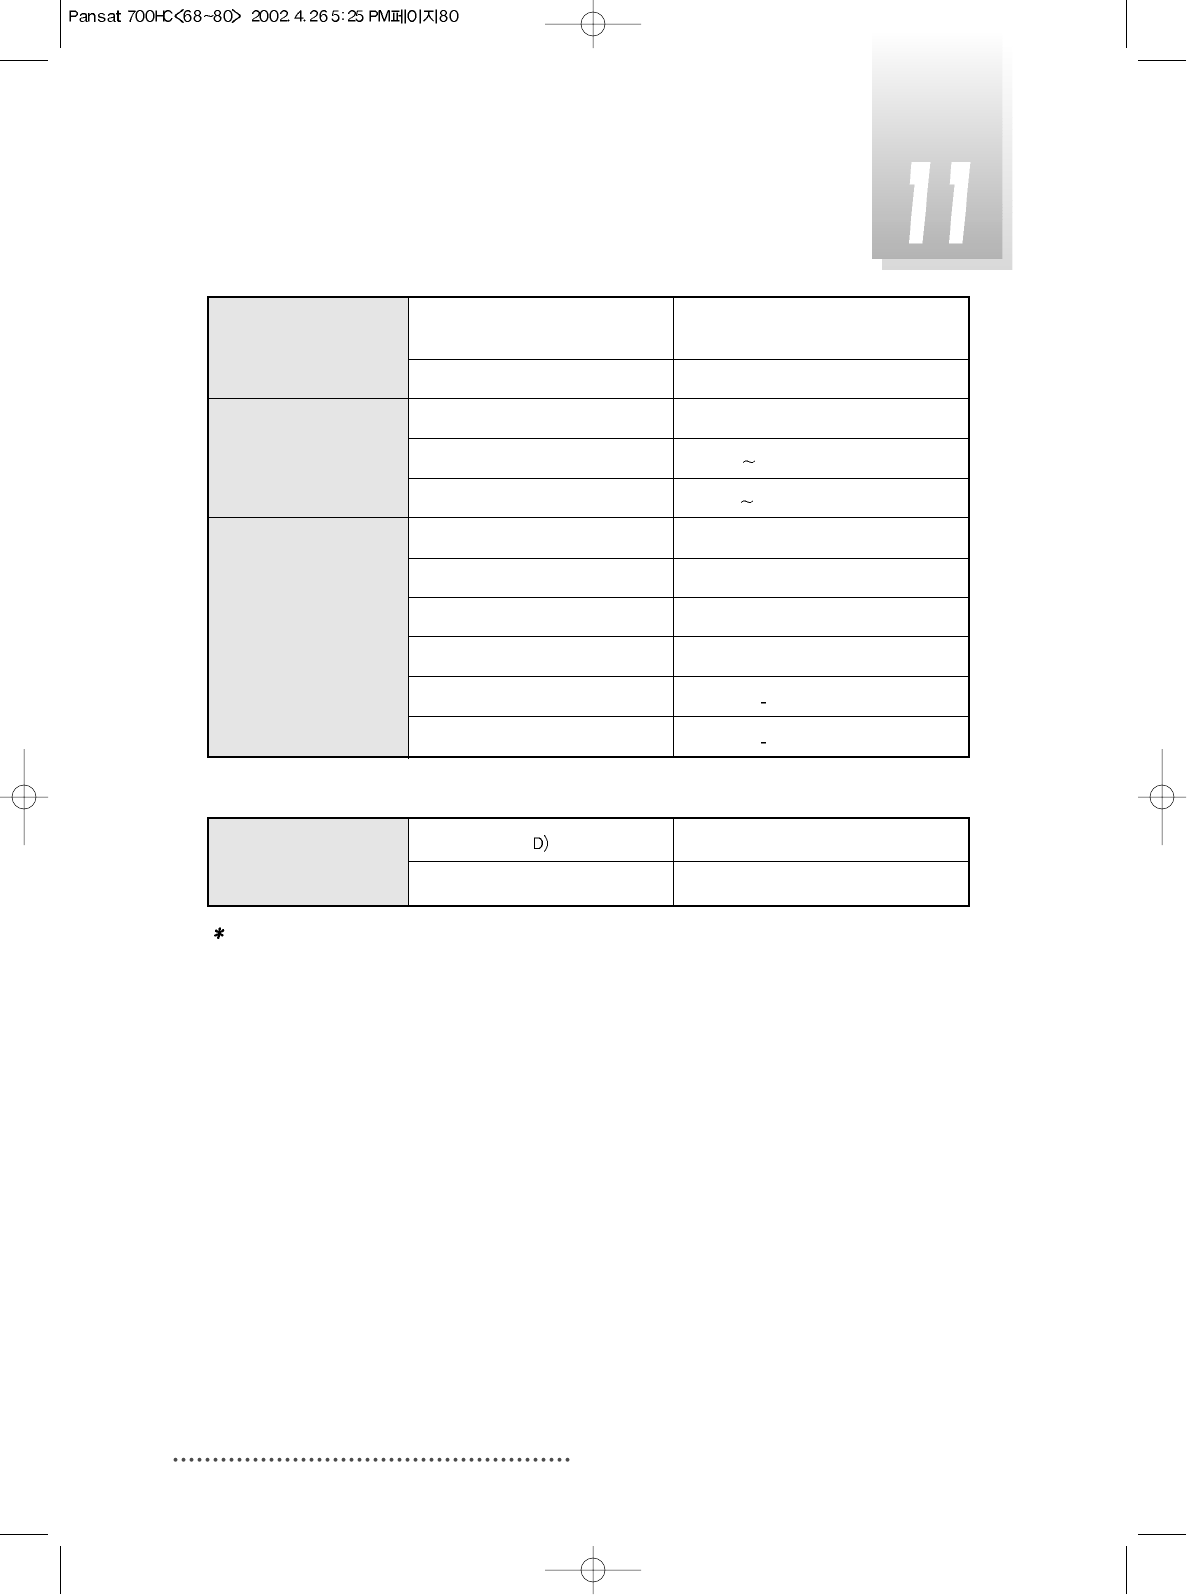
80
NEC-IR
up to 7 Meter
max 40W
100V 250V
47Hz 63Hz
1 X RCA cinch
2 X RCA cinch
1 X RCA cinch
9pin D-sub
IEC 169 24
IEC 169 24
335 X 58.5 X 268(
mm
)
3.2
Kg
Code
Operating condition
Power consumption
Supply voltage
Supply frequency
Video out
Audio L/R
DIGITAL OUT
Serial data
Digital tuner input
Loop-through Digital tuner
Size (W X H X
Weight (Net)
Remote control
Power supply
Rear Panel con-
nectors
Physical
Specification
Note :
These connectors can be removed by customer’s requirement.

50
You can set your TV display mode with this sub-menu.
Press MENU key.
Press or to select ‘System Parameters’, and press .
Press or to select ‘TV Type’.
Press or to select ‘Multi’, ‘PAL’, or ‘NTSC’.
Note : If the satellite signal and your TV type are mismatched, the TV picture
may be distorted. Even in this case, MENU will be displayed as normal.
(e.g. When you receive PAL satellite signal with NTSC TV type setting
or vice versa)
Multi When your TV is compatible with NTSC/PAL dual mode.
PAL When your TV is only for PAL reception. Regardless of
satellite signal, the display will be done in PAL format.
NTSC When your TV is only for NTSC reception. Regardless of
satellite signal, the display will be done in NTSC format.
8
Setting TV Type
51
This sub-menu allows you to select your TV aspect ratio to 4:3 or 16:9 according
to your wishes.
Press MENU key.
Press or to select ‘System Parameters’, and press .
Press or to select ‘Aspect Ratio’.
Press or to select ‘4x3’ or ‘16x9’ or ‘Auto’.
Note : If you set 4 x 3 when the Satellite input signal is 16 x 9, the right and
the left parts of the original picture may not be seen.
9
Setting Aspect Ratio
4x3 When your TV is 4:3.
16x9 When your TV is 16:9.
Auto When setting suitable aspect ratio automatically.
52
You can select the satellite input signal display mode.
Press MENU key.
Press or to select ‘System Parameters’, and press .
Press or to select ‘Screen’.
Press or to select ‘P/S’ or ‘L. Box’.
Note : 1. If you select ‘L.Box’, the screen might be distorted. Upper and lower
part of the screen will be blocked with black stripes.
2. ‘Screen’ function is helpful when receiving 16 x 9 signal with TV of
4x3 format.
P/S When you set screen display boundary from Pan/Scan
data of Satellite input signal. (For signal for 16x9 program)
L.Box You can watch 16 x 9 ratio screen by reducing original
size vertically and horizontally.
10
Setting Screen
53
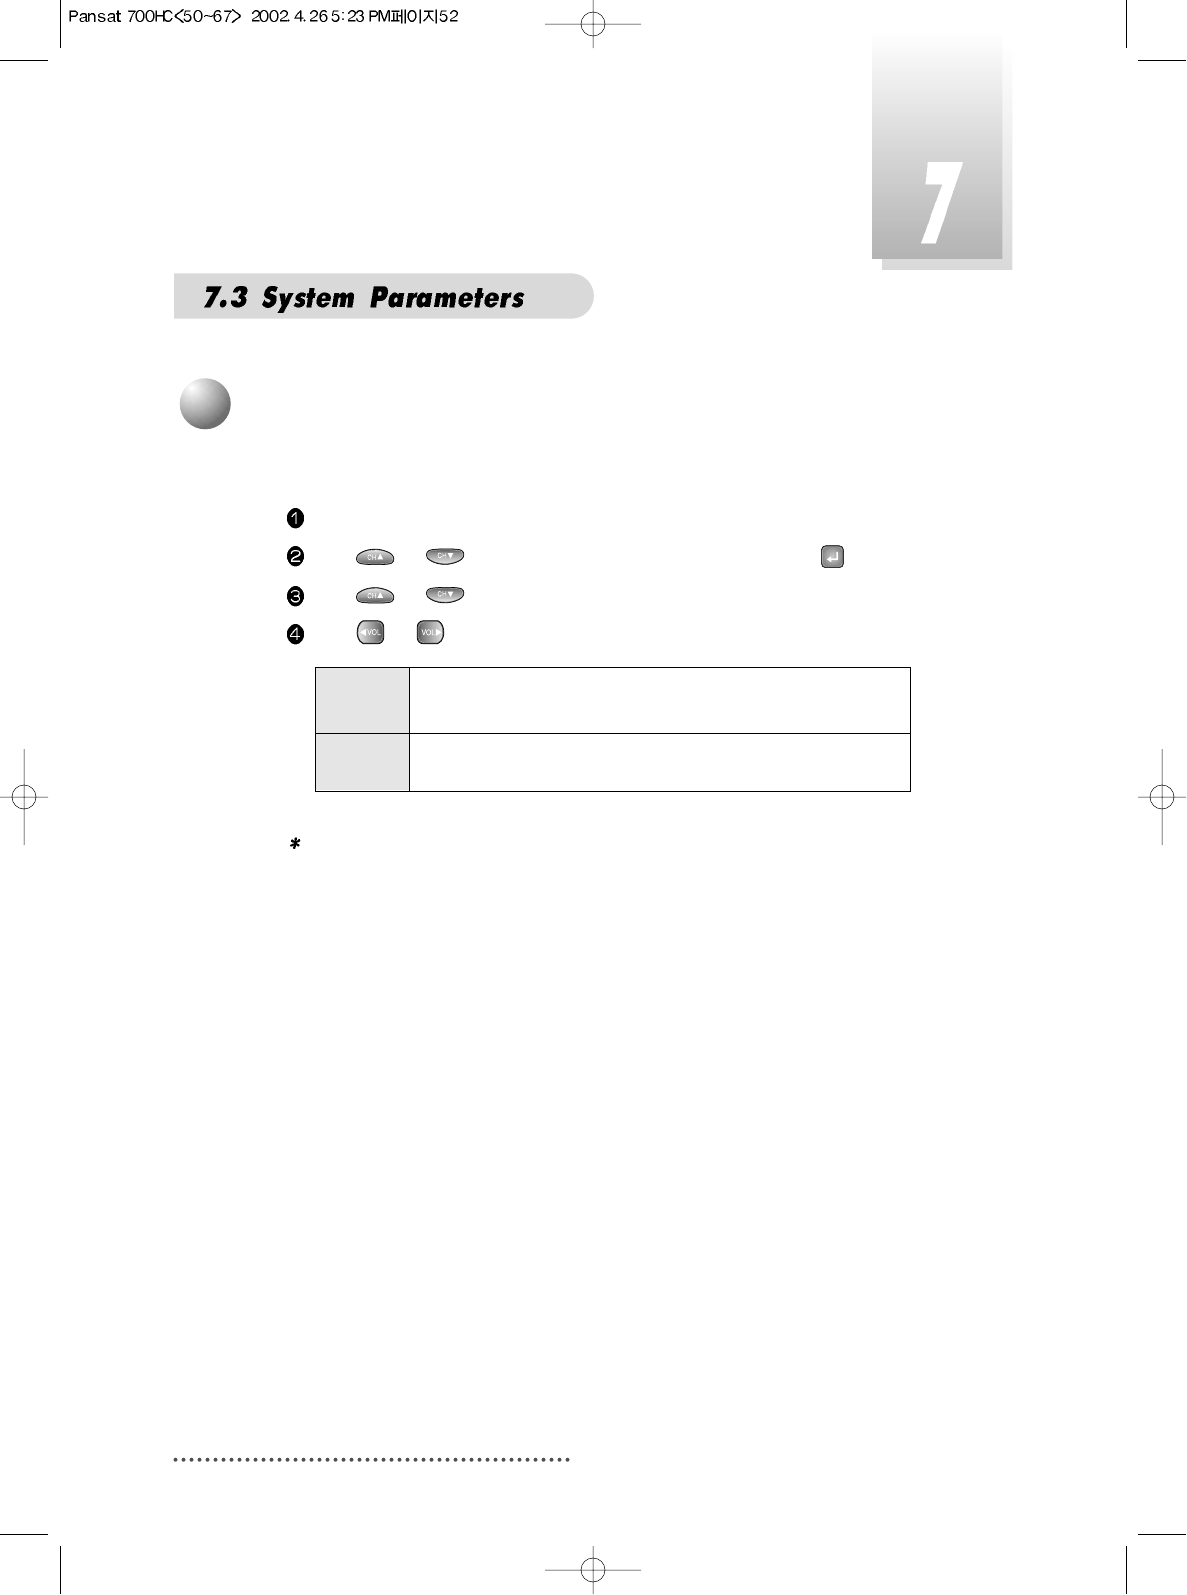
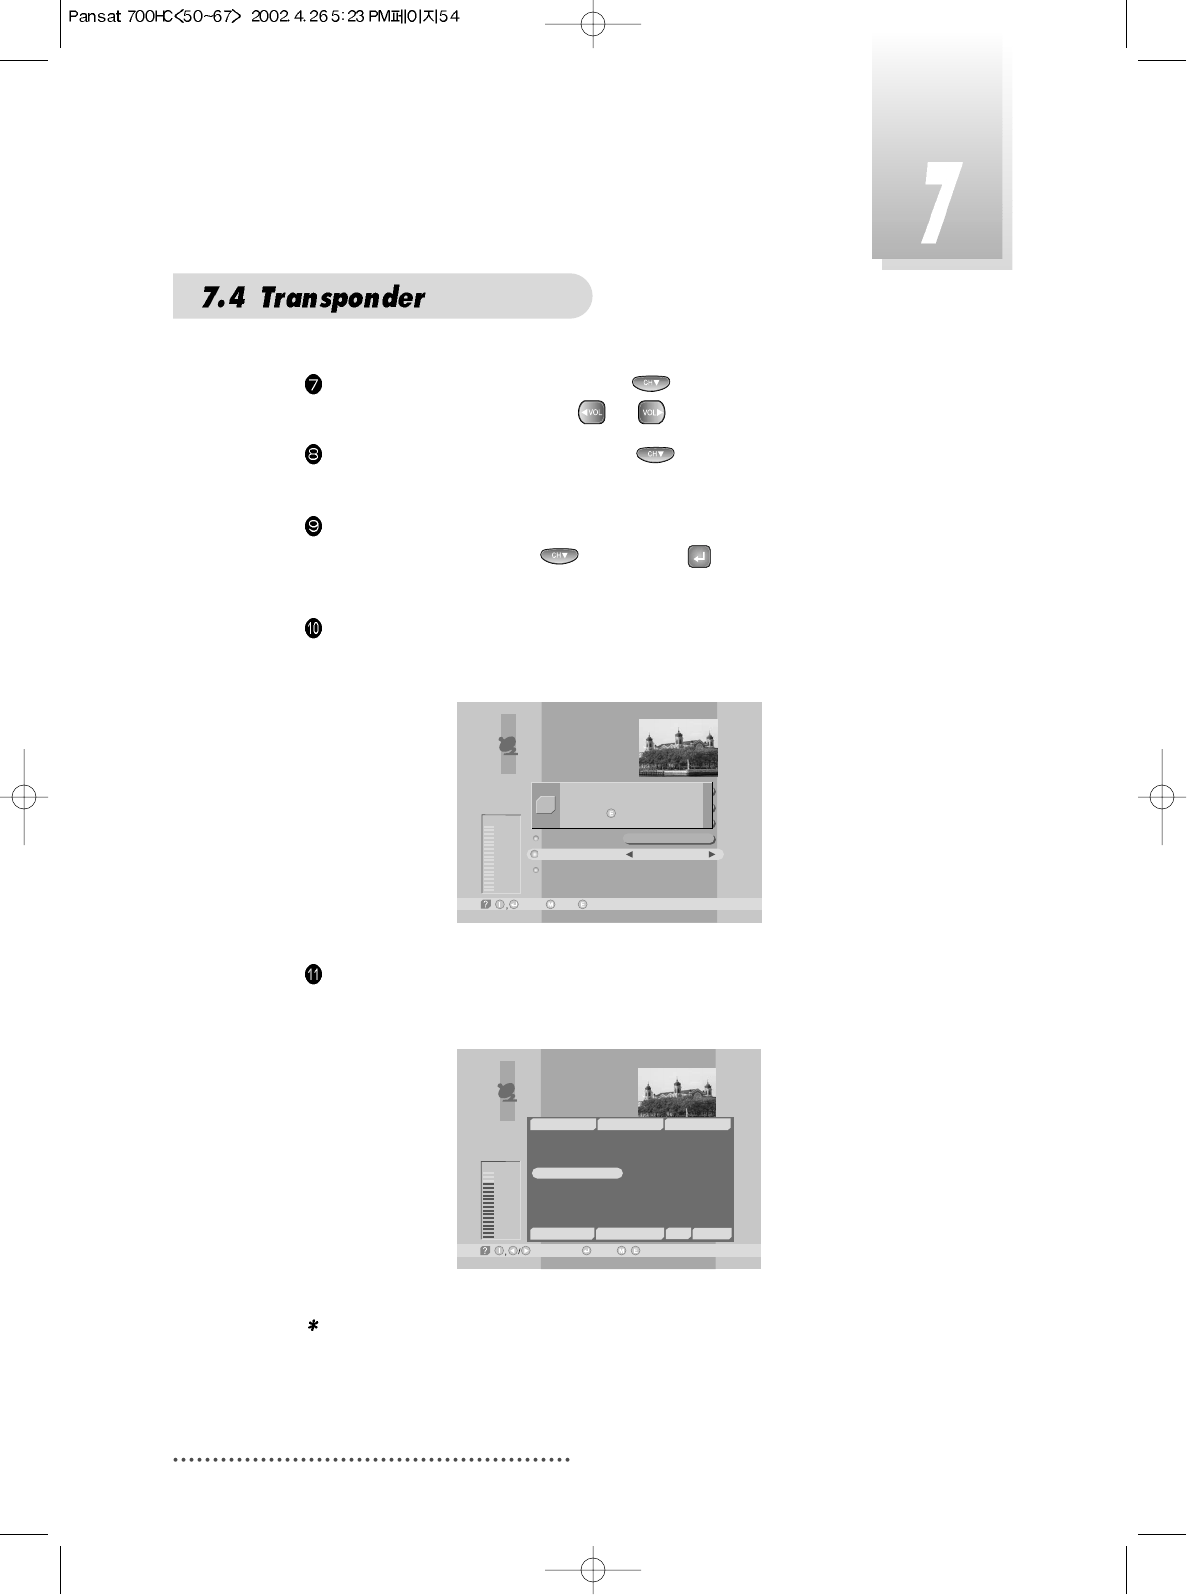
After ‘LNB Configuration’ and ‘Antenna Setup’ procedure, when nec-
essary, you can edit and/or add certain TPs (transponders)
Press MENU key.
Select ‘Installation’ with
or
, and press .
Screen
Select ‘TP Edit/Scan’ with
or
, and press .
Screen
Select the ‘Satellite Name’ which includes the TP you want to
add/edit with
or
.
Move to ‘TP Frequency’with and select the TP you want to
edit with
or
.
If you want to add the new TP, enter the TP frequency with
numeric keys.
1
TP Edit / Scan
Installation
-Next, -Prev.
LNB Configuration
Antenna Setup
Satellite Scan
TP Edit/Scan
Factory Set
TP Edit/Scan
-Select, -Prev.-Main,
AsiaSat 2
[24] 4,000 GHz
Horizontal-18V
28,123 MSPS
Free+Scrambled
Good
81%
Satellite Name
TP Frequency
Polarization
Symbol Rate
Scan
TP Delete
54
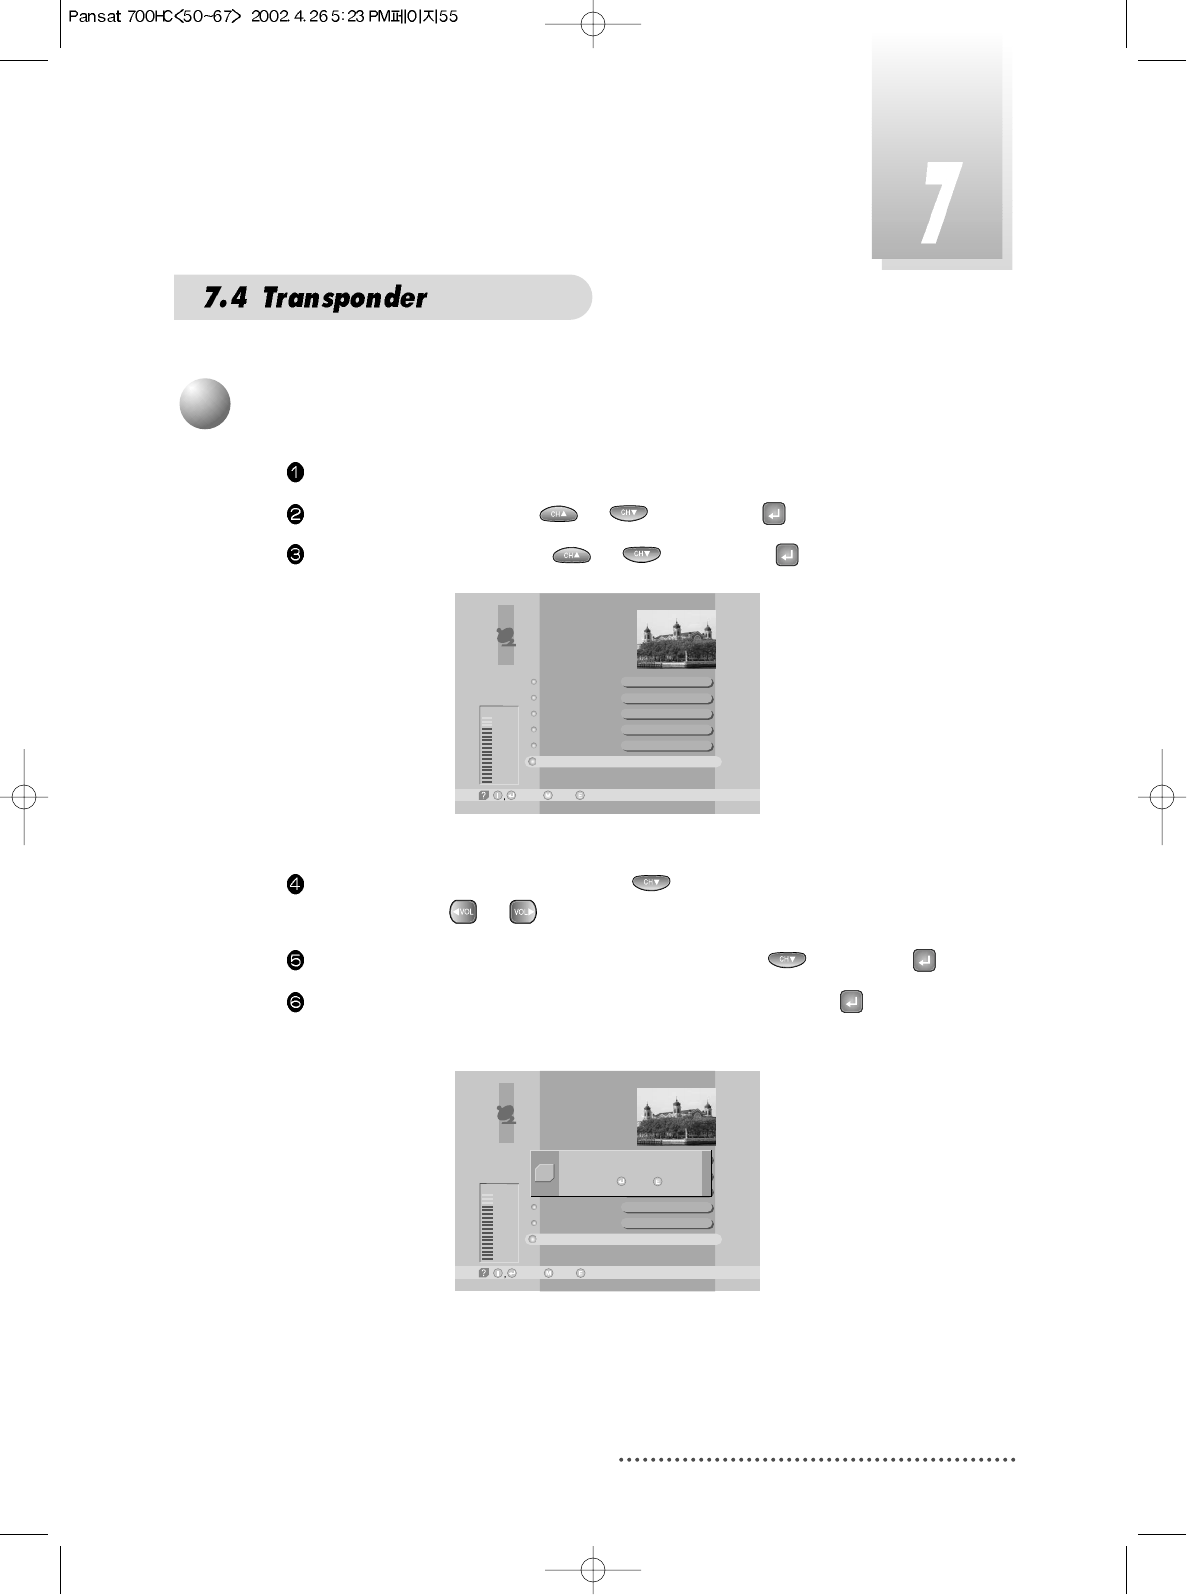
Select ‘Polarization’ by pressing and the set the proper
value for selected TP with
or
.
Select ‘Symbol rate’ by pressing and enter the symbol rate
value for the selected TP with numeric keys .
After entering all values of the TP parameters, move to ‘SCAN’
section (column) with and press for storing all the
entered TP data.
As a result, you can get the following menu showing the scan-
ning process.
Screen
After scanning process, the first channel of scanned TP will be
displayed.
Screen
Note : If the scan fails, please check whether your entered values are cor-
rect or not and the signal reception sensitivity is good or bad.
TP Edit/Scan
-Select, -Prev.-Main,
USER
[15] 3,820 GHz
Vertical-14V
28,123 MSPS
Free+Scrambled
Good
81%
Satellite Name
TP Frequency
Polarization
Symbol Rate
Scan
TP Delete
Scanning
Press to stop scanning
Q
TP Edit/Scan
Good
82%
-Watch, -Prev./-Page Up/Down,
TV: 6 Success Radio: 20
17
18
19
20
21
22
DW 9
RDP ANTENA 1
RDP ESPECIAL
NN
¥xÆWaN¥
<<
TWN
¥@uØ1/2Auø USA-
AsiaSat 2 [24] 4,000 GHz Hor. 28,123
~
~
9
10
11
12
13
14
15
16
RAI Internati
TVE
TV5-Asia
RTPi
uØoH-u1/4Ö¥x CS
ªFËê>>Ú¥x ET
«DoZ¥x USTV-I
oé¥>>¥x JET
55
Press MENU key.
Select ‘Installation’ with
or
, and press .
Select ‘TP Edit/Scan’ with
or
, and press .
Screen
Move to TP section (column) with and select the TP you want
to delete with
or
.
Move to ‘TP Delete’ section (column) by pressing and press .
When the menu asks you to confirm the deletion, press if you
want to delete it or press EXIT key if you want to void the deletion.
Screen
TP Edit/Scan
-Select, -Prev.-Main,
AsiaSat 2
[24] 4,000 GHz
Horizontal - 18V
28,123 MSPS
Free+Scrambled
Good
80%
Satellite Name
TP Frequency
Polarization
Symbol Rate
Scan
TP Delete
TP Edit/Scan
-Select, -Prev.-Main,
USER
[15] 3,820 GHz
Vertical-14V
28,123 MSPS
Free+Scrambled
Good
81%
Satellite Name
TP Frequency
Polarization
Symbol Rate
Scan
TP Delete
Do you want to delete this TP?
Yes / No
Q
2
TP Delete

56
The status of the receiver will return to factory default parameters by using this
function.
Press MENU key.
Select ‘Installation’ with or , and press .
Screen
Select ‘Factory Set’ with or , and press .
Screen
When the menu asks you to confirm the reset, press if you want to reset
or press EXIT key if you want to void the reset.
Note : Please be careful when you do 'Factory Set' because channel list
information is deleted.
LNB Configuration
Antenna Setup
Satellite Scan
TP Edit/Scan
Factory Set
Installation
-Next, -Prev.
LNB Configuration
Antenna Setup
Satellite Scan
TP Edit/Scan
Factory Set
Installation
-Next, -Prev.
Do you want to reset all data?
Yes / No
Q
57
You can use this menu when you change a TV channel to a Radio channel or
vice versa.
Press ‘TV/RADIO’.
When listening a radio channel, ‘r001’ will be displayed on the front panel.
2
TV / RADIO switching
This function is used for receiving a signal through the RF modulator.
If your receiver has no 'TV ANT IN' terminal in the rear panel, this key may not
work.
Press ‘TV/SAT’. The signal reception path will change to RF modulator and
‘TV/SAT’ LED on front panel will be lit.
The signal output through the RF modulator will be as follows :
TV/SAT LED
Power ON Power OFF
ON TV ANT IN signal will be out.
OFF Decoded signal will be out TV ANT IN signal will be out.
through RF.
1
TV / SAT switching
58
You can check the channel information on the channels of the transponder
you are watching.
Press GUIDE key, then the following menu will be displayed.
Screen
Note : 1. You can check local time, channel name, and other brief informa-
tion on the current program.
2. If you didn't set local time under ‘System Parameters’ section, the
GUIDE function may not work properly.
3. EPG information is delivered by satellite from service providers.
If the channel does not carry any signal on the guide data, this
function may not work properly.
Select Channel with / .
Then you can see current or next program information of the selected channel.
If you press GREEN, current or next program information would be convert-
ed to next or current program information respectively.
Screen
3
GUIDE(EPG:Electronic Program Guide)
Program Guide
-Schedule, -Extended, -Record-Current/Next,
19:33
19:23 19:53
Current
JOURNAL News - Sports -
Weather - Interview
1
2
3
4
5
6
7
8
Fujian 1
DIGITL VID
ANHUI TV
NMCHTV
Guangdong 1
Hunan 1
DWtv
MCM
JOURNAL Ne..
Program Guide
-Schedule, -Extended, -Record-Current/Next,
19:33
19:23 19:53
Current
JOURNAL News - Sports -
Weather - Interview
1
2
3
4
5
6
7
8
Fujian 1
DIGITL VID
ANHUI TV
NMCHTV
Guangdong 1
Hunan 1
DWtv
MCM
JOURNAL Ne..
Program Guide
-Schedule, -Extended,-Current/Next,
19:34
19:53 20:23
Next
In Focus
1
2
3
4
5
6
7
8
Fujian 1
DIGITL VID
ANHUI TV
NMCHTV
Guangdong 1
Hunan 1
DWtv
MCM
In Focus
-Record
59
If you press YELLOW, you can see program schedule list of the selected
channel.
Screen
If you want to see program information of a program in the program sched-
ule list, select the program with / .
Then you can see the program information in the right window.
Screen
If you press BLUE, you can see extended program information of the select-
ed program.
Screen
Program Guide
-Schedule, -Extended,-Current/Next,
19:39
Guest: Marianne Birthler Commissioner
for Stasi Files
[7] DWtv
11/03/1998 19:27~19:57
JOURNAL News-Sports-
Weather - Interview
-Reserve
Program Guide
-Schedule, -Extended,-Current/Next,
19:39
19:27~19:57
19:57~20:27
20:27~20:57
20:57~21:27
21:27~21:57
21:57~22:27
22:27~22:57
22:57~23:27
JOURNAL News - Sports..
In Focus
JOURNAL Nachrichten - ..
Thema
JOURNAL News - Busines..
Germany Live
JOURNAL Nachrichten - ..
Im Focus
[7] DWtv
11/03/1998 19:27~19:57
JOURNAL News-Sports-
Weather - Interview
-Reserve
Program Guide
-Schedule, -Extended,-Current/Next,
19:42
19:27~19:57
19:57~20:27
20:27~20:57
20:57~21:27
21:27~21:57
21:57~22:27
22:27~22:57
22:57~23:27
JOURNAL News - Sports..
In Focus
JOURNAL Nachrichten - ..
Thema
JOURNAL News - Busines..
Germany Live
JOURNAL Nachrichten - ..
Im Focus
[7] DWtv
11/03/1998 20:27~20:57
JOURNAL Nachrichten -
Wirtsohaft - Wetter -
Tagesthema
-Reserve
60
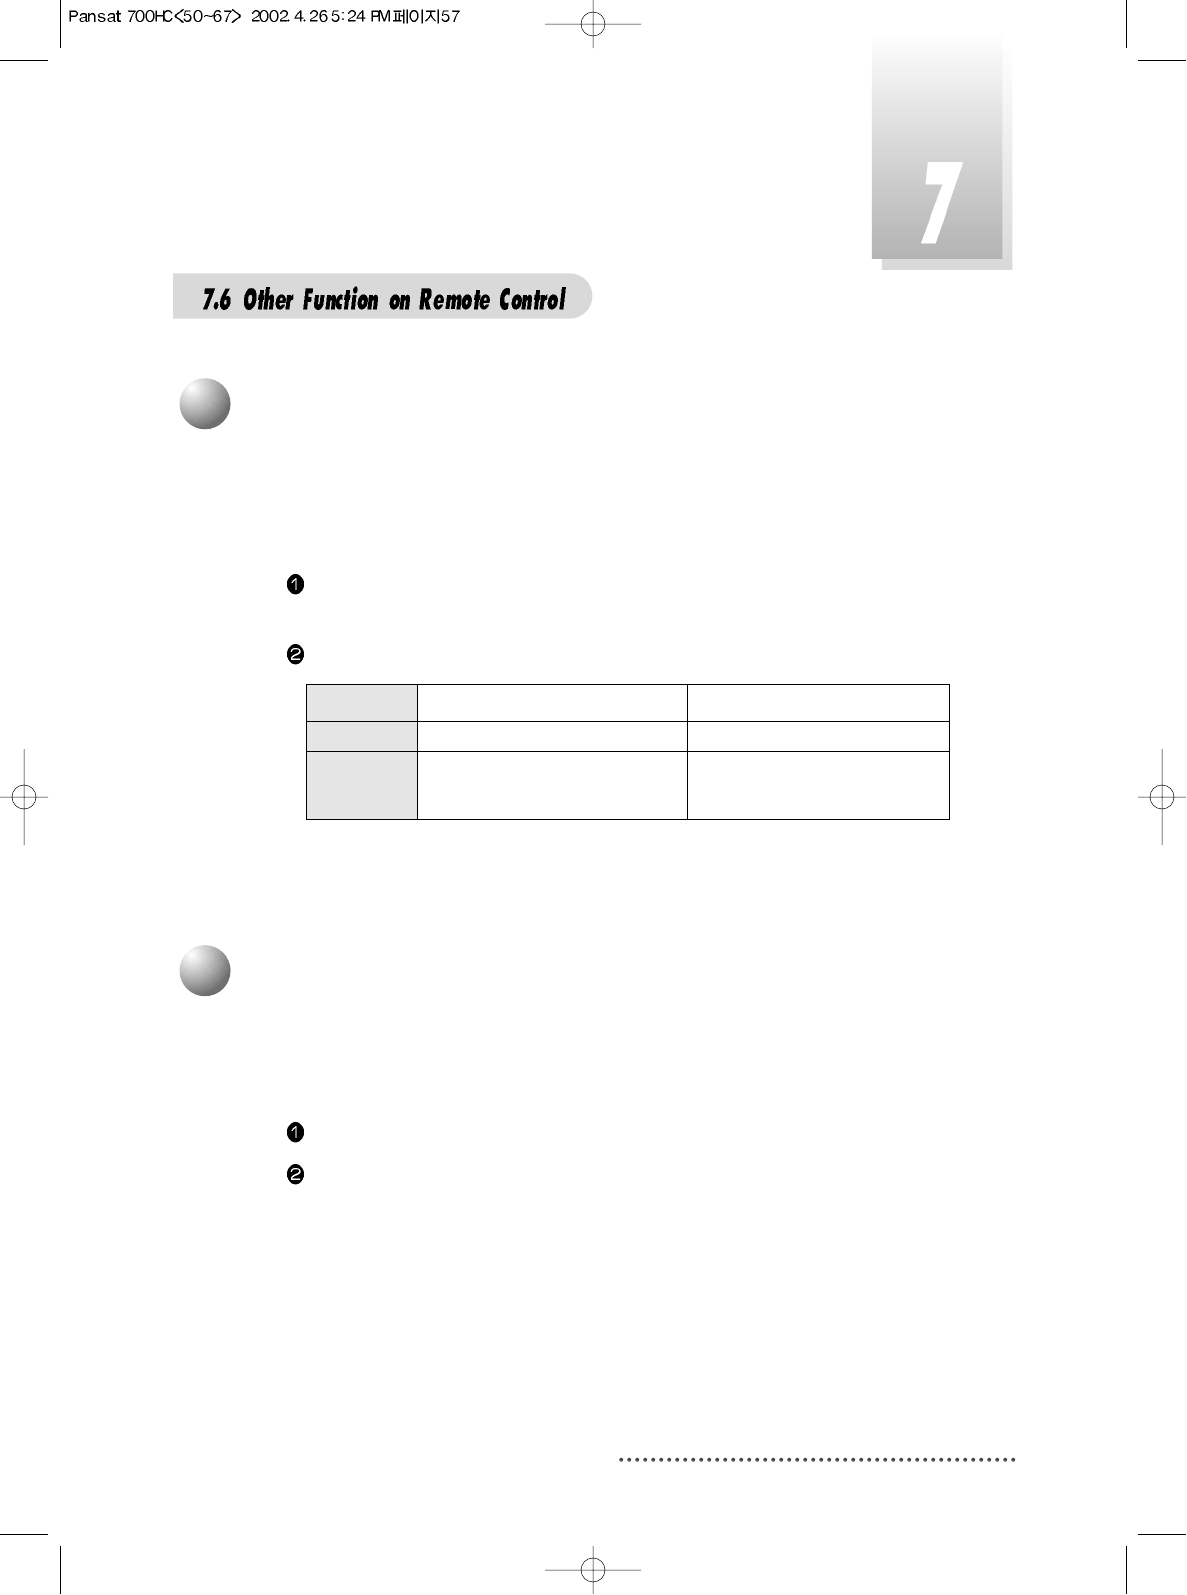
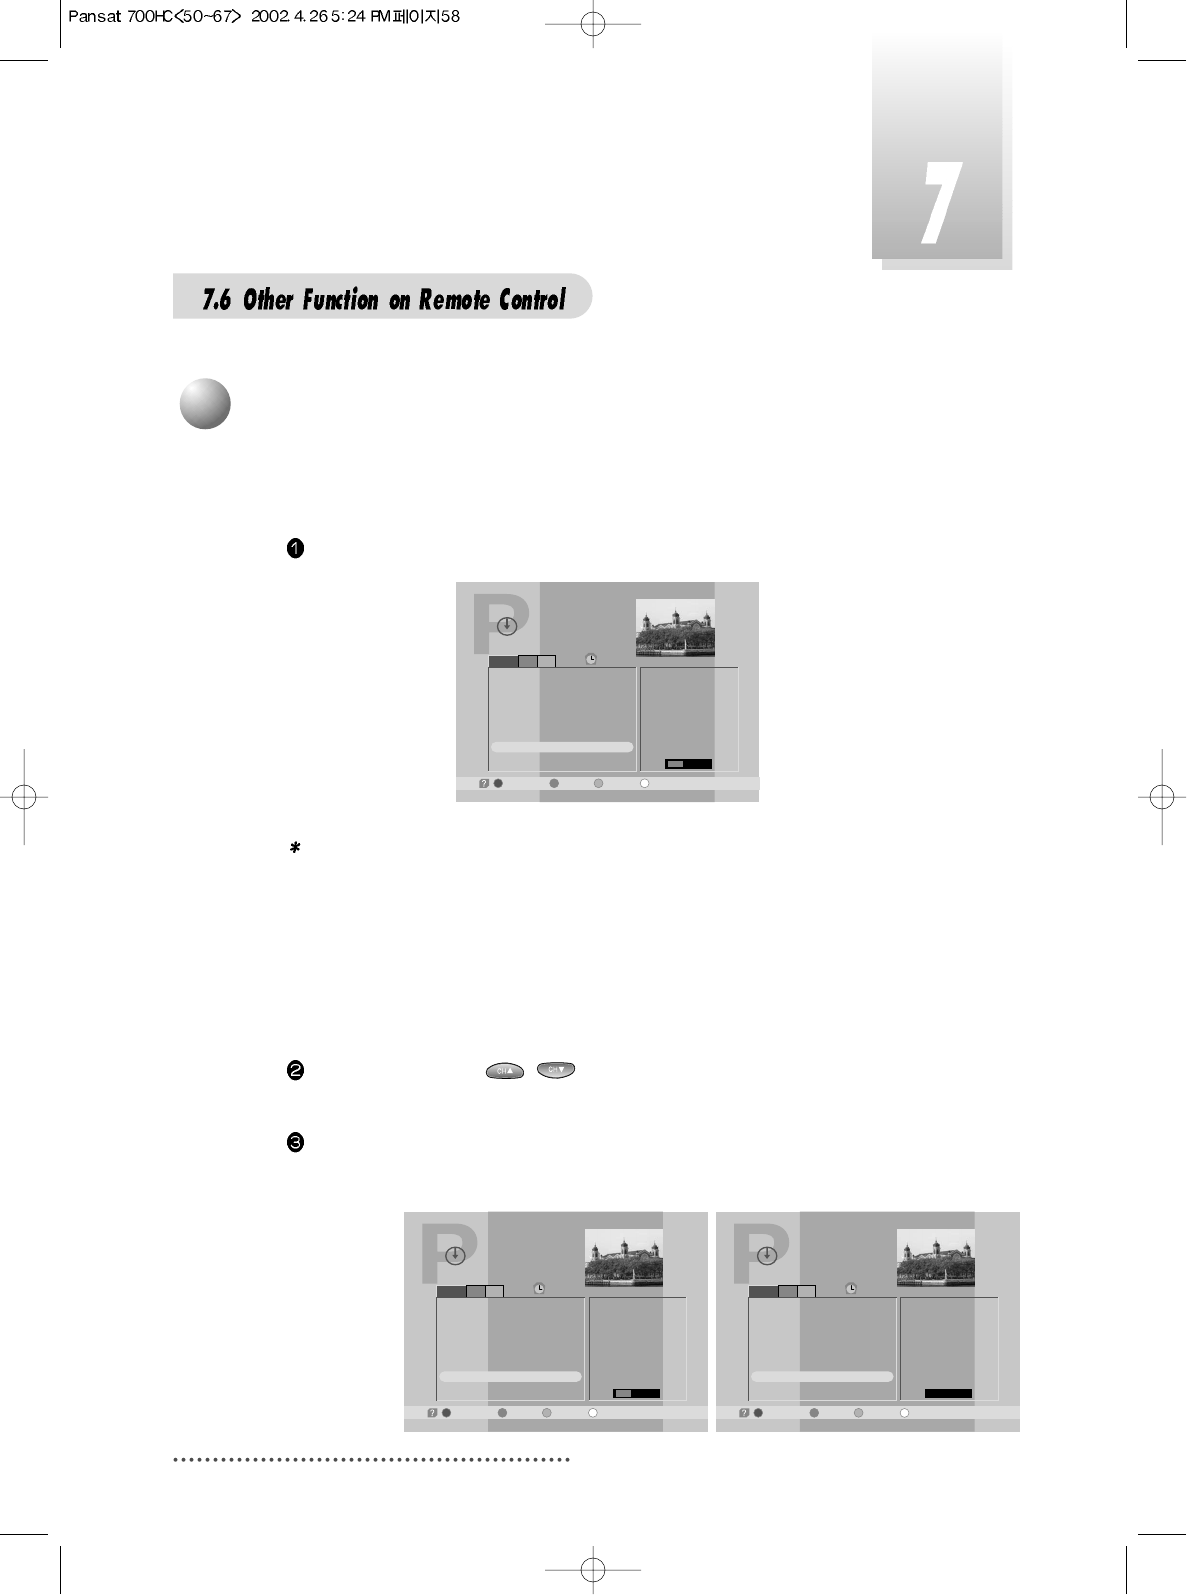
You can set up automatic power on-off (Timer) or automatic
recording on the program schedule list. After press YELLOW in the
Guide( EPG) menu, select a program with
/
or
/
and press .
Select 'Once/Daily/Weekly/No' of 'Status' with or .
Select ‘HD record’ and set ‘ON’ with if you want to record automatically.
Screen
Press to save the new 'Timer' setting.
Screen
Press MENU,EXIT or to finish GUIDE menu.
Note : 1. Without 'STATUS' being actuated (Yes), 'Timer' does not work.
2. If a program of prior time than current time ('Local Time' in 'System
Parameters' menu) is selected, Timer does not work.
3. Refer to 'Setting Timer' in 'System Parameters' in this manual.
Program Guide
-Schedule, -Extended-Current/Next,
19:42
19:27~19:57
19:57~20:27
20:27~20:57
20:57~21:27
21:27~21:57
21:57~22:27
22:27~22:57
22:57~23:27
JOURNAL News - Sports..
In Focus
JOURNAL Nachrichten - ..
Thema
JOURNAL News - Busines..
Germany Live
JOURNAL Nachrichten - ..
Im Focus
[7] DWtv
11/03/1998 20:27~20:57
JOURNA chrichten -
Weather -- Wetter -
11/03/1998 20:26
Timer
Status
HD record
11/03/1998 21:02
-Reserve, -Cancel
E
Once
ON
Program Guide
-Schedule, -Extended-Current/Next,
19:42
19:27~19:57
19:57~20:27
20:27~20:57
20:57~21:27
21:27~21:57
21:57~22:27
22:27~22:57
22:57~23:27
JOURNAL News - Sports..
In Focus
JOURNAL Nachrichten - ..
Thema
JOURNAL News - Busines..
Germany Live
JOURNAL Nachrichten - ..
Im Focus
[7] DWtv
11/03/1998 20:27~20:57
JOURNA chrichten -
Weather -- Wetter -
11/03/1998 20:26
Timer
Status
HD record
11/03/1998 21:02
-Reserve, -Cancel
E
No
ON
Program Guide
-Schedule, -Extended-Current/Next,
19:42
19:27~19:57
19:57~20:27
20:27~20:57
20:57~21:27
21:27~21:57
21:57~22:27
22:27~22:57
22:57~23:27
JOURNAL News - Sports..
In Focus
JOURNAL Nachrichten - ..
Thema
JOURNAL News - Busines..
Germany Live
JOURNAL Nachrichten - ..
Im Focus
[7] DWtv
11/03/1998 20:27~20:57
Wirtsohaft - Wetter -
Tagesthema
Reserved at Timer #1
!
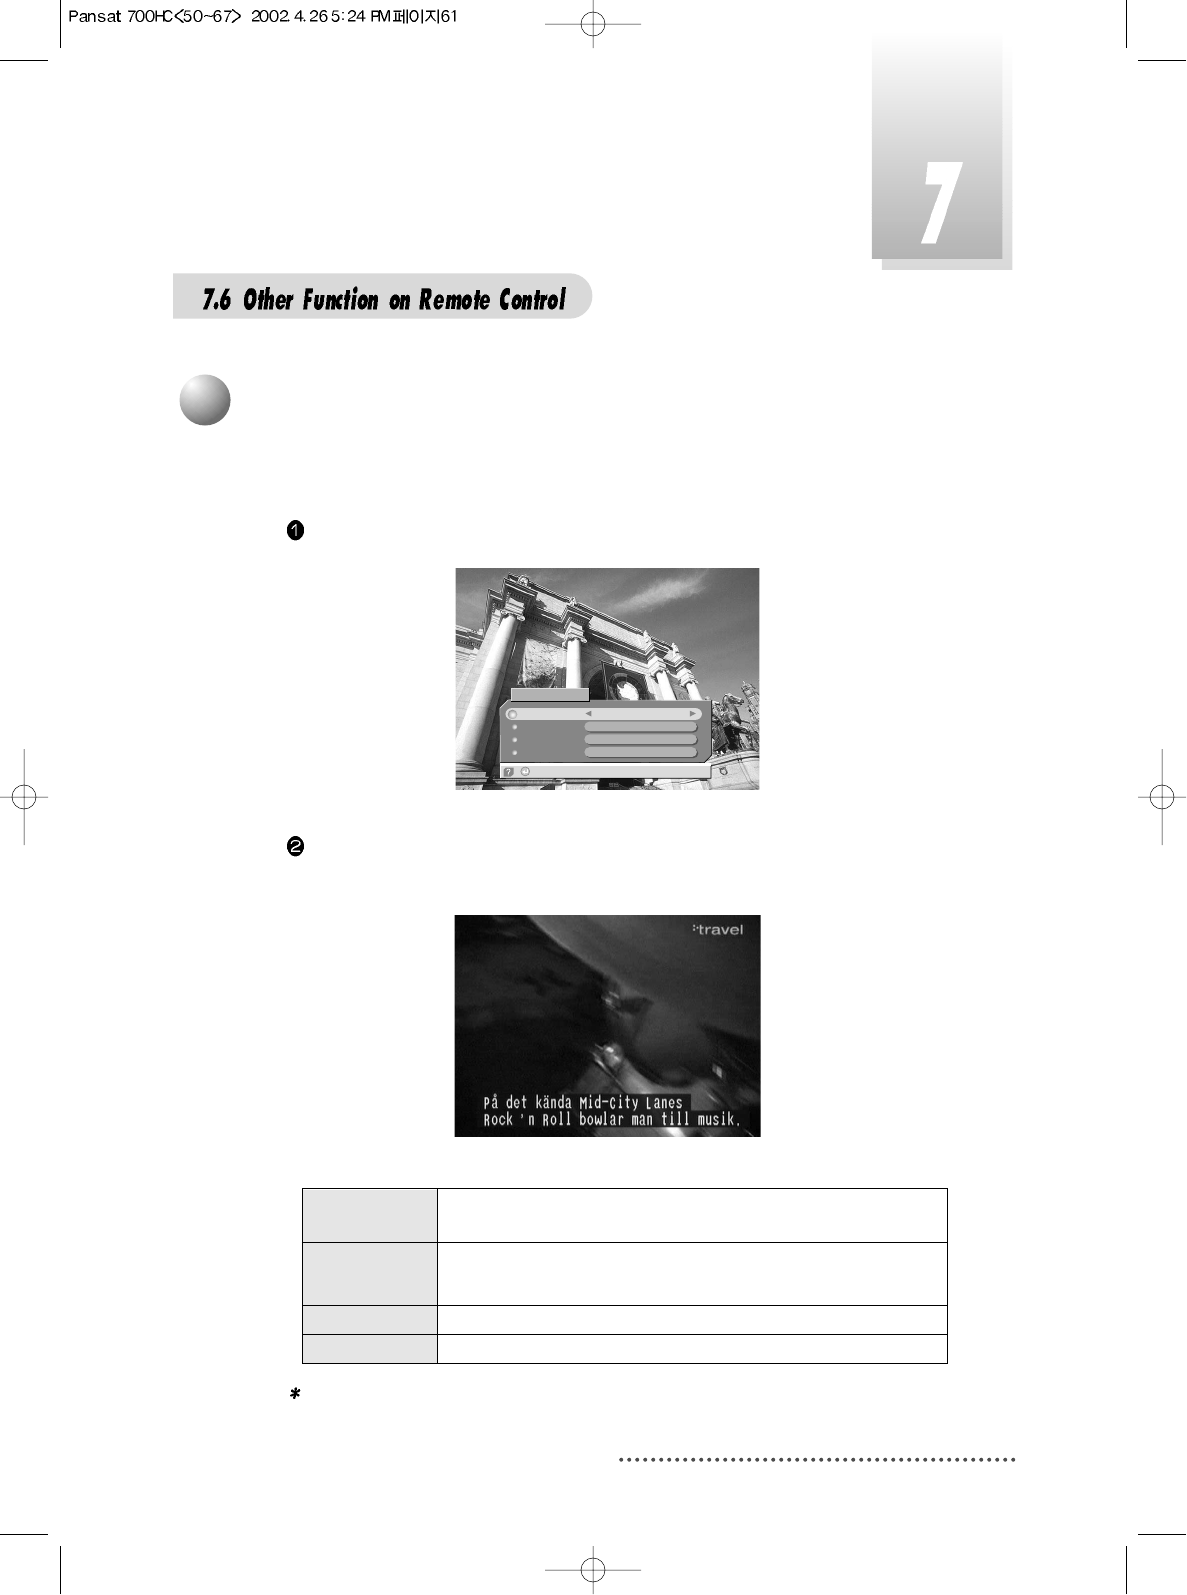
61
You can adjust the subtitle and audio condition/status of the current channel.
Press ‘AUDIO’ and subtitle and audio related window will be displayed on the screen.
Screen
In this example, program spoken language is 'English' and user's selected
subtitle language is 'Swedish'.
Screen
The contents of each parameter are as follows ;
Note : These subtitle and audio parameters are workable only when the
receiving channel supports these functions.
-Subtitle On/Off
Subtitle Track
Audio Track
Audio Mode
Dig.Output
2 of 10 [Swedish]
1 of 8 [English]
Stereo
Non-compressed
Subtitle/Audio
4
Subtitle/Audio
Subtitle Track (Subtitle language #) of (all subtitle language available in this
program)[ Current selected subtitle language ]
Audio Track (Audio track #) of (all tracks available in this program )
[spoken language in this program ]
Audio Mode Stereo -> Mono-Left -> Mono-Right
Dig.Output Non-compressed / Compressed
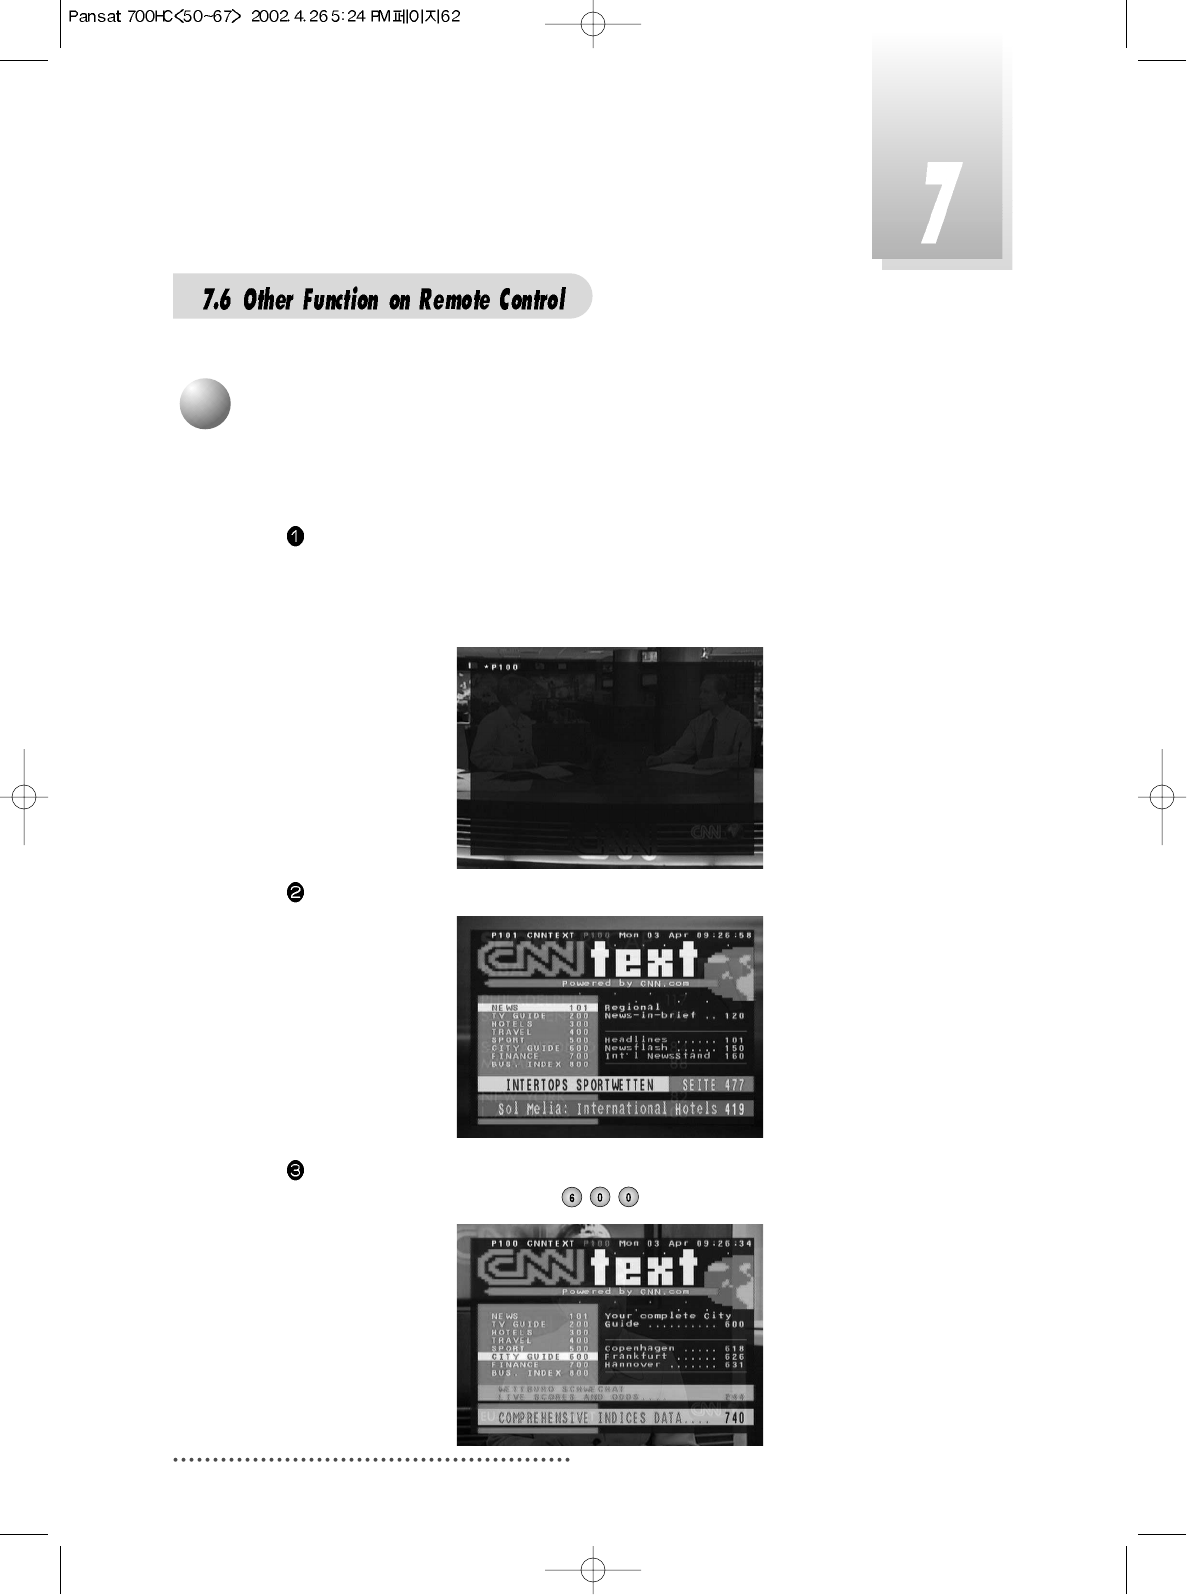
62
Teletext Service is text data service from Service Provider.
It is available only when the satellite signal carries teletext service data.
Press BLUE key and wait.
If ‘*’ sign is pop up in the left upside of the screen as the following picture, wait
until teletext service menu is displayed because ‘*’ means 'This program pro-
vides teletext service. So wait a moment'.
Screen
Teletext Service Data is displayed as following picture.
Screen
Select your interesting item with numeric keys. For example, if you want to
see about 'CITY GUIDE', press .
Screen
5
Teletext
63
Your receiver will automatically power-off when the time you set is passed.
Press ‘SLEEP’ key until the right time you want appears.
Screen
Note : 1. You can set SLEEP TIMER in 30 minute steps up to 150 minutes.
2. The SLEEP TIMER does not work while you are in ‘MENU’,
‘GUIDE’ or ‘CHANNEL LIST’.
6
Sleep Timer
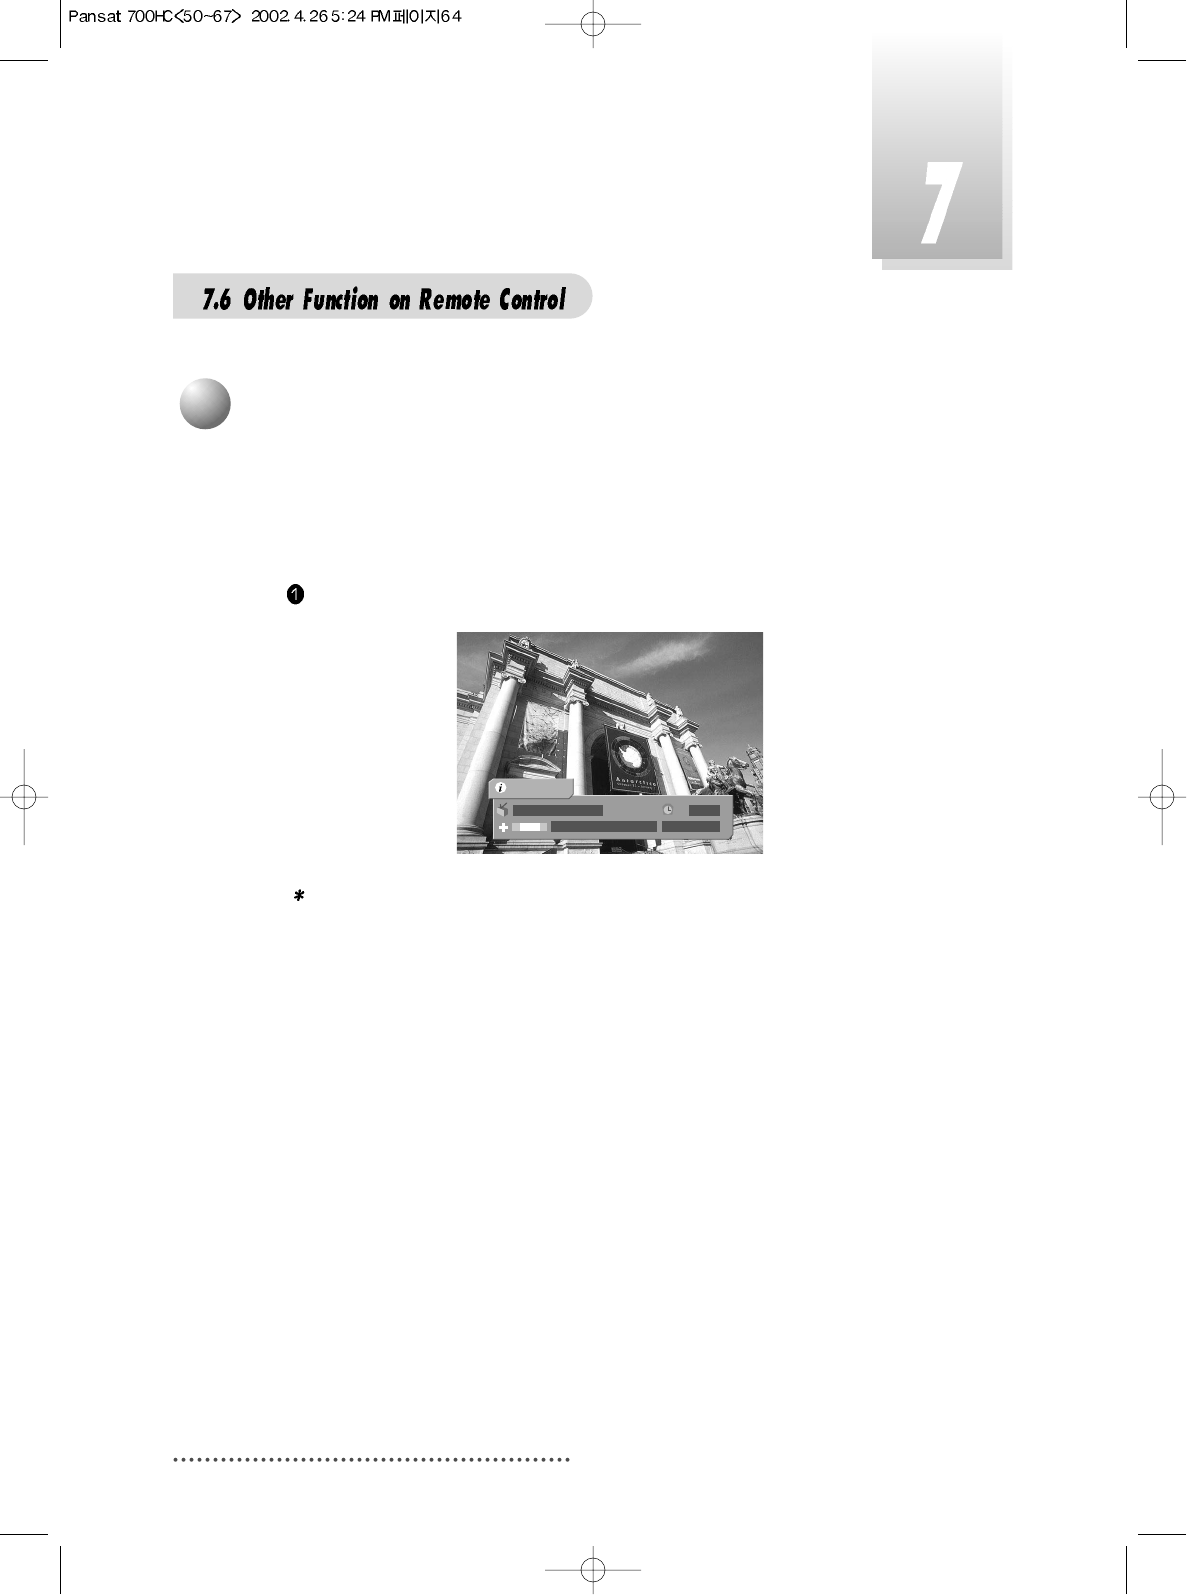
64
Brief information is displayed, such as current channel type, name, local
start/end time, guide information, current time, fav/normal mode, Audio
mode and Audio ID.
Press INFO, then the information bar will pop-up.
Screen
Note : If you have no information :
- Check your local time setting is correct.
- Information is not sent by the channel provider.
5 DWtv
JOURNAL News-Busin...
13:41
13:26 ~ 13:56
(((
(((
1/8
AsiaSat 2
7
Channel / Information
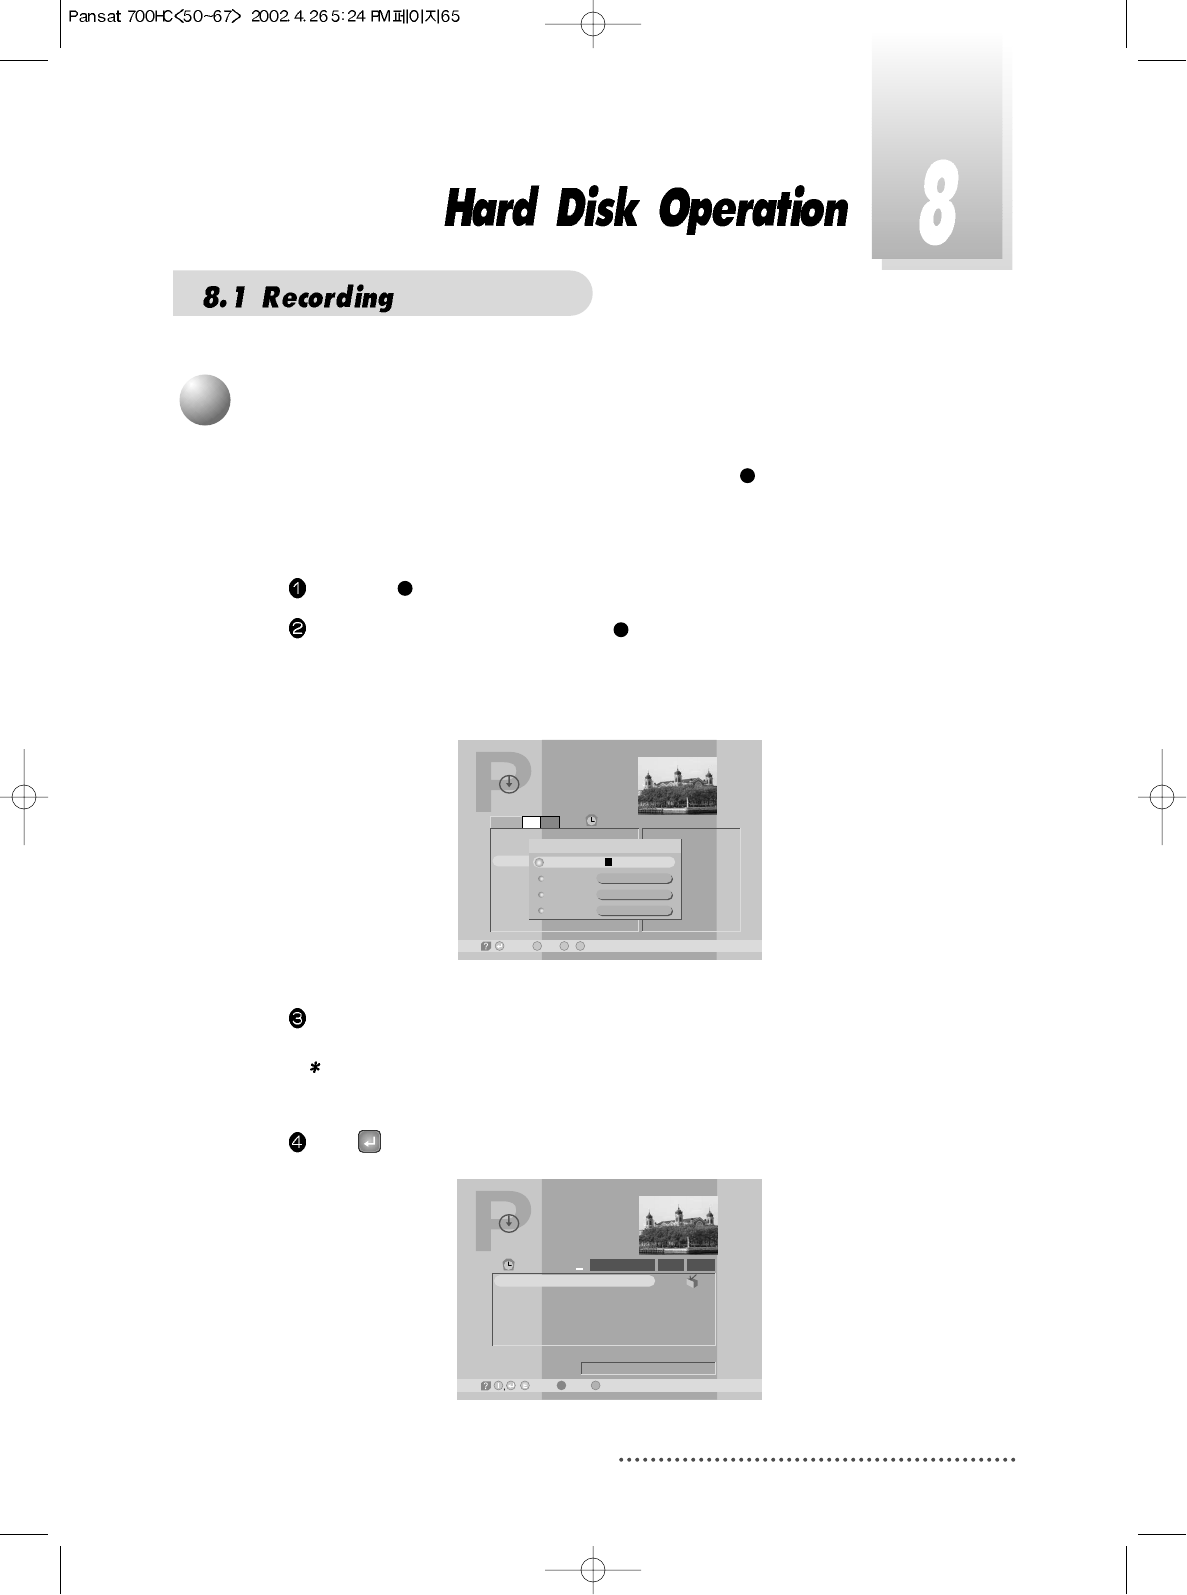
65
You can record the current channel by pressing RED( ) key.
If Program Guide menu has poped-up, you can record any channel you
want.
Press RED( ) key to record current channel.
In Program Guide menu, press RED( ) key to record after selecting a pro-
gram you want.
Then Record dialog menu will be displayed.
Screen
Some items can be edited in Record dialog menu.
Note : Default recording duration time is setted for 2 hours or the dnration
time of scheduled program is setted for its scheduled time.
Press to start recording.
Screen
Program Guide
-Record, -Exit,
E
~
11:19
Current
nt
00:36 00:35
0
-Edit
9
17
18
19
CH 22 - Indue
CH
Sa Name
Information
start
Stop
REC
SABo TV Notwo
Default Event
11:19
00:40
1
Start Recording
HD-Program Guide
-Delete, -Satellite Mode
11:20
REC
Title
Play time REC
28/08/2001 11:20
Free 38.8 GB (99.4%)
Default Event
Play Type
1 Default Event
/ -Wotoh,
R
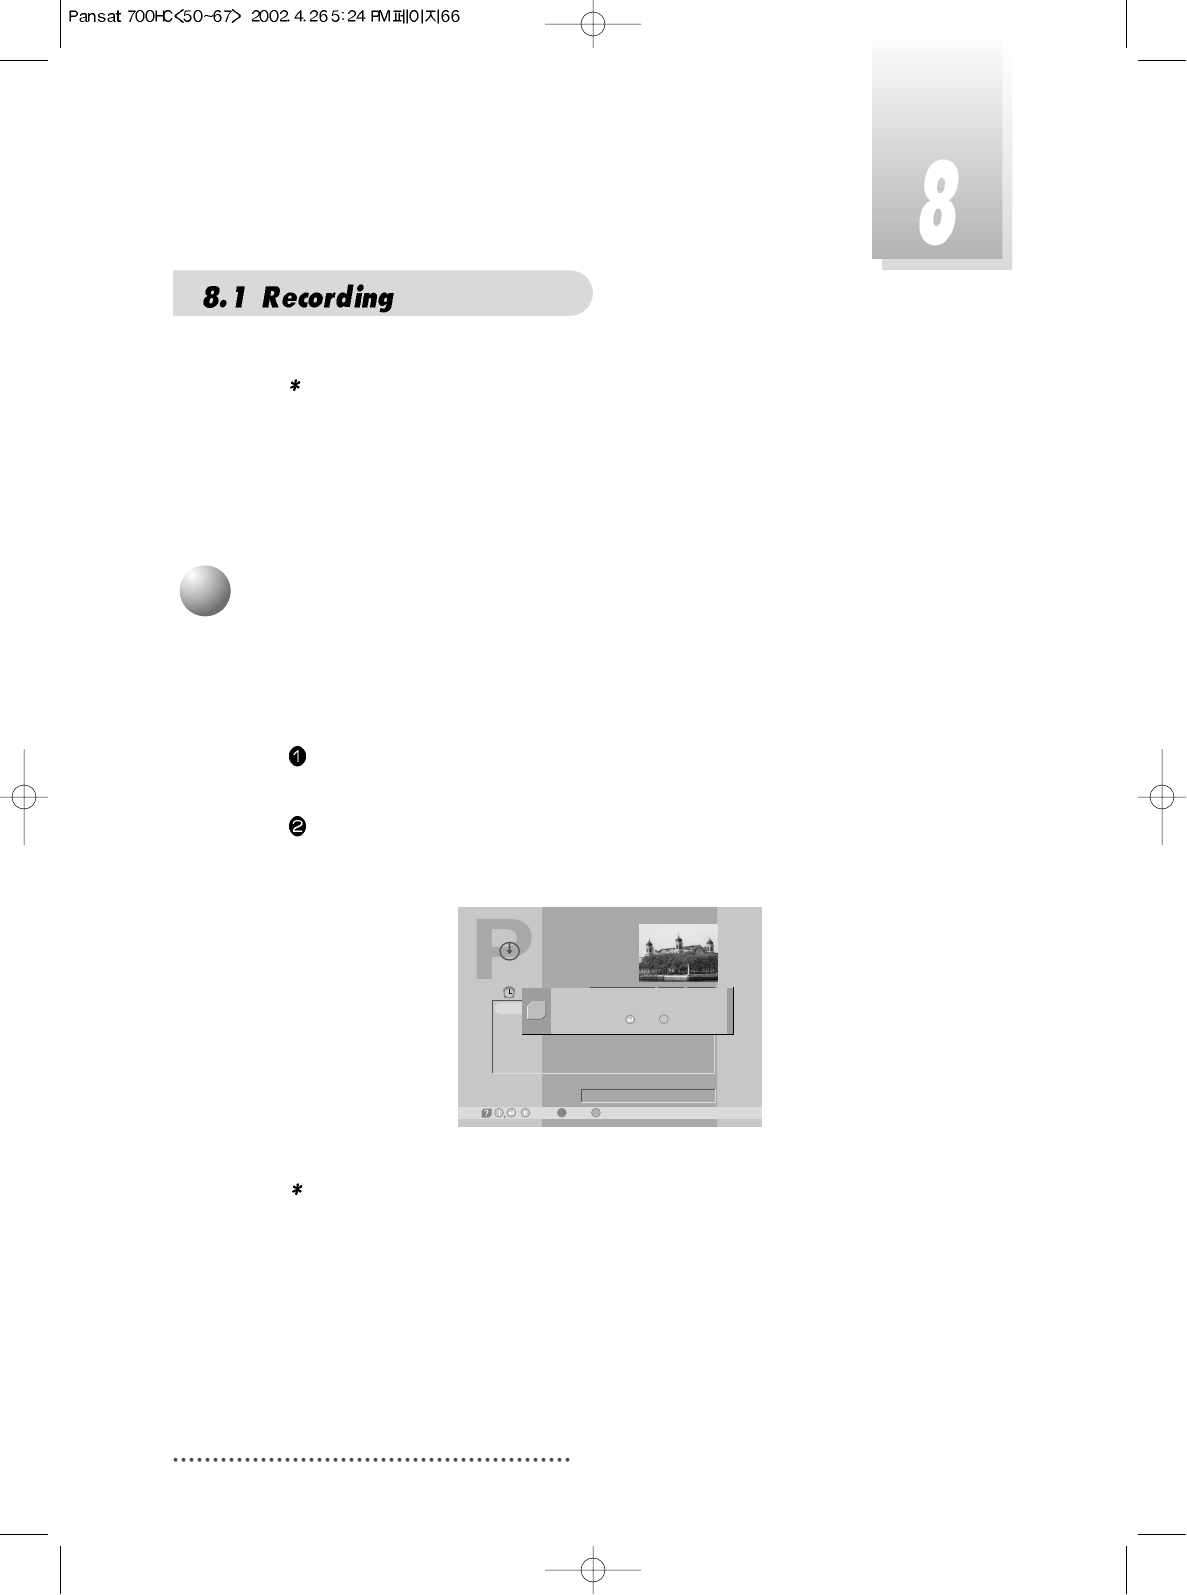
66
Note : When a program is recorded, only the program stored in HD can be
played and red R-icon is displayed.
Current recorded program is played automatically a little while later.
To stop recording mannally, you must enter HD-Program Guide menu and
press ORANGE(LIST) key.
If any program has been played, press ORANGE(LIST) key to enter HD-
Program Guide menu.
If HD-Program Guide menu is displayed.
Press ORANGE(LIST) key to stop recording.
Screen
Note : If there are any user inputs in HD-Program Guide for 5-minutes without
any playing and recording, your receiver will go automattically to
power-off.
HD-Program Guide
-Delete, -Satellite Mode
11:20
REC
Title
Play time REC
28/08/2001 11:20
Free 38.8 GB (99.4%)
Default Event
Play Type
1 Default Event
/ -Wotoh,
R
Do you want to stop recording?
Yes /
Q
No E
2
Stop Recording
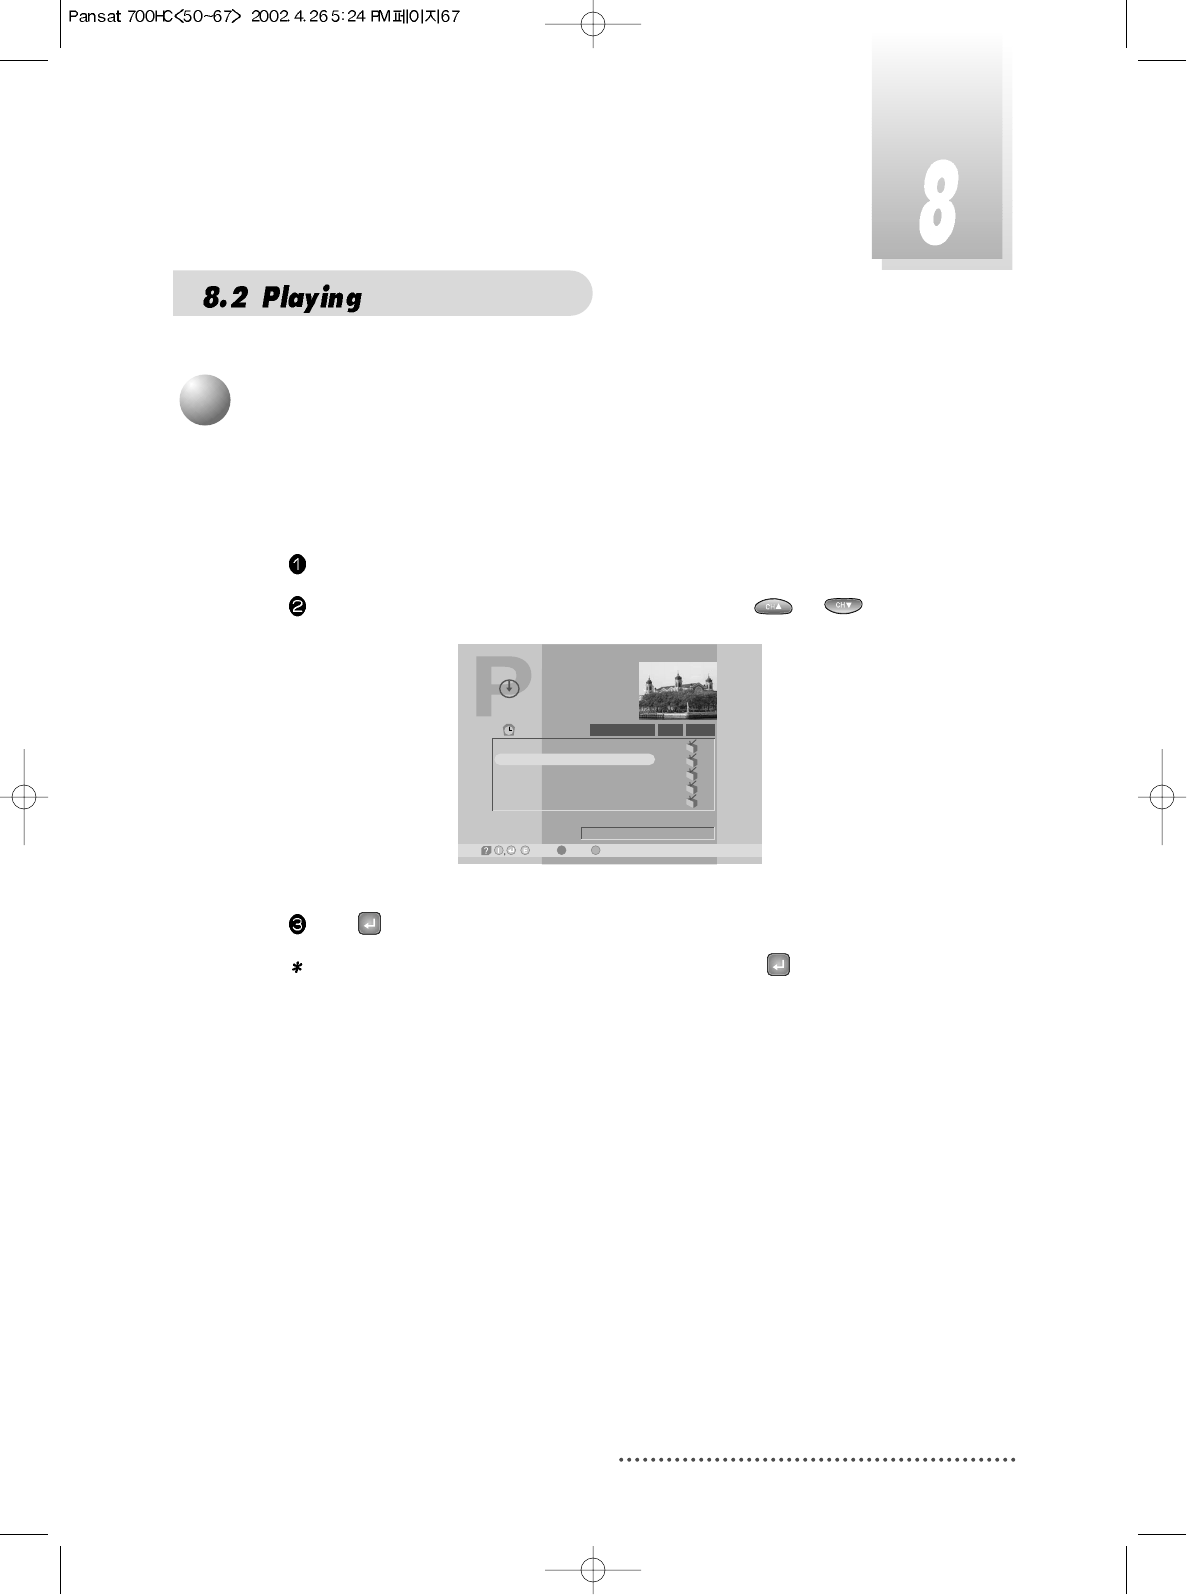
67
You must select a program to play stored programs.
For entering HD-Program Guide menu, press ORANGE(LIST) key.
Press ORANGE(LIST) key.
In HD-Program Guide, select a program by pressing or .
Screen
Press to start playing.
Note : For controlling trick play mode, you must press or INFO key then
HD-Information Bar will pop-up.
HD-Program Guide
-Delete, -Satellite Mode
11:52
00:01
00:03
00:01
00:01
00:25
Title
Play time 00:03
28/08/2001 11:22
Free 37.3 GB (95.6%)
CH 23 - Indus
Play Type
1
2
3
4
5
Default Event
CH 23 - Indus
CH 25 - DBN24
RAI Internati
CH 22 - Indus
/ -Wotoh,
1
Start Playing
IMPORTANT SAFETY INSTRUCTIONS
All the safety and operating instructions should be read
before the product is operated.
The safety and operating instructions should be
retained for future reference.
All warnings on the product and in the operating
instructions should be adhered to.
All operating and using instructions should be followed.
Unplug this product from the wall outlet before
cleaning.
Do not use liquid cleaners or aerosol cleaners, Use
damp cloth for cleaning.
Do not use attachments not recommended by the
product manufacturer as they may cause hazards.
Do not use this product near water - for example, near a
bath tub, wash bowl, kitchen sink or laundry tub; in a
wet basement; or near swimming pool; and the like.
Do not place this product on an unstable cart, stand,
tripod, bracket, or table, The product may fall, causing
serious injury to a child or an adult and serious damage
to the product. Use only with a cart, stand, tripod,
bracket, or table recommended by the manufacturer, or
sold with the product. Any mounting of the product
should follow the manufacturer’s instructions, and
should use a mounting accessory recommended by the
manufacturer.
A product and cart combination should be moved with care. Quick stops, excessive forces
and uneven surfaces may cause the product and cart combination to overturn.
WARNING
To prevent fire or shock hazard, do not expose
the unit to rain or moisture.
AVIS
POUR EVITER LE RISQUE D’INCENDIE OU CHOC ELECTRIQUE-NE
PAS EXPOSER L’APPAREIL A LA PLUIE OU LA MOITEUR
ATTENTION : RISQUE CHOC LELECTRIQUE-NE
PAS OUVRIR
CAUTION : TO REDUCE THE RISK OF ELECTRIC SHOCK
DO NOT REMOVE COVER (OR BACK).
NO USER SERVICEABLE PARTS INSIDE
REFER SERVICING TO QUALIFIED SERVICE PERSONNEL
RISK OF ELECTRIC SHOCK,
DO NOT OPEN
This symbol is intended to alert the user to the
presence of uninsulated "dangerous voltage"
within the product's enclosure that may be of
sufficient magnitude to constitute a risk of electric
shock to persons.
This symbol is intended to alert the user to the
presence of important operating and
maintenance(servicing) instructions in the
literature accompanying the appliance.
CAUTION : TO PREVENT ELECTRIC SHOCK. MATCH
WIDE BLADE OF PLUG TO WIDE SLOT,
FUSE INSERT.
ATTENTION : POUR ÉVITER LES CHOC ÉLECTRIQUES.
INTRODURE LA LAME LA PLUS LARGE
DE LA FICHE DANS LA BORNE
CORRESPONDANTE ED LA PRISE ET
POUSSER JUSOU’AU FOND.
NOTE TO CATV SYSTEM INSTALLER : THIS REMINDER
IS PROVIDED TO CALL THE CATV SYSTEM
INSTALLER’S ATTENTION TO ARTICLE 820-40 OF THE
NEC THE PROVIDES GUIDELINES FOR PROPER
GROUNDING AND, IN PARTICULAR, SPECIFIES THAT
THE CABLE GROUND SHALL BE CONNECTED TO
THE GROUNDING SYSTEM OF THE BUILDINGS AS
CLOSE TO THE POINT OF CABLE ENTRY AS
PRACTICAL.
Slots and openings in the cabinet are provided for ventilation and to ensure reliable operation of the product and to protect
it from overheating, and these openings must not be blocked or covered. The openings should never be blocked by placing
the product on a bed, sofa, rug, or other similar surface. The openings should not be placed in a built-in installation such as
a bookcase or rack unless proper ventilation is provided or the manufacturer's instructions have been adhered to.
This product should be operated only from the type of power source indicated on the marking label. If you are not sure of
the type of power supply to your home, consult your product dealer or local power company. For porducts intended to
operate from battery power, or other sources, refer to the operating instructions.
This product may be equipped with a polarized alternating-current line plug(a plug having one blade wider than the other).
This plug will fit into the power outlet only one way. This is a safety feature. If you are unable to insert the plug fully into the
outlet, try reversing the plug. If the plug should still fail to fit, contact your electrician to replace your obsolete outlet. Do
not defeat the safety purpose of the polarized plug.
Power supply cord should be routed so that they are not likely to be walked on or pinched by items placed upon or against
them, paying particular attention to cords at plugs, convenience receptacles, and the point where they exit from the
product.
If an outside antenna or clable system is connected to the product, be sure the antenna or cable system is grounded so as
to porvide some protection against voltage surges and built-up static charges. Article 810 of the National Electrical Code,
ANSI/NFPA 70, provides information with regard to proper grounding of the mest and supporting structure, gorunding of
the lead-in wire to an antenna discharge unit, size of grounding conductors, location of antenna-discharge unit, connection
to grounding electrodes, and requirements for the grounding electrode.
For added protedtion for this product during a lighting storm, or when it is left unattecded and unused for long periods of
time, unplug it from the wall outlet and disconnect the antenna or cable system. This will prevent damage to the product
due to lightning and power-line surges.
An outside antenna system should not be located in the vicinity of overhead power lines or other electric light or power
circuits, or where it can fall into such power lines or circuits. When installing an outside antenna system, extreme care
should be tacken to keep from touching such power lines or circuits as contact with them might be fatal.
Do not overload wall outlets, extension cords, or integral convenience receptacles as this can result in a risk of fire or
electric shock.
Never push any kinds of objects into this product through openings as they may touch dangerous voltage points or short-
out parts that could result in a fire or electric shock. Never spill any kind of liquid on the product.
Unplug this product from the wall outlet and refer servicing to qualified service personnel under the following conditions:
When the power supply cord or plug is damaged.
If liquid has been spilled, or objects have fallen into the product.
If the product has been exposed to rain to water. If the product does not operate normally by following the operating
instructions. Adjust only those controls that are covered by the operating instructions as an improper adjustment of other
controls may result in damage and will often require extensive work by a qulaified technician to restore the product to its
normal operation.
If the product has been dropped or damaged in any way.
When the product exhibits a distinct change in performance - this indicates a need for service.
When replacement parts are required, be sure the service technician has used replacement part specified by the
manufacturer or have the same characteristics as the original part. Unauthorized subsitutions may result in fire, electric

shock, or other hazards.
Upon completion of any service or repair to this product, ask the service technician to perform safety checks to determine
that the product is in proper operating condition.
The product should be situated away from heat sources such as radiators, heat registers, stoves, or other
products(including amplifiers) that produce heat.
NOTE : This equipment has been tested and found to comply with the limits for a Class B digital device pursuant to Part
15 of the FCC Rules.
These limits are designed to provide reasonable protection against harmful interference in a residential installation.
This equipment generates, uses, and can radiate radio frequency energy and, if not installed and used in accordance with
the instruclions, may cause harmful interference to radio communications.
However, there is no guarantee that interference will not occur in a particular installation.
If this equipment does cause harmful interference will not occur in a particular installation.
If this equipment does cause harmful interference to radio or television reception, which can be determined by tuming the
equipment off and on, the user is encouraged to try to correct the interference by one or more of the following measures:
Reorient or relocate the receiving antenna.
Increase the separation between the equipment and receiver.
Connect the equipment into an outlet of a circuit different from that to which the receiver is connected.
Consult the dealer or an experienced radio / TV technician for assistance.