Hyundai Digital Technology SO-5000ND Digital Satellite Receiver User Manual SO 5000ND
Hyundai Digital Technology Co., Ltd. Digital Satellite Receiver SO 5000ND
Users Manual
Digital Satellite Receiver
SO-5000ND
User’s Manual
HYUNDAI DIGITAL TECHNOLOGY
HYUNDAI DIGITAL TECHNOLOGY Co.,LTD.
Home Page : www.hdt.co.kr
URL : www.hdt-europe.eu
Service e-mail : service@hdt-europe.eu
43
Contents
1. Introduction
1.1. Overview ……………………………………………………………………… 4
1.2. Main Features ………………………………………………………………… 4
2. Safety/Precautions
2.1. Safety …………………………………………………………………………… 6
2.2. Precautions …………………………………………………………………… 8
3. Check Point before Use
3.1. Accessories …………………………………………………………………… 9
4. Controls/Functions
4.1 Front Panel …………………………………………………………………… 10
4.2 Remote Control ……………………………………………………………… 11
4.2.1Using the Remote Control …………………………………………… 12
5. How to Connect …………………………………………………………………… 13
6. Operation
6.1 Whats On ……………………………………………………………………… 14
6.1.1 Video Channels ………………………………………………………… 15
6.1.2 Radio Channels ………………………………………………………… 17
6.1.3 Planned Events ………………………………………………………… 19
6.1.4 Favourites ……………………………………………………………… 20
6.2 Setting ………………………………………………………………………… 22
6.2.1 Parental Control ……………………………………………………… 23
6.2.1.1 Channel Block …………………………………………………… 24
6.2.1.2 Set Ratings ……………………………………………………… 25
6.2.1.3 Change Menu PIN ……………………………………………… 26
6.2.2 User Setup ……………………………………………………………… 27
6.2.2.1 Edit Favourites ………………………………………………… 27
6.2.2.2 Language Setup ………………………………………………… 28
6.2.2.3 Audio …………………………………………………………… 29
6.2.2.4 Notifications …………………………………………………… 30
6.2.2.5 Screensaver Setup ……………………………………………… 31
6.2.3 System Setup…………………………………………………………… 32
6.2.3.1 Satellite Setup …………………………………………………… 33
6.2.3.2 TV Setup ………………………………………………………… 35
6.3 List Of Channels ……………………………………………………………… 36
7. Trouble Shooting ………………………………………………………………… 38
8. Specifications ……………………………………………………………………… 39
1. Introduction
1.1 Overview
This satellite receiver is designed for automobile.
Enjoy the wide choice of more 8,000 different channels, broadcasting a large
range of culture, sports, cinema, news, events, etc.
1.2 Main Features
Fully compliant with MPEG-2, H.264/AAC.
User friendly operating Menu and On-screen Graphic Menu
Easy to use EPG (Electronic Program Guide) on screen.
Age protection lock function.
Tele-text encoding
Supported Bluetooth2.0(Stereo Audio & Serial communication)
This product incorporates copyright protection technology that is protected
by U.S. patents and other intellectual property rights. Use of this copyright
protection technology must be authorized by Macrovision, and is intended
for home and other limited viewing uses only unless otherwise authorized by
Macrovision. Reverse engineering or disassembly is prohibited.
Changes or modifications not expressly approved by the party responsible for
compliance could void the user’s authority to operated the equipment under
FCC rules.
65
2. Safety/Precautions.
2.1 Safety
Be sure to read the user’s manual before starting the operation of the unit.
Do not touch the power cord with wet hands as it may cause electric shock.
Never open the cover. It is very dangerous to touch the inside of the unit
due to possible electric shock.
Place the unit in a well ventilated and no-heat environment.
When you do not use this unit for a long time, make sure that power cord is
pulled out from the outlet. Also do not use a damaged power cord as it
may cause fire or electric shock.
A professional installation is required. If reception is interrupted, contact
your local service center.
Apparatus shall not be exposed to dripping or splashing and no objects
filled with liquids, such as vases, shall be placed on the apparatus
IMPORTANT SAFETY INSTRUCTIONS
1) Read these instructions.
2) Keep these instructions.
3) Heed all warnings.
4) Follow all instructions.
5) Do not use this apparatus near water.
6) Clean only with a dry cloth.
7) Do not block any of the ventilation openings. Install in accordance with the
manufacturer’s instructions.
8) Do not install near any heat sources such as radiators, heat registers,
stoves, or other apparatus (including amplifiers) that produce heat.
WARNING
TO PREVENT FIRE OR SHOCK HAZARD DO NOT EXPOSE THE SET TO RAIN OR
MOISTURE
9) Do not defeat the safety purpose of the polarized or grounding type plug.
A polarized plug has two blades with one wider than the other. A
grounding type plug has two blades and a third grounding prong. The
wide blade or the third prong is provided for your safety. When the
provided plug does not fit into your outlet, consult an electrician for
replacement of the obsolete outlet.
10) Protect the power cord from being walked on or pinched particularly at
plugs, convenience receptacles, and the point where they exit from the
apparatus.
11) Only use the attachments/accessories specified by the manufacturer.
12) Use only with a cart, stand, tripod, bracket, or table
specified by the manufacturer, or sold with the
apparatus. When a cart is used, use caution when
moving the cart/apparatus combination to avoid
injury from tip-over.
13) Unplug this apparatus during lightning storms or when unused for long
periods of time.
14) Refer all servicing to qualified service personnel. Servicing is required
when the apparatus has been damaged in any way, such as power
supply cord or plug is damaged, liquid has been spilled or objects have
fallen into the apparatus, the apparatus has been exposed to rain or
moisture, does not operate normally, or has been dropped.
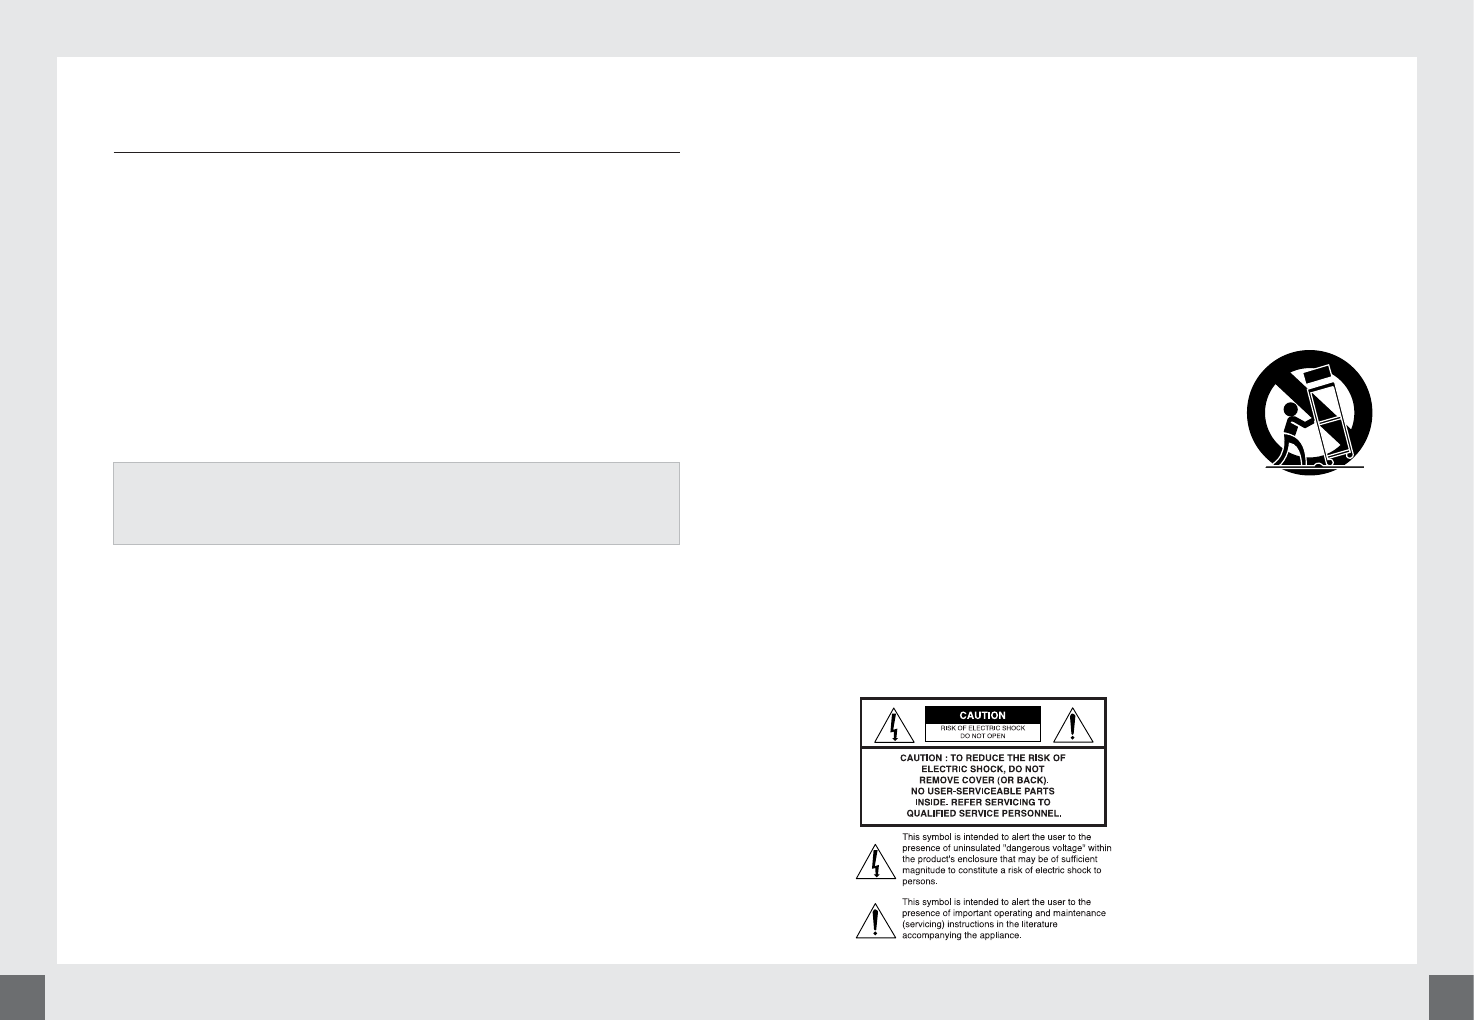
Explanation of Safety Related Symbols
87
2.2 Precautions
When installing the unit
Install the unit horizontally. An uneven installation may cause the unit to be
damaged.
Do not put heavy items such as a TV on the unit. That may cause the unit to
be damaged.
Do not leave the unit where the water drops or splashs.
Do not put water holding items such as vase on the unit.
Do not install the unit:
- Where it is subject to vibrations
- Where it is exposed to direct sunlight
- Where there is humidity
- Where the temperature is too high or too low.
- Where there is no ventilation
Moving the unit to a hot area from a cold one will cause condensation.
Do not operate the unit for one or two hours or until it has dried
completely
3. Check Point before Use
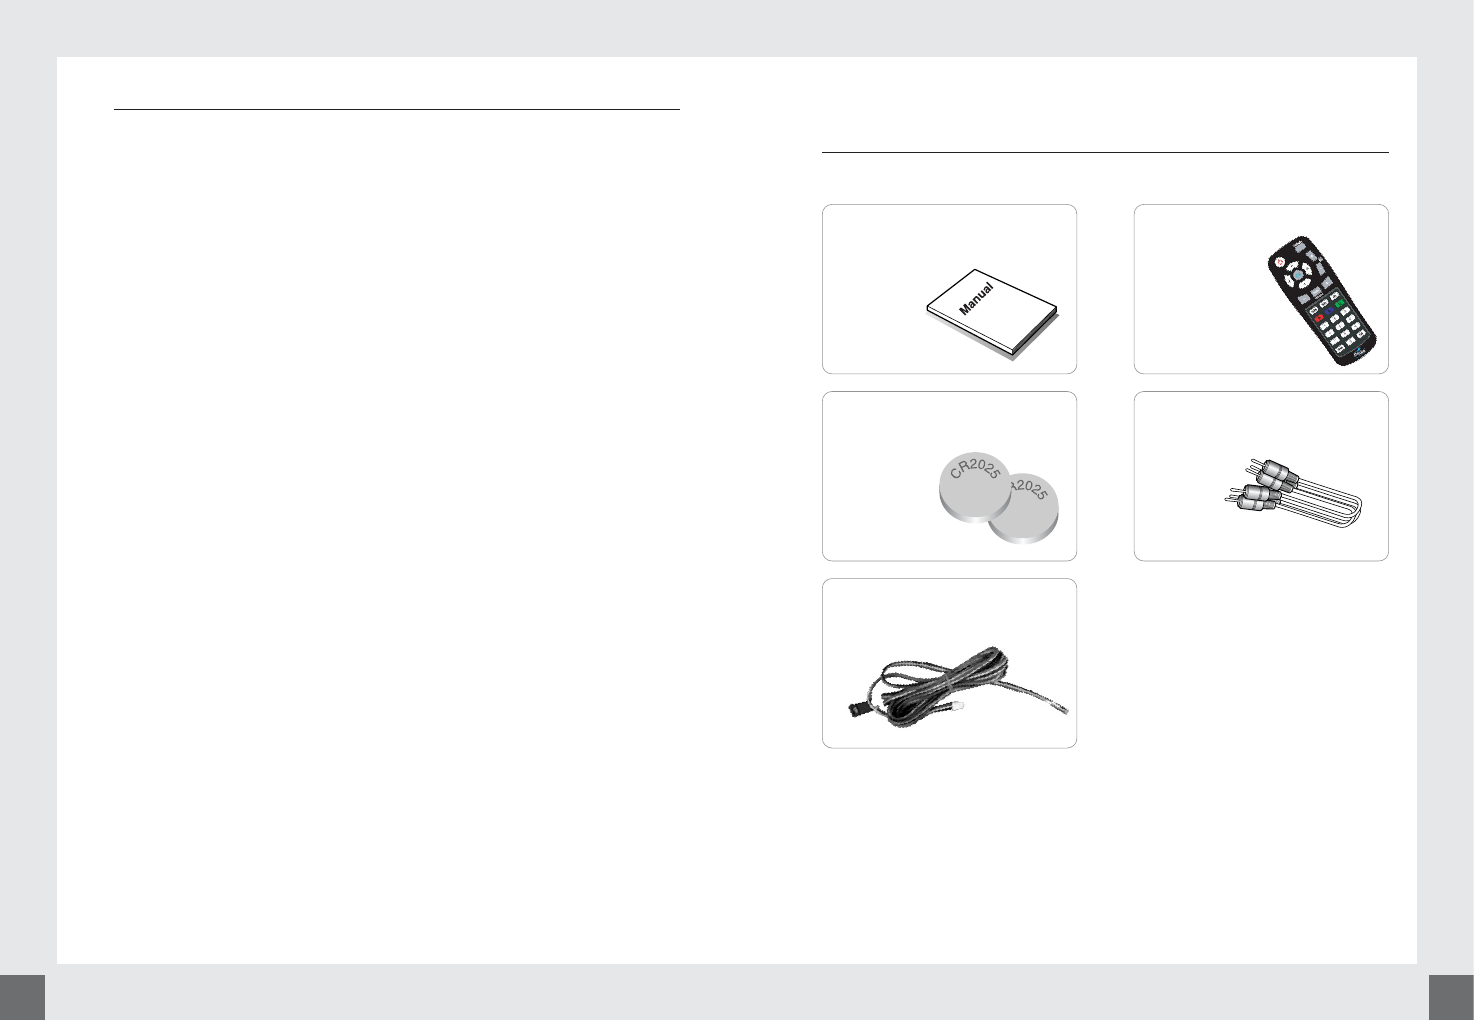
Accessories
Accessories of the Unit
If any accessories listed above are missing, contact the sales representative
where you purchased this unit.
MANUAL 1EA REMOTE CONTROL UNIT 1EA
BATTERY (CR2025) 1EA COMPOSITE CABLE (3M, 6M) 1EA
POWER CABLE (6M) 1EA
109
4. Controls/Functions
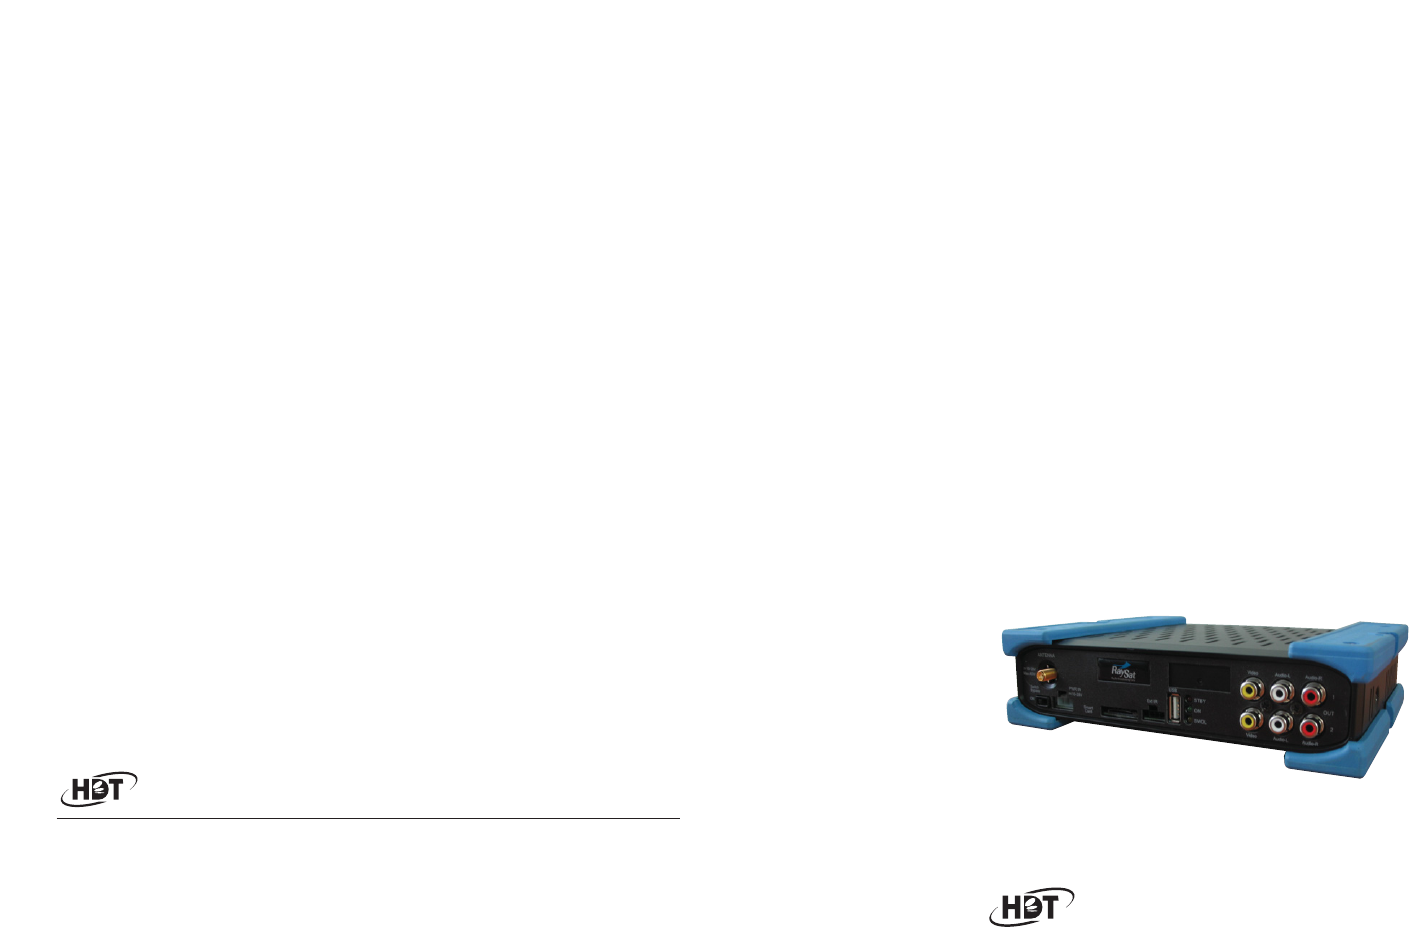
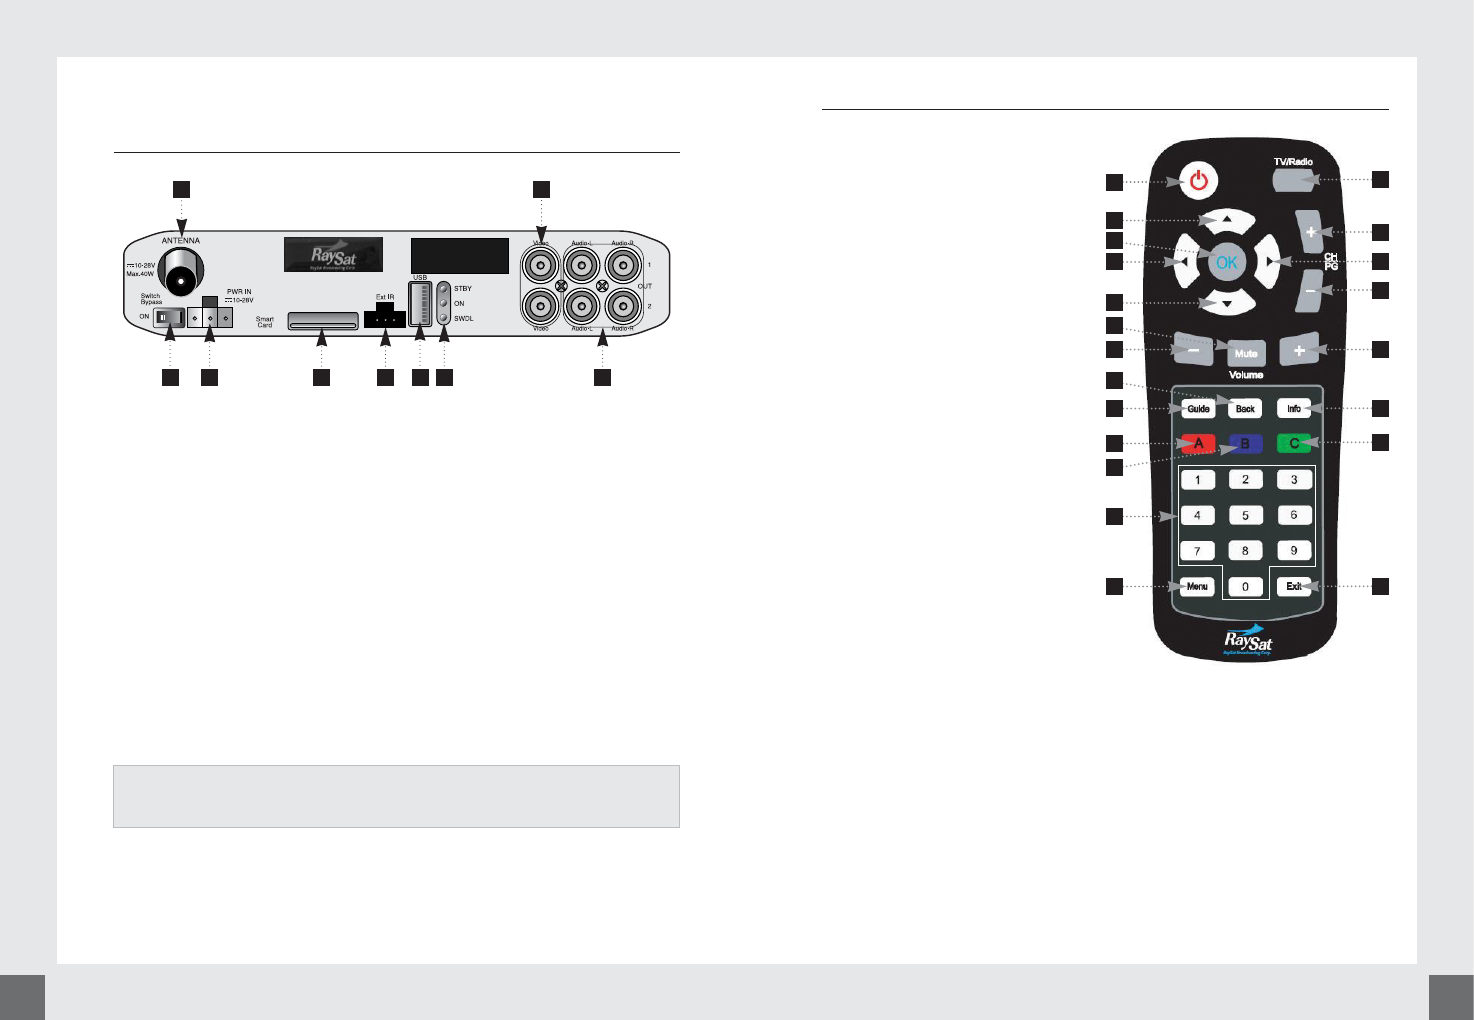
4.1 Front Panel
[1] Antenna : Digital cable signal input to digital tuner
[2] Switch Bypass : To switch the receiver in “Car SW mode” or “power on
mode”.
[3] PWR IN : Input Voltage level (10-28VDC).
[4] SIM slot(Smart Card) : SIM Card slot..
[5] Ext IR : To receive the infrared signal from IR RCU (If want to be use the IR
RCU).
[6] USB HOST 2.0 : When use the Firmware download
[7] LED Light : Turn on red light while in the “Standby mode”
Green light while in the “power on mode”.
Flashes yellow when receiving data from RF RCU
[8] Video : Composite video output
[9] Audio L/R : Audio output Left & Right
1 8
2 3 4 5 6 7 9
Connecting your TV directly to the audio/video output of your Set-Top Box
will assure a more vivid picture and enhance your viewing enjoyment.
4.2 RF Remote Control Unit.
[1] POWER : To switch into
‘Standby’ or ‘Power on’ mode
[2] TV/R : To switch between the TV
and Radio channels
[3] - [4] Up & Down : To move the
cursor position on the
application.
[5] - [6] Left & Right : To change
the value of an item with
preprogrammed values.
[7] (OK) : To select an item or to
confirm a menu
[8] CHANNEL : To adjust the
channel
[9] MUTE : To turn the sound
on/off.
[10] VOLUME : To adjust the
volume level.
[11] Guide : To watch program
information
[12] BACK : Reserved.
[13] INFO. : To display the
information of the current
channel
[14] RED : To see Favorite channel list. To set up favorite in the Channel list
menu
[15] BLUE : Reserved
[16] GREEN : To lock channel in the Channel list menu.
[17] Numeric Keys (0-9) : To select channels and input of channel numbers or
characters
[18] MENU : To enter the main menu.
[19] EXIT : To return to previous status or menu.
7
9
12
15
1
3
4
5
10
11
14
17
18
2
8
8
6
10
13
16
19

1211
4.2.1. Using the Remote Controller
Batteries
How to insert a battery
1) Open the cover at the top of the near side of the remote control.
2) Insert a CR2025 type battery to be aligned with appropriate +/- polarity.
3) Close the cover completely.
When to replace a battery
If the operational range of remote control is getting smaller, it indicates
batteries are almost consumed.
Replace the battery.
How to replace a battery
1) Check +/- polarities and insert a battery to be aligned with appropriate
+/- polarity.
2) Even if old and a new battery is the same. , do not use battery with
different characteristics.
Accident prevention
1) Do not recharge, heat or disassemble the battery. Do not cross +/-
polarities.
2) If remote controller is not going to be used for a long time, take the
battery out.
Paring
Is pressing RCU’s power and mute button at the same time while STB
become “power on mode”
Then RCU’s power button is lighting ( End paring )
5. How to Connect
5.1. When connecting IRD to Car TV with AV connectors
5.2. When connecting Car to STB with power cable
1413
6. Operation
The STB has the following EPG Menu Structure:
Add in the Correct Menu Structure from The Storybaod when the Updated
Storyboard is Released.
When the STB is powered ON the STB will
automatically tune to the last viewed
Channel. When the user presses the “TV”
button on the Remote Control Unit the
“Home” Screen is displayed.
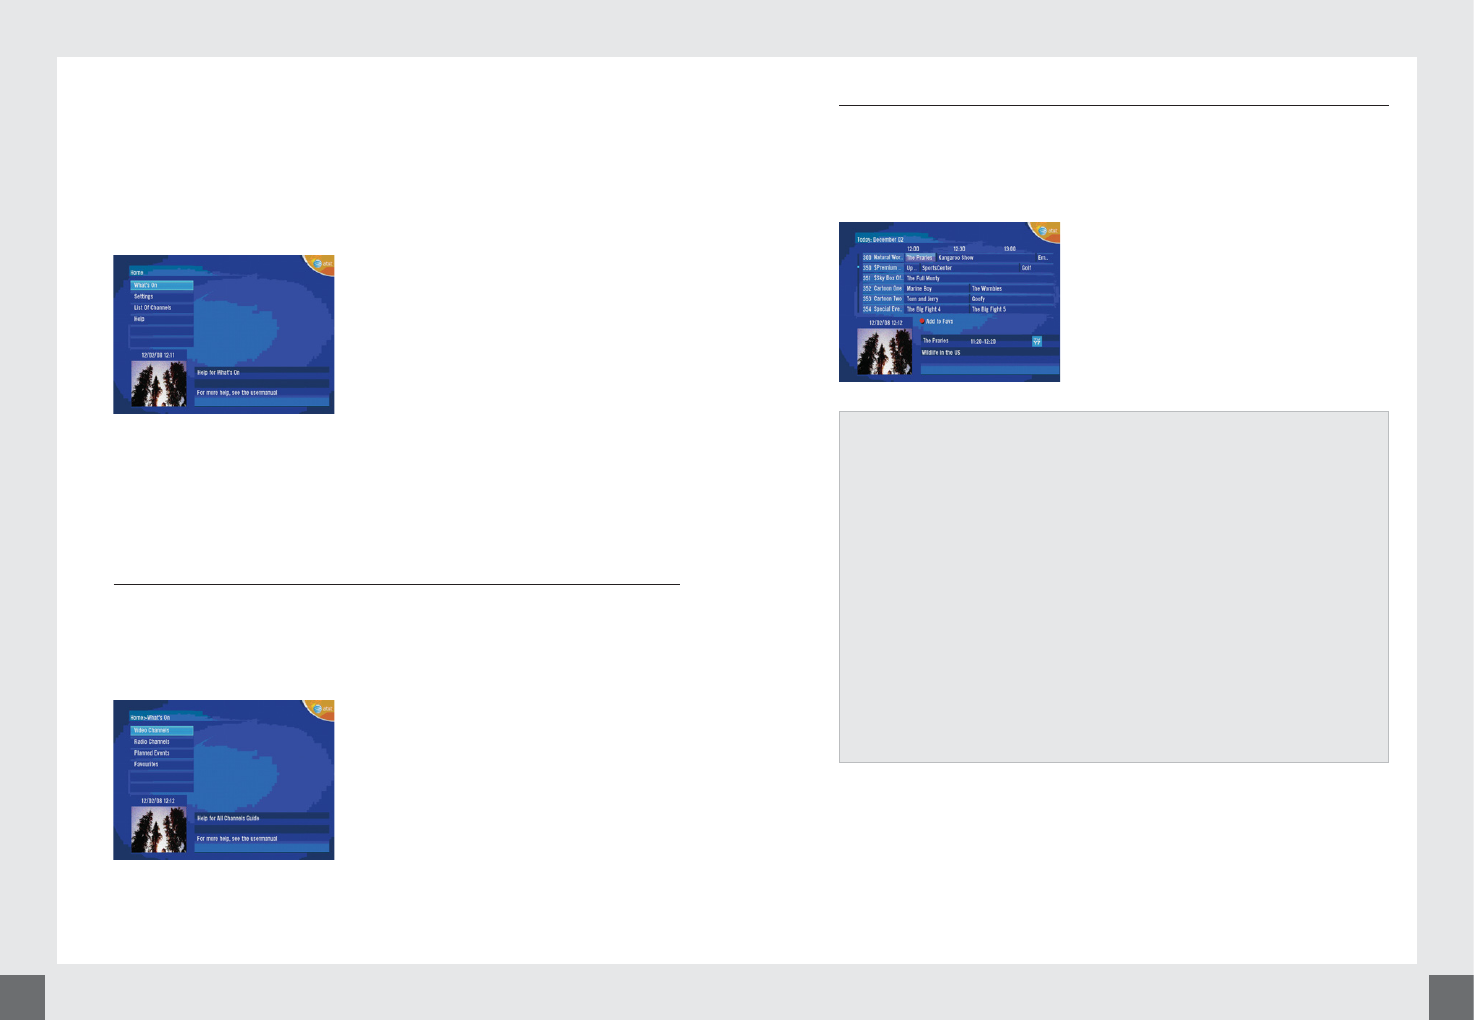
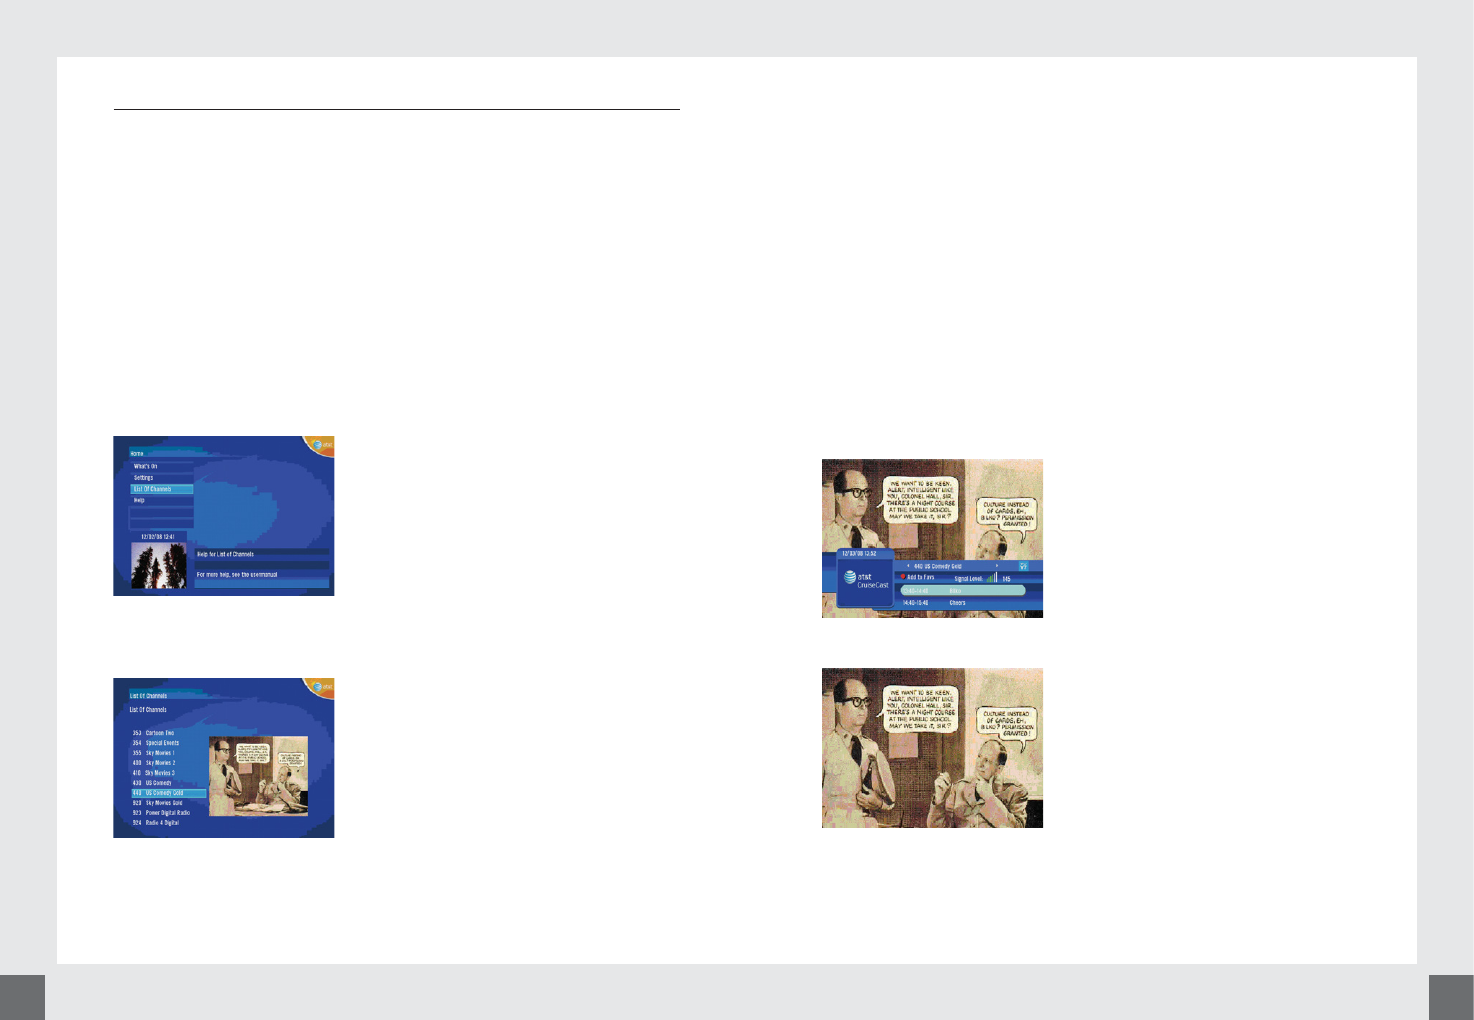
The Home Screen is the highest level menu screen.
The Home Screen will display the currently tuned to event in the bottom left
hand corner.
6.1Whats On
The user uses this menu to see which Video or Radio events are currently being
broadcast and what events will be broadcast in the Future, up to 7 hours ahead
of the current time.
In Addition to being able to see what the
Current and Future events are on the Video &
Radio Channels the user is able to see which
events have been booked for viewing (not Pay
Per View) as well as to see which Current and
Future events are being shown on the users
Favourite Channels (see page xx for
information on using Favourite Channels).
6.1.1Video Channels
To see which video events are currently being broadcast and which events
will be broadcast in the next 7 hours the user follows the menu structure,
Home-What’s On-Video Channels.
The user is able to scroll up and down
through the Channel listings to view Current
and Next events that are to be broadcast.
The user can scroll Right on any channel to
view Future broadcast events (up to 7 hours
ahead of current time) using the Remote
Control Unit.
Notes;
1. The Date format displayed above the video in the bottom left is
MM/DD/YY.
2. The “Add to Favs” feature is used by pressing the Red button on the
Remote Control Unit. The feature allows the user to add Channels to
their list of Favourite Channels.
3. The Program Synopsis window for the highlighted event displays the:
a. Event Name = The Praries.
b. Event Start Time = 11:20.
c. Event Finish Time = 12:20.
d. US TV Rating or MPAA Rating = TV Y7.
e. Short Description of the highlighted Event = “Wildlife in the US”.
4. The video of the currently tuned to event is displayed in the bottom left
hand corner.
1615
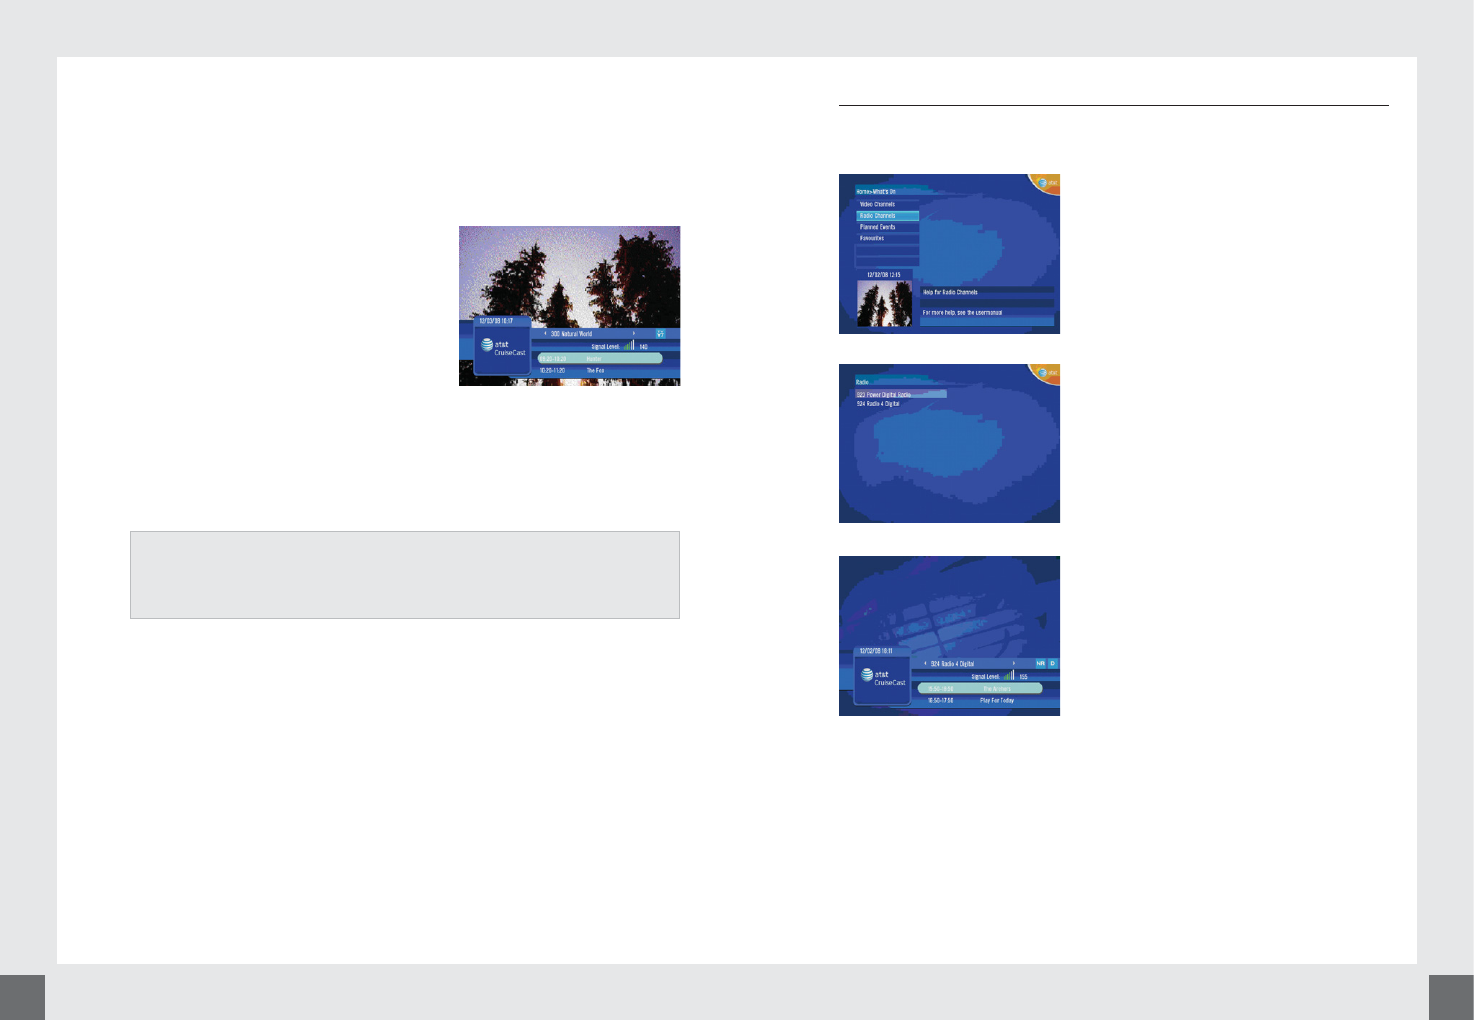
When the user finds a current event they wish to view the user will press the
“OK” button on the Remote Control Unit and the STB will display Full Video
of the selected event as well as display a Program Banner over the video.
The Program Banner displays the following information:
a. Date-MM/DD/YY Format.
b. Current Time = 10:17
c. Channel Number = 300
d. Channel Name = Natural World
e. Current Event Name = Hunter
f. Current Event Start Time = 09:20
g. Current Event Finish Time = 10:20
h. Next Event Name = The Fox.
i. Next Event Start Time = 10:20.
j. Next Event Finish Time = 11:20.
k. US TV Rating or MPAA Rating = TV Y7.
l. Received Signal Strength Indicator = 140.
Notes;
The duration that the Program Banner is displayed is configurable. Please
see the User Setup-Notifications section on page xx.
6.1.2 Radio Channels
To view which Radio events are currently being broadcast the user follows
the menu structure, Home-What’s On-Radio Channels.
The user is able to scroll up and down
through the Radio Channel listings.
The user can see the Current and Next event
that are to be broadcast once the user has
tuned to that Radio channel.
1817
Notes;
1. When the Radio Channel is tuned to the Blue background screen is
displayed with the Program Banner . The program banner contains the
following information:
a. Date-MM/DD/YY Format.
b. Current Time = 16:11.
c. Channel Number = 924.
d. Channel Name = Radio 4 Digital.
e. US TV Rating or MPAA Rating = NR.
f. Sub Rating = D.
g. Received Signal Strength Indicator ? shown as vertical bars with
numeric value = 155.
h. Current Event Name = The Archers.
i. Current Event Start Time = 15:50.
j. Current Event Finish Time = 16:50.
k. Next Event Name = Play For Today.
l. Next Event Start Time = 16:50.
m. Next Event Finish Time = 17.50.
2. When the Program Banner disappears then the Blue background screen
will display the following:
a. Song Title.
b. Artists Name.
c. Record Label.
d. Album Title.
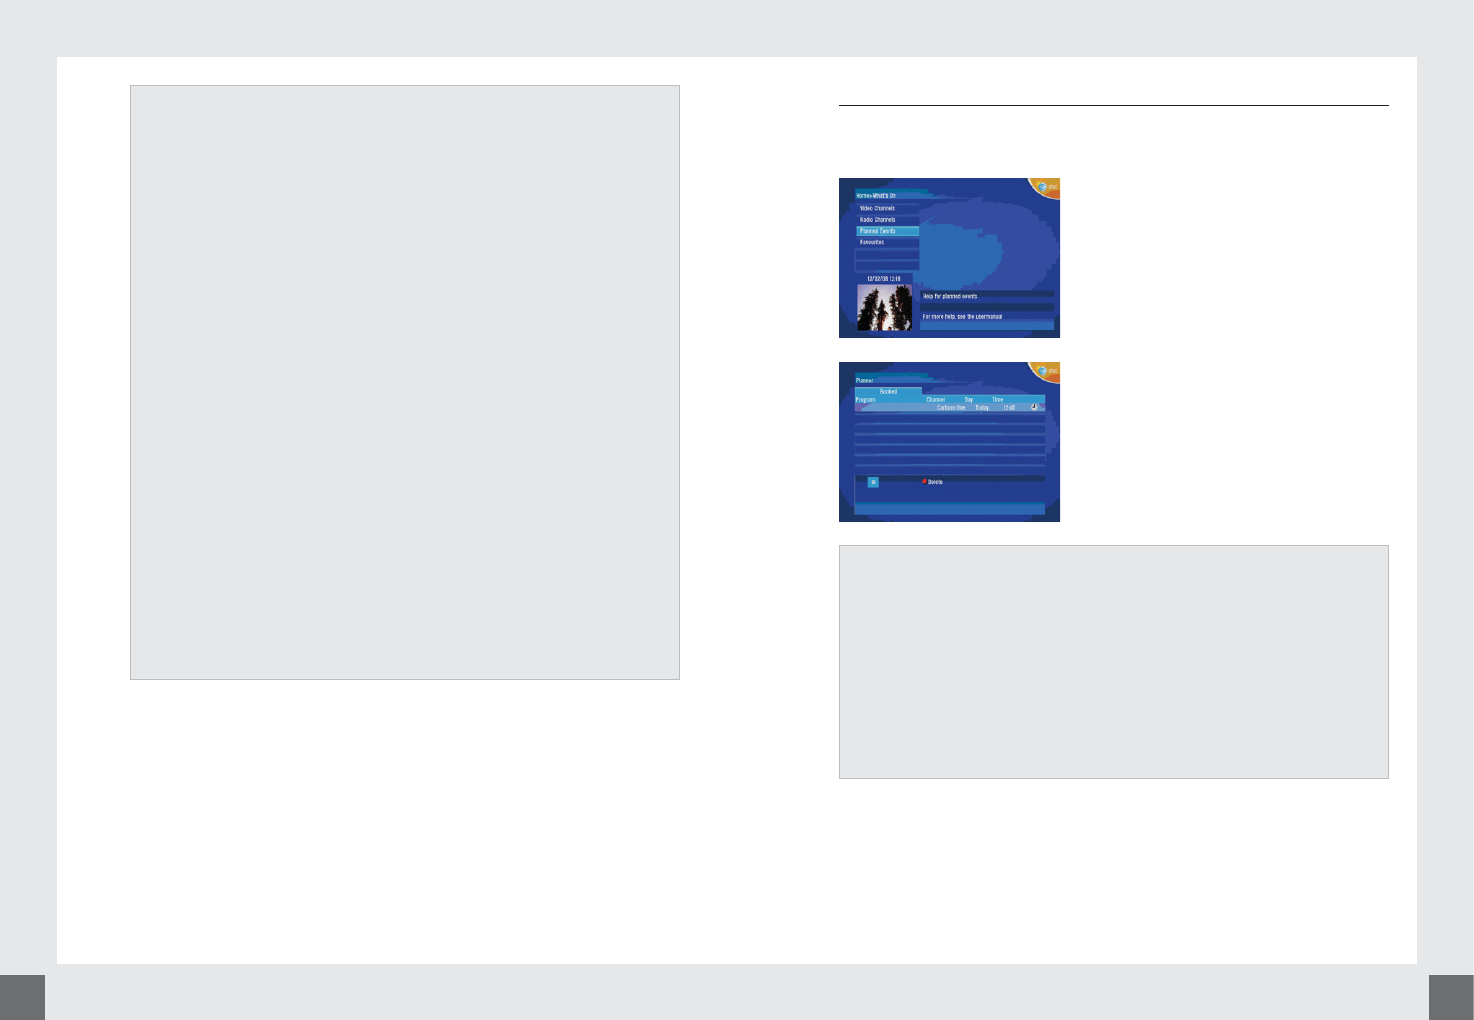
6.1.3 Planned Events
To view which Events the user has “booked” to view the user follows the
menu structure, Home-What’s On-Planned Events.
When the user presses “OK” on the Remote
Control Unit while Planned Events is
highlighted the user is presented with a list
of booked events in the Planner screen.
The Planner screen shows all of the events
that have been booked for viewing.
Notes;
1. The Planner screen shows the:
a. Channel Name.
b. Day when the event is to be broadcast.
c. The Start Time.
d. Reminder Notification.
e. The Sub category Rating.
2. The user can delete a booked event from the planner by highlighting the
event and pressing the red button on the Remote Control Unit.
2019
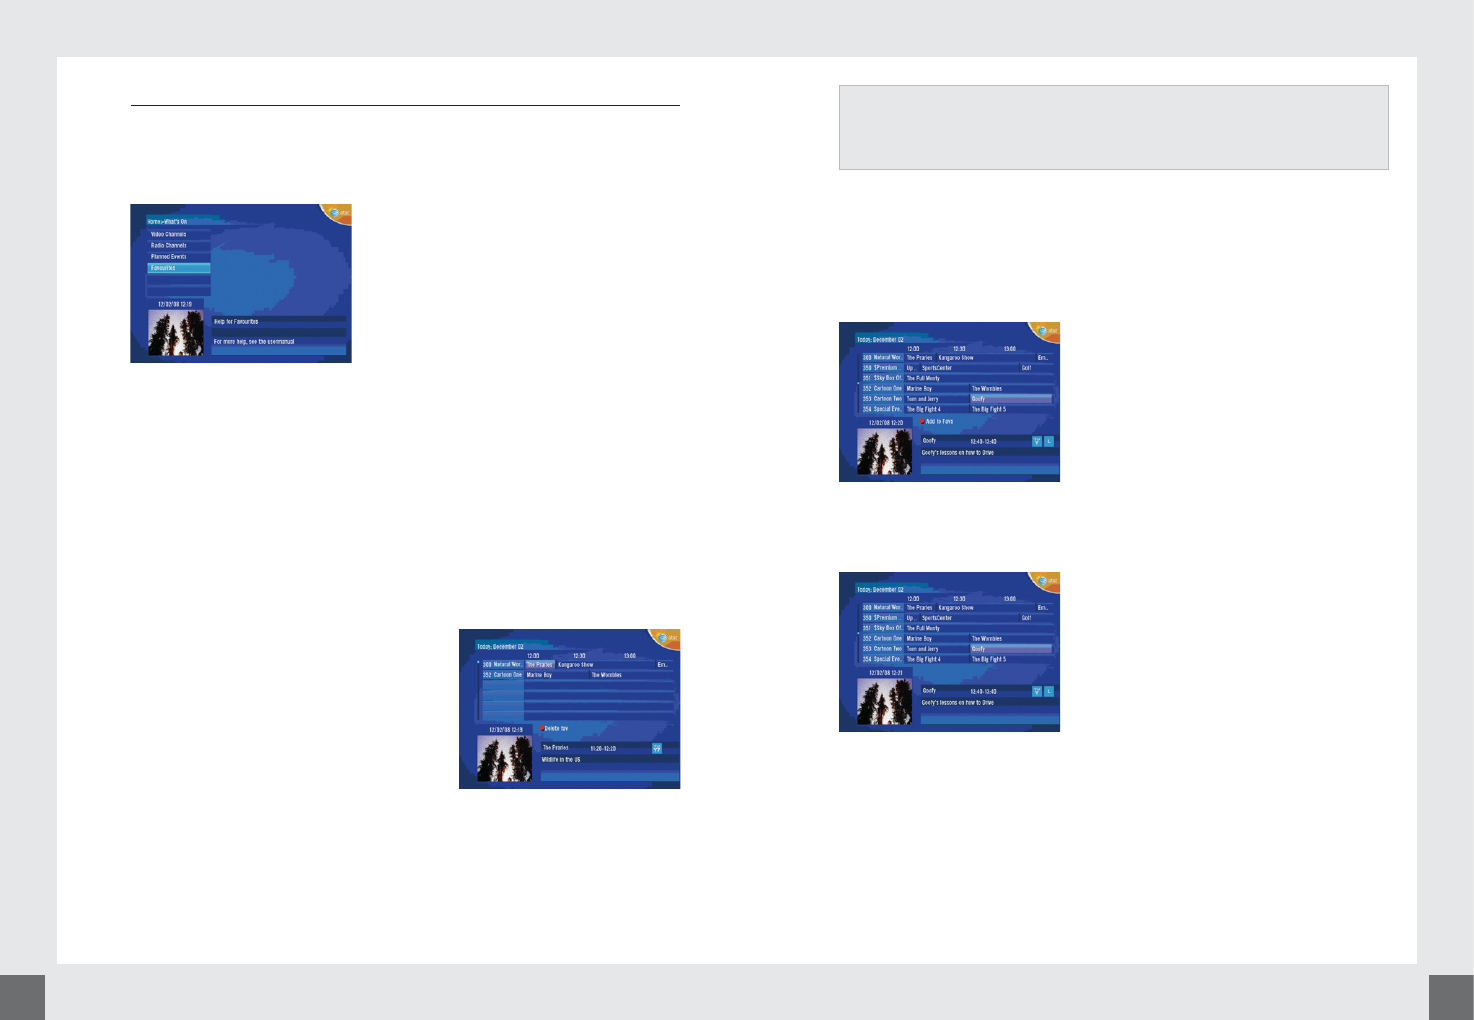
6.1.4 Favourites
To view which Channels the user has added to their favourites list and to see
what Current and Future Events are being broadcast on the favourite
channels the user follows the menu structure, Home-What’s On-Favourites.
The Favourites allows the user to collate their favourite Video and Radio
channels into one easy access list. This allows the user to view the Current
and Future Events that are being broadcast on favourite channels without the
need for the user to scroll through the main channel listings.
To Favourites displays up to 7 hours of future events for a channel that has
been added to the Favourites.
The information that is displayed for a highlighted event in the Favourites is
the same information that is displayed for Video Channels:
a. Date-MM/DD/YY Format.
b. Current Time = 12:19.
c. Channel Number = 300.
d. Channel Name = Natural World.
a. Event Name = The Praries.
b. Event Start Time = 11:20.
c. Event Finish Time = 12:20.
d. US TV Rating or MPAA Rating = TV Y7.
e. Short Description of the highlighted Event = “Wildlife in the US”.
If the user wishes to add a Channel in to their Favourites then the user must
go to the Video Channel guide or the Radio Channel guide and select an
Event in the Channel the user wishes to add to their Favourites.
The user then presses the Red button on the Remote Control Unit to add the
channel to their Favourites.
Once the Channel has been added to the users Favourites the Red “Add to
Favs” icon disappears from the EPG as shown below.
Notes;
1. To delete a Channel from the Favourite the user can pres the Red button
on the Remote Control Unit.
2221
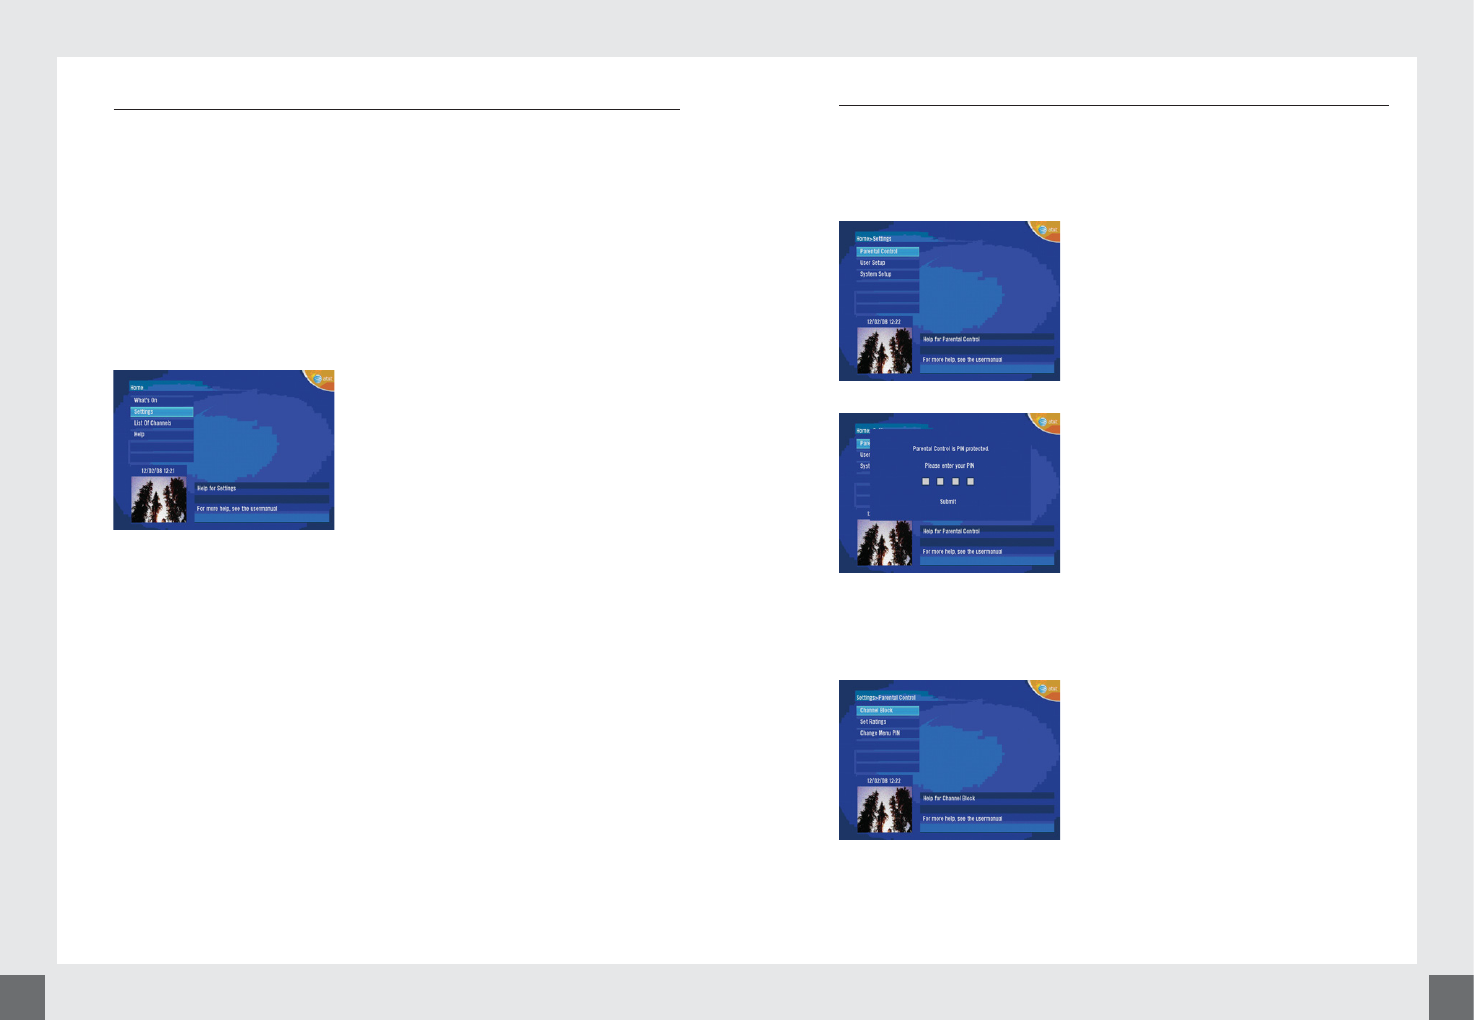
6.2 Settings
The Settings screen is the second level in the Home screen. There are 3 sub
menu screens of Settings. These are:
a. Parental Control.
b. User Setup.
c. System Setup.
The Parental Control and System Setup screen are each protected by a 4 digit
PIN. The PIN’s associated with these screens are:
• Parental Control = 0000
• System Setup = 9871
6.2.1 Parental Control
Parental Control allows Parents to control the content that can be viewed and
the content that can be blocked. A Parent can control what content can be
viewed and what content can be blocked by 3 methods:
1. Channel Blocking Only.
2. TV Rating/MPAA Content Rating Only.
3. Both Channel Blocking & TV Rating/MPAA
Content Rating.
When Parents choose to set Parental
Controls they will be need to enter a PIN
number to access the Parental Control Menu.
The default PIN number for Parental Control
access is 0000. It is recommended that the
PIN be changed to prevent unauthorized
access to the Parental Control Menu.
Once the PIN has been accepted then Parents can select one of the 3 Parental
Control sub menus.
Channel Block allows parents to select
particular channels that they wish to block
access to. All events on blocked channels will
subsequently be blocked.
Set Ratings allows parents to block content
on any channel that exceeds on of the TV
Ratings/MPAA Ratings.
Change Menu PIN allows parents to change
the default 4 digit PIN to a PIN of their
choosing.
2423
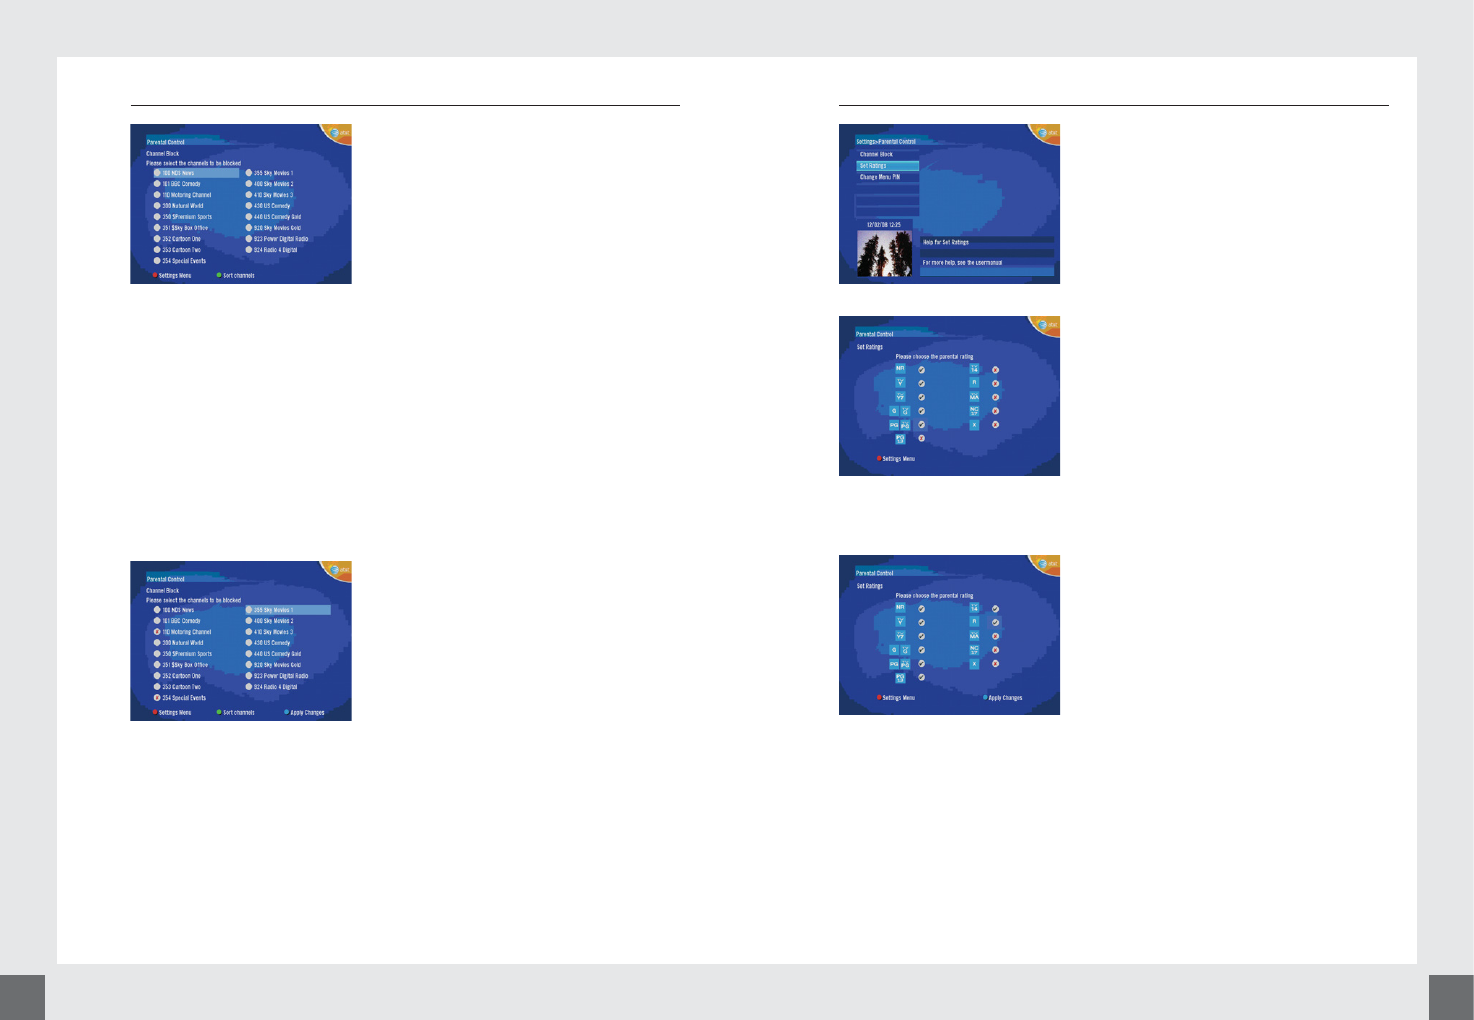
6.2.1.1 Channel Block
The Channel Block screen lists all Video and
Radio channels that are available to the
user.
To block channels the user scrolls through the channels. When the user
highlights a channel that they wish to block they press the “OK” button on
the Remote Control Unit.
A X will appear next to the channel. This channel is now blocked. The user is
not limited to the number of channels that they block.
To unblock a channel the user simply highlights the channel they wish to
unblock and presses the “OK” button on the Remote Control Unit.
To save changes the user must press the Blue button on the Remote Control
Unit.
6.2.1.2 Set Ratings
The user may choose to block events that
can be viewed based upon the Rating that
the event has been given.
When the user selects the Set Ratings sub
menu the use will be presented with the US
TV Ratings and the MPAA TV Ratings which
are displayed in order of rating value.
An event that has a rating that is allowed to
be viewed is represented by a Green V
An event that has a rating that is not
allowed to be viewed in represented by a
Red X
To select a rating that the user wished to
block or unblock the user must scroll
through the ratings and select a highlighted
rating by pressing the “OK” button on the
Remote Control Unit.
To save changed the user must press the
Blue button on the Remote Control Unit.
2625
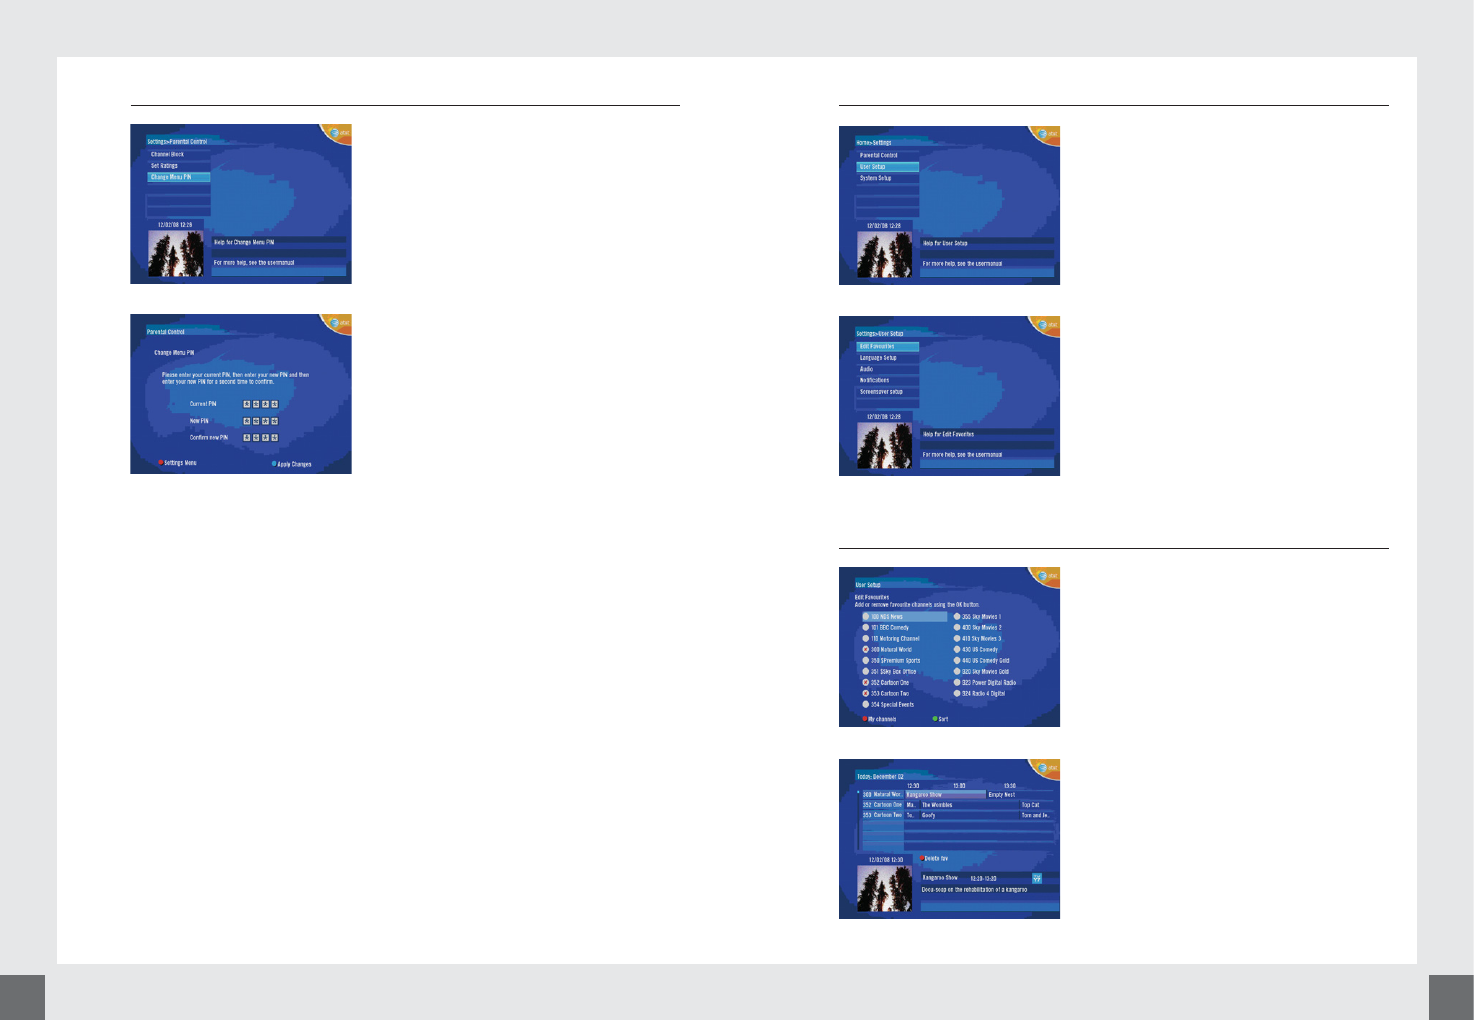
6.2.1.3 Change Menu PIN
To change the 4 digit PIN that is used to
access the Parental Control screen the user
can select the Change Menu PIN sub menu.
Once the user has selected the Change
Menu PIN option the user will need to enter
the current PIN, the new PIN and then will
need to confirm the New PIN.
The user can then press the Blue button on
the Remote Control Unit to save the
changes.
6.2.2 User Setup
The user set up menu allows the user to
modify the settings for the Set Top Box.
The user can modify the settings that are
shown below.
6.2.2.1 Edit Favourites
The user can add or remove Video or Radio
channels from their favourites list.
By pressing the Red button on the Remote
Control Unit the user is able to view a list of
their favourite channels. When the user is
viewing their favourites list the operation
and information presented to the user is the
same as described in section 1.1.4.
2827
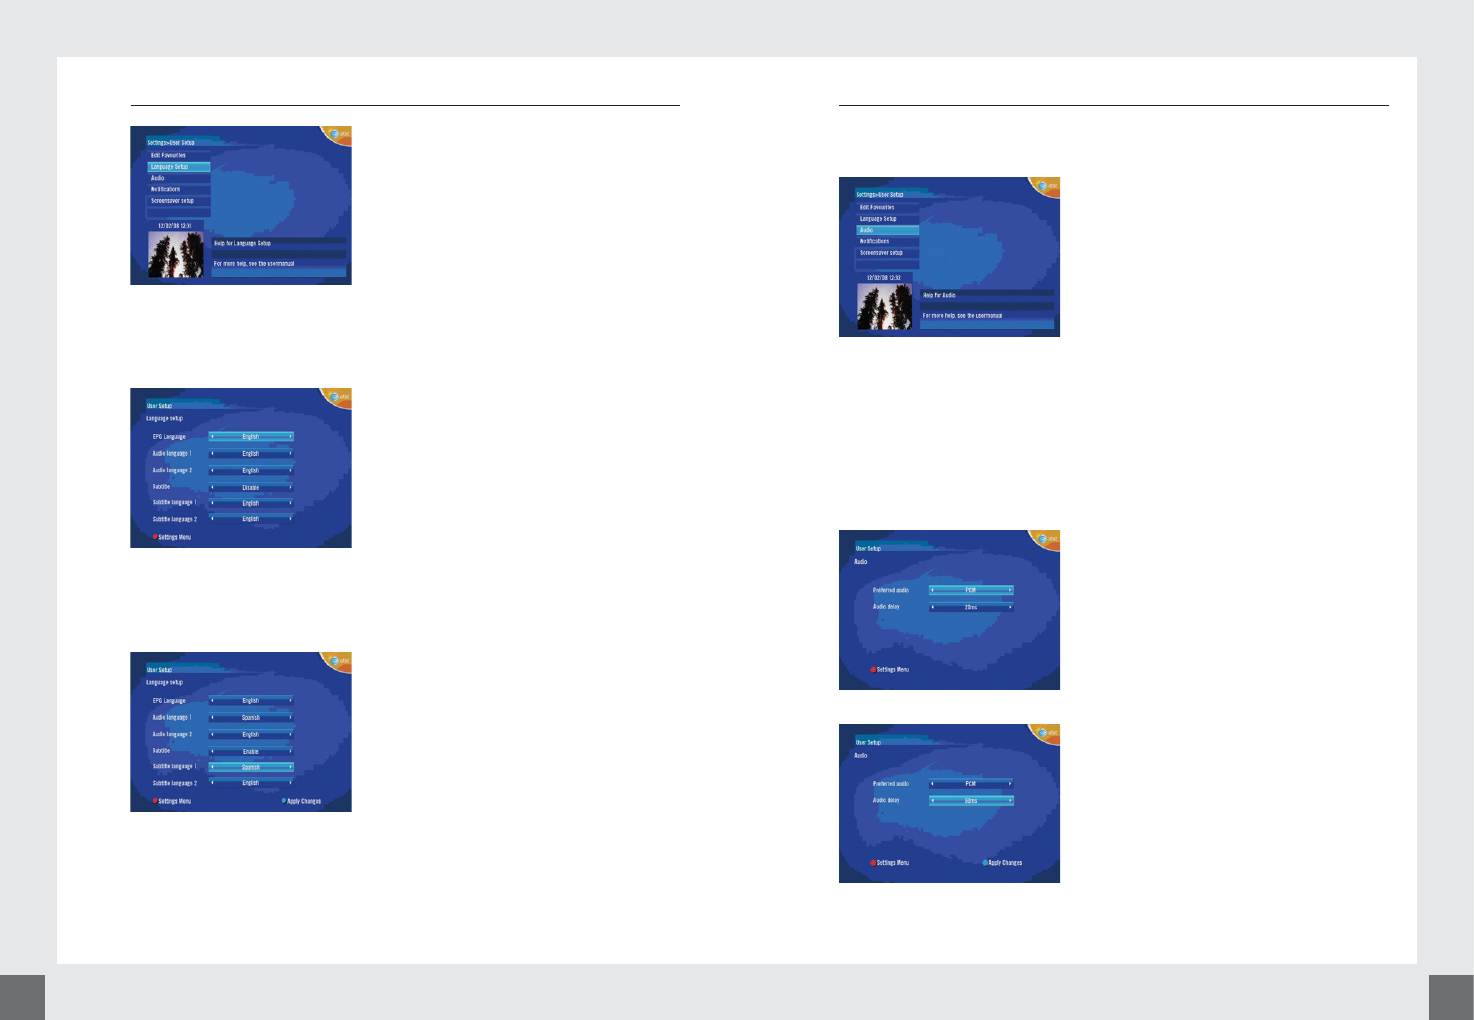
6.2.2.2 Language Setup
The user can change the EPG Text Language,
the Audio Language and the Closed
Captioning language from English to
Spanish. To do this the user selects the
Language Setup sub menu.
The user can then scroll through the fields and change the setting by pressing
the Right/Left arrow key on the Remote Control Unit.
THIS SCREEN BELOW IS NOT CORRECT. AN
UPDATES SCREEN IS PENDING.
Once the user has made the changes they require then user presses the Blue
button on the Remote Control Unit.
THIS SCREEN BELOW IS NOT CORRECT. AN
UPDATES SCREEN IS PENDING.
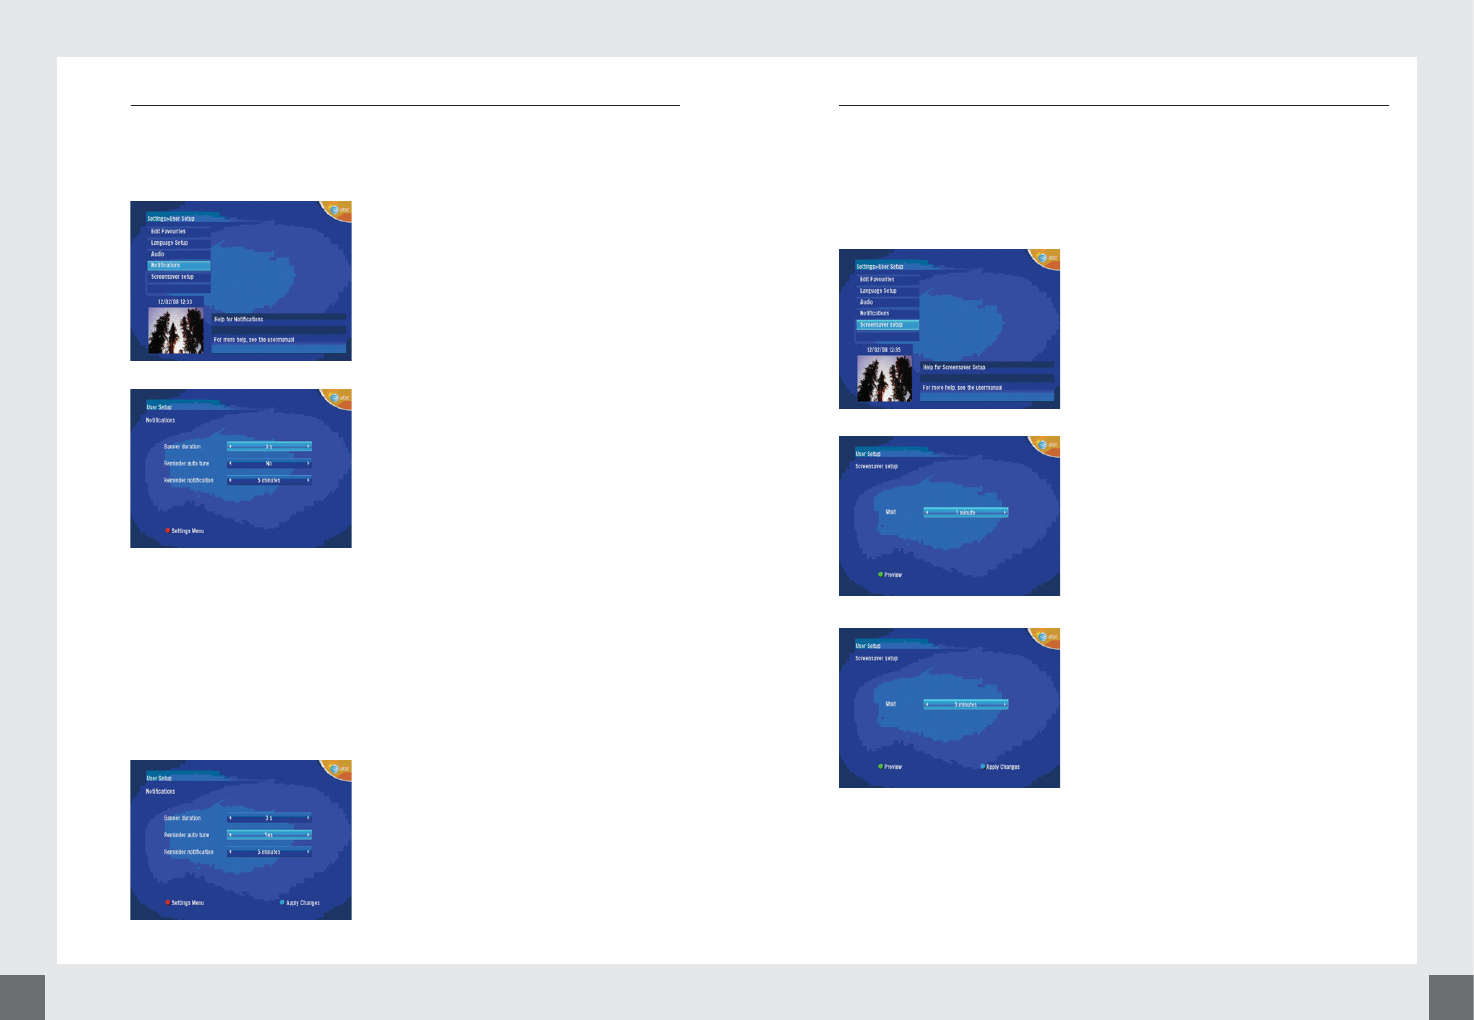
6.2.2.3 Audio
The user can change audio settings of the Set Top Box by selecting the Audio
sub menu.
Preferred Audio allows the user to select......
Need to confirm what the options will be.
Audio Delay allows the user to extend the audio delay. This is particularly
useful when using a surround sound system.
This needs to be removed from the EPG.
Need confirmation as to how this screen will
look with regard to available options or
whether or not the screen will be removed
from the EPG.
Need confirmation as to how this screen will
look with regard to available options or
whether or not the screen will be removed
from the EPG.
3029
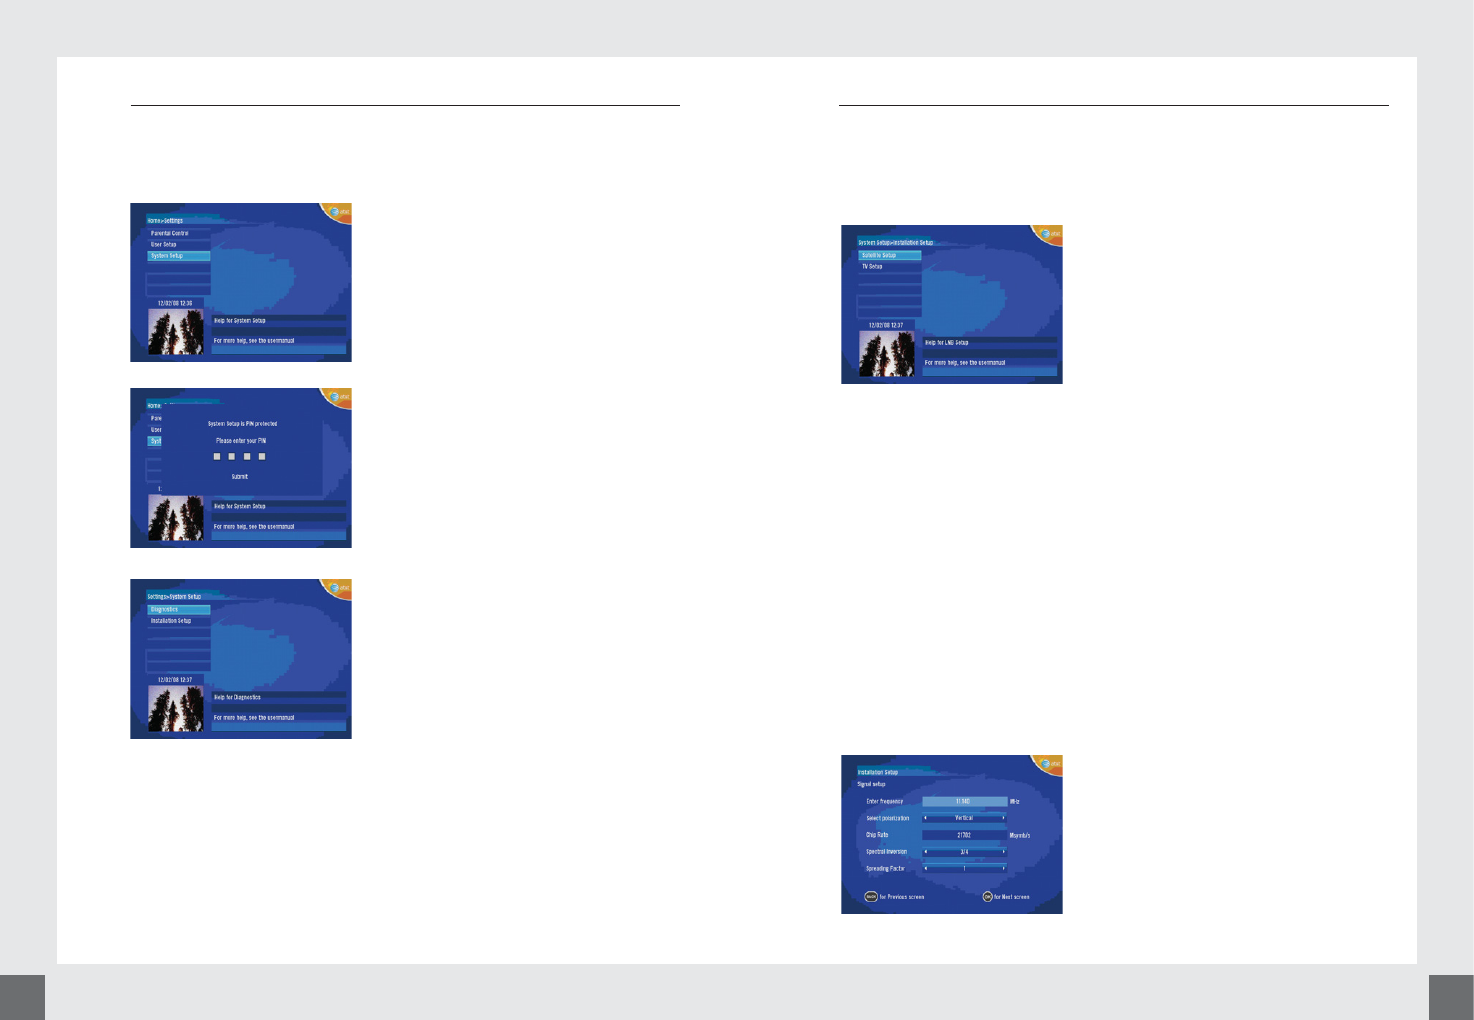
6.2.2.4 Notifications
The user can configure the notifications that appear on the screen as well as
the duration of how long the notifications are displayed for by choosing the
Notifications sub menu.
Banner Duration is the duration that the
Program Banner will be displayed on the
screen when the user tunes to a new event.
The range is from 0-60 seconds.
Reminder Auto Tune allows the user to
enable the Set Top Box to automatically tune
to a booked event even if the user is actually
tuned to a different channel and is watching
a different event.
Reminder Notification is the time before a
booked event is due to start that the user
will be reminded that a booked event is
going to start. The range is from 1-15
minutes.
To save any changes the user presses the
Blue button on the Remote Control Unit.
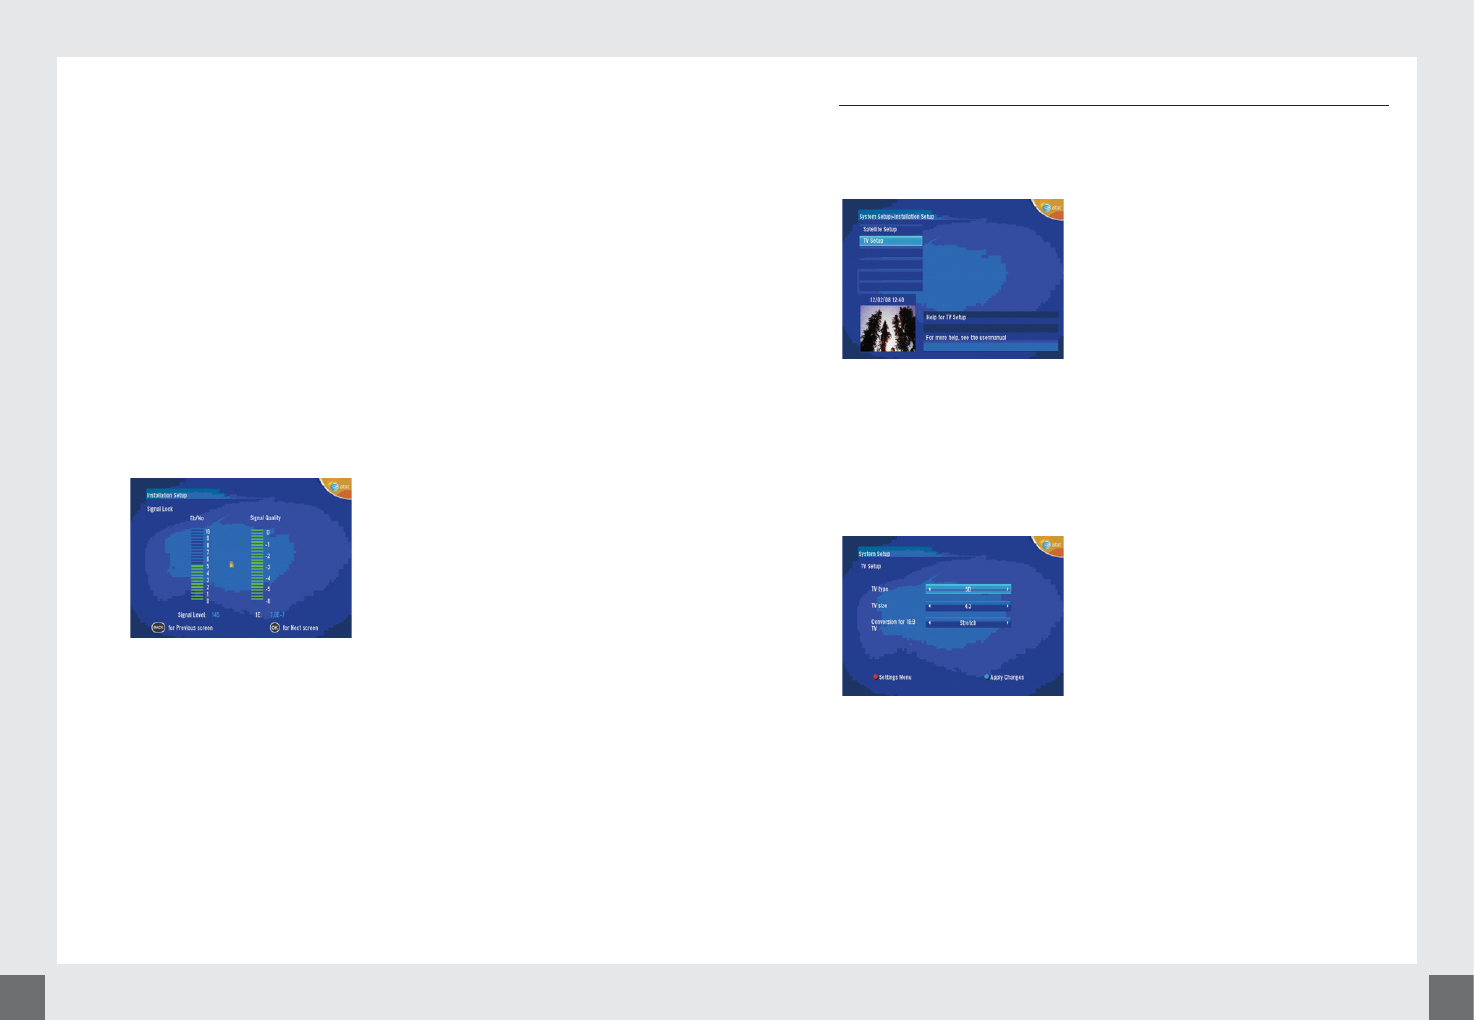
6.2.2.5 Screensaver Setup
The user can configure the Screensaver setup by selecting the Screensaver
setup sub menu.
The user can configure the period of time before a screen saver is displayed.
A screensaver will only be displayed when the user is in then Menu and sub
menu’s and no interaction has occurred between the user and the EPG.
The range is from 1-5 minutes.
To save any changes the user presses the
Blue button on the Remote Control Unit.
3231
6.2.3 System Setup
The System Setup menu is PIN protected and allows the user to change the
tuning parameters of the Set Top Box if the Set Top Box is not able to achieve
Signal Lock and the TV Setup.
To access the System Setup menu the user
must first enter a 4 digit PIN number, 9871.
The user can then access the Installation
Setup sub menu.
Once the user has accessed the Installation Setup sub menu the user can then
change the Satellite Setup parameters of the TV Setup parameters.
6.2.3.1 Satellite Setup
In the unlikely event that the Set Top Box can not receive a satellite signal the
user can call Technical Support on 1-866-800-9030 can go to the AT&T
website:
http://www.cruisecast.com
If the user is instructed by Technical Support
to change the Set Top Box tuning
parameters then the use will select the
Satellite Setup screen and press “OK” on the
Remote Control Unit.
There are 7 fields that can be configured by the user to re-tune the Set Top
Box are:
1. Frequency.
2. Polorisation.
3. Chip Rate.
4. Spectral Inversion.
5. Spreading Factor.
6. Orbital Position.
7. East / West Flag.
IMPORTANT: Do not change any of the 7 parameters unless asked to do
so by a Technical support representative.
THIS SCREEN IS NOT UP TO DATE.
3433
When the user has made the changes that the technical support
representative has asked for then the user presses the “OK” button on the
Remote Control Unit.
After pressing the “OK” button on the Remote Control Unit the user will be
presented with a Signal Lock screen.
THIS SCREEN IS NOT UP TO DATE.
When the Set Top Box has re-tuned and acquires Signal Lock the Signal Level
and 1E indicators will be green. Once the indicators are Green the user can
press “OK” button on the Remote Control Unit and the Set Top Box tune to
the parameters entered by the user.
If the Signal Lock and 1E indicators are Red then the user needs to consult
with the technical support representative.
6.2.3.2 TV Setup
The user can change the TV display by selecting the TV Setup sub menu by
highlighting the TV Setup sub menu and pressing “OK” on the Remote
Control Unit.
The user will be able to choose which TV format aspect ratio size they prefer
to watch video in:
• 4:3.
• 16:9.
THIS SCREEN IS NOT UP TO DATE.
3635
6.3 List Of Channels
The List Of Channels is the third level menu in the Home Screen. In this menu all
Video and Radio channels are listed together. There is no:
a. Date.
b. Current Time.
c. Channel Number.
d. Channel Name.
e. Event Name.
f. Event Start Time.
g. Event Finish Time.
h. US TV Rating or MPAA Rating-In this case TV Y7.
i. Short Description of the highlighted Event.
j. Received Signal Strength Indicator.
Information displayed in the List Of Channels
menu.
The user can view the list of channels by
highlighting the List Of Channels menu and
pressing “OK” on the Remote Control Unit.
The user will see the list of Video and Radio channels that are available.
The user can select a channel and preview the
current event on the channel, by pressing “OK”
on the Remote Control Unit.
The current event of the selected channel will
be displayed in the right hand side of the List
Of Channels Menu.
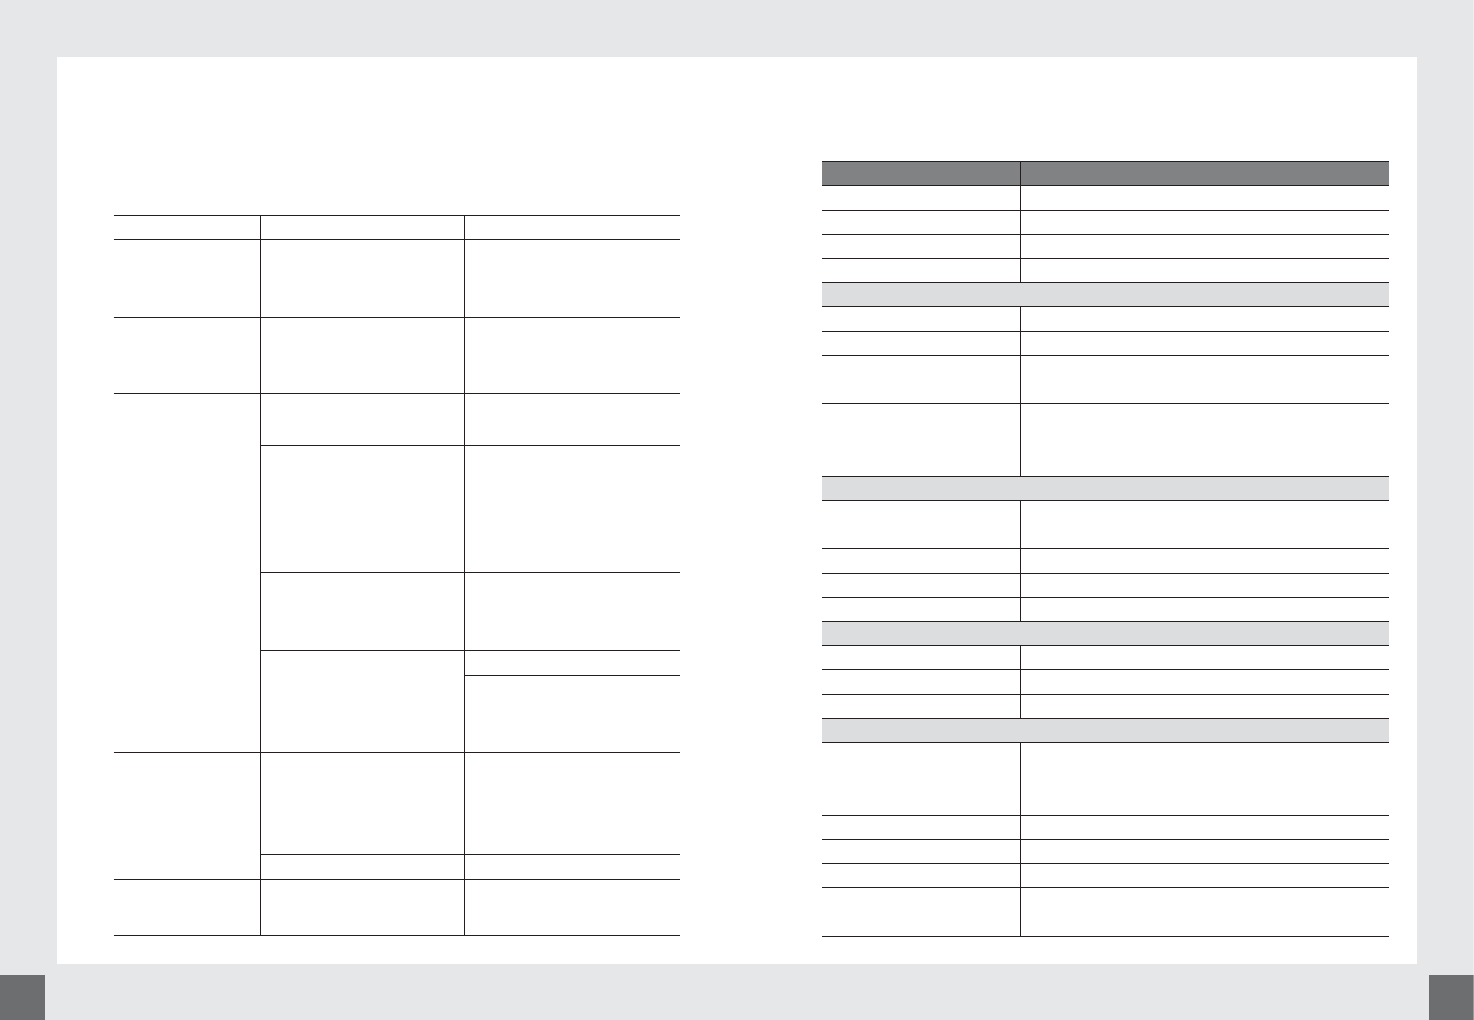
If the user wishes to tune to the previewed channel then the user can press “OK”
on the Remote Control Unit and the Set Top Box will display full video and the
program banner containing the relevant information for that event, such as:
a. Date MM/DD/YY format.
b. Current Time = 13:52.
c. Channel Number = 440.
d. Channel Name = US Comedy Gold.
e. Current Event Name = Bilko.
f. Current Event Start Time = 13:40.
g. Current Event Finish Time = 14:40.
h. Next Event Name = Cheers.
i. Next Event Start Time = 14:40.
j. Next Event Finish Time = 15:40.
k. US TV Rating or MPAA Rating = TV Y7.
l. Received Signal Strength Indicator = 145.
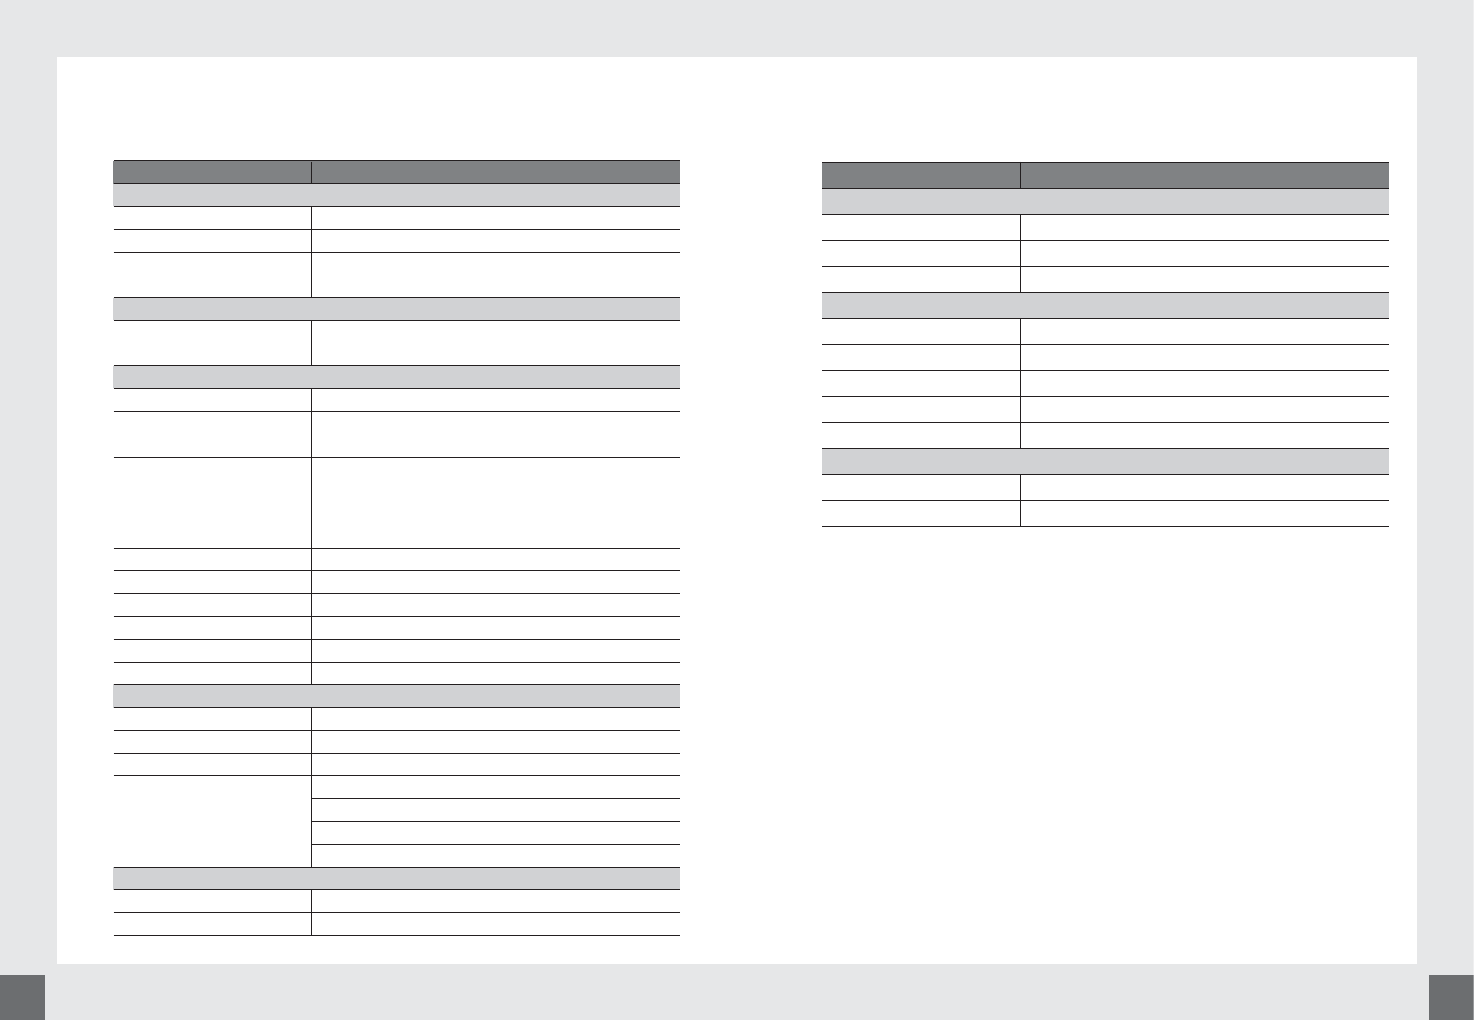
Once the Program Banner duration has expired then full video will be displayed.
3837
7. Trouble Shooting
This information will help you quickly solve the problem. If you are unable to
solve the problem, contact your service provider. (Therefore, if the unit does not
work properly, check it according to the procedures shown in the table below)
Problem
LED on front panel
does not light and
display
No Picture or
sound.
Black-and-white
screen or V-Hold.
The remote control
is not working.
The SIM card is not
working.
Possible causes
DC power disconnected.
Wrong connection of the
video/audio output to TV
input terminal.
Wrong connection of
satellite antenna cable.
No signal or weak signal.
Wrong setting of channel
information in MENU
screen.
Your TV mode is different
from satellite broadcasting
mode.
Remote controller is
incorrectly operated.
Battery exhausted.
The SIM card is not installed
properly.
Remedy
Check the power cable and
bypass switch.
Connect two terminals
correctly with RCA cable.
Connect the antenna cable
correctly.
Check the cable connections,
LNB and other equipment
connected between the LNB
and the receiver or adjust the
antenna.
Type the setting value
correctly.
Use TV of same mode.
Use the NTSC/PAL converter
connected to the receiver
and TV.
Check the remote controller’s
battery and then, if does not
become try paring between
RCU and STB once again.
Change the batteries.
Check that the SIM card has
been correctly inserted.
8. Specifications
Category Specification
Flash Memory 32Mbyte
DDR Memory 128Mbyte
EEPROM 256Kbit (32Kbyte )
Front End IMLM
Power Supply
Input Voltage Nominal 12VDC (10 to 28VDC range)
Swithch On/Off Control
Cable Detachable. three wires black / red/ yellow,
6m long, fuse protected
Mode Operating / Standby Modes
Standby = Video/Audio Off and iMLM power off via
FET cntrol
Video
CODEC MPEG-4 AVC/H.264 - Baseline, main and extended
profile, up to level 2 at least(Main only)
Transport stream MPEG2-TS
Aspect Ratio 4:3, 16:9; pan & scan; letterbox
Output 2 x CVBS (S-Video is not used)
Audio
CODEC MPEG-4 (AAC-HE), MPEG-1 layers 1, 2 and 3 (MP3)
Output Stereo Connector RCA jack - Female (two sets)
with Bluetooth Stereo audio transmission over Bluetooth
Remote Control
Type 2.4GHz ISM band (Nordic, nRF24L01)
STB is receive only
Actually, used frequency is 2.402~2.473GHz
Coverage Current coverage = 13M
Key 30Key
Battey CR2025 (3V)
Code Address coded and support multi Mobile STB
installation (pairing)
4039
Category Specification
USB
Functional USB2.0 Host
Speed Hi-Speed rate of 480Mbps
Port 2-Port (1-port is at front panel, 1-port is for IMLM
interface)
Smart Card
locking mechanism to resist vibration - push/push
SIM Socket with cover
Front Pannel Interface
RF connector x 1 : SMA Female(mounted on IMLM)
LED x 3 : standby/power-on (red/green), SW Dowload
(Blinking Yellow), remote control (blinking red)
USB connector X 1 : USB 2.0 HOST
Only firmware usage to do download be.
Firmware download can’t do by computer and
must use the device(USB memory) only
Power Switch x 1
Power connector x 1
RCA connnector x 2 : Female
S-Video connector x 1 : Female
Smartcard Slot x 1 : SIM Socket
IR Mouse x 1 : 3P Male
Bluetooth
Module CSR solution(2.4GHz)
Version Version 2.0
Class Class 2
Profile A2DP
AVRCP
SPP (upto 250kbps)
DUN
Mechanicial Specification
W x D x H Less than 8” x6” x2” (195 * 151.8 * 46 mm)
Weight Less than 5lbs
Category Specification
Operational and storage environment
Operation 0℃~ 50℃
Storage -35℃~ 80℃
Humidity 0 ~ 90%
RF Front End
Input Frequency 950MHz ~ 1750MHz
RF Input Connector SMA-Female 50ohm(Input Impedance 50ohm)
Input Level -65dBm ~ -25dBm
Modulation Data rate 15MCPS / 22.5MCPS / 30MCPS
Channel Bandwidth 18MHz / 27MHz / 36MHz
Antenna Controller Output
RF Output 315MHz or 333MHz
RF out level -40dBm