Hyundai IBT G73TR Dual Function Touch Monitor User Manual
Hyundai IBT Corp. Dual Function Touch Monitor
UserManual.wiki
>
Hyundai IBT
>
G73TR User Manual
User manual
Navigation menu
Upload a User Manual
Namespaces
Wiki Guide
HTML
PDF
Info
Views
User Manual
Discussion / Help
Navigation
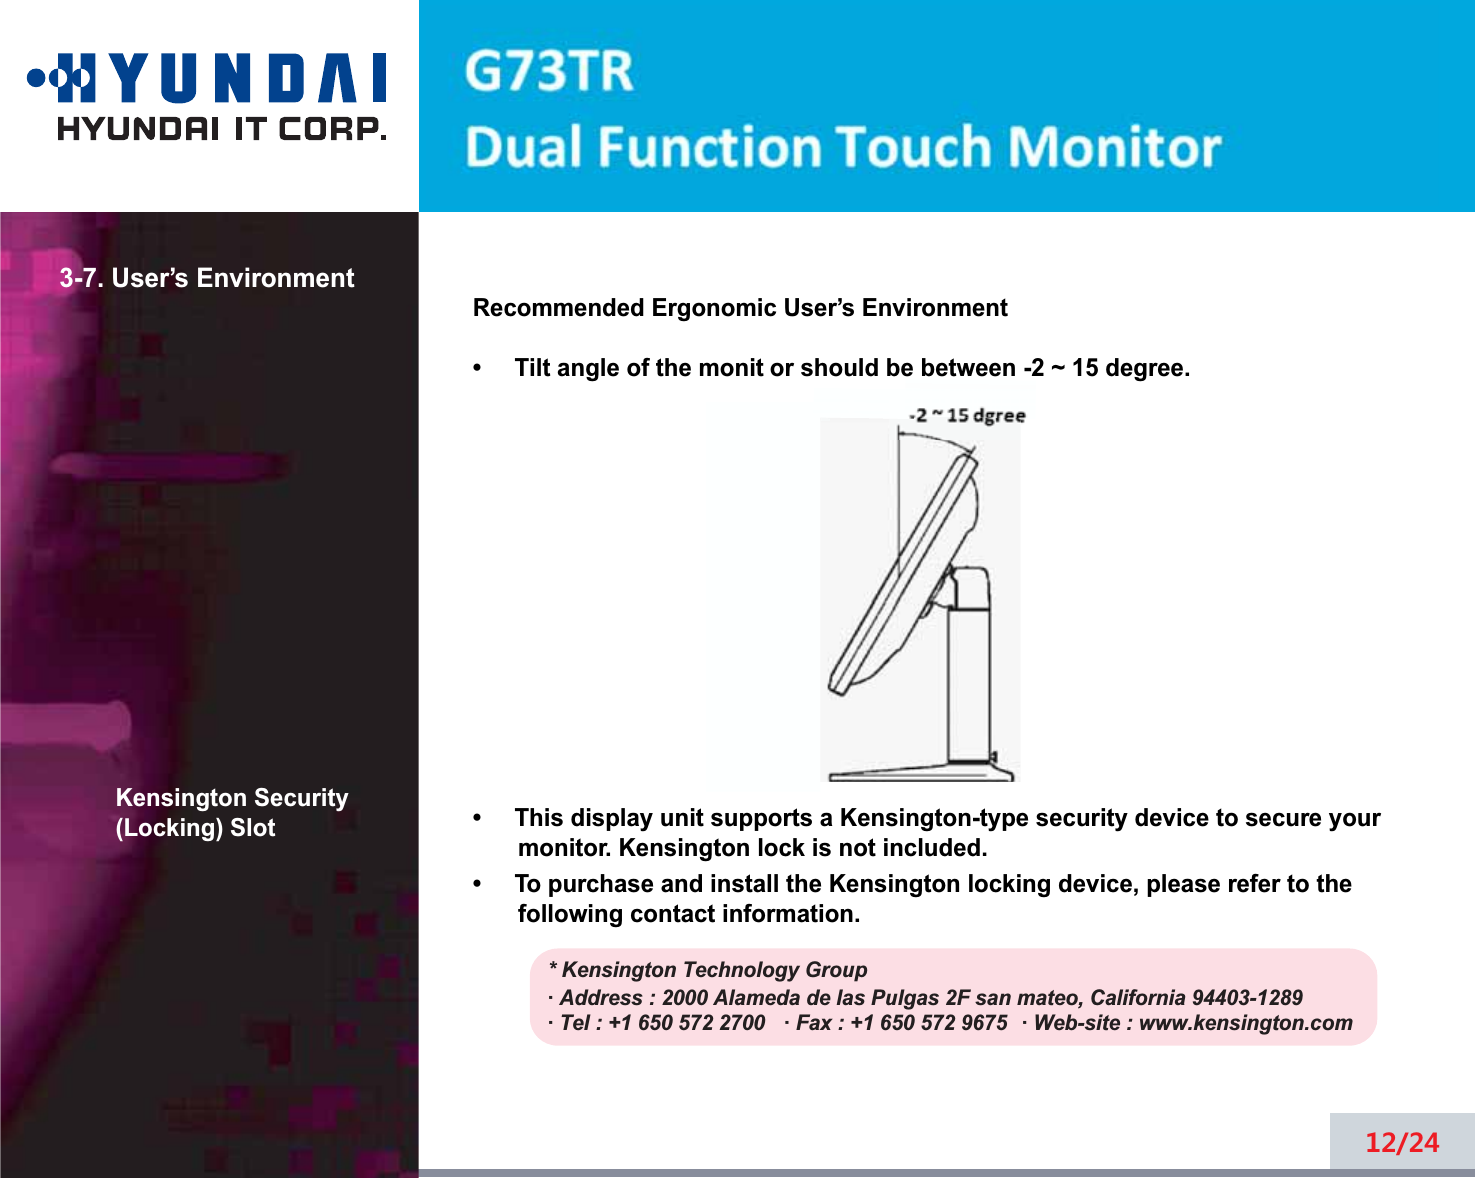
![1. Introduction2. Safety Information1/24This manual contains instructions for installing and operatingHYUNDAI IT G73TR.HYUNDAI IT G73TR. is a highly ergonomic color display unit.7YLHZDEOH6;*$/&'+LJKTXDOLW\VFreen rHVFDOLQJFDSDELOLW\9(6$'306'LVSOD\3RZHU0DQDJHPHQW6LJQDOLQJ9(6$''&%FRPSDWLELOLW\$GYDQFHGGLJLWDO2Q6Freen-Display controls)DVWDQGDFFXUDWHDXWRDGMXVWPHQW0RVWDGYDQFHGLPDJHVFDOLQJ6XSSRUWLQJ9(6$)ODW3DQHO0RQLWRU3K\VLFDO0RXQWLQJ,QWHrface'LJLWDO6LJQDO,QSXWE\'9,&RPSDWLELOLW\ZULH5HVLVWLYHTRXFKPRQLWRU*73757KLV0RQLWRUKDVEHHQHQJLQHHred and manufactured to assure your safety. You can prHYHQWVHULRXVHOHFWULFDOVKRFNDQGRWKHUKD]DrGVE\NHHSLQJLQPLQGWKHIROORZLQJ'RQRWSODFHDQ\WKLQJZHWRQWKHPRQLWRURUWKHSRZHUcorG1HYHUFRYHUWKHYHQWLODWLRQRSHQLQJVZLWKDQ\PDWHULDODQGQHYHUWRXFKWKHPZLWKPHWDOOLFRULQIODPPDEOHPDWHULDOV](https://usermanual.wiki/Hyundai-IBT/G73TR/User-Guide-1305815-Page-5.png)

![VESA MOUNT’G7KLVGLVSOD\XQLWVXSSRUWV9(6$)3030,VWDQGDUGIRU75PP[75PPVFUHZPRXQWLQJE\JLYLQJVFUHZKROHVRQWKH5HDU&RYHURIWKHXQLW)RUEX\LQJ9(6$)ODW3DQHO0RQLWRU0RXQWLQJ'HYLFHVSOHDVHFRQWDFWIROORZLQJLQIRUPDWLRQ2QO\0[VL]HVFUHZVKRXOGEHXVHGIRUSURSHUPRXQWLQJ8VLQJZURQJVL]HVFUHZPD\FDXVHGDPDJHVWRWKHGHYLFH* Ergotron, Inc.· Address : Ergotron Europe Kuiperbergweg 50 1101 AG Amsterdam The Netherlands· Tel : +3 1 20 696 60 65 · Fax : +3 1 20 609 04 59 · E-mail : info.eu@ergotron.com13/24!](https://usermanual.wiki/Hyundai-IBT/G73TR/User-Guide-1305815-Page-17.png)