ICP C8DNL075B12A1 User Manual 80+ SINGLE STAGE GAS FURNACE Manuals And Guides L0502516
ICP Furnace/Heater, Gas Manual L0502516 ICP Furnace/Heater, Gas Owner's Manual, ICP Furnace/Heater, Gas installation guides
User Manual: ICP C8DNL075B12A1 C8DNL075B12A1 ICP 80+ SINGLE STAGE GAS FURNACE - Manuals and Guides View the owners manual for your ICP 80+ SINGLE STAGE GAS FURNACE #C8DNL075B12A1. Home:Heating & Cooling Parts:Icp Parts:Icp 80+ SINGLE STAGE GAS FURNACE Manual
Open the PDF directly: View PDF ![]() .
.
Page Count: 2
INSTALLATION INSTRUCTIONS
Blower Door Replacement
This kit is designed to replace the blower door on the N8MPN, N8MPL, N9MP1, N9MP2, *8MPN, *8MPL, *8DNL,
*9MPD, *8MPT, *9MPT, *8MPV, *9MPV, H8UHh, MUF, HL, and FUH series furnace.
* Denotes Brand (T, H or C)
Read the entire instructions completely before starting the installation.
Examine kit to determine that the following parts are present with
the replacement blower door:
Parts List
Description Part# Qty
Model: Entry Level, C, H
Door Screw * 1014488 2
Wiring Label
Single Stage 1014484 1
2-Stage 1014485 1
Variable Speed (050) 1014486 1
Variable Speed 1014487 1
Export 50 Hz 1014495 1
Warning Label 1013810 1
Operating Instruction 1013494 1
Seal Strip 1013144 3
Instructions 441 06 1047 00 1
Model: Tempstar
Door Screw * 1014488 2
Wiring Label
Single Stage 1014484 1
2-Stage 1014485 1
Variable Speed (050) 1014486 1
Variable Speed 1014487 1
Export 50 Hz 1014495 1
Warning Label 1013810 1
Operating Instruction 1013494 1
Instructions 441 06 1047 00 1
Diagnostic Label
Single Stage 1012899 1
2-Stage 1013348 1
Seal Strip 1013144 3
Faceplate
1013489 or 1013490 or 1013491 1
Trim Strip 1013487 2
Hole Plug 1/4"Diameter 1010714 2
If any part is missing, immediately contact your parts supplier.
Note all parts will be used.
* Denotes parts available through Fast Parts.
Others are available only through Blower Door Kits.
Installation
Model: N9MP1, N8MPN, N8MPL, FUH (SeeFigure 1)
1. Place one Wiring Label part 1014484 on the inside of the
door.
2. Place seal strips (2) along the side edge on the inside of the
door. Trim seal strip to length.
3. Place Warning Label part 1013810 on the outside of the
door.
4. Place Operating Instruction part 1013494 below the warn-
ing label on the outside of the door.
5. Insert door screws (2) into screw holes located at the front
bottom of the door.
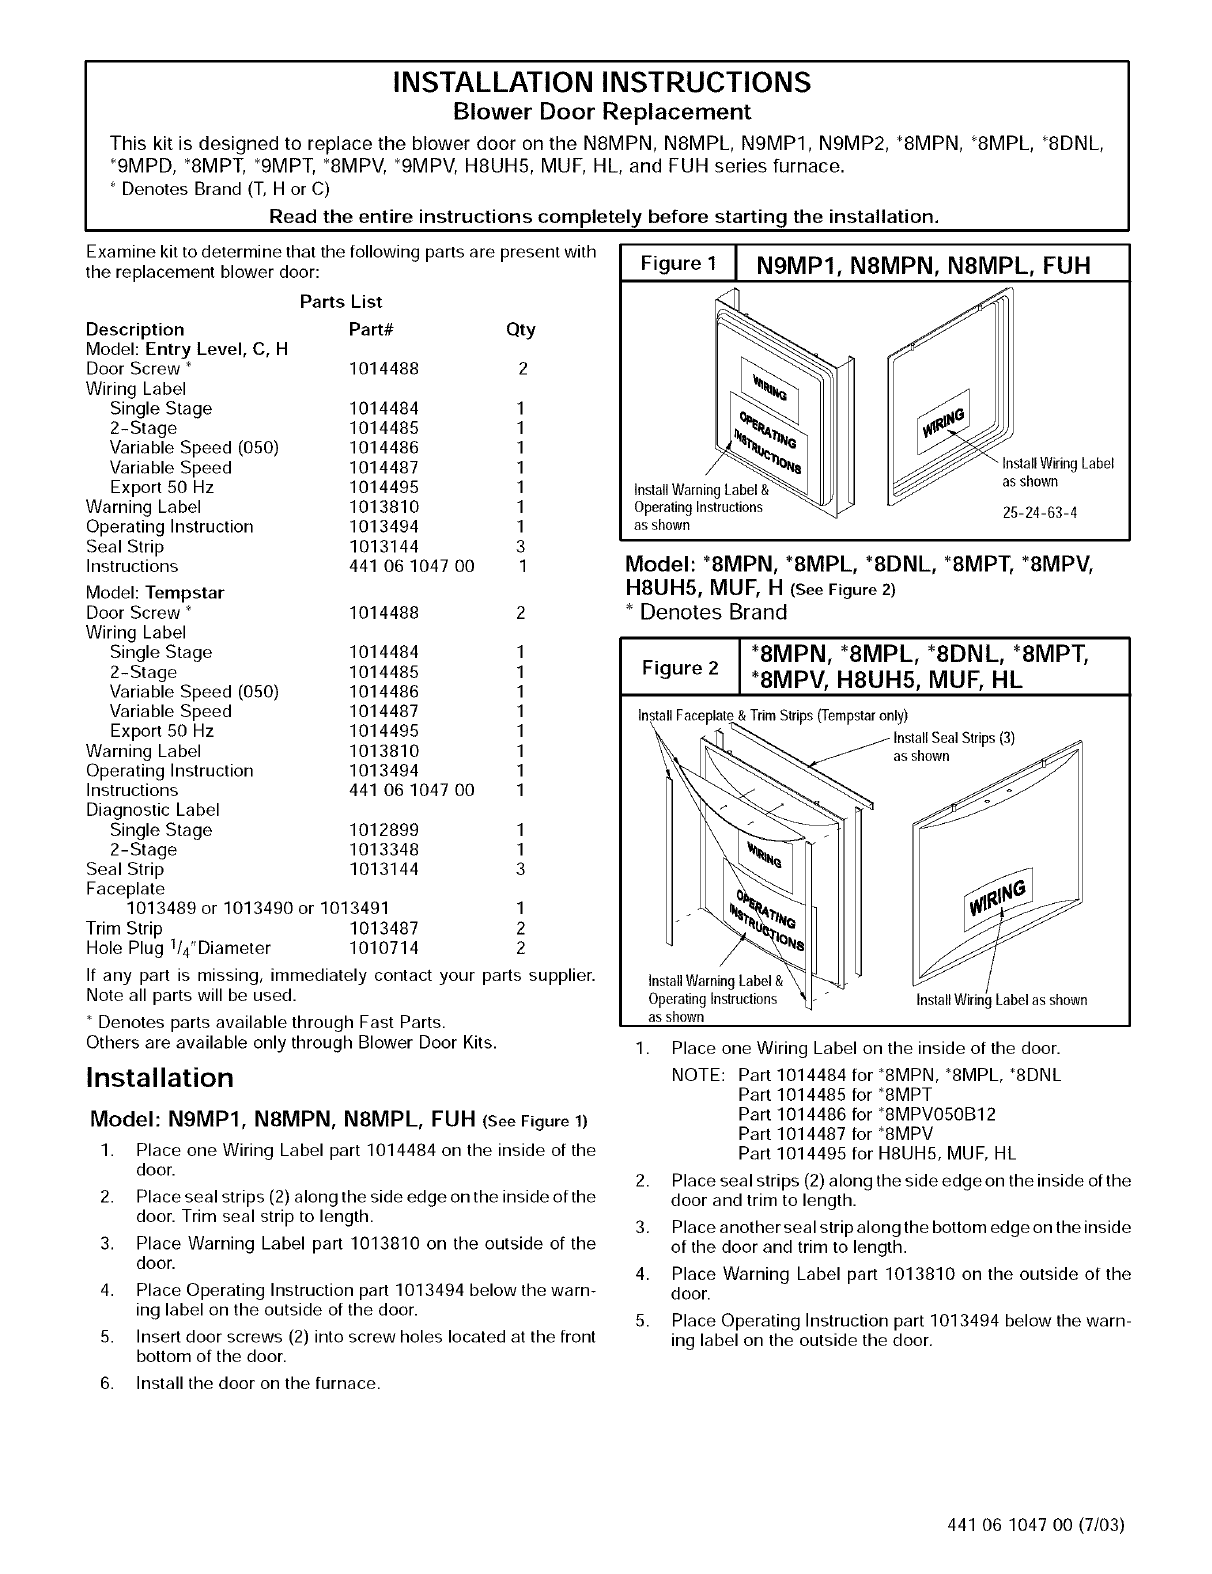
Figure 1IN9MP1, N8MPN, N8MPL, FUH
g Label
asshown
InstallWarningLabel&
OperatingInstructions 25-24-63-4
as shown
Model: *SMPN, *SMPL, *8DNL, *8MPT, *SMPV,
H8UHh, MUF, H (SeeFigure2)
* Denotes Brand
*8MPN, *SMPL, *SDNL, *SMPT,
Figure 2 *SMPV, H8UHh, MUF, HL
InstallFaceplate& Trim Strips (Tempstaronly)
r_ _ /Install Seal Strips (3)
\\\ \_"_,_ "': _ as shown
InstalIWarning Label & \ _
Operating Instructions _]- " Label as shown
asshown
1. Place one Wiring Label on the inside of the door.
NOTE: Part 1014484 for *8MPN, *8MPL, *8DNL
Part 1014485 for *8MPT
Part 1014486 for *8MPV050B12
Part 1014487 for *8MPV
Part 1014495 for H8UHh, MUF, HL
2. Place seal strips (2) along the side edge on the inside of the
door and trim to length.
3. Place another seal strip along the bottom edge on the inside
of the door and trim to length.
4. Place Warning Label part 1013810 on the outside of the
door.
5. Place Operating Instruction part 1013494 below the warn-
ing label on the outside the door.
6. Install the door on the furnace.
441 06 1047 00 (7/03)
6. (Tempstar only) Insert Face Plate on the designated holes
on the front of the door.
7. Install Hole Plugs (2) on faceplate.
8. (Tempstar only) Place Trim Strips (2) along the front side
edge of the door.
9. Insert door screws (2) into screw holes located at the front
bottom of the door.
10. Install the door on the furnace.
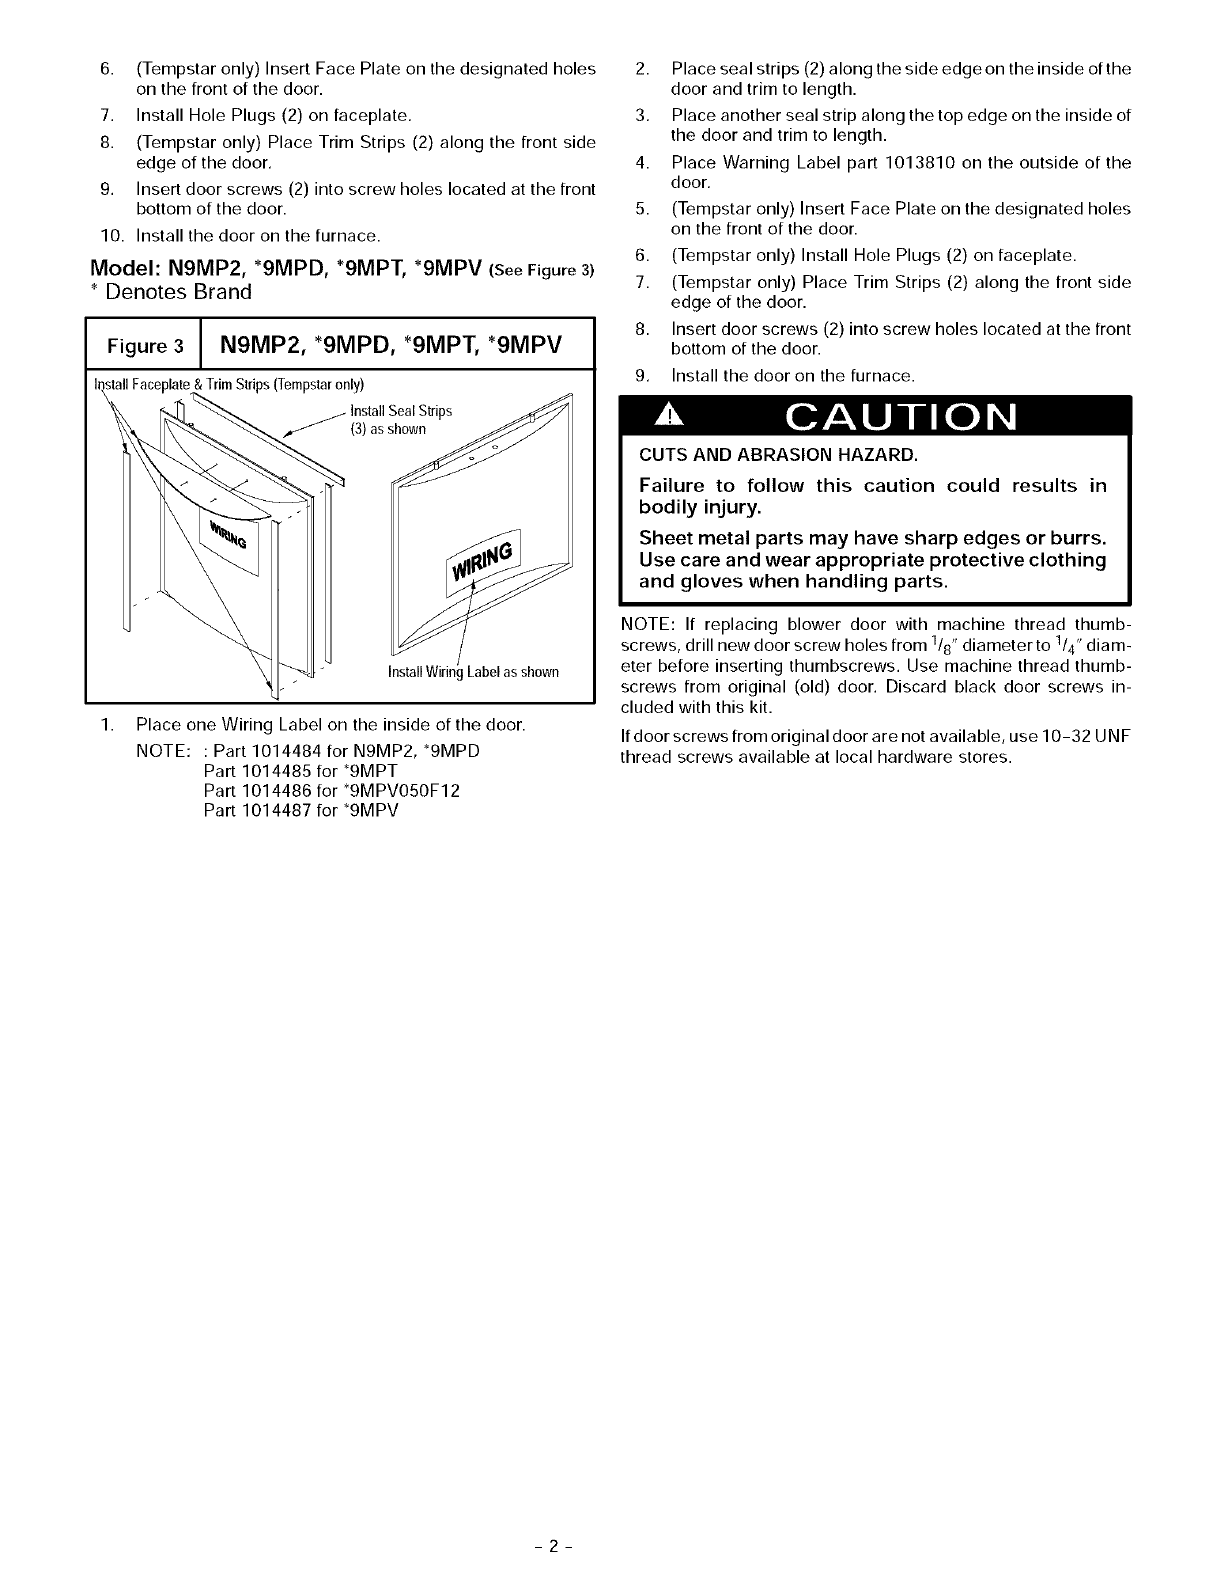
Model: N9MP2, *9MPD, *9MPT, *9MPV (SeeFigure3)
*Denotes Brand
Figure 3 N9MP2, *9MPD, *9MPT, *9MPV
_ \_ _ /(3) asshown ///
1. Place one Wiring Label on the inside of the door.
NOTE: :Part1014484forN9MP2,*9MPD
Part 1014485 for *9MPT
Part 1014486 for *9MPV050F12
Part 1014487 for *9MPV
2,
3.
4.
5.
6.
7.
8.
9.
Place seal strips (2) along the side edge on the inside of the
door and trim to length.
Place another seal strip along the top edge on the inside of
the door and trim to length.
Place Warning Label part 1013810 on the outside of the
door.
(Tempstar only) Insert Face Plate on the designated holes
on the front of the door.
(Tempstar only) Install Hole Plugs (2) on faceplate.
(Tempstar only) Place Trim Strips (2) along the front side
edge of the door.
Insert door screws (2) into screw holes located at the front
bottom of the door.
Install the door on the furnace.
CUTS AND ABRASION HAZARD.
Failure to follow this caution could results in
bodily injury.
Sheet metal parts may have sharp edges or burrs.
Use care and wear appropriate protective clothing
and gloves when handling parts.
NOTE: If replacing blower door with machine thread thumb-
screws, drill new door screw holes from 1/8" diameter to 1/4" diam-
eter before inserting thumbscrews. Use machine thread thumb-
screws from original (old) door. Discard black door screws in-
cluded with this kit.
If door screws from original door are not available, use 10-32 UN F
thread screws available at local hardware stores.
-2-
