ID TECH KIIISREDB ViVOpay Kiosk III SRED User Manual Testing Software
ID TECH ViVOpay Kiosk III SRED Testing Software
UserManual.wiki
>
ID TECH
>
KIIISREDB User Manual
User Manual
Navigation menu
Upload a User Manual
Namespaces
Wiki Guide
HTML
PDF
Info
Views
User Manual
Discussion / Help
Navigation

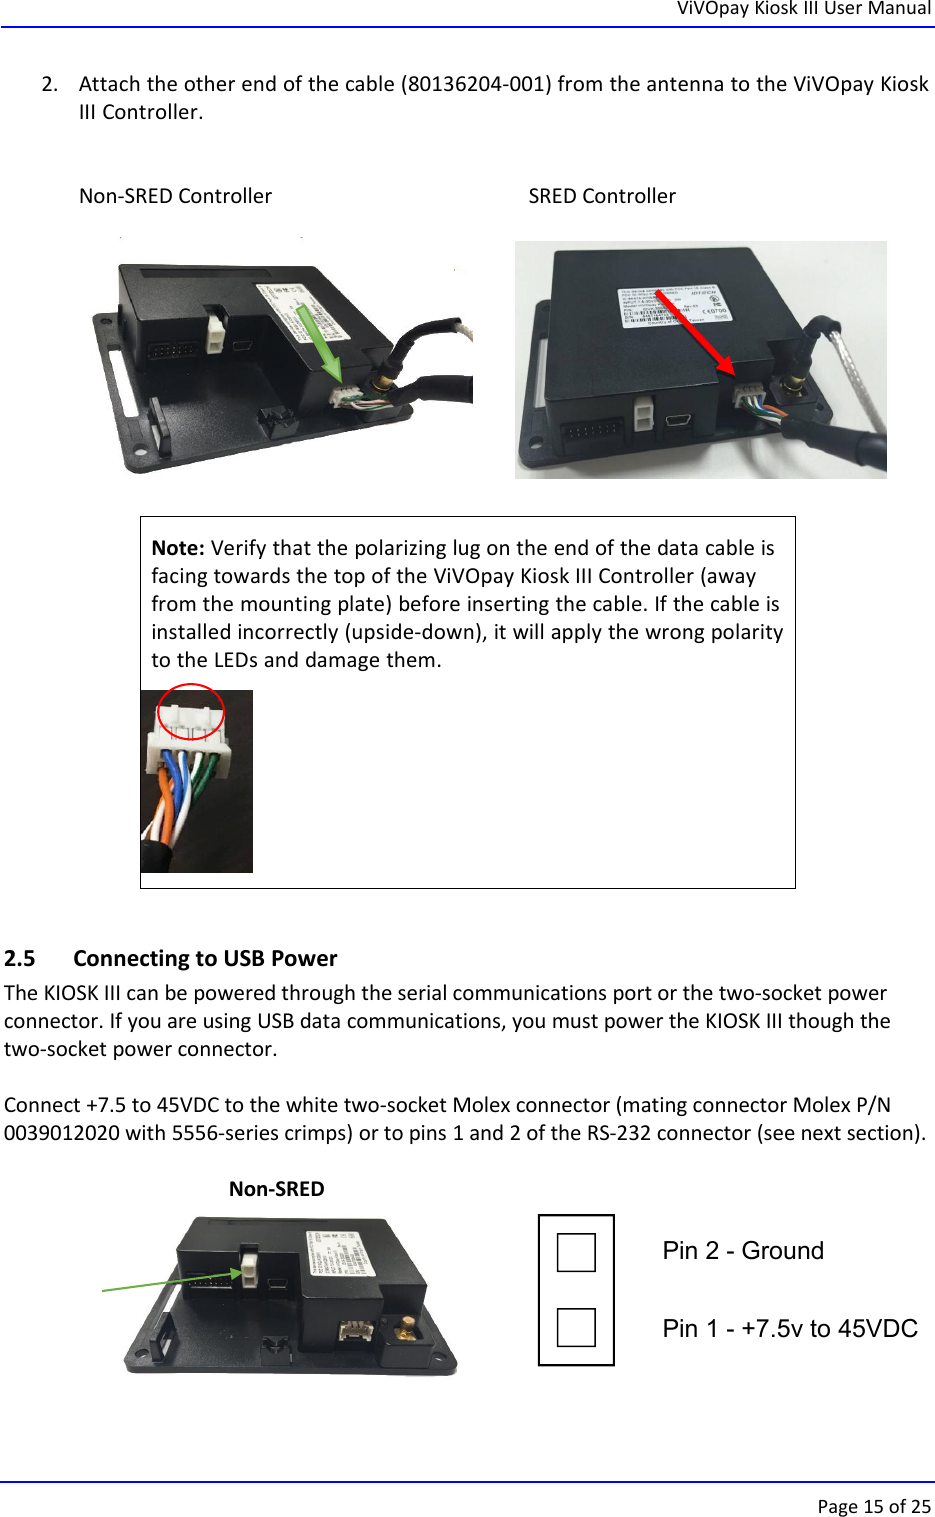
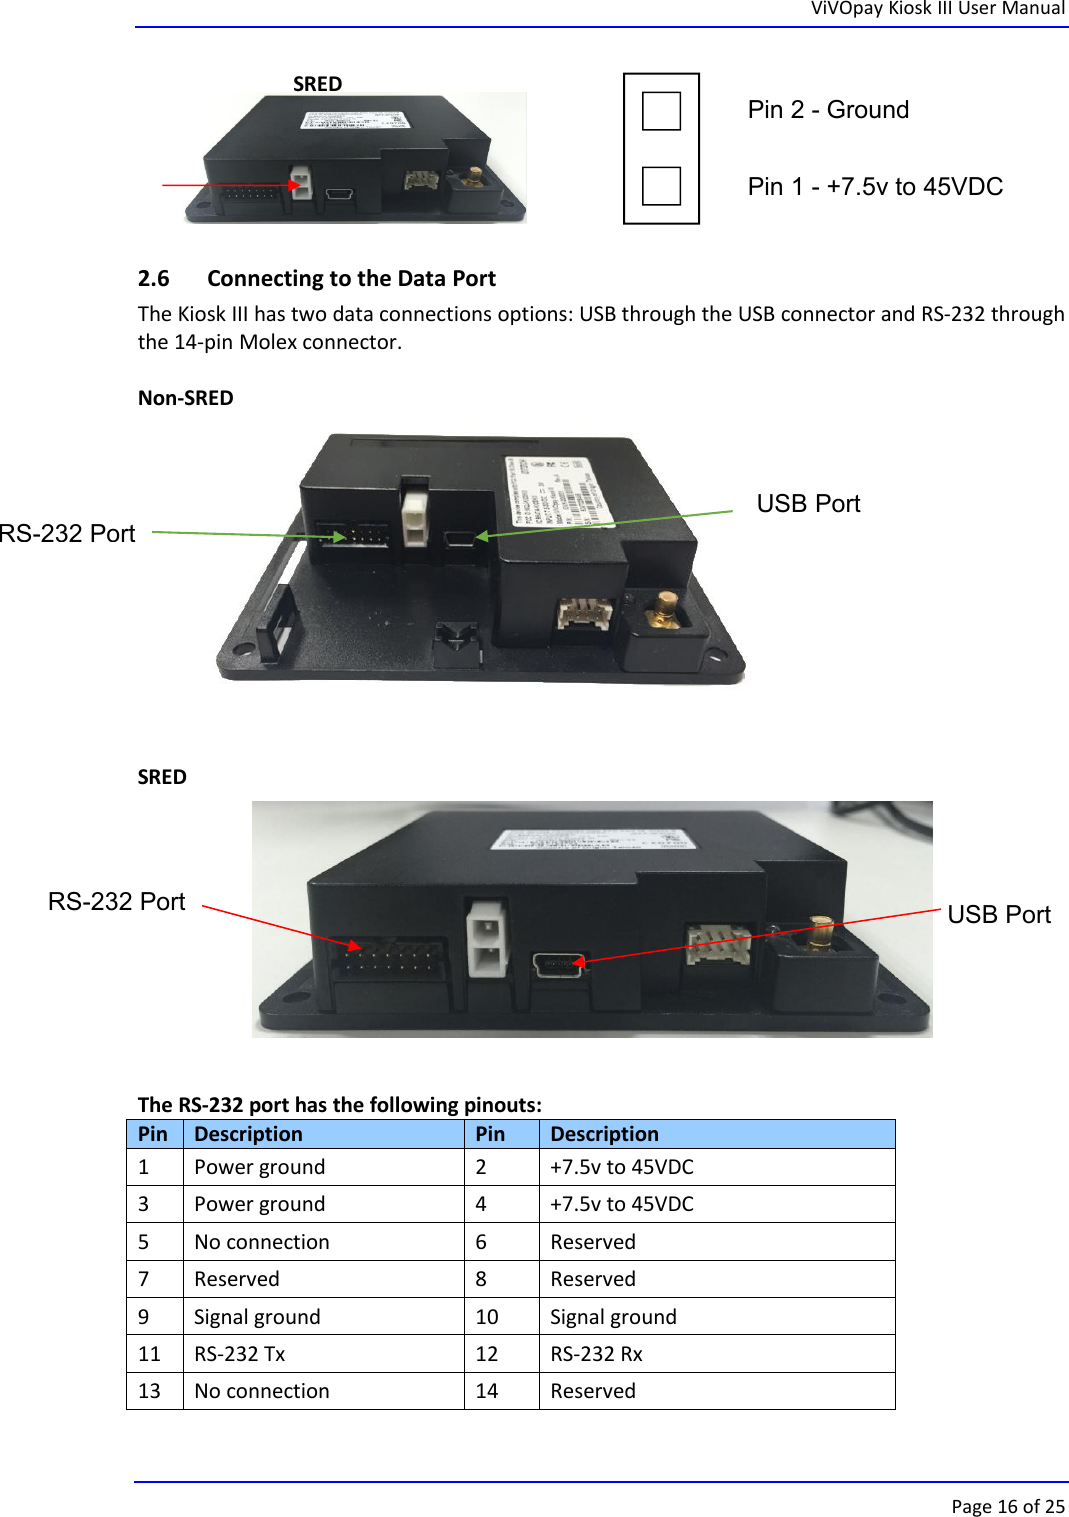
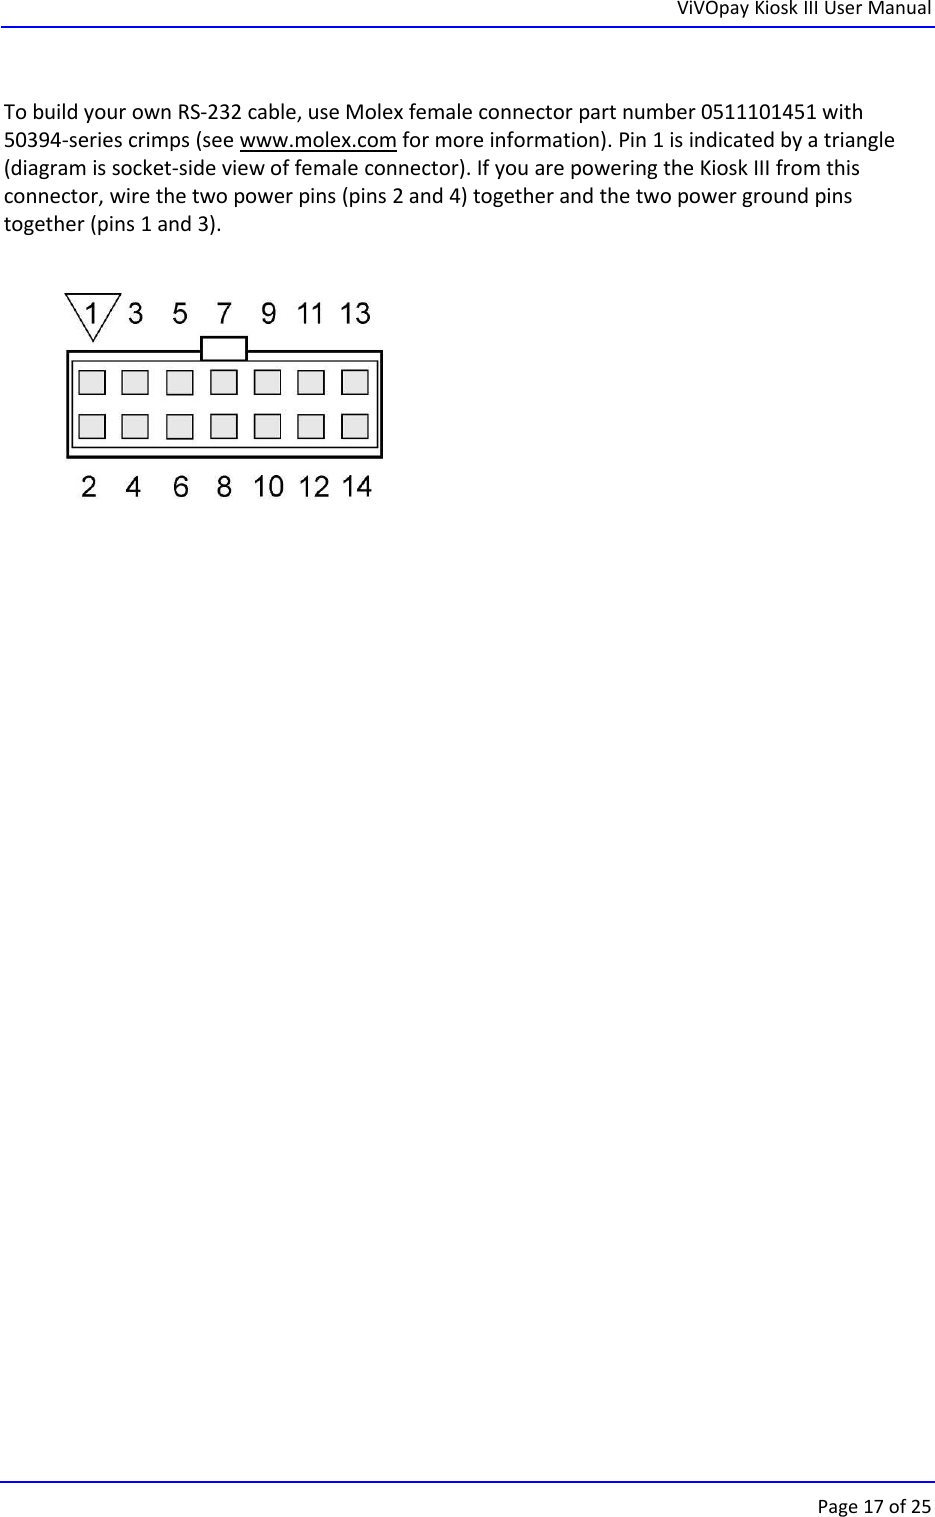
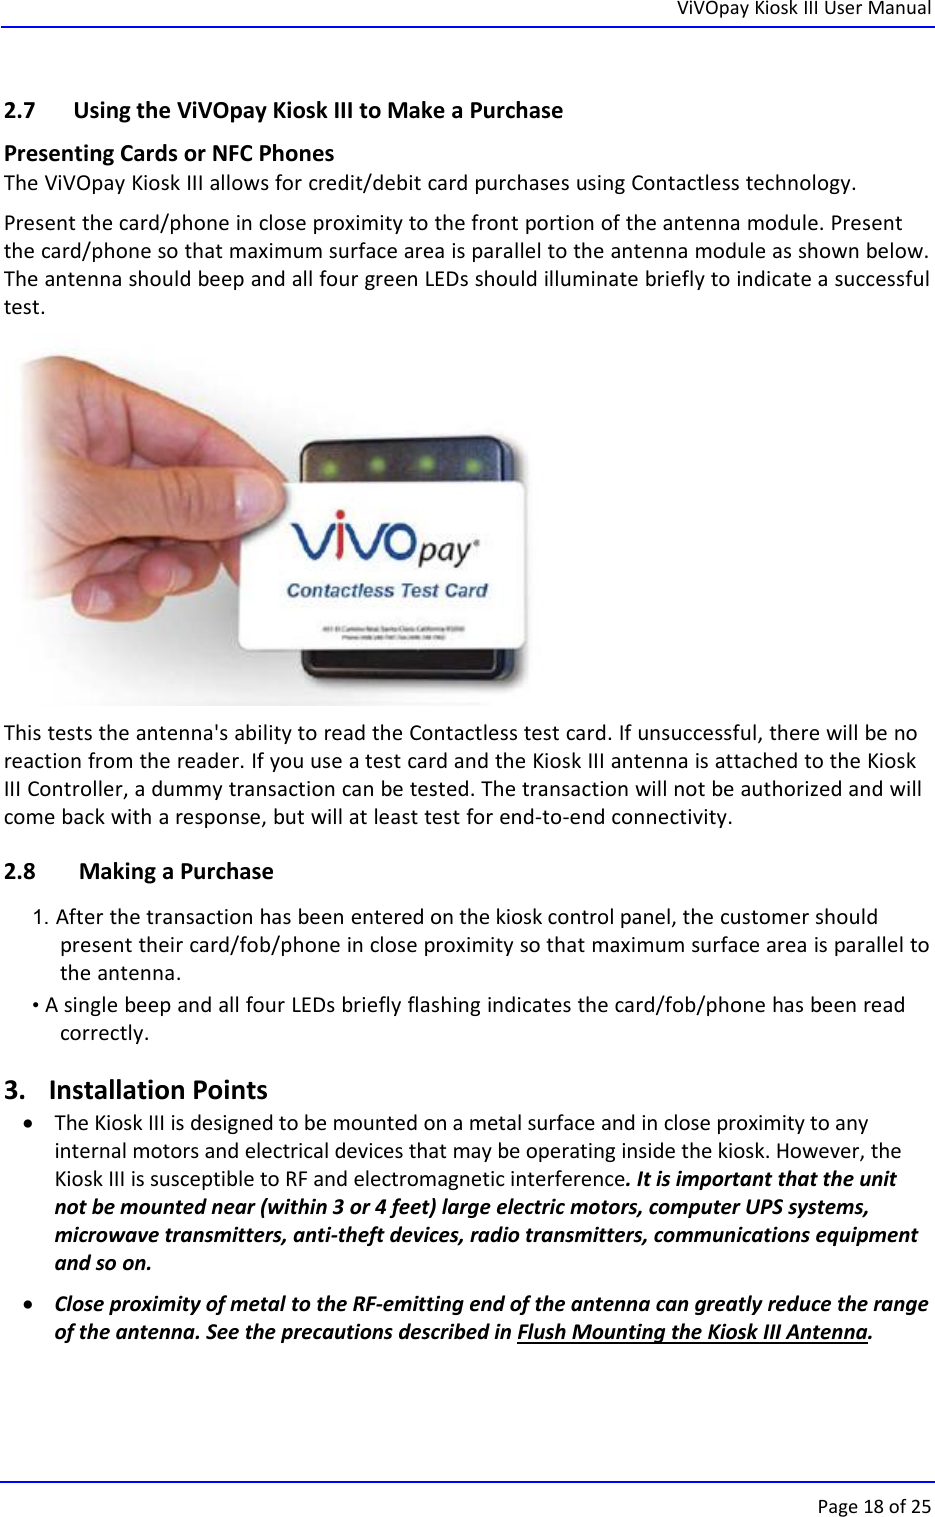
![ViVOpay Kiosk III User ManualPage 14 of 2563.50 [ 2.500 ]2. Locate the four 4.4mm (0.173 inch) mounting holes by holding the ViVOpay Kiosk IIIController in position and mark the holes. The following diagram shows the spacing onthe holes to be drilled for mounting the ViVOpay Kiosk III Controller.3. Drill the four 4.4 mm (0.173) mounting holes using a number 17 drill bit.4. Use four screws and nuts to mount the ViVOpay Kiosk III Controller to the kiosk surface.(Mounting screws are not provided and must be supplied by the installer.)5. Tighten the nuts to hold the ViVOpay Kiosk III Controller in position so that it does notmove.2.3.2 Mounting the ViVOpay Kiosk III Controller Using Mounting Tape1. Position the ViVOpay Kiosk III Controller on the interior of the kiosk making sure thatthere is sufficient room for the antenna mounting surface to be fully opened.2. Attach double-sided tape to the mounting surface.3. Position the ViVOpay Kiosk III Controller over the mounting tape and gently applypressure to hold the controller in position.2.4 Attaching the Cables from the Antenna to the Controller1. Attach the SMB end of the cable (80136204-001) from the antenna to the ViVOpay Kiosk IIIcontrollernon-SRED Controller SRED Controller](https://usermanual.wiki/ID-TECH/KIIISREDB/User-Guide-4163563-Page-14.png)