IDT Technology RP107R Bicycle Computer (Receiver) User Manual 1e 13 6
IDT Technology Limited Bicycle Computer (Receiver) 1e 13 6
UserManual.wiki
>
IDT Technology
>
RP107R User Manual
Manual
Navigation menu
Upload a User Manual
Namespaces
Wiki Guide
HTML
PDF
Info
Views
User Manual
Discussion / Help
Navigation

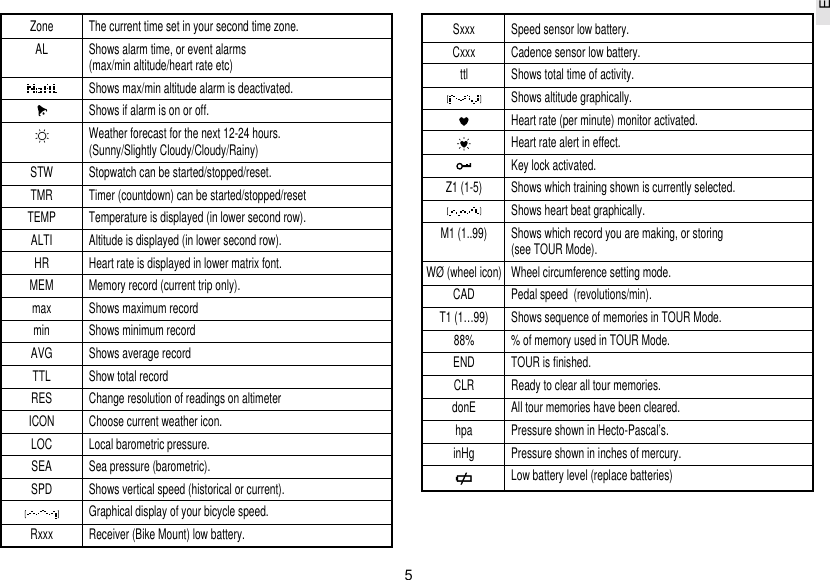
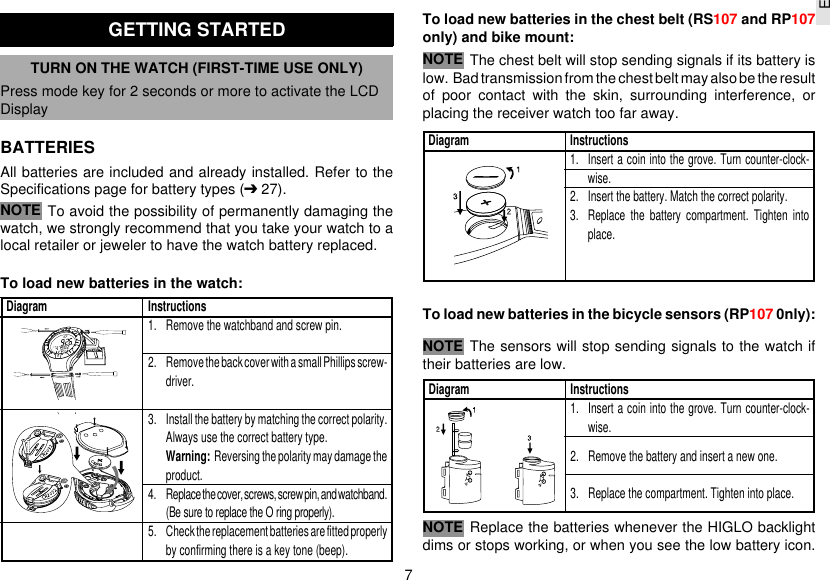

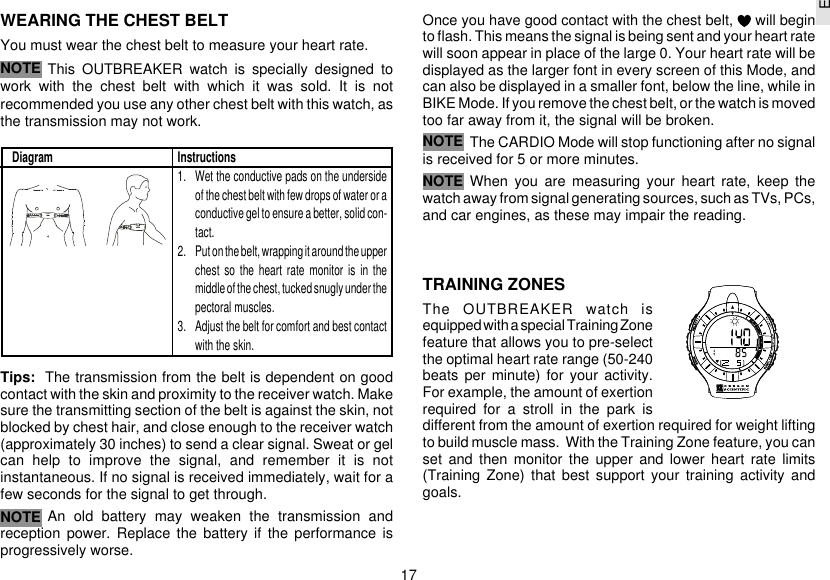
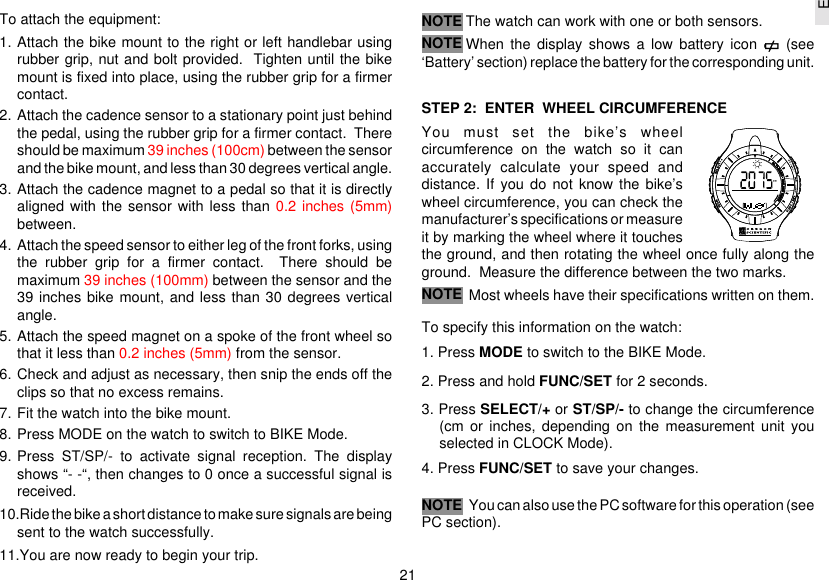
![E12SET THE SEA-LEVEL PRESSURESea level pressure can change relative to location. To achieveaccurate altitude readings, set the sea-level pressure valuebefore every trip. Check the newspaper, local news station,trail marker, or weather forecast for local readings, and alwaysselect the reading nearest to your present location.The altitude reading will change according to the sealevel pressure adjustment.VIEW THE SEA-LEVEL PRESSURETo view a graphical image of the current sealevel pressure reading, press FUNC/SET withthe SEA screen shown in ALTI-BARO Mode.Press again to return to normal display.SET ALTITUDE ALERTThe watch can be set to remember an altitude limit (either up ordown, but not both simultaneously). If the alarm is activated, aseries of beeps (at 5 second intervals) will sound, and the modebar will blink, when you breach the limit. To end the alert, pressany button.To set the alert limits and activate or deactivate the alert:NOTEDiagram Instructions1. While in ALTI-BARO Mode, press SELECT/+ untilthe SEA (sea pressure) screen is shown.2. Press and hold FUNC/SET for two seconds, thenuse SELECT/+ or ST/SP/- to change the value.The value will change in increments of 1 hPa or.03 inHg, depending on the measurement unit youselected in CLOCK Mode (see CLOCK mode).3. Press FUNC/SET again when finished.Diagram Instructions1. Press SELECT/+ until you reach the Alarm screen.(Display reads 'AL' or 'NoAL' at the bottom)2. Press and hold FUNC/SET for two seconds.3. You may set the arrow at the bottom of the screen toa ascending, or descending limit (but not both). Tochange direction, press SELECT/+ or ST/SP/-.4. Press FUNC/SET again, then press SELECT/+ orST/SP/- to change the altitude limit. (The alarm willbe automatically activated once the limits are set).5. Alternatively press ST/SP/- if you simply want toaccept a preset altitude alert setting. (Activated[AL] or deactivated [NoAL]).](https://usermanual.wiki/IDT-Technology/RP107R/User-Guide-486674-Page-12.png)
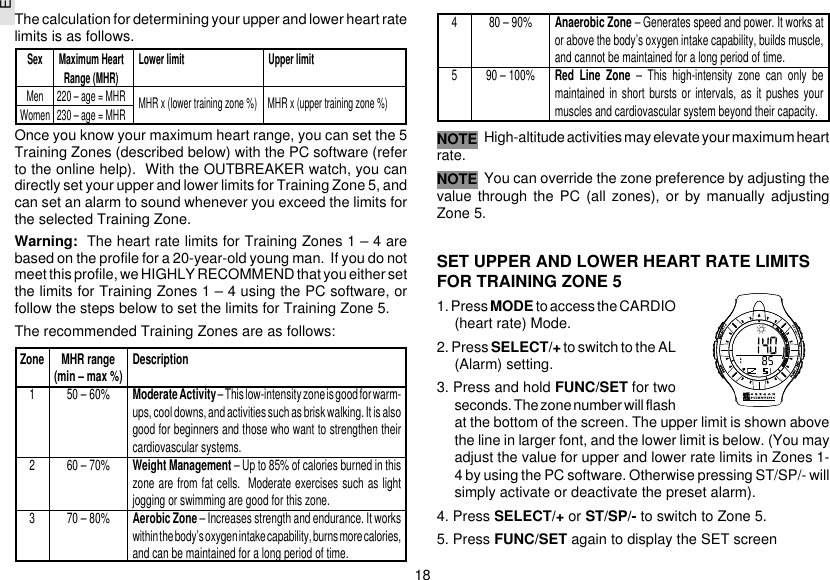
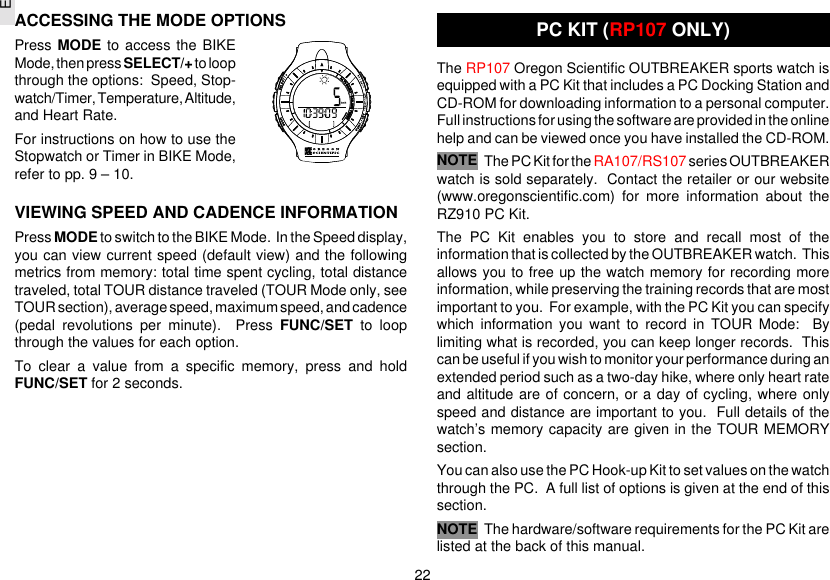
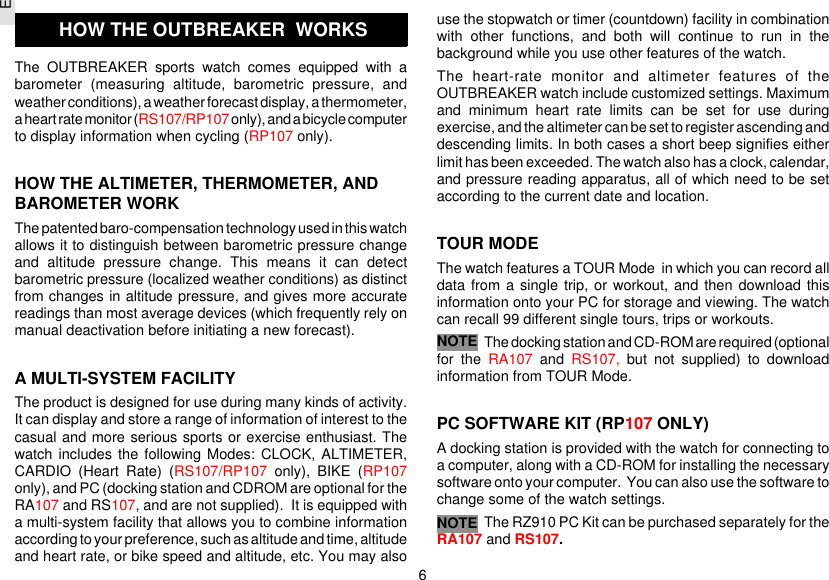
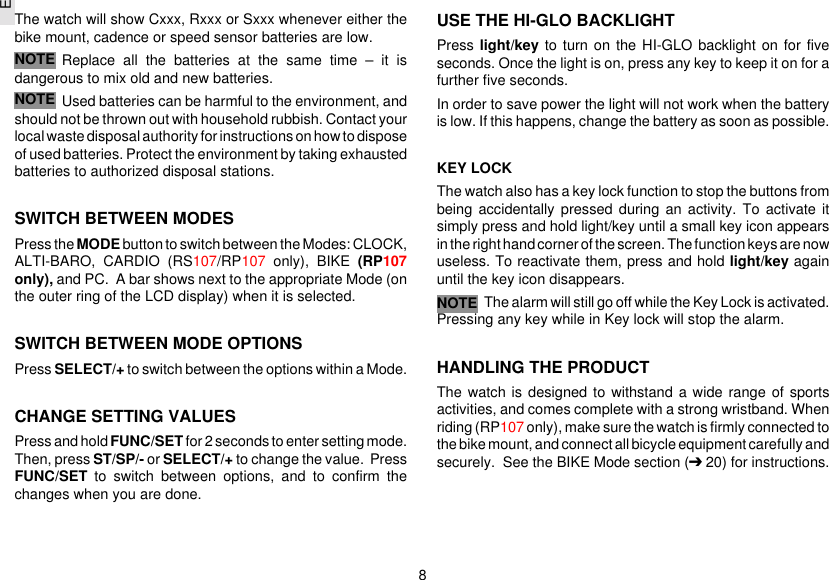
![23EPC MODESET UP FOR PC MODETo use the features of the PC Mode, you will need the PC Kit(includes PC docking station, connector cable, and theinstallation software CD-ROM), and a PC or laptop computer.All three models (RA/RP/RS 107) support the PC Mode.However, the PC Kit for the RA107 and the RS107 is soldseparately.USING THE SOFTWAREDouble-click on the Oregon Scientific icon. Once the softwareopens, click on Help for information about the function yourequire.PC MODE OPTIONSYou can perform the following tasks by using the CD-ROMsoftware supplied.Diagram Instructions1. Connect the PC Docking Station to your computer. Forbest results, turn the computer off before you connect.2. Install the software using the CD-ROM (first-time useonly). The process is automatic, and requires you torespond to self-explanatory prompts.Once the software is installed, an Oregon Scientific iconwill be placed on your desktop.3. Mount the watch on the docking station, making sure thecontact points on the station and the watch are aligned.The watch should automatically switch to PC Mode.The cadence, speed and heart rate functionswill be temporarily disabled when you use the watch inPC Mode.NOTEAccess/recall information/ on the PC• All information recorded in TOURMode, including temperature,altitude, heart rate, wheel speed,cadence, trip distance, etc,[Provided this data has beenselected in “Data should be stored”in the “Configuration menu” (seesoftware help menu)].• Back up/import and export data• Define user data• Display graphical chart and printtable• Give data overview with a specifieddurationChange watch settings on the PC• Date and time (set to PC time, or amanual setting)• Time, and event alarm (3 eventalarms, 1 daily alarm, and select alarmduration)• Current sea-level pressure• Altitude limits• Weather icon• Upper and lower heart rate limits forTraining Zones 1 – 5.• Wheel circumference/diameter• TOUR Mode data recording anddownload options• Choose a serial port (Com 1 to Com 4)• Sampling rate (1 second and up)• Unit settings (Metric or Imperial)NOTE](https://usermanual.wiki/IDT-Technology/RP107R/User-Guide-486674-Page-23.png)