IDT Technology SSMART Boot loadable platform with BLE User Manual STARTING YOUR WATCH FIRST TIME
IDT Technology Limited Boot loadable platform with BLE STARTING YOUR WATCH FIRST TIME
UserManual.wiki
>
IDT Technology
>
SSMART User Manual
user manual
Navigation menu
Upload a User Manual
Namespaces
Wiki Guide
HTML
PDF
Info
Views
User Manual
Discussion / Help
Navigation


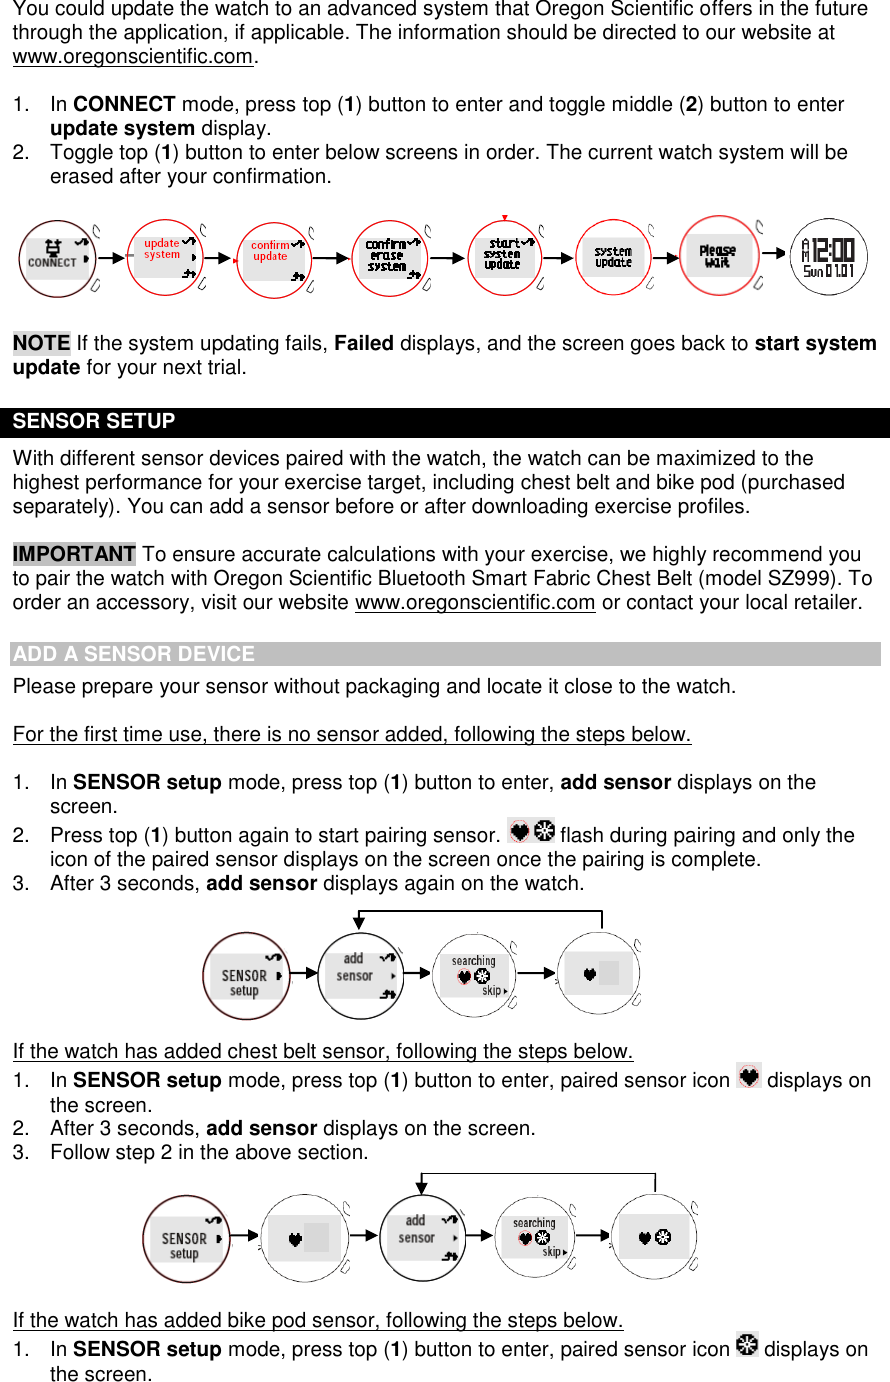
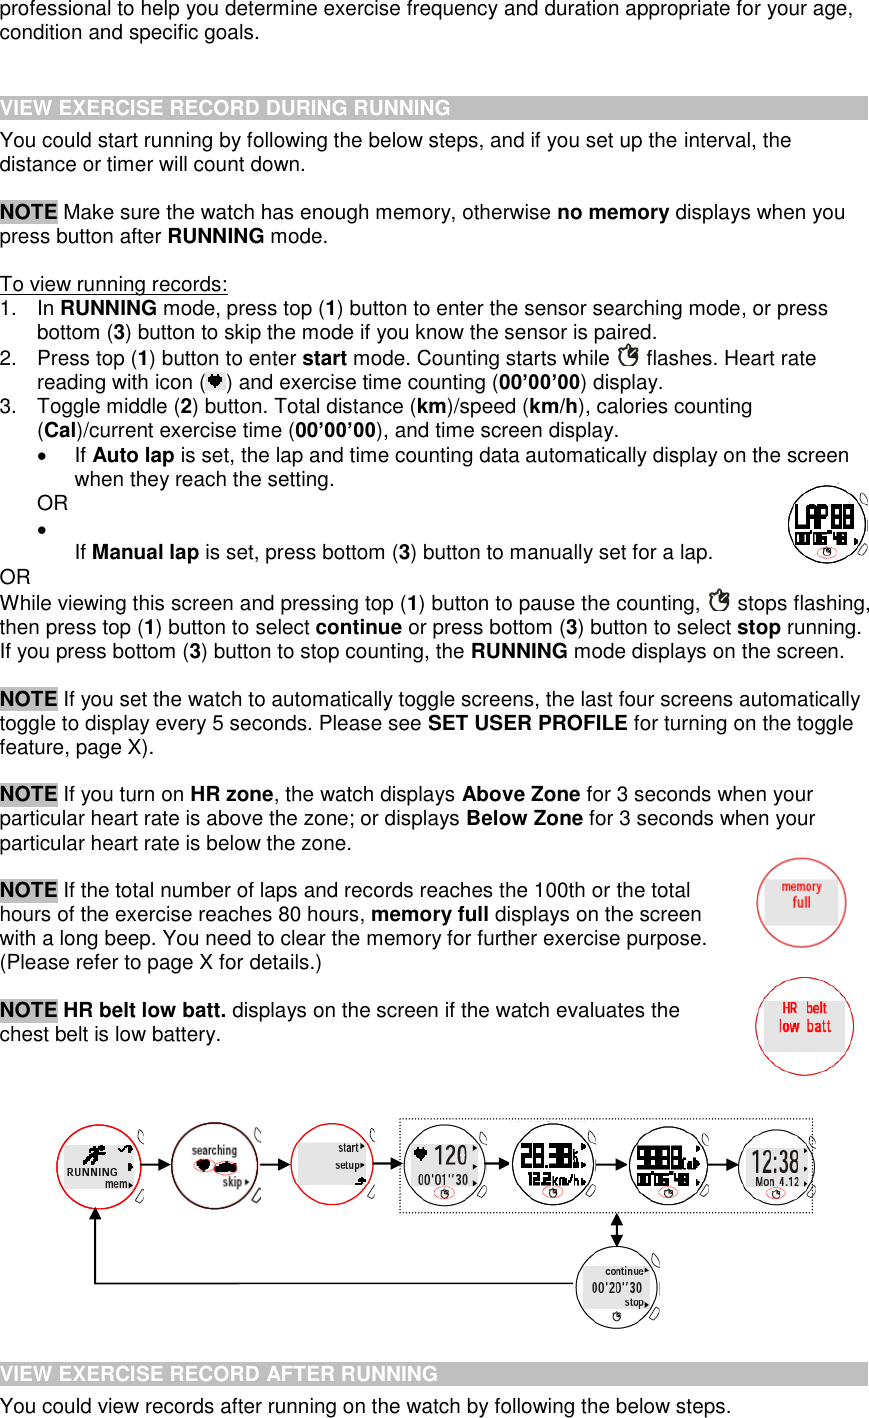
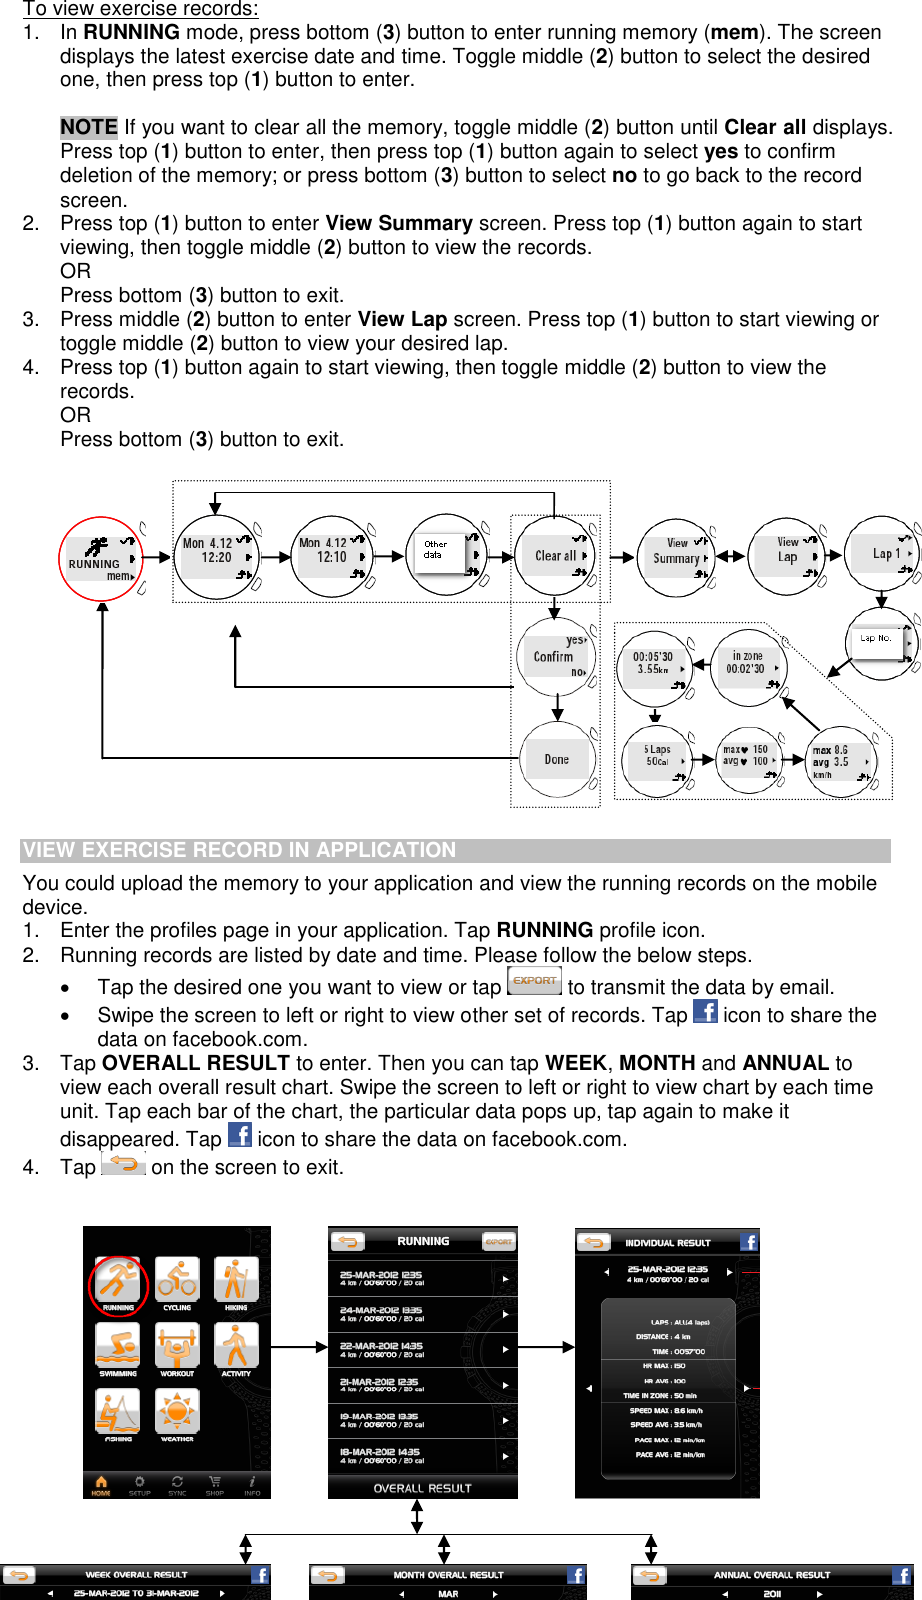
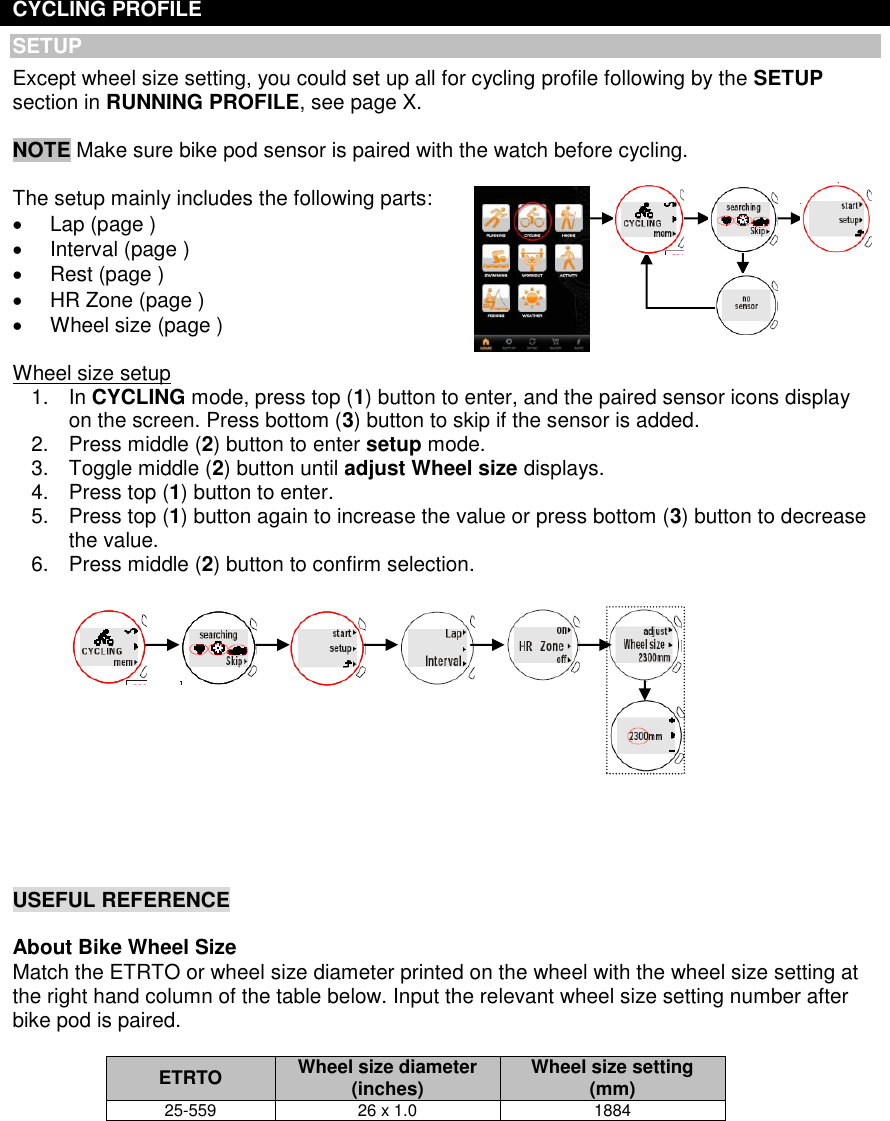
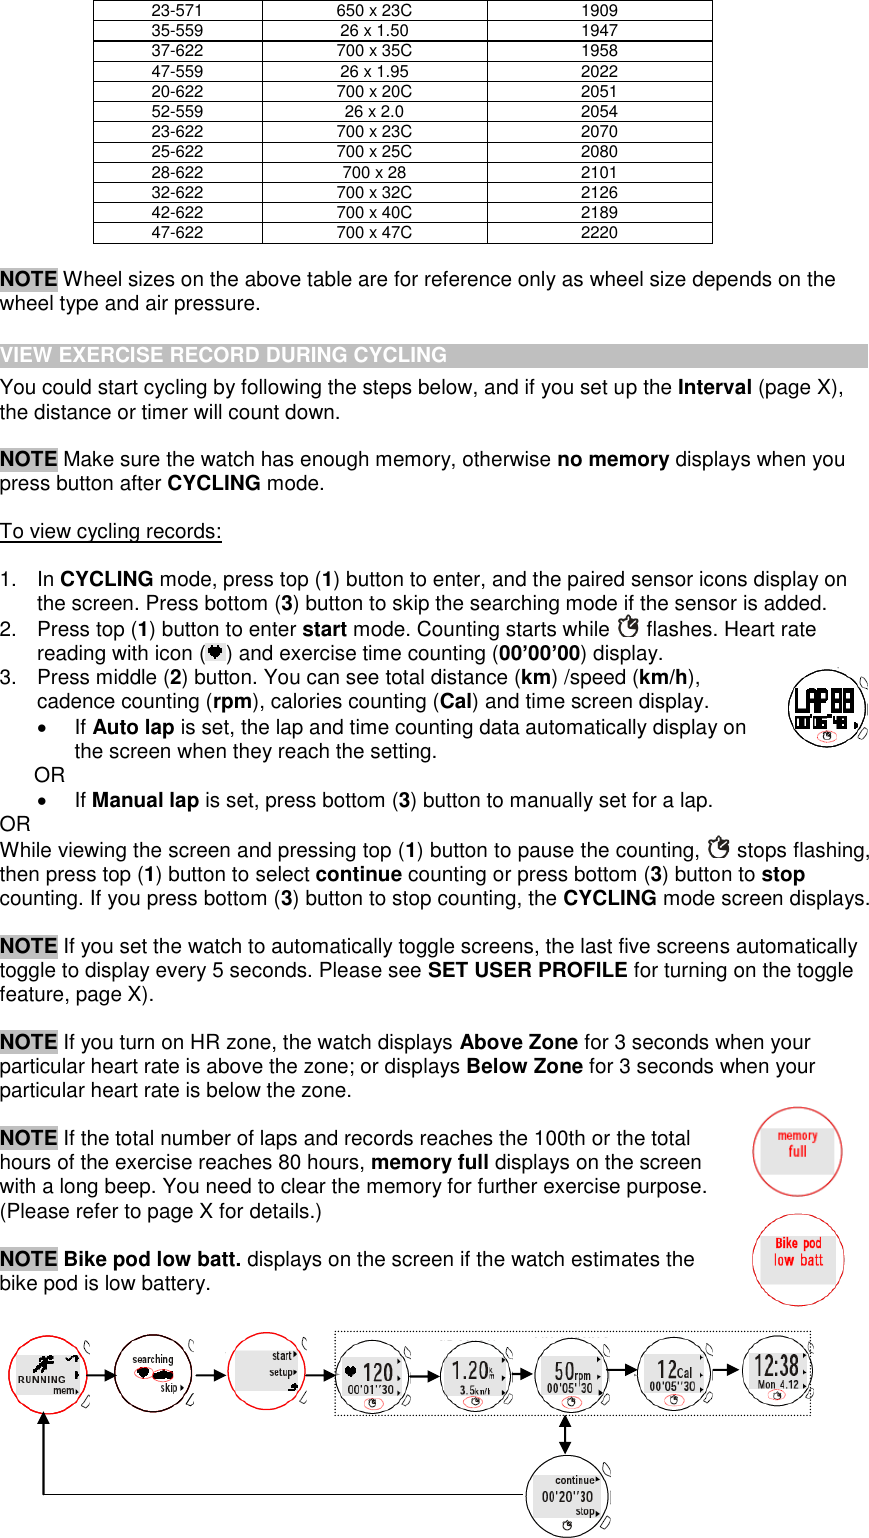
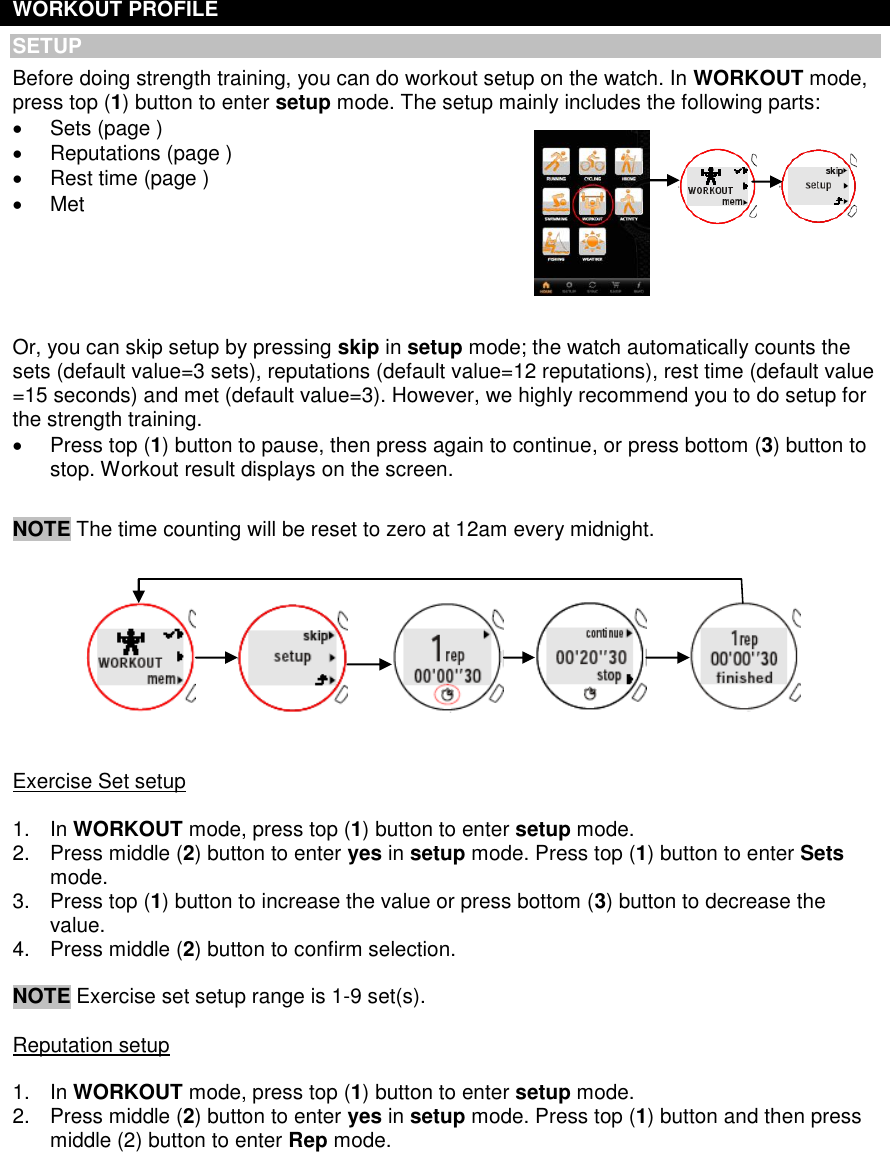
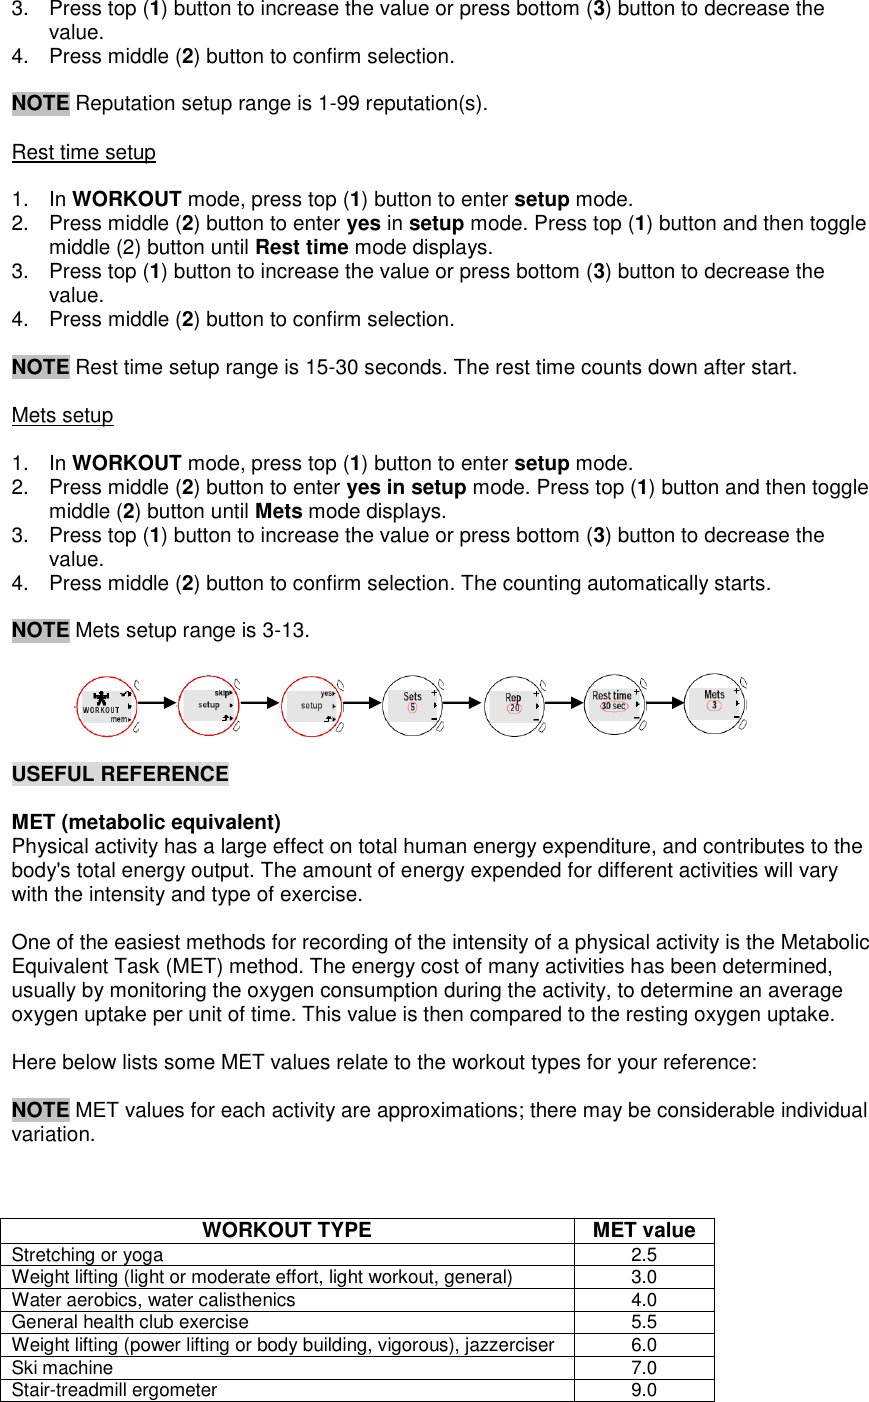
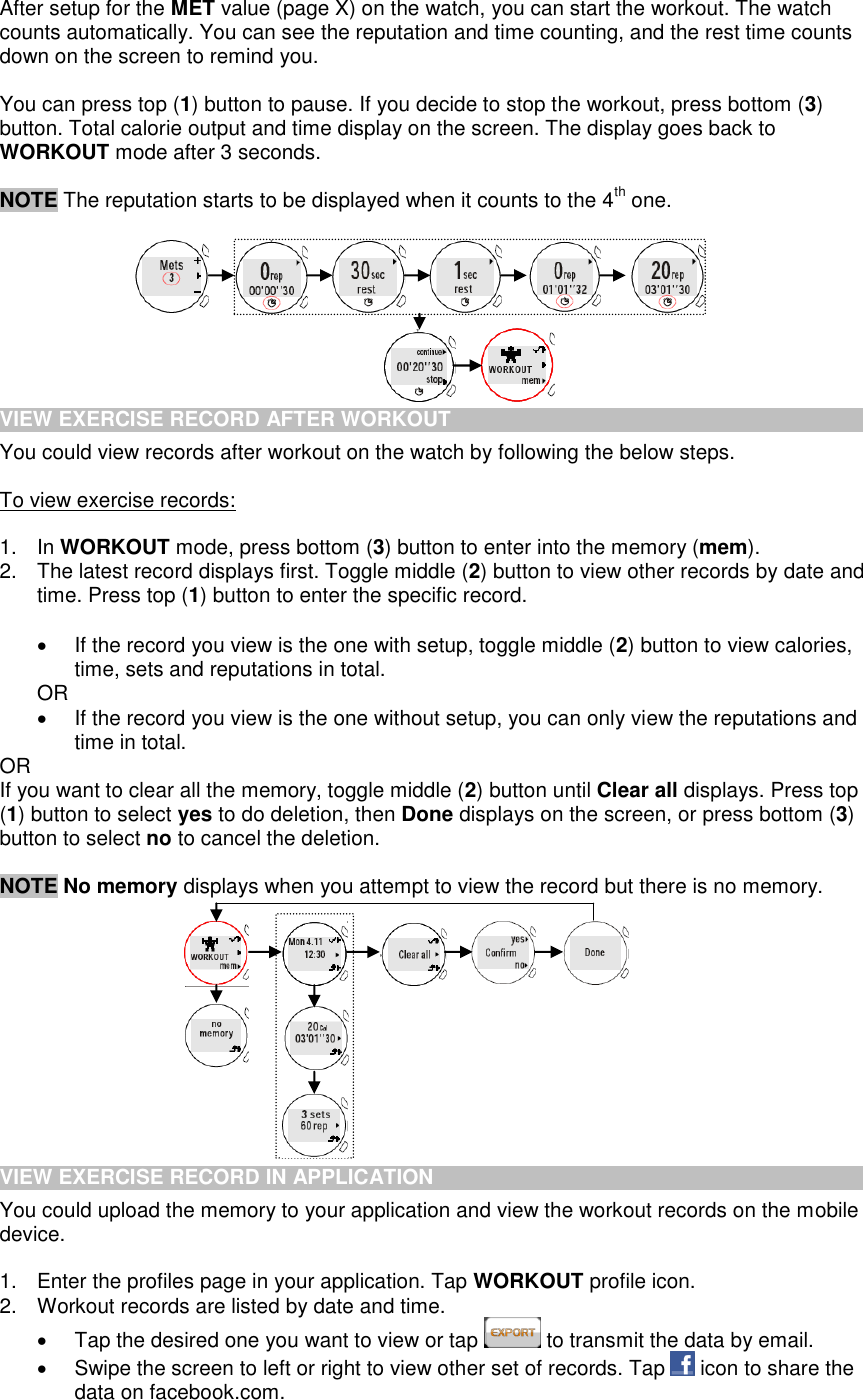
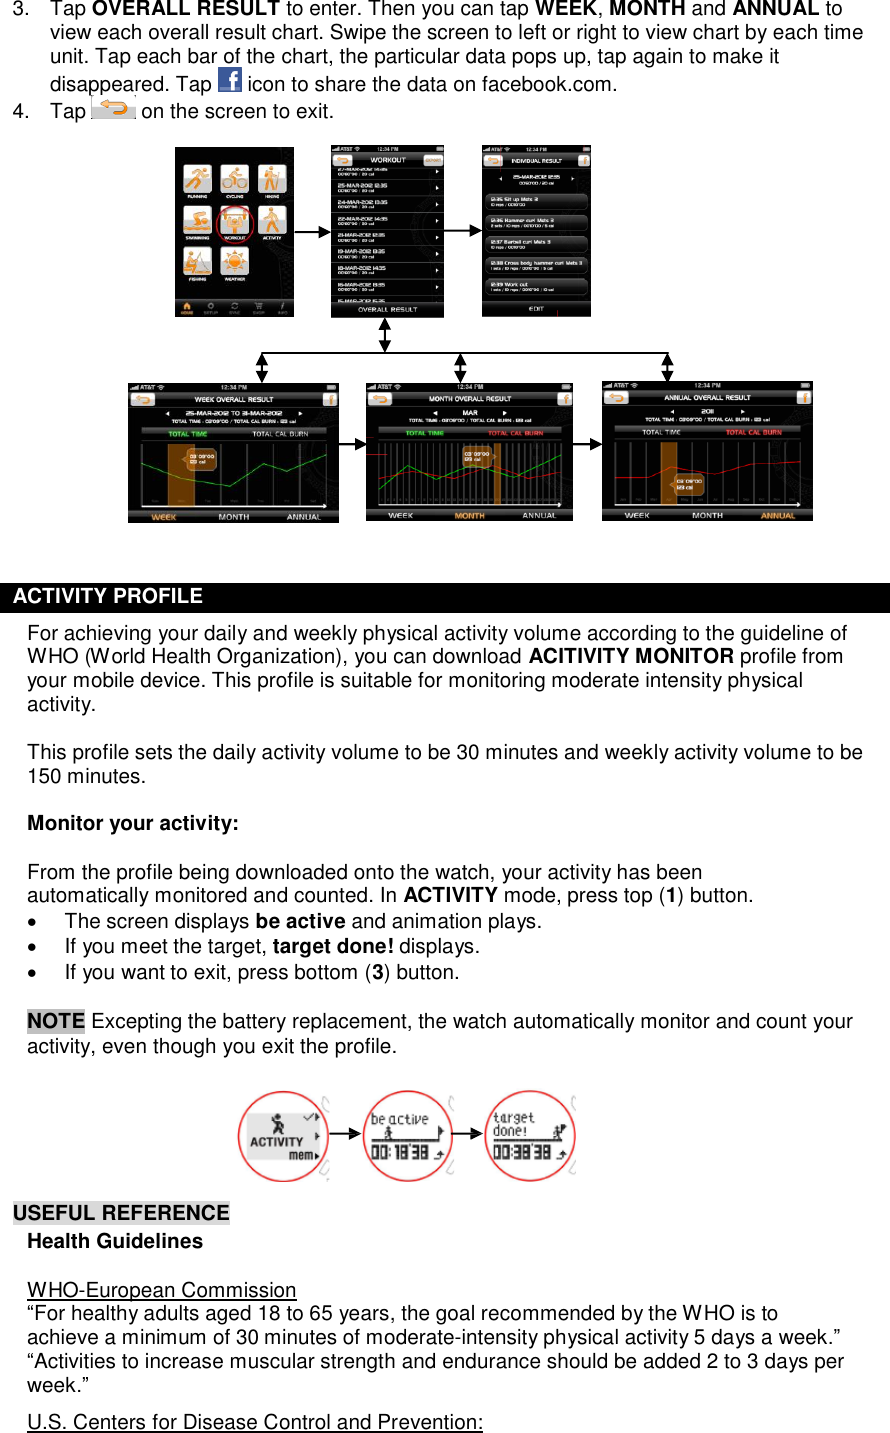
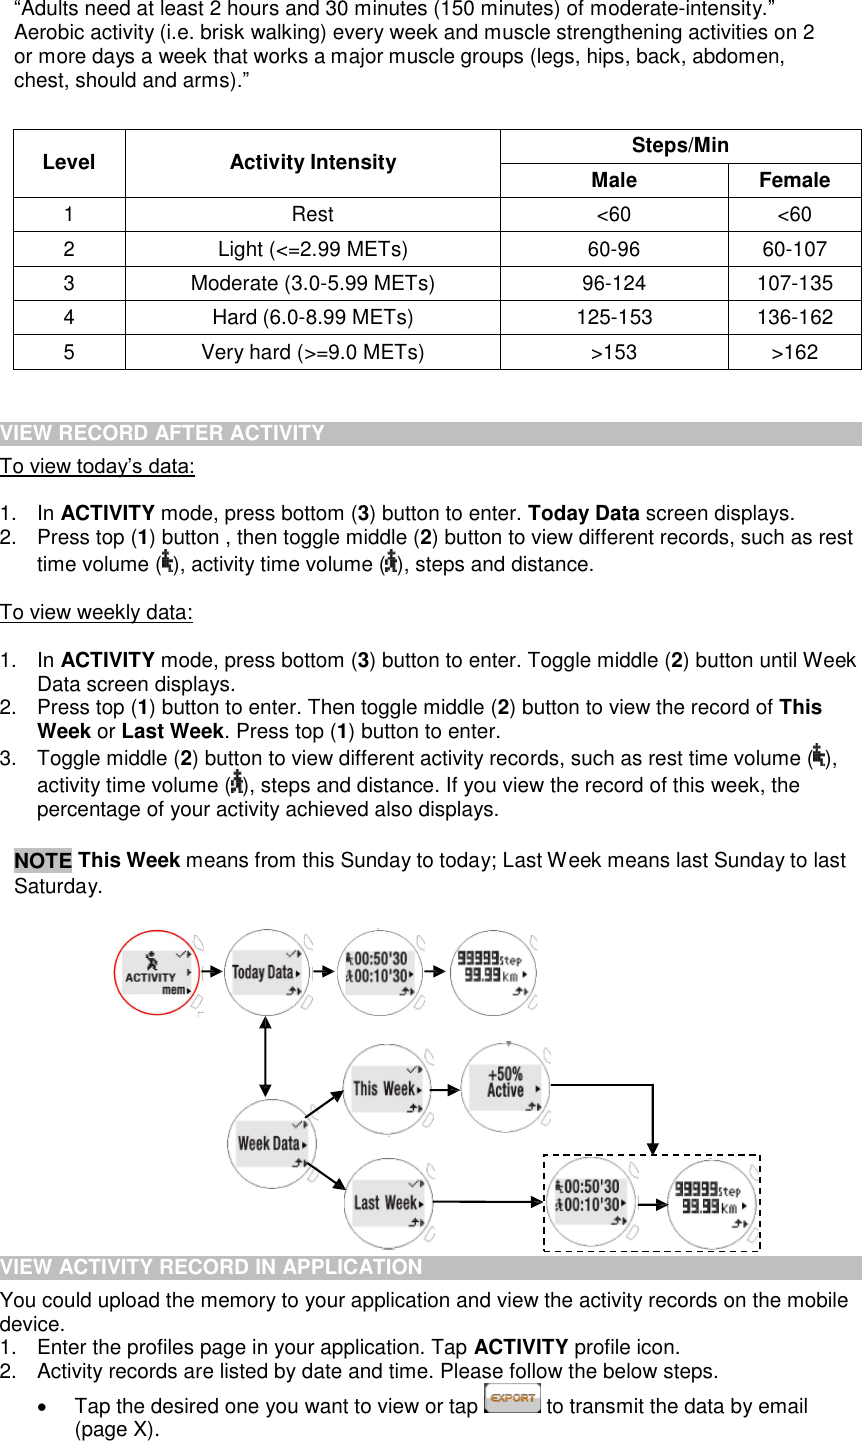
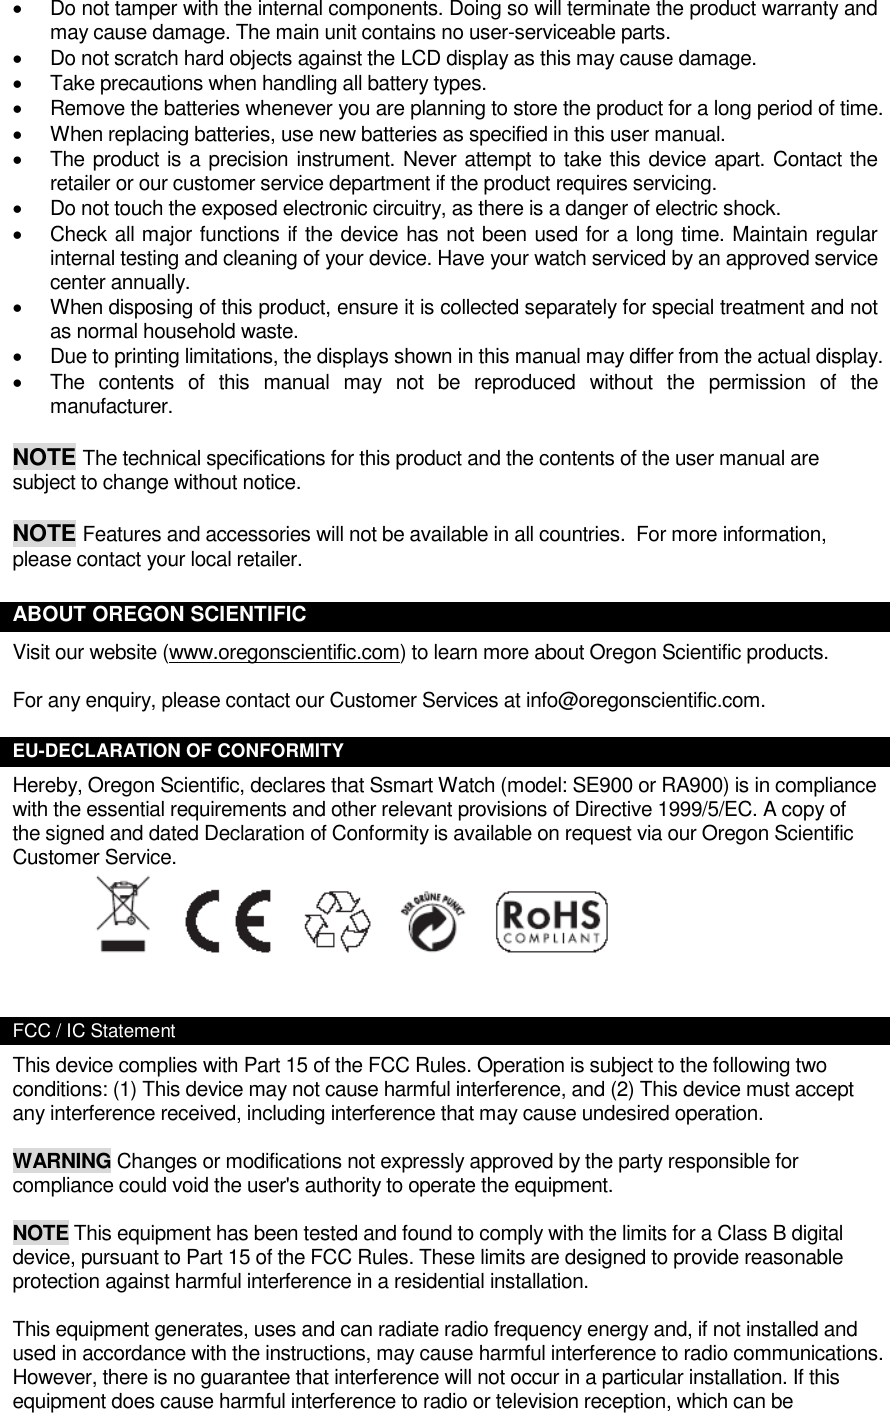
![3. Press top (1) button or press bottom (3) button to select from Fat burn 61-70%, Aerobic 71-80% or Anaerobic 81-90%. 4. Press middle (2) button to confirm selection. USEFUL REFERENCE Target Zone To help achieve maximum health benefits from your workout program, it is important to know your health index as shown below: Maximum Heart Rate (MHR) Upper heart rate limit Lower heart rate limit MHR is expressed in beats per minute. You can get your MHR from an MHR test, or you can estimate it by using the following formula: 220-age=MHR The watch is pre-programmed with three target zone options, each with its lower and upper heart rate limit, as listed in the table below. ZONE NAME LOWER LIMIT UPPER LIMIT Fat burn 61% x MHR 70% x MHR Aerobic 71% x MHR 80% x MHR Anaerobic 81% x MHR 90% x MHR The zone range from 61% to 80% of your maximum heart rate is where you achieve cardiovascular benefits, burn fat and become fitter. There are three categories of training as described in the table below. The upper and lower heart rate limits are calculated by multiplying your MHR by the percentages of the selected training category. For example: A 40-year-old training for fat burn purpose: His upper heart rate limit [220-40(age)] x 70% His lower heart rate limit [220-40(age)] x 61% NOTE Always warm up before exercise and select the training category that best suits your physique. Exercise regularly, 20 to 30 minutes per session, three to four times a week for a healthier cardiovascular system. WARNING Determining your individual training category is a critical step in the process towards an efficient and safe training program. Please consult your doctor or health TRAINING CATEGORY MHR% DESCRIPTION Fat burn 61-70% This is the lowest training intensity level. It is good for beginners and those who want to strengthen their cardiovascular systems and burn some fat. Aerobic 71-80% Increases strength and endurance. It works within the body’s oxygen intake capability, burns more calories and can be maintained for a long period of time. Anaerobic 81-90% Generates speed and power. It works at or above the body’s oxygen intake capability, builds muscle and cannot be maintained for a long period of time.](https://usermanual.wiki/IDT-Technology/SSMART/User-Guide-1817994-Page-9.png)