IDT Technology STC300-01 Ultra-precision Professional Weather System User Manual WMR300 EN R25 indd
IDT Technology Limited Ultra-precision Professional Weather System WMR300 EN R25 indd
Contents
- 1. User Manual 1
- 2. User Manual 2
User Manual 2
8
EN
You need to input latitude and longitude of your location. Please refer to
your local weather observatory website. The latitude and longitude input affects
the sunrise/sunset time.
Excepting the latitude and longitude, AUTO/DST (Daylight saving time)/ST
(Standard time) settings also affect the sunrise/sunset time. If AUTO is set, the
sunrise/sunset time follows the DST/ST setting of the RF clock data. If ST is set,
the sunrise/sunset time assumes standard time. If DST is set, the sunrise/sunset
time assumes daylight saving time.
To select clock display mode:
Press area repeatedly to toggle among:
• Clock with seconds
• Clock with weekday
• Date with year
CLOCK RECEPTION
This product is designed to synchronize its clock automatically with a clock signal.
WMR300:
Slide switch to EU / UK to select the desired signal and manually set clock by
selecting time zone between -12 and +12.
• EU: DCF-77 signal: within 1500km (932 miles) of Frankfurt, Germany.
• UK: MSF-60 signal: within 1500km (932 miles) of Anthorn, England.
Press RESET whenever you change EU / UK setting.
WMR300A:
• WWVB-60 signal: within 3200km (2000 miles) of Fort Collins Colorado. Manually
set clock to select time zone Pacific ( P) / Mountain (M) / Central (C) / Eastern (E).
The icons below indicate the status of the clock reception signal.
Icon Meaning
Time is synchronized, but not updated once during the last 48 hours.
Flashing Receiving signal is weak.
Time is synchronized and updated at least once during the last
48 hours.
Flashing Receiving signal is strong
Reception takes 4-10 minutes for synchronizing.
To enable / disable signal reception:
Press and hold a place within area to enable / disable signal reception.
A beep will sound to confirm action.
ALARM CLOCK
To set the daily alarm:
1. Press area to activate. displays next to the area and the tool bar
displays at the below of the screen.
2. Press .
• Press to turn on the daily alarm. and displays.
• Press to turn off the daily alarm. disappears.
3. Press to change the time display between 12hr/24hr format.
4. Press and hold to enter editing mode.
5. Press or to edit and press to confirm editing.
6. Press anywhere not in area to exit.
MOON PHASE
In the Northern hemisphere, the moon waxes (amount of moon we see that grows
after the New moon) from the right. So, the sunlit part of the moon moves from right
to left in the Northern hemisphere while in the Southern hemisphere, it moves from
left to right. The direction depends on the latitude of the person observing it.
Below are two tables which diagrammatically illustrate how the moon will appear
on the main unit .
Northern hemisphere
New Moon Full Moon
Waxing Crescent Waning Gibbous
First quarter Third quarter
Waxing Gibbous Waning Crescent
Southern hemisphere
New Moon Full Moon
Waxing Crescent Waning Gibbous
First quarter Third quarter
Waxing Gibbous Waning Crescent
To view moon phase:
1. Press clock area to activate.
2. Press or to view moon phase for specific dates.
WEATHER FORECAST
This product forecasts the next 12 to 24 hours of weather within a 30-50 km
(19-31 mile) radius (US – with a 75% accuracy).
Icon Meaning
Sunny
Partly cloudy
Cloudy
Rainy
Snowy
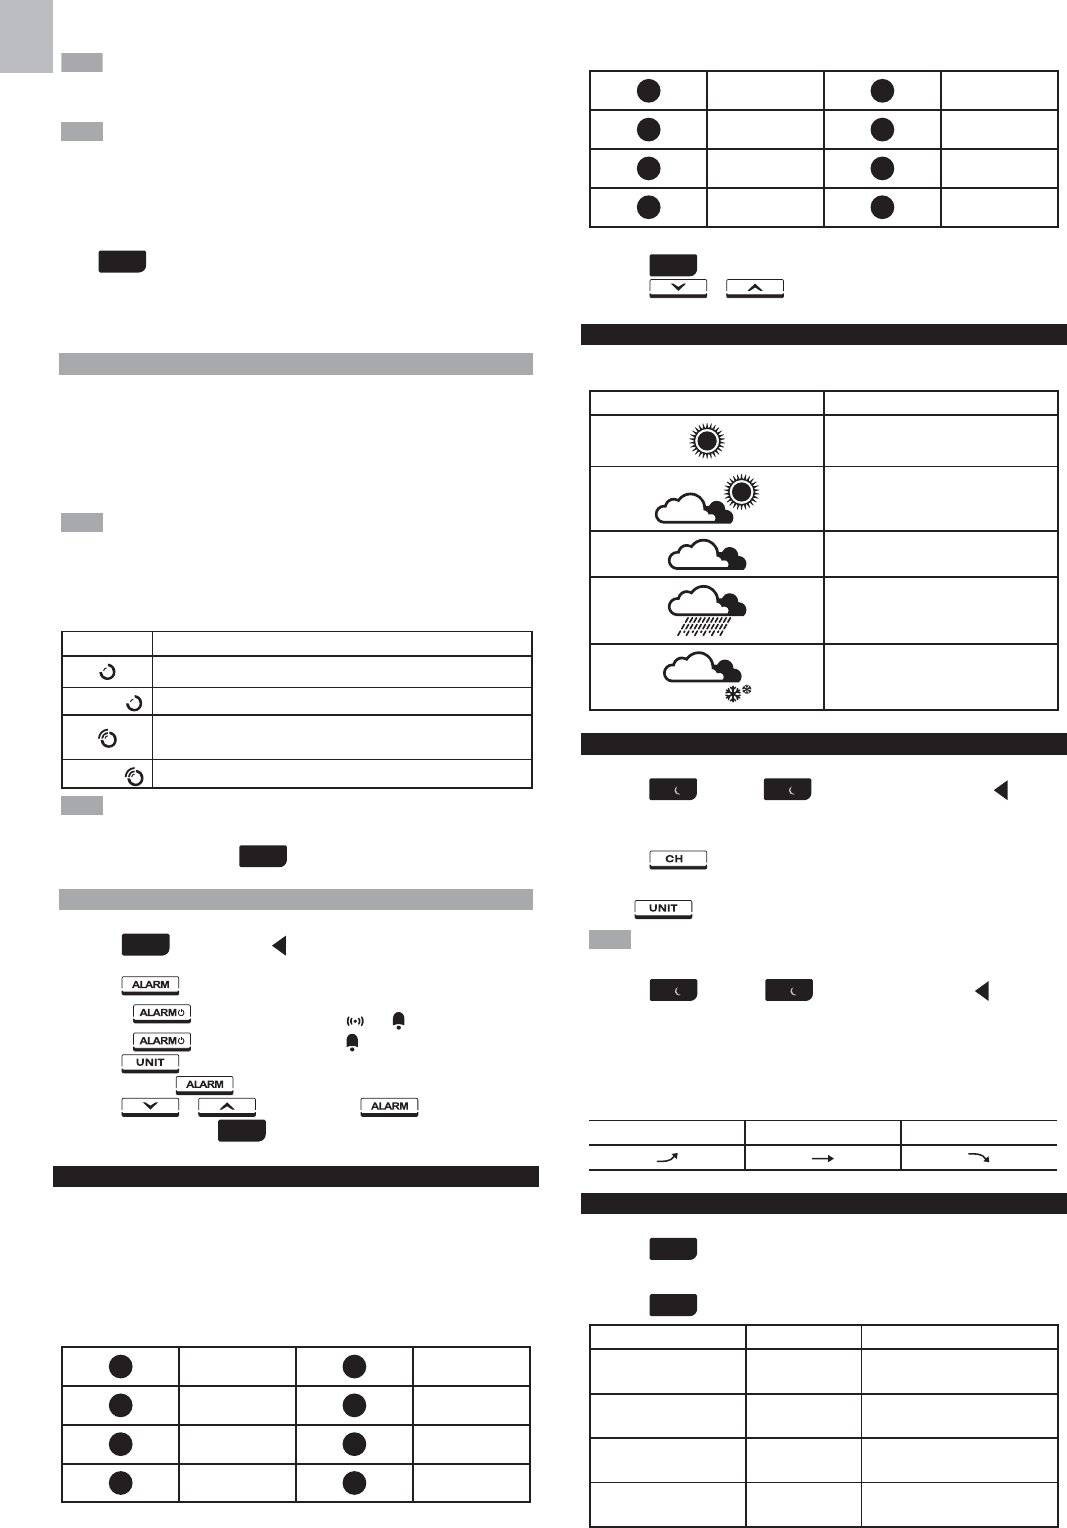
TEMPERATURE AND HUMIDITY
To view temperature area:
• Press INDOOR / OUTDOOR temperature area. displays
on top of the temperature reading.
To change channel (outdoor temperature only):
• Press to change channel.
To select the temperature measurement unit:
• Press to select °C / °F.
The unit of all temperature related displays will be changed simultaneously.
To view humidity readings:
• Press INDOOR / OUTDOOR humidity area. displays on
top of the humidity reading.
To view temperature and humidity trend:
The temperature and humidity trend icons are based on recent sensor readings.
The trend lines are shown next to the temperature and humidity readings. The
trend is shown as follows:
Rising Steady Falling
DEWPOINT / HEAT INDEX / WIND CHILL
To view dew point:
• Press area repeatedly until DEWPOINT displays.
To view heat index:
• Press area repeatedly until HEAT INDEX displays.
Temperature Range Warning Meaning
27°C to 32°C
(80°F to 89°F) Caution Possibility of heat exhaustion
32°C to 40°C
(90°F to 104°F)
Extreme
Caution Possibility of heat dehydration
41°C to 54°C
(105°F to 129°F) Danger Heat exhaustion likely
54°C to 92°C
(130°F to 151°F) Extreme danger Strong risk of dehydration /
sun stroke
9
EN
Heat index is only calculated when temperature is 80° F / 27°C or above.
To view wind chill:
• Press area repeatedly until WIND CHILL displays.
SUNRISE / SUNSET
Make sure you input latitude and longitude of your location in area,
which affects the sunrise/sunset time.
Excepting the latitude and longitude, daylight saving time setting also affects
sunrise and sunset (See Manually Set Clock).
You can view the sunrise or sunset time in area.
•
Press SUNRISE/SUNSET area. displays on the top of the time display.
• Press to change the time display between 12hr/24hr format.
WIND
DIRECTION CALIBRATION
Before pairing a wind sensor, make sure the head of the wind vane of that sensor
point to the north while pressing KEY for 2 seconds in the transmitter box to calibrate
the direction. If the calibration is successful, red light flashes once. You can use a
compass to look for an accurate direction of north if necessary.
However, if you are the user in North America, there are already 15°(degree)
variations existing between the true north and a compass reading of north. You
can consult your local observatory about this issue.
If it is difficult to control the wind vane after installation, you can calibrate through
setting on main unit.
1. Make a compass approach to the wind vane.
2. Calculate the angle between the current direction
and the north direction.
3. Press wind area to activate.
4. Press and hold , and then
press or to calibrate
the angle value.
5. Press again to confirm setting.
For example, inputting the angle value that you
want to set as north. If current direction is 25
degree and you want to set it as north, then you
input 25 degree in the calibration mode. Once
you return to the idol mode, the direction reading
displays 0 degree, which is the north.
You need to calibrate the wind sensor again if you want to relocate the sensor.
WIND SPEED / DIRECTION
To select wind display mode:
Press wind area to toggle between:
• GUST (Gust)
• AVG (Average)
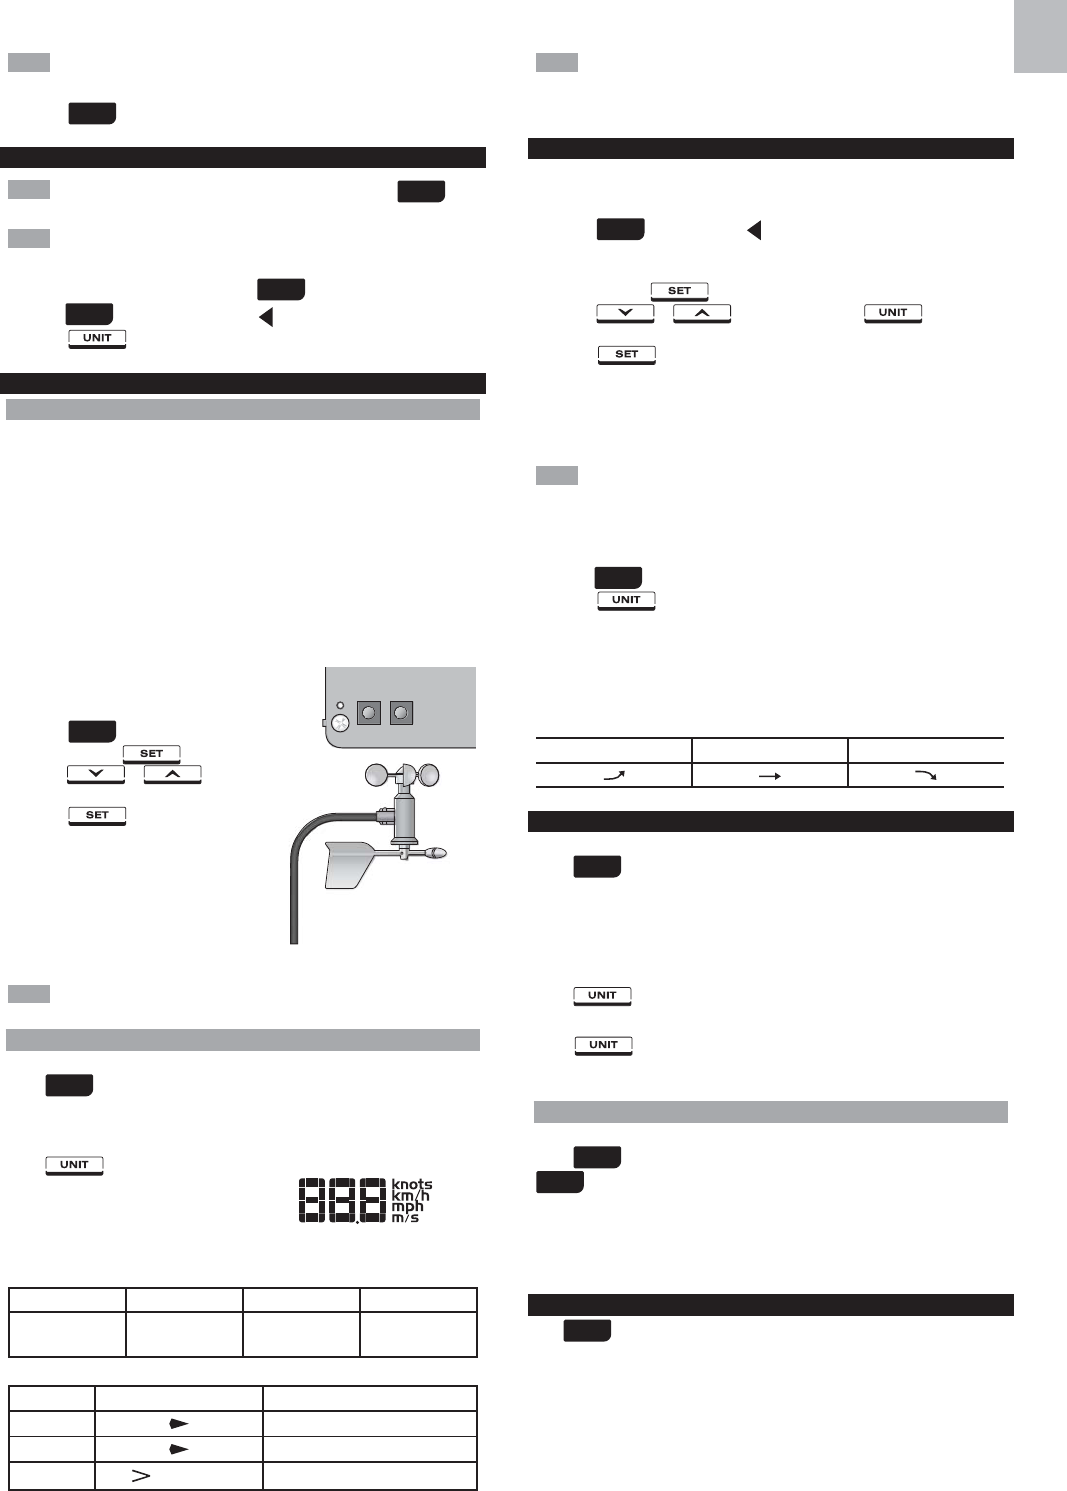
To select wind speed unit:
Press to switch among:
• Knots (knots)
• Kilometres per hour (km/h)
• Miles per hour (mph)
• Metres per seconds (m/s)
The wind level is shown by a series of text icons:
LIGHT MODERATE STRONG STORM
2-8 mph
(3-13 km/h)
9-25 mph
(14-41 km/h)
26-54 mph
(42-87 km/h)
>55 mph
(>88 km/h)
To read the wind direction:
Status Wind Direction Indicator Meaning
GUST Real-time wind direction
AVG Real-time average wind direction
AVG (Max 6 sets) Wind direction of last 1 hour
The wind chill factor is based on the combined effects of temperature and
wind speed. Displayed wind chill is calculated solely from channel 1 thermometer
and humidity sensor.
BAROMETRIC PRESSURE
The altitude reflects distance from sea level at your position.
To set the altitude level compensation for the barometric readings:
1. Press area to activate. displays next to the area and the tool bar
displays at the below of the screen.
2. Press the area until ALT displays on the screen. You are in altitude mode.
3. Press and hold on the tool bar.
4. Press or to edit. You can press to change the
altitude unit between M (Meter) and FEET (Feet) while editing.
5. Press to confirm or touch panel area (except tool bar/barometer
area) to confirm.
6. After setting altitude, the new altitude setting will not be effective immediately.
The ALT icon flashes and stops flashing until the next pressure sampling. The
new altitude setting takes effect on the new pressure sampling.
When altitude is set to 0 meter, the pressure reading is the local pressure.
If the altitude is set to the current location, the new pressure reading is an offset
pressure to the sea level.
To select the measurement unit for the barometer:
1. Press barometer area to toggle between altitude and current barometer.
2. Press to select inHg (inches of mercury) / mmHg (millimetres of
mercury) / mb (millibars per hectopascal) / hPa.
To view pressure trend:
The barometric pressure trend icons are based on recent sensor readings.
The trend lines are shown next to the pressure readings. The trend is shown
as follows:
Rising Steady Falling
RAINFALL
To select rainfall display mode:
Press rain area to toggle between:
• THIS HOUR (Hourly rainfall)
• RATE (Rain rate)
• ACCUM (Accumulated rainfall)
• PAST 24 hrs (Rainfall recorded in the past 24 hours)
To select the measurement unit for the rainfall:
Press to select between mm (millimeter) and in (inch).
To select the measurement unit for the rainfall rate:
Press to select between in/hr (inch per hour) and mm/hr (millimeter
per hour).
ACCUMULATED RAINFALL
To display accumulated rainfall:
Press rain area repeatedly until ACCUM display. (SINCE displays in the
clock area that displays the start date / time of rainfall recording simultaneously).
To reset SINCE time:
Press and hold MEM to set current time as start of accumulated rainfall records.
The rainfall record is cleared and reset to 0.
BAR CHART
The bar chart simultaneously displays the data while you press on the
corresponding area.
To select chart display mode:
Press on the below areas to toggle among these chart displays.
• IN TEMP (Indoor temperature)
• IN HUM (Indoor humidity)
• OUT TEMP (Outdoor temperature)
• OUT HUM (Outdoor humidity)
• DEWPOINT (Dew point)
• HEAT INDEX (Heat index)
10
EN
• WIND CHILL (Wind chill)
• WIND (Wind speed)
• BARO (Barometer)
• RAINFALL (Rain)
To select time range display mode:
Press bar chart area to toggle the chart records between the following
time ranges.
• LAST 24 HRS (Past 24 hours)
• LAST 24 DAYS (Past 24 days)
• LAST 24 MTHS (Past 24 months)
To select record range display mode:
Press bar chart area, and then press to toggle the chart records
between the following ranges.
• MAX (Maximum record)
• MIN (Minimum record)
The purpose of the bar chart is to provide a quick comparison between
the records. Changing the measurement unit will have corresponding effect on
the bar chart display.
MEMORY
MAX / MIN OF TODAY / MONTHLY RECORDS
Area Type of Memory Indicators
Temperature
Current indoor /
outdoor temperature
MONTHLY MAX
MIN
TODAY MAX
MIN
Heat index MONTHLY MAX
TODAY
Wind chill MONTHLY MIN
TODAY
Dewpoint MONTHLY MAX
TODAY MIN
Humidity Current indoor /
outdoor humidity
MONTHLY MAX
MIN
TODAY MAX
MIN
Wind Gust wind speed MONTHLY MAX
TODAY
Barometer Barometer
MONTHLY MAX
MIN
TODAY MAX
MIN
Rain
Rain rate MONTHLY MAX
TODAY
Rainfall MONTHLY MAX
TODAY
To view memory records:
1. Press desired area to activate.
2. Press to toggle between MIN/MAX of TODAY/MONTHLY
recorded readings.
To clear individual area records:
1. Select a record in memory.
2. Press and hold for 2 seconds.
3. Delete process is complete when display changes to current reading.
When MAX/MIN reading displays, the corresponding timestamp will be
displayed in the area
HOURLY RECORDS
Display Hourly readings of up to
Barometer 24 hours back
Hourly Rainfall 24 hours back
To view hourly records:
1. Press desired area to activate until the hour frame displays.
2. Press or to view current (0 hr) / hourly reading
(from -1hr to -24hr).
DATA LOG
The weather data can be automatically saved by setting data logger, and then you
can view the data through a PC program by uploading to the PC.
To set data log:
1. Press area, then press to activate DATA LOG mode.
2. Press and hold .
3. Press or to select frequency of data recording (1 / 5 / 15
/ 60 minutes).
4. Press .
5. Number of days memory will allow for records will be displayed.
Frequency In Minutes No. of Days Available for Data Logging with
Memory Available
1 22D (3 weeks)
5 113D (3.5 months)
15 341D (10.5 months)
60 1364D (3.5 years)
To view remaining days for records:
Press area.
When DATA LOG is almost full, DATA LOG flashes to remind you to
transfer the data to PC for storage. Otherwise, data logger cannot log any more
data when it is full.
To upload records to PC:
Plug the small end of the USB cable to USB port on the main unit and the big end
of the cable into the USB port of the PC. The records will be uploaded onto the
software run by the PC via the USB cable.
displays in area on main unit.
PC program provided must be installed before uploading of records from
main unit.
To clear records:
1. Press area, then press , DATA LOG displays.
2. Press and hold .
3. After all the data cleared, the display shows the new time remaining. Delete
process is complete and successful.
ALARM
Weather alarms are used to alert you of certain weather conditions. Once activated,
the alarm will turn on and start flashing when a certain criterion is met. The alarm
does not flash and goes back to normal until the reading is not beyond the alarm
setting anymore.
Area Type of Alarm
Clock Daily alarm
Temperature
Current indoor / outdoor temperature HI
LO
Heat index HI
Dew point HI
LO
Wind chill LO
Humidity Current indoor / outdoor humidity HI
LO
Wind Gust wind speed HI
Barometer Barometric pressure *
Rain Rain rate HI
Past 24-hour rainfall HI
*Barometric pressure alarm is a pressure drop alarm
To set the alarm:
1. Press desired area to activate.
2. Toggle to display current reading and HI / LO alarm.
3. Press and hold .
4. Press or to set the desired values.
11
EN
5. Press
• to confirm and continue to next setting
OR
• Touch anywhere on the screen (except tool bar / area) to confirm
and exit.
To enable / disable alarms:
1. Press desired area to activate.
2. Press to display set HI / LO alarm.
3. Press to turn alarm on or off.
- - indicates alarm is not set / disabled.
Clock alarm sound is different from weather alarms to allow for easy
differentiation by user.
To silence any alarm:
• Press anywhere on the touch panel.
OR
• The alarm automatically turns off after 2 minutes.
When alarm is on, the channel of triggered alarm will be flashed and alarm
sound lasts for 2 minutes.
BACKLIGHT
Press anywhere on the touch panel to activate the backlight for 8 seconds.
OR
If the main unit is powered by power adapter, switch the LIGHT to ON in the main
unit compartment. The light will be on until you switch it OFF.
You need to take off the battery compartment cover to do switching.
RESET
Main unit:
Press RESET to return to the default settings.
You need to take off the battery compartment
cover to do switching.
Transmitter box:
Press RESET to remove the record of the calibrated
wind direction.
MAINTAINANCE
Each sensor of this kit has a durable plastic casing that should retain its luster for
many years. It is better to do regular maintenance to keep the sensors with high
accuracy every half year. Do cleaning the casing only with a soft cloth slightly
dampened with water or a mild soap. Please use screw drivers or wrench to take
some parts off if necessary.
Electrical storms can sometimes cause power surges harmful to electronic
equipment. For your own safety, take caution when using the main unit or doing
maintenance during storms.
To Maintain the Thermo/Hygro Sensor (THGN300)
1. Remove the rain collector from the rain gaug.
2. Unscrew the three type B screws from the
rain gauge.
3. Unscrew the three screws from the bottom
of the thermo/hygro sensor casing.
4. Take off the white sensor protective cap by
squeezing its two sides with some pressure.
5. Extract the inner cap and filter screen from
the outer cap.
6. Clean the filter screen and casing
with water.
7. Install all the parts until they are
entirely dried.
If the temperature and humidity readings are still strange and inaccurate,
you need to consider replacing this sensor, please contacting our customer service
for the details.
To Maintain the Rain Gauge (PCR300)
Clean the hole of the rain collector and the
tipping bucket for maintaining accuracy is
very important.
1. Check the filter regularly and ensure it is
not fully covered by the leaves or other
objects. Clean the hole of the rain
collector by water.
2. Pulling bucket holder a little distance to
take off the tipping bucket for cleaning the
dirt by water. Ensure the surface of the
tipping bucket without droplet before
returning to the bucket holder, which
affects the accuracy.
3. Clean the drain holes on the rain gauge base.
The user should unplug the rain sensor before cleaning. Otherwise, the
tipping bucket still makes data.
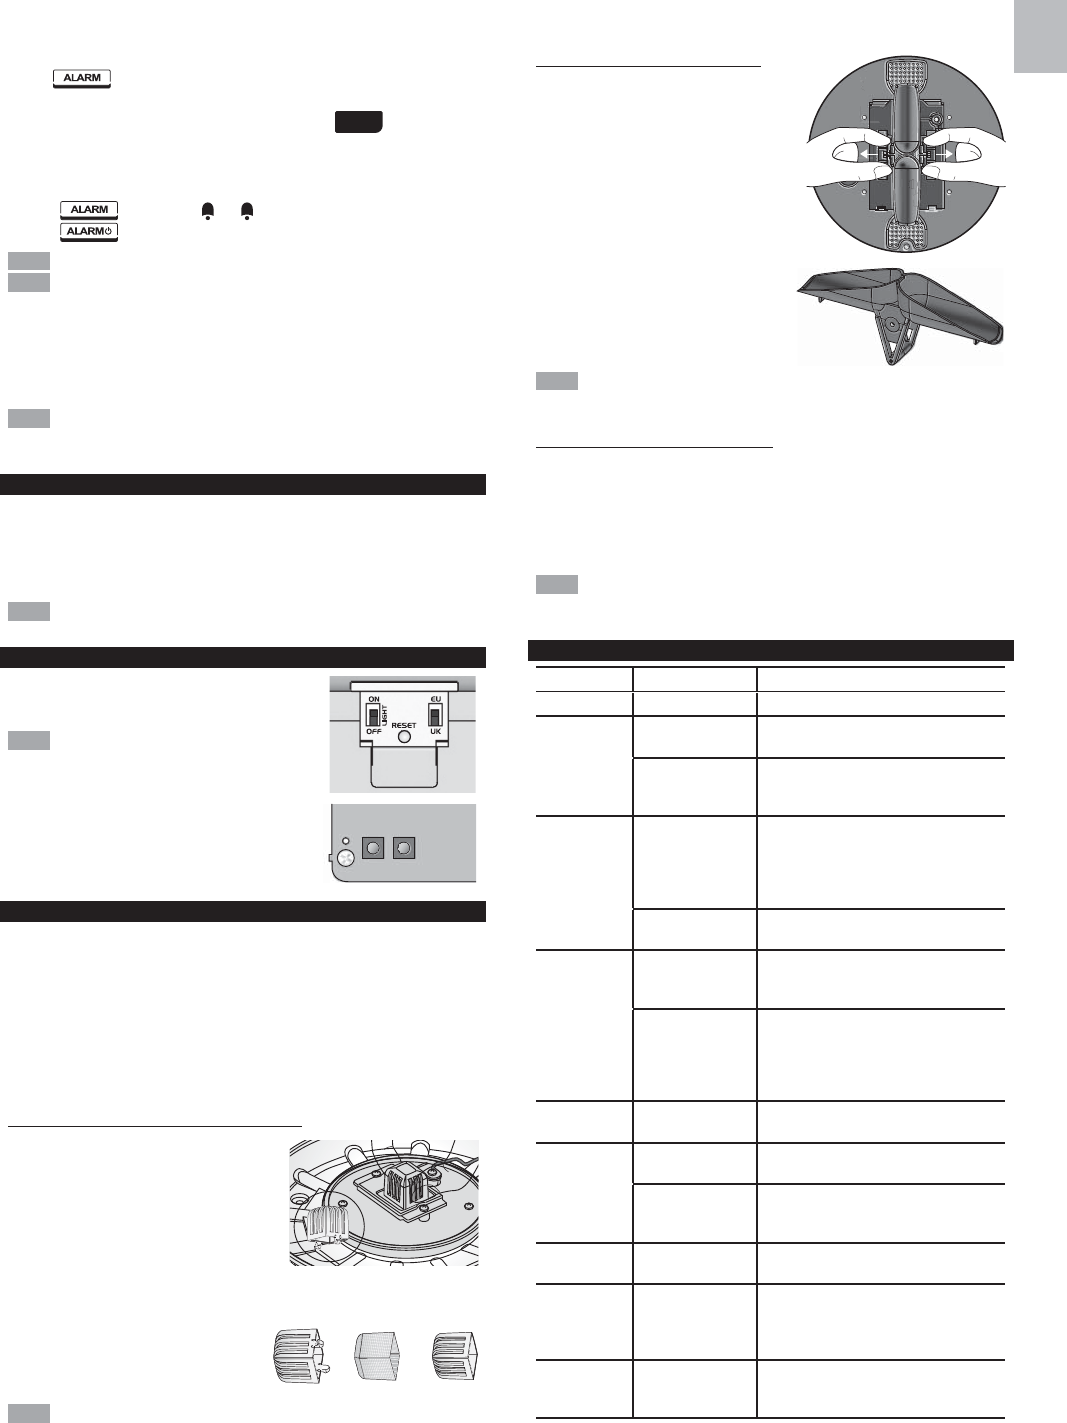
To Maintain the Wind sensor (WGR 300)
If the wind cup doesn’t spin in the wind or does not spin as fast as they should
1. Remove the wind cup and clear out all bugs, spider webs or debris.
2. Ensure the O-ring surrounding the shaft keeps over 0.3mm gap from plastic. If
there is any friction or interference between the O-ring and plastic, it will make
the wind cup spinning slowly and affect the reading accuracy of wind speed.
Do not apply any fluid lubricant on the shaft and bearing. It probably breaks
the inner electronic components.
TROUBLE SHOOTING
Problem Symptom Remedy
Barometer Strange readings Check altitude setting on the main unit.
Wind sensor No updates of the
wind direction
Check the wind vane.
Display dashes on
main unit
1. Check the connections.
2. Check the channel setting.
3. Check the pairing successful or not.
Rain sensor No readings 1. Check the cable tie on the tipping
bucket to be cut away or not.
2. Check the balance indicator.
3. Check the plastic filter in rain collector.
4. Check the connections.
Strange readings 1. Check the plastic filter in the rain collector.
2. Check the balance indicator.
Temp/hygro
sensor
Display dashes 1. Check the connections.
2. Check the pairing.
3. Check the channel setting.
No outdoor temp/
hygro readings
1. Check the rechargeable battery in
transmitter box.
2. Check the power adapter connection
and main unit batteries status.
3. Do maintenance for the sensor.
Calendar Strange date /
month
1. Change language.
2. Check the calendar setting.
Clock Cannot adjust
clock
Disable radio-controlled clock.
Cannot
auto-synchronize
1. Check batteries status.
2. Reset the main unit.
3. Manually activate radio controlled clock.
Sunrise/
Sunset
Strange readings 1. Set longitude/latitude.
2. Check the daylight saving time setting.
Transmitter
box
LED light(s) do not
flash
1. Check the switch.
2. Check the polarity of the
rechargeable battery.
3. Check the connection of the solar panel.
Sensors
pairing
Time is too long 1. Adjust the antennas to be parallel.
2. Reset the pairing switch (switch off
then on again).
12
EN
PRECAUTIONS
• Do not subject the unit to excessive force, shock, dust, temperature or humidity.
• Do not cover the ventilation holes with any items such as newspapers, curtains etc.
• Do not immerse the unit in water. If you spill liquid over it, dry it immediately
with a soft, lint-free cloth.
• Do not clean the unit with abrasive or corrosive materials.
• Do not tamper with the unit’s internal components. This invalidates the warranty.
• Only use fresh batteries. Do not mix new and old batteries.
• Images shown in this manual may differ from the actual display.
•
When disposing of this product, ensure it is collected separately for special treatment.
• Placement of this product on certain types of wood may result in damage to its
finish for which Oregon Scientific will not be responsible. Consult the furniture
manufacturer’s care instructions for information.
• The contents of this manual may not be reproduced without the permission of
the manufacturer.
• Do not dispose old batteries as unsorted municipal waste. Collection of such
waste separately for special treatment is necessary.
• Please note that some units are equipped with a battery safety strip. Remove
the strip from the battery compartment before first use.
The technical specifications for this product and the contents of the user
manual are subject to change without notice.
SPECIFICATIONS
MAIN UNIT
Dimensions
(L x W x H)
205 x 146 x 52.5 mm
(8.07 x 5.75 x 2.07 inches)
Weight 740g (1.63lbs) with batteries; 540 g (1.2lbs) without battery
Battery 3 x C size 1.5V batteries
Adaptor DC 6V 100mA adapter
Support channels 1wind, 1rain, 1UV, 1solar and 1~8 thermo/hygro
INDOOR BAROMETER
Barometer unit Mb,hPa, inHg and mmHg
Measuring range 540 to 1,100mb/hPa
Accuracy +/- 1mb/hPa between 677 & 1,016hPa
Resolution 0.1mb/hPa ,0.01inHg, 0.1mmHg (remark: inHg and mmHg
converted from the pressure of 0.1mb resolution)
Altitude setting -600m ~ 4570m (-999feet ~ 14993 feet)
User setting for offset local pressure to sea level pressure
Weather forecast Sunny, Snowy, Partly Cloudy, Cloudy and Rainy
Display modes Current, Max, Min, Historical data for last 24hrs
Memory modes Today Max & Min, Monthly Max & Min (with time stamp)
Alarm Pressure change alarm
INDOOR TEMPERATURE
Temp. unit ˚C or ˚F
Displayed range 0˚C to 60˚C
Operating range 0˚C to 60˚C
Accuracy +/- 0.5˚C or 1˚F typical at room temperature
Resolution 0.1˚C or 0.1˚F (remark: ˚F convert from 0.1˚C display)
Display modes Current, Min and Max
Memory modes Today Max & Min, Monthly Max & Min (with time stamp)
Alarm Hi / Lo
INDOOR RELATIVE HUMIDITY
Displayed range 0% to 99%RH
Operating range 0% to 99%RH
Resolution 1%
Accuracy +/-3% (Typical) @ 25˚C
Display modes Current, Min and Max
Memory modes Today Max & Min, Monthly Max & Min (with time stamp)
Alarm Hi / Lo
RADIO-CONTROLLED / ATOMIC CLOCK
Synchronization Auto or disabled
Clock display HH:MM:SS / HH:MM Weekday
Hour format 12hr AM/PM or 24hr
Calendar DD/MM/YR or MM/DD/YR
Weekday in
6 languages EN, FR, DE, IT, ES, RU
OUTDOOR TEMPERATURE / HUMIDITY UNIT
RELATIVE TEMPERATURE
Dimensions
(Ø x H)
Ø190 x 126 mm
(Ø7.48 x 4.96 inches)
Weight 580g(1.28lbs)
Temp. unit ˚C or ˚F
Displayed range -40˚C to 65˚C
Operating range -40˚C to 65˚C
storage
temperature -45˚C to 70˚C
Resolution 0.1˚C
Accuracy +/- 0.5 ˚C
Memory modes
Today Max & Min, Monthly Max & Min (with time stamp)
Dew point temp. Max and Min
Wind chill temp. Min
Heat index temp. Max
Alarm
Hi / Lo for current temp and dew point
Hi for heat index
Lo for wind chill
RELATIVE HUMIDITY
Displayed range 0% to 99%RH
Operating range 0% to 99%RH
Resolution 1%
Accuracy 3%
Display modes Current, Min and Max
Memory modes Today Max & Min, Monthly Max & Min (with time stamp)
Alarm Hi / Lo
SOLAR RF TRANSMITTER BOX
Dimensions
(L x W x H)
178 x 154 x 91.7mm
(7 x 6.06 x 3.61 inches)
Weight 530 g (1.2 lbs)
Battery 1.2 V recharged battery
RF frequency 915Mhz (US) / 868Mhz (EU, UK)
Range 300 meters (1000 feet), line of sight no obstructions
Transmission intervals
Wind: 2.5~3 sec
TH: 10~12 sec
Rain: 20~24 sec
Channel 1wind, 1rain, 1UV, 1solar and 1thermo/hygro
RAIN GAUGE
Dimensions
(L x W x H)
287.5 x 226 x 279 mm
(11.32 x 8.90 x 10 inches)
Weight 1213g (2.674lbs)
Operating temperature -40 ~ +65˚C
Storage temperature -45 ~ + 70˚C
Unit for rainfall mm and in
Unit for rain rate mm/hr and in/hr
Range for rainfall 0~393.6 inches
Range for rain rate 0~1016mm/hr
Resolution 0.01inches (0.254mm) typical
Accuracy for rainfall +/- 4%
13
EN
Accuracy for rain rate ±5% 0~ 127mm/Hr (0~5 in/hr)
Memory modes Acc rainfall for last memory reset
Max rain rate
Display modes Rain rate, Rainfall (Past 24hrs/Hourly/Accumulated)
Alarm Hi for rain rate & past 24 hr
WIND SENSOR UNIT
Dimensions
(L x W x H)
516 x 345.5 x 135 mm
(20.31 x 13.60 x 5.32 inches)
Weight 520g (1.15lbs)
Operating temperature -40 ~ +65˚C
Storage temperature -45 ~ + 70˚C
Wind speed unit m/s, km/h, mph, knots
Wind speed range 0~80m/s
Wind speed resolution 0.1mph or 0.1knot or 0.1m/s
Speed accuracy +/- 0.9m/s (under 18m/s)
+/- 5% (above 18m/s)
Direction resolution 1º
Direction accuracy 3º
Memory modes Today/Monthly Max gust speed with direction (with
time stamp)
Display modes Gust/average wind speed & direction
Alarm Hi for Gust speed
ABOUT OREGON SCIENTIFIC
Visit our website www.oregonscientific.com to learn more about
Oregon Scientific products.
For any enquiry, please contact our Customer Services at info@oregonscientific.com.
EU-DECLARATION OF CONFORMITY
Hereby, Oregon Scientific, declares that this Ultra-precision Professional Weather
System (model: WMR300 / WMR300A) is in compliance with the essential
requirements and other relevant provisions of Directive 1999/5/EC. A copy of the
signed and dated Declaration of Conformity is available on request via our Oregon
Scientific Customer Service.
FCC STATEMENT
This device complies with Part 15 of the FCC Rules. Operation is subject to the
following two conditions: (1) This device may not cause harmful interference, and
(2) This device must accept any interference received, including interference that
may cause undesired operation.
Changes or modifications not expressly approved by the party responsible
for compliance could void the user’s authority to operate the equipment.
This equipment has been tested and found to comply with the limits for
a Class B digital device, pursuant to Part 15 of the FCC Rules. These limits are
designed to provide reasonable protection against harmful interference in a
residential installation.
This equipment generates, uses and can radiate radio frequency energy and, if
not installed and used in accordance with the instructions, may cause harmful
interference to radio communications. However, there is no guarantee that interference
will not occur in a particular installation. If this equipment does cause harmful
interference to radio or television reception, which can be determined by turning
the equipment off and on, the user is encouraged to try to correct the interference
by one or more of the following measures:
Reorient or relocate the receiving antenna.
Increase the separation between the equipment and receiver.
Connect the equipment into an outlet on a circuit different from that to which the
receiver is connected.
Consult the dealer or an experienced radio / TV technician for help.
DECLARATION OF CONFORMITY
The following information is not to be used as contact for support or sales. Please call
our customer service number (listed on our website at www.oregonscientific.com),
or on the warranty card for this product for all inquiries instead.
We
Name:
Oregon Scientific, Inc.
Address: 19861 SW 95th Ave.Tualatin,
Oregon 97062 USA
Telephone No.: 1-800-853-8883
declare that the product
Product No.: WMR300/WMR300A
Product Name: Ultra-precision Professional Weather System
Manufacturer: IDT Technology Limited
Address: Block C, 9/F, Kaiser Estate,
Phase 1, 41 Man Yue St.,
Hung Hom, Kowloon,
Hong Kong
is in conformity with Part 15 of the FCC Rules. Operation is subject to the following
two conditions: 1) This device may not cause harmful interference. 2) This device
must accept any interference received, including interference that may cause
undesired operation.

14
EN
Ultra-precision Professional Weather System
Model: WMR300 / WMR300A
USER MANUAL

15
EN
© 2013 Oregon Scientific. All rights reserved.
P/N: 300103309-00001-10