INTO TECH LIVE240 DVR BOARD User Manual USERS MANUAL 1
INTO-TECH Inc. DVR BOARD USERS MANUAL 1
Contents
- 1. USERS MANUAL 1
- 2. USERS MANUAL 2
USERS MANUAL 1

Contents
ⅠⅠInstallation Manual
1. Hardware Installation
2. Software Installation
ⅡⅡUser Manual
3. User Manual- Server
01. Main Program
02. Search Program
03. AVI Backup Manager
04. Backup Manager
4. User Manual- Client
01. NetClient Program
02. WebClient Program
※※Annex
Annex 1. I/O Device
Annex 2. Dynamic IP
Annex 3. IP Router
4
11.. HHaarrddwwaarree IInnssttaallllaattiioonn
Please check contents before installation: DVR Board, Extension
Cable, Audio & PTZ Installation, etc., if you are missing any parts
please contact your local dealer.
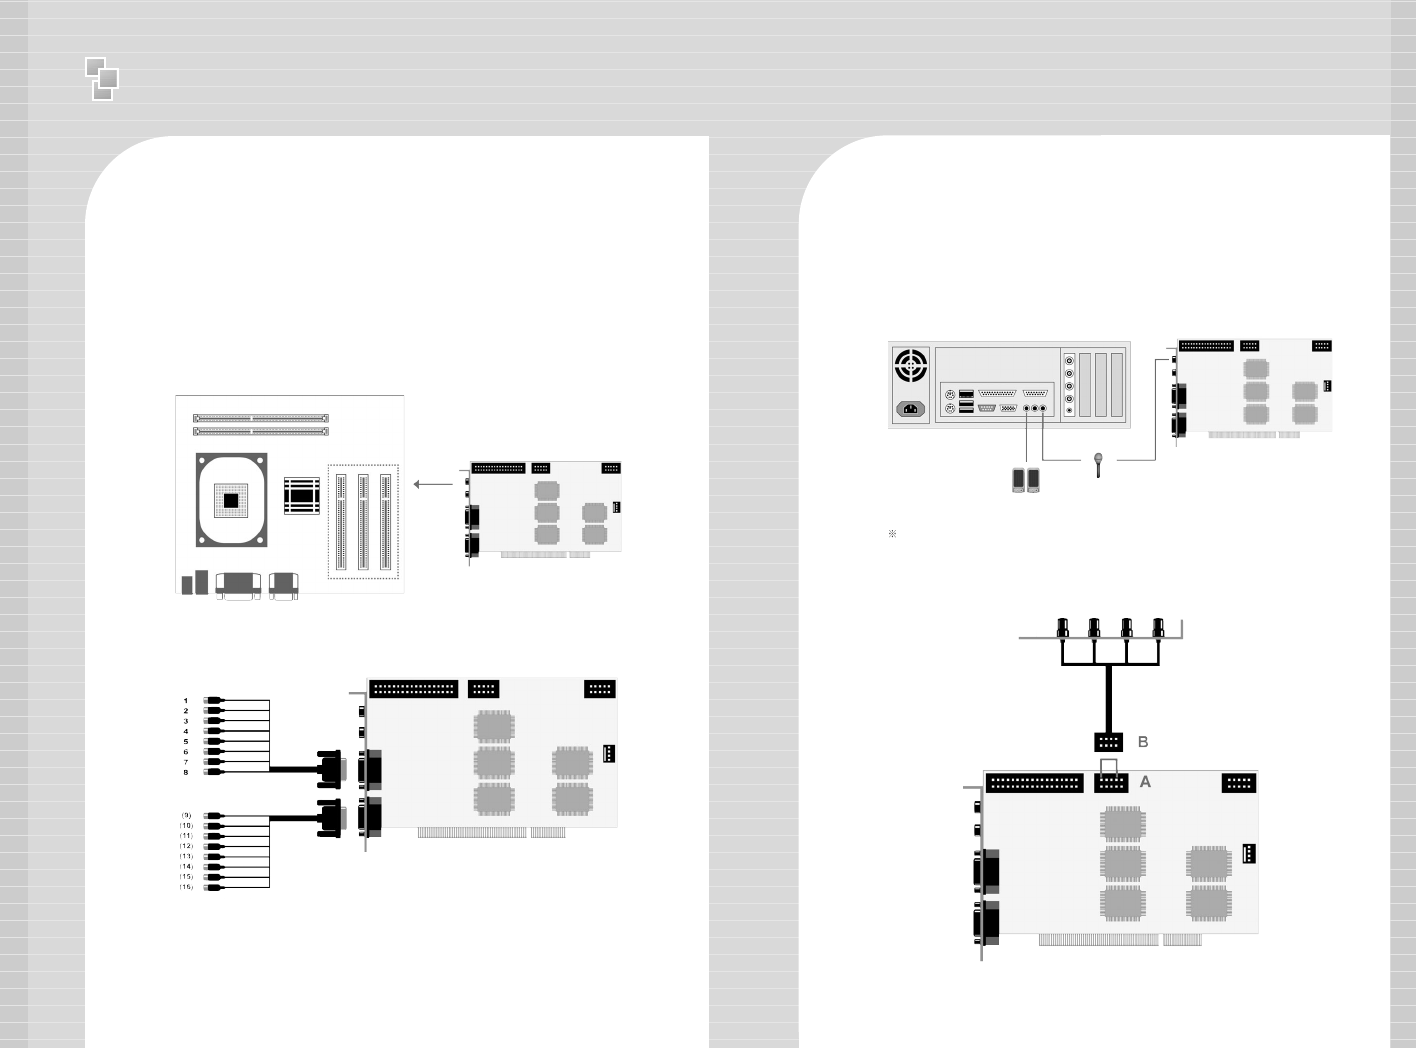
1. DVR Board & Extension Cable Installation
1-1. Insert the DVR Board to an empty PCI Slot in DVR PC.
1-2. Use Extension Cable to connect cameras.
Either connect the MIC to Audio IN port of DVR Board OR Mainboard MIC port.
2. DVR Audio Installation
2-1. Prepare DVR PC and MIC.
2-2. Connect the MIC to the Mainboard MIC Port of DVR PC OR
the Audio IN port on DVR Board. Please connect the Speaker to
the back panel of DVR PC.
<Mainboard>
<Extension Cable-1>
<Extension Cable-2>
<DVR Board>
<DVR System Back Panel>
<DVR Board>
<Speaker>
<MIC>
<4CH>
<H DVR Board>
- H Board: Connect the 4CH MIC(B) to DVR Board(A) starting
from the left.
<DVR Board>
5
Ⅰ
Installation manual - Hardware Installation
Ⅰ
Installation manual - Hardware Installation
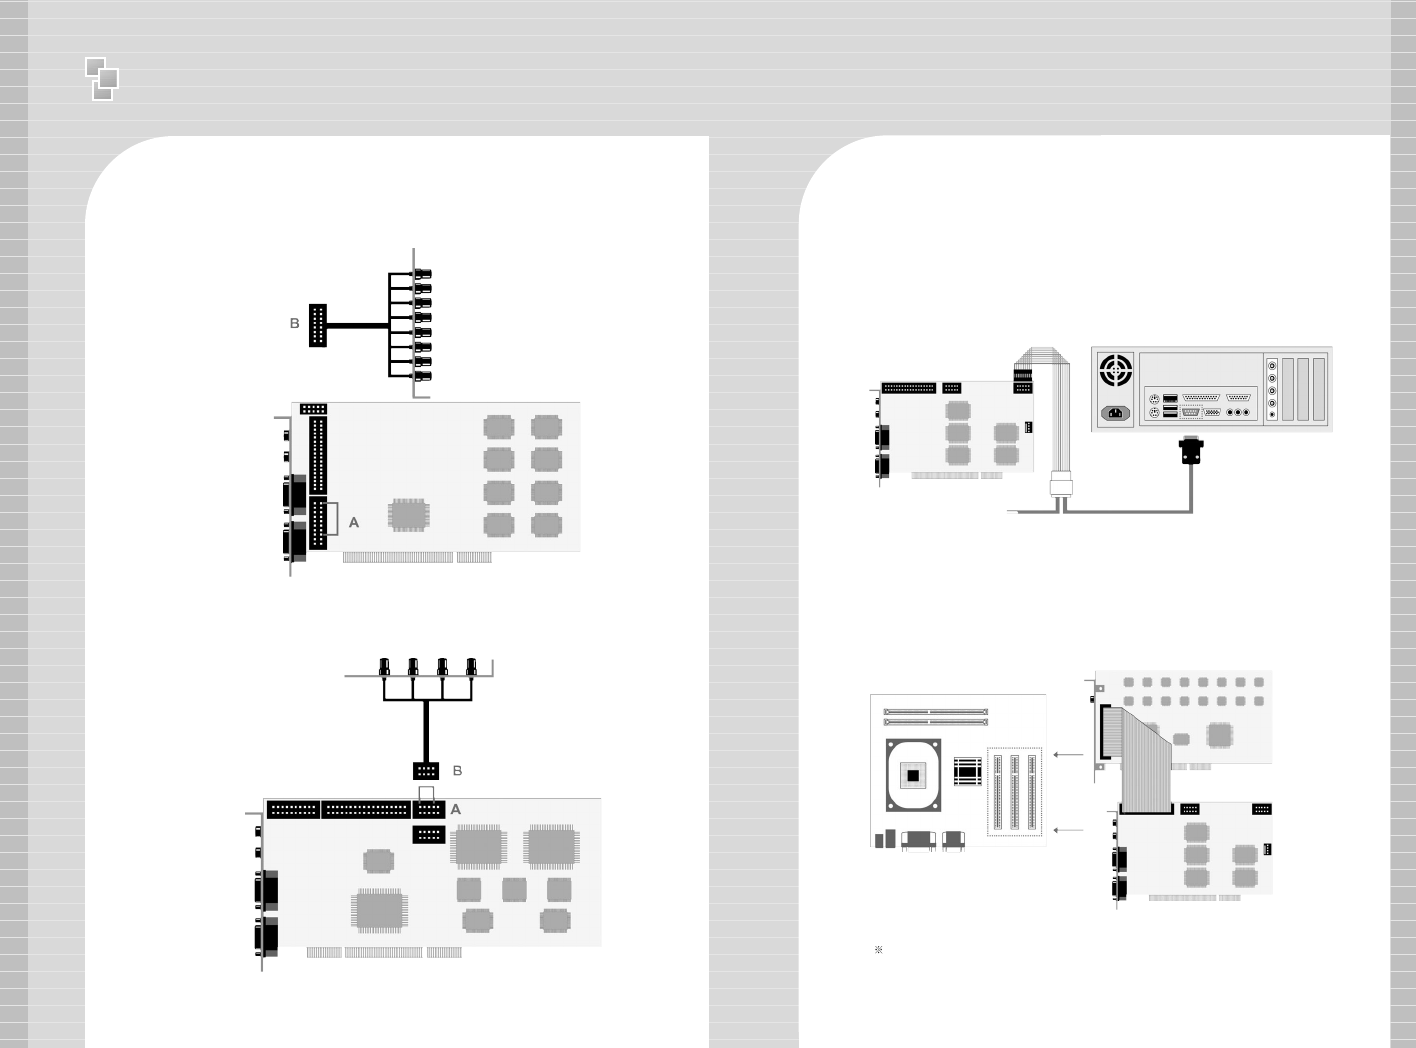
4. Real Display(RD) Board Installation
4-1.
Insert the Real Display Board into an empty PCI Slot in DVR PC.
4-2. Use Cable to connect Real Display Board with DVR Board.
Real Display Board cannot be used alone, it must be used with S, H, HPLUS
DVR Boards.
67
A
B
3. P/T/Z Installation
3-1. P/T/Z Cable
[A] Cable : Connect to COM port of DVR PC
[B] Cable : Connect to DVR Board
[C] Cable : Connect to Receiver Cable
- HP Board: Connect the 8CH MIC(B) to DVR Board(A) starting
from the top.
- RC Board: Connect the 4CH MIC(B) to DVR Board(A) starting
from the left.
C
<8CH>
<HP DVR Board>
<4CH>
<RC DVR Board>
<Mainboard>
<RD Board>
<DVR Board>
<DVR System>
<DVR Board>
B
A
<P/T/Z Cable>
89
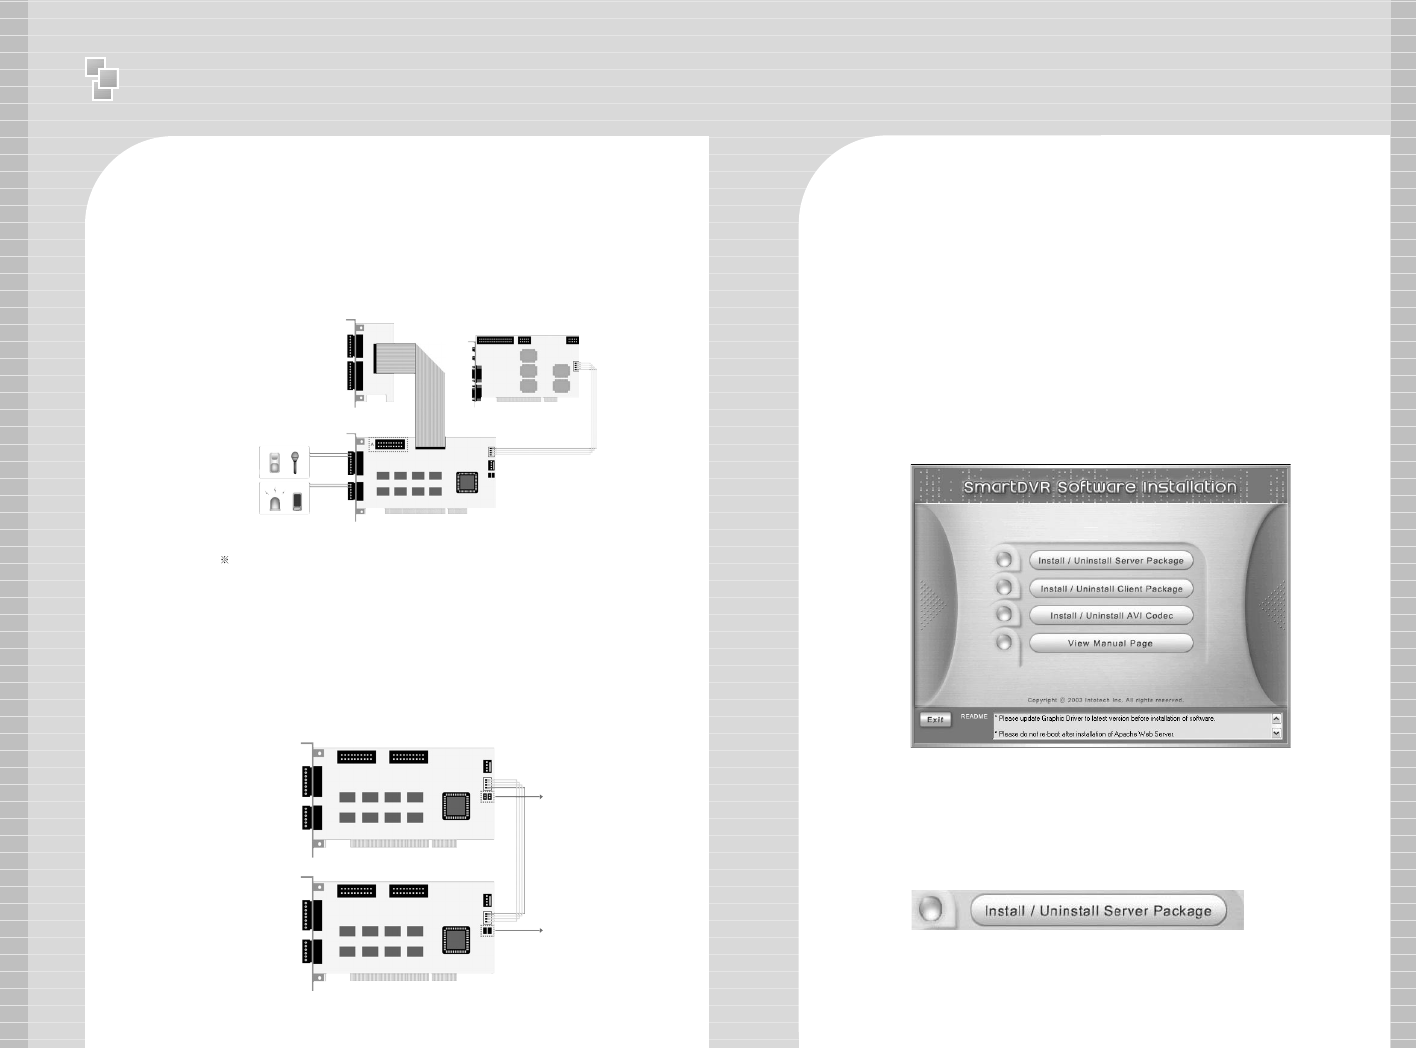
To use 16 port In/Out,
A : Slave Board must remove jumper.
B : Master Board must install jumper.
< 16 port In/Out Connection>
5. I/O Board Installation
5-1. Prepare Sensor, Alarm, I/O Board and I/O Extension Board for I/O
Board Installation.
A : Industrial Case System can use In/Out port separately when additional
Back Panel is available.
< 8 port In/Out Connection>
I/O Extension Board <DVR Board>
<I/O Board>
<I/O Slave Board>
<I/O Master Board>
4CH Input
3CH Output
A
A
B
4CH Input
5CH Output
Ⅰ
Installation manual - Software Installation
1. Software Installation
You can install SmartDVR Software by using SmartDVR Formula CD
or downloading from INTOTECH website, www.intotech.co.kr.
Software CD consists of Server Package (Main program, WebClient
program, Apache HTTP Server program), Client Package (NetClient
program) & AVI Codec. User Manual is also available from SW CD.
[Main Program Installation]
Insert SmartDVR Formula CD into CD-ROM drive or run
DvrSetup.exe file; the following installation screen will appear .
Click the icon below and Main Program installation will
automatically proceed.
Installation Step : Apache HTTP Server (Web Server) ->
WebClient -> SmartDVR Formula
Ⅰ
Installation manual - Software Installation
10 11
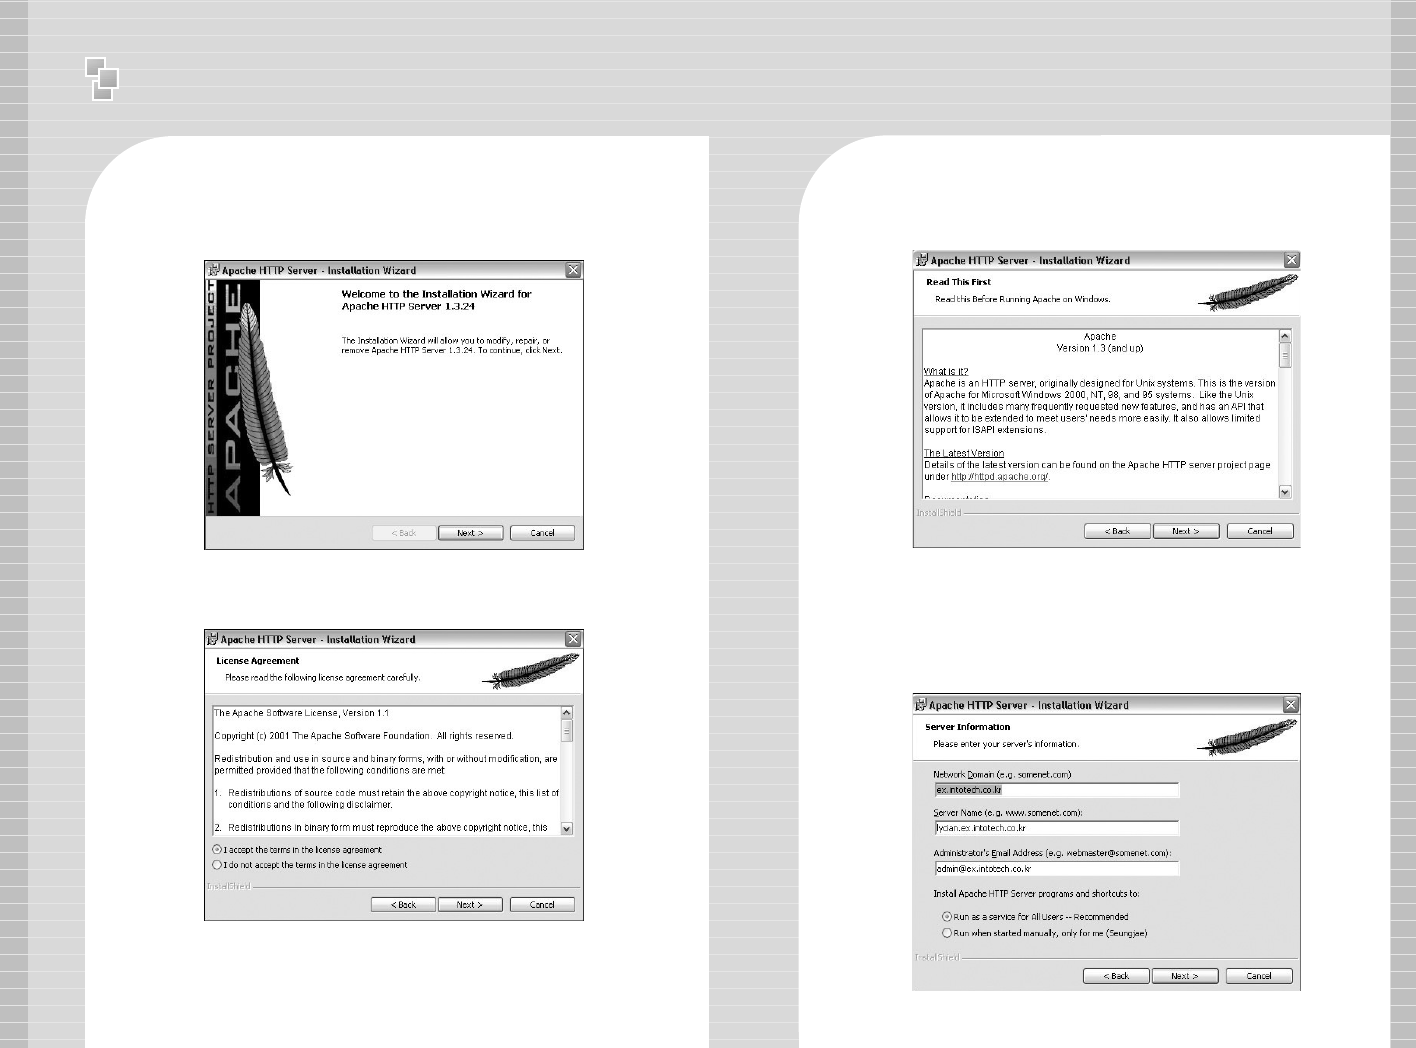
1. SmartDVR Apache HTTP Server (Web Server) Installation
1-1 Installation wizard tool will appear. Click [Next].
1-2 Read the License Agreement and if you agree to the
contents, select [I accept…] and click [Next].
1-3 Click [Next] after checking server information of Apache
HTTP Server.
1-4 Insert Network Domain, Server Name, Administrator’s
E-mail Address.
(This procedure is only a formality. In general cases, follow example)
Select [Run as a service for All Users – Recommended]
and click [Next].
Ⅰ
Installation manual - Software Installation
12 13
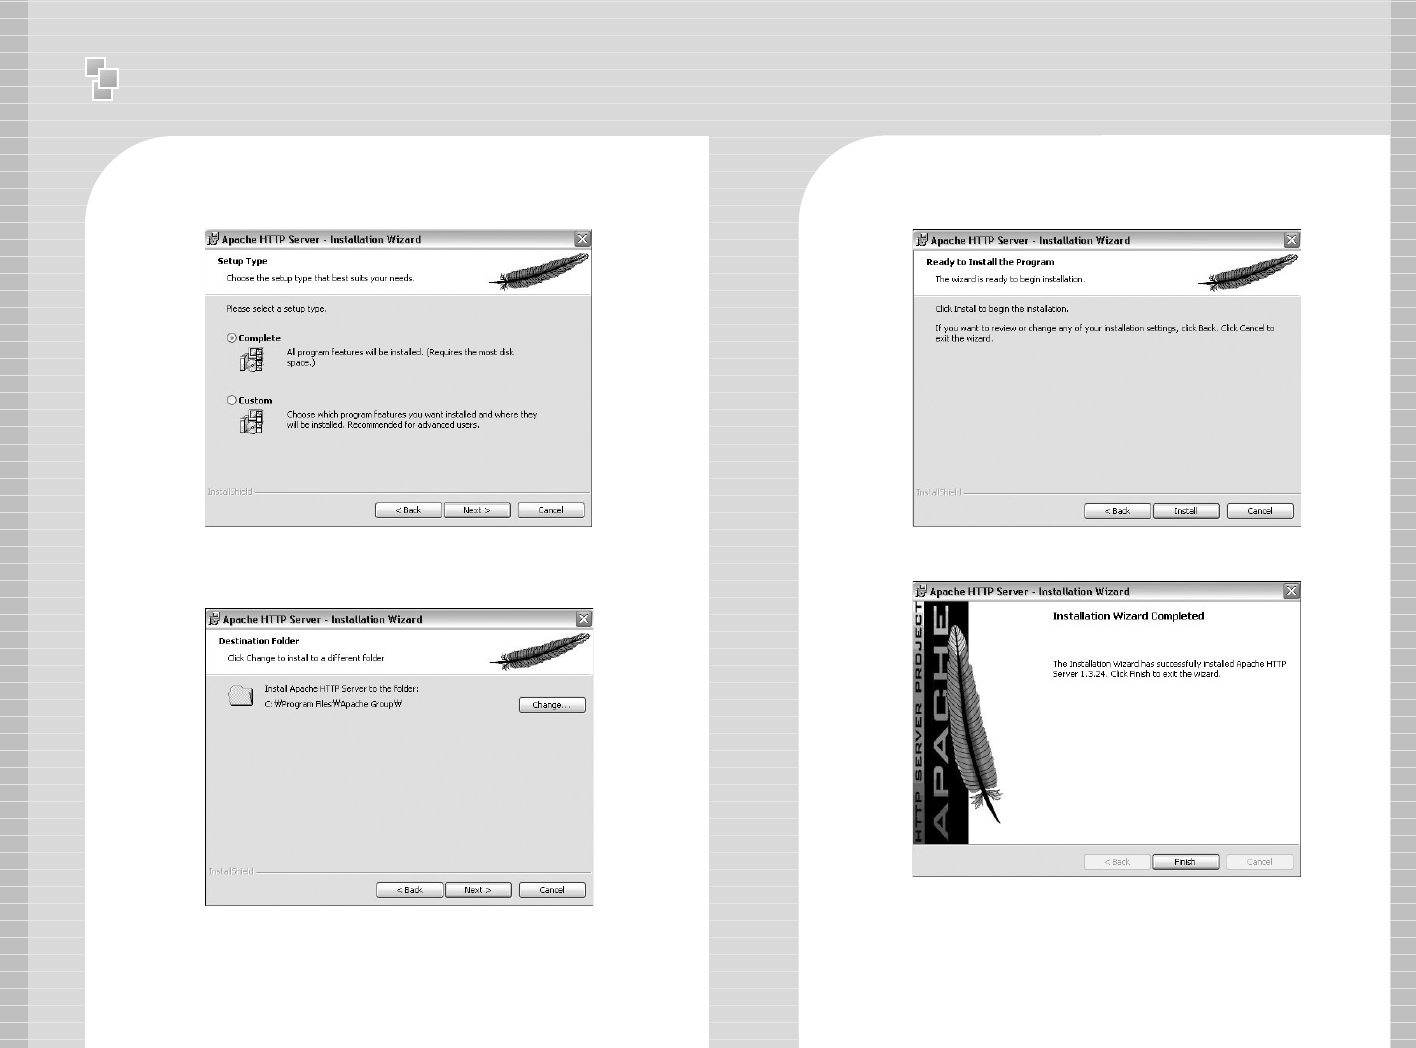
1-5 Select Setup Type as [Complete] and click [Next].
1-6 Click [Next] without change of setting. Note: Do not change
the directory!
1-7 After the setting is finished, click [Install] and start installation.
1-8 After the installation is done, click [Finish].
Ⅰ
Installation manual - Software Installation
14 15
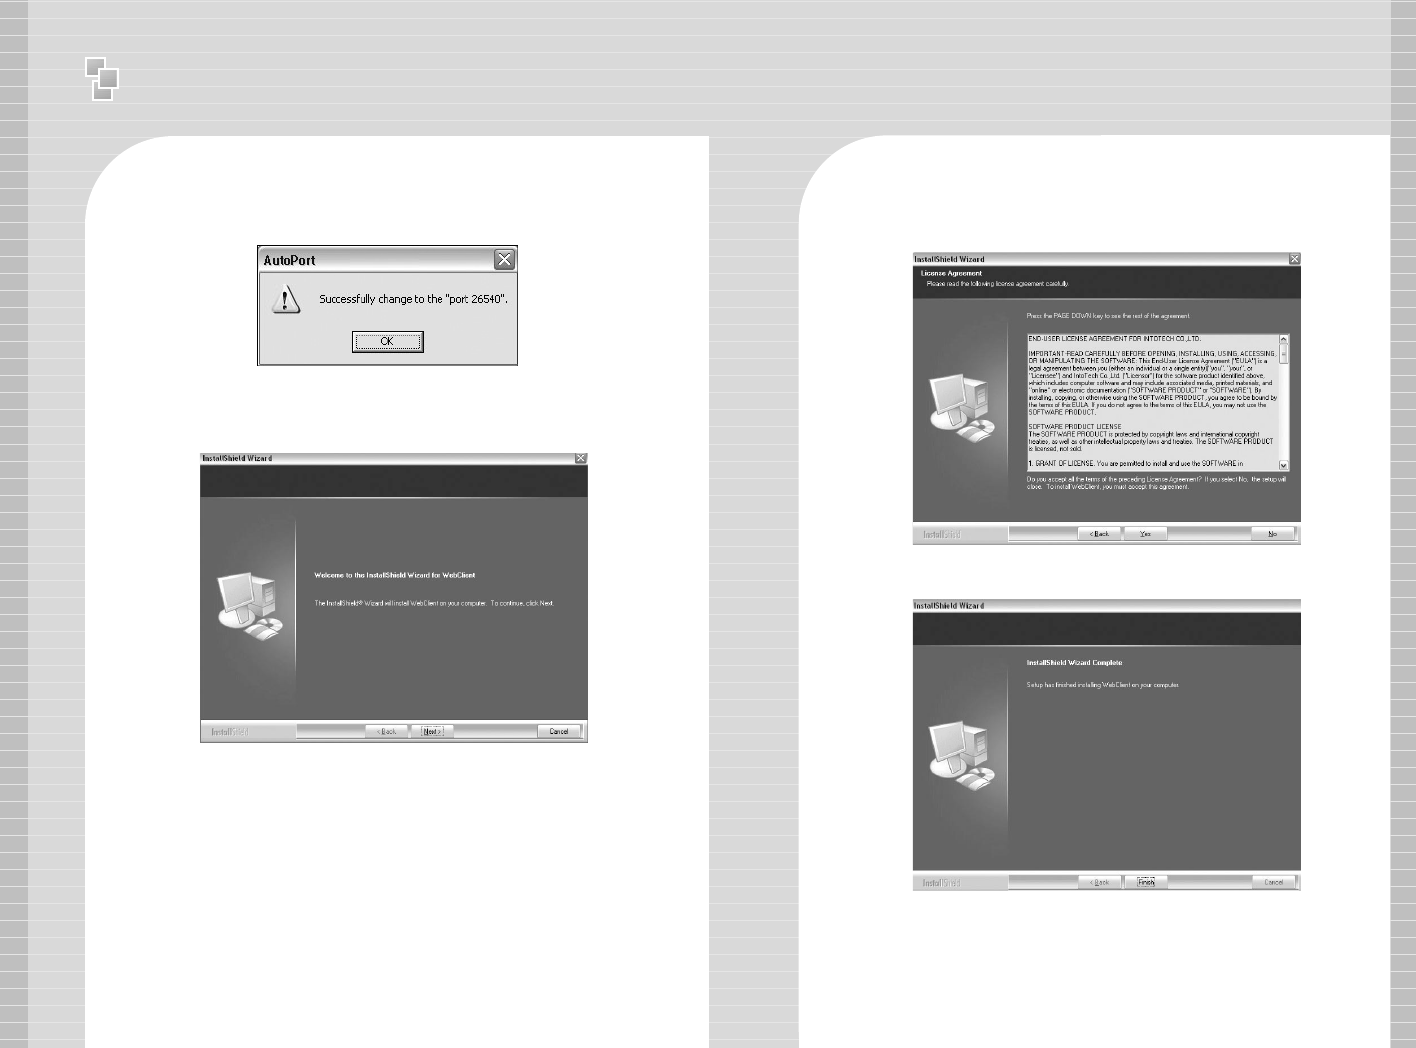
1-9 After the installation is finished, a message confirming the
change of the Server port of Apache will appear.
2 SmartDVR WebClient Installation
2-1 After the Installation Wizard Tool is appeared, click [Next].
2-2 Check the contents of License Agreement; if you agree to the
contents, click [Yes].
2-3 After the installation is done, click [Finish].
Ⅰ
Installation manual - Software Installation
16 17
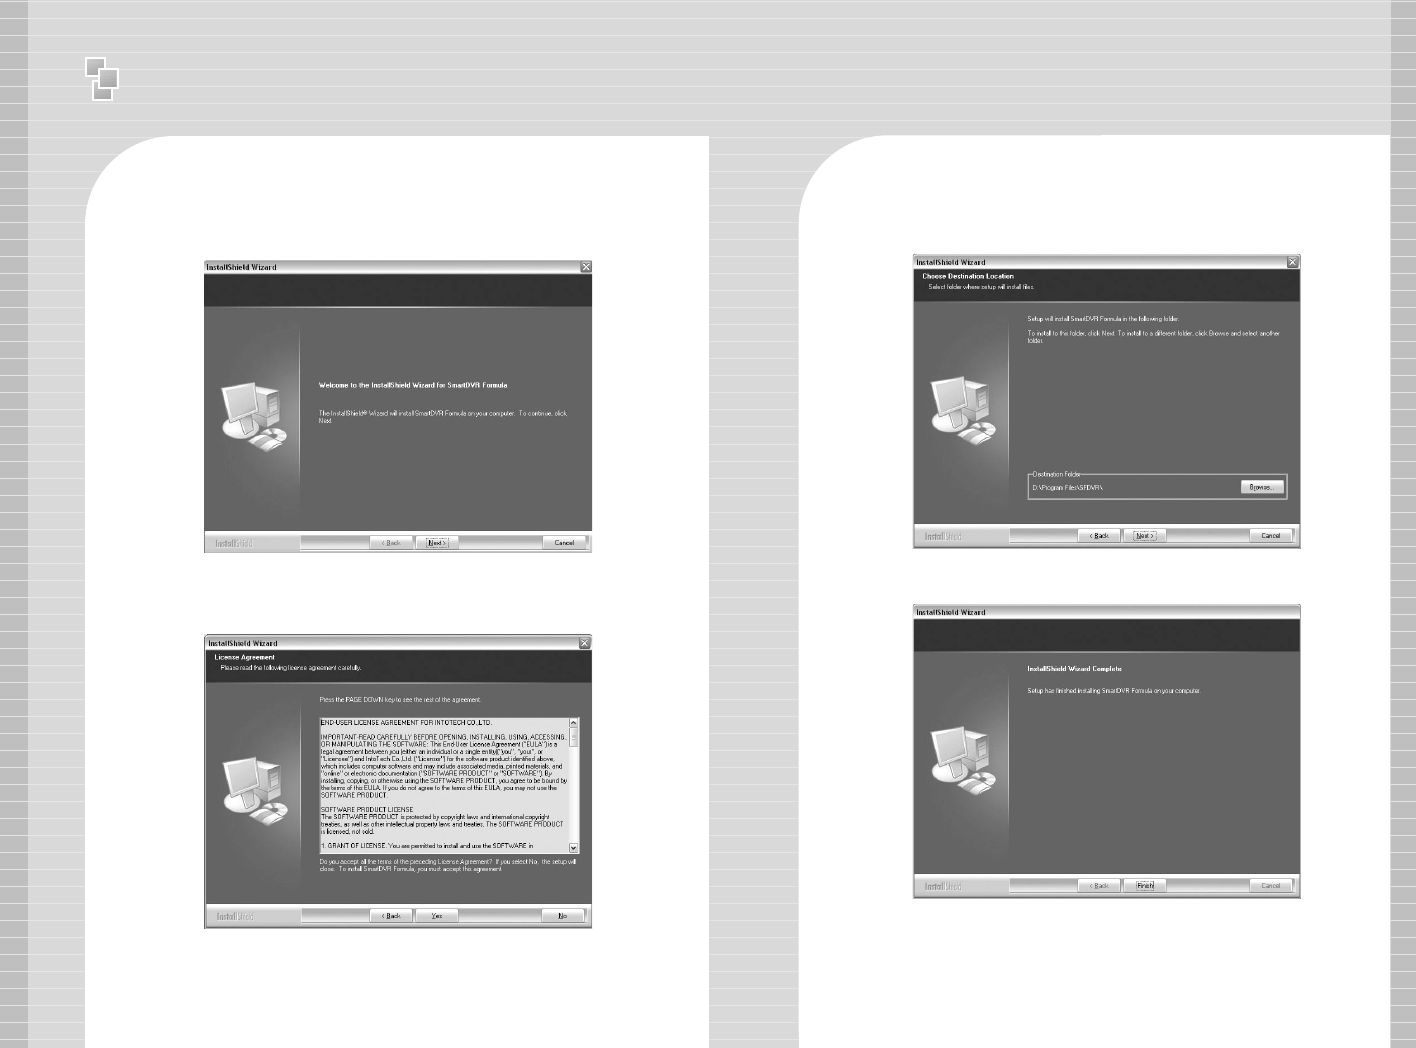
3 SmartDVR Formula Installation
3-1 After Installation Wizard Tool is appeared, Click [Next].
3-2 Check the details of License Agreement; if you agree to the
contents, click [Yes].
3-3 After choosing [Destination Folder] for installation, click
[Next].
3-4 After the installation is done, click [Finish].
Ⅰ
Installation manual - Software Installation
19
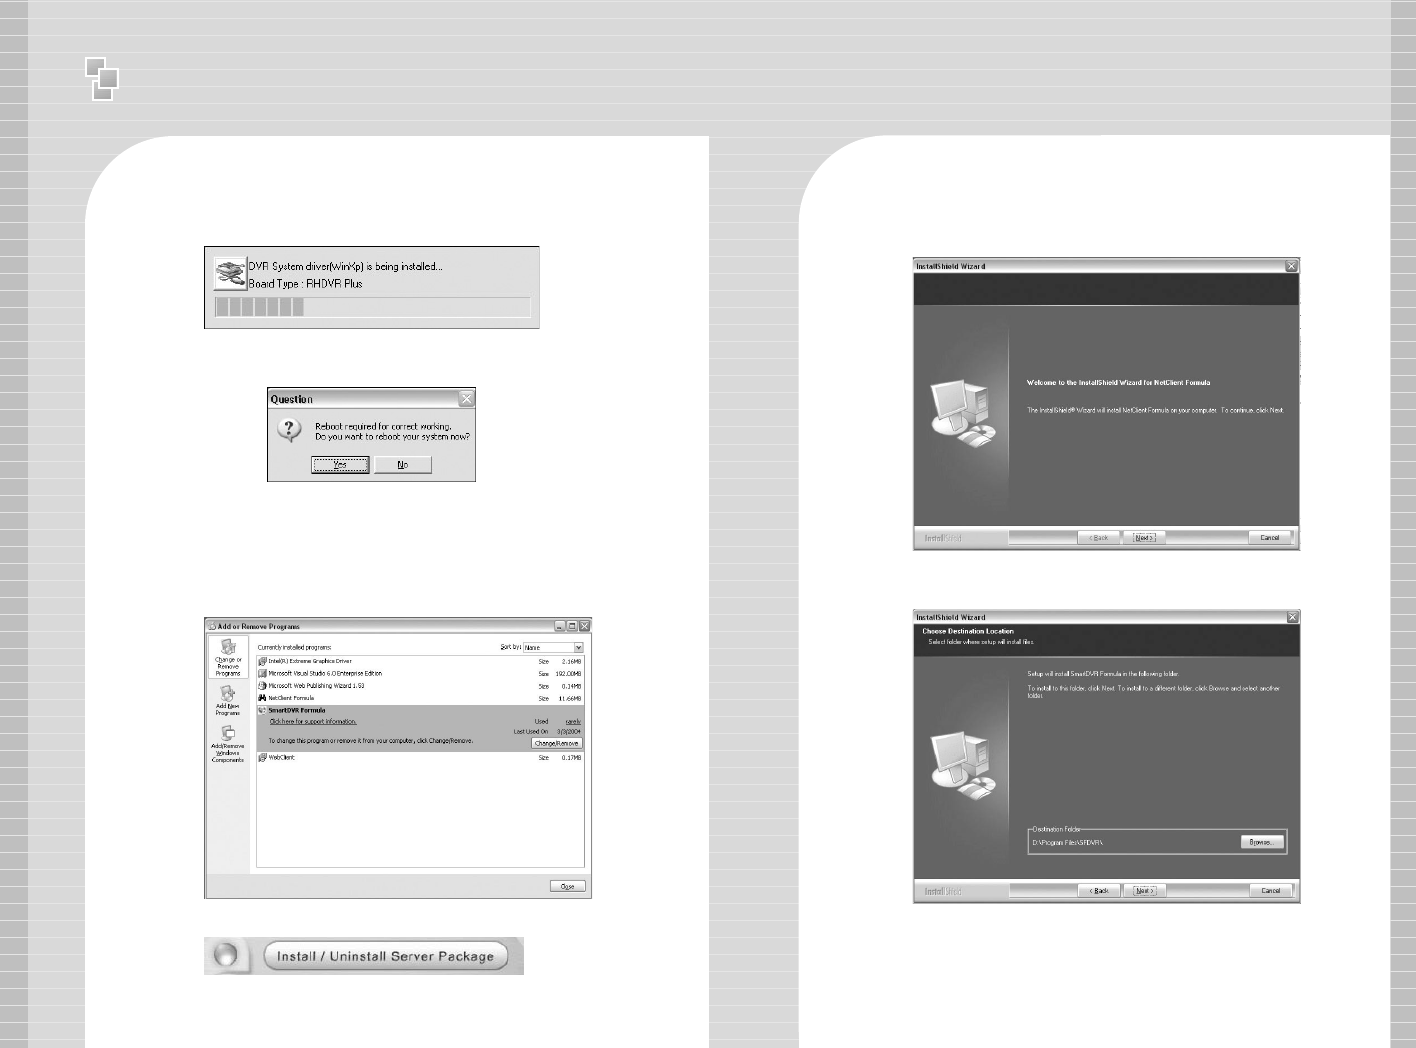
3-5 Driver Installation: Wizard automatically installs drivers
according to each board type.
3-6 Reboot PC after all the installation.
4. SmartDVR Formula Uninstallation
4-1 Goto [Start] – [Control panel] and click [Add/Remove
Program].
4-2 Select [SmartDVR Formula] and click [Change/Remove].
Click the icon below and NetClient Program installation will proceed.
5 NetClient Installation
5-1 After the Installation Wizard Tool is appeared, click [Next].
5-2 After choosing [Destination Folder] for installation, click [Next].
18