IONICS EMS IOTADV IOT PLATFORM User Manual Doc 53 15 IoT Platform Advance v0 00
IONICS EMS, INC IOT PLATFORM Doc 53 15 IoT Platform Advance v0 00
UserManual.wiki
>
IONICS EMS
>
IOTADV User Manual
Users Manual.pdf
Navigation menu
Upload a User Manual
Namespaces
Wiki Guide
HTML
PDF
Info
Views
User Manual
Discussion / Help
Navigation
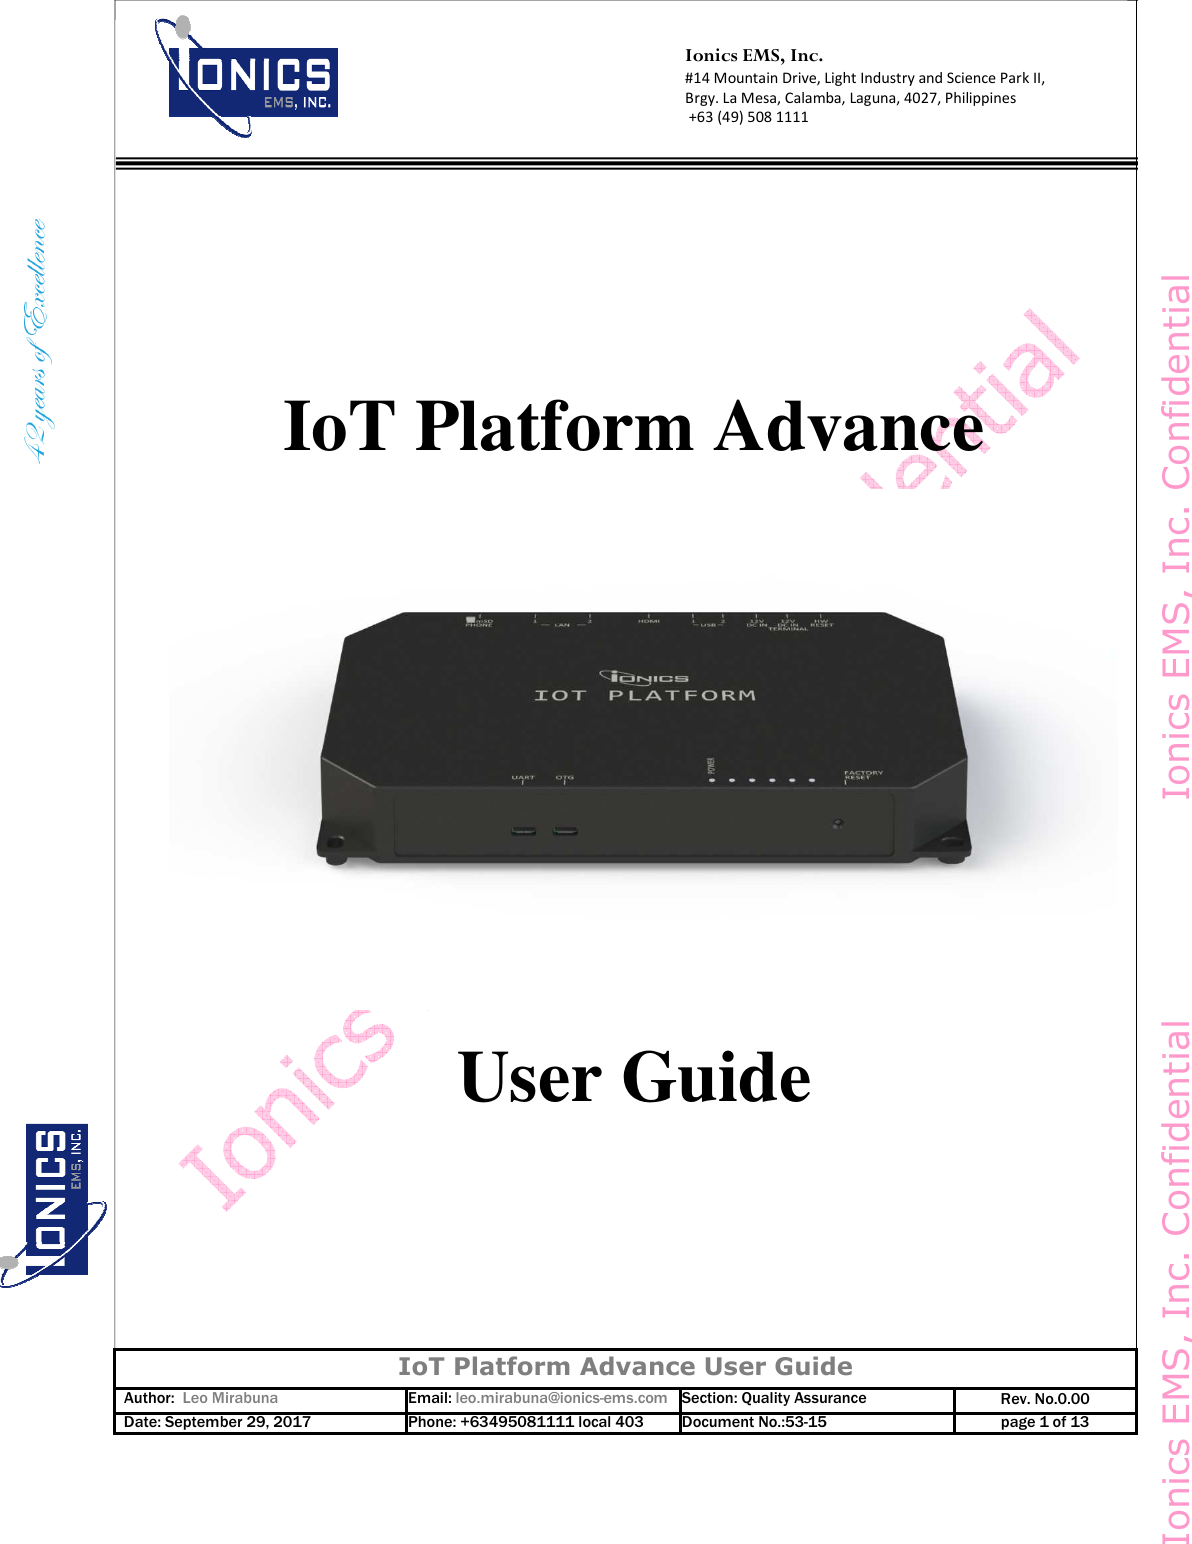

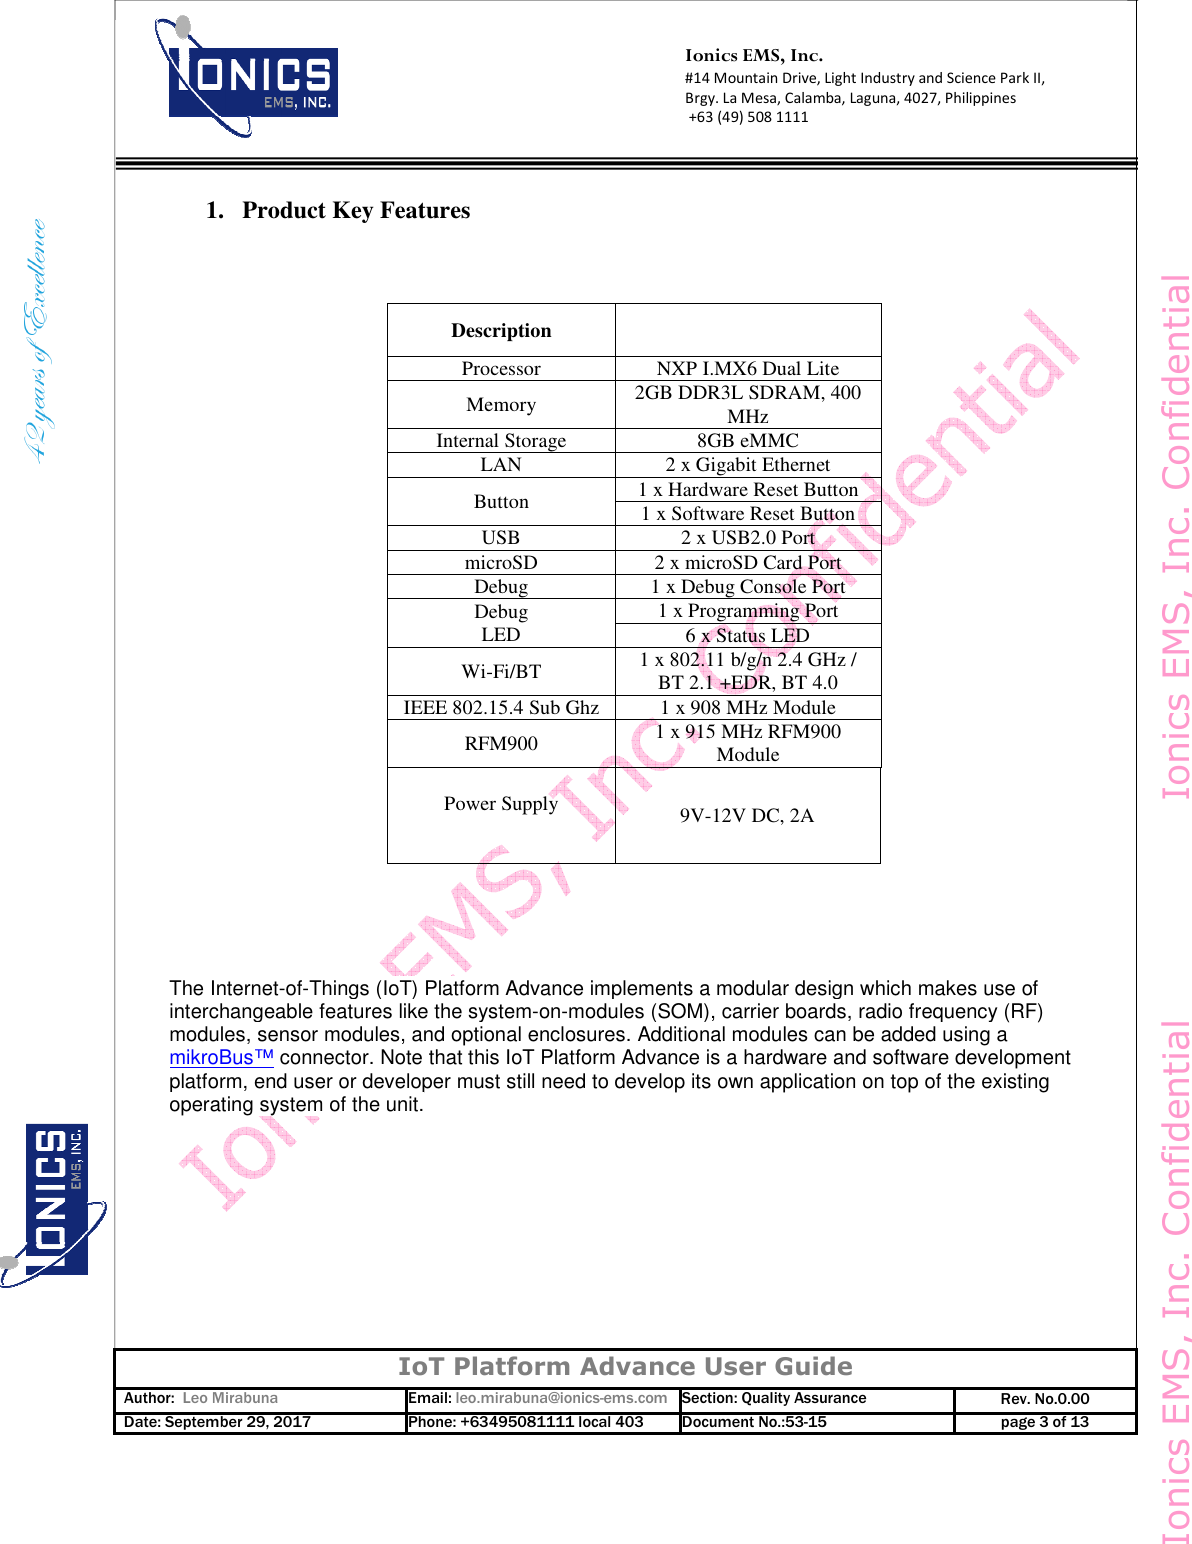

![IoT Platform Advance User Guide Author: Leo Mirabuna Email: leo.mirabuna@ionics-ems.com Section: Quality Assurance Rev. No.0.00 Date: September 29, 2017 Phone: +63495081111 local 403 Document No.:53-15 page 8 of 13 Ionics EMS, Inc. Confidential Ionics EMS, Inc. Confidential Ionics EMS, Inc. #14 Mountain Drive, Light Industry and Science Park II, Brgy. La Mesa, Calamba, Laguna, 4027, Philippines +63 (49) 508 1111 3. microSD card slot To check if microSD card port is working, insert microSD card in the port. And check in the console if it was detected. Check for microSD card information like size and do some basic read write test. Example: root@xenial:~# blockdev --getsize64 /dev/mmcblk2 | awk '{ split( "KB MB GB" ,v ); s=1; while( $1>1024 ){ $1/=1024; s++ } print $1 v[s-1] }' root@xenial:~# mount /dev/mmcblk2p1 /mnt/ root@xenial:~# dd if=/dev/zero of=/mnt/write-test bs=8k count=10k 4. WLAN To check for Wi-Fi module is working. The WLAN module is a USB device. List the available USB devices to verify that the module is detected. Example: root@xenial:~# lsusb Bus 001 Device 002: ID 05e3:0608 Genesys Logic, Inc. Hub Bus 001 Device 001: ID 1d6b:0002 Linux Foundation 2.0 root hub Bus 002 Device 002: ID 0bda:b720 Realtek Semiconductor Corp. Bus 002 Device 001: ID 1d6b:0002 Linux Foundation 2.0 root hub root@xenial:~# ifconfig wlan0 wlan0 Link encap:Ethernet HWaddr 38:1d:d9:96:66:f9 inet addr:192.168.8.1 Bcast:192.168.8.255 Mask:255.255.255.0 inet6 addr: fe80::3a1d:d9ff:fe96:66f9/64 Scope:Link UP BROADCAST RUNNING MULTICAST MTU:1500 Metric:1 RX packets:3976 errors:0 dropped:19 overruns:0 frame:0 TX packets:12 errors:0 dropped:0 overruns:0 carrier:0 collisions:0 txqueuelen:1000 RX bytes:264 (264.0 B) TX bytes:640 (640.0 B) root@xenial:~# iw dev wlan0 info Interface wlan0 ifindex 4 wdev 0x1 addr 38:1d:d9:96:66:f9 ssid ionics_iot-9666f9 type AP wiphy 0 5. CC1310 a. Server mode](https://usermanual.wiki/IONICS-EMS/IOTADV/User-Guide-3655389-Page-8.png)