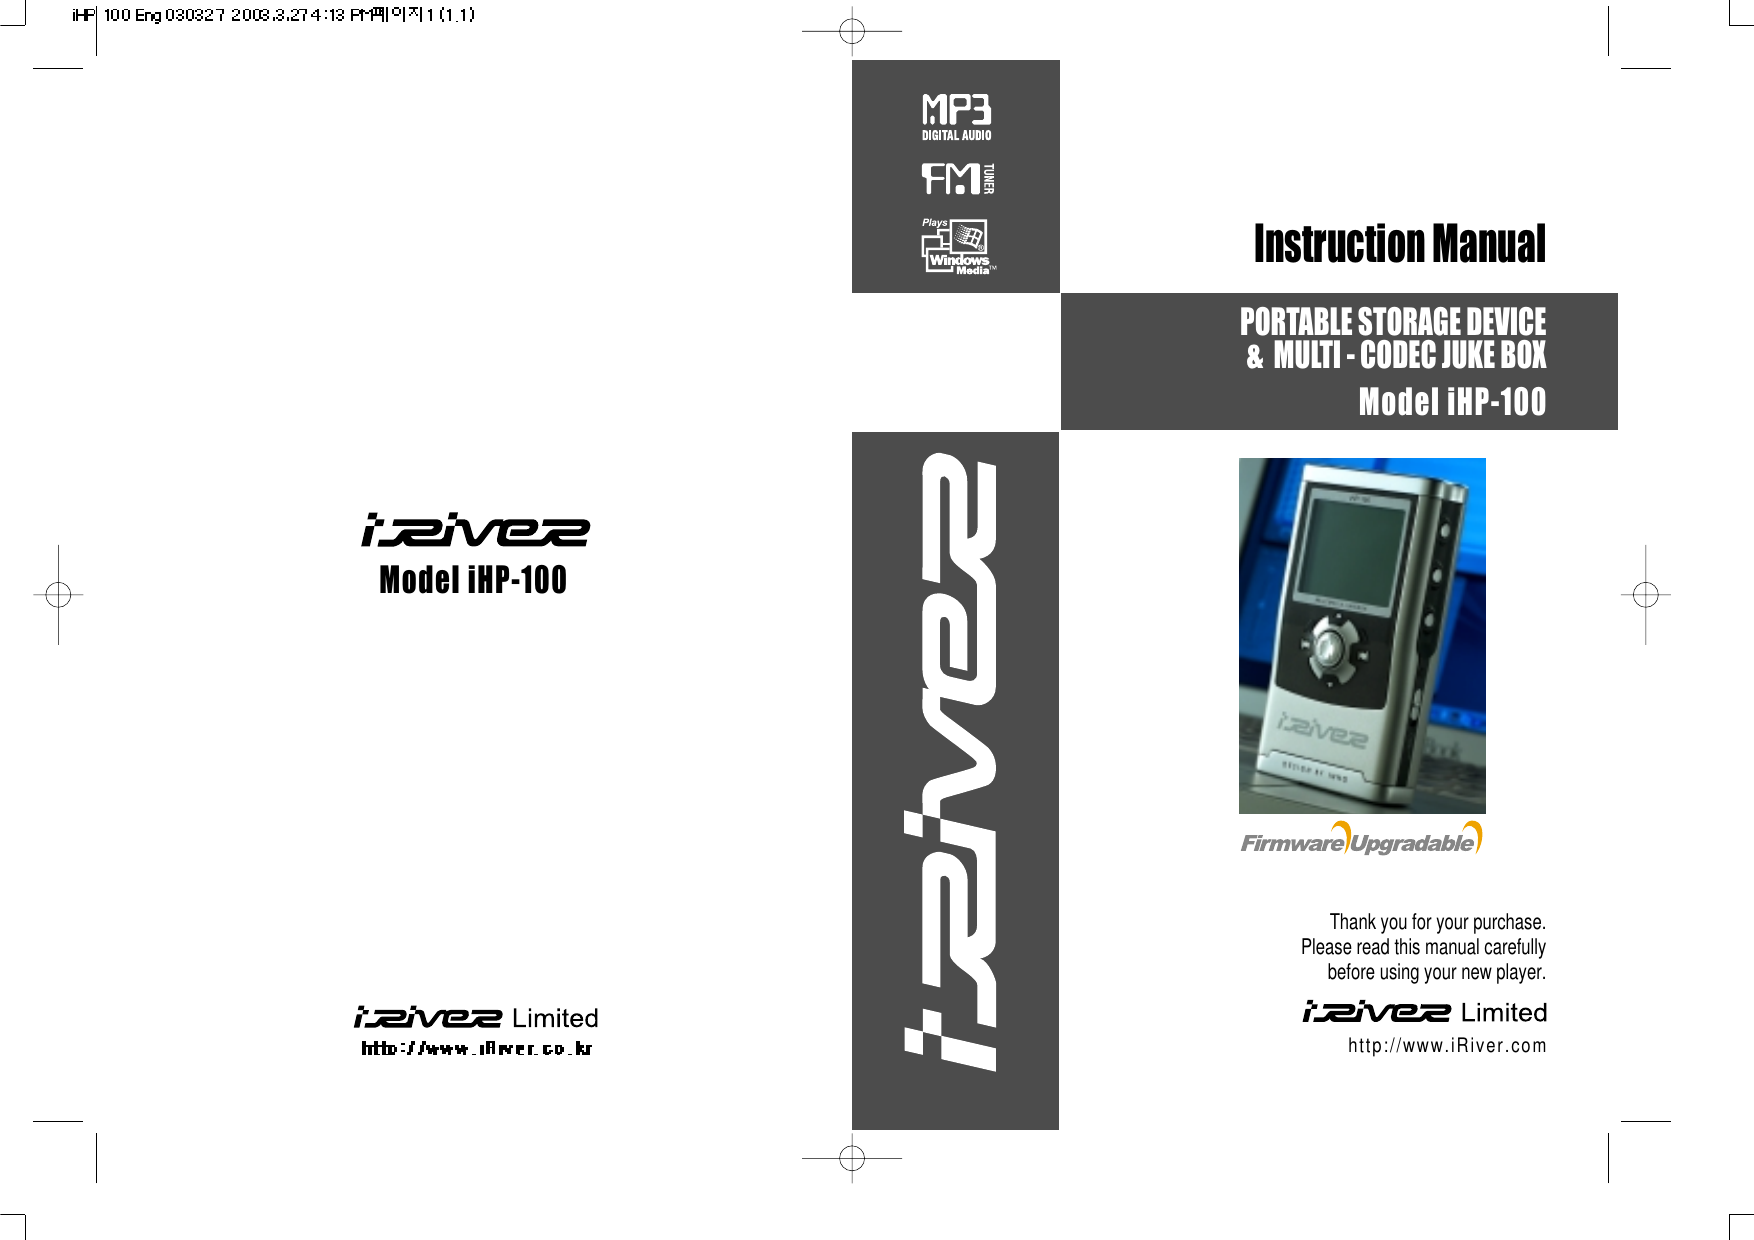
IRIVER IHP100 MP3 Player User Manual users manual a
IRIVER LIMITED MP3 Player users manual a
UserManual.wiki
>
IRIVER
>
IHP100 User Manual
>
users manual a
Contents
1.
users manual a
2.
users manual b
users manual a
Navigation menu
Upload a User Manual
Namespaces
Wiki Guide
HTML
PDF
Info
Views
User Manual
Discussion / Help
Navigation
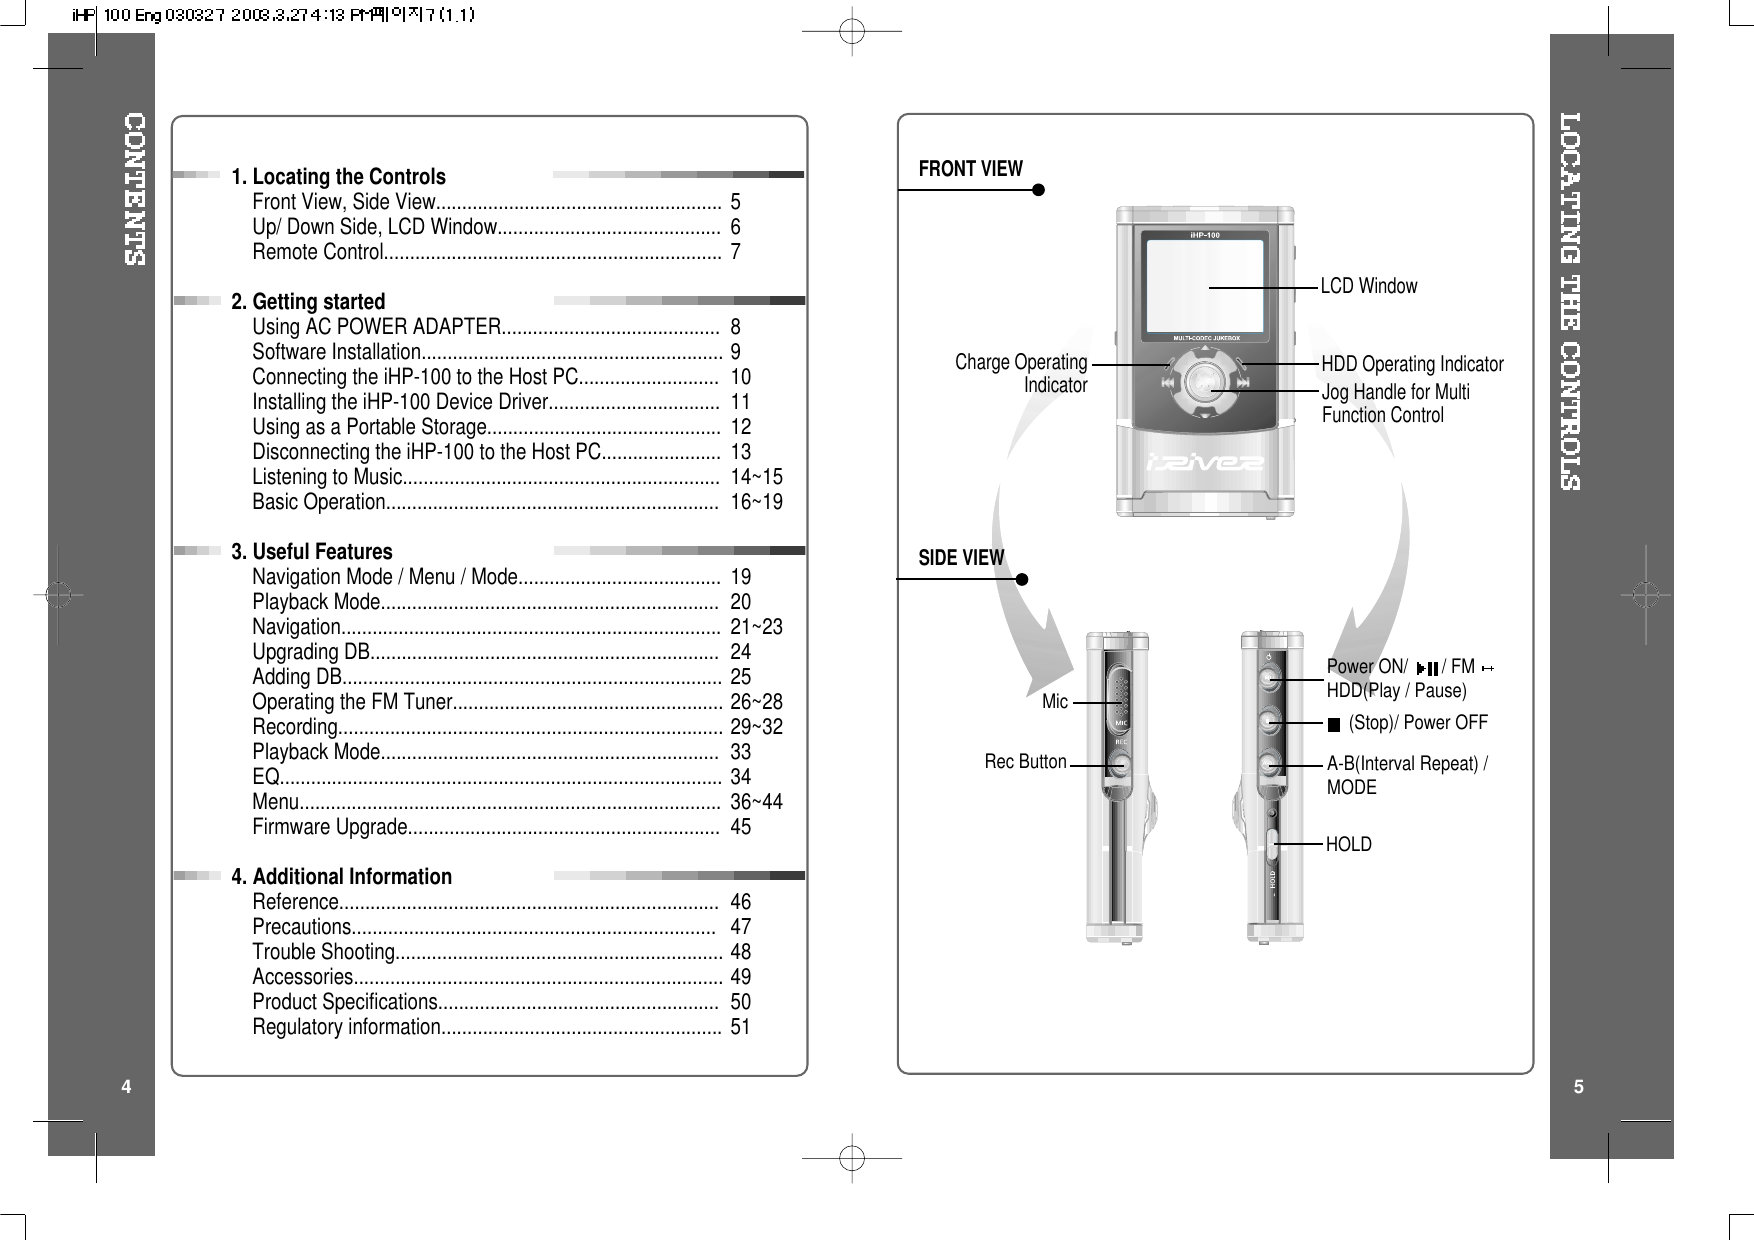
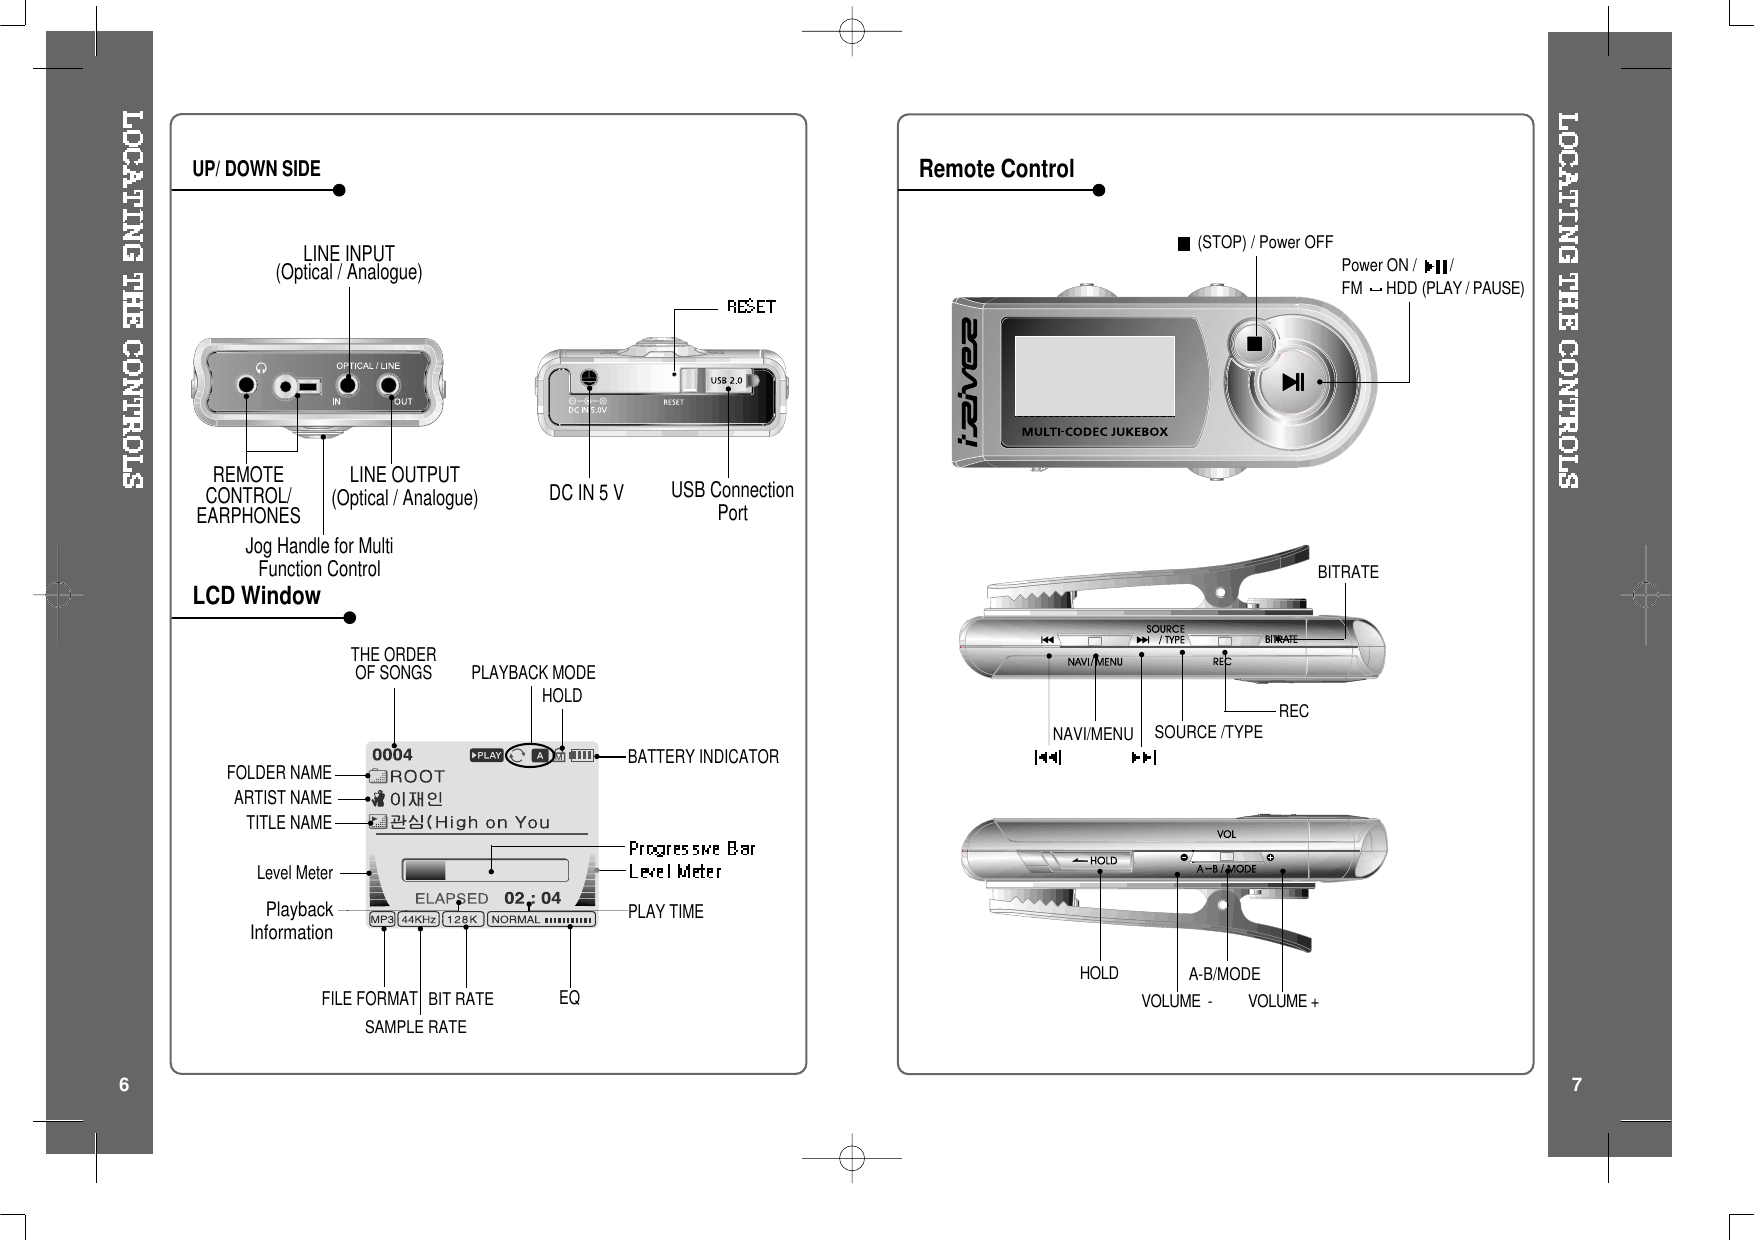
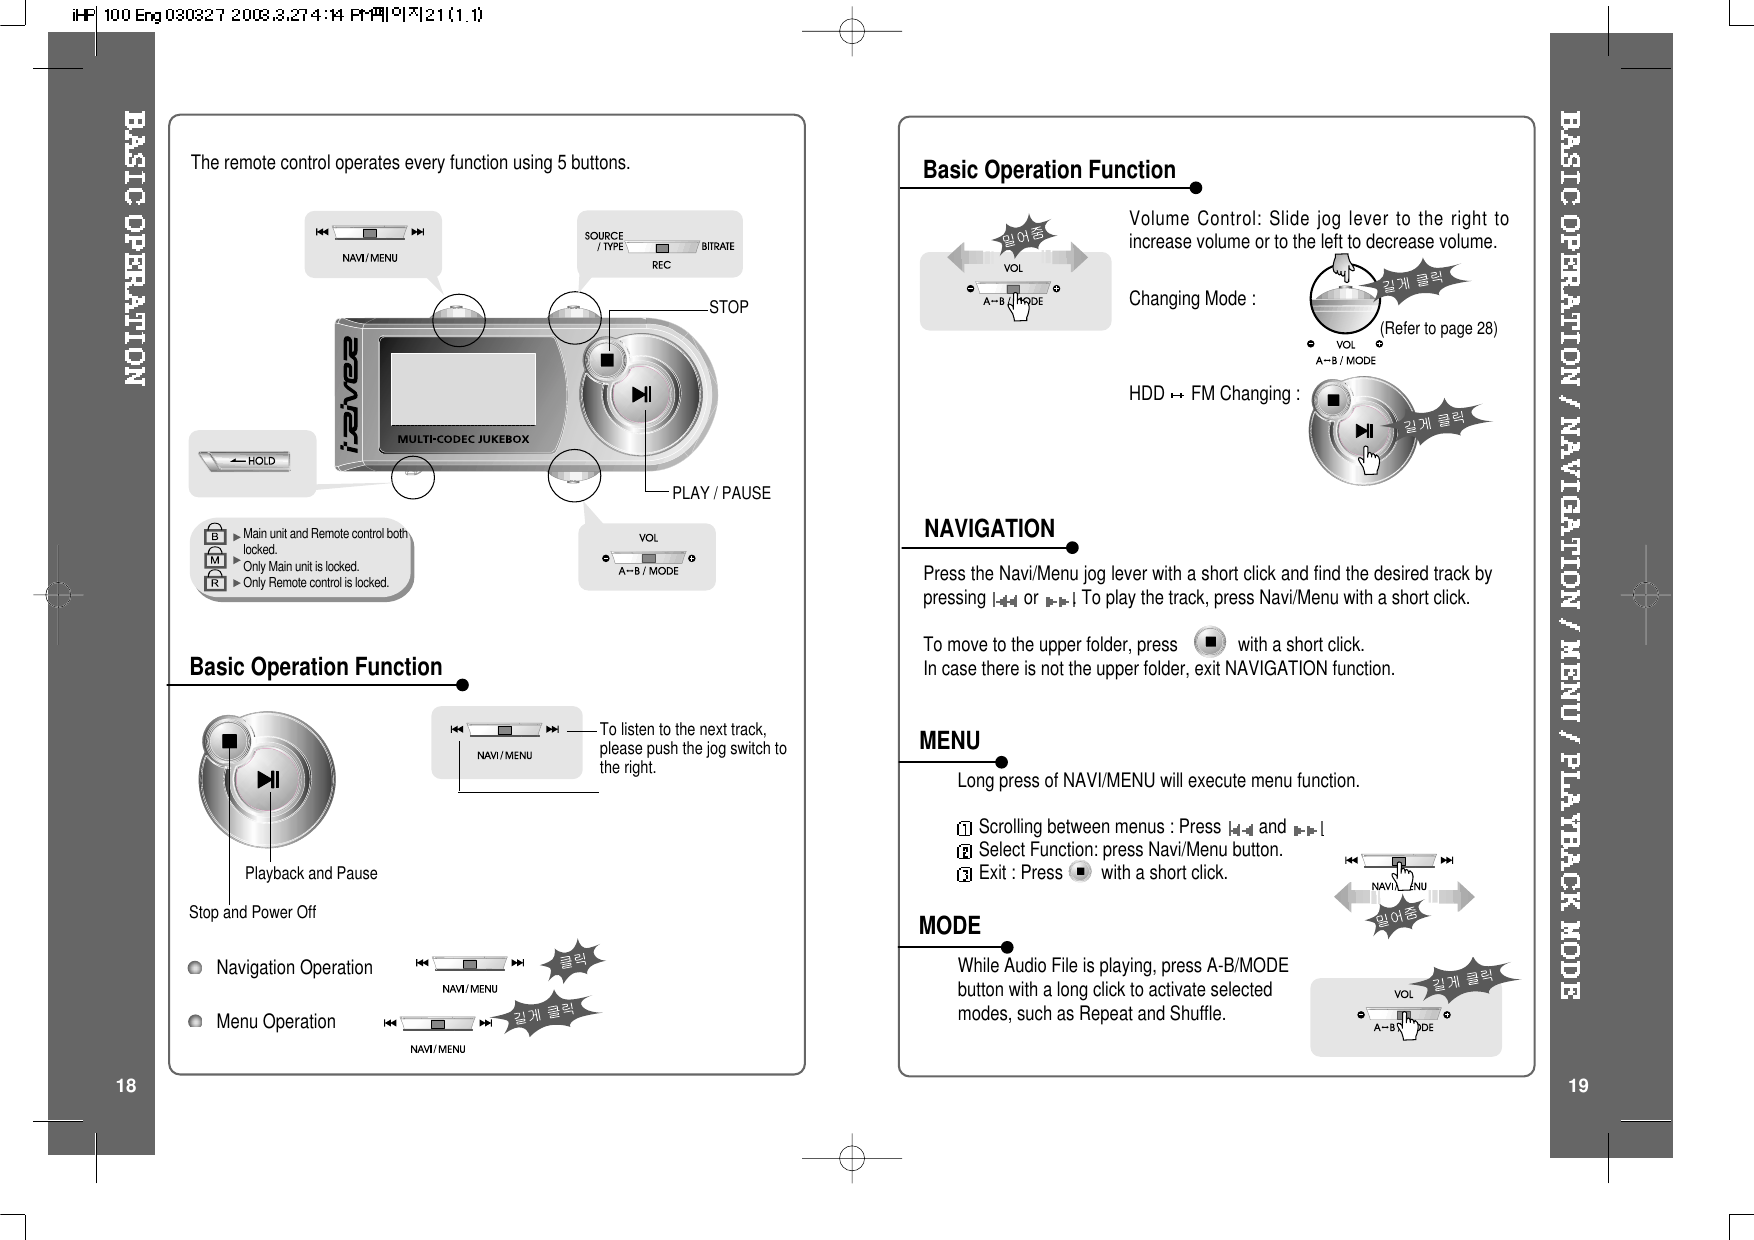
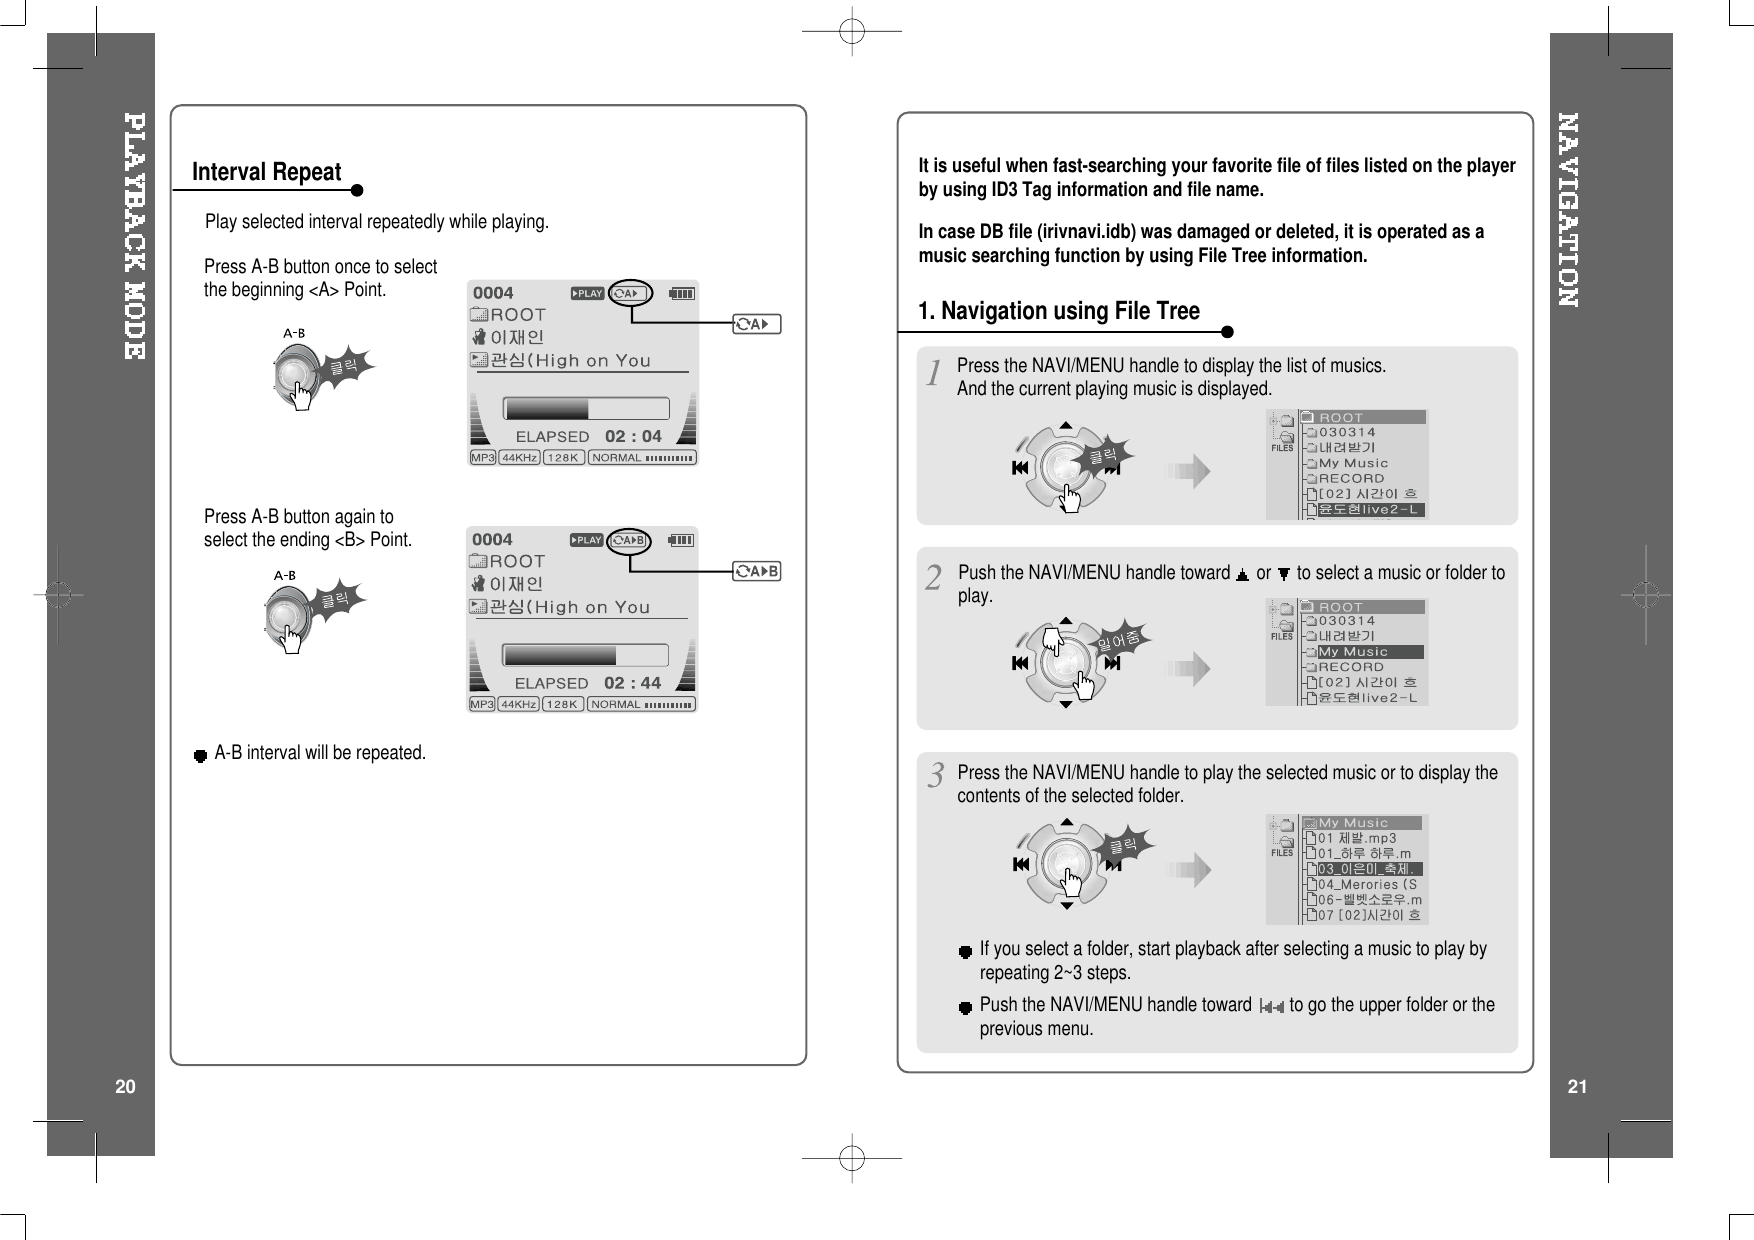
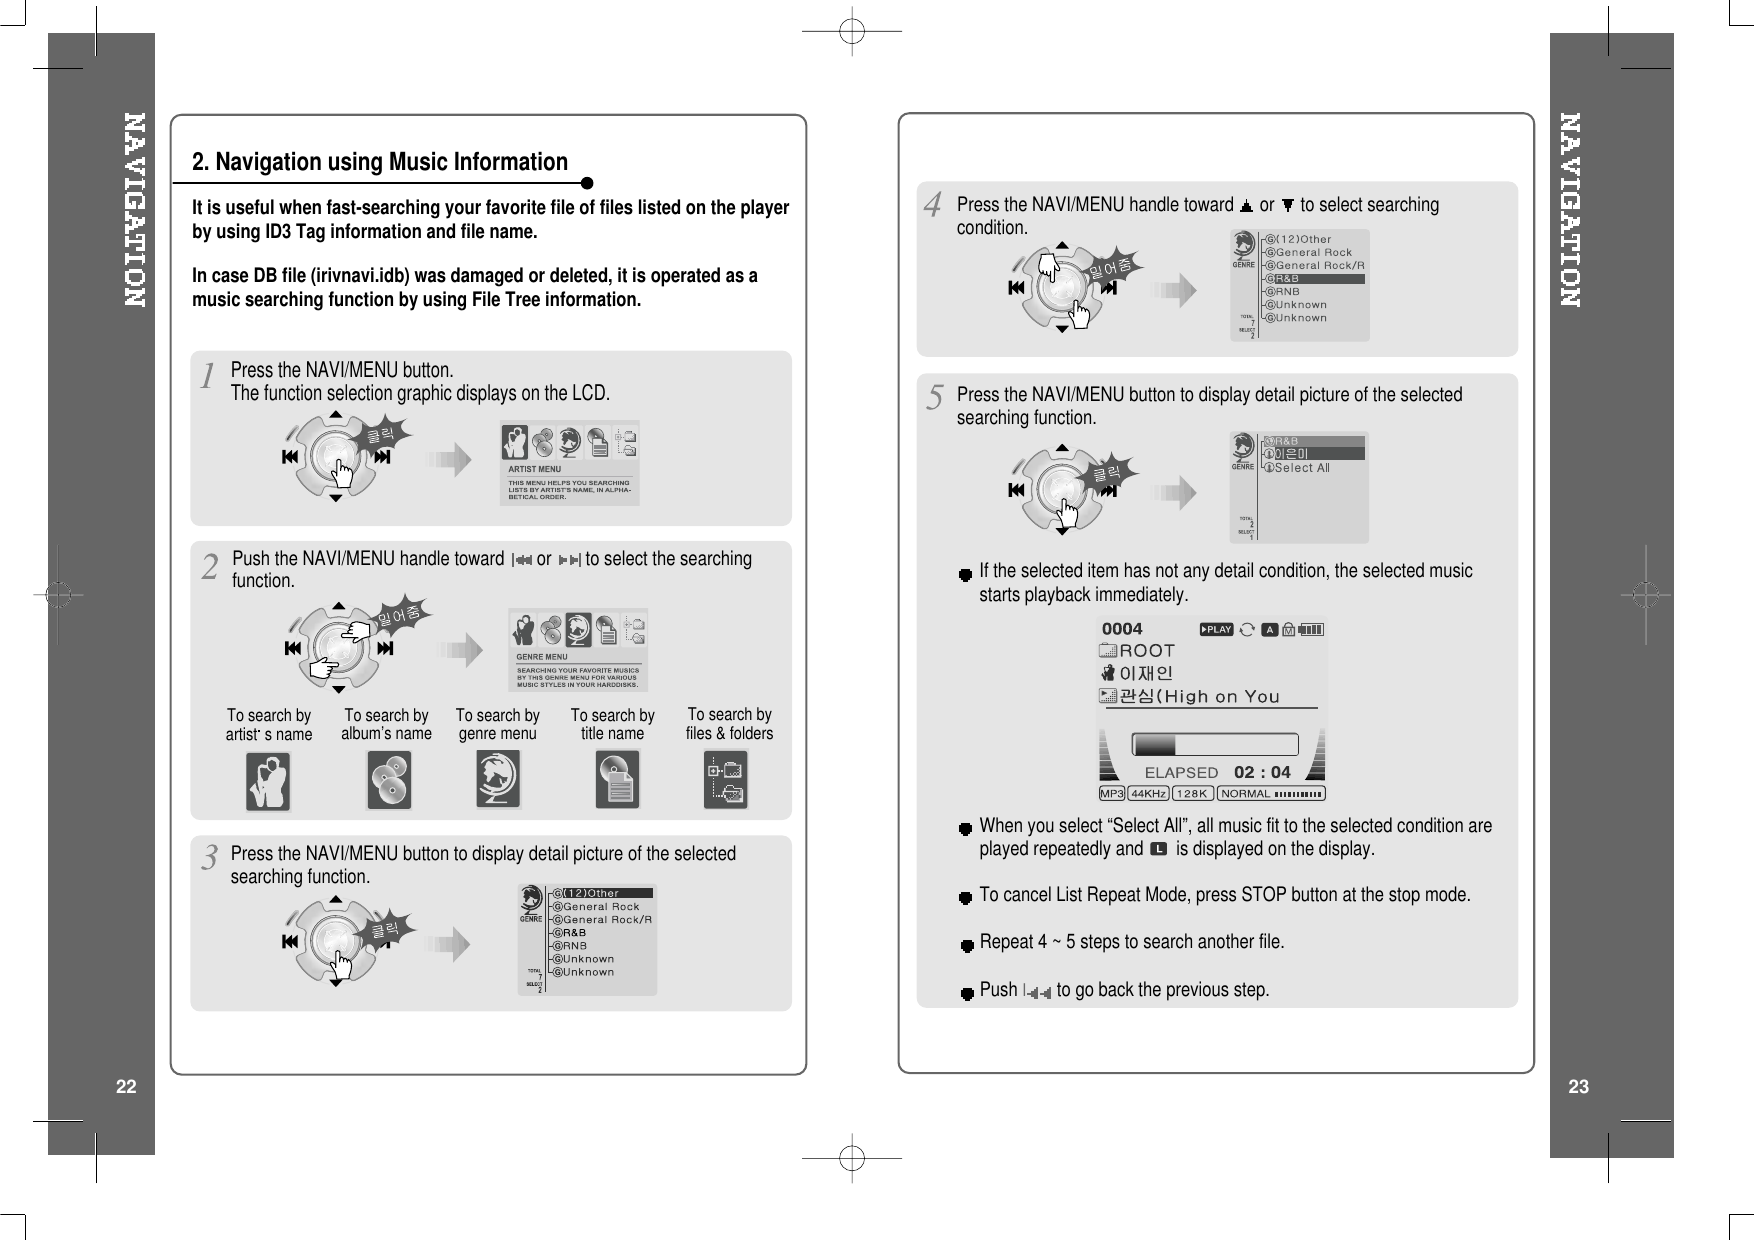
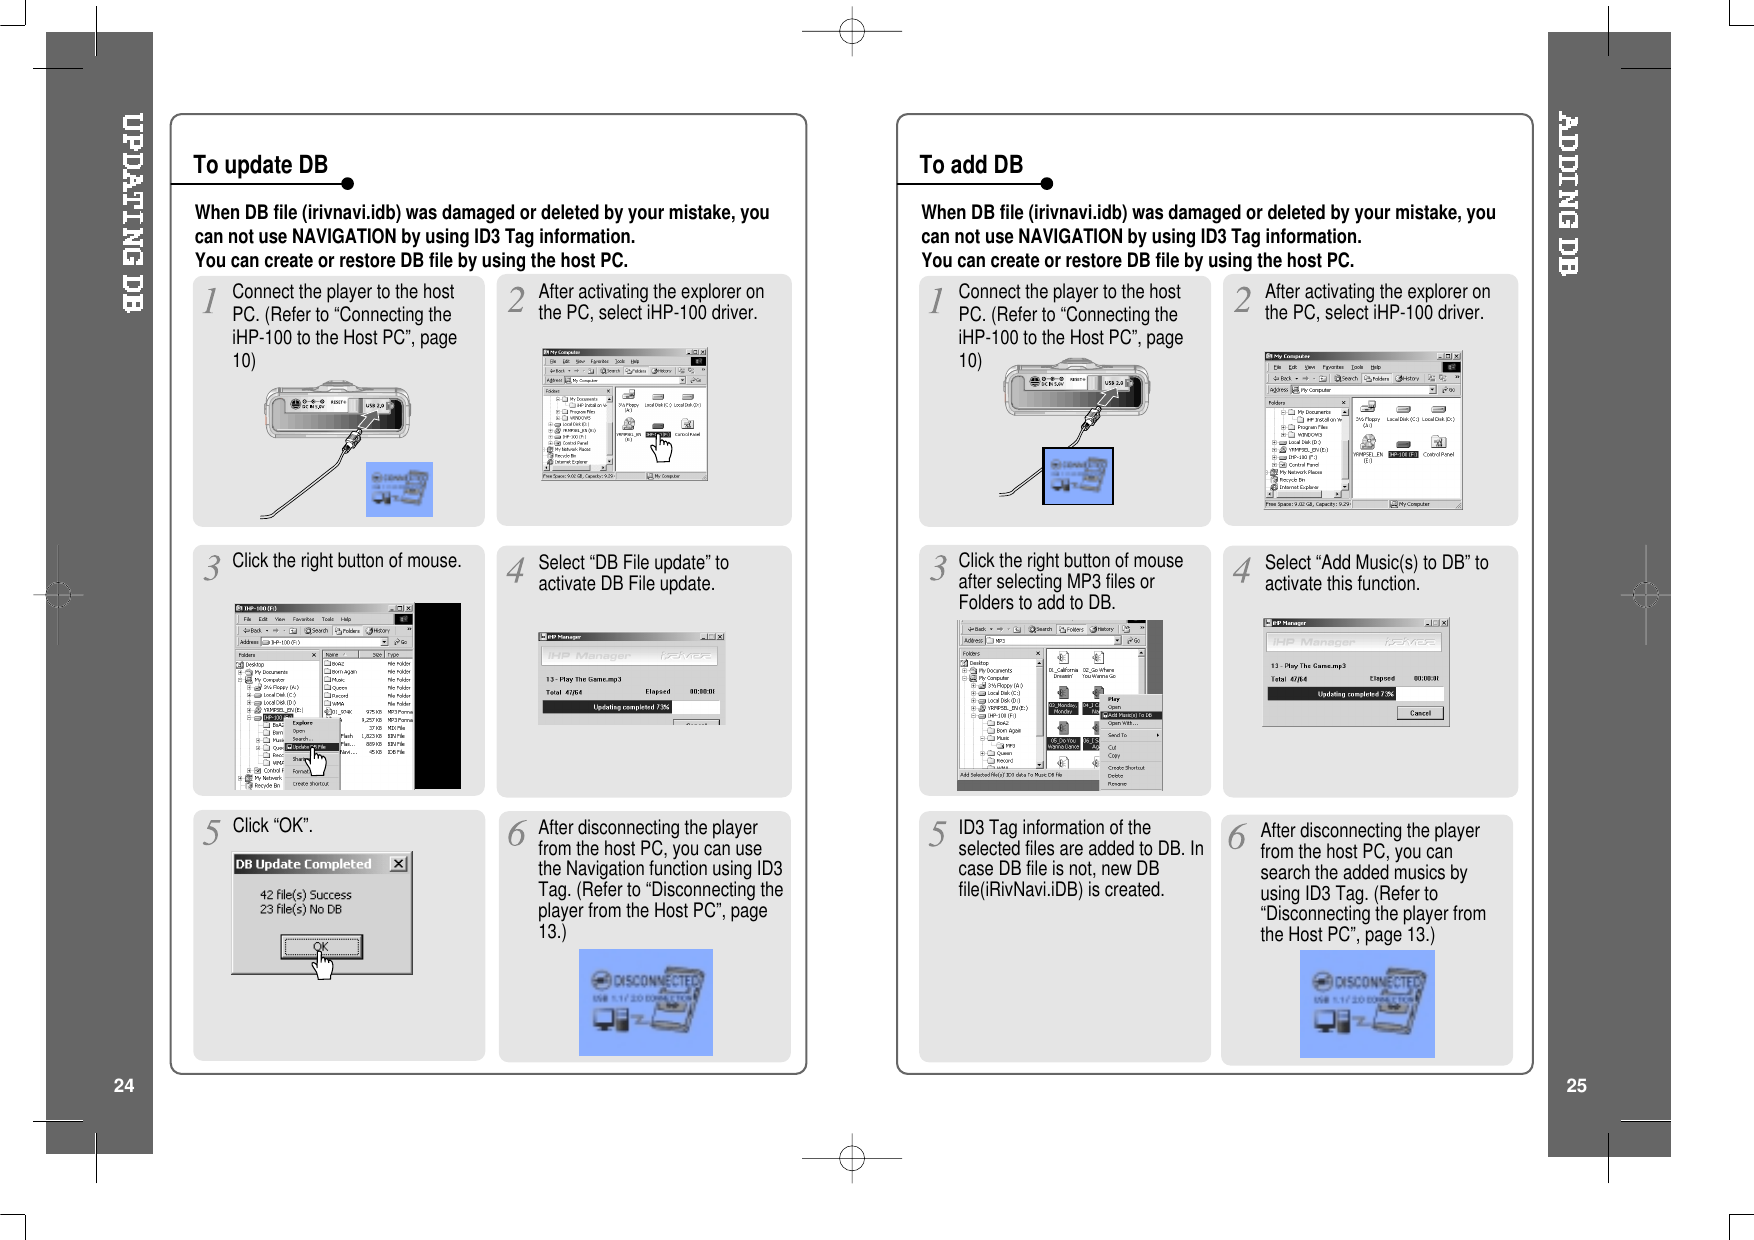
![Basic OperationNAVIGATIONTo RecordTo activate Navigation 1.To increase volume.2.To select the previous music forAudio files or station for FM.3.To increase volume.4.To select the next music for Audio files orstation for FM.5.To select NAVI/MENU function.6. Internal Microphone7. To change record standby mode or startrecording.8.To start or pause playback to change FM .9.To stop playback or recording or turn off.10.To select EQ mode, A-B repeat or memory stationsfor FM automatically.EQ : NORMAL ROCK JAZZCLASSIC U. BASS User EQ11. HOLD : the buttons on the player will not functionor not.To activate MenuTo adjust the volumePress + on volume button to increasevolume and press – on button todecrease volume.(Refer to page 26)Press NAVI/MENU button and find the desired track by pressing the VOL + or VOL –button, or , NAVI/MENU button.There are two methods using ID3 Tag and PATH/NAME of File on NAVIGATION.Refertopage21fordetails.Selecting FMMode when listeningFM :[Record standby]File playback FMreceiving[To select source to record][To start recording][Tostoprecording/Standby for recording][To select Bitrate Type] [To select File Type]16 17](https://usermanual.wiki/IRIVER/IHP100.users-manual-a/User-Guide-320964-Page-10.png)