Identiv PAT11211000 Physical Access Terminal User Manual PAT111 Installation Manual
Identiv, Inc Physical Access Terminal PAT111 Installation Manual
Identiv >
Contents
- 1. Users Manual 1111
- 2. Users Manual 1121
Users Manual 1111
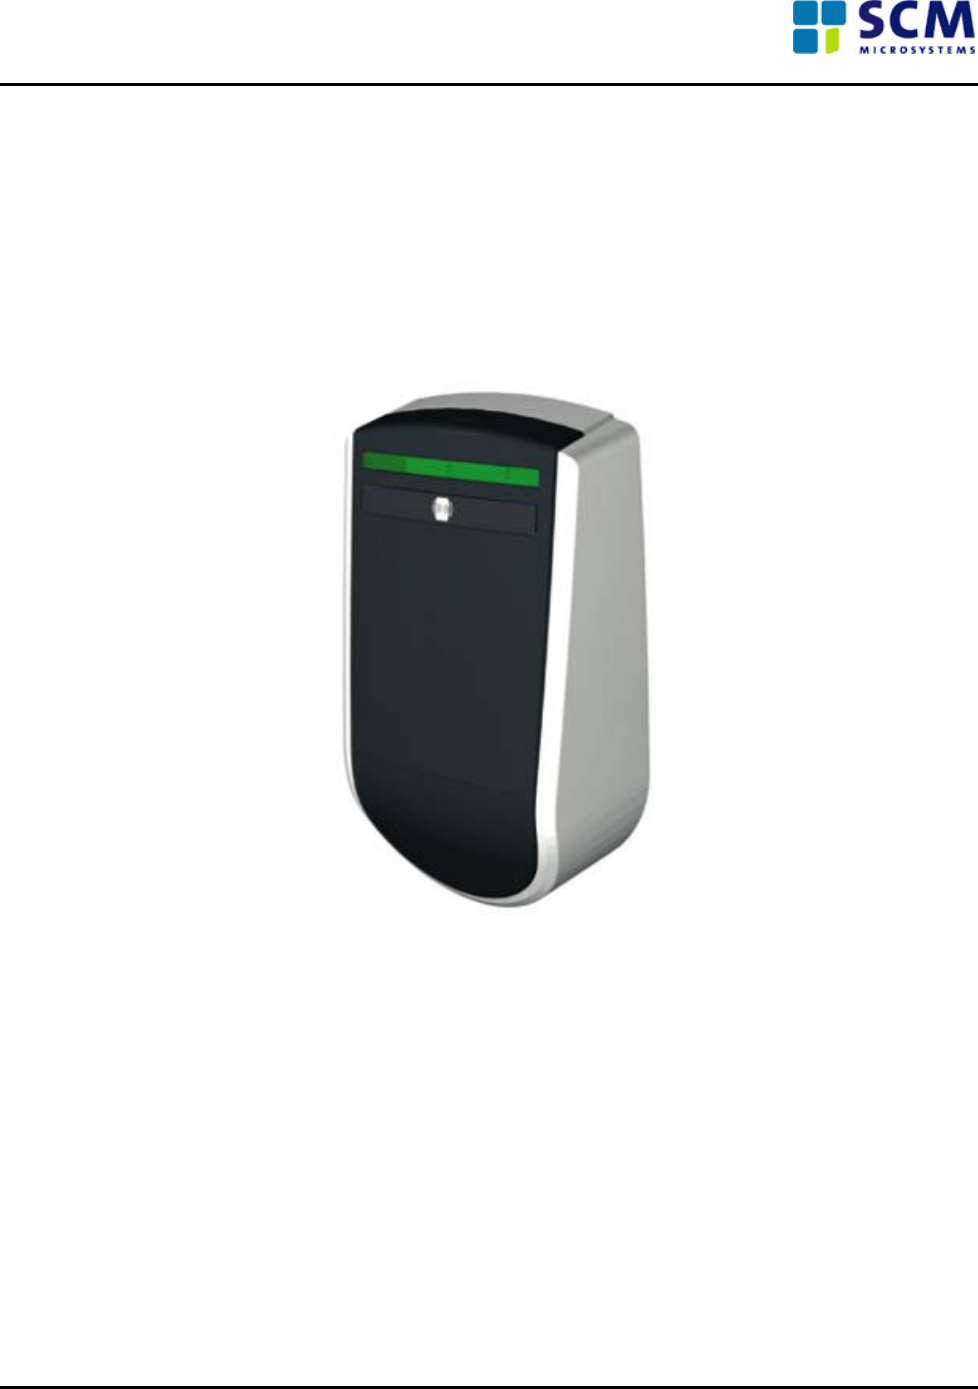
PAT 1111
Installation Manual
Rev 1.0
31st Aug 2005
PAT 1111 Installation Manual Page 1 of 6

PAT 1111 Installation Manual Page 2 of 6
Package Details
• PAT 1111
• Mounting plate and screws
• Test card (contactless)
• Installation manual
Recommendations
• Cable, 10 conductor (Wiegand/Magstripe), 22GA Shielded, Upto 150 mtrs, Line Resistance 2.5 ohms
• Cable, 8 conductor (RS485), 22AWG twisted pair, Upto 4000 feet
• Regulated DC power supply unit
Specifications
Host Interface • Wiegand/Magstripe (CLK/Data)
• RS485 (2 or 4 wires)
• 3 relay inputs to set reader state
SAM • ISO 7816 1-3
• T=0, T=1 protocol support (5V card)
• Communication speed up to 344,086 bps
Contactless • ISO 14443 Type A and B (13.56 MHz)
• Supports ISO 14443 part 1 to 4
• Operating distance: 1 inch
• Communication speed: 106 Kbps
• Internal 3DES for card authentication (DESFire)
Human Interface • 1 LED beam (green and red) for access information
(granted and denied)
• 1 LED for contactless card access
• Buzzer for user acoustic feedback
Application • Full SDK (software development kit) available
• Field Secure firmware upgrade
Dimensions • LWH 148 84 46 mm
Power • 10V to 16V DC – 200mA
Approvals • FCC, UL 294, CE
Installation Instructions
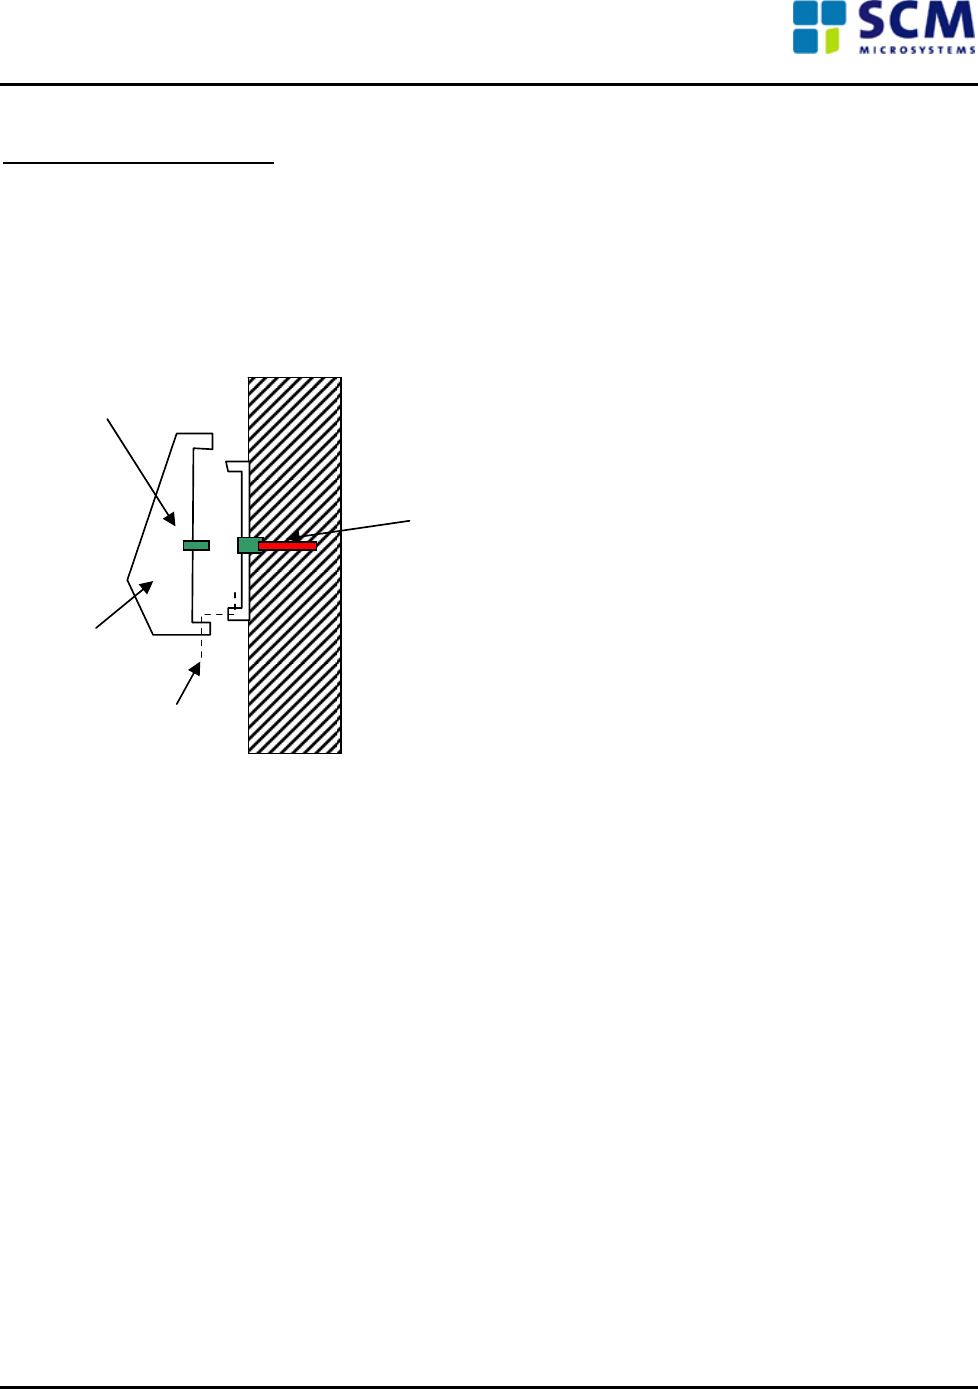
• Fix the mounting plate in an appropriate position on the wall, where the cable can be easily
connected to the back of the reader.
• Place the reader on the mounting plate and fix it by using mounting screw.
This is shown in the picture below.
Unit
Mounting
plate
Connector
Male - female
Screw
Cable
PAT 1111 Installation Manual Page 3 of 6
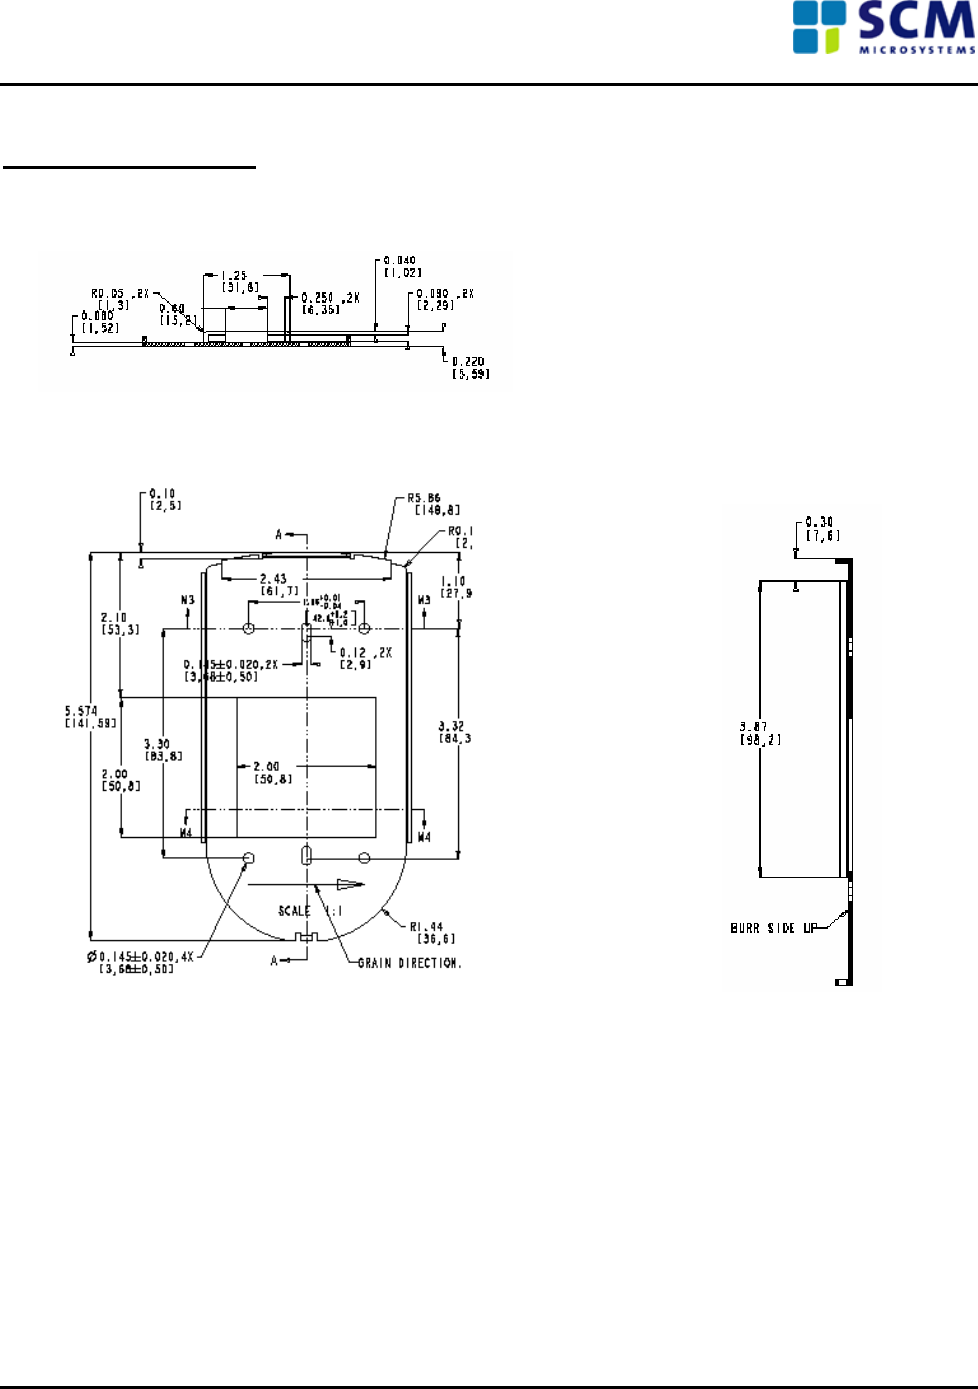
Mounting plate details
Fig 1.1 Mounting plate (Horizontal view)
Fig 1.2 Mounting plate (Normal view) Fig 1.3 Mounting plate (Vertical view)
PAT 1111 Installation Manual Page 4 of 6
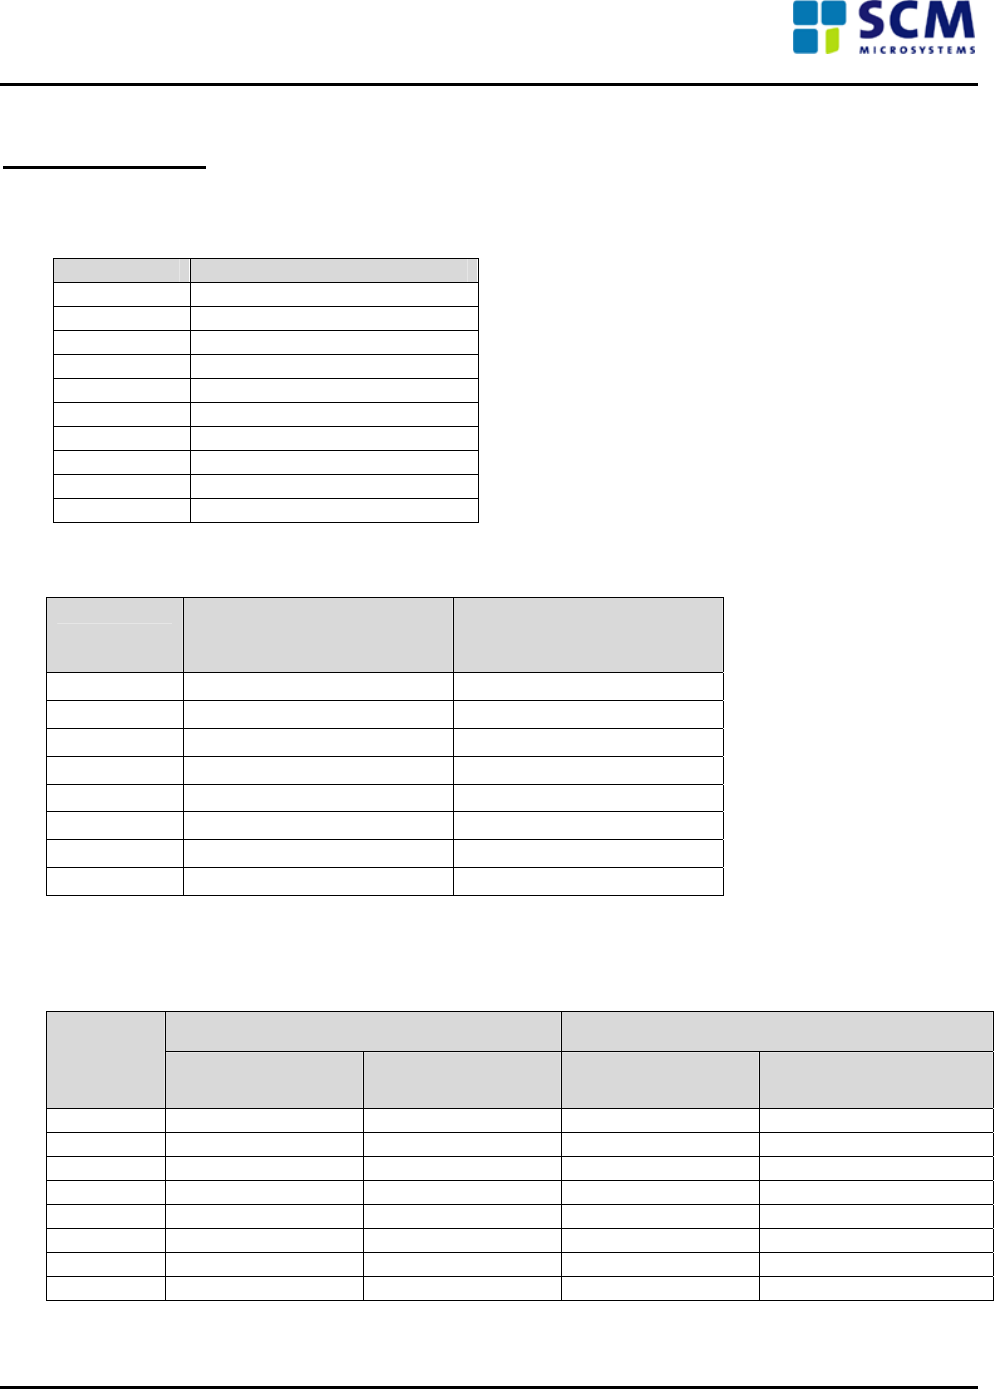
Connector details
Connector details for Wiegand/Magstripe – 10pin Terminal Block
Pin Number Signal Name
1 Relay IN1
2 Relay IN2
3 Relay IN3
4 Relay GND
5 Wiegand Data0 / Mag Data
6 Wiegand Data1 / Mag CLK
7 Wiegand LED IN
8 Wiegand Buzzer IN
9 Wiegand GND
10 Wiegand +12V
Connector details for RS485 – 8pin Terminal Block
Pin Number Signal Name
(Full Duplex Operation ) Signal Name
(Half Duplex Operation)
1 RX_A RX/TX_A
2 RX_B RX/TX_B
3 TX_A No connection
4 TX_B No connection
5 RS485 GND RS485 GND
6 SHIELD SHIELD
7 Power +12V Power +12V
8 Power GND Power GND
A – Non-inverted RS485 differential signal; B – Inverted RS485 differential signal
Configuration details for RS485 DIP switch - 8 position, Termination & Biasing Selection Switch.
Full Duplex RS485 Half Duplex RS485
Switch
Position
With Termination
and Biasing OFF With Termination
and Biasing ON** With Termination
and Biasing OFF With Termination and
Biasing ON**
1 OFF ON OFF ON
2 OFF ON OFF ON
3 OFF ON OFF ON
4 OFF ON OFF OFF
5 OFF OFF ON ON
6 OFF OFF ON ON
7 ON ON OFF OFF
8 OFF OFF ON ON
**Only for reader installed at the ends in the RS485 network
PAT 1111 Installation Manual Page 5 of 6
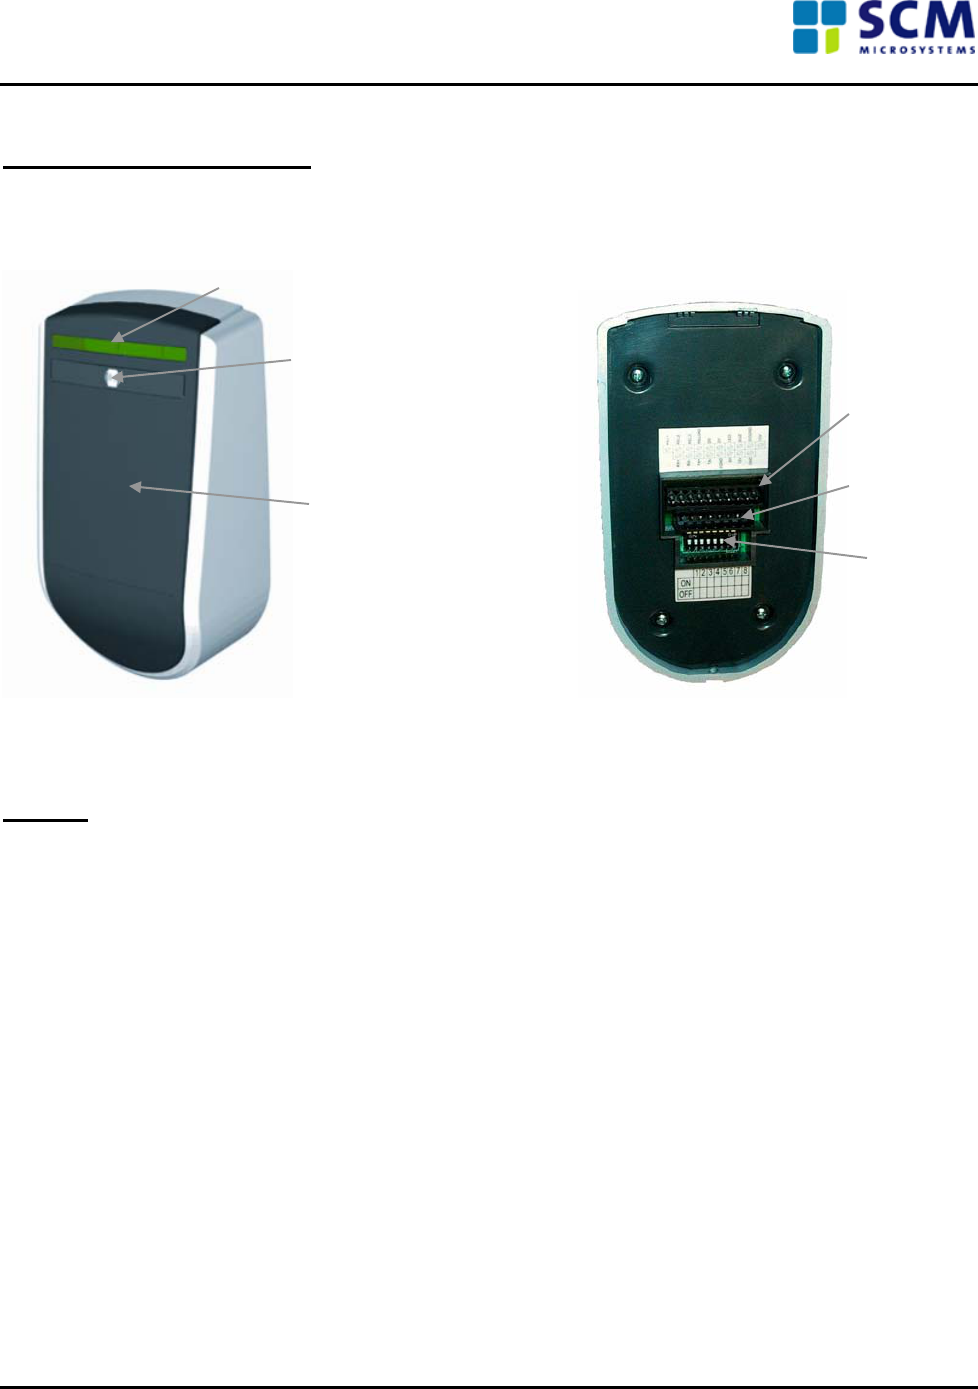
Photographs of the Reader
Front view Rear view
Access Granted/Denied
Indication LED
Contactless LED
10 pin terminal block for
Wiegand/Magstripe
8 pin terminal block for
RS485
Contactless field
RS485 DIP switch
Testing
• Connect the reader to the host through Wiegand/Magstripe/RS485 interface.
• Switch on the power to the reader and check if the contactless LED glows. This signifies that the
reader is ready.
• Wave the test contactless card in front of the reader. Check for the contact less LED to blink steadily.
This activity of the reader signifies that the reader is reading the data from the card and passing it to
the host.
• For a successful read, the access control LED bar should glow in GREEN and a short beep must be
heard from the reader.
End of the document
PAT 1111 Installation Manual Page 6 of 6