Infopia IGM-1003F Blood Glucose Test Meter User Manual
OSANG Healthcare Co., Ltd. Blood Glucose Test Meter
UserManual.wiki
>
Infopia
>
IGM 1003F User Manual
User Manual
Navigation menu
Upload a User Manual
Namespaces
Wiki Guide
HTML
PDF
Info
Views
User Manual
Discussion / Help
Navigation


![Transferring Your Result Data You can transfer test results from the GluNEO Lite Smart meter to a computer. You will need to download the software from the following web site (http://www.osanghc.com) and purchase the computer cable from your local representative. This is sold separately. [User] [PC] [cable]](https://usermanual.wiki/Infopia/IGM-1003F/User-Guide-3815640-Page-37.png)
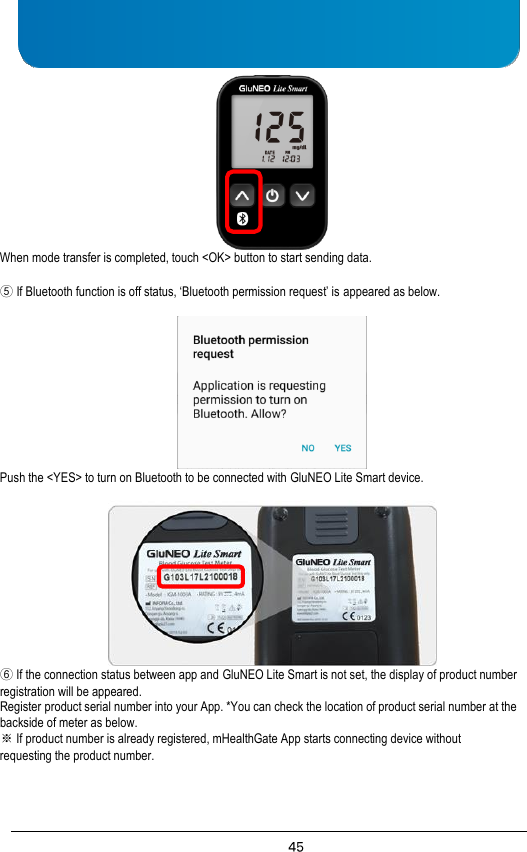
![[Display of product number registration] [In case that registered product number is different from the device product number]](https://usermanual.wiki/Infopia/IGM-1003F/User-Guide-3815640-Page-46.png)
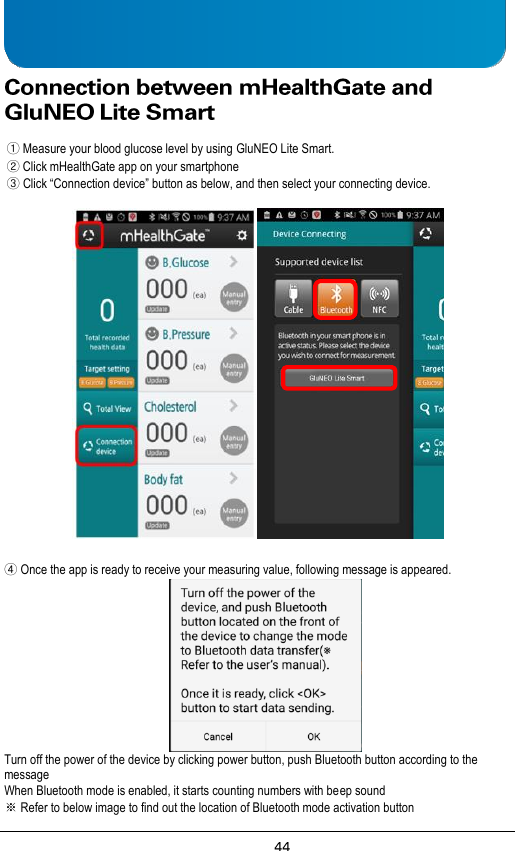
![[Display of Data transmission] ⑦ Once the data is completely transferred, below display will be appeared. Select <Select & Save> button or <Save all> button, and store measuring value into your App. ※ If several people use one GluNEO Lite Smart device together, select <Select & Save> button to select and store your measurement.](https://usermanual.wiki/Infopia/IGM-1003F/User-Guide-3815640-Page-47.png)