Inmarsat Solutions GLOBEI250S3BDE Maritime Satelline Voice and Data Router User Manual
Inmarsat Solutions (US) Inc. Maritime Satelline Voice and Data Router
UserManual.wiki
>
Inmarsat Solutions
>
GLOBEI250S3BDE User Manual
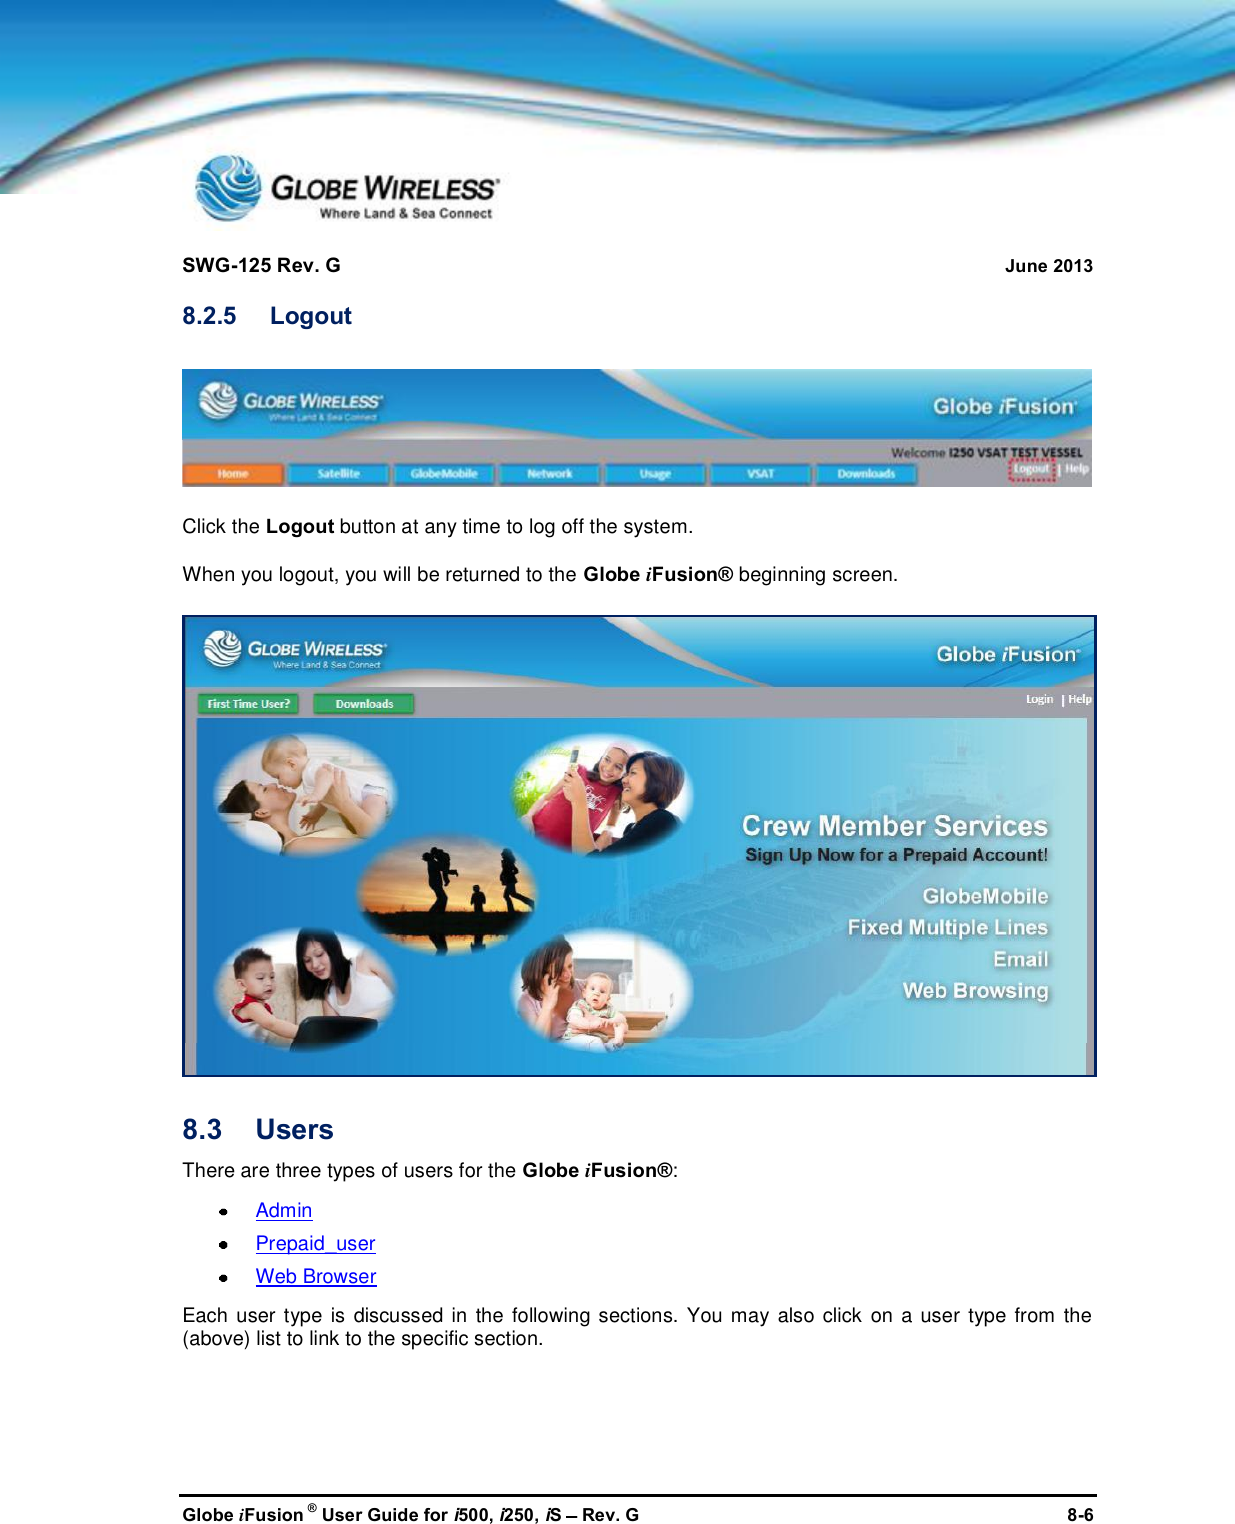
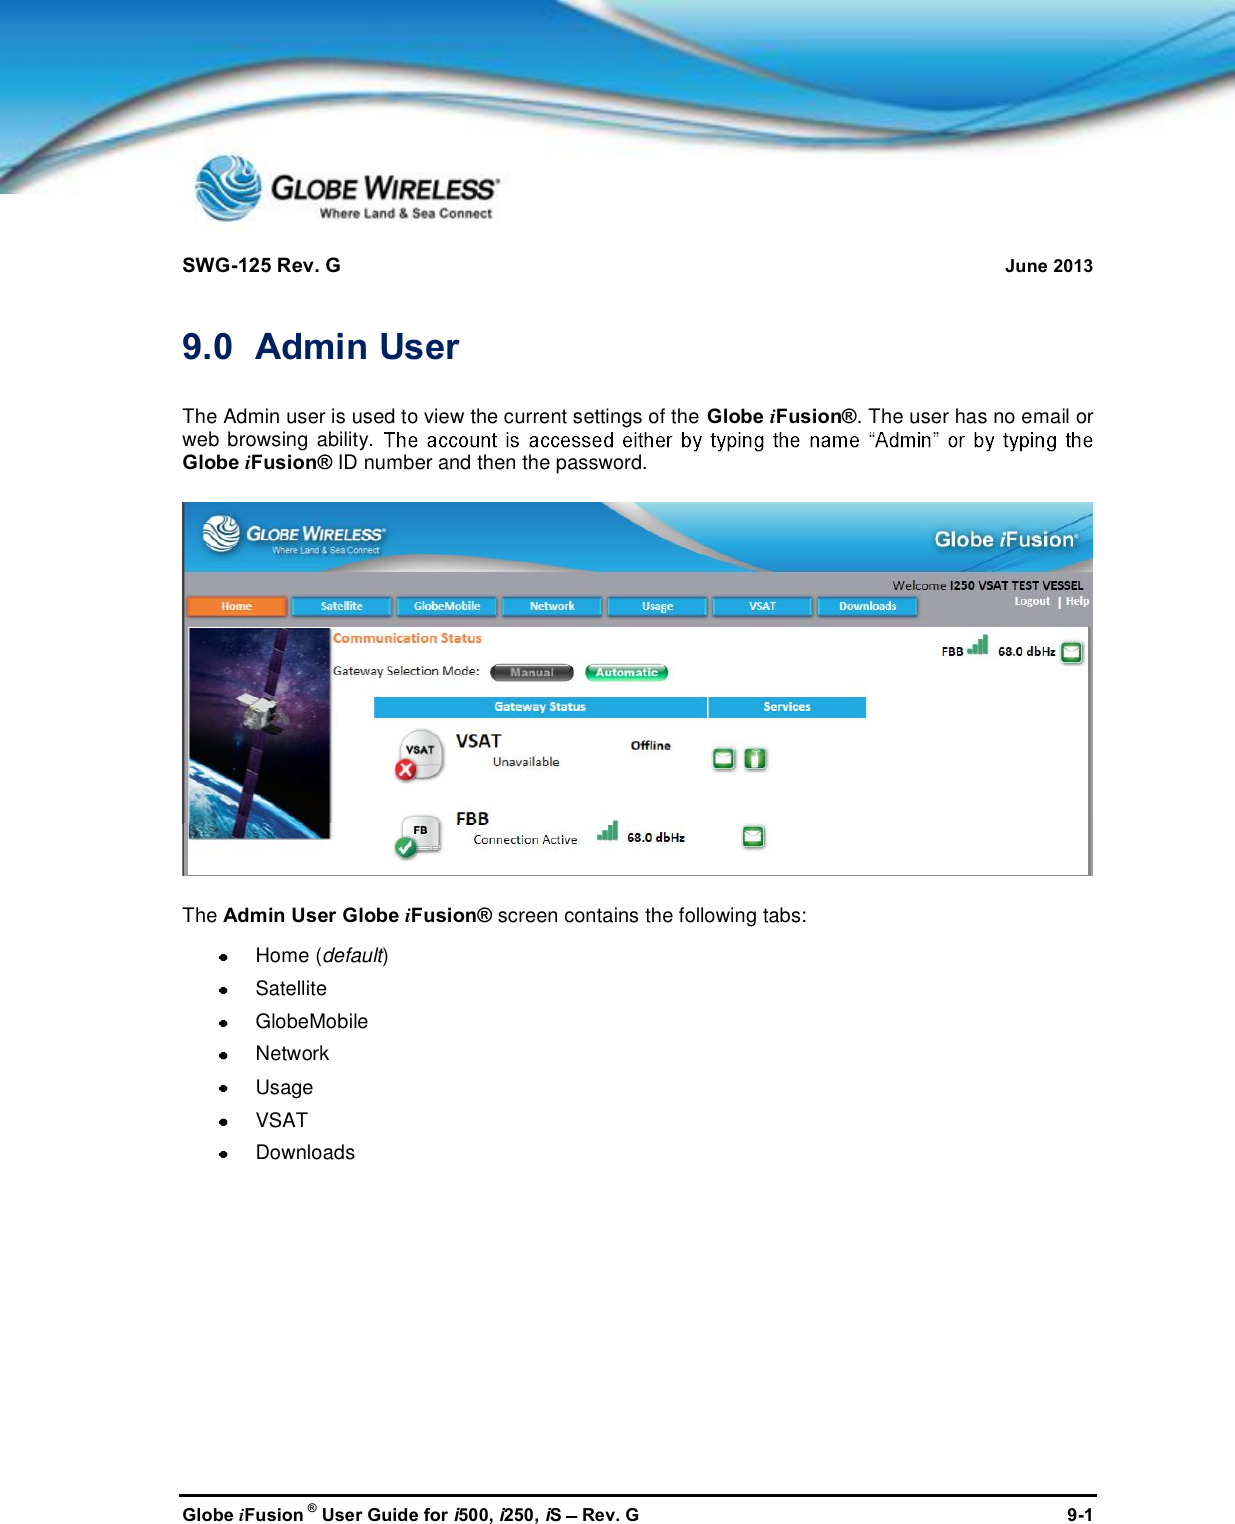
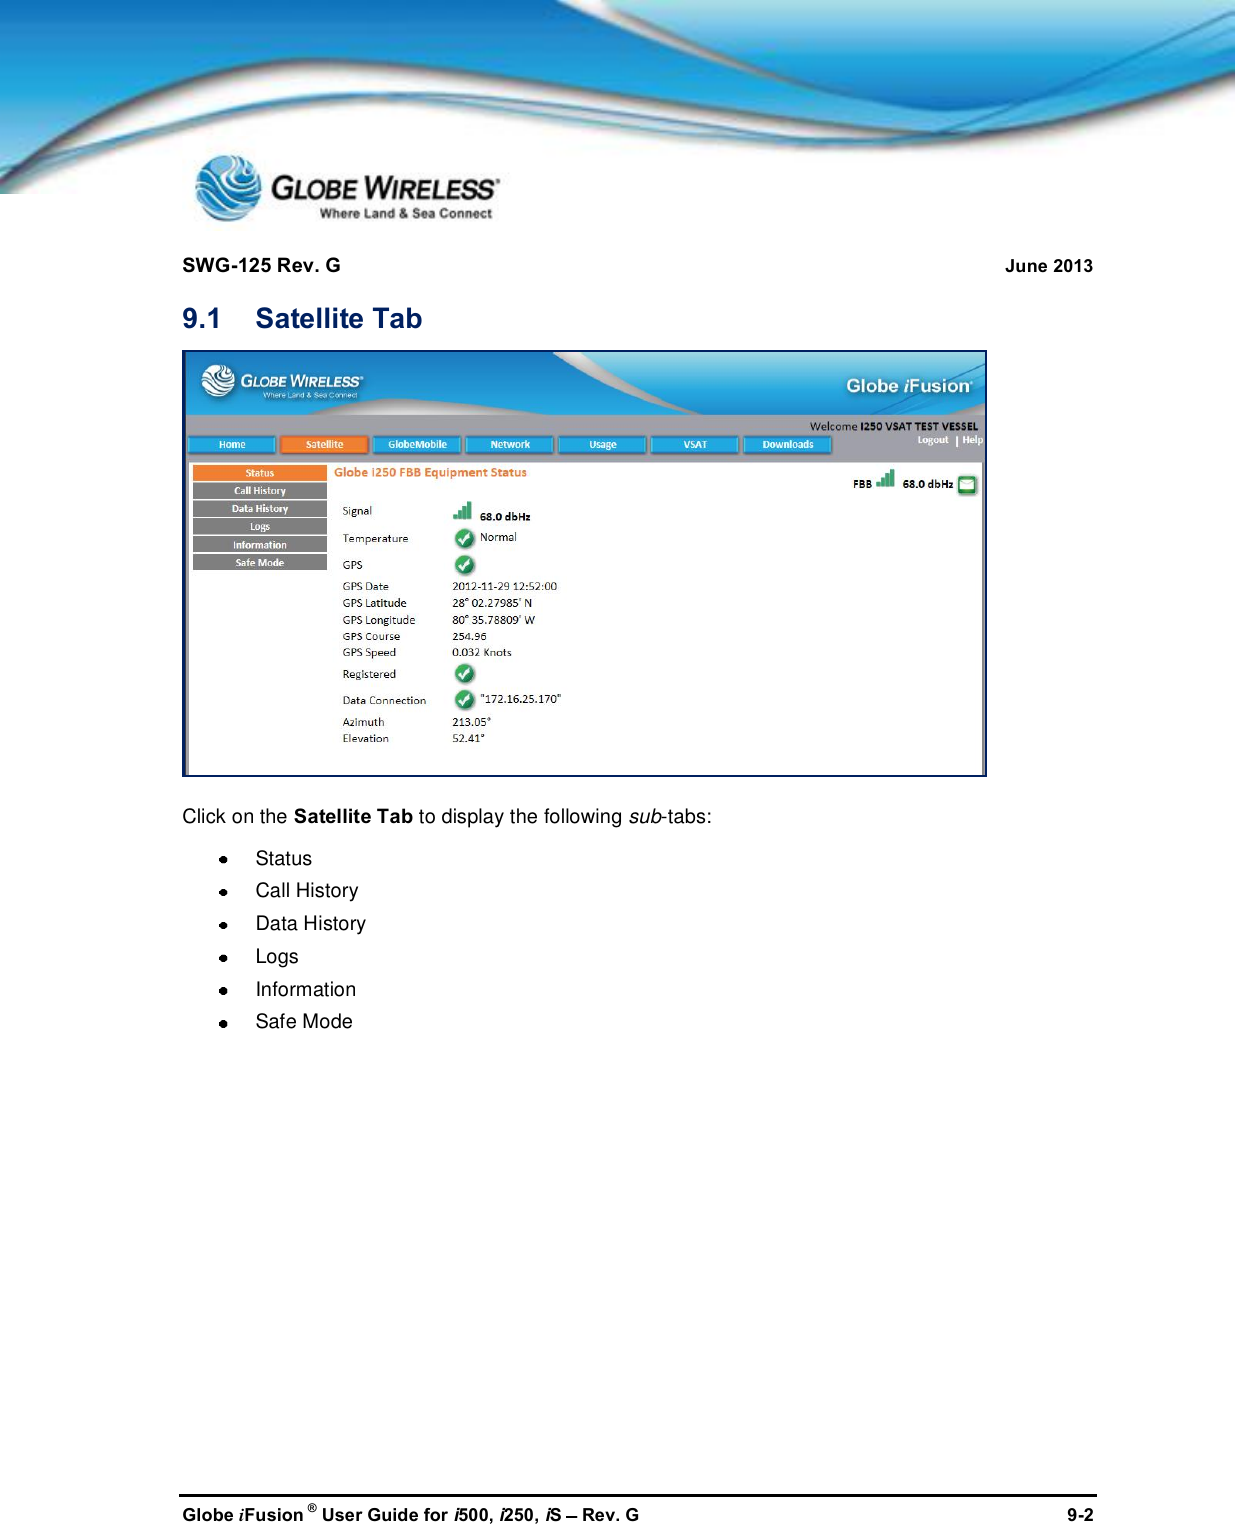
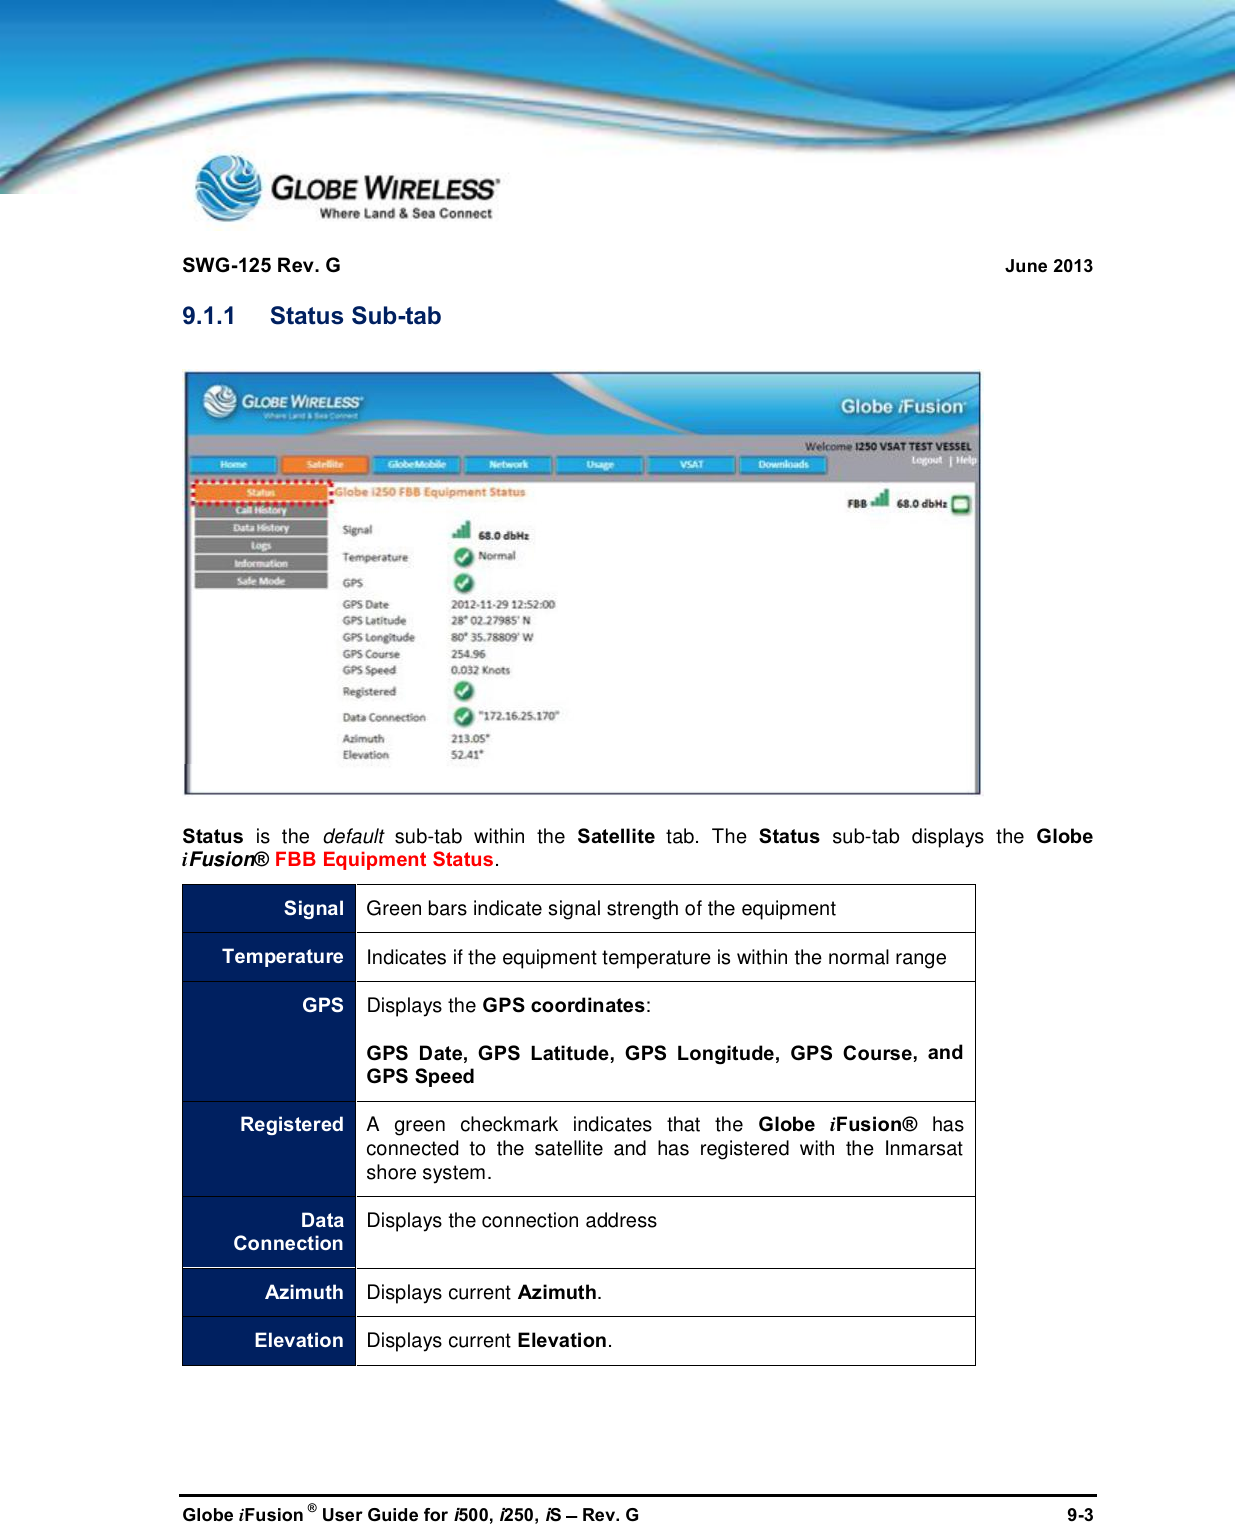
User Manual
Navigation menu
Upload a User Manual
Namespaces
Wiki Guide
HTML
PDF
Info
Views
User Manual
Discussion / Help
Navigation

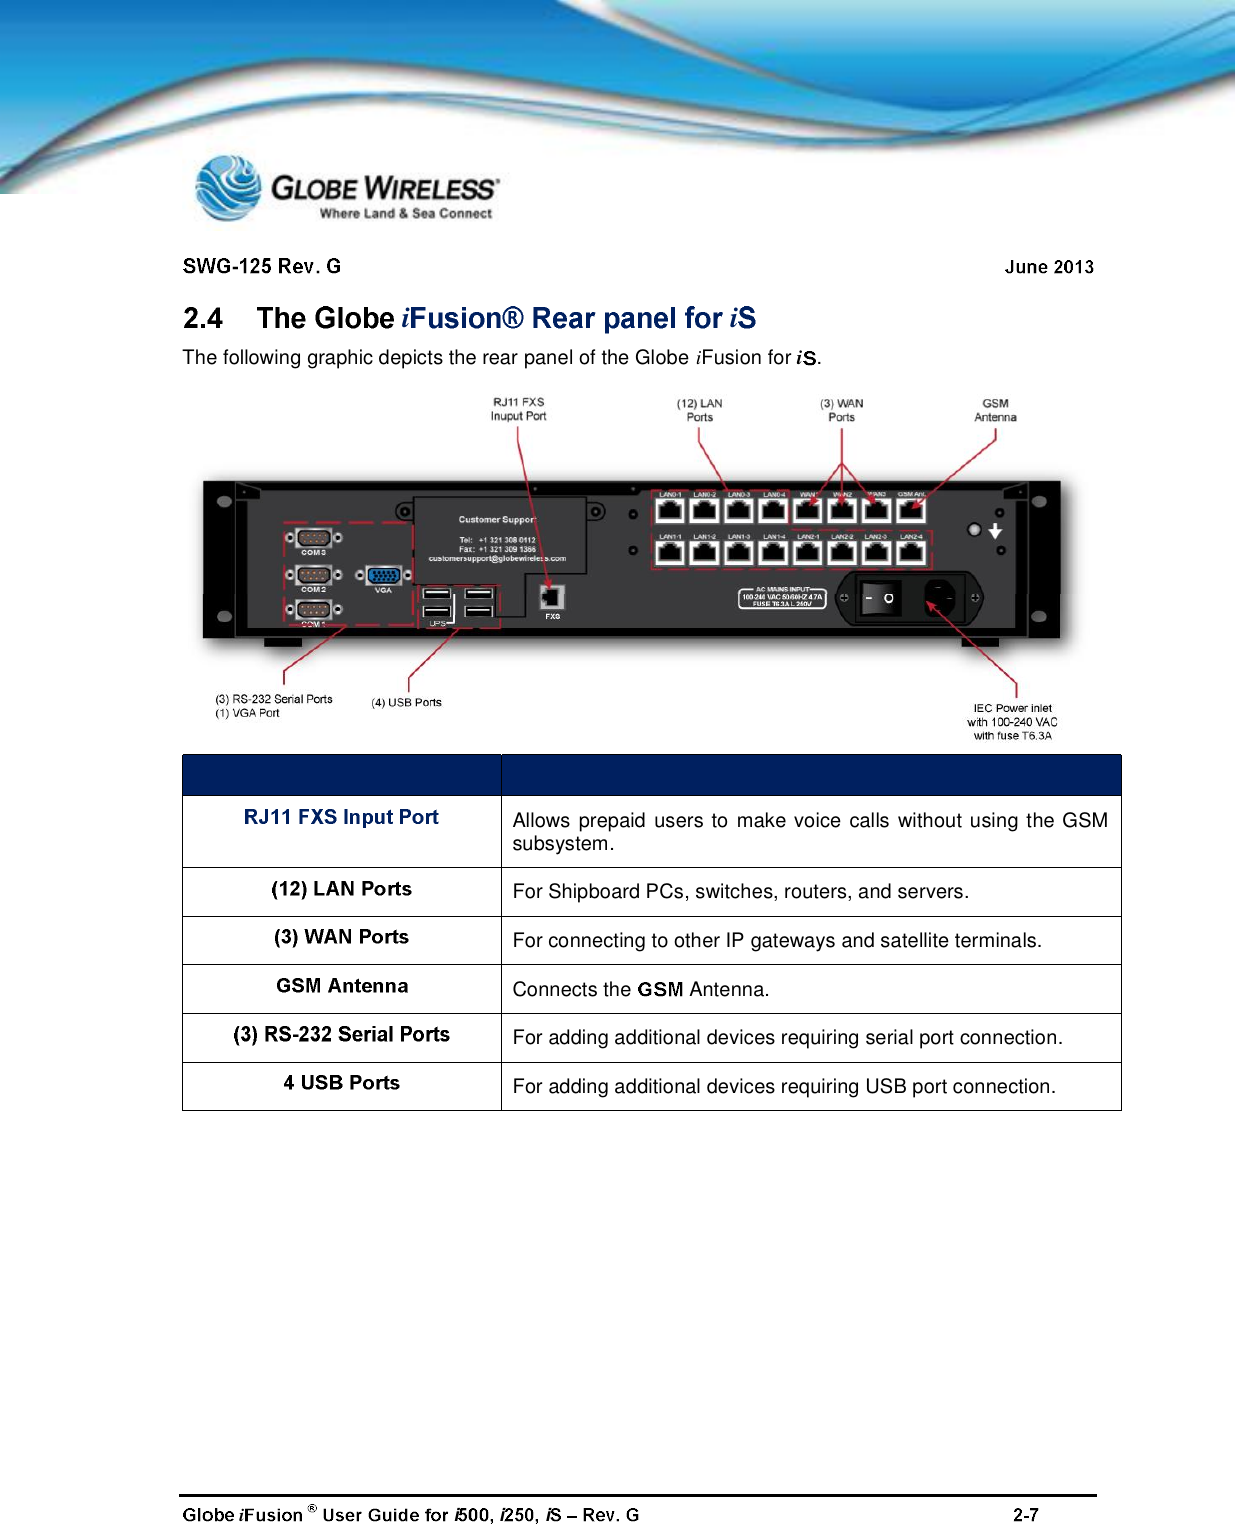
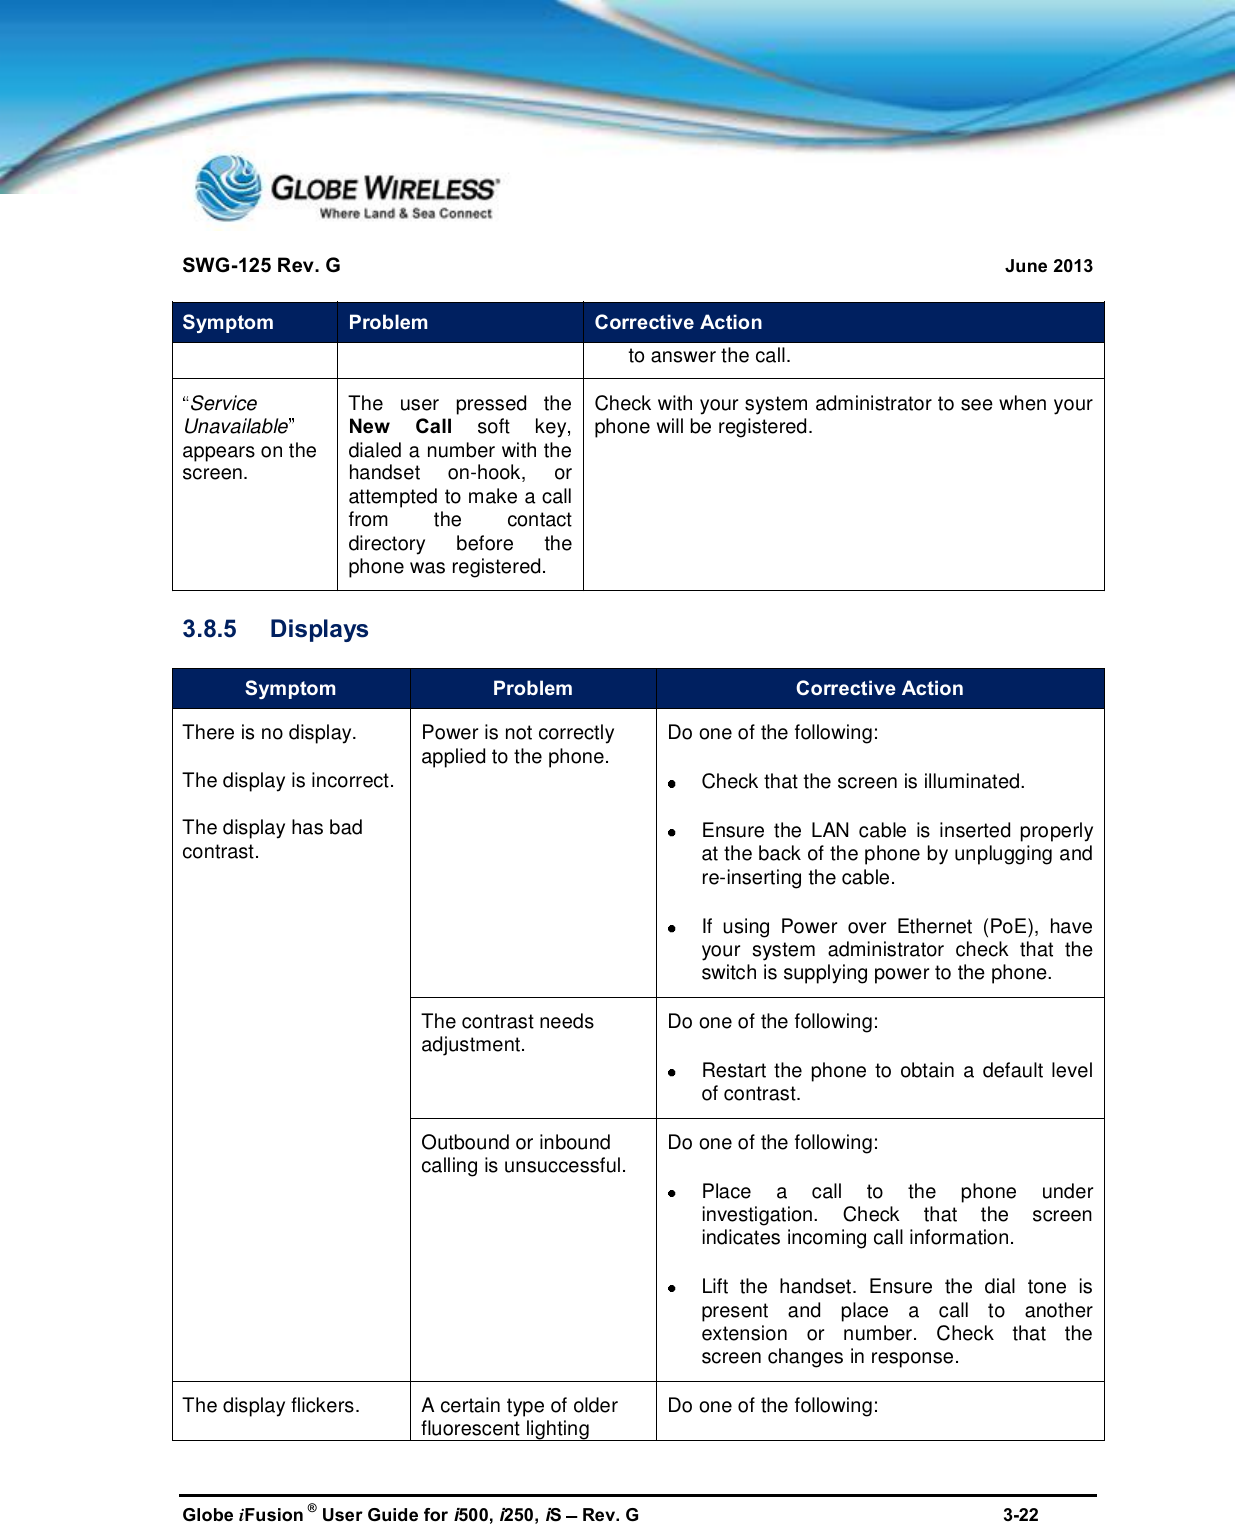
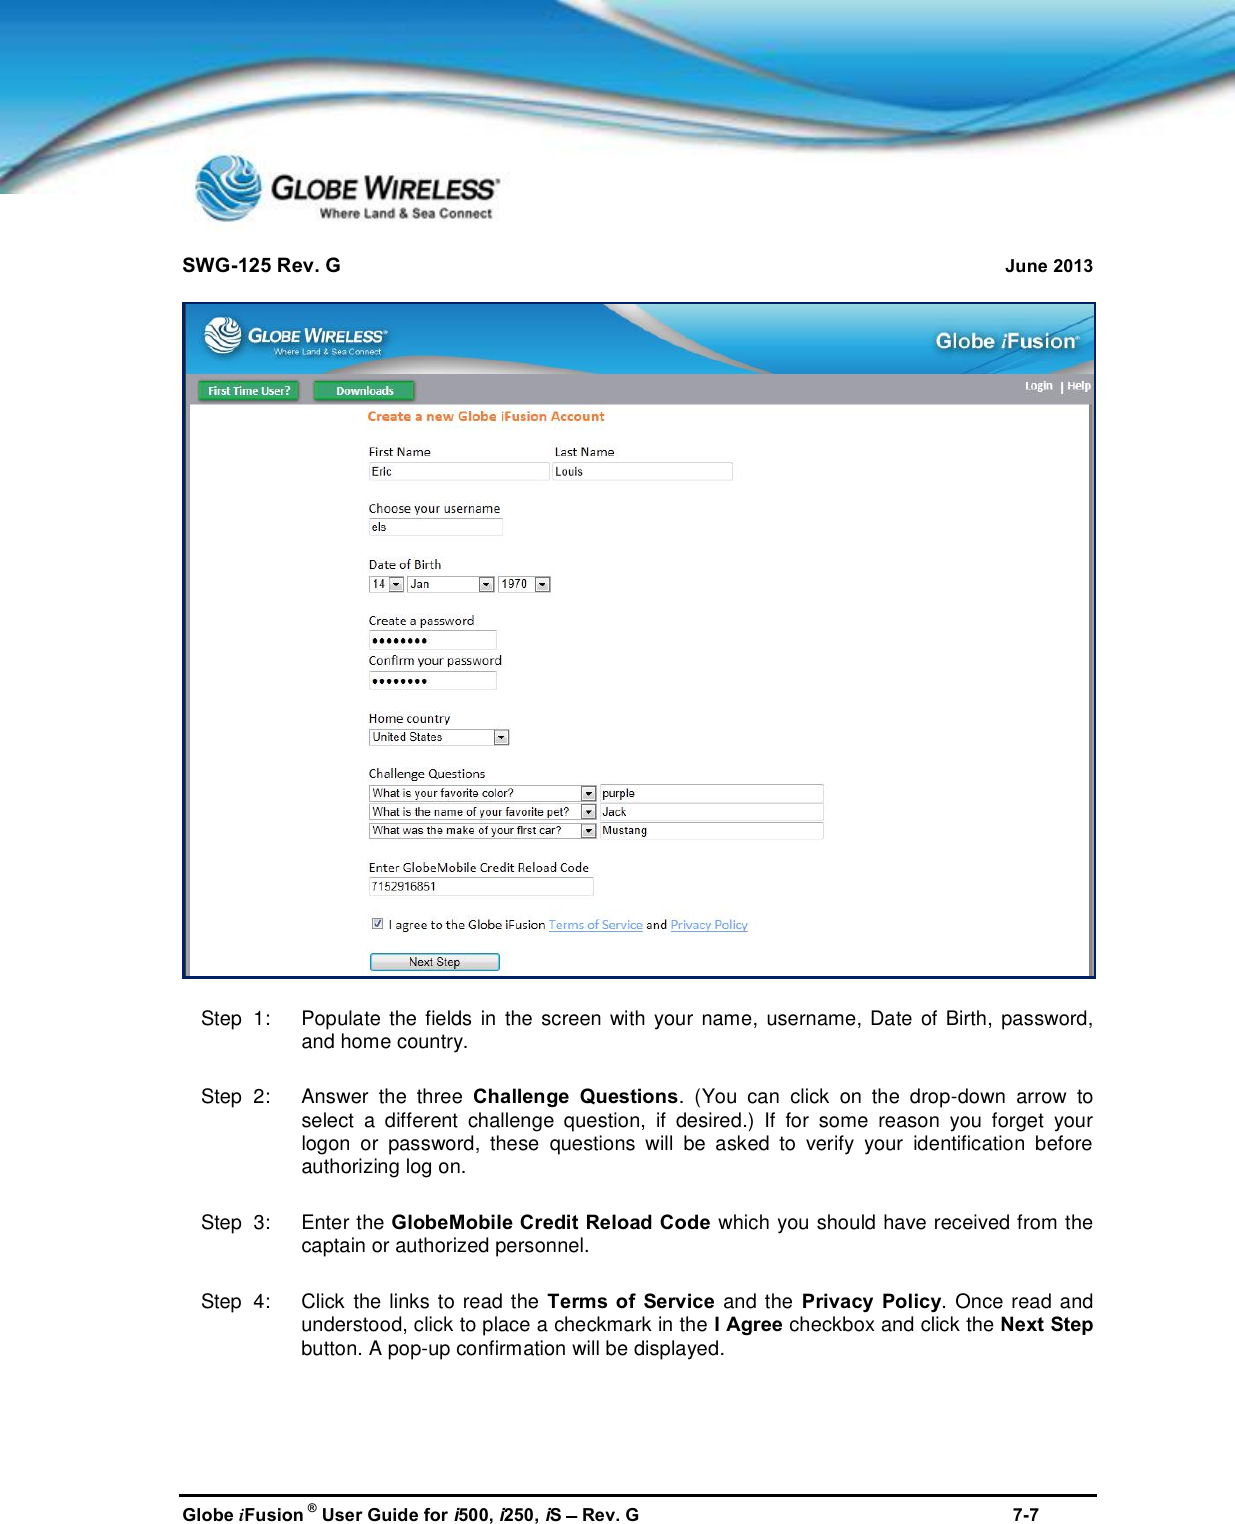
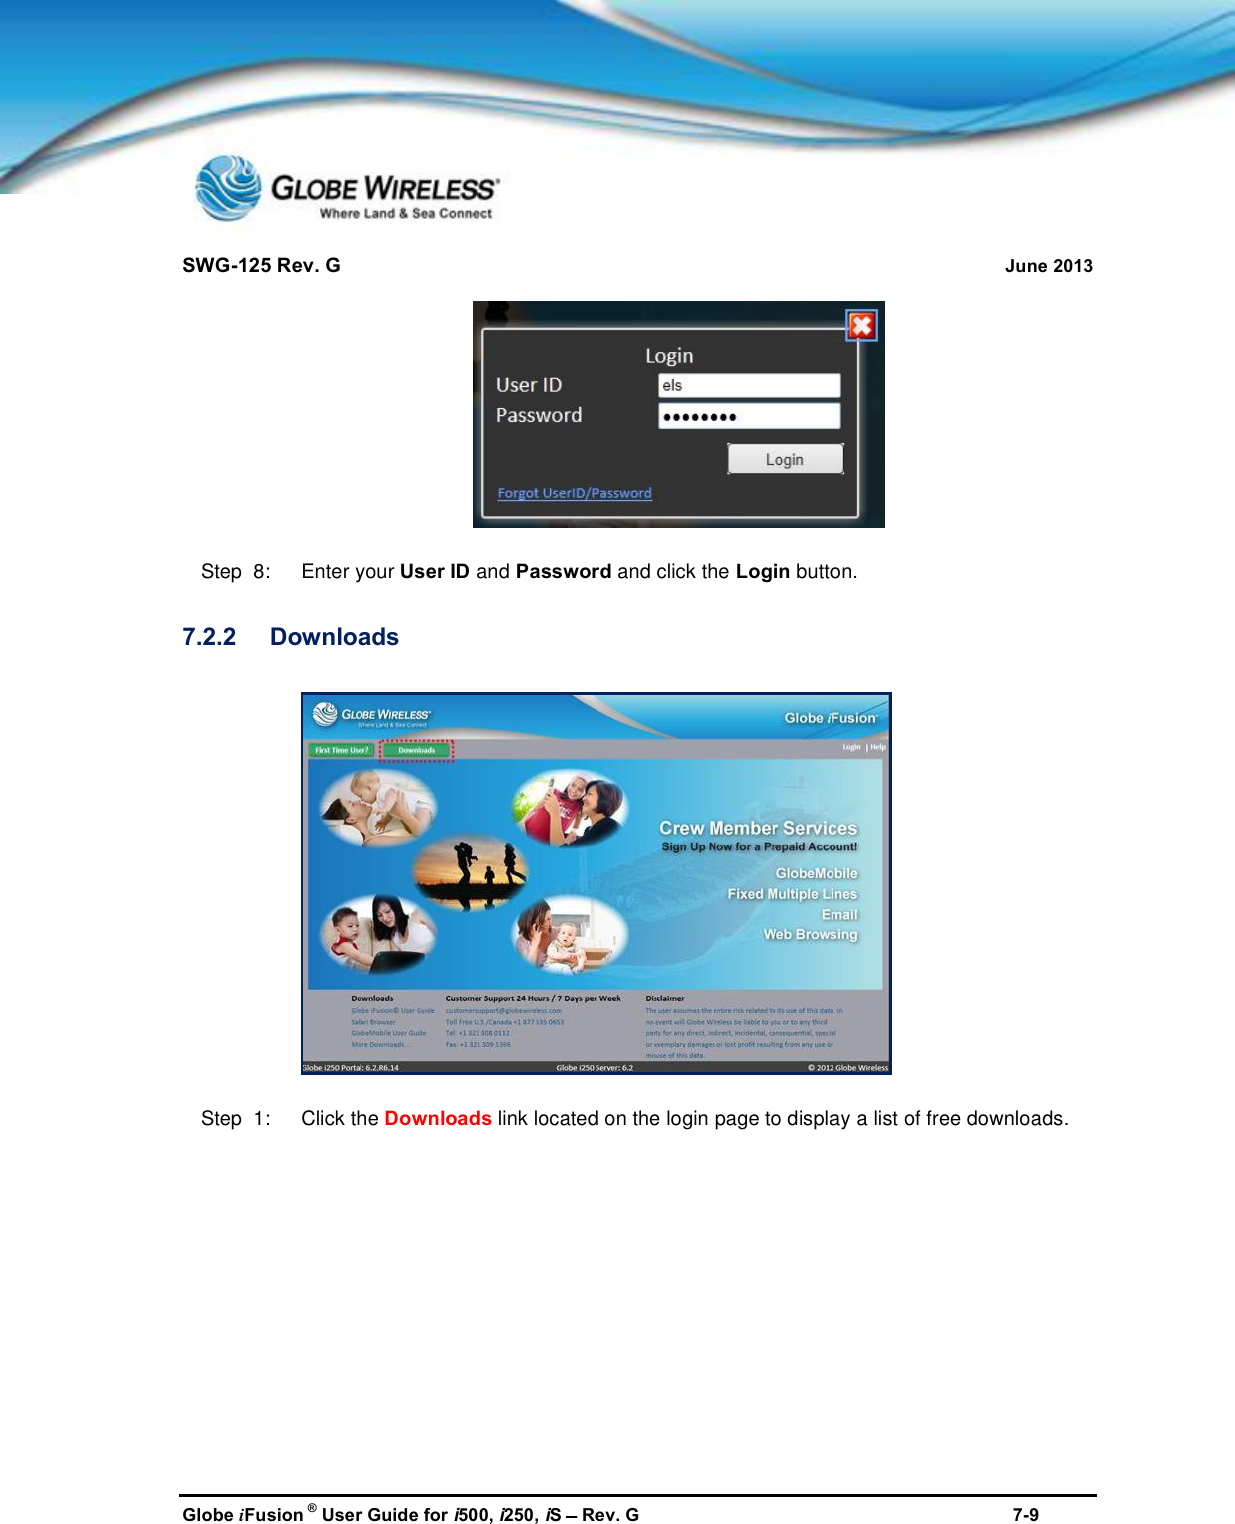
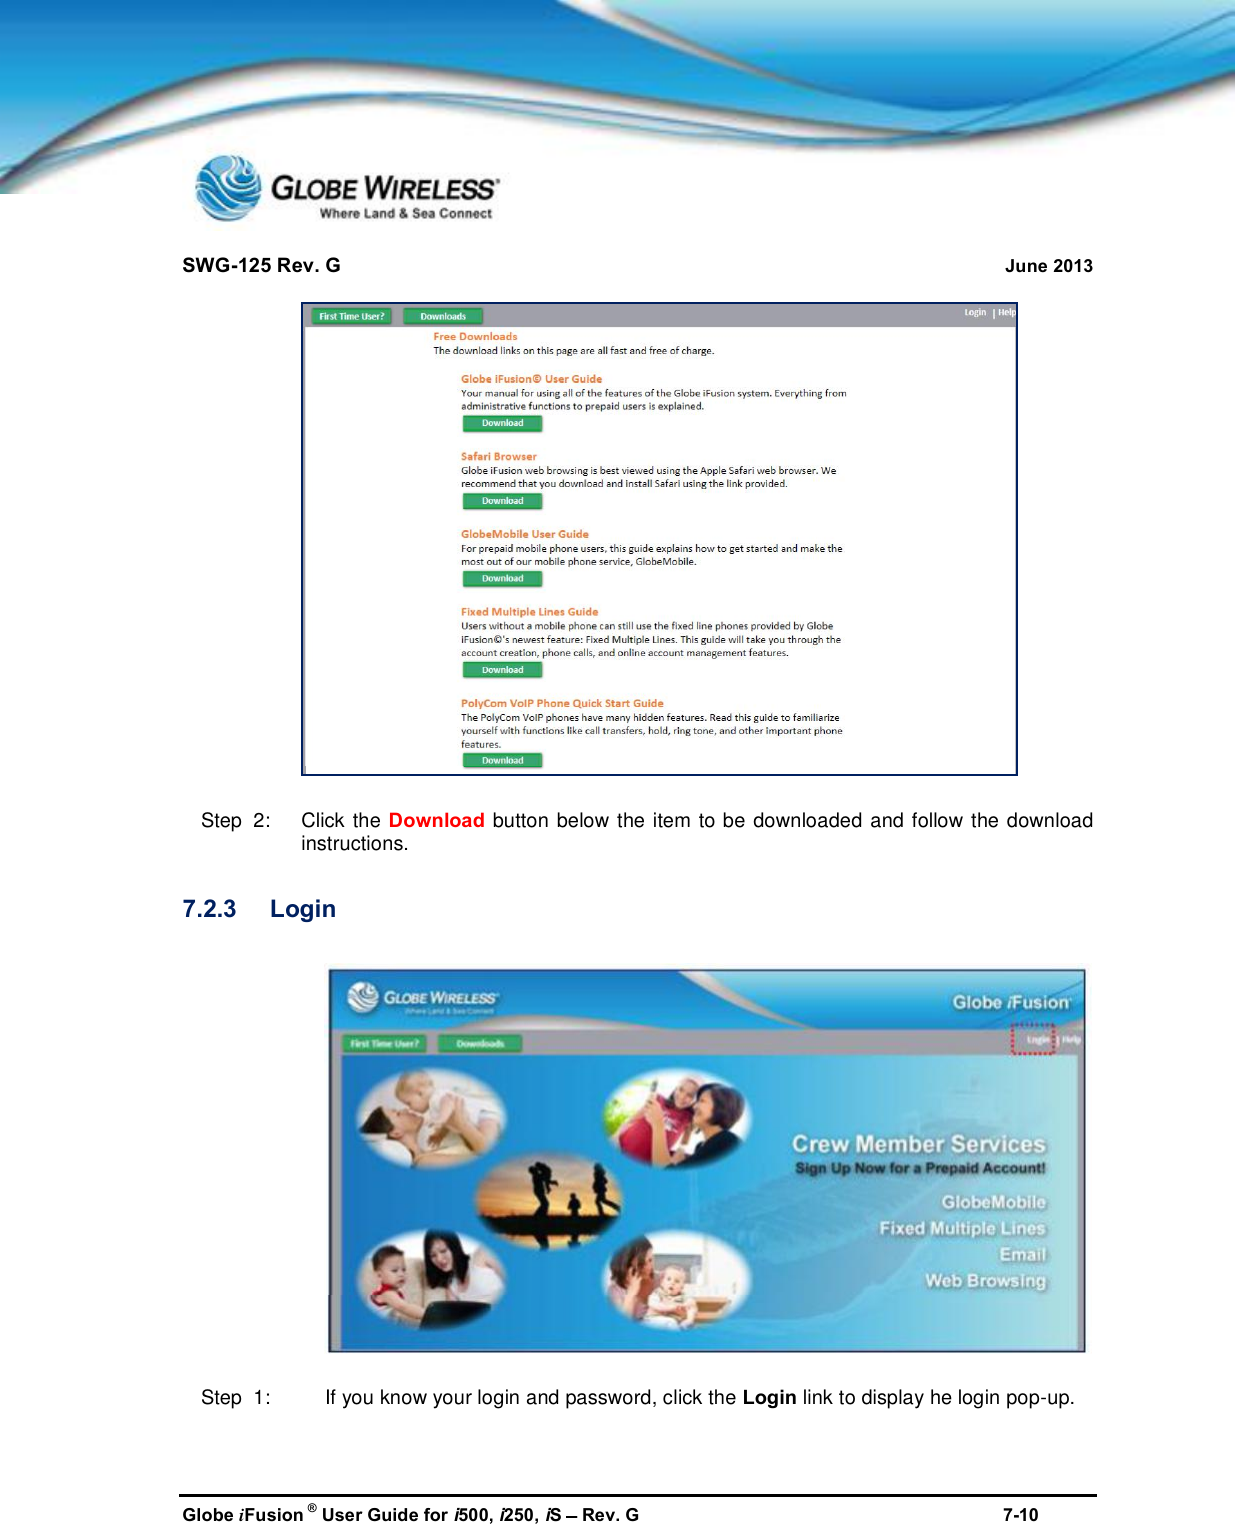
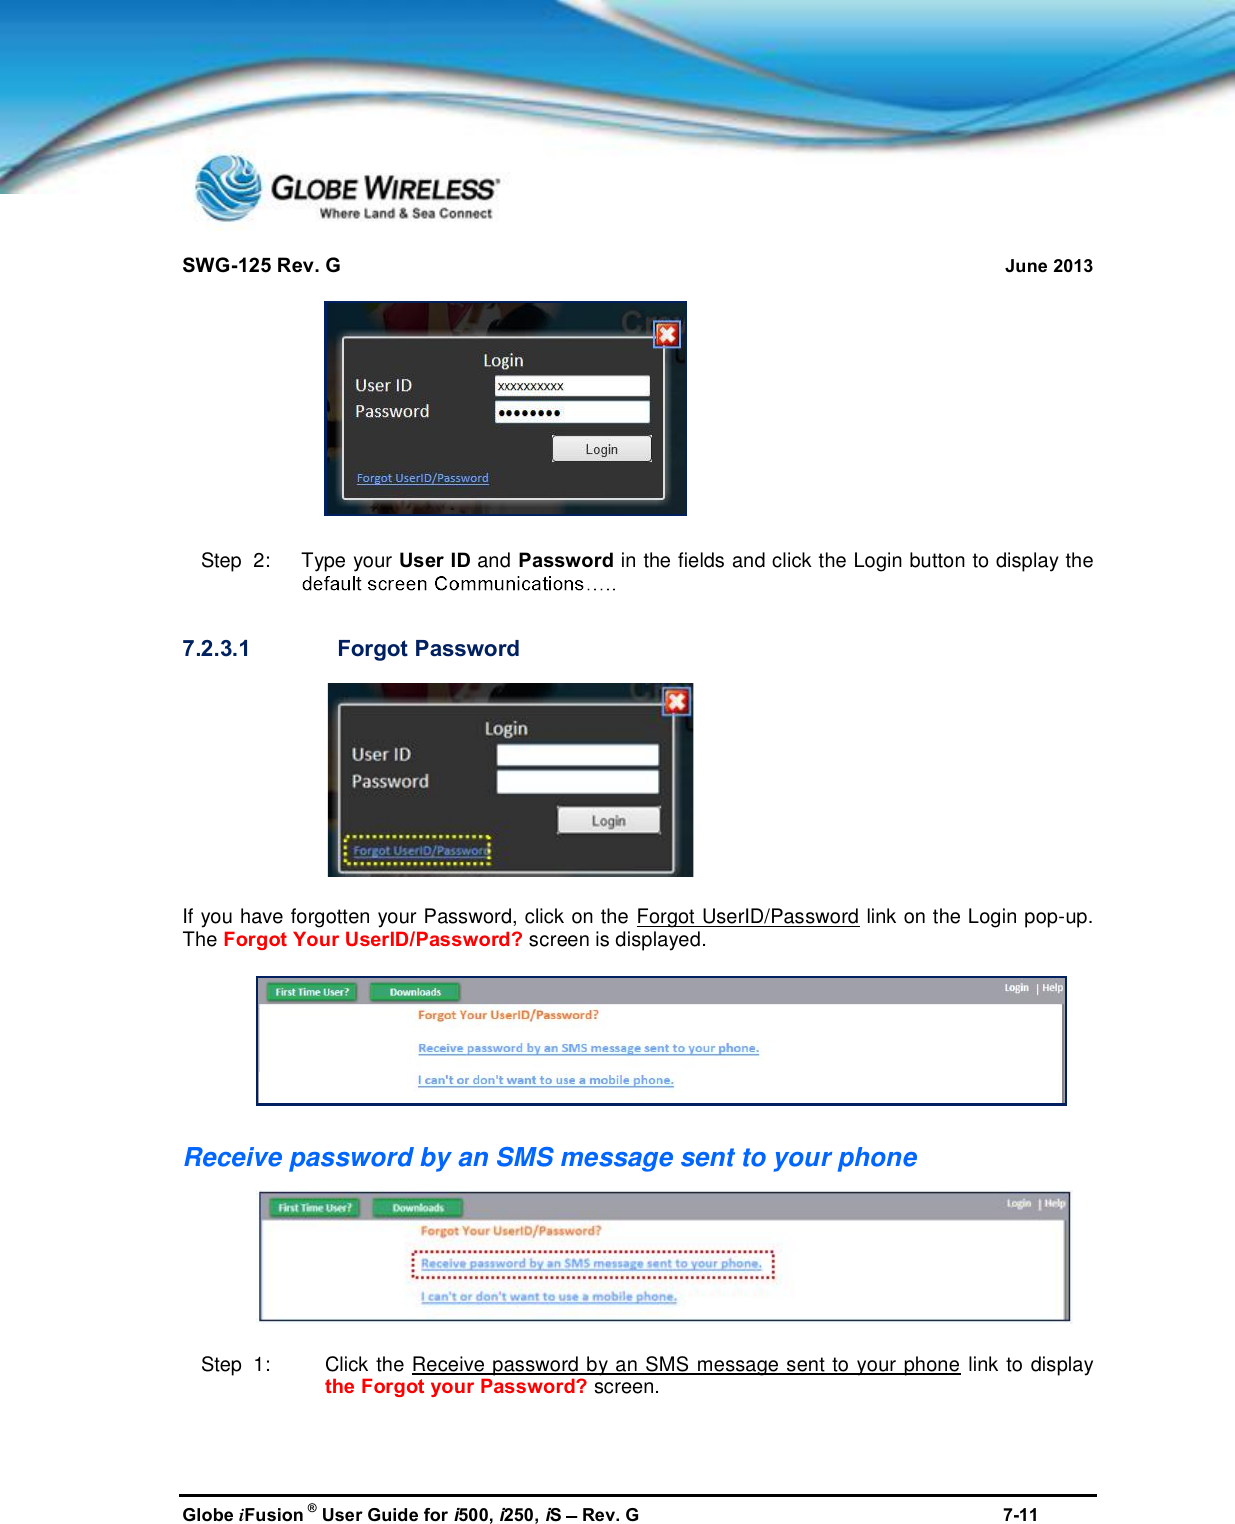
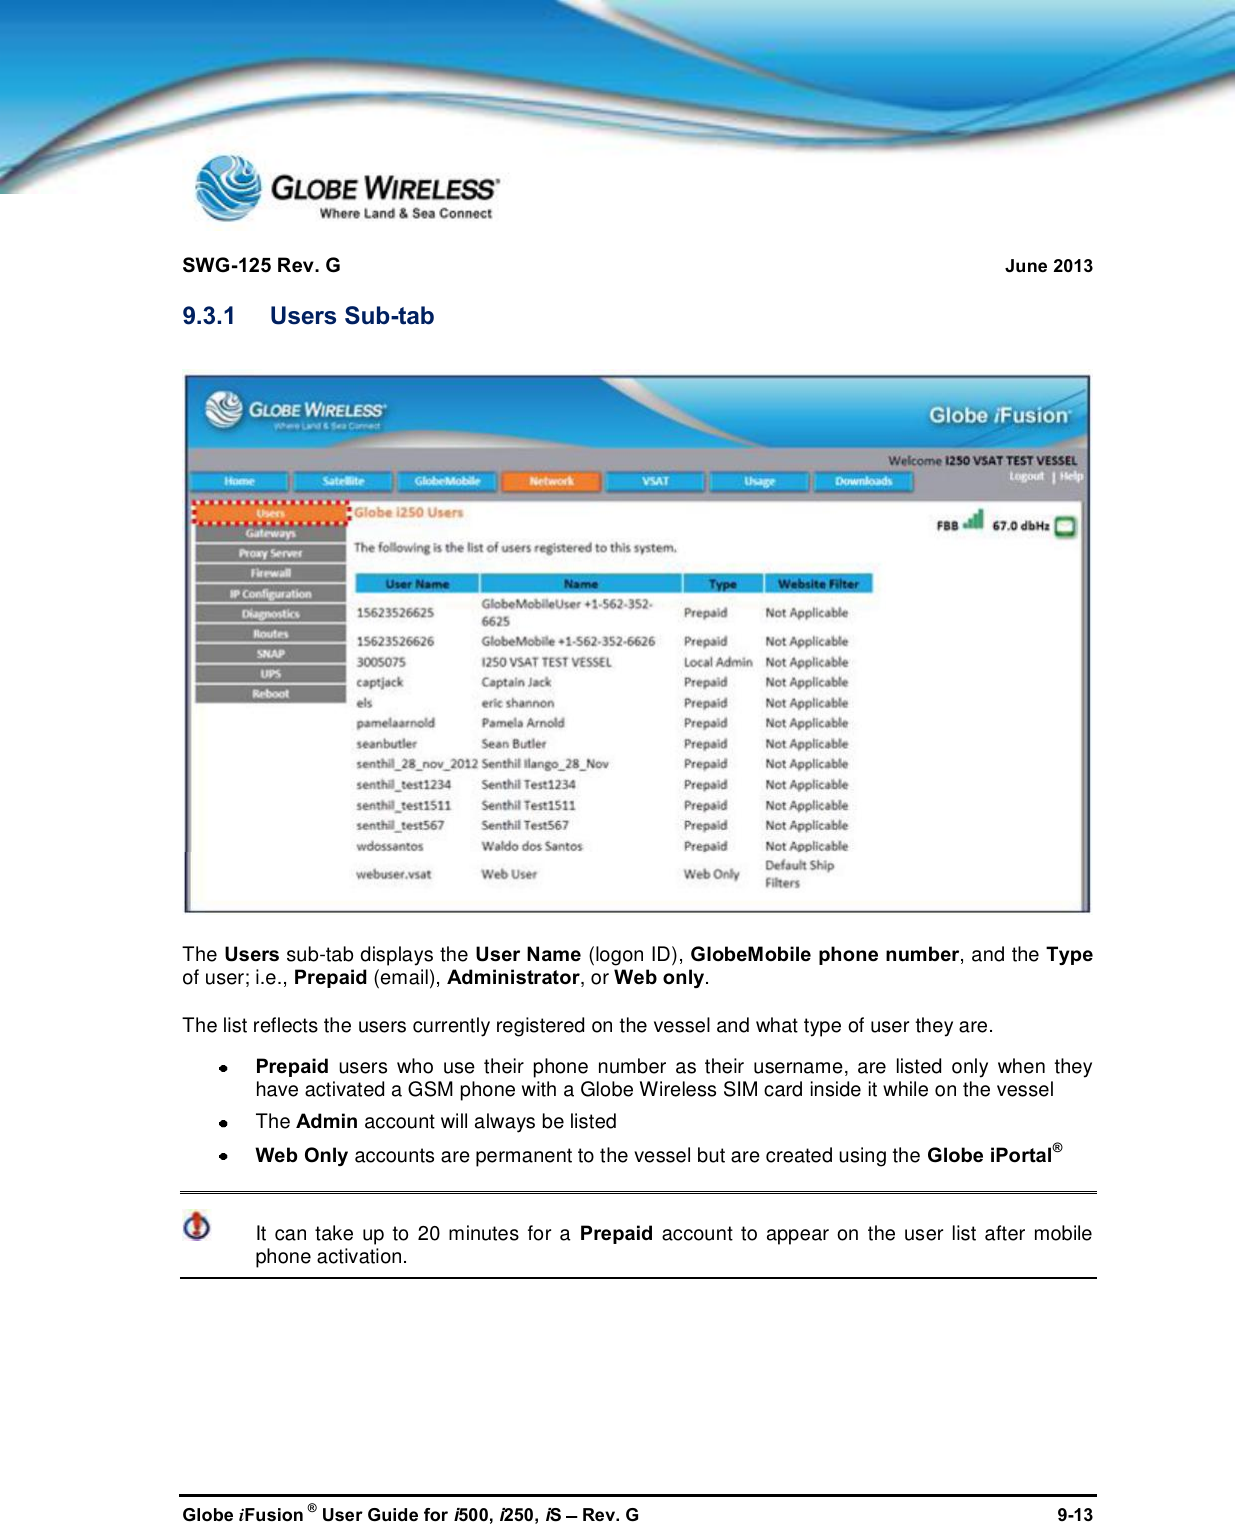
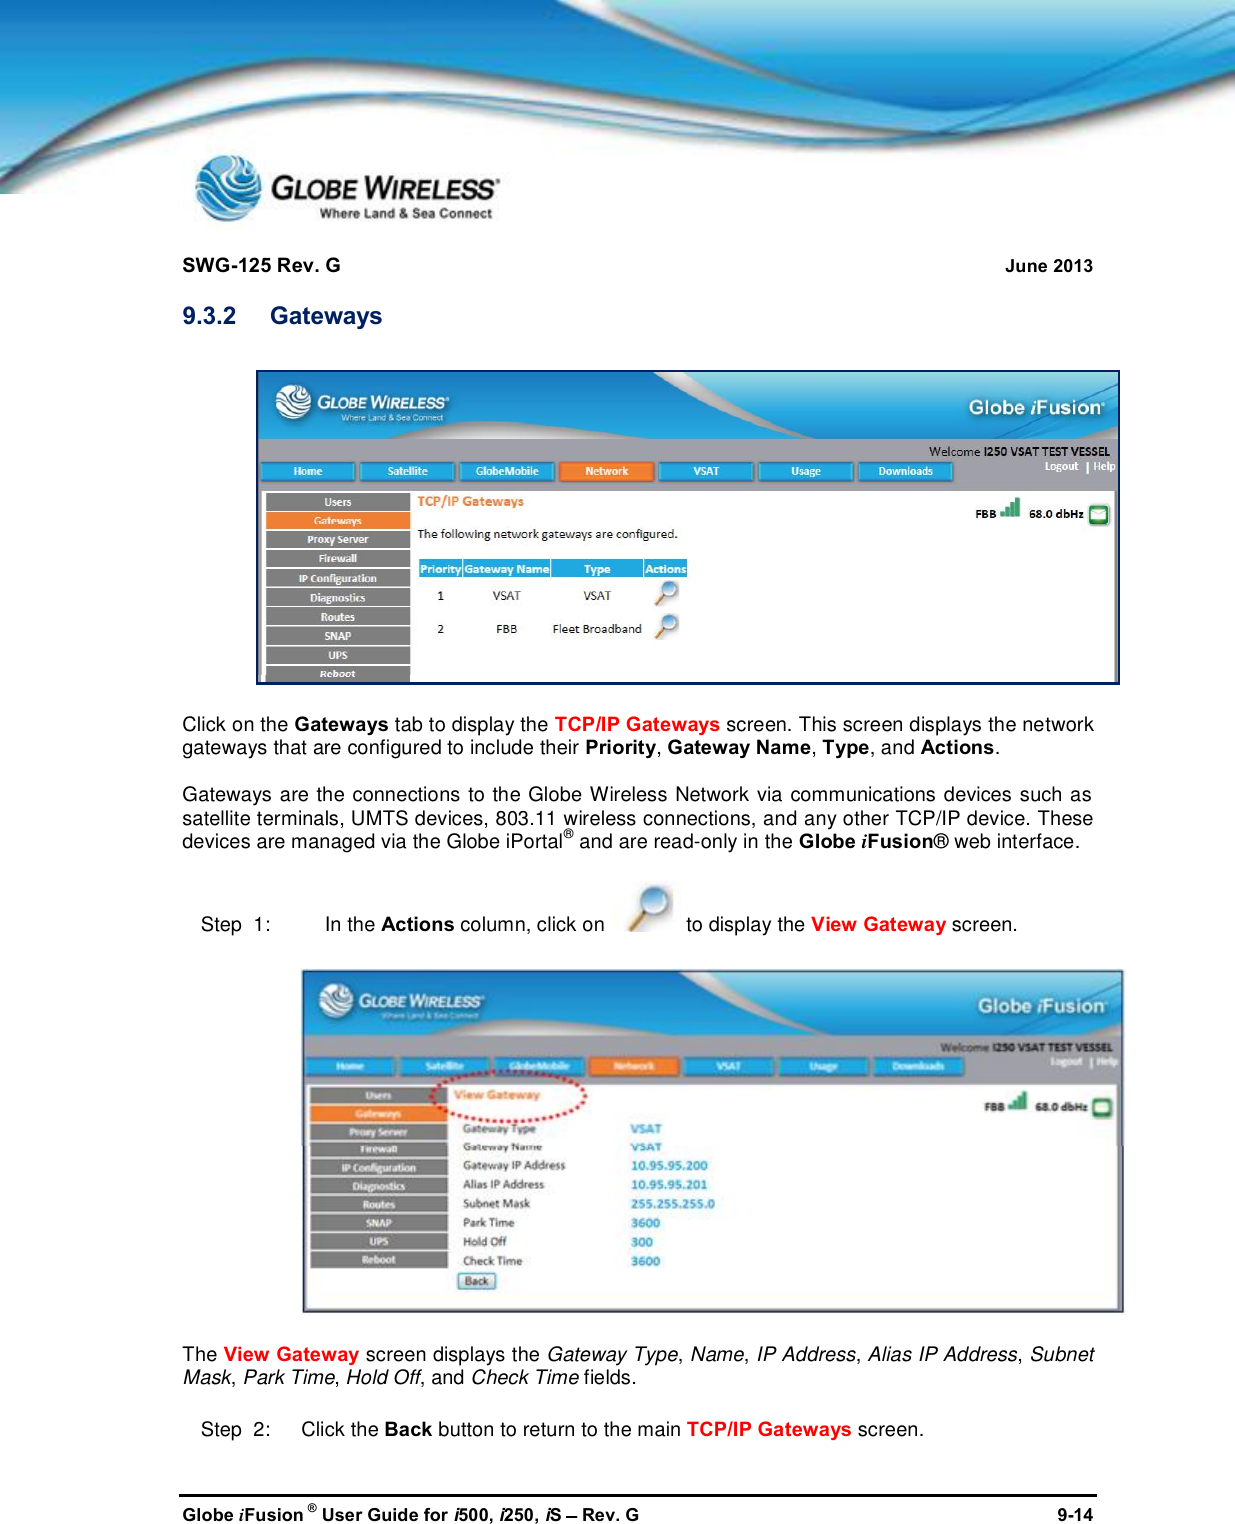
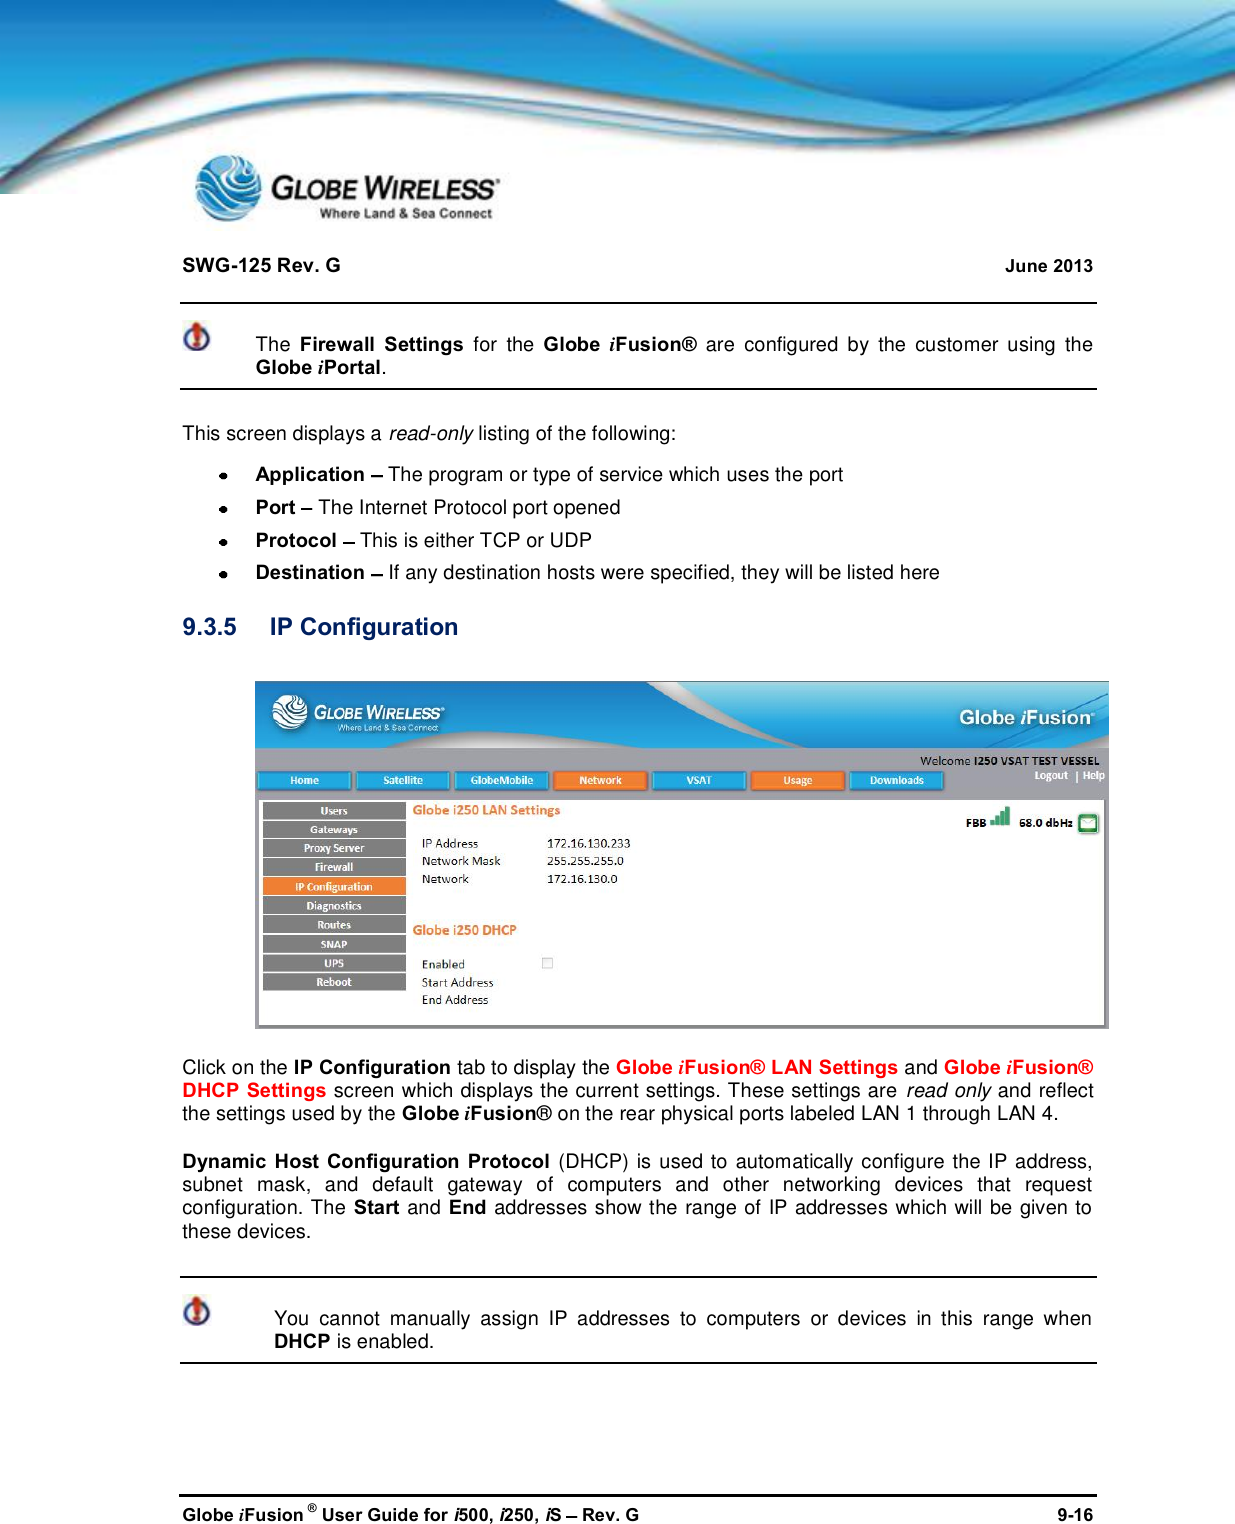
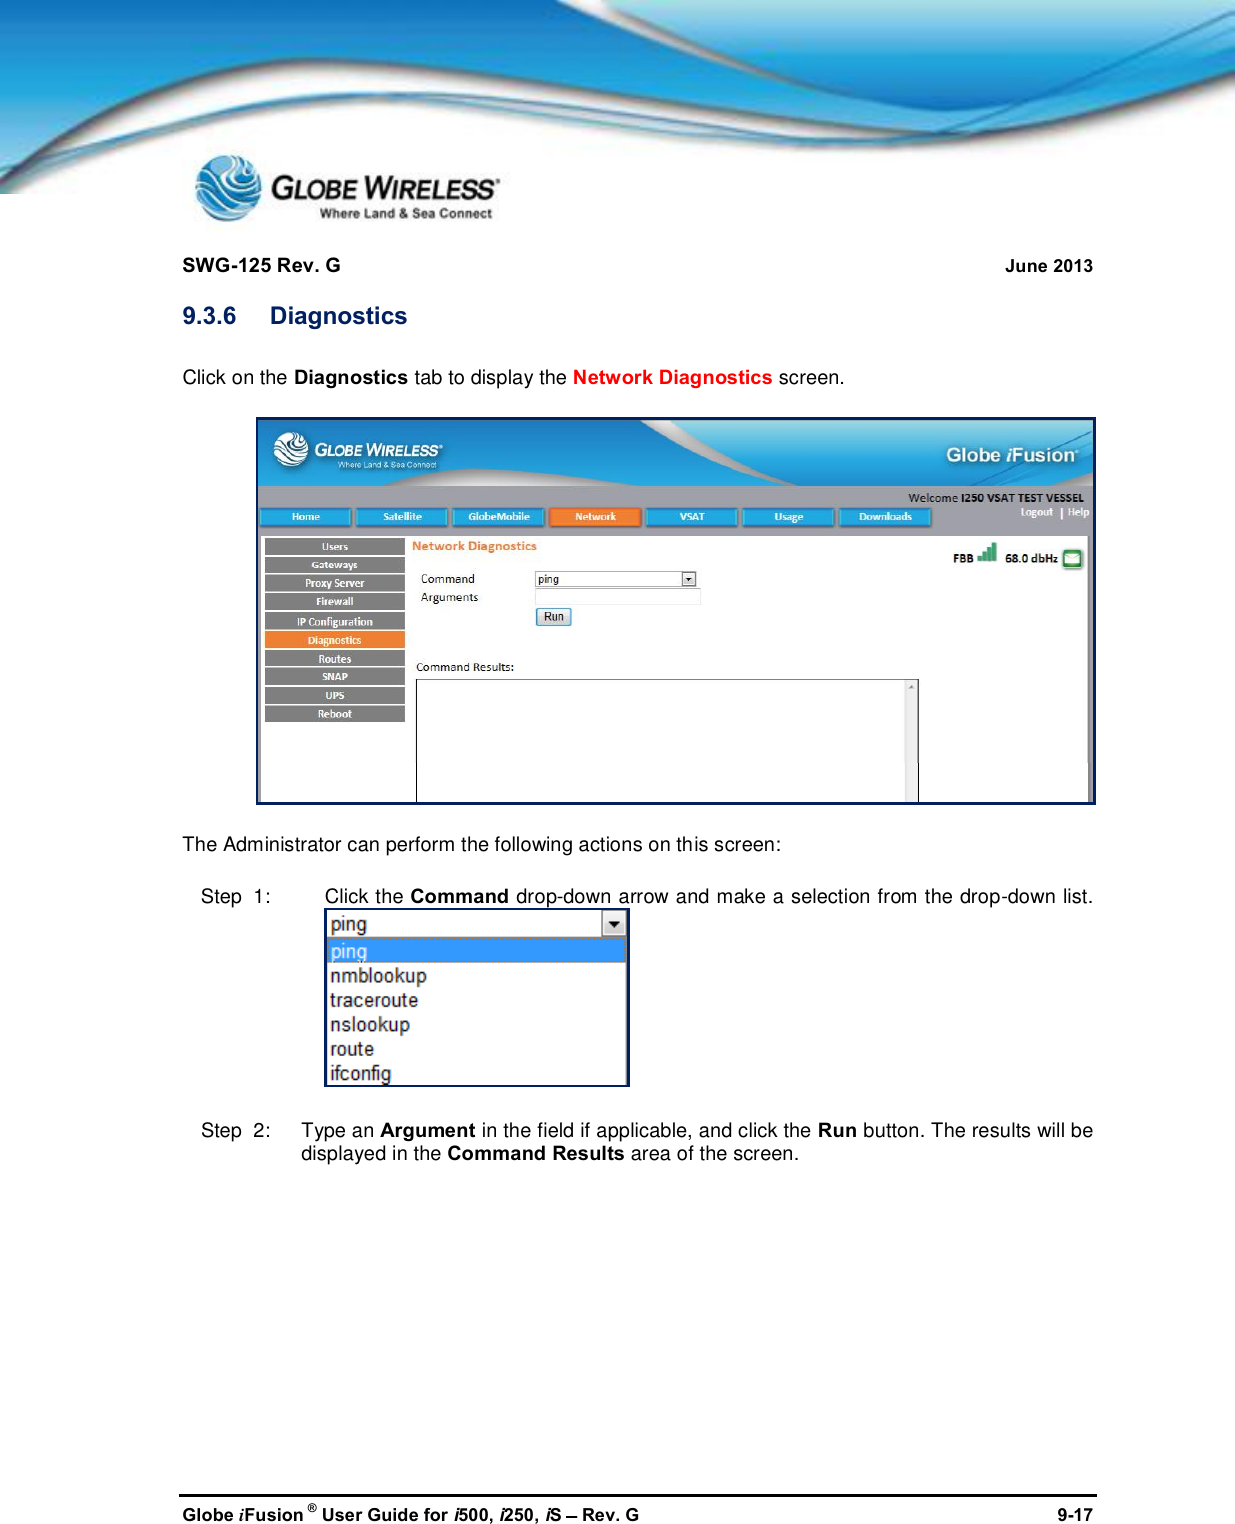
![SWG-125 Rev. G June 2013Globe iFusion ®User Guide for i500, i250, iSRev. G xiiThis Device complies with FCC & IC radiation exposure limits set forth for anuncontrolled environment. The Antenna used for this transmitter must be installedto provide a separation distance of at least 100cm from all persons and must not beco-located or operating in conjunction with any other antenna or transmitterFCC CAUTION:Any Changes or modifications not expressly approved by the manufacturer couldvoid the user's authority, which is granted by FCC, to operate this Maritime SatelliteVoice and Data RouterEu Declaration of Conformity:Globe wireless LLC, 1571 Robert J. Conlan Blvd. Palm Bay, FL 32905 declares underour sole responsibility that the Product, brand name as Globe wireless and model:Globe i250-S3 Maritime Satellite Voice and Data Router, to which this declarationrelates, is in conformity with the following standards and/or other normativedocuments:ETSI EN 301 444 V1.2.1:2012ETSI EN 301 489-1 V1.9.2:2011ETSI EN 301 489 -19 V1.2.1:2002ETSI EN 301 489 -20 V1.2.1:2002EN 60945:2002EN 60950-1:2006+A11:2009+A1:2010+A12:2011We hereby declare that all essential radio test suite have been carried out and thatthe above named product is in conformity to all the essential requirements ofDirective 1999/5/EC.The Conformity Assessment procedure referred to Article 10 and detailed in Annex[III] or [IV] of Directive 1999/5/EC has been followed with involvement of thefollowing notified body(ies):TIMCO ENGINEERING, INC., P.O BOX 370, NEW BERRY, FLORIDA 32669.](https://usermanual.wiki/Inmarsat-Solutions/GLOBEI250S3BDE/User-Guide-2006666-Page-12.png)

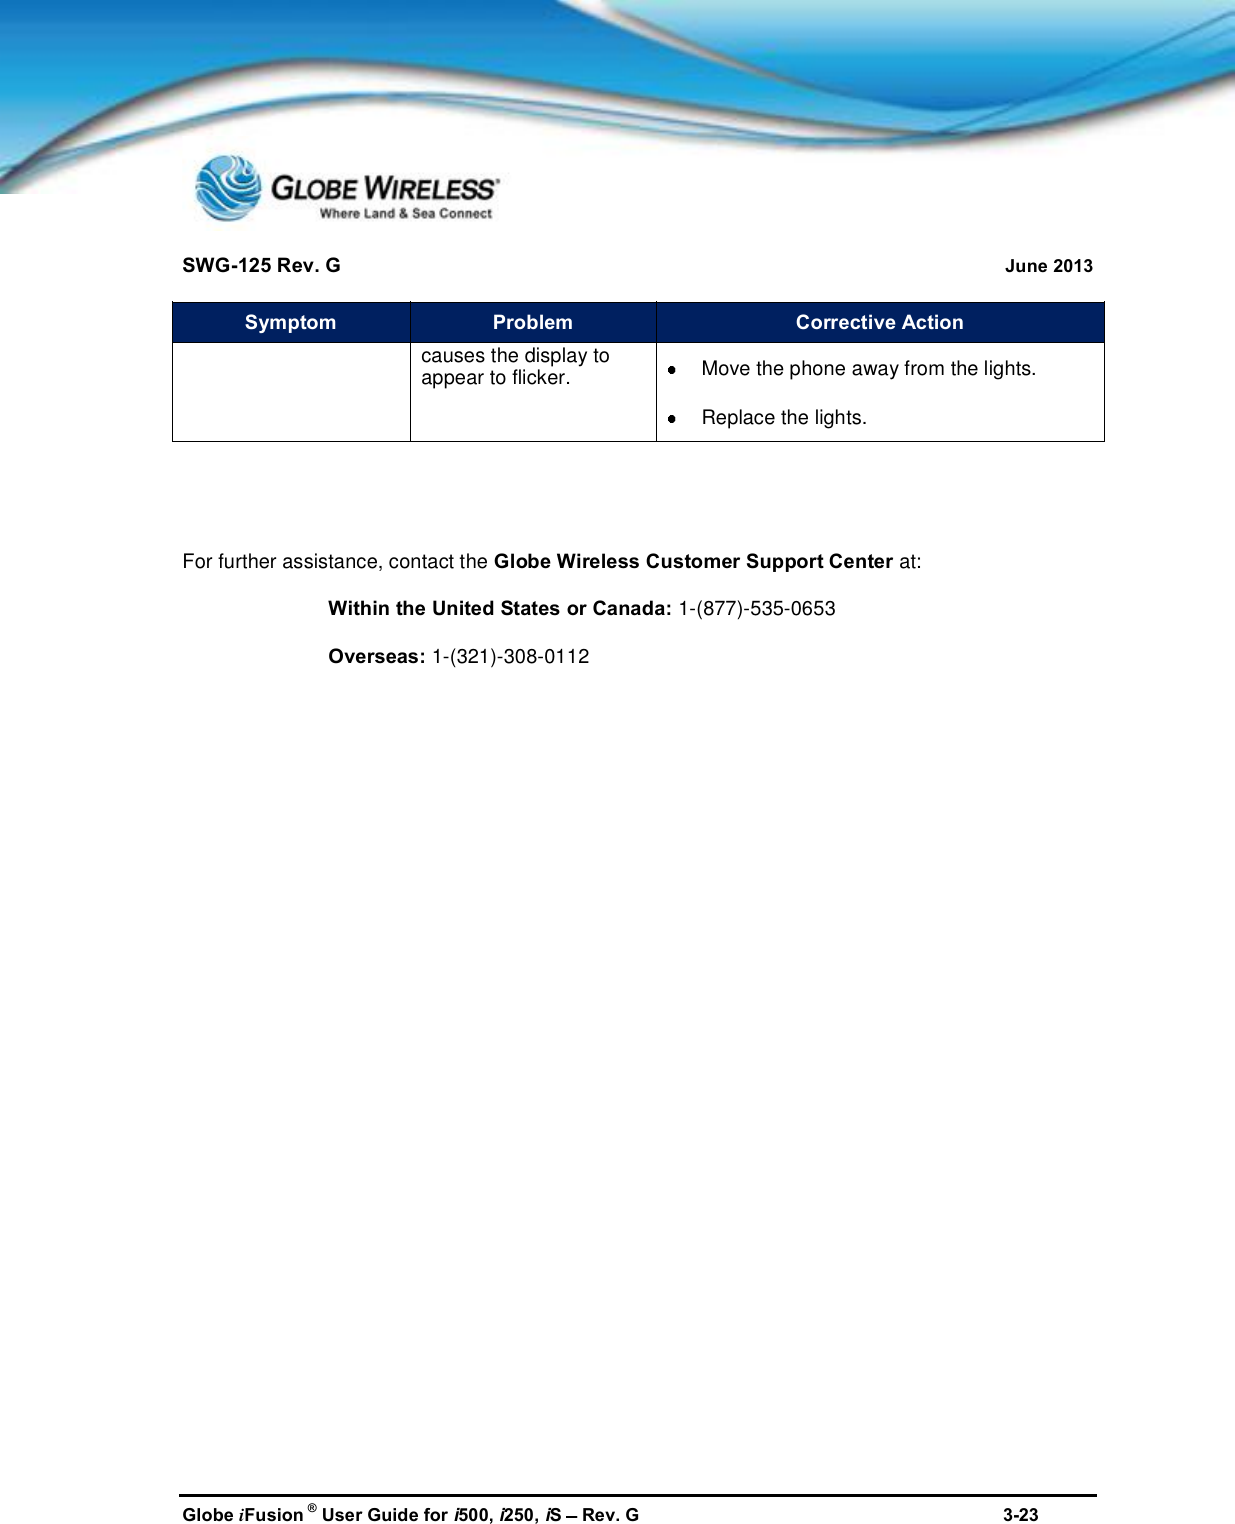
![SWG-125 Rev. G June 2013Globe iFusion ®User Guide for i500, i250, iSRev. G xviThis Device complies with FCC & IC radiation exposure limits set forth for anuncontrolled environment. The Antenna used for this transmitter must be installedto provide a separation distance of at least 100cm from all persons and must not beco-located or operating in conjunction with any other antenna or transmitterFCC CAUTION:Any Changes or modifications not expressly approved by the manufacturer couldvoid the user's authority, which is granted by FCC, to operate this Maritime SatelliteVoice and Data RouterEu Declaration of Conformity:Globe wireless LLC, 1571 Robert J. Conlan Blvd. Palm Bay, FL 32905 declares underour sole responsibility that the Product, brand name as Globe wireless and model:Globe i250-S3 Maritime Satellite Voice and Data Router, to which this declarationrelates, is in conformity with the following standards and/or other normativedocuments:ETSI EN 301 444 V1.2.1:2012ETSI EN 301 489-1 V1.9.2:2011ETSI EN 301 489 -19 V1.2.1:2002ETSI EN 301 489 -20 V1.2.1:2002EN 60945:2002EN 60950-1:2006+A11:2009+A1:2010+A12:2011We hereby declare that all essential radio test suite have been carried out and thatthe above named product is in conformity to all the essential requirements ofDirective 1999/5/EC.The Conformity Assessment procedure referred to Article 10 and detailed in Annex[III] or [IV] of Directive 1999/5/EC has been followed with involvement of thefollowing notified body(ies):TIMCO ENGINEERING, INC., P.O BOX 370, NEW BERRY, FLORIDA 32669.](https://usermanual.wiki/Inmarsat-Solutions/GLOBEI250S3BDE/User-Guide-2006666-Page-16.png)


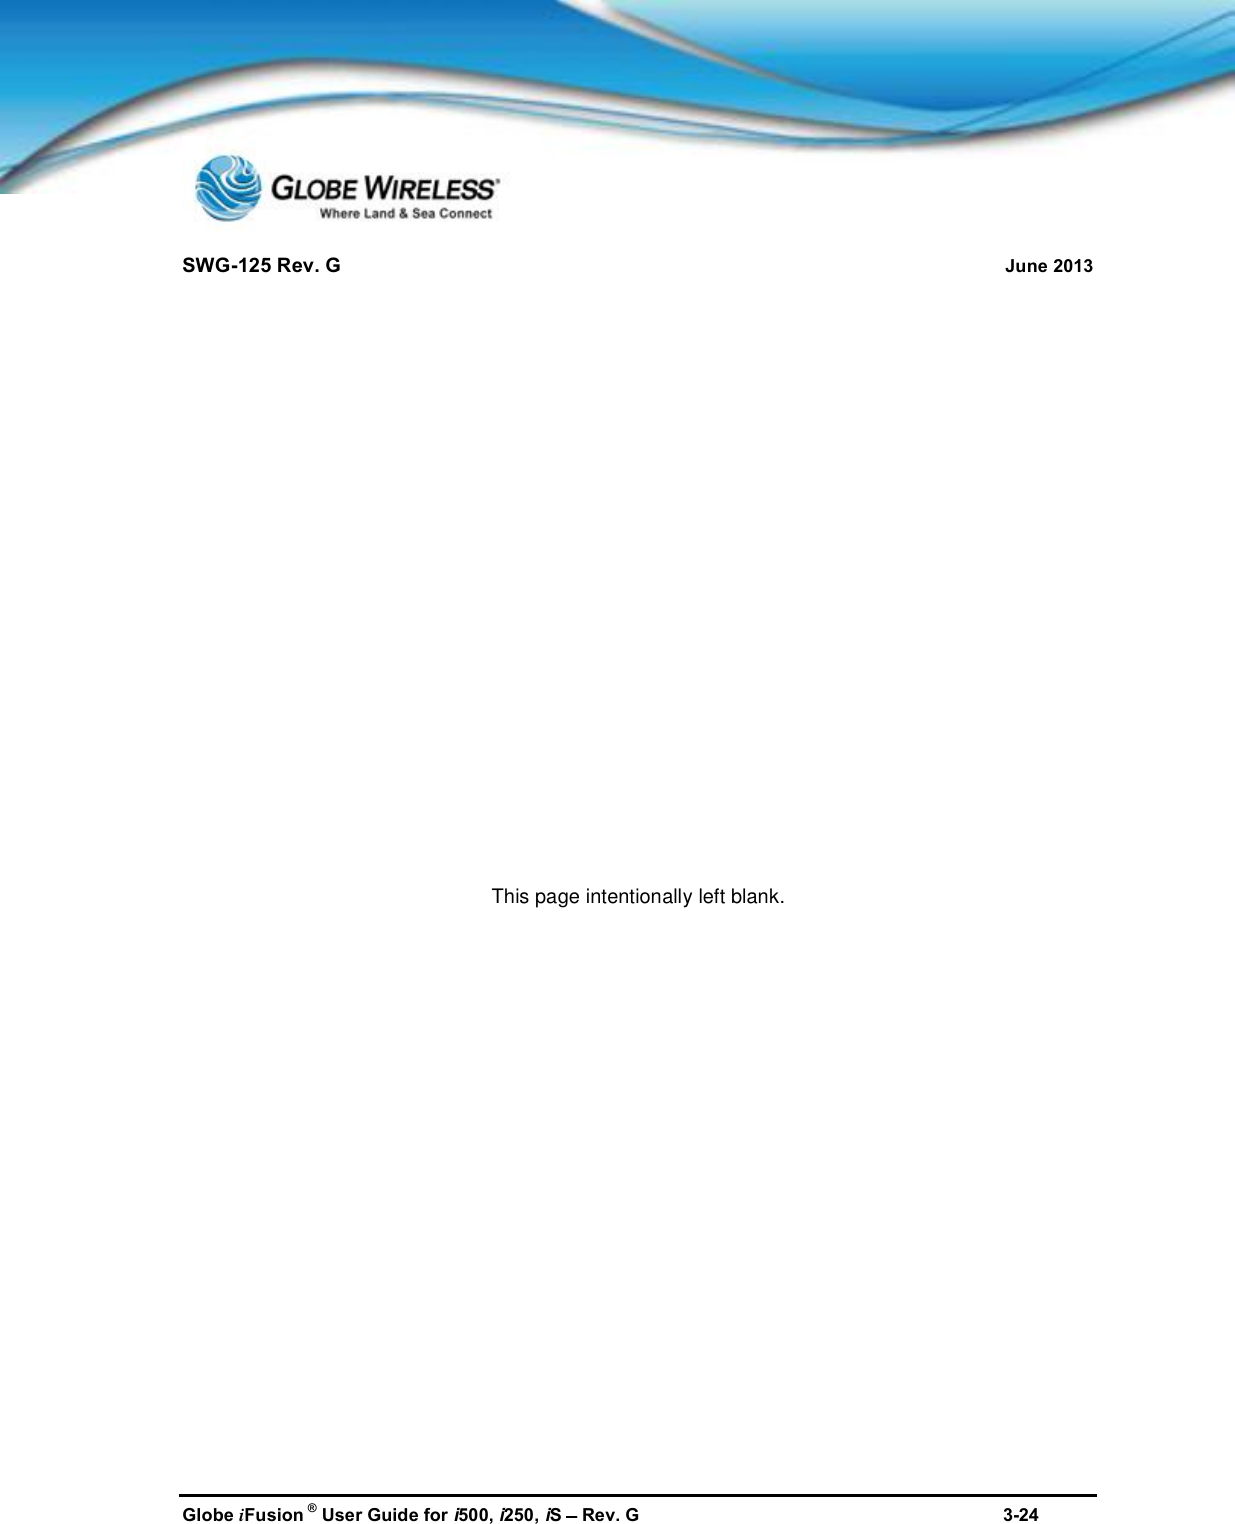

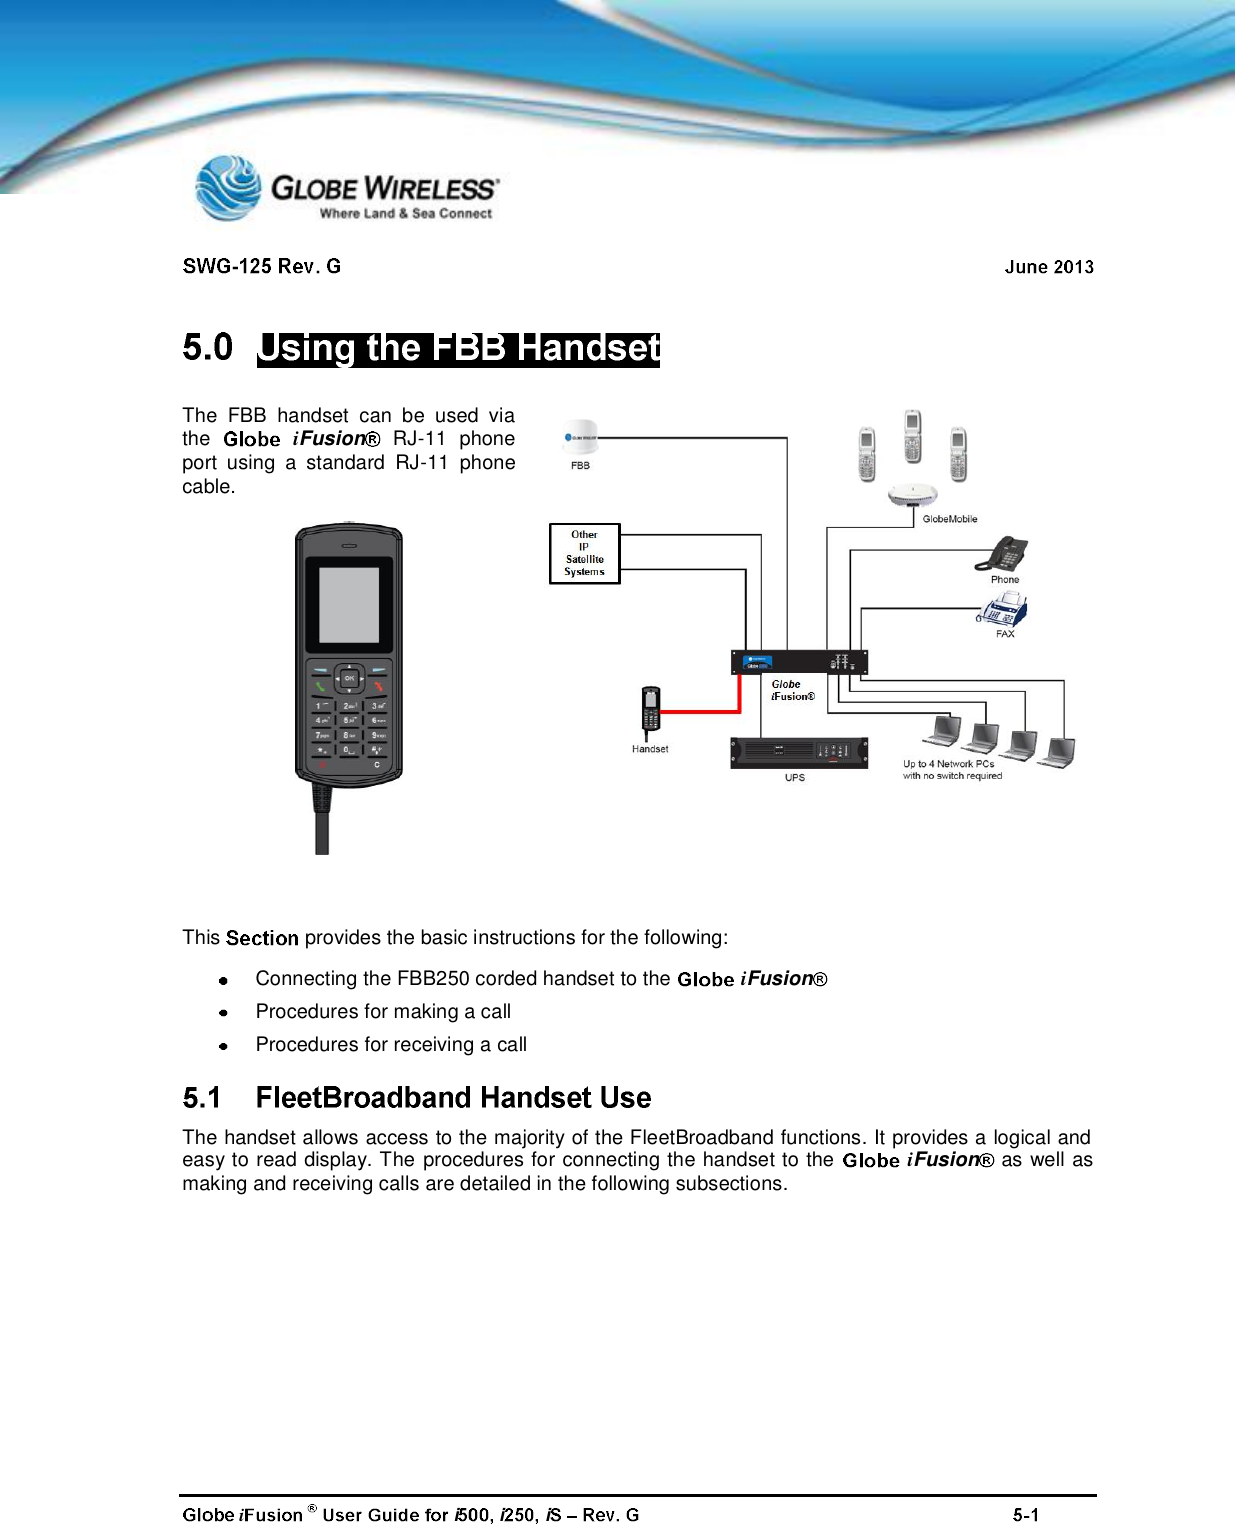
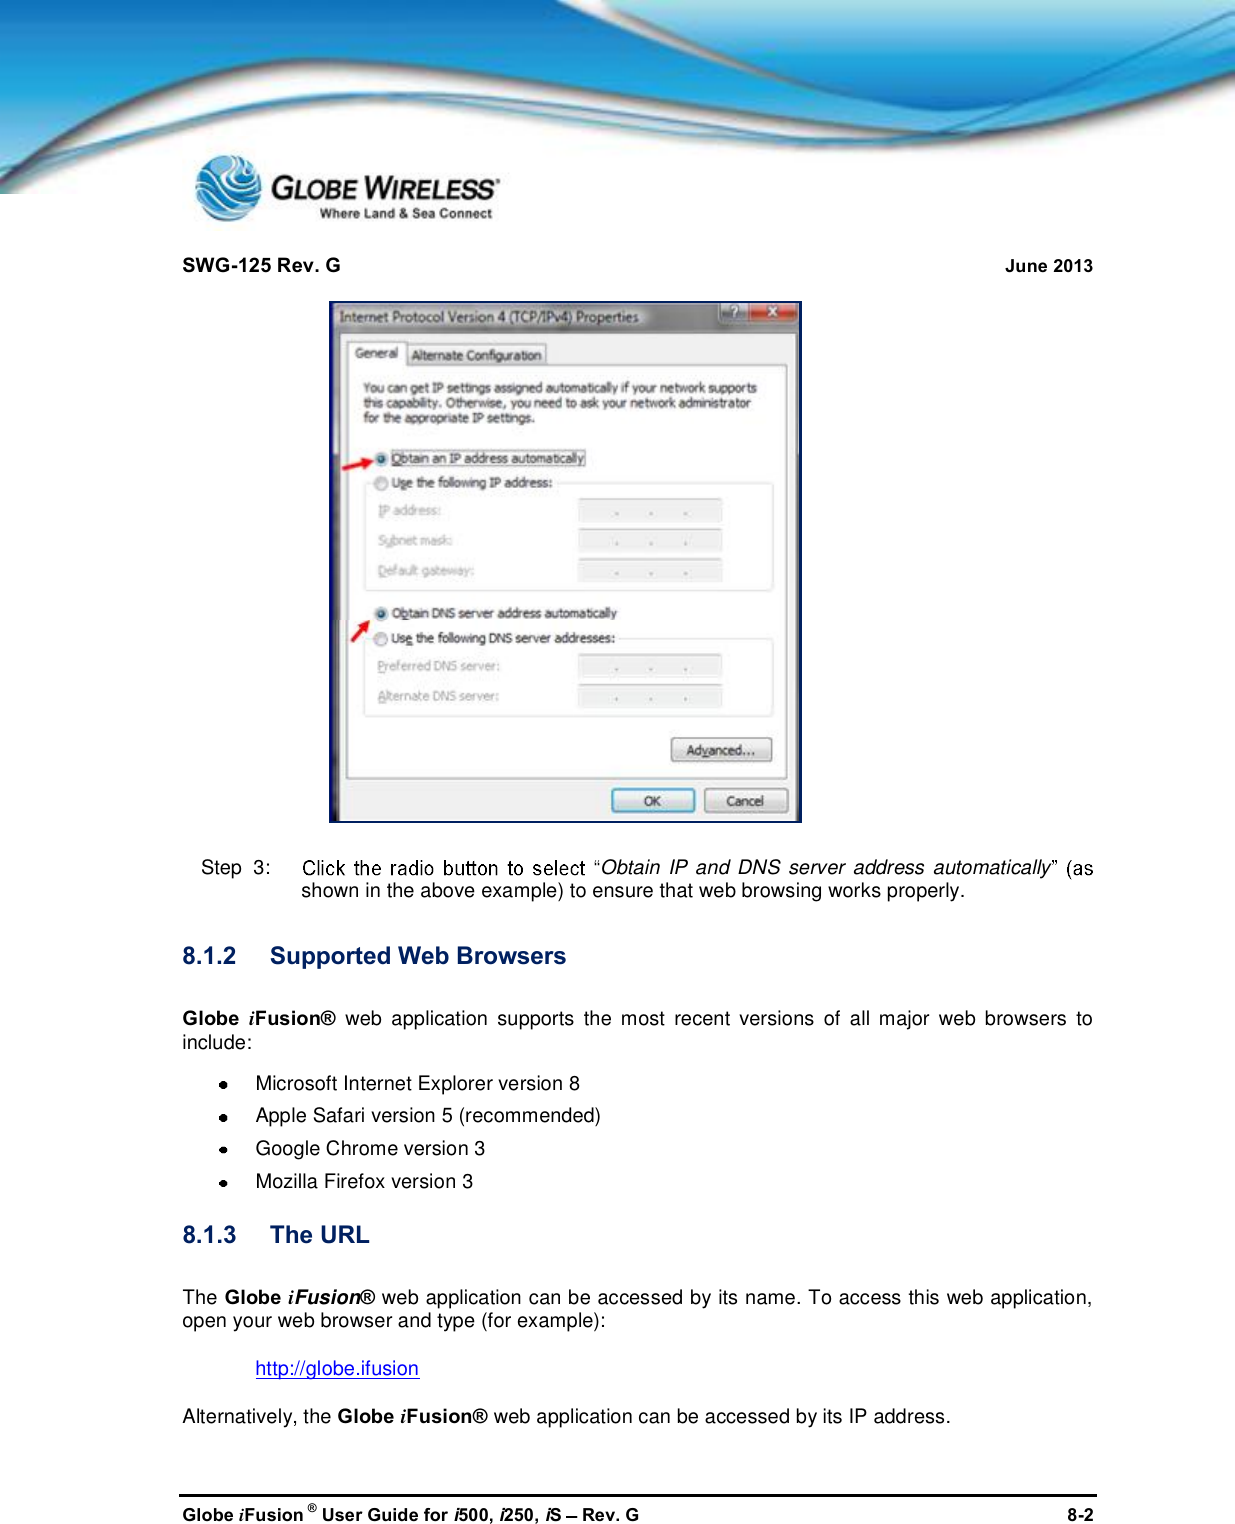
![SWG-125 Rev. G June 2013Globe iFusion ®User Guide for i500, i250, iSRev. G 5-25.1.1 Connect the handset to the Globe iFusion®Connect the RJ-11 phone cable from the FBB250 handset to the Handset Port located on the rear ofthe Globe iFusion®.5.1.2 Making a CallStep 1: Using the alpha-numeric keypad on the handset, dial the number in the followingformat:00 + [country code] [area code] [number]Step 2: PressStep 3: To end the call, press5.1.3 Receiving a CallStep 1: The phone will ring when a call is coming in, and the call number will be displayed onthe handset screen.Step 2: Answer the incoming call by pressingStep 3: To end the call, press](https://usermanual.wiki/Inmarsat-Solutions/GLOBEI250S3BDE/User-Guide-2006666-Page-64.png)


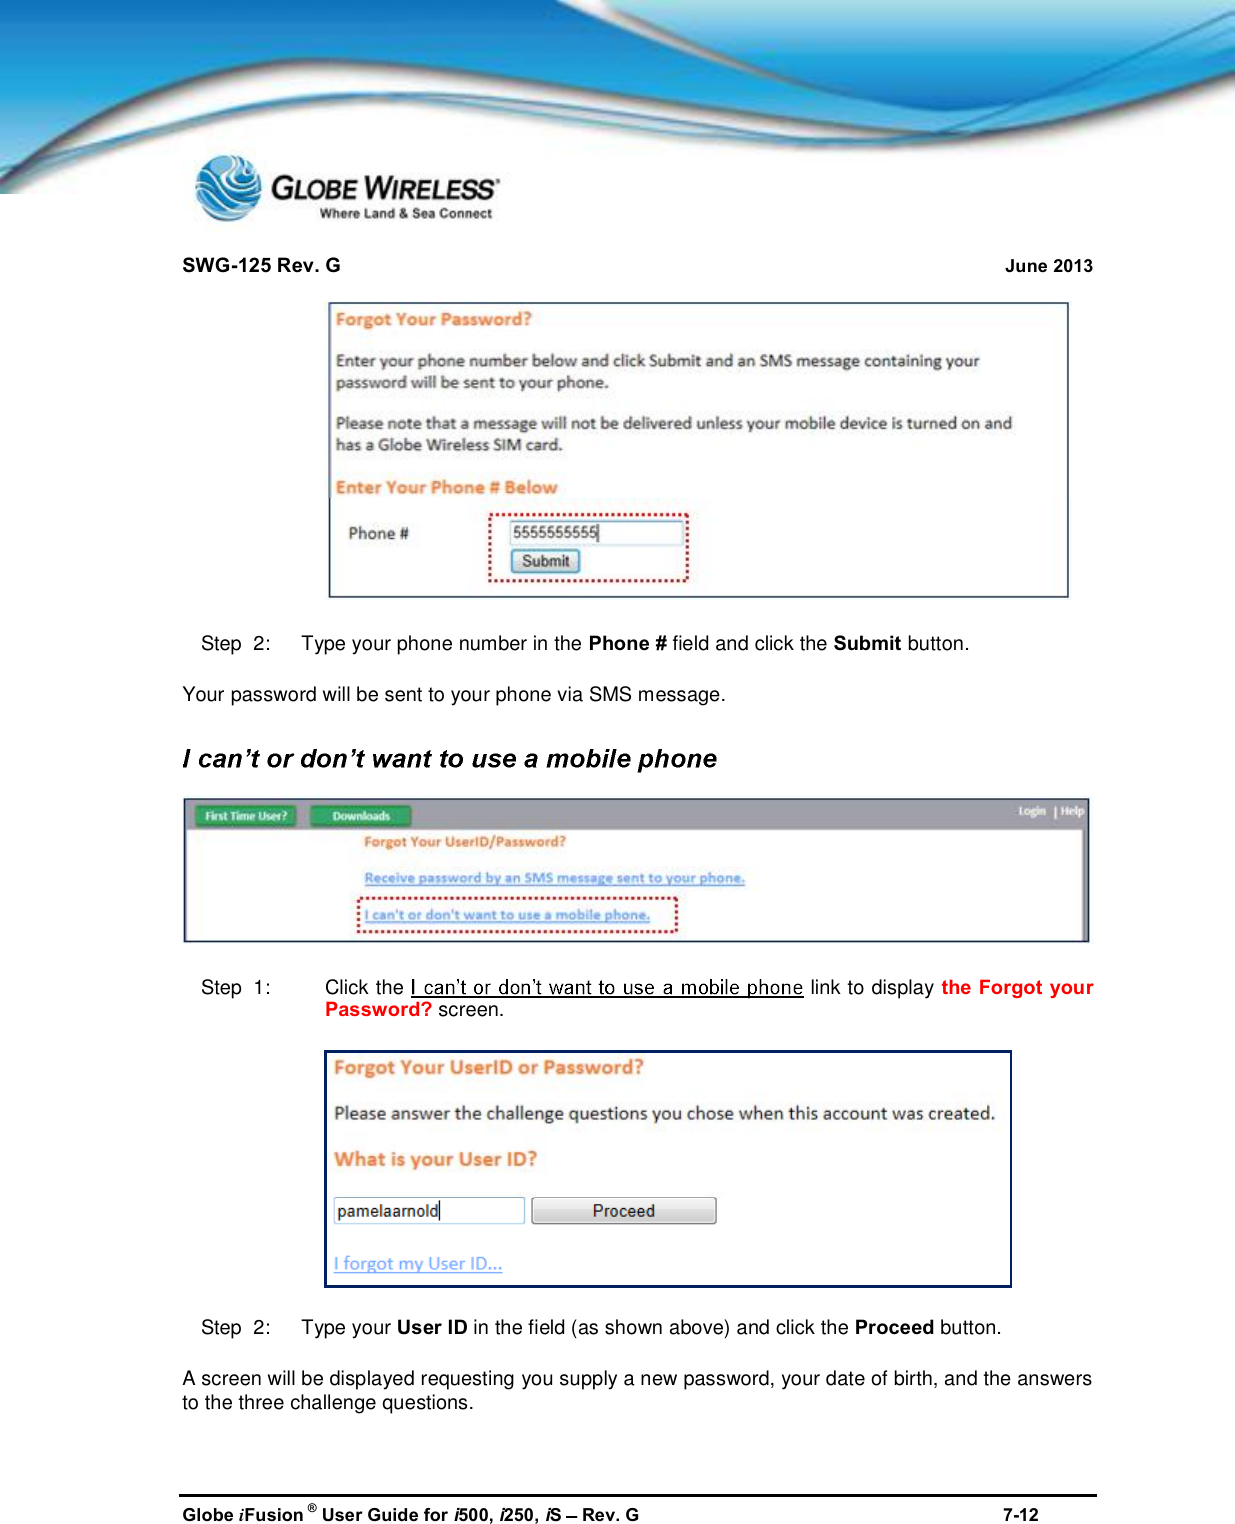
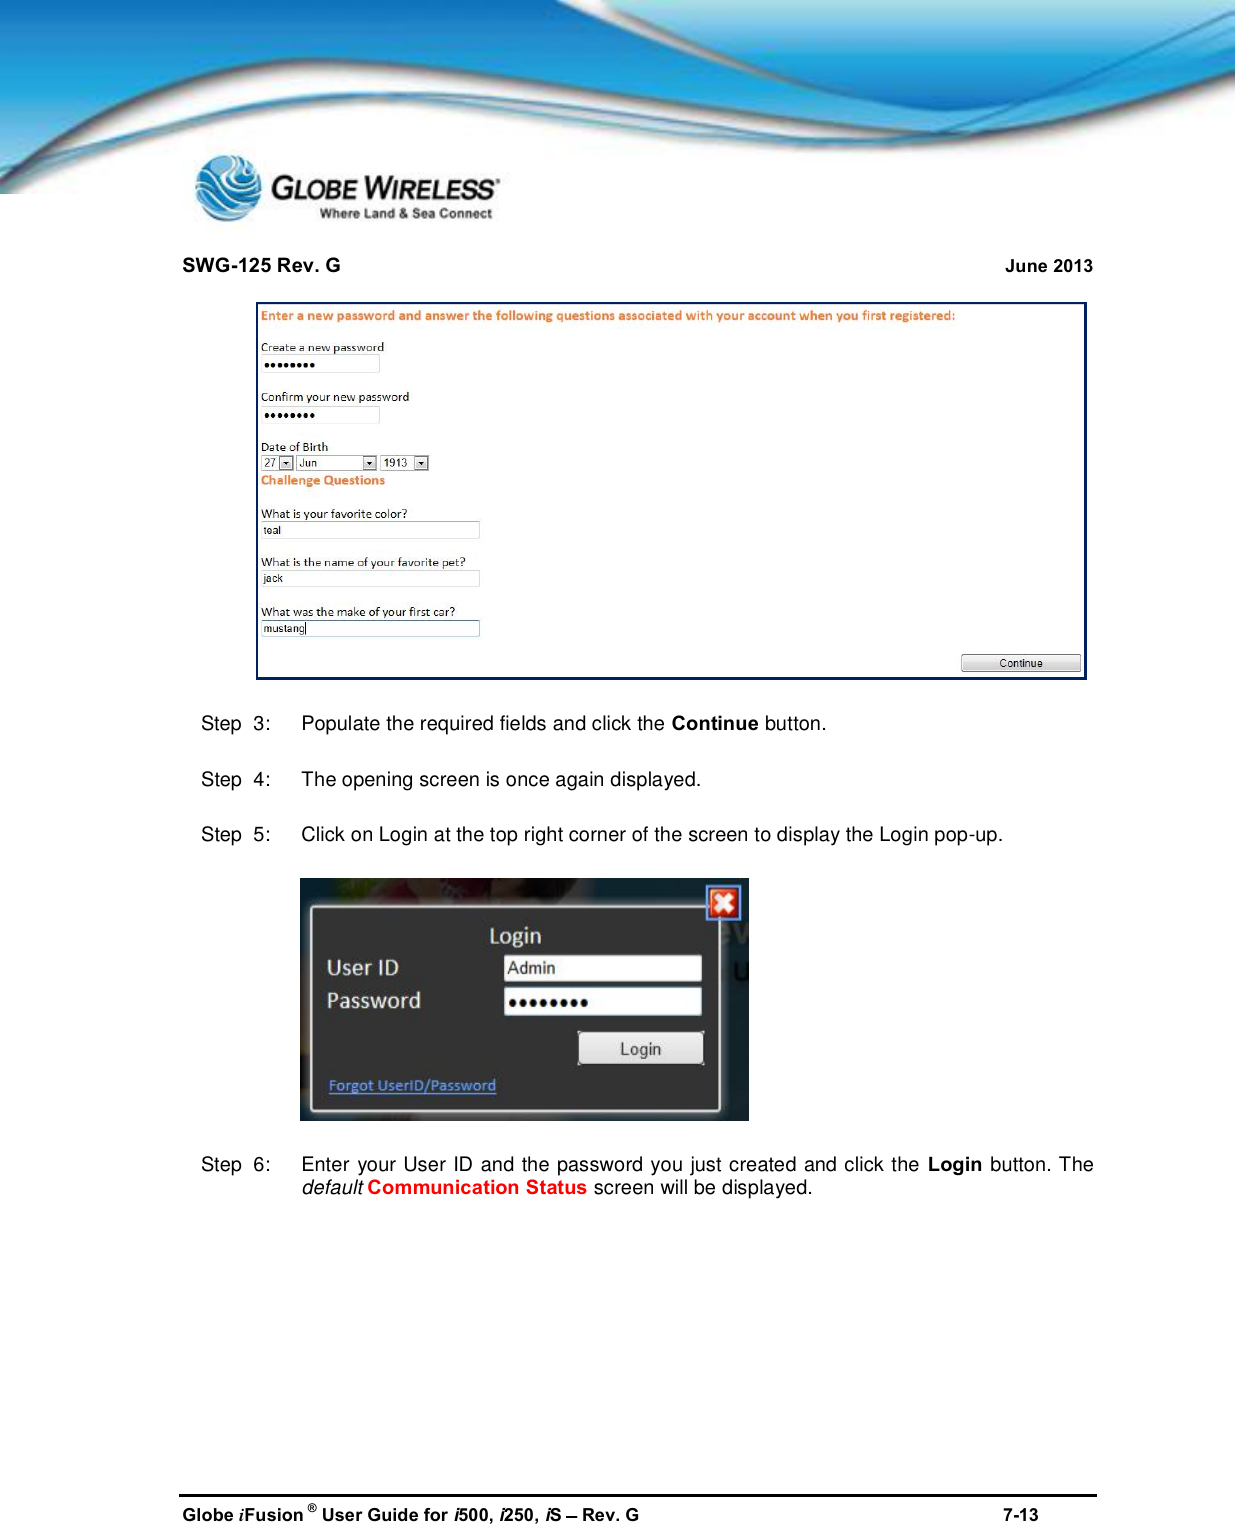
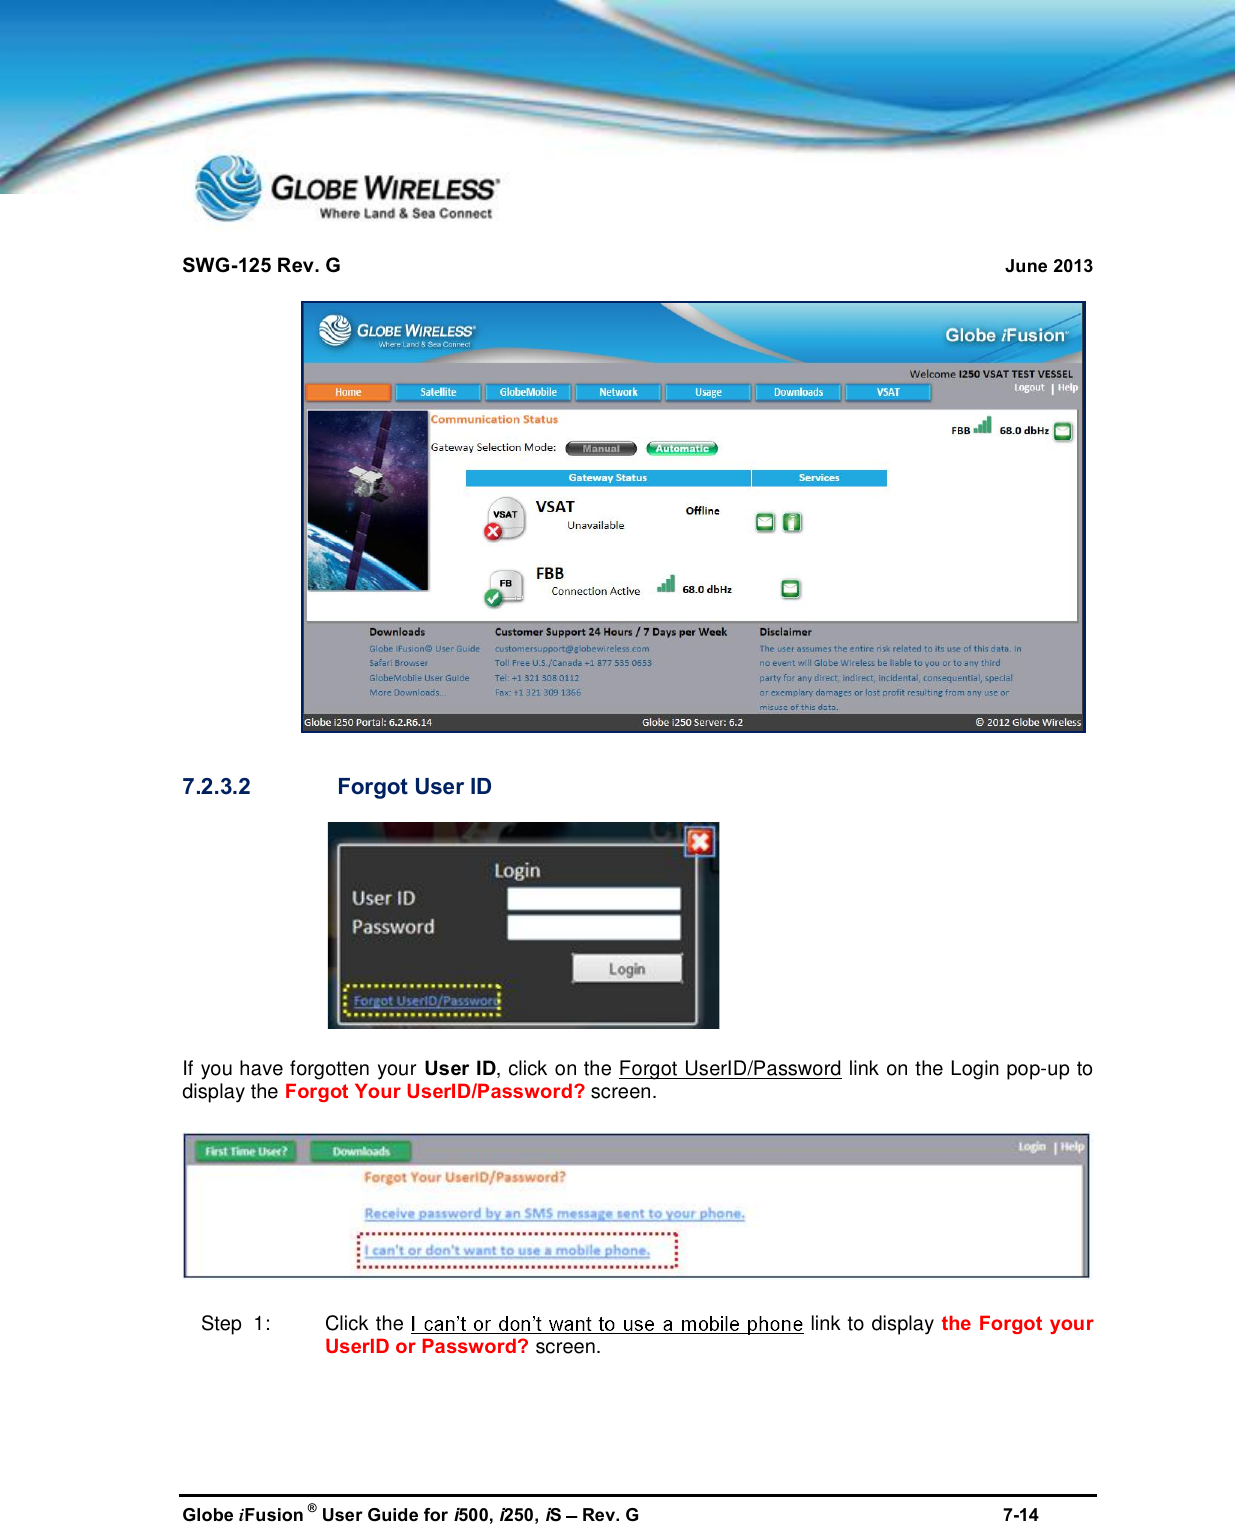

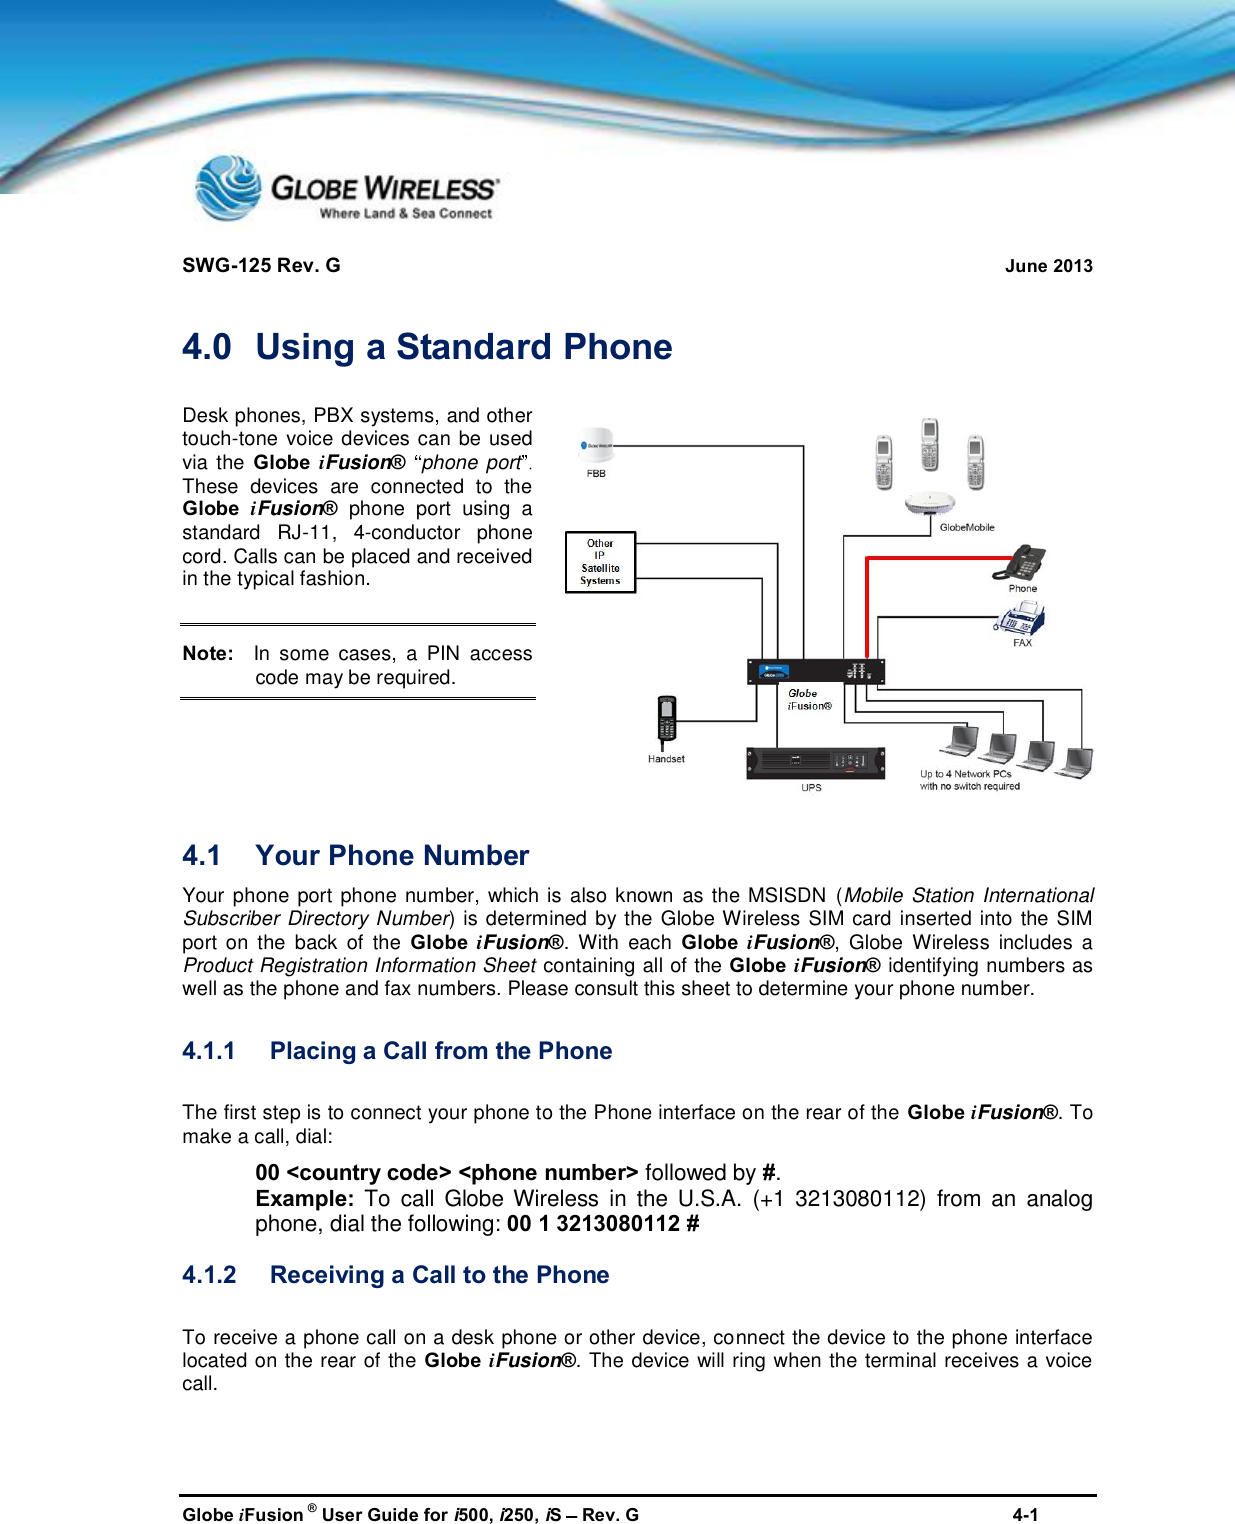
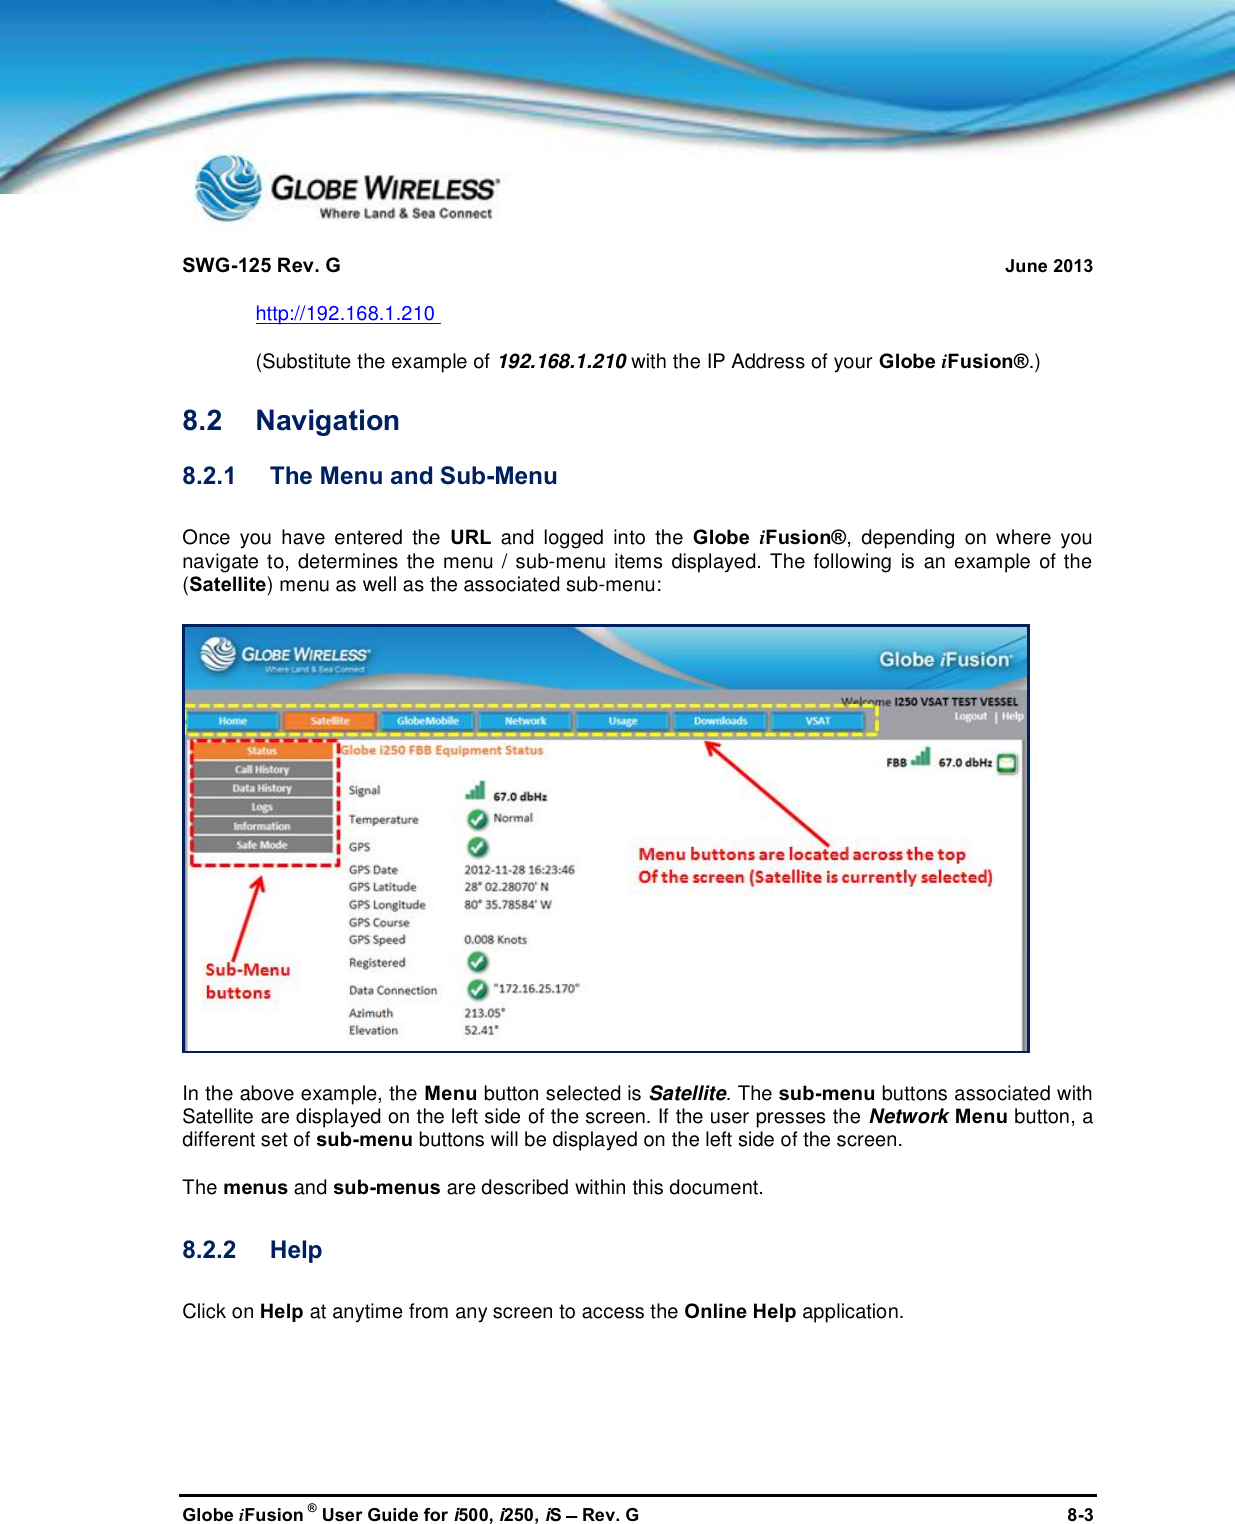
![SWG-125 Rev. G June 2013Globe iFusion ®User Guide for i500, i250, iSRev. G 7-167.2.4 Placing and Receiving CallsStep 1: Dial + [country code] [area code] [number]. You may hear a dial tone or ringing tonedepending on destination and time delay.Step 2: Once you have finished the call, hang-up.Note: Once disconnected, you will receive a free text message with the cost of the call and yourremaining balance.7.2.5 SMS Text messagingStep 1: Enter your SMS message (refer to your phone user manual for instructions). An SMSmessage can be up to 160 characters in length.Step 2: or email address (refer to your phoneuser manual for instructions).Step 3: Send the message.Note: Multimedia (MMS) messages are not currently supported.7.2.6 Operation Entering and Exiting Shipping PortsAlthough you can use the GlobeMobile SIM to roam on standard GSM shore networks, these callsare at much higher rates. Globe Wireless recommends that you use a local SIM while on shorewhenever possible. Also note that as the vessel enters and leaves a distance of two miles from theshoreline, the Globe iFusion®may disable and enable the GSM Antenna unit(s).Important! It is especially important for mobile phone users to take note of which carrier isdisplayed on their device once the vessel nears the shoreline. The Globe Wirelesscarrier symbol is GWIRELESS.](https://usermanual.wiki/Inmarsat-Solutions/GLOBEI250S3BDE/User-Guide-2006666-Page-82.png)
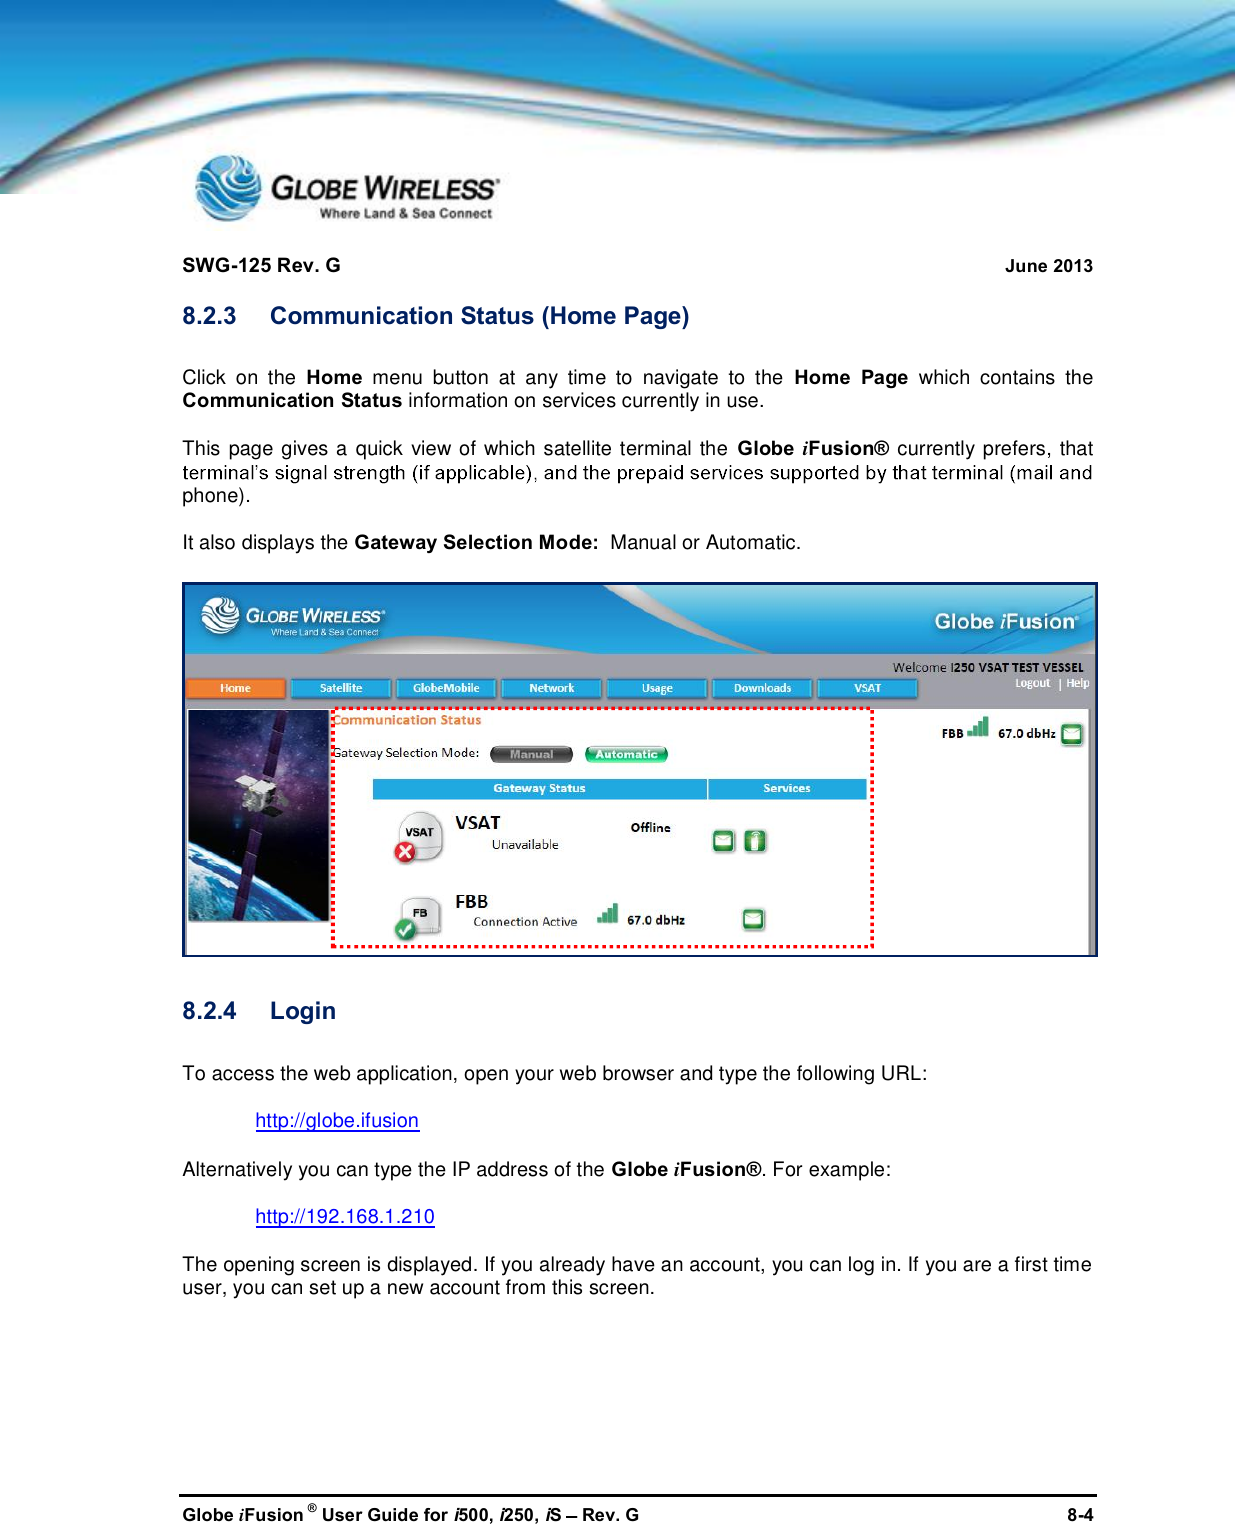


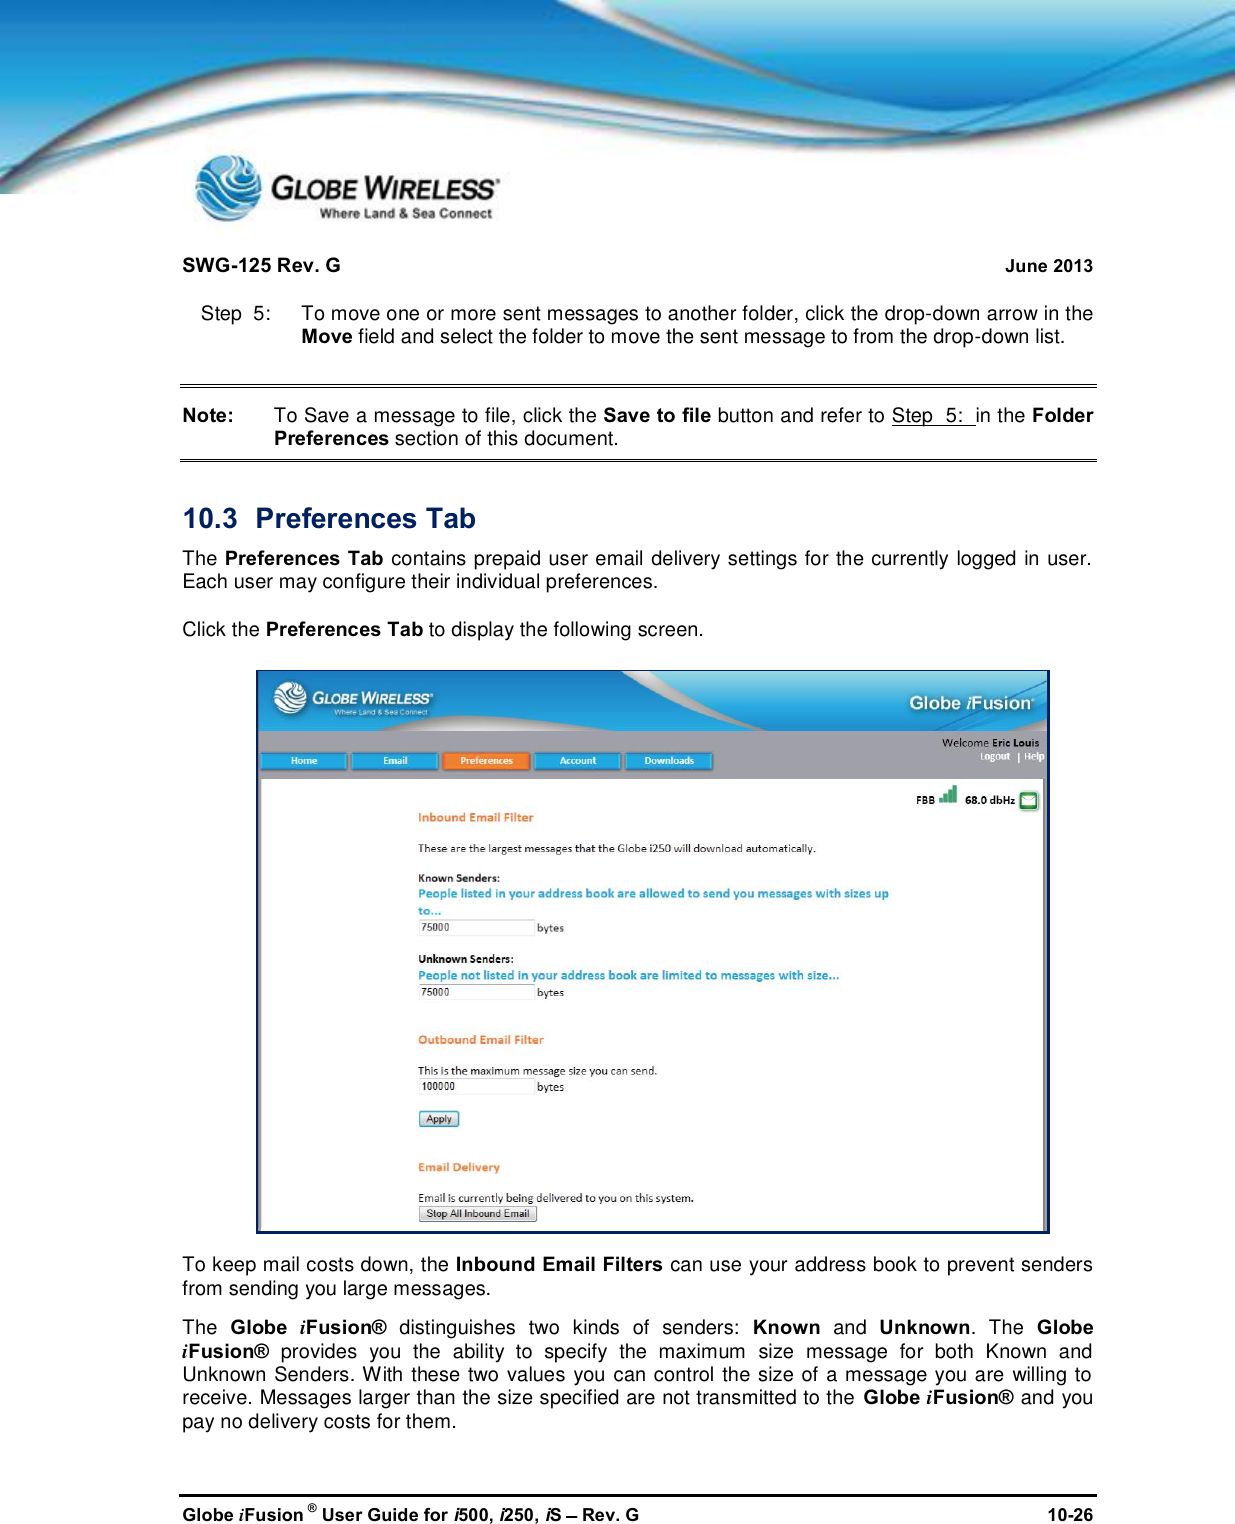
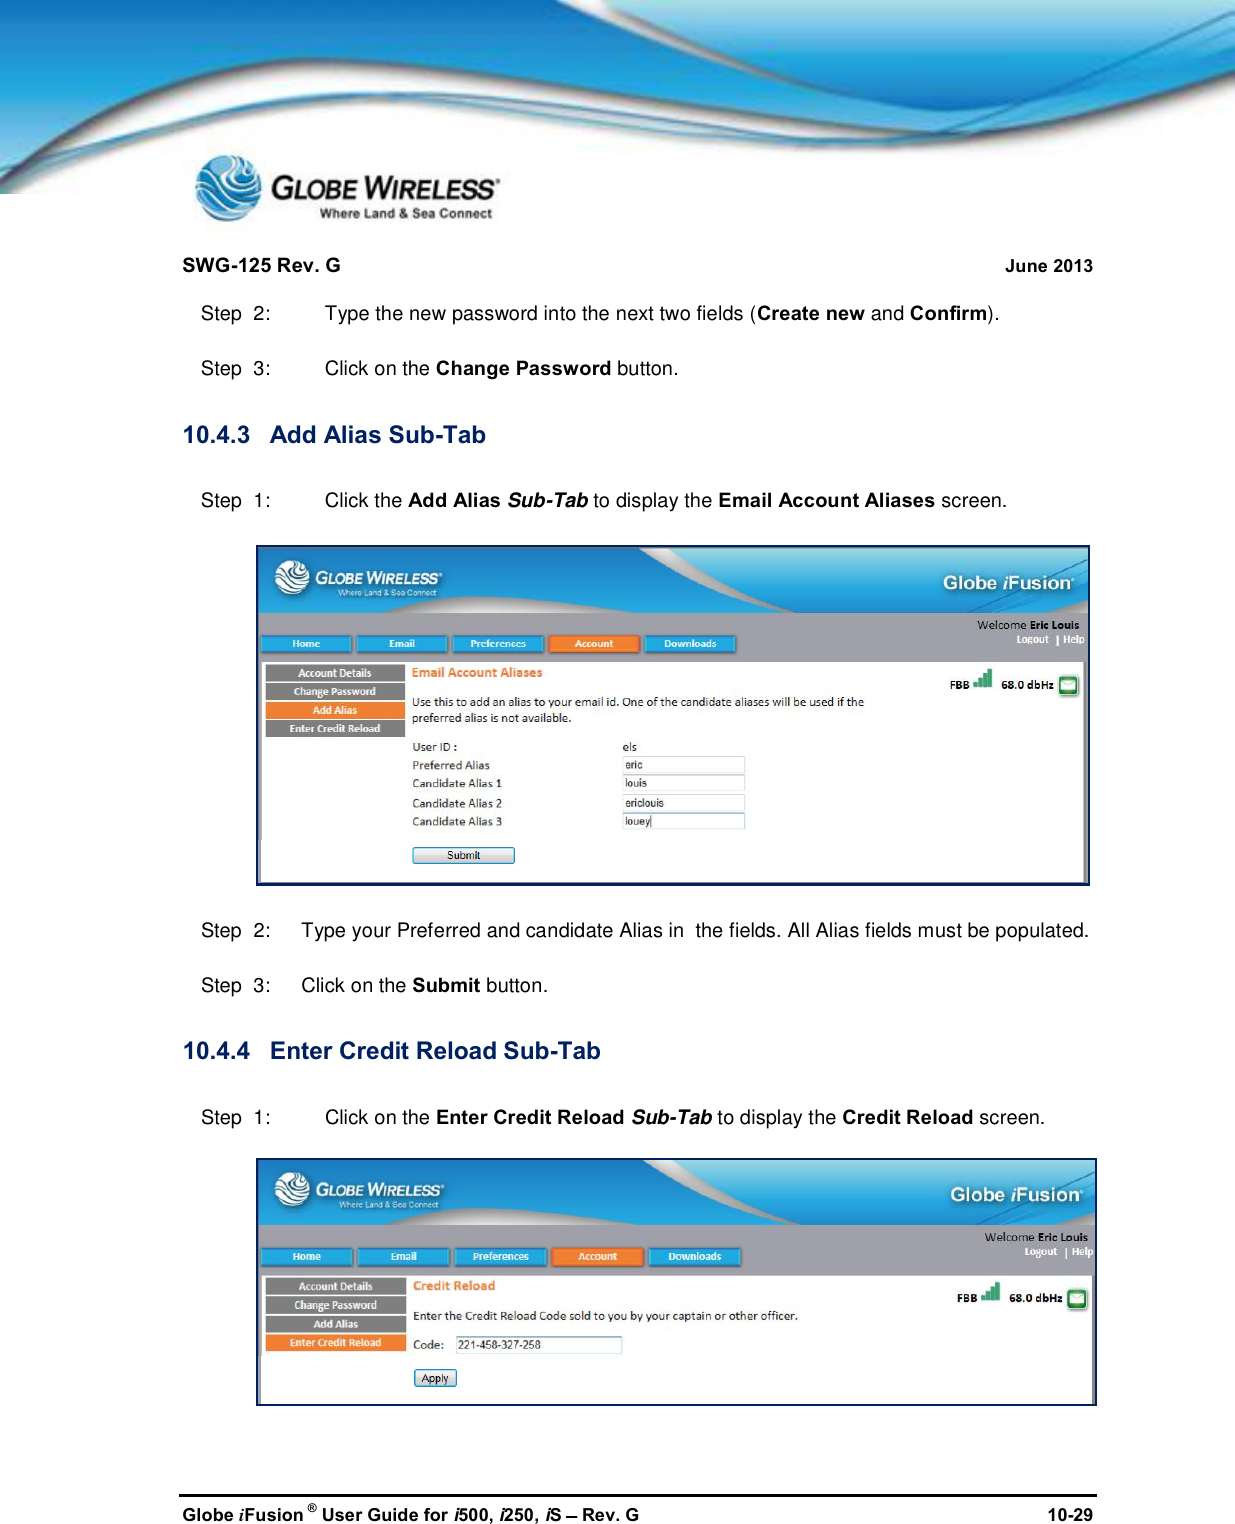
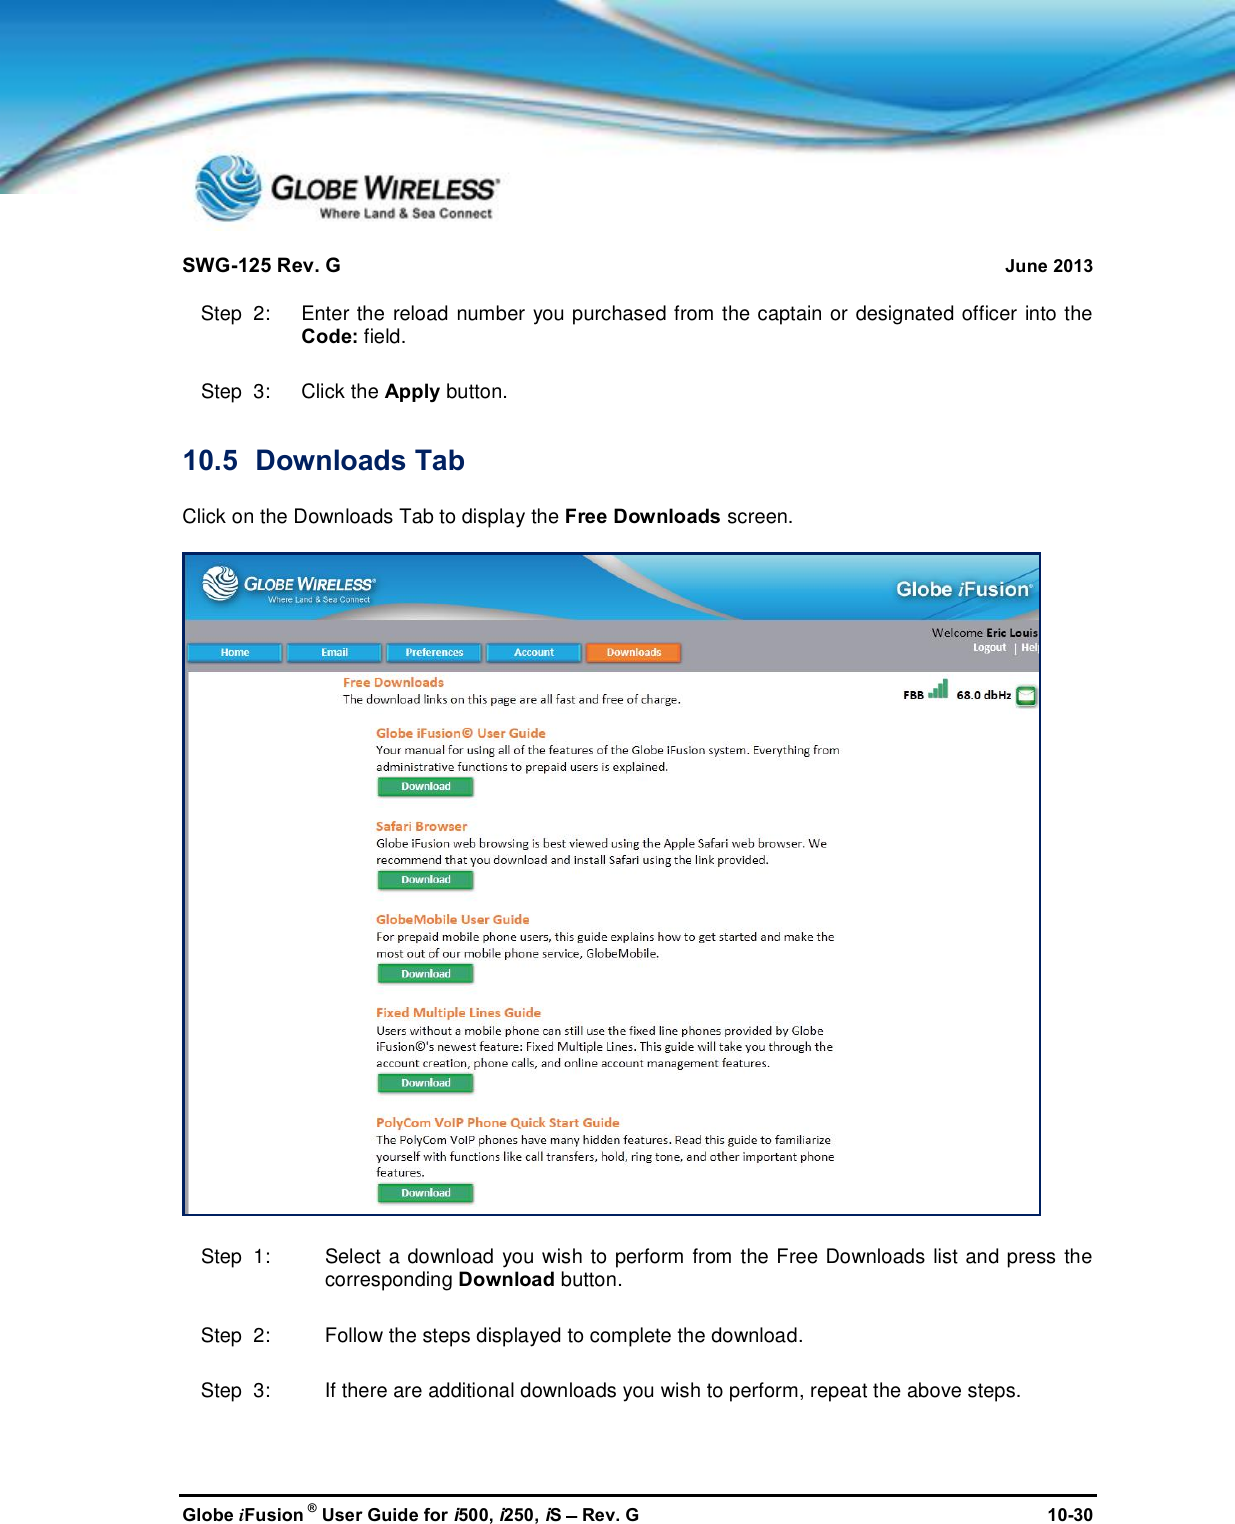
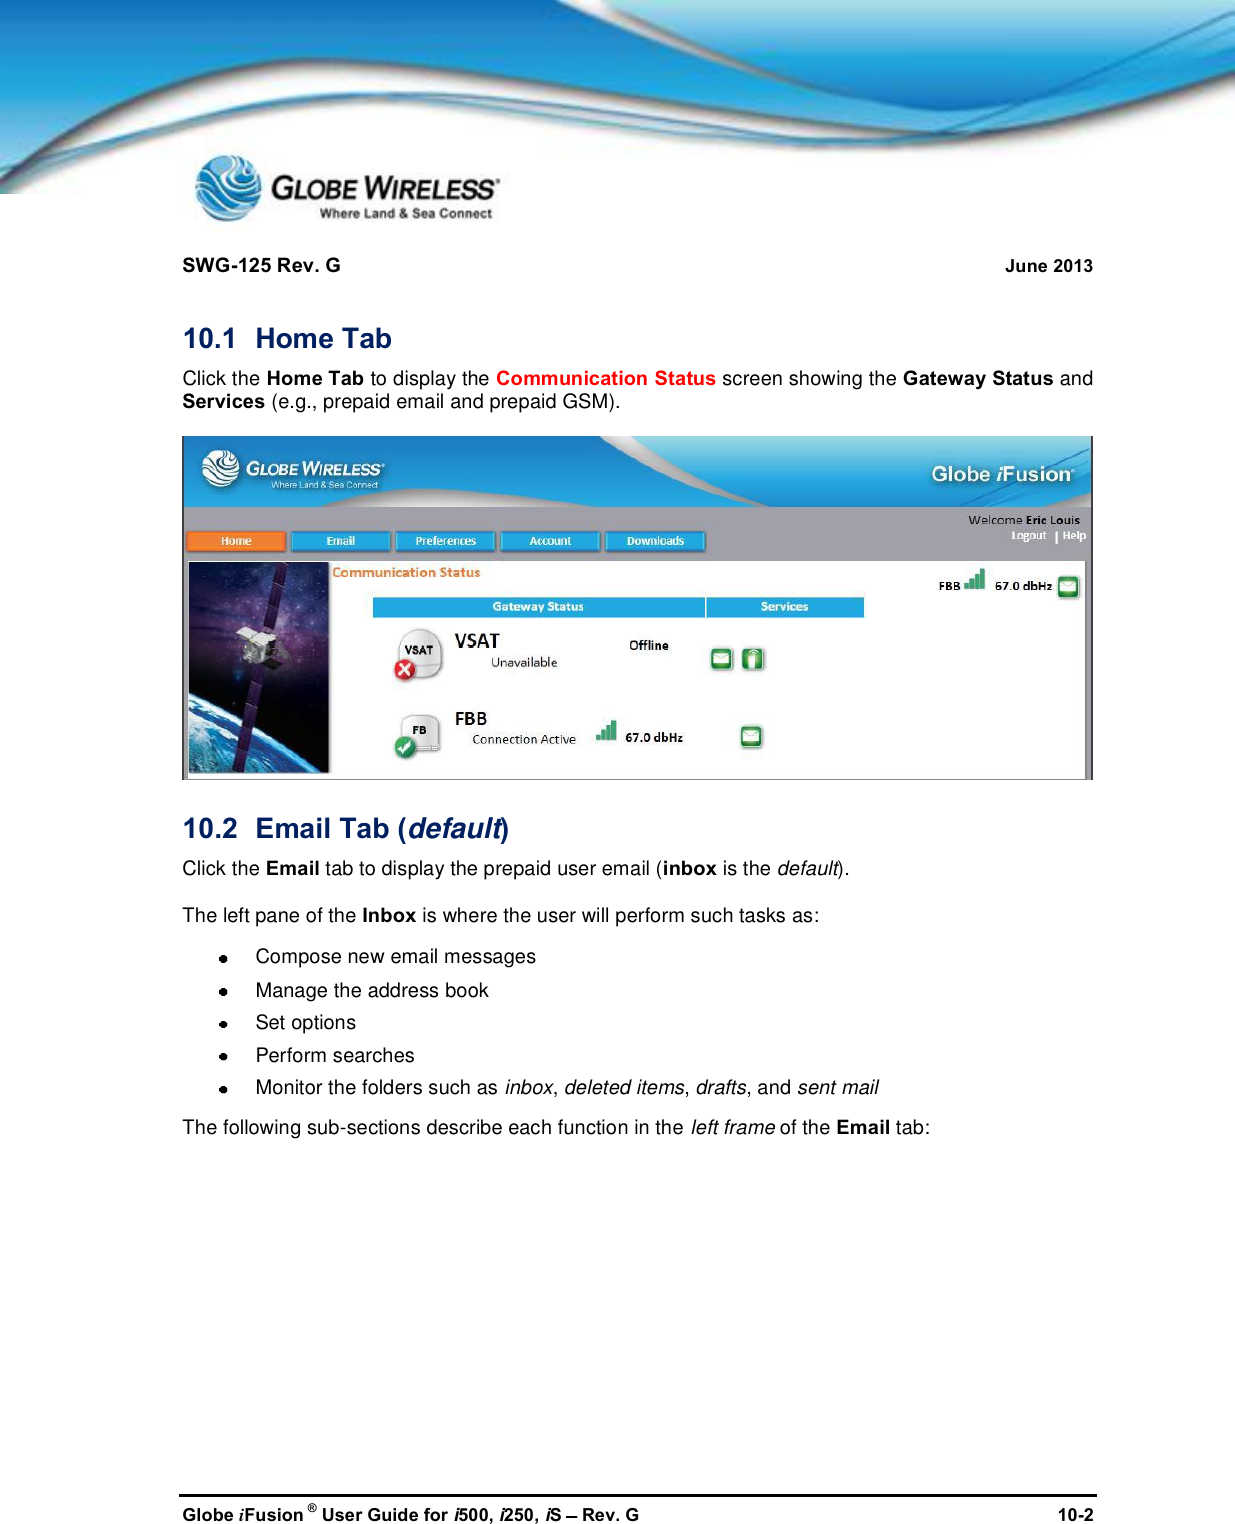
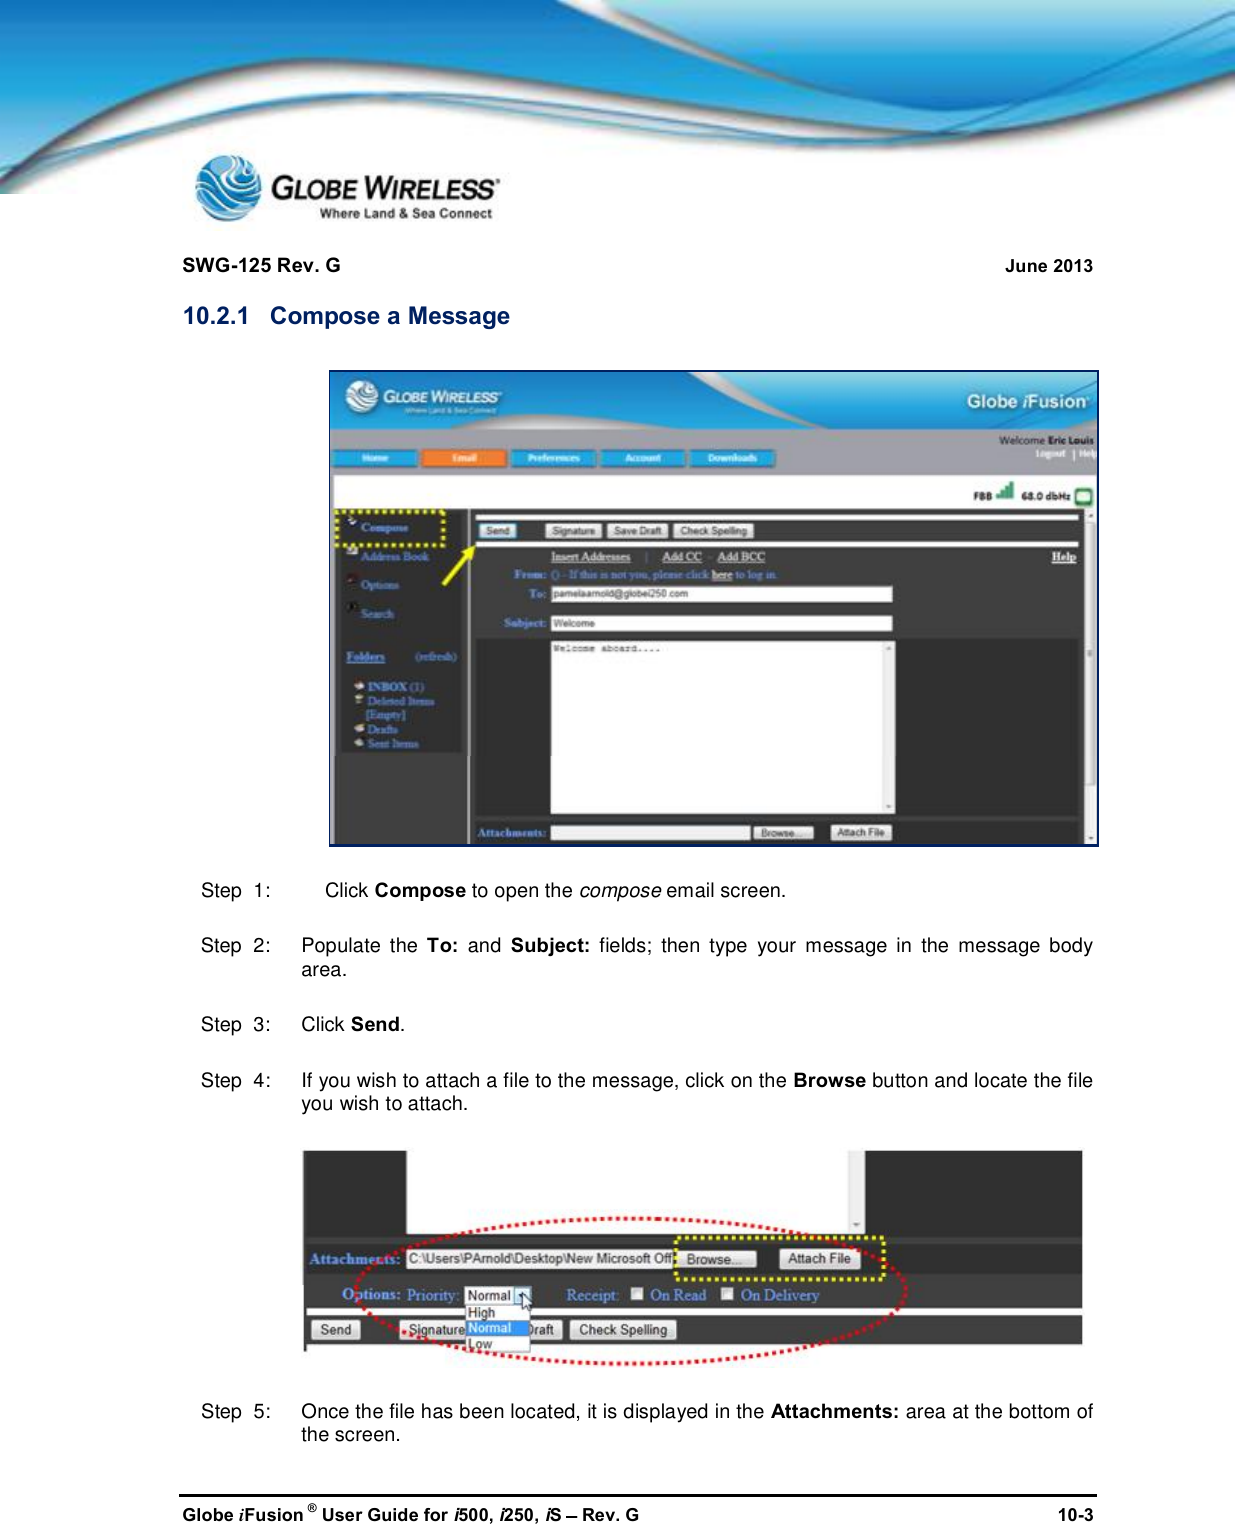
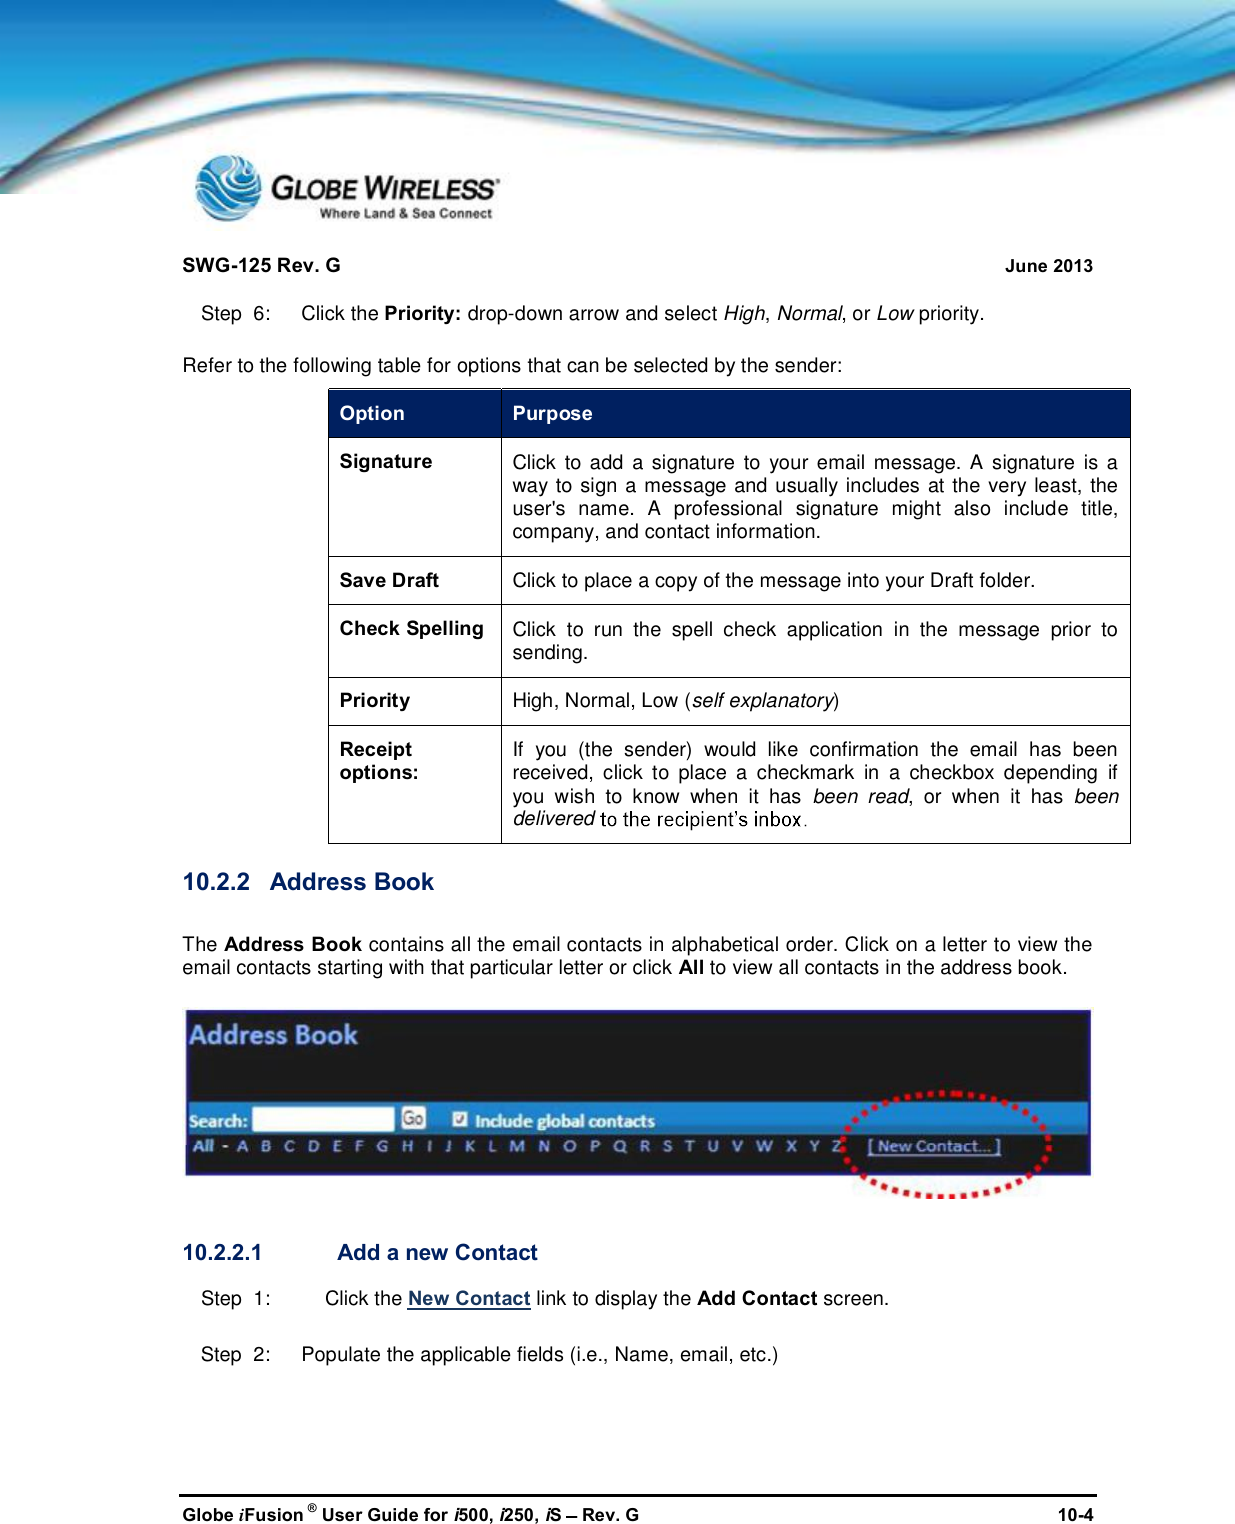
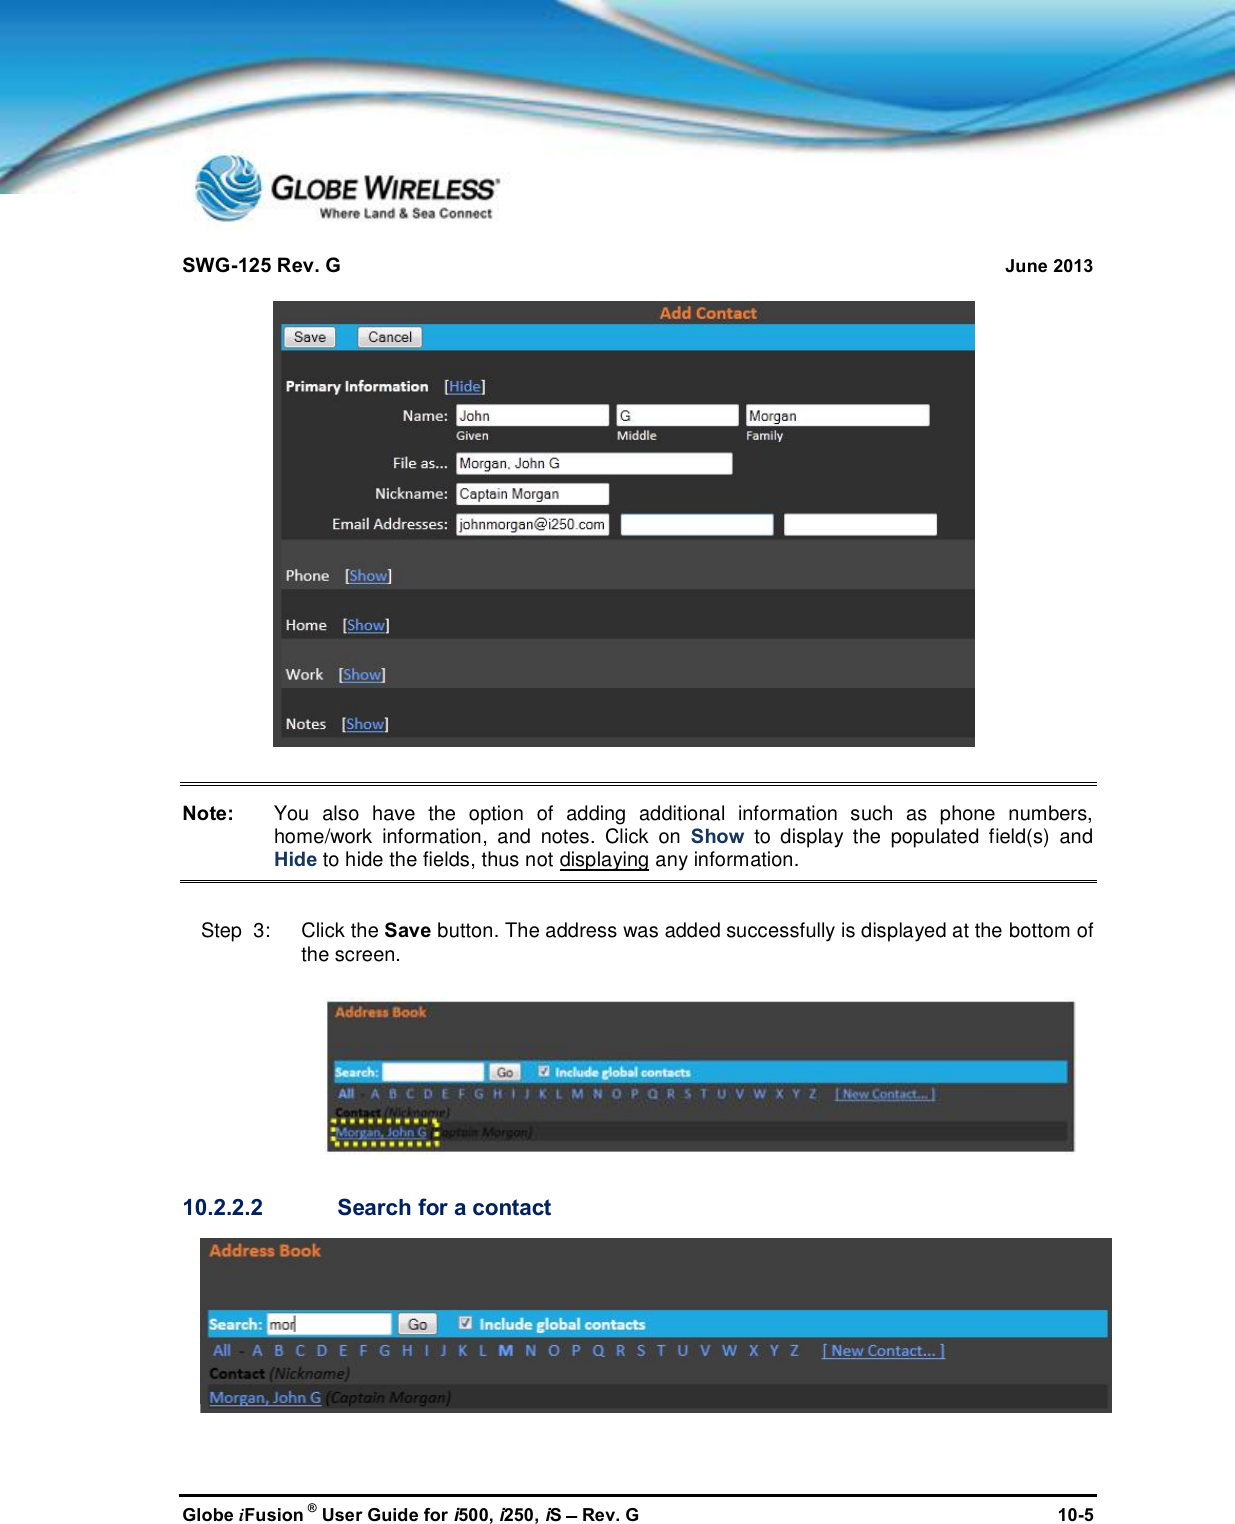
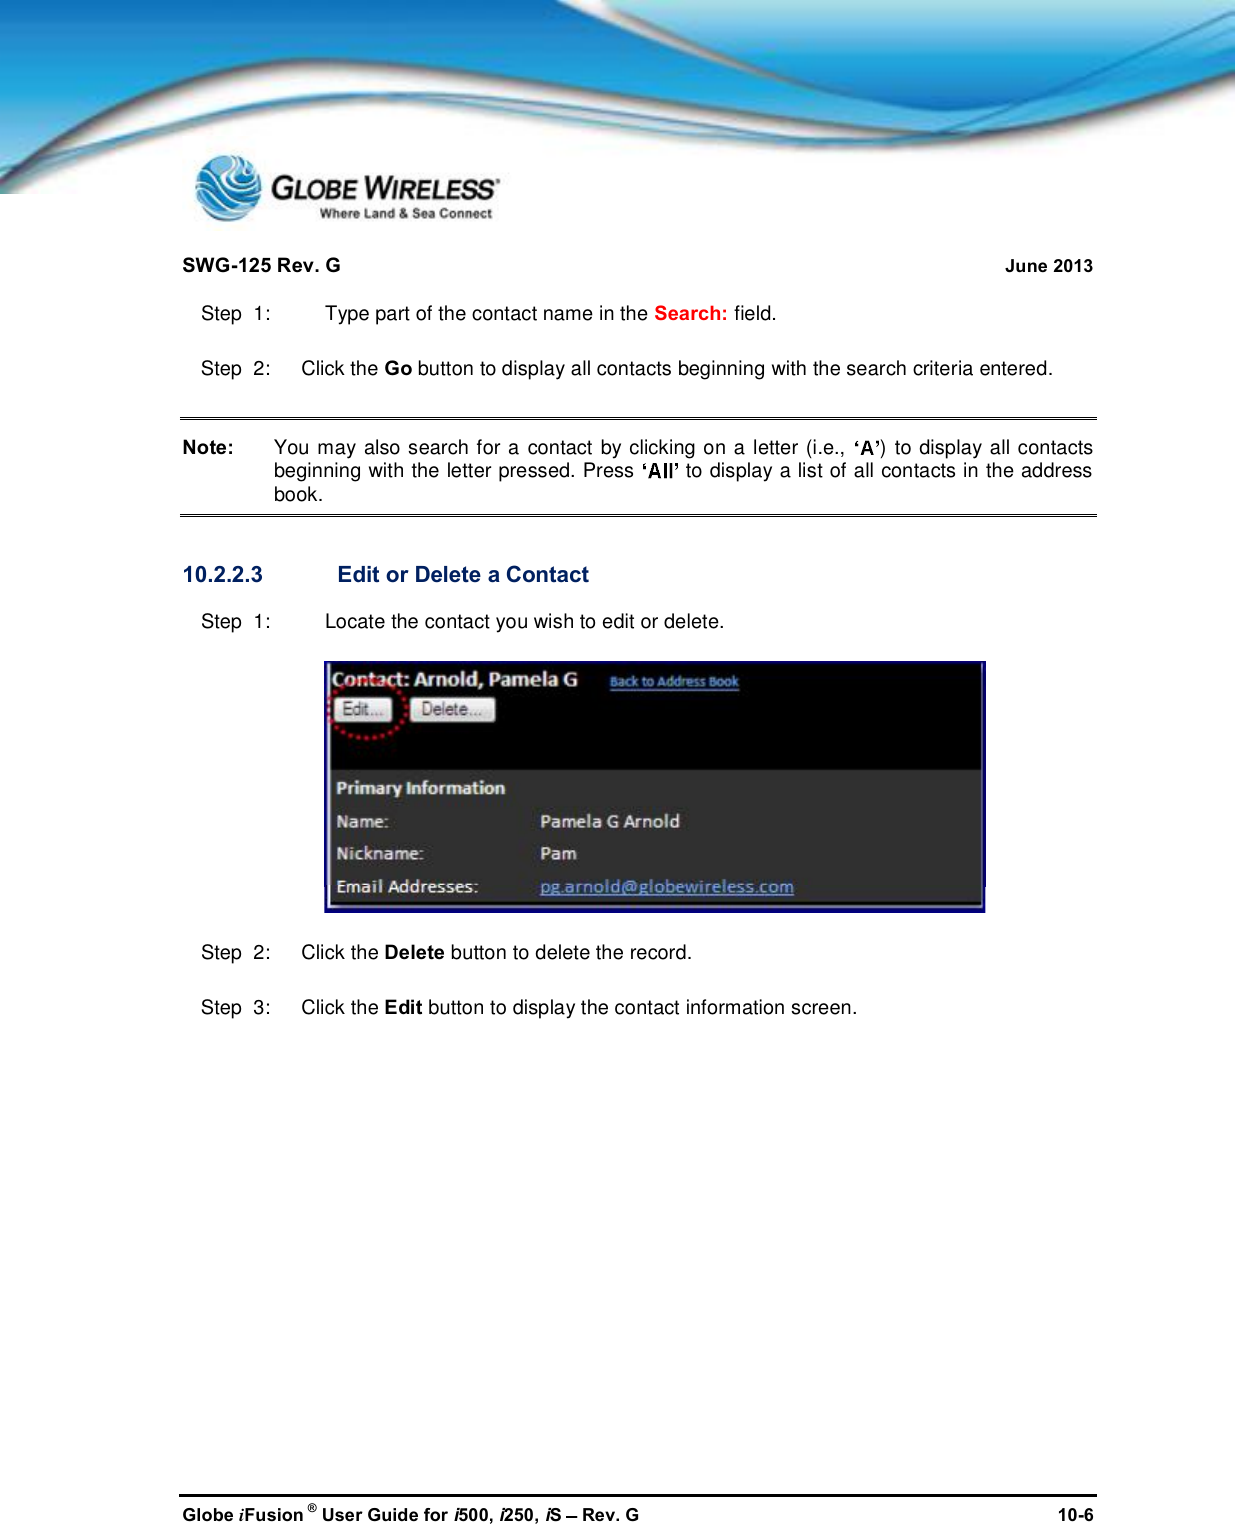
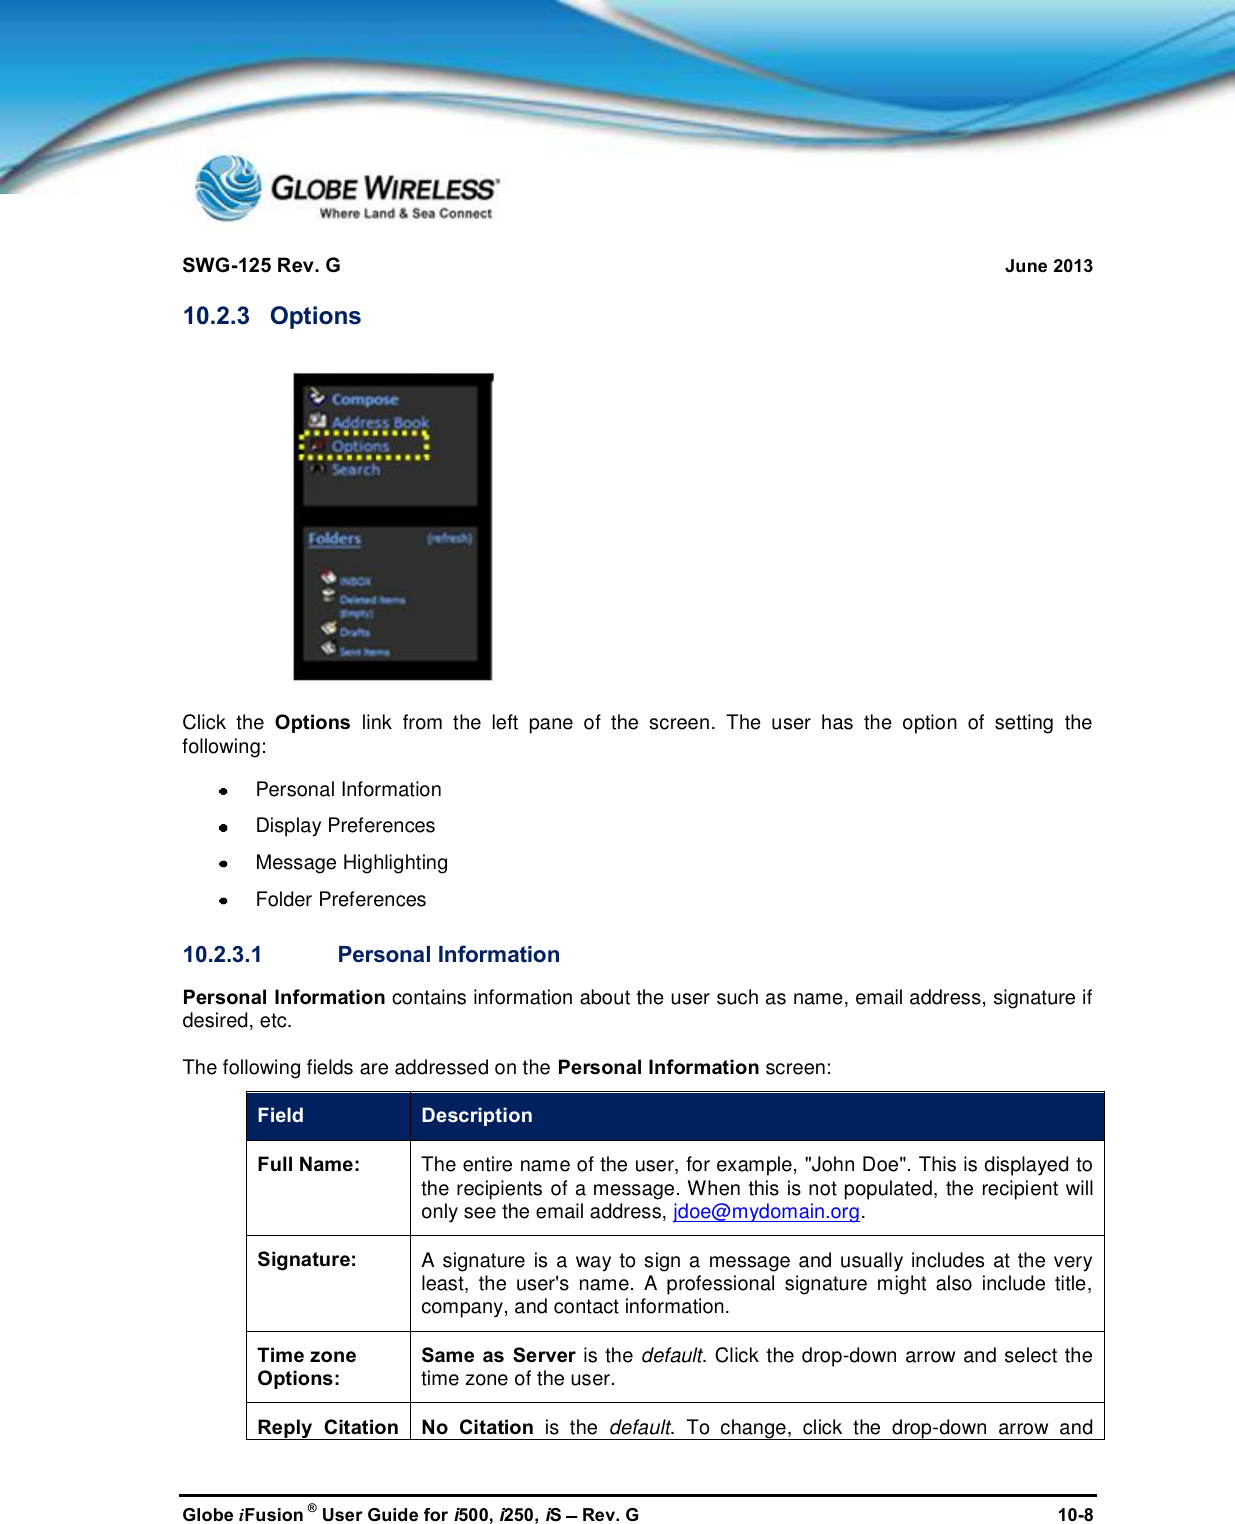
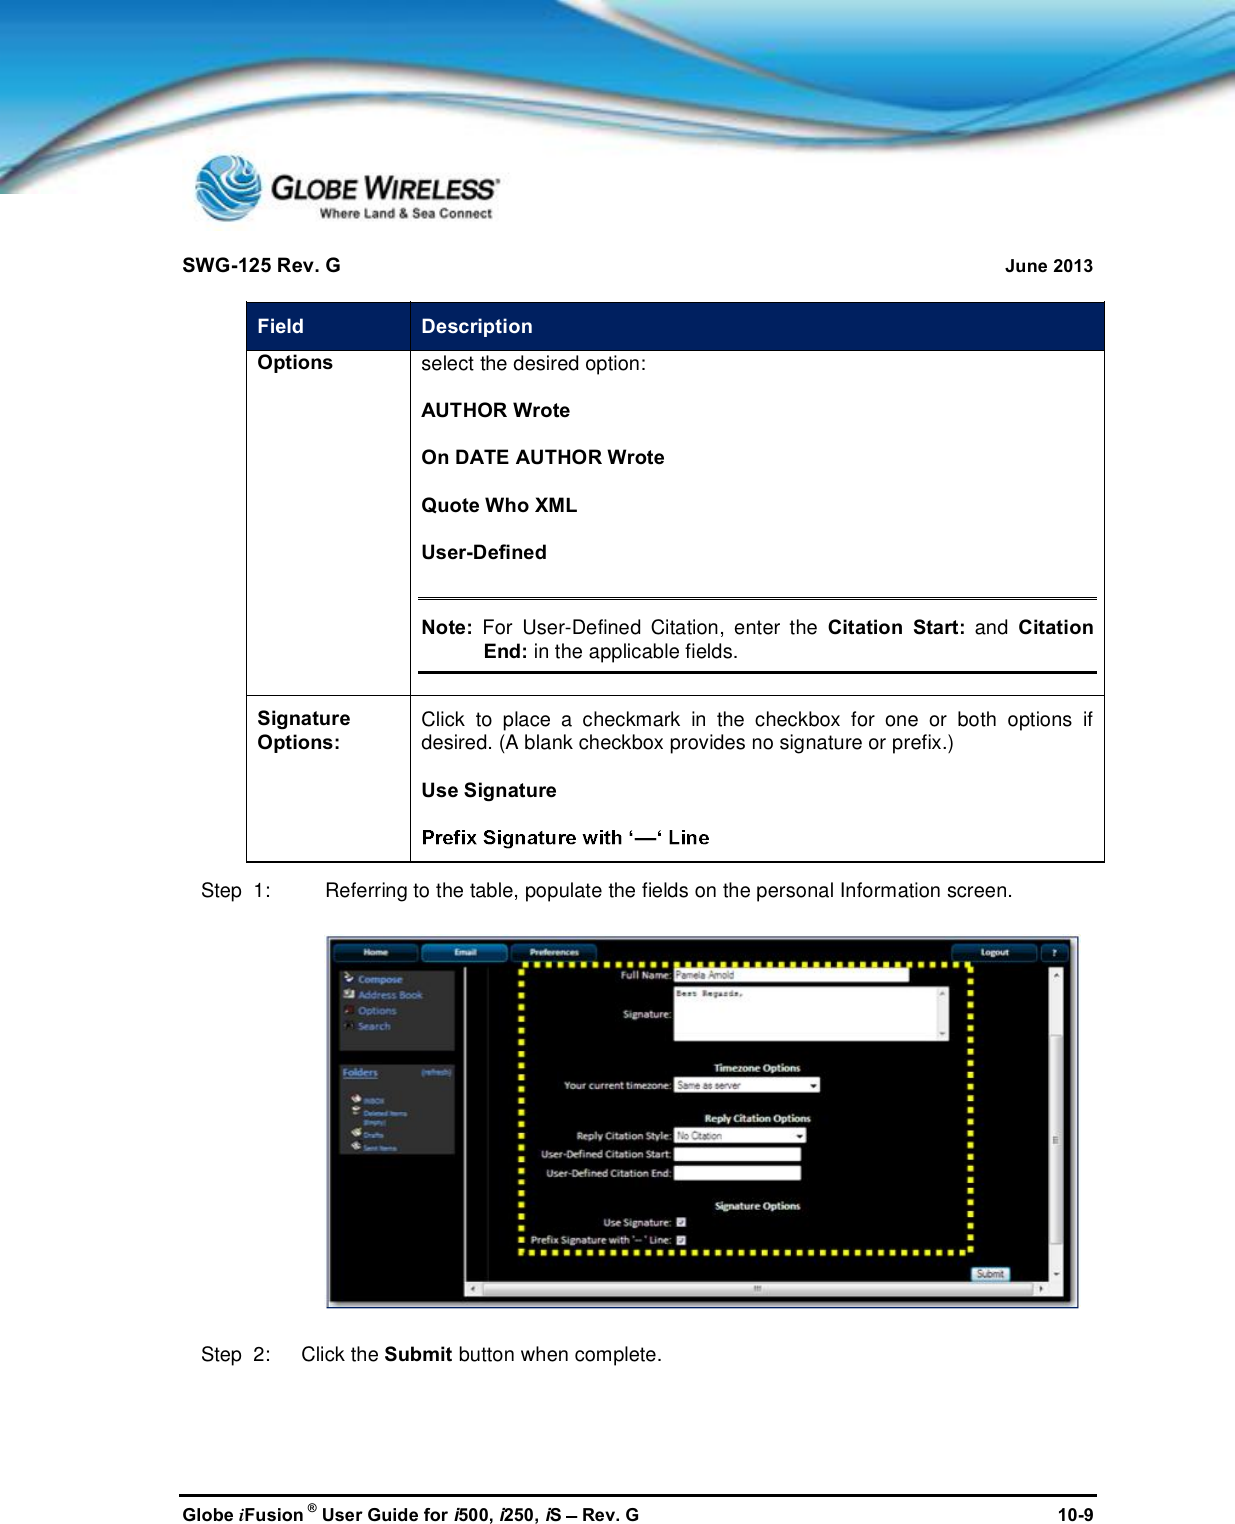
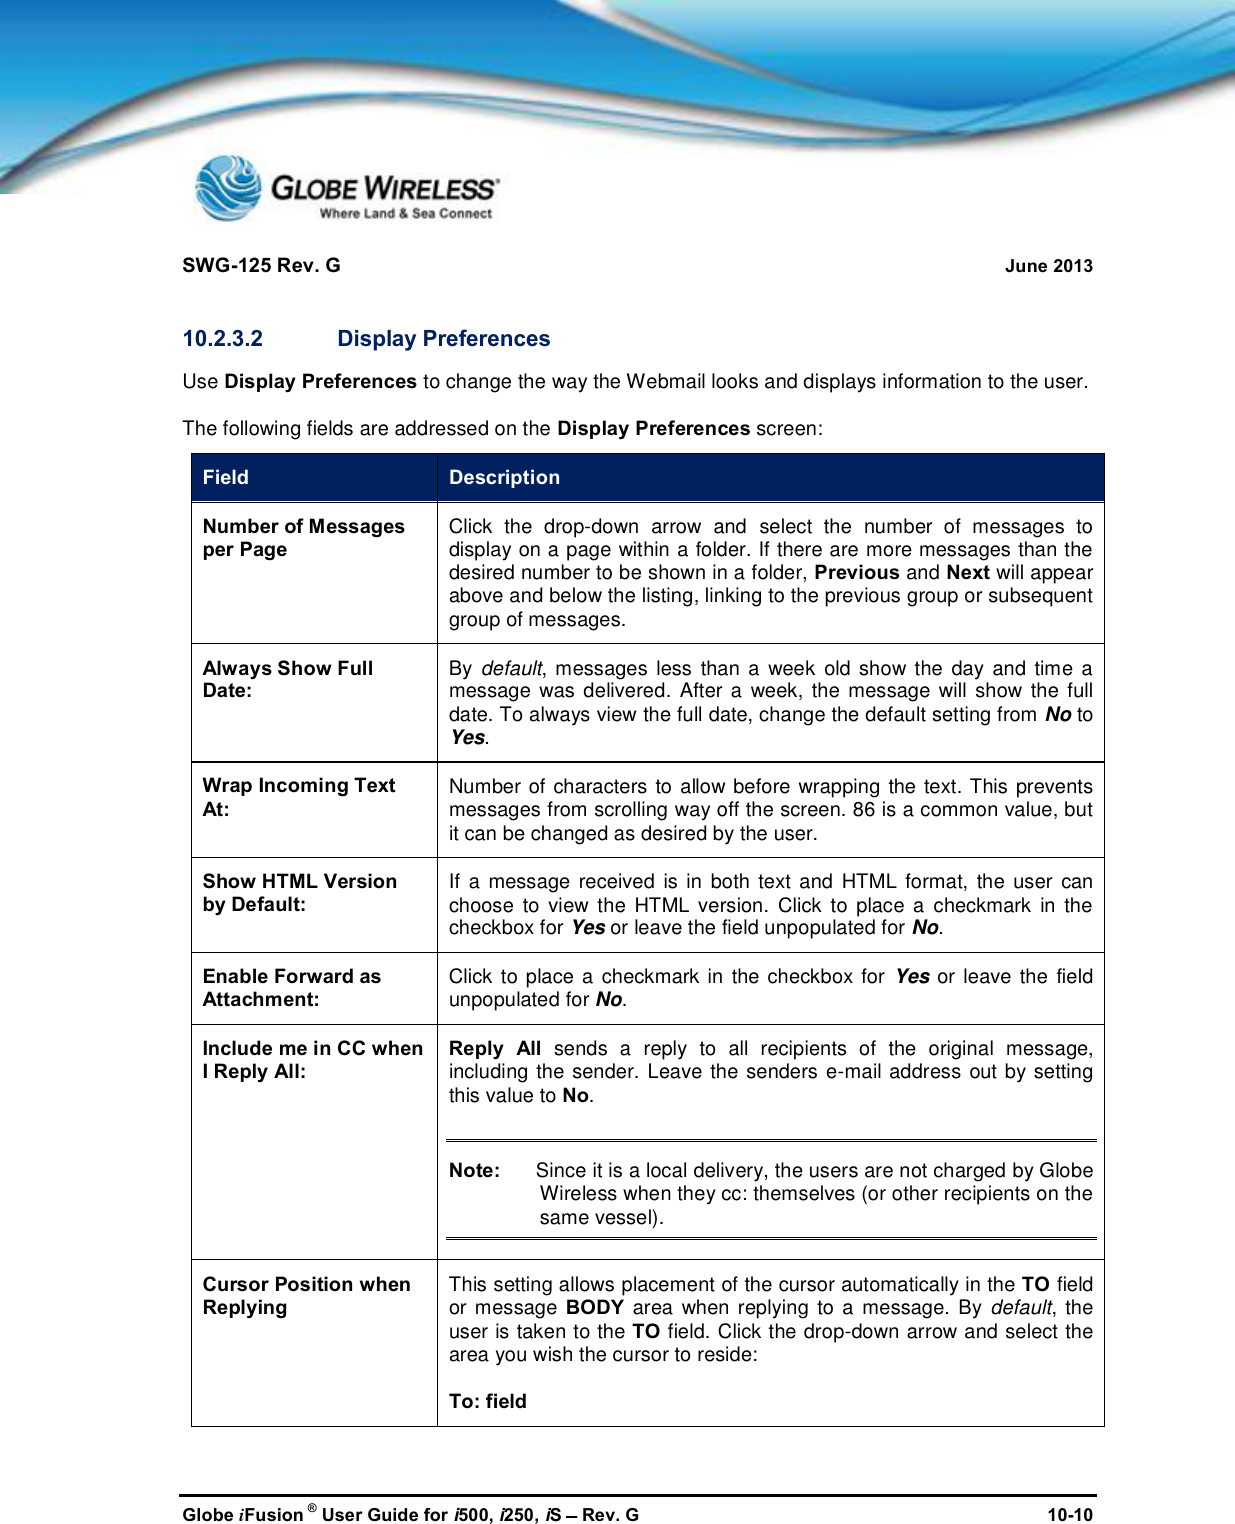
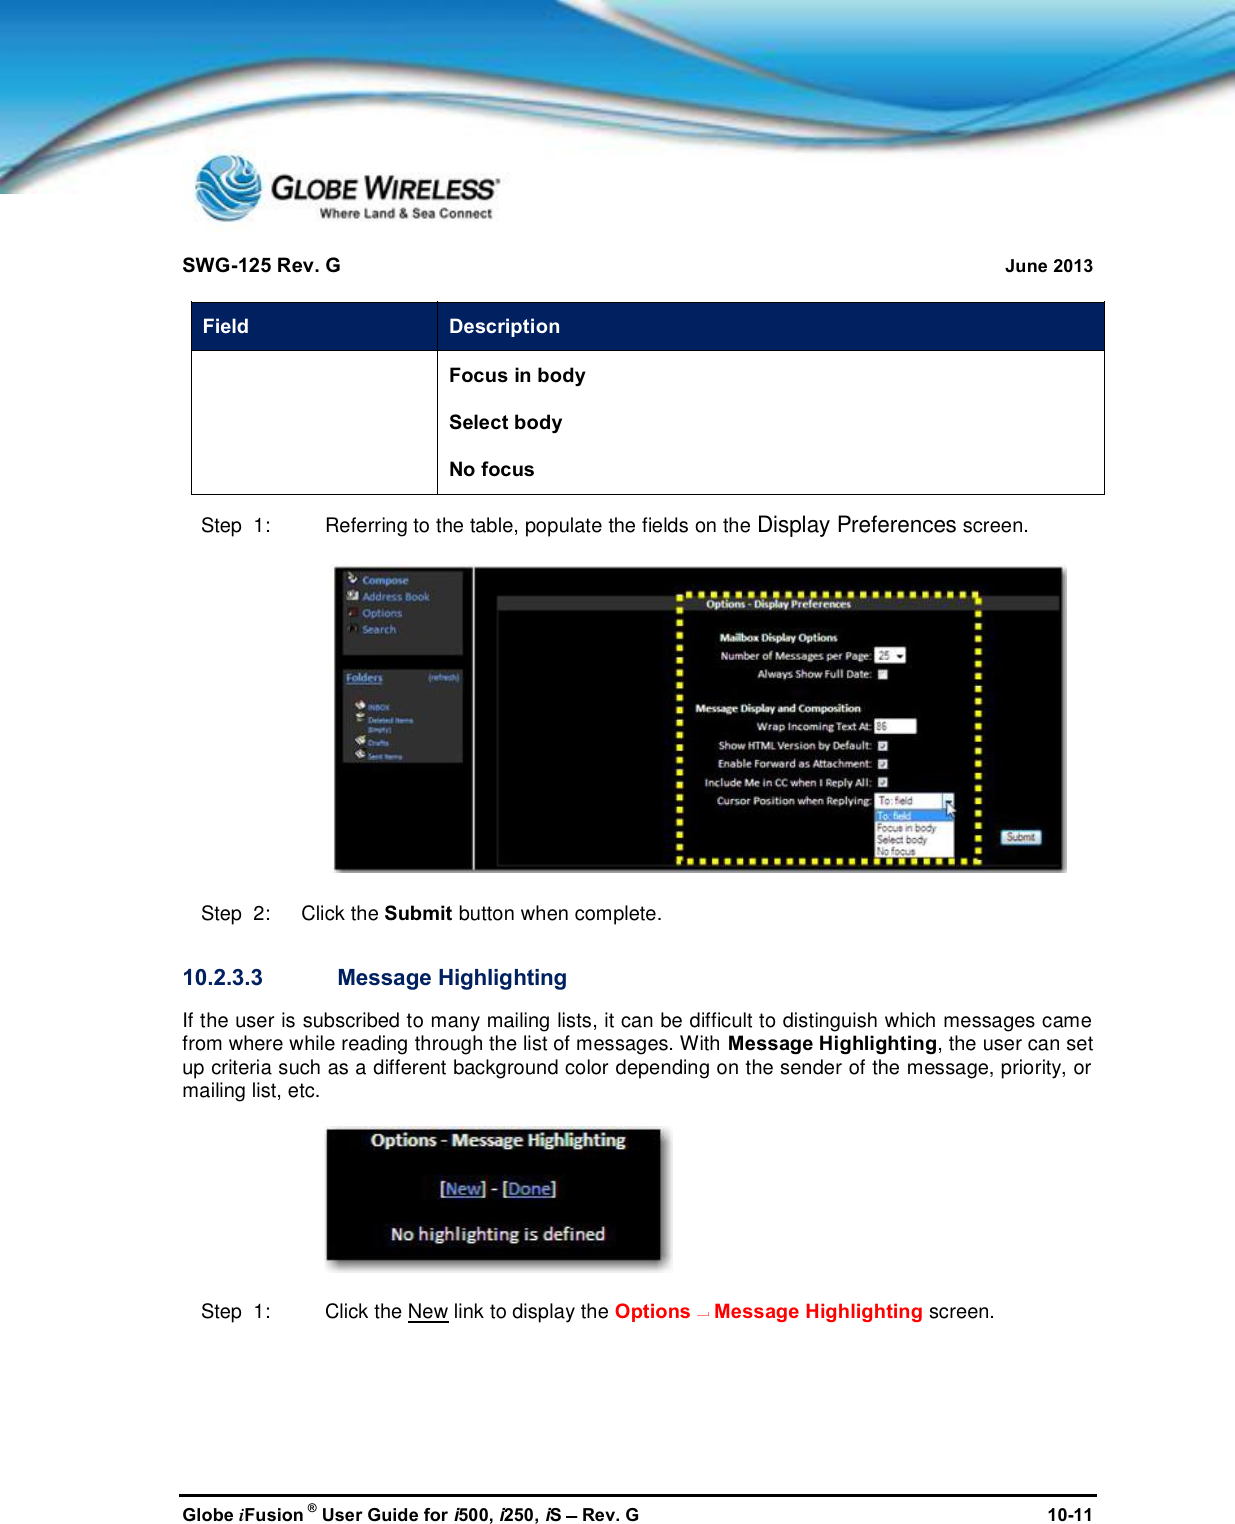
![SWG-125 Rev. G June 2013Globe iFusion ®User Guide for i500, i250, iSRev. G 10-110.0Prepaid UsersWhen the Prepaid User logs in to the Globe iFusion®, the default Email Inbox screen is displayed.The Prepaid User screen contains the following tabs:Home TabEmail (default] TabPreferences TabAccount TabDownloads Tab](https://usermanual.wiki/Inmarsat-Solutions/GLOBEI250S3BDE/User-Guide-2006666-Page-113.png)

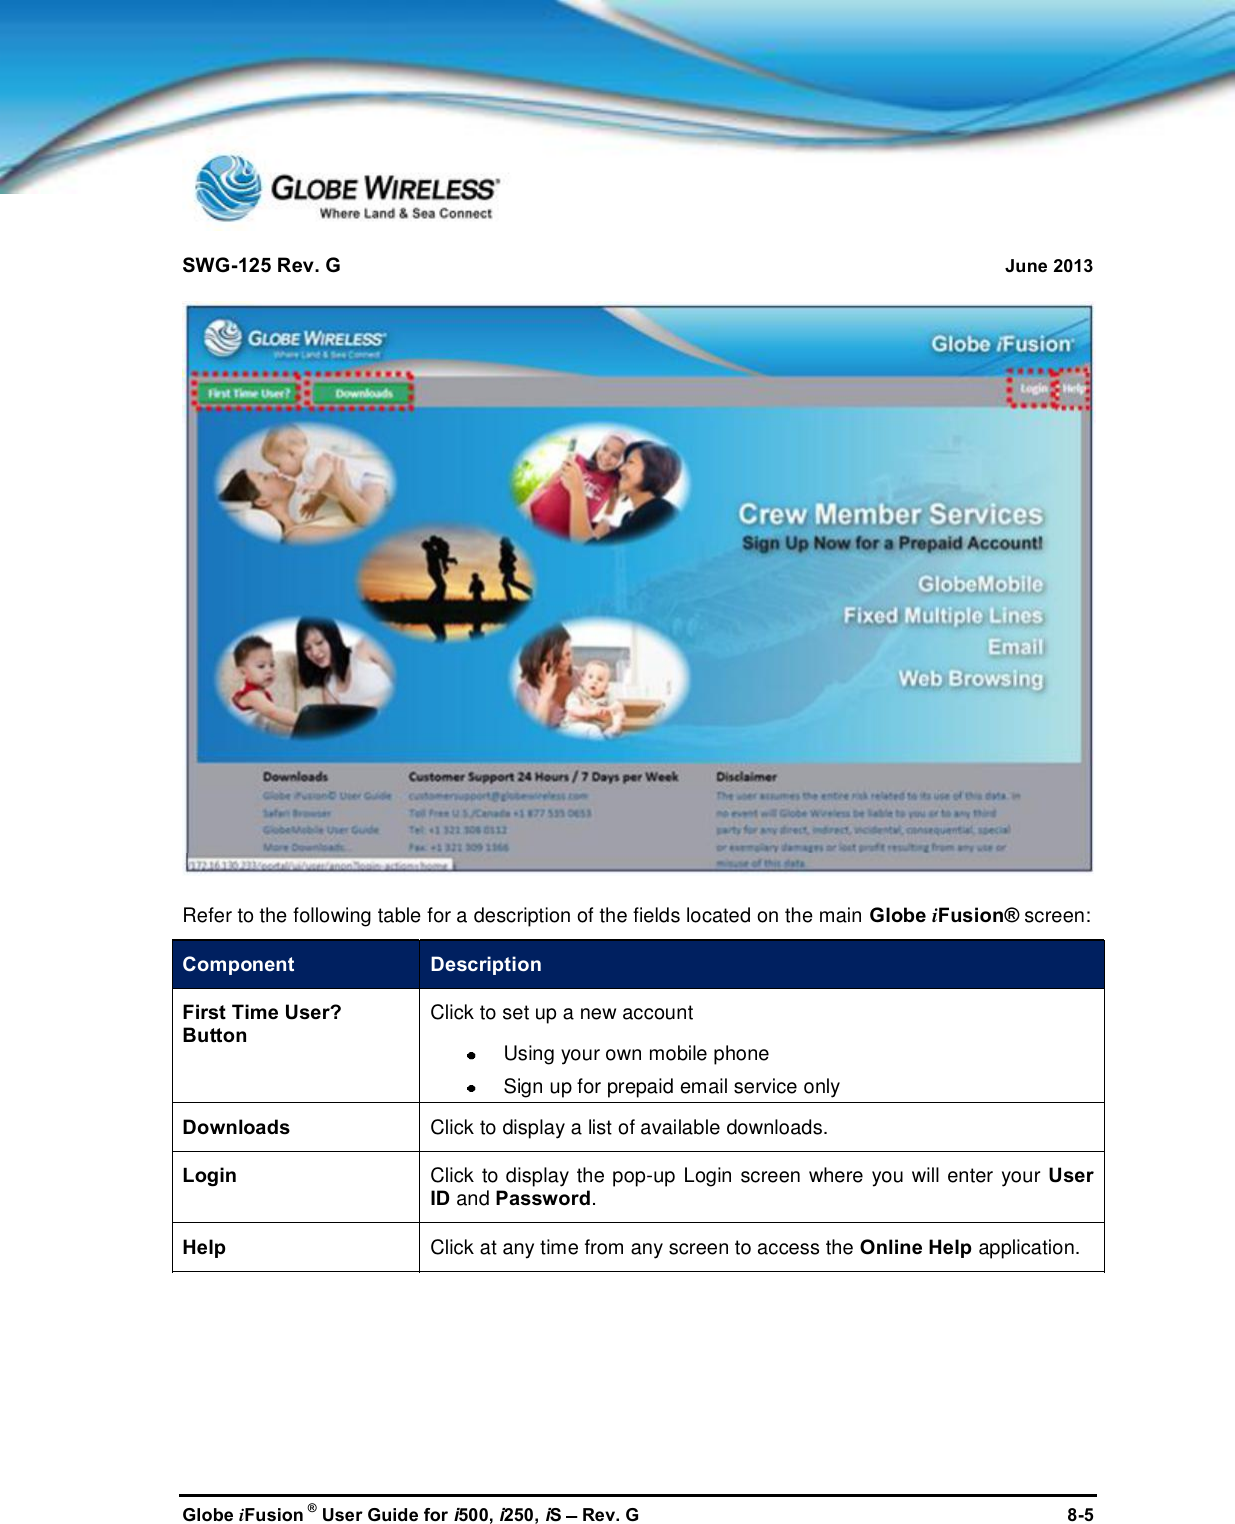
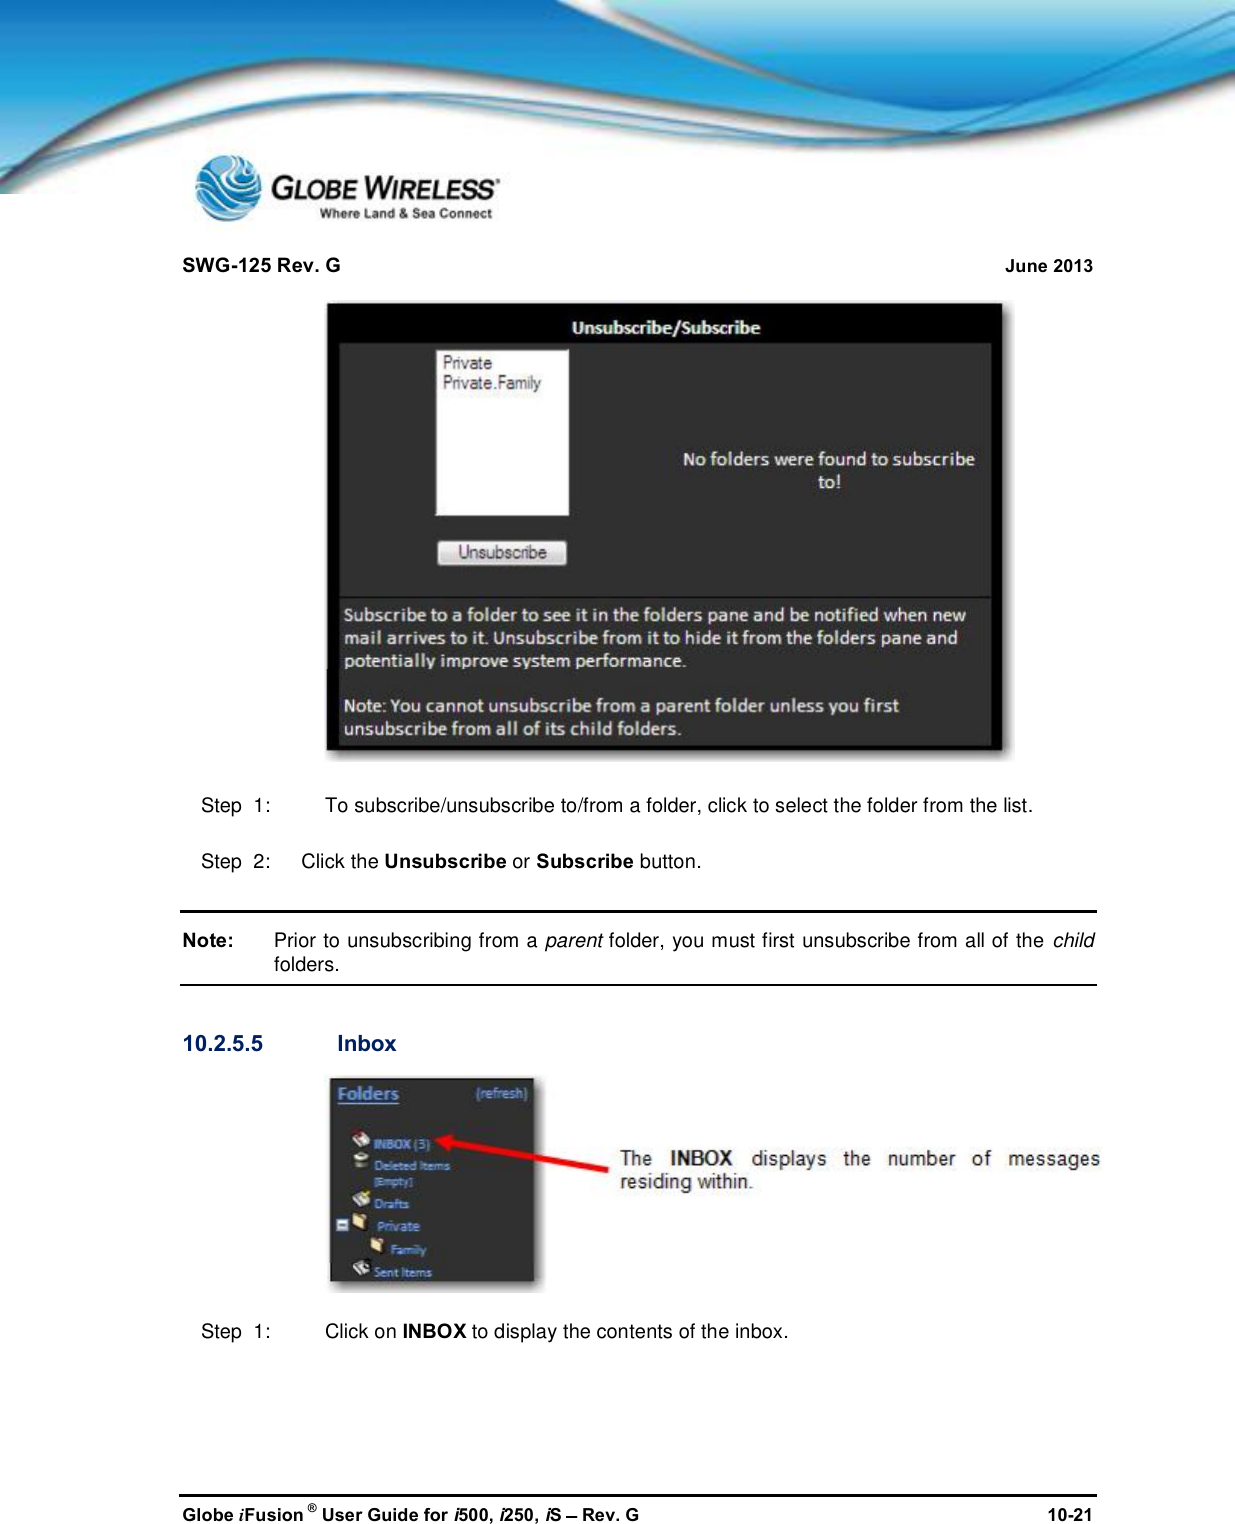
![SWG-125 Rev. G June 2013Globe iFusion ®User Guide for i500, i250, iSRev. G 10-20Step 2: Click the Yes button. A Deleted folder successfully pop-up screen is displayed.Note: Whenever a Parent folder is deleted, all subsequent child folders are automatically deletedas well. Both deleted folders now reside in the Deleted Items Folder (above graphic).Step 3: To delete the folders from the Deleted Items folder, click on the [Empty] link. Thedeleted Parent and subsequent Child folders are removed.10.2.5.4 Unsubscribe / SubscribeUnsubscribing to a folder is the same as hiding it from the folders pane so that it cannot beseen. Performing this action can improve system performanceSubscribing to a folder allows you to view it in the folders pane, thus being notified whennew mail arrives to the folder](https://usermanual.wiki/Inmarsat-Solutions/GLOBEI250S3BDE/User-Guide-2006666-Page-132.png)
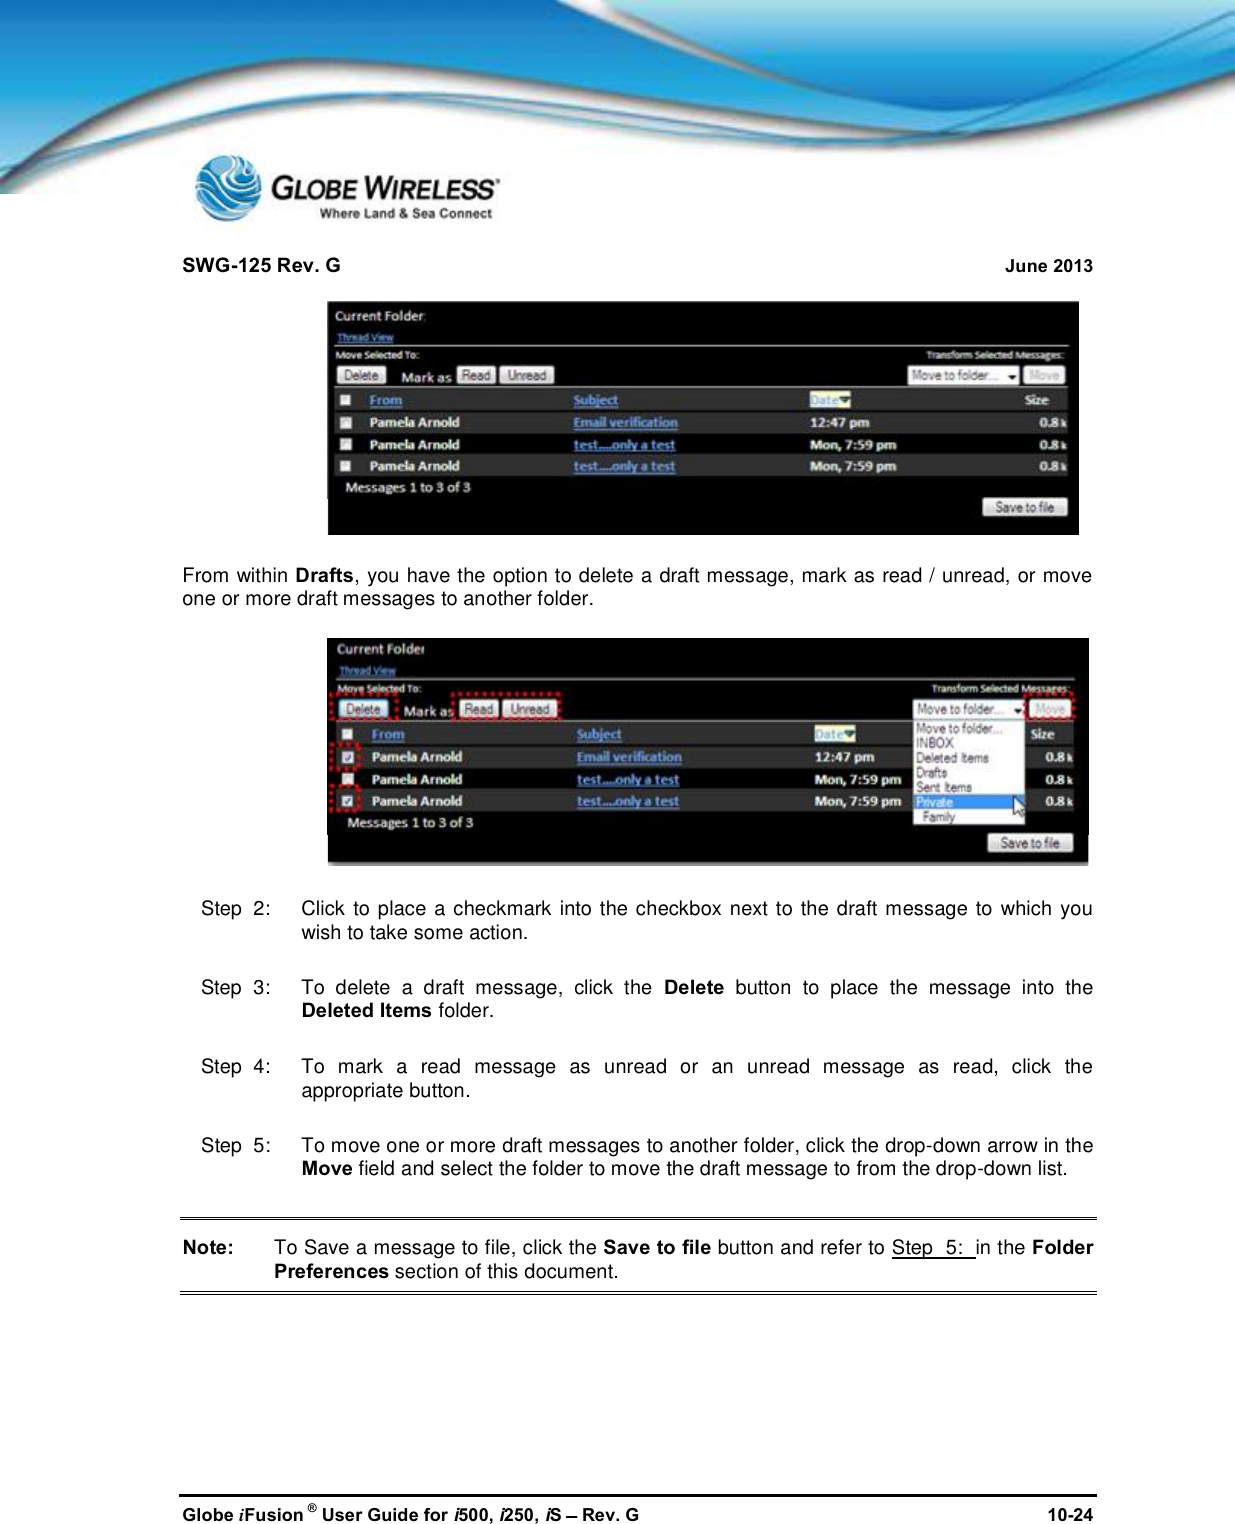
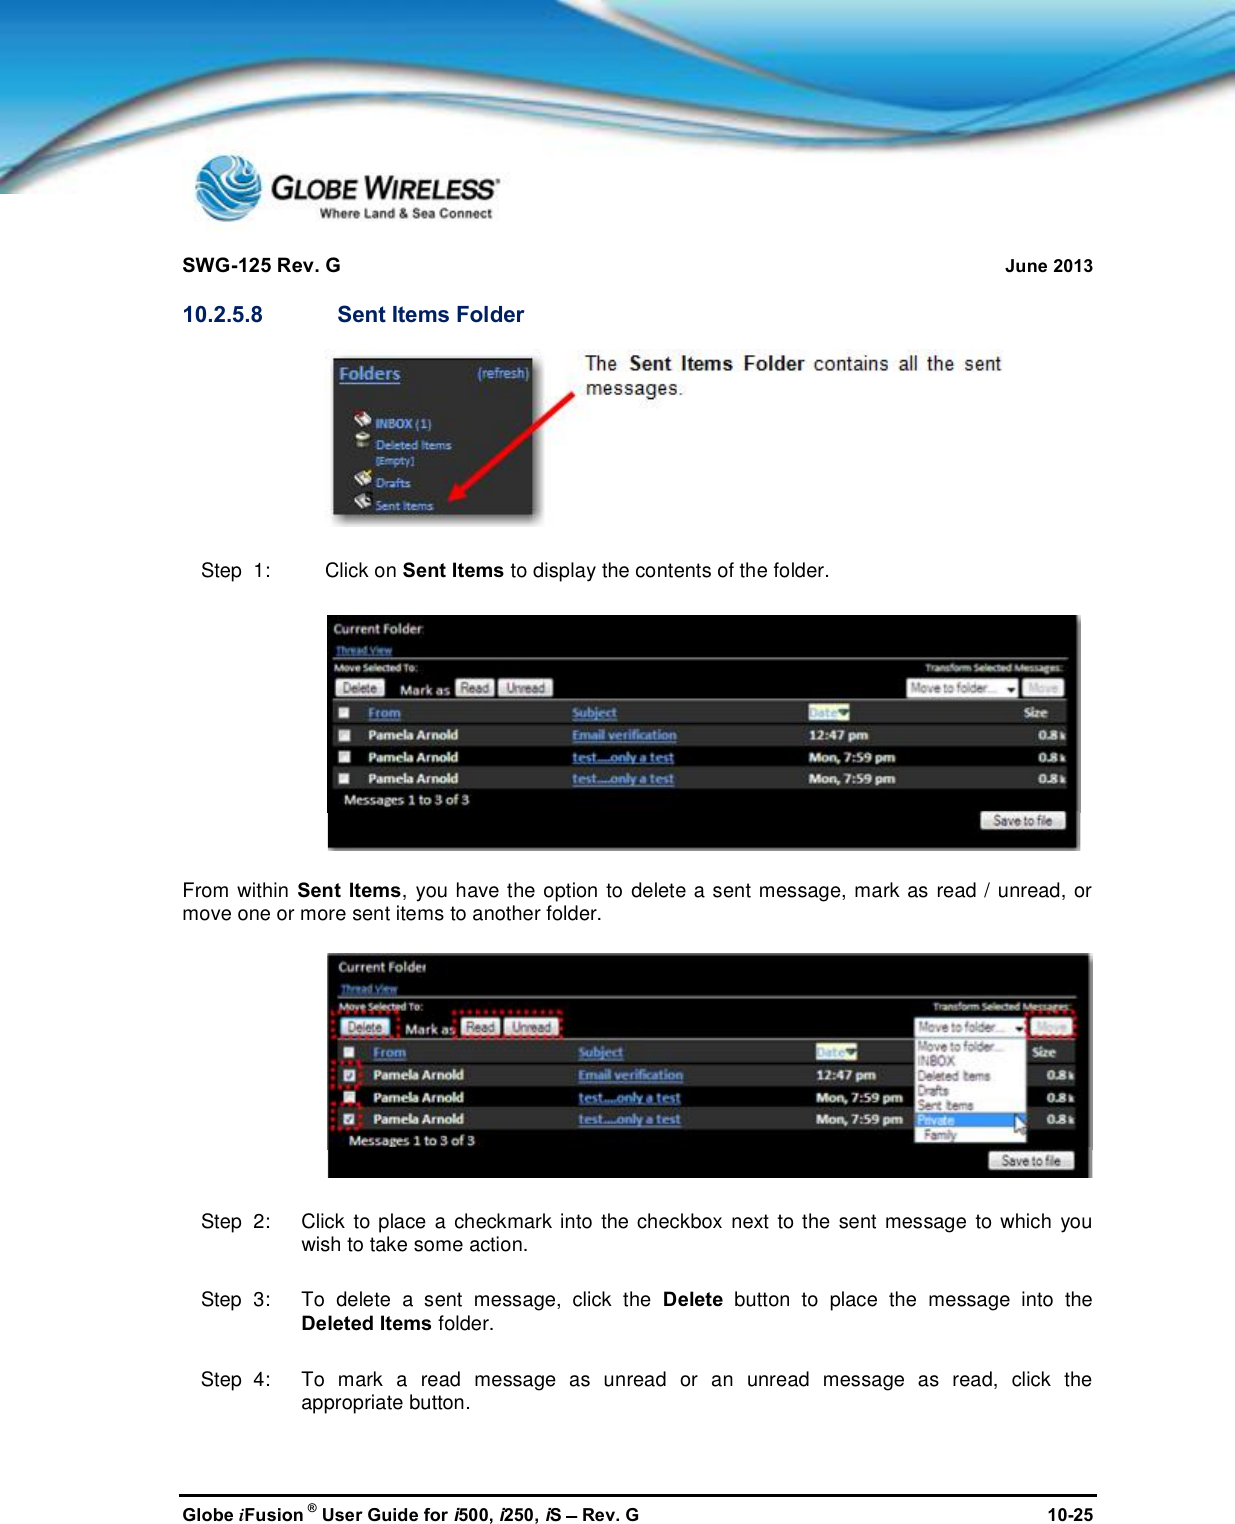
![SWG-125 Rev. G June 2013Globe iFusion ®User Guide for i500, i250, iSRev. G 10-2310.2.5.6 Deleted Items FolderStep 1: To delete items from the Deleted Items folder click on [empty] to display thefollowing message:Step 2: Click the OK button to complete the action.10.2.5.7 Drafts FolderStep 1: Click on Drafts to display the contents of the folder.](https://usermanual.wiki/Inmarsat-Solutions/GLOBEI250S3BDE/User-Guide-2006666-Page-135.png)