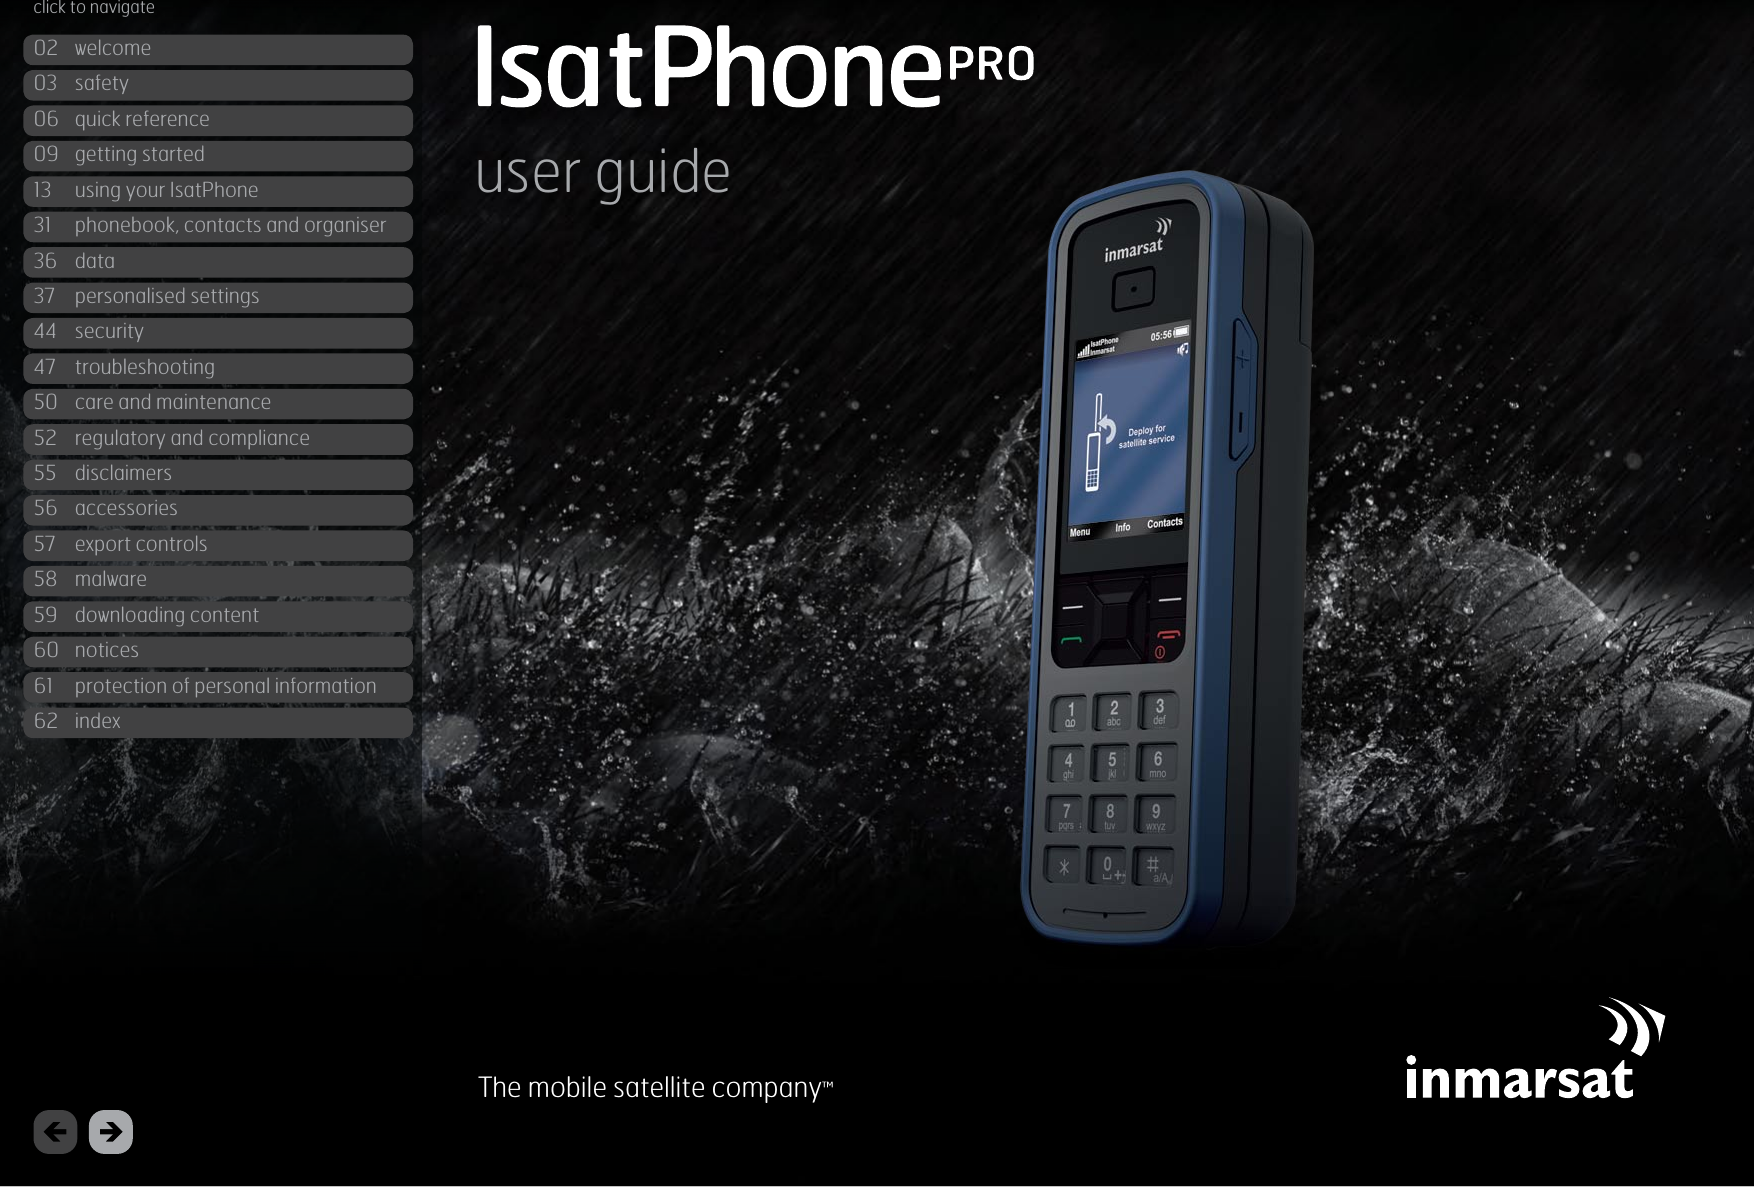
Inmarsat ISATPHONE Satellite phone with Bluetooth and GPS for use on the Inmarsat satellite network User Manual

Inmarsat Limited Satellite phone with Bluetooth and GPS for use on the Inmarsat satellite network

User Manual

click to navigate02  welcome03  safety06  quick reference09  getting started13  using your IsatPhone31  phonebook, contacts and organiser36  data37  personalising settings44  security47  troubleshooting50  care and maintenance52  regulatory and compliance55  disclaimers  56  accessories   57  export controls58  malware59  downloading content60  notices61  protection of personal information62  index1The mobile satellite company™user guideclick to navigate02  welcome03  safety06  quick reference09  getting started13  using your IsatPhone31  phonebook, contacts and organiser36  data37  personalised settings44  security47  troubleshooting50  care and maintenance52  regulatory and compliance55  disclaimers  56  accessories   57  export controls58  malware59  downloading content60  notices61  protection of personal information62  index
click to navigate02  welcome03  safety06  quick reference09  getting started13  using your IsatPhone31  phonebook, contacts and organiser36  data37  personalised settings44  security47  troubleshooting50  care and maintenance52  regulatory and compliance55  disclaimers  56  accessories   57  export controls58  malware59  downloading content60  notices61  protection of personal information62  index2Congratulations on buying your IsatPhone Pro. It offers the ultimate combination:  Global coverage  Robust handset  Clear voice quality  Reliable network connection  Long battery life  Easy to useFrom Inmarsat, the world’s leading provider  of mobile satellite communications.Please follow this user guide for further information on how to set up,  connect, personalise and use your phone safely. Further information  is available at inmarsat.com/isatphone.
click to navigate3 Exposure to radio frequency energyIsatPhone Pro is a radio transmitter and receiver.  When the phone or Bluetooth handsfree is turned  on, it emits low levels of radio frequency energy.  The phone is designed and manufactured not to exceed the safety limits for exposure to radio frequencies (RF) as recommended by the ICNIRP (International Commission on Non-Ionising Radiation Protection) and as adopted within mandatory standards of the European Commission and the  United States of America.Specific Absorption Rate (SAR) is used to measure radio frequency energy absorbed by the body when using a mobile phone. IsatPhone Pro is compliant with the EC standards for exposure specified in EN 50360 and EN 50361. For use of the phone at the ear, these standards set a SAR limit of 2.0 W/kg averaged over a 10g volume. IsatPhone Pro is also compliant with the Federal Communications Commission (FCC) standards and test procedures as reflected in the requirements of 47 CFR §2.1093 and FCC OET 65 Supplement C. For use of the phone at the ear, these standards set a SAR limit of 1.6 W/kg averaged over a 1g volume. Tests for SAR are conducted in accordance with international guidelines for testing using standard operating positions as per the procedures for the applicable standards, with the device transmitting at the highest certified power levels in all operational frequency bands.safetyNote: The SAR requirements for IsatPhone Pro  are met for handheld at the ear. No measures have been taken for SAR compliance in a body-worn position, since in such a position the device cannot properly communicate with the satellite. Use of the IsatPhone Pro in a body-worn position is therefore not recommended from both a performance and a safety perspective. PacemakersWireless phones may adversely affect the operation of some implanted cardiac pacemakers and other medically implanted equipment. Pacemaker patients should be aware that the use of an IsatPhone Pro in close proximity to a pacemaker might cause the device to malfunction. If a minimum distance of 15cm is kept between an IsatPhone Pro and a pacemaker, the risk of interference is limited. If you have any reason to suspect interference is occurring, immediately switch off your IsatPhone Pro. Contact your cardiologist for more information. Hearing aidsAlthough most modern hearing aids are immune to radio frequency interference from satellite terminals, some wireless devices may interfere with some hearing aids. In the event of such interference from the use of the IsatPhone Pro, maintain additional separation between you and your IsatPhone Pro and/or consult with your doctor or audiologist.31safety02  welcome03  safety06  quick reference09  getting started13  using your IsatPhone31  phonebook, contacts and organiser36  data37  personalised settings44  security47  troubleshooting50  care and maintenance52  regulatory and compliance55  disclaimers  56  accessories   57  export controls58  malware59  downloading content60  notices61  protection of personal information62  index2
 Other medical devicesAlthough most modern electronic medical equipment in hospitals and other clinical environments is shielded from RF energy, there is still a risk that a wireless device could cause interference. As such, never use your IsatPhone Pro near electronic medical equipment without first requesting permission. Blasting areas and potentially explosive environmentsAs with any wireless phone, do not use your IsatPhone Pro where blasting work is in progress. Observe all restrictions and follow any regulations or rules. Do not use your IsatPhone Pro in areas with a potentially explosive atmosphere. Note that such areas are often, but not always, clearly marked. Battery safetyUse only Inmarsat-supplied or approved batteries, and recharge your battery with Inmarsat-supplied or approved chargers for the phone. Use of batteries that are not Inmarsat-supplied or approved may pose increased safety risks. Do not dispose of batteries in a fire, as they may explode. See Care and maintenance on page 50, and for guidance on the disposal of batteries and electronic equipment, see page 54. Batteries may burn or explode if damaged. Do not dismantle, open, bend or cut cells or batteries.  Do not attempt to modify or remanufacture the battery. Do not immerse or expose the battery  to water or other liquids. In the event of a battery leak, avoid contact of contents with skin or eyes. If this does happen,  flush the affected areas with water and seek medical help as appropriate. ChildrenKeep out of the reach of children. Do not allow children to play with your phone or accessories. They could hurt themselves or others. Products may contain small parts that could become detached and create a choking hazard. 321safetyclick to navigate402  welcome03  safety06  quick reference09  getting started13  using your IsatPhone31  phonebook, contacts and organiser36  data37  personalised settings44  security47  troubleshooting50  care and maintenance52  regulatory and compliance55  disclaimers  56  accessories   57  export controls58  malware59  downloading content60  notices61  protection of personal information62  index
 DrivingOnly use Isatphone Pro in a vehicle using an Inmarsat-approved vehicular docking unit. Check with the vehicle manufacturer to be sure that your phone or Bluetooth will not affect the electronic systems in  the vehicle. Full attention should be given to driving at all times and local laws and regulations restricting the use of electronic and wireless devices while driving must  be observed.  Loudness warningAvoid volume levels that may be harmful to your hearing.  Pinch hazardTake care when opening and closing the antenna of your phone, as it may be possible to trap a fingertip.321safetyclick to navigate502  welcome03  safety06  quick reference09  getting started13  using your IsatPhone31  phonebook, contacts and organiser36  data37  personalised settings44  security47  troubleshooting50  care and maintenance52  regulatory and compliance55  disclaimers  56  accessories   57  export controls58  malware59  downloading content60  notices61  protection of personal information62  index
click to navigate6quick reference your IsatPhoneVolume up keyVolume down keyHandsfree restHandsfree restEar pieceNavigation keysCentre selection keyLeft selection keyLocal timeProduct nameStatus barRed keyRight selection keyInformation shortcutRight selection labelNetworkLeft selection labelGreen keyKeypadMicrophone2.5mm audio connector Micro USB port Strap attachment pointUSB/audio protective cover ScreenSignal strengthicons  Keypad locked   Alarm set   Call divert on   Unread message   Microphone muted   Loud profile active   Vibrate profile active   Phone memory full   Bluetooth is paired   Bluetooth headset      connected to your      phone  Wired handsfree       headset connected  GPS fix required   USB connection   Conference call activated   Closed user group number   New voicemail   Missed call   Loudspeaker activated   Silent profile active   Message memory full   SIM card memory full   Bluetooth on   Battery02  welcome03  safety06  quick reference06 yourIsatPhone06 icons07  menu08  coverage map09  getting started13  using your IsatPhone31  phonebook, contacts and organiser36  data37  personalised settings44  security47  troubleshooting50  care and maintenance52  regulatory and compliance55  disclaimers  56  accessories   57  export controls58  malware59  downloading content60  notices61  protection of personal information62  index
click to navigate7menuUser guide instructions commence from the main screen.The red key   will take you to the main screen.Call settings Security Language Display Bluetooth About Reset settings settingsNew message Inbox Outbox Drafts Sent Saved  Templates SIM messages  messagingGeneral Silent Loud Vibrate only prolesGPS location gps positionPhonebook SIM contacts FND list My phone number Service provider Emergency numbers Voicemail number Groups contactsOrganiser Date and time World clock Calculator extrasSatellite search Advanced options Network operator network connectivityMissed calls Received calls Dialled calls Call duration  call logOnce alarm Recurrent alarm alarm02  welcome03  safety06  quick reference06  your IsatPhone06  icons07 menu08  coverage map09  getting started13  using your IsatPhone31  phonebook, contacts and organiser36  data37  personalised settings44  security47  troubleshooting50  care and maintenance52  regulatory and compliance55  disclaimers  56  accessories   57  export controls58  malware59  downloading content60  notices61  protection of personal information62  index
click to navigate8coverage mapIsatPhone Pro may be operated globally.This map depicts Inmarsat’s expectations of coverage, but does not represent a guarantee of service.  The availability of service at the edge of coverage areas fluctuates depending on various conditions. I-4 Asia-PacificI-4 Americas  I-4 EMEA02  welcome03  safety06  quick reference06  your IsatPhone06  icons07  menu08 coveragemap09  getting started13  using your IsatPhone31  phonebook, contacts and organiser36  data37  personalised settings44  security47  troubleshooting50  care and maintenance52  regulatory and compliance55  disclaimers  56  accessories   57  export controls58  malware59  downloading content60  notices61  protection of personal information62  index
click to navigate9getting startedpackage contentsYour IsatPhone Pro box contains:•  Phone• Battery•  CD•  Quick start guide•  Warranty•  Mains charger and four universal plug adaptors•  Car charger•  Micro USB cable•  Wired handsfree headset•  Wrist strapThe CD can be accessed by a PC running Windows Vista or XP (tested on Windows Vista SP1 and Windows XP Pro SP3) and contains the following documents:•  Quick start guide•  User guide•  WarrantyThe CD also contains the following applications and related “How to” guides:•  USB drivers: for charging your phone via a PC, setting up a software modem and for running contact synchronisation and firmware upgrade tools•  Contact synchronisation tool: for synchronising your phone with Microsoft Outlook and Microsoft Outlook Express contacts•  Firmware upgrade tool: for undertaking future upgradesThe above documents and applications are available in English, Spanish, French, Japanese, Portuguese, Russian, Chinese and Arabic. They can also be downloaded from inmarsat.com/isatphonesetting up your IsatPhoneSubscriptions and SIM cardsTo use your phone, you will need a SIM card and a subscription. The services available to you may depend on your choice of subscription. Contact your service provider for details.Inserting the SIM cardYour service provider may have inserted your SIM for you. If not, your phone will prompt you to Insert SIM and offer only a limited service until you do so.321setting up your IsatPhone02  welcome03  safety06  quick reference09  getting started09 packagecontents09 settingupyourIsatPhone(3)11  attaching the wrist strap12  switching your phone on and off12  setting the phone language and time zone12  using info 12  accessing important information about  your phone12  upgrading your phone13  using your IsatPhone31  phonebook, contacts and organiser36  data37  personalised settings44  security47  troubleshooting50  care and maintenance52  regulatory and compliance55  disclaimers  56  accessories   57  export controls58  malware59  downloading content60  notices61  protection of personal information62  index
click to navigate101  Remove the battery cover by using a coin to turn the screw slot until it is vertical2  If the battery is in place, lift it out3  Slide the catch down on the SIM holder and flip it outwards4  Make sure the angled corner of your SIM card is on your left and slide it into the holder5  Flip the holder back into place and slide the catch back up6  Insert the battery, replace the cover and turn the screw slot until it is horizontalInserting and removing the batteryYour phone is supplied with a rechargeable battery, which may not be fully charged when you take it out  of the box. Always switch the device off and disconnect the charger before removing the battery. See Care and maintenance on page 50 for more information.1  Remove the battery cover using a coin to release the screw or use the ridged edge of the battery, which is designed for this purpose2  Insert the battery by pressing the battery forward and down.  It will click into place 3  Remove the battery by pressing the battery forward, then lift up and out of the phone. Replace the cover and lock the screw321setting up your IsatPhone02  welcome03  safety06  quick reference09  getting started09 packagecontents09 settingupyourIsatPhone(3)11  attaching the wrist strap12  switching your phone on and off12  setting the phone language and time zone12  using info 12  accessing important information about  your phone12  upgrading your phone13  using your IsatPhone31  phonebook, contacts and organiser36  data37  personalised settings44  security47  troubleshooting50  care and maintenance52  regulatory and compliance55  disclaimers  56  accessories   57  export controls58  malware59  downloading content60  notices61  protection of personal information62  index
click to navigate11Charging the phone battery Your phone is powered by a rechargeable lithium-ion battery. To maximise its life and its charging capacity, the first time you charge the battery, charge it overnight. Use only Inmarsat-supplied or approved batteries, and recharge your battery with Inmarsat-supplied or approved chargers for the phone.  Do not leave the battery charging for extended periods of time.The battery can be charged by:•  Using the AC charger (connecting to a wall socket)•  Using the micro USB cable (connecting to a PC)•  Using the car charger (connecting to a vehicle cigarette lighter/power outlet)You also have the option of using a solar charger. Contact your service provider for details.Connect the charger to a power source and the micro USB connector to the port at the base of the phone, under the USB/audio protective cover. When the battery needs charging, the low battery alert sounds and a Battery low message is displayed. The phone will automatically switch off shortly afterwards. You might be able to switch the phone on again, but you cannot make or receive any calls until the battery has been recharged or replaced.attaching the wrist strapYour phone is supplied with a wrist strap. To connect the strap, remove the battery cover. Thread the small loop through the entry point at the base of the phone. Loop it over the anchor point to secure it and replace the battery cover.321setting up your IsatPhone02  welcome03  safety06  quick reference09  getting started09  package contents09 settingupyourIsatPhone(3)11 attachingthewriststrap12  switching your phone on and off12  setting the phone language and time zone12  using info 12  accessing important information about  your phone12  upgrading your phone13  using your IsatPhone31  phonebook, contacts and organiser36  data37  personalised settings44  security47  troubleshooting50  care and maintenance52  regulatory and compliance55  disclaimers  56  accessories   57  export controls58  malware59  downloading content60  notices61  protection of personal information62  index
click to navigate12switching your phone on and offTo switch on, hold down the red key   for a few seconds until the screen lights up. The Inmarsat logo will appear followed by the main screen. To switch off, press and hold the red key   for a few seconds.Note: If you see the message Insert SIM, you must insert a SIM card to use your phone. You will also be prompted to enter the PIN code if one is set. The default setting for the PIN code is off. See Setting up SIM PIN code on page 46 for more information. Until a SIM card is inserted, only a limited service is available. See Making an emergency call on page 17 for more information.setting the phone language and time zoneThe first time you turn on your phone, you will be prompted to select your language. This will be the display language. Select your language from a list using the navigation keys and the centre selection key. See Setting phone language on page 39 for more information.After you have selected your language, you will be prompted to select your time zone. Your phone automatically receives universal time (UTC) from GPS satellites. By selecting the time zone, the phone’s clock will display your local time. If you move into another time zone, you will need to change this setting.  See Setting the time and Setting the time zone  on page 40 for more information.using infoImportant information about the status of your phone is displayed in the information shortcut Info on the main screen. These include missed calls, new messages, voicemails, today’s organiser appointments, active profile status, your phone number and your service provider’s number. Info will pop up on the main screen if you have missed a call or have new messages or voicemails waiting. To access Info at other times, press the centre selection key. When Info is open, use the navigation keys to highlight the information you wish to access and press the centre selection key to open.accessing important information about your phoneImportant information about your phone is displayed under Menu > Settings > About. These include your model, firmware version, IMEI number and IMSI number. You may need to supply this information when contacting your service provider.upgrading your phoneFrom time-to-time it may be necessary to upgrade your phone’s software in order to improve its functionality and operation. Inmarsat or your service provider will contact you if your phone needs upgrading. Run the CD supplied with your phone to download the firmware upgrade tool and to access the “How to upgrade your phone” guide. These are also downloadable from inmarsat.com/isatphone. 02  welcome03  safety06  quick reference09  getting started09  package contents09  setting up your IsatPhone (3)11  attaching the wrist strap12 switchingyourphoneonandoff12 settingthephonelanguageandtimezone12 usinginfo12 accessingimportantinformationaboutyourphone12 upgradingyourphone13  using your IsatPhone31  phonebook, contacts and organiser36  data37  personalised settings44  security47  troubleshooting50  care and maintenance52  regulatory and compliance55  disclaimers  56  accessories   57  export controls58  malware59  downloading content60  notices61  protection of personal information62  index
click to navigate13Your IsatPhone makes and receives calls by communicating with Inmarsat satellites in orbit above the equator. Your phone antenna must be deployed and there must be a clear line of sight to an Inmarsat satellite for you to make and receive calls.connecting to the satelliteSwitch your phone on, hold down the red key   for a few seconds until the screen lights up. The Inmarsat logo will appear followed by the main screen.If prompted to enter a PIN, enter the PIN code. The PIN is originally set by your service provider which you can reset. See Setting up SIM PIN code on page 46 for more information.  Stand outside with a clear view of the sky with the phone antenna pointing upwards. There must be a clear line of sight between the phone’s antenna and the satellite.  The more sky you can see the stronger the signal should be from the satellite. If open sky makes up about 70% of your view when you look up, then the signal should be strong.Searching satellite will appear on the screen. The top left of the screen will display Inmarsat when your phone is connected to the satellite.The signal bars indicate the signal strength. At least two signal bars are required to make and receive calls.obtaining a GPS xBefore you can make a call, your phone needs a GPS fix so it can be located by the satellite. This happens automatically but if a new GPS fix is needed, the GPS fix   icon will be displayed. Keep the phone in the open with a clear view of the sky until the   icon disappears. Your phone is now ready to make and receive calls. See Obtaining a GPS fix manually on page 29 for more information.using your IsatPhone02  welcome03  safety06  quick reference09  getting started13  using your IsatPhone13 connectingtothesatellite13 obtainingaGPSx14  making and receiving calls (4)17  calling handsfree18  using voicemail18  additional call features (2)20  advanced call features (3)23  messaging (6)29  using your GPS location information30  prepay services31  phonebook, contacts and organiser36  data37  personalised settings44  security47  troubleshooting50  care and maintenance52  regulatory and compliance55  disclaimers  56  accessories   57  export controls58  malware59  downloading content60  notices61  protection of personal information62  index
click to navigate14making and receiving calls 1. Switch on your phone by holding down the red key   for several seconds.2. Stand outside with a clear view of the sky and the antenna pointing upwards.3. Check your phone is connected to the satellite network - Inmarsat is displayed at the top left of the screen.4. Ensure you have at least two bars of signal strength.5. Ensure there is sufficient battery power.6. Ensure that your phone has a GPS fix – the GPS fix required   icon is not displayed.7. Dial the full international number and press the green key, eg. +44 1621 123456  .8. To end a call, press the red key  .9. Switch off your phone by holding down the red key   until the screen shuts down.Making a callEnter the full international number by dialling either + (hold down the 0 key for 3 seconds) or 00, country code, area code (without the leading 0), telephone number and press the green key  , eg. 00 44 1621 123456  or + 44 1621 123456  . A Calling message and the name of the person being called (if listed in your Phonebook or SIM contacts) will display on the screen. When the call is answered, the screen will show the call time in minutes and seconds. To end the call press the red key  .Making a call from saved contactsSelect Menu > Contacts > Phonebook. Scroll to the desired name using the navigation keys, or enter the first letter of the name in the search field. The matching contacts will be listed. Highlight the name and press the green key  . See Phonebook, contacts and organiser on page 31 for more information.4321making and receiving calls02  welcome03  safety06  quick reference09  getting started13  using your IsatPhone13  connecting to the satellite13  obtaining a GPS x14 makingandreceivingcalls(4)17  calling handsfree18  using voicemail18  additional call features (2)20  advanced call features (3)23  messaging (6)29  using your GPS location information30  prepay services31  phonebook, contacts and organiser36  data37  personalised settings44  security47  troubleshooting50  care and maintenance52  regulatory and compliance55  disclaimers  56  accessories   57  export controls58  malware59  downloading content60  notices61  protection of personal information62  index
click to navigate15Re-dialling a numberPress the green key  , select from the list of previously dialled numbers using the navigation keys and press the green key   to start the call. Your phone stores 30 dialled numbers. Alternatively, select Menu > Call log > Dialled calls, select the person you wish to call and press the green key  .Re-dialling automaticallyTo switch Auto re-dial on or off, select Menu > Settings > Call settings > Auto re-dial and make your selection. The default setting is off.When activated, if your call did not complete, your phone displays Retry? and the reason why the connection was unsuccessful. Press Select to automatically re-dial the number three times until the call is answered. If you press any key or receive a call during this time, re-dialling is interrupted. If the re-dial is successful the phone beeps, then rings. Select Close if you do not want to retry.Receiving a callTo receive a call, your antenna must be deployed and your phone connected to the satellite. Press the green key   to accept the call or press the red key   to reject it. You will see Call from followed by either the name of the caller (if listed in your Phonebook or SIM contacts), the calling number, or Withheld.If you do not wish your phone to play a ringtone, set your active profile to silent or vibrate only. See Sounds, ringtones and profiles on page 37 for more information. To mute the ringing tone when a call comes in, press Silence.Declining a callPress the red key  . The call is disconnected and the caller details are stored in Missed calls for later retrieval.Returning a callYour phone automatically stores the numbers of the last 20 phone calls you have answered or missed. To return a call, select Menu > Call log. Select the appropriate folder, eg. Missed calls or Received calls, highlight the contact and press the green key  .Making a call while on another callYou can put your current call on hold and make a second call at any time. Select the contact by selecting Options > Contacts > Phonebook or by dialling the full international number. When you press the green key  , your current call will automatically be put on hold. By selecting Swap you can switch between calls at any time. You can end either call at any time by selecting Options > End held call or End active call.4321making and receiving calls02  welcome03  safety06  quick reference09  getting started13  using your IsatPhone13  connecting to the satellite13  obtaining a GPS x14 makingandreceivingcalls(4)17  calling handsfree18  using voicemail18  additional call features (2)20  advanced call features (3)23  messaging (6)29  using your GPS location information30  prepay services31  phonebook, contacts and organiser36  data37  personalised settings44  security47  troubleshooting50  care and maintenance52  regulatory and compliance55  disclaimers  56  accessories   57  export controls58  malware59  downloading content60  notices61  protection of personal information62  index
click to navigate16Receiving a second call while on a callThe incoming call will be diverted to your voicemail unless you have set up Call waiting. See Setting up call waiting on page 20 for more information.Using call waitingWhen Call waiting is activated, a pop-up and an audible alert will notify you if another caller is calling you when you are on another call. When you receive this alert you can press the green key   to accept the second call. The first call is placed on hold automatically while the second call is taken. By selecting Options > Swap you can switch between calls at any time.You can end either call at anytime by selecting Options > End held call or End active call.If you receive a third call while you have one active and one held call, the name or number of the caller will be displayed. Ending either the active or the held call will automatically answer the new call.If you wish to disconnect the first call to accept the second, select Options > End active call.If you do not wish to accept the second call, press the red key  . The call is disconnected and the caller details are stored in Missed calls and Info for later retrieval. If you do nothing, the second caller will be diverted to your voicemail. If voicemail has not been activated, then the call will appear as a missed call. See Setting up call waiting on page 20 for more information. Making conference callsYour phone can host conference calls with up to five participants. To initiate a conference call, call the first participant. When the first participant is connected, call the second participant by selecting Options > Contacts > Phonebook, select the second participant’s name and press the green key  . When the second participant is connected, select Options > Conference. You are now in a three-way conference call. Repeat for more participants. To end a conference call, select End or press the red key  .To answer a new inbound call, press the green key    or select Options > Answer. The conference call will be placed on hold. To place all participants into one call, select Options > Conference.To place an inbound call into conference without answering it first, select Options > Add waiting to conference.To disconnect individual conference callers, select Options > Disconnect caller and press Select, or the centre selection key. A list of the participants is displayed. Select by highlighting their name or number and press Select, or the centre selection key, to disconnect them from the call.To speak privately to one participant during a conference call, select Options > Private with a caller and select from the list. To resume the call with all participants, select Options > Conference. To put individual participants of a conference call on hold, select Options > Hold conference party and choose from the list of current callers displayed.4321making and receiving calls02  welcome03  safety06  quick reference09  getting started13  using your IsatPhone13  connecting to the satellite13  obtaining a GPS x14 makingandreceivingcalls(4)17  calling handsfree18  using voicemail18  additional call features (2)20  advanced call features (3)23  messaging (6)29  using your GPS location information30  prepay services31  phonebook, contacts and organiser36  data37  personalised settings44  security47  troubleshooting50  care and maintenance52  regulatory and compliance55  disclaimers  56  accessories   57  export controls58  malware59  downloading content60  notices61  protection of personal information62  index
click to navigate17Making an emergency callWireless phones, including IsatPhone Pro, operate using radio signals, wireless networks, landline networks, and user-programmed functions. Because of this, connections in all conditions cannot be guaranteed. You should never rely solely on any wireless device for essential communications like medical emergencies. Emergency calling requirements for satellite phones vary from country to country. Always check your emergency contact numbers and ensure they are stored on your phone before travelling. Please contact your service provider for specific country information.To make an emergency call in the US, dial 911 or 112. Your call will be put through to a call centre which will connect you to the appropriate emergency service. Alternatively, select Menu > Contacts > Emergency numbers. An emergency call is free of charge. Prepay users do not need a positive balance to make an emergency call. Dialling 911 or 112 overides all security locks and bars on your phone.For details on emergency calling in the rest of the world, please contact your service provider.Using the volume controlThe two volume keys on the side of the phone adjust the call volume.Muting a callSelect Options > Mute while on a call. To cancel, select Options > Unmute.Using loudspeakerSelect Loudspeaker at any time during a call.calling handsfree You can also use your phone in handsfree mode. Place the phone on its side with the antenna pointing upwards and use loudspeaker or a handsfree headset. Loudspeaker can be activated at any time during the call. To use the wired handsfree headset, connect it  to the audio port at the base of the phone, under  the protective cover. To use a Bluetooth headset,  see page 42 for more information.4321making and receiving calls02  welcome03  safety06  quick reference09  getting started13  using your IsatPhone13  connecting to the satellite13  obtaining a GPS x14 makingandreceivingcalls(4)17 callinghandsfree18  using voicemail18  additional call features (2)20  advanced call features (3)23  messaging (6)29  using your GPS location information30  prepay services31  phonebook, contacts and organiser36  data37  personalised settings44  security47  troubleshooting50  care and maintenance52  regulatory and compliance55  disclaimers  56  accessories   57  export controls58  malware59  downloading content60  notices61  protection of personal information62  index
click to navigate18using voicemailYou will be able to receive voicemail messages if your service provider has enabled voicemail. Your phone automatically checks for voicemails shortly after it has been switched on and connected to the network. It will also send you voicemails that arrive while you are connected to the network. If you have a new voicemail, the voicemail icon   will appear in the status bar at the top of the main screen and in Info. To listen to the message, hold down the  key on the keypad for a few seconds and your phone will automatically connect you to your Inmarsat voicemail. Alternatively, you can dial the short code 570 followed by the green key   or the full international number 00 870 772 001 899 or + 870 772 001 899 and the green key  . Follow the spoken instructions. The default language for voicemail is English, but your service provider may have enabled your voicemail in your chosen language. If you wish to change the voicemail language, follow the spoken instructions or contact your service provider.additional call features Viewing call lengthYour phone logs the duration of outgoing and incoming calls. Press the green key   and Dialled calls appears, which lists the date, time and duration of each call. Use the navigation keys to access Received calls and Missed calls. Alternatively,  select Menu > Call log and make your selection. You may find the Call duration log useful for checking the Last dialled call duration, and the total time of Dialled calls.To reset the counter, highlight the value you wish to reset, select Options > Clear and press the left navigation key labelled Select.To reset all counters, select Options > Clear timers.Setting the minute counterSelect Menu > Settings > Call settings > Minute counter and select your preferred setting. The default setting is off. When enabled, your phone will beep after every minute of your call.21additional call features02  welcome03  safety06  quick reference09  getting started13  using your IsatPhone13  connecting to the satellite13  obtaining a GPS x14  making and receiving calls (4)17  calling handsfree18 usingvoicemail18 additionalcallfeatures(2)20  advanced call features (3)23  messaging (6)29  using your GPS location information30  prepay services31  phonebook, contacts and organiser36  data37  personalised settings44  security47  troubleshooting50  care and maintenance52  regulatory and compliance55  disclaimers  56  accessories   57  export controls58  malware59  downloading content60  notices61  protection of personal information62  index
click to navigate19Setting up call summarySelect Menu > Settings > Call settings > Call summary and then use the navigation and centre selection keys to select On. The default setting is off.When Call summary is activated, the date, time and duration of the call is displayed.Setting up and using speed dialFirst, select Menu > Settings > Call settings > Speed dialling and then use the navigation and centre selection keys to select On. The default setting is off. Eight speed dial slots are available, from 2-9. Speed dial 1 is reserved for voicemail.From the main screen, press and hold down for a few seconds the number key that you would like to associate with a contact. If the number is not yet assigned, a pop-up will ask if you wish to assign a contact to the key. Select Yes and a list of Phonebook contacts is displayed. Use the navigation keys to highlight the contact and then the contact’s details. Press OK to save your selection.Alternatively, select Contacts > Phonebook. Use the navigation keys to highlight the contact name, press the centre selection key to open or select Options > Open. Highlight the number to which you would like to assign the speed dial, eg. Mobile. Select Options and select Assign speed dial. Highlight a speed dial slot marked Unassigned, press the centre selection key to assign the phone number to that speed dial slot. To remove speed dial, follow the instructions above and select Remove speed dial.To speed dial, hold down the appropriate number of the keypad for a few seconds and the phone will automatically dial the number.Setting any key answerSelect Menu > Settings > Call settings > Any key answer and select On. The default setting is off. When activated, press any key to answer a call.Deleting all call logs Select Menu > Call Log. Select Options > Clear all. Press Yes to confirm.21additional call features02  welcome03  safety06  quick reference09  getting started13  using your IsatPhone13  connecting to the satellite13  obtaining a GPS x14  making and receiving calls (4)17  calling handsfree18  using voicemail18  additional call features (2)20  advanced call features (3)23  messaging (6)29  using your GPS location information30  prepay services31  phonebook, contacts and organiser36  data37  personalised settings44  security47  troubleshooting50  care and maintenance52  regulatory and compliance55  disclaimers  56  accessories   57  export controls58  malware59  downloading content60  notices61  protection of personal information62  index
click to navigate20advanced call featuresAdvanced call features are controlled by the Inmarsat network. To check or change these features, the phone must be connected to the satellite with a signal strength of at least two bars.Sending your caller IDSelect Menu > Settings > Call settings > Send my caller ID, then select On, Off or Set by network and press OK. Set by network leaves it to the network to select whether Caller ID is displayed. The default setting is Set by Network.When Send my caller ID is on, your caller ID will be displayed on the recipient’s phone. If this feature is switched off, your caller ID will be hidden and Withheld displayed in its place. Setting up call waitingSelect Menu > Settings > Call settings > Call waiting, and select Activate. There may be a short delay before the network responds. Activated will appear when the setting has been enabled. The Call waiting default setting is off. From the Call waiting menu you can also select to Check status or Deactivate. To use call waiting, see Using call waiting on page 16 for more information.Call barringAn IsatPhone Pro SIM card always uses an international number format, + or 00, and the country code, 870. Call barring prevents the following call types from being made or received by your phone:• Outgoing calls: bars all outgoing calls• International calls: bars all outgoing calls• International except to home: bars all outgoing calls except to other Inmarsat numbers• Incoming calls: bars all incoming calls• Incoming outside home: bars all incoming calls except from other Inmarsat numbersIf you are using a SIM card with local country numbering, the call barring is as described by  the menu.The first time you set up call barring, you will need to reset the barring password. Select Menu > Settings > Call settings > Call barring. Select Options and navigate to Change barring pass code. Enter the barring pass code and select OK. The default is 0000. Enter a new four-digit pass code and select OK. Then enter the new pass code again to confirm it.You will need to enter this new pass code whenever you change your call barring settings.To cancel a bar, highlight that type of call in the Call barring menu, select Options and select Cancel. To cancel all call barring, select Options and select Cancel all barring. To check the status of a call bar, highlight that type of call in the Call barring menu, select Options and select Check status.321advanced call features02  welcome03  safety06  quick reference09  getting started13  using your IsatPhone13  connecting to the satellite13  obtaining a GPS x14  making and receiving calls (4)17  calling handsfree18  using voicemail18  additional call features (2)20 advancedcallfeatures(3)23  messaging (6)29  using your GPS location information30  prepay services31  phonebook, contacts and organiser36  data37  personalised settings44  security47  troubleshooting50  care and maintenance52  regulatory and compliance55  disclaimers  56  accessories   57  export controls58  malware59  downloading content60  notices61  protection of personal information62  index
click to navigate21The barring code can be entered incorrectly an unlimited number of times. If you have forgotten your code, please contact your service provider.Note: Fixed number dialling, Call barring and  Call divert does not prevent emergency calling.  Call barring and Call divert cannot be active at  the same time.Diverting callsSelect Menu > Settings > Call settings > Call divert. Call divert allows you to forward incoming calls to your voicemail or another phone number:• Only voice calls – diverts any voice call to your voicemail or another number • Only data calls – diverts data calls to another phone number • Only fax calls – diverts fax calls to another phone number • If busy – when you are engaged on another call, this option diverts calls either to your voicemail or to another number• If no reply – this option allows you to select how long your phone should ring (up to 30 seconds) before the call is diverted to your voicemail or another number • If out of reach – when you are out of reach of a satellite signal this option diverts calls either to your voicemail or to another number• If not available – diverts all ‘If busy’, ‘If no reply’ and ‘If out of reach’ calls. If you assign a divert number for any of these calls, that number will take precedence over the ‘If unavailable’ divert numberAfter making your selection, you will be prompted to enter the phone number or voicemail to which calls are to be diverted. Select Options to select a number from your phonebook.To cancel call divert, highlight that type of call in the Call divert menu, select Options and select Cancel. To cancel all call diverts, select Options and select Cancel all forwarding. To check the status of a call divert, highlight that type of call in the Call divert menu, select Options and select Check status.Note: Fixed number dialling, Call barring and  Call divert does not prevent emergency calling.  Call barring and Call divert cannot be active at  the same time.Fixed number dialling (FND) When Fixed number dialling is activated, the user is limited to dialling or texting only numbers stored in the FND list. The default setting is off. 321advanced call features02  welcome03  safety06  quick reference09  getting started13  using your IsatPhone13  connecting to the satellite13  obtaining a GPS x14  making and receiving calls (4)17  calling handsfree18  using voicemail18  additional call features (2)20 advancedcallfeatures(3)23  messaging (6)29  using your GPS location information30  prepay services31  phonebook, contacts and organiser36  data37  personalised settings44  security47  troubleshooting50  care and maintenance52  regulatory and compliance55  disclaimers  56  accessories   57  export controls58  malware59  downloading content60  notices61  protection of personal information62  index
click to navigate22Activating and de-activating fixed  number diallingSelect Menu > Settings > Security, highlight Fixed number dialling from the list and press the centre selection key. Select On to activate and press the centre selection key or OK. You will be prompted to enter your PIN 2 code. The default PIN 2 is 9999. See Setting up SIM PIN 2 code on page 46 for more information. Contact your service provider if this code was not specified or was reset at purchase.To add a number to your list, select Menu > Contacts > FND list and press the centre selection key. Press Options and select either New FND contact or Copy from phonebook. You will then be prompted for the PIN 2 code.FND list entries are stored on your SIM card. Only one name and one contact number can be stored for each entry.Fixed number dialling can restrict your phone to a certain prefix, as well as individual phone numbers. To limit outbound calls or text messages to a specific country or range of corporate numbers, create an FND list entry with the international prefix and local prefix you wish to allow, followed by the correct number of remaining digits replaced by question marks. Press the * key twice to enter a question mark.Example: To limit calls to UK landlines, create an  FND list entry: +44??????????. Substitute any number  in place of the ? symbols while dialling or sending  a message.When fixed number dialling is activated, your phone still enables numbers stored in other areas of Contacts to be viewed.Using fixed number diallingSelect Menu > Contacts > FND list and the contact. Select Call or Send message from Options.To send email messages when fixed number dialling is activated, the message centre number should be added to the FND list. See Message settings on  page 28 for more information on finding your message centre number.Note: Fixed number dialling, Call barring and  Call divert does not prevent emergency calling.321advanced call features02  welcome03  safety06  quick reference09  getting started13  using your IsatPhone13  connecting to the satellite13  obtaining a GPS x14  making and receiving calls (4)17  calling handsfree18  using voicemail18  additional call features (2)20 advancedcallfeatures(3)23  messaging (6)29  using your GPS location information30  prepay services31  phonebook, contacts and organiser36  data37  personalised settings44  security47  troubleshooting50  care and maintenance52  regulatory and compliance55  disclaimers  56  accessories   57  export controls58  malware59  downloading content60  notices61  protection of personal information62  index
click to navigate23messagingUsing the message menuSelect Menu > Messaging. Select any one of the following options and press the centre selection key  or select Options > Open. The functions are:• New message - to create a new message• Inbox - to store received messages• Outbox - to temporarily store messages waiting to be sent. Messages are placed in Outbox, for example, when your phone is not connected to the network. If sent, messages will be stored in Sent. If unsent, messages will be stored in Drafts • Drafts - when a message is written but not ready or able to be sent, the message is saved here• Sent - to store the last 20 messages sent. If you do not want your sent messages to be saved, select Menu > Messaging > Options > Settings > Text msg settings > Saving sent messages to off• Saved messages - to store received messages• Templates - If you regularly send similar messages, you can set up a template. To do this, compose a new message, select Menu > Messaging > New message > Text message and compose the parts of your message that will not change. Select Options > Save as template. To compose a new text message based on this template, select Menu > Messaging > New message > Compose from template and then select the template you would like to use.  Edit the text, add recipient and then select  Options > Send• SIM messages - to store messages in SIM memoryEntering textYou need to enter text when composing a message, adding a contact to your phonebook, adding an appointment to your organiser or searching. Your phone offers two types of text entry mode: predictive and standard. Using predictive text entryPredictive text mode allows you to use less keystrokes to type a word as it uses a built-in dictionary as a time-saving feature.For example, to type the word hello, you would only use 5 keystrokes (one for each letter of the word). When you type h (number 4 on the keypad) a list appears on the screen. It is not necessary to select the letter h as when you type e (number 3) the dictionary begins to narrow down the words that begin with he. Key number 5 twice to type ll, then number 6 for the letter o. This will result in the dictionary selecting the only known word with these sequential letters, ie. hello.If the dictionary has a number of options for the same keystrokes it will present a list of words. Use the down arrow to scroll to the word you require and press the centre selection key. As always, press the 0 key to create a space between words.654321messaging02  welcome03  safety06  quick reference09  getting started13  using your IsatPhone13  connecting to the satellite13  obtaining a GPS x14  making and receiving calls (4)17  calling handsfree18  using voicemail18  additional call features (2)20  advanced call features (3)23 messaging(6)29  using your GPS location information30  prepay services31  phonebook, contacts and organiser36  data37  personalised settings44  security47  troubleshooting50  care and maintenance52  regulatory and compliance55  disclaimers  56  accessories   57  export controls58  malware59  downloading content60  notices61  protection of personal information62  index
click to navigate24If the word you are typing is not in the dictionary, Word not in dictionary appears. Press OK and select Spell word, type the word you want to enter and press Select. The new word is now saved in your dictionary for future use.You can change the text entry settings whilst composing a message. Click and hold the # key. A pop-up menu offers options to change the language, text editing mode or to add a new word. Note: To change the language of the dictionary used while composing a text message, select Options > Writing language. Using standard (non-predictive) text entryStandard text entry enables you to key text in manually, letter by letter, without the phone suggesting the word you are attempting to type.To enter text, repeatedly press a number key, 2-9, until the desired character appears. For numbers, hold the key down longer until the number appears. To insert a space, press the 0 key. For symbols such as punctuation marks, press the * key and then use the navigation keys to select from the menu. Press the # key to change text editing and capitalisation. To delete text, place the cursor to the right of the character you wish to delete and select Clear. Move the cursor around the message using the navigation keys to insert or delete text anywhere in the message.Selecting text entry modeThe icon at the top right of your screen displays your choice of text entry mode and character case. The default setting is standard text. If you want to change the text entry mode press the # key repeatedly until your chosen mode icon is indicated. The modes are:  Predictive mode – all capitalised    Predictive mode – initial capital only    Predictive mode – no capitals    Standard mode – all capitalised    Standard mode – initial capital only     Standard mode – no capitals     Standard mode – numbers only    Standard mode – symbols onlyCreating a text messageThe character limit for a text sent from your phone is approximately 1600 Latin characters or 740 non-Latin characters, ie up to 10 concatenations, including the recipient’s telephone number.654321messaging02  welcome03  safety06  quick reference09  getting started13  using your IsatPhone13  connecting to the satellite13  obtaining a GPS x14  making and receiving calls (4)17  calling handsfree18  using voicemail18  additional call features (2)20  advanced call features (3)23 messaging(6)29  using your GPS location information30  prepay services31  phonebook, contacts and organiser36  data37  personalised settings44  security47  troubleshooting50  care and maintenance52  regulatory and compliance55  disclaimers  56  accessories   57  export controls58  malware59  downloading content60  notices61  protection of personal information62  index
click to navigate25Select Menu > Messaging > New message > Text message. A blank screen will appear. Compose your message. See Entering text on page 23 for more information. When you have finished, add the recipient(s). If their details are already stored in your Contacts select Options > Add recipient and select the name from the list. Use the left and right navigation keys to move between Phonebook and  SIM contacts.If the recipient’s details are not stored, use the up navigation key to move the cursor to the To: line. Enter the recipient’s full international number. If you make a mistake, use the left and right navigation keys to move the cursor and Clear to delete a number.When you have finished adding recipients, select Options > Send or press the centre selection key.If you want to save your message so you can edit or send it later, select Options > Save, or select Options > Exit and confirm that you want to save the text. The message will be saved in the Drafts folder. When you are ready to complete it, select Menu > Messaging > Drafts.Creating a text message for sending  to an email addressYour phone can also send text messages to email addresses. Instead of displaying your name to the recipient the message will display your details in the following format:From: your phone number@message.inmarsat.com eg. From: 870776XXXX@message.inmarsat.com.The character limit for a text sent from your phone to an email address is approximately 1600 Latin characters or 740 non-Latin characters, ie up to 10 concatenations, including the recipient’s email address.Select Menu > Messaging > New message > Email message. Compose your message. Recipients can be added from stored contacts by selecting Options > Add recipient. Only entries containing an email address will be displayed.To send your message to an email address which is not stored, use the up navigation key to move the cursor into the To: field and type the address. For symbols such as the @ sign, press the * key and then use the navigation keys to select from the menu. After entering the address, wait for 5 seconds and the phone will place a ; after the entry, allowing you to enter another address. When you move the cursor away from the To: field or open Options, your phone will check the email addresses entered. If addresses do not follow the format of a valid email address, they will be deleted and an error message displayed.Receiving text and email messagesMessages can be received when the antenna is deployed and your phone is connected to the network, even if you are on a call, or when incoming calls are forwarded to another phone number.654321messaging02  welcome03  safety06  quick reference09  getting started13  using your IsatPhone13  connecting to the satellite13  obtaining a GPS x14  making and receiving calls (4)17  calling handsfree18  using voicemail18  additional call features (2)20  advanced call features (3)23 messaging(6)29  using your GPS location information30  prepay services31  phonebook, contacts and organiser36  data37  personalised settings44  security47  troubleshooting50  care and maintenance52  regulatory and compliance55  disclaimers  56  accessories   57  export controls58  malware59  downloading content60  notices61  protection of personal information62  index
click to navigate26If your phone is switched off when a message is received, the message is stored by the network until your phone is switched on and registered with the network. Delivery will be attempted for the duration that your message remains in the network. To check or change this setting, select Menu > Messaging > Options > Settings > Text msg settings > Validity period or Menu > Messaging > Options > Settings > Email settings > Validity period. When you receive a message on your phone, an unread message   icon will appear on the status bar. Info will pop-up and display a list of unread messages. If you wish to read the message later, press Close. To read the message, select Menu > Messaging > Inbox. Alternatively, with Info open, use the centre selection and navigation keys to highlight and open Unread messages.Incoming text messages accommodate the full 10 concatenations. However, incoming messages from emails are restricted to approximately 160 Latin and 74 non-Latin characters. If the sender exceeds this limit, the message will be truncated upon receipt.Viewing your received messagesInbox lists the last 20 messages received, including message status (read or unread), the sender’s name or number, the first words of the message and the date received. Use the up and down navigation keys to highlight a message and press the centre selection key or select Options > Open.Replying to sender Open the message and select Options > Reply. A new blank message will be displayed and the To: field will automatically be completed.Forwarding a messageOpen the message and select Options > Forward > Test message or Email message. The message is displayed with the cursor flashing in the empty To: field. Enter the recipient’s number or to add a contact from the phonebook, press Options > Add recipient. When the To: field is completed, select Options > Send. A pop-up confirms that the message has been sent. The sent message is stored in the Sent list.Calling a number from a received messageOpen the message and press the green key   or select Options > Call. After the number has been called, the message is considered read and remains in the inbox.Saving details from a received message Open the message and select Options > Address clipboard. The sender’s number is displayed. Select Options > Add to contacts. You can either Create new or Update existing. Select which field to save the number in the contacts list, complete other fields as appropriate and select Options > Save. The contact will be stored in Phonebook. See Creating a new contact on page 31 for more information.654321messaging02  welcome03  safety06  quick reference09  getting started13  using your IsatPhone13  connecting to the satellite13  obtaining a GPS x14  making and receiving calls (4)17  calling handsfree18  using voicemail18  additional call features (2)20  advanced call features (3)23 messaging(6)29  using your GPS location information30  prepay services31  phonebook, contacts and organiser36  data37  personalised settings44  security47  troubleshooting50  care and maintenance52  regulatory and compliance55  disclaimers  56  accessories   57  export controls58  malware59  downloading content60  notices61  protection of personal information62  index
click to navigate27Saving a received messageTo save a received message, open the message you wish to save and select Options > Copy to folder > Saved messages.Deleting messagesSelect the message from the list displayed in any of the message folders and select Options > Delete. A pop-up will appear asking you to confirm the action. Press Yes. To delete all the messages in the folder, select Options > Delete all messages.Setting up message groupsIf you regularly send the same text or email message to the same group of people, you can set up a group. Select Menu > Contacts > Groups, then select Options > Create new. Enter a name for your group and select OK, followed by Yes. You can set up a maximum of 20 groups, and the same contact can be a member of more than one group.To add members to a group, select Menu > Contacts > Groups, highlight the group to which you would like to add members and press the centre selection key. Now select Options > Add member. This will retrieve your phonebook. Highlight the name of the contact you would like to add to the group and press the left or centre selection key. A group can have any number of contacts.By selecting Options when a member of the group is highlighted, you can also:• Open the contact’s details• Call the contact•  Send a Text message to the contact• Remove from group to remove the contact from this group• View group list to view the members of each groupAssign group ringtone to give all members of this group the same ringtone, so that you will be able to recognise when a member of the group is calling you.To send a text message to the whole group, select Menu > Messaging > New message > Text message or Email message > Options > Add recipient and then press the right navigation key three times to move between the tabs. Select the group from the list and compose your message.You can also add members to groups directly from your phonebook. In your phonebook, simply highlight the contact, select Options > Add to group, then select which group to which you would like to assign the contact. You can also see which members belong to a group by selecting Options > Belongs to group.Sending a text to a group of peopleIf you regularly send the same text to a group of people, you can create a group in your phonebook.  To send the text to a group you have already set up, select Options > Add recipient and then press the right navigation key twice to display the list of groups.654321messaging02  welcome03  safety06  quick reference09  getting started13  using your IsatPhone13  connecting to the satellite13  obtaining a GPS x14  making and receiving calls (4)17  calling handsfree18  using voicemail18  additional call features (2)20  advanced call features (3)23 messaging(6)29  using your GPS location information30  prepay services31  phonebook, contacts and organiser36  data37  personalised settings44  security47  troubleshooting50  care and maintenance52  regulatory and compliance55  disclaimers  56  accessories   57  export controls58  malware59  downloading content60  notices61  protection of personal information62  index
click to navigate28Using message settingsSelect Menu > Messaging > Options > Settings > Text msg settings or Email settings.Text message settings:Use same message centre: Always set to Yes.SMSC management: Both specify the number to which your phone will despatch your messages for delivery.Validity period: Specifies the length of time your message will remain in the network, should it be pending for delivery to the recipient.Saving sent messages: The default setting is on.  The setting can be changed if required. Long message sending: The default setting is on. This allows approximately 1600 Latin or 740 non-Latin characters to be sent ie. up to 10 concatenations.Reply with original / Reply without original: The sender’s original message is included/excluded as part of any reply that you compose. The default setting is off.Set defaults: This resets all message settings.Entering your service centre numberIt is unlikely that you would need to enter or change your service centre number unless advised to do so by your service provider.The number of your service centre is required in order to send messages. In the unlikely event that this detail is not on your SIM card, you can enter the number yourself. To enter a service centre number, select Menu > Messaging > Options > Settings > Text msg settings > SMSC management. If the phone number of your service centre is displayed, select Options > Exit. If there is no number in the display, select Options > Edit and enter the full international number of the service centre. You will be prompted to activate the number. Press Yes. Your phone is now ready to send and receive messages. Alternatively, select Menu > Messaging > Options > Settings > Email settings > Options > Edit and add the email centre number and select Apply.Setting a message delivery expiry periodIf your message cannot be delivered, you can change the length of time your message will remain in the network. To check or change the expiry period select select Menu > Messaging > Options > Settings > Text msg settings > Validity period. 654321messaging02  welcome03  safety06  quick reference09  getting started13  using your IsatPhone13  connecting to the satellite13  obtaining a GPS x14  making and receiving calls (4)17  calling handsfree18  using voicemail18  additional call features (2)20  advanced call features (3)23 messaging(6)29  using your GPS location information30  prepay services31  phonebook, contacts and organiser36  data37  personalised settings44  security47  troubleshooting50  care and maintenance52  regulatory and compliance55  disclaimers  56  accessories   57  export controls58  malware59  downloading content60  notices61  protection of personal information62  index
click to navigate29using your GPS location informationAs well as locating your phone’s position for the satellite, you can also view your GPS location and send it as a text message or email.Viewing your GPS location informationSelect Menu > GPS position > Options > View location information to view the date and time of when your last GPS fix was taken and your latitude and longitude at that time. Your exact location is indicated with a white dot on the world map.Displaying GPS in metric or imperial measuresSelect Menu > GPS position. The Valid GPS fix screen appears. Select Options > Set unit and make your selection. The default setting is metric units.Sending your GPS locationSelect Menu > GPS position and select Options > Send GPS location. The elapsed time since the last GPS fix was obtained is displayed and you are presented with two options. Select Send to use the stored value or New to acquire a new GPS fix. Press the red key   to cancel. Make your decision on the basis of any significant distance travelled since the stored GPS fix was obtained. Note that requesting a new fix will temporarily delay the sending of your location. When the GPS fix to be used has been acquired, select Text message or Email message. Only editing of the recipient field is permitted. Enter the destination number or email address directly into the To: field, or choose Options > Add recipient to select an existing entry from Contacts. You are presented with the list of Phonebook contacts. Use the left and right navigation keys to select SIM contacts or Groups.Obtaining a GPS fix manuallyOn rare occasions, your phone may continue to show the GPS fix required   icon, which means that a new GPS fix is needed in order for your phone to connect to the network. If this occurs, select Menu > GPS position. The new GPS fix is displayed. When this screen is open, your phone will attempt to refresh the GPS fix every 30 seconds.National GPS policiesSome national GPS policies do not allow users to access their GPS information in particular locations. Your phone continues to access the GPS satellites as usual, so its performance is unaffected. However, your phone will not display its GPS location. For more information, please contact your service provider.02  welcome03  safety06  quick reference09  getting started13  using your IsatPhone13  connecting to the satellite13  obtaining a GPS x14  making and receiving calls (4)17  calling handsfree18  using voicemail18  additional call features (2)20  advanced call features (3)23  messaging (6)29 usingyourGPSlocationinformation30  prepay services31  phonebook, contacts and organiser36  data37  personalised settings44  security47  troubleshooting50  care and maintenance52  regulatory and compliance55  disclaimers  56  accessories   57  export controls58  malware59  downloading content60  notices61  protection of personal information62  index
click to navigate30prepay servicesIf you have a prepay subscription, your service provider will have informed you of the services available to you. Your phone also enables you to make a balance enquiry and redeem prepay vouchers for Inmarsat’s prepay service, free of charge. Making a balance enquiryFrom the main screen enter your balance enquiry code, *106# and press the green key  . Your current balance and expiry date will be shown on the screen.Redeeming a prepay voucherFrom the main screen enter the top-up code, *101*VoucherNumber#, eg. *101*1234567890123456# and press the green key . Your new balance and expiry date will be shown on the screen.02  welcome03  safety06  quick reference09  getting started13  using your IsatPhone13  connecting to the satellite13  obtaining a GPS x14  making and receiving calls (4)17  calling handsfree18  using voicemail18  additional call features (2)20  advanced call features (3)23  messaging (6)29  using your GPS location information30 prepayservices31  phonebook, contacts and organiser36  data37  personalised settings44  security47  troubleshooting50  care and maintenance52  regulatory and compliance55  disclaimers  56  accessories   57  export controls58  malware59  downloading content60  notices61  protection of personal information62  index
click to navigate31phonebook, contacts & organisermanaging contacts  in your phonebookContacts can be stored in either your phone’s memory via Phonebook or on your SIM card via SIM contacts. Up to 300 contacts can be stored in the phonebook and up to 250 on your IsatPhone Pro SIM card. To view the contacts in your phone’s memory, select Contacts from the main screen.Creating a new contactThere are several ways to create a contact. From the main screen type in the number to save, including the full international code. Select Options > Add to contacts > Create new contact. Define the number you are saving, eg. Telephone, Office phone, Mobile phone, Fax etc, then select Options > Save. The saved contact details are displayed.Alternatively, open the contacts directory either by selecting Menu > Contacts or by selecting Contacts. Highlight the location where you wish to save the contact and press Select. The default setting is Phonebook. You are presented with a list of stored contacts, select Options > New contact. Enter the first name, last name and the telephone number. If you wish to save a contact detail other than phone number, select Options > Add detail and select from the list presented. After entering all relevant details, select Options > Save or press the centre selection key.Finding a contactYou can find a contact in your phonebook either by using the navigation keys to scroll through the list of all contacts or by entering the first characters of a contact’s name in the search field at the top of the list of contacts. See Entering text on page 23 for more information.Opening a contactHighlight the contact’s name in the phonebook and press the centre selection key or select Options > Open. Use the up and down navigation keys to select a number.Ordering contacts by first or last nameSelect Phonebook > Options > Settings > Display name order and then select either First last (to list them alphabetically by first name) or Last first (to list them alphabetically by last name).Editing a contactTo change or add details for a contact already in your phonebook, use the up and down navigation keys to highlight the contact, then select Options and select Edit. Move between the details using the navigation keys. Edit the text or numbers. See Entering text on page 23 for more information. To save the changes to the contact, press the centre selection key and then select Yes. Or select Options > Save > Yes.21managing contacts in your phonebook02  welcome03  safety06  quick reference09  getting started13  using your IsatPhone31  phonebook, contacts and organiser31 managingcontactsinyourphonebook(2)33  managing contacts on your SIM card 33  synchronising contacts with Outlook33  sending and receiving contact details34  your phone number34  your service provider number34  alarm35  organiser35  calculator36  data37  personalised settings44  security47  troubleshooting50  care and maintenance52  regulatory and compliance55  disclaimers  56  accessories   57  export controls58  malware59  downloading content60  notices61  protection of personal information62  index
click to navigate32To discard changes, press the centre selection key and when prompted to save changes, select No. Alternatively, select Options > Save > No. See Entering text on page 23 for more information.Calling a contactHighlight the contact’s name and press the green key . If there is more than one number stored for that contact (eg. office and mobile) select one of them using the centre selection key.Texting or emailing a contactHighlight the contact’s name, select Options > Send message. Select Text message or Email as appropriate. Write your message and and select Options > Send. If you are sending a text message and there is more than one number stored for that contact select one using the centre selection key.Deleting a contactSelect Menu > Contacts or press Contacts. Select from the list. Use the navigation keys to highlight the stored contact that you would like to delete. Select Option > Delete. You will be prompted to confirm the deletion by pressing Yes.Deleting all contactsOpen your phonebook, select Options, select Delete all and then select Yes.Duplicating a contactDuplicating a contact can be a quick way to add a new contact with similar details to an existing one. Highlight the contact you wish to duplicate, select Options > Duplicate and then amend the new contact’s details. When you have finished, save the new contact by pressing the centre selection key followed by Yes.21managing contacts in your phonebook02  welcome03  safety06  quick reference09  getting started13  using your IsatPhone31  phonebook, contacts and organiser31 managingcontactsinyourphonebook(2)33  managing contacts on your SIM card 33  synchronising contacts with Outlook33  sending and receiving contact details34  your phone number34  your service provider number34  alarm35  organiser35  calculator36  data37  personalised settings44  security47  troubleshooting50  care and maintenance52  regulatory and compliance55  disclaimers  56  accessories   57  export controls58  malware59  downloading content60  notices61  protection of personal information62  index
click to navigate33managing contacts on your SIM cardContacts can be stored on your SIM card as well as in Phonebook. Storing contacts on your SIM card allows you to move contacts from one phone to another. Storing contacts on both the SIM card and the phonebook allows you to back-up your contacts.To view the contacts on your SIM card, select Menu > Contacts > SIM contacts. You can navigate, edit, delete, make calls or send texts in exactly the same way as Phonebook.To copy a contact from your SIM card to your phonebook highlight the contact in SIM contacts, select Options and select Copy to phonebook.To copy all SIM card contacts to Phonebook, this option arises when the SIM card is inserted. The first time Contacts is accessed after inserting the SIM card, you will prompted to Copy SIM contacts to Phonebook and to confirm the action. Please note that this process may take a little time.To copy a contact from your phone’s memory to your SIM card, select Phonebook and highlight the contact. Select Options > Copy to SIM.To delete all contacts from your SIM card, select Menu > Contacts > SIM contacts > Options > Delete all.To find out how many contacts are stored on your SIM card and how many more you can add, select Menu > Contacts > SIM Contacts > Options > SIM details.synchronising contacts  with OutlookThe contact synchronisation tool, supplied with your phone, enables you to transfer contact information held in Microsoft Outlook or Outlook Express on your PC with that stored on your phone. Run the CD, supplied with your phone, to download the Contact synchronisation tool and to access the “How to synchronise your contacts” guide. These are also downloadable from inmarsat.com/isatphone.sending and receiving contact detailsTo send a business card, highlight the appropriate contact in your phonebook or SIM contacts folder and select Options > Send business card. Select either Text message or Email message. A text or email message is displayed including all details stored for this contact in the body of the message. Enter the full international phone number of the recipient in the To: field or select Options > Add recipient to specify a stored contact. Select Options > Send.21sending and receiving contact details02  welcome03  safety06  quick reference09  getting started13  using your IsatPhone31  phonebook, contacts and organiser31  managing contacts in your phonebook (2)33 managingcontactsonyourSIMcard33 synchronisingcontactswithOutlook33 sendingandreceivingcontactdetails34  your phone number34  your service provider number34  alarm35  organiser35  calculator36  data37  personalised settings44  security47  troubleshooting50  care and maintenance52  regulatory and compliance55  disclaimers  56  accessories   57  export controls58  malware59  downloading content60  notices61  protection of personal information62  index
click to navigate34When you receive a business card, it will appear as a normal message in your Inbox, but the title of the message will be Business card. Highlight the message and press the centre selection key or select Options > Open. The contact details are presented like any other entry in the phonebook. To save Business card details, select Options > Create new or Update existing.Business card details are saved to your phonebook. Once the details have been saved, the original message is deleted from your Inbox.your phone numberFrom the main screen, open Info by pressing the centre selection key and selecting My phone number.Your phone number is usually programmed onto your SIM card by your service provider. If not, the entry will be blank. You can enter the number yourself by selecting Menu > Contacts > My phone number. If a SIM card is subsequently inserted with a stored phone number, your entry will be overwritten.your service provider numberOpen Info by pressing the centre selection key and selecting Service provider or for full details select Menu > Contacts > Service provider. These details are programmed onto your SIM card and are not editable.alarmYou can use your phone as an alarm clock. When set, the alarm   icon is displayed on the status bar. The alarm will sound for 60 seconds at the same volume as the phone is set to ring. If you do not press a key while the alarm is sounding it will snooze for 9 minutes before sounding again. This will continue until you switch the alarm off.The alarm can also be used to remind you of upcoming events in your organiser. See Creating an entry in your organiser on page 35 for more information.Setting an alarmSelect Menu > Alarm and select the type of alarm. Once alarm sounds the next time the clock shows the selected time. Recurrent alarm sounds regularly, on selected days of the week. Enter the alarm time and select OK. If this is a recurrent alarm, use the navigation and centre selection keys to tick which days of the week it should sound, then select OK.Silencing a ringing alarmWhen the alarm sounds, select Stop or the centre selection key. If you press the right selection key Snooze, it will sound again in 9 minutes.Cancelling an alarmSelect Menu > Alarm, select which alarm you would like to remove, then select Options > Remove and confirm your choice.21sending and receiving contact details02  welcome03  safety06  quick reference09  getting started13  using your IsatPhone31  phonebook, contacts and organiser31  managing contacts in your phonebook (2)33  managing contacts on your SIM card 33  synchronising contacts with Outlook33  sending and receiving contact details34 yourphonenumber34 yourserviceprovidernumber34 alarm35  organiser35  calculator36  data37  personalised settings44  security47  troubleshooting50  care and maintenance52  regulatory and compliance55  disclaimers  56  accessories   57  export controls58  malware59  downloading content60  notices61  protection of personal information62  index
click to navigate35organiserThe organiser is a calendar allowing you to record and view appointments and to set reminder alarms.Browsing your organiserSelect Menu > Extras > Organiser to open your organiser. The current month, with today’s date highlighted, is displayed. An appointment is indicated by a small green square in the corner of the calendar entry. The indicator is red when the appointment is for today. To view any particular day in detail, highlight the day and then select Options > Open or press the centre selection key.Use the navigation keys to move between days and months. To view a week at a time instead of a month select Options > View week. If you would like to view a date that is not displayed in the month or week views, select Options > Go to date, enter the date and select OK.Creating an entry in your organiserSelect Menu > Extras > Organiser. Highlight the relevant day using the navigation keys or Options > Go to date and select Options > Create entry. Enter the appropriate details and select Options > Save.When the alarm is set to on, at the specified time, the appointment subject name will display and an alert will sound. The day’s appointments are listed in Info.Personalising your organiserSelect Menu > Extras > Organiser > Options > Organiser settings. From this menu you can change:• Calendar view – view by month, week or day• Alarm tone – if this is set to off, the appointment’s name will be displayed at the specified time, but the alarm will not sound • Week start day – start day for week and month views• Week view title option – week view displayed by day or week number• Auto erase option – automatically deletes past appointments or after a specified durationcalculator The phone’s calculator allows you to carry out simple mathematics using the phone’s keypad and the on-screen icons.Select Menu > Extras > Calculator. Enter numbers using the keypad. Use the navigation keys to highlight operations such as + or -, and select them with the centre selection key. For a decimal point, either select the . icon, or press * on the keypad.02  welcome03  safety06  quick reference09  getting started13  using your IsatPhone31  phonebook, contacts and organiser31  managing contacts in your phonebook (2)33  managing contacts on your SIM card 33  synchronising contacts with Outlook33  sending and receiving contact details34  your phone number34  your service provider number34  alarm35 organiser35 calculator36  data37  personalised settings44  security47  troubleshooting50  care and maintenance52  regulatory and compliance55  disclaimers  56  accessories   57  export controls58  malware59  downloading content60  notices61  protection of personal information62  index
click to navigate36datadata, modem, email and faxThe ‘How to’ guide is downloadable from  inmarsat.com/isatphone02  welcome03  safety06  quick reference09  getting started13  using your IsatPhone31  phonebook, contacts and organiser36  data37  personalised settings44  security47  troubleshooting50  care and maintenance52  regulatory and compliance55  disclaimers  56  accessories   57  export controls58  malware59  downloading content60  notices61  protection of personal information62  index
click to navigate37personalised settingssounds, ringtones and proles Your current sound profile is always displayed in the status bar of the main screen, and can also be accessed via Info.To change your phone’s sound profile, select Menu > Profiles, and highlight the one you want and press the centre selection key. There are four sound profiles:• General – for everyday use• Silent – no vibration or sound• Loud – for noisy environments• Vibrate only – vibration and no soundYou can customise any of these profiles by highlighting it, selecting Options and selecting Personalise. This allows you to change the following aspects of the sound profile:• Vibrate mode – on or off• Alert volume – sound level• Keypad volume – sound level when a key is pressed• Alert ring mode – constant, ring once, beep, silent or increasing volume• Ringtone – the sound your phone makes when it receives a call• Key sound – the sound your phone makes when a key is pressed• Message alert – the sound your phone makes when it receives a text messageHighlight the setting you would like to change, press the left or centre selection key, use the navigation keys to alter the setting and press Select.To restore the default settings for a sound profile, highlight the profile, select Options > Reset to default.Selecting a ringtoneEach profile can play one of 8 ringtones to notify you of an incoming call.Select Menu > Profiles and highlight the appropriate profile. Select Options > Personalise > Ringtone from the list and press Select or the centre selection key. The current ringtone for the profile is played and highlighted in the list. Use the navigation keys to highlight and hear the other ringtone files available. Press Select or the centre selection key to specify the highlighted ringtone.If no sound is heard when you highlight a ringtone, the Alert volume for your profile may be set to 0. This is the default for both Silent and Vibrate only. To change the ringtone volume, select Back to return to Profiles. Highlight Alert volume and press Select.21sounds, ringtones and proles02  welcome03  safety06  quick reference09  getting started13  using your IsatPhone31  phonebook, contacts and organiser36  data37  personalised settings37 sounds,ringtonesandproles(2)39  setting phone language40  setting date and time40  setting time zone 41  customising display settings41  setting up keypad lock41  setting up phone lock42  bluetooth (2)43  operating a closed user group (CUG)43  reset all settings44  security47  troubleshooting50  care and maintenance52  regulatory and compliance55  disclaimers  56  accessories   57  export controls58  malware59  downloading content60  notices61  protection of personal information62  index
click to navigate38Allocating a unique ringtone to callersYou can allocate a specific ringtone to a contact. Regardless of the active profile, the allocated ringtone will be used for the specified caller, but the alert volume of the active profile will be respected.Highlight the desired contact entry in your Phonebook or SIM contacts and press the centre selection key or select Options > Open. Highlight the relevant contact detail and select Options > Assign ringtone. From the list of available ringtones, highlight your preference and press Select. The name of the ringtone will be displayed under the contact detail specified.To remove an associated ringtone, open the contact entry, highlight the ringtone and select Options > Remove ringtone.Setting phone and writing languageThe display and writing language of the phone can be changed by selecting Menu > Settings > Language. Highlight any of the following options and press Select:• Phone language — to set the display language  of the phone• Writing language — to set the texting language  of the phone• Predictive text — to set the text editing mode  for composing messages21sounds, ringtones and proles02  welcome03  safety06  quick reference09  getting started13  using your IsatPhone31  phonebook, contacts and organiser36  data37  personalised settings37 sounds,ringtonesandproles(2)39  setting phone language40  setting date and time40  setting time zone 41  customising display settings41  setting up keypad lock41  setting up phone lock42  bluetooth (2)43  operating a closed user group (CUG)43  reset all settings44  security47  troubleshooting50  care and maintenance52  regulatory and compliance55  disclaimers  56  accessories   57  export controls58  malware59  downloading content60  notices61  protection of personal information62  index
click to navigate39setting phone languageThe first time you switch on your phone, you will be prompted to select the display language. You can change this at any time. Select Menu > Settings > Language > Phone language, highlight the desired language and press the left or centre selection keys.If you do not understand your phone’s current language setting, follow these directions to navigate to the Phone language menu.• Press the red key   to return to the main screen• Press the left selection key to go to the menu screen• Press the down navigation key twice to highlight the Settings  icon• Press the centre selection key to open Settings• Press the down navigation key twice to highlight the Language   icon and press the centre selection key• Press the centre selection key and use the navigation keys to highlight the correct language and press the centre selection key again to change the phone’s languageSetting writing languageSelect Menu > Settings > Language > Writing language. Select the desired language and press OK.Setting predictive textThe predictive text setting is used to set the text editing mode for composing messages. Select Menu > Settings > Language > Predictive text. Select Available or Hidden. The default setting is available. See Using predictive text entry on page 23 for more details.Changing keypadYour phone is supplied with a Latin keypad as standard. Dual-alphabet keypads are available in Latin with Arabic, Chinese, Japanese or Russian characters. If your phone does not have your preferred keypad, contact your service provider.02  welcome03  safety06  quick reference09  getting started13  using your IsatPhone31  phonebook, contacts and organiser36  data37  personalised settings37  sounds, ringtones and proles (2)39 settingphonelanguage40  setting date and time40  setting time zone 41  customising display settings41  setting up keypad lock41  setting up phone lock42  bluetooth (2)43  operating a closed user group (CUG)43  reset all settings44  security47  troubleshooting50  care and maintenance52  regulatory and compliance55  disclaimers  56  accessories   57  export controls58  malware59  downloading content60  notices61  protection of personal information62  index
click to navigate40setting date and timeYour phone automatically receives UTC time from GPS satellites. The first time you use your phone, you will be prompted to select a language from the list, followed by the option to select your local time. When completed, local time will be displayed on the status bar.You will need to reset the time when you travel to different time zones. The Date and time menu lets you change the date and time format.Setting the timeSelect Menu > Extras > Date and time > Time settings.Setting the dateSelect Menu > Extras > Date and time > Date settings.setting the time zoneYou may wish to change the local time zone on your phone if you move to a new location or if your new phone is not displaying the correct time zone. You may also wish to know the time in another location, eg. your head office.Setting the local time zoneSelect Menu > Extras > World time. The world time map appears. Select Options > Select > Local time zone. Use the navigation keys to highlight the required time zone and press Select.Setting the remote time zoneSelect Menu > Extras > World time. Select Options > Select remote time zone. Use the navigation keys to highlight the required time zone and press Select. Setting daylight saving time (DST) Select Menu > Extras > World time. Select Options and select from a list to enable/disable local/remote DST. DST is displayed as 0 or +1 on the world map. 02  welcome03  safety06  quick reference09  getting started13  using your IsatPhone31  phonebook, contacts and organiser36  data37  personalised settings37  sounds, ringtones and proles (2)39  setting phone language40 settingdateandtime40 settingtimezone41  customising display settings41  setting up keypad lock41  setting up phone lock42  bluetooth (2)43  operating a closed user group (CUG)43  reset all settings44  security47  troubleshooting50  care and maintenance52  regulatory and compliance55  disclaimers  56  accessories   57  export controls58  malware59  downloading content60  notices61  protection of personal information62  index
click to navigate41customising display settingsLighting the keypad and screenThe backlights for the screen and keypad can be controlled by going to select Menu > Settings > Display. Select any one of the following options and press Select to save your changes.• Brightness – to set the brightness of the screen• Screen light – to set the duration for screen backlights• Keypad light – to set the duration for keypad backlight• Screen standby – to set the duration for the screen backlights after the last keystrokesetting up keypad lockThe keypad lock disables the keypad and prevents accidental dialling. When activated, the phone will respond to the green   and red keys   to answer  or reject call.Select Menu > Settings > Security, select Automatic keypad lock, and then select the duration before the keypad is locked. Deactivate the automatic keypad lock using the same menu.To lock the keypad, ensure the main screen is displayed, press the centre selection key followed by the * key within 3 seconds. The keypad locked   icon is displayed on the status bar.To unlock the keypad, press the centre selection key followed by the * key on the keypad within 3 seconds.setting up phone lockPhone lock protects your phone against unauthorised use.Select Menu > Settings > Security and select Phone lock. Specify the idle period, from 30 seconds to 30 minutes, after which time the phone will automatically lock. You will be prompted to Enter phone lock code. To unlock the phone, enter the code when prompted. The default admin code is 123456. See Setting up the admin code on page 45. The new setting will be accepted when the code is accepted.02  welcome03  safety06  quick reference09  getting started13  using your IsatPhone31  phonebook, contacts and organiser36  data37  personalised settings37  sounds, ringtones and proles (2)39  setting phone language40  setting date and time40  setting time zone 41 customisingdisplaysettings41 settingupkeypadlock41 settingupphonelock42  bluetooth (2)43  operating a closed user group (CUG)43  reset all settings44  security47  troubleshooting50  care and maintenance52  regulatory and compliance55  disclaimers  56  accessories   57  export controls58  malware59  downloading content60  notices61  protection of personal information62  index
click to navigate42bluetoothThe Bluetooth connection on your phone allows you to connect wirelessly to a Bluetooth headset enabling you to use the phone in handsfree mode.To activate Bluetooth connectivity select Menu > Settings > Bluetooth. Select Settings > Bluetooth and select On. The Bluetooth   icon indicator appears in the status bar. Connecting a new Bluetooth deviceThe first time you use a particular Bluetooth headset with your phone, you will need to pair the phone and the headset. Ensure the Bluetooth headset is switched on before you begin.Select Menu > Settings > Bluetooth > Paired devices. A list of Bluetooth devices in range of your phone will appear on the screen. If the device does not appear, select Options and select Search for devices from the new menu that appears. Searching... will be displayed at the top of the screen, followed by the names of all the devices in range. A blue tick will be displayed next to any devices already paired with your phone.Select the device you want to pair and enter its pass code. Bluetooth devices such as headsets generally have their pass code set in the factory and printed either on the device or its packaging. Some devices allow you to set the pass code yourself.The device should now be listed in the Paired devices menu. Highlight it and press the left selection key, then select Connect from the menu. The device should now be listed on the Connected devices menu accessed from the Bluetooth menu. This icon indicates that your phone is connected with a Bluetooth headset.Whenever the device attempts to make a connection with your phone, you will be prompted whether you want to accept the connection. To automatically accept connection requests from a particular device, highlight it in the Paired devices menu, select Options and select Set as authorised. You should only authorise devices that belong to you, or that you trust. If you no longer want a device to be authorised, select Set as unauthorised.To connect a different headset, you must disconnect the current headset. Highlight the device on the Connected devices menu, select Options and select Disconnect.If you no longer want a headset to be paired with your phone, highlight it on the Paired devices menu, select Options and then select Delete.Other choices in the Options menu are Rename, which allows you to select a more descriptive name for your headset, and Device attribute, which displays the headset’s name, and the time and date at which  it was connected. 21bluetooth02  welcome03  safety06  quick reference09  getting started13  using your IsatPhone31  phonebook, contacts and organiser36  data37  personalised settings37  sounds, ringtones and proles (2)39  setting phone language40  setting date and time40  setting time zone 41  customising display settings41  setting up keypad lock41  setting up phone lock42 bluetooth(2)43  operating a closed user group (CUG)43  reset all settings44  security47  troubleshooting50  care and maintenance52  regulatory and compliance55  disclaimers  56  accessories   57  export controls58  malware59  downloading content60  notices61  protection of personal information62  index
click to navigate43When you are not using Bluetooth connectivity, select Bluetooth > Off or My phone’s visibility > Invisible. This prevents unauthorised connection. Do not pair with an unknown device.Setting up Bluetooth lockIf Bluetooth lock is enabled, the phone will require the admin code to be entered before Bluetooth settings can be changed. See Setting up the admin code on page 45 for more information. The default setting is off.To enable or disable this feature, select Menu > Settings > Security and select Bluetooth lock from the list. Select On or Off and then enter Admin code.operating a closed user group (CUG) The Closed User Group (CUG) service allows you to form closed user groups from which access is restricted. A user may be a member of one or more CUGs. Members of a specific CUG can communicate amongst themselves but not, in general, with users outside the group. This feature is operated by your service provider who will provide further instructions on its use. The default setting is off.To enable, select Menu > Settings > Security > Closed user group, select On, enter your CUG number and press OK.Group numbers range from 0-9. If the CUG is on,  the CUG index   icon appears on the status bar.reset all settingsSelect Menu > Settings > Reset settings. You will be prompted for the Admin code in order to make this change. See Setting up admin code on page 45 for more information. Returning to default settings will not affect your admin or user codes, PINs, organiser entries, contacts, messages or call logs. To return these to default setting or to delete these entries see:•  Setting up SIM PIN code on page 46•  Setting up SIM PIN 2 code on page 46•  Deleting a contact on page 32•  Deleting SIM contacts on page 33•  Deleting messages on page 27•  Deleting all call logs on page 1921bluetooth02  welcome03  safety06  quick reference09  getting started13  using your IsatPhone31  phonebook, contacts and organiser36  data37  personalised settings37  sounds, ringtones and proles (2)39  setting phone language40  setting date and time40  setting time zone 41  customising display settings41  setting up keypad lock41  setting up phone lock42  bluetooth (2)43 operatingaclosedusergroup(CUG)43 resetallsettings44  security47  troubleshooting50  care and maintenance52  regulatory and compliance55  disclaimers  56  accessories   57  export controls58  malware59  downloading content60  notices61  protection of personal information62  index
click to navigate44securitySecurity features  Action  Default  Default  Code controlled by     setting  code  lengththe phoneKeypad lock  Only the green and red keys are active    Centre          selection       key and * Admin code  Creates Phone lock  Off  123456  6 digits   Restricts access to Bluetooth   Restricts access to Reset settings   Creates User code  Off   4-6 digitsthe SIM cardPIN  Restricts access to SIM card  Off  8888  4-8 digitsPIN 2  Restricts access to Fixed number dialling  Off  9999  4-8 digitsthe networkBarring password  Restricts access to Call barring  Off  0000  4 digitssecurity locks and codes02  welcome03  safety06  quick reference09  getting started13  using your IsatPhone31  phonebook, contacts and organiser36  data37  personalised settings44  security44 securitylocksandcodes45  security features controlled by the phone46  security features controlled by the SIM card46  security features controlled by the network47  troubleshooting50  care and maintenance52  regulatory and compliance55  disclaimers  56  accessories   57  export controls58  malware59  downloading content60  notices61  protection of personal information62  index
click to navigate45Setting up the admin codeSelect Menu > Settings > Security and select Admin code. You will be prompted for the current code. The default setting is 123456. When this is accepted, you will be prompted to enter your new code and then confirm it. The code must be 6 digits long. If you lose your admin code, contact your service provider. The default setting is off.The admin code can be entered incorrectly an unlimited number of times. If you have forgotten  your code, contact your service provider.Setting up the user codeSelect Menu > Settings > Security and select User code. You will be prompted to enter the 6-digit Admin code. Once this is accepted, you will be prompted to create a new user code and to confirm it. The code can be 4-6 digits in length. The default setting is off. The user code can be entered incorrectly an unlimited number of times. If you have forgotten your code, contact your phone’s administrator.Security can be controlled by the phone, the SIM card or the Inmarsat network. This enables you to match security requirements to your needs. The keypad lock prevents accidental dialling; the phone lock prevents an unauthorised user from using your phone even if they replace the SIM card. The SIM PIN prevents an unauthorised user from using your SIM even if they place it in another phone. The admin code restricts access to particular features on the phone. For example, an individual might only wish to activate the keypad lock. A corporate organisation might choose to restrict functions available to their employees by activating the admin code and issuing a user code.security features controlled  by the phoneAccess to your phone can be restricted by the keypad lock to prevent accidental dialling (see Setting up keypad lock on page 41 for more information) or by activation of the admin code.The admin code can be activated to create a Phone lock, restrict access to Bluetooth lock, Reset settings and to create a User code so that a third party can use the phone but not have access to the restricted features. See Setting up Bluetooth lock on page 43 and Reset all settings on page 43 for more information.02  welcome03  safety06  quick reference09  getting started13  using your IsatPhone31  phonebook, contacts and organiser36  data37  personalised settings44  security44  security locks and codes45 securityfeaturescontrolledbythephone46  security features controlled by the SIM card46  security features controlled by the network47  troubleshooting50  care and maintenance52  regulatory and compliance55  disclaimers  56  accessories   57  export controls58  malware59  downloading content60  notices61  protection of personal information62  index
click to navigate46security features controlled  by the SIM cardAccess to your SIM card can be restricted by activating its PIN code. The advanced call feature, Fixed number dialling, can be protected by your SIM PIN 2 code. See Fixed number dialling on page 21 for more information.Setting up SIM PIN codeSelect Menu > Settings > Security > PIN request and select On. You will be asked to enter your SIM’s PIN code. If you make an error entering the number, press Cancel to clear the digits and re-enter. Press the centre selection key or OK. The default 4-8 digit code for SIM PIN is 8888. The default setting is off.To change the PIN code stored on your SIM card, select Menu > Settings > Security > Set PIN. Enter the existing PIN code, then the new PIN. Repeat the new PIN to confirm it.If the PIN code is entered incorrectly three times, your SIM card can only be unlocked using the PUK code. Contact your service provider if you do not have a record of your PUK code. If the PUK code is entered 10 times incorrectly the SIM will lock and you should contact your service provider. The default setting for PIN is off.Setting up SIM PIN 2 codeThe default 4-8 digit code for PIN 2 is 9999.  The default setting is off.If the PIN 2 code is entered incorrectly three times, your SIM card can only be unlocked using the PUK 2 code. Contact your service provider if you do not have a record of your PUK 2. If the PUK 2 code is entered 10 times incorrectly the SIM will lock and you should contact your service provider. To change the PIN 2 code, select Menu > Settings > Security > Set PIN 2. Enter the existing PIN 2 code, then the new PIN 2 code. Repeat the new PIN 2 code to confirm it.security features controlled  by the networkWhen enabled, the advanced call feature, Call barring, is protected by a code. The default setting is off. See Call barring on page 20 for more information.02  welcome03  safety06  quick reference09  getting started13  using your IsatPhone31  phonebook, contacts and organiser36  data37  personalised settings44  security44  security locks and codes45  security features controlled by the phone46 securityfeaturescontrolledbytheSIMcard46 securityfeaturescontrolledbythenetwork47  troubleshooting50  care and maintenance52  regulatory and compliance55  disclaimers  56  accessories   57  export controls58  malware59  downloading content60  notices61  protection of personal information62  index
click to navigate47troubleshooting My phone will not switch on • Check if the battery is inserted correctly• Check if the battery needs charging. Charging for 20 minutes should provide enough power to switch the phone on• If the battery does not charge it has probably exceeded its usage period and you will need to replace it with a new oneMy phone cannot make  or receive calls• Ensure the SIM card is inserted in the phone and is fully provisioned by your service provider• Check you have a valid GPS fix (See Using your GPS location information on page 29 for more information)• Ensure the phone’s antenna is fully extended and you have a clear line of sight to the satellite. See Connecting to the satellite on page 13 for more information. A least two signal bars are required to make and receive calls• If you have less than two bars signal strength, rotate the phone and angle the antenna until the signal strength increases and you are able to make and receive calls• If the phone has sufficient signal strength and cannot make or receive calls, check if Call barring (page 20), Diverting calls (page 21) or Fixed number dialling (page 21) have been activated• If you have a prepay subscription, check your prepay balance to ensure  you have sufficient credit to make a call. See Making a balance enquiry  on page 30 for more information• Contact your service provider if you are unable to resolve the problemProblem    Solution321troubleshooting02  welcome03  safety06  quick reference09  getting started13  using your IsatPhone31  phonebook, contacts and organiser36  data37  personalised settings44  security47  troubleshooting50  care and maintenance52  regulatory and compliance55  disclaimers  56  accessories   57  export controls58  malware59  downloading content60  notices61  protection of personal information62  index
click to navigate48 My phone cannot receive  a text message• The phone can store a maximum of 20 messages in its memory. If the memory is full, delete a few texts to free up memory for new messages.  See Deleting messages on page 27 for more information• If you still cannot receive a text, your service centre number may not be correct. See Entering your service centre number on page 28 for more information or contact your service providerMy phone continues to display Searching satellite…• Ensure your phone’s antenna is fully extended• Ensure your phone’s antenna is pointed towards the satellite. Press Help for onscreen guidance. Consult the Coverage map on page 8 to ensure you are within coverage• Ensure there is a clear line of sight to the satellite with no obstacles which could block the signal. See Connecting to the satellite on page 13 for more information• Contact your service provider if you are unable to resolve the problemMy phone displays a language I do not understand• Press the red key   to return to the main screen• Press the left selection key to go to the menu screen• Press the down navigation key twice to highlight the Settings   icon• Press the centre selection key to open Settings• Press the down navigation key twice to highlight the Language   icon  and press the centre selection key• Press the centre selection key and use the navigation keys to highlight the correct language and press the centre selection key again to change the phone’s language Problem    Solution321troubleshooting02  welcome03  safety06  quick reference09  getting started13  using your IsatPhone31  phonebook, contacts and organiser36  data37  personalised settings44  security47  troubleshooting50  care and maintenance52  regulatory and compliance55  disclaimers  56  accessories   57  export controls58  malware59  downloading content60  notices61  protection of personal information62  index
click to navigate49 My phone does not display a GPS position• Some national policies do not allow users to access their GPS information in particular locations. Your phone continues to access the GPS satellites as usual, but your phone will not display its GPS locationMy phone does not seem to receive voicemails• Ensure your service provider has enabled voicemail• If you have not used your phone and connected to the network for some time, it may be that your voicemails have been automatically deleted from the network. Ensure that you connect to the network at regular intervalsMy phone and/or SIM has been lost or stolen• Contact your service provider as soon as possible so your phone and/or SIM can be barredHow do I contact my service provider?• Your service provider number is stored on your SIM card. To view your service provider open Info by pressing the centre selection key and selecting Service providerProblem    Solution321troubleshooting02  welcome03  safety06  quick reference09  getting started13  using your IsatPhone31  phonebook, contacts and organiser36  data37  personalised settings44  security47  troubleshooting50  care and maintenance52  regulatory and compliance55  disclaimers  56  accessories   57  export controls58  malware59  downloading content60  notices61  protection of personal information62  index
click to navigate50care and maintenancecaring for your IsatPhone ProYour IsatPhone is a highly sophisticated electronic device. Complying with the following recommendations will help you to protect your warranty coverage and extend your phone’s life:•  Keep your phone dry. Liquids or moisture can contain minerals that will damage electronic circuits. If your phone does get wet, dry it with a soft absorbent cloth as soon as possible, remove the battery and allow your phone and battery to dry completely before replacing it•  The connector covers are intended to protect your phone. When the connectors are not in use, keep these covers firmly closed at all times. Ensure that the connectors are free from dust or dirt before connecting any accessory. When closing the connector cover, ensure the area around the connectors, and the rubber sealing surfaces of the cover are clean and free from dirt. Ensure that the cover is fully closed to give maximum protection to your phone •  Do not store your phone in dusty, dirty or damp areas as this may shorten its life•  Do not store your phone in direct sunlight, or in places where the sun’s heat can be focused, like on the dashboard of a vehicle•  Do not store your phone and battery in extreme cold and hot areas exceeding a temperature range of -20ºC to +70ºC (-4ºF to +158ºF). Extreme temperatures can shorten the life of your phone and damage the battery•  Your phone’s operating temperature range is –20°C to +55°C (-4°F to +131°F). The charging temperature range is 0°C to +45°C (+32°F to +113°F)•  If you are carrying a separate battery, keep it inside the plastic bag supplied. Always keep batteries separated from other metallic objects and keep it dry to prevent damage•  If your phone displays Battery overheating, switch it off and place in a cool area•  Do not use harsh chemicals, cleaning solvents or strong detergents to clean your phone•  Do not paint your phone•  Do not attempt to disassemble your phone or undertake repairs yourself•  Use only the Inmarsat-supplied or an approved replacement antenna. Unauthorised antennas, modifications or attachments could damage the device and may violate regulations governing  radio devices21care and maintenance02  welcome03  safety06  quick reference09  getting started13  using your IsatPhone31  phonebook, contacts and organiser36  data37  personalised settings44  security47  troubleshooting50  care and maintenance50 caringforyourIsatPhonePro(2)51  certications52  regulatory and compliance55  disclaimers  56  accessories   57  export controls58  malware59  downloading content60  notices61  protection of personal information62  index
click to navigate51•  Use only Inmarsat-supplied or approved batteries, and recharge your battery with Inmarsat-supplied  or approved chargers for the phone•  Unplug the charger from the power socket and your phone when not in use. Do not leave a fully-charged battery connected to a charger, as overcharging may shorten its life. The battery can be charged and discharged hundreds of times, but it will eventually wear out. Batteries gradually lose their charge even when the phone is completely switched off. When the talk and standby times are noticeably shorter than normal, replace the battery•  When using any cable connections with your phone, ensure that it cannot be stepped on, tripped over or otherwise subjected to damage or stress•  Upgrade your phone’s firmware when advised to do so by Inmarsat or your service providerThese suggestions apply equally to your phone, battery, chargers, and any accessory. If your phone is not working properly, contact your service providercerticationsYour IsatPhone Pro is certified with an Ingress Protection rating of IP54, which means that your  phone is resistant to dust and splashing.21care and maintenance02  welcome03  safety06  quick reference09  getting started13  using your IsatPhone31  phonebook, contacts and organiser36  data37  personalised settings44  security47  troubleshooting50  care and maintenance50 caringforyourIsatPhonePro(2)51 certications52  regulatory and compliance55  disclaimers  56  accessories   57  export controls58  malware59  downloading content60  notices61  protection of personal information62  index
click to navigate52regulatory and complianceIsatPhone Pro is in conformity with the following standards and/or normative documents:Health and Safety: EN 60950-1, EN 50360, EN 50361EMC: EN 301 489-1, EN 301 489-17, EN 301 489-20Spectrum: EN 300 440, EN 301 328, EN 301 681The technical files relevant to the above declaration are held at Inmarsat Global Limited, 99 City Road, London EC1Y 1AX, United Kingdom. european declaration of conformity and CE marking0168     Inmarsat Global Limited hereby declares that IsatPhone Pro is in conformity    with the essential requirements and other relevant provisions of the R&TTE     Directive (1999/5/EC).         A copy of the original Declaration of Conformity can be found at:    inmarsat.com/isatphone.BABT    Forsyth House, Churchfield Road, Walton-on-Thames,     Surrey, KT12 2TD, United Kingdom.Restrictions on use   In France, outdoor use of Bluetooth must be limited to 10 mW EIRP within the of IsatPhone Pro in   frequency band 2454 MHz to 2483.5 MHz. the European Economic Area  In Italy, outdoor use of Bluetooth outside one’s own premises requires      a general authorisation.02  welcome03  safety06  quick reference09  getting started13  using your IsatPhone31  phonebook, contacts and organiser36  data37  personalised settings44  security47  troubleshooting50  care and maintenance52  regulatory and compliance52 europeandeclarationofconformityandCEmarking53  FCC Part 15 declaration53  GMPCS53  Industry Canada54  disposal of electrical and electronic  equipment and batteries within the  European Economic Area54  RoHS compliance55  disclaimers  56  accessories   57  export controls58  malware59  downloading content60  notices61  protection of personal information62  index
click to navigate53FCC Part 15 declarationIsatPhone Pro complies with Part 15 of the FCC Rules and, as such, operation is subject to the following two conditions:1  This device may not cause harmful interference, and2  This device must accept any interference received, including interference that may cause undesired operationNote: This equipment has been tested and found to comply with the limits of a Class B digital device, pursuant to Part 15 of the FCC Rules. These limits are designed to provide reasonable protection against harmful interference when the equipment is operated in a residential environment. This equipment generates, uses, and radiates radio frequency energy, and if not installed and used in accordance with the instructions, may cause harmful interference.If this equipment does cause interference to radio or television reception, which can be determined by turning the equipment off and on, the user is encouraged to try to correct the interference as follows:•  Reorient or relocate the receiving antenna•  Increase the separation between the equipment  and the receiver•  Connect the equipment into an outlet on a  circuit different from that to which the receiver  is connected•  Consult the dealer or an experienced radio/TV technician for helpFCC caution: Under 47 CFR §15.21, changes or modifications not expressly approved by the manufacturer could void the user’s authority to operate the equipment.GMPCSIsatPhone Pro carries the International Telecommunication Union (ITU) Global Mobile Personal Communications by Satellite (GMPCS)-MoU mark. Industry CanadaThis Class B digital apparatus complies with Canadian ICES-003. 02  welcome03  safety06  quick reference09  getting started13  using your IsatPhone31  phonebook, contacts and organiser36  data37  personalised settings44  security47  troubleshooting50  care and maintenance52  regulatory and compliance52  european declaration of conformity  and CE marking53 FCCPart15declaration53 GMPCS53 IndustryCanada54  disposal of electrical and electronic  equipment and batteries within the  European Economic Area54  RoHS compliance55  disclaimers  56  accessories   57  export controls58  malware59  downloading content60  notices61  protection of personal information62  index
click to navigate54disposal of electrical and electronic equipment and batteries within the European Economic AreaDirective 2002/96/EC regulates the disposal of electrical and electronic equipment in the EU and Directive 2006/66/EC regulates the manufacture and disposal of batteries in the EU. Inmarsat has joined an EU certified Producer Compliance Scheme (PCS) to meet its obligations as a producer under these Directives.Electronic equipment and batteries should not be included as household waste but should be left at an appropriate collection point for recycling. This helps prevent potential negative consequences for the environment and human health. Check local regulations by contacting your local city office, your household waste disposal service, the vendor of your phone or calling Inmarsat’s or your local service provider’s call centre. Do not attempt to remove internal batteries. Internal batteries shall be removed only by a waste treatment facility or trained service professional. The crossed out wheeled-bin symbol on IsatPhone Pro and its rechargeable battery reminds you that all electrical and electronic products and batteries must be taken to separate collections at the end of their working life. This applies to the EU and other locations where separate collection systems are available.RoHS complianceIsatPhone Pro complies with the EC Directive on the restriction of the use of certain hazardous substances in electrical and electronic equipment 2002/95/EC (RoHS). 02  welcome03  safety06  quick reference09  getting started13  using your IsatPhone31  phonebook, contacts and organiser36  data37  personalised settings44  security47  troubleshooting50  care and maintenance52  regulatory and compliance52  european declaration of conformity  and CE marking53  FCC Part 15 declaration53  GMPCS53  Industry Canada54 disposalofelectricalandelectronicequipmentandbatterieswithintheEuropeanEconomicArea54 RoHScompliance55  disclaimers  56  accessories   57  export controls58  malware59  downloading content60  notices61  protection of personal information62  index
click to navigate55disclaimersThis user guide is published by Inmarsat without any warranty. Except as provided by applicable law and in the IsatPhone Pro end-user warranty, no warranties of any kind, either express or implied, including, without limitation, the implied warranties of satisfactory quality, merchantability and fitness for a particular purpose, are made in relation to the accuracy, reliability or completeness of this user guide. Inmarsat reserves the right to make changes to this user guide at any time and without prior notice.All illustrations are for illustration only and are not  an accurate depiction of an actual IsatPhone Pro.All rights are reserved. 02  welcome03  safety06  quick reference09  getting started13  using your IsatPhone31  phonebook, contacts and organiser36  data37  personalised settings44  security47  troubleshooting50  care and maintenance52  regulatory and compliance55  disclaimers  56  accessories   57  export controls58  malware59  downloading content60  notices61  protection of personal information62  index
click to navigate56Inmarsat provides the following in-box accessories with the IsatPhone Pro: •  Battery•  CD•  Mains charger and four universal plug adaptors•  Car charger•  Micro USB cable•  Wired handsfree headset•  Wrist strapInmarsat reserves the right to add or delete accessories from this list in our absolute discretion.accessories02  welcome03  safety06  quick reference09  getting started13  using your IsatPhone31  phonebook, contacts and organiser36  data37  personalised settings44  security47  troubleshooting50  care and maintenance52  regulatory and compliance55  disclaimers  56  accessories   57  export controls58  malware59  downloading content60  notices61  protection of personal information62  index
click to navigate57IsatPhone Pro and in-box accessories may contain commodities, technology and/or software subject  to export controls and regulations imposed by the  US and other countries. Diversion contrary to law  is prohibited.export controls02  welcome03  safety06  quick reference09  getting started13  using your IsatPhone31  phonebook, contacts and organiser36  data37  personalised settings44  security47  troubleshooting50  care and maintenance52  regulatory and compliance55  disclaimers  56  accessories   57  export controls58  malware59  downloading content60  notices61  protection of personal information62  index
click to navigate58Malicious software (also commonly referred to as malware) is software that can harm the phone or other computers. Malware or harmful applications can include viruses, worms, spyware, and other unwanted programmes.While the phone does employ security measures to resist such efforts, Inmarsat does not warrant or represent that the phone will be impervious to the introduction of malware. You can, however, reduce the risk of malware attacks by exercising care when downloading content or accepting applications, refraining from opening or responding to messages from unknown sources, using trustworthy services to access the Internet, and only downloading content  to IsatPhone Pro from known, reliable sources.malware02  welcome03  safety06  quick reference09  getting started13  using your IsatPhone31  phonebook, contacts and organiser36  data37  personalised settings44  security47  troubleshooting50  care and maintenance52  regulatory and compliance55  disclaimers  56  accessories   57  export controls58  malware59  downloading content60  notices61  protection of personal information62  index
click to navigate59IsatPhone Pro has the capability to download, store and forward additional content. The use of such content may be restricted or prohibited by rights of third parties, including but not limited to restriction under applicable copyright laws. You, and not Inmarsat, are entirely responsible for additional content that you download to or forward from your phone.Prior to your use of any additional content, please verify that your intended use is properly licensed or is otherwise authorised. Inmarsat does not guarantee the accuracy, integrity or quality of any additional content or any other third party content.Under no circumstances will Inmarsat be liable in any way for your improper use of additional content or other third party content.downloading content02  welcome03  safety06  quick reference09  getting started13  using your IsatPhone31  phonebook, contacts and organiser36  data37  personalised settings44  security47  troubleshooting50  care and maintenance52  regulatory and compliance55  disclaimers  56  accessories   57  export controls58  malware59  downloading content60  notices61  protection of personal information62  index
click to navigate60INMARSAT is a registered trademark of the International Mobile Satellite Organisation; the Inmarsat LOGO is a registered trademark of Inmarsat (IP) Company Limited. Both trademarks are licensed to Inmarsat Global Limited.Bluetooth is a trademark or a registered trademark of Bluetooth SIG Inc. and any use of such mark by Inmarsat is under licence.Microsoft Outlook, Microsoft Outlook Express, Microsoft Windows Vista SP1, Microsoft Windows XP Pro SP3 are trademarks or registered trademarks of Microsoft Corporation in the United States and other countries. Other product and company names mentioned herein may be the trademarks of their respective owners. Copyright © Inmarsat Global Limited 2010. notices02  welcome03  safety06  quick reference09  getting started13  using your IsatPhone31  phonebook, contacts and organiser36  data37  personalised settings44  security47  troubleshooting50  care and maintenance52  regulatory and compliance55  disclaimers  56  accessories   57  export controls58  malware59  downloading content60  notices61  protection of personal information62  index
click to navigate61The user is advised to erase personal data before disposing of the phone. Deleting data from the phone memory does not ensure that it cannot be recovered. Accordingly, Inmarsat does not warrant against recovery of information.protection of personal information02  welcome03  safety06  quick reference09  getting started13  using your IsatPhone31  phonebook, contacts and organiser36  data37  personalised settings44  security47  troubleshooting50  care and maintenance52  regulatory and compliance55  disclaimers  56  accessories   57  export controls58  malware59  downloading content60  notices61  protection of personal information62  index
click to navigate62aaccessories  56admin code  45alarm cancelling  34setting  34silencing  34any key answer  19bbarring calls  20battery care  50charging  11inserting  10low power alert  11removing  10bluetooth connecting  42lock  43security  42business card  34ccalculator  35calendar  35indexcall waiting setting  20using  16caller ID sending  20calls additional features  18advanced features  20barring  20conference  16declining  15delete call logs  19dialling  14diverting  21emergency  17from contacts  14from received message  26handsfree  17length  18mute a call  17receiving a call  15receiving a second call  16returning  15summary  19volume control  17while on another call  15car charger  11CD  902  welcome03  safety06  quick reference09  getting started13  using your IsatPhone31  phonebook, contacts and organiser36  data37  personalised settings44  security47  troubleshooting50  care and maintenance52  regulatory and compliance55  disclaimers  56  accessories   57  export controls58  malware59  downloading content60  notices61  protection of personal information62  index62 abc63  c  d  e  f  g64  g  h  i  k  l  m65  m  n  o  p  q  r66  s  t  u  v  w
click to navigate63charger car  11 mains  11solar  11USB  11closed user group operating  43code admin  45PUK  46PUK 2  46SIM PIN  46SIM PIN 2  46user  45conference calling  16contact calling a contact  32creating  31deleting  32deleting all  32duplicating  32editing  31emailing  32finding  31opening  31ordering by first or last name  31sending and receiving  33synchronising with Outlook  33synchronising with Outlook Express  33texting  32copy SIM contacts to phonebook  33coverage map  8CUG  43ddata  36date and time setting  40daylight saving time (DST)  40disclaimers  55displaycustomising settings  41divertingcalls  21eexport controls  57ffirmware version  12fixed number dialling activating  22de-activating  22using  22ggeneral profile  37GPSdisplaying in imperial  29displaying in metric  29fix  13national policies  29obtaining a manual fix  29satellites  12sending your location  29viewing your location  2902  welcome03  safety06  quick reference09  getting started13  using your IsatPhone31  phonebook, contacts and organiser36  data37  personalised settings44  security47  troubleshooting50  care and maintenance52  regulatory and compliance55  disclaimers  56  accessories   57  export controls58  malware59  downloading content60  notices61  protection of personal information62  index62  a  b  c63 cdefg64  g  h  i  k  l  m65  m  n  o  p  q  r66  s  t  u  v  w
click to navigate64groups add  27assign ringtone  27belongs to  27members  27remove  27sending texts to  27view  27hhandsfree calling  17iIMEI number  12IMSI number  12info using  12 important information  12IsatPhone caring for  50kkeypad changing  39light  41locking  41volume  37llanguage phone  39writing  39local time zone setting  40lock bluetooth  43keypad  41phone  41loud profile  37loudspeaker  17mmains charger  11map satellite coverage  8members groups  27message service centre number  28messagesconcatenation  28create new  24create text for sending to email  25delete  27expiry period  28forward  26groups  27receive  25reply  26service centre number  28setting  28validity  28viewing received messages  2602  welcome03  safety06  quick reference09  getting started13  using your IsatPhone31  phonebook, contacts and organiser36  data37  personalised settings44  security47  troubleshooting50  care and maintenance52  regulatory and compliance55  disclaimers  56  accessories   57  export controls58  malware59  downloading content60  notices61  protection of personal information62  index62  a  b  c63  c  d  e  f  g64 ghiklm65  m  n  o  p  q  r66  s  t  u  v  w
click to navigate65Microsoft Outlook  9Microsoft Outlook Express  9minute counter  18model  12my phone number  34nnumber re-dial  15service provider  34your phone number  34oorganiser browsing  35creating an entry  35personalising  35ppass code call barring  20personalising settings  37phonelanguage  12lock  41off  12on  12upgrade  12phone language setting  39phonebook managing contacts  31predictive text setting  39prepay balance enquiry  30voucher redemption  30prepay services  30profiles general  37loud  37silent  37vibrate only  37PUK code  46PUK 2 code  46qquick start guide  9rreceived messagessave details  26save message  27re-dial auto  15remote time zone setting  40reset all settings  43ring modealert  37ringtones assign to groups  27unique  3802  welcome03  safety06  quick reference09  getting started13  using your IsatPhone31  phonebook, contacts and organiser36  data37  personalised settings44  security47  troubleshooting50  care and maintenance52  regulatory and compliance55  disclaimers  56  accessories   57  export controls58  malware59  downloading content60  notices61  protection of personal information62  index62  a  b  c63  c  d  e  f  g64  g  h  i  k  l  m65 mnopqr66  s  t  u  v  w
click to navigate66ssatellite connecting to  13screen brightness  41light  41lighting  41standby  41security admin code  45network-controlled  46phone-controlled  45SIM card-controlled  46SIM PIN code  46SIM PIN 2 code  46user code  45service provider  34silent profile  37SIM card contact management  33inserting  9subscription  9SIM contacts copying  33SIM PIN code  46SIM PIN 2 code  46solar charger  11sounds ringtones  37speed dialling removing  19setting up  19using  19ttexts entering  23message alert  37predictive text  23selecting standard or predictive mode  24sending to group  27standard text  24time daylight saving (DST)  40time and date setting  40time zone local  40remote  40setting  40troubleshooting  47uuser code  45vvibrate-only profile  37voicemail  18wworld time  40wrist strap  11writing language  39 02  welcome03  safety06  quick reference09  getting started13  using your IsatPhone31  phonebook, contacts and organiser36  data37  personalised settings44  security47  troubleshooting50  care and maintenance52  regulatory and compliance55  disclaimers  56  accessories   57  export controls58  malware59  downloading content60  notices61  protection of personal information62  index62  a  b  c63  c  d  e  f  g64  g  h  i  k  l  m65  m  n  o  p  q  r66 stuvw
click to navigate02  welcome03  safety06  quick reference09  getting started13  using your IsatPhone31  phonebook, contacts and organiser36  data37  personalised settings44  security47  troubleshooting50  care and maintenance52  regulatory and compliance55  disclaimers  56  accessories   57  export controls58  malware59  downloading content60  notices61  protection of personal information62  index67inmarsat.com/isatphone While the information in this User Guide has been prepared in good faith, no representation or warranty, express or implied, is made or given as to the adequacy, accuracy, reliability or completeness of such information. Inmarsat Global Limited nor any group company or their respective officers, employees or agents shall have any responsibility or liability to any person resulting from the use of the information in this User Guide. Copyright © Inmarsat Global Limited 2010. All rights reserved. INMARSAT is a registered trademark of the International Mobile Satellite Organisation; the Inmarsat LOGO is a registered trademark of Inmarsat (IP) Company Limited. Both trademarks are licensed to Inmarsat Global Limited. IsatPhone Pro UG June 2010.

Navigation menu