Inmarsat ISATPHONE2W Satellite phone with Bluetooth and GPS for Inmarsat GMR2+ satellite network User Manual
Inmarsat Limited Satellite phone with Bluetooth and GPS for Inmarsat GMR2+ satellite network
Inmarsat >
Contents
- 1. User guide
- 2. QSG
- 3. User manual
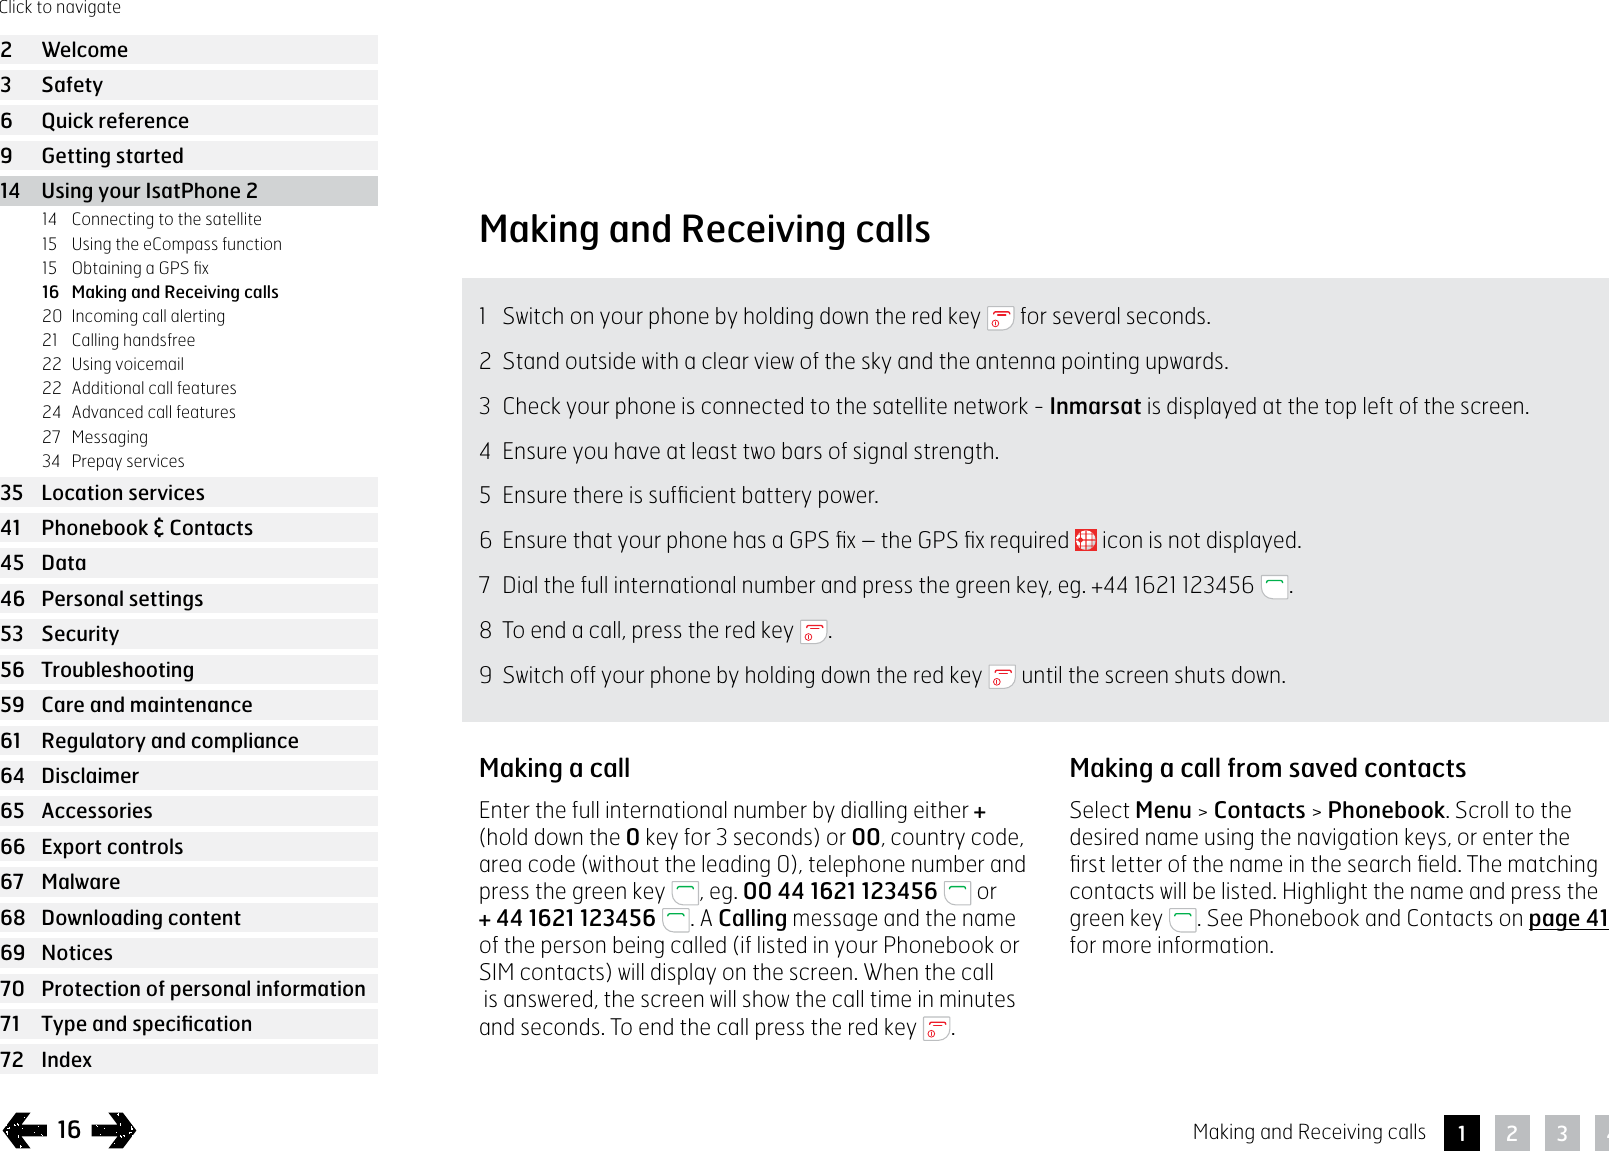
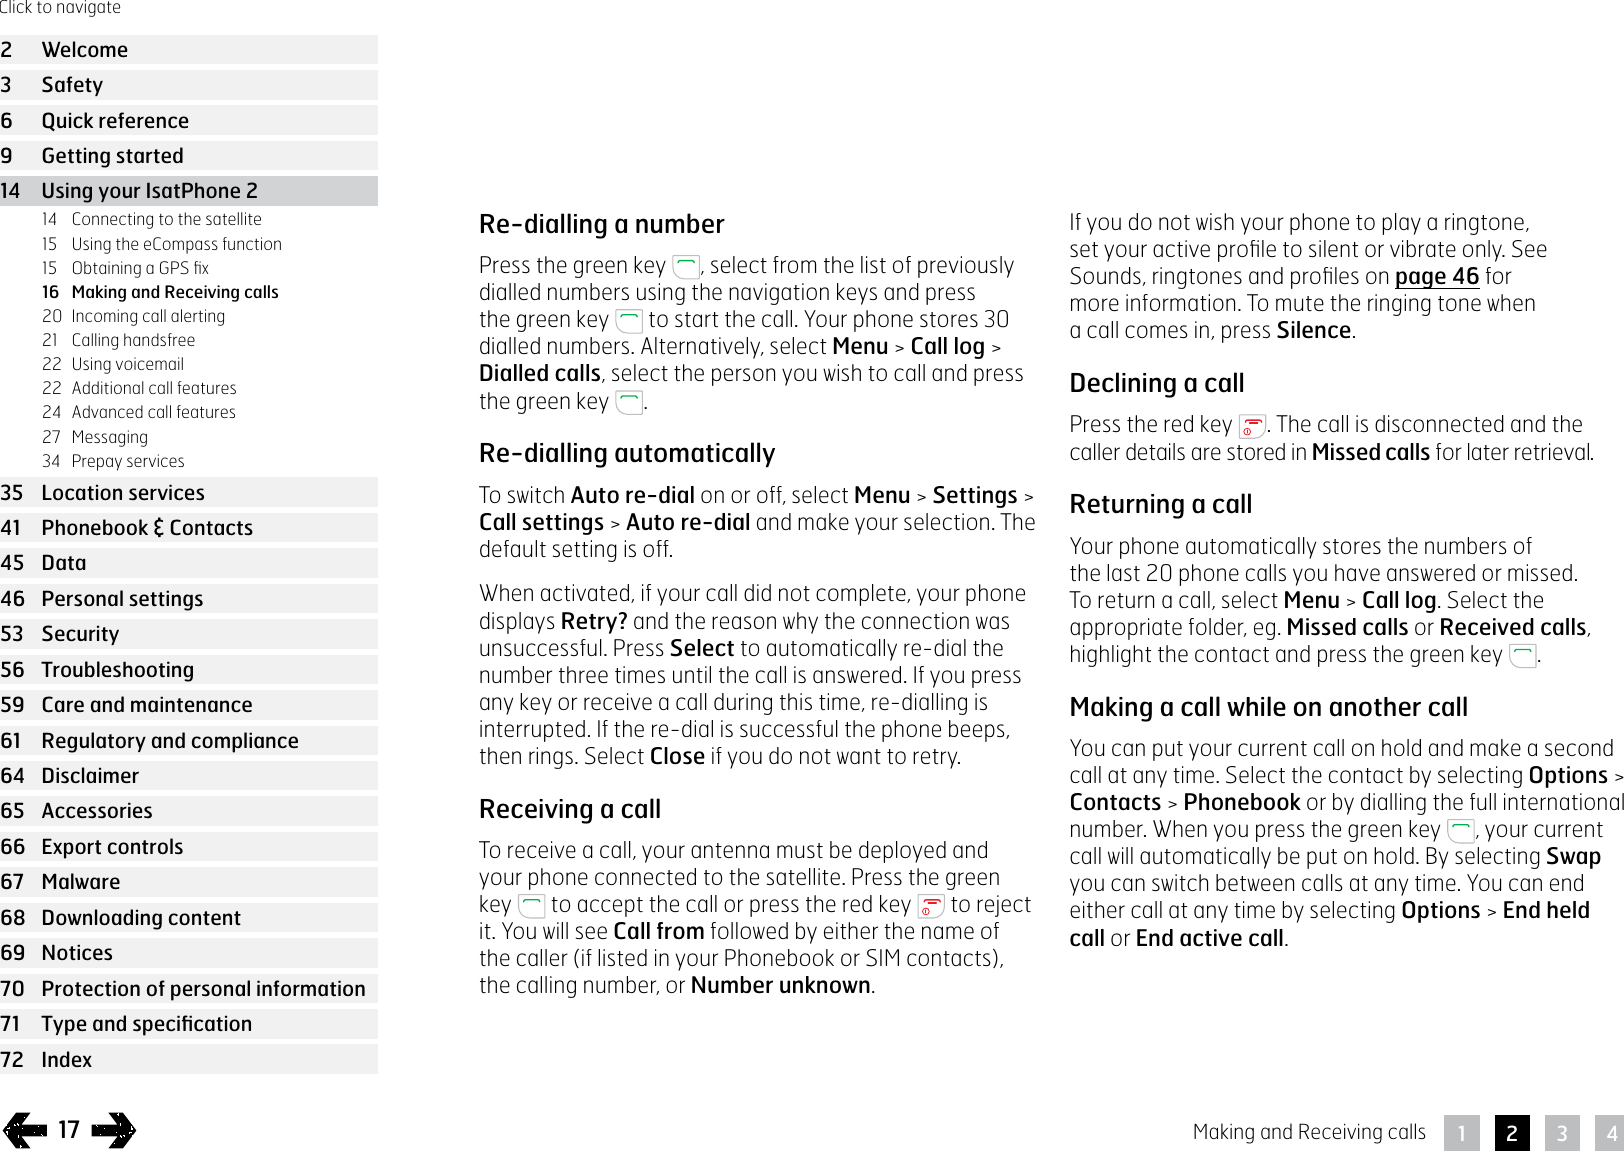
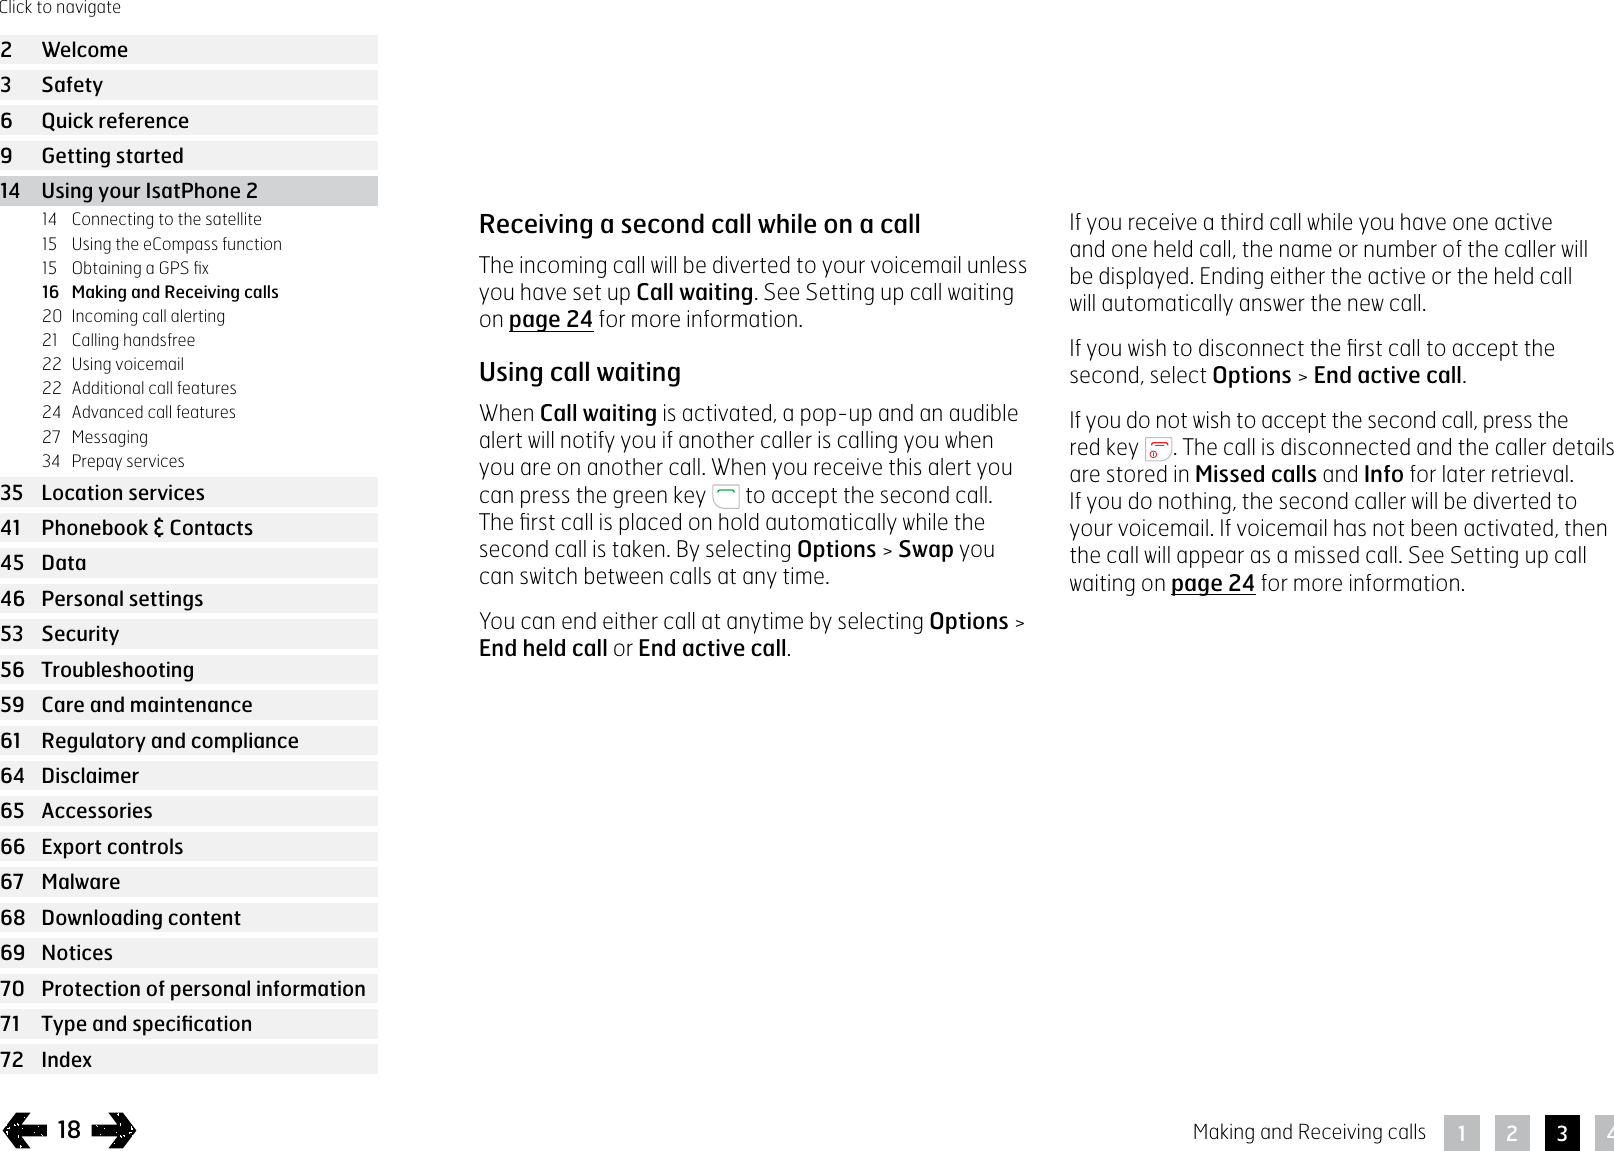
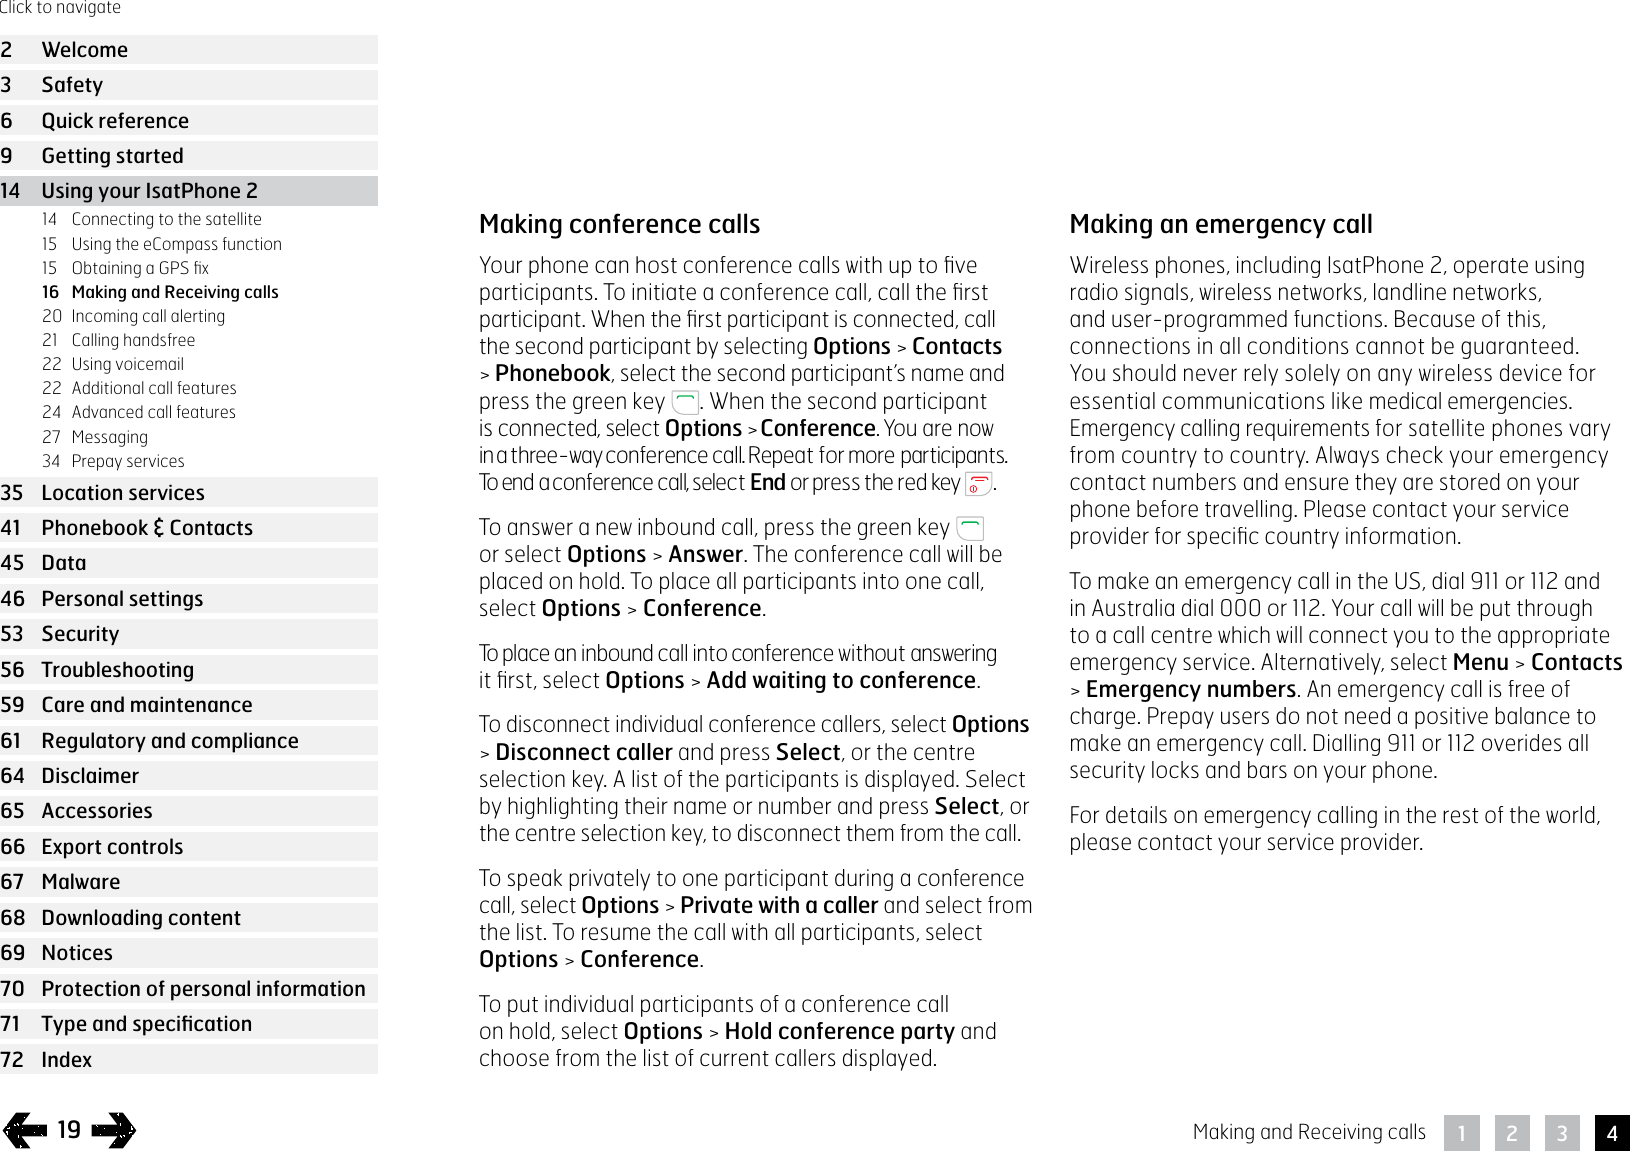
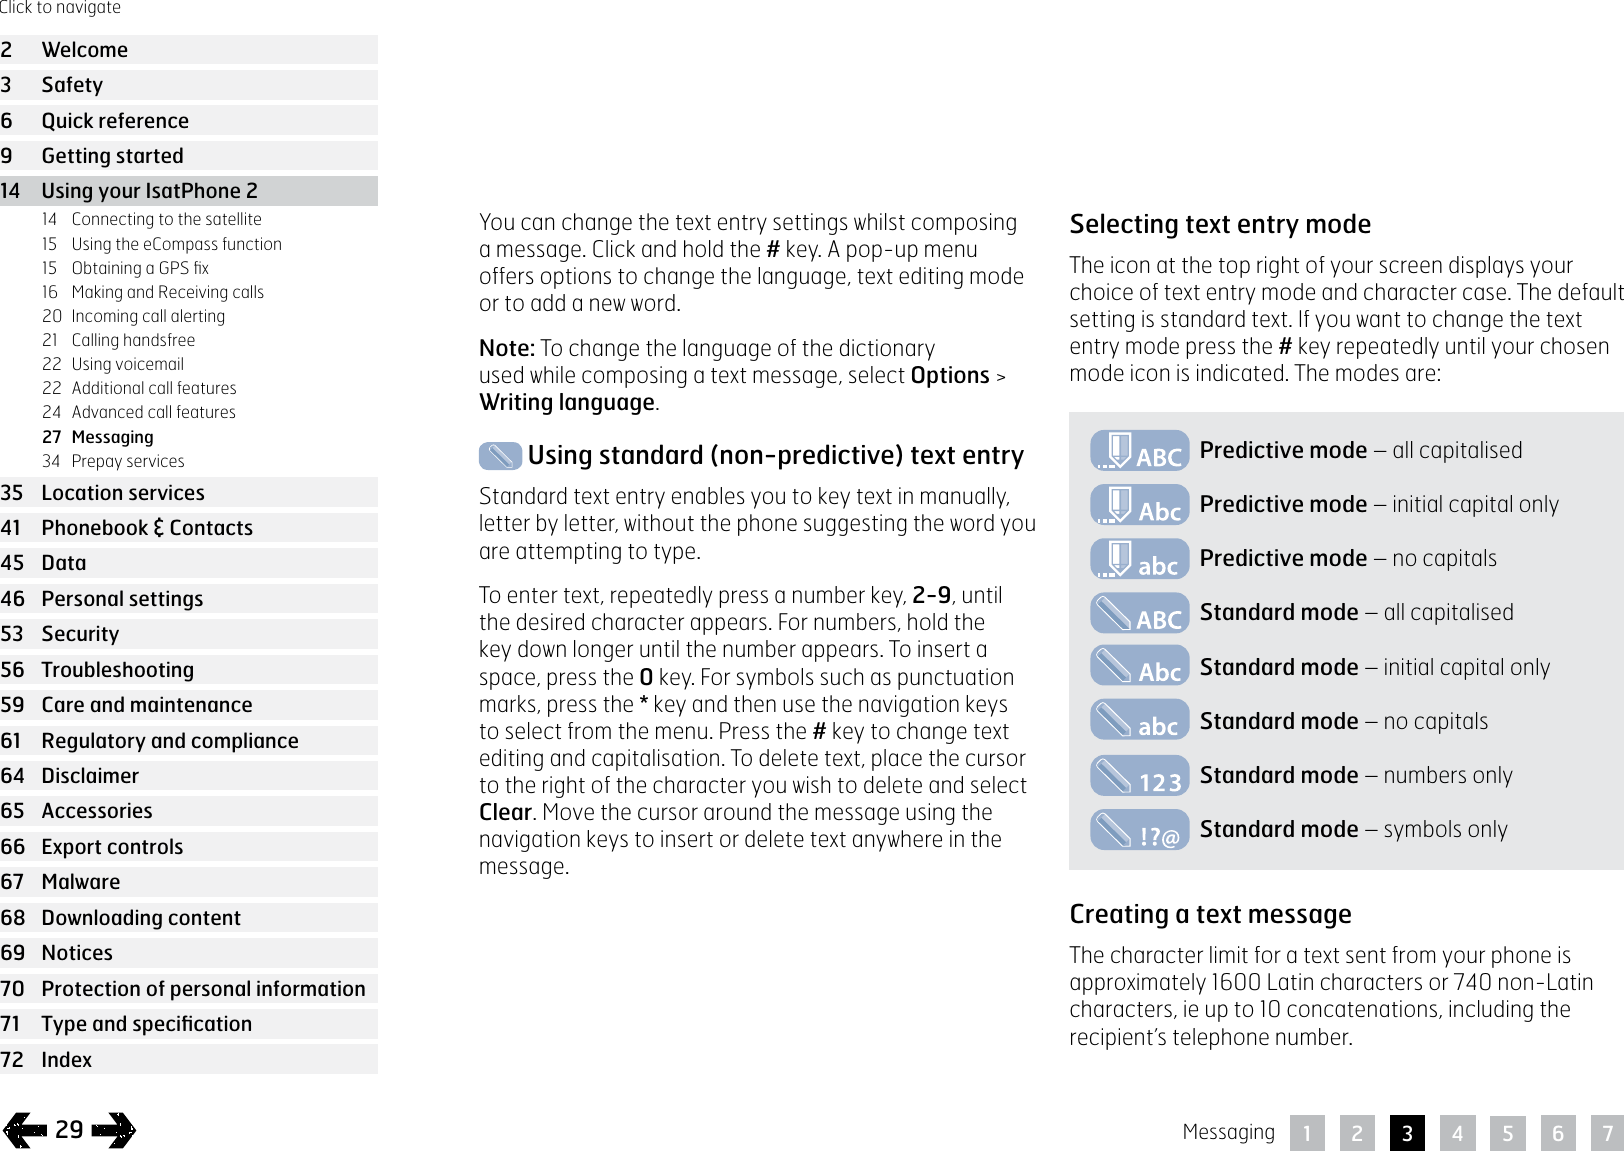
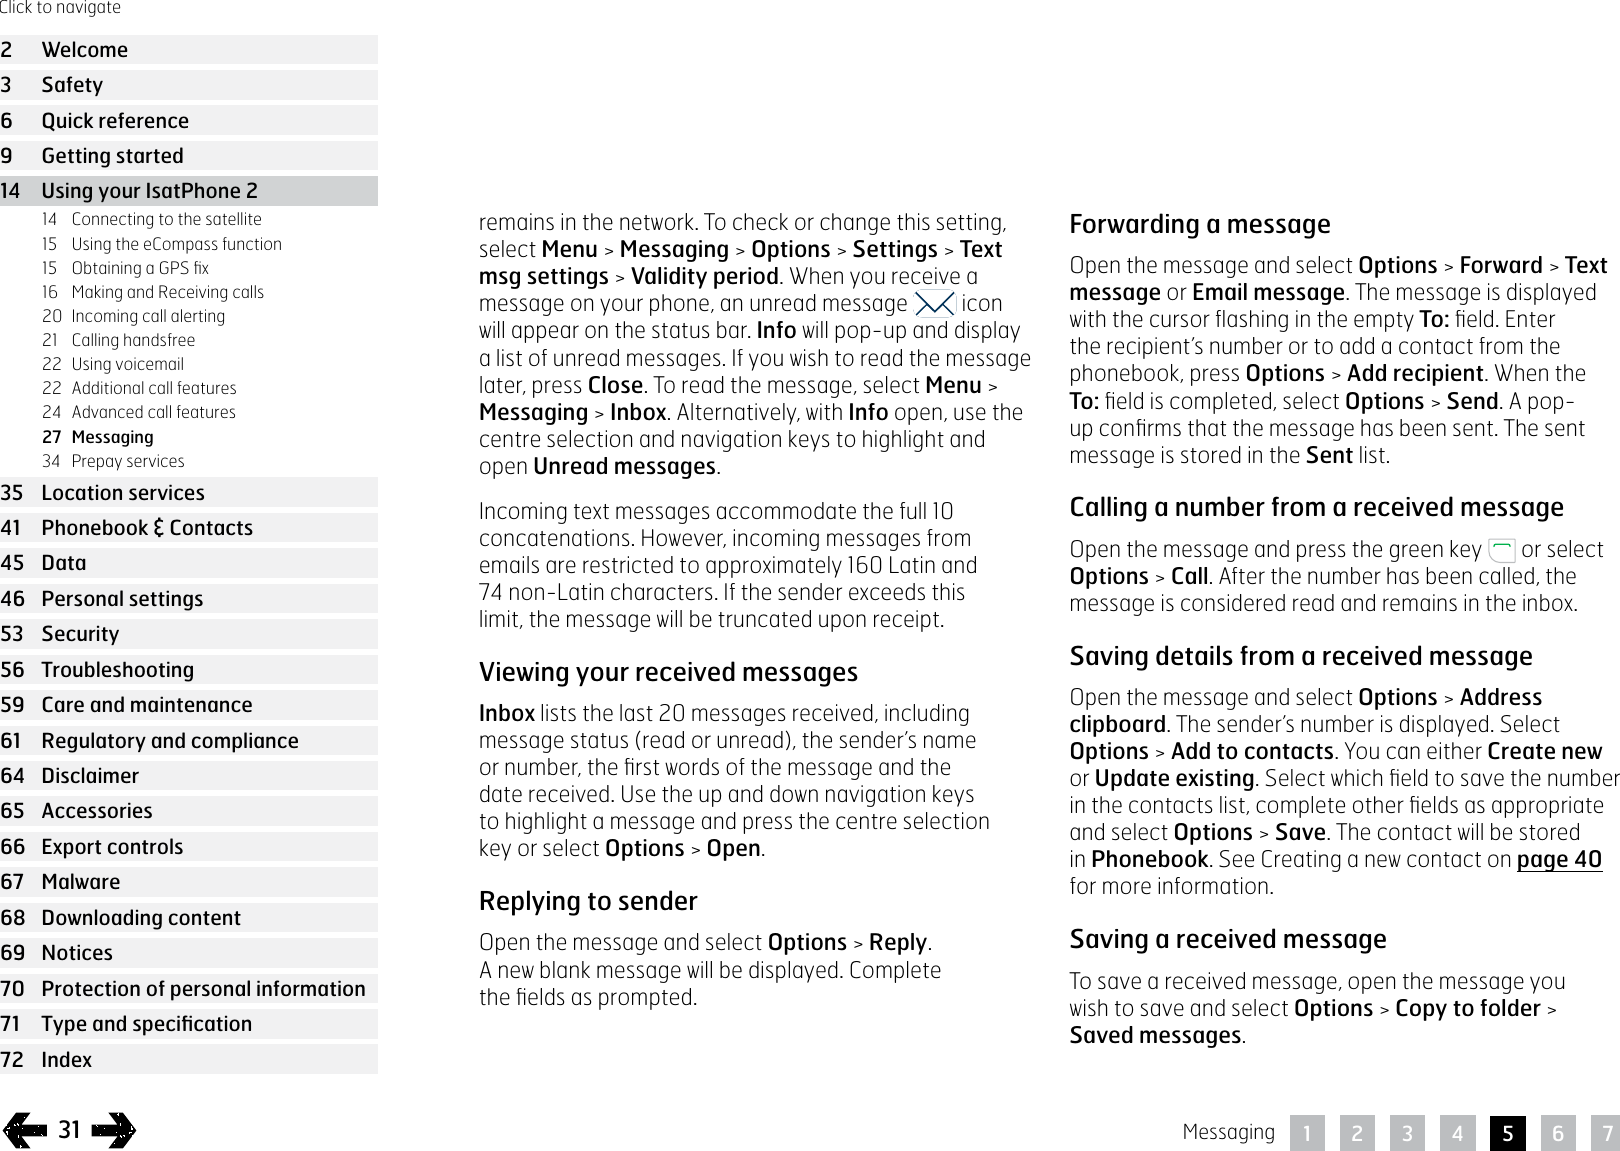
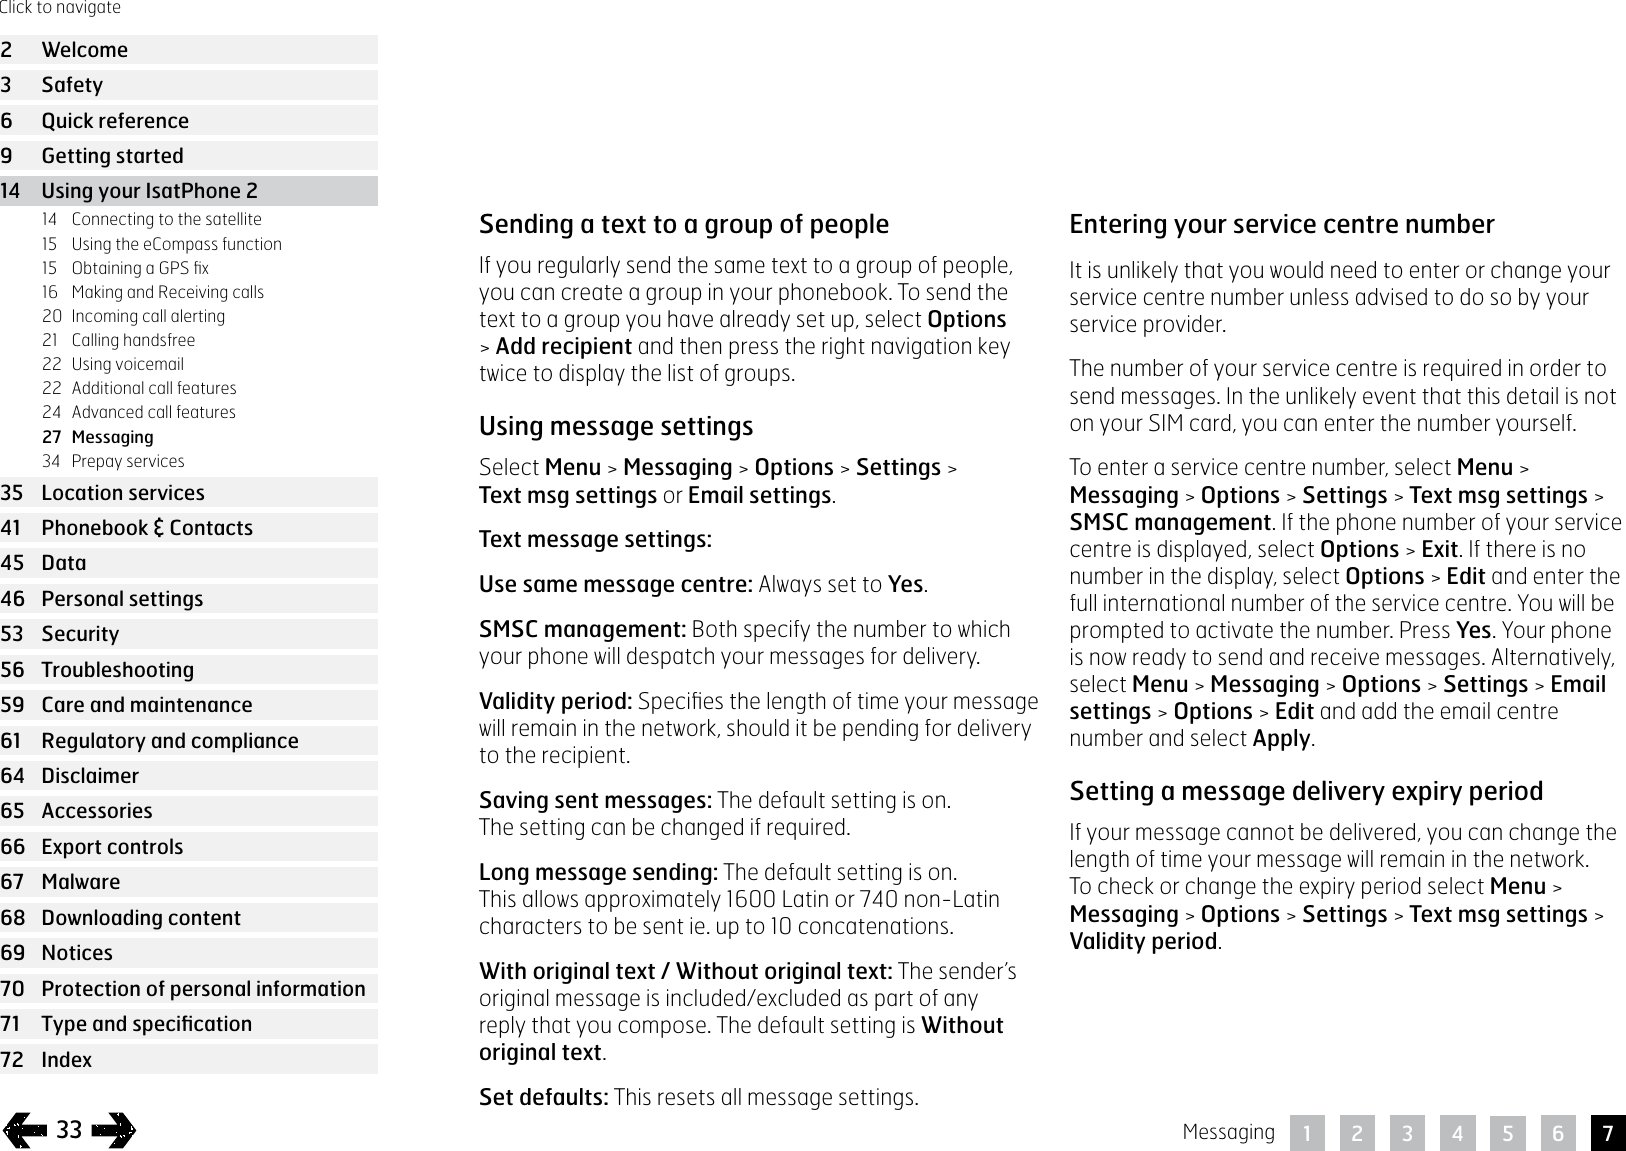
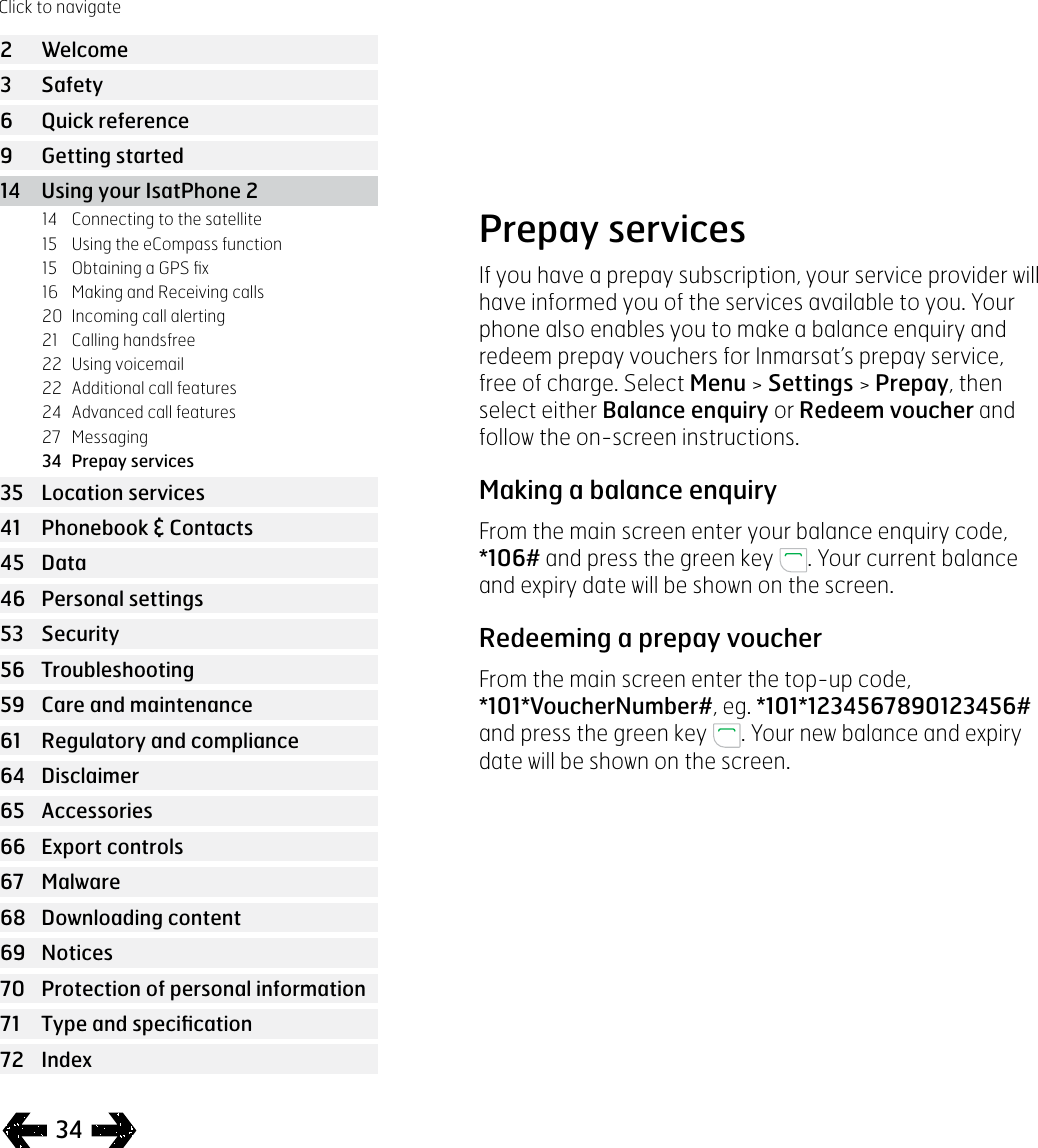
User manual
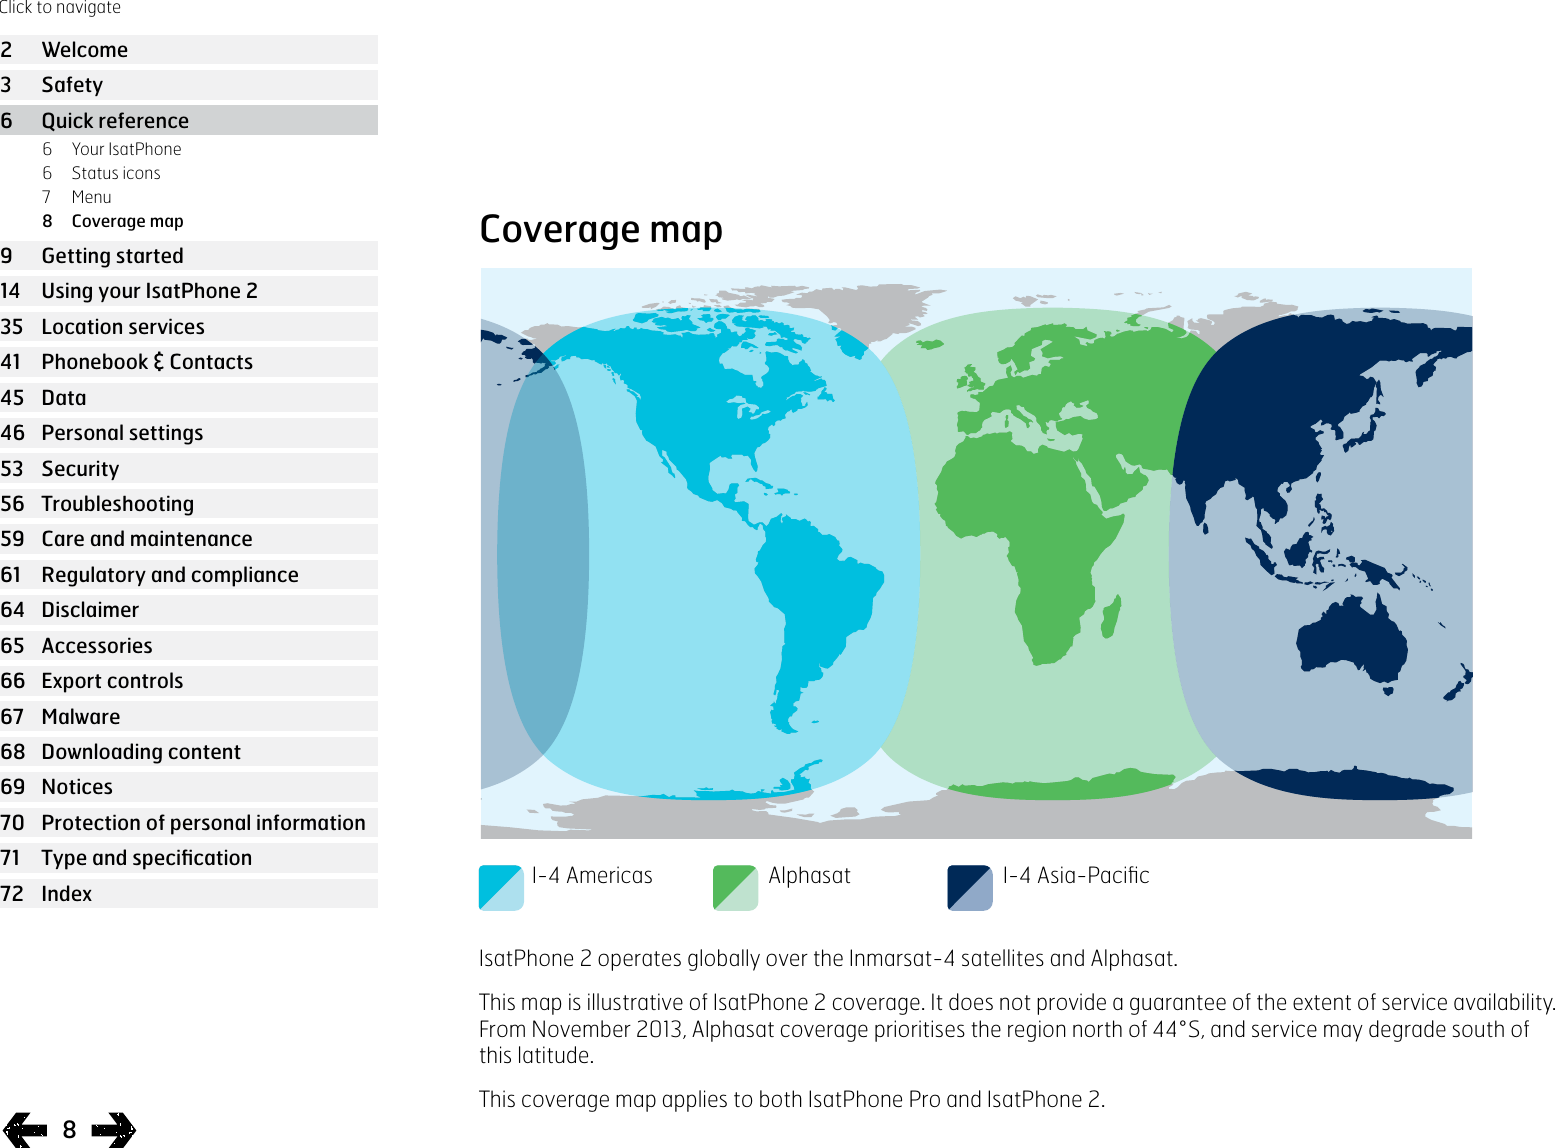
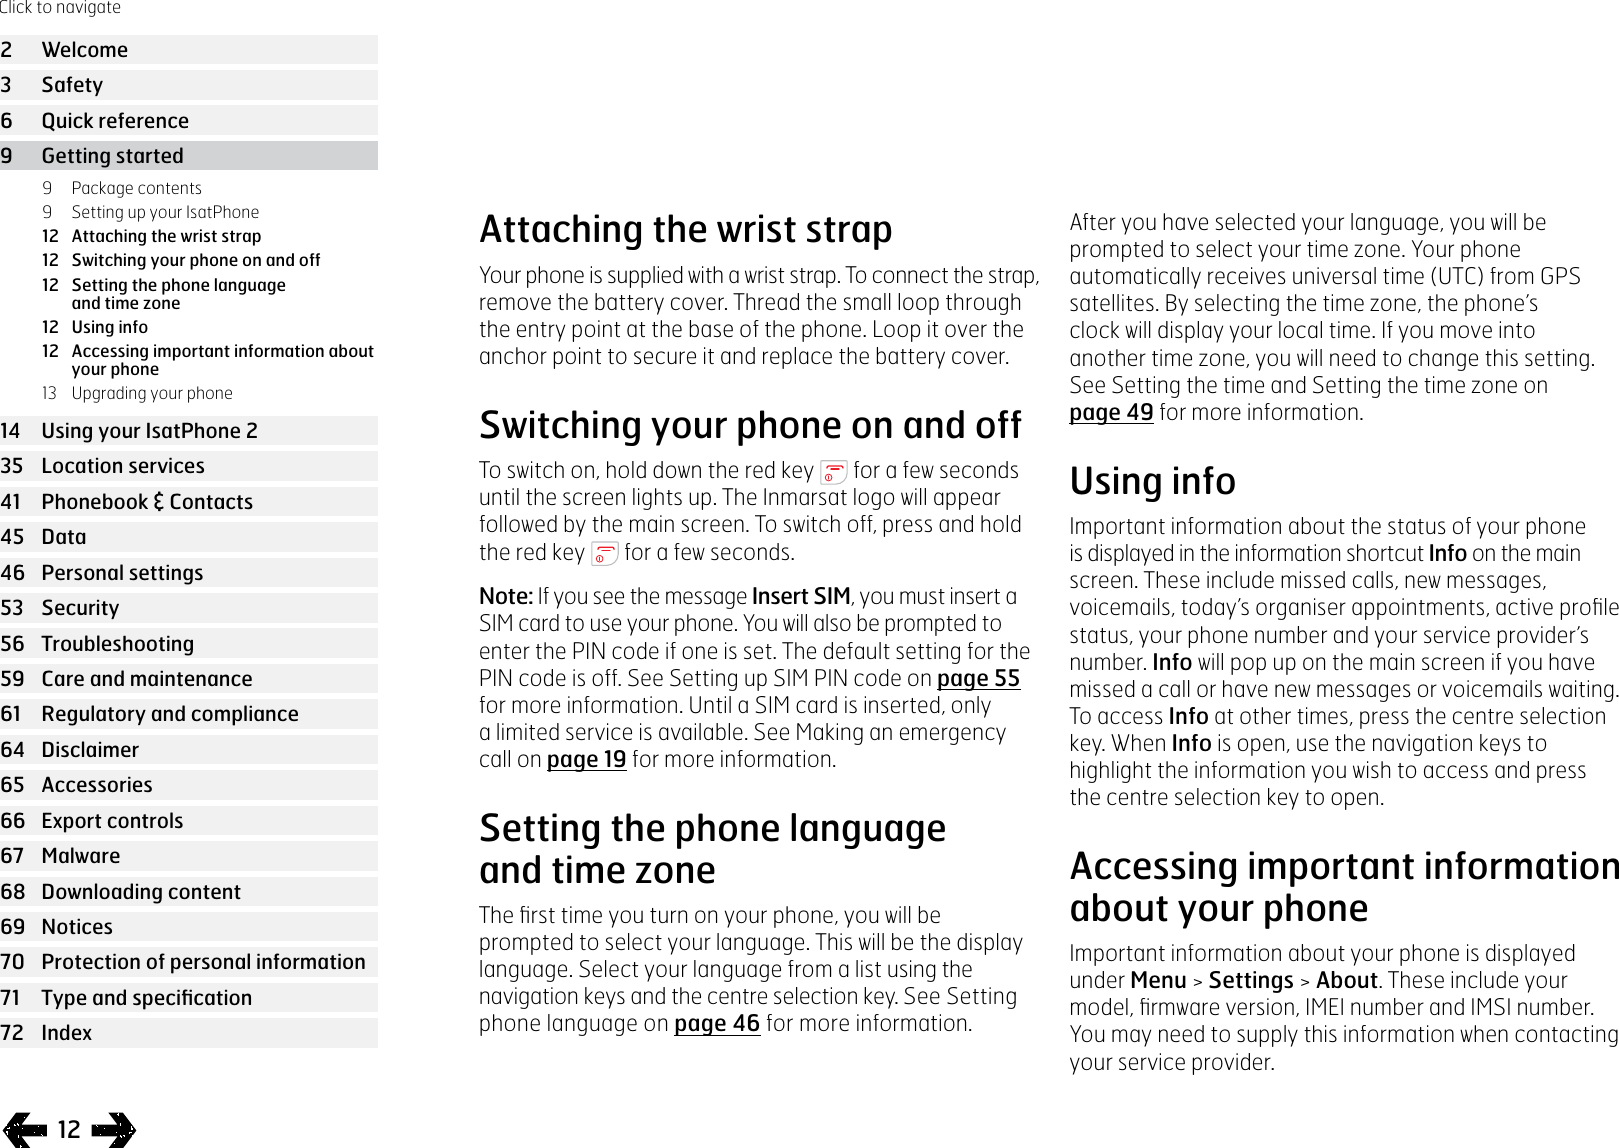
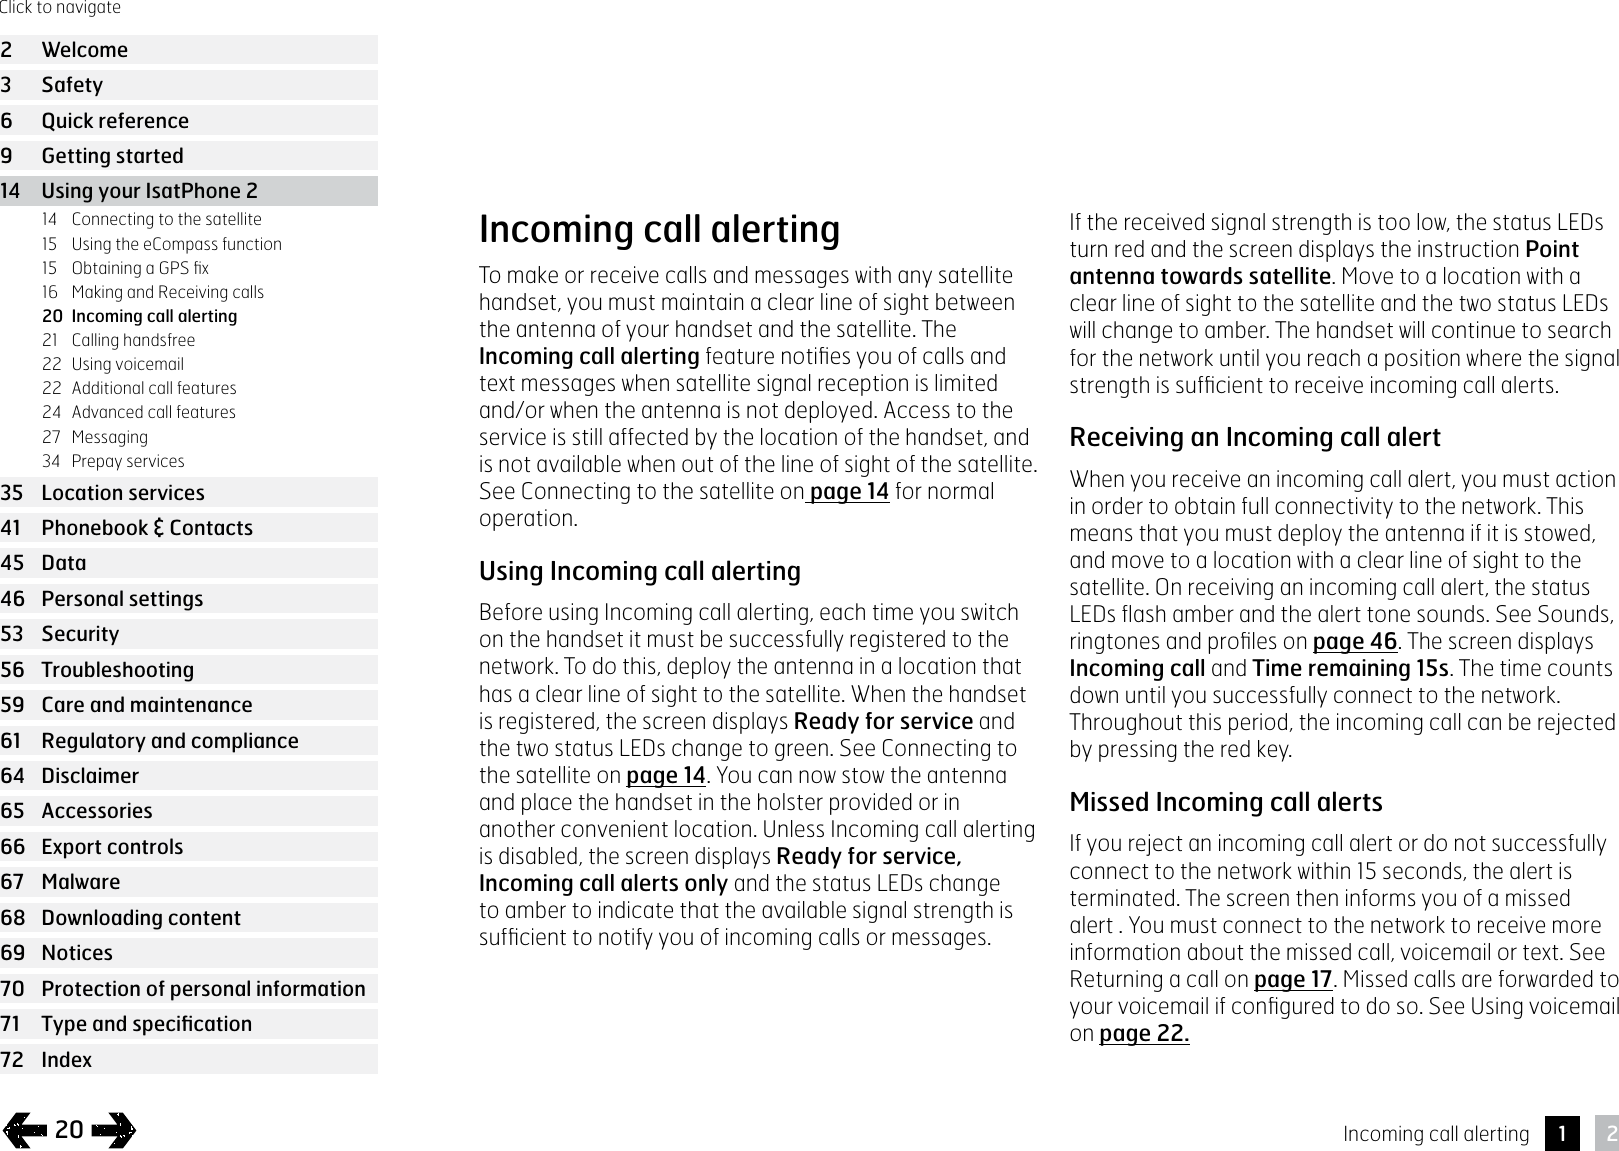


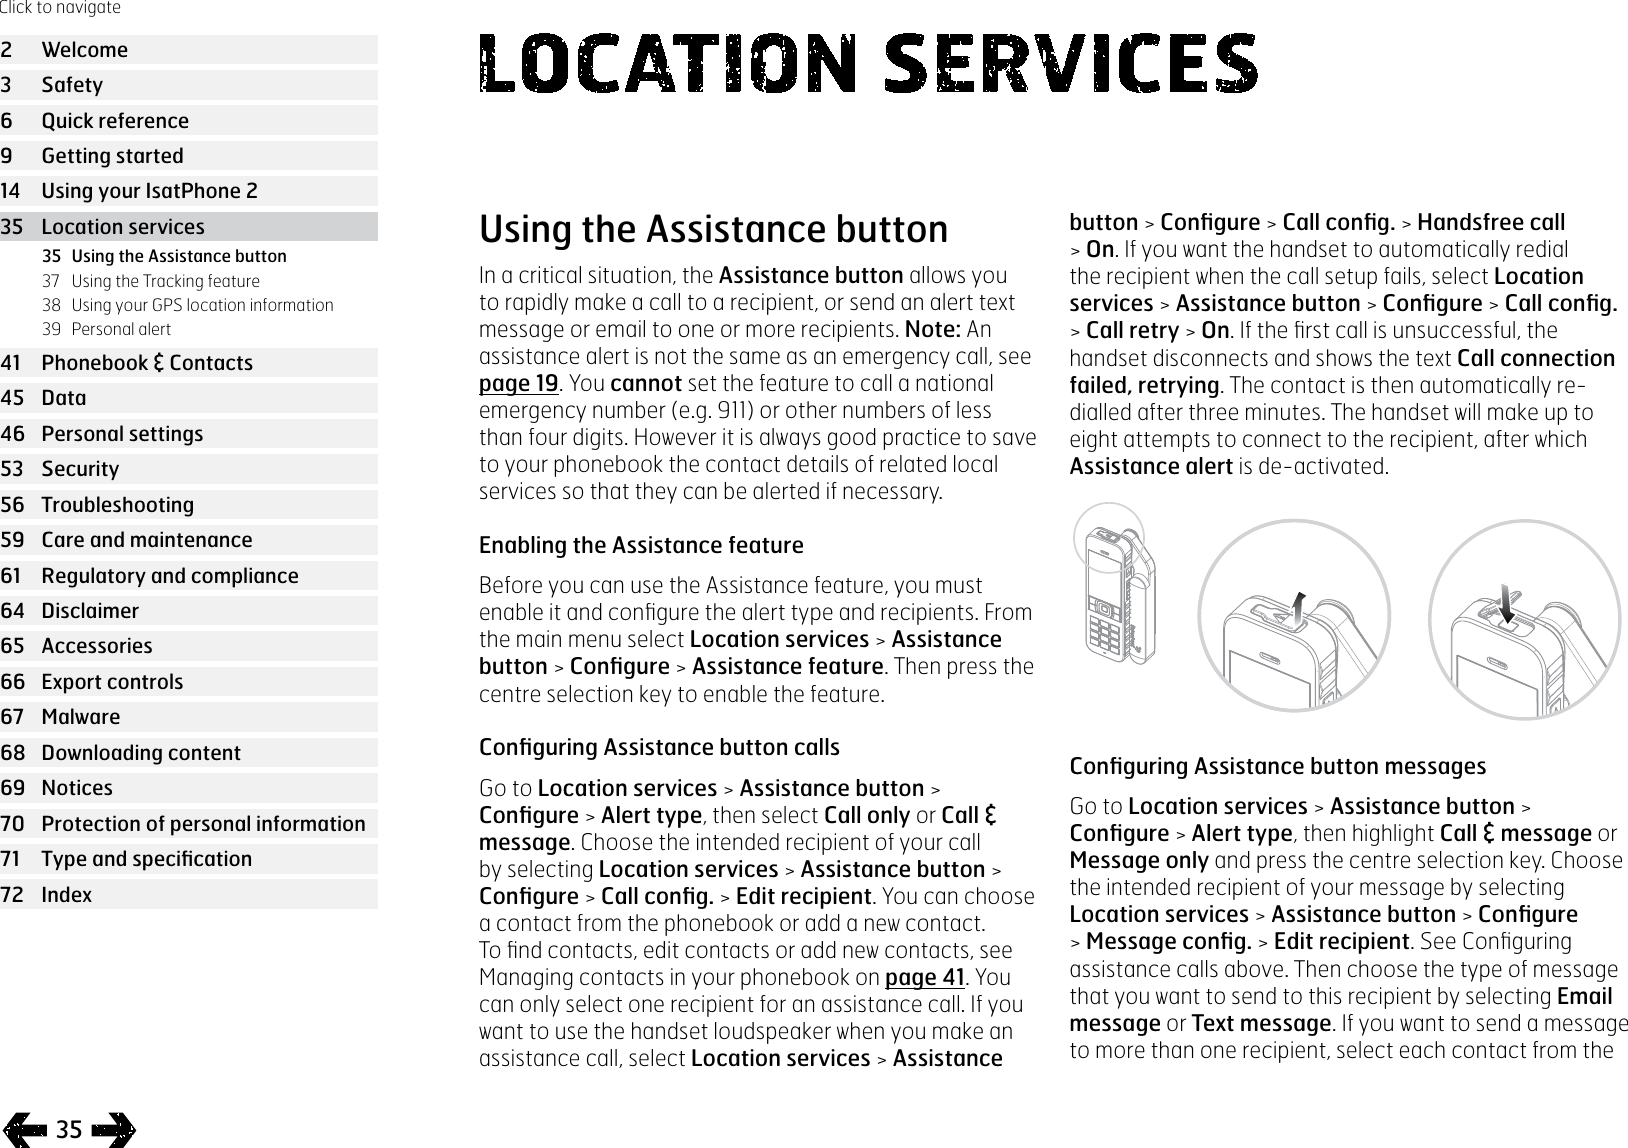

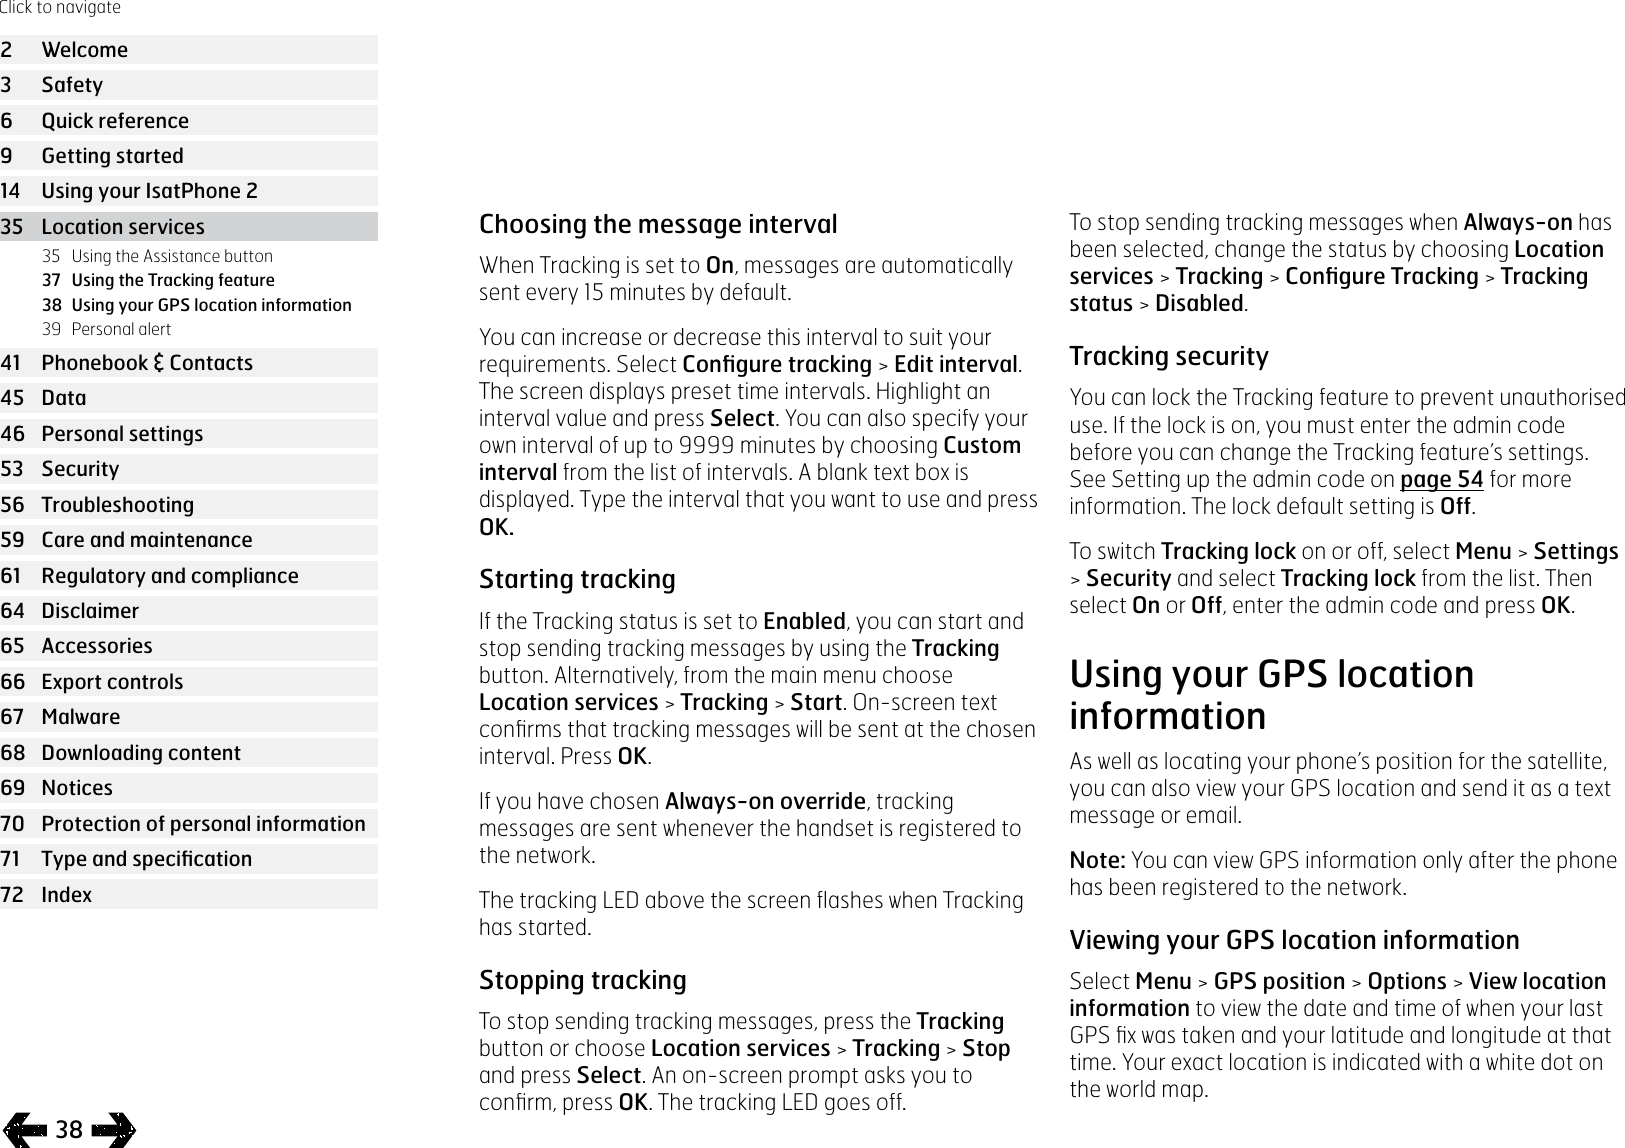
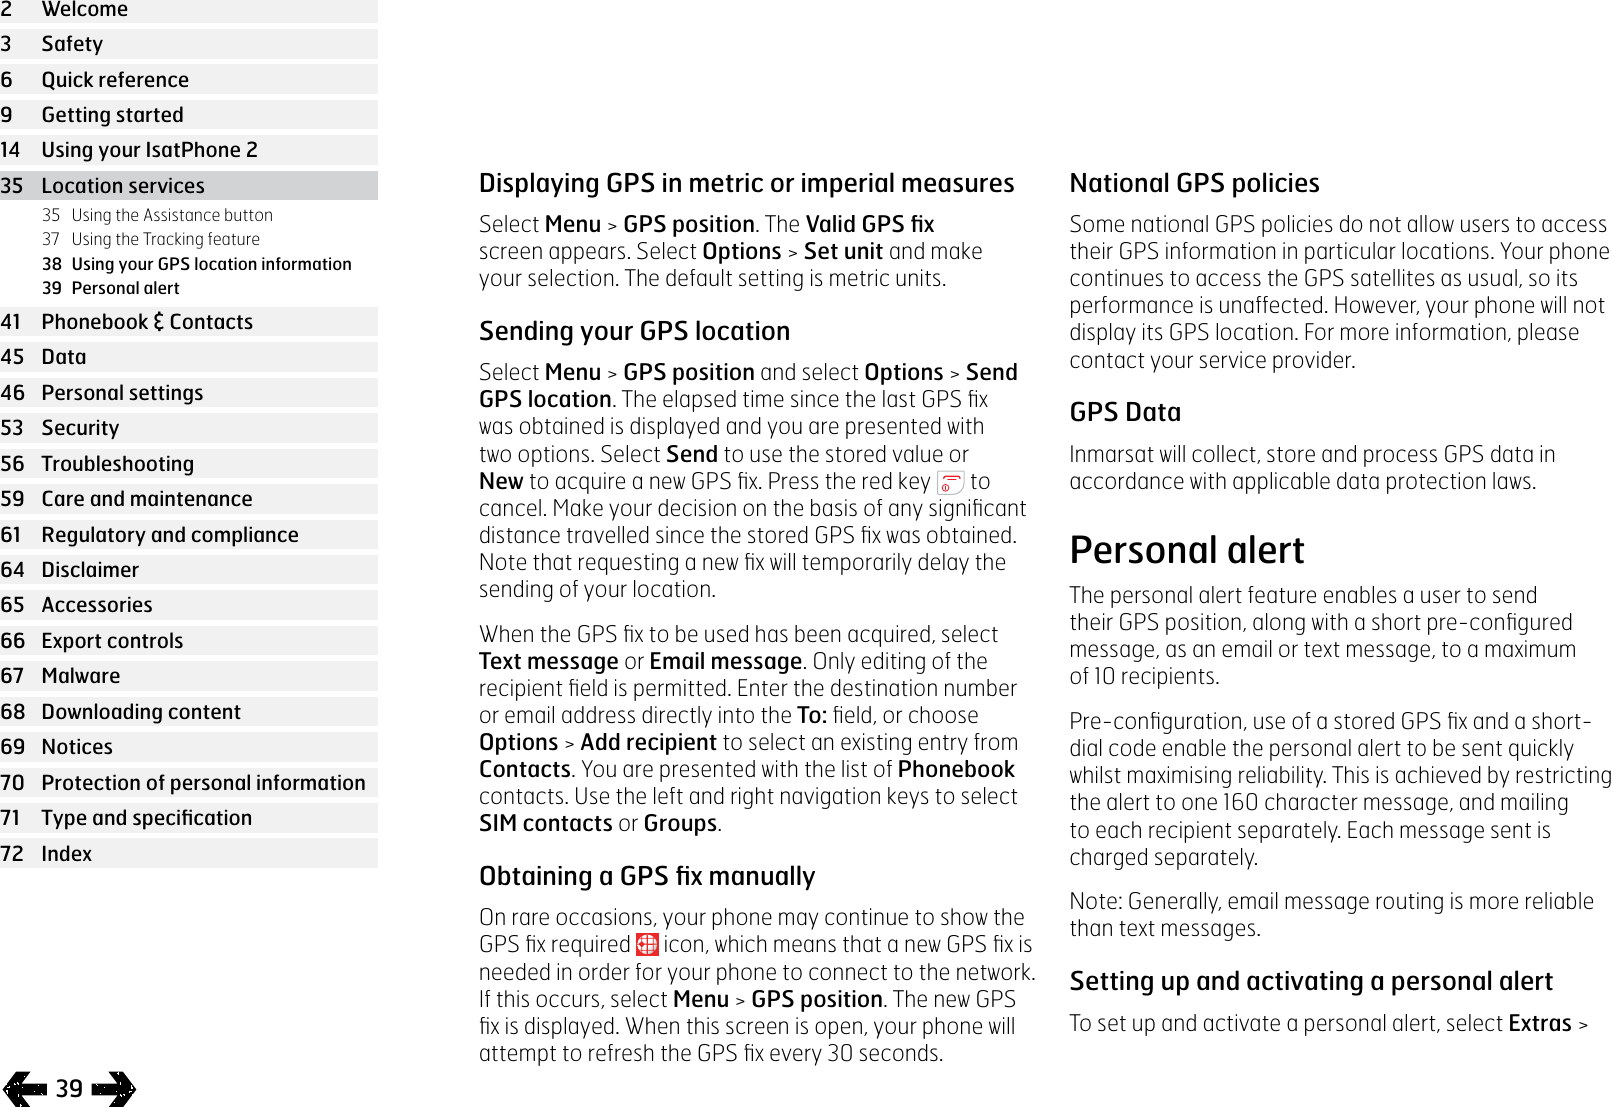
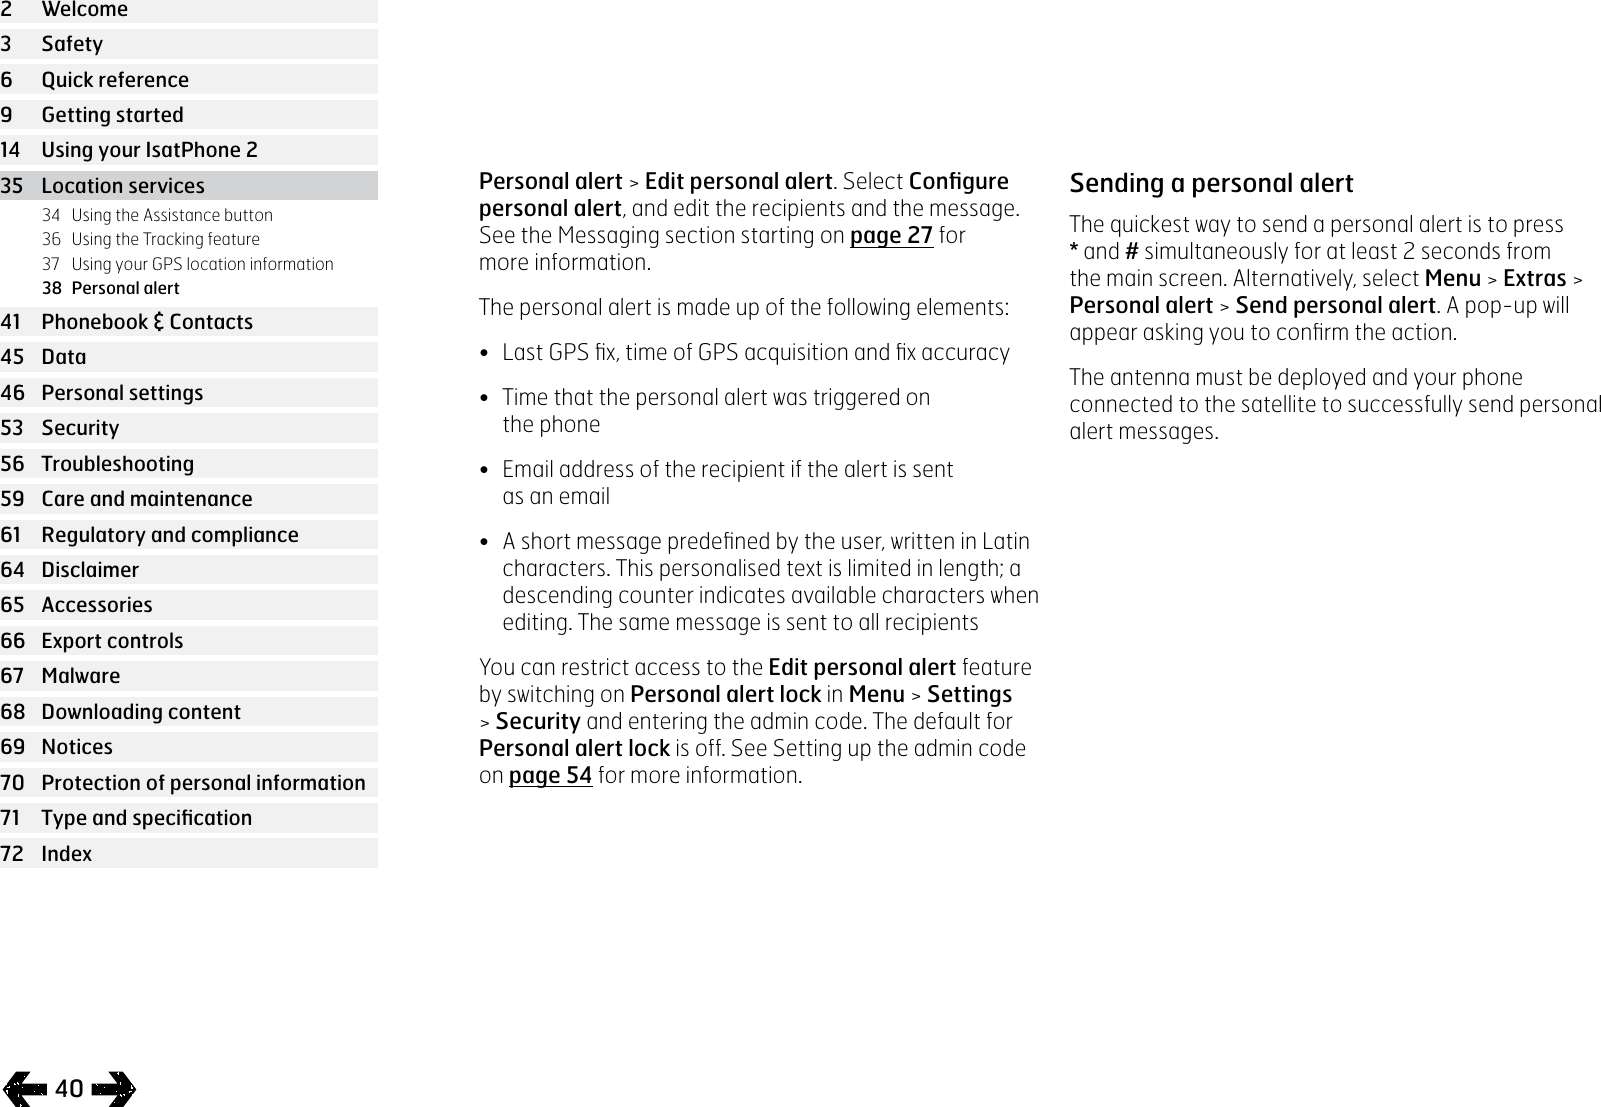
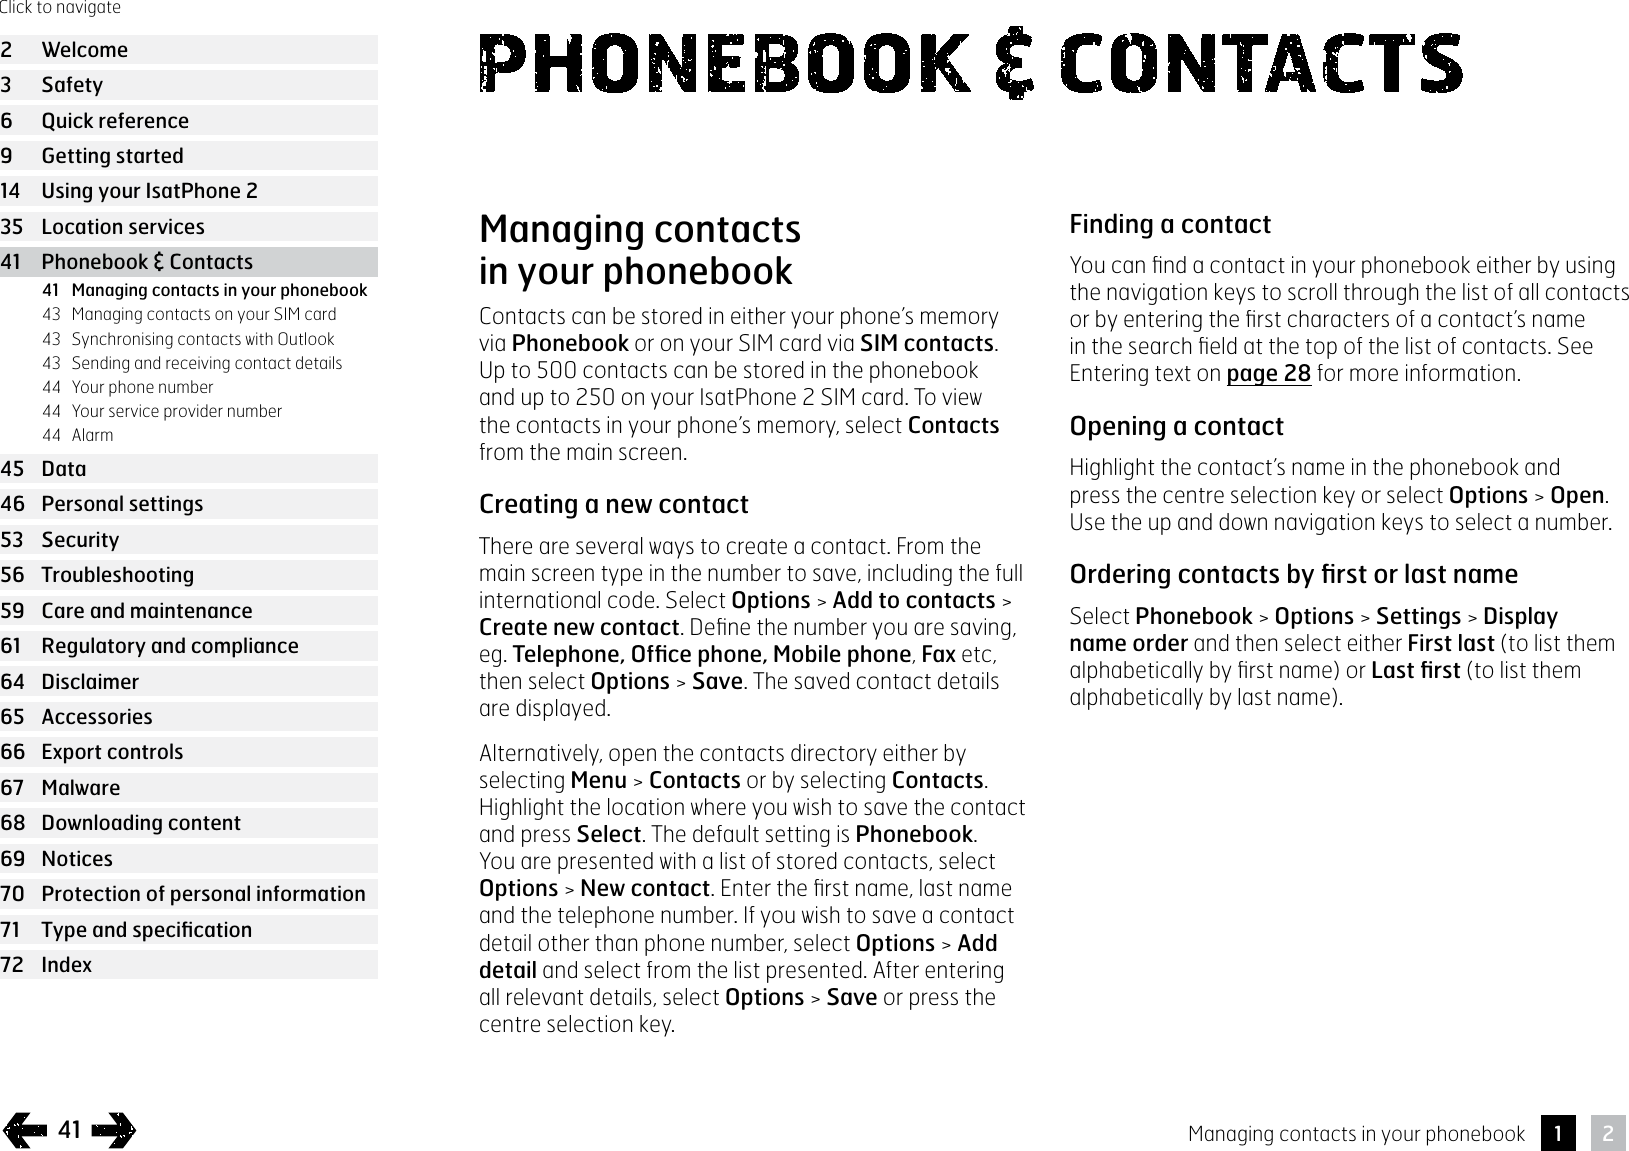
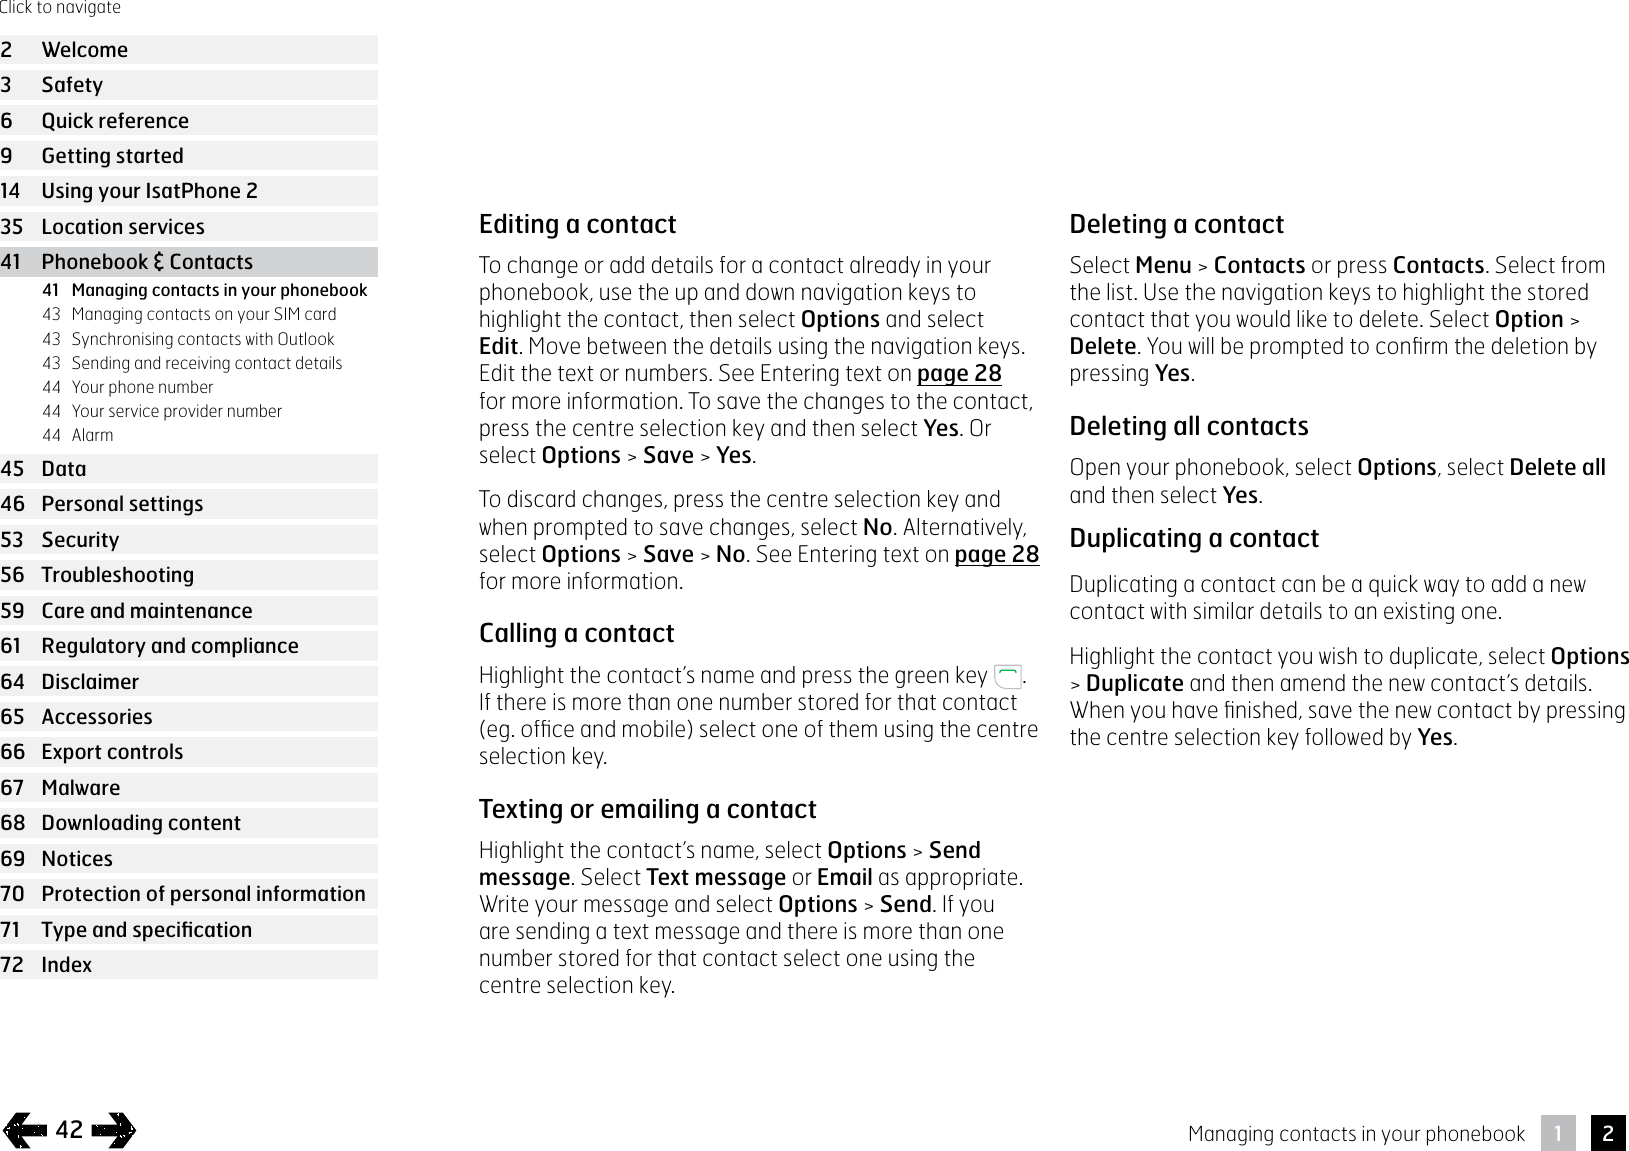
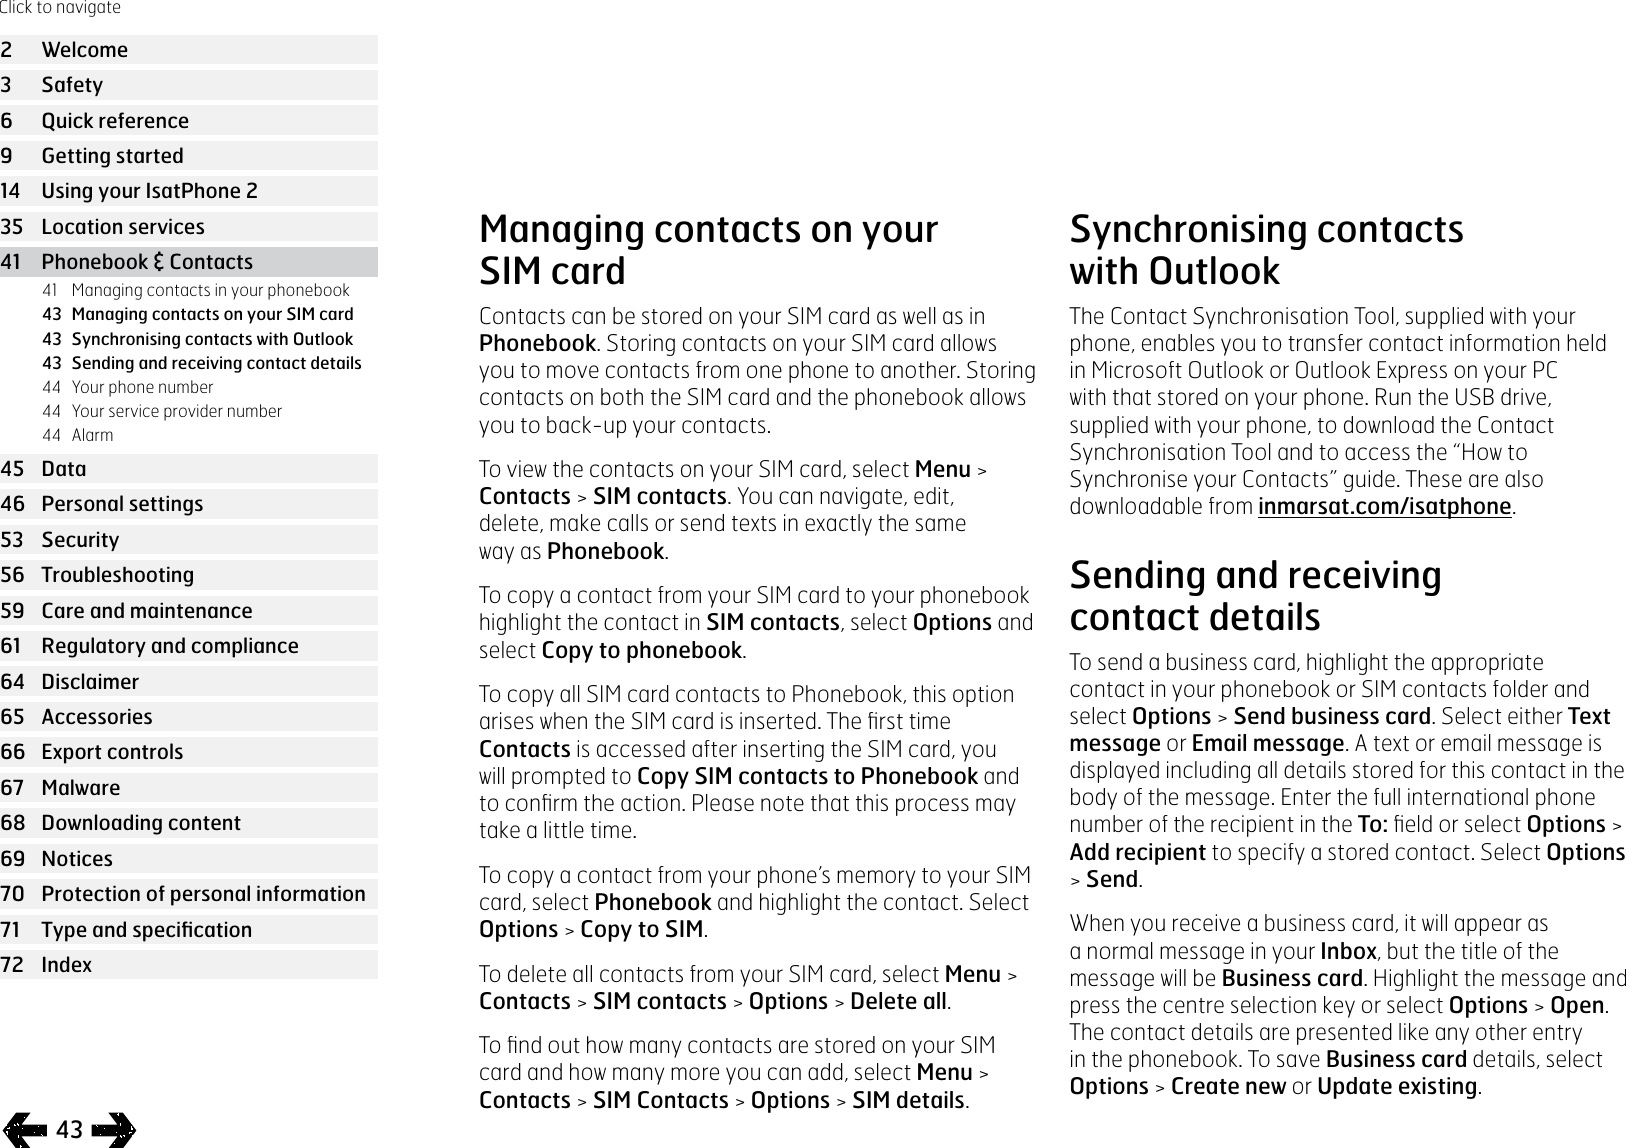
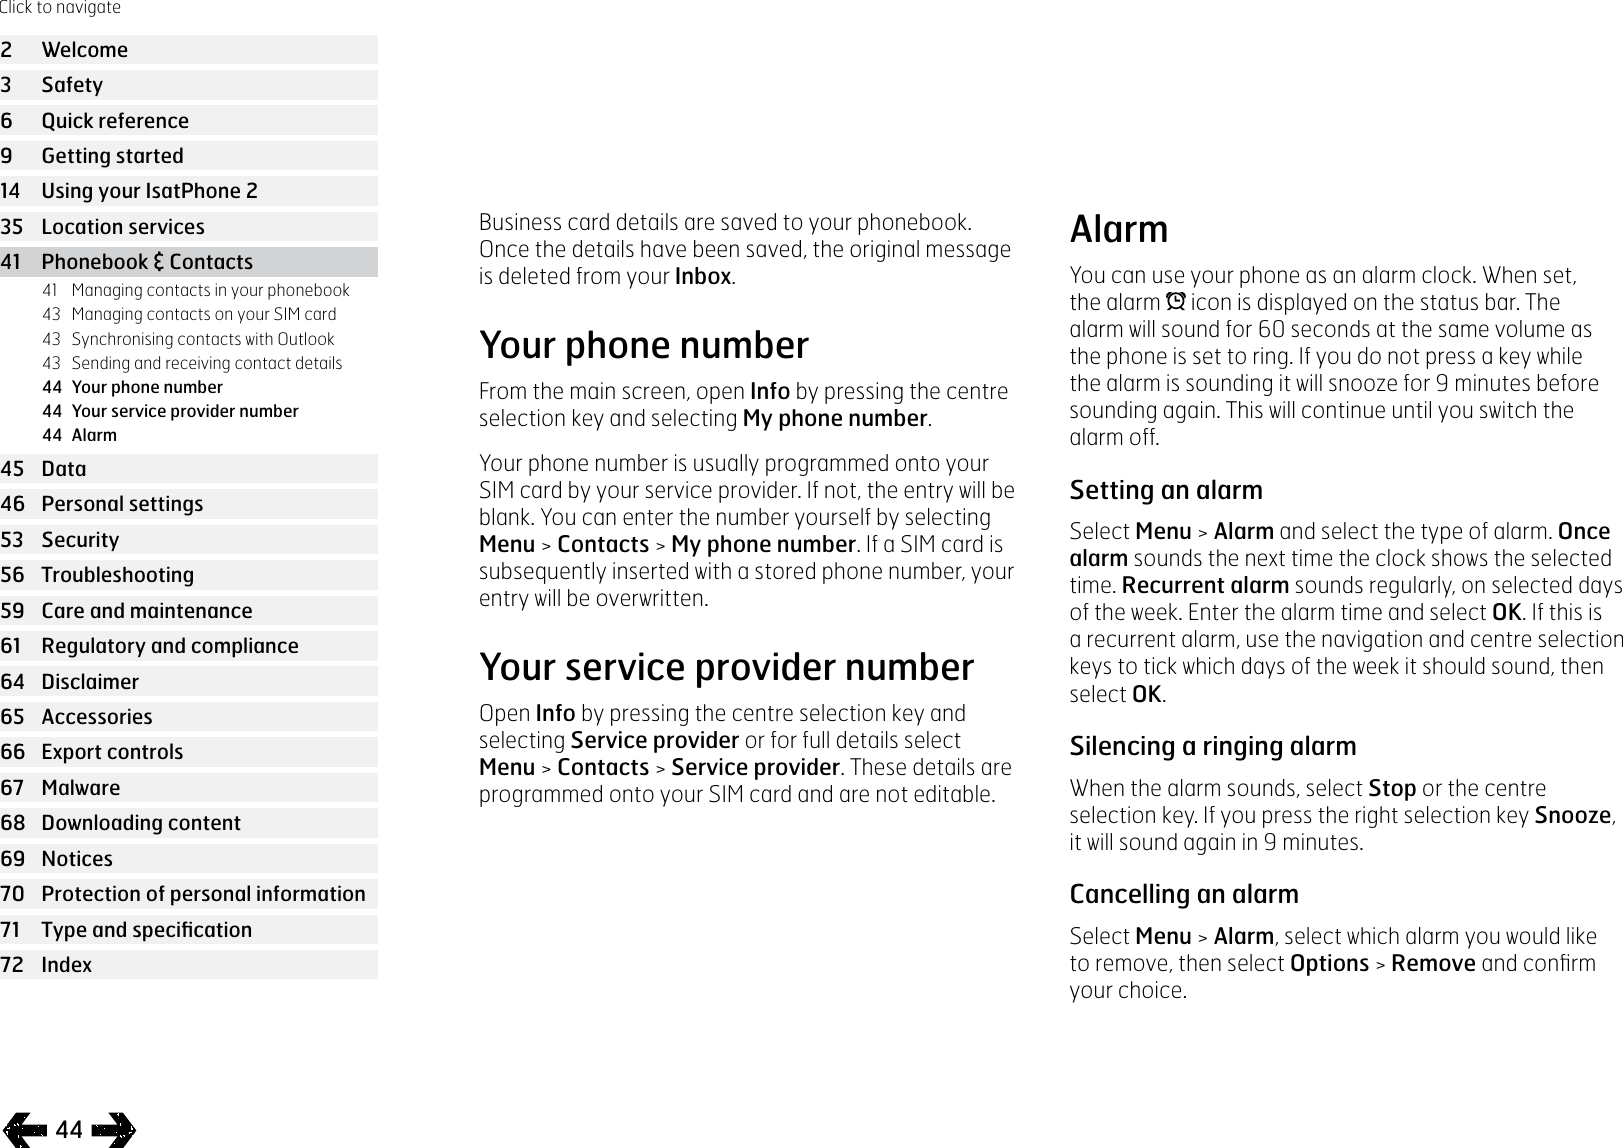
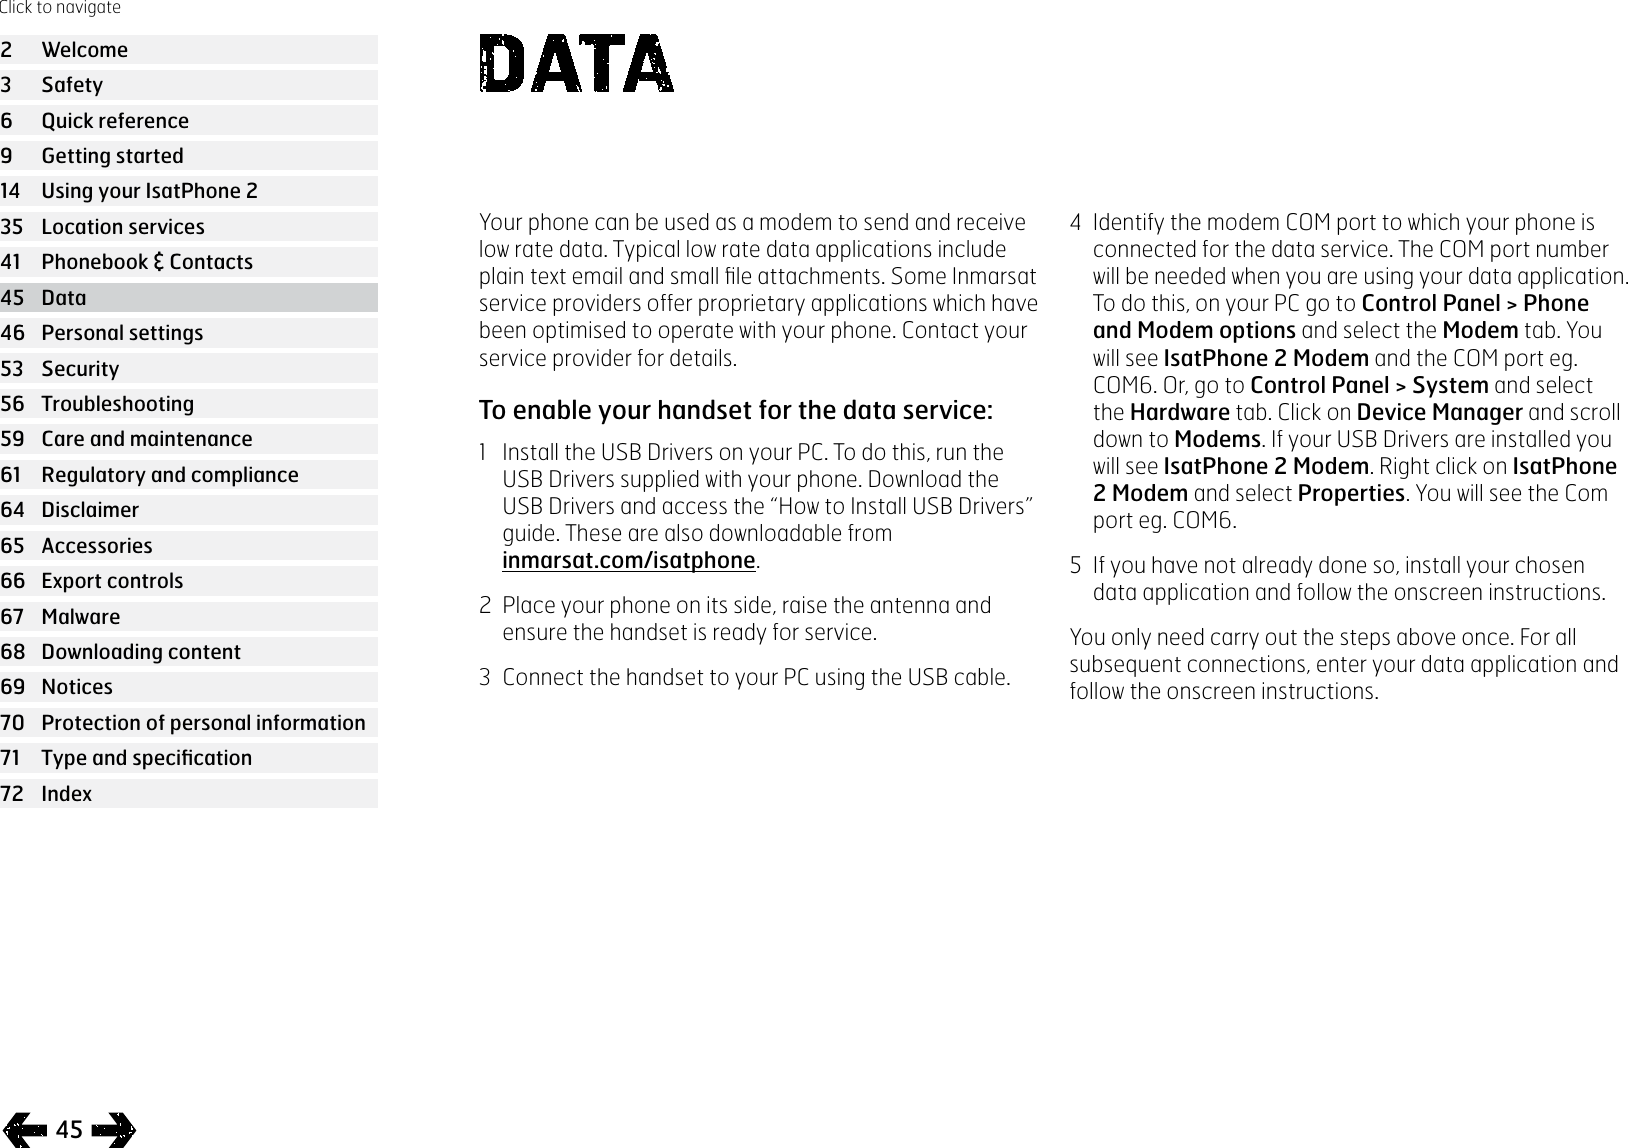
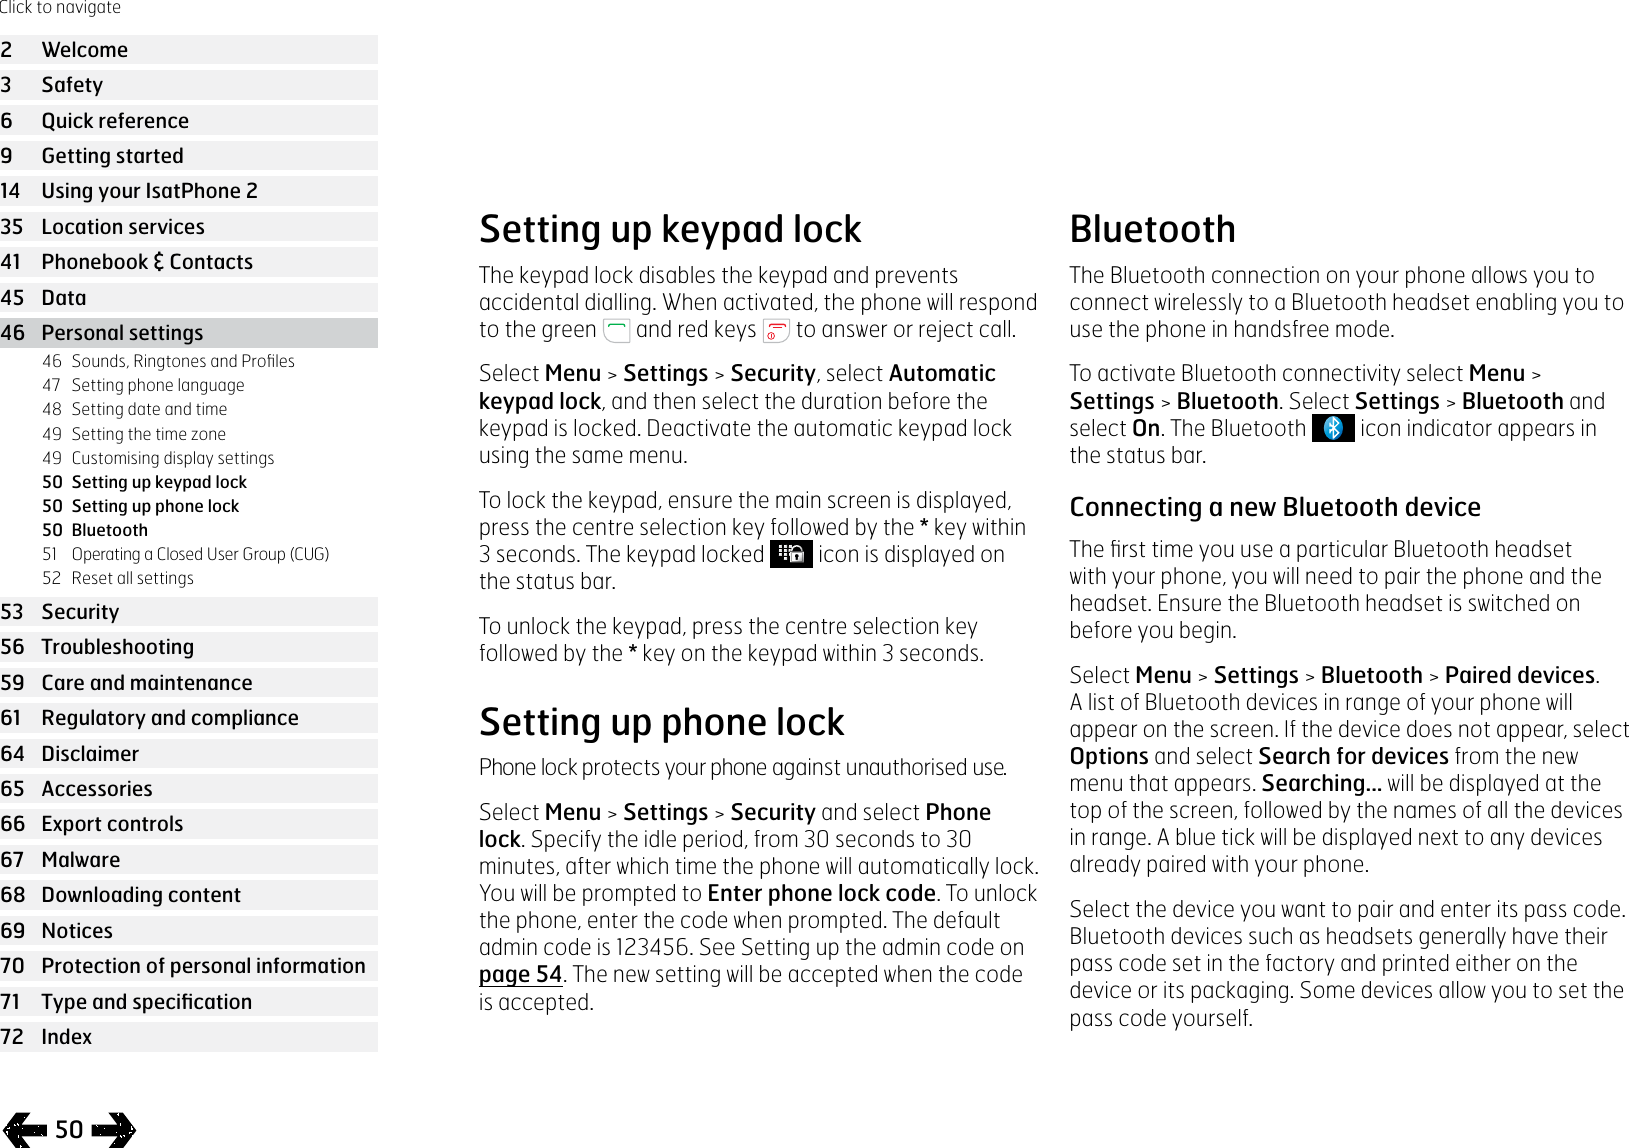
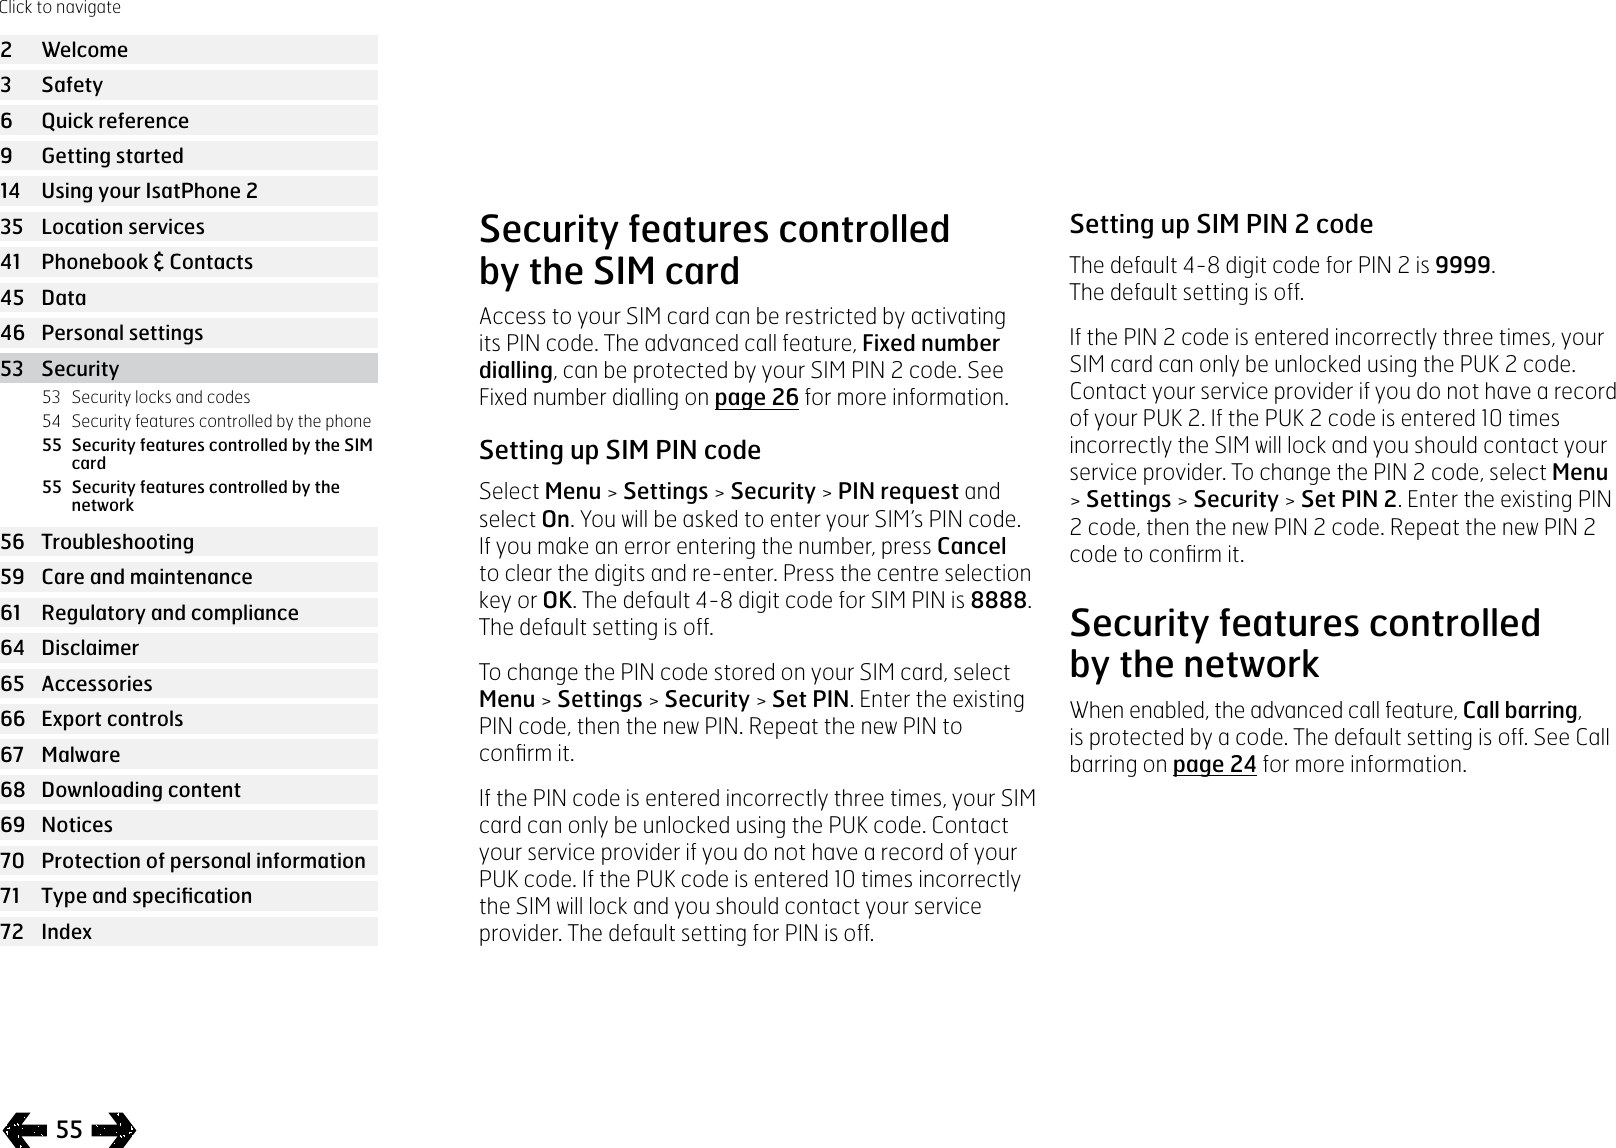
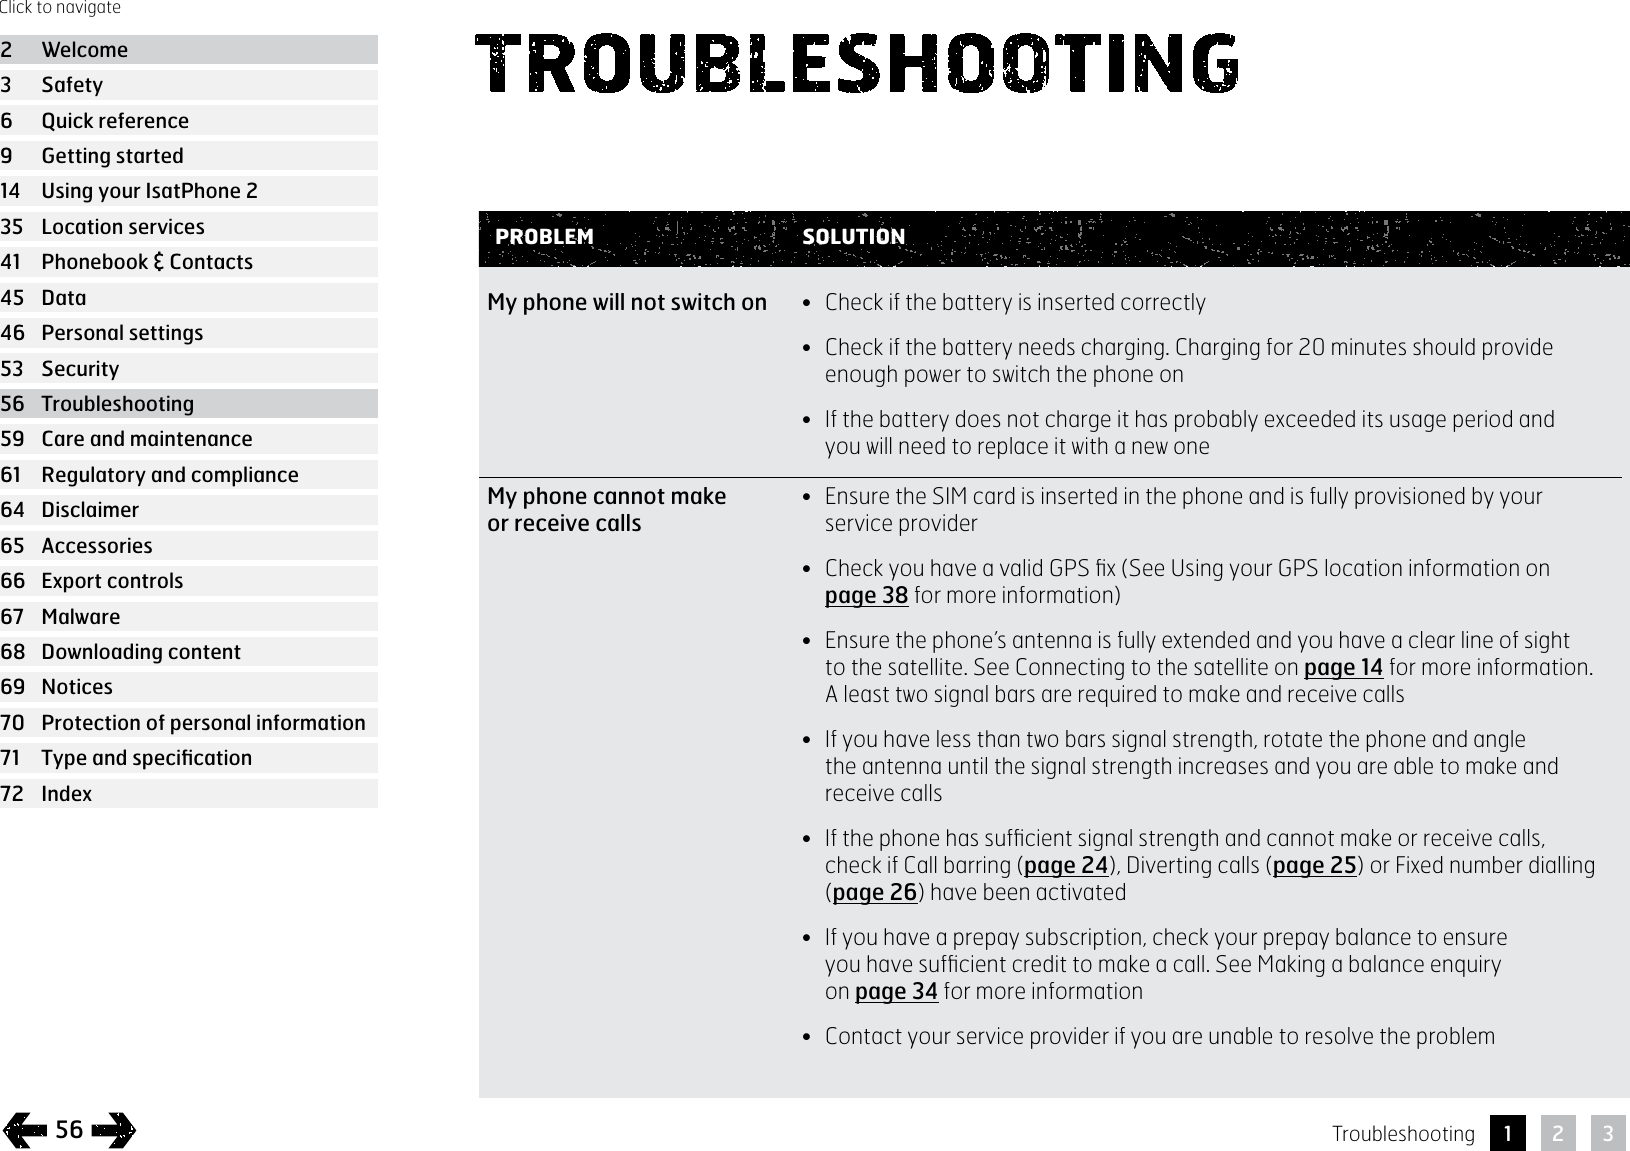
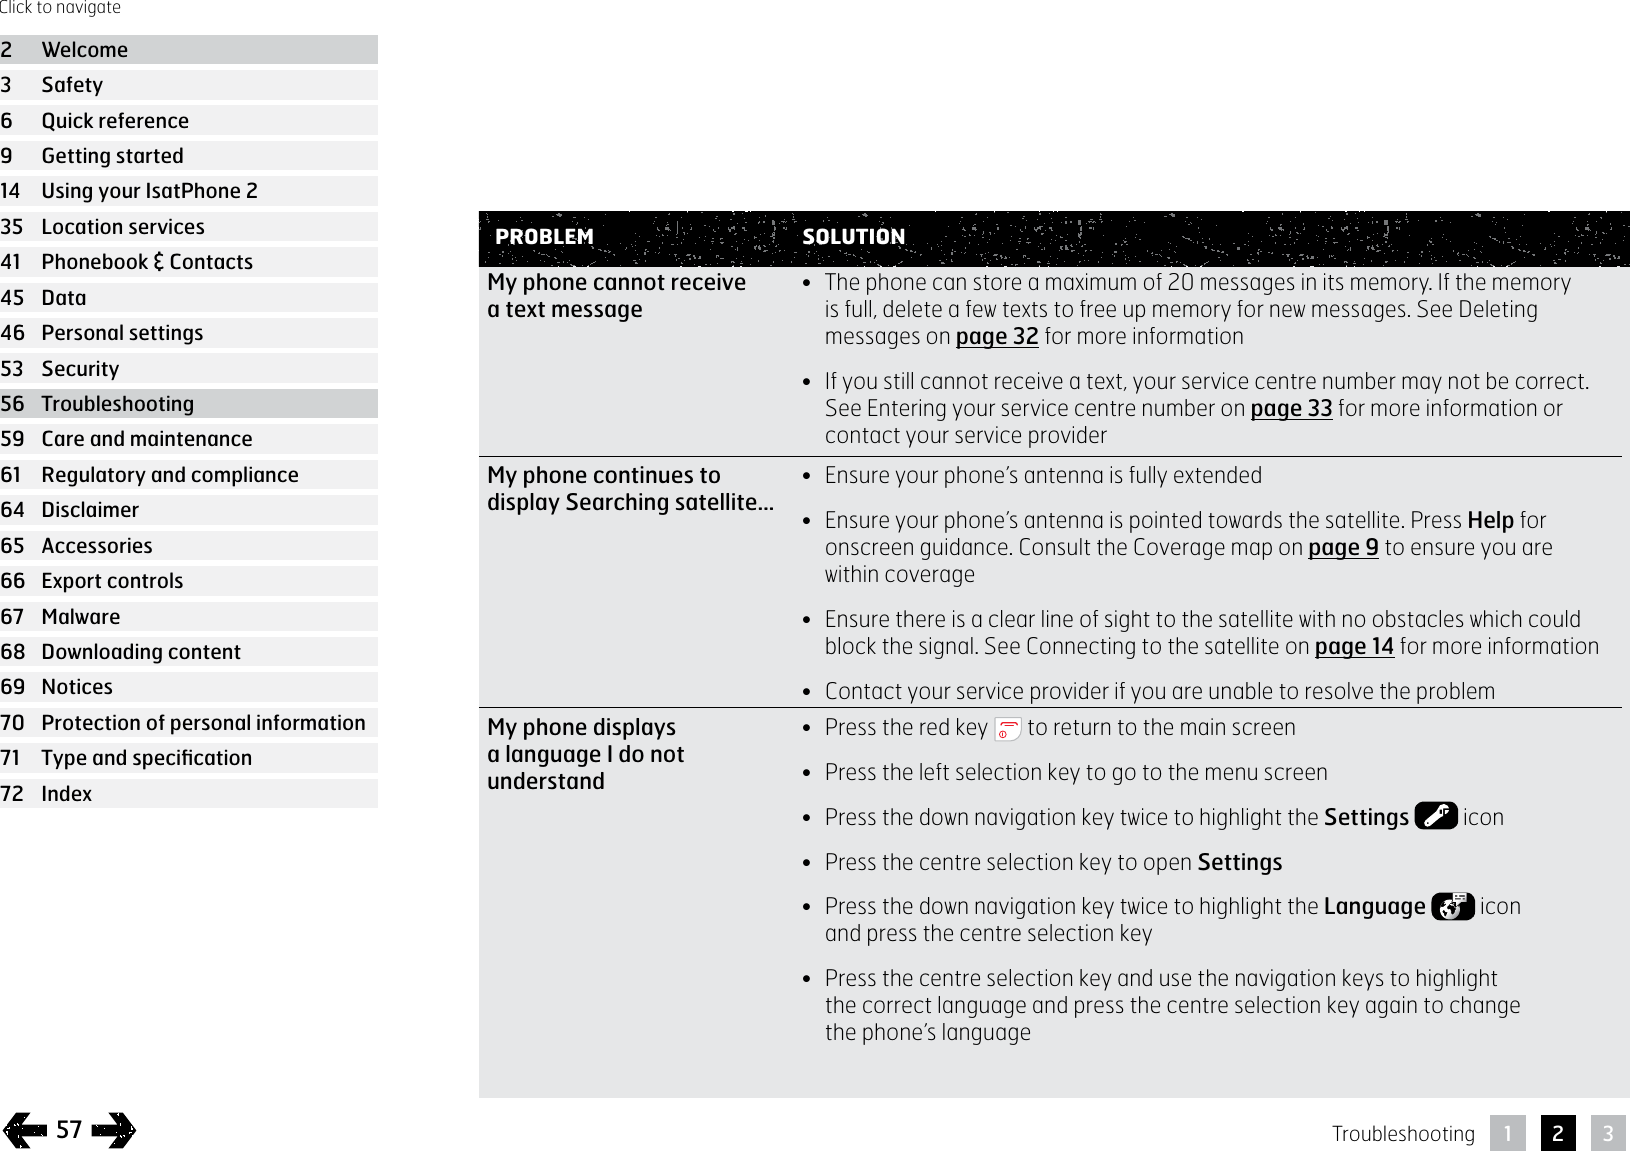
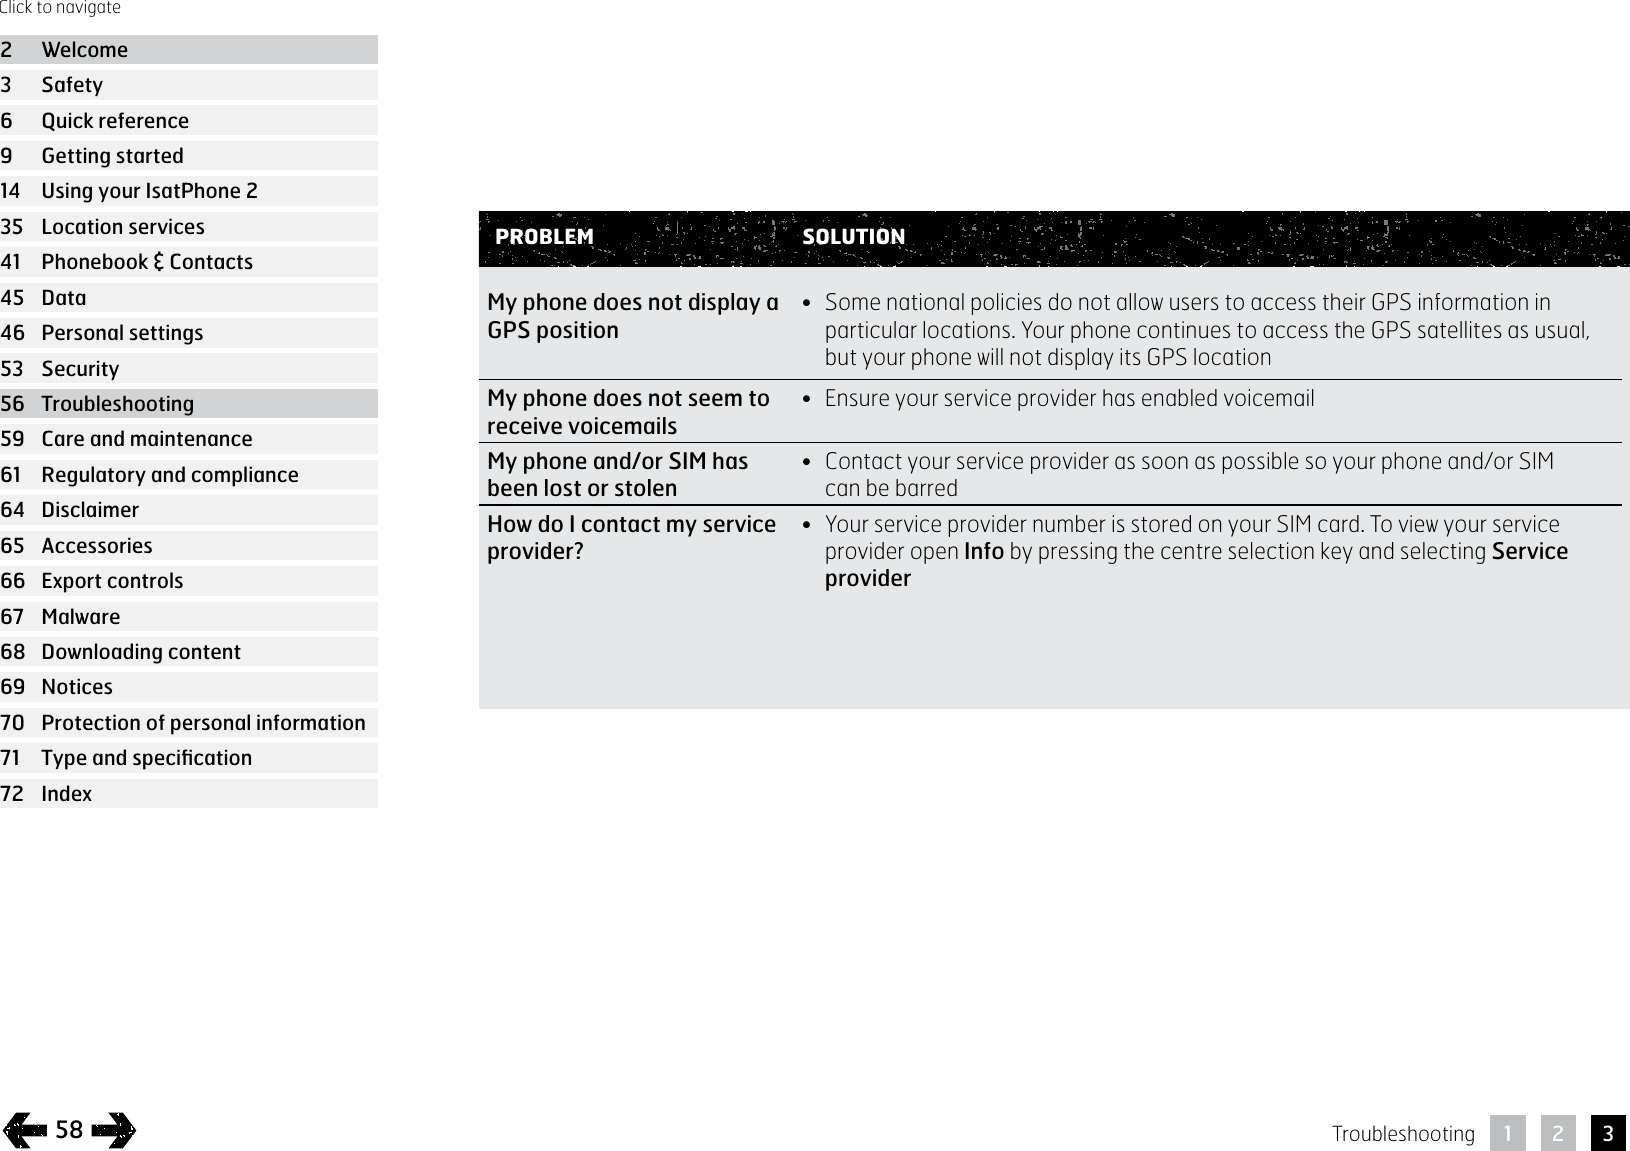
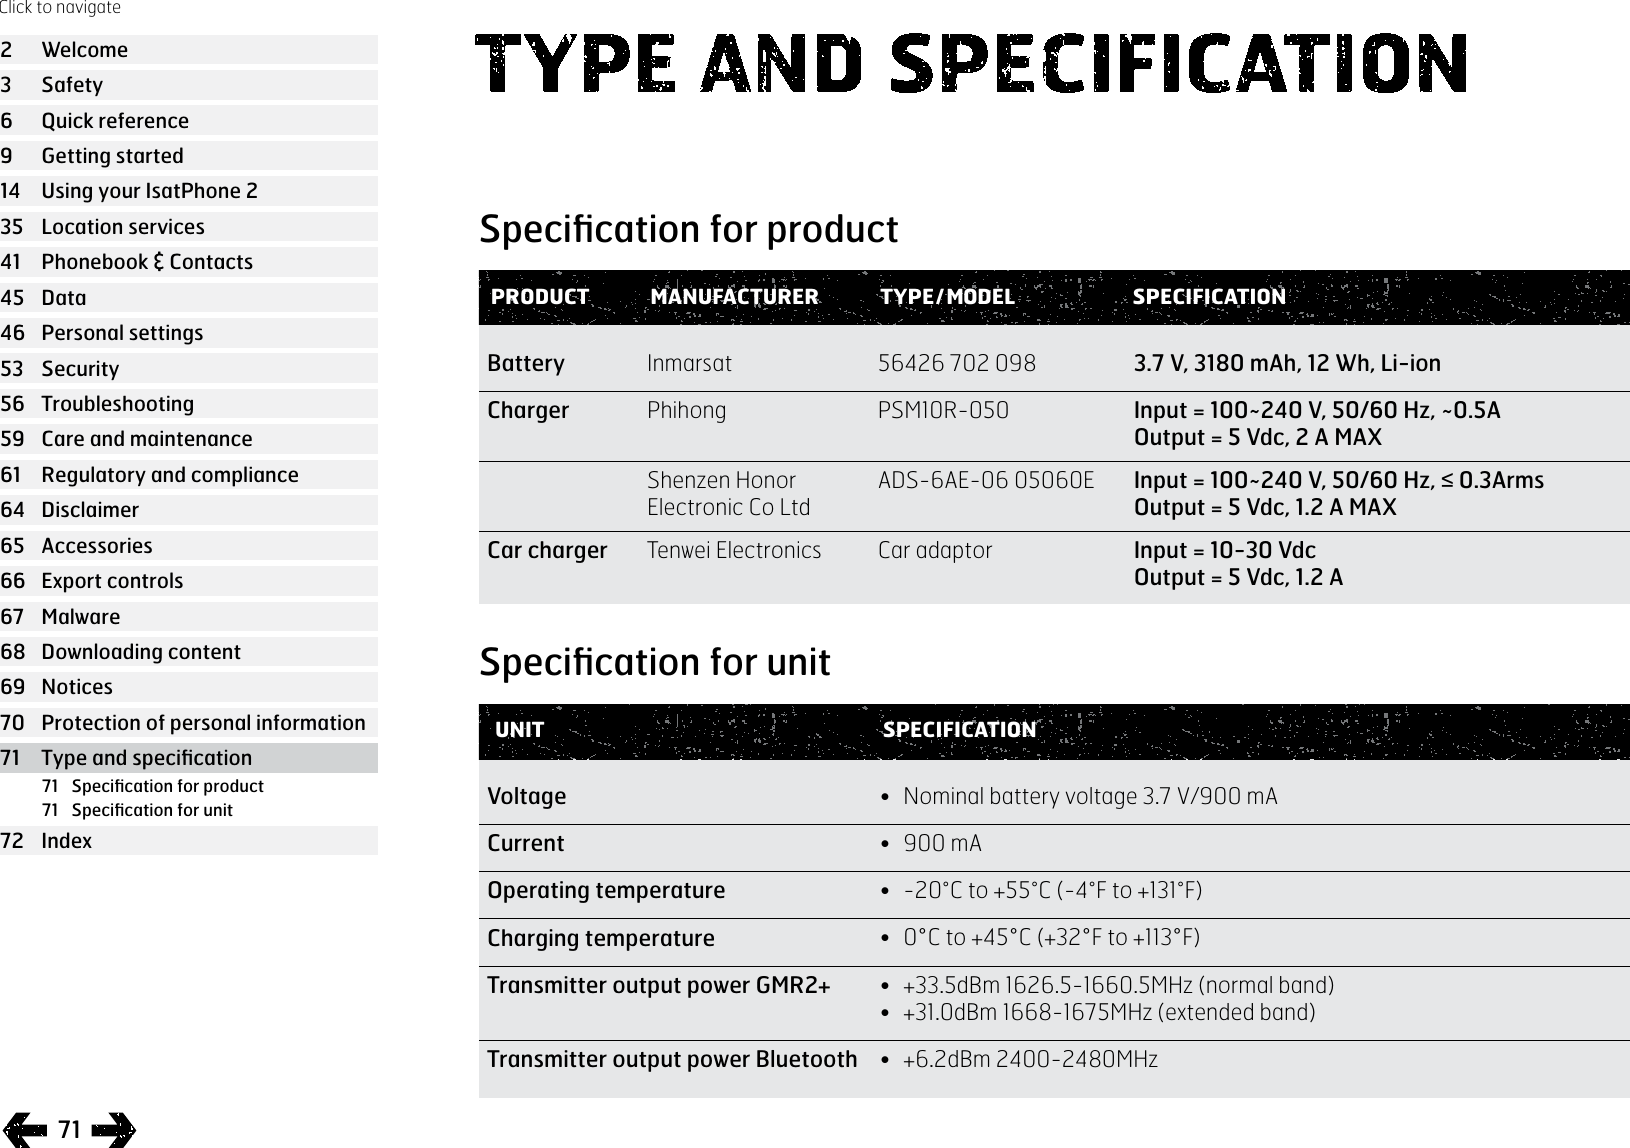
![37Using the Tracking featureThe Tracking feature allows you to send text messages or emails reporting the GPS coordinates of your current location to one or more recipients or, alternatively, to a tracking portal. The messages are automatically generated by the handset, with updated coordinates, at a default preset interval of 15 minutes. To send any message, your handset must be registered to the network. See Connecting to the satellite on page 14.Configuring TrackingTracking status• The Tracking feature has three states - Enabled, Disabled and Always-on - that control access to the sending of tracking messages. To configure the status, go to the main menu and choose Location services > Tracking > Configure tracking > Tracking status. Then choose a state:• Enabled: allows you to start and stop sending tracking messages, either by navigating the menu or by using the Tracking button [graphic] above the volume up/down keys on the side of the handset• Disabled: removes the ability to start or stop the transmission of tracking messages• Always-on: The handset continues to send messages whenever it is connected to the network• Choosing the message recipients and message typeSelect Location services > Tracking > Configure tracking > Edit recipient. You can choose a contact from the phonebook or add a new contact. To find and edit contacts or to add new contacts, see Managing contacts in your phonebook on page 41. If you want to send messages to more than one recipient, select each contact from the phonebook separately (adding new contacts if necessary). A maximum of ten recipients is permitted. When you have chosen a recipient, press Select. The message types available for that contact are displayed, highlight Text message or Email message and press Select. Note that a recipient’s email addresses cannot exceed 40 characters.Click to navigate2 Welcome3 Safety6 Quick reference9 Getting started14 Using your IsatPhone 235 Location services41 Phonebook & Contacts45 Data46 Personal settings53 Security56 Troubleshooting59 Care and maintenance61 Regulatory and compliance64 Disclaimer65 Accessories66 Export controls67 Malware68 Downloading content69 Notices70 Protection of personal information 71 Type and specification72 Index35 Using the Assistance button37 Using the Tracking feature38 Using your GPS location information39 Personal alert](https://usermanual.wiki/Inmarsat/ISATPHONE2W.User-manual/User-Guide-3831962-Page-37.png)