Innostream I-2100 E-GSM1900 GPRS Terminal Equipment User Manual UserMan
Innostream Inc. E-GSM1900 GPRS Terminal Equipment UserMan
UserMan

Colour Mobile Phone Dualband i2100 User’s Guide INNOSTREAM Confidential
PAGE : 1 of 1
Colour Mobile Phone
Dualband GSM/DCS
I-2100 User’s Guide

Colour Mobile Phone Dualband i2100 User’s Guide INNOSTREAM Confidential
PAGE : 2 of 2
Contents
1.BEFORE YOU START
1.1 PHONE LAYOUT AND ICONS ........................................................................................................
1.2 KEYS DESCRIPTION ....................................................................................................................
1.3 SILENCE MODE ..........................................................................................................................
1.4 USING THE NAVIGATION KEYS.....................................................................................................
1.5 USING THE EARPHONE ...............................................................................................................
1.6 DISPLAY IN THE IDLE SCREEN .....................................................................................................
2.GETTING STARTED.................................................................................................................
2.1 HOW TO ATTACH THE BATTERY..................................................................................................
2.2 HOW TO REMOVE THE BATTERY..................................................................................................
2.3 HOW TO CHARGE THE BATTERY ..................................................................................................
2.4 HOW TO PLACE THE SIM CARD ....................................................................................................
2.5 HOW TO REMOVE THE SIM CARD..................................................................................................
2.6 HOW TO SWITCH YOUR PHONE ON AND OFF ..................................................................................
3. SECURITY CODES ...................................................................................................................
3.1 PIN ..........................................................................................................................................
3.2 PUK..........................................................................................................................................
3.3 PIN2.........................................................................................................................................
3.4 PUK2 .......................................................................................................................................
3.5 SIM LOCK CODE .........................................................................................................................
3.6 LOCK CODE ...............................................................................................................................
3.7 PASSWORD................................................................................................................................
4. MAKING AND RECEIVING A CALL ........................................................................................
4.1 MAKING A CALL.........................................................................................................................
4.2 ANSWERING A CALL ...................................................................................................................
4.3 MAKING THE EMERGENCY CALL ..................................................................................................
4.4 MAKING AN INTERNATIONAL CALL ..............................................................................................
4.5 ENTERING A "PAUSE" CHARACTER IN A DIAL STRING ....................................................................
4.6 NOTIFICATION OF MISSED CALL...................................................................................................
5. IN-CALL OPTIONS..................................................................................................................
5.1 PUTTING A CALL ON HOLD/UNHOLD ............................................................................................
5.2 MAKING A SECOND CALL ............................................................................................................
5.3 SWAPPING BETWEEN ACTIVE CALLS AND HELD CALLS ..................................................................
5.4 ANSWERING A SECOND INCOMING CALL........................................................................................
5.5 ADJUSTING THE EARPIECE VOLUME .............................................................................................
5.6 MUTING THE MICROPHONE .........................................................................................................
5.7 SENDING DTMF..........................................................................................................................
5.8 STORING A NUMBER ON THE SCRATCHPAD ...................................................................................
5.9 USING THE SMS FUNCTION
5.10 USING THE LOUDSPEAKER..........................................................................................................
5.11 making a conference call

Colour Mobile Phone Dualband i2100 User’s Guide INNOSTREAM Confidential
PAGE : 3 of 3
6. PHONEBOOK ...........................................................................................................................
6.1 STORING A PHONE NUMBER WITH A NAME....................................................................................
6.2 QUICK SEARCHING FOR A NUMBER IN THE PHONEBOOK .................................................................
6.3 STORING A NUMBER OF THE RECENT CALLS TO THE PHONEBOOK ...................................................
6.4 SPEED LIST ...............................................................................................................................
6.5 USING THE PHONEBOOK OPTIONS................................................................................................
7. TEXT EDITING ........................................................................................................................
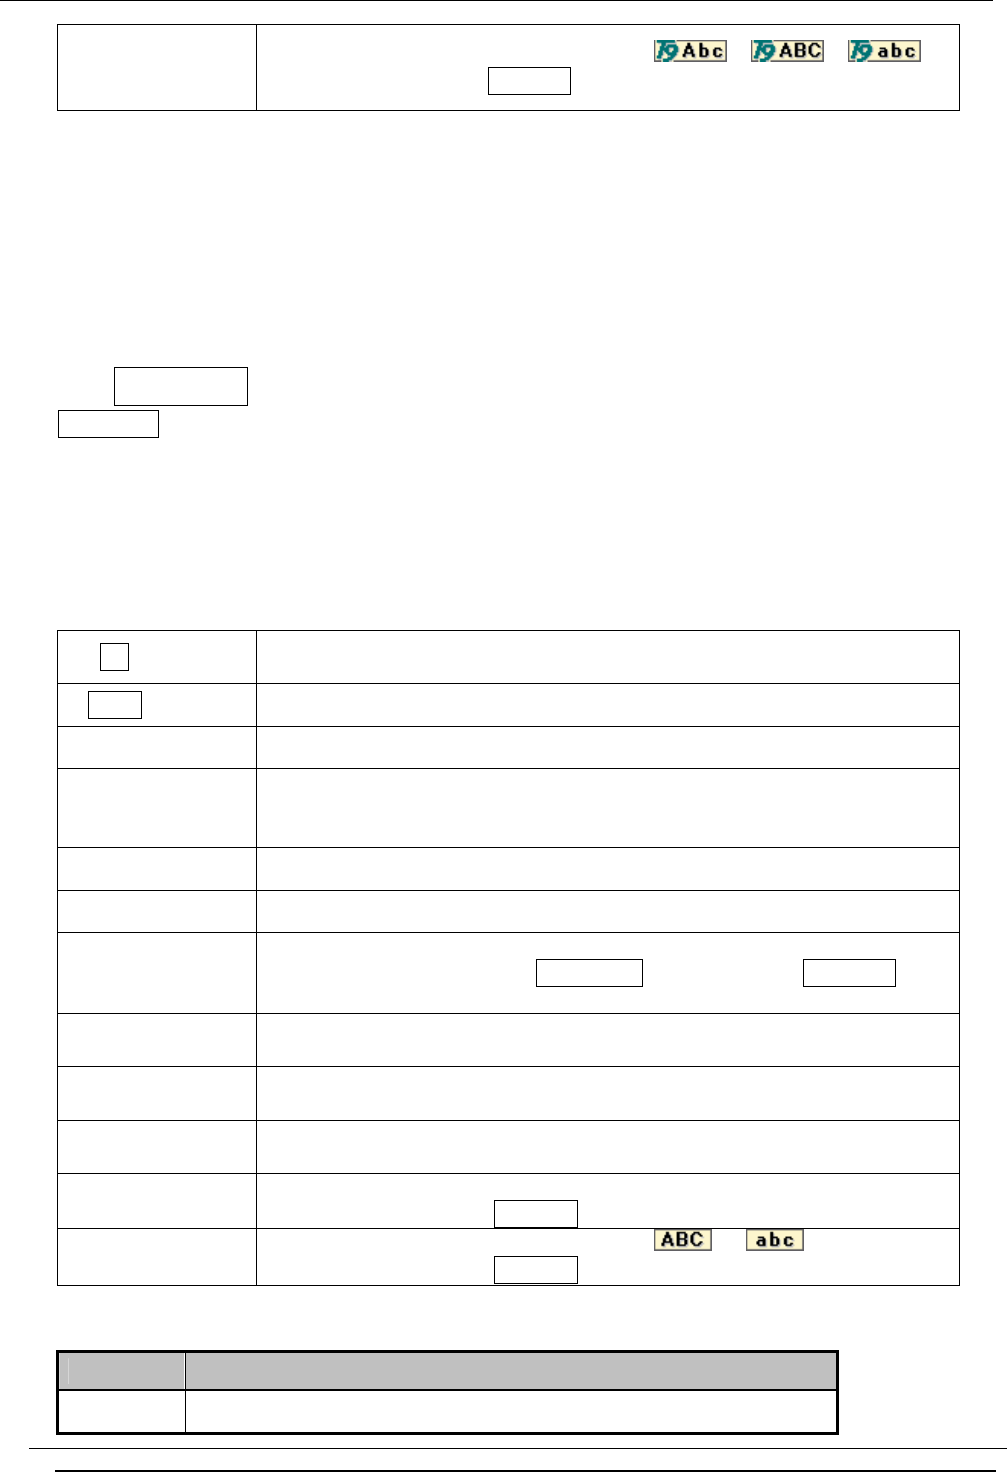
7.1 INPUT MODE ............................................................................................................................
7.2 T9 ENGLISH INPUT MODE ..........................................................................................................
7.3 MULTI-TAP INPUT MODE...........................................................................................................
7.4 NUMERIC INPUT MODE ..............................................................................................................
7.5 SYMBOLS INPUT MODE ..............................................................................................................
8. THE MENU MAP......................................................................................................................
9. THE MENU FUNCTIONS.........................................................................................................
9.1 MESSAGES
(SMS, MMS, E-mail, Voicemail, Broadcast)
9.2 CALL RECORDS
(Dialled Calls, Received Calls, Missed Calls, Delete Records, Cost & Duration, Data Counter)
9.3 PHONE SETTING
(Own Numbers, Language, Sound Setting, Display Setting, Clock Setting, Call Setting, Connection
Setting, Security Setting, My Menu)
9.4 CAMERA & MEDIA
(Camera, Image File, Audio File, File Manager)
9.5 ORGANISER
(Calendar, View Today Report, Alarm, Memo)
9.5 NETWORK SERVICE
(Call Divert, Call Barring, Call Waiting, Caller Identity, Closed User Group, Network Selection)
9.6 GAME & UTILITY
(Games, Java, Biorhythm, Timer, calculator, Voice Memo, Melody Composer, Converter)
9.7 INTERNET
(Home, Resume, Bookmarks, Push Messages, Settings, Empty Temp Files, Go To Address)
9.8 SIM AT SERVICE
10. DATA AND FAX.....................................................................................................................
11. PHONE AND BATTERY CARE ..............................................................................................
12. TROUBLE SHOOTING ...........................................................................................................
13. GLOSSARY .............................................................................................................................
14. SAFETY INFORMATION........................................................................................................
15. INDEX.....................................................................................................................................

Colour Mobile Phone Dualband i2100 User’s Guide INNOSTREAM Confidential
PAGE : 4 of 4
1. Before You Start
1.1 Phone Layout and Icons
The following illustration shows the main elements of your phone.
< Icons in the main display screen >
Shows the received signal strength. The larger the number of bars, the better
the signal strength.
Appears when a new text message has been received
Appears when you have messages waiting in voice mail
Appears when vibrator is selected as ring tone type.
Appears when an alarm clock is enabled.
Appears when the phone is out of your home network area and the phone is
has registered to the network other than its home service(i.e when travelling
in other countries with GSM service)
Shows the level of battery status. The more bars you see, the more power
battey has left.
indicates that your phone is on the silent mode.
If your phone is in the silent mode, all audible key tones are muted and all
audible alerts are changed to vibrator alert.
Appears when a PUSH message has been received
< Icons in the sub display screen >
Shows the received signal strength.
Appears when vibrator is selected as ring tone type.
indicates that your phone is on the silent mode.
Appears when an alarm clock is enabled.
Shows the level of battery status.
< Network status images in the sub display screen >
Indicates that your phone is on the emergency mode that is only available for
the emergency call.
It means your phone is in the area of the coverage of a GSM/DCS network but
your phone is not allowed to be register to the network.
Indicates that your phone is not on the network service.
It means your phone is in the area out of the coverage of a GSM/DCS
network.
Indicates that your phone is searching for a network coverage.
If your phone is in the area of the coverage of a GSM/DCS network and your phone is registered
to the network, Analog Clock, Image, Date or User Text is displayed according to the setting of
Sub Screen menu. Please see Section 9 for more details.
< Event images in the sub display screen >
Appears when an alarm is expired.
Appears when the alarm of scheduler is expired.
Indicates that your phone is under security code checking after power up.
Colour Mobile Phone Dualband i2100 User’s Guide INNOSTREAM Confidential
PAGE : 5 of 5
Appears when a missed call has occurred.
Appears when a new text message has been received
Appears when you have messages waiting in voice mail
Appears when a new PUSH message has been received
Indicates that your SIM card is not inserted.
Indicates that the battery level of your phone is low.
Indicates that the battery of your phone is being charged.
Indicates that the battery of your phone is fully charged while your phone is
not powered up.
1.2 Keys Description
Description
Performs the functions indicated by the text in the bottom line of the display
screen above those keys.
Makes or answers a call.
In the idle mode, launches the recent calls list.(Dialled, Missed and
Received )
In the menu, selects a menu function or stores information that you have
entered (such as a name) in the phone or SIM memory.
Ends a call.
Also switches the phone on or off when pressed and held.
In the menu, returns to the idle mode or cancels your input.
Enters numbers, letters and some special characters.
In the idle mode, enters special dial characters.
Enters ‘ +’ (International Indicator) or ‘ P’ (Pause) when pressed and held
While you are playing the game, these keys are used for adjusting the game
melody volume.
(on the left side of phone)
If a cell broadcasted message is displayed on the idle screen, scrolls it
up/down.
During a call, adjust the earpiece volume.
During a game, adjust the game melody volume.
[VOL-UP]
In the idle mode, displays the today’ s date and day for short time.
It switches between the silent mode and previous profile you have set on
Activate Profile menu when pressed and held in the idle mode.
[VOL-DOWN]
In the idle mode, launches Voice Memo menu if you press and hold while the
folder is opened.

Colour Mobile Phone Dualband i2100 User’s Guide INNOSTREAM Confidential
PAGE : 6 of 6
In the editing mode, moves the cursor.
In the menu, moves the menu cursor.
In the idle mode, each key has following functionality.
[NAVI-LEFT] : launches the Games menu
[NAVI-RIGHT] : launches the Biorhythm menu to check today’ s your
biorhythm.
During a call, [NAVI-LEFT] and [NAVI-RIGHT] change the call focus on the
multiple calls state.
[NAVI-UP] : launches the Calendar menu
[NAVI-DOWN] : launches the Inbox SMS message list.
During a call, [NAVI-UP] and [NAVI-DOWN] adjust the earpiece volume.
[NAVI-CENTRE]
In the editing mode, launches the editing mode selection menu.
In the menu, selects the menu on which menu cursor is.
In the idle mode, accesses the WAP site.
1.3 Silent Mode
You can switch the sound/alert mode of your phone by just pressing and holding the [VOLUME-
UP]on the idle screen. icon on the top of the main display screen or icon on the top of the
sub display screen indicates that your phone is under the silent mode status.
If your phone is in the silent mode, all audible key tones are muted and all audible alerts are
changed to vibrator alert.
! Note : If your phone is on the silent mode, the entry of some menu related to sound/alert is
prohibited.
1.4 Using the Navigation Keys
To use the navigation keys appropriately.
1. [NAVI-LEFT] : Push the left side of the navigation key bar to left direction.
2. [NAVI-RIGHT] : Push the right side of the navigation key bar to right direction.
3. [NAVI-UP] : Push the up side of the navigation key bar to up direction.
4. [NAVI-DOWN] : Push the down side of the navigation key bar to down direction.
5. [NAVI-CENTRE] : Push the navigation key bar down.
1.5 Using the Earphone
If you insert the earphone to the jack on the topside of your phone, you can use it in the same
way as your phone’ s earpiece and microphone.
You can answer or end a call by pressing the hook button on the earphone.
When new waiting call is come while you are in a call, you can answer the waiting call by
pressing the hook button on the earphone. (The first call will be held automatically)
You can make the last number dialled call in the idle screen by pressing the hook button on the
earphone. The last number dialled is launched by pressing the hook button, and then the call will
be made by pressing the hook button again.

Colour Mobile Phone Dualband i2100 User’s Guide INNOSTREAM Confidential
PAGE : 7 of 7
!Note : If the earphone is inserted, your phone’ s standby time may be reduced.
Therefore, please eject the earphone when not used.
1.6 Display Screens in the Idle Mode
< Main Display Screen >
Icon Area:
7 icons such as Signal Level, SMS, Voicemail, Vibrator, Alarm, Roaming, and Battery Level are
displayed indicating the phone status.
If the silent mode is enabled, icon will appear in the Vibrator icon’ s place.
Network Status and Icon Area:
Network name registered is displayed.
If there is not any GSM/DCS network near the location you are, No Service is displayed.
If you are in the coverage of a GSM network but you are not allowed to be registered to the
network, Emergency Only is displayed.
icon appears on the right of the area when PUSH message has arrived.
! Note : If you press [VOLUME-UP], current date and day are is displayed on the area for short
time. The time is always displayed on the bottom right of the User Selectable Area.
User Selectable Area:
A photo or image is displayed according to the setting of Picture menu. Please see Section 9 for
details.
If you set to get the broadcast message from the network, you can see it on the idle screen. For
details of how to activate and deactivate it, please see Broadcast menu in Section 9. In this case,
the User Selectable Area updates the received broadcast messages. If you want to go back to
default screen, press [END].
! Note: The broadcast message service may not be available on all networks.
Function Key Area:
The functions assigned to right soft key and left soft key are displayed.
< Sub Display Screen >
Icon Area:
4 soft icons such as Signal Level, Vibrator, Alarm, and Battery Level are displayed indicating
the phone status.
Network Status or Event Area:

Colour Mobile Phone Dualband i2100 User’s Guide INNOSTREAM Confidential
PAGE : 8 of 8
The adequate network status image is displayed according to the network status.
Analog Clock, Image, Date or User Text is displayed according to the setting of Sub Screen
menu only while your phone is registered to a GSM/DCS network.
If an event is occurred, an adequate event image is displayed.
For more details, please see Section 1.1.
! Note : If you press [VOLUME-UP] on the idle screen, current date and day is displayed on the
area for short time.
Time Area:
Current time is displayed in the Area.
2. Getting Started
NOTE :
Please never detach the battery from your mobile while your phone is alive. To turn off your
phone, please press and hold down only Power key until you see the power-off animation.
Please use only approved batteries and chargers.
2.1 How to attach the battery
1. Align the bottom of the battery down into the holes in the bottom of the phone.
2. Then sit the battery on the back of the aligned until it clicks into place.
2.2 How to remove the battery
Turn off your phone first.
1. Press up the battery release latch
2. Slightly lift the upper place of battery out of back of phone.
2.3 How to charge the battery
The first charging must be for at least 4 hours in order to achieve optimum performance when
you buy this phone. Normally your phone completes to charge the battery in one hour.
You can make calls whilst charging your phone.
Your phone turns off by itself if the battery is not able to supply enough power.
!Note : Do not charge your phone without the battery in place.
< Charging with the Travel Adaptor>
1. Plug your Travel Adaptor into the charger socket at the bottom of your phone.
The charging icon will be indicated on the Sub-LCD screen.

Colour Mobile Phone Dualband i2100 User’s Guide INNOSTREAM Confidential
PAGE : 9 of 9
After complete charging, the charging icon disappears.
!Note : Even after complete charging, the phone automatically checks the battery status during
the Travel Adaptor is inserted. Once it detects that the battery level is below full status, it will
automatically recharge the battery.
< Charging with the Battery Charger>
1. Plug your Travel Adaptor into the charger socket at the bottom of the Battery Charger.
2. Sit your phone into the holder of the Battery Charger properly sliding down.
The LED indicators of the Battery Charger indicate the charging status as follow.
- Green Colour : It indicates idle state or full-charged state.
- Red Colour : It indicates the battery is being charging.
!Note : Charging with the Battery Charger, the charging icon is not displayed on the Sub-LCD
screen of your phone. LED indicators of the Battery Charger indicate the charging state.
2.4 How to place the SIM card
Ensure the phone is switched off and the charger is detached first before you start the following
steps.
1. Remove the battery.
2. Sit your SIM card into the holder. Beware the direction of the SIM card.
3. Slide the SIM card into the holder.
2.5 How to remove the SIM card
Ensure the phone is switched off and the charger is detached first before you start the following
steps.
1. Remove the battery.
2. Slide the SIM card by pushing the back of the card and remove it from the holder.
! Note: About the SIM card
The SIM card is a computer chip containing information about your subscription, security,
phonebook etc.
When you register as a subscriber with GSM/DCS network operator, you are provided with the
SIM card.
Always handle the SIM card with care and insert with the gold contacts face down.
2.6 How to switch your phone On and Off
Make sure that the battery is attached.

Colour Mobile Phone Dualband i2100 User’s Guide INNOSTREAM Confidential
PAGE : 10 of 10
1. Open the folder
2. a) To switch your phone on, press and hold down [END] until you hear the power-on
melody.
Some SIM card may be protected with PIN.
If Enter PIN is prompted, enter your PIN and then press [Ok soft key].
For more details, please see Security Codes in section 3.
! Note: If your PIN is entered invalidly three times in succession, your SIM card is
blocked . In order to unblock it, see Security Codes in section 3.
If Enter Lock Code is prompted, enter your Lock Code and then press [Ok soft key].
The Lock Code is factory set to 0 0 0 0.
For more details, please see Security Codes in section 3.
After the phone is turned on, the phone searches for a network.
b) To switch your phone off, press and hold down [END] until you see the power-off
animation.
3. Security Codes
The security codes are used to protect your phone and SIM card from other person’ s use and
control access to security and other options within the menus.
You can change the security codes (except SIM Lock Code, PUK Code, PUK2 Code). For more
details, please see the Security Setting menu in section 9.
3.1 PIN
PIN is Personal Identification Number, used to safeguard your SIM card.
PIN code is composed of at least 4 to 8 digits, and usually provided with your SIM card.
If the PIN code is entered incorrectly more than three times in succession, PIN will be blocked
and your SIM card will automatically lock-up and the Enter PUK screen will be prompted. Once
you SIM card is blocked, you must enter the unblock code (PUK) to use your phone again.
3.2 PUK
PUK is Personal Unblocking Key, used to unblock the blocked SIM card due to incorrectly
entered PIN. PUK code is composed of 8 digits, and usually provided with your SIM card. If the
PUK code is entered incorrectly ten times in succession, PUK will be blocked and your SIM card
will be automatically lock-up and the SIM Blocked message will be displayed. Once you see the
message then you need to contact your network service provider for a new SIM card.

Colour Mobile Phone Dualband i2100 User’s Guide INNOSTREAM Confidential
PAGE : 11 of 11
3.3 PIN2
PIN2 is Personal Identification Number 2, used to access specific function of your SIM card, for
example PIN2 code is used to set a Maximum Cost, Price & Unit or a Fixed Dialling Number.
PIN2 code is composed of at least 4 to 8 digits, is only available when your SIM card supports
such functions. If the PIN2 code is entered incorrectly three times in succession, PIN2 will be
blocked and the Enter PUK2 screen will be prompted. Therefore those functions cant not be
used until the unblock code (PUK2) is entered.
3.4 PUK2
PUK2 is Personal Unblocking Key 2, used to unblock the blocked PIN2 due to incorrectly
entered PIN2. PUK2 code is composed of 8 digits and it is only used when those functions
mentioned above are available. If the PUK2 code is entered incorrectly ten times in succession,
the PUK2 will be blocked. Therefore those functions cant not be used until the unblock
code(PUK2) is entered.
3.5 SIM Lock Code
SIM Lock Code is used to safeguard your phone being used by another SIM card. The SIM Lock
Code is composed of 4 digits. The code is a security code entered when you enable the SIM
Lock menu.
3.6 Lock Code
Lock Code is used to prevent your phone from being used by another person. The code is
composed of 4 digits. The code is provided with your phone and is preset from factory to default
setting of ‘ 0 0 0 0’
3.7 Password
Password is used to access call barring service and the code is the network password of four
digits code. In order to get the Password, you should subscribe call barring service on your
network service provider and then request for the Password.
4. Making and Receiving a Call
4.1 Making a call
1. To make a call on your phone, enter the area code and the phone number in the idle screen.
In case you enter a number incorrectly, press the [Clear soft key] once to delete

Colour Mobile Phone Dualband i2100 User’s Guide INNOSTREAM Confidential
PAGE : 12 of 12
the last digit that you have entered. To remove all the digits, press and hold the [Clear soft
key] down until they are deleted, or press [END].
2. Press the [SEND].
If the number is identified from the phonebook, the name is displayed.
You can hear the Connect Tone when the call is answered from the called person, if you set it
On. For more details, please see User Preferences menu in Section 9.
If you want to end the call while making a call, press [End soft key] or [END], or close the
folder. The screen will display a brief message and return to the idle.
! Note: The brief message at the call ending may remain long time if the network is busy.
If the earphone is inserted, or if the call is data call, the folder closing does not make
the call end.
Quick dialling from Phonebook list
1. Press [Phonebook soft key] in the idle screen.
2. Search the group with [NAVI-LEFT] or [NAVI-RIGHT] to find the group that person you
want to call belongs to.
3. Locate the cursor with [NAVI-UP] or [NAVI-DOWN] to the name or number you want to
call.
4. Press [SEND].
Quick dialling from Speed List
Press and hold a numeric key ([0]~[9]) that represents the entry number in the Speed List.
Then the number assigned on the key will be automatically dialed. Please see section 6.5 for
more details.
Quick dialling from recent calls list
1. Press [SEND] for the recent calls in the idle screen.
2. Search the type of the recent calls with [NAVI-LEFT] or [NAVI-RIGHT].
3. Locate the cursor with [NAVI-UP] or [NAVI-DOWN] to the name or number you want to
call.
4. Press [SEND].
4.2 Answering a call
1. When there is an incoming call, the phone icon on the sub display screen will be displayed,
and the
melody will sound or the vibrator will work according to the setting.
If the caller is identified, the caller phone number or name(if stored in the Phonebook) is
displayed and small group icon on the Sub-LCD screen is displayed.
The following small fixed icons are available.

Colour Mobile Phone Dualband i2100 User’s Guide INNOSTREAM Confidential
PAGE : 13 of 13
: indicates No Group.
: indicates Family group.
: indicates Friends group.
: indicates Colleague group.
: indicates Business group.
: indicates VIP group.
: indicates Group1 (User defined group 1).
: indicates Group2 (User defined group 2).
: indicates Group3 (User defined group 3).
If the caller is not identified, No Number or Withheld (if the network suppresses the number
display) is displayed.
2. Press [Answer soft key] or [SEND] or open the folder to answer the incoming call.
If Any Key Answer menu option is set to On and the folder has been opened, you can press
any key to answer the call except for the [End soft key] or [END].
! Note: If the earphone is inserted, or if the call is data call, the folder opening does not make
the call answer.
If Folder Answer menu option is set to On, the folder opening does not make the call
answer.
3. If you want to reject the incoming call when the folder has been closed, press [VOLUME-UP]
or [VOLUME-DOWN].
Press [End soft key] or [END], or close the folder if the folder has been opened.
The call number is saved in the missed calls list.
! Note: If the earphone is inserted, or if the call is data call, the folder closing does not make the
call reject.
If the folder is closed, [VOLUME-UP] or [VOLUME-DOWN] is used for rejecting the
incoming call regardless of the Any Key Answer menu.
4.3 Making the emergency call
It is possible to call the emergency services if there is a GSM/DCS network within reach. You
can dial the emergency number even if the handset is locked, or there is no SIM card in your
phone, or your phone cannot be register with your home network.
1. Enter 112 to call the emergency services,.
2. Press [SEND].
! Note: In the situation such as power-on that Enter Lock Code or Enter PIN is prompted, press
simply the [SOS soft key] to call the emergency services.
Some network may not allow the emergency call (112) and may request to insert SIM

Colour Mobile Phone Dualband i2100 User’s Guide INNOSTREAM Confidential
PAGE : 14 of 14
card.
4.4 Making an international call
1. Press and hold down the [* ] until ‘+’ sign appears to dial an overseas number.
The ‘+’ tells the network that the call is international.
2. Enter the country code, the area code (without the leading zero) and the phone number.
3. Press [SEND].
! Note: Some network may not allow the international call with ‘+’.
4.5 Entering a “Pause” Character in a Dial String
A pause character may be entered into a dial string by pressing and holding down [#] until a
‘P’ sign appears.
4.6 Notification of Missed Call
If you are unable to answer an incoming call for a reason or if you reject the call, the Missed
Call notification message is displayed.
You can immediately obtain a list of incoming missed calls (calls not answered) from the idle
screen by pressing the [View soft key].
5. In-Call Options
Your phone provides a number of call control functions that you can use during a call.
To access these call control functions, press the [Option soft key] or right function soft key
during a call.
The following illustrations show the example of the display according to the call state.
icon in the title area of the screen indicates that you are currently on a call.
icon in the title area of the screen indicates that you are in the conference call state. (For
example, 2 active calls or 2 held calls)
The boxed digits in middle place of the title area of the screen indicate the number of the
focused call in the multiple calls state. You can focus to next or previous call by pressing
[NAVI-RIGHT] or [NAVI-LEFT].
In the main area of the screen, you can see the number or name (if stored in the phonebook) and
the call state of the focused call. Depending on your subscription, you may see the remaining
cost in the bottom area of the screen.
The time counter in the bottom area of the screen starts when the call starts and indicates how
long you have been on the call.

Colour Mobile Phone Dualband i2100 User’s Guide INNOSTREAM Confidential
PAGE : 15 of 15
! Note: All of the call control options are not always displayed through all calls, necessary
options only will be displayed according to the call state.
5.1 Putting a call on hold/unhold
You can put the current call on hold when the call is active state if this service is supported on
the network.
1. Press [Hold soft key], or select the Hold option in the Option menu if muted.
2. To make the held call reactivate, press [Unhold soft key], or select the Unhold option
in the Option menu if muted.
5.2 Making a second call
You can make a second call while you are in a call.
1. Enter the second phone number or fetch it up via Phonebook option.
2. Press [SEND]. The first call is automatically put on hold if the second call is made.
< Connecting the first participant with another participant>
If you press [Transfer soft key] while the second call is being made, the function allows you to
make two participants connect, and then allows you to leave the conversation by itself.
Thereafter, two participants are connected to each other.
5.3 Swapping between active calls and held calls
You can swap calls while there are active calls and held calls on conversation.
Press [Swap soft key], or select the Swap option in the Option menu if muted.
The current active calls are placed on hold and the held calls are reactivated.
5.4 Answering a second incoming call
You will be notified of an incoming call while you are in a call. Call waiting tone sounds in the
earpiece, and the display will show that a second call is waiting. This feature, known as Call
Waiting, is only available if the network supports it and if you have set the Call Waiting menu to
Activate.
For details of how to activate and deactivate it, please see Call Waiting menu in Section 9.
You can answer the second incoming call by pressing [Answer soft key] or [SEND].
The first active call is automatically put on hold, and then the incoming call is active.
If the incoming call is comeing while you already have active calls and held calls, the following
options are available by pressing [Option soft key] or [SEND].
• End Active Call : makes active calls end and answer the incoming call.
• End Held Call : makes held calls end and answer the incoming call.

Colour Mobile Phone Dualband i2100 User’s Guide INNOSTREAM Confidential
PAGE : 16 of 16
You can reject the second incoming call during a call without answering it by pressing [Reject
soft key] or [END].
5.5 Adjusting the earpiece volume
During a call, you can adjust the earpiece volume.
To increase the volume, press [VOLUME-UP] or [NAVI-UP].
To decrease the volume, press [VOLUME-DOWN] or [NAVI-DOWN].
5.6 Muting the microphone
You can mute the microphone during a call by selecting the Mute option so that the other party
cannot hear you.
You can unmute by pressing the [Unmute soft key], and then the other party can hear you
again.
5.7 Sending DTMF
You can turn off the DTMF tone by selecting the DTMF Off option so that the tone is not
transmitted to the remote end during a call.
You can turn on the DTMF tone by selecting the DTMF On option.
The option is automatically reset to the DTMF On when a call is started.
! Note: To communicate with answering machine, you must use with the DTMF On state.
5.8 Storing a number on the scratchpad
You can store a number you entered during a call.
1. Enter a number during a call.
2. Press [Save soft key] to store it to the Phonebook.
If the number entered remains not deleted without saving, the number will be displayed on the
screen after ending the call.
5.9 Using the SMS function
You can read or create SMS messages during a call by selecting the Messages option.
For details of how to use it, please see Short Message menu in Section 9.
5.10 Using the loudspeaker
You can turn on the loudspeaker by selecting the Loudspeaker On option so that the speech
from the remote end is heard in the loudspeaker.
The option is automatically reset to the Loudspeaker Off when a call is started.
5.11 Making a conference call

Colour Mobile Phone Dualband i2100 User’s Guide INNOSTREAM Confidential
PAGE : 17 of 17
The conference call service provides you with the ability to have a simultaneous communication
with up to six persons if this service is supported on the network.
! Note: The Conference Call Service may not be available on all networks.
Setting up a Conference Call
1. Make a first call in a normal way.
2. Make second call while you’ re already in a call, then the first participant is automatically put
on
hold.
3. To join the first participant to the conference call, press [Option soft key] and select the
Join All option. icon in the title area of the screen will be displayed.
All the conference call participants can now hear each other.
4. To add a new participant to the conference call, repeat step 2 and step 3 as required.
You can add incoming callers into conference call by answering the call and pressing [Option
soft key], followed by the Join All option.
Available Options
Please proceed as following sequence to use appropriate option on conference call state.
1. At first, focus on the participant who you want by scrolling through the participants with using
[NAVI-LEFT] or [NAVI-RIGHT].
2. Press [Option soft key].
The following options relevant to conference call are available.
Hold All : puts the conference call (all active calls) on hold.
Private : makes a private call with the focused participant (whose details is currently
displayed on-screen) of the conference call, then puts the other participants on
hold automatically.
Join All : joins all held calls to the conference call.
Transfer : allows you to make two participants connect, then drop your call from the
conversation. Two participants are connected to each other.
It can be available when one participant is on hold and the other participant is
active, or when one participant is on hold and you are making the other call.
End Active Call : makes all active calls end and keep the held call.
! Note: [END] is used for dropping the focused call.
If you close the folder, the conference call is ended.
6. Phonebook
! Note: If you change with another SIM card, you may lose the information of phonebook data in
the previous SIM card. If you do so, the type of the number, text memo and group type may be
lost. Only the name and telephone number will remain in previous SIM card.
Colour Mobile Phone Dualband i2100 User’s Guide INNOSTREAM Confidential
PAGE : 18 of 18
You can store the phone numbers and their corresponding names in the memory of your SIM
card. In addition, you can store up to 500 numbers and names into your phone memory. The SIM
card memory and phone memory is physically separated but they are searched as a single
entity.
You can protect your phonebook information against other persons.
For more details, please see Security Setting menu in Section 9.
The following illustration shows an example of the display of phonebook list.
The small icon on the far left side of the each record indicates the group type.
The following small group icons are available.
: indicates No Group.
: indicates Family group.
: indicates Friends group.
: indicates Colleague group.
: indicates Business group.
: indicates VIP group.
: indicates Group1 (User defined group 1).
: indicates Group2 (User defined group 2).
: indicates Group3 (User defined group 3).
The scroll-bar on the right side of the screen indicates current position of the record on which
menu cursor is located.
The small icon on the far left side of the each record indicates the record group type.
You can move to another group by pressing [NAVI-LEFT] or [NAVI-RIGHT] key.
6.1 Storing a phone number with a name
1. Enter the number at the idle screen and press [Save soft key].
2. Enter the name of the person or service.
If you want to know more about input mode please see section 7.
Press [Ok soft key] when the name input completed.
3. You can see the following screen.
With pressing [NAVI-UP] or [NAVI-DOWN], you can move the editing cursor to the item that
you wish to edit or add.
Press the [Edit soft key], and you can edit or add the item.
For each name, you can set the group of the name with adequate group icon explained before.
You can save up to three(3) telephone numbers and one text memo for each name.
For each number, you can set the type of the number with following icons.
: Mobile
: Home
: Office

Colour Mobile Phone Dualband i2100 User’s Guide INNOSTREAM Confidential
PAGE : 19 of 19
: Fax
: Pager
After editing, press [Save soft key] to save the record.
The record will be saved into SIM memory or Phone Memory according to the setting of
Place To Save in the Settings option.
6.2 Quick searching for a number in the phonebook
1. Press the [Phonebook soft key] in the idle screen.
The names stored in the phonebook will be listed in alphabetical order.
2. Press the first letter of the name that you want to search for.
To choose a letter on a keypad, the key is pressed the appropriate number of times,
rapidly in succession, once for the first letter, twice for the second letter etc.
! Note: If you found the name, you can dial the number by pressing [SEND].
6.3 Storing a number of the recent calls to the phonebook
1. Press [SEND] in the idle screen. Recent Dialled calls list will be displayed.
With pressing [NAVI-LEFT] or [NAVI-RIGHT], you can move the screen cursor to another
call record type screen.
With pressing [NAVI-UP] or [NAVI-DOWN], you can move the list cursor to the recent
number.
2. Press [View soft key] on the name that you wish to store.
3. Press [Paste soft key] and then press [Save soft key].
6.4 Speed List
You can add, edit or delete the Speed Dial Numbers by Speed List option on the Settings option.
To speed dial one of these numbers on the idle screen, press and hold the numeric key (0 - 9)
that represents the entry in the speed dial list. The number is automatically dialled without
further input.
!Note : Speed List record will be stored in the SIM memory regardless of Place To Save
settings.
Adding a new number to the Speed Dial List
1. Press [Phonebook soft key] in the idle screen.
2. Press [Option soft key] in the phonebook name list screen.
3. Select Settings option.
4. Select Speed List option.
5. Locate the menu cursor to a <Empty> list, and then press [Option soft key].
Select Add option.
6. Press [Ok soft key] after entering the new name and number.

Colour Mobile Phone Dualband i2100 User’s Guide INNOSTREAM Confidential
PAGE : 20 of 20
Editing a number in the Speed Dial List
1. Do step 1 to step 4 in the adding sequence.
2. Locate the menu cursor to a list you wish to edit, and then press [Option soft key].
3. Select Edit option.
4. Press [Ok soft key] after editing the name and number.
Deleting a number in the Speed Dial List
1. Do step 1 to step 4 in the adding sequence.
2. Locate the menu cursor to a list you wish to delete, and then press [Option soft key].
3. Select Delete option. The list will be displayed as a <Empty>.
6.5 Using the Phonebook options
If you press [Option soft key] after locating the menu cursor to the name you wish to do an
action, the following options are available.
View : views the details of the selected record.
Search : searches the record you want to find.
Add : adds a new record.
Edit : edits the number and name of the selected record.
Delete : deletes the selected record.
Change Group : changes the group type of the selected record.
Settings : You can set overall phonebook control.
The following options are available.
- Group Melody : set the Ring Melody for each group type.
- Place To Save : set a default saving location.
- Status : identifies the memory use in your SIM card and your phone memory.
- Speed List : adds, edits or deletes the Speed Dial Number.
7. Text Editing
!Note : T9 English input mode will be replaced with the adequate T9 language according to the
Language Setting menu.
For example, if you select ltaliano at the menu, T9 input mode will be T9 ltaliano instead of T9
English. Some languages may support only T9 English for the T9 input mode.
7.1 Input Mode
You can select following text input modes by pressing [NAVI-CENTRE] on each editing screen.
T9 English
Multi-tap
Numeric
Colour Mobile Phone Dualband i2100 User’s Guide INNOSTREAM Confidential
PAGE : 21 of 21
Symbols
If you are in the T9 English mode, the [#] key is used to switch the letter entry mode. ( -
> -> )
If you are in the Multi-tap mode, the [#] key is used to switch the letter entry mode. ( ->
)
By pressing and holding [#] key in an input mode, Symbols mode can be also selected.
By pressing and holding [*] key in an input mode, Numeric mode can be also selected.
The initial default input mode is automatically switched according to the Language Setting menu
and the editing situation as follows.
Editing a message or string in Create Message menu, in Template menu, Greeting Message
menu, User Text menu, User Define CUG menu, User Define List menu (of the Broadcast
menu) and Scheduler message.
If the phone language is set to English,
Initial default input mode : T9 English mode
Optional input modes : Multi-tap mode, Numeric mode and Symbols mode.
Editing a name or string in Phonebook name, Bookmarks name (Browser) and WAP Browser
input.
If the phone language is set to English,
Initial default input mode : Multi-tap mode
Optional input modes : T9 English mode, Numeric mode and Symbols mode.
Editing a name in Connection Settings menu. (URL Browser editing)
Initial default input mode : Multi-tap mode.
Optional input modes : T9 English mode, Numeric mode and Symbols mode.
mode and Symbols mode.
(1) If the phone language is set to ,
Initial default input mode : T9 PinYin mode
Optional input modes : T9 English mode, T9 Stroke mode, Multi-tap mode, Numeric
mode and Symbols mode.
(2) If the phone language is set to ,
Initial default input mode : T9 Stroke mode
Optional input modes : T9 English mode, Multi-tap mode, Numeric mode and Symbols
mode.
Editing a name in Connection Settings menu. (URL Browser editing)
Colour Mobile Phone Dualband i2100 User’s Guide INNOSTREAM Confidential
PAGE : 22 of 22
Initial default input mode : Multi-tap mode.
Optional input modes : T9 English mode, Numeric mode and Symbols mode.
7.2 T9 English input mode
Using the T9 English mode, you can enter words by successively pressing the key
corresponding to each letter in order to get the desired word. Although each key of the numeric
keypad represents several letters, only one key press per letter is required. The T9 English
mode matches your keystrokes to its Linguistic Database to determine which word the user
intended to spell. With each keystroke, the Word or Candidate Selection List is updated and the
most likely interpretation of the keystrokes is presented. In cases where more than one
interpretation is possible, T9 English mode presents interpretations in order of their frequency
of use in the language. In those cases, the user selects the desired word or character from the
interpretations.
[Key Function Table]
[Ok soft key] accepts the string entered on the edit screen, and thens turn to next
menu or screen.
[Clear soft key]
Short : clears a character of the string entered on the editing area
or clears a character on the active word(the word remain active).
Long : clears all characters
[NAVI-LEFT] accepts the active word and then moves the cursor to left direction by
a character on the editing area.
[NAVI-RIGHT]
1. accepts the active word and then moves the cursor to right
direction by a character on the editing area.
2. Space
[NAVI-UP]
1. switches the word entered on the editing area to previous similar
word during word editing.
2. moves the cursor to previous line if you are not in a word editing.
[NAVI-DOWN]
1. switches the word entered on the editing area to next similar word
during word editing.
2. moves the cursor to next line if you are not in a word editing.
[NAVI-CENTRE]
Short : launches the character input mode selection menu.
Long : toggles between the Multi-tap input mode and T9 English
input mode.
[END] clears all the string entered on the editing area, and then turns back to
previous menu or screen.
[1]
Short:Smart punctuation (You can enter some popular symbol
character using [NAVI-UP] or [NAVI-DOWN])
Long: Number entry.
[2] - [9] Short:Text entry.
Long: Number entry.
[0] Short:Space (It means the previous word entry is accepted)
Long: Number entry.
[*] Long : switches to the Numeric input mode.
Colour Mobile Phone Dualband i2100 User’s Guide INNOSTREAM Confidential
PAGE : 23 of 23
[#] Short : switches the letter entry mode. ( -> -> )
Long : switches to the Symbols input mode.
7. 3 Multi-tap input mode
Multi-Tap input mode provides a method of explicit spelling normally used on devices with a
limited set of mechanical keys.
To choose a letter on a keypad, the key is pressed the appropriate number of times,
rapidly in succession, once for the first letter, twice for the second letter etc.
[Key Function Table]
[Ok soft key] accepts the string entered on the editing area, and then turns to next
menu or screen.
[Clear soft key] clears a character of the string entered on the editing area.
[NAVI-LEFT] moves the cursor to left direction by a character on the editing area.
[NAVI-RIGHT]
1. moves the cursor to left direction by a character on the editing
area.
2. space
[NAVI-UP] moves the cursor to previous line on the editing area.
[NAVI-DOWN] moves the cursor to next line on the editing area.
[NAVI-CENTRE]
Short : launches the character input mode selection menu.
Long : toggles between the T9 English input mode and Multi-tap input
mode.
[END] clears all the string entered on the editing area, and then turns back to
previous menu or screen.
[1] – [9] Short : Text entry. (See the Character List Table)
Long : Number entry
[0] Short : Space
Long : Number entry
[*] Short : Text entry. (See the Character List Table)
Long : switches to the Numeric input mode.
[#] Short : switches the letter entry mode. ( ->)
Long : switches to the Symbols input mode.
[Character List Table]
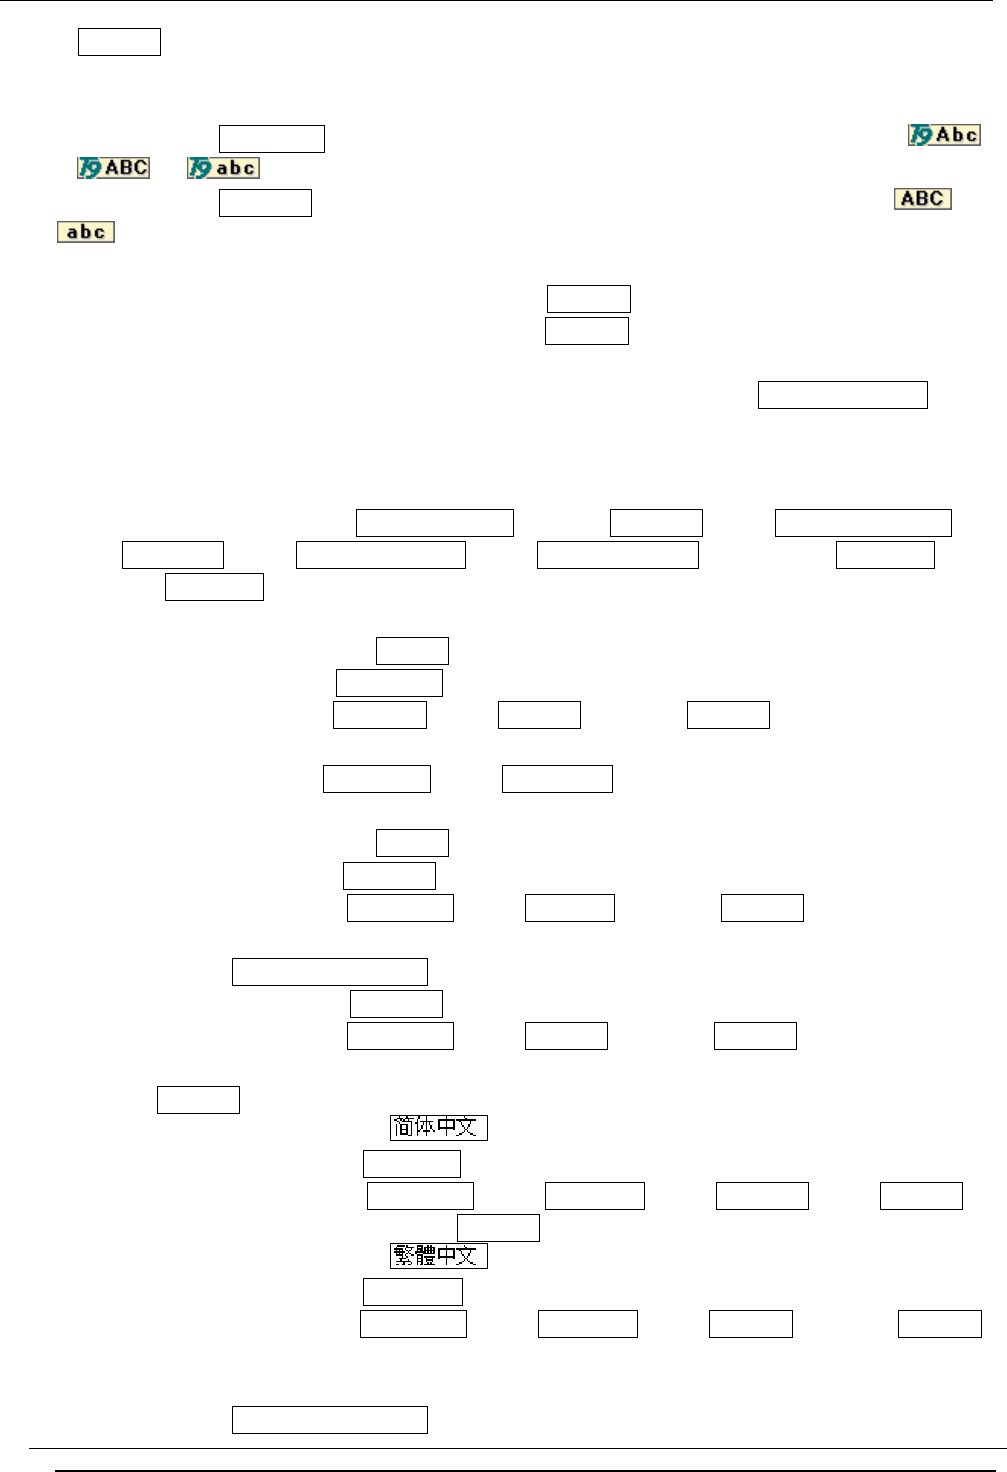
Key Characters
[0] SPACE
Colour Mobile Phone Dualband i2100 User’s Guide INNOSTREAM Confidential
PAGE : 24 of 24
[1] . / : ? _ - = # & @
[2] A B C A A Æ C Γ
a b c a a a æ β
[3] D E F Δ E Φ
d e f e e
[4] G H I Θ
g h i ì
[5] J K L Ξ
j k l
[6] M N O N O Ø Ω
m n n o o o ø
[7] P Q R S Π Σ
p q r s
[8] T U V U
t u v u u
[9] W X Y Z Ψ Ω
w x y z
[*] , ! ‘ “ ( ) ; % + * < >
7. 4 Numeric input mode
This mode uses the standard numeric keypad to allow users to enter numeric information such
as phone numbers, addresses, etc.
[Key Function Table]
[Ok soft key] accepts the string entered on the edit screen, and then turns to the
next menu or the screen.
[Clear soft key] clears a digit of the string entered on the editing area.
[NAVI-LEFT] moves the cursor to the left direction by a digit on the editing area.
[NAVI-RIGHT] moves the cursor to the left direction by a digit on the editing area.
[NAVI-UP] moves the cursor to the beginning of the string.
[NAVI-DOWN] moves the cursor to the end of the string.
[NAVI-CENTRE] launches the character input mode selection menu.
[END] turns back to the previous character input mode.
[0] Short : 0
Long : Space
[1] - [9] Number entry.
[*]
One time of pressing : ‘ *’
Two times of pressing : ‘ +’
Long : turn back to the previous character input mode.
[#] One time of pressing : ‘ .’
Two times of pressing : ‘ #’
Colour Mobile Phone Dualband i2100 User’s Guide INNOSTREAM Confidential
PAGE : 25 of 25
7. 5 Symbols input mode
This input mode allows users to enter symbols or formatting characters into text message.
[Key Function Table]
[Select soft key] accepts the symbol which cursor indicate , and then turns back to the
previous character input mode.
[Quit soft key] turns back to the previous character input mode.
[NAVI-LEFT] moves the cursor to left.
[NAVI-RIGHT] moves the cursor to right.
[NAVI-UP] moves the cursor to up.
[NAVI-DOWN] moves the cursor to down.
[NAVI-CENTRE] accepts the symbol which cursor indicate , and then turns back to the
previous character input mode.
[SEND] accepts the symbol which cursor indicate , and then turns back to the
previous character input mode.
[END] turns back to the previous character input mode.
[Available Symbols]
. / : @ , ? ! ‘ - _
( ) ; & % + * # < =
> “ £ $ ¥ € Γ Δ Θ Λ
Ξ Π Σ Φ Ψ Ω ¿ ¡ § ¤
8. The Menu Map
! Note: Depending on the contents of your SIM card, some menu items may not be visible.
Messages
1.1 SMS
Inbox
Outbox
Create Message
Template
SMS Setting ------- Message Centre
Validity Period
Delivery Report
Reply Path
Message Protocol

Colour Mobile Phone Dualband i2100 User’s Guide INNOSTREAM Confidential
PAGE : 26 of 26
Connection Type
Status
Chat
1.2 MMS
Inbox
Outbox
Create message
Drafts
Sent
Archive
Templates
MMS Settings ------ Save messages
Read reports
Deliver receipts
Message centre
WAP profile
MMS lifetime
MMS download
Spam filter
1.3 E-mail
Inbox
Outbox
Create Message
E-mail Setting ----- Connection Profile
E-mail Accounts
My E-mail Accounts
Send Option
Connect Repeat
Size Limit
Status
1.4 Voicemail
Connect to Voicemail
Number Setup ---- Home Mailbox
Roam Mailbox
1.5 Broadcast
Read All Messages
Receive Setting
Display On Idle
Subject List ----- Active List
User Define List
Language List
Call Records
2.1 Dialled Calls

Colour Mobile Phone Dualband i2100 User’s Guide INNOSTREAM Confidential
PAGE : 27 of 27
2.2 Received Calls
2.3 Missed Calls
2.4 Delete Records
2.5 Cost & Duration
Last Call
All Calls
Maximum Cost
Price & Unit
2.6 Data Counter
Last Data
All Data
Phone Setting
3.1 Own Numbers
3.2 Language
3.3 Sound Setting
Profiles
Key Tone Type
Ring Melody
SMS Melody
Rising Volume
Connect Tone
Minute Tone
Power Tone
3.4 Display Setting
Colour Mode
Wallpaper ------ Sample Image ----- Main Screen
Sub Screen
Download
Camera
LCD contrast ----- Main Screen
Sub Screen
Greeting Message
Backlight Time ------ 10 secs
30 secs
1 Min
1 Min 30 secs
Clock Display
Network Name Display
External Light
3.5 Clock Setting
Set Time

Colour Mobile Phone Dualband i2100 User’s Guide INNOSTREAM Confidential
PAGE : 28 of 28
Set Date
Time Update
Time Format --- 12 Hour
24 Hour
World Time
3.6 Call Setting
Caller Number
Any Key Answer
Folder Answer
Auto Redial
3.7 Connection Setting
MMS Profiles
E-mail Profiles
WAP Profiles
GPRS Setup
3.8 Security Setting
PIN Access
SIM Lock
Phone Lock
Phonebook Lock
Album Lock
Change Codes
FDN
Factory Reset
3.9 My Menu
Camera & Media
4.1 Camera
Taking Picture
Picture Decoration
Camera Setting - Resolution
Shutter Sound
Saving Mode
4.2 Image File
Photo Album
Downloaded Image
4.3 Audio File
Voice Record File
Composed Melody
Downloaded Audio

Colour Mobile Phone Dualband i2100 User’s Guide INNOSTREAM Confidential
PAGE : 29 of 29
4.4 File Manager
Organiser
5.1 Calendar
5.2 View Today Report
5.3 Alarm
Morning Alarm – Set Time
Alarm Status
Alarm Tone
Repeat Status
Power Up
Snooze
General Alarms
5.4 Memo
Network Service
6.1 Call Divert
Always
When Not Answered
When Busy
When Not Found
Cancel All
6.2 Call Barring
In Calls
In Calls If Abroad
Out Calls
Foreign Out Calls
Foreign exc. to Home
Cancel All
6.3 Call Waiting
Activate
Cancel
Status
6.4 Caller Identity
Show Caller Name
Restrict. Called ID
Restrict. Your ID
Present. Called ID
Present. Your ID
6.5 Closed User Group
CUG Select
User Define CUG
6.6 Network Selection
Selection
Preferred List

Colour Mobile Phone Dualband i2100 User’s Guide INNOSTREAM Confidential
PAGE : 30 of 30
Game & Utility
7.1 Games
7.2 Java
7.3 Biorhythm
7.4 Timer
Stopwatch
Countdown
7.5 Calculator
7.6 Voice Memo
7.7 Melody Composer
7.8 Converter
Internet
8.1 Home
8.2 Resume
8.3 Bookmarks
8.4 Push Messages
8.5 Settings
Connection Settings
User Preferences
Security Certificate
8.6 Empty Temp Files
8.7 Go To Address
SIM AT Service
! Note : The SIM AT Service menus may be different according to the content of your SIM card.
9. The Menu Functions
You can enter to menu setting mode by pressing [Menu soft key].
In the menu setting mode, three types of menu are used in your phone.
The digit on the right-top side of the screen indicates the menu number, you can access the
menu by pressing the menu number.
[Select soft key] or [NAVI-CENTRE] is used for selecting the menu on which menu cursor is.
Icon Menu

Colour Mobile Phone Dualband i2100 User’s Guide INNOSTREAM Confidential
PAGE : 31 of 31
Your phone provide easy-to-understand graphical animation icon menu. You can easily
understand the meaning of each graphical animation icon by the text on the top display line. To
move the cursor, use [Navigation Keys].
Choice Menu
You can see max 6 menu items on the menu selection area.
The text in the title area indicates the name of parent menu item.
The menu cursor is moved by [NAVI-UP] and [NAVI-DOWN].
Choice Menu with Value
You can see max 6 menu items on the menu selection area and see the value window on each
menu below.
The text in the title area indicates the name of parent menu item.
If the menu cursor moves to the item, the setting value of the menu item is displayed on the
value window.
If the menu item does not have any setting value, the value window is not displayed.
The menu cursor is moved by [NAVI-UP] and [NAVI-DOWN].
9.1 Messages
9.1.1 SMS
The message can be sent by Fax, E-mail, ERMES, and X400 format, provided that these
services are supported on the network. To send text messages with your phone, you need to set
the Message Service Centre Number (obtained from your home network operator) on the
Message Centre menu.
If a message has arrived, your phone displays New Message in idle screen and sets icon to
inform you of the arrival.
The arrived message is saved in SIM memory as the first place. If SIM memory is full, it is saved
in phone memory. Your phone has maximum 100 spaces for the SMS records in the phone
memory. If the SIM memory and the Phone memory are both full, SMS Full is indicated, icon
blinks and you cannnot receive any more new message. In the case, you need to delete old and
unnecessary messages by using Delete, Delete Inbox or Delete Outbox option in Inbox or
Outbox menu.
You can create the message limit to 1064 alphanumeric characters(462 characters in case of
Chinese character) at one message in Create Message menu.
The long message is saved into maximum 7 records. Also, long received message is saved in
same way.
! Note : The SMS service may not be available on all networks. Some network allows to be sent
only within its own network.
9.1.1.1 Inbox

Colour Mobile Phone Dualband i2100 User’s Guide INNOSTREAM Confidential
PAGE : 32 of 32
With this menu, You can view the new text messages or the read messages.
Sender phone numbers or names (if stored in the Phonebook) are displayed on the list.
The small icon on the far left side of the each list indicates following meanings.
: The message is the new unread message.
: The message is the read message.
If you press [Select soft key], you can see the message contents with a sender phone number
and its arrival time by using [NAVI_UP] and [NAVI-DOWN].
If you select [Options soft key], following options are available.
Delete : Allows you to delete the viewed message.
Reply : Allows you to send a reply message to the sender of the viewed message.
Voice Call : Enables you to call the sender of the viewed message.
Extract Number : Enables you to get all numbers(with more than 2 digits) in the message
and sender’s phone number. If you select a number on the list, you can
store the number into phonebook, or can make call with the number.
Forward : Allows you to forward the viewed message to someone else.
Edit : Enables you to edit the viewed message contents.
If you select Save option, the edited message is listed in Outbox menu.
Delete Inbox : Allows you to delete all messages of Inbox menu.
9.1.1.2 Outbox
With this menu, you can view the saved messages which have been sent or unsent.
Recipient phone numbers or names (if stored in the Phonebook) are displayed on the list.
The small icon on the far left side of the each list indicates following meanings.
: It is the sent message.
: It is the unsent message.
If you select [Options soft key], Delete, Send, Extract Number, Forward, Edit and Delete
options are available.
With Send option, you can send the saved message unchanged as it is.
9.1.1.3Create Message
With this menu, you can write a text message of up to 1064 alphanumeric characters (462
characters in case of Chinese character), and then you can save and send the message.
Input a text message and then press the [Ok soft key]. After that, enter the recipient phone
number on the Destination screen. You can input the number directly or get from the phonebook
by pressing the [Phonebook soft key].
If you press the [Ok soft key] on the screen, following options are available.
Send : Sends the text message to the recipient phone number.
The message doesn’t be saved.
Save : Saves the text message and the recipient phone number.
Save and Send : Saves the text message and the recipient phone number, and then sends.
9.1.1.4 Template
Using this menu, you can preset text strings that you use frequently.

Colour Mobile Phone Dualband i2100 User’s Guide INNOSTREAM Confidential
PAGE : 33 of 33
You can create and send a new message using Create Message option with the text string.
Following options are available.
Create Message: Enables you to create and send a new message with the text string you
preset.
Add : Allows you to add new text string.
Edit : Allows you to edit the selected text string on the list.
Delete : Allows you to delete the selected text string on the list.
9.1.1.5 SMS settings
- Message Centre
With this menu, you can view the Message Center Number List and currently activated the
Message Center Number.
Activate : Activate the selected Message Center Number to use sending a message.
Add : Add the Message Center Number, if the Message Center SIM memory is available.
Edit : Edit the Message Center Number and Save it.
Delete : Delete the Message Center Number. If the selected Message Center Number is the
Base Area, this menu cannot be displayed.
The number can be obtained from your home network service provider.
- Validity Period
This menu allows you to set the length of time period that your message will be stored at the
Message Service Centre in the network while attempts are made to deliver them to the recipient.
Available options are One Hour, Two Hours, Six Hours, One Day, Two Days, One Week, Four
Weeks and Six Months.
- Reply Path
With this menu, you can select which Message Service Centre will route your reply message.
If you select Own Centre, the cost of the reply message is charged to your bill and you can
receive the reply message regardless of the recipient’s SMS service subscription.
Own Centre : When the recipient sends reply message to you, your own Message Service
Centre that has set on the Message Centre menu is used.
Remote Centre : When the recipient sends reply message to you, his Message Service
Centre(Remote Message Service Centre) is used.
- Delivery Report
You can set whether network sends the delivery report message to your phone or not. The
delivery report message means that the sent message has arrived to the recipient properly.
- Message Protocol
With this menu, you can use a network messaging service which offers you the facility of
converting your text messages into alternative formats (Normal, Fax, Voicemail, ERMES,
Paging, X.400 or Internet).
! Note : All formats may not be available on all networks.
Colour Mobile Phone Dualband i2100 User’s Guide INNOSTREAM Confidential
PAGE : 34 of 34
- Connection Type
You can select which connection will be used for sending or receiving SMS
CS only : Only Circuit Switch Connection will be used.
CS preferred : If Circuit Switch connection and GPRS connection are possible, Circuit Switch
connection will be used at first. If it failed, GPRS connection will be used.
GPRS only : Only GPRS Connection will be used.
GPRS preferred : If Circuit Switch connection and GPRS connection are possible, GPRS
connection will be used at first. If it failed, Circuit Switch connection will be used.
- Status
You can identify the memory use for SMS message in your SIM card and your phone memory.
9.1.1.6 Chat
This chat service allows you to do chatting with standard SMS. During the chat session, you can
see all the received and sent chat message on screen. Chat messages are not saved on SIM card.
9.1.2 MMS
A multimedia message can contain text, images, and/or sound clips.
To send Mutimedia messages with your phone, you need to set the Message Service Centre
Number and the other Wap profile setting (obtained from your home network operator) on the
Message Center menu and Wap profile menu.
If multimedia message has arrived your phone displays New Mutimedia Message in idle screen
to inform you of the arrival. Messages are stored within the local filing system. When storing
messages within the filing system, the maximum number and size of stored messages is entirely
dependent upon available local filing system storage space.
9.1.2.1 Inbox
With this menu, You can view the new mutimedia messages or the read messages.
Sender phone numbers or names (if stored in the Phonebook) are displayed on the list.
The small icon on the far left side of the each list indicates following meanings.
: The message inform you the new message arrived. It is not downloaded yet.
: The message is the downloaded and read message.
If you select [Options soft key], following options are available.
Read : Reads/displays the message (and downloads it if it was deferred/left on the server).
Delete : Allows you to delete the viewed or list selected message.
Edit : Enables you to edit the viewed or list selected message contents.
Move to : Allows you to move the message to another mailbox folder.
(Inbox, Outbox,Drafts, Sent, Templates)
Forward : Allows the message to be forwarded to someone else.
Archive : Moves the message to the archive folder (only shown if not already
in the archive folder)
Save as template : Saves the message for use as a template (only shown
If not already in the template folder)
Details : Enables you to see the message contents.details

Colour Mobile Phone Dualband i2100 User’s Guide INNOSTREAM Confidential
PAGE : 35 of 35
Delete Inbox : Allows you to delete all messages of Inbox menu.
9.1.2.2 Outbox
With this menu, you can view a list of any messages waiting to be sent
Recipient phone numbers or names (if stored in the Phonebook) are displayed on the list.
If you select [Options soft key], following options are the same as above Inbox
9.1.2.3 Create Message
The user is presented with a screen showing the first page in a blank MMS
message. The screen displays the page with an informational/status bar above the message showing:
. The presence of any sounds or attachments on the current page.
. The size of the whole MMS in bytes or kilobytes.
. The current page number/total number of pages.
If you select [Options soft key], following options are available.
Add receipient : Proceeds to the subject/address stage of the message creation.
Insert : Adds a picture / sound to the current page, replacing any
existing picture/sound. An icon at the top of the screen will
indicate the presence of a sound.
Delete : Deletes an object from the current page. The user will
be prompted for which object to delete (it will list all
picture, sound objects on the current
page).
Preview : Previews the current MMS message.
Object prop’s : Displays a list of objects on the current page and allows
their properties to be set (text, picture, sound). After selecting an object from an
appropriately constructed list for the current page the user will be presented with
the properties for the given object which will include: . When to appear. The time at
which the object is displayed relative to the start of the current page (0s, 1s, 2s, 4s, 8s,
16s or “other”)
. Displayed for. The length of time for which the object
is displayed (“ maximum” , 1s, 2s, 4s, 8s, 16s or “ other” ). “ maximum” implies the
object is displayed until the end of the current page.
Page
Add Page : Adds an additional page after the current page and
makes it the active/displayed page.
Delete Page : Deletes the current page (only displayed if there is at
least one other page).
Previous Page : Moves to the previous page in the MMS (only displayed
if there is a page before the current page).
Next Page : Moves to the next page in the MMS (only displayed if
there is a page after the current page).
Apply template : Reformats the current message using a saved template.

Colour Mobile Phone Dualband i2100 User’s Guide INNOSTREAM Confidential
PAGE : 36 of 36
9.1.2.4 Drafts
With this menu, you can view a list of any draft messages which have
been created, but are not ready to be sent
Recipient phone numbers or names (if stored in the Phonebook) are displayed on the list.
If you select [Options soft key], following options are the same as above Inbox
9.1.2.5 Sent
With this menu, you can view a list of sent messages
Recipient phone numbers or names (if stored in the Phonebook) are displayed on the list.
If you select [Options soft key], following options are the same as above Inbox
9.1.2.6 Archive
With this menu, you can view a list of saved/archived messages
Recipient phone numbers or names (if stored in the Phonebook) are displayed on the list.
If you select [Options soft key], following options are the same as above Inbox
9.1.2.7 Templates
With this menu, you can view a list of messages which can be used as a
starting point when creating new messages
Recipient phone numbers or names (if stored in the Phonebook) are displayed on the list.
If you select [Options soft key], following options are the same as above Inbox
9.1.2.8 MMS Settings
Save messages : Whether to save a copy of all sent messages in the “ Sent” folder (yes/no).
Read Reports : Whether to request and send read reports.
Delivery Reports : Whether to request and send delivery reports.
Message centre : Allows the address (URL) of the MMS proxy relay or MMSC to be set.
WAP Profile : Configures which WAP profile is used to connect over when sending/receiving
MMS messages.
MMS lifetime Controls the lifetime of created MMS messages (1hour – 1 week or as set by
network)
MMS download : Controls whether new MMS messages are downloaded as soon as they are
available or only when the user has confirmed they wish to receive them.
Automatic : download new messages immediately in the background and notify the user when
they are fully downloaded.
Prompt : when a new message is available notify the user and allow the user to decide hether
to download the message or not.
On read : record the availability of the new message in the Inbox, but don’ t notify the user.
Spam filter : Spam emails are defined as MMS messages where the message class is set to
“ Advertisement” .
Off : all MMS messages are accepted.
Defer spam : the user is prompted whether to download a spam message.
Reject spam : spam messages are rejected with no user notification.

Colour Mobile Phone Dualband i2100 User’s Guide INNOSTREAM Confidential
PAGE : 37 of 37
9.1.3 E-mail
You can use your phone to send and receive e-mail.
! Note : Before using e-mail, make sure that you have your e-mail account and connection
profile details.
<Inbox>
With this menu, You can view your e-mail account or e-mail messages.
! Note : Before using e-mail, set up e-mail account and connection option in E-mail Setting
menu
At First you enter this menu, you can see your email account list if you had set your account
settings in setting menu.
The small icon on the far left side of the each list indicates following meanings.
: The message is the new unread message.
: The message is the read message.
If you press [Select soft key], you can see the message contents with a sender e-mail address
and its arrival time by using [NAVI_UP] and [NAVI-DOWN].
If you select [Options soft key], following options are available.
Delete : Allows you to delete the viewed message.
Reply : Allows you to send a reply message to the sender of the viewed message.
Voice Call : Enables you to call the sender of the viewed message.
Forward : Allows you to forward the viewed message to someone else.
Edit : Enables you to edit the viewed message contents.
If you select Save option, the edited message is listed in Outbox menu.
Delete Inbox : Allows you to delete all messages of Inbox menu.
<Outbox>
With this menu, you can view the saved e-mail which have been sent or unsent.
Recipient e-mail address or names (if stored in the Phonebook) are displayed on the list.
The small icon on the far left side of the each list indicates following meanings.
: It is the sent message.
: It is the unsent message.
If you select [Options soft key], Delete, Send, Extract E-mail Address, Forward, Edit and
Delete options are available.
With Send option, you can send the saved e-mail unchanged as it is.
<Create Message>
With this menu, you can write a e-mail, and then you can save and send the message.
Input a e-mail and then press the [Ok soft key]. After that, enter the recipient e-mail address
on the Destination screen. You can input the e-mail address directly or get from the phonebook
by pressing the [Phonebook soft key].
If you press the [Ok soft key] on the screen, following options are available.
Send : Sends the e-mail to the recipient e-mail address.

Colour Mobile Phone Dualband i2100 User’s Guide INNOSTREAM Confidential
PAGE : 38 of 38
The message doesn’t be saved.
Save : Saves the e-mail and the recipient e-mail address.
Save and Send : Saves the e-mail and the recipient e-mail address, and then sends.
<E-mail Setting>
- Connection Porfile
With this menu, you can view the Connection Profile List and currently activated the Connection
Profile.
Activate : Activate the selected Connection Profile to use sending a e-mail.
Add : Add the Connection Profile.
Edit : Edit the Connection Profile and Save it.
Delete : Delete Connection Profile. If the selected Connection Profile is the
Base Area, this menu cannot be displayed.
- E-mail Accounts
With this menu, you can view E-mail Accounts List and currently activated the E-mail Account.
Set Default : Set Default the selected E-mail Accounts to use sending a e-mail.
Add : Add the E-mail Account.
Edit : Edit the E-mail Account and Save it.
Delete : Delete E-mail Account. If the selected E-mail Account is the
Base Area, this menu cannot be displayed.
- My E-mail ACcounts
With this menu, you can input your e-mail address
- Send Option
This menu allows you to set the send option When sending your new e-mail. Available options
are Next Connection, Immediatley and None
- Connection Repeat
This menu allows you to set the Connection Repeat option When you are not using e-mail menu.
Available options are None
Every 10 Min, Every 30 Min, Every 1 Hour, Every 3 Hour, User Input Time
- Size Limit
You can set size Limit of receiving e-mail
- Status
You can identify the memory use of e-mail in your phone memory.
9.1.4 Voicemail
Your phone is capable of dealing with voicemail if this service is supported on the network. If
the voicemail has arrived, your phone displays New Voicemail in the idle screen and sets to
inform you of the arrival.
By selecting the < Connect Voicemail>, you can then listen to the voicemail.
Your phone automatically dials to the configured number that has stored in Number Setup menu.

Colour Mobile Phone Dualband i2100 User’s Guide INNOSTREAM Confidential
PAGE : 39 of 39
! Note : The voicemail service may not be available on all networks. For more details, please
contact your network service provider.
< Connect Voicemail>
With this menu, you can listen to the voicemails you have received.
<Number Setup>
With this menu, voice mailbox numbers can be stored.
- Home Mailbox
The voicemail number is to dial when you are on the home network to listen to the voicemail.
- Roam Mailbox
The voicemail number is to dial when you are on the other network to listen to the voicemail.
9.1.5 Broadcast
This network service allows you to receive the broadcasted text messages on various topics
such as weather, traffic, local district code, local hospitals, taxis or pharmacy in the area where
you are. You can even receive the message to be in a particular language. (For example, when
you are abroad) by using Language List option. For more information about topics, please
contact your service provider.
! Note : This service may not be available on all networks.
<Read All Messages>
With this menu, you can read all the broadcasted text messages received.
In title area of the screen, the name of the message subject item is displayed.
The contents of the message subject are updated whenever new contents are received.
If the message subject is not sent from the area you are, No Message is displayed.
You can read the message through by pressing [NAVI-DOWN].
To move to next message subject item, press [Next soft key].
<Receive Setting>
This menu allows you to enable or disable the reception of the broadcasted text messages.
All : Enables to receive all broadcasted text messages regardless of the setting of
Subject List and Language List.
Active List : Enables to receive all broadcasted text messages depending on the setting of
Subject List and Language List.
Disable : Disables to receive the broadcasted text messages.
<Display On Idle>
This menu allows you to enable or disable to view new broadcasted text messages
in the idle screen.
On : New broadcasted text messages are displayed in the idle screen.
Colour Mobile Phone Dualband i2100 User’s Guide INNOSTREAM Confidential
PAGE : 40 of 40
Off : New broadcasted text messages aren’t displayed in the idle screen.
<Subject List>
This menu allows you to select the subject items of the broadcasted text message.
Each item is identified by three digits index. Following table shows the default subject items
your phone has. If the default subject items list dose not have has not the item you want or if
the index or name of a default subject item is different from that of the network service provider,
you can add or edit in User Define List menu.
Index Subject Name
000
010
020
022
024
030
032
034
040
050
052
054
056
057
058
059
Index
Flashes
Hospitals
Doctors
Pharmacy
Far Traffic
Local Traffic
Taxis
Weather
District
Network Info.
Operator
National Help
Intl. Help
National Care
Intl. Care
!Note : For more information about the available subjects, please contact your network service
provider.
- Active List
All items list you selected are displayed. You can add and delete the list by using Add and
Delete option. The number of items in the list depends on your SIM card.
- User Define List
You can add, edit and delete the subject item you want. You can define up to five items. After
that, you need to add the defined subject in the Active List in order to enable the subject.
<Language List>
You can select your preferred languages of the broadcasted message by using Insert and Delete
options.
The number of languages you can select depends on your SIM card.
9.2 Call Records
Within this menu, you can identify all call records that you have dialled, received or missed.

Colour Mobile Phone Dualband i2100 User’s Guide INNOSTREAM Confidential
PAGE : 41 of 41
9.2.1 Dialled Calls
This menu lets you view the last 10 dialled calls.
In the dialled calls list, you can view the details of the record by pressing the [View soft key].
In the view screen you can make a call to the number by pressing [SEND], or can paste the
number to the idle screen by pressing [Paste soft key] and then can save the record to the
phonebook by pressing the [Save soft key].
You can delete a record in a view screen by pressing [Delete soft key].
9.2.2 Received Calls
This menu lets you view the last 10 received calls.
In the received calls list, you can view the details of the record by pressing the [View soft key].
In the view screen you can make a call to the number by pressing [SEND], or can paste the
number to the idle screen by pressing [Paste soft key] and then can save the record to the
phonebook by the pressing the [Save soft key].
You can delete a record in a view screen by pressing [Delete soft key].
9.2.3 Missed Calls
This menu lets you view the last 10 missed calls.
In the missed calls list, you can view the details of the record by pressing the [View soft key].
In the view screen you can make a call to the number by pressing [SEND], or can paste the
number to the idle screen by pressing [Paste soft key] and then can save the record to the
phonebook by pressing the [Save soft key].
You can delete a record in a view screen by pressing [Delete soft key].
9.2.4 Delete Records
This menu lets you delete the record of the recent calls. Following options are available.
All Calls: deletes the record of all recent calls.
Dialled: deletes the record of the dialled calls.
Received: deletes the record of the received calls.
Missed: deletes the record of the missed calls.
9.2.5 Cost & Duration
You can view the cost and duration of the last call, or all calls. Costs are shown only if your
network operator supports this service.
The following options are available.
Last Call : allows you to check or reset the cost and the duration of the last call.
All Calls : allows you to check or reset the cost and the duration of all calls.
If you press the [Reset soft key], you may have to enter your PIN2 according

Colour Mobile Phone Dualband i2100 User’s Guide INNOSTREAM Confidential
PAGE : 42 of 42
to SIM card contents.
Maximum Cost : allows you to check or change the maximum limit for the cost of calls.
If you press the [Change soft key], you must enter your PIN2. The value that
multiplied the entry by the value set at Price & Unit option is displayed.
Price & Unit : allows you to set the cost of one unit and currency code. This price per unit
is applied when calculating the cost of calls. If you press the [Change soft key],
you must enter your PIN2.
! Note: Not all SIM cards support this feature. The number of items in these lists depends on
the contents of your SIM card.
9.2.6 Data Counter
You can view the size of the sent data, the received data and total data transferred in the Last
Data session or All Data sessions.
The following options are available.
Last Data : allows you to check or reset the data size used in the last session.
All Data : allows you to check or reset the data size used in the all sessions.
9.3 Phone Setting
9.3.1 Own Numbers
This menu displays your phone numbers. You can view, add, edit, and delete the numbers,
stored in your SIM card.
9.3.2 Language
You can select in which language the display text is shown.
If you select Automatic, the display text is automatically displayed according to the country of
your SIM card.
This setting also determines which text input mode is selected when you write a text message.
For details, please see section 7.
9.3.3 Sound Setting
With this menu, you can customize various audible settings.
! Note : To switch on the silence mode, press and hold [VOLUME-UP] on the left side of phone
in the idle screen. To switch off the mode, press and hold down [VOLUME-UP] again.
If your phone is in the silence mode, all audile key tones and melodies are prohibited and all
alerts are changed to the vibrator regardless of the setting in this menu.
The audio profile menu allows you to access a group of pre-defined settings. A profile is a
group of audio settings which are set to suit a wide variety of events and environments (e.g.
meetings, movies, etc). There are six types of profiles; Normal, Meeting, Outdoor, Car, Silent
and VIP profiles.
Colour Mobile Phone Dualband i2100 User’s Guide INNOSTREAM Confidential
PAGE : 43 of 43
The table below shows the default settings of each profile.
Normal Meeting Outdoor Car Silent VIP
Ring Type Melody Vibrator Melody +
Vibrator Melody Light Melody +
Vibrator
Ring
Volume Level 7 Level 0 Level 7 Level 7 Level 0 Level 7
SMS Alert
Type Melody Vibrator Melody Melody Off Melody
SMS Alert
Volume Level 7 Level 0 Level 7 Level 7 Level 0 Level 7
Key Tone
Volume Level 5 Level 0 Level 7 Level 5 Level 0 Level 5
Speaker
Volume Level 6 Level 6 Level 7 Level 7 Level 6 Level 7
Game
Volume Level 5 Level 0 Level 7 Level 5 Level 0 Level 5
<Ring Type>
This menu allows you to select how to be informed of any incoming call.
Following types are available.
Melody : Your phone rings using the ringing melody selected at menu option of Ring Melody
option.
Vibrator: Your phone rings using the vibrator.
Light: Your phone rings using the backlight illuminated on the Sub-LCD screen, rather than
the normal ringing tone or vibrator.
Melody + Vibrator: Your phone rings using both melody and vibrator simultaneously.
<Ring Volume>
This option allows you to adjust the ringing volume to one of eight levels.
Use [NAVI-UP] and [NAVI-DOWN], and then press [Select soft key].
<SMS Alert Type>
This menu allows you to select how to be informed of new incoming SMS message.
Following types are available.
Melody : Your phone alerts using the SMS alert sound selected at menu option of
SMS Melody option.
Vibrator: Your phone alerts using the vibrator.
Off : Your phone does not alert with sound or vibrator.
<SMS Alert Volume>
This option allows you to adjust the SMS alert volume to one of eight levels.
Use [NAVI-UP] and [NAVI-DOWN], and then press [Select soft key].
<Key Tone Volume>

Colour Mobile Phone Dualband i2100 User’s Guide INNOSTREAM Confidential
PAGE : 44 of 44
This option allows you to adjust the key volume to one of eight levels when you press a key.
Use [NAVI-UP] and [NAVI-DOWN], and then press [Select soft key].
<Speaker Volume>
This option allows you to adjust the speaker or earpiece volume to one of eight levels when you
are in active call state.
Use [NAVI-UP] and [NAVI-DOWN], and then press [Select soft key].
<Game Volume>
This option allows you to adjust the game volume to one of eight levels when you play a game.
Use [NAVI-UP] and [NAVI-DOWN], and then press [Select soft key].
9.3.3.1 Profiles
This option allows you to activate and change the settings of the selected profile according to
your wish.
! Note : If your phone is in the silence mode, this menu is not visible.
9.3.3.2 Key Tone Type
This option allows you to select the tone that the keypad generates when you press a key on the
idle screen.
Following types are available.
Tone : When a key is pressed, your phone makes a different sound(DTMF Tone) for
different keys.
Voice : When a numeric key is pressed, your phone makes voice for each numeric keys.
Beep : When a key is pressed, your phone makes same sound for different keys.
Waterdrop : When a key is pressed, your phone makes water drop sound.
Off : When a key is pressed, your phone makes no sound.
9.3.3.3 Ring Melody
This menu allows you to select which melody is used for any incoming call.
You can select the melody that you prefer among various melodies.
Furthermore, you can select following melody as Ring Melody.
9.3.3.4 SMS Melody
This menu allows you to select how to be informed of any SMS message delivery.
You can select the melody that you prefer among various melodies.
9.3.3.5 Rising Volume
With this menu set to On, the alert volumes for incoming call and alarm tones are to be ramped.
9.3.3.6 Connect Tone
With this menu set to On, your phone beeps at connecting to a network during a making call.
! Note : This function may not be possible on all networks.

Colour Mobile Phone Dualband i2100 User’s Guide INNOSTREAM Confidential
PAGE : 45 of 45
9.3.3.7 Minute Tone
With this menu set to On, your phone beeps 10 seconds before every one minute during a call to
remind you of how long the call has been in progress.
9.3.3.8 Power Tone
With this menu set to On, your phone sounds melody during the period of powering up or down.
9.3.4 Display Setting
<Color Mode >
You can select your favourite colour mode that makes your phone get different feeling of the
colour.
<Wallpaper >
You can apply image from sample image, download and camera folder to main and sub wallpaper.
The following folder are available.
Sample Image : supply some image for main and sub wallpaper
Download : images from PC or network.
Camera: images from Camera.
<LCD Contrast r >
This menu allows you to adjust the contrast of the Main and Sub LCD screen.
<Greeting Message>
This menu allows you to edit a greeting message that is briefly displayed when the phone is
switched on.
<Backlight Time>
You can select a backlighting time of the Main LCD screen.
The following options are available.
10 secs : The backlight comes on for 10 seconds.
30 secs : The backlight comes on for 30 seconds.
1 Min: The backlight comes on for 1 minute.
1 Min 30 secs : The backlight comes on for 1 minute 30 seconds.
<Clock Display>
You can select clock display mode.
The following options are available.
On :.Enable clock display on Main and Sub wallpaper
Off : Disable clock display on Main and Sub wallpaper
<Network Name Display>
You can select network name display mode.

Colour Mobile Phone Dualband i2100 User’s Guide INNOSTREAM Confidential
PAGE : 46 of 46
The following options are available.
On :.Enable network name display on Main and Sub wallpaper.
Off : Disable network name display on Main and Sub wallpaper.
<External Light>
9.3.5 Clock Setting
<Set Time>
This menu allows you to change the time displayed in the idle screen.
You can use numeric key ([0]~[9]) to change time value and use [NAVI-LEFT] or [NAVI-
RIGHT] to change the setting place. If you have selected 12 Hour time format, you can change
am/pm value by pressing [NAVI-UP] or [NAVI-DOWN].
<Set Date>
This menu allows you to change the date displayed in the idle screen.
You can use numeric key ([0]~[9]) to change date value and use [NAVI-LEFT] or [NAVI-
RIGHT] to change setting place.
<Time Update>
This menu allows you to change time update option. If you select automatic, the time in your
phone is set by network.
! Note 1. This option only takes effect using GPRS SIM card.
2. For the automatic update setting to take effect, the phone needs to be restarted.
<Time Format>
This menu allows you to change time format between 12 Hour and 24 Hour.
<World Time>
This menu allows you to identify what time it is in various cities around the world.
You can easily set your local time in another country by pressing [Set Local soft key].
9.3.6 Call Setting
<Caller Number>
This menu prevents your phone number from being displayed on the phone of the person being
called.
The following options are available.
Default : The default setting provided by the network is used.
Hide Number : Your phone number is not displayed on the called person's phone.
!Note : In some network, when you make a call with hiding the telephone
number, the network does not allow to make the call.
Send Number : Your phone number is displayed on the called person’s phone each time you

Colour Mobile Phone Dualband i2100 User’s Guide INNOSTREAM Confidential
PAGE : 47 of 47
make a call.
<Any Key Answer>
With this menu, you can answer an incoming call by pressing any key except the [End soft key]
or [END].
On: You can press any key except the [End soft key] and the [END] to answer an incoming
call.
Off: You can only press the [Answer soft key] and the [SEND] to answer an incoming call.
<Folder Answer>
With this menu, you can answer an incoming call with just [SEND] regardless the folder opening.
On: You can answer the incoming call by the folder opening.
Off: You can answer the incoming call by only [SEND] regardless the folder opening.
<Auto Redial>
With this menu, your phone makes up to five attempts to redial a phone number after an
unsuccessful call.
The following options are available.
On: The number entered is redialled automatically.
Off: The number entered is not redialled.
! Note: The number of retrial may be variable according to the cause of the unsuccessful call.
If you press any key or close the folder cover, or if an incoming call or SMS is arrived,
the redialling mode is stopped.
9.3.7 Connection Setting
<MMS Profiles>
<E-mail Profiles>
<WAP Profiles>
<GPRS Setup>
9.3.8 Security Setting
To access this menu, you must first enter the Lock Code.
The feature enables you to protect the use of your phone. Various codes and passwords are
used to protect your phone. They are described in the section 3.
! Note : The Lock Code is factory set to 0 0 0 0.
<PIN Access>
With this menu set to Enable, your phone asks to enter the PIN each time the phone is switched

Colour Mobile Phone Dualband i2100 User’s Guide INNOSTREAM Confidential
PAGE : 48 of 48
on. If Disable, doesn't ask to enter the PIN.
<SIM Lock>
With this menu set to Enable, your phone asks to enter the SIM Lock Code when a different SIM
card is inserted. If Disable, your phone doesn't ask to enter the SIM Lock Code.
<Phone Lock>
With this menu set to On, your phone will be locked. The display asks you to enter the Lock
Code each time the phone is switched on.
<Phonebook Lock>
With this this menu set to On, your phonebook will be locked. The display asks you to enter the
Lock Code each time you enter the phonebook.
<Album Lock>
With this this menu set to On, your Album will be locked. The display asks you to enter the
Lock Code each time you enter the Album.
<Change Code>
You can change all security codes in this menu.
- Lock Code
You can change your current Lock Code to new one in this menu.
- PIN Code
You can change your current PIN to a new one in this menu.
- PIN2 Code
You can change your current PIN2 to a new one in this menu.
- Password
You can change your network password in this menu. You need a password to activate network
call barring. The network password is supplied by your network service provider and is not the
same as the PIN for your SIM card.
<Fixed Dial Number>
To change the setting of this menu, you must first enter the PIN2.
With this menu set to Enable, FDN mode is enable and you can only make a call with the
numbers that are stored in the FDN list.
You can find, add, edit or delete the FDN numbers list by pressing [Phonebook soft key] in the
idle screen after enabling the FDN mode.
If Disable, FDN mode is disable and you can make a call in normal way.
<Factory Reset>
This menu enables you to restore the default value of the phone setting value.

Colour Mobile Phone Dualband i2100 User’s Guide INNOSTREAM Confidential
PAGE : 49 of 49
9.4 Camera & Media
9.4.1 Camera
<Taking Picture>
This menu allows you to take pictures with the phone’ s built-in camera and adjust its settings.
You can take a picture by pressing [NAVI-CENTRE].
If you press [Setup soft key], You can adjust the following settings.
- Resolution
- Zoom
- Brightness
- Color mode
- Skin
<Picture Decoration>
This menu allows you to compound the picture and the background image.
<Camera Setting>
This menu allows you to adjust additional functions.
Resolution : Enables you to change Resolution.
Self Timer : Enables you to take a picture with the timer.
Shutter Sounds : Enables you to choose a shutter sound.
Saving Mode : Enables you to select whether save picture automatically or manually.
9.4.2 Image File
<Photo Album>
This menu allows you to view, organise, delete and send pictures stored in your phone.
<Downloaded Image>
This menu allows you to view, organize, delete and send images stored via messaging or WAP
service.
9.4.3 Audio File
<Voice Record File>
<Composed Melody>
<Downloaded Audio>
Using this menu, you can download a melody through the Internet or SMS message. The
downloaded melody is linked to Ring Melody list, Alarm Tone list or Group Melody list.
Your phone supports only Smart Messaging Type (RTTTL) of melody for the download.
Colour Mobile Phone Dualband i2100 User’s Guide INNOSTREAM Confidential
PAGE : 50 of 50
9.4.4 File Manager
This menu allows you to organize and delete files stored in your phone.
9.5 Organiser
9.5.1 Calendar
With this menu, you can use calendar function and scheduler function.
If you enter this menu, the date cursor is on the today’ s date. Further, the lunar date
corresponding to today is also displayed on the top-right side.
If the date on the cursor has schedule list, then adequate icons of the schedule are displayed on
the bottom-right side.
You can use key on the calendar as follows.
[NAVI-LEFT] or [NAVI-RIGHT] : One(1) day decrement or increment.
[NAVI-UP] or [NAVI-DOWN] : Seven(7) days decrement or increment.
[*] or [#] : One(1) month decrement or increment.
The scheduler function helps you keep track of reminder, calls, meetings, birthdays, travels or
wedding that you need to know. Your phone sounds adequate melody alarm when the set
date/time for the schedule is reached.
You can add up to 100 schedule list.
Six(6) schedule types are available for the schedule.
: It indicates Reminder schedule.
: It indicates Meeting schedule.
: It indicates Birthday schedule.
: It indicates Call schedule.
: It indicates Travel schedule.
: It indicates Wedding schedule.
Following scheduler options are available.
View Today : enables you to view the schedule list of the date.
View Week : enables you to view the schedule list of the week.
View Month : enables you to view the calendar and schedule.
Go to date : enables you to go specific date.
Manage Schedule : enables you to add and delete schedule.
View Biorhythm : enables you to view your biorhythm of the date.
Setting :enablesyoutosetcalendaroption.
9.5.2 View Today Report
This menu enables you to review today schedule and biorhythm.
9.5.3 Alarm

Colour Mobile Phone Dualband i2100 User’s Guide INNOSTREAM Confidential
PAGE : 51 of 51
<Morning Alarm>
This menu enables you to set the morning alarm
Set Time : sets the time for the alarm.
Alarm Status : enables you to decide whether the alarm is enable or disable.
Alarm Tone : selects the alarm tone melody.
Repeat Status : enables you to decide which day of the week the alarm alerts.
Power Up : enables you to decide whether the alarm alerts or not while your phone is powered
off.
Snooze: sets the repeat alert option.
<General Alarms>
This menu enables you to set the general alarms
Set Time : sets the time for the alarm.
Alarm Status : enables you to decide whether the alarm is enable or disable.
Alarm Tone : selects the alarm tone melody.
Enter Message : enters message for the alarm.
Repeat Status : enables you to decide whether the alarm alerts every day or not.
Power Up : enables you to decide whether the alarm alerts or not while your phone is powered
off.
9.5.4 Memo
This menu enables you to write memo.
Open : enables you to view selected memo.
Add : enables you to add new memo.
Delete : enables you to delete selected memo
Mark : enables you to mark selected memo as done.
Unmark : enables you to unmark selected memo as not done.
9.6 Network Service
These features are network services.
Please contact your network service provider to check their availability and subscribe to the
feature if you wish.
9.6.1 Call Divert
This network service enables incoming calls to be rerouted to another number you specify.
For example, you may wish to divert your business calls to a colleague while you are on holiday.
Call diverting can be set up in the following ways.
You must enter a number that the incoming call should be forwarded to.
- Always : All incoming calls are diverted.
- When Not Answered: Incoming call is diverted if you do not answer the call.
You can change the unanswered delay time.
! Note: A network may impose a constant time for the unanswered delay time.

Colour Mobile Phone Dualband i2100 User’s Guide INNOSTREAM Confidential
PAGE : 52 of 52
- When Busy : Incoming call is diverted if you are already in another call.
- When Not Found : Incoming call is diverted if you are not in an area connectable.
- Cancel All : All call divert settings are deactivated. Calls can be normal.
Additionally, you can specify individual diverting options for each of the following services.
Speech
Data Async
Fax
Following options for each service are available:
Activate: activates the call diverting service selected.
Cancel : cancels the call diverting service selected
Status : displays the current status of the call diverting service selected.
! Note: After the action of the call diverting service selected is sent to the network, the network
acknowledgement is displayed.
9.6.2 Call Barring
This network service allows you to restrict your calls.
You can request your network service provider to bar the following types of call.
To use Activate and Cancel options, you must enter your network Password.
Please contact service provider for the Password.
- In Calls : All incoming calls are barred.
- In Calls If Abroad : All Incoming calls are barred when abroad.
- Out Calls : All outgoing calls cannot be made.
- Foreign Out Calls : Any outgoing international calls cannot be made.
- Foreign exc.to Home : When abroad, outgoing call can be made only to numbers within the
current country and to your home country that is the country where your home
network provider is located.
- Cancel All: All call barring settings are deactivated. Calls can be made and received normally.
Additionally, you can specify individual barring options for each of the following services:
Speech
Data Async
Fax
Following options for each service are available.
Activate: activates the call barring service selected.
Cancel : cancels the call barring service selected.
Status : displays the current status of the call barring service selected.
! Note: After the action of the call barring service selected is sent to the network, the network
acknowledgement is displayed.

Colour Mobile Phone Dualband i2100 User’s Guide INNOSTREAM Confidential
PAGE : 53 of 53
9.6.3 Call Waiting
This network service enables you to know when there is a second call waiting while you are in a
call, if network service provider supports this feature.
This feature is not available for fax and data services.
The following options are available.
Activate: activates the call waiting service.
Cancel : cancels the call waiting service.
Status : displays the current status of the call waiting service.
9.6.4 Caller Identity
This feature lets you view the following line identification settings status of the network.
- Show Caller Name : The caller's name information(even if the name has not saved in your
Phonebook) is displayed on your phone when you receive a call.
Your name information is displayed on the called person’s phone when you make a
call.
- Restrict. Called ID : The caller's phone number is not displayed on your phone when you
receive a call.
- Restrict. Your ID : Your phone number does not appear on the called person on your phone
when you make a call.
- Present. Called ID : The caller's phone number is displayed on your phone when you receive
a call.
- Present. Your ID : Your phone number is displayed on the called person's phone when you
make a call.
9.6.5 Closed User Group
This network service allows the restriction of calls to and from a selected user group.
You may be a member of up to 10 user groups. For details on creating a user group and
activating and using this service, please contact your network service provider.
This function can, for example, be used when a company lends SIM cards to its employee and
wants to restrict the outgoing calls to members of a working team.
<CUG select>
You can select CUG you want.
If you select a CUG group defined from User Define CUG menu, the CUG group will be used.
Default : This menu of CUG allows you to use the closed user group with network service
provider agreed.
Not CUG : This menu of CUG does not allow you to use this feature.
<User Define CUG>
The list of current CUG you defined appears. You can add, edit, delete or delete all CUG list.

Colour Mobile Phone Dualband i2100 User’s Guide INNOSTREAM Confidential
PAGE : 54 of 54
The list will be listed up into the CUG Select menu list.
9.6.6 Network Selection
The Network Selection feature enables you to select whether the network to be registered on
roaming (outside your home network area) is searched automatically or manually, and enables
you to set up a preferred network list to be used when selecting a network automatically.
<Selection>
If you select Automatic, your phone will be connected to the first available network in the order
of your home network and then your preferred network list which are available on roaming.
If you select Manual, your phone will scan for the available network and display all available
networks list in your area.
The small icon on the far right side of the each list indicates following meanings.
: The network is an available network to connect to.
: The network is not an available network to connect to.
You can select the network you wish to connect to from this networks list.
If your phone loses the network signal of the selected network operator, it displays the screen
of the manual selection.
! Note: If you select the unavailable network manually, your phone cannot get the network
service. You have to change the network selection mode to Automatic or select the
available network manually.
<Preferred List>
This menu allows you to list your preferred networks to be used when roaming. This function is
available when the network selection mode is Automatic.
Your phone connects to the networks in order of appearance in this networks list, if the
networks are available in your area.
You can add or delete the networks list by pressing [Option soft key].
9.7 Game & Utility
9.7.1 Games
When you select this menu, you can see embedded games and downloaded games.
You can change the game volume in Game Volume menu on the Edit Profile menu.
You can also change the game volume while during you are enjoying the game, by pressing [*]
or [VOL-DOWN] to decrease the volume, [#] or [VOL-UP] to increase the volume.
9.7.2 Java
9.7.3 Biorhythm
Colour Mobile Phone Dualband i2100 User’s Guide INNOSTREAM Confidential
PAGE : 55 of 55
When you enter this menu, Set Birthday will be prompted if you have not input before.
Three sine waves about your birthday are displayed on the biorhythm screen.
The blue colour of wave indicates your physical rhythm this month.
The red colour of wave indicates your emotional rhythm this month.
The green colour of wave indicates your intellectual rhythm this month.
The vertical line indicates today.
If you enter the birthday of other person by pressing [Birthday soft key], you can see his
biorhythm.
9.7.4 Stopwatch
<Stopwatch>
The stopwatch can check nine(9) laps time and save one record.(One record is composed of
nine(9) lap times) When the stopwatch is not running, you can start or restart and reset the
stopwatch. In running state, you have two choices (stop and save lap time). If you press [Lap
Time soft key], the total time does not stop but present lap time stop and new lap time
immediately start. Also you can save present record or load previous record. Whether the
stopwatch is running or not, you can directly check lap lap time by pressing numeric key
([0]~[9]). In screen first big number is total time, and small two lines show you lap time with
lap time order.
[Key Function Table]
[Start soft key] starts or restarts the stopwatch
[Stop soft key] stops the stopwatch
[Reset soft key] resets and delete present record
[Lap Time soft key] saves the lap time or reset the stopwatch (when pressed and held)
[NAVI-LEFT] checks saved lap times backward (previous lap time)
[NAVI-RIGHT] checks saved lap times forward (next lap time)
[NAVI-UP] saves present record in not running state
[NAVI-DOWN] loads saved record in not running state
[0]~[9] directs check saved lap time directly
[END] ends the stopwatch and then turns back to the previous menu
! Note: The stopwatch is not turned off when you answer an incoming call or the phone is
sounding an alarm. But if you don’t save record and press [END], record will be lost.
<Countdown>
You can check countdown timer by using this menu.
Enter : enables you to enter countdown main screen. You can set time and start the timer.
Countdown Tone : enables you to select countdown expiry tone.
Auto Repeat : enables you to decide whether the countdown timer restart automatically or not.

Colour Mobile Phone Dualband i2100 User’s Guide INNOSTREAM Confidential
PAGE : 56 of 56
9.7.5 Calculator
Your phone has built-in engineering calculator, which can perform basic arithmetic operation
and scientific function.
Some of its features include:
- Normal and scientific output
(addition, subtraction, division and multiplication)
- Support for all standard mathematical functions
(sin, cos, tan, asin, acos, atan, sinh, cosh, tanh, exp, log, log10 and sqrt)
- More than 15 built-in variables for memories labelled A to Q.
Press the [Answer soft key] to display the result of an arithmetic operation.
Press the [Clear soft key] once to erase a figure to the left of the cursor.
Use the [*] key to enter the decimal part of a number or special symbols such as ., (, ), ^, e, !,
<, > and =.
Use the [#] key to see helpful information for calculation.
Use the [NAVI-CENTRE] key to enter Option menu for function and memory.
9.7.6 Voice Memo
With this menu, you can record up to three(3) voice memos.
The voice memo is linked to Ring Melody list, Alarm Tone list or Group Melody list.
Following options are available.
Play : enables you to hear the voice memo on the list.
Delete : deletes the recorded data of the voice memo on the list.
Record : enables you to record voice into the voice memo on the list.
Thereafter, the voice memo on the list indicates time and recording period
time on the memo name.
Delete All : deletes all of the recorded data on the list.
9.7.7 Melody Composer
This function allows you to compose your own melodies to be used as the ring tone.
Three octaves are available. A maximum of 50 notes can be entered. You can adjust the length
of a note and add a rest, as required.
You can compose melodies.
1. When you access the menu, the names of melodies created are displayed.
Otherwise, predefined names appear. Select the melody that you wish to
create or edit.
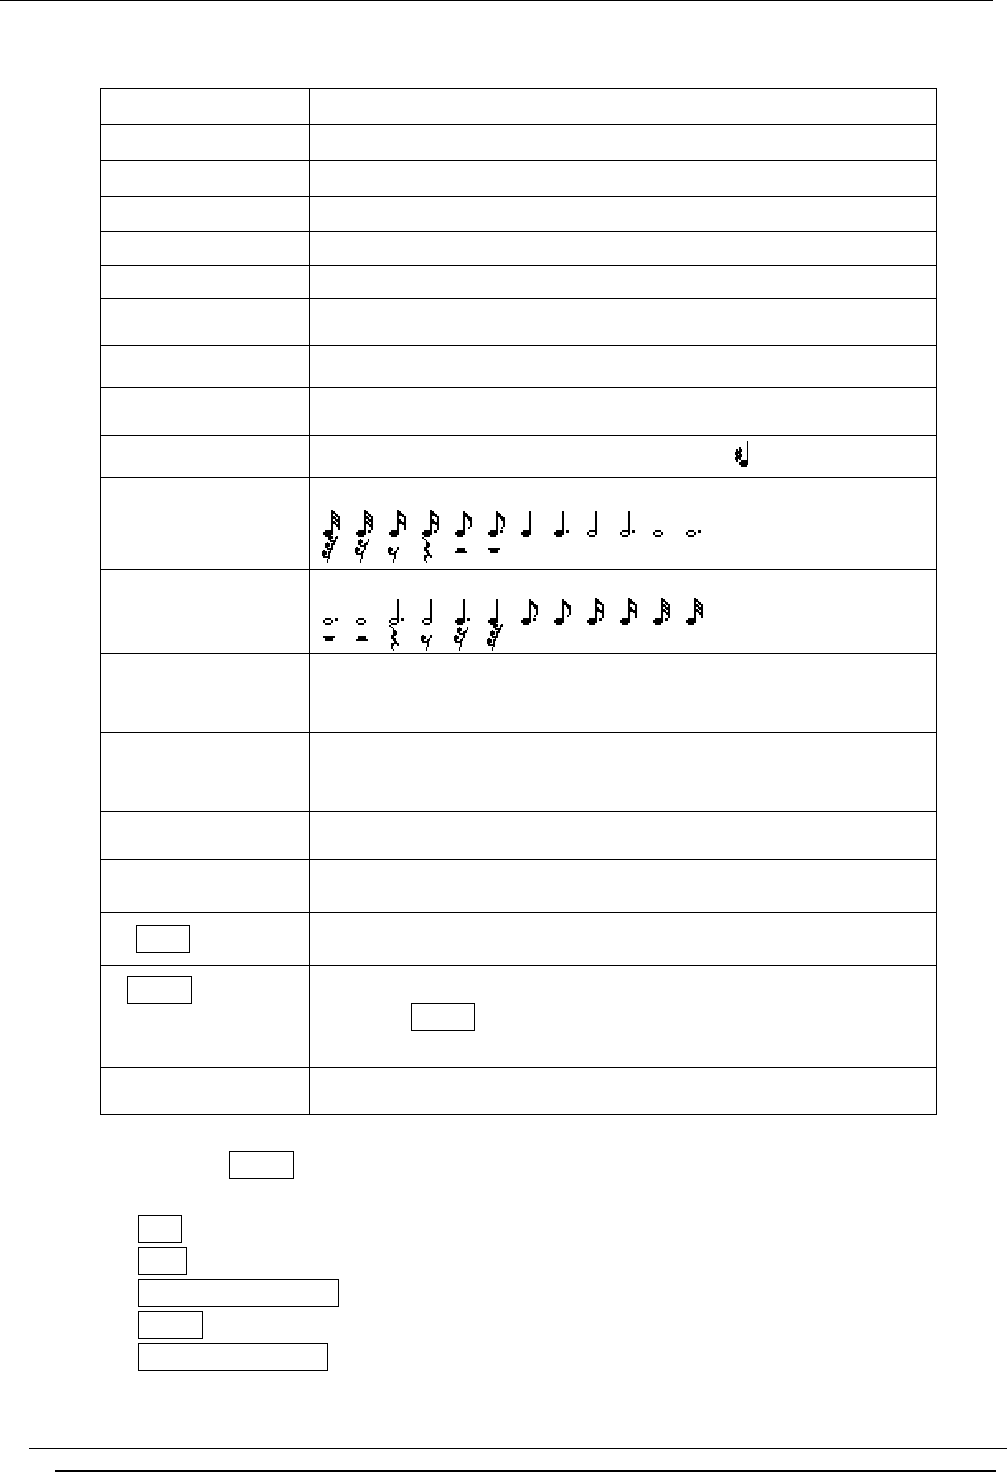
Colour Mobile Phone Dualband i2100 User’s Guide INNOSTREAM Confidential
PAGE : 57 of 57
2. Then you can see musical paper and compose your melody using the following keys.
[1] C (Do), the first note in the musical scale
[2] D (Re)
[3] E (Mi)
[4] F (Fa)
[5] G (Sol)
[6] A (La)
[7] B (Si)
[0] Rest
[*] moves a note up or down one octave
[#] makes a note a semitone up. (For example )
[8]
increases the length of a note or a rest
[9]
decreases the length of a note or a rest
[NAVI-UP]
moves a note a tone up
(For example, the note A changes to A#, B, C, C#, and so on in
the scale each time you press the [NAVI-UP]key)
[NAVI-DOWN]
moves a note a tone down
(For example, the note C# changes to C, B, A#, A, and so on in
the scale each time you press the [NAVI-DOWN]key)
[NAVI-LEFT] moves the note cursor to the next note
[NAVI-RIGHT] moves the note cursor to the previous note
[Clear soft key] Short : clears the note in the note cursor
Long : Clears all musical paper
[Option soft key],
[SEND] or
[NAVI-CENTRE]
launches Option menu
[END] turns back to previous menu or screen
If you press [Option soft key], [SEND] or [NAVI-CENTRE], the following options are
available.
Play : Listens to your melody
Save : Saves your melody
Add To Ring Melody : Saves your melody and add it to ring tone melody.
Delete : deletes your melody
Set Control Section : sets control parameters on the paper such as speed, style and
volume.

Colour Mobile Phone Dualband i2100 User’s Guide INNOSTREAM Confidential
PAGE : 58 of 58
3. When you are satisfied with your melody, press the Save or Set Control Section in options.
4. Enter a title name for your melody
5. If you press [Ok soft key], the melody is saved.
The composed melody is linked to Ring Melody list, Alarm Tone list or Group Melody list.
9.7.8 Converter
9.8 Internet
WAP is a standard specifically created for mobile communications devices and gives fast and
easy access to the Internet information and services. Now you can find a lot of useful
information by using the micro browser in your mobile phone, instead of using your computer.
There are WAP service available that you will be able to access, such as reservation services,
news, sports and weather, games ad banking, etc.
The ways in which you can go to a WAP page are as follows:
- Selecting Home menu.
- Selecting a address list in Bookmarks menu
- Entering its address either in the Go to address menu or in the WAP browser
Press the navigation key[NAVI-CENTRE] to connect directly to Internet services in the idle
screen.
Browser
In the WAP browser, you can see the call status icon.
The call status icon indicates the call connection status.
The available icons are as follows.
: shows that the data call is currently being connected
: shows that the data call is disconnected.
: shows that the data call is in the Secure Mode.
You can highlight the specific hyperlink with a cursor that is indicated as an underline each and
view the content by selecting the highlighted hyperlink. You may choose these items
pressing the [NAVI-CENTRE], [SEND] and [Select soft key] in the screen.
If you press [Option soft key] on the browser, you can use the following available options.
The options depend on the contents of the WAP site.
Home : connects to the homepage you defined in the profile
Refresh : reloads the current page
Select : follows the highlighted hyperlink
Back : navigates back one page in the history list
Colour Mobile Phone Dualband i2100 User’s Guide INNOSTREAM Confidential
PAGE : 59 of 59
Stop : stops a browser action
Add Bookmark : adds a new list to the bookmarks for the Web page you are viewing
Bookmarks : presents the list and allows you to go to the Web page you want.
Go to Address : allows you to enter a URL to browse to
Top : jumps back to the top of the current page
Exit : exits the browser at any time, then the idle screen will be displayed.
The following keys are available for use when browsing:
[NAVI-UP] : moves the screen upwards.
[NAVI-DOWN] : moves the screen downwards.
[NAVI-LEFT] : moves the screen to the left (if the horizontal scroll bar is available).
[NAVI-RIGHT] : moves the screen to the right (if the horizontal scroll bar is available).
[NAVI-CENTRE] or [SEND]: selects an item (if it is a selectable item).
[END] : exits the browser.
Note!: Although the call is not in active state, if you ask the browser to do an action (by
selecting an option menu or by pressing the [Back soft key] ), it automatically makes a call and
tries to reconnect to the WAP site.
9.8.1 Home
Once a connection profile has been set up, you can connect to the home page you defined.
9.8.2 Resume
You can access the WAP site that you accessed before. If you have not accessed any site, your
phone is connected to the home page.
9.8.3 Bookmarks
You can access the list of bookmark sets in this menu.
The following four options are available by pressing [Option soft key].
Add Bookmark : creates a new bookmark name/URL.
Go To : launches the WAP browser and loads the page bookmarked.
Edit : allows you to alter the name/URL of the bookmark.
Delete : deletes the current bookmark.
9.8.4 Push Messages
You can receive push messages sent by your service provider. The push message is a kind of
notification from network, for example, stock news, weather news, headline news or e-mail.
If a push message has arrived, your phone displays New PUSH Message in the idle screen and
sets icon to inform you of the arrival. If you select [View soft key], you can view the
received push messages on the list.
The small icon on the far right side of the each list indicates following meanings.

Colour Mobile Phone Dualband i2100 User’s Guide INNOSTREAM Confidential
PAGE : 60 of 60
: indicates that you have not accessed a Internet site related to the PUSH message of
the list.
: indicates that you have accessed a Internet site related to the PUSH message of the
list.
If you select [Options soft key], following options are available.
Info : Allows you to view the received push message.
If you press [Select soft key] in the viewer, you can connect to Internet to view more
information.
Load : Allows you to go to the site linked with the received push message.
Delete : Allows you to delete the received push message
Delete All : Allows you to delete all of the received push messages.
9.8.5 Settings
<Connection Settings>
A WAP profile consists of a group of network settings. After having set them up, you simply
switch between the different WAP profiles, without having to re-enter the settings every time
you want to change your network connection.
At first, select a profile you want to set up. And then you will be asked if you want to activate,
edit, rename or delete the profile with options.
- Activate
This option activates the chosen setting as a current WAP setting to be used for the WAP
connection.
- Edit
This option edits the WAP setting values to connect to Internet.
! Note : The setting value varies according to the WAP service provider. So please contact your
network service provider for the values before using WAP services.
If you select Edit, the following options are available.
Homepage : Enter the address of the WAP page that you want to use as your home page
for the WAP profile.
Connection Type : Select type of internet connection.
Temporary is a non-confirmed (connectionless) service.
Continuous is a confirmed delivery mechanism but generates more network traffic.
Connection Options : The options are None or Secure and depend on the gateway you are
using.

Colour Mobile Phone Dualband i2100 User’s Guide INNOSTREAM Confidential
PAGE : 61 of 61
Bearer : You must select the bearer service provided by your WAP gateway which will be
either GSM Data or SMS.
You will see different menu items as bearer to which you selected.
1. Data Service Settings include:
The service settings below are only available when GSM Data has been selected as a
bearer service.
IP Address
You must enter the IP address of the WAP gateway you want to use to access WAP pages.
Dial Number
You need to enter the telephone number to dial to access your WAP gateway.
Data Call Type
You need to select the type of data call to make, that is: Analogue or ISDN (digital).
Data Call Speed
This is the speed of your data connection and should be provided by your network.
Server Login
This is your user identity (Username and Password) for your dial-up server
Timeout
You need to select one of three timeout periods, after which browser will report a failure
to send a data (for example, because the WAP gateway is not responding)
2. SMS Service Settings include:
The service settings below are only available when SMS has been selected as a bearer
service.
Server Number
This is the telephone number of the SMS Service Centre and should be provided by your
network.
Service Number
This is the telephone number to dial to access your WAP gateway and should be provided
by your network.
Rename
This option changes the name of the chosen profile.
Delete Profile

Colour Mobile Phone Dualband i2100 User’s Guide INNOSTREAM Confidential
PAGE : 62 of 62
This option deletes the selected profile.
<User Preferences>
- Cache Mode
For Always Check, the cache is always checked every time the browser opens a WAP site.
This should be set for normal operation.
For Never Check, the cache is never checked when connecting to the Internet.
- Push Security
This options are used for filtering the received push messages.
Accept All : You can receive all push messages.
Trusted Only : You can receive only authenticated or trusted push messages.
Accept None : You can not receive any push message.
- Display Images
This allows you to select whether images on WAP cards are displayed or not.
<Security Certificate>
This lists the trusted root certificates that are stored on the handset for secure-mode
connections. Security certificate are used by some WAP services for security purpose, for
example, server certificates, banking services or other authority certificates. You can download
the certificate from a WAP page if the WAP service supports the use of authority certificates.
After the download, you can save or delete it. If you save the certificate, it is added to the
security certificate list on the phone.
! Note : If you delete the security certificate on the phone, you cannot use some WAP service
with secure mode connection.
9.8.6 Empty Temp Files
When opening a WAP page, if the WAP page which has been stored in the cache, the browser
automatically use the stored data in the cache. This menu enables you to flush the cache.
Empty Cache : This allows you to delete Cache Data information piled such as image or text.
Empty Cookies : This allows you to delete Cookie Data information piled such as user
information.
Empty Passwords : This allows you to delete a Password information piled.
9.8.7 Go to address
This menu enables you to directly enter a URL address and open it.
When you enter the URL you may not need to type the prefix “ http:// “.
Before using this menu, please check the activated profile has been correctly set.

Colour Mobile Phone Dualband i2100 User’s Guide INNOSTREAM Confidential
PAGE : 63 of 63
9.9 SIM AT Service
SIM Card provides several value added menu service other than your handset does.
This menu service will display and work on the menu of your phone only when your SIM card
supports it. Therefore, this menu may not be shown depending on your SIM card.
The contents and terms of the menu function lists will depend on your network service provider.
Please contact your network service provider (a network operator or the service provider) in
regards with availability of any services related to your SIM card, application information and
the costs.
! Note: Please be aware that you may probably be charged due to activated SMS or call when
you use those menu services.
The text of the SIM AT menus may be different from your phone language setting because the
text is directly comes from your SIM card.
10. Data and Fax
You can transfer data or fax to other devices via a data cable that is connected to PC. The data
cable is used to connect your phone to the PC’ s serial port.
To send and receive e-mail and faxes, connect to computer and access the Internet, you need
the appropriate data/fax communication software installed on your computer.
Also, you have to subscribe the data service when you subscribe a network service provider.
This service varies depending on the network, so contact service provider before you start
using the service.
!Note : The data cable is optional part, so you need to purchase that from your phone dealer in
order to enjoy the data/fax world.
Modem configuration setting on the PC
Your phone has an integral modem. You need to install a standard modem in your PC’ s
operating system.
- Standard modem with 19200 bit/s (115200 initialisation speed)
- Fax Class 1 modem, max 9600 bit/s
For using fax service, you need to check the fax application program on the PC as below.
- Modem initialisation: AT+IFC=1,1
- Flow Control : Software Flow Control
- 115200 initialisation speed and Fax Class 1 modem

Colour Mobile Phone Dualband i2100 User’s Guide INNOSTREAM Confidential
PAGE : 64 of 64
How to use the data service.
1. Connect the data cable between the PC’ s serial port and your phone’ s external socket.
2. Execute a dial-up Modem software on the PC.
You need to set the Modem configuration on the PC before you use.
3. Execute appropriate data/fax program such as Internet browser on the PC.
! Note : Some data service provider releases a integrated data/fax software including the dial-up
modem software.
Using the travel adapter during the data service
The data cable has a socket for the travel adapter. You can charge your phone while you are
enjoying the data/fax world.
To do it, connect the plug of the travel adaptor to the socket of the data cable as following
illustration.
11. Phone and Battery Care
- Keep in mind that a new battery’ s full performance is achieved only after two or three times
of complete charging and discharging cycles!
- The battery can be charged and discharged hundreds of times but it will eventually wear out.
When the operating time (talk-time and stand-by time) is noticeably shorter than normal, The
symptom means the time to buy a new battery.
- Do not attempt to open the casing on your phone or its battery.
- Use only the supplied or an approved replacement antenna. Unauthorized antennas,
modifications or attachments could damage the phone and may violate regulations governing
use of mobile phones or FCC regulations.
- Always keep SIM card out of children’ s reach.
- Use your phone battery only for its intended purpose, and never use any charger or battery
which is damaged or worn out.
- Never allow the battery terminals to short circuit, as this can cause damage to the battery or
to the connecting object. (a short circuit can occur if a metallic object such as a coin, clip or
pen causes direct connection between the + and – terminals of the battery)
Therefore, always take adequate precautions when carrying a spare battery in a purse or
pocket.

Colour Mobile Phone Dualband i2100 User’s Guide INNOSTREAM Confidential
PAGE : 65 of 65
- Battery must be recycled or disposed of properly, and must not be disposed of in municipal
waste. Never dispose of batteries in a fire.
- When you unplug your phone from its charger, grasp and pull the plug, not the power cord.
- For good operation times, discharge a Li-ion battery from time to time by leaving your phone
switched on until it turns itself off.
- Do not drop, knock or shake it.
- Do not use harsh chemicals, cleaning solvents, or strong detergents to clean it. Wipe it with a
soft cloth slightly dampened in a mild soap-and-water solution.
12.Troubleshooting
If you meet a trouble on the your phone operation, please check the followings.
These checks enable you to save the time and expense due to the unnecessary after-service.
1. When Enter PIN appears at the power-up.
The PIN check is currently enabled.
You must enter the PIN supplied together with your SIM card. You can disable the PIN check if
you want, please see Security Setting menu in section 9.
2. When Enter PUK appears at the power-up.
PIN has been entered invalidly three times in succession and your SIM card has been blocked.
In order to unblock it, you must enter the PUK supplied together with your SIM card.
3. When Insert SIM screen appears at the power-up.
Please check that your SIM card is inserted adequately.
4. When Enter Lock Code appears at the power-up.
Your phone is phone locked.
You must enter the Lock Code supplied together with your phone.
5. When No Service appears.
You probably are in the area out of the coverage of a GSM/DCS network.
6. When Emergency Only appears even though a number of the signal bar are indicated.
You probably are in the area out of the coverage of your home GSM/DCS network.
You probably are in the coverage of another GSM/DCS network but you are not allowed to be

Colour Mobile Phone Dualband i2100 User’s Guide INNOSTREAM Confidential
PAGE : 66 of 66
registered to the network.
7. If any tone is not generated when you press a keypad.
You need to check the silent mode setting. If you can find icon on the top of the main display
screen it is the silent mode. By pressing and holding [VOL-UP] on the idle screen, you can
switch it off.
You need to check the Key Tone Type of User Preferences menu.
You need to check Key Tone Volume of the profile option that you have set on Activate Profile
menu.
8. If an audible alert is not made when a call is received.
You need to check the silent mode setting. If you can find icon on the top of the main display
screen it is the silent mode. By pressing and holing [VOL-UP] on the idle screen, you can
switch it off.
You need to check Ring Type and Ring Volume of the profile option that you have set on
Activate Profile menu.
9. If an audible alert is not made when an alarm is expired.
You need to check the silent mode setting. If you can find icon on the top of the main display
screen it is the silent mode. By pressing and holing [VOL-UP] on the idle screen, you can
switch it off.
10. If an outgoing call is not made.
You have probably set an outgoing calls barring option. You need to check Call Barring menu.
Otherwise, you have probably set to Hide Number in Caller Number menu of Call Setting menu.
In some network, when you make a call with hiding the telephone number, the network does not
allow to make the call.
11. If an incoming call is not made.
You have probably set an incoming calls barring option. You need to check Call Barring menu.
12. If an outgoing SMS message is not sent.
You need to check the Message Centre option in Message Setup menu.
13. If all audible key tones are muted and all audible alerts are changed to vibrator alert.
You need to check the silent mode setting. If you can find icon on the top of the main display
screen it is the silent mode. By pressing and holing [VOL-UP] on the idle screen, you can
switch it off.
14. If some menus relevant to the sound are not visible on the Sound Setting menu.
You need to check the silent mode setting. If you can find icon on the top of the main display
screen it is the silent mode. By pressing and holing [VOL-UP] on the idle screen, you can
switch it off.

Colour Mobile Phone Dualband i2100 User’s Guide INNOSTREAM Confidential
PAGE : 67 of 67
15. If nothing is displayed in the Network Status or Event Area of the Sub Display Screen.
You need to check the Display menu of the Sub Screen menu. If you have selected User Text
but you have not entered any text, nothing is displayed.
16. If a telephone number that has over 20 digits is not saved and Number Too Long is
displayed when you try to save the number.
You need to check Place To Save option of Settings option in Phonebook.
If you have set to SIM Memory, maximum 20 digits can be saved in to SIM card.
If you change to Phone Memory, you can save maximum 40 digits into phone memory.
For more details, please see Phonebook menu in section 6
13. Glossary
Cell Broadcast
This network service allows you to receive the broadcasted text messages on various topics
such as weather, traffic, local district code, local hospitals, taxis or pharmacy in the area where
you are.
CUG (Closed User Group)
This network service allows the restriction of calls to and from a selected user group.
DTMF (Dial Tone Multi Frequency)
Codes sent as tone signals. Used for telephone banking, for accessing an answering machine,
etc.
International Indicator
‘+’ sign automatically adds the correct international code in front of a telephone number
when dialling out of a country.
Network Service Operator
To be able to use your phone, you need a subscription to a network. You get this subscription
from a network operator, together with a SIM card that you need to use with your phone.
PIN (Personal Identification Number)
The code is to establish authorization for access to certain functions or information in your SIM
card. The PIN code comes with your subscription. It may be a four to eight digit number and can
be changed as required.
PIN2 (Personal Identification Number 2)
The code is an authorization code to access certain special field in your SIM card. The PIN2
code does not come with your subscription in some country.
PUK (Personal Unblocking Key Code)

Colour Mobile Phone Dualband i2100 User’s Guide INNOSTREAM Confidential
PAGE : 68 of 68
Used to unlock a blocked SIM card. This comes with your subscription
Roaming
Use of your phone when you are outside your subscription network area.
SIM (Subscriber Identity Module)
It contains subscriber details, security information and memory for a personal directory of
numbers.
SMS (Short Message Service)
Messages to be sent and received via the network service operator’ s message centre to your
mobile phone. To use this service, it must be supported from your network.
WAP (Wireless Application Protocol)
A standard specifically created for mobile communications devices and gives fast and easy
access to Internet information and services.
14. Safety Information
For the efficient and safe operation of your phone, observe these guidelines.
Everyday Use of your phone
For normal operating position, hold your phone as you would any other telephone, with the
antenna pointed up and over your shoulder.
Do not touch the antenna unnecessarily when your phone is in use, as this will affect call quality
and may cause the phone to operate at a higher power level than otherwise needed.
As with any other radio transmitting equipment, you are advised that for the satisfactory
operation of your phone and for your own safety, you should use your phone only in the normal
operating position.
Using your phone in a vehicle
Safety comes first, and is the ultimate responsibility of the driver. Please:
i) Give full attention to driving – driving safely is your first responsibility.
ii) Use Hands-free Kit, if available.
iii) If you have those kits make sure it is done pre-programmed numbers where possible,
and keeping calls brief and to a minimum.
iv) If you don’ t have a Hands-free Kit, pull off the road and park your vehicle before making
or answering a call in driving conditions so require.
Non-ionizing radiation (exposure to Radio Frequency Signals)
Your phone is a low power radio transmitter and receiver. When it is on, it receives and also
sends the radio frequency(RF) signals. Most modern electronic equipment is shielded from RF

Colour Mobile Phone Dualband i2100 User’s Guide INNOSTREAM Confidential
PAGE : 69 of 69
signals. However, certain electronic equipment may not be shielded against the RF signals from
your mobile phone. RF signals may affect improperly installed or inadequately shielded
electronic systems in motor vehicles. Consult your vehicle manufacturer and the manufacturer of
any equipment that has been added to the vehicle.
Pacemakers
The Health industry Manufacturers Association recommends that a minimum separation of six
inches be maintained between a mobile phone and a pacemakers to avoid potential interference
with the pacemaker. Users with pacemakers:
i) Always keep your phone at least 20 cm (6inches) from your pacemakers when the phone
is switched on.
ii) Do not carry your phone in your breast pocket.
iii) Use the ear opposite the pacemakers to minimize the potential for interference.
iv) Switch off your phone immediately if you suspect that interference is being caused.
Hearing aids
Some mobile phones, including your mobile phone, may interfere with certain hearing aids. In the
event of such interference you may consult the hearing manufacturer to discuss alternatives.
Other medical devices
If you use any other medical devices, please consult a physician or the manufacturer of the
medical devices to determine if they are adequately shielded from external RF energy. Your
physician may be able to assist you in obtaining this information. Always check the regulations
of the healthcare facilities, which generally request that all mobiles are switched off on entry.
Operating Environment
Remember to follow any special regulations in force in any area, and always turn off your phone
wherever it is forbidden to use it, or when it may cause interference or danger.
Aircraft Safety
FCC regulations prohibit using your phone while in the air. Switch off your phone before
boarding an aircraft.
Explosive Atmospheres and materials
Turn your phone off and do not remove the battery when in any area with a potential explosive
atmospheres and obey all signs and instructions. You must observe restrictions on the use of
radio equipment in fuel depots; below deck on boats; fuel or chemical transfer or storage
facilities; areas where the air contains chemicals or particles, such as grain, dust, or metal
powders; areas with signs about explosive atmospheres or where blasting operations are in
progress; any other areas where you would normally be advised to turn off your vehicle engines.
For Vehicle Equipped with an Air Bag
Al air bag inflates with great force. Do not place objects, including both installed or portable
wireless equipment, in the area over the air bag or in the air bag development area. If in-vehicle

Colour Mobile Phone Dualband i2100 User’s Guide INNOSTREAM Confidential
PAGE : 70 of 70
wireless equipment is improperly installed and the air bag inflates, serious injury could result.
Battery charging
Do not charge the phone without the battery in place.
Please use only approved batteries and chargers.
15. Index
Note : The contents of user’ s guide is subject to change for technical improvement without
notice.
FCC & Industry Canada Regulatory Compliance
This device complies with Part 15 of the FCC Rules. Operation is subject to the following two conditions:
(1) this device may not cause harmful interference, and (2) this device must accept any interference
received, including interference that may cause undesired operation.
Your mobile device is a low power radio transmitter and receiver. When it is ON, it receives and also
sends out radio frequency (RF) signals. In August 1996, the Federal Communications Commission (FCC)
adopted RF exposure guidelines with safety levels for mobile device. Those guidelines are consistent
with safety standards previously set by both U.S. and international standards bodies: American National
Standard Institute (ANSI), National Council of Radiation Protection and Measurements (NCRP), and
International Commission on Non-Ionizing Radiation Protection (ICNRP). Those standards were based
on comprehensive and periodic evaluations of the relevant scientific literature. The design of your Module
complies with the FCC guidelines and applicable
Statement according to FCC part 15.105
NOTE: This equipment has been tested and found to comply with the limits for a Class B digital device,
pursuant to Part 15 of the FCC Rules. These limits are designed to provide reasonable protection against
harmful interference in a residential installation. This equipment generates, uses and can radiate radio
frequency energy and, if not installed and used in accordance with the instructions, may cause harmful
interference to radio communications. However, there is no guarantee that interference will not occur in a
particular installation. If this equipment does cause harmful interference to radio or television reception,
which can be determined by turning the equipment off and on, the user is encouraged to try to correct the
interference by one or more of the following measures:
. Reorient or relocate the receiving antenna.
. Increase the separation between the equipment and receiver.
. Connect the equipment into an outlet on a circuit different from that to which the receiver is connected.
. Consult the dealer or an experienced radio/TV technician for help.
RF exposure FCC
For body worn operation, to maintain compliance with FCC RF exposure guidelines, use only accessories
that contain no metallic components and provide a separation distance of 15mm (0.6 inches) to the body.
Use of other accessories may violate FCC RF exposure guidelines and should be avoided.
Health and Safety Information FCC

Colour Mobile Phone Dualband i2100 User’s Guide INNOSTREAM Confidential
PAGE : 71 of 71
This EUT has been shown to be capable of compliance for localized specific absorption rate (SAR) for
uncontrolled environment/general population exposure limits specified in ANSI/IEEE Std. C95.1-1992 and
had been tested in accordance with the measurement procedures specified in FCC/OET Bulletin 65
Supplement C (2001) and IEEE Std. 1528-200X (Draft 6.5, January 2002).
Ministry of Health (Canada), Safety Code 6. The standards include a substantial safety margin designed
to assure the safety of all persons, regardless of age and health. The exposure standard for wireless
mobile phones employs a unit of measurement known as the Specific Absorption Rate, or SAR. The SAR
limit set by the FCC is 1.6W/kg *.
* In the U.S. and Canada, the SAR limit for mobile phones used by the public is 1.6 watts/kg (W/kg)
averaged over one gram of tissue. The standard incorporates a substantial margin of safety to give
additional protection for the public and to account for any variations in.