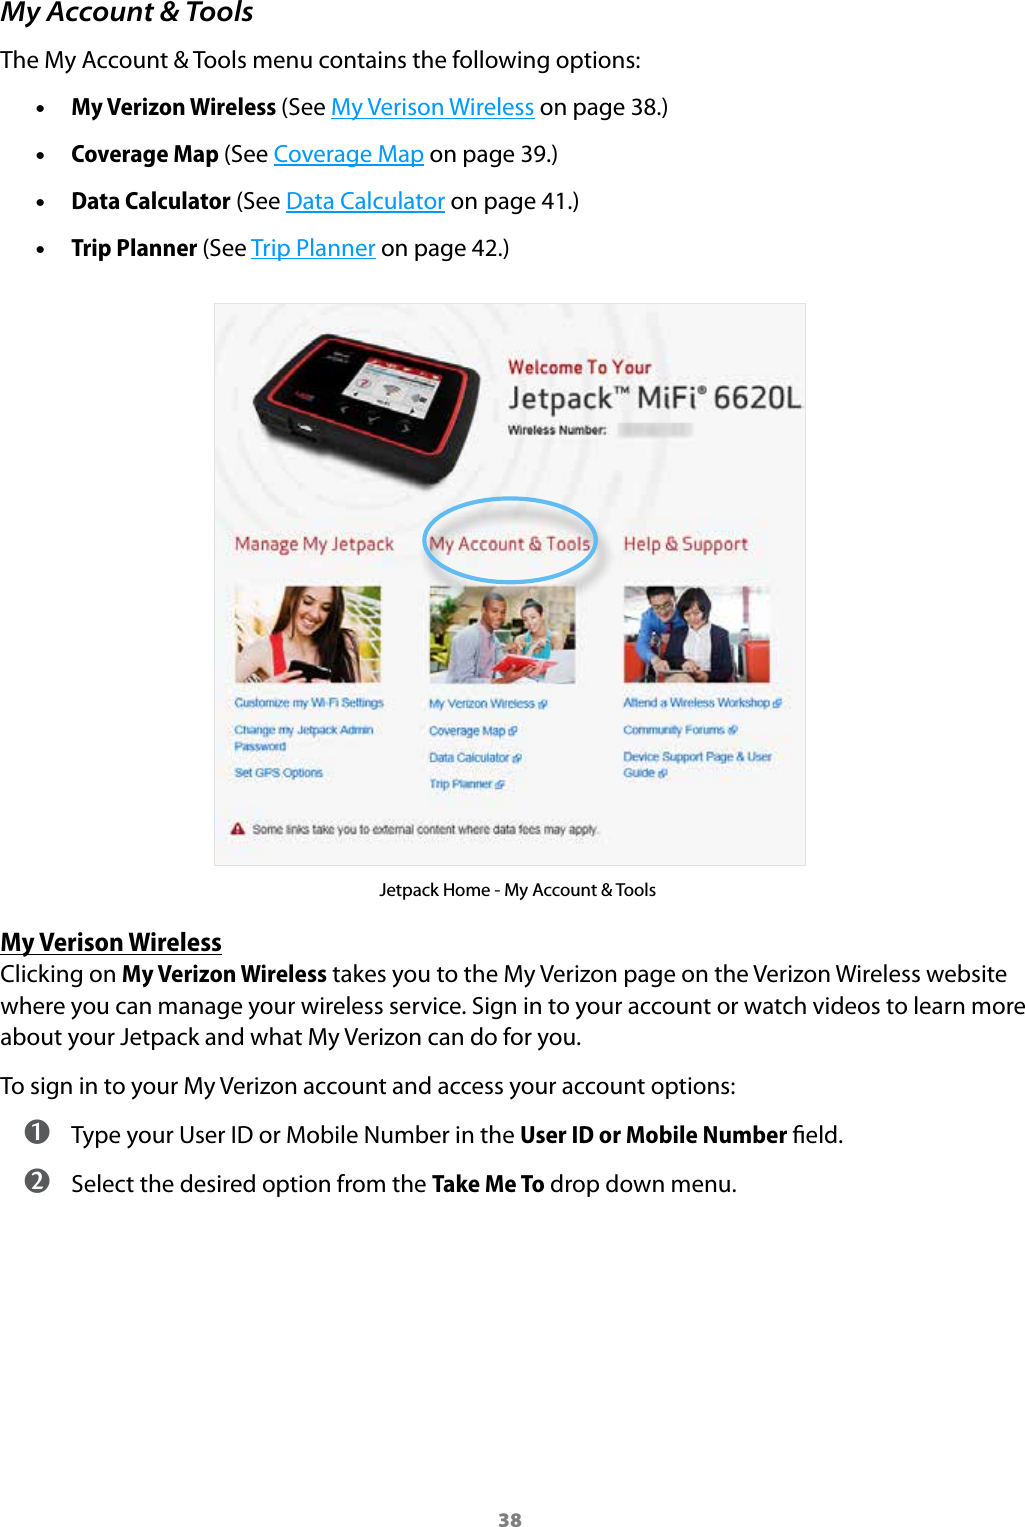
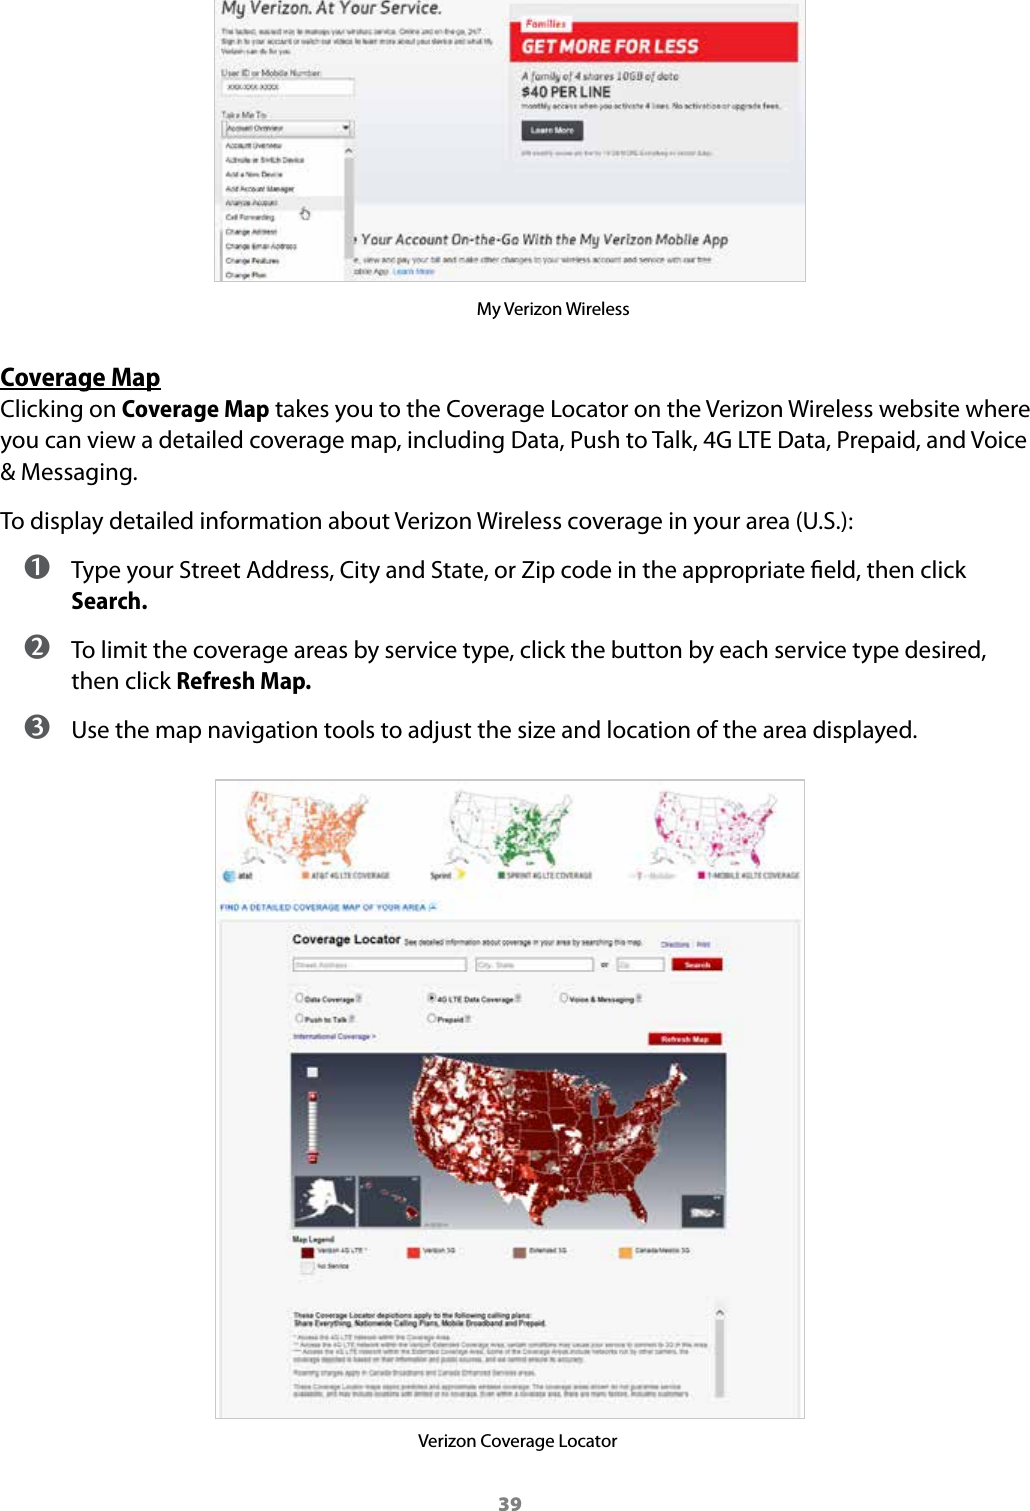
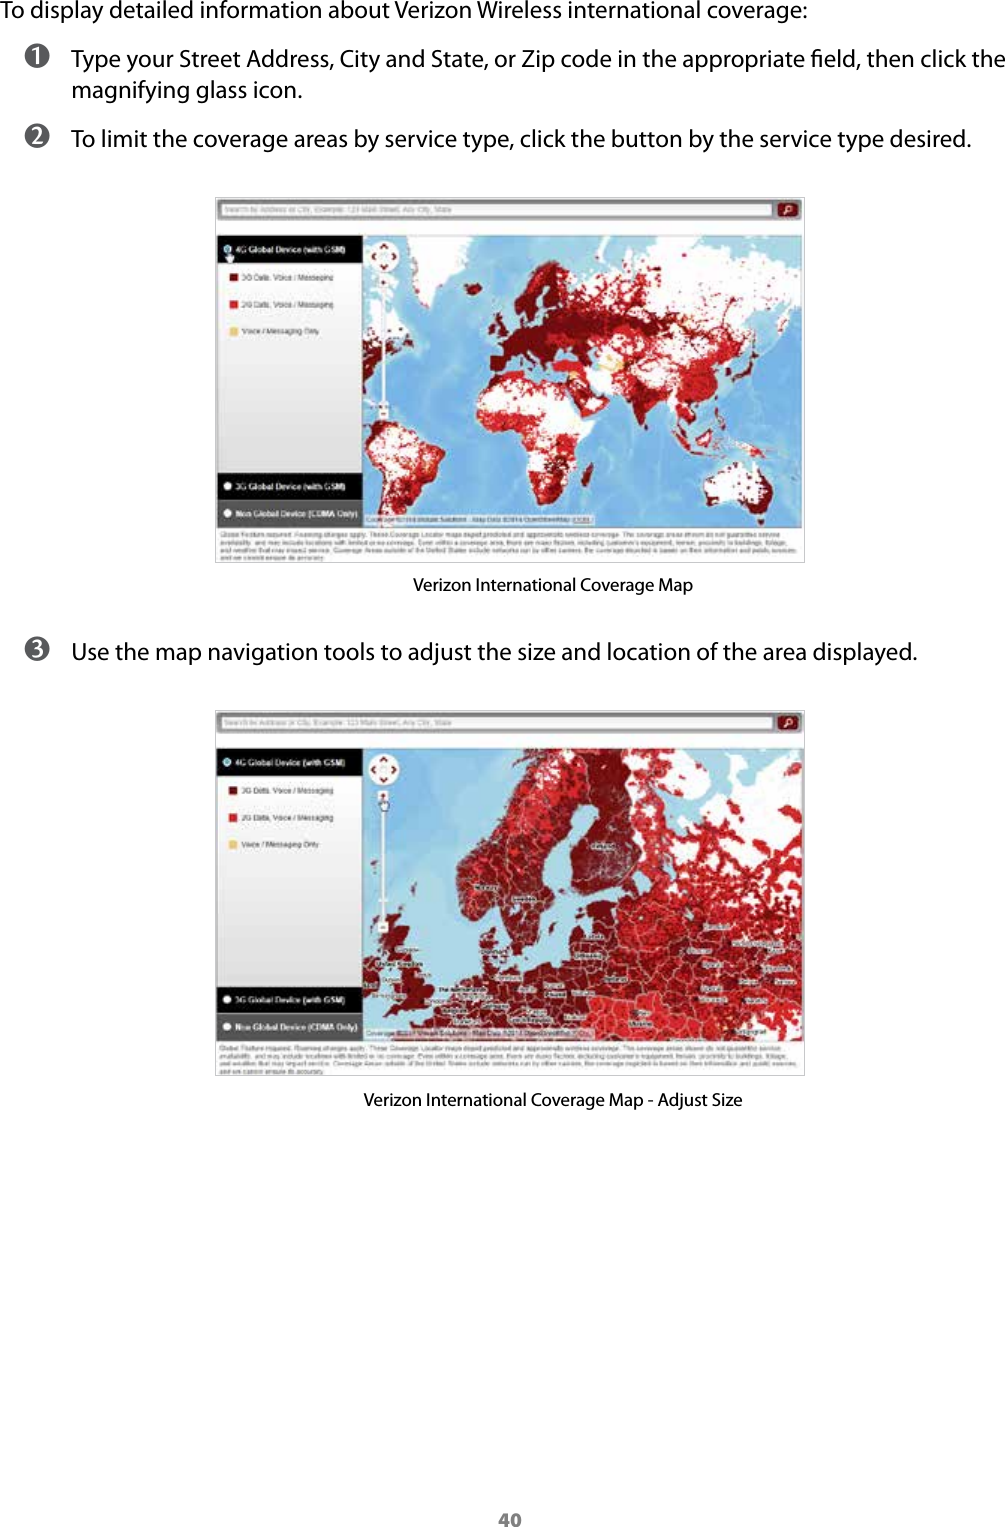
Inseego NVWMIFI6620 4G LTE, 3G WCDMA/CDMA, GSM and Wi-Fi Mobile Hotspot User Manual
Novatel Wireless Inc 4G LTE, 3G WCDMA/CDMA, GSM and Wi-Fi Mobile Hotspot
UserManual.wiki
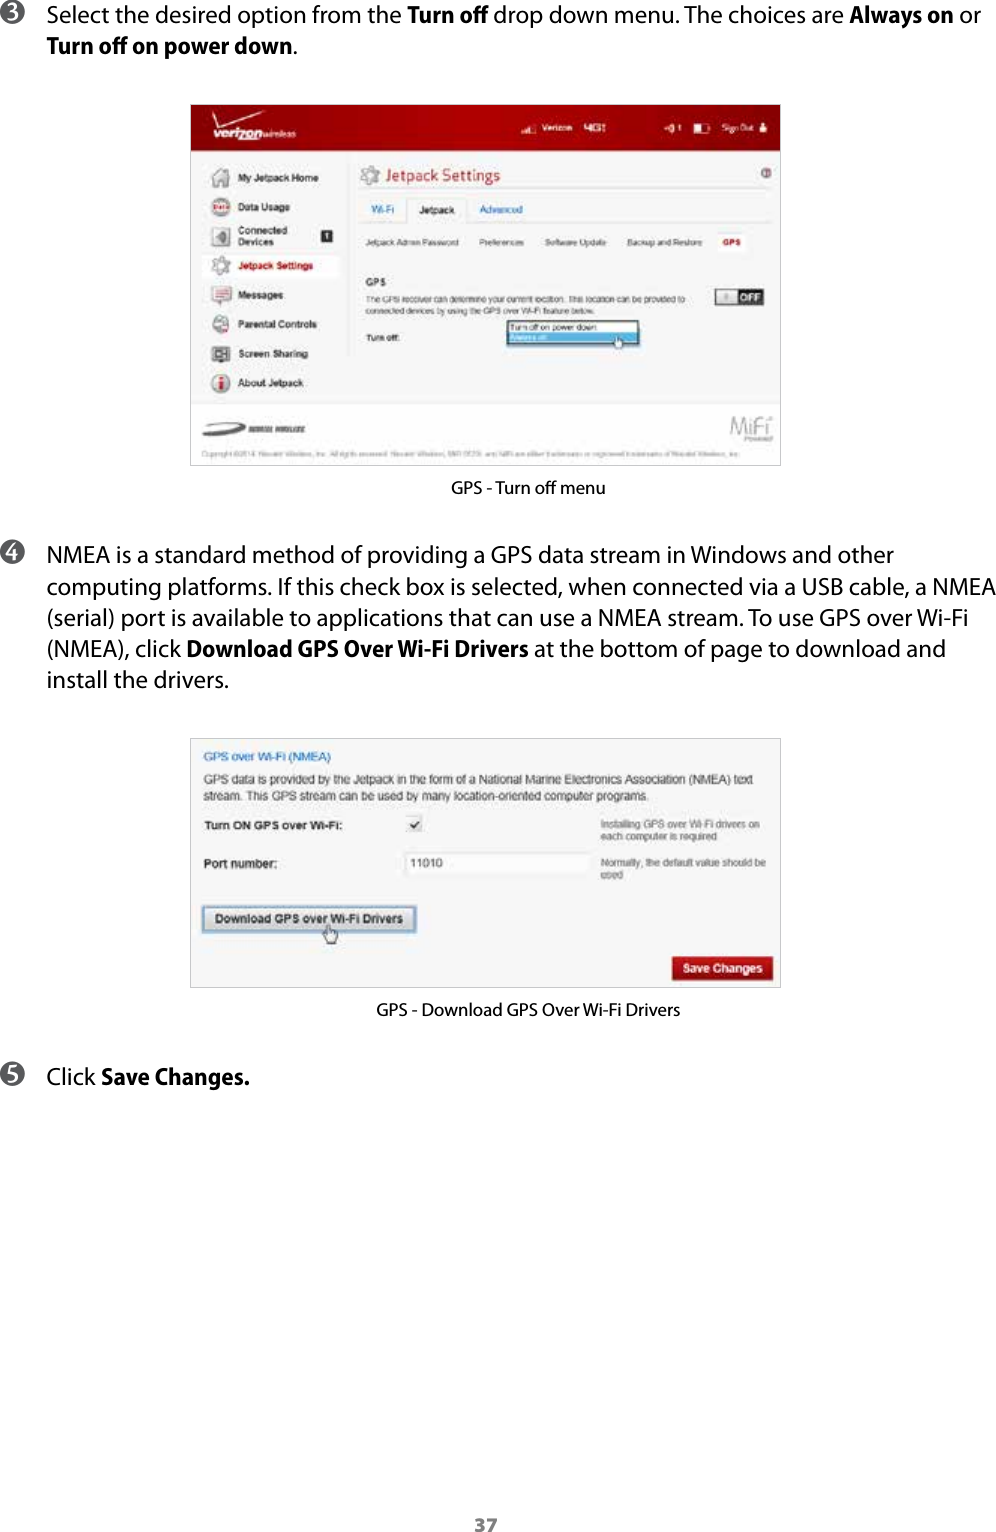
>
Inseego
>
NVWMIFI6620 User Manual
User Manual
Navigation menu
Upload a User Manual
Namespaces
Wiki Guide
HTML
PDF
Info
Views
User Manual
Discussion / Help
Navigation