Insulet 019 UST500 PDM User Manual
Insulet Corporation UST500 PDM
UserManual.wiki
>
Insulet
>
019 User Manual
>
Users manual
Contents
1.
User Manual
2.
User manual
3.
Users manual
Users manual
Navigation menu
Upload a User Manual
Namespaces
Wiki Guide
HTML
PDF
Info
Views
User Manual
Discussion / Help
Navigation


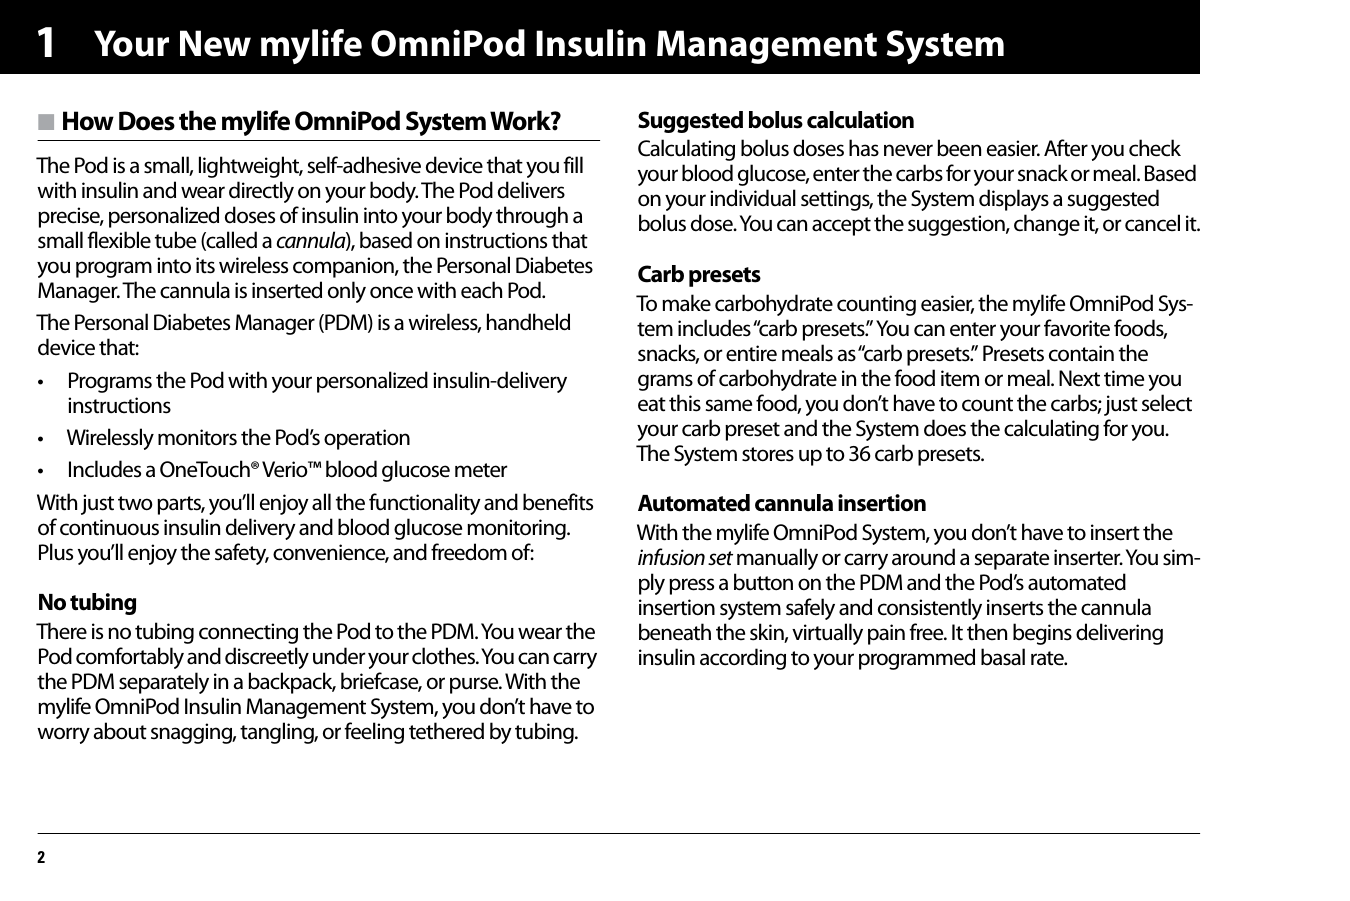

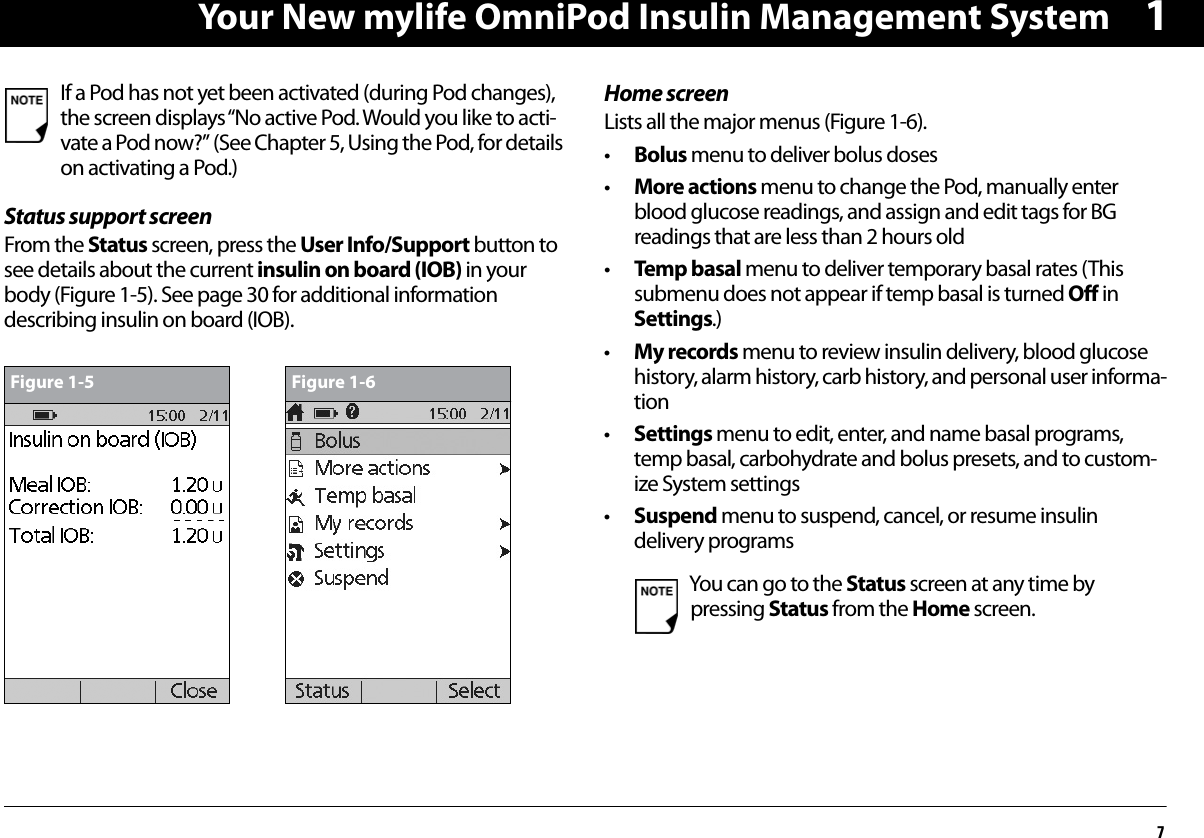
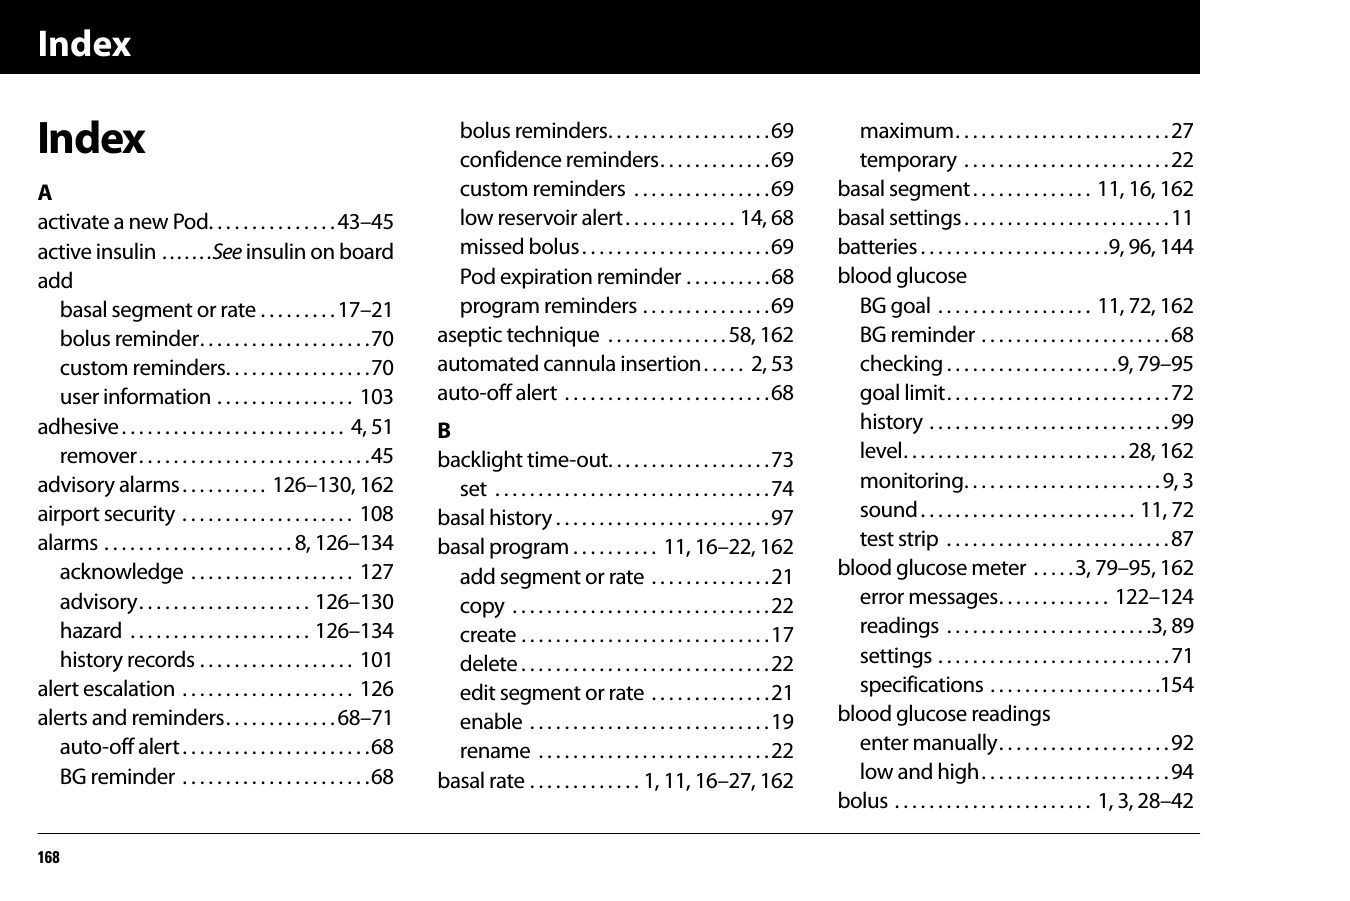
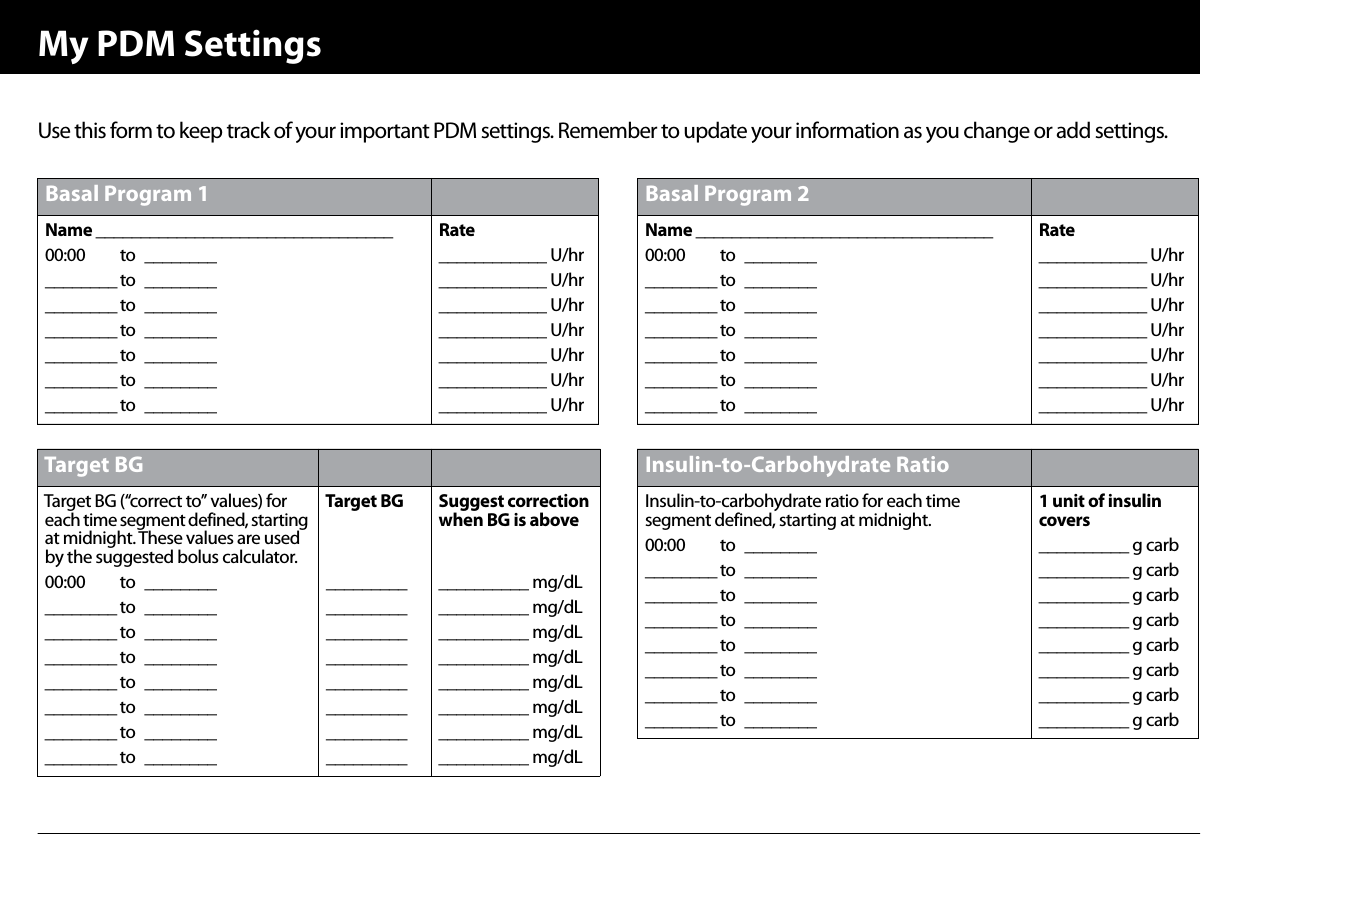
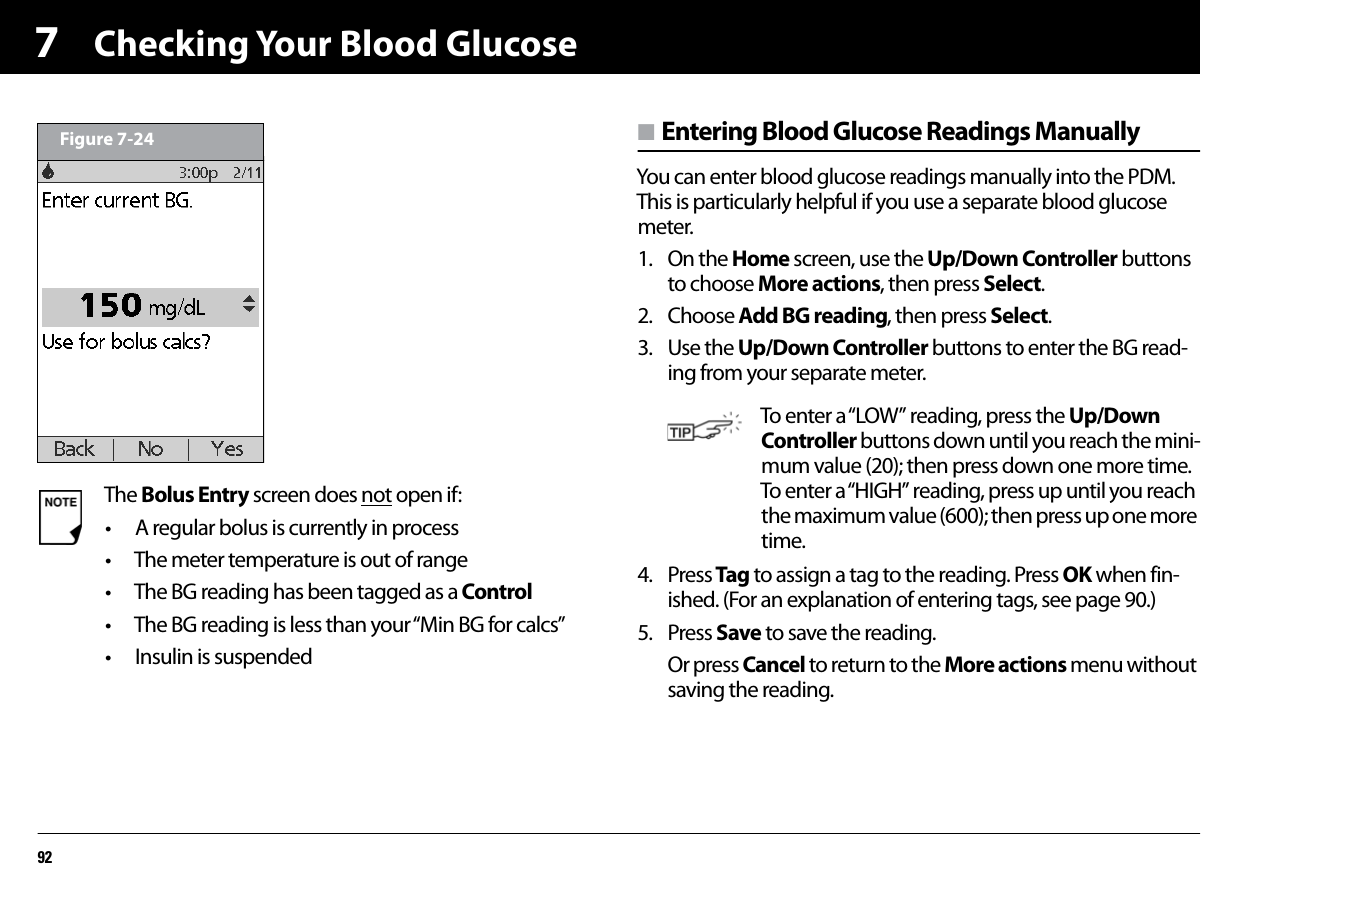
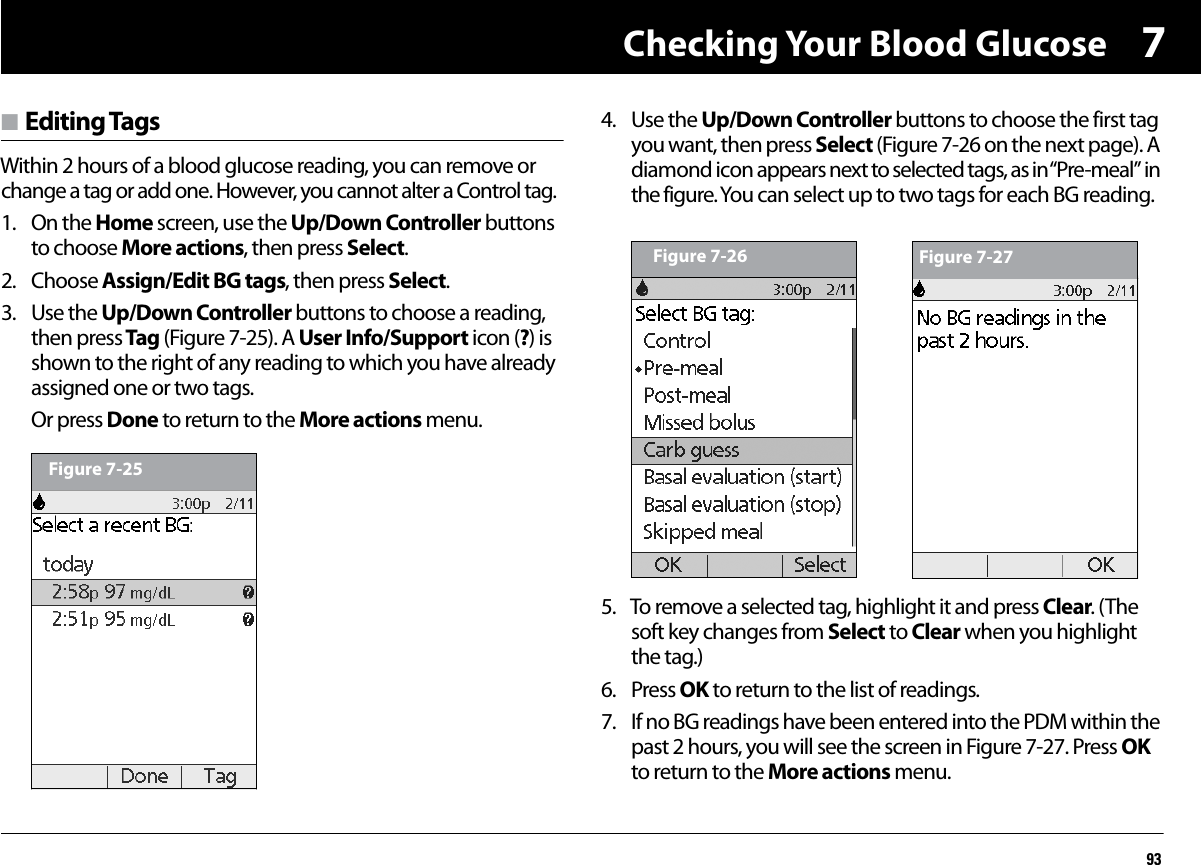
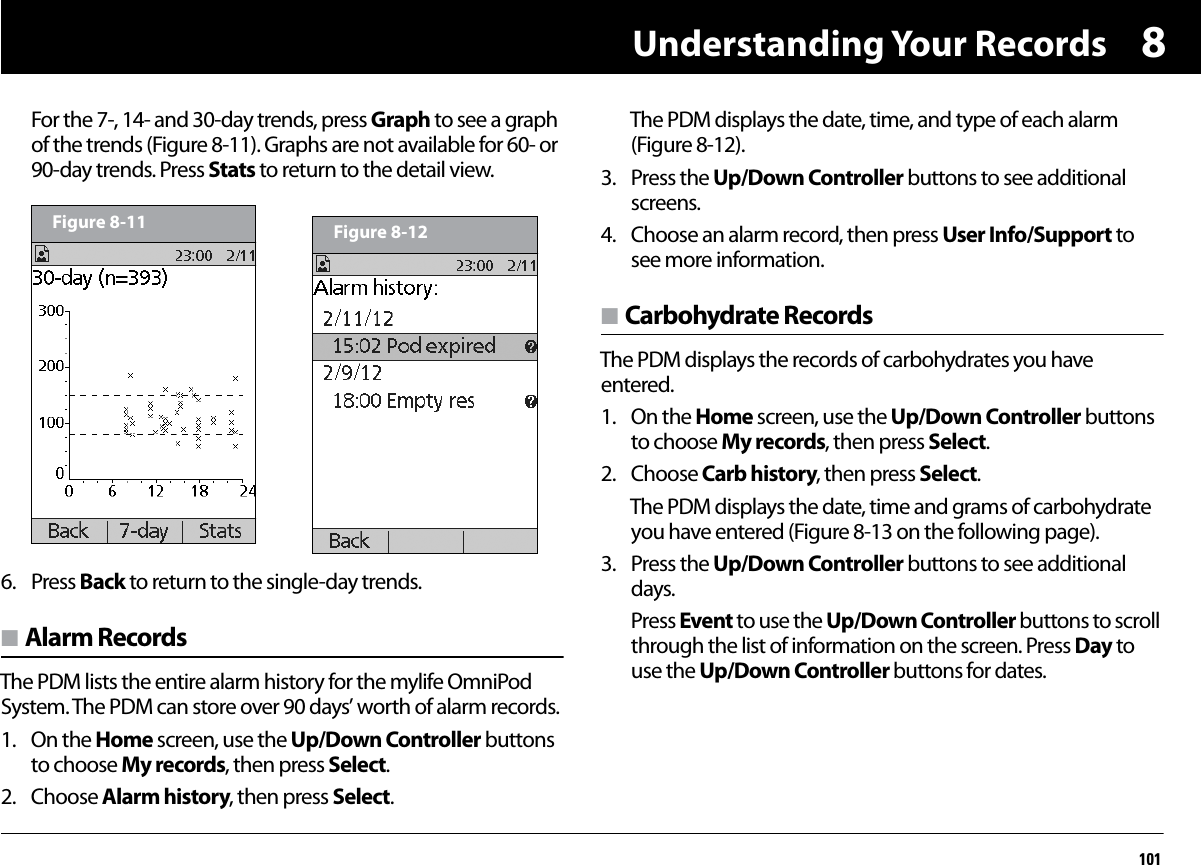
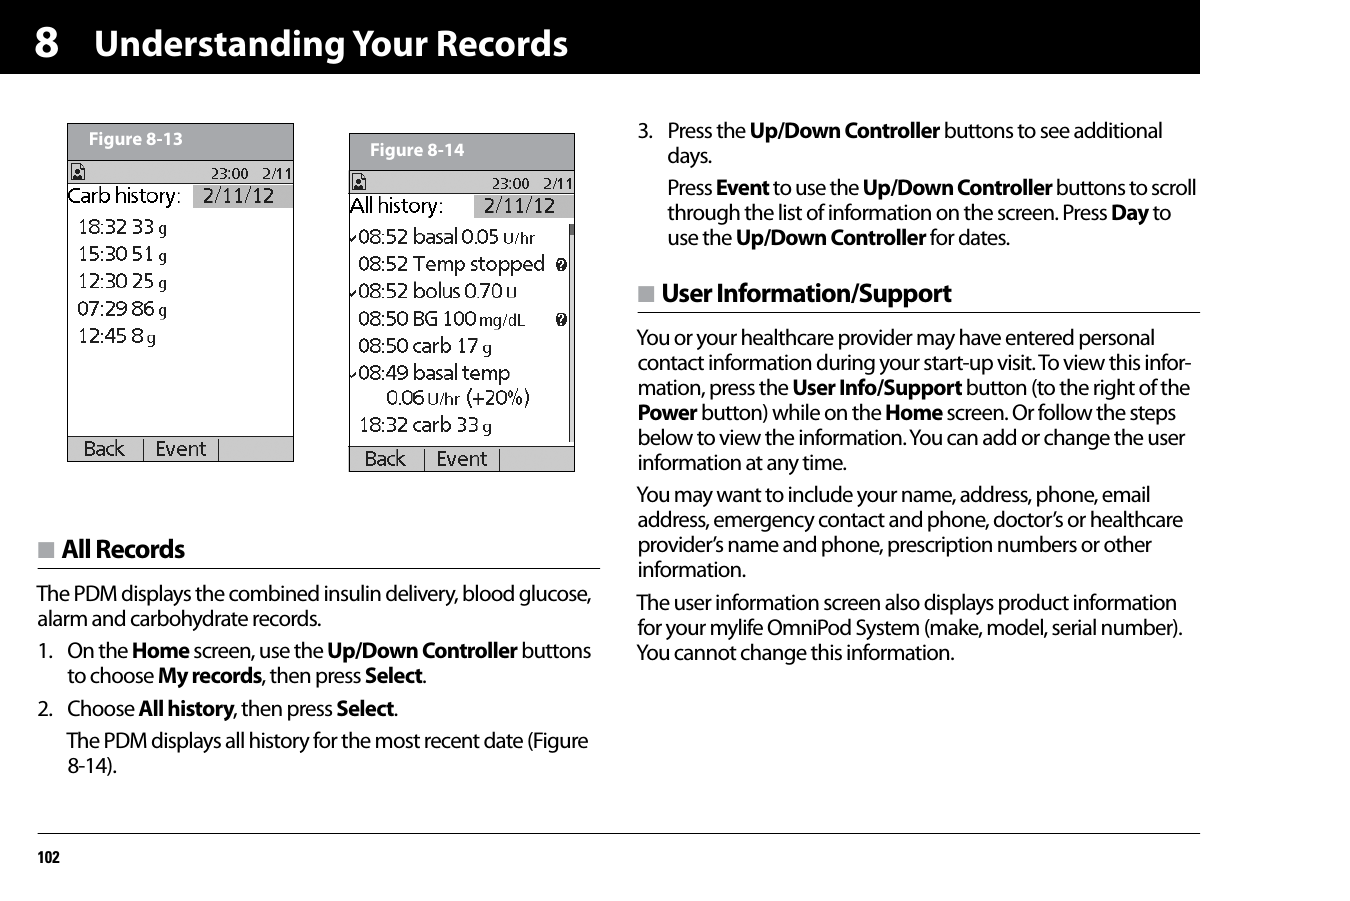
![Getting Started1023. Replace the battery door.4. Turn the PDM face up. The PDM has begun to power on auto-matically.n The mylife OmniPod Setup WizardThe first time you turn on the Personal Diabetes Manager, the Setup Wizard comes on automatically. Although setup is easy with the Wizard, if you are a first-time user, your healthcare pro-vider must guide you through the process. Setup takes only a few minutes and is easy to do:• Use the Up/Down Controller buttons to increase or decrease a number, or to move up or down a list.• Press the Soft Key labeled Next, Select, Done, or Save to con-tinue to the next screen.• Press Back to return to the previous screen. To get started, press Next on the Wizard's Welcome Screen to begin setting up your PDM.Enter your PDM ID1. Use the Up/Down Controller buttons to scroll through the list of characters. An up-and-down-arrow symbol on the screen indicates the character that can be changed.2. Press the middle Soft Key (labeled with the right arrow) to move the underscore to the next character. 3. Enter each character one at a time. For example, if you want to enter your name, you might enter J, a, n, e, [space], S, m, i, t, h. (A blank character or space is the first and last option in the scrolling menu.)4. Press Next.Select the ID screen color1. Use the Up/Down Controller buttons to choose a color, then press Next.The diagram inside the compartment shows you which direction to insert the batteries (Figure 2-2 on the previous page).Do not use any other type of batteries than AAA alkaline batteries to power the PDM. Never use old or used batteries; the PDM may not work properly.Initial settings are “---” [blank] for target blood glucose value, insulin-to-carbohydrate ratio, correction factor, and duration of insulin action.](https://usermanual.wiki/Insulet/019.Users-manual/User-Guide-2090008-Page-22.png)
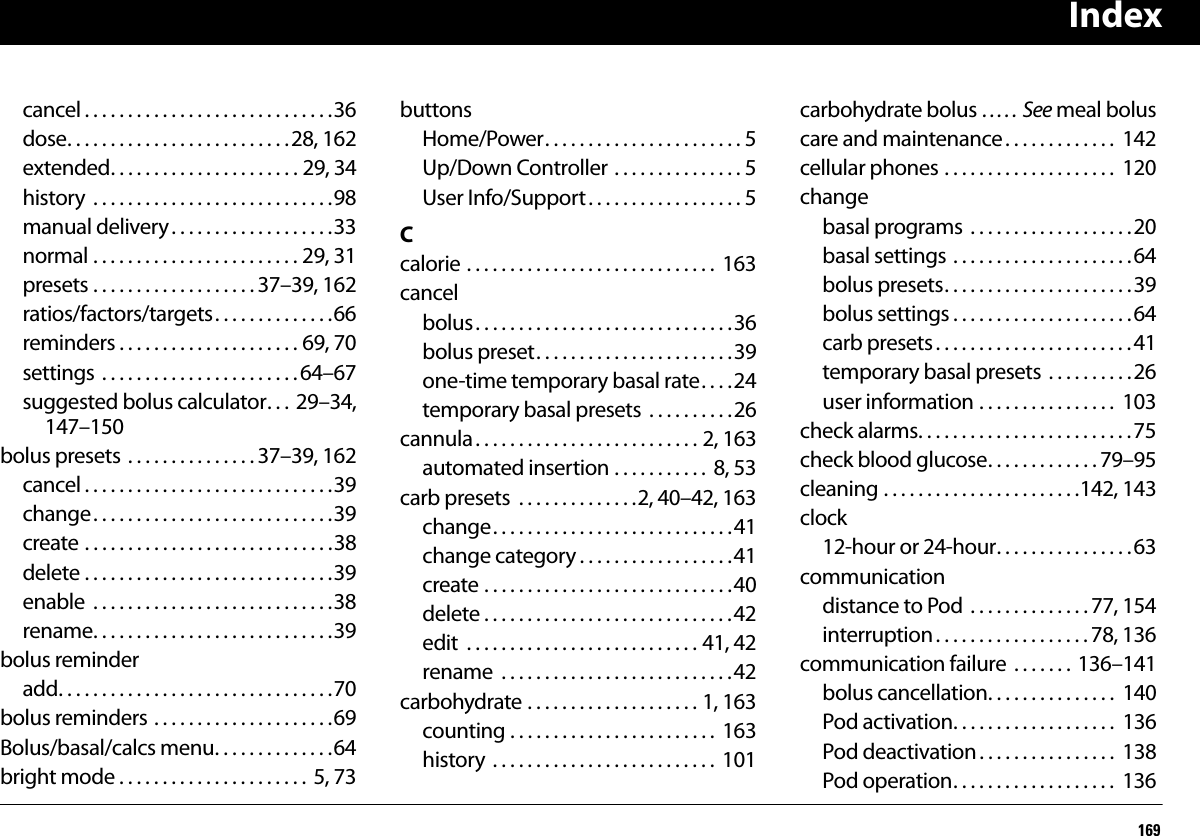
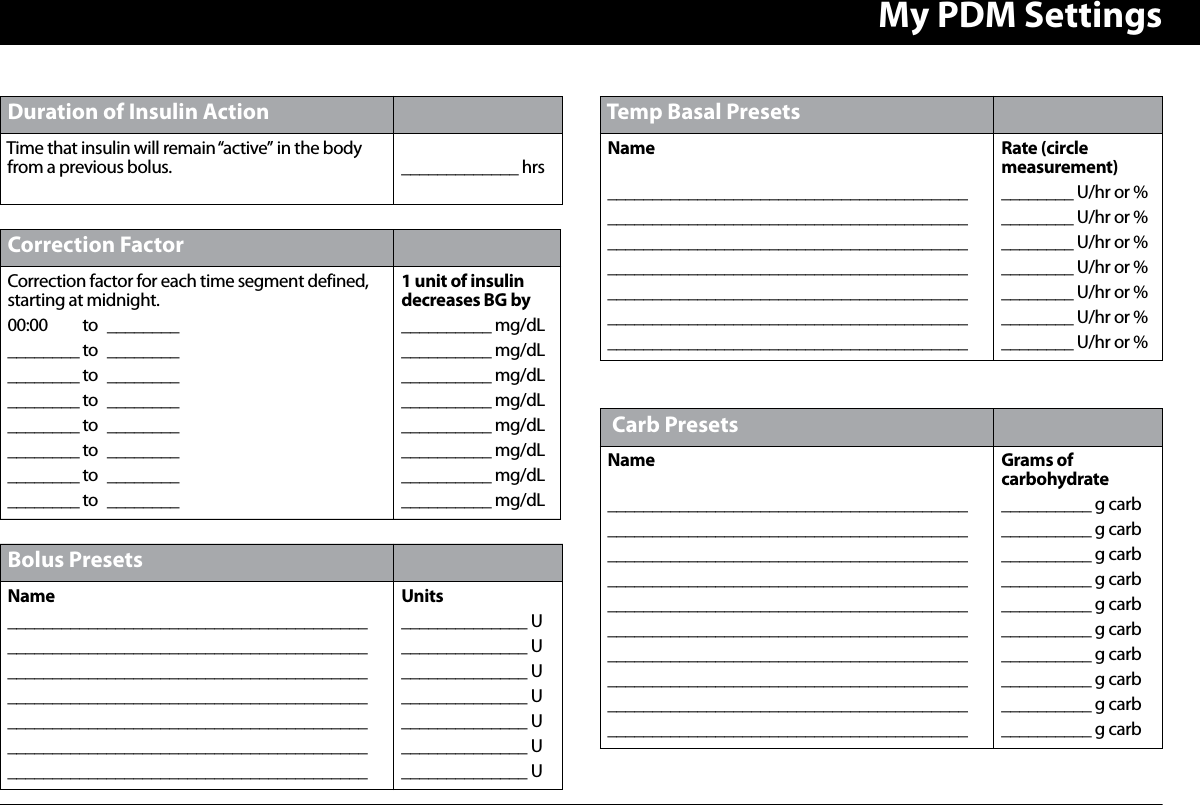
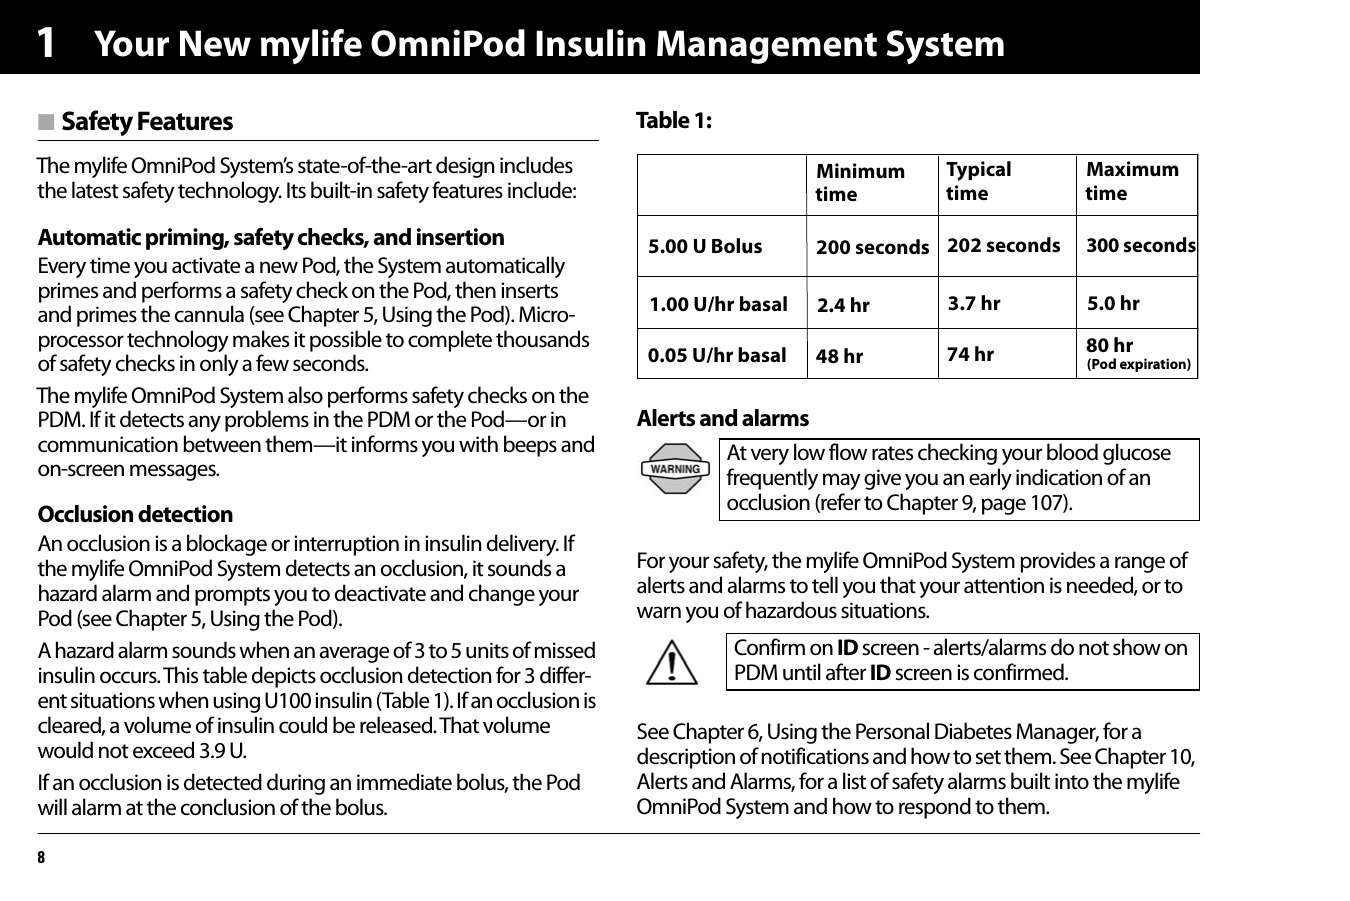
![Getting Started1224. Press Save to accept the BG goal.Set the suggested bolus calculator1. To set the suggested bolus calculator feature, choose On or Off, then press Next. Enter target blood glucose value1. Use the Up/Down Controller button to enter a target blood glucose (BG) value, then press Next.2. Use the Up/Down Controller buttons to enter the “correct above” value or correction threshold (the BG value above which you want the PDM to suggest a correction bolus), then press Next.3. To save the target BG value, press Done. To change these set-tings, select the segment you wish to change and press Edit.You can define up to 8 target BG time segments. To enter additional segments, choose [add new], then:a. Press New. b. Enter a start time for the target BG segment, then press Enter.c. Enter an end time for the target BG segment, then press Next.d. Enter a target blood glucose value, then press Next.Use the Up/Down Controller buttons to enter the “cor-rect above” value or “correction threshold” (the BG value above which you want the PDM to suggest a correction bolus), then press Next.e. When you have finished entering segments, press Done.4. To see the segments as a list, press List. To return to the graphic view, press Graph.5. Press Save to accept the target BG profile you have set.Enter minimum BG allowed for use in bolus calculation1. Use the Up/Down Controller buttons to enter a minimum blood glucose value, below which the System will not calcu-late a suggested bolus. The values are in 0.1 mmol/L incre-ments and range from 2.8 to 3.9 mmol/L.2. Press Next.Check with your healthcare provider before adjust-ing these settings.If the suggested bolus calculator is set to On, perform the following steps. If set to Off, you will be prompted to “Select bolus increment” and “Enter maximum bolus.”If the suggested bolus calculator is On, a correction bolus will be suggested only when your BG is above the value shown in brackets on the screen.](https://usermanual.wiki/Insulet/019.Users-manual/User-Guide-2090008-Page-24.png)
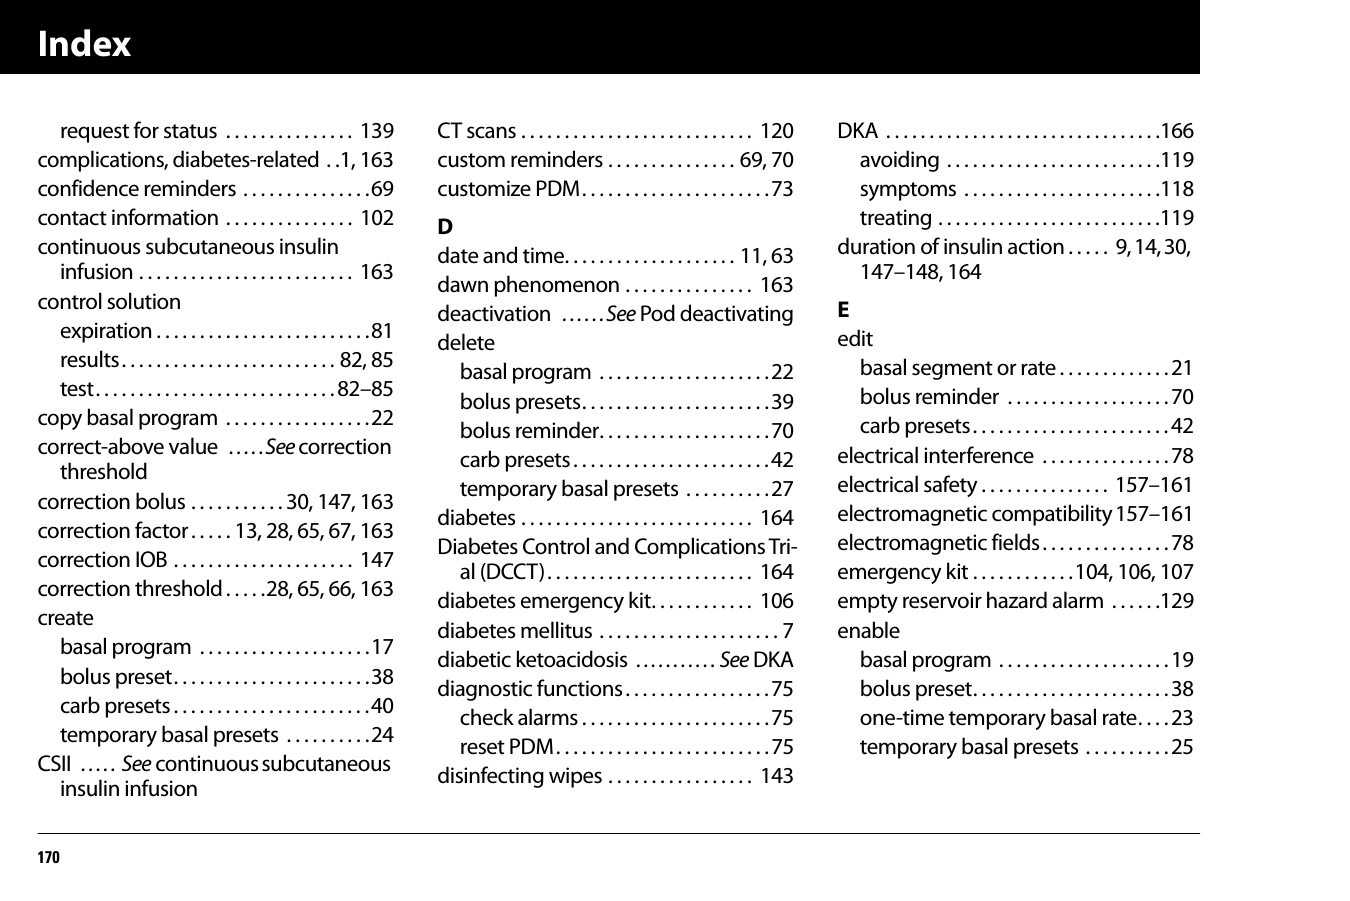
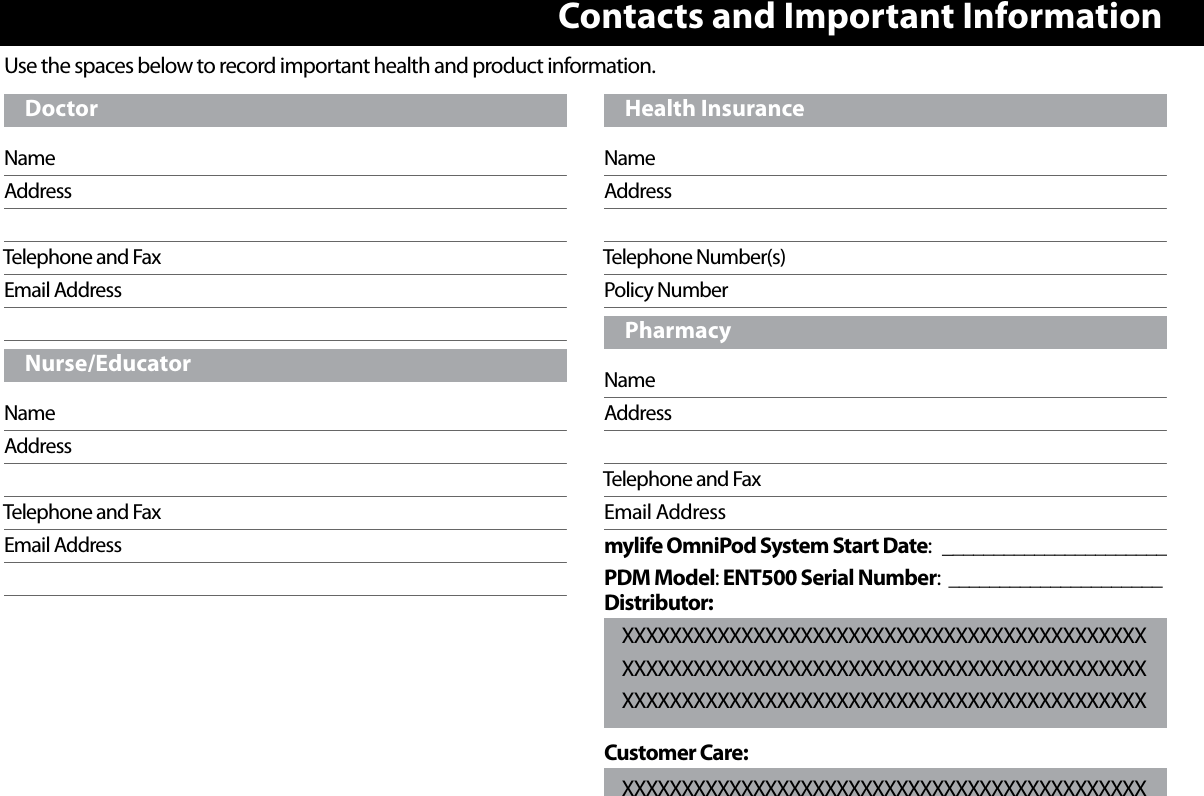
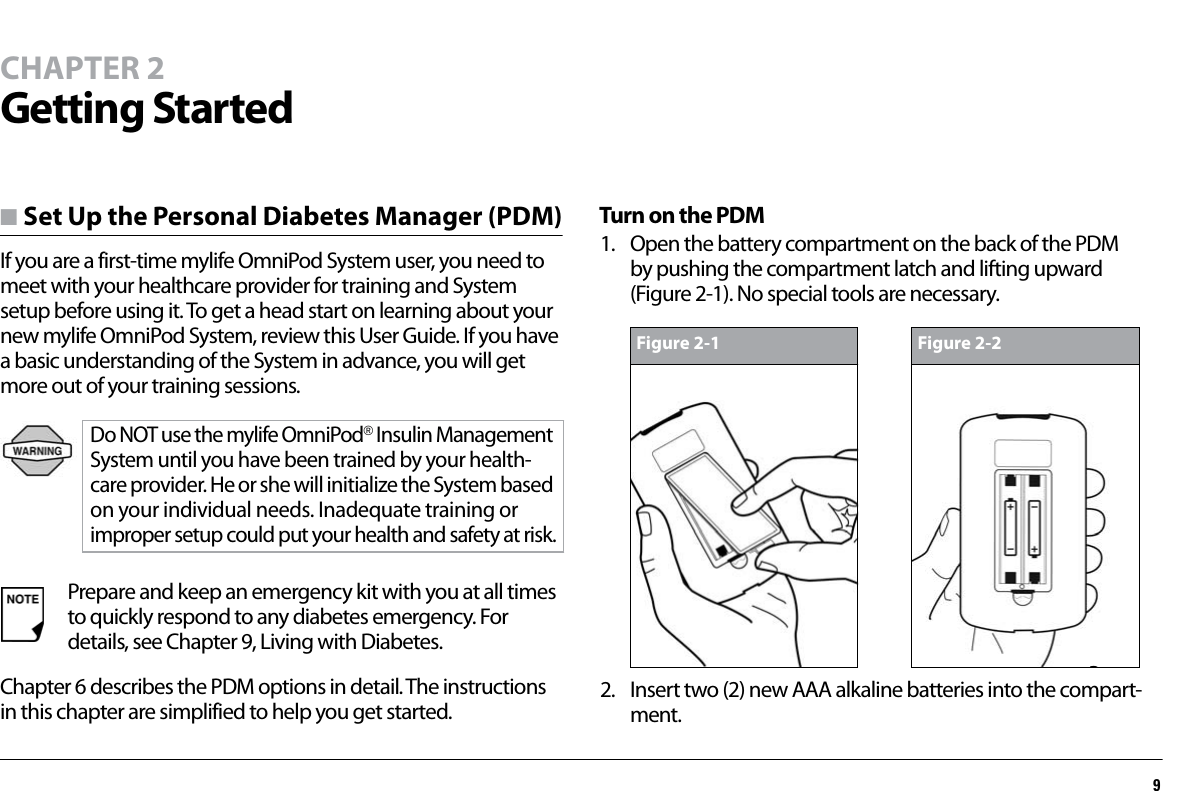
![Getting Started132Enter insulin-to-carbohydrate ratio1. Use the Up/Down Controller buttons to enter your insulin-to-carbohydrate ratio, then press Next. (Insulin-to-carbohy-drate ratio is the number of carbs in grams covered by 1 unit of insulin.)2. To save the ratio, press Done. To change the ratio, select the segment you wish to change and press Edit.You can define up to 8 insulin-to-carbohydrate time seg-ments. To enter additional ratios, choose [add new], then:a. Press New.b. Enter a start time for the segment, then press Next.c. Enter an end time for the segment, then press Next.d. Enter the insulin-to-carb ratio for the new time segment, then press Next.e. To save the new ratio, press Done.3. To see the ratios as a list, press List. To return to the graphic view, press Graph.4. Press Save to accept the ratios you have set.Enter correction factor1. Use the Up/Down Controller buttons to enter how much one unit of insulin decreases your blood glucose, then press Next.2. To save the correction factor, press Done. To change the factor, select the segment you wish to change and press Edit.You can define correction factors for up to 8 time segments. To enter additional correction factors, choose [add new], then:a. Press New.b. Enter a start time for the segment, then press Next.c. Enter an end time for the segment, then press Next.d. Enter the correction factor, then press Next.e. To save the new correction factor segment, press Done.3. To see the factors as a list, press List. To return to the graphic view, press Graph.4. Press Save to accept the correction factors you have set.Set reverse correction1. To set reverse correction, use the Up/Down Controller buttons to choose On or Off, then press Next.If you enter carbs and reverse corrections are On, the System will subtract insulin from the suggested meal bolus to compensate for a low blood glucose (below the BG target you set). With reverse corrections Off, the System will not subtract insulin from the sug-gested meal bolus dose due to a low BG. Follow your healthcare provider’s recommendation to set reverse correction On or Off.](https://usermanual.wiki/Insulet/019.Users-manual/User-Guide-2090008-Page-25.png)

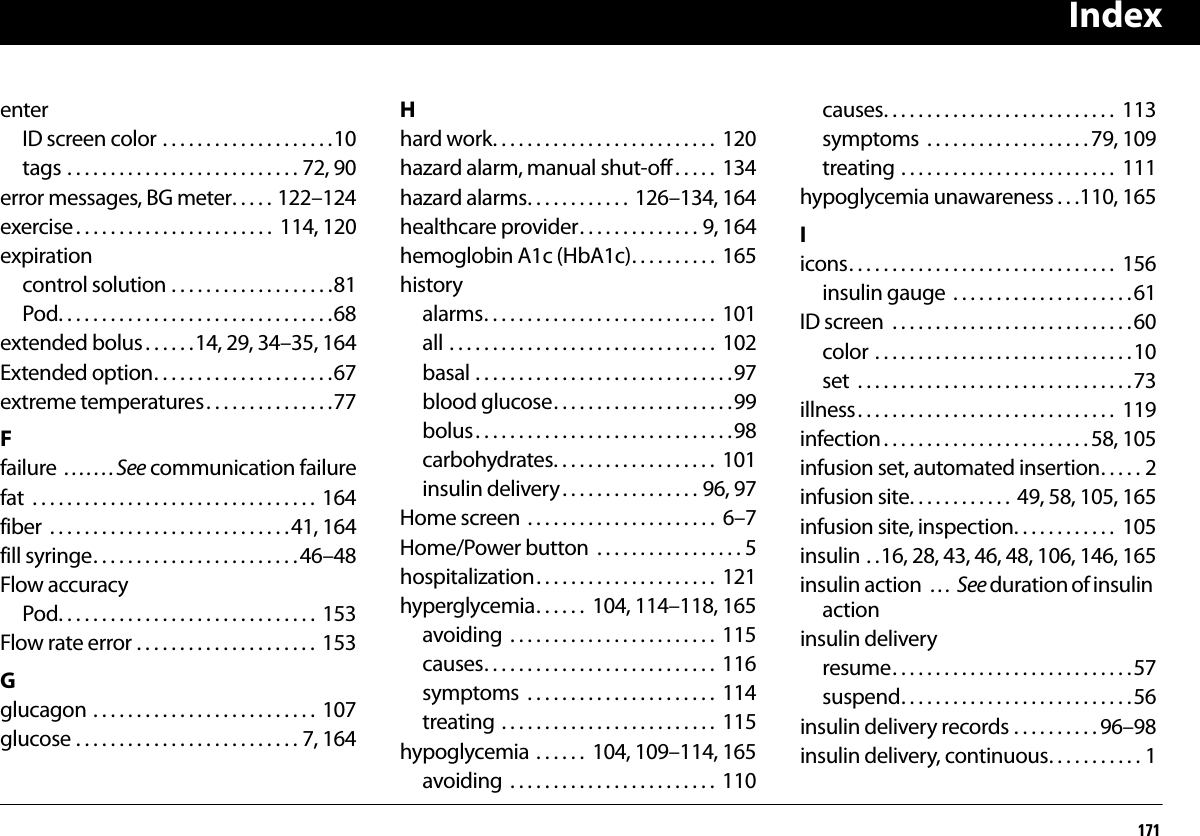
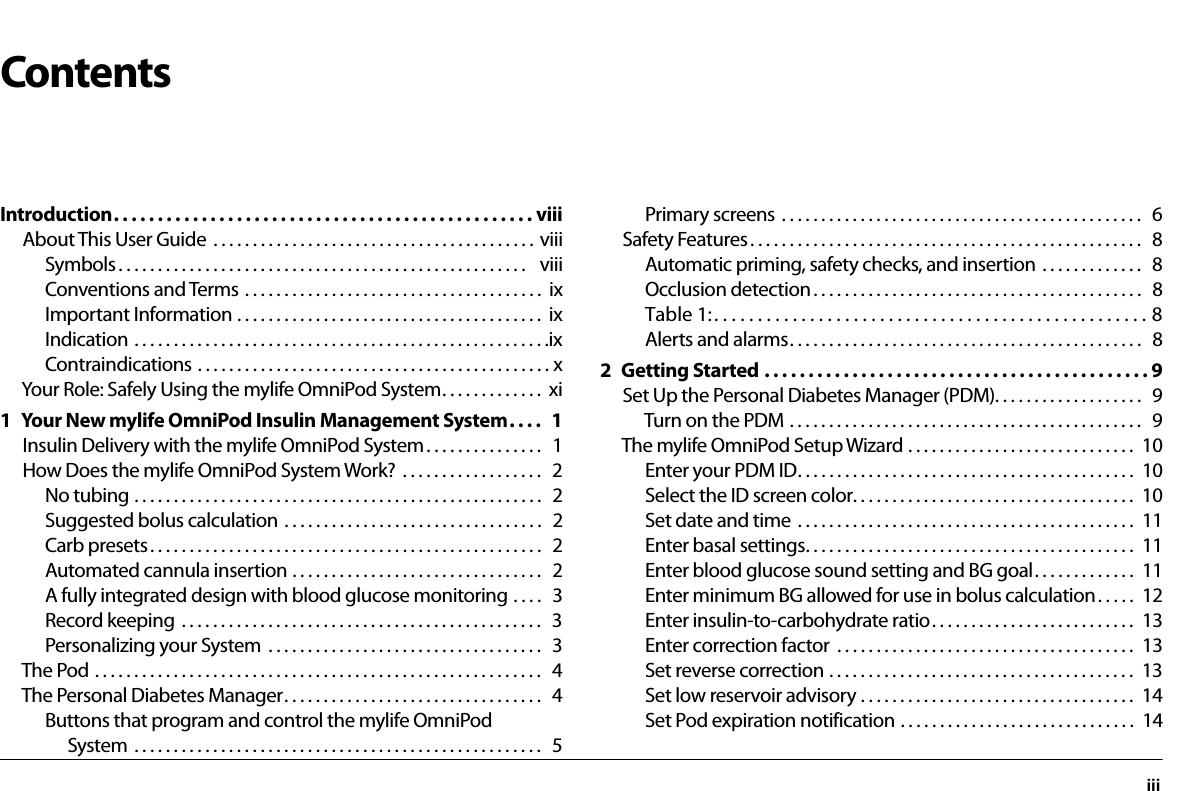
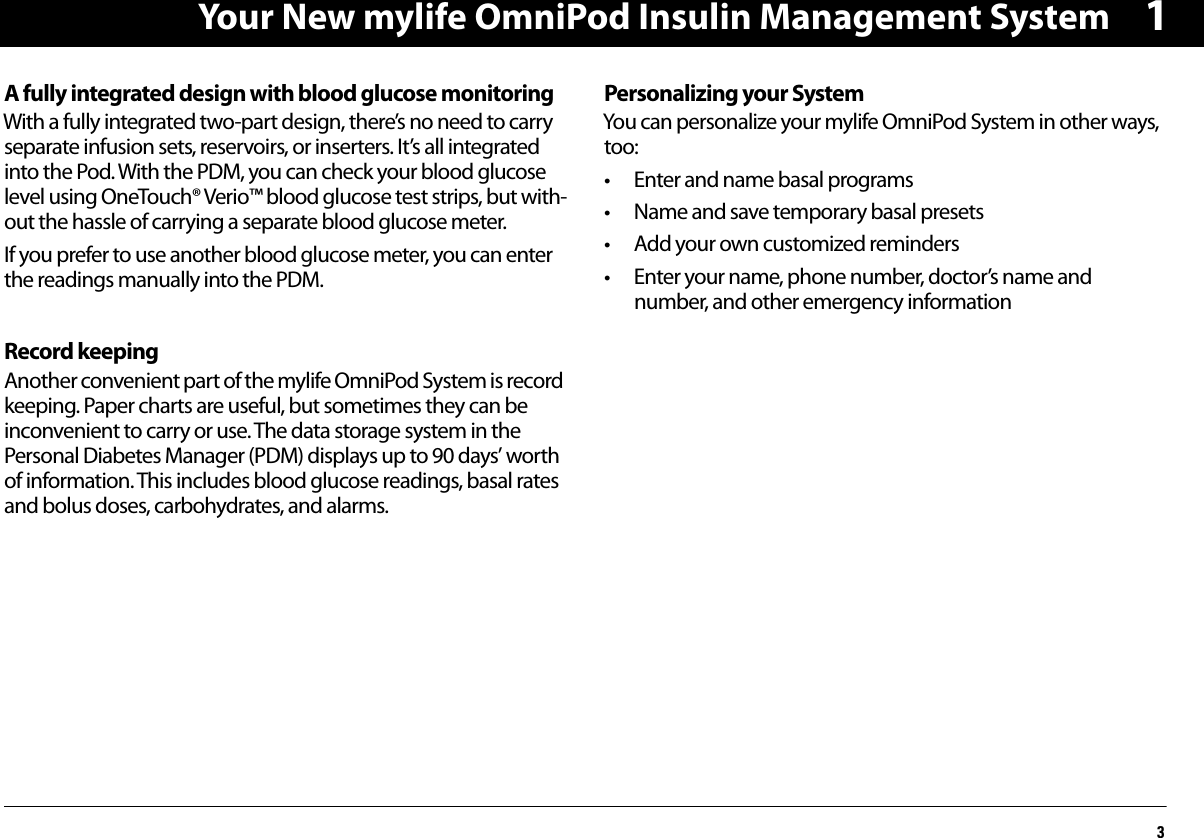
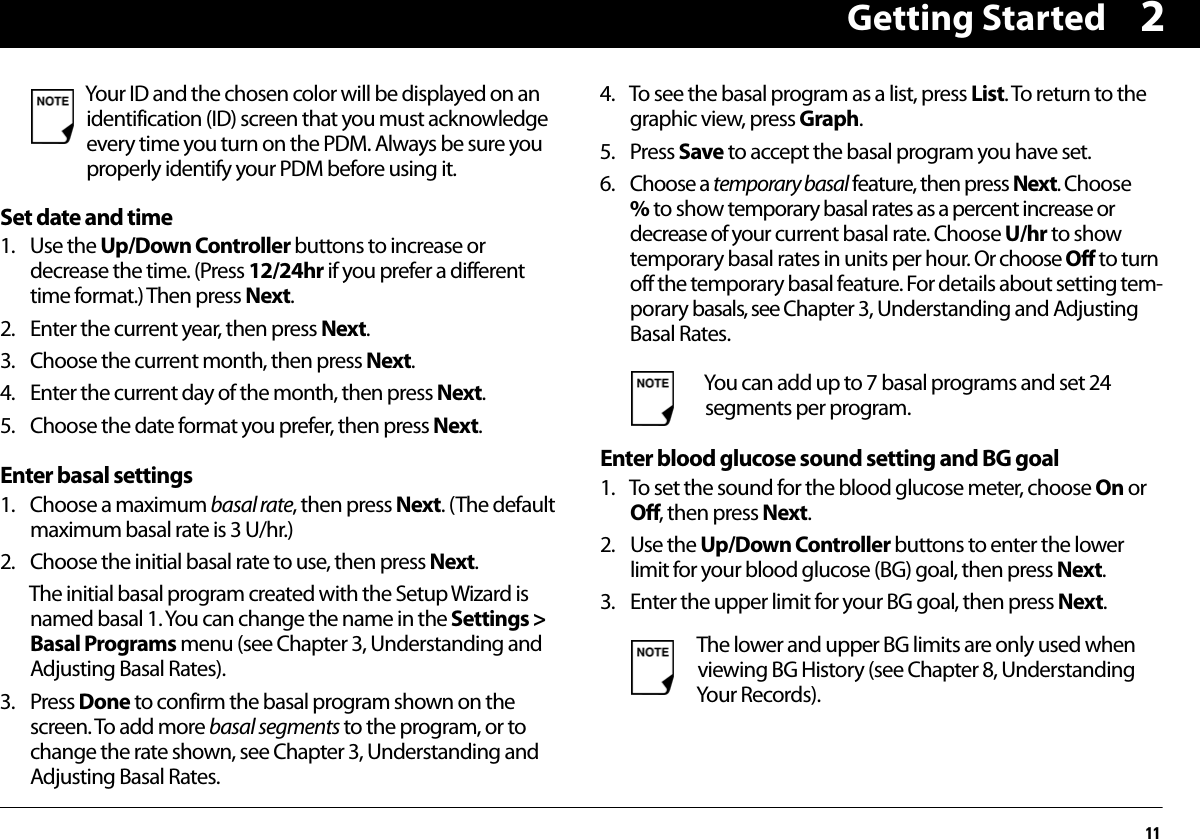
![Understanding and Adjusting Basal Rates173In addition to normal daily changes, insulin needs can vary with different routines or days of the week. For example, regular school or workday routines may differ from weekend routines, and insulin needs may differ, too. With your healthcare provider, you will decide on the basal rates that best match your lifestyle and insulin needs. You will enter at least one basal program (your Basal 1 Program) into your PDM during the setup process (see Chapter 2, Getting Started). You can add other programs later as you fine-tune your System settings or when your needs change.You can also create temporary basal presets to use on occasions when you need to adjust your basal rate for a short period of time. See “Temporary Basal Rates and Presets” later in this chapter.Create a basal programThe Personal Diabetes Manager can store up to 7 different basal programs. Each program can contain 24 rates, programmed in half-hour increments. Once you enter a basal program into the PDM, you only need to press a few buttons to pick the program you want. The Pod continues to deliver insulin at those rates until you change that program or switch to another one.1. On the Home screen, use the Up/Down Controller buttons to choose Settings; then press Select.2. Choose Basal programs (Figure 3-1), then press Select. 3. Choose [add new] (Figure 3-2), then press New.4. To use the default naming system, simply press Next. The default naming system automatically assigns program names in numerical order, such as basal 1, basal 2, basal 3.If you want to give a different name to the program:a. Press the Up/Down Controller buttons to scroll through the list of characters. An up-and-down arrow symbol on the screen indicates the character that can be changed.Check with your healthcare provider before adjust-ing these settings.Figure 3-1 Figure 3-2](https://usermanual.wiki/Insulet/019.Users-manual/User-Guide-2090008-Page-29.png)
![Understanding and Adjusting Basal Rates183b. Press the middle Soft Key (labeled with the right arrow) to move the underscore to the next character. c. Enter each character one at a time. For example, if your weekend schedule is different from your weekday sched-ule, you might enter W, e, e, k, e, n, d (Figure 3-3). (A blank character or space is the first and last option in the scroll-ing menu.) d. Press Next. 5. Enter the rate, in U/hr, for the first basal segment (from 0.05 to the maximum you entered during setup), then press Next.6. Review the list showing your new basal program.To use the same basal rate for the entire 24-hour program, press Done and continue with step 7.Or, to add basal segments and rates (for example, a higher basal rate between 08:00 and 15:00):a. Choose an existing basal segment, then press Edit.Or, choose [add new], then press New.b. Enter the start time (for example, 08:00), then press Next. Basal segments are in 30-minute increments.c. Enter the end time (for example, 15:00), then press Next.d. Enter the rate for the new basal segment (for example, 0.80 U/hr), then press Next.Figure 3-3 Figure 3-4As a safety feature, the words “Invalid basal program name” (Figure 3-4) appear if the name you entered does not have at least one character or if the name is being used for another basal program. Capitals and lowercase letters are considered the same. Press OK to return to the previous screen and enter a different name.Basal rates outside the changed segment do not change.](https://usermanual.wiki/Insulet/019.Users-manual/User-Guide-2090008-Page-30.png)
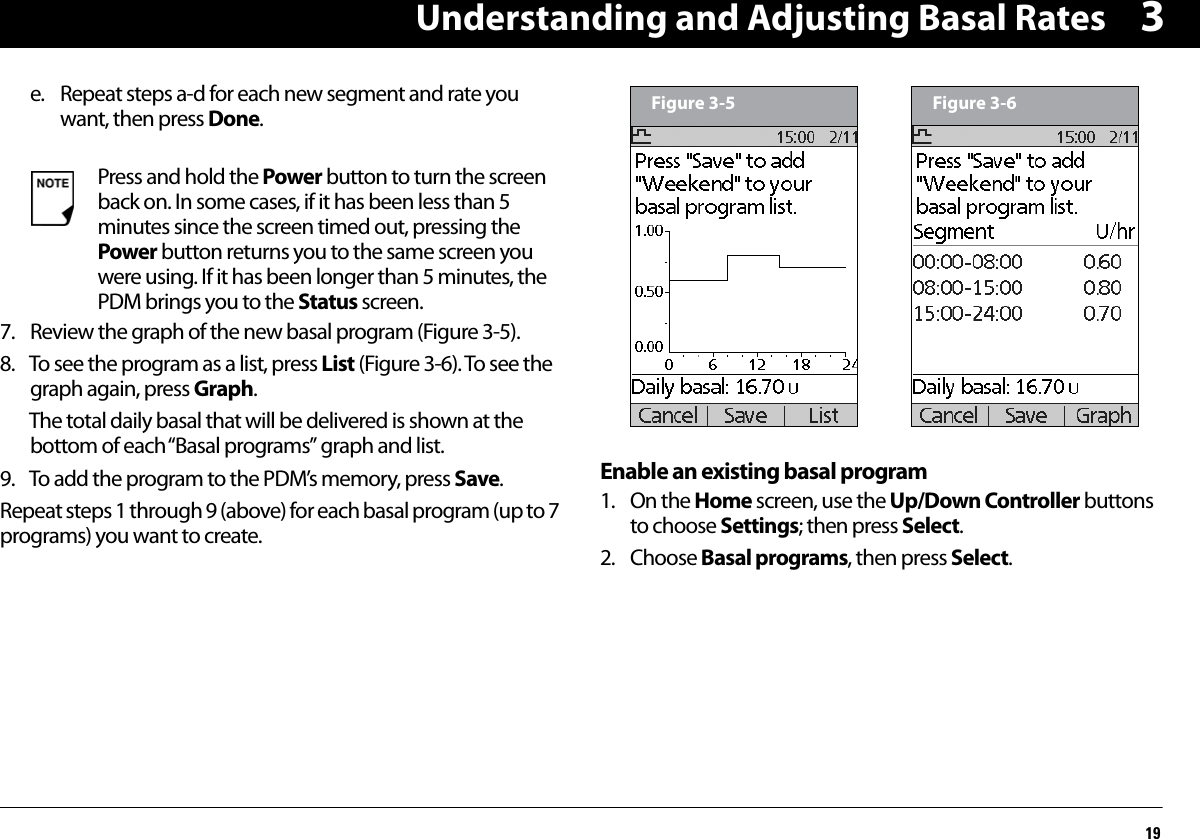
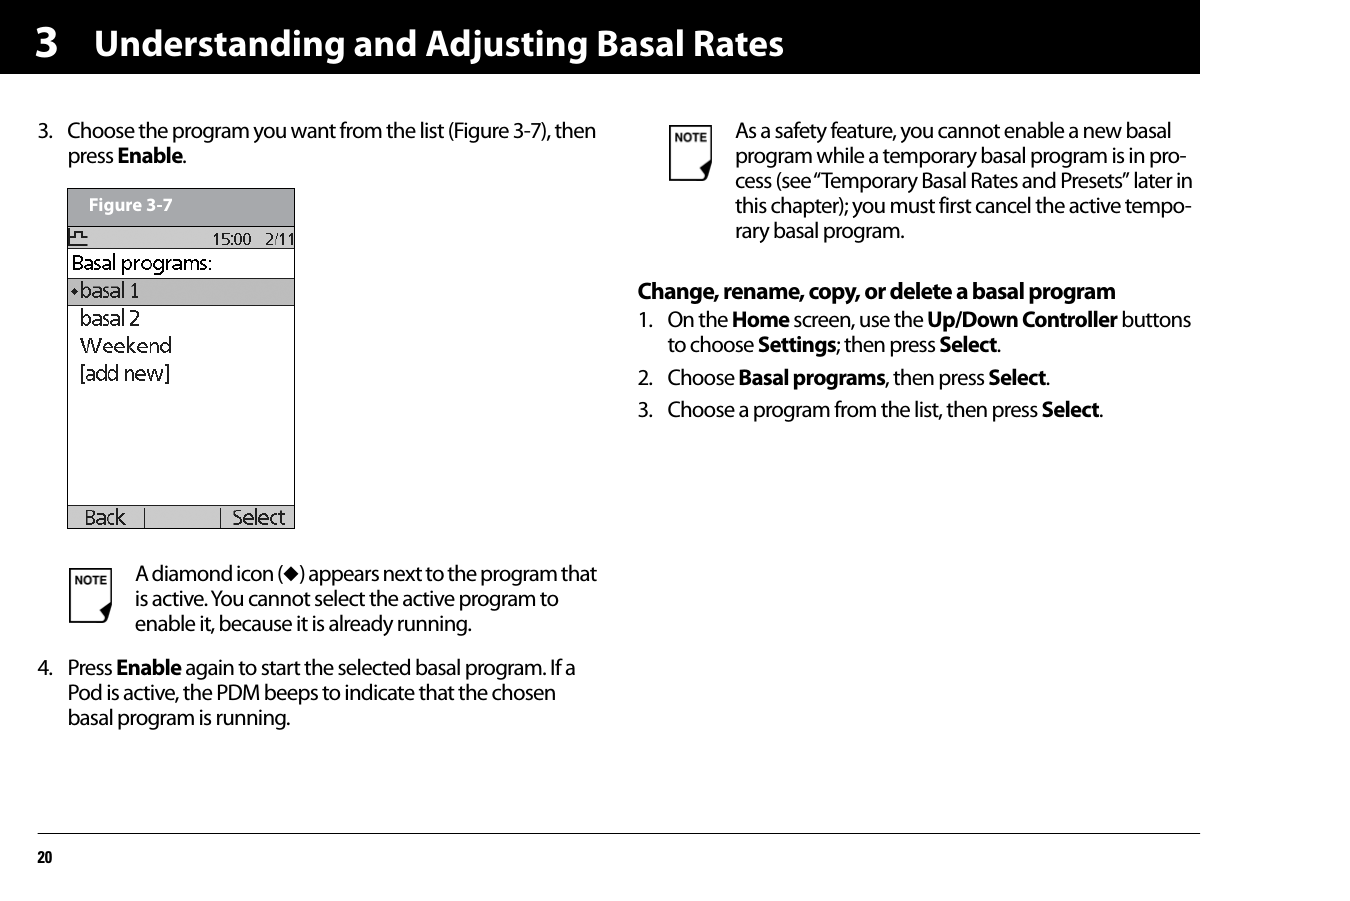
![Understanding and Adjusting Basal Rates213To view the segments of the basal program1. Choose View, then press Select (Figure 3-8).To edit or add a segment or rate in the basal program1. Choose Edit, then press Select. 2. Choose the segment to change, then press Edit (Figure 3-9).Or, choose [add new], then press New.3. Enter a start time for the segment you want to change, then press Next.4. Enter an end time for this segment, then press Next.5. Enter a basal rate for the new segment, then press Enter.6. To save the newly entered segment into the basal program, press Save (Figure 3-10). If you want to make additional edits, repeat steps 2–5.7. To see the program as a list, press List. To see the graph again, press Graph.As a safety feature, you must suspend insulin delivery before editing an active basal program (see Chapter 5, Using the Pod). Remember to resume delivery after the edits are made.Figure 3-8 Figure 3-9Figure 3-10](https://usermanual.wiki/Insulet/019.Users-manual/User-Guide-2090008-Page-33.png)
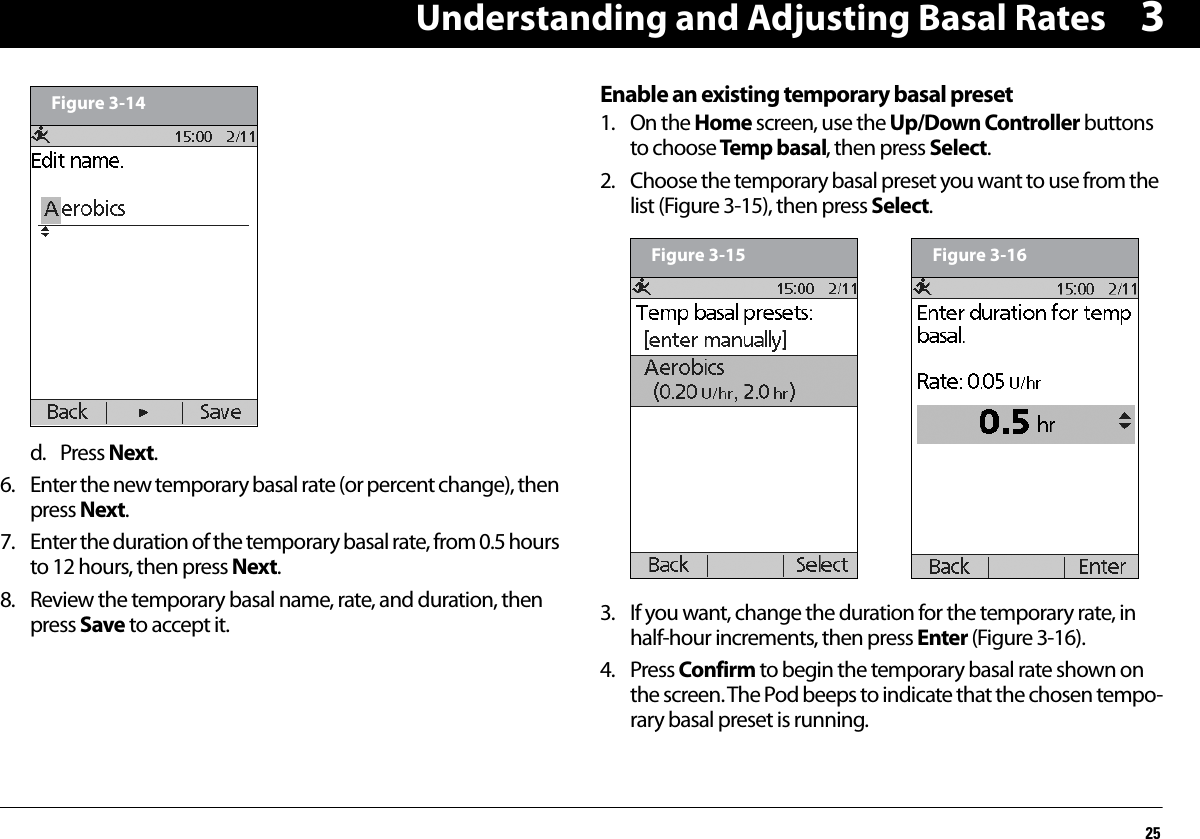
![Understanding and Adjusting Basal Rates233change. To easily handle predictable, short-term changes, you can “preset” a temporary basal rate, so it is ready whenever you need it. The PDM can remember up to 7 temporary basal presets.You can set a temporary basal rate for a duration of 30 minutes to 12 hours. Once the time limit is reached, the System automati-cally returns to the active basal program. When using units per hour, the mylife OmniPod System allows you to set temporary basal rates from 0.0 U/hr, up to your max basal rate. When using percent rate, you can set temporary basal rates from “Off” to +95% of your active rate, as long as the tem-porary rate is less than or equal to your max basal rate. Another limit on the temp basal rate when configured in % is that the rate cannot be decreased such that the resultant flow rate will be less than 0.05 U/hr. Example – if flow rate is 0.10 U/hr, you can’t create a temp basal of -60%.See the sections below on creating, enabling, cancelling, and changing temporary basal presets.Enable a one-time temporary basal rate1. On the Home screen, use the Up/Down Controller buttons to choose Temp basal, then press Select.2. If you have created temp basal presets, choose [enter manu-ally] from the list, then press Select.If you have not created any temp basal presets, the PDM skips this step.3. Enter the temporary basal rate in either units per hour (Figure 3-11) or percent change (Figure 3-12), depending on how you choose to show the rates, then press Enter. 4. Enter the duration for the temporary rate, then press Enter.5. Press Confirm to start the temporary basal rate shown on the screen. The Pod beeps to indicate that the temporary basal rate is running.During initial setup, you and your healthcare provider either turned Off temporary basal rates, or chose to show the rates as % or U/hr. To change this setting, see Chapter 6, Using the Personal Diabetes Manager.Figure 3-11 Figure 3-12](https://usermanual.wiki/Insulet/019.Users-manual/User-Guide-2090008-Page-35.png)
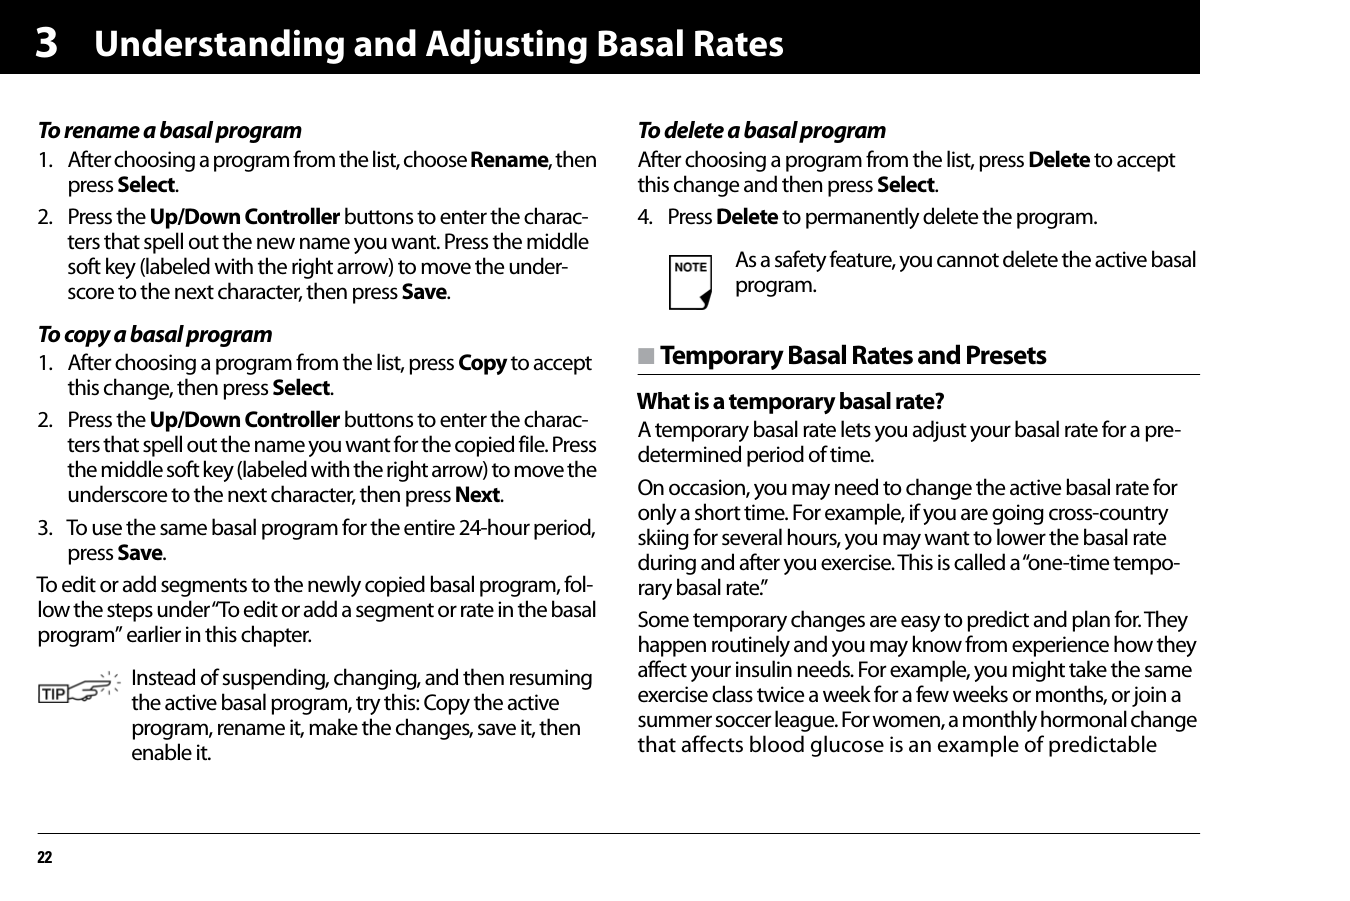
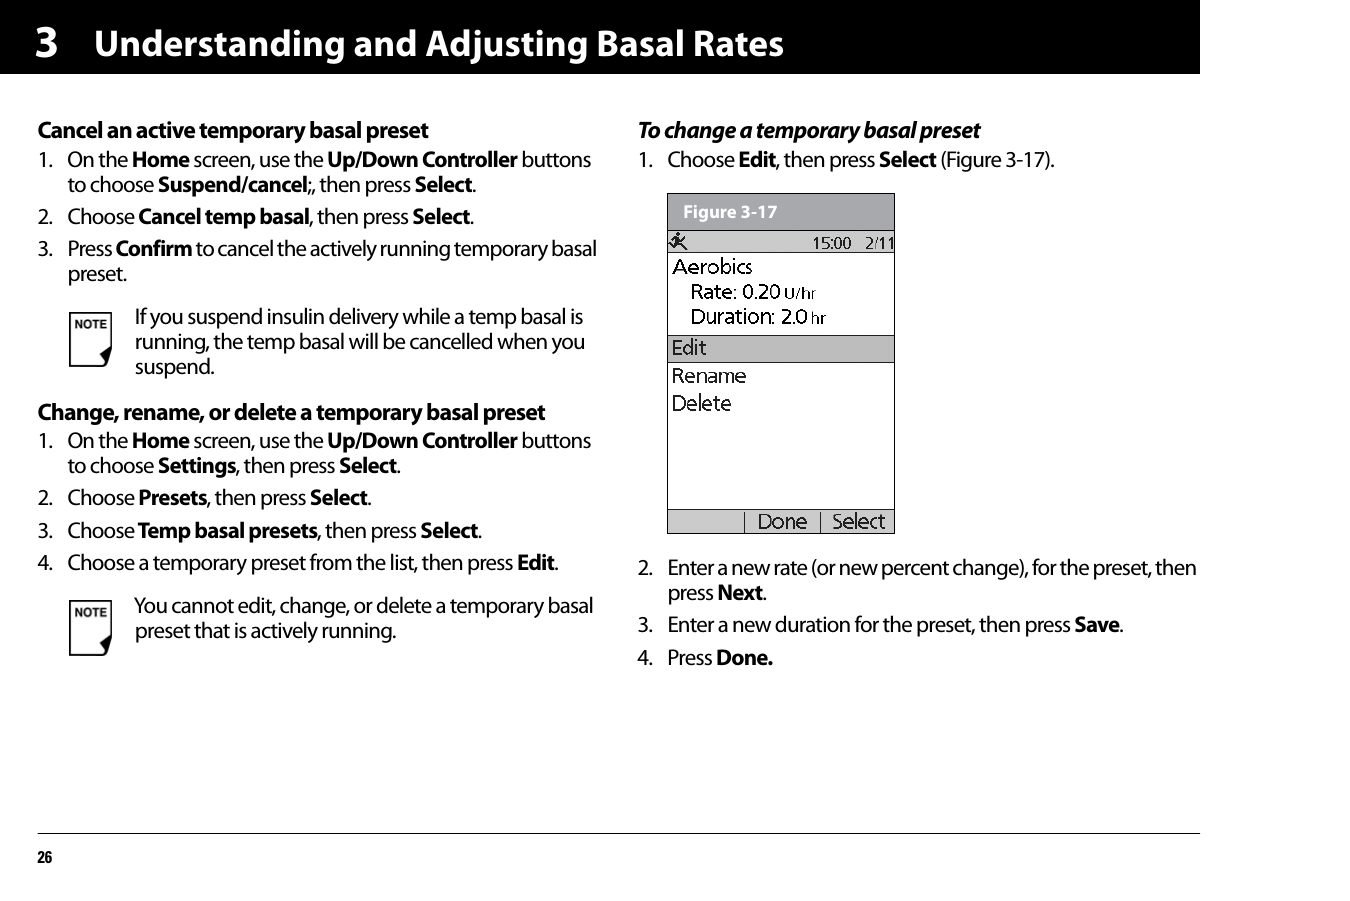
![Understanding and Adjusting Basal Rates243Cancel a one-time temporary basal rate1. On the Home screen, use the Up/Down Controller buttons to choose Suspend/cancel, then press Select.2. Choose Cancel temp basal (Figure 3-13), then press Select. 3. Press Confirm to cancel the temporary basal shown on the screen.Create a temporary basal preset1. On the Home screen, use the Up/Down Controller buttons to choose Settings, then press Select.2. Choose Presets, then press Select.3. Choose Temp basal presets, then press Select.4. Choose [add new], then press New.5. To use the mylife OmniPod System’s default naming system, simply press Next. The default naming system automatically assigns program names in numerical order, such as temp basal 1, temp basal 2, temp basal 3.Or, to give a different name to the program:a. Press the Up/Down Controller buttons to scroll through the list of characters. An up-and-down arrow symbol on the screen indicates which character can be changed.b. Press the middle Soft Key to move the underscore to the next character.c. Enter each character one at a time. For example, if you take an aerobics class two nights a week, you might enter A, e, r, o, b, i, c, s (Figure 3-14 on the next page). (A blank character or space is the first and last option in the scroll-ing menu.) Figure 3-13Capitals and lowercase letters are considered the same.](https://usermanual.wiki/Insulet/019.Users-manual/User-Guide-2090008-Page-36.png)
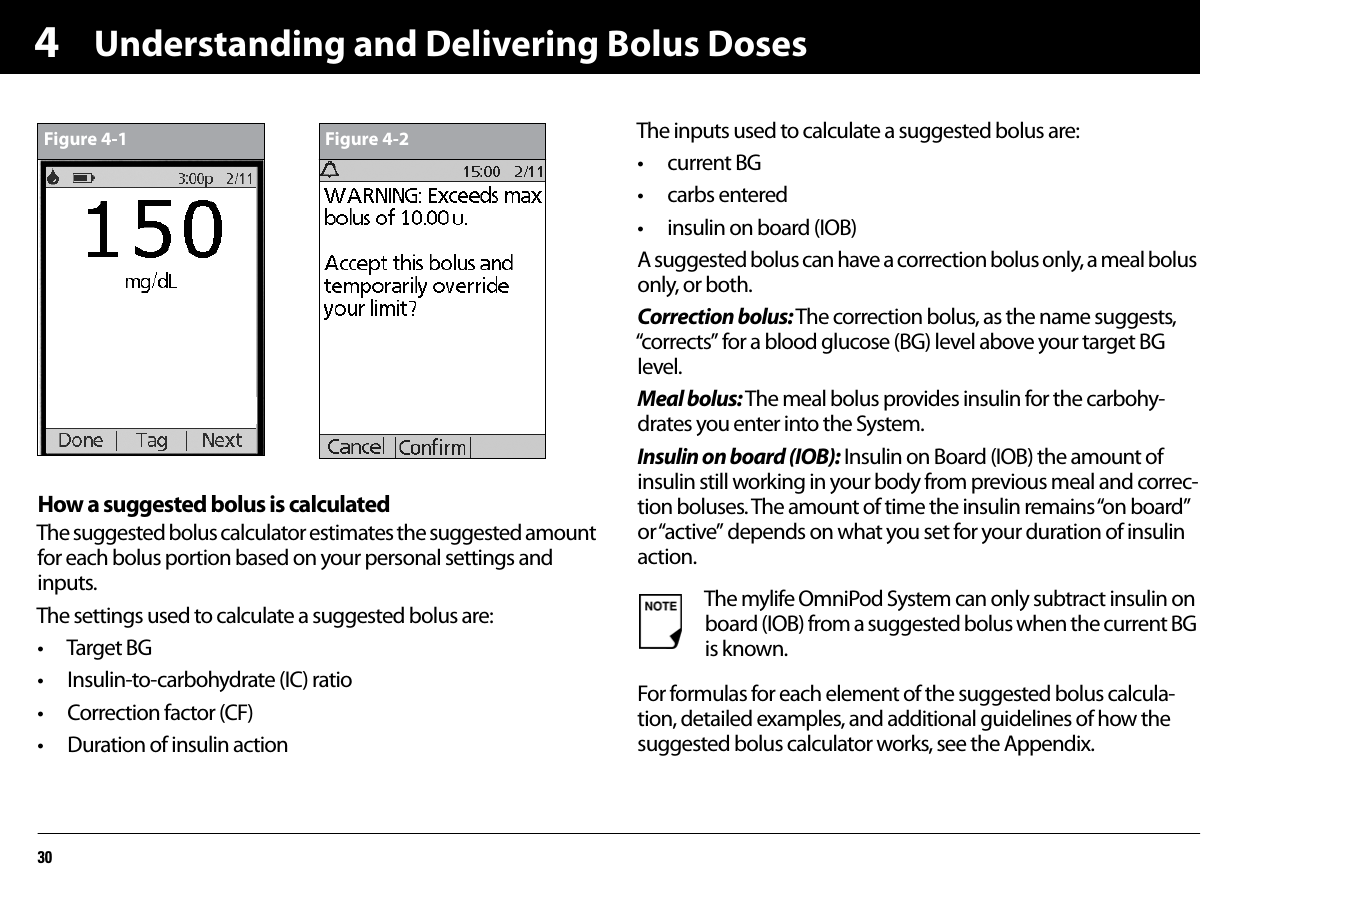
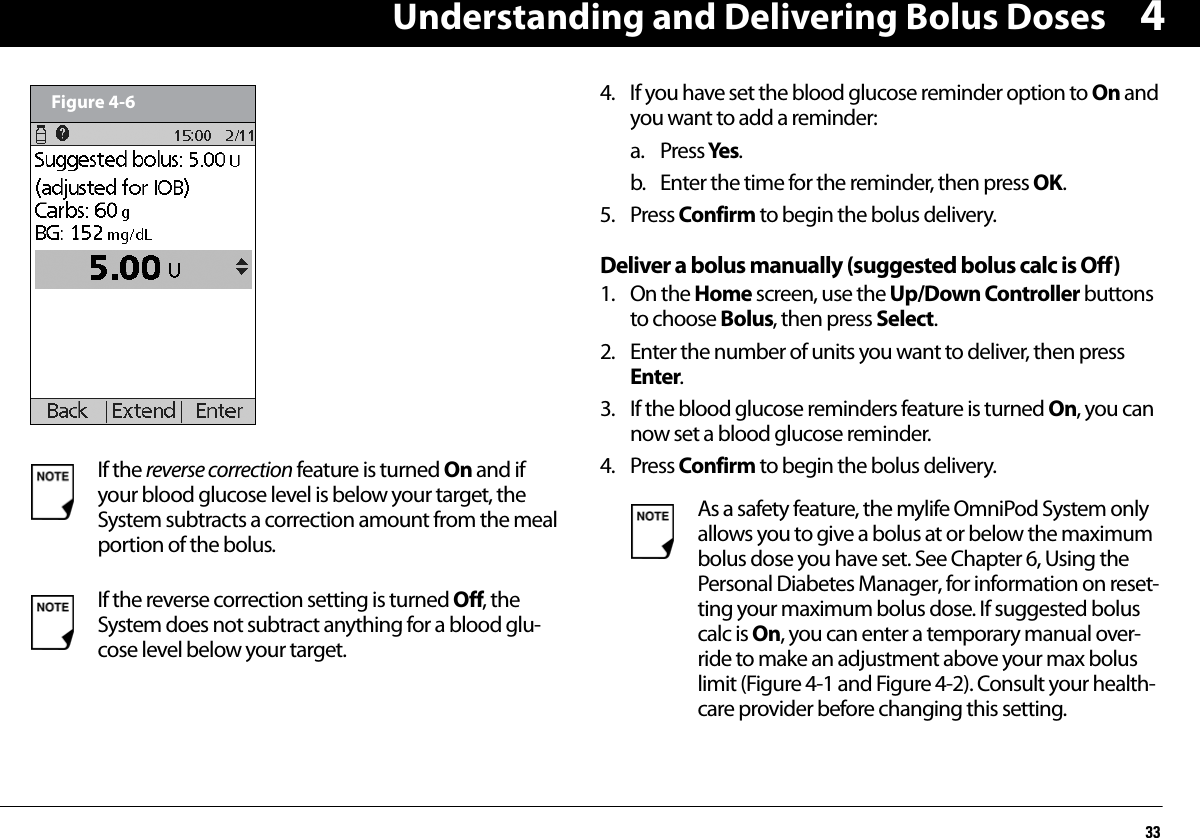
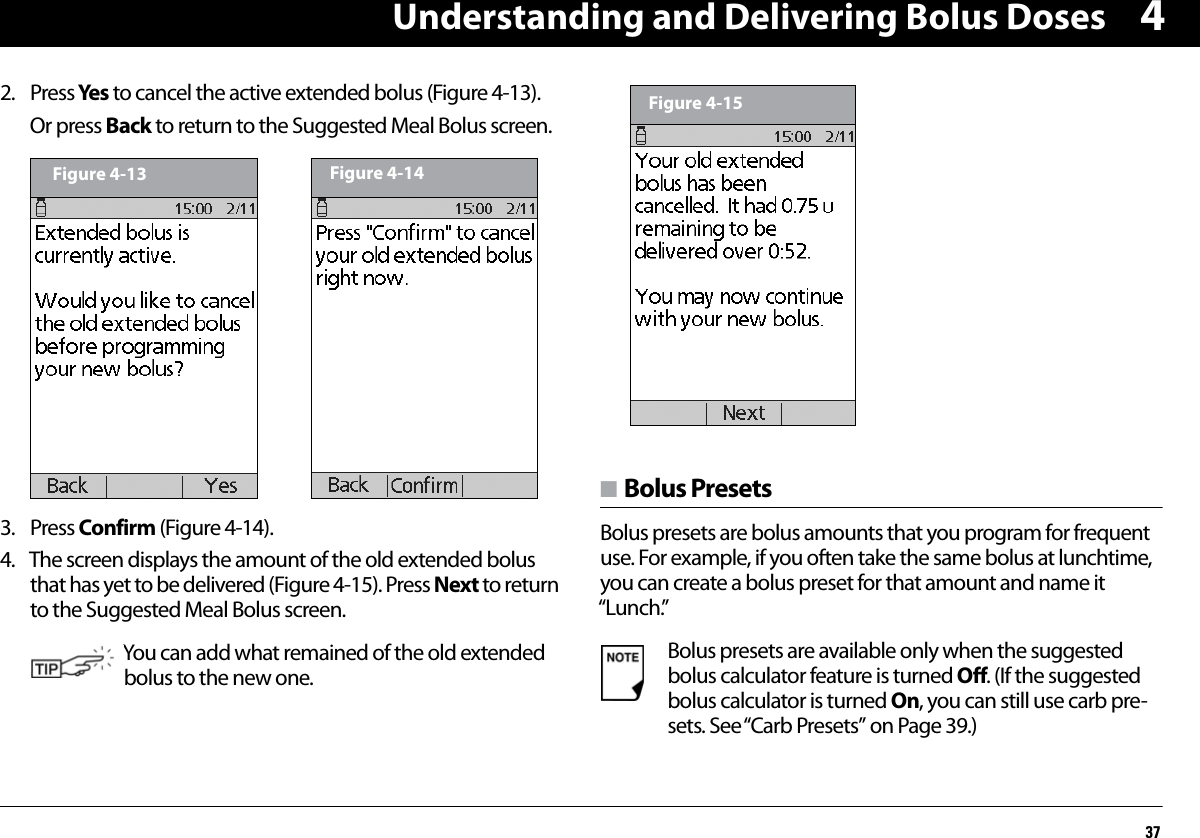
![Understanding and Delivering Bolus Doses3242. If you are not going to eat now, press No (Figure 4-4). The Suggested Bolus screen appears (Figure 4-5). Press Enter to accept the suggested bolus.Or, if you wish, press the Up/Down Controller buttons to increase or decrease the suggested bolus. Then press Enter to accept the bolus. 3. If you are going to eat now:a. Press Yes (Figure 4-4), enter the number of carbohydrates you are about to eat, then press Enter.If you’ve previously entered a carb preset, then either:• Use the Up/Down Controller buttons to choose [enter manually], then press Select. Enter the num-ber of carbohydrates that you are going to eat, then press Enter.• Use the Up/Down Controller buttons to choose favorites, snacks, or meals. From there, select a carb preset you have previously entered (see “Carb Presets” later in this chapter), then press Select.b. Press Enter to accept the suggested bolus (Figure 4-6 on the following page).Or press the User Info/Support (?) button to view calcula-tion information used for this suggested bolus. Press Close to return to the Suggested Bolus screen, then press Enter.In the Suggested Bolus screen (Figure 4-5), “adjusted for IOB” appears only when Insulin on Board (IOB) is a factor in the calculation.Figure 4-4 Figure 4-5To view detailed information about the calcula-tions used for this suggested bolus, press the User Info/Support button and scroll through the infor-mation screens. Press Close to return to the Suggested Bolus screen.](https://usermanual.wiki/Insulet/019.Users-manual/User-Guide-2090008-Page-44.png)
![Understanding and Delivering Bolus Doses384Create a bolus preset1. On the Home screen use the Up/Down Controller buttons to choose Settings; then press Select.2. Choose Presets, then press Select.3. Choose Bolus presets, then press Select.4. Choose [add new], then press New.5. To use the mylife OmniPod System’s default naming system, simply press Next. The default naming system automatically assigns program names in numerical order, such as bolus 1, bolus 2, bolus 3.Or, to give a different name to the program:a. Press the Up/Down Controller buttons to enter the char-acters that spell the name you want. The up and down arrow symbol on the screen indicates which character can be changed.b. Press the middle Soft Key (labeled with the right arrow) to move the underscore to the next character.c. Enter each character one at a time. For example, if you frequently take the same bolus at lunchtime, you might enter L, u, n, c, h (Figure 4-16).d. Press Next.6. Enter the new bolus preset amount, up to the maximum bolus you entered during setup; then press Next. 7. Review the bolus preset name and amount, then press Save to accept it. Enable an existing bolus preset1. On the Home screen, use the Up/Down Controller buttons to choose Bolus; then press Select.2. Choose the bolus preset you want to use from the list (Figure 4-17), then press Select.3. Press Enter to confirm the bolus preset amount, or, if neces-sary, use the Up/Down Controller buttons to adjust the bolus amount.Figure 4-16 Figure 4-17](https://usermanual.wiki/Insulet/019.Users-manual/User-Guide-2090008-Page-50.png)
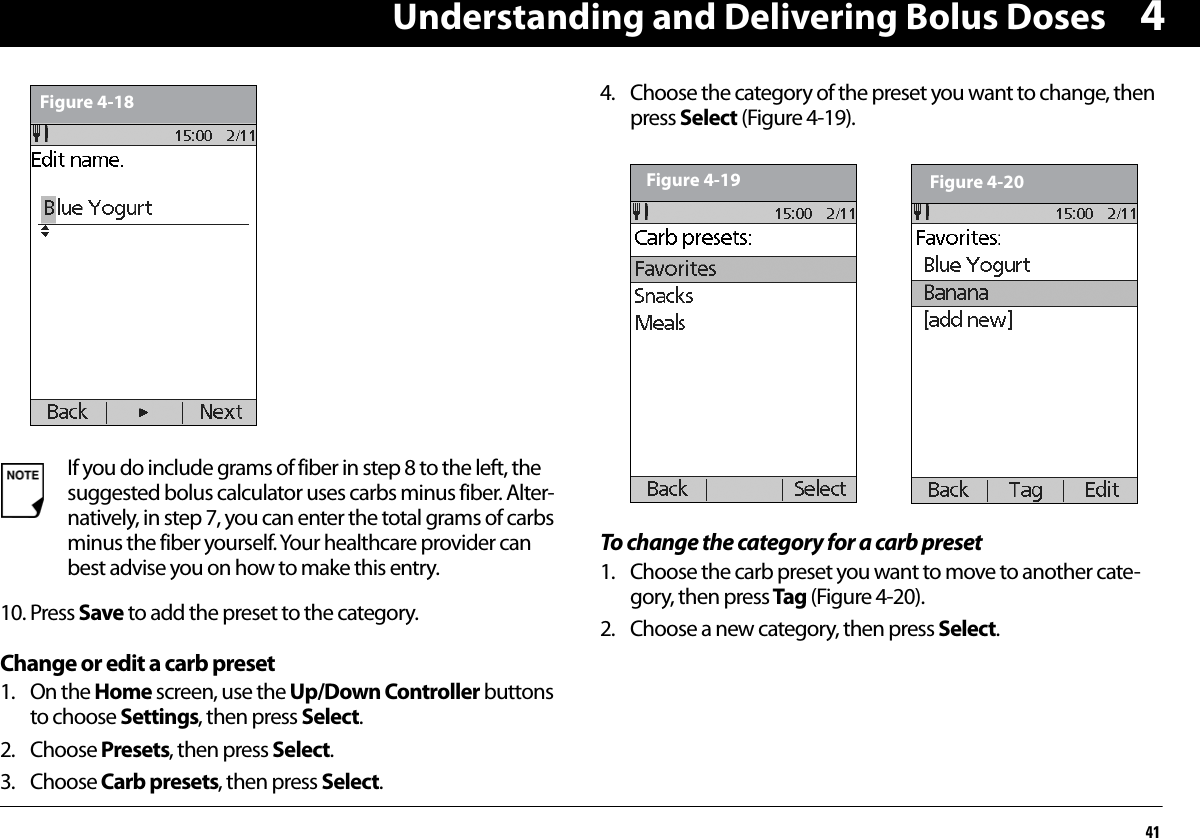
![Understanding and Delivering Bolus Doses404n Carb PresetsCarb presets are favorite food items, snacks, or meals that you eat frequently. After you enter these items, you can quickly select one when entering carb amounts during the suggested bolus calculator process.Create a carb preset1. On the Home screen, use the Up/Down Controller buttons to choose Settings, then press Select.2. Choose Presets, then press Select.3. Choose Carb presets, then press Select.4. Choose the category for this carb preset: (Favorites, Snacks, or Meals), then press Select.5. Choose [add new], then press New.6. To use the mylife OmniPod System’s default naming system, simply press Next. The default naming system automatically assigns program names in numerical order, such as carb pre-set 1, carb preset 2, carb preset 3.Or, to give a different name to the program:a. Press the Up/Down Controller buttons to enter the char-acters that spell the name you want. An up and down arrow symbol on the screen indicates the character that can be changed.b. Press the middle Soft Key (the right arrow) to move the underscore to the next character.c. Enter each character one at a time. For example, if you frequently eat a breakfast consisting of plain low-fat yogurt with blueberries, sweetener, and cinnamon, you might enter B, l, u, e, [space], Y, o, g, u, r, t (Figure 4-18 on the next page).d. Press Next.7. Enter the grams of carbohydrate in the meal, then press Next.8. For American food label enter the fiber. For European food label do not enter the fiber, because it is already counted off the carbohydrate. Press Next.9. If you want, enter the grams of fat and protein in the meal, and the total calories. Press Next after each entry. These additional units are not required. If you prefer not to enter them, simply press Next repeatedly to skip through the screens.](https://usermanual.wiki/Insulet/019.Users-manual/User-Guide-2090008-Page-52.png)


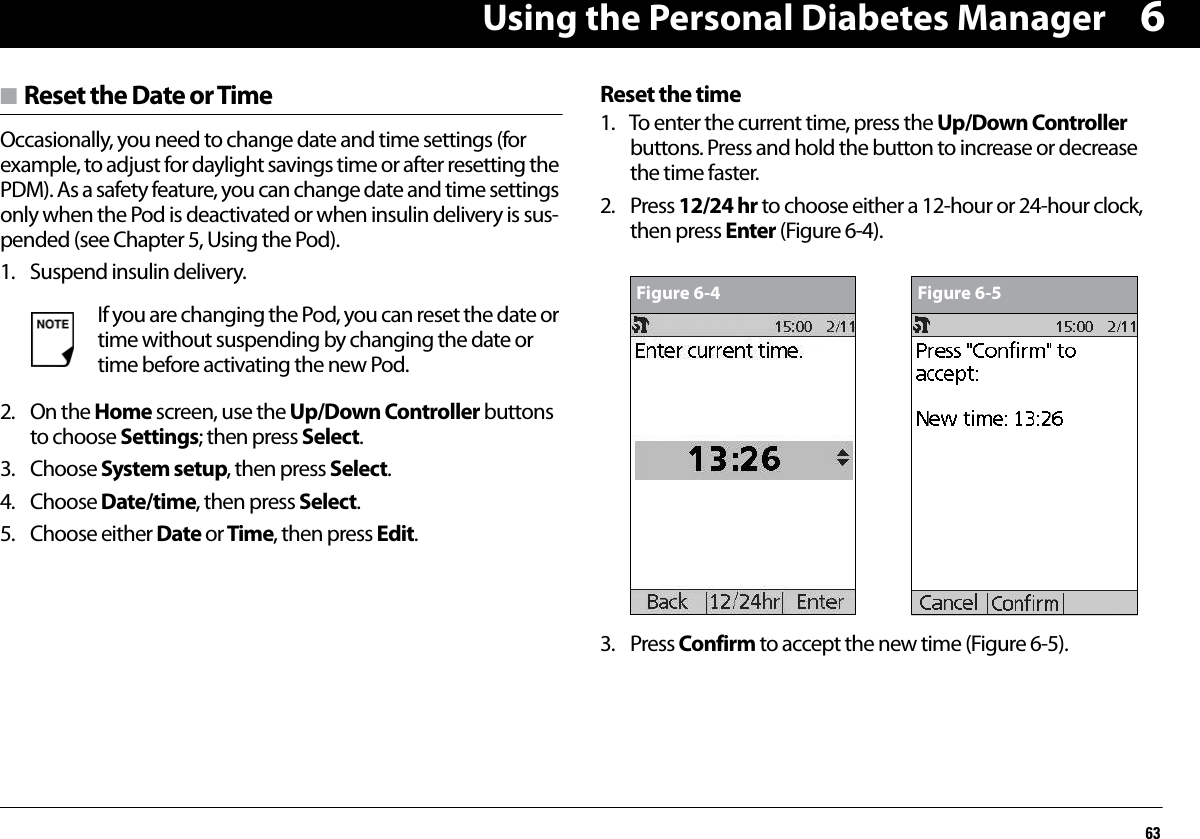
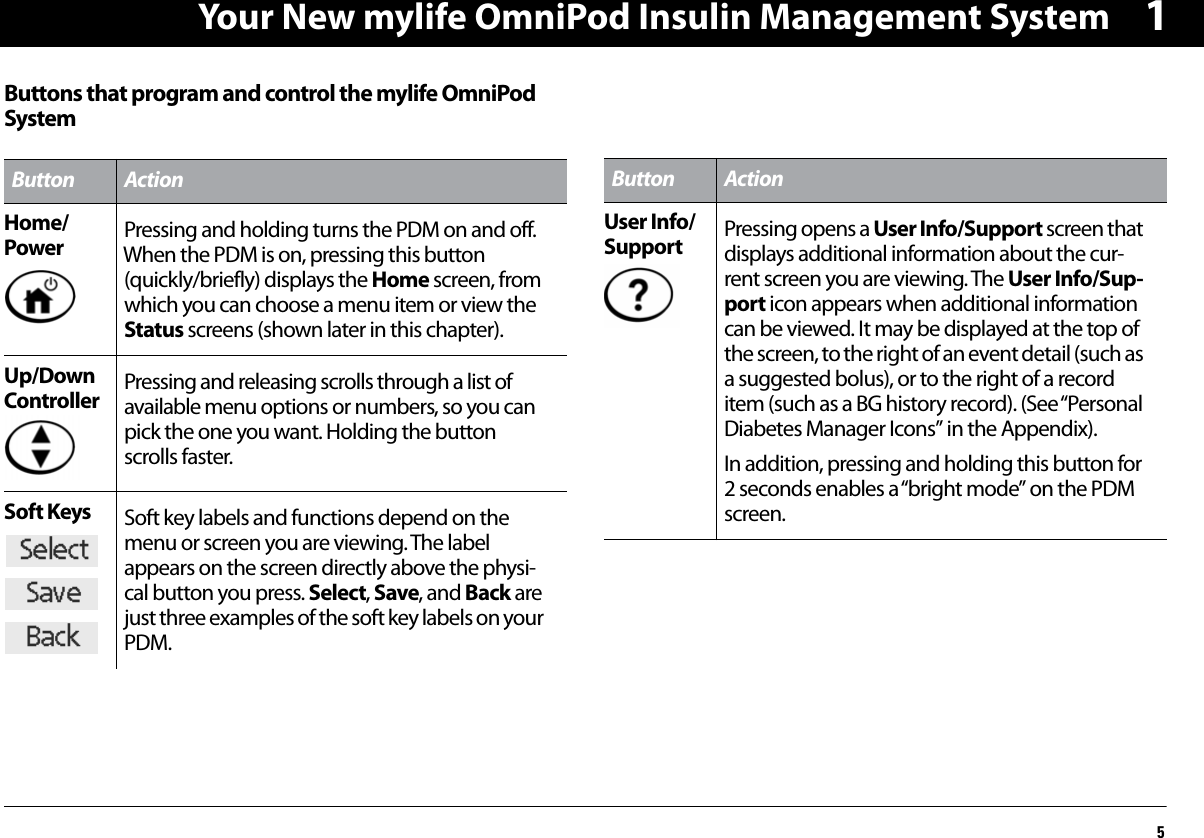
![Using the Personal Diabetes Manager656a. To edit an existing target BG time segment, choose the segment, then press Edit. Use the Up/Down Controller buttons to choose a new start time, end time, target BG value, and correct-above value (correction threshold). Press Next after each entry.b. To add a segment, choose [add new], then press New. Use the Up/Down Controller buttons to choose a start time, end time, target BG value, and correct-above value (correction threshold). Press Next after each entry.c. When you have completed all the time segments you want, press Done, then Save.2. Min BG for calcs (smallest blood glucose value allowed for calculating boluses)—Use the Up/Down Controller buttons to enter a new minimum BG, then press Next.3. Insulin-to-carb (IC) ratio—You can edit existing time seg-ments and add segments, up to a total of 8.a. To edit an existing IC ratio time segment, choose the seg-ment, then press Edit (Figure 6-7 on next page). Use the Up/Down Controller buttons to choose a new start time, end time, and IC ratio. Press Next after each entry.b. To add a segment, choose [add new], then press New. Use the Up/Down Controller buttons to choose a start time, end time, and IC ratio. Press Next after each entry.c. When you have completed all time segments, press Done, then Save. 4. Correction factor—You can edit existing time segments and add segments, up to a total of 8.a. To edit an existing correction factor time segment, choose the segment, then press Edit. Use the Up/Down Control-ler buttons to choose a new start time, end time, and cor-rection factor. Press Next after each entry. b. To add a segment, choose [add new], then press New. Use the Up/Down Controller buttons to choose a start time, end time, and correction factor. Press Next after each entry.c. When you have completed all time segments, press Done, then Save.Figure 6-7](https://usermanual.wiki/Insulet/019.Users-manual/User-Guide-2090008-Page-77.png)
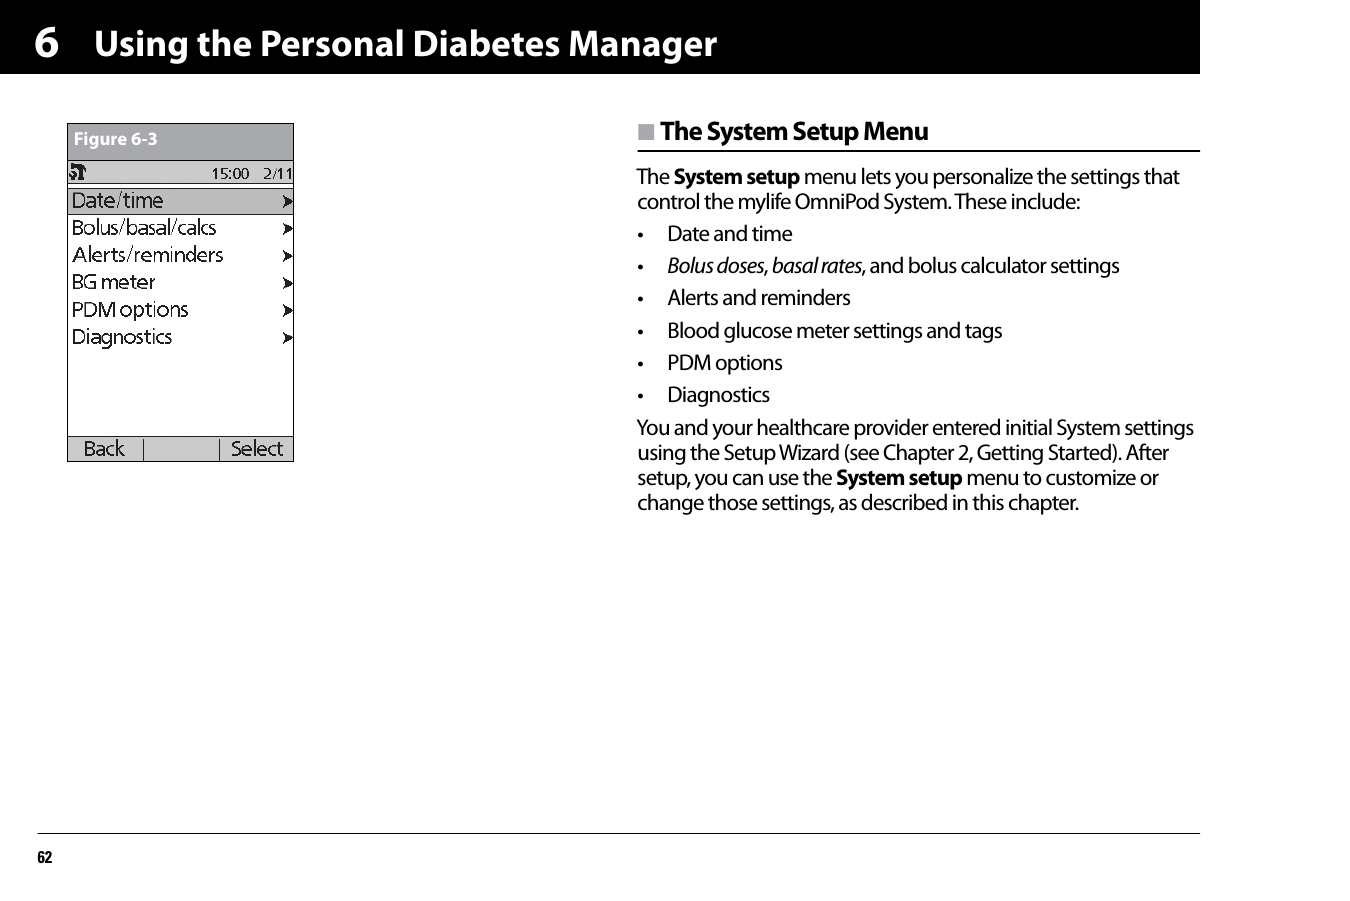
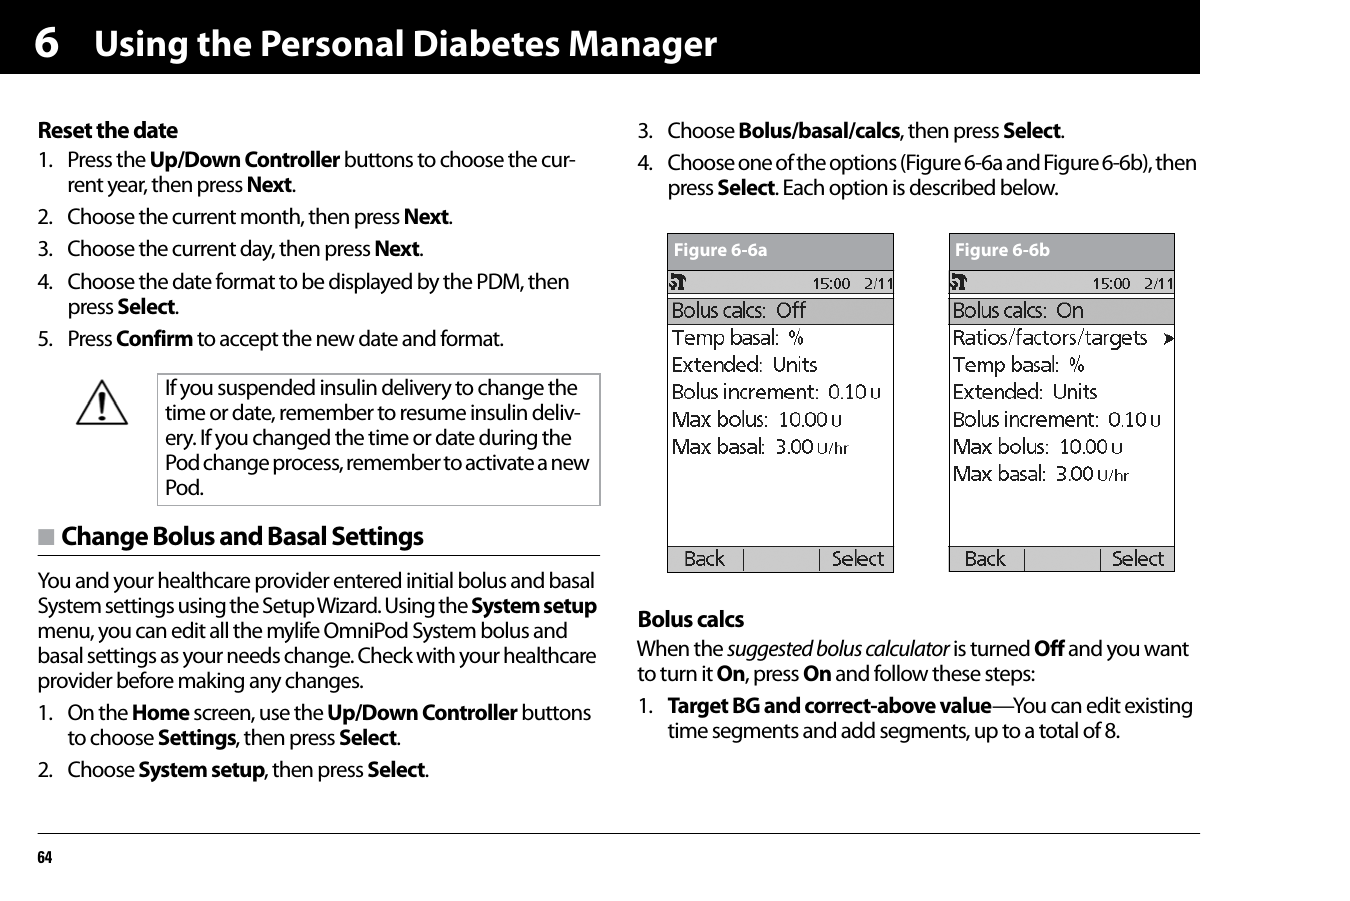
![Using the Personal Diabetes Manager6665. Reverse correction—Choose On or Off, then press Next.6. Insulin action (duration)—Use the Up/Down Controller buttons to choose a duration of insulin action, then press Done.7. Press OK.Ratios/factors/targetsWhen the suggested bolus calculator is turned On, you can view and change all the settings using the Ratios/factors/targets menu option. Choose Review all settings, then press Select (Figure 6-8a) or choose one setting from the menu, then press Select (Figure 6-8b). The steps are the same whether you choose all settings or individual ones.1. Target BG and correct-above value—You can edit existing segments and add segments, up to a total of 8.a. To edit an existing target BG time segment, choose the segment, then press Edit. Use the Up/Down Controller buttons to choose a new start time, end time, target BG value, and correct-above value (correction threshold). Press Next after each entry.b. To add a segment, choose [add new], then press New. Use the Up/Down Controller buttons to choose a start time, end time, target BG value, and correct-above value (correction threshold). Press Next after each entry.c. When you have completed all the time segments you want, press Done, then Save.2. Min BG for calcs (smallest blood glucose value allowed for calculating boluses)—Use the Up/Down Controller buttons to enter a new minimum BG, then press Enter.3. Insulin-to-carb (IC) ratio—Number of grams of carbohy-drate covered by one unit of insulin. You can edit existing time segments and add segments, up to a total of 8.a. To edit an existing IC ratio time segment, choose the segment, then press Edit. Use the Up/Down Controller Figure 6-8a Figure 6-8bWhen the suggested bolus calculator is turned Off, the Ratios/factors/targets option does not appear in the Bolus/basal/calcs menu.](https://usermanual.wiki/Insulet/019.Users-manual/User-Guide-2090008-Page-78.png)
![Using the Personal Diabetes Manager676buttons to choose a new start time, end time, and IC ratio. Press Next after each entry.b. To add a segment, choose [add new], then press New. Use the Up/Down Controller buttons to choose a start time, end time, and IC ratio. Press Next after each entry.c. When you have completed all time segments, press Done, then Save.4. Correction factor—You can edit existing time segments and add segments, up to a total of 8.a. To edit an existing correction factor time segment, choose the segment, then press Edit. Use the Up/Down Control-ler buttons to choose a new start time, end time, and cor-rection factor. Press Next after each entry.b. To add a segment, choose [add new], then press New. Use the Up/Down Controller buttons to choose a start time, end time, and correction factor. Press Next after each entry.c. When you have completed all time segments, press Done, then Save.5. Reverse correction—Choose On or Off, then press Select.6. Insulin action (duration) or Insulin on Board (IOB)—Use the Up/Down Controller buttons to choose a duration of insulin action, then press Enter.Temp basalChoose %, U/hr, or Off to set the mode for temporary basal rates and presets, then press Select.ExtendedChoose %, Units, or Off to set the mode for extended boluses, then press Select.Bolus incrementChoose 0.05, 0.10, 0.50, or 1.00 units for bolus increments, then press Select.Max bolusUse the Up/Down Controller buttons to enter the maximum bolus dose you can take, then press Enter.Max basal rateUse the Up/Down Controller buttons to enter the maximum basal rate you can choose, then press Enter. Some settings have preset defaults, but all settings are changeable. See the Appendix for a list of Sys-tem specifications, including preset default settings.For additional details on bolus and basal settings, see Chapter 3, Understanding and Adjusting Basal Rates, and Chapter 4, Understanding and Deliver-ing Bolus Doses.](https://usermanual.wiki/Insulet/019.Users-manual/User-Guide-2090008-Page-79.png)
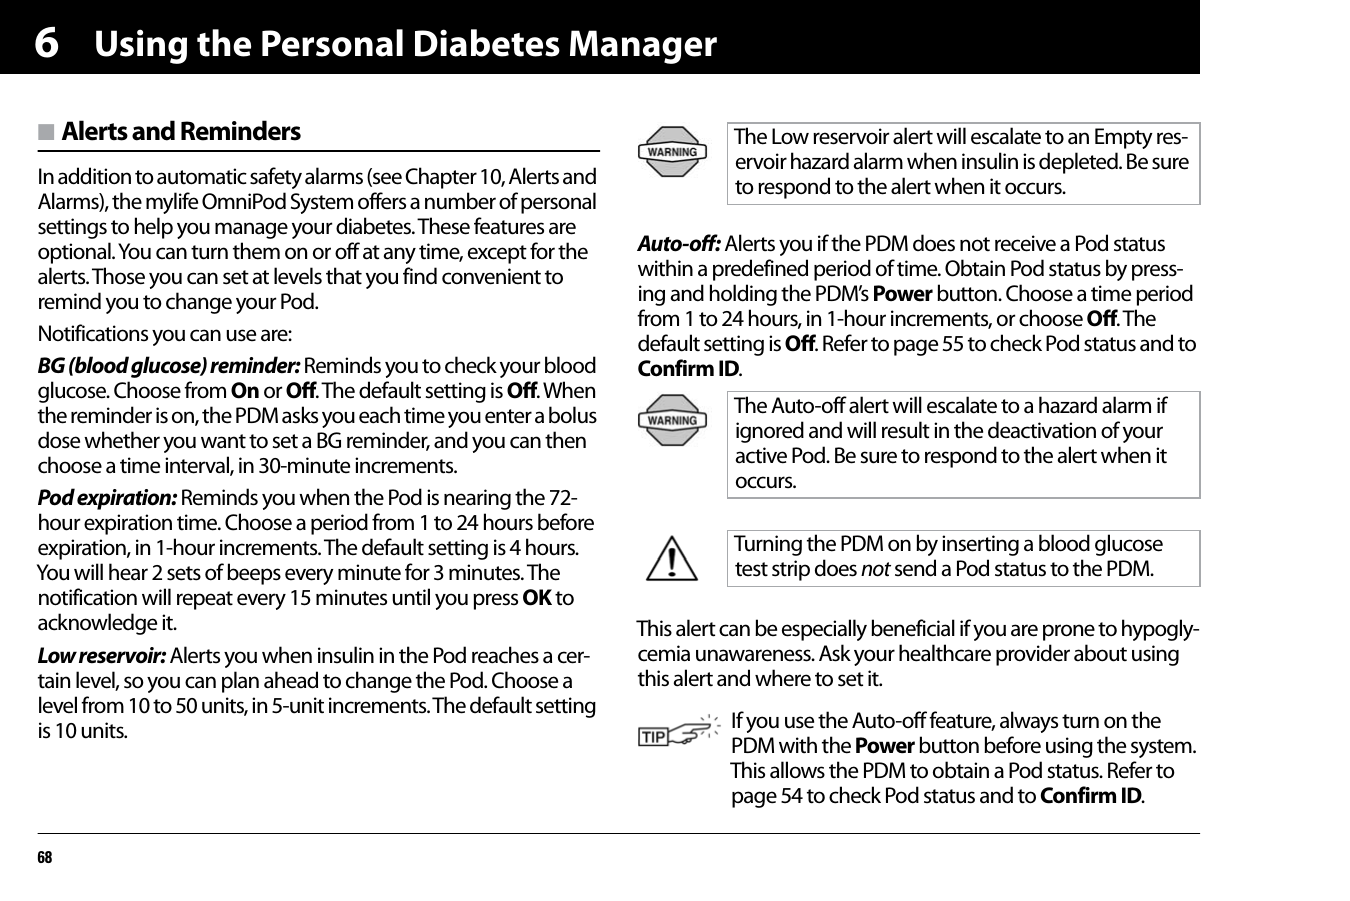
![Using the Personal Diabetes Manager7065. For all except Bolus reminders and Custom reminders, choose the desired option or set the desired value, then press Select or Enter.6. For Bolus reminders• Use the Up/Down Controller buttons to choose On or Off, then press Select.• If you chose On, you are taken to a new screen where you can add, edit or delete reminders:To add a Bolus remindera. Use the Up/Down Controller buttons to choose [add new], then press New.b. Choose a start time, then press Next.c. Choose an end time, then press Save.To edit a Bolus remindera. Choose the bolus reminder you wish to edit, then press Edit.b. Choose Edit, then press Select.c. Enter a new start time, then press Next.d. Enter a new end time, then press Save.To delete a Bolus remindera. Choose the bolus reminder you wish to delete, then press Edit.b. Choose Delete then press Select.c. Press Delete to remove the bolus reminder.7. For Custom reminders• Use the Up/Down Controller buttons to choose [add new], then press New.• To use the mylife OmniPod System’s default naming sys-tem, simply press Next. The default naming system automatically assigns names in numerical order, such as alert 1, alert 2, alert 3.If you want to give a different name to the reminder:a. Use the Up/Down Controller buttons to scroll through the list of characters. An up-and-down arrow symbol on the screen indicates the character that can be changed.b. Press the middle Soft Key (the right arrow) to move the underscore to the next character.c. Enter each character one at a time. For example, for a reminder to pick up a prescription, you might enter R, x (Figure 6-10 on the next page). (A blank character or space is the first and last option in the scrolling menu.)](https://usermanual.wiki/Insulet/019.Users-manual/User-Guide-2090008-Page-82.png)
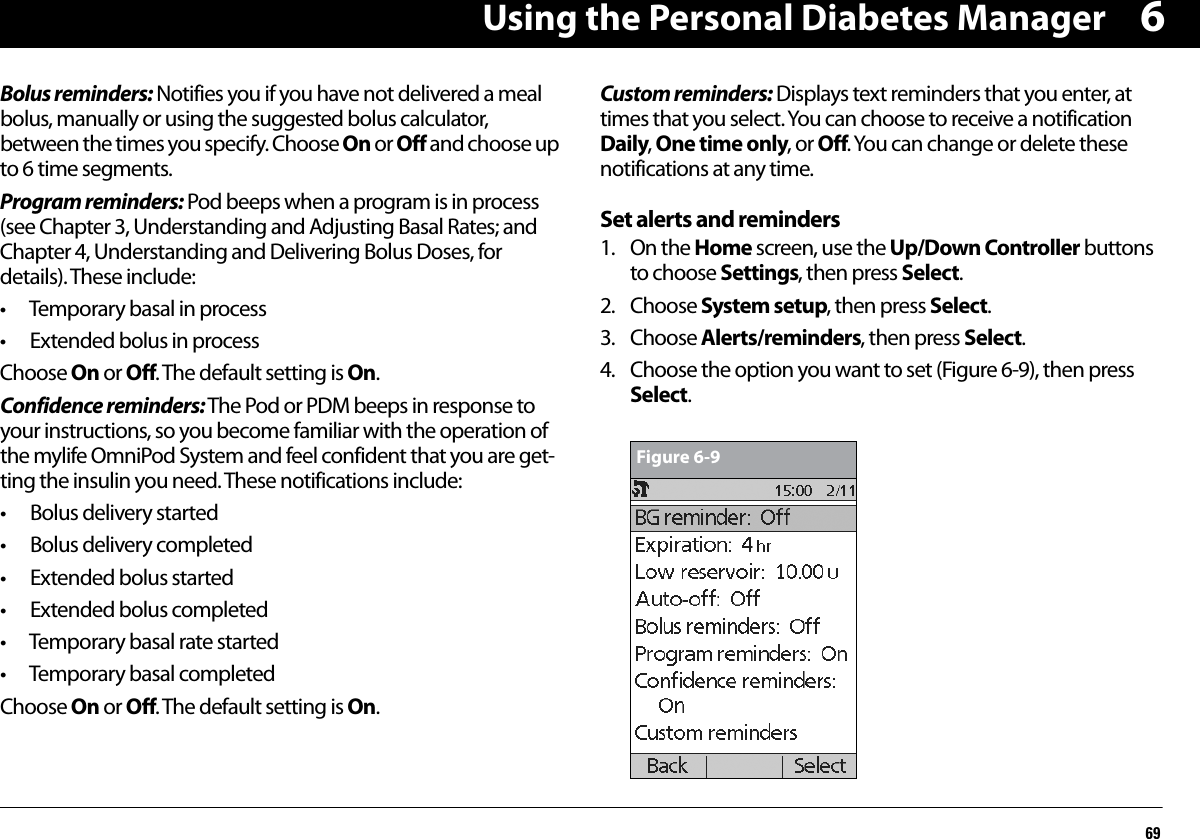
![Using the Personal Diabetes Manager726Change BG goal limitsTo change the BG goal limits, press Edit, change either or both values, then press Save.Manage the blood glucose tags listYou can create up to 15 custom blood glucose tags and hide any of the standard tags you do not plan to use. Standard BG tags are shown first on the screen (Figure 6-12a), followed by custom tags, and then [add new] (Figure 6-12b). For more information about tagging BG readings, see Chapter 7, Checking Your Blood Glucose.1. To hide or show a standard BG tag, choose the tag, and press Show (if it is marked as hidden) or Hide.Tags you choose to show will be check marked; hidden ones will not be.2. To add a custom tag, choose [add new] at the end of the list of custom tags, then press New. In the Edit name screen, either:a. Press Save to save the new tag with the default name, custom tag1, custom tag2, and so on; orb. Use the Up/Down Controller buttons to choose letters and numbers for a name, followed by the middle Soft Key (the right arrow) to move forward one space. Then press Save.3. To delete a custom tag, choose the tag, press Delete, then press Delete again. Or press Cancel to leave the tag unchanged.Change BG soundTo change BG sound, choose On or Off, then press Select.Figure 6-12a Figure 6-12b](https://usermanual.wiki/Insulet/019.Users-manual/User-Guide-2090008-Page-84.png)
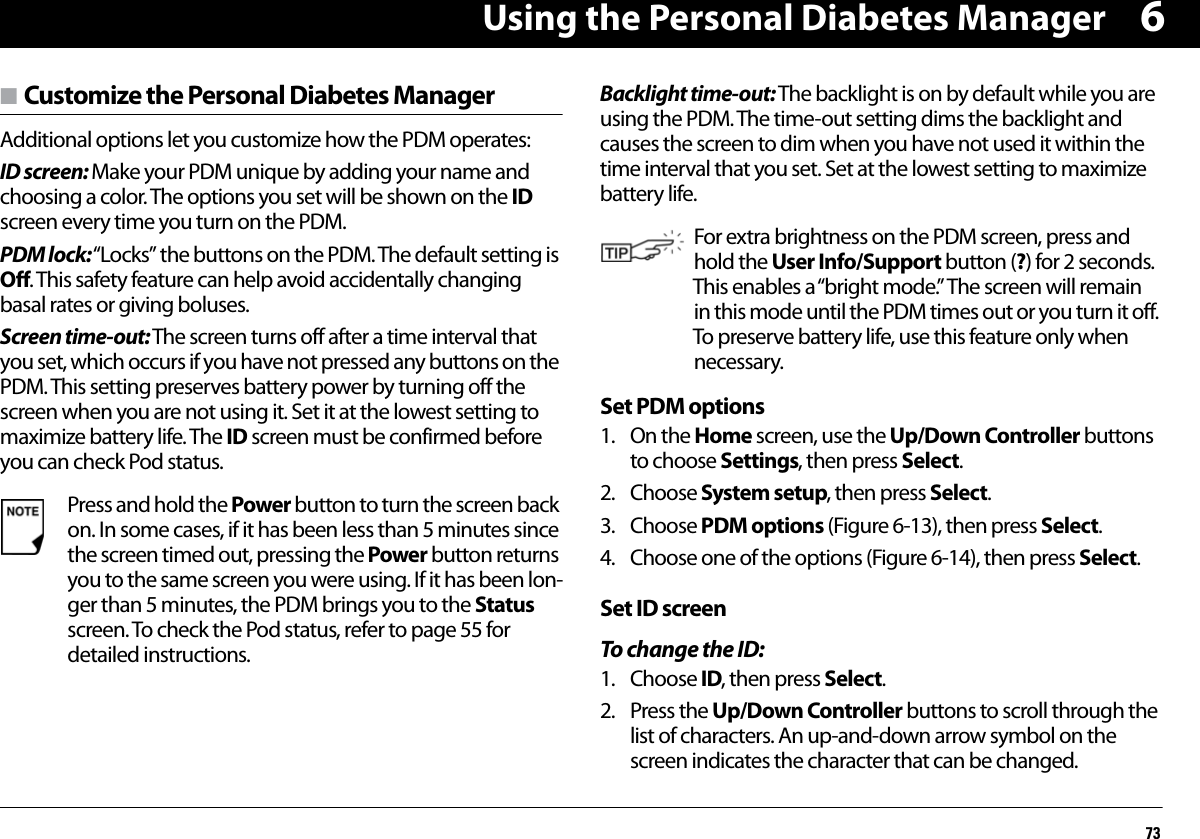
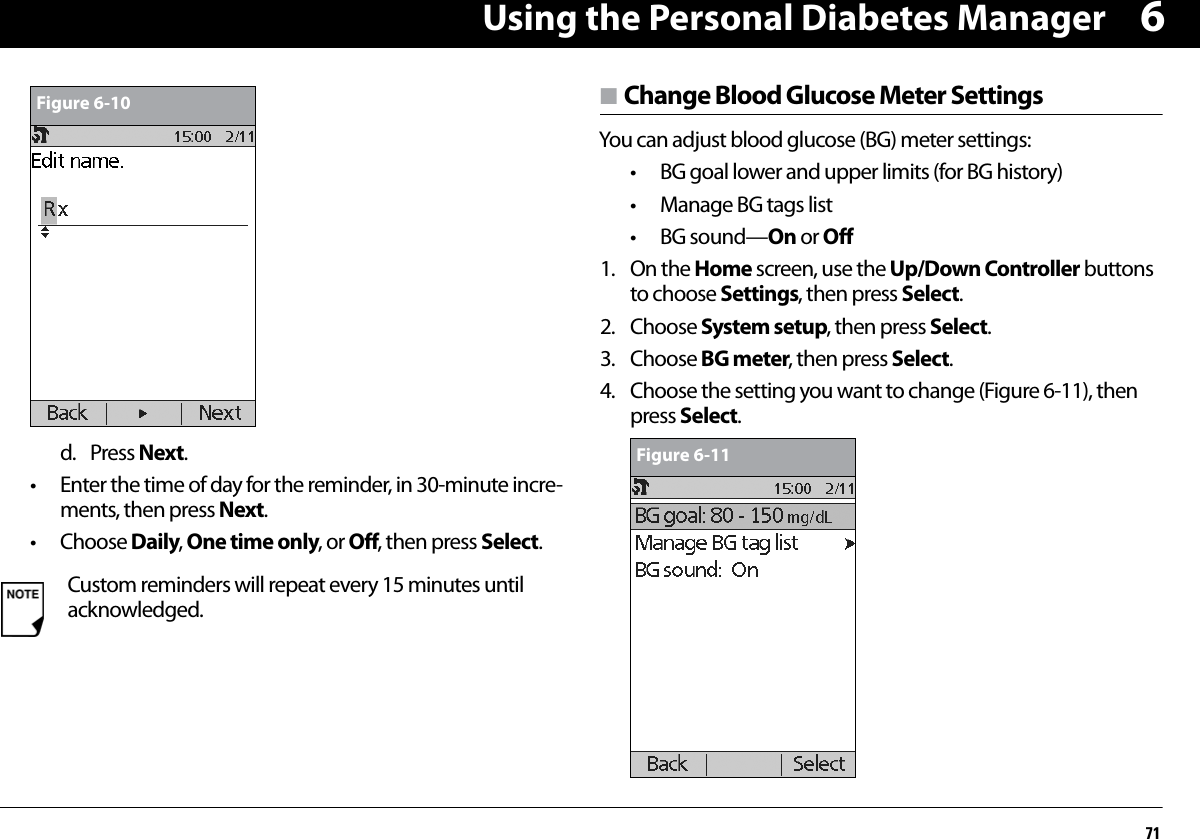
![Using the Personal Diabetes Manager7463. Press the middle Soft Key (labeled with the right arrow) to move the underscore to the next character. 4. Enter each character one at a time. For example, if you want to enter your name, you might enter J, a, n, e, [space], S, m, i, t, h. (A blank character or space is the first and last option in the scrolling menu.)5. Press Save.To change the ID screen color:1. Choose Screen color, then press Select.2. Use the Up/Down Controller buttons to choose a color, then press Select.Set PDM lockChoose On or Off, then press Select.Set the Screen time-outChoose a time interval, then press Select.When the screen times out and goes black, turn it on again by pressing the Home/Power button.Set the Backlight time-outChoose a time interval, then press Select.When the screen dims, turn it on again by pressing any button. The PDM will ignore the usual command and re-light the screen.As a safety feature, an ID must be entered to enable the PDM to be identified.Figure 6-13 Figure 6-14If you choose On, other PDM options and most other soft keys are locked and will not respond to button presses. To use them, you must first set PDM lock to Off.The lowest setting will drain the battery the least.](https://usermanual.wiki/Insulet/019.Users-manual/User-Guide-2090008-Page-86.png)

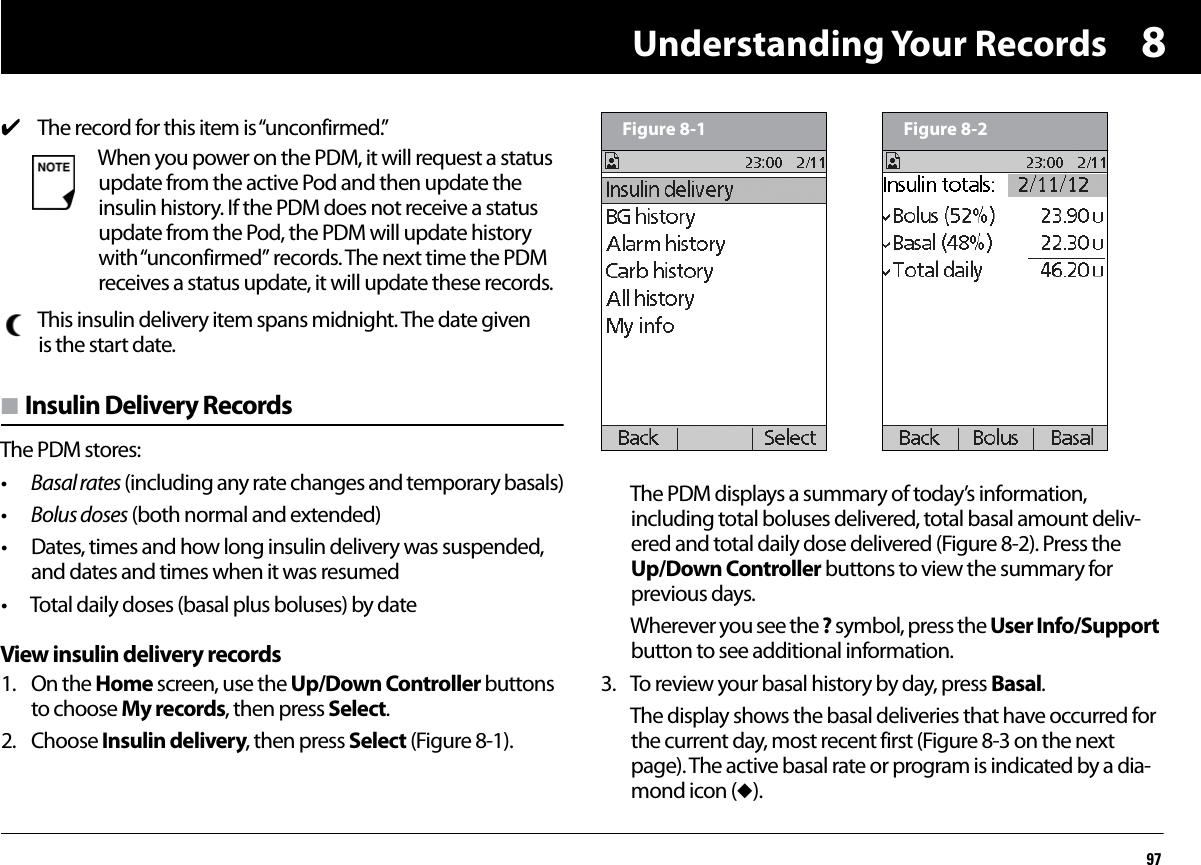

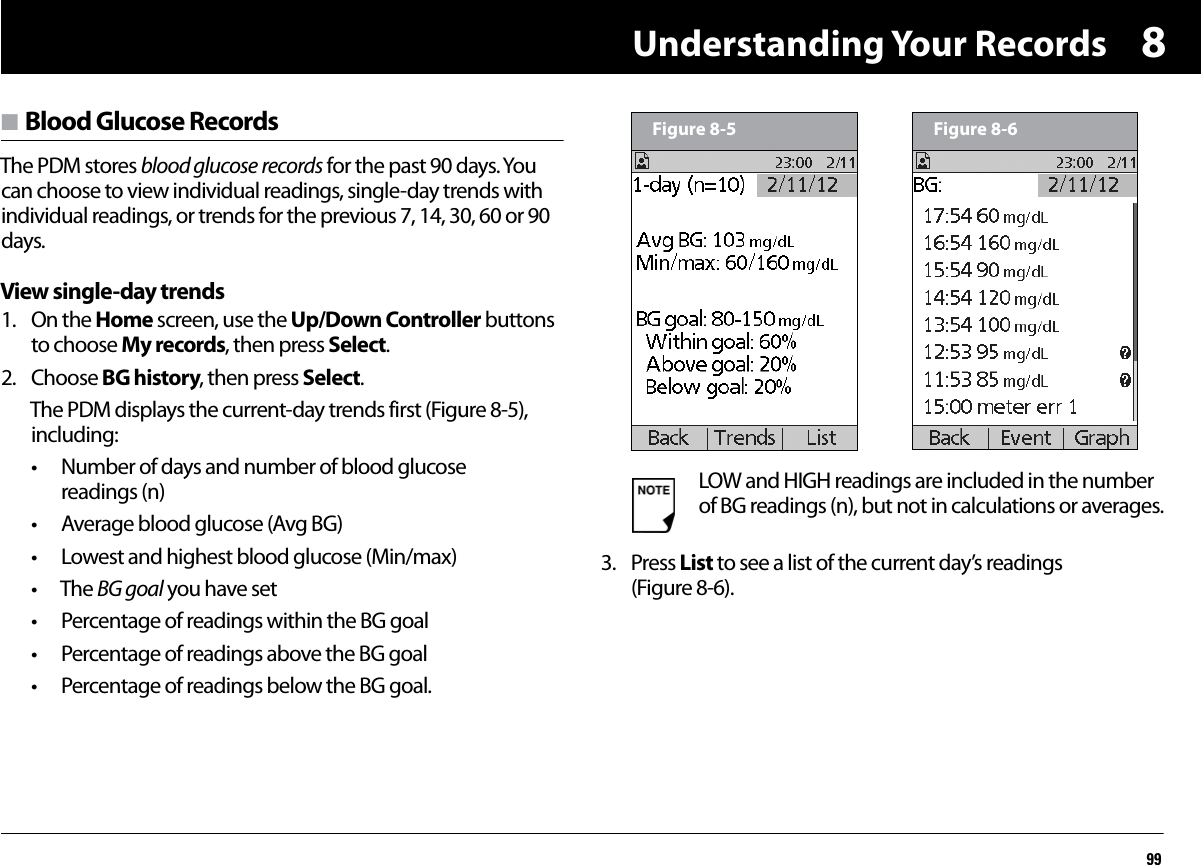
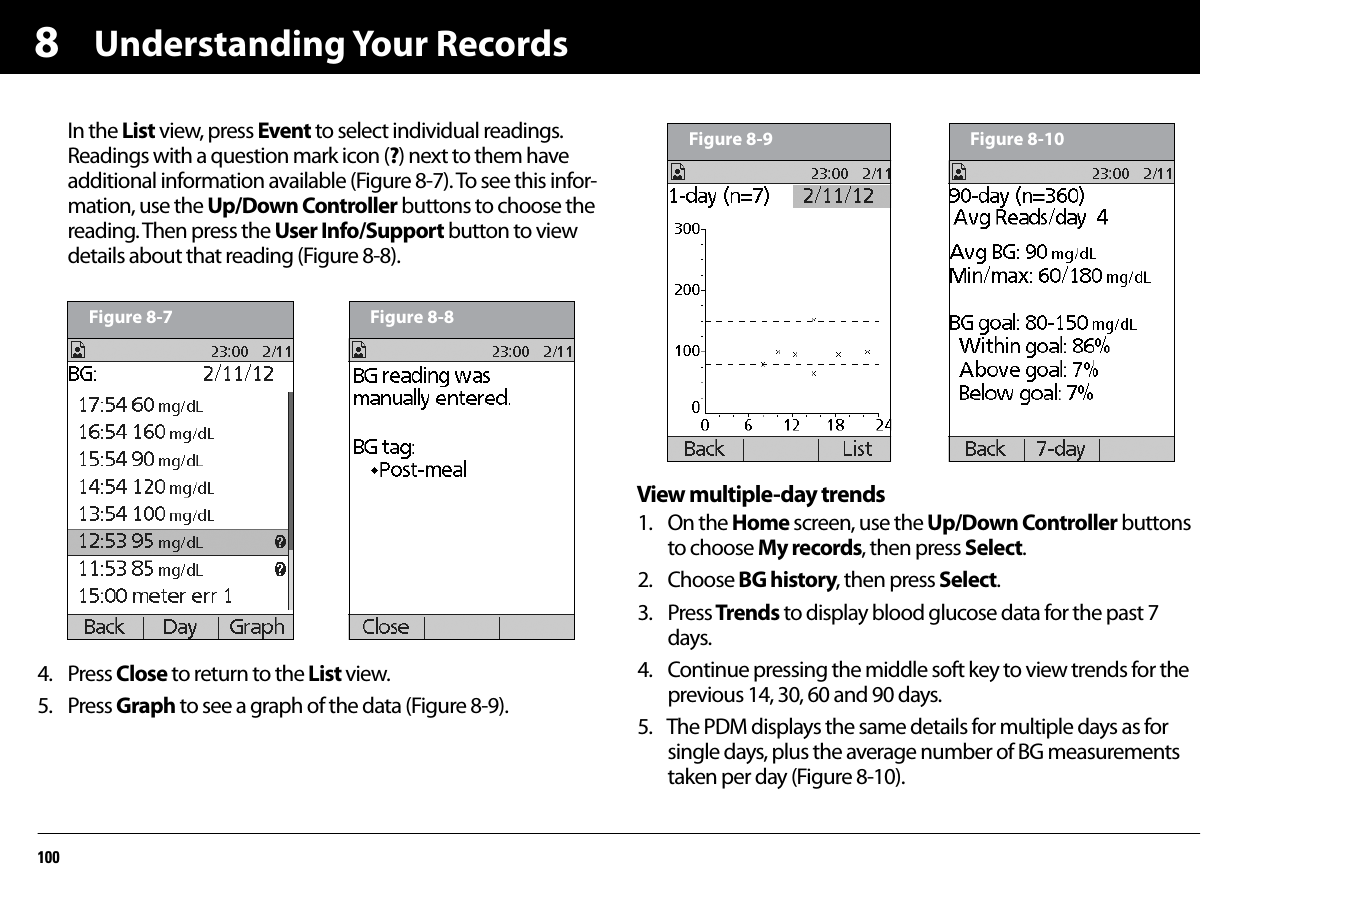
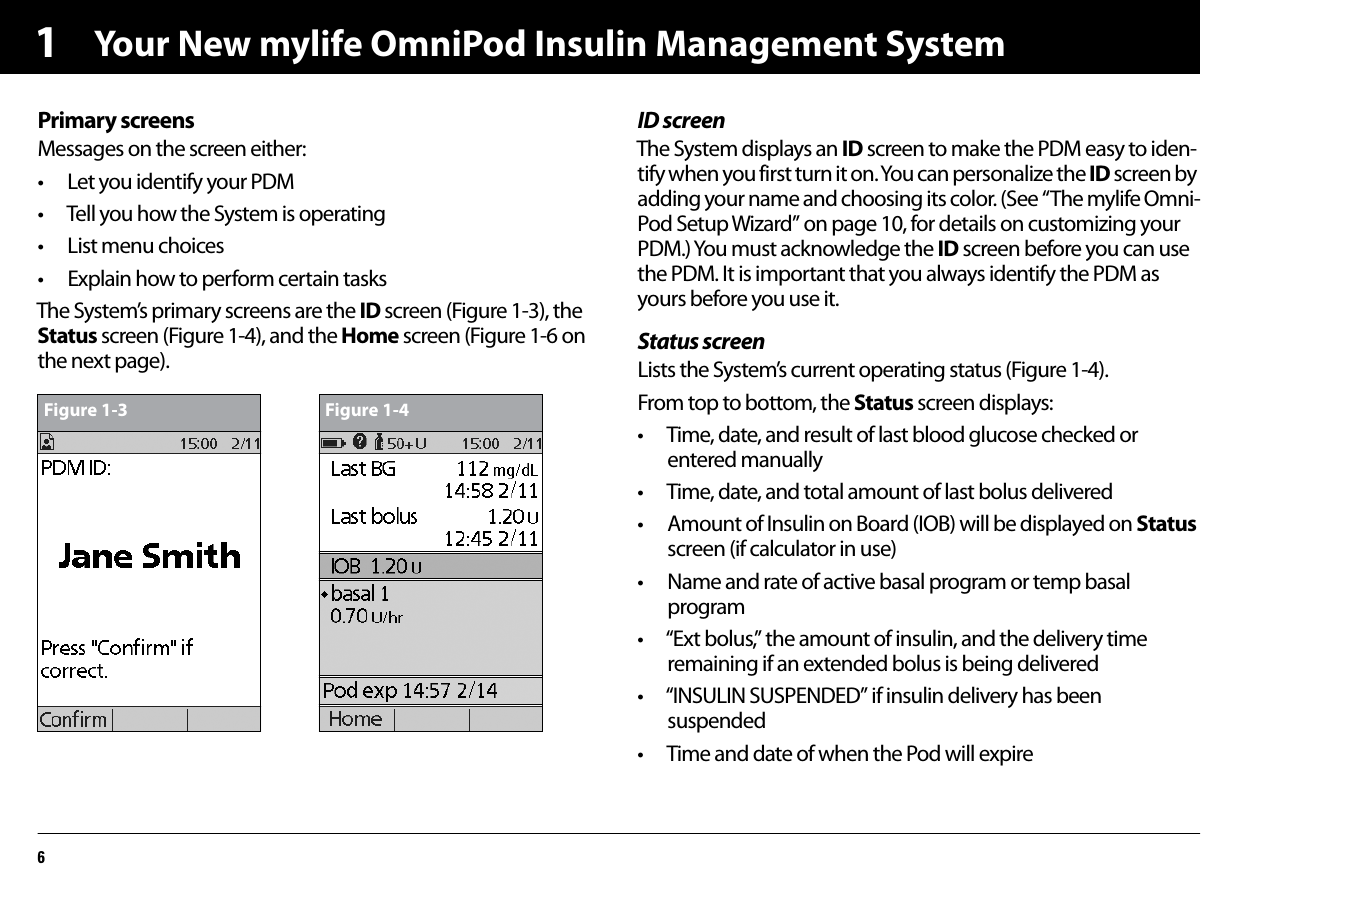
![Understanding Your Records1038Add or change user information1. On the Home screen, use the Up/Down Controller buttons to choose My records, then press Select.2. Choose My info, then press Select.3. Choose an existing line or [My info] (Figure 8-15), then press Edit.4. Press the Up/Down Controller buttons to scroll through the list of characters. An up-and-down arrow symbol ( ) on the screen indicates the character that can be changed.5. Press the middle soft key to move the underscore to the next character.6. Enter each character one at a time. For example, if you want to enter your address, you might enter 5, 6, 5, [space], M, a, i, n, [space], S, t, [period]. (A blank character or space is the first and last option in the scrolling menu.)For your healthcare provider and local phone number, you might enter J, a, n, e, [space], S, m, i, t, h, [comma], [space], 5, 5, 5, [hyphen], 1, 2, 3, 4 (Figure 8-16).7. Press Save.8. Repeat steps 3–7 for each line of personal information you want to enter or change. Twenty lines are available.The User Info/Support icon is also displayed on the suggested bolus screen. For information about the support information displayed on these screens, see Chapter 4, Understanding and Deliver-ing Bolus Doses.The first line of My Info displays the information that was entered for the ID screen during your PDM setup. For information on editing this line, see Chapter 6, Using the Personal Diabetes Manager, “Customize the Personal Diabetes Manager.”Figure 8-15 Figure 8-16](https://usermanual.wiki/Insulet/019.Users-manual/User-Guide-2090008-Page-115.png)
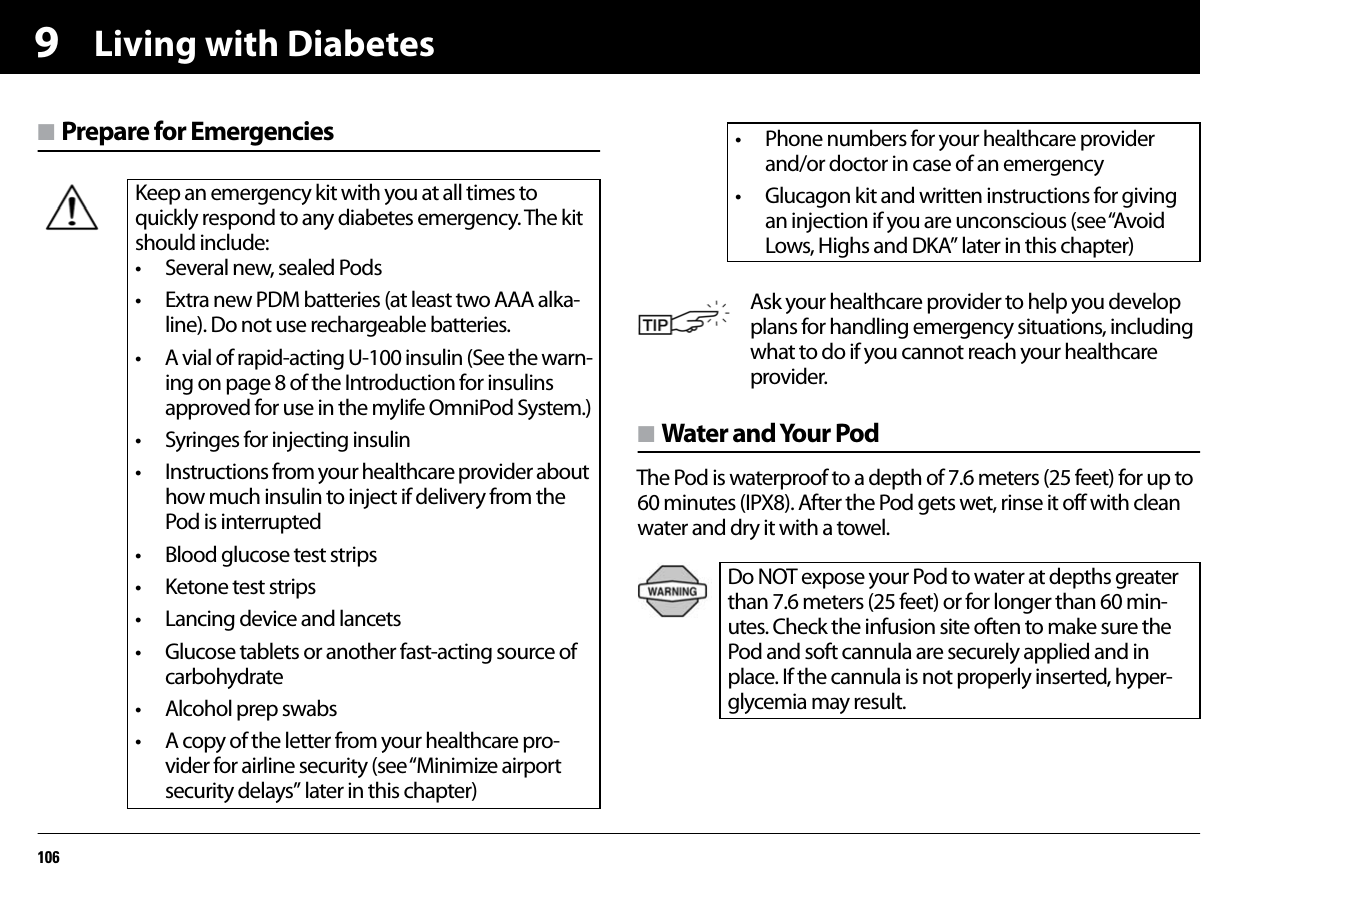

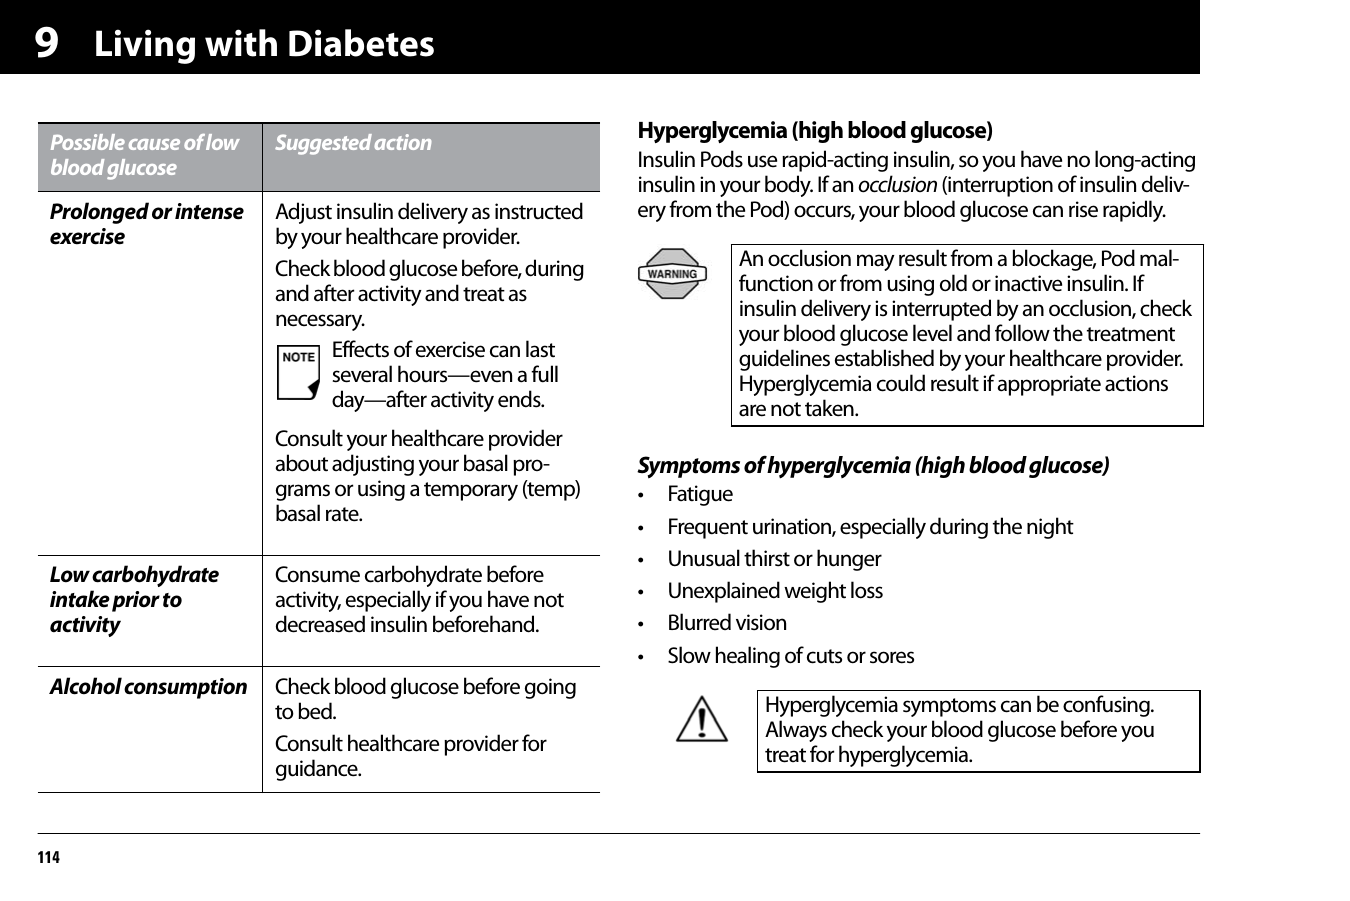
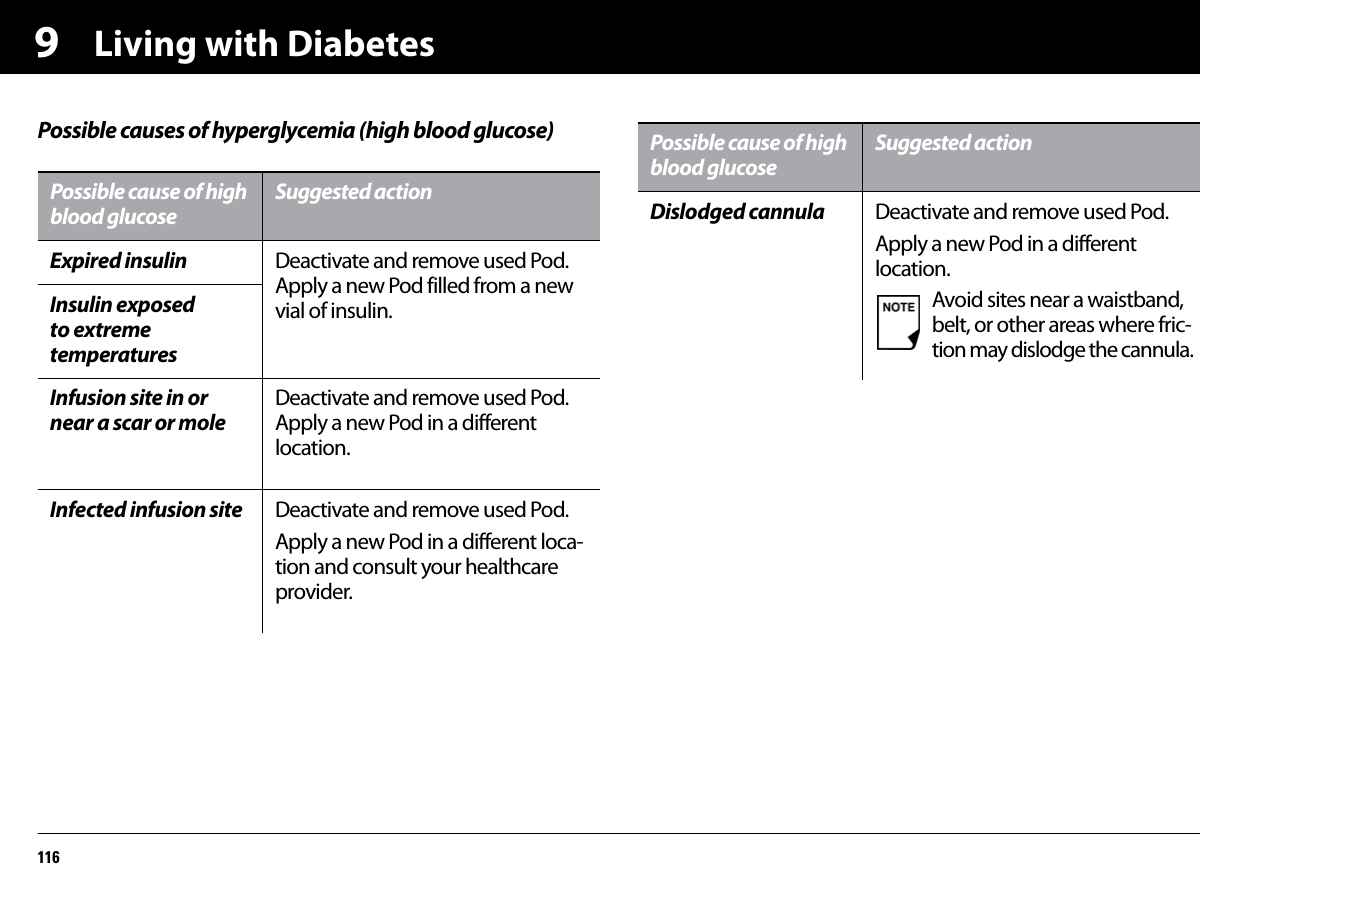
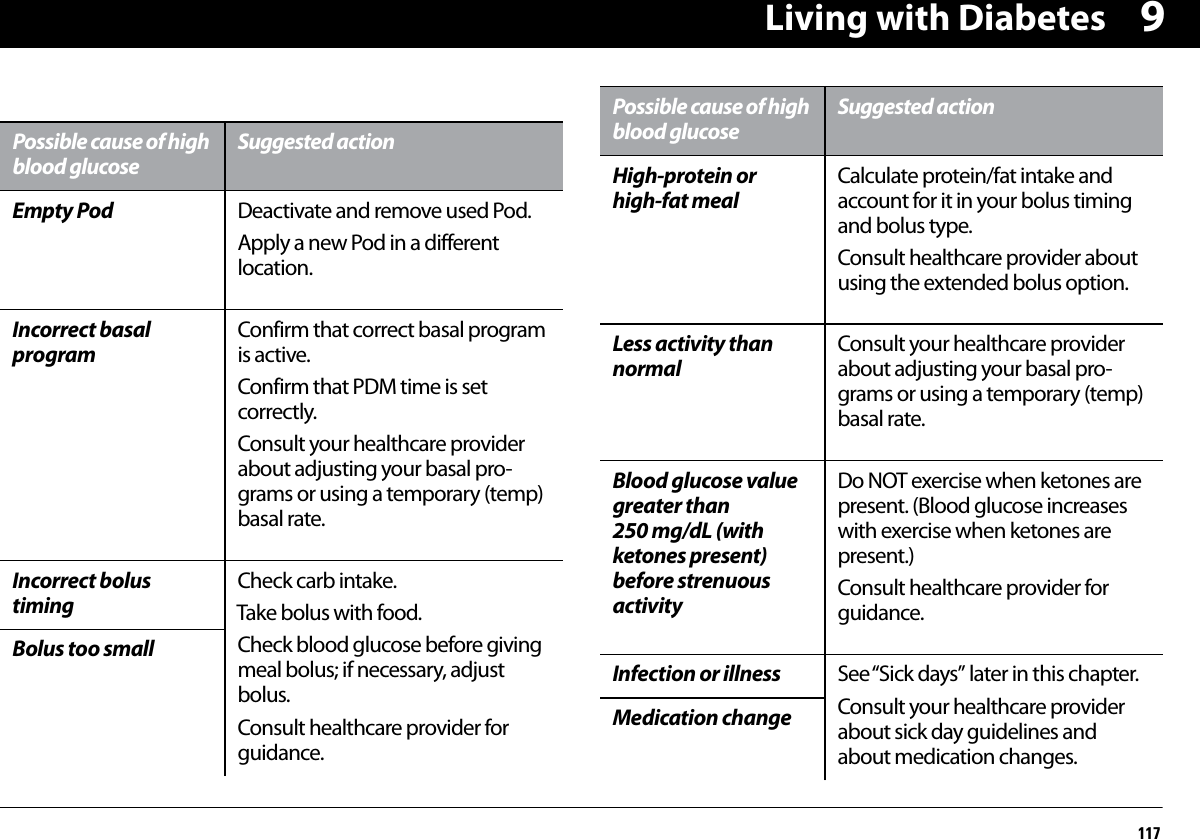
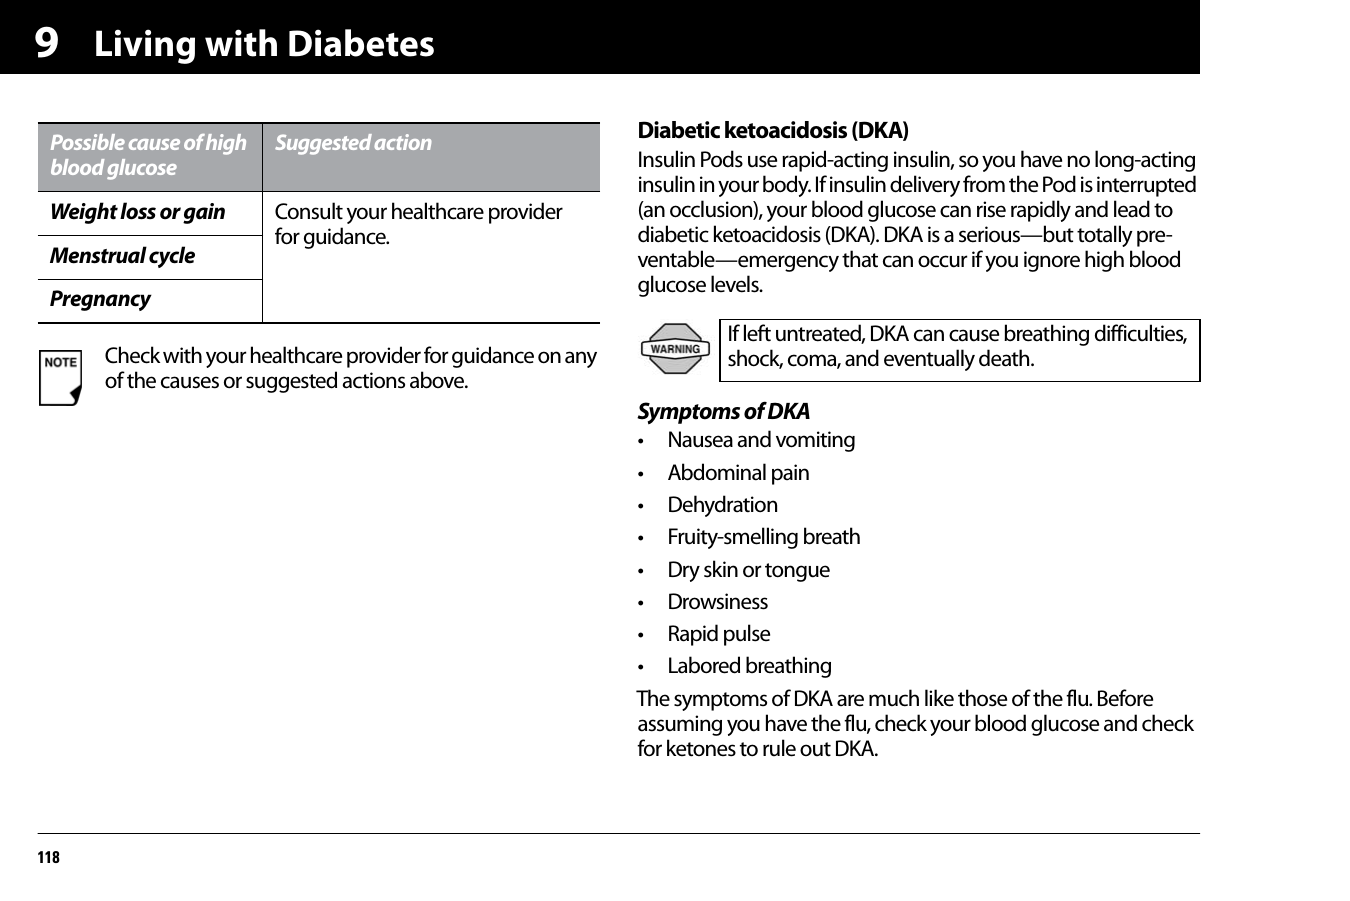
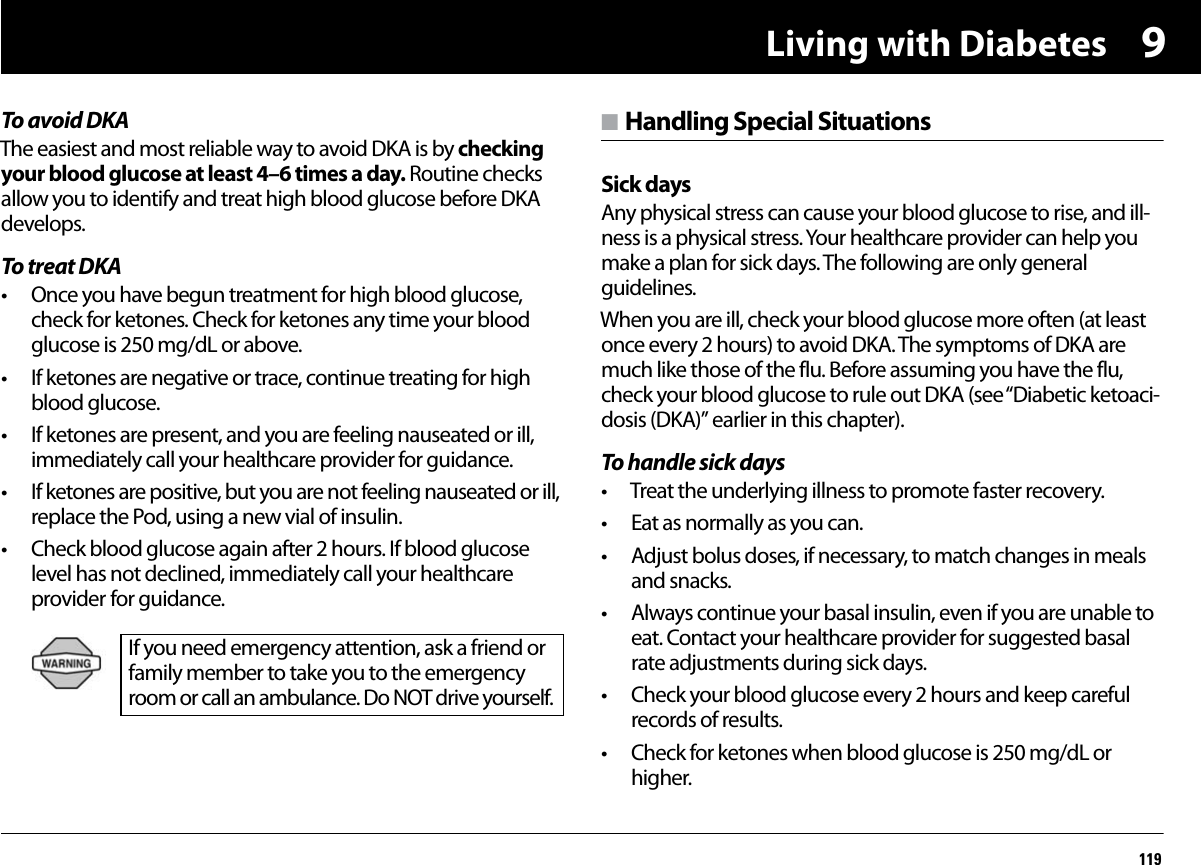
![Living with Diabetes1159To avoid hyperglycemia (high blood glucose)Check your blood glucose at least 4–6 times a day (when you wake up, before each meal, and before going to bed). In addi-tion, always check it:• If you feel nauseated or sick• Before driving a car• Whenever your blood glucose has been running unusually high or low• If you suspect that your blood glucose is high or low• Before, during and after strenuous physical activities• As directed by your healthcare providerTo treat hyperglycemia (high blood glucose)Always check your blood glucose levels frequently while treating hyperglycemia. You don’t want to over-treat the condition and cause your BG level to drop too far.1. Check your blood glucose level. The result will help you to find out how much insulin is needed to return your blood glucose to the BG goal.2. If your blood glucose is 250 mg/dL or above, check for ketones. If ketones are present, follow your healthcare provider’s guidelines.3. If ketones are not present, take a correction bolus as pre-scribed by your healthcare provider.4. Check blood glucose again after 2 hours.5. If blood glucose levels have not decreased, take a second bolus by injection, using a sterile syringe. Ask your healthcare provider whether to inject the same amount of insulin as in step 3.6. If you feel nauseated at any point, check for ketones and call your healthcare provider immediately (see “Diabetic ketoaci-dosis (DKA)” later in this chapter).7. If blood glucose remains high after another 2 hours (a total of 4 hours), replace the Pod. Use a new vial of insulin to fill the new Pod. Then:• Contact your healthcare provider for guidance.• Drink eight ounces of water every 30 minutes until blood glucose is within BG goal. 8. Investigate possible cause for hyperglycemia to avoid similar problems in the future [see “Possible causes of hyperglyce-mia (high blood glucose)“].If you need emergency attention, ask a friend or family member to take you to the emergency room or call an ambulance. Do NOT drive yourself.](https://usermanual.wiki/Insulet/019.Users-manual/User-Guide-2090008-Page-127.png)