Integrated Display Technology CU328 2.4GHz FHSS Cordless Phone w/ CID, Radio and MP3 User Manual manual
Integrated Display Technology Ltd 2.4GHz FHSS Cordless Phone w/ CID, Radio and MP3 manual
UserManual.wiki
>
Integrated Display Technology
>
CU328 User Manual
User Manual
Navigation menu
Upload a User Manual
Namespaces
Wiki Guide
HTML
PDF
Info
Views
User Manual
Discussion / Help
Navigation
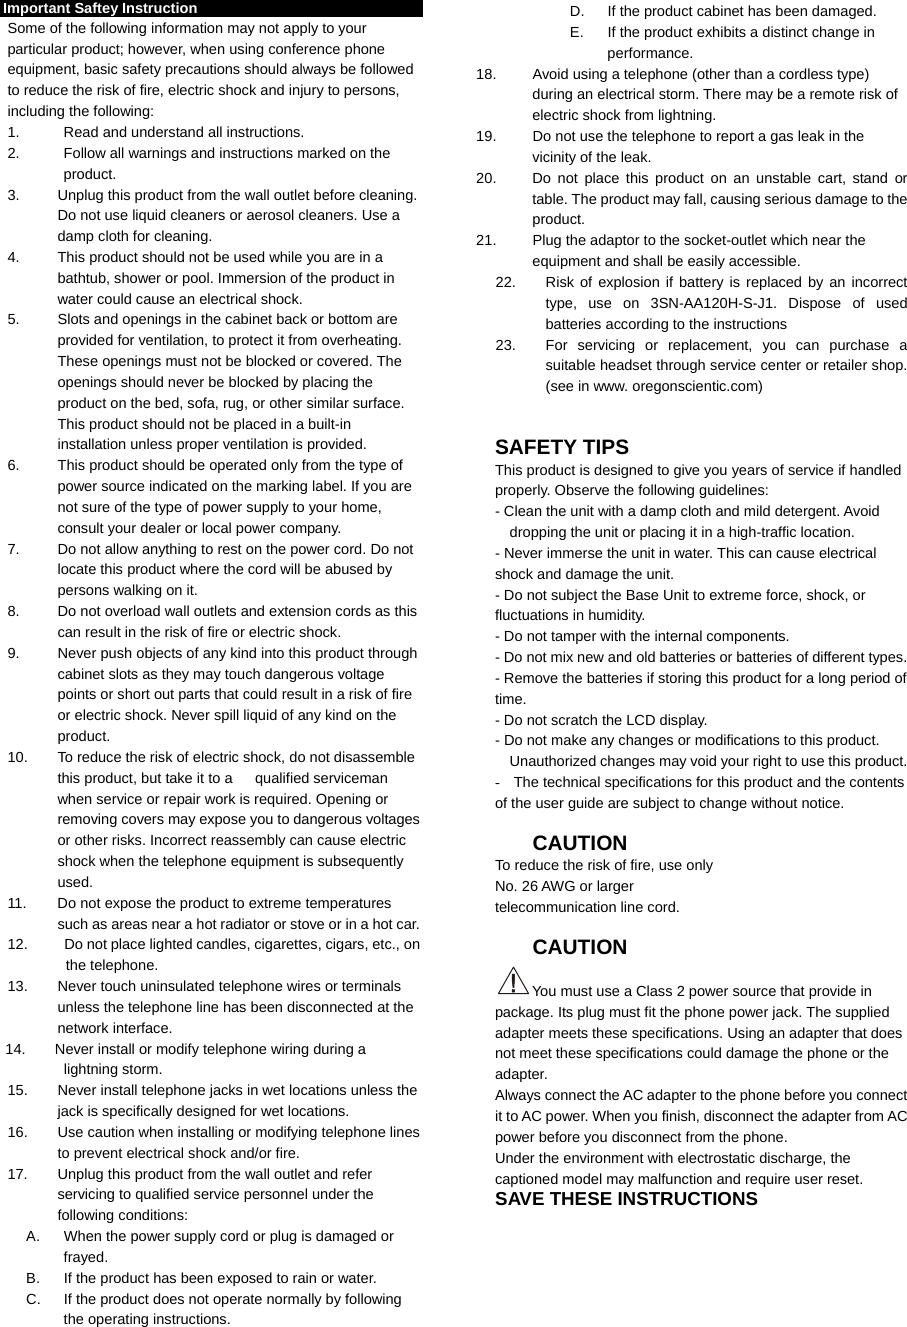
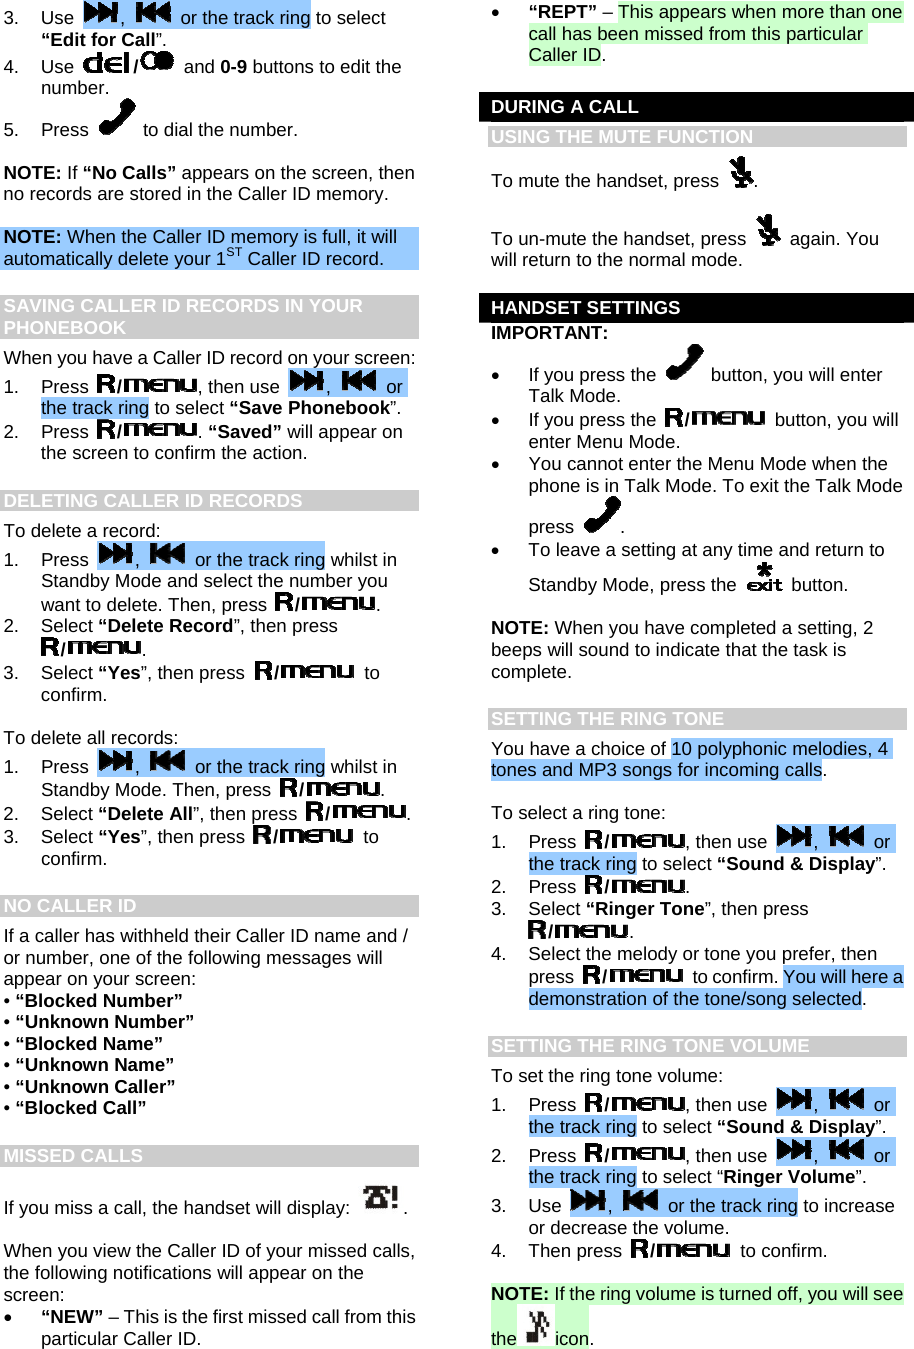
![• Adjustable ring tones (including MP3 ring tone), volume levels, language display, handset IDs and low-battery / out-of-range warning signals. • Rechargeable batteries and up to 7-hours of continuous talk time. • Support for MP3 and WMA audio file formats • Multi-format support for mass data storage • 5 preset equalizer settings • Multilanguage menu support IMPORTANT: To use all of the features of this telephone, you must subscribe to either the standard Caller ID service or Caller ID with Call Waiting service from your local telephone company. The following items should be included in the CU328 package: • Base unit • Telephone audio station • 1 AC adaptor • Telephone line cord • 1 battery • Battery order sheet • User manual • CD-ROM (MP303S) USB driver for Windows98® • Stereo headset with mic • USB cable HANDSET – FRONT VIEW HANDSET – FRONT VIEW 1. Number keys 2. / [DELETE] key 3. [PLAY / PAUSE] key 4. [REWIND] key 5. [INTERCOM] key 6. [STOP] key 7. [TALK] key 8. [Microphone] 9. / key 10. Track ring 11. Speaker 12. [Address Book] key 13. [FORWARD] key 14. [MUTE] key 15. Charging prongs 16. PAGE button 17. Charge / in-use indicator HANDSET/BASE – BACK AND BOTTOM VIEW 1. USB socket 2. SD CARD slot 3. HEADSET jack 4. Radio antenna 5. POWER jack 6. TELEPHONE jack GETTING STARTED Certain other communication devices may use the 2.4GHz frequency for communication and, if not set properly, these devices may interfere with your new telephone.](https://usermanual.wiki/Integrated-Display-Technology/CU328/User-Guide-566240-Page-3.png)
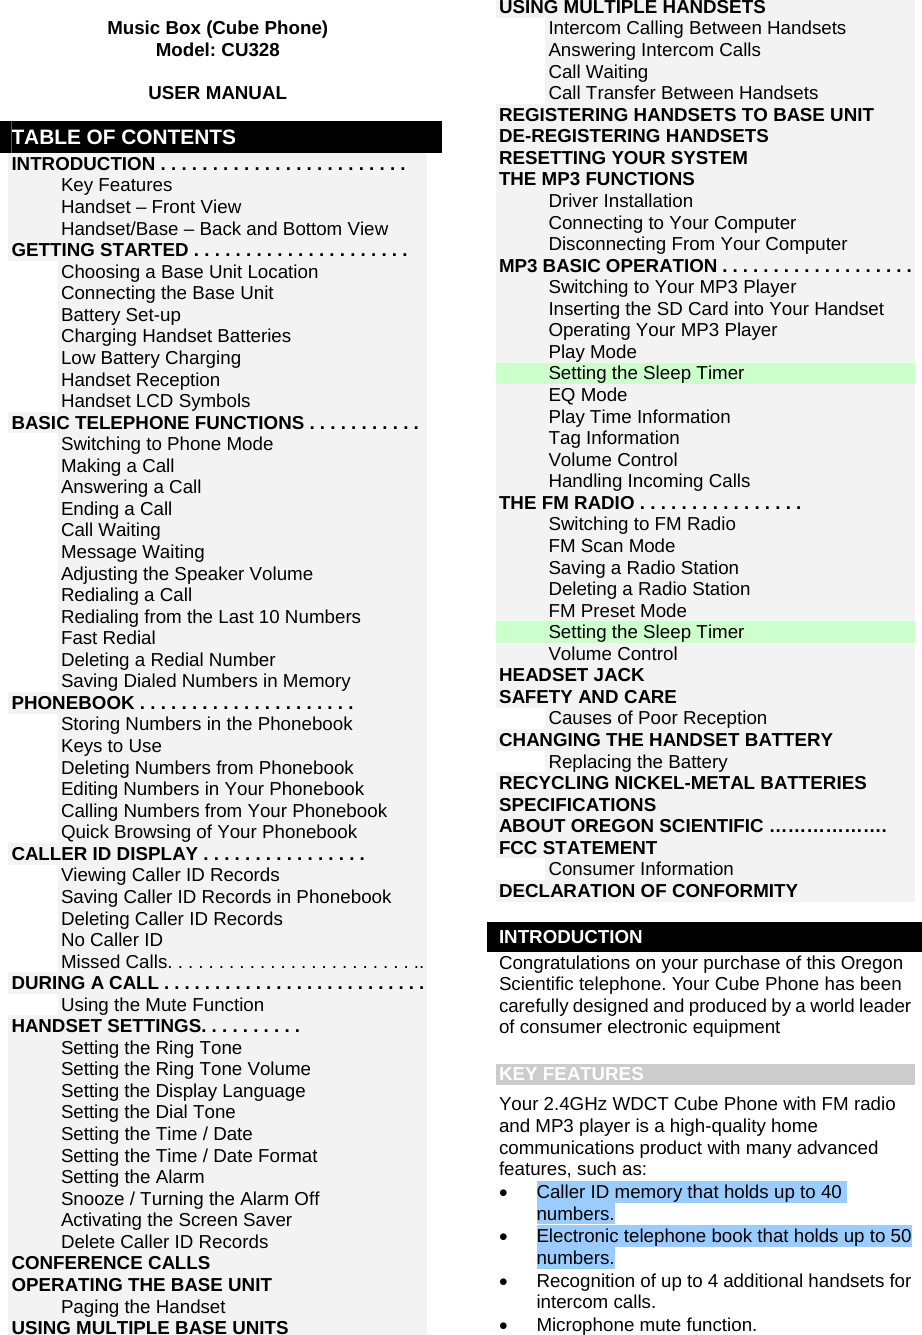
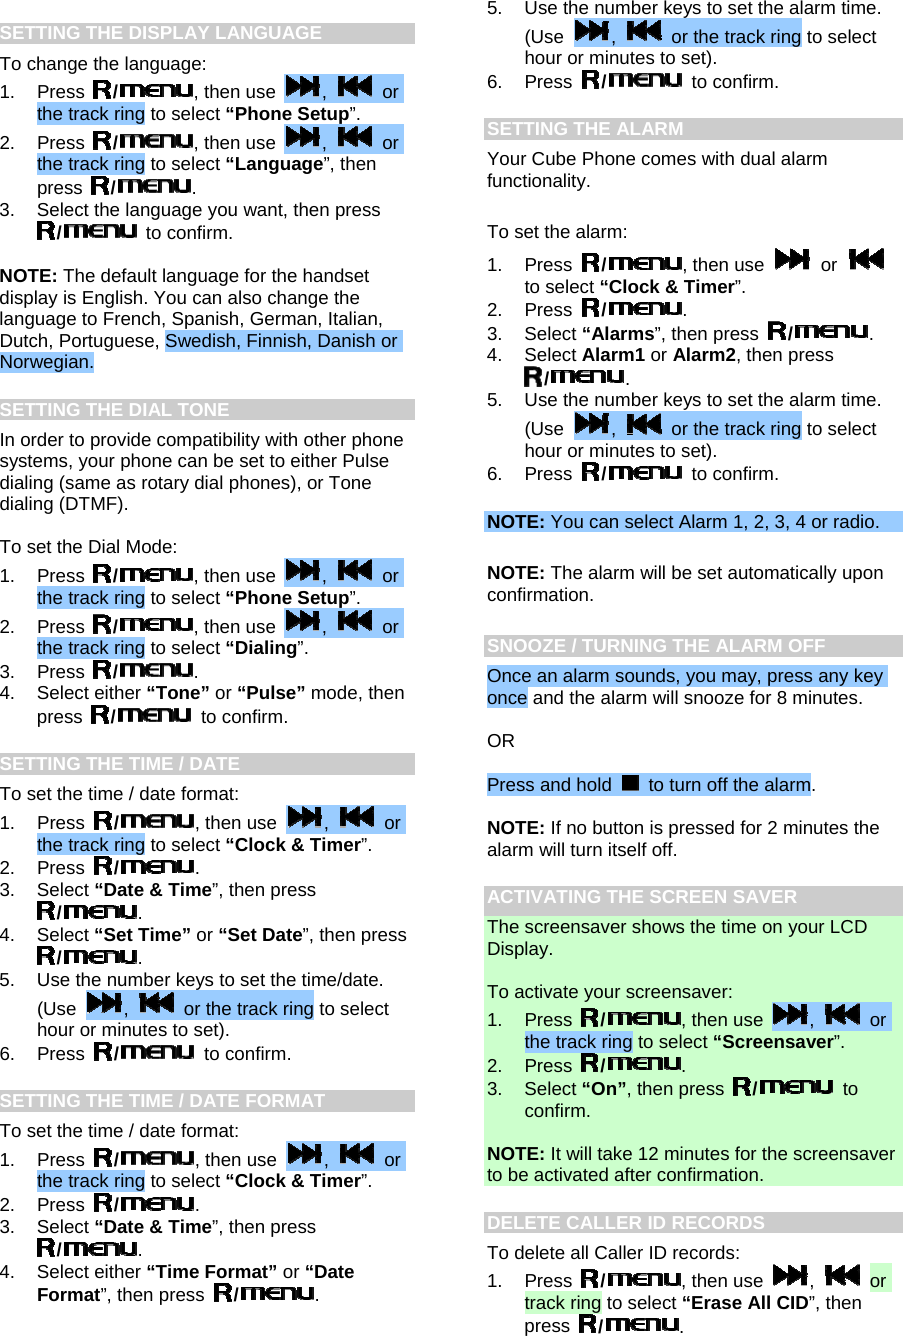
![7. Enter the phone number and then press /. The handset will beep twice indicating that the record has been stored. NOTE: If only a phone number and no name is input, then the record can still be saved. KEYS TO USE When entering a name, “B” will be entered by pressing the “2” button once, followed by pressing “2” again within 1 second. If pressed beyond 1 second, “A” is entered and the second press of “2” will give the entry of “AA”. [PLEASE LAY OUT IN CHART FORMAT] The list of characters is shown below: CAPITAL LETTERS SMALL LETTERS 1 SPACE 1 _ - + = ^ ~ . , ; : ? ! SPACE 1 _ - + = ^ ~ . , ; : ? ! 2 ABC2ÄÆÅÀÁÂÃÇ abc2äæåàáâãç 3 DEF3ÈÉÊËÐ def3èéêëð 4 GHI4ÌÍÎÏ ghi4ìíîï 5 JKL5 jkl5 6 MNO6ÖØÒÓÔÕÑ mno6öøòóôõñ 7 PQRS7 pqrs7 8 TUV8ÙÚÛÜ tuv8ùúûü 9 WXYZ9ÝÞ wxyz9ýþ 0 0 * # $ & % / \ | ( ) [ ] < > 0 * # $ & % / \ | ( )[ ] < > • Press when editing a name to return to Standby Mode. Press when editing a number to get “*”. # Press to change between capital and small letters. DELETING NUMBERS FROM PHONEBOOK To delete a record in your phonebook: 1. Press /. 2. Use , or the track ring to select “Phone Book”, then press /. 3. The handset display shows a record. Use , or the track ring to select the record you want to delete. Press /. 4. Enter the name (see KEYS TO USE section) and then press /. 5. Use , or the track ring to select “Delete Record”. 6. Press /. 7. Select “Yes” to complete deletion. The handset will beep twice indicating that the record has been deleted. To delete all records: 1. Follow steps 1-4 above and select “Delete All?” 2. Now follow steps 6-7 above. EDITING NUMBERS IN YOUR PHONEBOOK To edit a record in your phonebook: 1. Press /. 2. Use , or the track ring to select “Phone Book”, then press /. 3. Press / again, and then use , or the track ring to select “Edit Record”. 4. Press /. Use / to edit the name. (See KEYS TO USE section) and then press /. 5. Use / to edit the number and then press /. The handset will beep twice indicating that the record has been stored. CALLING NUMBERS FROM PHONEBOOK To call using a number in your phonebook: 1. Press /. 2. Use , or the track ring to select “Phone Book”, then press /. 3. Use , or the track ring to select a number, then press to dial the number. QUICK BROWSING OF YOUR PHONEBOOK To browse through your phonebook quickly: 1. Press and then use or to browse through your phonebook. 2. Then press the key with the 1st letter of the person’s name you are looking for. (For example, press key 7, 4 times to get quick access to a name beginning with ‘S’). Press to dial the selected number, or press to return to Standby Mode. NOTE: You can use the phonebook function while on an active call. CALLER ID DISPLAY If you have subscribed to this service, the caller’s phone number will display when there is an incoming call. NOTE: If the caller’s phone number was stored in the phonebook, the associated name will be displayed with the phone number. Each entry in the caller list has the: • Caller number (up to 24 digits) • Caller name (up to 15 characters • Date and time of the call • Number of calls made to this number (up to 40). VIEWING CALLER ID RECORDS To view caller ID records: 1. When the phone is in Standby Mode use , or the track ring to browse through Caller ID records. 2. If you need to edit the phone number before making the call press /.](https://usermanual.wiki/Integrated-Display-Technology/CU328/User-Guide-566240-Page-6.png)
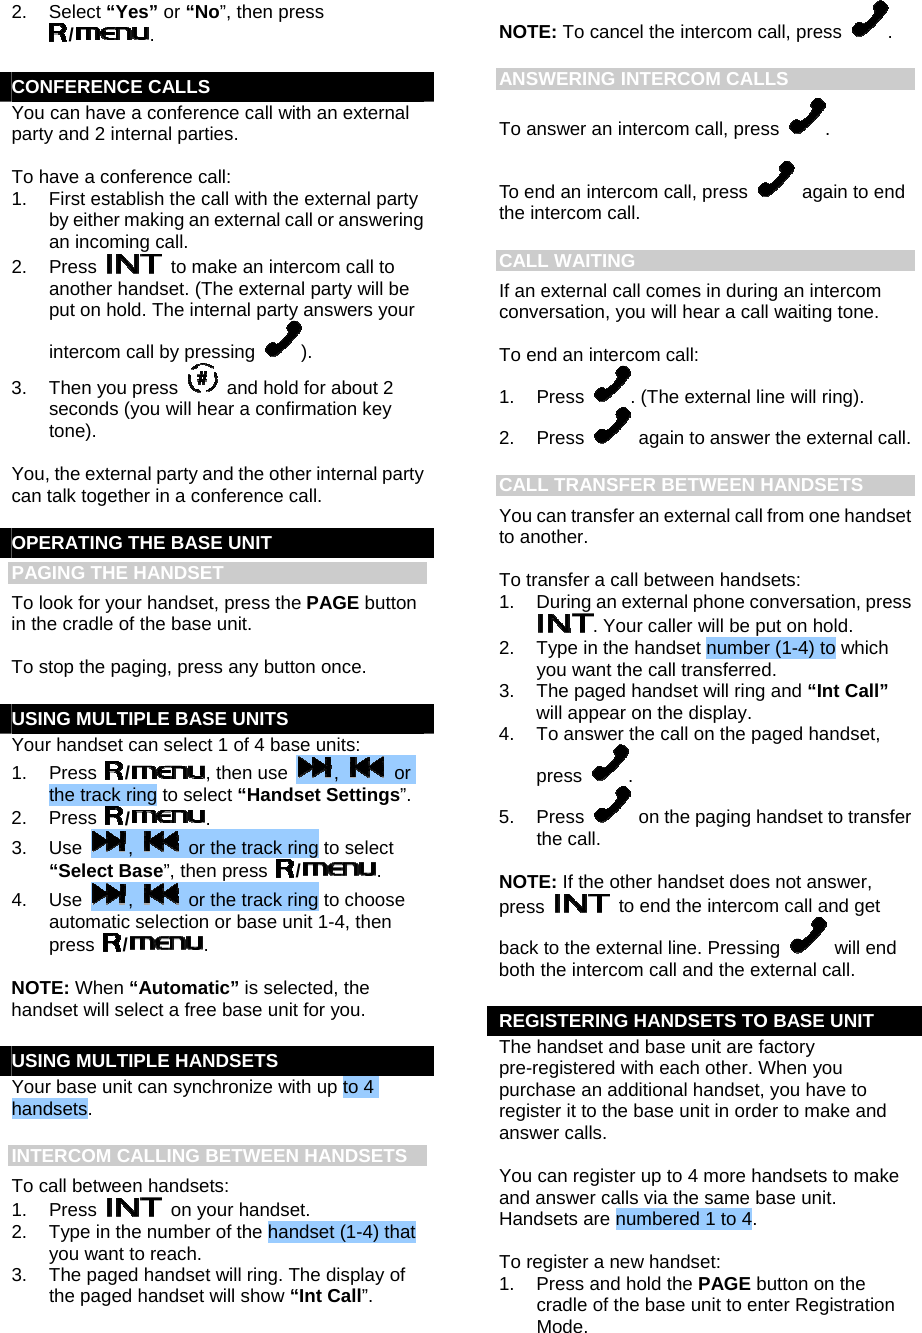
![equipment and receiver. • Connect the equipment into an outlet on a circuit different from that to which the receiver is connected. • Consult the dealer or an experienced radio / TV technician for help. CONSUMER INFORMATION a. This equipment complies with Part 68 of the FCC rules and the requirements adopted by the ACTA. On the bottom of this equipment is a label that contains, among other information, a product identifier in the format US:KT5W400BCU328. If requested, this number must be provided to the telephone company. b. An applicable certification jack Universal Service Order Codes (USOC) for the equipment is provided (i.e., RJ11C) in the packaging with each piece of approved terminal equipment. The mounting of the approval unit in the final assembly must be made so that the approved unit is isolated from exposure to any hazardous voltages within the assembly. Adequate separation and restraint of cables and cords have been provided c. A plug and jack used to connect this equipment to the premises’ wiring and telephone network must comply with the applicable FCC Part 68 rules and requirements adopted by the ACTA. A compliant telephone cord and modular plug is provided with this product. It is designed to connect to a compatible modular jack that is also compliant. See installation instructions for details. d. The REN is used to determine the number of devices that may be connected to a telephone line. Excessive RENs on a telephone line may result in the device not ringing in response to an incoming call. In most but not all areas, the sum of RENs should not exceed five (5.0). To be certain of the number of devices that may be connected to a line, as determined by the total RENs, contact the local telephone company. [For products approved after July 23, 2001, the REN for this product is part of the product identifier that has the format US:KT5W400BCU328. The digits represented by ## are the REN without a decimal point (e.g., 03 is a REN of 0.3). For earlier products, the REN is separately shown on the label]. e. If this equipment CU328 causes harm to the telephone network, the telephone company will notify you in advance that temporary discontinuance of service may be required. But if advance notice isn't practical, the telephone company will notify the customer as soon as possible. Also, you will be advised of your right to file a complaint with the FCC if you believe it is necessary. f. The telephone company may make changes in its facilities, equipment, operations or procedures that could affect the operation of this equipment. If this happens the telephone company will provide advance notice in order for you to make necessary modifications to maintain uninterrupted service. g. Should you experience trouble with this equipment, please contact Oregon Scientific www2.oregonscientific.com/service/support or call 1-800-853-8883 for repair or warranty information. If the equipment is causing harm to the telephone network, the telephone company may request that you disconnect the equipment until the problem is resolved. h. Please follow instructions for repairing if needed (e.g. REPLACING THE BATTERY section); otherwise do not alter or repair any parts of THE device except where specified. i. Connection to party line service is subject to state tariffs. Contact the state public utility commission, public service commission or corporation commission for information. NOTICE If your home has specially wired alarm equipment connected to the telephone line, ensure the installation of this CU328 does not disable your alarm equipment. If you have questions about what will disable alarm equipment, consult your telephone company or a qualified installer. NOTICE According to telephone company reports, AC electrical surges, typically resulting from lightning strikes, are very destructive to telephone equipment connected to AC power sources. To minimize damage from these types of surges, a surge arrestor is recommended. This equipment is to be supplied from an identified USB port complying with the requirements of Limited Power Source. CAUTION To maintain compliance with the FCC's RF exposure guidelines place the base unit at least 20cm from the nearby persons."](https://usermanual.wiki/Integrated-Display-Technology/CU328/User-Guide-566240-Page-15.png)