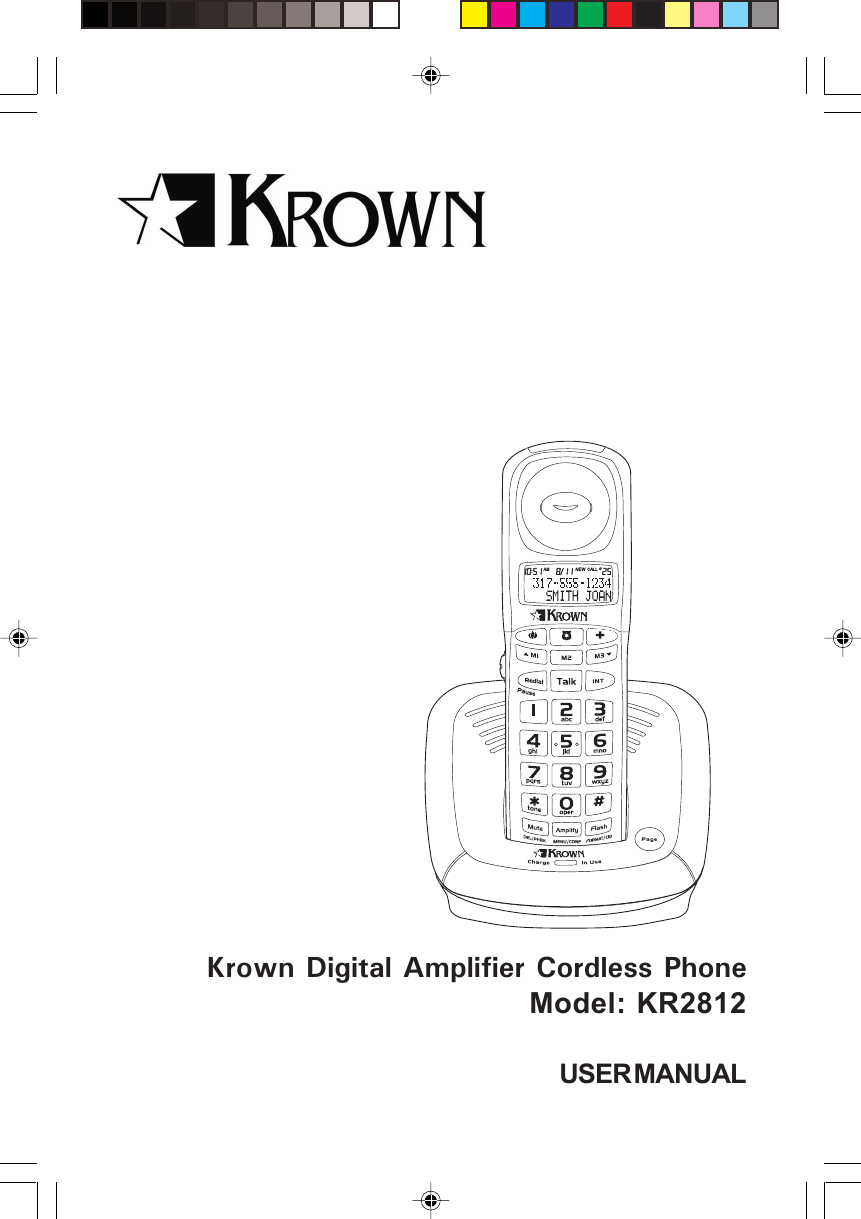
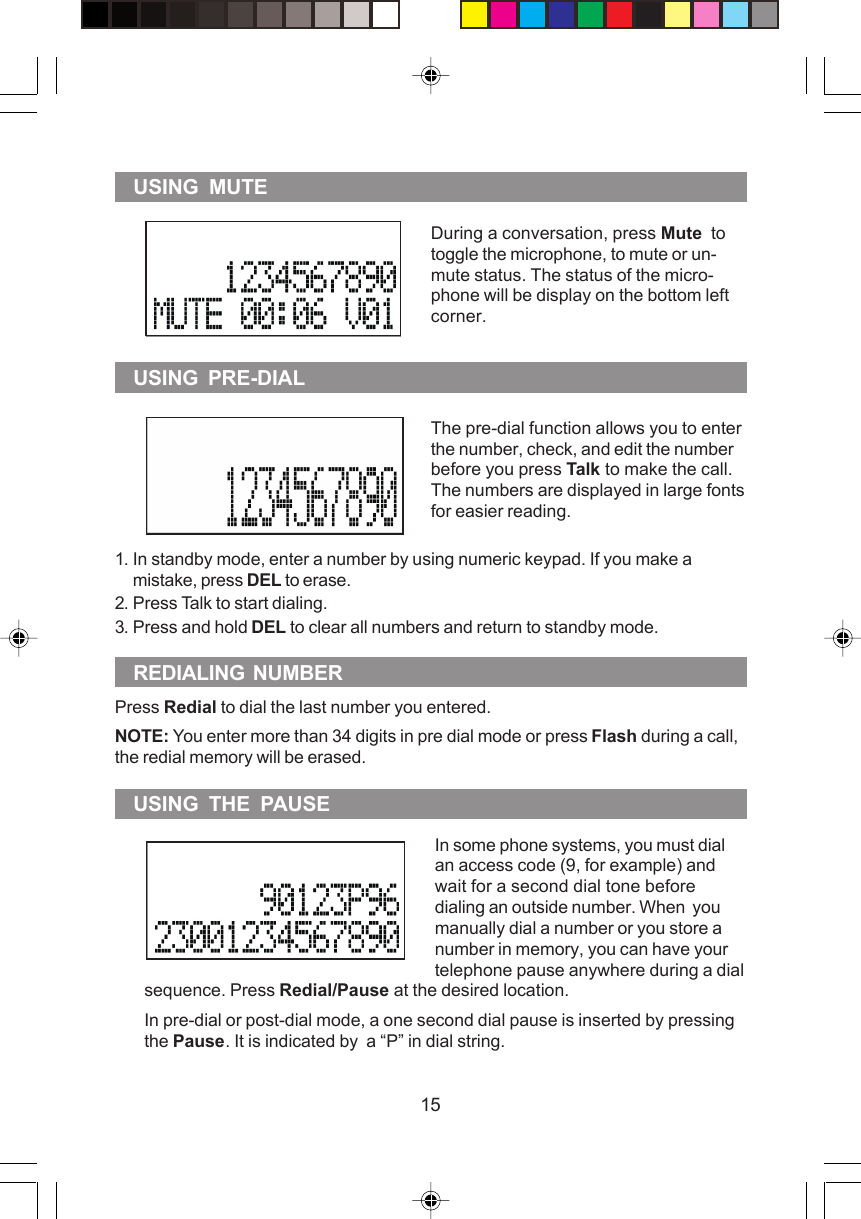
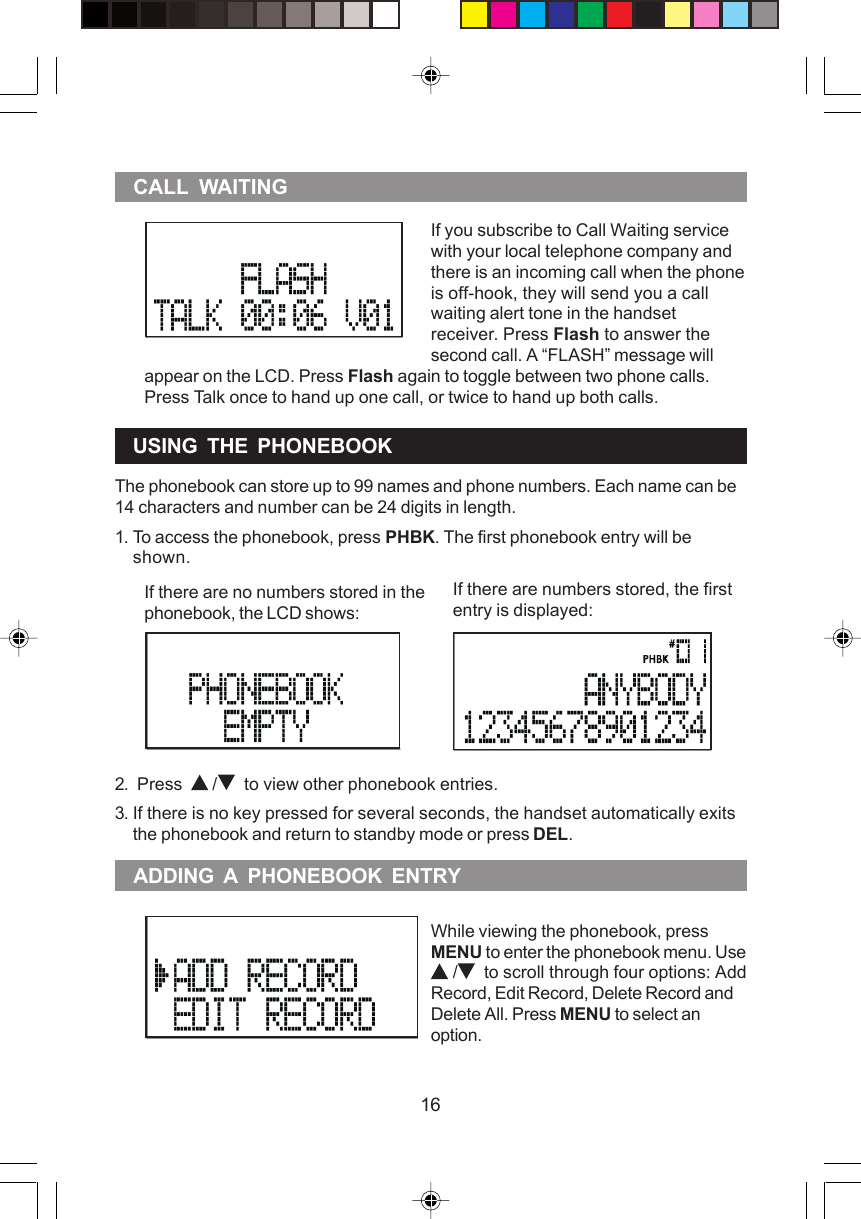
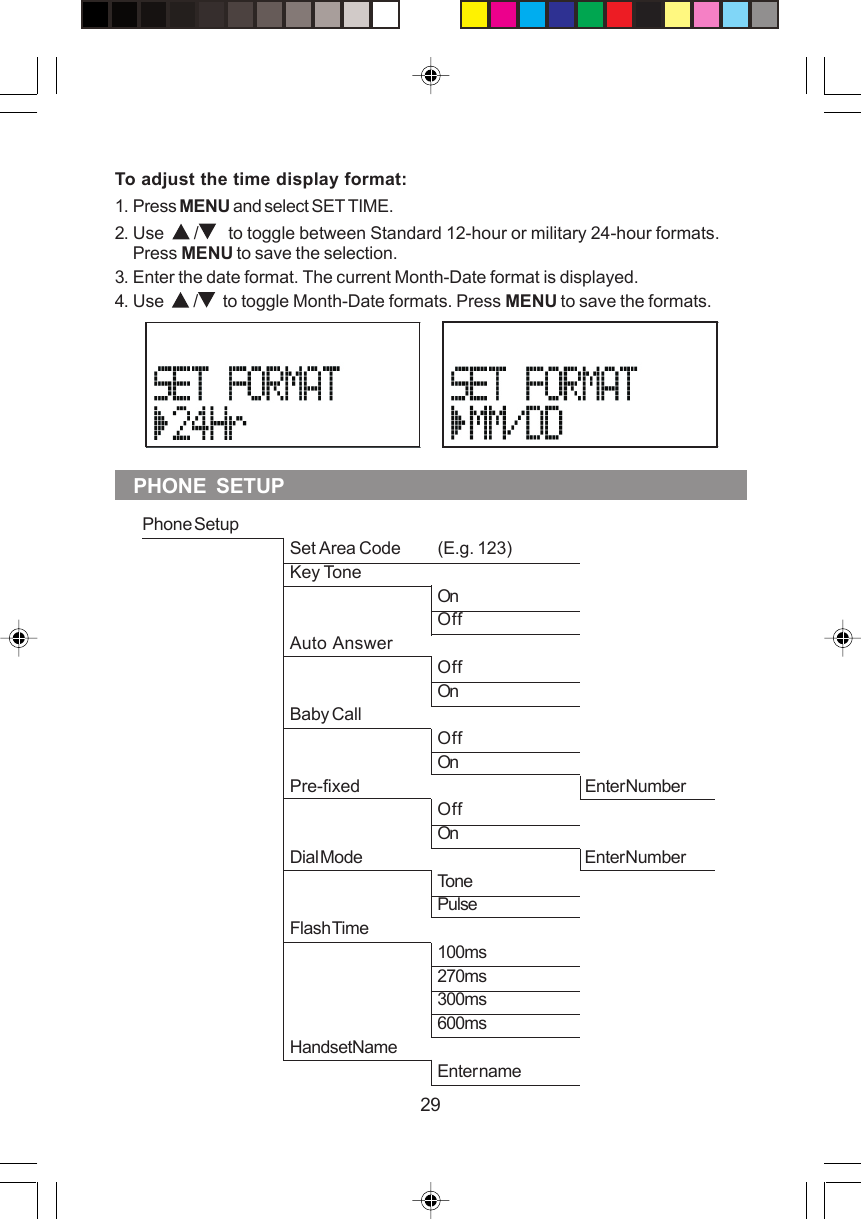
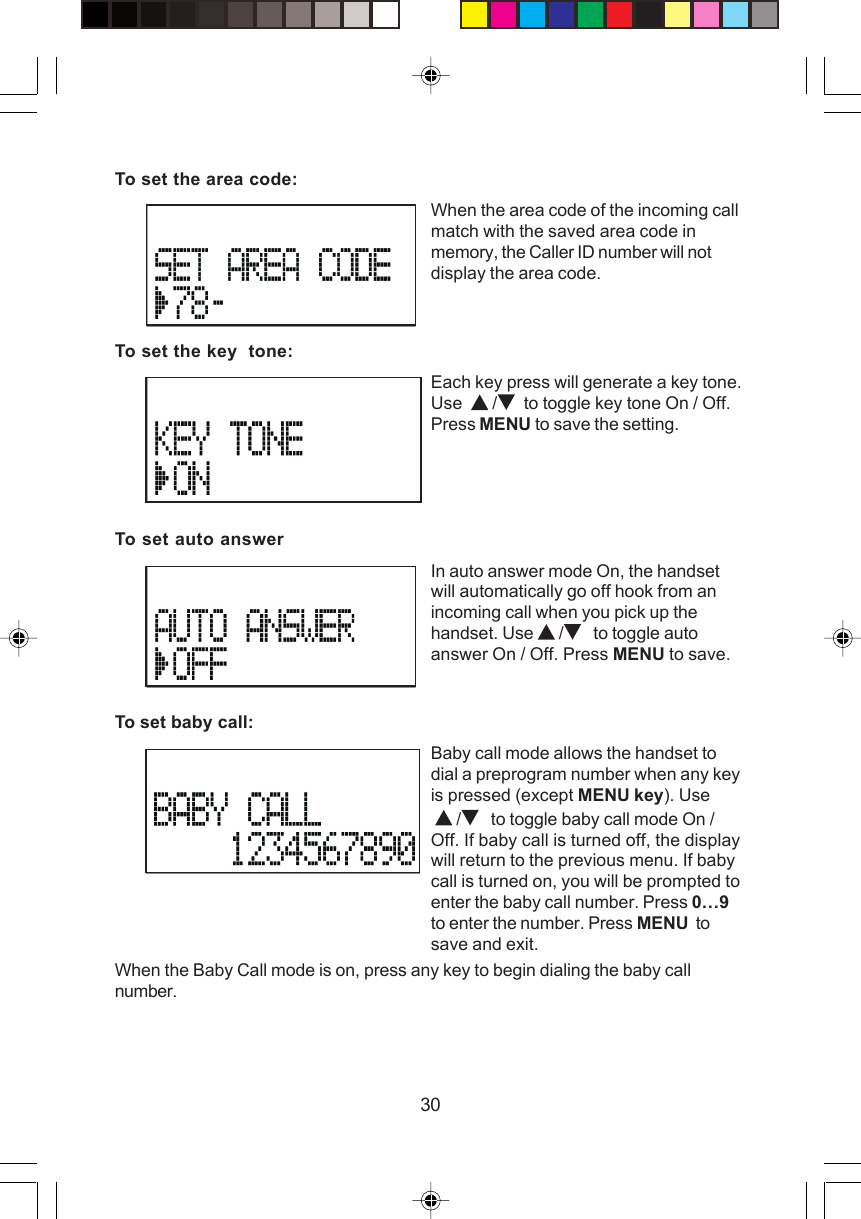
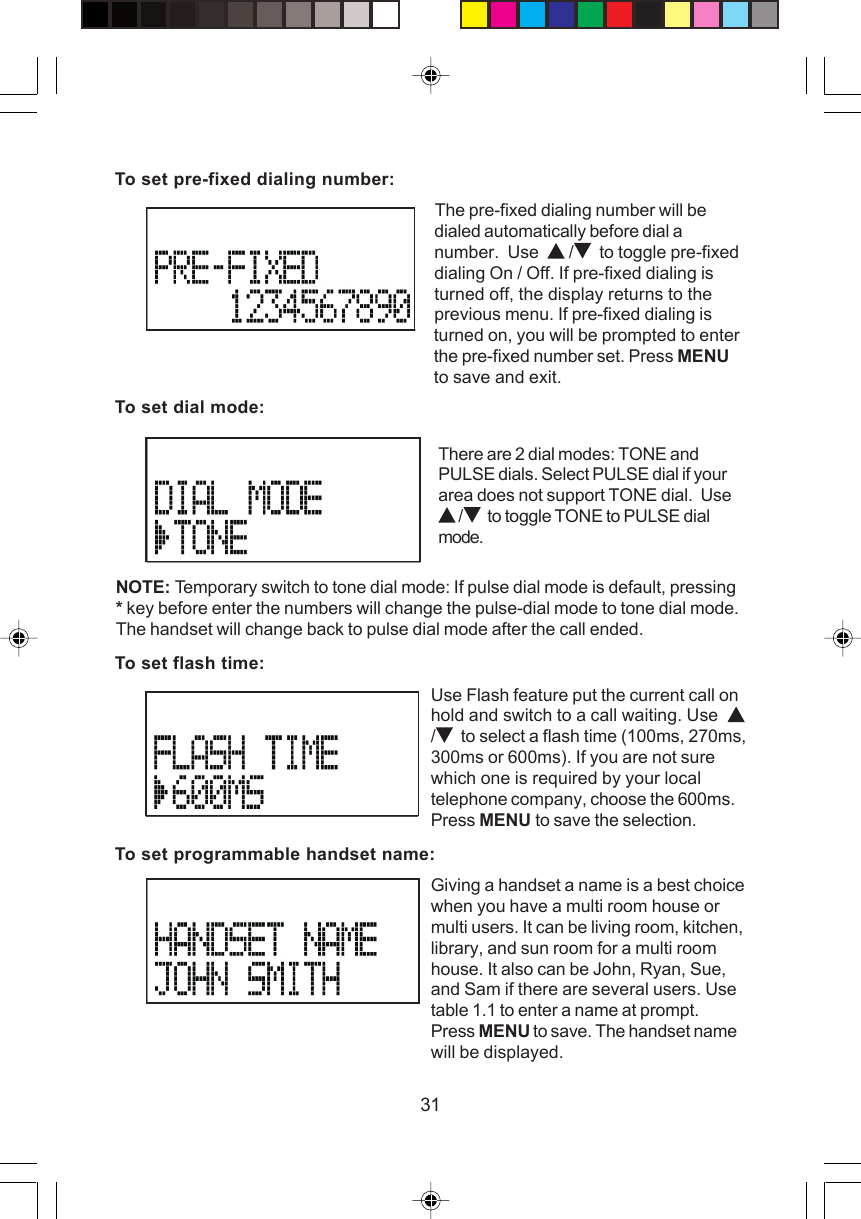
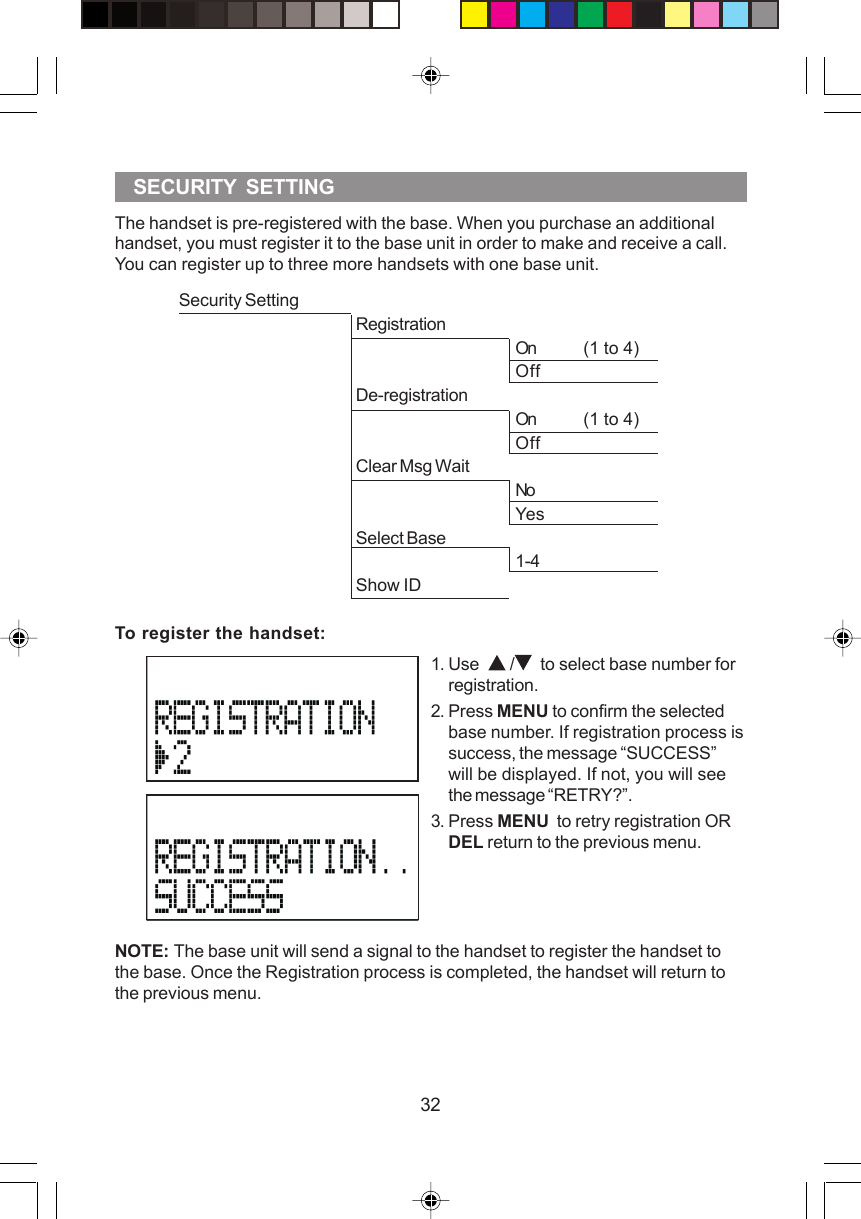
Integrated Display Technology KR2812 2.4GHz FHSS Cordless Phone w/ CID User Manual KR2812 MANUAL 24 MAR p65
Integrated Display Technology Ltd 2.4GHz FHSS Cordless Phone w/ CID KR2812 MANUAL 24 MAR p65
UserManual.wiki
>
Integrated Display Technology
>
KR2812 User Manual
User Manual
Navigation menu
Upload a User Manual
Namespaces
Wiki Guide
HTML
PDF
Info
Views
User Manual
Discussion / Help
Navigation
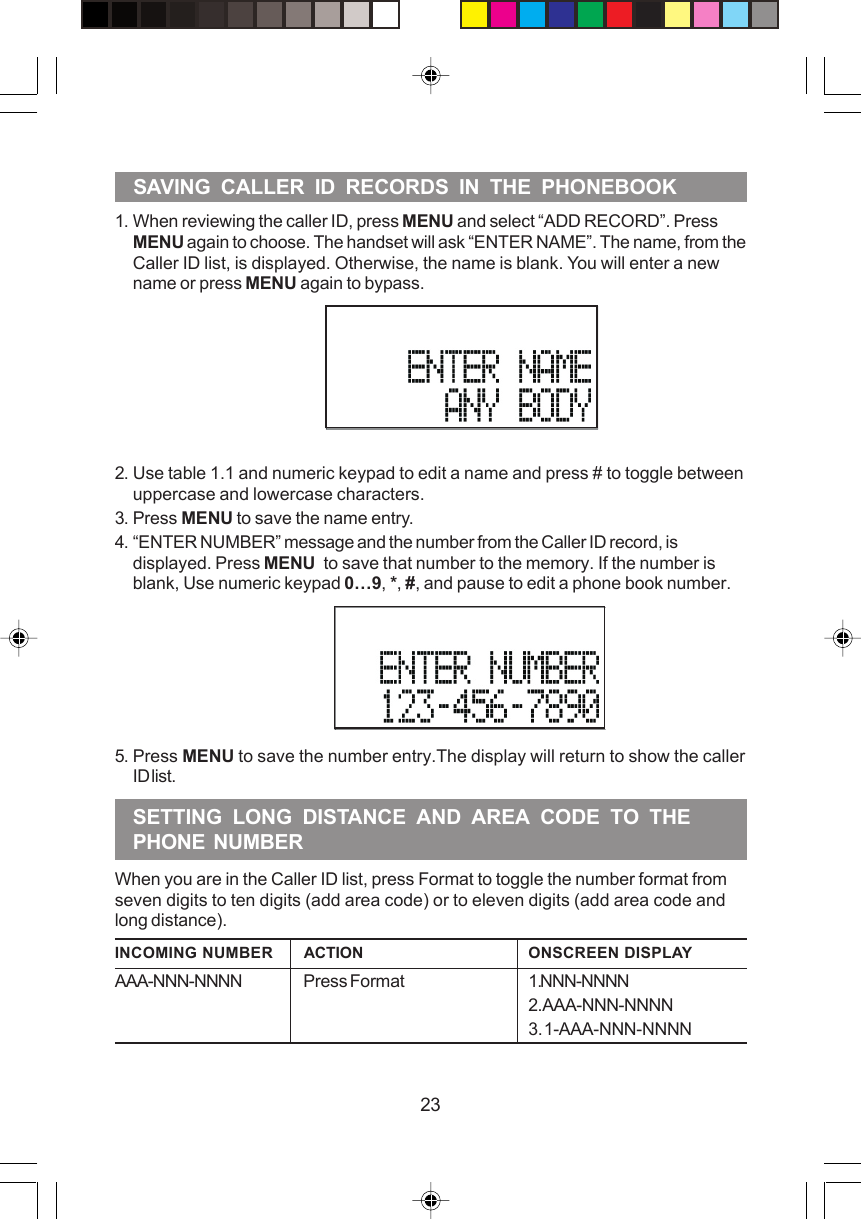
![171. Select the sub-menu item “ADD RECORD” to add a phonebook entry. If thephonebook is full, a “PHONEBOOK FULL” message will be displayed.2. If there is available storage space in the phonebook, the message “ENTERNAME” will appear on the LCD. Using table 1.1 to enter a phonebook name orpress MENU again to bypass.Table 1.1Press DEL key to erase the character.3. After enter a name, press Menu to save. The “ENTER NUMBER” prompt will bedisplayed. Enter a number by using numeric keypad: 0…9, #,*, and Pause.Key Key press12 3 4561space 1,.;:2 A(a) B(b) C(c) 2 ( [3 D(d) E(e) F(f) 3 ) ]4 G(g) H(h) I(i) 4 $ <5 J(j) K(k) L(l) 5 ‘ >6 M(m) N(n) O(o) 6 + -7 P(p) Q(q) R(r) S(s) 7 %8 T(t) U(u) V(v) 8 ¡÷ ^9 W(w) X(x) Y(y) Z(z) 9 =00 / \ & | _**#?!{}# Toggle between upper / lower case letters](https://usermanual.wiki/Integrated-Display-Technology/KR2812/User-Guide-665011-Page-17.png)


![38Your telephone has built-in lightning protection to reduce the risk of damage fromsurges in telephone line and power line current. This lightning protection meets orexceeds FCC requirements. However, lightning striking the telephone or powerlines can damage your telephone.Lightning damage is not common. Nevertheless, if you live in an area that hassevere electrical storms, we suggest that you unplug your phone when stormsapproach to reduce the possibility of damage.This equipment complies with Part 68 of the FCC rules and the requirementsadopted by the ACTA. On the bottom of this equipment is a label that contains,among other information, a product identifier in the formatUS:KT5W400BKR2812. If requested, this number must be provided to the tele-phone company.An applicable certification jacks Universal Service Order Codes (USOC) for theequipment is provided (i.e., RJ11C) in the packaging with each piece of approvedterminal equipment. The mounting of the approval unit in the final assembly must bemade so that the approved unit is isolated from exposure to any hazardousvoltages within the assembly. Adequate separation and restraint of cable andcords have provided.A plug and jack used to connect this equipment to the premises wiring andtelephone network must comply with the applicable FCC Part 68 rules andrequirements adopted by the ACTA. A compliant telephone cord and modular plugis provided with this product. It is designed to be connected to a compatiblemodular jack that is also compliant. See installation instructions for details.The REN is used to determine the number of devices that may be connected to atelephone line. Excessive RENs on a telephone line may result in the devices notringing in response to an incoming call. In most but not all areas, the sum of RENsshould not exceed five (5.0). To be certain of the number of devices that may beconnected to a line, as determined by the total RENs, contact the local telephonecompany. [For products approved after July 23, 2001, the REN for this product ispart of the product identifier that has the format US:KT5W400BKR2812. The digitsrepresented by N/A are the REN without a decimal point (e.g., 03 is a REN of 0.3).For earlier products, the REN is separately shown on the label.]LIGHTNINGCONSUMER INFORMATION](https://usermanual.wiki/Integrated-Display-Technology/KR2812/User-Guide-665011-Page-38.png)