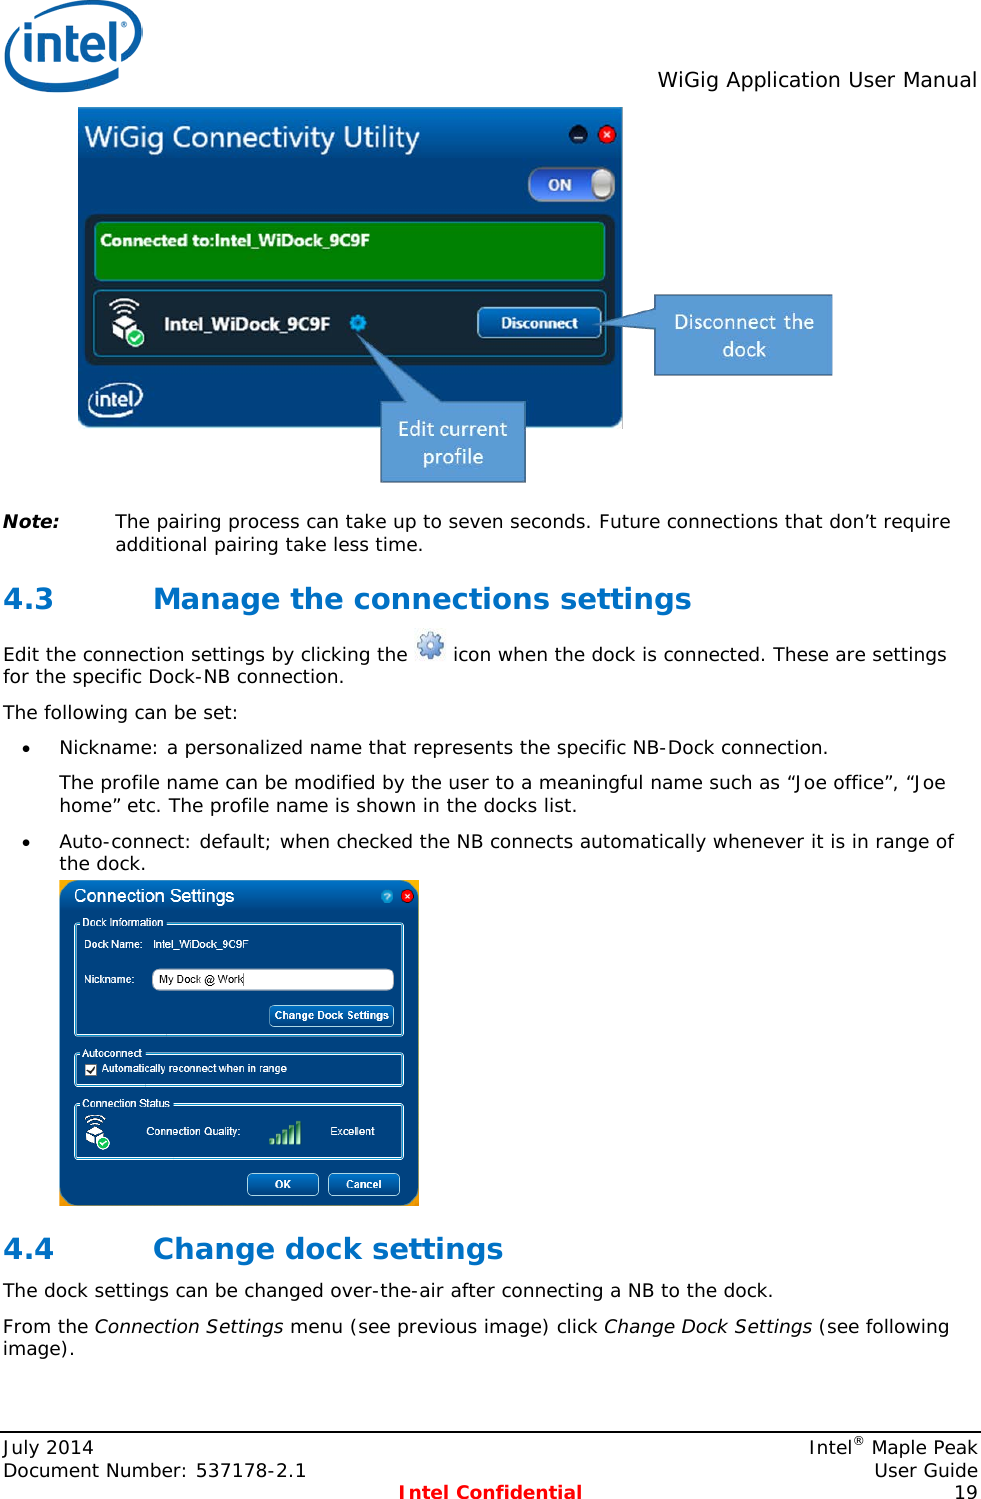
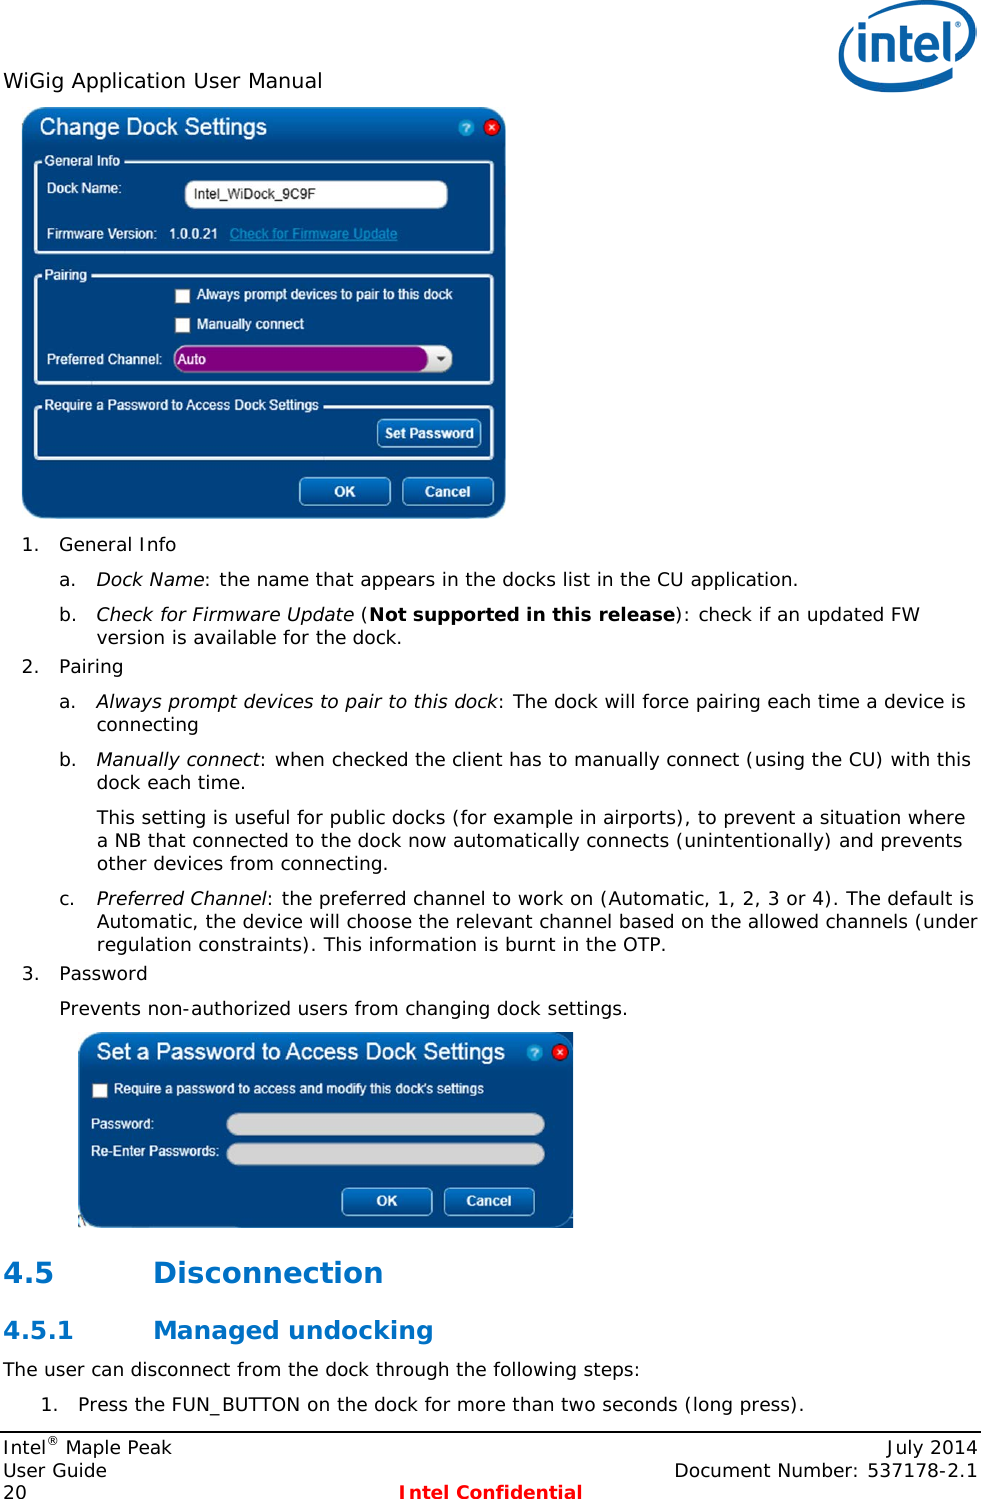
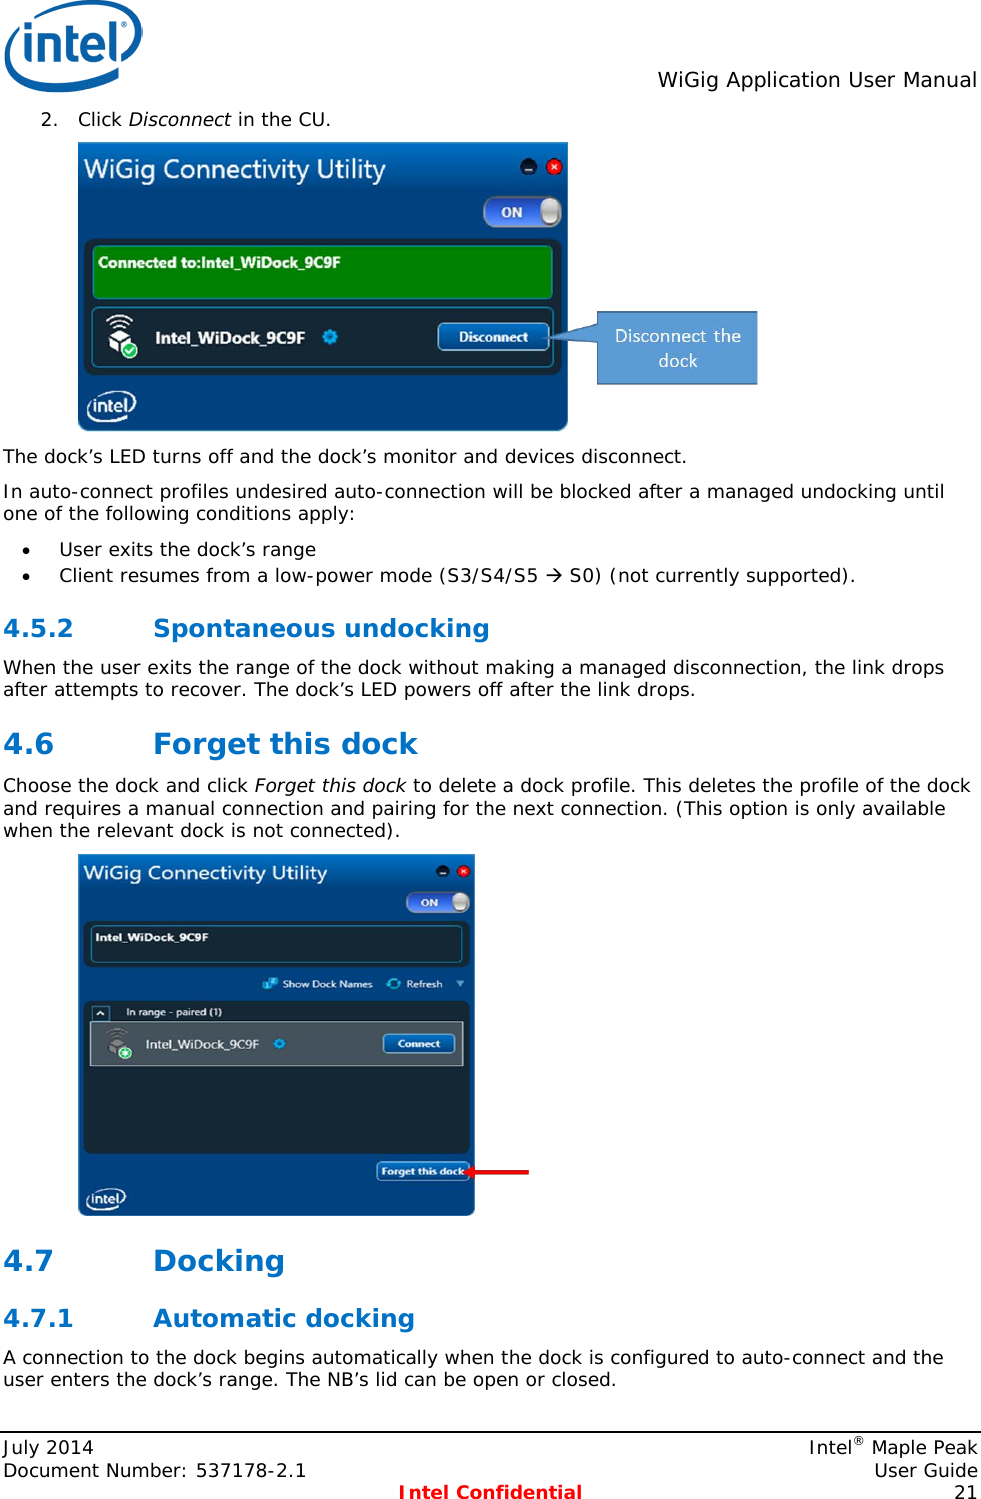
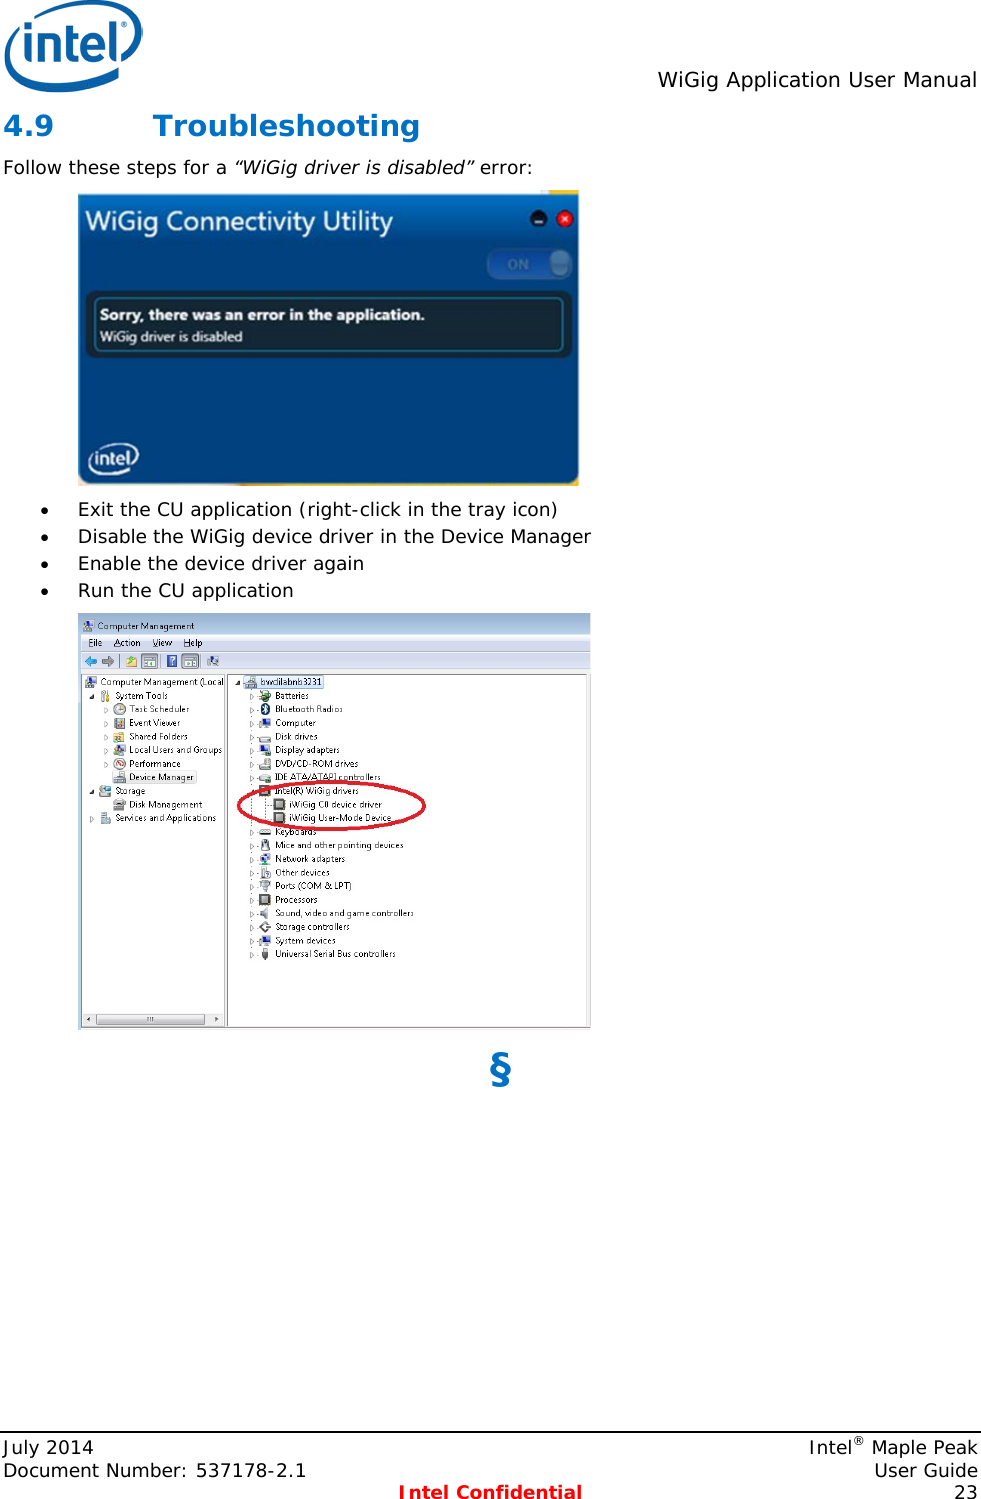
Intel 17265NG Wireless Network Adapter User Manual Intel Maple Peak
Intel Mobile Communications Wireless Network Adapter Intel Maple Peak
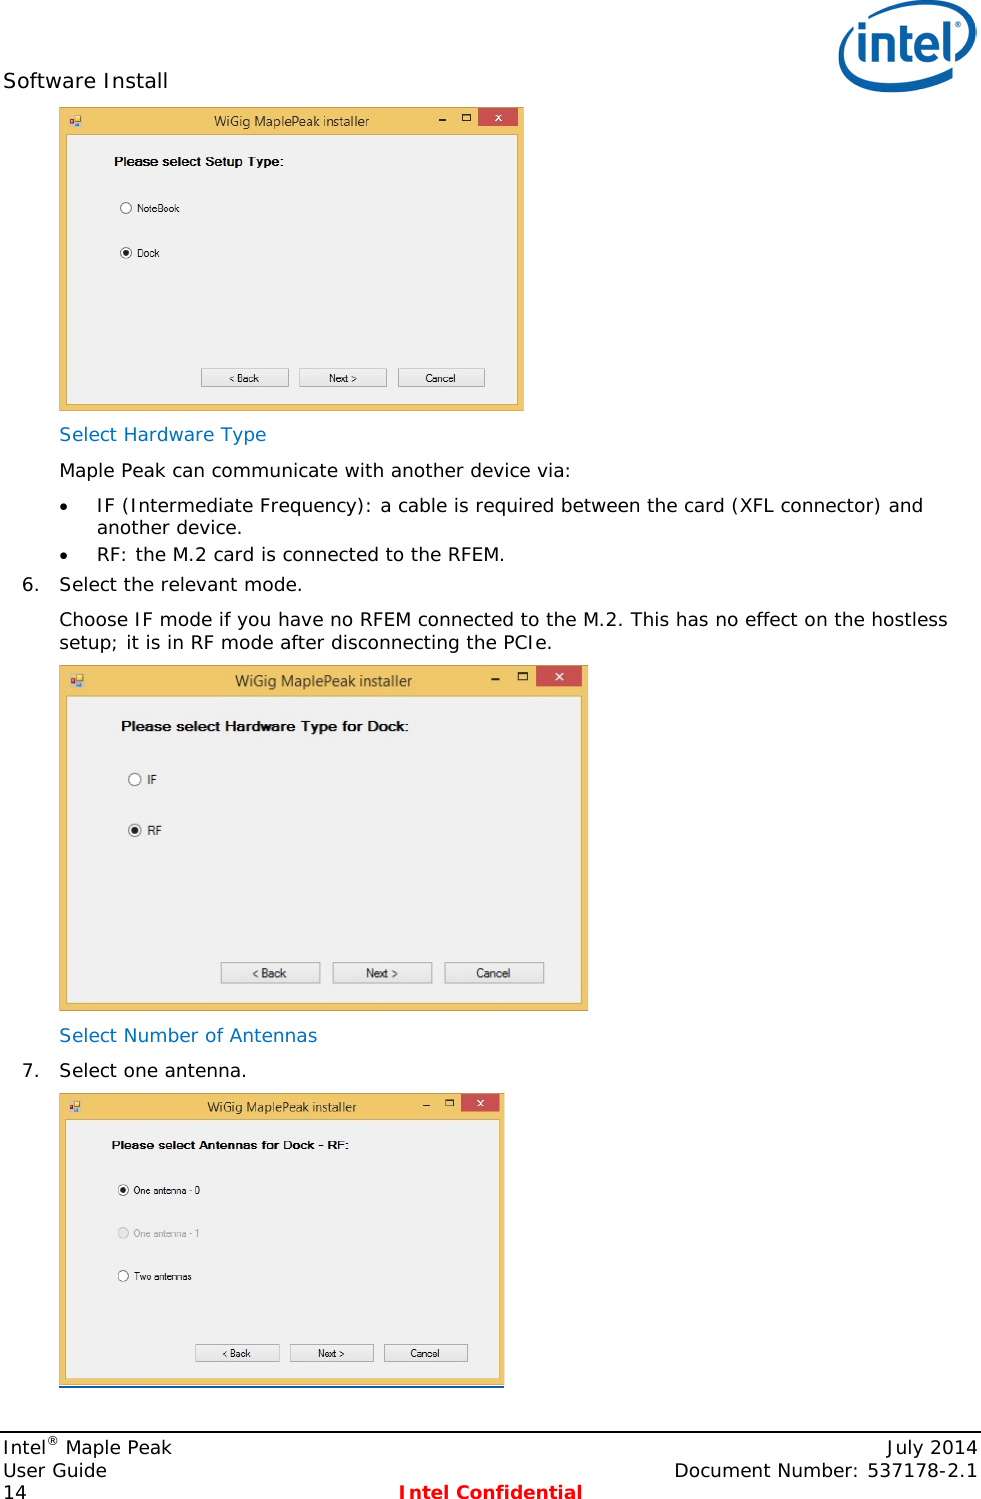
Intel >
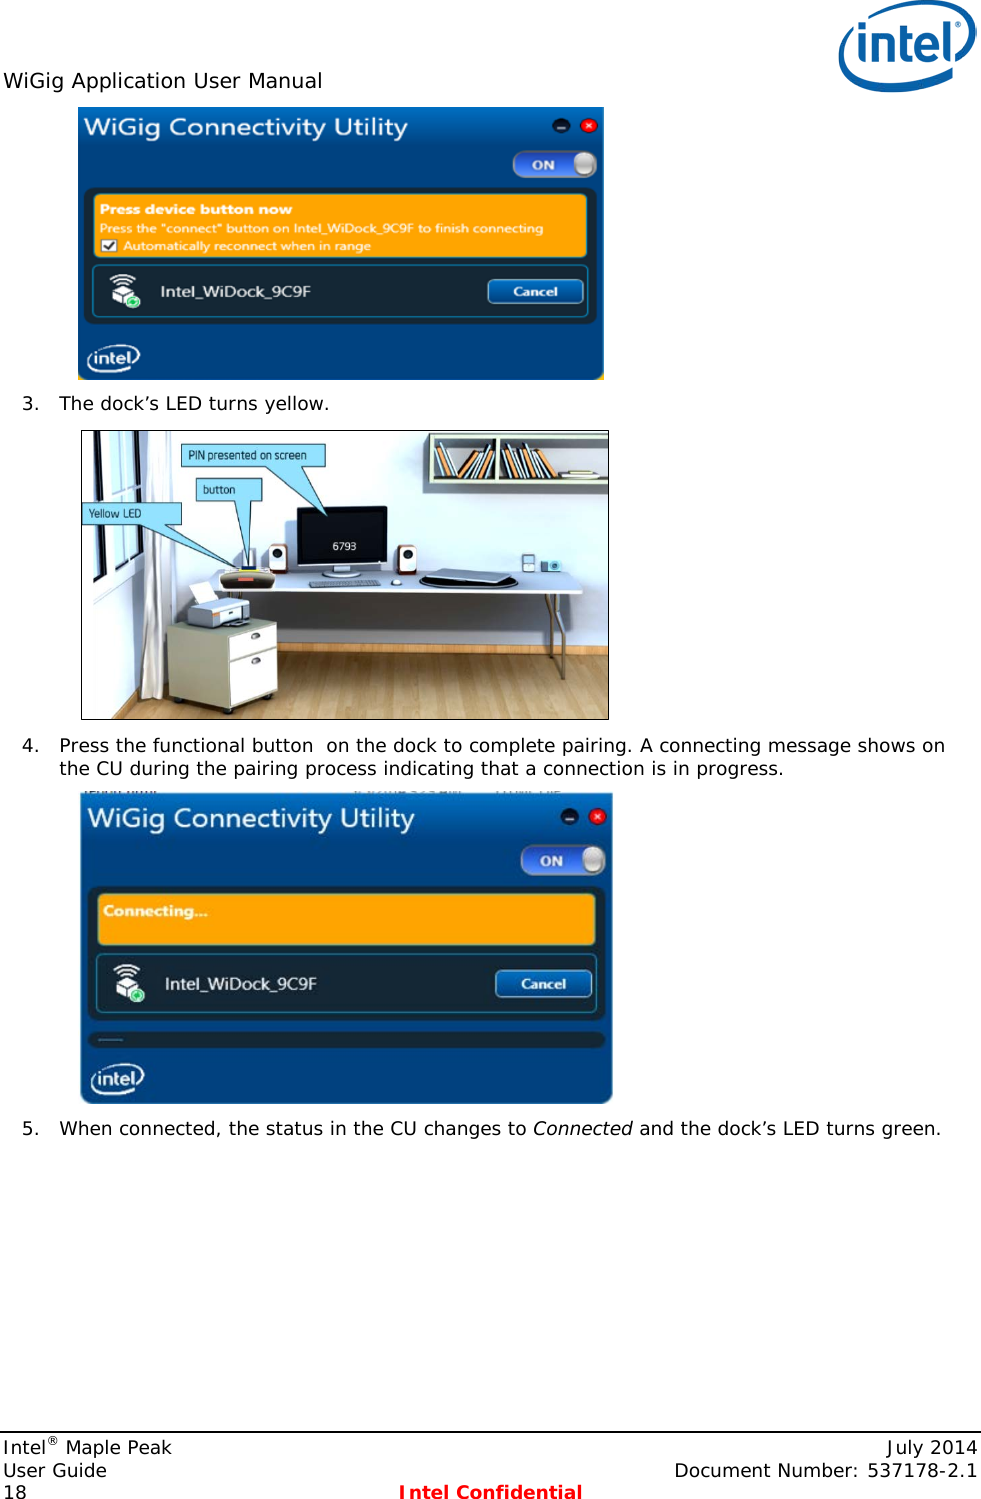
Contents
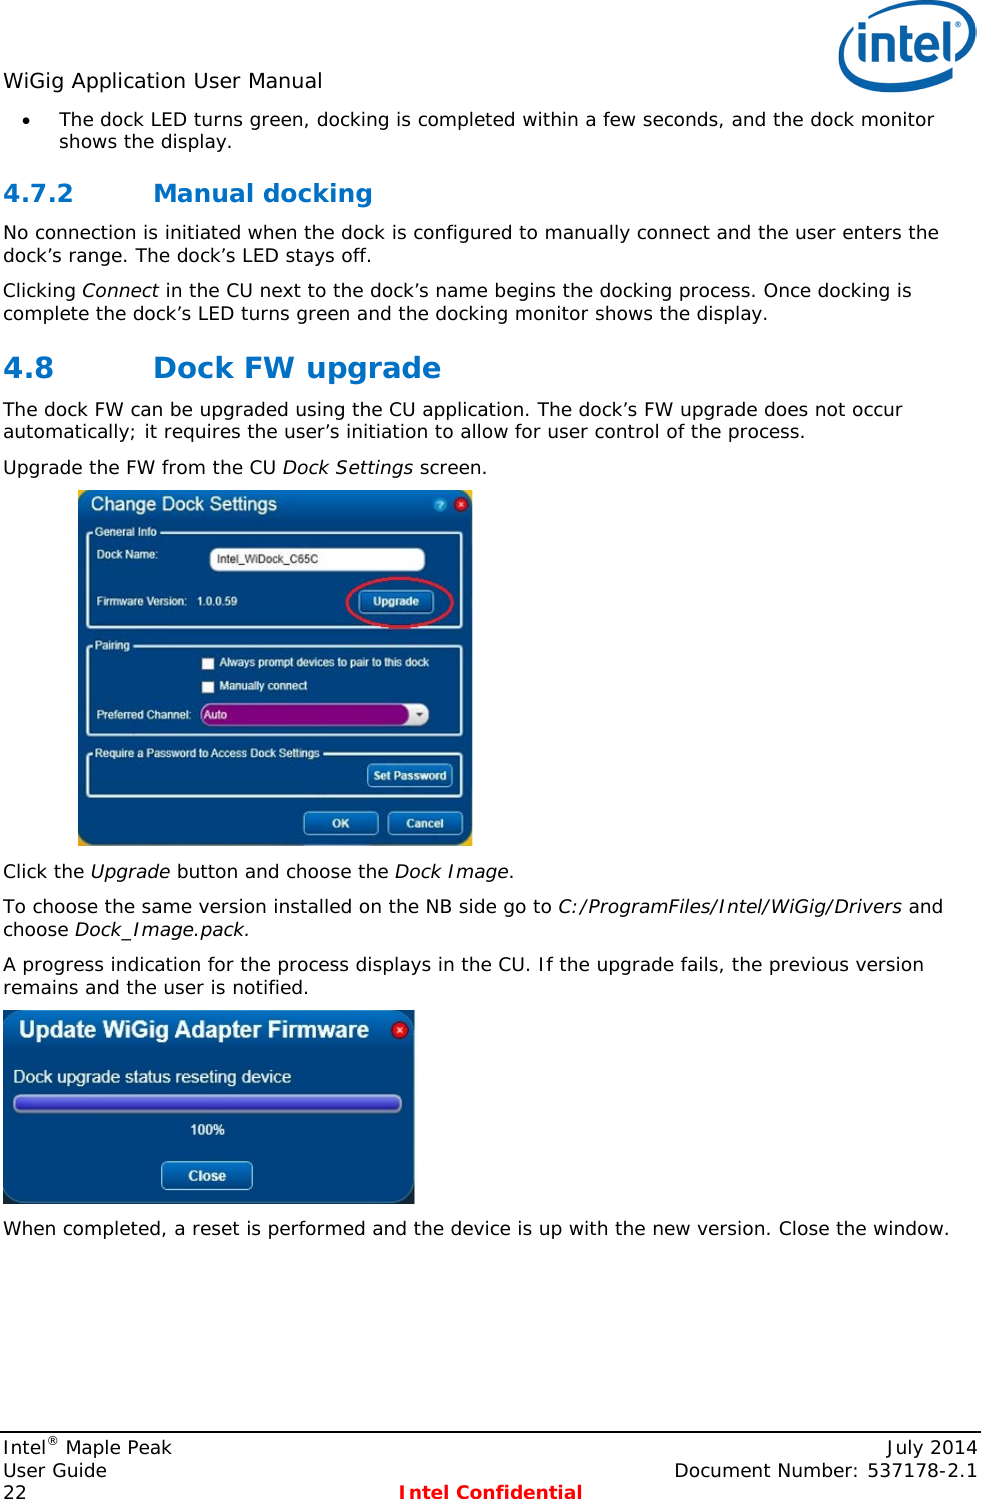
- 1. User Manual 1
- 2. User Manual 2
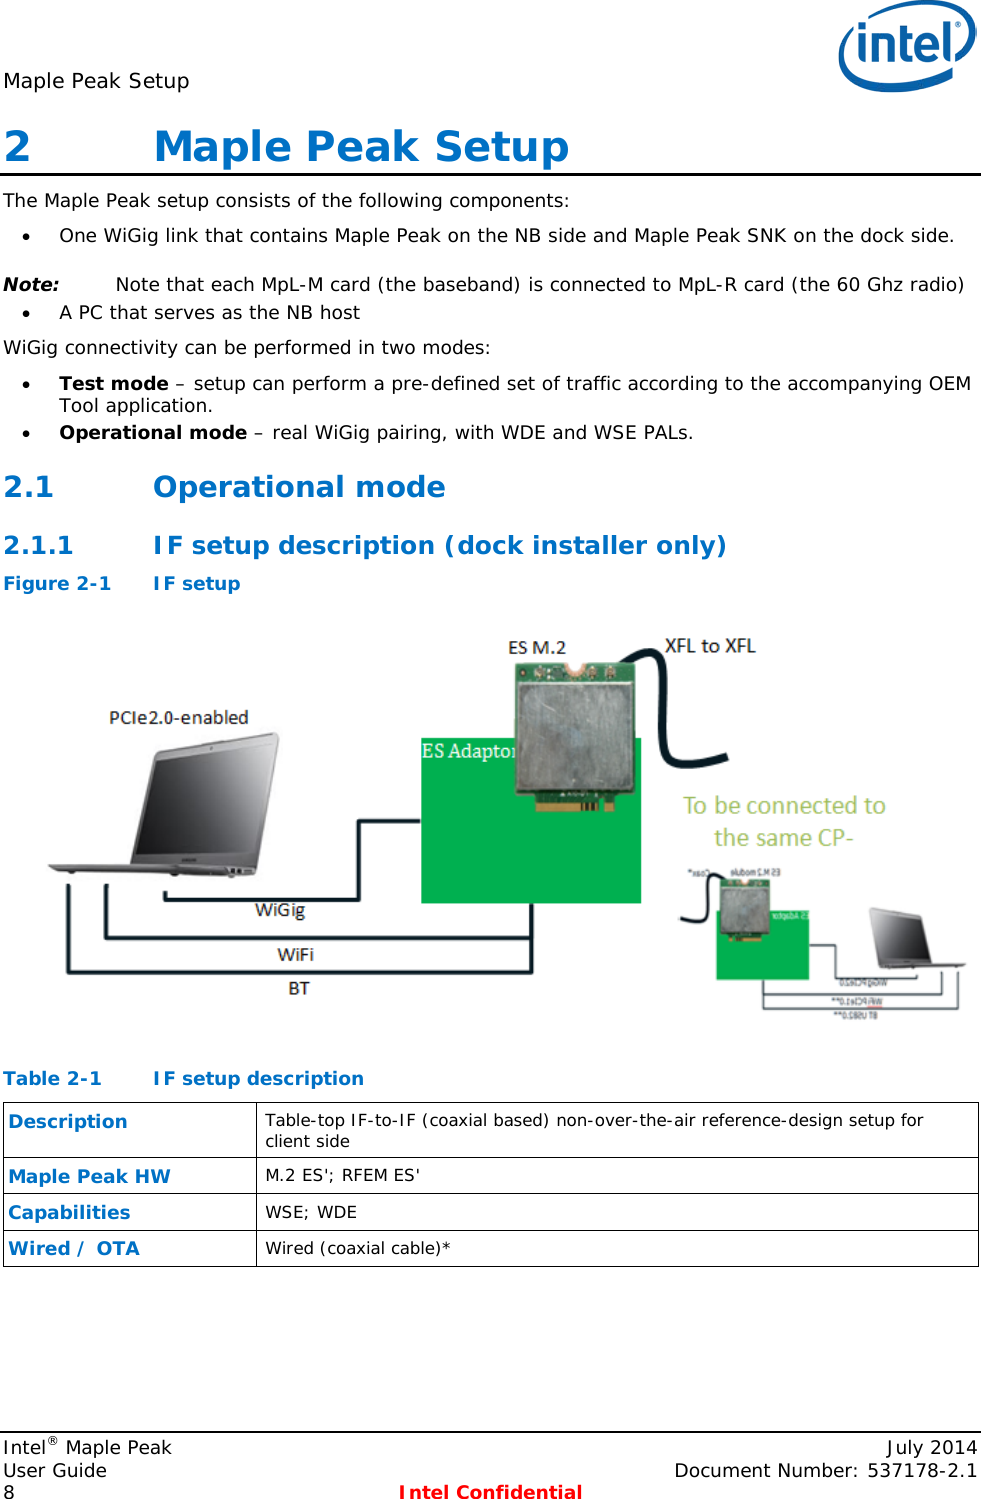
- 3. User Manual
- 4. Users Manual
User Manual 1