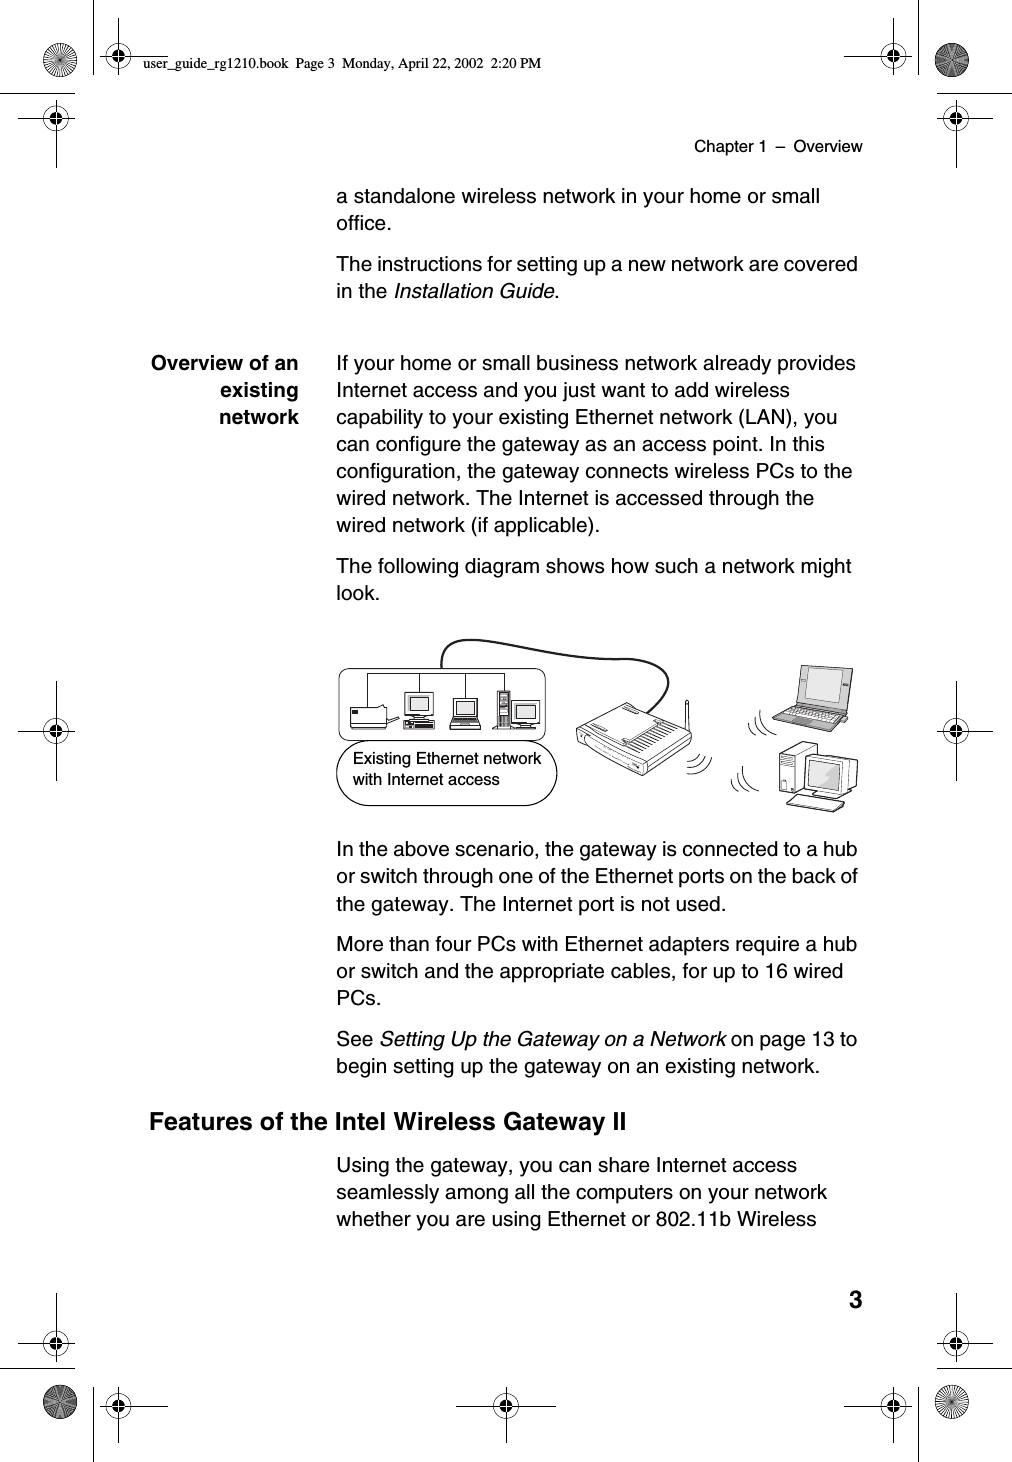
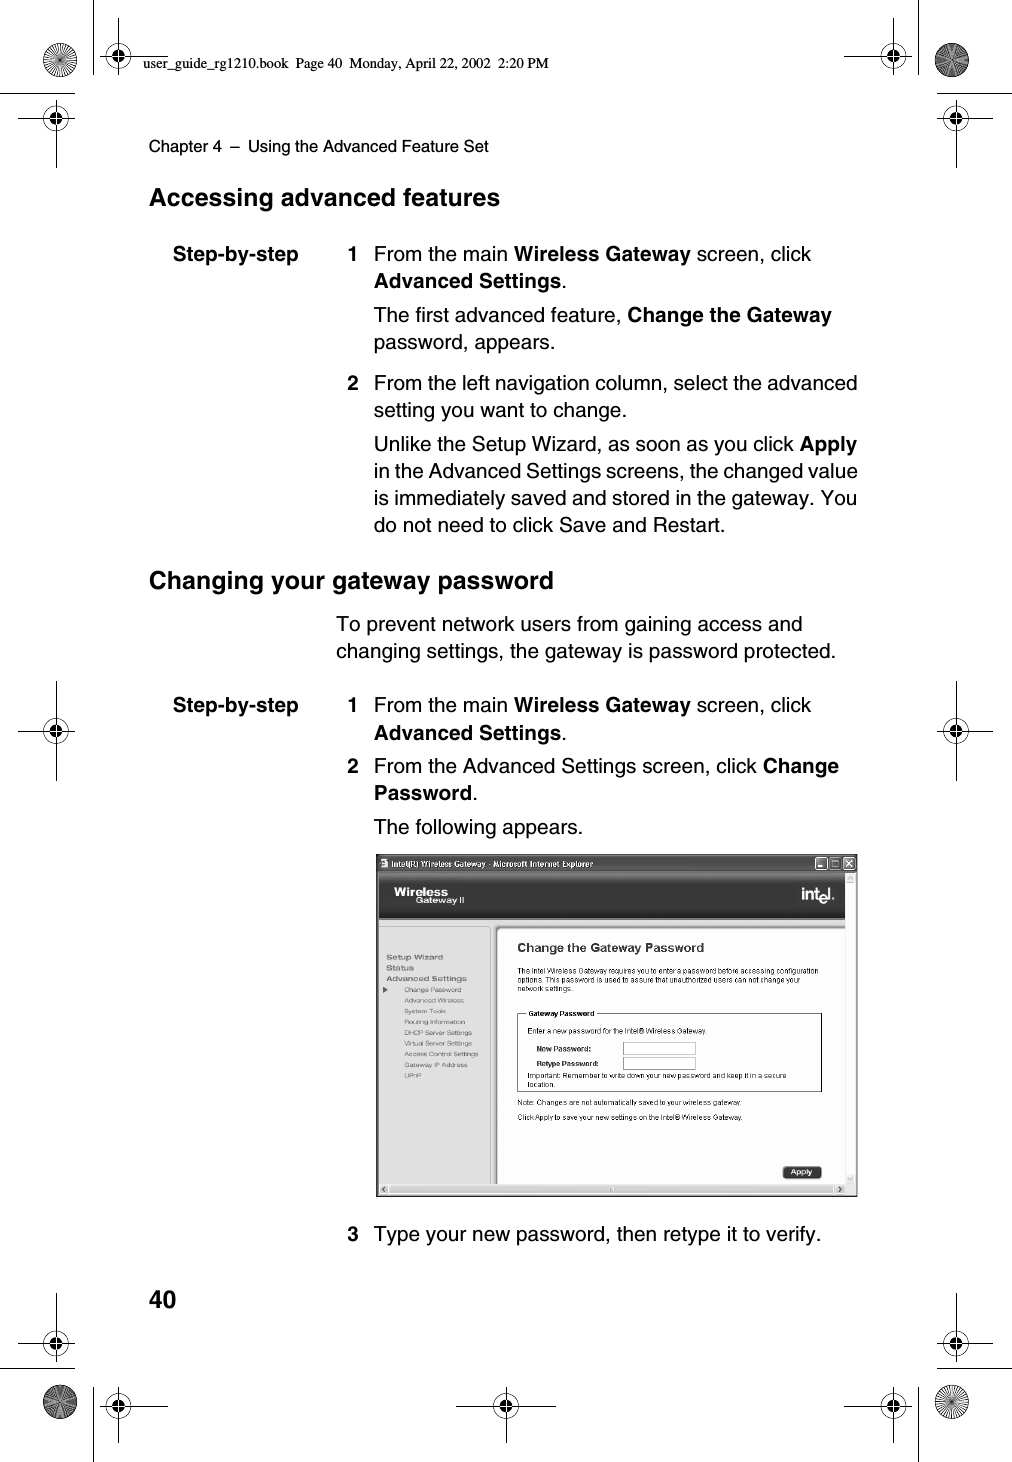
Intel AP1210 Wireless Gateway User Manual user guide rg1210
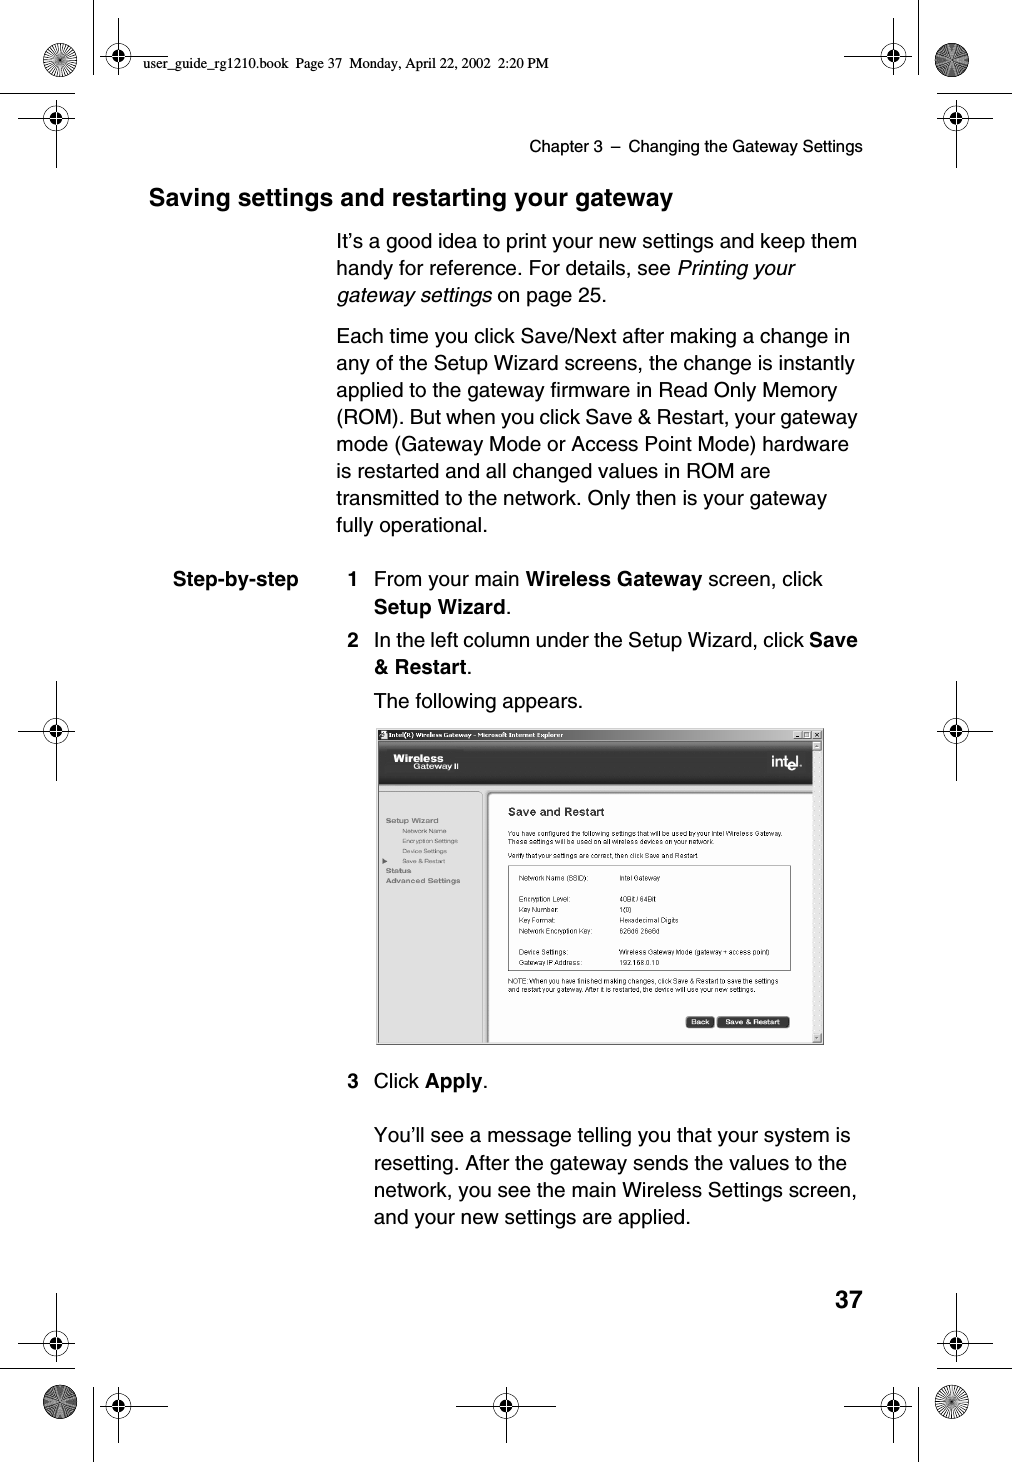
Intel Corporation Wireless Gateway user guide rg1210
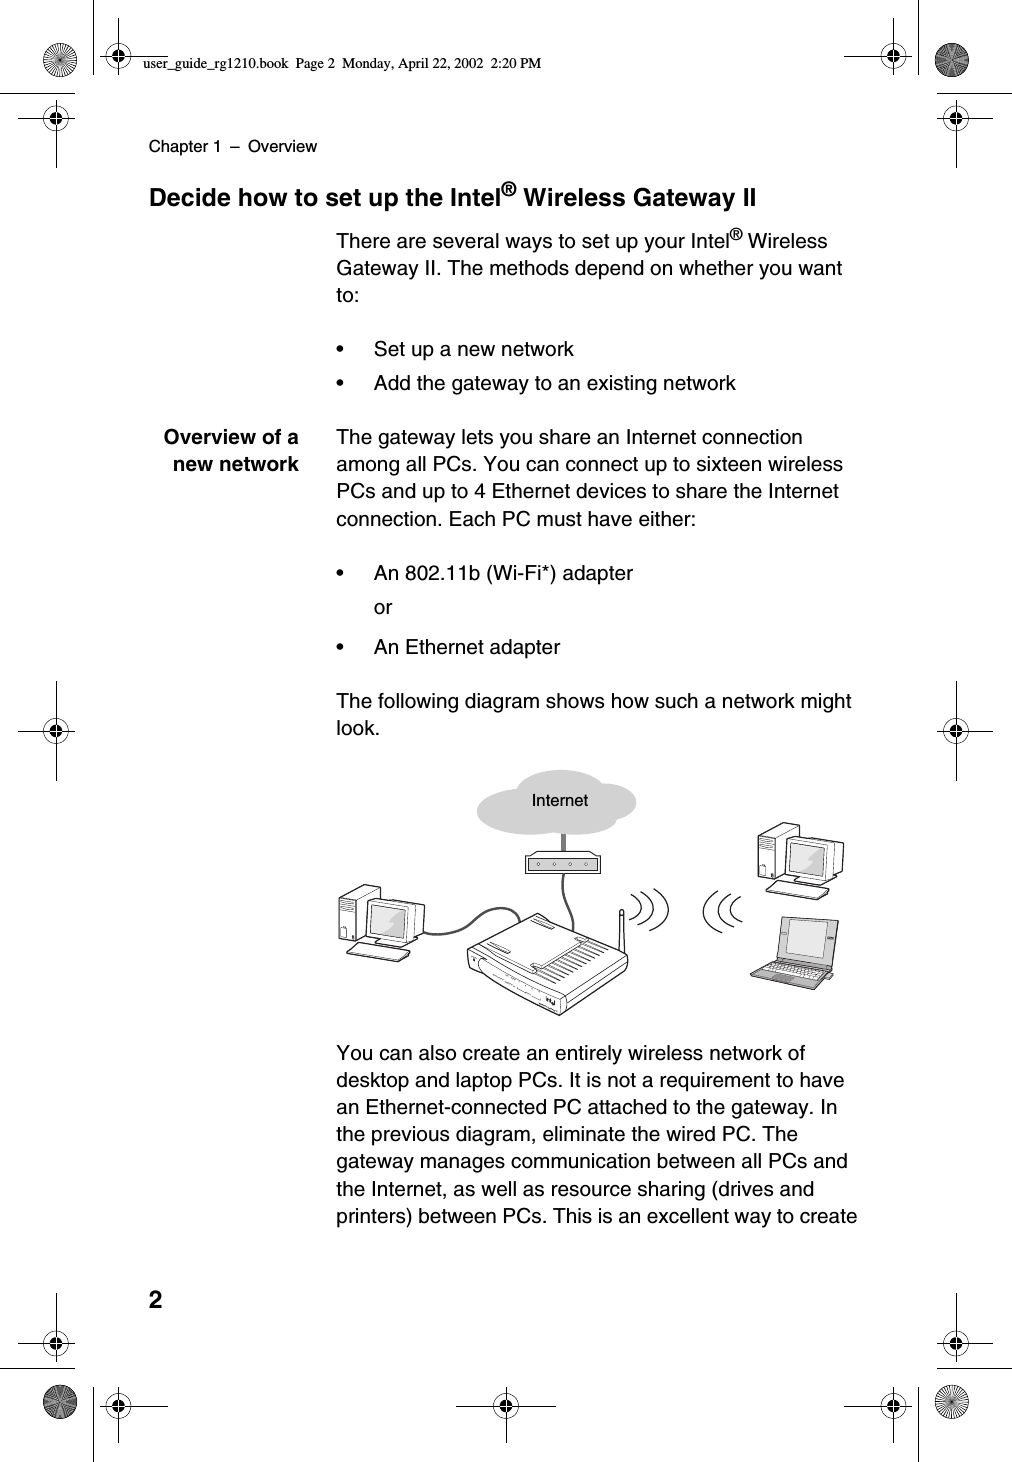
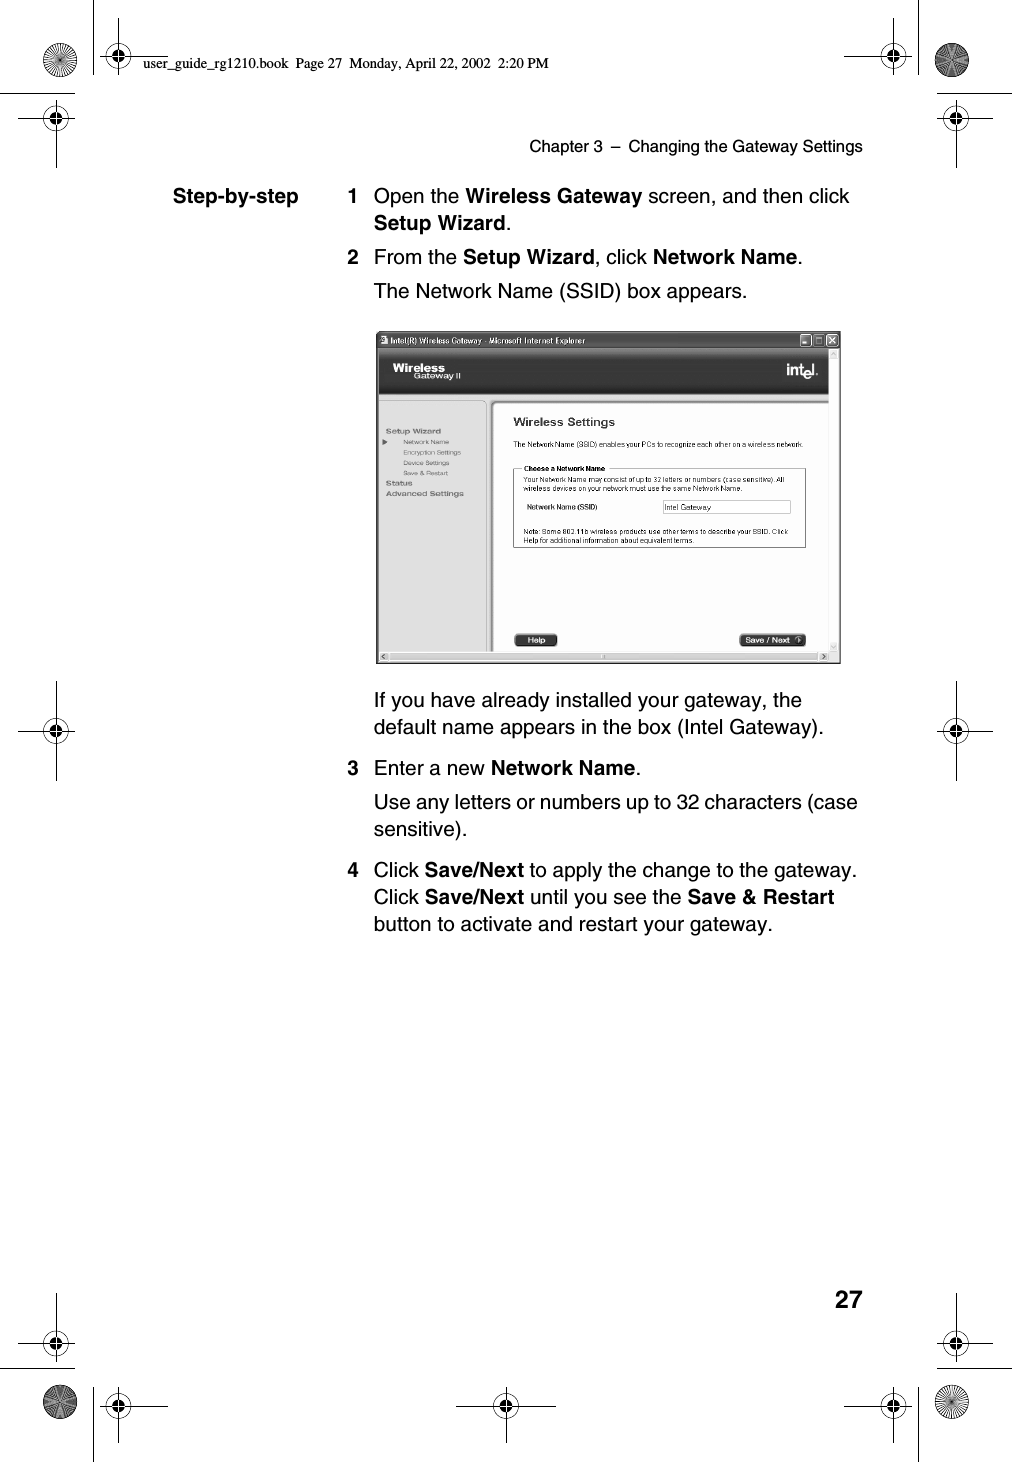
UserManual.wiki
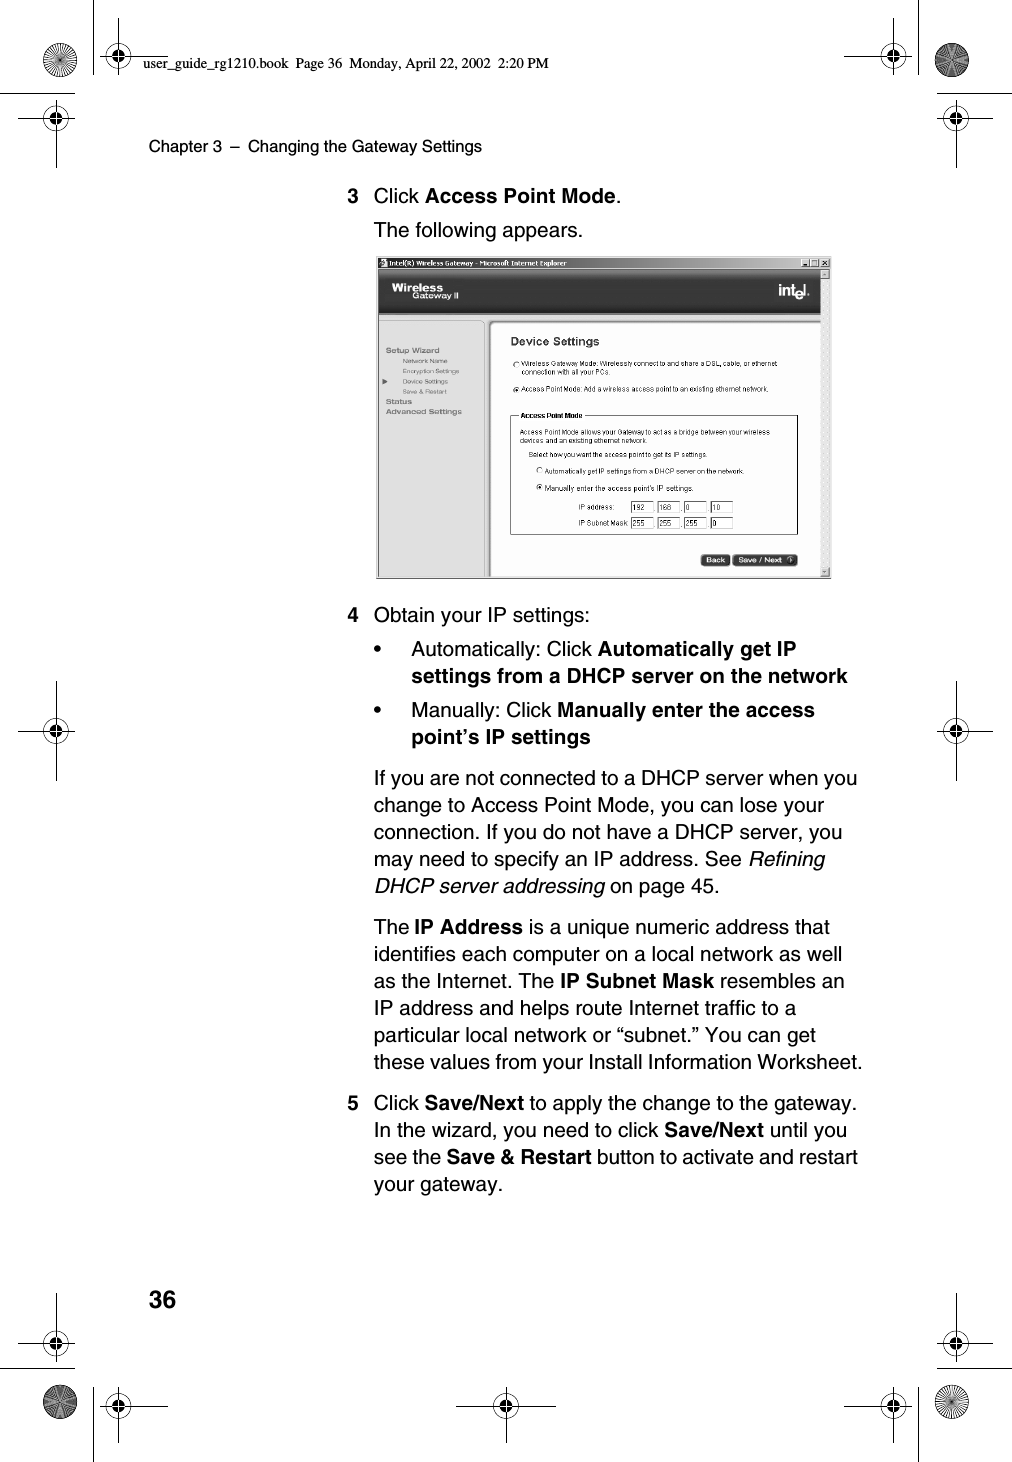
>
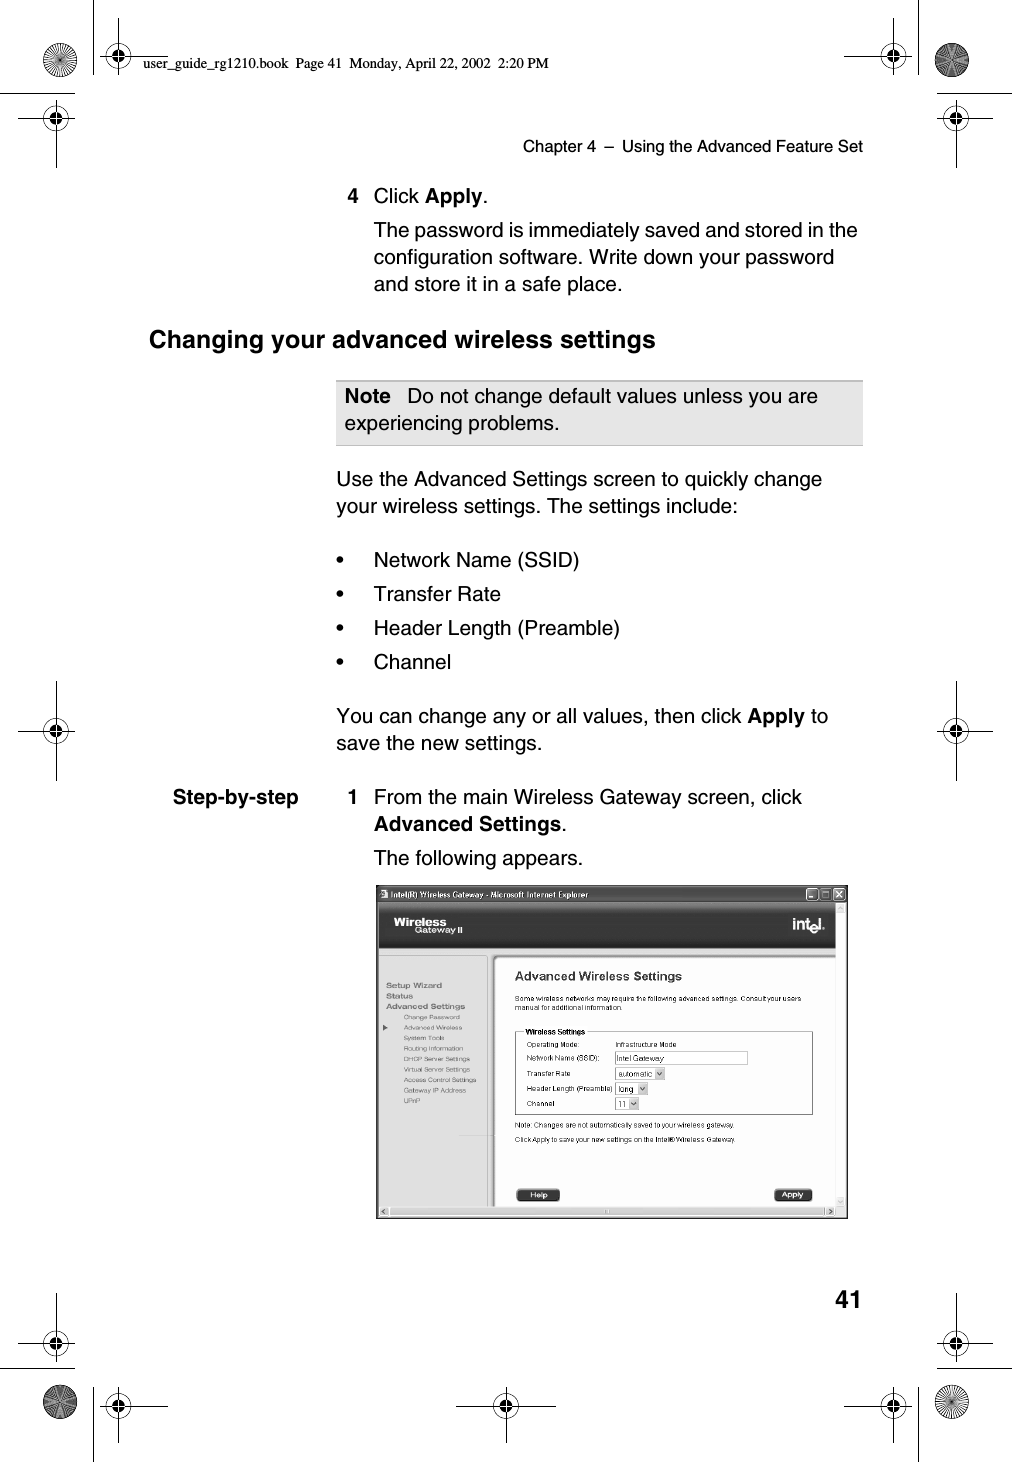
Intel
>
AP1210 User Manual
Revised Manual
Navigation menu
Upload a User Manual
Namespaces
Wiki Guide
HTML
PDF
Info
Views
User Manual
Discussion / Help
Navigation


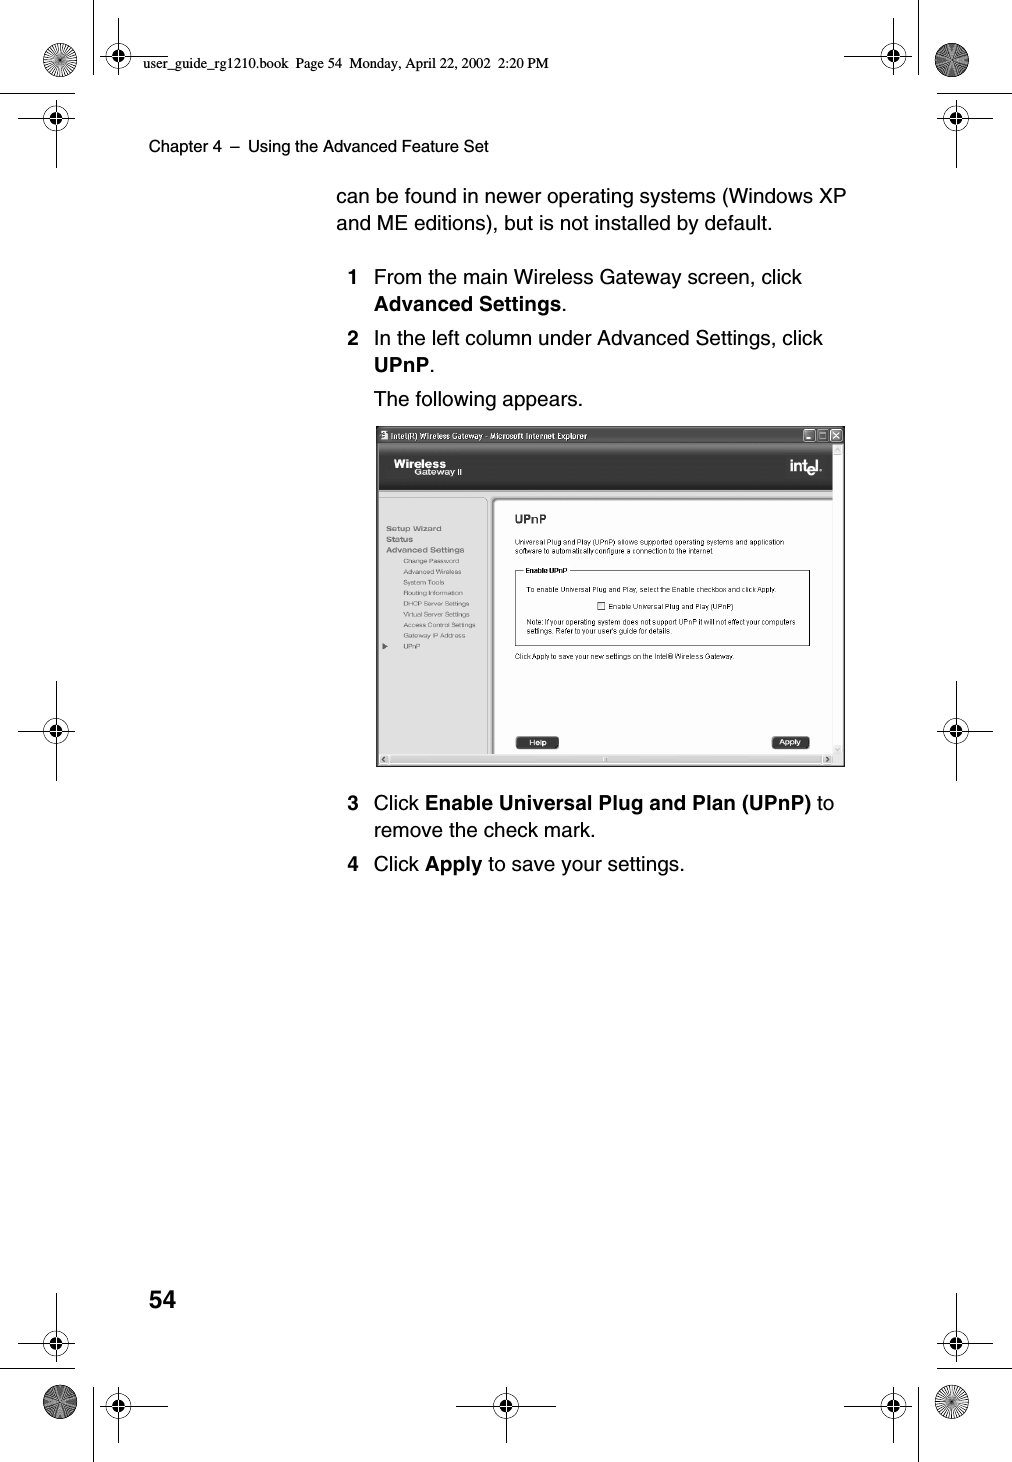

![Chapter 5 –Troubleshooting64Worksheet. If it is correct, you should be able tobrowse the Internet.•Verify that each PC connected to the gateway canaccess the Internet. See I can’t connect to theInternet through my gateway on page 60.•Check the e-mail settings provided by your ISP oneach PC.Problem I’m using a third-party adapter and I cannot accessthe gateway or the InternetSolution Use the following instructions to make sure the networkproperties are set correctly for obtaining an IP address.Setting or checking your IP addressDepending on your operating system, follow theappropriate set of instructions.Windows 98 and ME1Click Start > Settings > Control Panel > Network.2Select the TCP/IP --> [the name of the NetworkAdapter]. For example, Intel®AnyPoint®Wireless IIAdapter.3Click Properties.4Click the IP Address tab.5Make sure that the Obtain an IP addressautomatically option is selected.6On the DNS Configuration tab, make sure DisableDNS is selected.7If one or both are not selected, select them, and thenrestart the PC.Note If you can access the Internet, the problem isNOT in the gateway.user_guide_rg1210.book Page 64 Monday, April 22, 2002 2:20 PM](https://usermanual.wiki/Intel/AP1210/User-Guide-248044-Page-68.png)
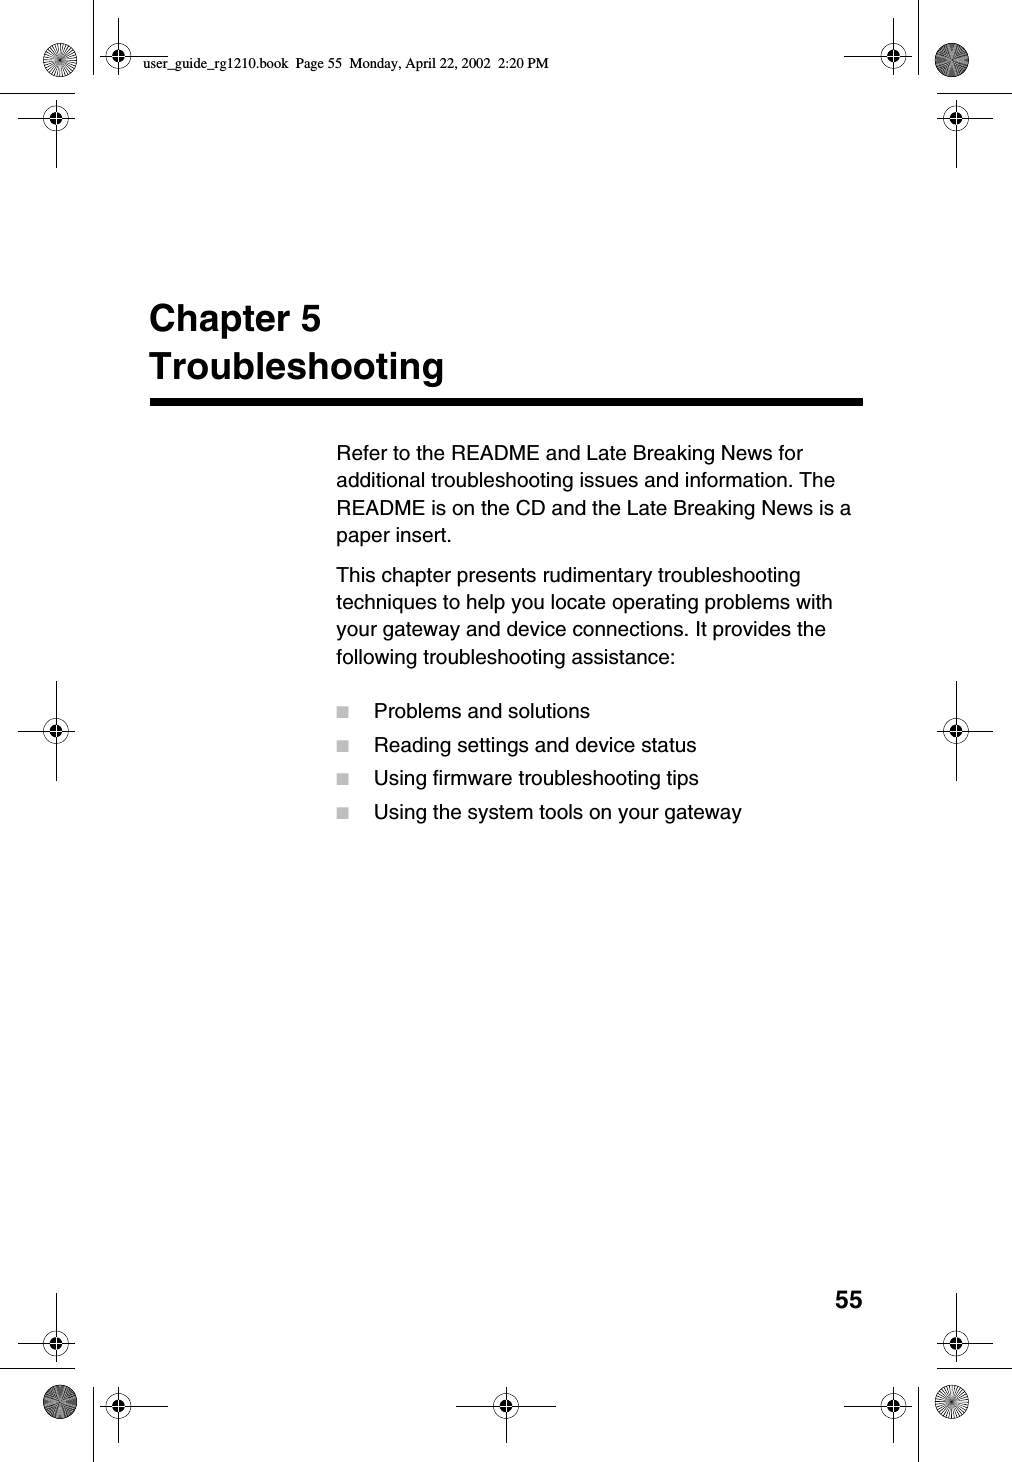
![Chapter 5 –Troubleshooting65Windows 20001Click Start > Settings > Network and Dial-upConnections.2Right-click [the name of the Network Adapter], forexample, Intel AnyPoint Wireless II Adapter, andselect Properties.3In the Local Area Connection Properties dialog box,click Internet Protocol (TCP/IP).4Click Properties.5Make sure that the Obtain an IP addressautomatically option is selected.6Make sure that the Obtain DNS server addressautomatically option is selected.7If one or both are not selected, select them andrestart the PC after you make the change.Windows XP1Click Start > Control Panel > NetworkConnections, and then click Network Connections.2Right-click [the name of the Network Adapter], forexample, Intel AnyPoint Wireless II Adapter, andselect Properties.3In the Local Area Connection Properties dialog box,click Internet Protocol (TCP/IP).4Click Properties.5Make sure that the Obtain an IP addressautomatically option is selected.6Make sure that the Obtain DNS server addressautomatically option is selected.7If one or both are not selected, select them andrestart the PC after you make the change.user_guide_rg1210.book Page 65 Monday, April 22, 2002 2:20 PM](https://usermanual.wiki/Intel/AP1210/User-Guide-248044-Page-69.png)


![Chapter 8 –Regulatory Compliance Statements87CAUTIONIF YOU MAKE ANY MODIFICATION TO THEEQUIPMENT NOT EXPRESSLY APPROVED BYINTEL, YOU COULD VOID YOUR AUTHORITY TOOPERATE THE EQUIPMENT.RF exposure compliance statementsNotice: Install or position the Intel®Wireless Gateway IIModel 1210 so that the antenna is at least 8 inches (20cm.) from the user or other persons. Failure to locate theantenna at this minimum distance may result inexceeding the FCC limits for human exposure to RF(radio frequency) energy. Also, do not operate inconjunction with any other antenna or transmitters.Canadian compliance statementsThis Class B digital apparatus complies with CanadianICES-003.[French] Cet appereil numérique de la classe B estconforme àla norme NMB-003 du Canada.This equipment complies with Canada 210. Operation issubject to the following two conditions: (1) this devicemay not cause interference, and (2) this device mustaccept any interference, including interference that maycause undesired operation of the device. To preventradio interference to the licensed service, this device isintended to be operated indoors and away from windowsto provide maximum shielding. Equipment (or its transmitantenna) that is installed outdoors is subject to licensing.European Union compliance statementsWe, Intel Corporation, declare under our soleresponsibility that the product:Intel Wireless Gateway II Model 1210user_guide_rg1210.book Page 87 Monday, April 22, 2002 2:20 PM](https://usermanual.wiki/Intel/AP1210/User-Guide-248044-Page-91.png)