User Manual
Congratulations on your new phone purchase!
This guide will help you to quickly setup and
understand the important features on your new
San Diego from Orange.
welcome
Note: Screen images and icons are simulated for the purpose of this guide.
Actual displays may vary. Instructions in this guide may change depending
on the software version on your device.
a fast processor
Featuring the 1.6 GHz Intel® Atom™ processor
that delivers great performance for speedy
application and web page loading, advanced
multi-tasking, and smooth video playback.
intelligent camera
An advanced 8MP HD camera that lets you capture images
quickly - up to 10 photos a second so you’ll never miss
the best shot, even in challenging environments. Featuring
advanced image processing for quality, color accuracy and
low-light capture.
These smart features mean that no matter how you capture
your images, they come out exactly how you want them.
great entertainment
Easily create and share superb [or true] HD-quality video,
and with super-smooth playback, your phone becomes a
personal theatre you can take with you anywhere.
To maximize your entertainment experience you can easily
project your smartphone screen to your HDTV through
an HDMI cable.

PAGE : 2contents
Contents
Table of Contents ........................................................................................ 2
contents .................................................................................................. 2
1 get started ................................................................................................ 4
1.1 your phone ......................................................................................... 4
1.2 phone buttons .................................................................................... 5
1.3 phone slots, ports & jacks ................................................................... 5
1.4 charge the battery .............................................................................. 5
1.5 insert micro-SIM card ......................................................................... 6
1.6 turn on the phone ............................................................................... 6
1.7 set up your phone .............................................................................. 7
1.8 sleep and wake ................................................................................. 7
1.9 touchscreen ........................................................................................ 8
2 homescreen and basic features .............................................................. 9
2.1 customize your homescreen ............................................................. 10
2.2 status and notification icons .............................................................. 10
2.3 search .............................................................................................. 12
2.4 secure your phone ............................................................................ 13
2.5 use the app launcher ........................................................................ 13
2.6 use the play store ............................................................................. 14
3 onscreen keyboard basics ..................................................................... 15
3.1 suggestions and auto-complete ........................................................ 15
3.2 swype keyboard ............................................................................... 16
4 make and answer calls ........................................................................... 17
4.1 use the phone tab ............................................................................ 17
4.2 answer and reject calls ..................................................................... 19
4.3 using the call log tab ......................................................................... 20
4.4 use the contacts tab ......................................................................... 20
4.5 quick contacts .................................................................................. 22
4.6 contact settings ................................................................................ 23
4.7 use the Favorites tab ........................................................................ 23
5 send and receive messages .................................................................. 24
5.1 send messages ................................................................................ 24
5.2 manage messages ........................................................................... 25
5.3 message settings .............................................................................. 26
6 take photos and videos .......................................................................... 27
6.1 change picture & video settings ........................................................ 28
6.2 view your pictures and video ............................................................. 30
7 browse the web ...................................................................................... 32
7.1 bookmarks, most visited, and history ................................................ 33
7.2 use multiple browser windows .......................................................... 33
7.3 set your home page .......................................................................... 33
7.4 change browser settings ................................................................... 33
8 play music ............................................................................................... 35
8.1 playback screen ............................................................................... 35
8.2 work with Playlists ............................................................................ 36
8.3 manage music on your phone........................................................... 36
9 Wi-Fi/Bluetooth/VPN .............................................................................. 37
9.1 Use Wi-Fi ......................................................................................... 37
9.2 Wireless Bluetooth® Connection....................................................... 37
9.3 transfer files between your phone and computer .............................. 38
9.4 connect to Virtual Private Networks .................................................. 38
9.5 share your phone’s data connection ................................................. 39
9.6 wireless display ................................................................................. 40
10 accounts ............................................................................................... 41
11 email ...................................................................................................... 42
11.1 working with accounts .................................................................... 44
12 calendar ................................................................................................ 45
12.1 view your events ............................................................................. 45
12.2 store and display calendars ............................................................ 46
12.3 change calendar settings ................................................................ 47
13 Gmail ..................................................................................................... 48
13.1 Gmail settings ................................................................................. 48
14 other phone functions .......................................................................... 49
14.1 update software .............................................................................. 49
14.2 downloads ...................................................................................... 49
14.3 manage applications ....................................................................... 49
14.4 clock .............................................................................................. 50
14.5 calculator ........................................................................................ 51
Table of Contents

PAGE : 3contents
15 changing phone settings ...................................................................... 53
15.1 wireless & networks settings ........................................................... 53
15.2 call settings ..................................................................................... 55
15.3 sound settings ................................................................................ 55
15.4 display settings ............................................................................... 55
15.5 wireless display ............................................................................... 55
15.6 location & security settings ............................................................. 55
15.7 applications settings ....................................................................... 56
15.8 accounts & sync settings ................................................................ 56
15.9 privacy settings ............................................................................... 57
15.10 storage settings ............................................................................ 57
15.11 language & keyboard settings ....................................................... 57
15.12 accessibility settings ..................................................................... 57
15.13 date & time settings ...................................................................... 57
15.14 about phone ................................................................................. 58
PAGE : 41.0 get started
1 get started
Congratulations on your new phone purchase.
This guide will help you to quickly come up to speed on the important features
of your phone.
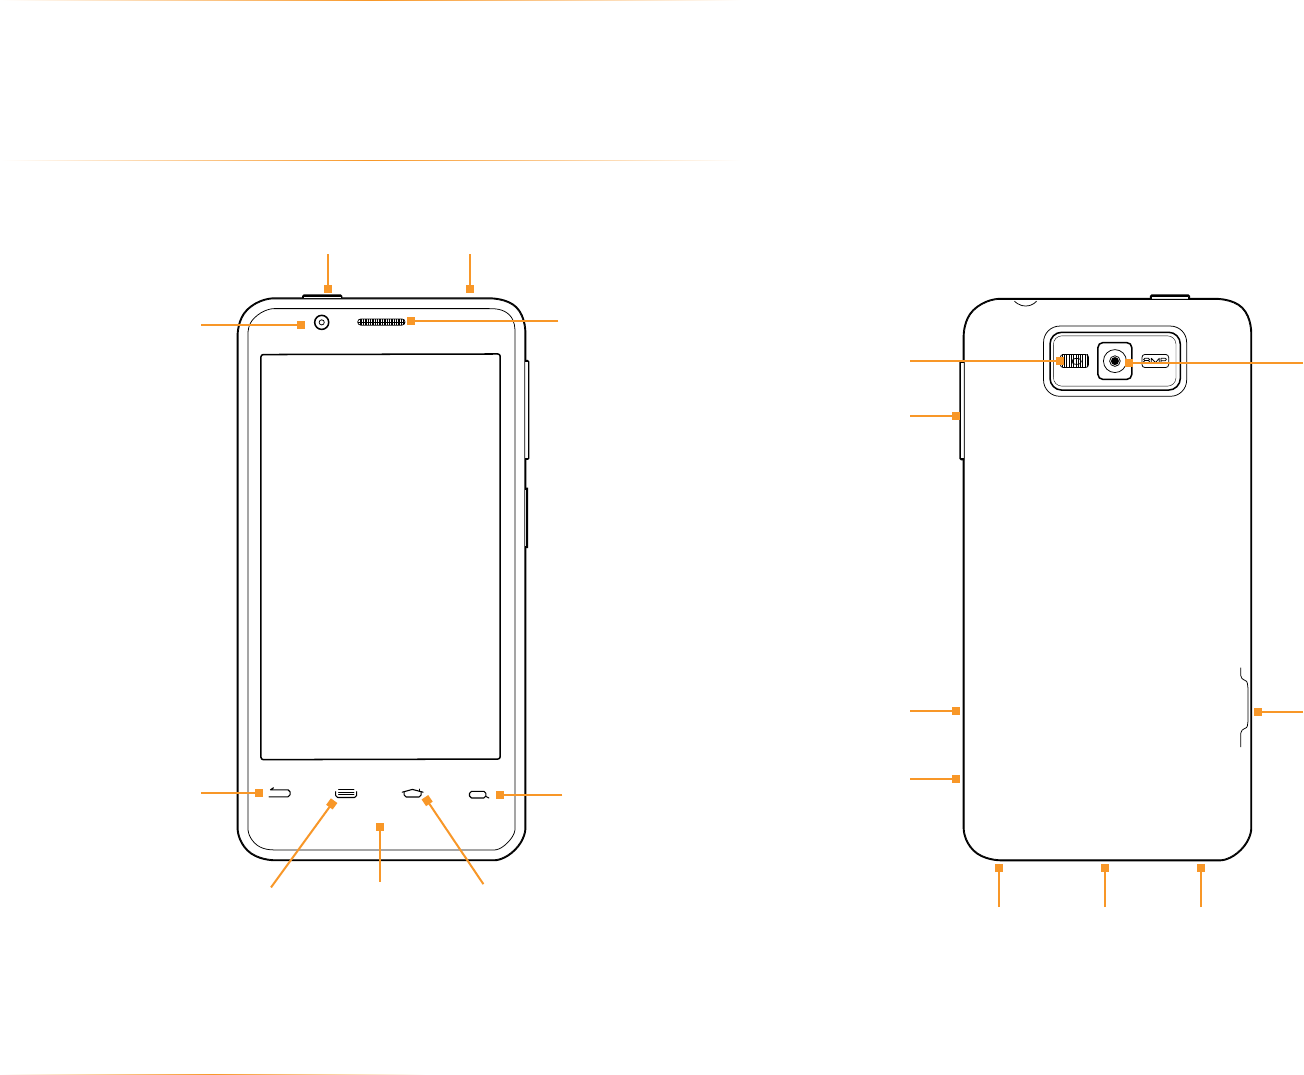
1.1 your phone
Speaker
Microphone
(Do not cover)
Search
Front-Facing
Camera
Back
Menu Home
3.5 mm Audio JackPower Button
USB/
Power Port
Rear-Facing
Camera
Flash
HDMI Port
Volume
Micro-SIM
Card Tray
Camera Button
Speaker Speaker
PAGE : 51.0 get started
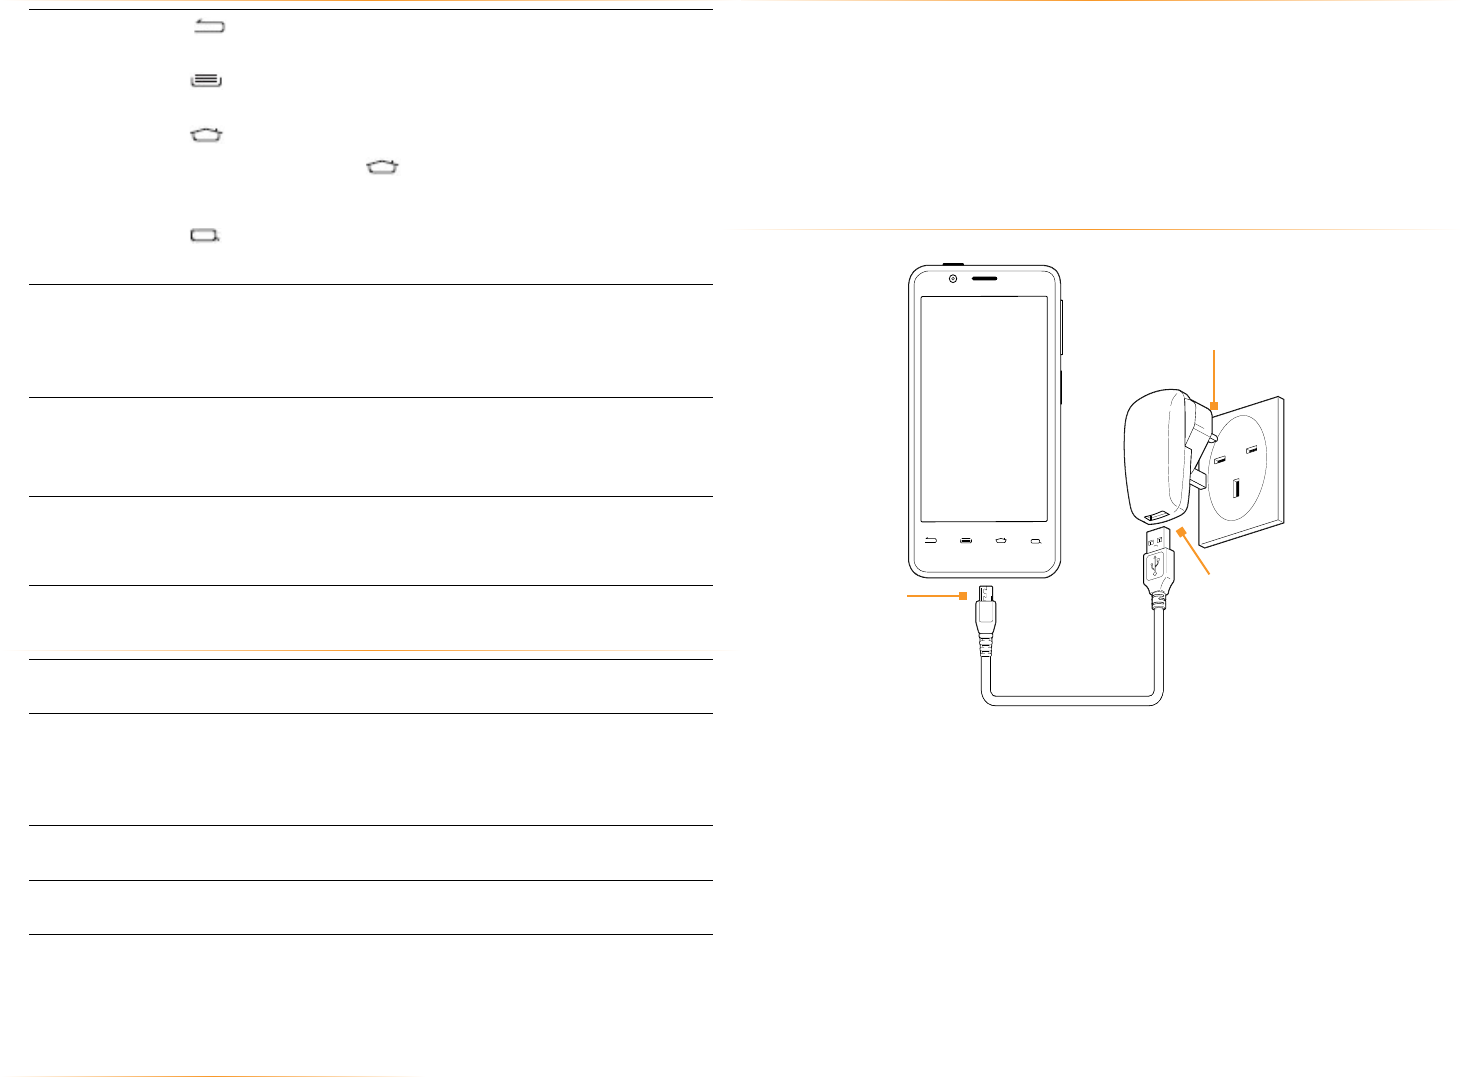
1.4 charge the battery
Before using your phone for the first time, charge the phone for eight hours.
To charge the battery:
1. Attach one end of the USB cord to the phone’s micro-USB port and the
other end to the plug.
2. Plug the phone into the walll.
1.4.1 battery tips
For the best battery life, let your battery drain down to 20% or less (indicated
by an orange battery icon in the status bar) before recharging, and do not leave
your phone plugged in after it is fully charged.
To make your charge last as long as possible:
• Change the screen timeout rate and display brightness
(see Display Settings).
•Disable Wi-Fi and NFC not in use when not in use (see Wireless & Networks
Settings).
1.2 phone buttons
Buttons Press to go back to the previous screen or to close a
menu or dialog box.
Press to display actions and settings specific to the
current screen.
Press to return to the center panel of the Homescreen.
TIP: Press and hold to display shortcuts to your most
recently used apps.
Press to search your phone and the web. See Search
for more information.
Power Button Press and hold to turn your phone on. To turn the phone
off, press and hold, then follow the instructions onscreen.
When your phone is on, press to wake your phone or put it
into sleep mode.
Volume Press on the top to increase the volume. Press on the
bottom to decrease the volume.
TIP: Press either top or bottom to silence an incoming call.
Camera
Button
Press and hold to switch to the camera.
TIP: When in the camera app, press to take a picture or to
start and stop recording a video.
1.3 phone slots, ports & jacks
3.5 mm Audio
Jack
Plug in headphones or other audio device.
USB/Power
Port
Connect USB cord to phone and power adapter to charge
the phone.
NOTE: You can plug the USB cord to phone and connect
to your PC.
Micro-SIM
Card Tray
Tray to insert SIM Card. Use the SIM eject tool to open the
tray.
HDMI Port Plug in HDMI cable and connect to TV or other electronics
to transmit HD images.
Connect
this end to
phone’s
USB port.
Connect this end
to plug.
Plug into wall.
PAGE : 61.0 get started
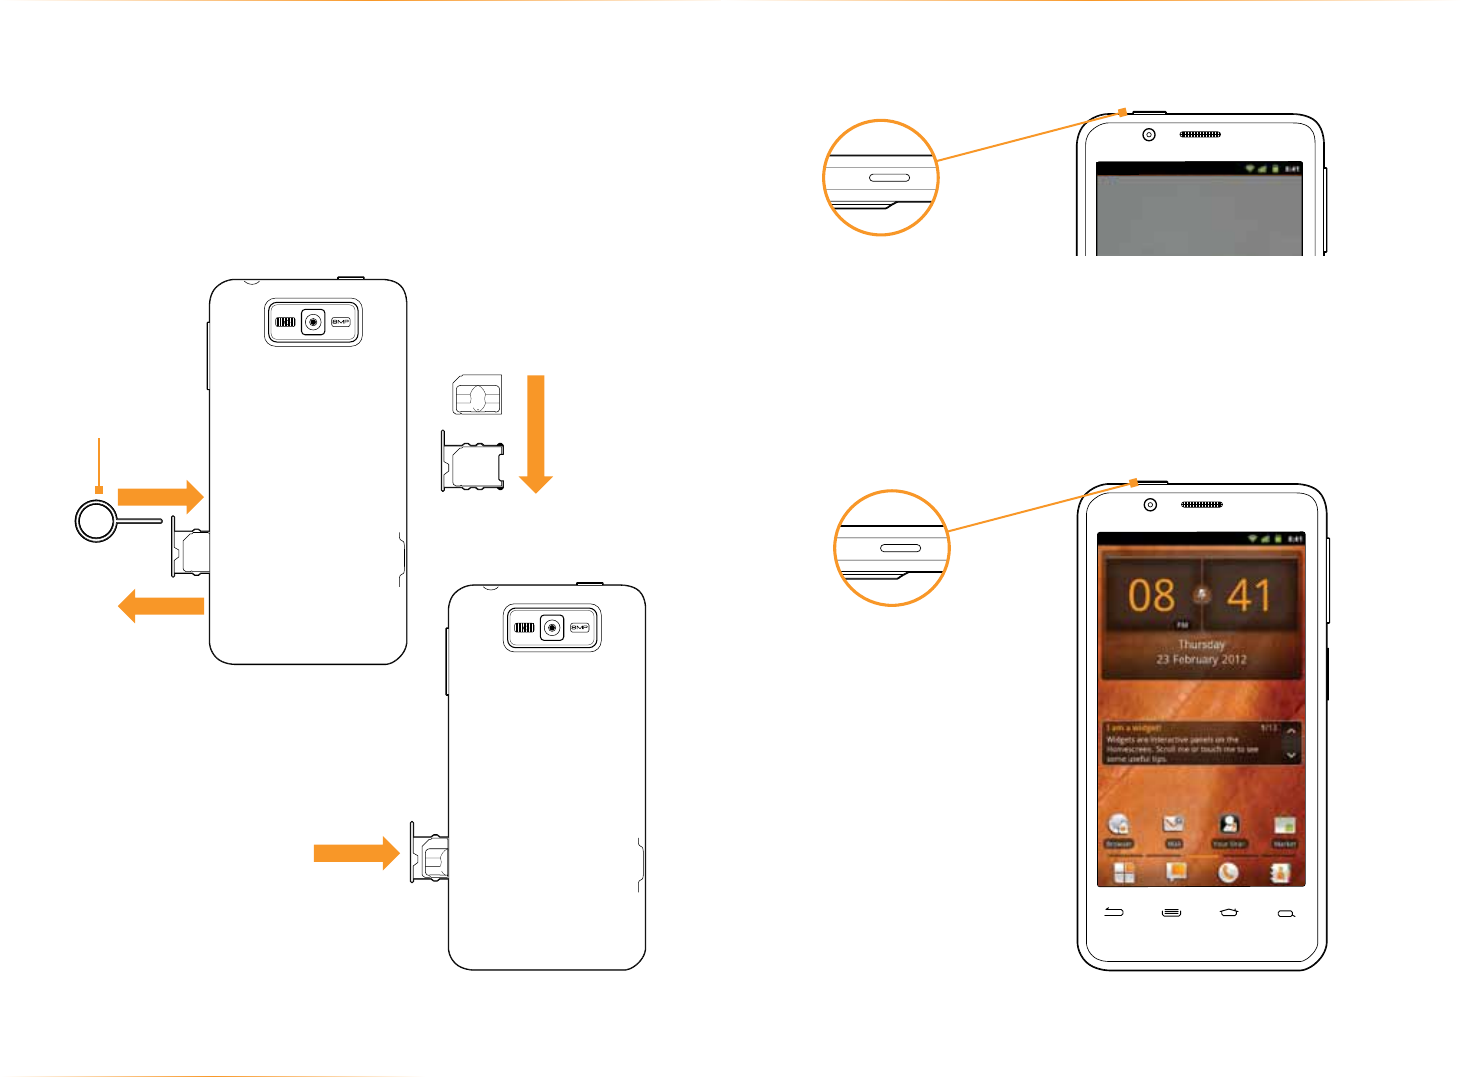
1.5 insert micro-SIM card
If your micro-SIM card is not already installed in your phone, follow these
procedures to insert a micro-SIM card.
To insert the micro-SIM card:
1. Open the micro-SIM card tray with the SIM eject tool (included).
2. Insert the micro-SIM card into the tray, making sure that it matches the
illustration on the tray.
3. Push the tray back into the phone.
1.6 turn on the phone
To turn on the phone:
•Hold down the power button to turn the phone on.
TIP: One press will silence the phone....pressing and holding allows you to turn
your phone into airplane mode.
To turn the phone off:
•Hold down the power button, then touch Power off.
NOTE: Use SIM eject tool only as indicated.
1. Open the micro-SIM
card tray with the SIM
eject tool (included).
2. Insert Micro-SIM card
into tray.
3. Push tray back
into phone.
SIM eject tool
Hold down the power button to
turn the phone on.
Hold down the power button,
then touch Power off to turn the
phone off.
PAGE : 71.0 get started
1.7 set up your phone
The first time you turn on your phone, you will be prompted through the
configuration of the phone.
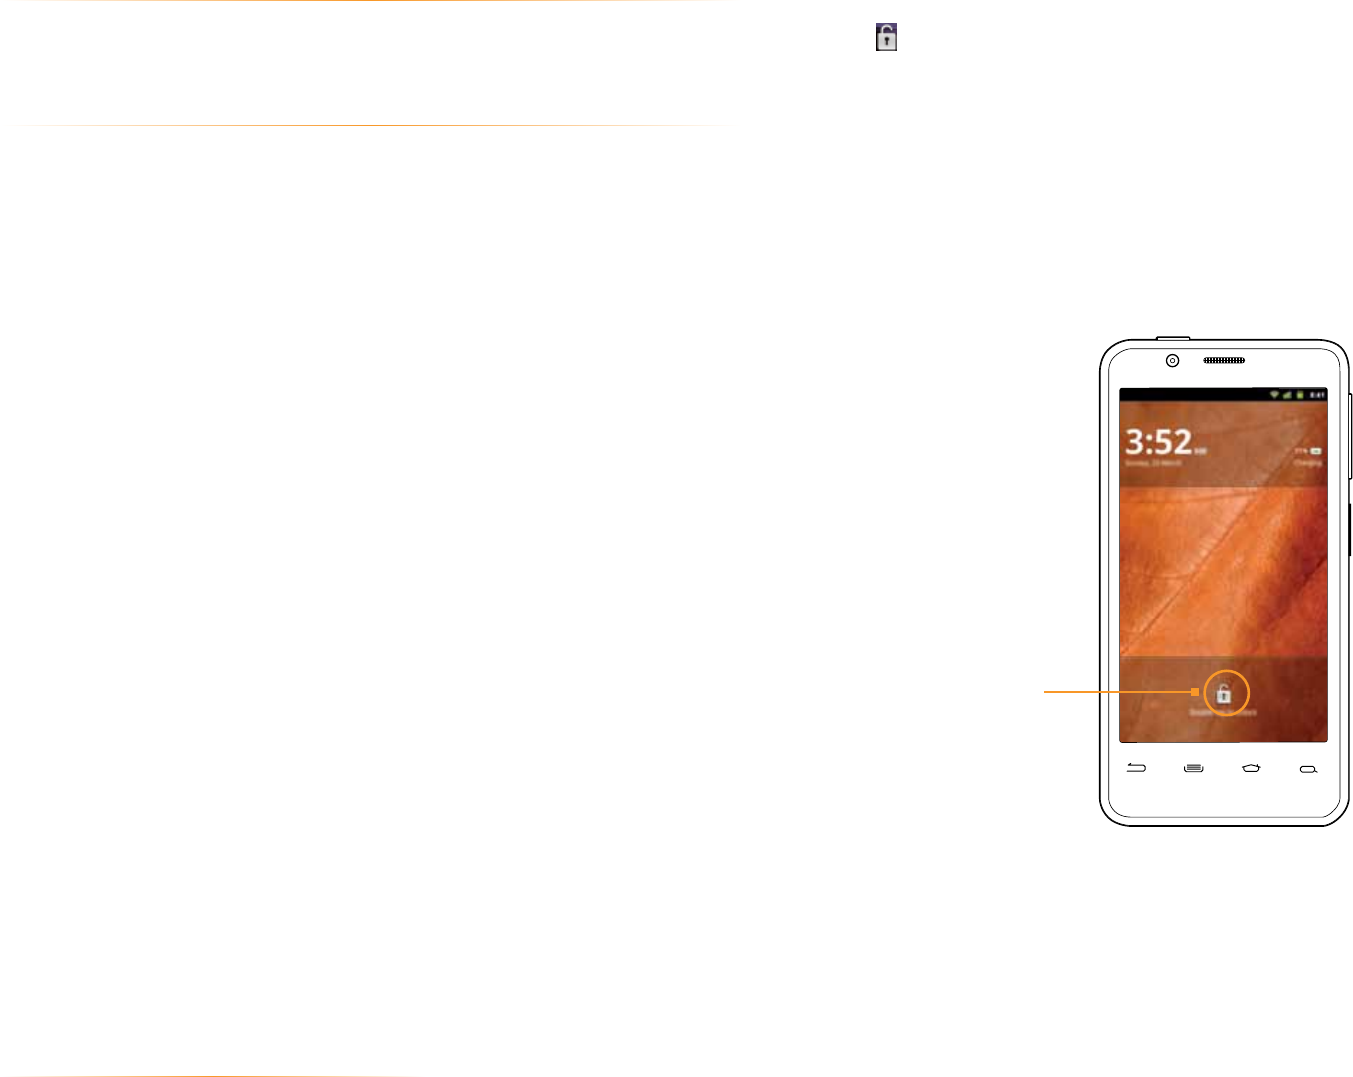
1.8 sleep and wake
When your phone is on, you can put the phone in sleep mode and lock your
phone. Your phone will also go into sleep mode if left idle, to save battery life.
You can wake and unlock your phone when you’re ready to use it.
To put the phone in sleep mode:
•Briefly press the power button.
Your phone goes into sleep mode, without disrupting any running application,
download, or phone call.
NOTE: If you press the power button for too long, you’ll see the power off
menu.
TIP: Turn off the phone by pressing and holding for several seconds.
To wake the phone:
1. Press the Power button.
2. Double-tap .
Your phone’s screen will resume display.
NOTE: If your phone is secured, you must enter your password, pin, or pattern
to wake it. See Securing your Phone for more details.
When the phone is in sleep
mode, and you want to wake
the phone, press the power
button and then double-tap
the unlock icon.

PAGE : 81.0 get started
1.9 touchscreen
Use your fingers on the touchscreen to perform actions, open objects, slide the
screen, and more.
Below are the different ways of interacting with your touchscreen.
• Drag: Touch and hold an object, then drag the object to a new location. For
example, drag any icon on the Homescreen to a new location.
•Double-tap: Quickly touch the screen twice to zoom in when using the
Gallery or on zoomed-out Browser pages. For example, double-tap a news
site to zoom in on the text.
• Pinch: When using Gallery or zoomed-out Browser pages, place two fingers
on the screen at once, then move your fingers together to zoom out or move
them apart to zoom in. For example, move your fingers apart to zoom out of
a news site in the Browser.
• Slide: Quickly move your finger from one edge of the screen to the opposite
edge to scroll the display up, down, left or right. For example, quickly move
your finger from the left side of the Homescreen to the right to scroll the
Homescreen to a different panel.
• Touch: Touch an object on the screen to select or open it. For example,
touch on the Homescreen to open the Phone app.
• Touch and hold: Touch an object on the screen and continue to hold it to
reveal other options. For example, in the Contacts app, touch and hold a
contact to reveal options for working with contacts.
PAGE : 92.0 homescreen and basic features
TIP: The orange bar at the bottom of the screen indicates which one of the five
panels is displayed.
To quickly access your phone’s main functions:
• Touch to choose an app from the App Launcher. For more information on
apps and the App Launcher, see Manage Applications.
• Touch to send a message. For more information on Messaging, see Send
and Receive Messages.
• Touch to make a call. For more information on calling, see Making and
Answering Calls
•Touch to see your contacts. For more information on contacts, see Make
and Answer Calls
2 homescreen and basic features
The Homescreen is a gateway to all of your phone’s applications and features,
and it displays whenever you turn on your phone.
To open the Homescreen:
•Open the Homescreen at any time by pressing the button.
The Homescreen is split into five panels, with the center panel displayed
when the Homescreen opens.
To scroll the Homescreen:
•Slide the screen to the left or right.
Touch to send a
message.
Touch to call or send
a message to your
contacts.
Slide left or right to see
more panels.
Touch to open the
App tray.
Touch to make
a call.
Touch and hold an empty
spot to add shortcuts and
widgets or to change
the wallpaper.
Touch an app to open it.
PAGE : 102.0 homescreen and basic features
TIP: Rearrange items on your screen by touching and holding them and then
dragging them to a new location. You can also delete them by touching and
holding and then dragging them to the trash.
You can perform the following actions with folders.
To open a folder Touch the folder.
To add items to a folder Drag an item on your Homescreen into the
folder.
NOTE: You cannot put shortcuts in a contact
folder.
To remove items from a
folder
Touch and hold an item in the folder, then
release it on the Homescreen or on the trash
icon.
To rename a folder Open a folder, then touch and hold the title bar
and enter a new folder name.
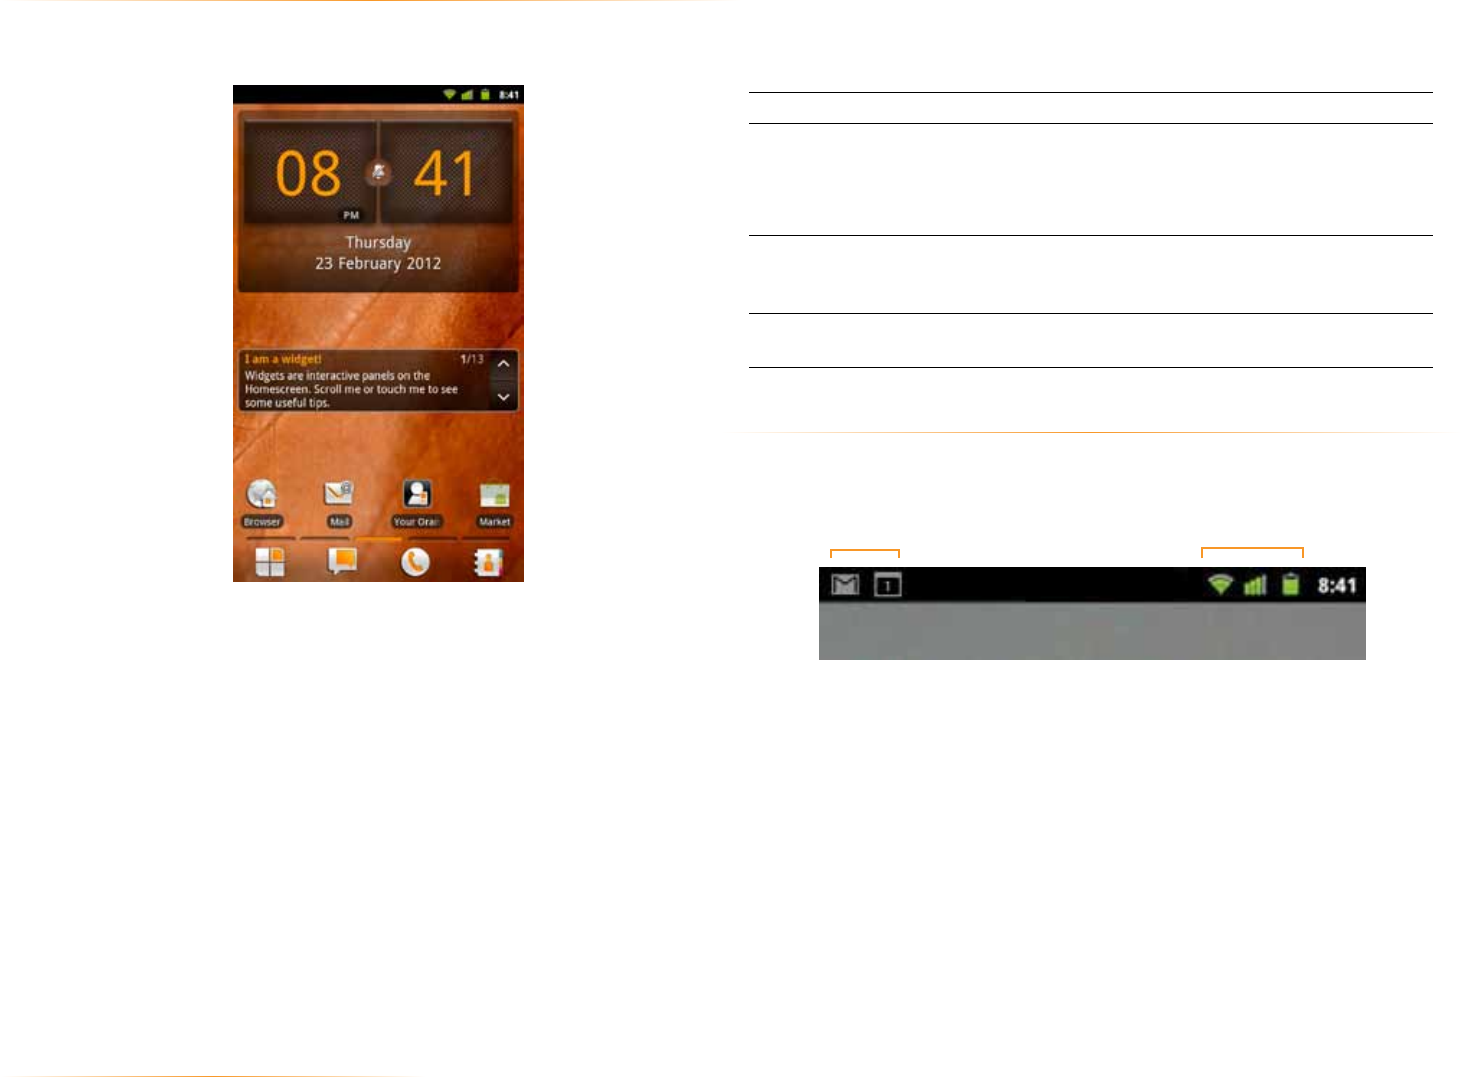
2.2 status and notification icons
The status bar at the top of the screen displays important information about
your phone.
• Notification icons display current or ongoing events such as a new email or
ongoing download.
• Status icons display critical phone functions such as battery life and signal
strength.
2.1 customize your homescreen
You can easily customize your Homescreen—add and remove items, organize
itmes into folders and change the background picture (or wallpaper).
To customize your Homescreen:
• Touch and hold an empty space on the Homescreen, then touch the type of
item you want to add and follow the prompts.
The following types of items are available.
• Shortcuts are links to your favorite items such as apps, web pages, and
contacts.
• Widgets are apps that run directly on your Homescreen, such as a music
player, newspaper, or clock.
• Folders behave like a desktop folder, helping you organize your contacts and
other items.
•Wallpaper Wallpaper is a static or animated background image for your
screen.
Notification icons Status icons
PAGE : 112.0 homescreen and basic features
Below are the status and notification icons.
NOTE: Installed apps may use their own unique notification icons.
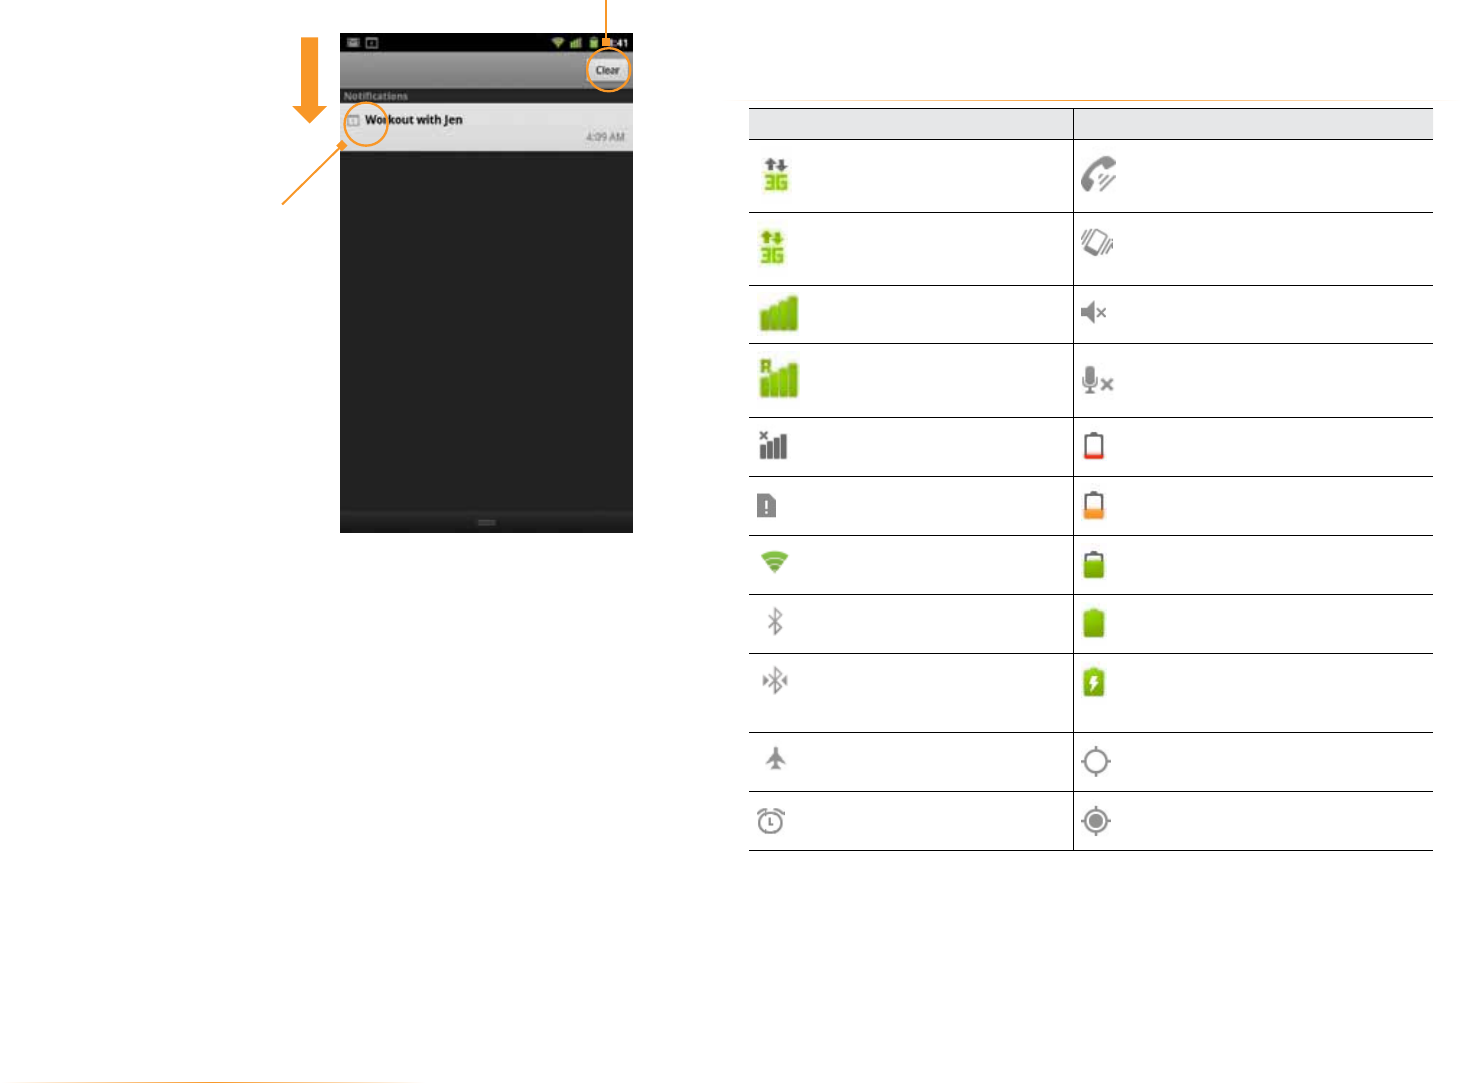
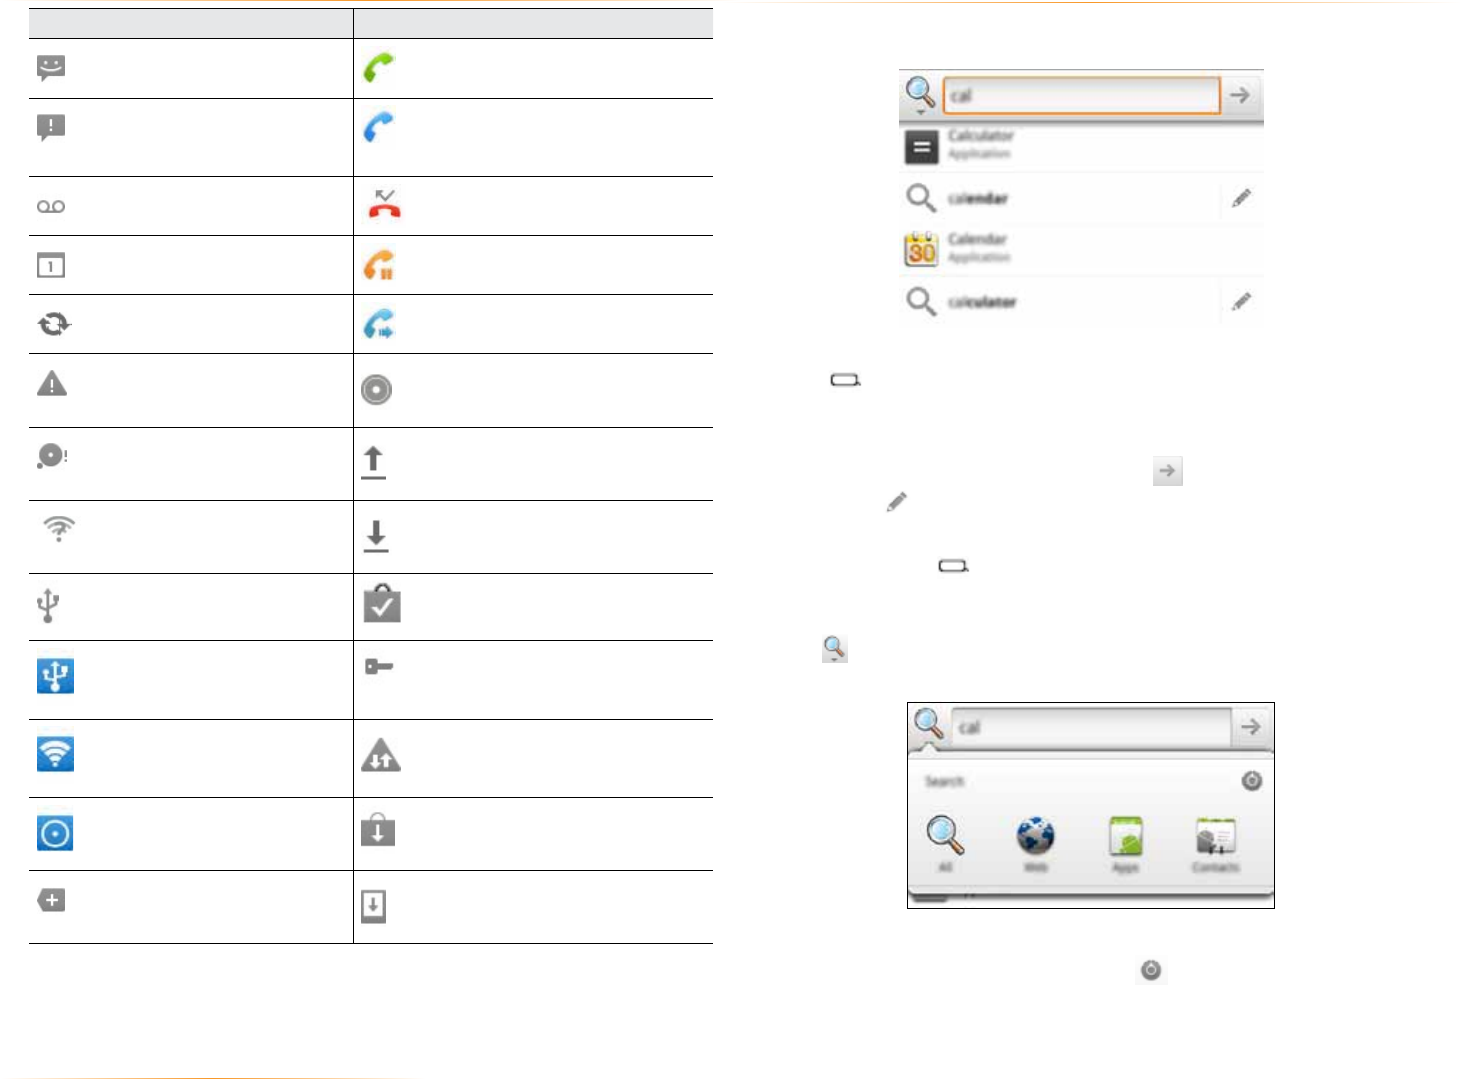
2.2.1 status icons
Icon Description Icon Description
Connected to mobile
network Speakerphone on
Mobile network in use Vibrate mode
Mobile network strength Ringer silenced
Roaming Phone microphone muted
No signal Battery very low
No micro-SIM card installed Battery low
Connected to Wi-Fi
network Battery partially drained
Bluetooth wireless
technology on Battery full
Connected to wireless
product featuring Bluetooth
technology
Battery charging
Airplane mode GPS on
Alarm set Receiving location data from
GPS
To open the notifications panel:
•Drag the status bar to the bottom of the screen.
To respond to a notification:
• Touch a notification in the panel to open the corresponding application. For
example, touching a new email notification opens the Email app’s inbox.
To clear notifications:
•Open the notifications panel and touch Clear at the top right.
Ongoing notifications, such as active downloads, will remain on the list.
To close the notifications panel:
•Drag the status bar back to the top of the screen.
Touch a notification to
respond.
Touch to clear notifications.
Drag down to
display notifications.
PAGE : 122.0 homescreen and basic features
2.3 search
Search on your phone and on the web with the built-in Search function.
To run a search.
1. Press .
2. Type a search term. As you type,
Search displays matching results.
3. Touch a matching result to open it, or press to search the web.
TIP: Touch the icon next to a result to enter that result as search text.
TIP: Find items in a search-enabled app, such as Email or Music, by opening
the app and pressing .
To narrow your search.
• Touch and specify where to search (for example, search only Contacts or
Messaging app).
TIP: You can specify which applications are available for Search by touching
the options icon in the corner of the chooser and selecting which apps to
search.
2.2.2 notification icons
Icon Description Icon Description
New text or
multimedia message
Call in progress
Problem with text
or multimedia
message delivery
Call in progress using a
Bluetooth headset
New voicemail Missed call
Upcoming event Call on hold
Data syncing Call forwarding on
Problem with sign-in or
sync
Song playing
USB storage full Uploading data
Open Wi-Fi
network available
Downloading data
Phone connected via
USB cable
Download finished
Phone sharing its
data connection via
USB tethering
Connected to or disconnected
from virtual private network
(VPN)
Phone sharing its data
connection as a Wi-Fi
hotspot
Carrier data threshold
approaching or exceeded
USB tethering and
Wi-Fi hotspot
Application update available
More notifications System update available
PAGE : 132.0 homescreen and basic features
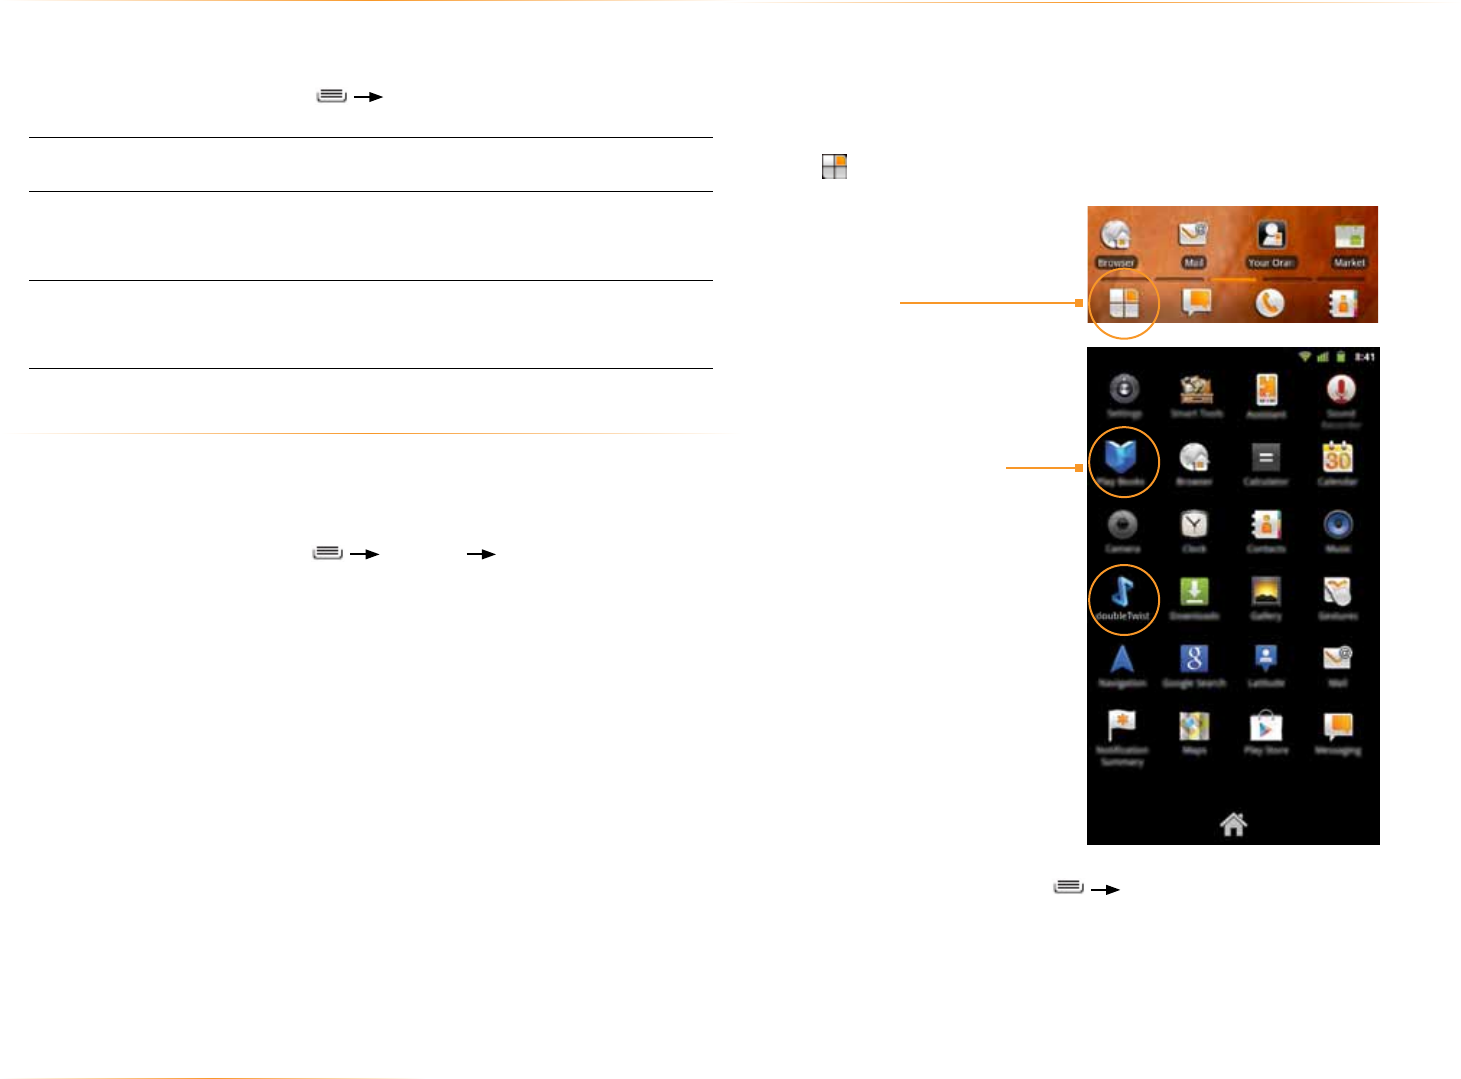
2.5 use the app launcher
Apps are small programs that add features to your phone. Many apps come
preinstalled, and additional apps can be purchased in the Play Store.
You can use the App Launcher to easily access all of your installed apps.
To use the App Launcher:
•Touch , then touch an app to open it.
TIP: From the Homescreen, Touch All programs to see a list of apps.
To add an app shortcut to the Homescreen:
• Touch and hold an app. Once the Homescreen displays, drop the app onto
an empty spot on the Homescreen.
2.3.1 search settings
You can change the default Search settings.
To change Search settings:
•From the Search screen, press Search Settings.
Search Show web suggestions: Show suggestions as you
type.
Searchable items Select which applications to search by default.
NOTE: Only the selected applications will display and
be searched within the Search application.
Clear shortcuts Erase previously searched-for results.
NOTE: Saving your previous searches makes it easy
to return to a frequently searched-for item.
2.4 secure your phone
You can configure your phone to require a password, pin, or pattern in order to
turn it on or wake it up. Securing your phone can help keep its contents private.
To secure your phone:
1. From the Homescreen, press Settings Locations & security.
2. Touch Set up screen lock to secure your phone or Change screen lock to
change the current security lock.
3. Select one of the following settings:
•None disables screen locking.
•Pattern lets you draw a custom pattern to unlock your phone.
• PIN lets you use a 4 to 16 digit number combination to unlock your
phone.
• Password lets you use a 4 to 16 digit password to unlock your phone.
NOTE: Once you have selected a lock for your phone, you will need to enter
this lock each time you turn on or wake up your phone.
TIP: Use the doubleTwist™ app
to seamlessly transfer your songs,
photos, and other personal media
from your PC to your phone.
2. Touch an app to open it.
1. Touch to open the
App tray.

PAGE : 142.0 homescreen and basic features
2.6 use the play store
Many apps are available for download from the Play Store. Many are free!
To use the Play Store:
•Touch , then touch .
Search or browse for apps. You’ll be able to confirm that you want to purchase
an app, and see the permissions it requires, before installing it on your phone.
TIP: Google play store can only be used when google account is activated.
PAGE : 153.0 onscreen keyboard basics
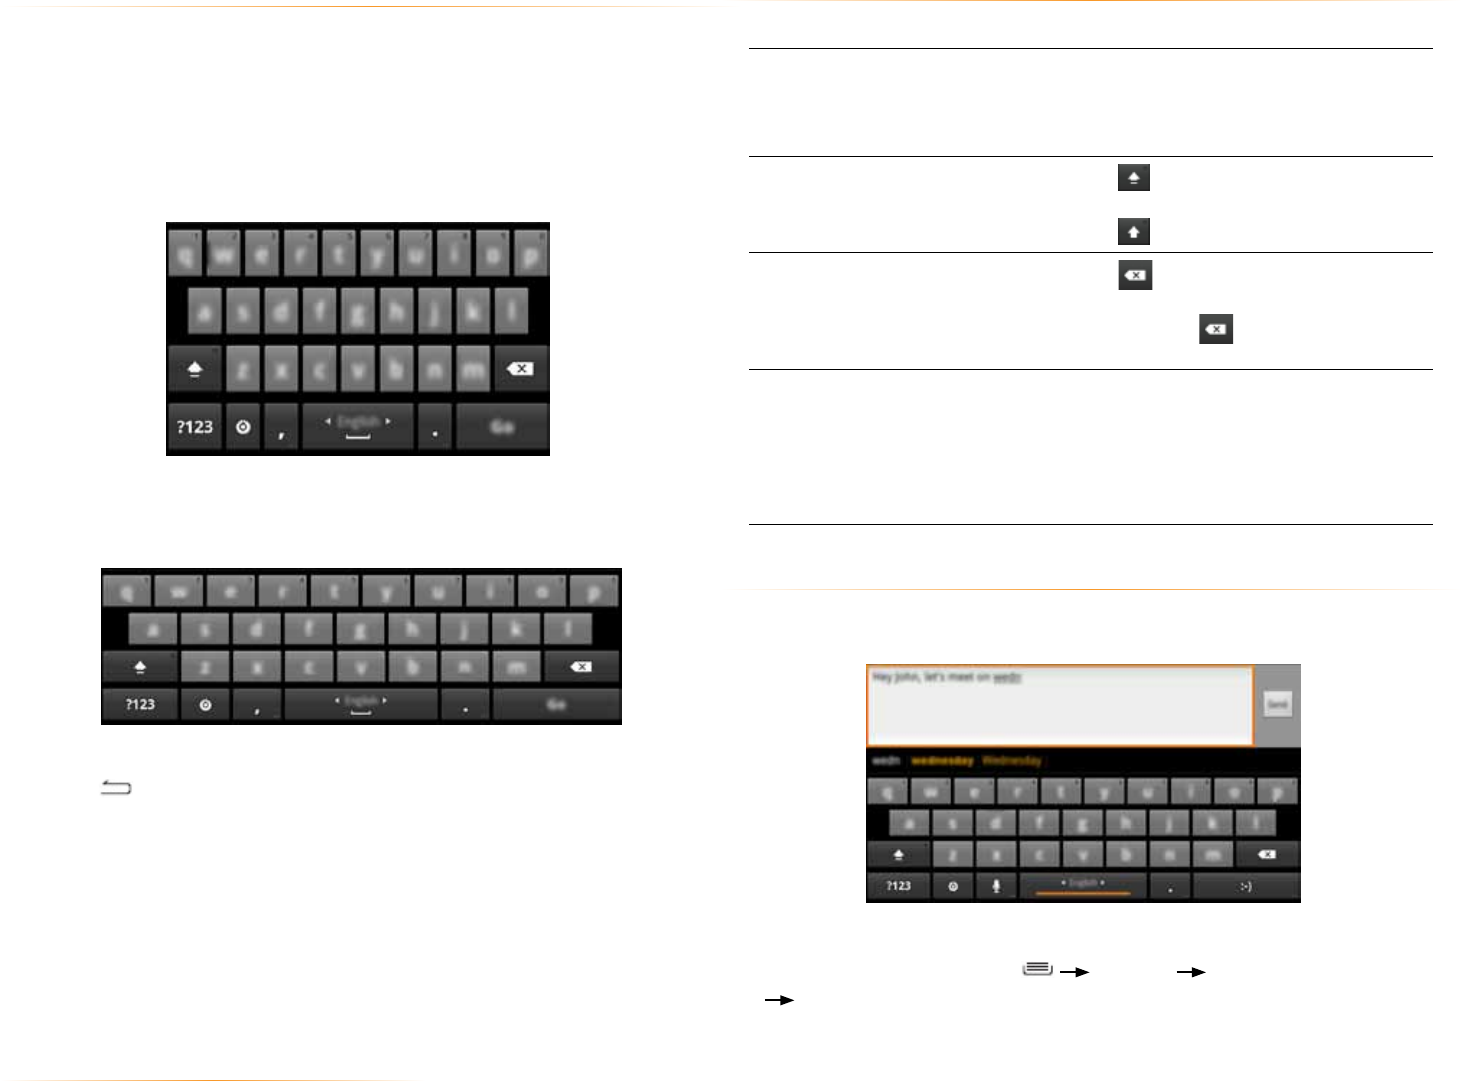
Onscreen Keyboard Options
While using the onscreen keyboard, the following options are available.
Switch keyboard display Touch the ?123 key to enter numbers and
symbols or the ABC key to enter letters.
To see additional symbols while in symbol
display, touch the ALT key.
Capitalize the next letter Touch to capitalize the next letter you
enter.
Touch again to turn CAPS LOCK on.
Delete text Touch to erase the last
character entered.
Touch and hold to continuously erase
characters.
Change keyboard language If your keyboard has multiple languages
enabled, slide your finger across the
spacebar to change a language.
See Language & Keyboard Settings
for information on enabling multiple
languages.
3.1 suggestions and auto-complete
The keyboard includes suggestions and auto-complete to make entering long
words easy.
To turn on suggestions and/or auto-complete:
• From the Homescreen, press Settings Language & keyboard
Android Keyboard, then select Show Suggestions or Auto-complete.
3 onscreen keyboard basics
The onscreen keyboard lets you use your touchscreen to dial numbers, type
emails, enter URLs, and more.
To use the Onscreen Keyboard:
• Touch any text field to display the onscreen keyboard, then touch the
characters on the keyboard to enter text.
TIP: Move the insertion point by touching where you want to enter text.
To view the keyboard in landscape orientation:
• Turn your phone sideways to rotate the keyboard, making it larger and easier
to use.
To close the onscreen keyboard:
•Press .
PAGE : 16
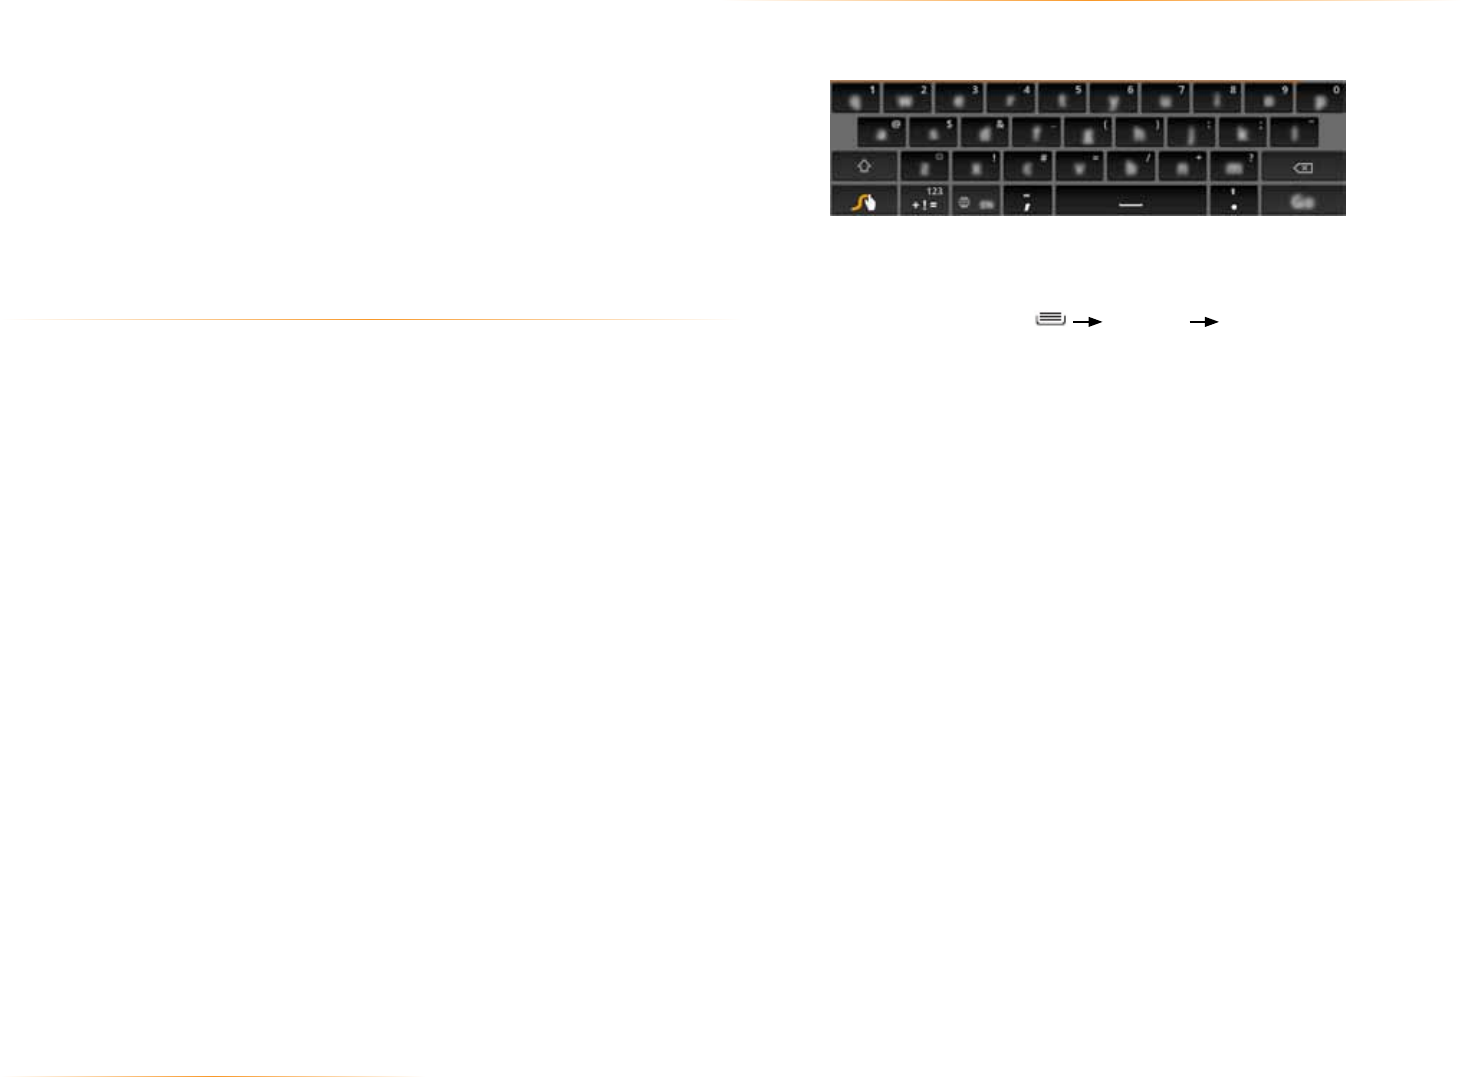
3.2 swype keyboard
Swype(TM) is a powerful tool that lets you ‘swipe’ your finger across the
keyboard to spell out and enter words.
Swype and Android Keyboard cannot both be enabled simultaneously.
To select preferred keyboard:
1. From the HomeScreen, press Settings Language &
Keyboard -> Swype -> Select input method.
2. Touch Swype or Android Keyboard to select the desired input method.
To use the suggestions feature:
1. Begin entering text in a text field or message.
Your phone displays suggested words and punctuation directly above the
keyboard.
2. Touch a suggested word or punctuation mark to enter it or drag the display
to the right to see more suggestions.
TIP: Touch the spacebar after entering a word to append a period.
To use the auto-complete feature:
• Touch the spacebar (or any punctuation mark) to enter the highlighted word.
3.1.1 user dictionary for suggested words
You can modify the dictionary that the onscreen keyboard uses to suggest
words.
To add a word to the user dictionary:
1. Type a word.
The current word is highlighted in white at the left of the suggested word list.
2. Touch and hold the word to add it to the user dictionary.
For information on editing and deleting words in the user dictionary, see
Language & Keyboard Settings.
3.0 onscreen keyboard basics
PAGE : 174.0 make and answer calls
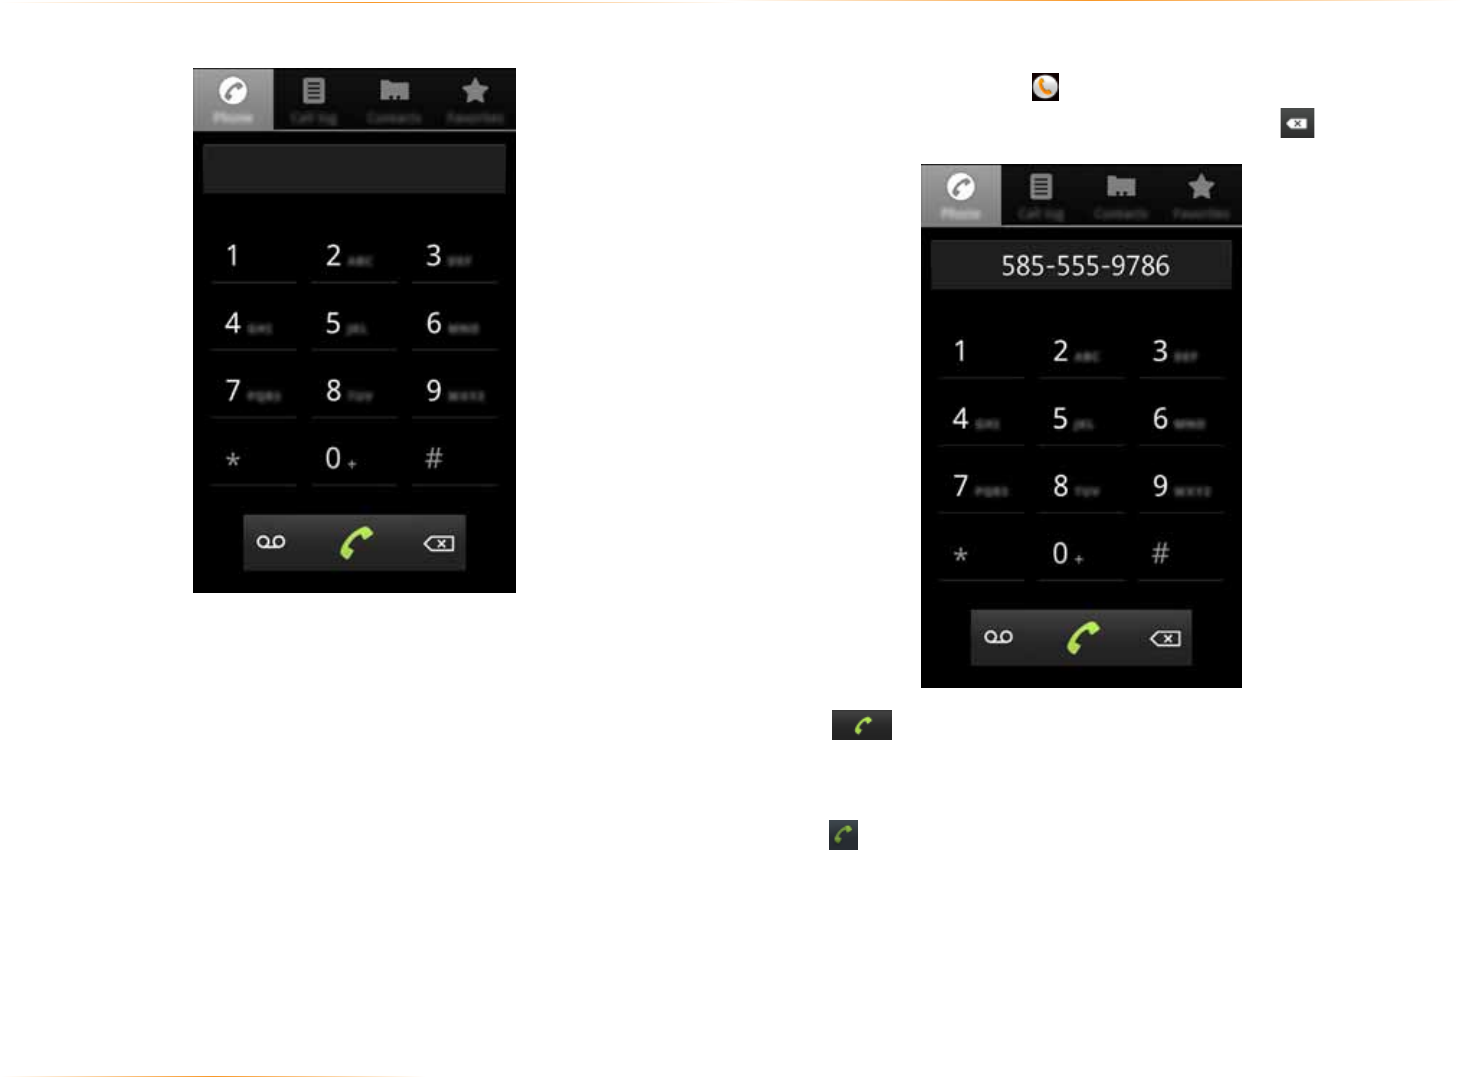
4.1 use the phone tab
The Phone app’s Phone tab lets you make and manage calls.
To make a call:
1. From the Homescreen, touch .
2. Touch the numbers on the dial pad to dial a number, using to make
corrections.
3. Touch to dial the number.
NOTE: For international calls, first touch and hold 0 to enter + and then dial
the number. Additionally, you can also switch to any application without ending
the call. Return to the phone screen by expanding the notifications bar and
touching .
4 make and answer calls
Use the Phone app to make calls and to store and find your contacts.
You can move between the phone dialer, call history, contacts, and favorites by
touching the tabs at the top of the Phone app.
PAGE : 184.0 make and answer calls
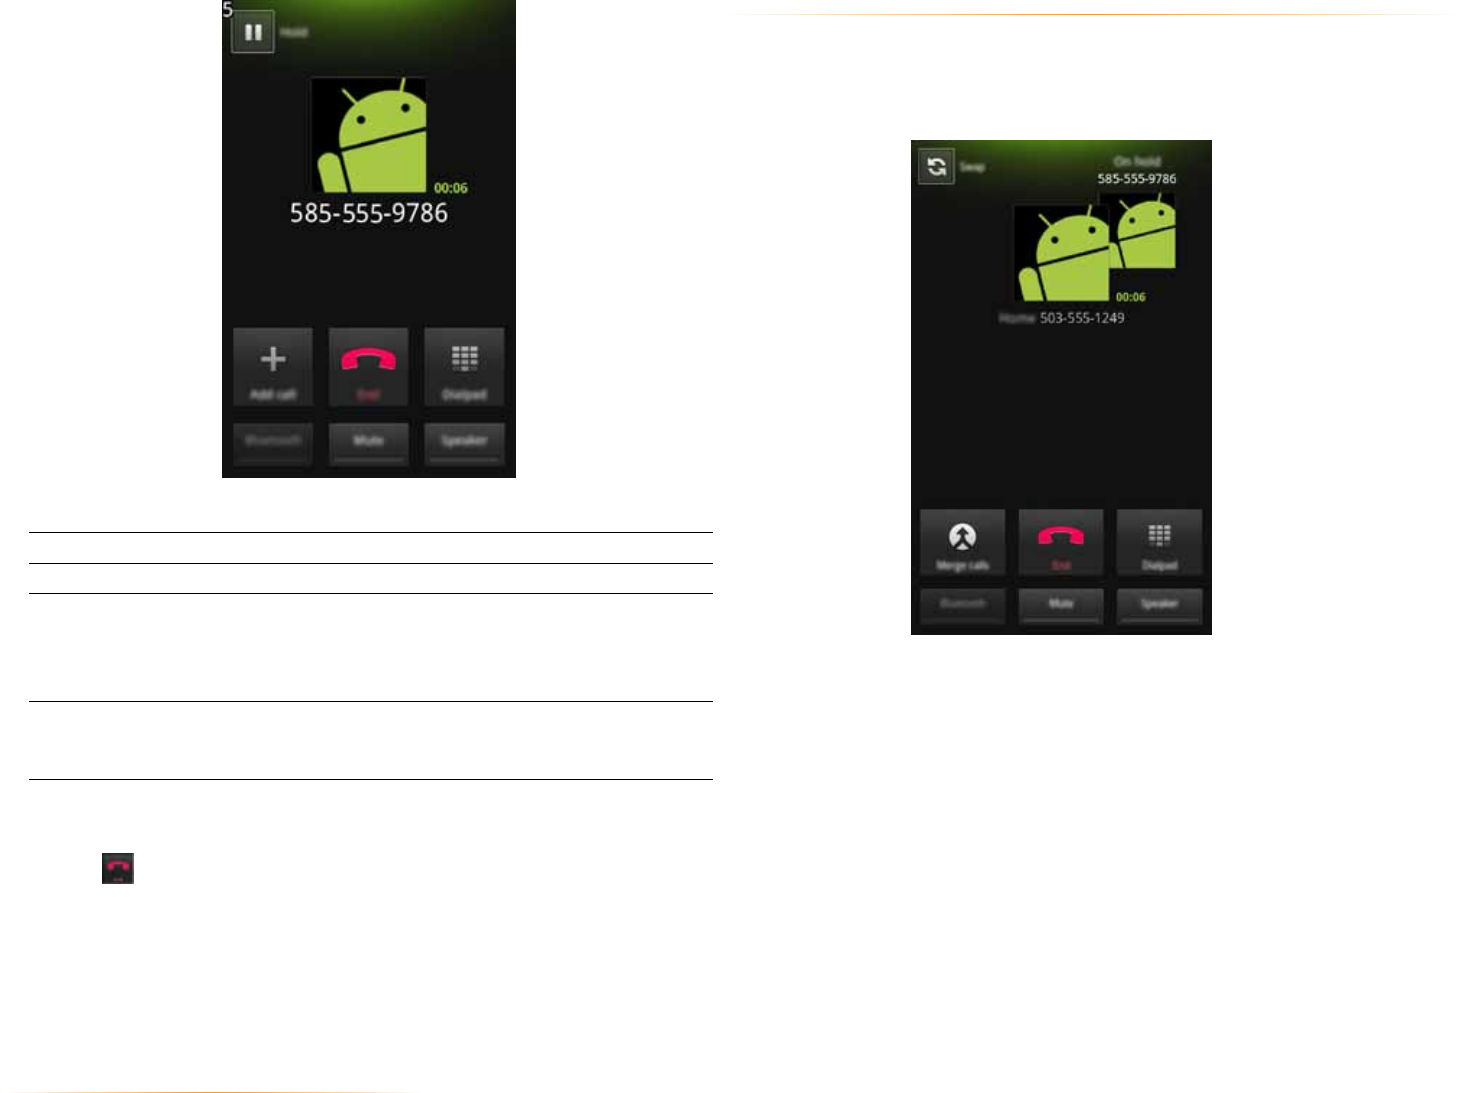
4.1.1 work with multiple calls
You can make another call while on a call.
To add a call:
•While on a call, touch Add Call and dial another number.
To move between calls:
•Touch .
To merge calls into a conference call:
•Touch Merge calls to join two or more calls together into a single conference
call.
The following actions are available while you are on a call.
To hold a call Touch Hold to hold or resume the current call.
To mute a call Touch Mute to mute or unmute the call.
To use
speakerphone
Touch Speaker to turn speakerphone on or off.
Warning! To avoid damage to your hearing, do not
hold the phone against your ear when speakerphone
is turned on.
To use a Bluetooth
headset
Touch Bluetooth to automatically transfer calls
to a connected Bluetooth headset. See Wireless
Bluetooth Connection for more information.
To end a call:
•Touch
PAGE : 194.0 make and answer calls
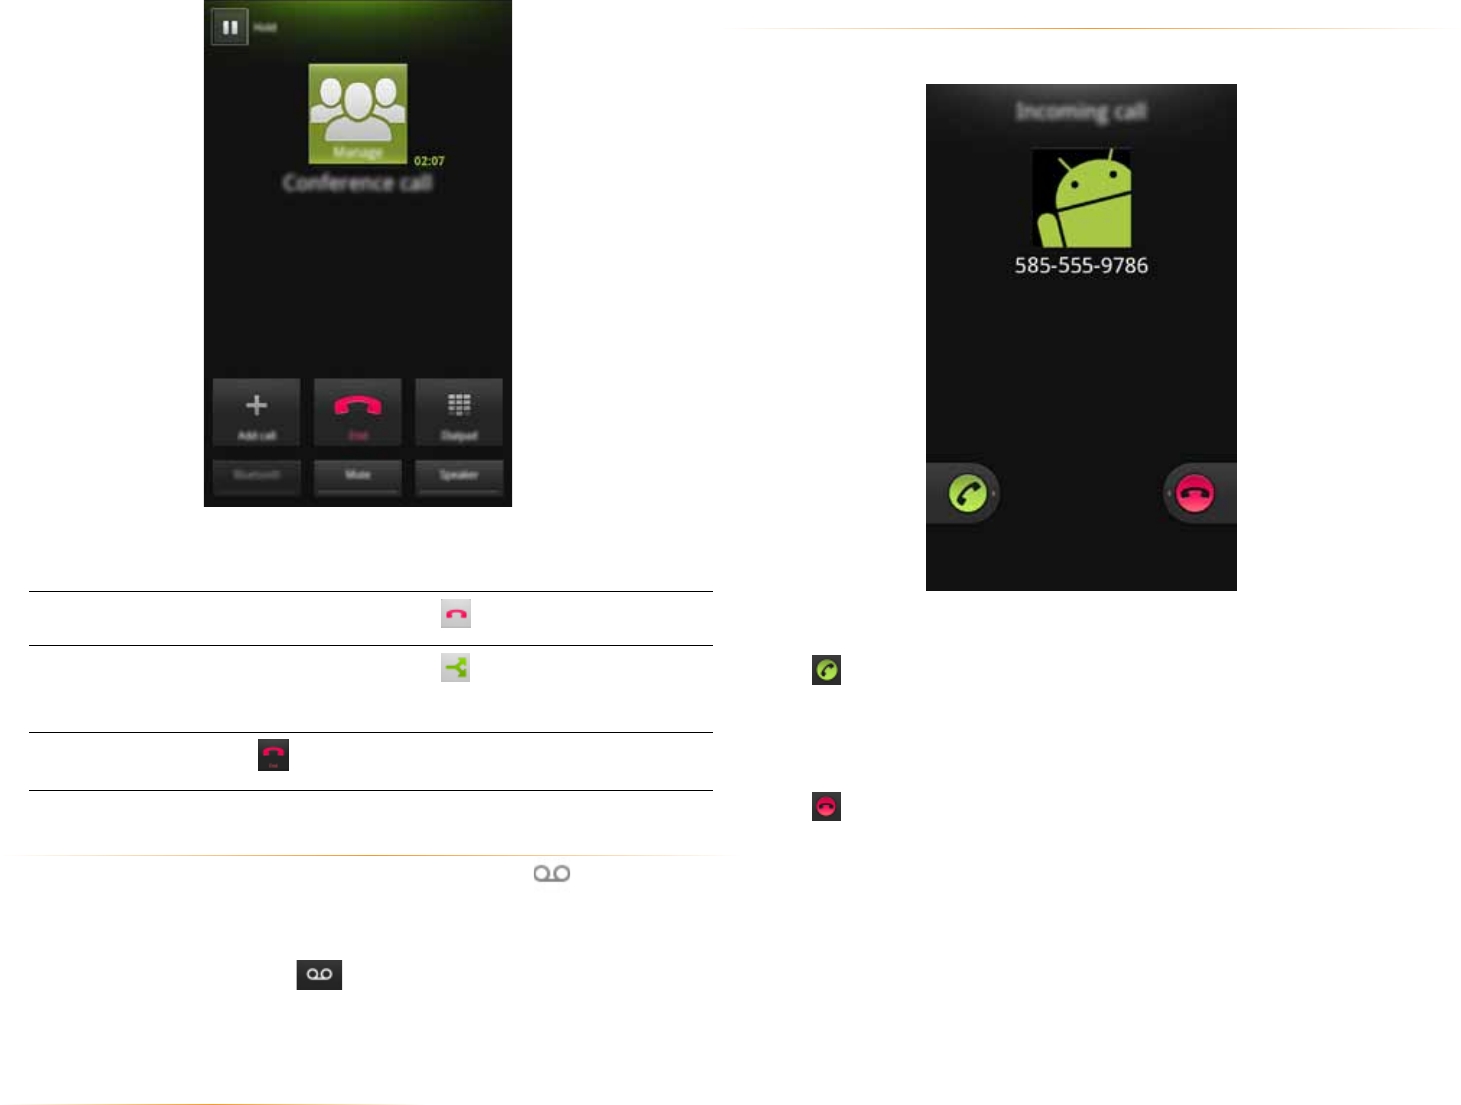
4.2 answer and reject calls
When you receive a call, you will see the following screen.
To accept a call:
• Slide to the right.
If you are already in a call, that call will be placed on hold while you answer
the new call.
To reject a call:
• Slide to the left.
The rejected call will automatically be directed to your voicemail.
The following options are available when on a conference call.
To drop a
participant Touch Manage, then touch .
To talk privately
to a participant Touch Manage, then touch .When you are done
talking privately, touch Merge Calls to add the participant
back to the conference call.
To end the call Touch to end the conference call and disconnect all
callers.
4.1.2 Voicemail
When you receive voicemail, a voicemail notification icon ( ) displays in the
notifications panel.
To check voicemail:
•Within the Phone app, touch .
TIP: You can also open the notifications panel and touch the voicemail
notification.
PAGE : 204.0 make and answer calls
To remove all entries
from the call log
Press Clear Call Log.
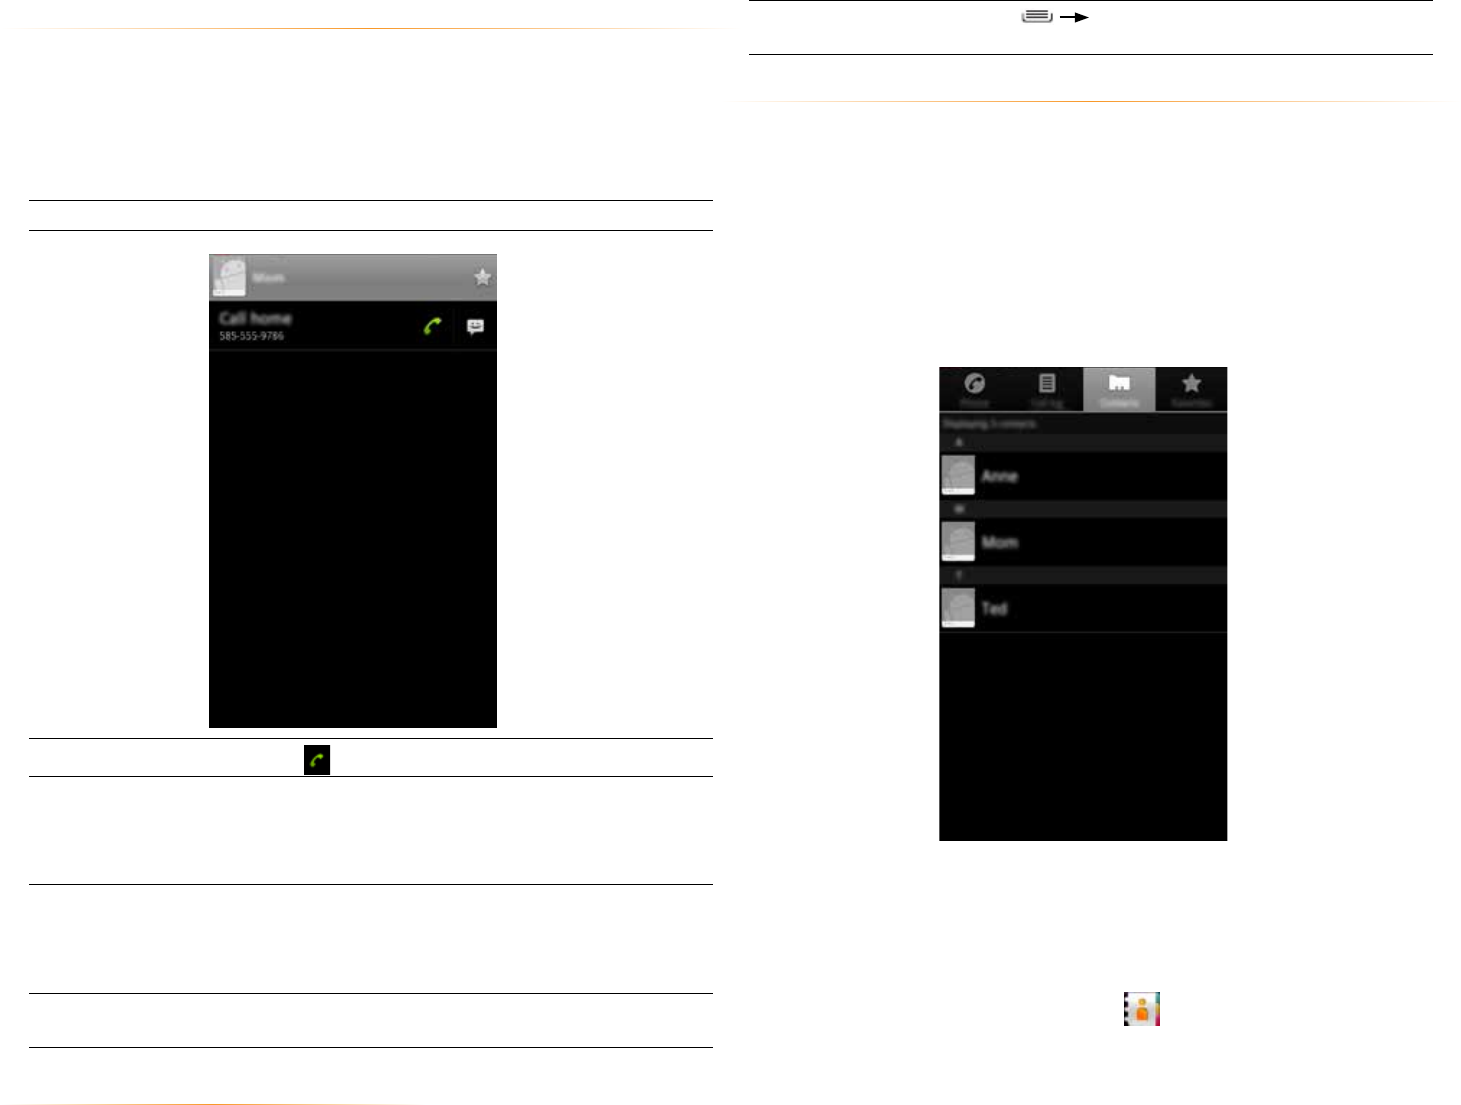
4.4 use the contacts tab
The Contacts Tab displays the contacts from your accounts along with any
contacts you have added.
NOTE: By default, contacts in your accounts and on your phone will be
synchronized so that any changes to the contacts on your phone will be
matched in your accounts, and vice versa. See Accounts for more information.
NOTE: Depending on your account settings, information you add or remove
from your phone will be synchronized with your external accounts. See
Accounts for more information.
To find a contact:
1. From the Phone app, touch the Contacts tab.
Scroll up and down to view all contacts.
2. Touch a contact to see more details.
TIP: Quickly see your contacts by touching on the Homescreen
4.3 using the call log tab
The call log lists calls you have made, missed, and received. It also lets you call
entries, send messages, and add caller information to contacts.
To use the call log:
•From the Phone app, touch the Call Log tab.
The following options are available from the call log.
To see more details Touch an entry.
To call the entry Touch .
To send a text
message
Touch the entry to see more details, then touch Send
Text Message.
For more information on messaging, see Sending
and Receiving Messages.
To add to contacts Touch the entry to see more details, then touch Add
to Contacts.
For more information on adding contacts, see Using
the Contacts Tab.
To remove an entry
from the call log
Touch and hold the entry, then touch Remove Call
from Log.
PAGE : 214.0 make and answer calls
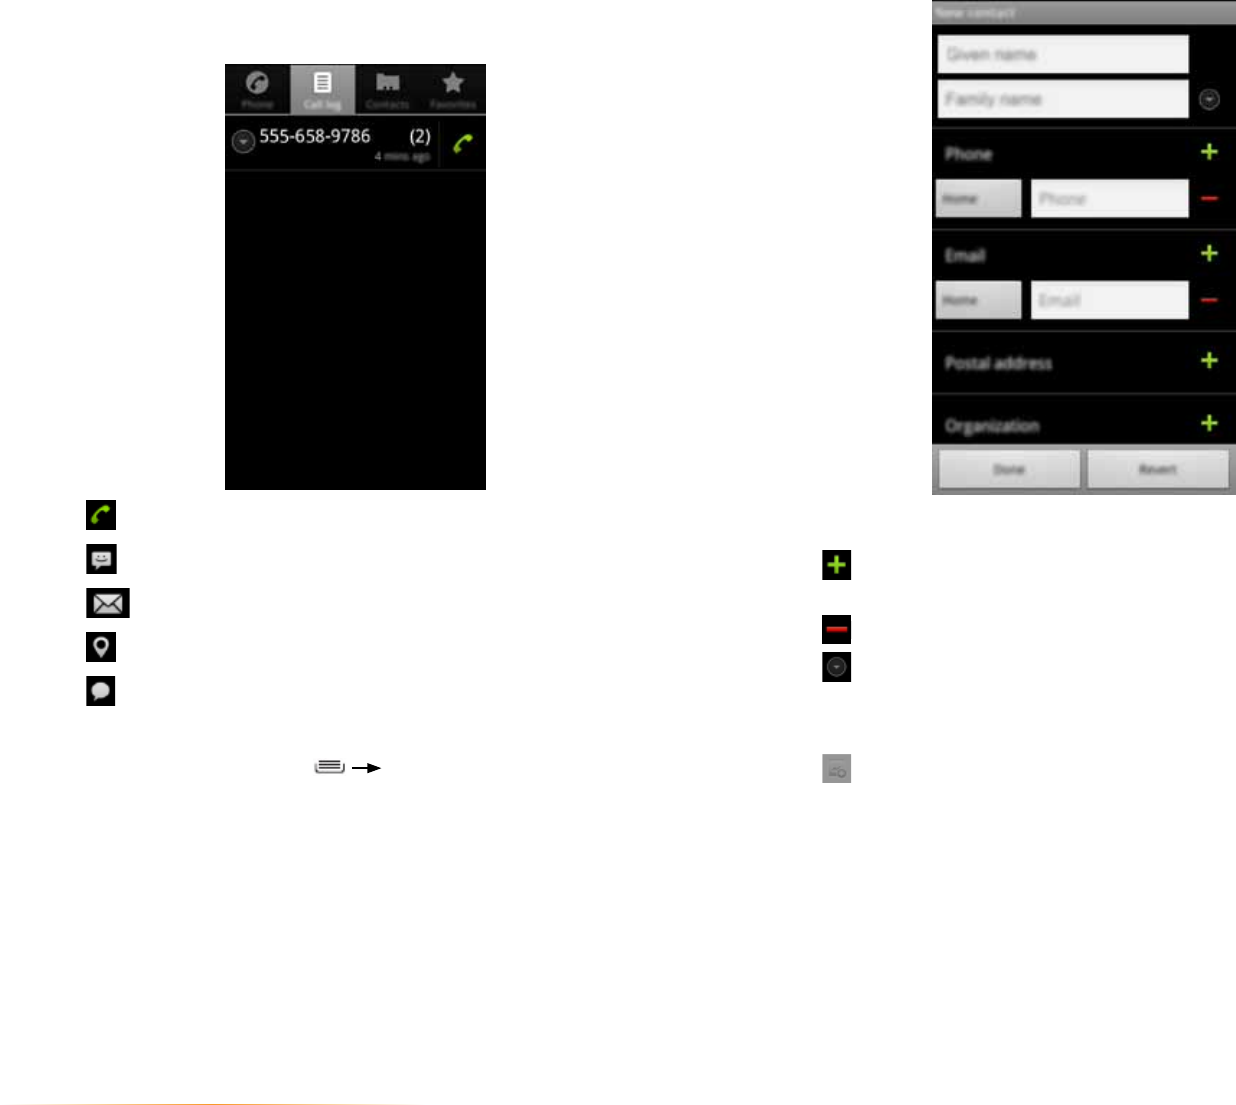
Use the following controls to add information about the contact:
• Touch to add another field of the same kind, such as multiple phone
numbers or email addresses.
•Touch next to a field to delete the field.
•Touch beneath the name fields to view more name fields.
• Touch More at the bottom of the contact screen to reveal other fields, such
as IM and website address fields.
• Touch and follow the prompts to choose or take a photo for your
contact’s icon.
To edit a contact:
1. From the Contacts tab, touch and hold a contact, then touch Edit contact.
2. Modify the contact information, as described above.
3. Touch Done.
To communicate with contacts:
•Touch the contact, then touch one of the following icons:
Touch to call a contact.
Touch to send a text message.
Touch to send an email.
Touch to look up an address in Google Maps.
Touch to start an IM chat.
To add a contact:
1. From the Contacts tab, press New Contact.
2. Enter contact information, filling in as many or as few of the fields as desired.
3. Touch Done to create a new contact, or touch Revert to discard the new
contact without saving.
NOTE: If you have multiple accounts, select the account to which you want to
add the new contact.
PAGE : 224.0 make and answer calls
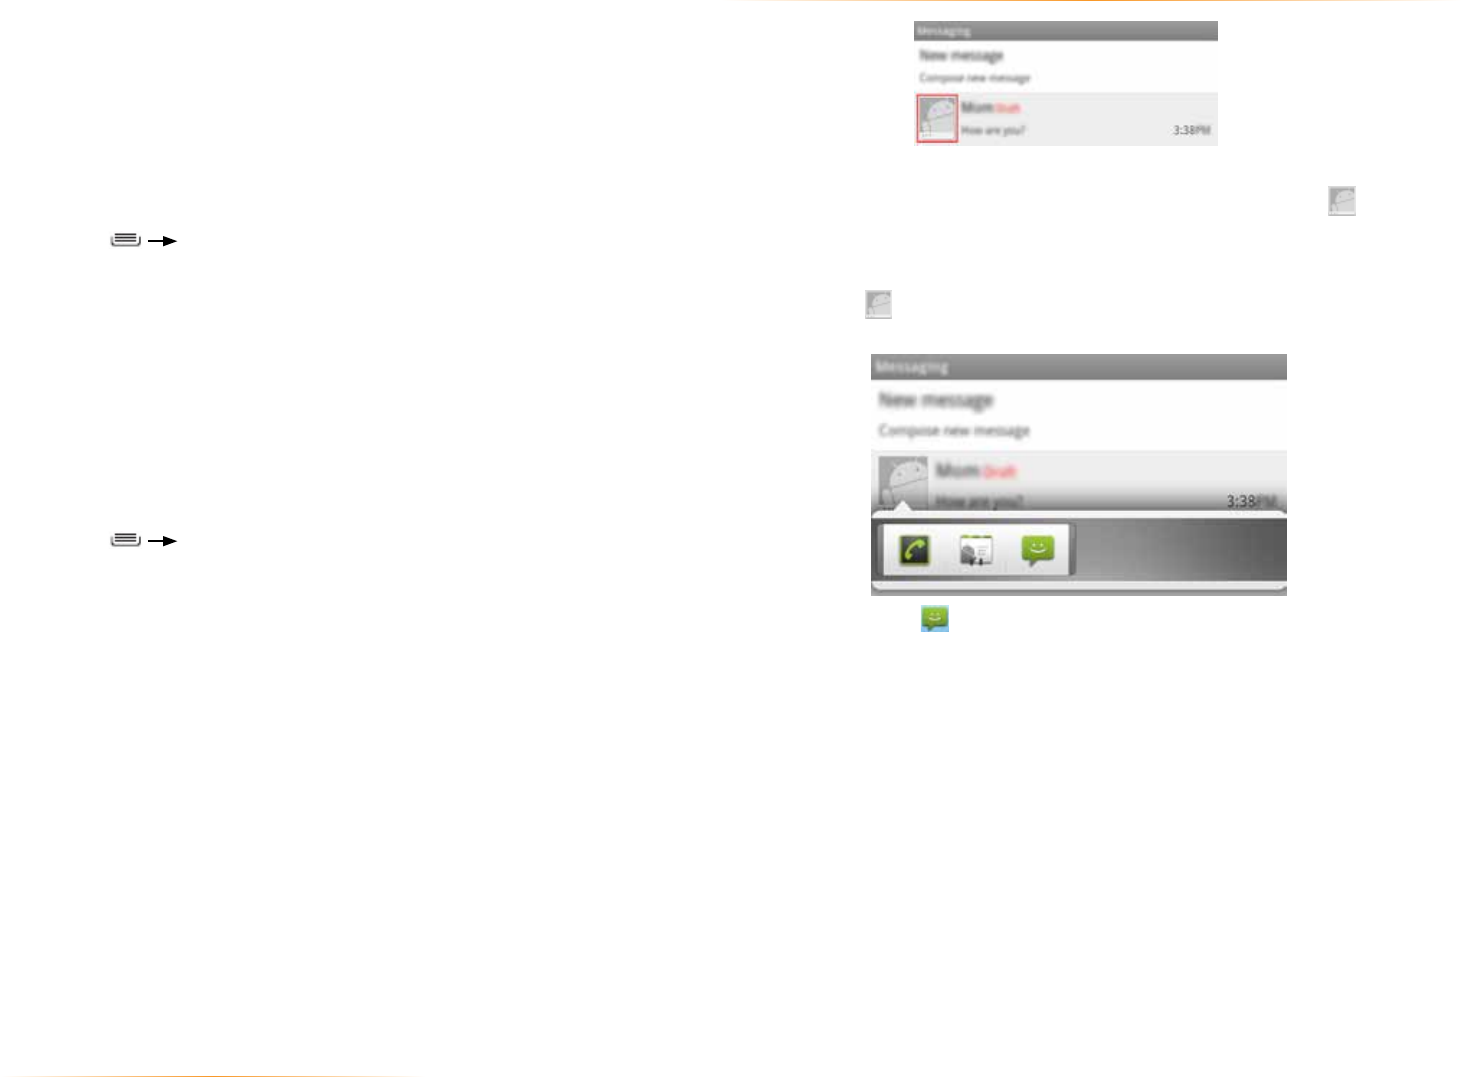
4.5 quick contacts
Some applications use Quick Contacts to easily call, message, or otherwise
communicate with a contact. Just look for the Quick Contacts icon . Drag
the Quick Contacts list to the left or right to reveal additional app icons.
To use quick contacts:
1. Touch the icon, then touch one of the app icons to communicate with
the contact using the selected app.
For example, touch to message the contact.
To delete a contact:
1. From the Contacts tab, touch and hold a contact, then touch Delete
contact.
2. Touch OK to confirm.
NOTE: Read-only contact information—such as that from an external app—will
only be hidden, not deleted.
To join contacts:
1. From the Contacts tab, touch and hold a contact, then touch Edit contact.
2. Press Join.
3. Touch a suggested contact to join the two contacts together.
TIP: You can show more suggestions by touching Show all contacts.
The name and picture of the contact you select first will be used for the
resulting joined contact. Contacts with the same name from two different
accounts are automatically joined.
To separate contacts:
1. From the Contacts tab, touch and hold a joined contact, then touch Edit
contact.
2. Press Separate contact.
PAGE : 23
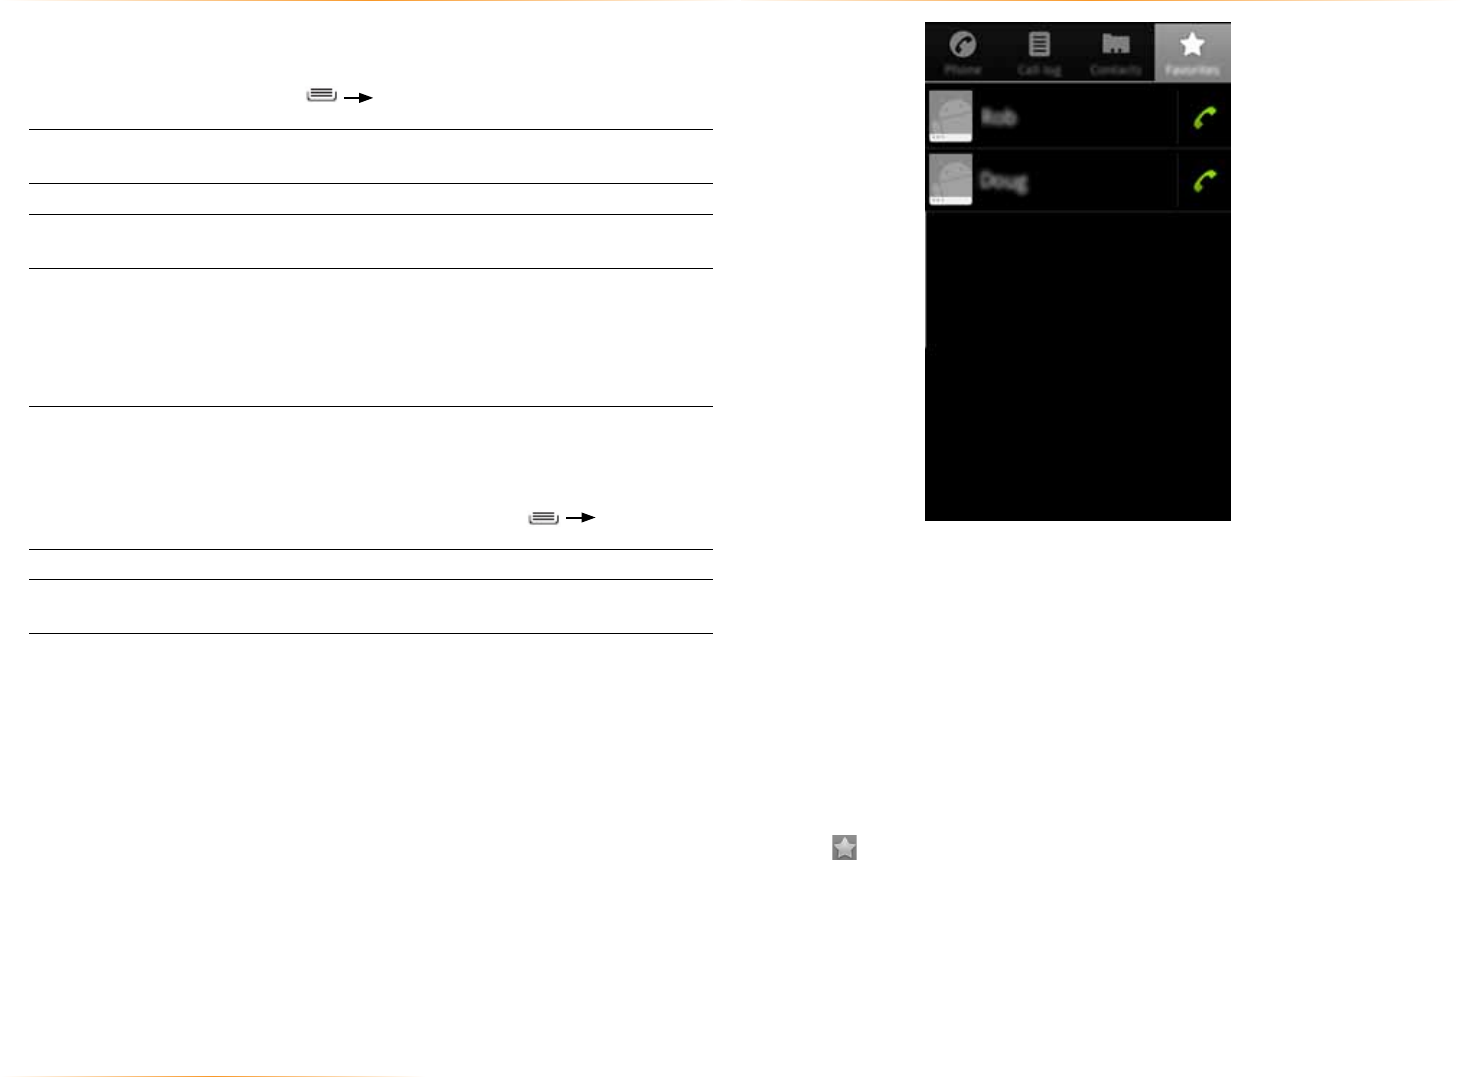
4.7 use the Favorites tab
The Favorites tab displays the contacts you communicate with most frequently.
To use the Favorites tab:
•From within the Phone app, touch the Favorites tab.
To communicate with a favorite:
• Touch the contact, then touch an icon, as described under Using the
Contacts Tab.
To add a favorite:
1. From the Contacts tab, touch a contact.
2. Touch .
4.6 contact settings
You can fine-tune how contacts are displayed with the following settings.
To set display options:
•From the Contacts tab, touch Display Options.
Only contacts with phones Display only contacts with phone
numbers.
Sort list by Sort contacts by first or last name.
View contact names View contact names by First OR Last
name.
Choose contacts to display Touch an account, then touch to select
the groups to display.
NOTE: This action only affects groups or
contacts displayed on the contact screen.
Your sync settings are not affected.
You can fine tune a specific contact’s options with the following settings.
To set contact options:
• From the Contacts tab, touch a contact and then touch Options.
Ringtone Specify the desired ringtone.
Incoming calls Send the contact’s calls directly
to voicemail.
4.0 make and answer calls

PAGE : 24
5.0 send and receive messages
5.1 send messages
To send a message:
1. From the Message app, touch New Message.
2. Enter a recipient in the To field.
Matching numbers and contacts appear as you type.
3. Touch a matching contact or number to select it, or enter a new number to
message a new contact.
4. Touch the Type to Compose field and enter a message.
5. Touch Send to send your message.
TIP: You can add smileys, subject headings, and more. See Message Options,
below, for more information.
NOTE: If you enter more than 160 characters, the rest are sent as a separate
message. In a long message, numbers under the Send button display the
number of characters remaining.
5 send and receive messages
The Message app sends and receives text and multimedia messaging threads
(groups of sent and received messages).
To open the messaging app:
•From the Homescreen, touch .
To view a message:
•Within the Message app, touch a messaging thread.
The messages inside the thread display, with the newest message at the
bottom of the screen.
TIP: Threads with new messages are displayed in bold.
To view a multimedia attachment:
• If the message has a multimedia attachment, touch the attachment to view it.
TIP: Touch and hold an attachment to download it to your phone.
PAGE : 25
5.0 send and receive messages
5.2 manage messages
To delete a messaging thread:
• Open the messaging window, and touch and hold a messaging thread. Then
touch Delete Thread.
TIP: Press Delete Threads to delete all messaging threads.
To forward, lock, or view message details:
1. Open the messaging window, and touch a messaging thread.
2. Touch and hold a message, then choose one of the following:
• Touch Forward, enter a recipient, and then touch Send to forward a
message.
• Touch Lock message to keep a message from being automatically
deleted. Touch Unlock message to remove the lock from a message.
• Touch View Message Details to see message details, such as when a
message was sent.
To attach multimedia to a message:
1. Press Attach.
2. Select the desired type of attachment (for example, a music file or a
captured picture), then follow the prompts to send the message.
Message Options
The following actions are available while composing a message.
Save message as a draft Press .
ALTERNATE: Exiting the Message app will also
save any draft messages.
Resume working on a
draft
Touch a message thread marked “Draft.”
Discard a draft Clear the message text.
Enter a smiley Press Insert smiley and touch the
smiley you want to insert.
ALTERNATE: Touch and hold :-) on the onscreen
keyboard and drag to select a smiley.
ALTERNATE: Enter the characters that make up
the smiley.
Add a subject heading
to your message
Press Add Subject and enter the
subject heading.
PAGE : 26
Notification Settings
Notifications Receive a notification whenever a new message is
received.
Select ringtone Select the ringtone that plays when you receive a
message notification.
TIP: Select the ringtone “silent” to turn off
message ringtones.
Vibrate Select to have the phone vibrate when you
receive a new message.
5.3 message settings
To specify message settings:
•From the main Messaging window, press Settings.
The following settings are available.
Storage Settings
Delete old messages Automatically delete the oldest message in a
messaging thread whenever the message limits
are exceeded.
Text message limit Set the number of text messages to save in each
messaging thread. If Delete old messages is
enabled, your oldest text message will be deleted
whenever this limit is exceeded.
Multimedia message
limit
Set the number of multimedia messages to
save in each messaging thread. If Delete old
messages is enabled, your oldest multimedia
message will be deleted whenever this limit is
exceeded.
Text Message (SMS) Settings
Delivery reports Request a delivery report whenever you send a
text message.
Multimedia Message (MMS) Settings
Delivery reports Request a delivery report whenever you send a
multimedia message.
Read reports Request reports when your multimedia messages
are read or deleted.
Auto-retrieve Automatically download attachments from
incoming multimedia messages.
Roaming auto-retrieve Turn on auto-retrieve even when on another
carrier’s network.
NOTE: Turning off this option lets you prevent
data roaming costs.
5.0 send and receive messages
PAGE : 276.0 take photos and videos
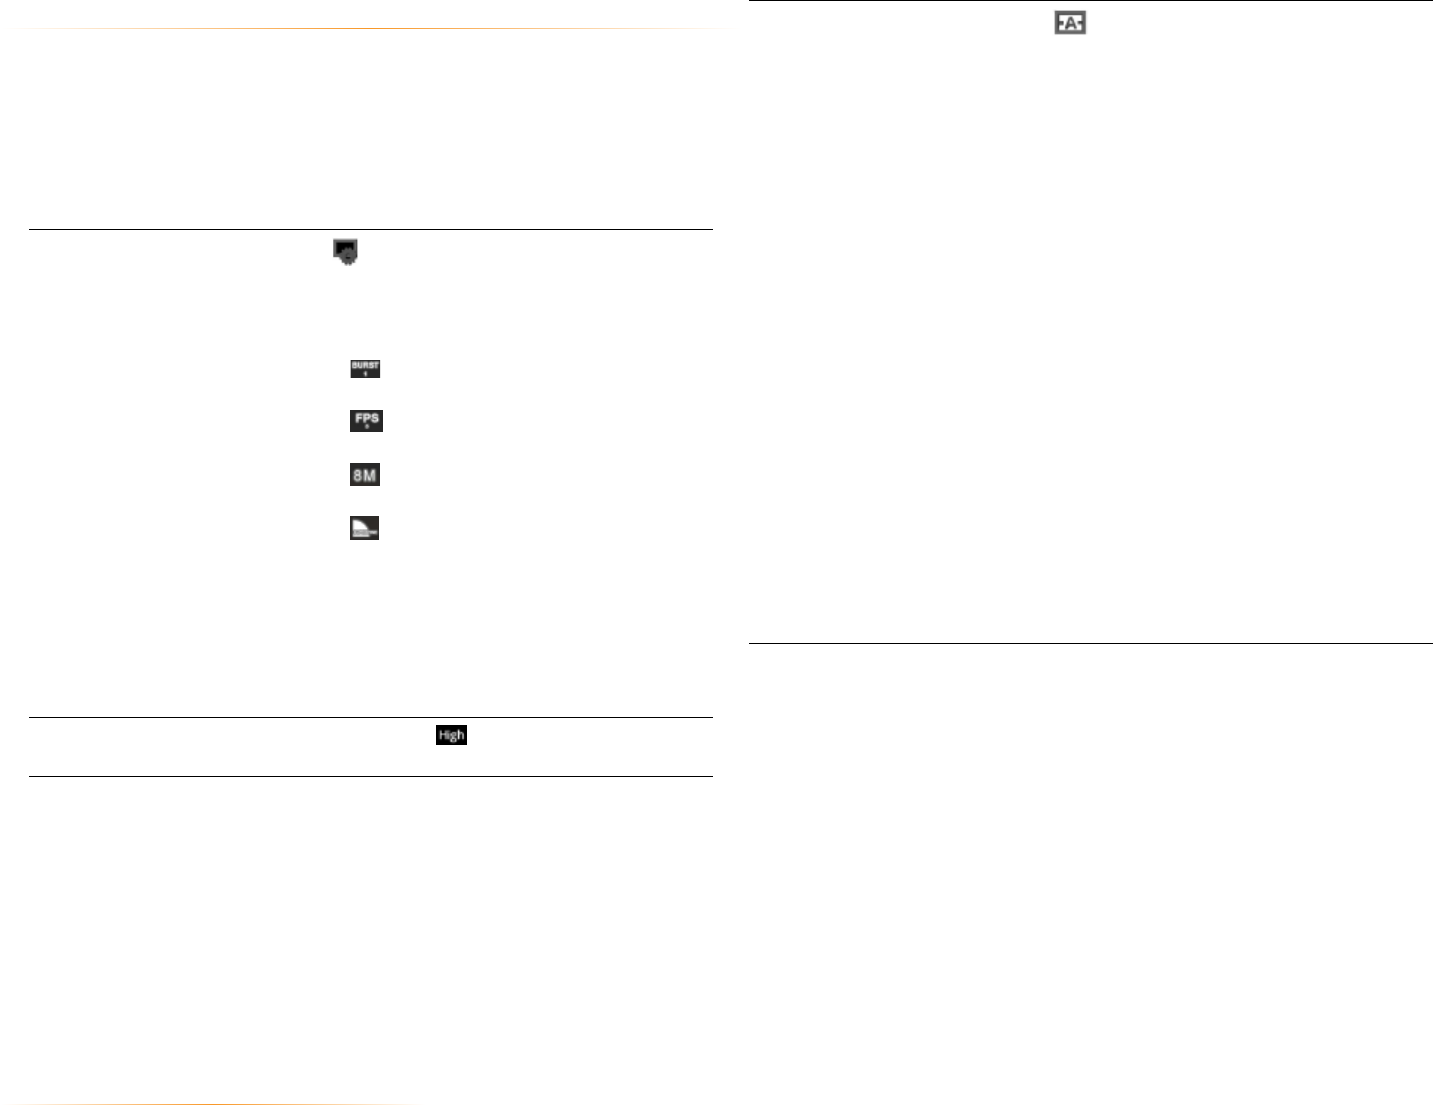
Camera buttons and icons
Once opened, the Camera app displays the following icons and buttons:
Touch the or to switch between camera and video
mode.
Use the shutter button to take a picture or shoot a video.
Touch to select the front-facing camera for self-portraits or the
back-facing camera for high quality pictures.
Drag down the top of the screen (in portrait) or left (in
landscape) to display camera settings, such as brightness,
focus, and so on.
NOTE: See “Changing Picture & Video Settings,” below to
learn about changing camera settings.
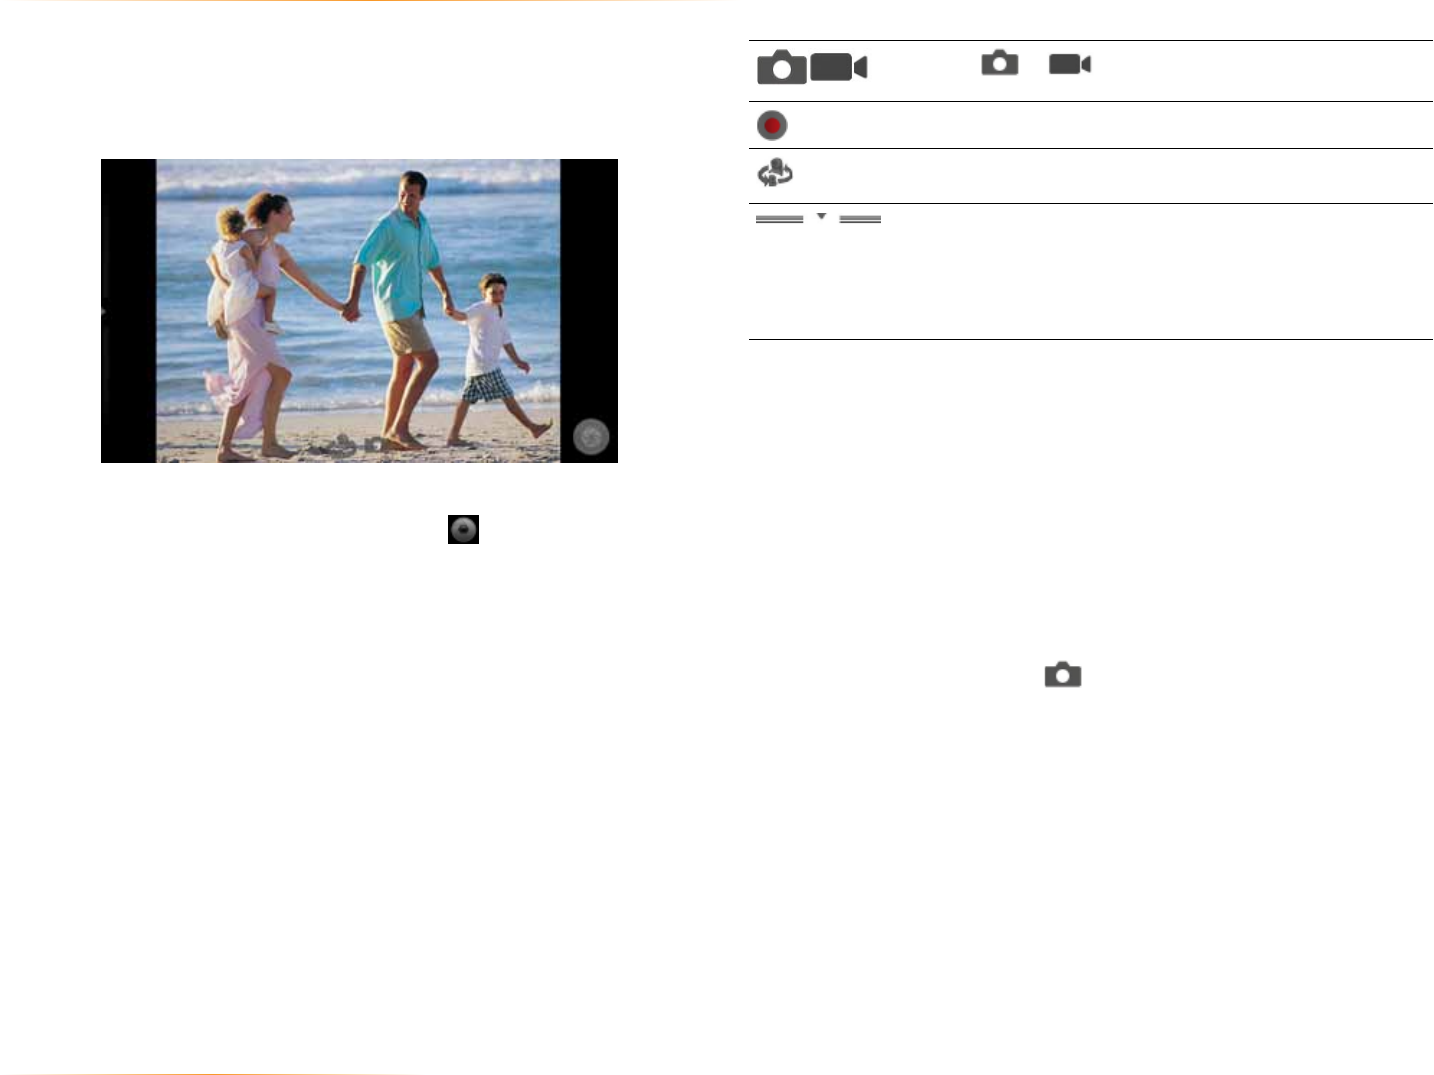
To take a picture:
1. Frame your subject on the camera.
2. Touch the Shutter button to take your picture and save the image to the
Gallery.
Auto-Focus:
If Auto-focus is selected, hold down the camera button halfway to focus the
area in the green box onscreen, and then push the camera button all the way
down to take a photo. See Changing Picture and Video Settings below to learn
about changing focus and other settings.
To shoot a video:
1. From the Camera app, choose .
2. Touch the Shutter button to begin recording. When done, press the Shutter
button again to stop and save the video to the Gallery.
6 take photos and videos
The Camera app lets you take and share pictures and videos.
To start the Camera app
• Press and hold the Camera button on the side of the phone until the Camera
app opens.
TIP: You can also open the Camera by touching in the app launcher.
PAGE : 286.0 take photos and videos
To optimize settings for
specific scenes Touch (second from the right) and select
from a list of common photographic subjects,
such as fireworks or the beach. The Camera app
will enable all the right settings for taking a picture
of the selected subject. The following settings are
available:
• Auto mode automatically selects settings
which are appropriate for most photographs.
• Sports configures the camera for fast action
subjects and emphasizes shorter exposure time
to prevent motion blur.
• Portrait optimizes for photos of a person at
near to middle distances.
• Landscapes sets focus to infinity and
configures the camera for landscape and
scenery far from the camera.
• Night favors settings for night time or low light
photography.
• Night portrait better accommodates
photographing a person in low light conditions.
• Fireworks pre-configures the camera to take
pictures of fireworks at night.
• Text mode configures the camera to take
pictures of text documents at short distance.
6.1 change picture & video settings
You can use the Camera app’s settings to help capture the perfect photo.
Most of these settings are available only on the back-facing camera.
To display camera settings:
•Drag down the top of the screen (in portrait) or left (in landscape) to display
camera settings, such as brightness, focus, and so on.
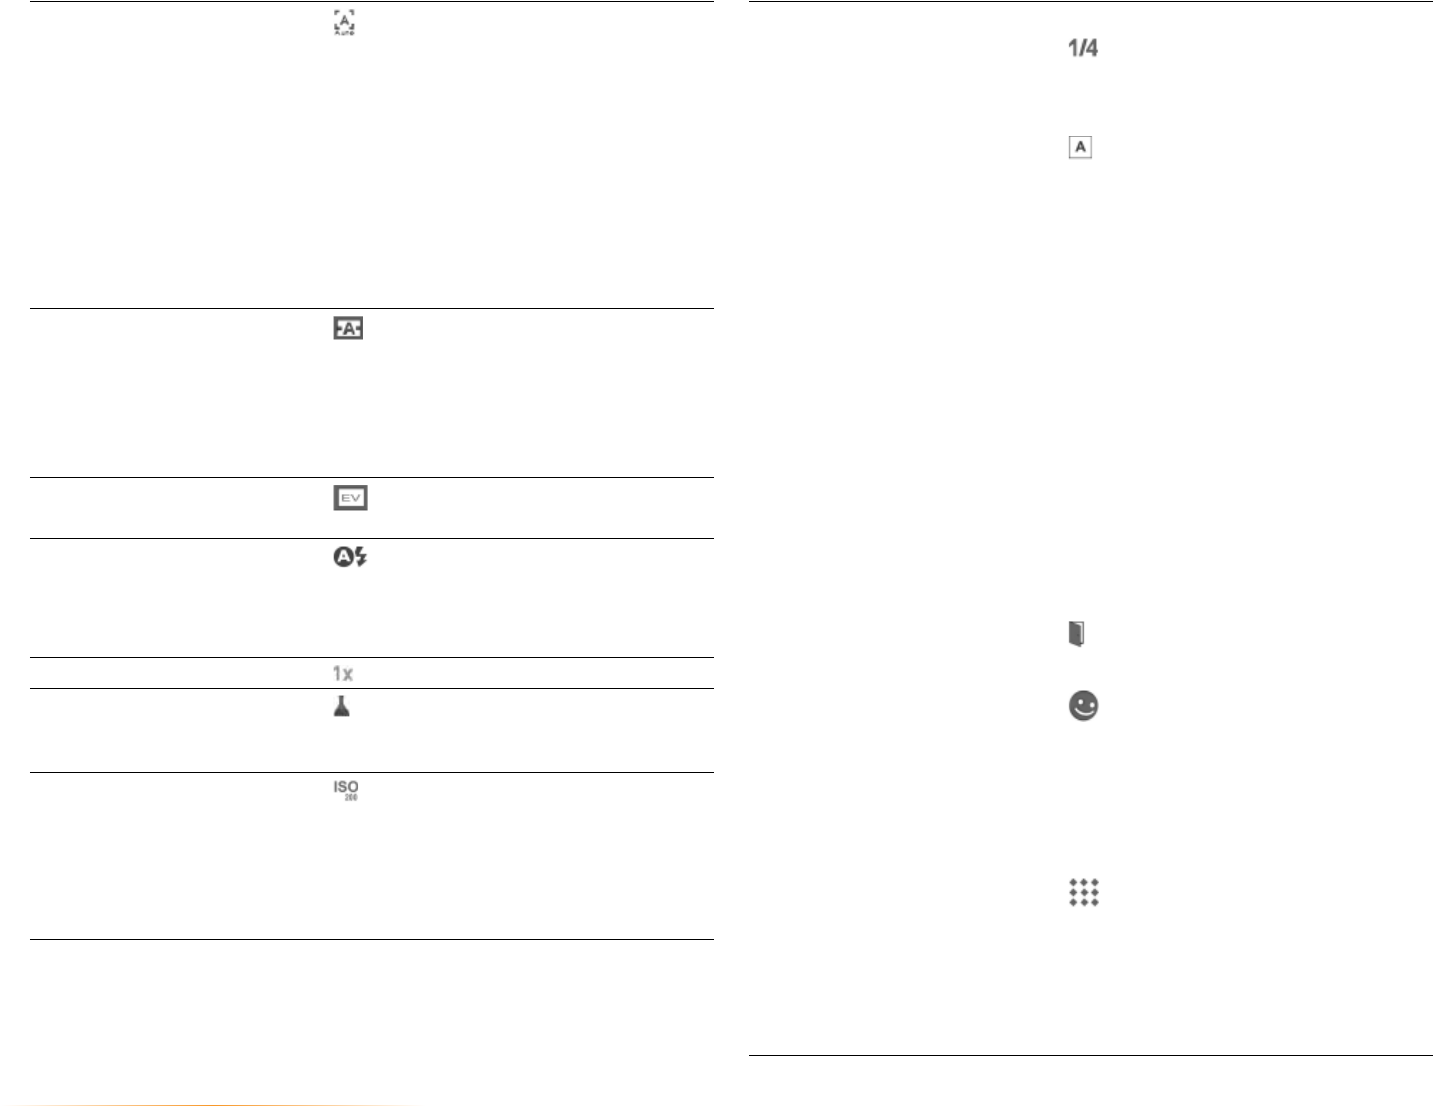
To change burst, photo
size and other settings Touch to display a menu controlling burst
capture, picture quality post view time, and
capture bracketing.
The following options are available:
• Touch to take a quick series (or burst) of
photos each time you touch the shutter button.
• Touch to select the rate (in frames per
second) at which a burst of photos is captured.
• Touch to specify the size of your photo in
megapixels.
• Touch toselect the quality of the captured
JPEG.
The remaining icons on this menu control
the number of seconds a captured photo is
displayed, and whether exposure and focus
are automatically varied during a burst photo
sequence.
To set video quality (Video only) Touch to specify the quality of the
captured video.
PAGE : 296.0 take photos and videos
To change advanced
settings
The following advanced settings are available:
•Touch to select the exposure time in
seconds. This setting only takes effect when AE
Mode is in either Manual or Aperture Priority.
•Touch [AE mode icon] to select an Auto
Exposure mode:
• Auto – set ISO and shutter speed
automatically, ignoring any manual
settings.
• Manual – use the current ISO and shutter
speed settings.
• Shutter Priority – use the manual shutter
speed to automatically calculate the best
ISO value for a normally exposed image.
• Aperture priority – use the manual ISO
setting to calculate the best shutter speed
to get a normally exposed image.
• AE Metering Mode – specify whether
metering is done automatically, or to
optimize a small spot in the center of the
focus area, or the entire center of the
focused area.
•Touch to override the camera’s automatic
setting and select indoor or outdoor settings.
•Touch to enable or disable the following
settings. eXtreme Noise Reduction (XNR),
Advanced Noise Reduction (ANR), Red Eye
Correction, and Geometric Distortion
Correction. NOTE that XNR, ANR and GDC are
normally selected automatically by the camera.
•Touch to addresses the artifacts produced
from incandescent lights that naturally flicker at
50 Hz or 60 Hz. Be default, the camera
automatically attempts to detect the presence
of these banding artifacts and compensate for
them.
To change focus
settings Touch to control how the camera focuses.
The following settings are available:
• Automatically focuses the camera for the best
focus setting for subjects in the range of 50 cm
to infinity.
• Infinity sets the focus lens to focus on subjects
far away.
• Macro changes the focus range to close
ranges of 10 to 50 cm.
• Touch allows you to touch the area of the
screen on which you want to focus.
To change the white
balance Touch (fourth from the right) to either
automatically or manually choose the correct
ambient light setting (such as Daylight or
Incandescent lighting).
NOTE: The preview window shows the effects of
the different white balance modes.
To change exposure Touch to use either longer (+1, +2) or shorter
exposure (-1, -2).
To change flash
settings Touch , and select a flash setting: Auto, Off,
On, or Torch for a constant light.
NOTE: When capturing a video, the available
Flash settings are Off and On.
To change the zoom Touch and select a zoom.
To change the color
effect Touch and specify color enhancements, such
as making the photo black and white or adding a
sepia filter.
To change the ISO
value Touch to manually set an ISO value. The
default value is recommended for most users, but
advanced users can decrease the value for well lit
conditions or increase it for darker conditions.
NOTE: The setting only takes effect when AE
Mode is in either Manual or Aperture Priority.
PAGE : 306.0 take photos and videos
6.2 view your pictures and video
Pictures and videos you take with the camera app are stored in the Gallery app,
and can be previewed within the main camera screen.
The Gallery app displays the pictures and videos you’ve taken on your phone,
downloaded from the web, or uploaded to a synchronized Picasa account
(Google’s web-based photo storage). Gallery stores all of your photographs
and videos in albums. Photographs and videos captured with the Camera app
are stored in the “Camera” album, while downloaded media is stored in the
“Downloads” album.
To preview your captures:
• Touch an image within the camera app to display your recently captured
pictures and videos.
To open the Gallery app:
•From the App Launcher, touch .
To open an album and view the pictures and videos inside:
• From within the Gallery app, touch the thumbnail for the album you want to
open.
Thumbnails for all pictures and videos inside the album will display.
TIP: You can slide left or right to see more albums.
To open a picture or video:
• Within an album, touch the thumbnail for the picture or video you want to
open.
More pictures and videos inside the album can be seen by sliding left or right.
While viewing an album, you can drag the slider at the top of the screen to
to display each pictures and video inside the album as one tile, or to
to group them into smaller albums within the main album. The latter setting
is useful for albums with many pictures and videos. At the top of the screen
press the button with the (Camera) icon to open the Camera app.
•Attempt to save the GPS coordinates with
each picture.
•Enable to correct the lighting in photos
where the subject is standing in front of a
window or other brightly lit background.
•Touch to enable an experimental feature that
writes the sensor raw image data to USB
storage. This option is not meant for end-user
operation.
•Touch [rotation mode icon] to record image
rotation information in the image header or in
the image itself. Including the information in the
header may not display the image in the correct
rotation in some viewing applications. Including
the information in the image will make it always
display correctly, but may increase processing
time.
•(Video only) Enable to compensate for
shake produced by holding the camera in your
hand.
•(Video only) Enable to turn on noise
reduction, reduce “noise” in the video frames.
To reset capture
settings
Touch Reset to return all the camera settings
to their default values. The settings are saved
between camera sessions even if you return to
the Android homescreen and restart the camera
application.
PAGE : 31
6.2.2 working with albums
You can share albums, delete them, and view their details.
Select an album Press twice. Checkboxes appear next to
each album. Touch an album’s checkbox to
select or unselect it, or press the Select All or
Unselect All buttons at the top of the screen
to select or unselect all albums.
View details for selected
album(s)
Select at least one album, then touch More
Details. Details about the selected album(s) will
display, such as the total number of pictures
contained.
Share album(s) Select at least one album, then touch Share
and select the application or device you wish
to use to share the album, such as Gmail to
mail it. The application or device you selected
opens. You can then use the app or device to
finish sharing the album(s).
Delete album(s) Select at least one album, then touch the
Delete button at the bottom of the screen. The
album(s) and all pictures contained within are
removed from your phone. Only albums stored
on your phone can be deleted in this way.
6.2.1 work with a photo or video
After opening a photo or video, you can share it, delete it, and more.
Zoom in and out of a
photo While viewing a photo, touch to zoom in, or
to zoom out.
See a slideshow of
photos
While viewing a photo, touch the Slideshow
button. The remaining photographs in the
album will each be briefly displayed.
Control a video While watching a video, use the button to
pause, the button to rewind, or the
button to fast forward.
View photo or video
details
Open a photo and press , then touch
More Details.
NOTE: To view video details, open an album,
then press twice. Checkmark boxes will
appear next to each video. Touch a video to
check it, then press touch More Details. If
one photo or video is checked, specific
information about that photo or video and
displays, while if multiple photos or videos are
checked, general information about all of them
will display.
Share a photo or video Press More Share to share an
opened photo or video.
Delete a photo or video Press More Delete to delete an
opened photo or video from your phone.
6.0 take photos and videos
PAGE : 327.0 browse the web
To navigate the browser:
•Press to move to the previous page.
•Press Forward to move to the next page.
•Press Refresh to refresh a page.
•Press Stop to stop loading a page.
To enter a URL or search terms:
1. Touch the URL/Search field at the top of the screen.
2. Enter a URL or search term, using the on-screen keyboard.
As you enter information, matching search terms and websites display.
3. Touch to open a URL or search for entered text, touch a matching
website to open it, or touch a matching term to search for it.
TIP: If the URL field is hidden, press .
To zoom in and out:
There are three ways to zoom in:
•Double-touch to zoom in and out.
Once zoomed in, you can slide the screen up, down, left, and right to view
the entire page.
•Pinch the screen to zoom in and out. See Touchscreen for more information
on how to pinch.
•Slide your finger on the screen to reveal the zoom control,
then touch or to zoom in or out.
To search for text within a webpage:
• Press More Find on Page, then enter the text you want to
search for.
As you enter text into the search field, matching text on the page is
highlighted.
TIP: Touch and to scroll through all matching text.
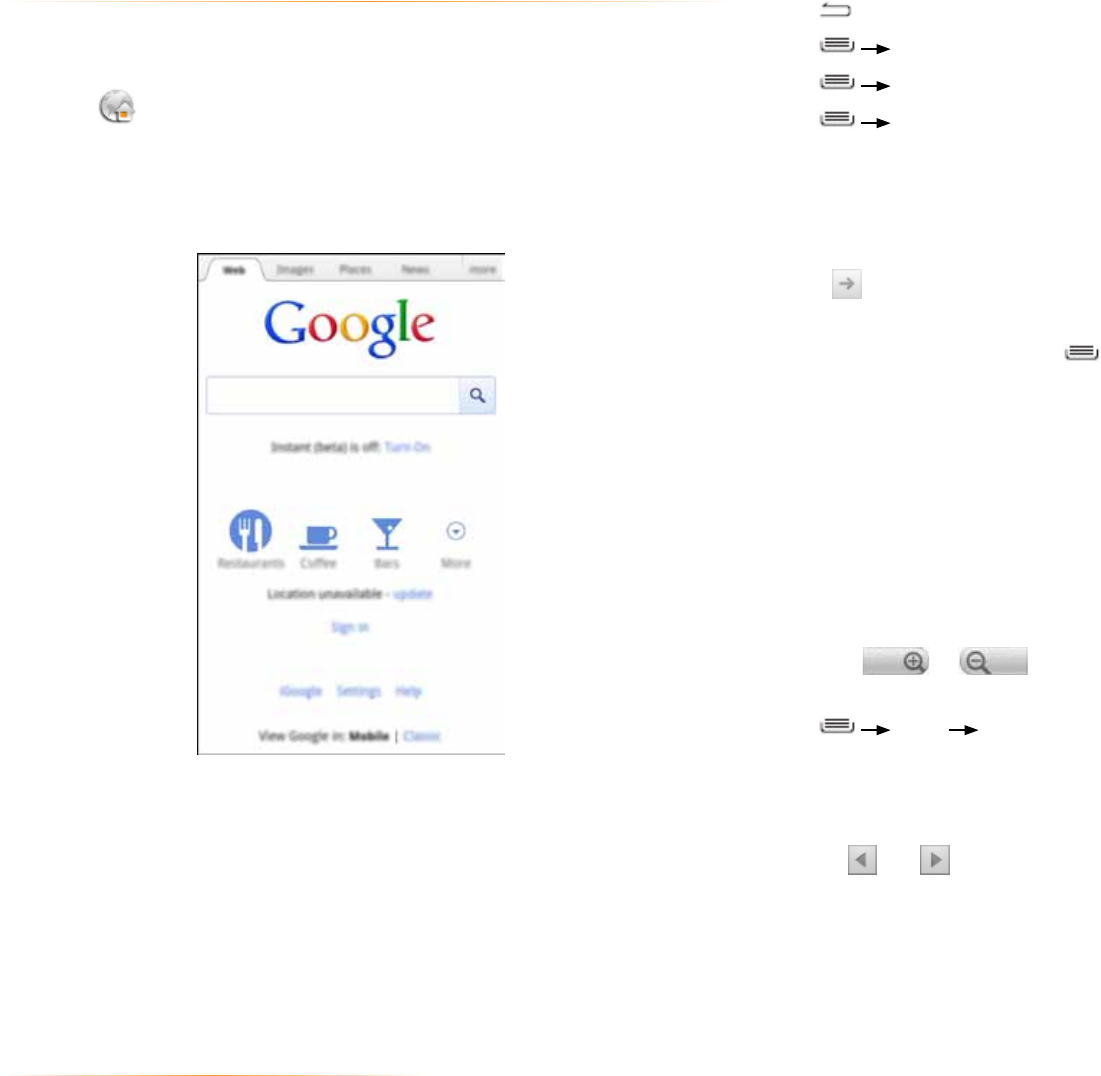
7 browse the web
Surf the web on your Android phone using the Browser App.
To open the browser application:
•Press .
The Browser window opens and displays your home page.
You can slide the screen up and down to scroll the browser window, and use
the touchscreen to interact with the web page.
Working with Hyperlinked Words:
Touching a phone number opens the number in the phone app; touching an
address on a web page opens the location in the Maps app; touching an email
address opens the address in the Email or Gmail app.
Touching and holding an object, such as an address or photo, brings up a
menu of commands. For example, touching and holding a photo allows you to
save the photo on your phone.
PAGE : 33
7.3 set your home page
Your home page opens when the browser is first launched, or when you open a
new browser window. You can set which website to use as your home page in
the Settings window.
To set your home page:
1. Press More Settings Set Home Page
2. Enter a URL or touch Use Current Page.
3. Touch OK.
7.4 change browser settings
You can configure a number of Browser settings, such as how pages display,
or track private information.
To change your browser settings:
•Press More Settings
The table below lists some of the more popular browser settings.
Popular Browser Settings
Text Size Increase or decrease the size of website text.
Default Zoom Increase or decrease the default magnification
level.
Block pop-up windows Prevent websites from opening pop-up windows
without your consent.
Load images Check to display images in Browser, or uncheck
to disable all image loading.
NOTE: Turning image loading off will significantly
increase page loading speed.
Enable JavaScript* Check to allow JavaScript* to run, or uncheck to
disallow JavaScript*.
NOTE: Many websites will not function correctly
without JavaScript*.
Enable plug-ins Enable or disable plug-ins.
Clear cache Touch Clear Cache to delete cache files.
NOTE: Browser stores text and images (a
“cache”) from the websites you visit, in order to
load them more quickly when you revisit the page.
7.1 bookmarks, most visited, and history
You can bookmark frequently-visited sites, as well as viewing your bookmarks,
history, and most-visited sites.
To bookmark a site:
1. Touch at the top of the screen.
2. Touch Add.
3. Edit the information if desired, then touch OK to confirm.
To view bookmarks, history, and most visited sites:
1. Touch at the top of the screen.
2. Touch the Bookmarks, Most visited, or History tab.
3. Touch a website to open it.
TIP: Touch and hold a page to open a menu that lets you manage an entry by
editing, deleting, sharing, and so on.
To clear your browser history:
•Press Clear History to clear your browser history.
For information on configuring or disabling what Browser tracks, see
Changing Browser settings.
7.2 use multiple browser windows
You can have up to eight different browser windows open at one time.
To switch to another window:
•Press Windows, then touch a window.
To close a window:
•Press Windows, then touch beside a window.
To open a new window:
•Press Windows New Window.
7.0 browse the web
PAGE : 34
Accept cookies Uncheck to prevent sites from storing cookies on
your phone.
NOTE: Many webpages store, read, and update
files (called cookies) on your phone. These can
be used for anything from storing passwords to
remembering your preferences.
Clear all cookie data Touch to clear all cookies from your phone.
Enable location Permit websites with location-specific content to
ask if you want to share your location using your
phone’s location information.
NOTE: Requires phone’s location feature to be
turned on.
Clear location access Removes all access granted to websites to view
your location.
Remember passwords Remembers passwords.
Clear passwords Clear saved passwords.
Reset to default Delete all Browser data, including history, cookies,
passwords, and bookmarks; restore all Browser
settings to their default state.
7.0 browse the web
PAGE : 35
TIP: To use a song as a ringtone, touch and hold the song, then touch Use as
phone ringtone.
To play music:
• Touch a song to play it and all of the songs following it (for example, touch a
song in an album start playing the album at that point, or touch a song in a
playlist to start the playlist at that point.
TIP: Touch and hold an artist, album, or playlist, then touch Play to play every
song for that artist, album, or playlist.
8.1 playback screen
The Playback screen displays the current song and shuffles your music, pause
a song, and more.
8 play music
Use the Music app to listen to your music, see your music library, and create
and listen to playlists.
To open the Music app:
•From the App launcher, touch .
The Music app opens and displays your library.
NOTE: If this is your first time using the Music app, the Music app may
catalogue the audio and music files on your phone into a library.
To view music on your phone:
• Touch one of the four tabs at the top of the screen to display artists, albums,
songs, or playlists.
8.0 play music
PAGE : 36
8.3 manage music on your phone
You can search for and delete music on your phone.
To search for music on your phone
• In the main Music screen, touch , then type the name of an artist, album
or song to search your music library.
To delete a song from your phone:
1. Find the song you want to delete.
2. Touch and hold the song, then touch Delete.
3. Touch OK to confirm.
8.3.1 transfer music from computer
You can transfer music, audio, or playlist files from your computer onto your
phone, following the instructions for transferring files described in Transfer Files
between your Phone and Computer.
Once transferred, the Music app will automatically find and catalogue all
supported music, audio, and playlist files (including MP3, M4a, AMR, MIDI,
M3U, WPL, and PLS, and OGG Vorbis, as well as music purchased from online
stores, and music copied from your CD collection.)
To see the current
playlist
Touch .
To play your songs in
random order
Touch .
To repeat a playlist or
song Touch once to repeat the current playlist, or
twice to repeat the current song.
Play the next song Touch .
Play the previous song Touch .
Pause or resume playing Touch to pause the current song, or
to resume.
Touch at the bottom of the library screen to
return to the playback screen.
8.2 work with Playlists
You can use playlists to organize your music files into sets of songs.
To create a playlist:
1. Touch and hold a song, then touch Add to Playlist New.
2. Enter the name of the new playlist, then touch OK.
The playlist is created, with the song you selected as the new playlist’s first
song.
3. Continue adding songs to the playlist by touching and holding each song
you want to add, then touching Add to Playlist and selecting the playlist.
Rearrange songs in a playlist:
1. From the music library, touch the Playlists tab, then touch a playlist.
2. Touch and hold the left side of a song entry, then drag a song up or down to
change its order in the playlist.
3. Press to save the new arrangement and exit the playlist.
Remove songs from a playlist:
1. From the music library, touch the Playlist tab, then touch a playlist.
2. Touch and hold a song, then touch Remove from Playlist.
Rename or delete a playlist:
1. From the music library, touch the Playlist tab.
2. Touch and hold a playlist, then touch Rename or Delete.
8.0 play music

PAGE : 379.0 Wi-Fi/Bluetooth/VPN
To remove or modify a saved network:
1. From the Homescreen, press Settings Wireless & networks
Wi-Fi settings.
2. Touch and hold the network, then touch Forget network or Modify
network.
9.2 Wireless Bluetooth® Connection
You can use your phone to connect to wireless products featuring Bluetooth
technology up to eight meters away. To connect to a Bluetooth wireless
technology-enabled product for the first time, you must pair it with your phone.
Once paired, your phone will automatically connect to paired products.
To pair phone with Bluetooth wireless technology-enabled product:
1. From the Homescreen, press Settings Wireless & networks.
2. If Bluetooth wireless technology is not enabled, touch Bluetooth to turn it
on.
3. Touch Bluetooth settings. The available Bluetooth wireless technology-
enabled products display.
4. Select the product you wish to pair.
5. Confirm the product number and touch Pair to pair the product. Once
paired, your phone will automatically connect with the product.
NOTE: If the product requires a pass code before pairing, try entering 0000
or 1234, or check the product’s documentation. If your phone doesn’t display
the Bluetooth wireless technology-enabled product, touch Scan for devices
to rescan. See the documentation that came with your product to learn how to
configure it to be discoverable by phone.
To disconnect a Bluetooth wireless technology-enabled product:
1. From the Homescreen, press Settings Wireless & networks
Bluetooth settings.
2. Touch a connected product, then touch OK to disconnect.
To reconnect a paired Bluetooth wireless technology-enabled product:
1. From the Homescreen, press Settings Wireless & networks
Bluetooth settings.
2. Touch a paired product to which you want to connect.
9 Wi-Fi/Bluetooth/VPN
Your Android phone can connect to Wi-Fi networks, Bluetooth wireless
technology-enabled products (such as headsets), and your computer. You can
also connect to virtual private networks (or VPNs) and use your phone as a
hotspot.
9.1 Use Wi-Fi
Your phone can connect to Wi-Fi network up to 100 meters away. Once
connected, you can use your connection to browse the internet, check your
email, and more.
Using a Wi-Fi network can help save on data costs for your phone.
To connect to a wireless network:
1. From the Homescreen, press Settings Wireless & networks.
2. If Wi-Fi is not enabled, touch Wi-Fi to turn it on.
3. Touch Wi-Fi settings.
The available networks display.
4. Touch a network, then touch Connect.
NOTE: For secured networks, enter the requested security information, then
touch Connect.
TIP: If no networks are listed, make sure the Wi-Fi box has a checkmark.
To add a network:
1. From the Homescreen, press Settings Wireless & networks
Wi-Fi settings.
2. Scroll to the bottom of the list of available networks and touch Add Wi-Fi
network.
3. Enter the network’s SSID (the name of the network).
4. Touch Save.
Your phone saves the information entered, and uses it to connect to the
network whenever it is available.
NOTE: If the network is secured, enter the security information by touching
Open (under Security) and selecting the type of network security which the
network uses (for example, WEP or WPA). Then enter the requested security
information, such as a password.
PAGE : 38
3. Touch Turn on USB Storage, then touch OK.
Once connected, your phone’s storage will appear as an accessible drive on
your computer. You can open the drive and copy files from it and to it just as
you would with a flash drive or memory card.
NOTE: While your phone is connected to your computer, any applications
that require access to your phone’s files (such as Gallery and Music) will be
unusable.
To disconnect your phone from the computer:
1. On your phone, touch Turn off USB storage.
If this screen is no longer displaying, drag down the notification panel and
touch Turn off USB storage to redisplay the screen.
2. Once “Preparing USB card” stops displaying in the notification area, click
“Safely remove hardware and eject media” from your computer’s system
tray.
3. Select your phone from the displayed options.
4. Disconnect the USB cable from your phone and your computer.
9.4 connect to Virtual Private Networks
Virtual private networks (VPNs) allow you to connect to a secured local
network from outside the network. VPNs are commonly deployed by schools,
corporations, and other institutions that rely primarily on an on-location
network, but allow secure access from the outside.
To connect to a VPN for the first time, add that VPN to your phone. You can
then connect to it automatically at any time.
To add a VPN to your phone:
1. From the Homescreen, press Settings Wireless & networks
VPN settings Add VPN.
2. Select the type of VPN, based on instructions from your VPN administrator,
and then follow your network administrator’s instructions to configure each
component of the VPN’s settings.
3. When you are done configuring the VPN, press Save.
Your phone saves the VPN’s configuration and connects.
To unpair a device
1. From the Homescreen, press Settings Wireless & networks
Bluetooth settings.
2. Touch and hold a paired but disconnected device, then touch Unpair.
9.3 transfer files between your phone and computer
You can transfer files between your phone and your computer by connecting
your phone to your computer’s USB port (USB 2.0 version or higher).
To transfer files between your phone and your computer
1. Use the USB cable that came with your phone (the “cord” of your phone’s
power cord) to connect your phone to your computer’s USB port.
Warning! Follow any instructions that appear on your computer when
connecting to the USB port. Failure to follow these instructions may result in
damage to your files.
2. Once connected, you will see the following screen.
9.0 Wi-Fi/Bluetooth/VPN

PAGE : 39
phone.
4. When you are finished, uncheck USB tethering, or simply disconnect the
USB cable.
Go to intel.com/software/android for the latest drivers.
9.5.2 share your phone’s data connection as a Wi-Fi Hotspot
You can turn your phone into a Wi-Fi Hotspot to allow other computers and
devices use your phone’s data connection as a wireless network.
To turn your phone into a Wi-Fi Hotspot:
1. From the Homescreen, press Settings Wireless & networks
Tethering & portable hotspot.
2. Touch Portable Wi-Fi Hotspot to enable it.
Your phone will broadcast its Wi-Fi SSID, and can be connected to like any
other wireless network.
Uncheck the Portable Wi-Fi Hotspot setting to stop sharing your phone’s data
connection.
Secure your Portable Wi-Fi Hotspot
You can secure your phone’s Wi-Fi connection, so that other devices and
computers can only use it as a Wi-Fi hotspot after entering the required security
information.
To secure your phone’s portable Wi-Fi hotspot:
1. From the Homescreen, press Settings. Wireless & networks
Tethering & portable hotspot.
2. Ensure that Portable Wi-Fi Hotspot is checked, then touch
Portable Wi-Fi Hotspot Settings Configure Wi-Fi hotspot.
3. Change any desired security settings, then touch Save.
To connect to a previously-added VPN
1. From the Homescreen, press Settings Wireless & networks
VPN settings.
The VPNs you have added are listed at the bottom of the screen.
2. Touch the desired VPN.
Enter any requested information.
3. Touch Connect.
To disconnect from a VPN:
•Open the notifications panel, and touch the active VPN notification.
9.5 share your phone’s data connection
You can share your phone’s data connection with a computer, allowing that
computer to access the internet by using your phone’s data stream. You can
share your phone’s data connection with a single computer by using USB
tethering, or with up to eight computers at a time by enabling the Portable Wi-Fi
Hotspot setting.
NOTE: Not all carriers support sharing your phone’s data connection. Please
check with your carrier to find out more.
9.5.1 share your phone’s data connection via USB Tethering
You can share your phone’s data connection with a single computer via the
USB port. However, you can only do this when you are not currently using the
USB port to share files.
NOTE: Some operating systems, such as Windows XP, require you to prepare
your computer before enabling USB tethering. Visit www.android.com/tether
for more information.
To tether your phone:
1. Use the USB cable that came with your phone to connect your phone to
your computer’s USB port.
2. From the Homescreen, press Settings. Wireless & networks
Tethering & portable hotspot.
3. Touch USB Tethering to enable tethering.
Your phone will begin sharing its data connection with your computer. For
help with setting us USB tethering on your computer, please use the Help
available on the Tethering & portable hotspot settings page on your
9.0 Wi-Fi/Bluetooth/VPN

PAGE : 40
9.6 wireless display
Wireless Display streams from your phone to your Wireless Display-enabled
devices, such as a TV or computer monitor.
Before using Wireless Display on your phone, first make sure you’ve turned on
a properly configured Wireless Display-capable device.
NOTE: See your device’s manual for help on configuring it for Wireless Display.
To stream to a Wireless Display device:
1. From the Homescreen, press Settings. Wireless Display.
Touch Wireless Display to enable the setting.
2. A list of available devices displays. Touch the device that you want to
stream.
3. If this is your first time streaming, enter the required PIN in the confirmation
field, then touch Connect. Otherwise, simply touch Connect.
Your phone will connect to the device and begin streaming. A Stop button
will appear next to the device you’re streaming to. Touch it to stop
streaming.
Configuring Wireless Display device:
If no devices appear, make sure your phone is in range of a properly configured
Wireless Display device. Additionally, once Wireless Display is enabled, you can
then stream from a Wireless Display-supported app such as Gallery – just look
for the Display button.
9.0 Wi-Fi/Bluetooth/VPN
PAGE : 41
You can only remove your first Google account by deleting all personal
information from your phone.
To remove an account from your phone:
1. From Accounts & sync, touch the account to remove.
2. Touch Remove Account.
3. Touch to confirm deletion.
To change an account’s synchronization settings:
1. From Accounts & sync, touch the account whose synchronization settings
you want to change.
2. In the screen that opens, check or uncheck the kinds of information you
want synchronized. For example, your Google account lets you enable
or disable synchronization of your book, contacts, Gmail account, and
calendar.
NOTE: Previously synchronized data remains on your phone until you manually
delete it.
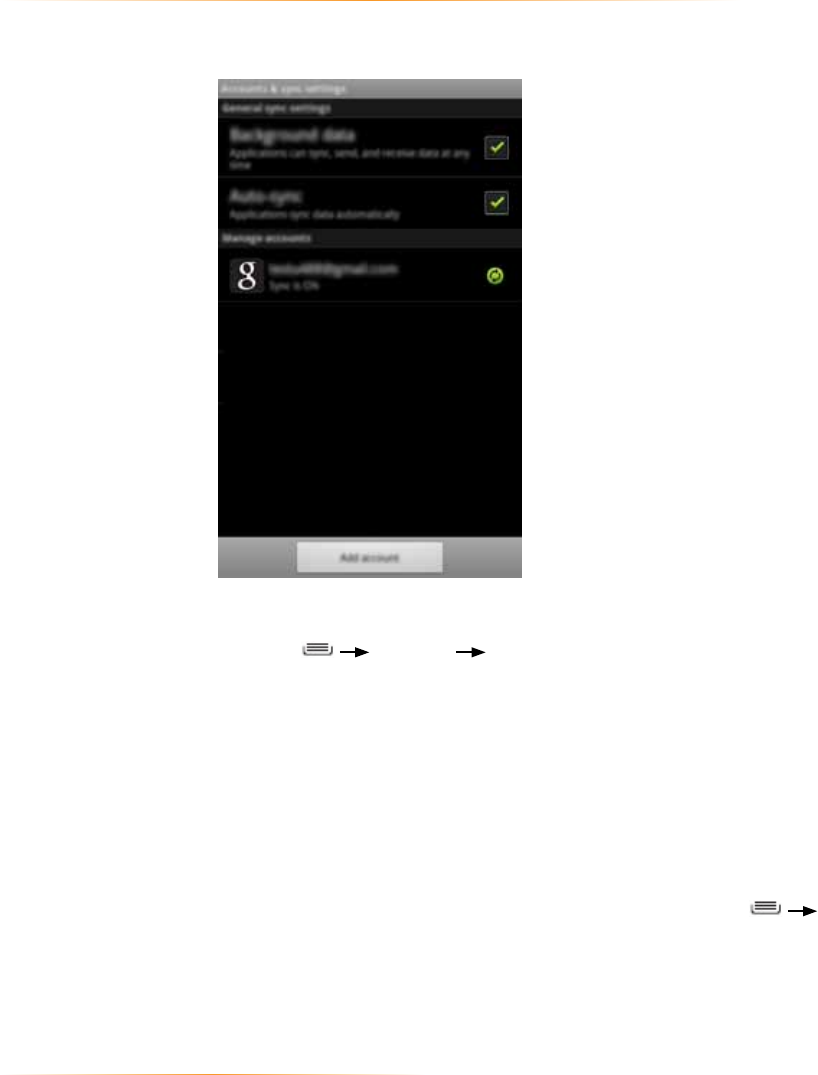
To turn background data on or off:
•From Accounts & sync, check or uncheck Background data.
NOTE: Turning this option off extends battery life and lowers data usage, but
stops most background transmissions, such as receiving Gmail messages and
keeping track of Calendar events.
To turn automatic synchronization on or off:
•From Accounts & sync, check or uncheck Auto-sync.
NOTE: If this option is turned off, accounts and applications must be
synchronized manually.
To manually synchronize an account:
1. From Accounts & sync, touch the account to sync.
2. Touch the type of data to sync.
TIP: You can sync all types of data for the account by pressing
Sync Now.
10 accounts
You can add accounts to your phone such as Google, email and corp accounts
as well as synchronizing contacts with other applications.
To open the Accounts screen
•From the Homescreen, press Settings Accounts & sync.
The first time you open an app that uses accounts (such as Email, Calendar
or Gmail) you will be prompted to add an account. The process for adding an
account within these apps is identical to that described above.
To add an account to your phone:
1. From the Accounts screen, touch Add Account.
2. Select the type of account to add, such as a corporate account (using
Microsoft Exchange) or a Google account.
3. Follow the on-screen instructions for configuring your account (or configure
your account manually).
10 accounts
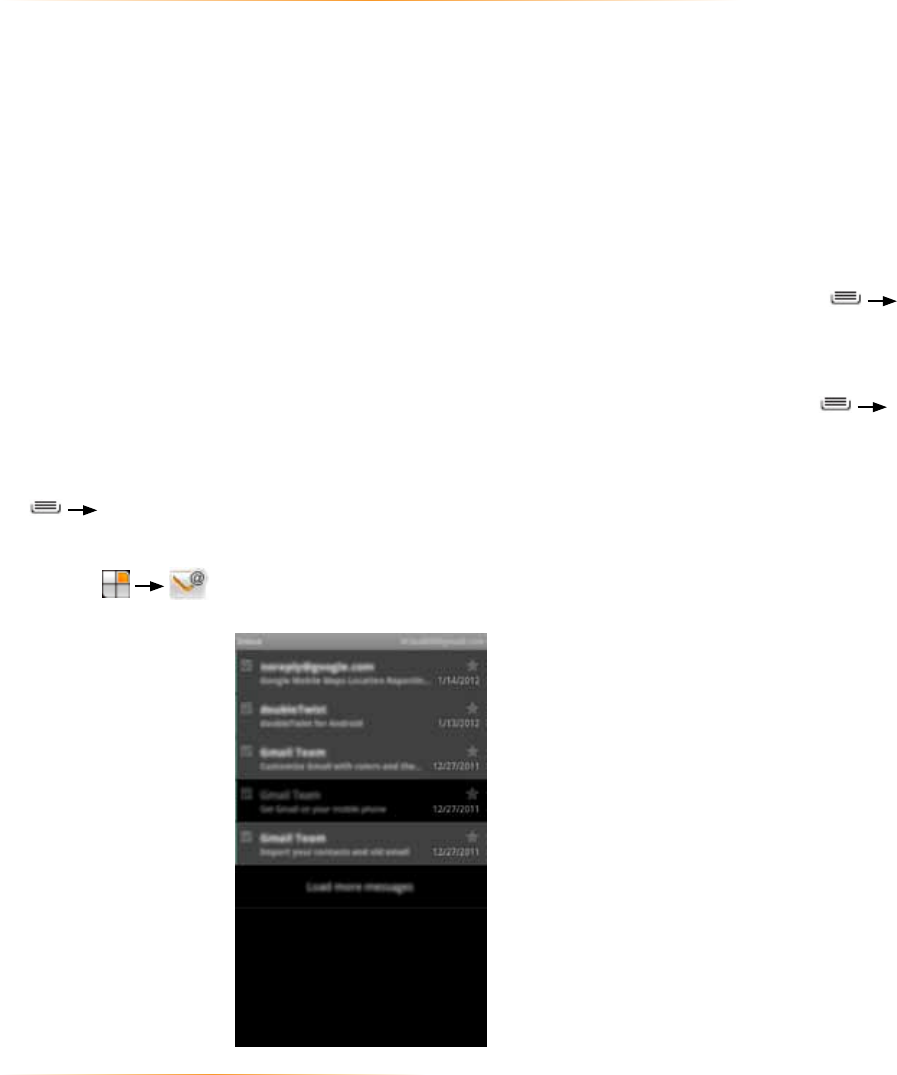
PAGE : 4211.0 email
If you have more than one email account, you will be able to work with an
account’s inbox or a combined inbox. This is described under Using the
Accounts Screen.
Your inbox displays, displaying new messages at the top and unread messages
bolded.
TIP: To work with multiple messages in your inbox, touch the checkbox next to
each message you want to work with, and then touch Mark unread, Add star,
or Delete.
To view an account’s folders:
1. Press Folders to view a list of the account’s folders.
2. Touch a folder to open it.
To check for new messages:
•Press Refresh.
TIP: Synchronized accounts refresh automatically.
11 email
The Email app allows you to access your web-based email (such as Yahoo
or Hotmail) and your corporate accounts (using Microsoft Exchange). The
examples in this chapter show a Gmail account set up using the Email app.
To add a new account: Before using the Email app, first set up your accounts
as described below.
To add a new account:
If you’re launching the Email app for the first time, the Email Account Wizard will
open, and guide you through adding an account.
1. Enter your email address and password.
2. Touch Next, then wait for the Email app to connect with your mail provider.
3. Enter a display name (the name displayed to anyone to whom you send a
message.) You can also enter an optional account name, which will display
in the Email app’s list of accounts.
4. Touch Done to add the account.
NOTE: You can add another account at any time by pressing
Add Account in the Email app’s Accounts Screen.
To use the Email app:
•Touch .
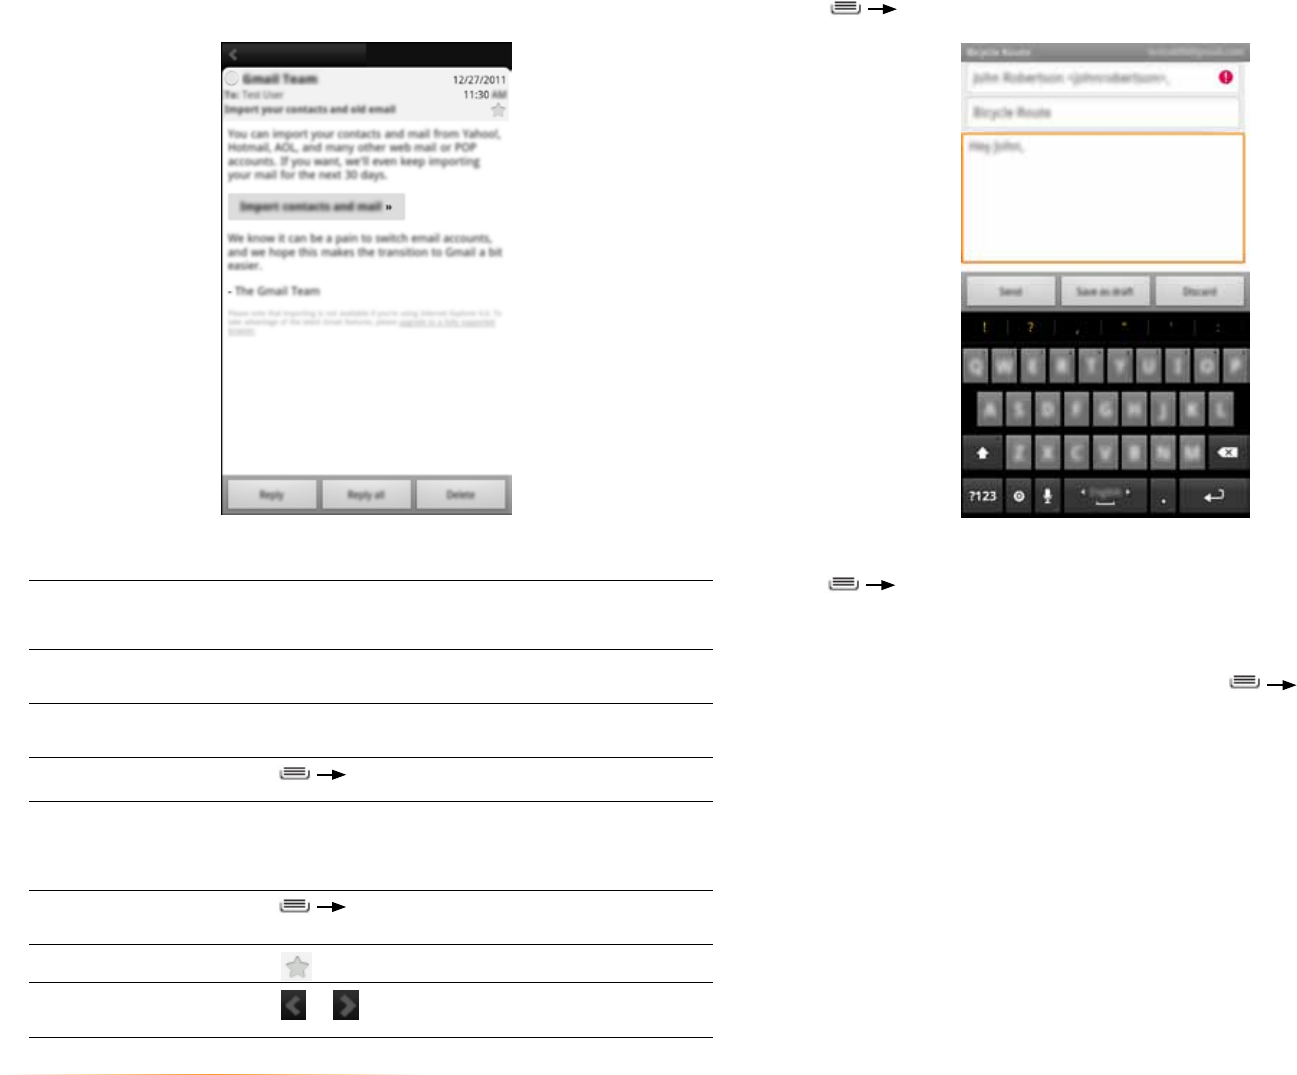
PAGE : 43
To send a message:
1. Press Compose.
2. Enter the recipient, subject, and message text. Add a Cc or Bcc recipient by
pressing Add Cc or Add Bcc.
3. Touch Send to send the message, Draft to save it as a draft, or Discard to
discard unsaved drafts.
TIP: Add an attachment (such as a picture) by pressing Add
attachment and selecting an attachment.
To read a message:
•Touch a message to open it.
The following actions are available while working with a message.
To open or save
an attachment
Touch Open or Save to open or save an attachment.
To display images Touch Show Pictures to display images within
a message.
To reply Touch Reply to reply to the sender or Reply All to reply
to all recipients.
To forward Press Forward.
To delete Touch Delete.
NOTE: Some accounts let you recover deleted
messages from a Trash folder.
To mark a
message unread
Press Mark as unread.
To star a message Touch .
To open next or
previous message Touch or at the top of the screen.
11.0 email
PAGE : 44
Default
account
Select the default email account.
NOTE: The default email account is used by default
whenever you send an email without specifying which
account to send it from, such as when you click on a
contact’s email address.
Email
notifications
Receive a notification whenever a new email arrives in this
account’s inbox.
Select
ringtone
Select the ringtone for new email notifications.
TIP: Select the ringtone “silent” to turn off email ringtones.
Vibrate Select to have the phone vibrate when you receive a new
message
Incoming
and Outgoing
settings
Configure the server settings for this account.
11.1 working with accounts
If you have more than one Email account, you can switch between inboxes
using the Accounts screen.
NOTE: Adding and removing accounts is described in Accounts.
To open the Accounts screen:
•Press Accounts.
To open an inbox:
• Touch an account to open that account’s inbox, or touch Combined Inbox to
view all of your accounts’ messages in one inbox.
•When working in the combined inbox, different account’s messages are
marked with colored bars.
•Touch Starred or Drafts to view starred and draft messages from all of your
accounts.
To display an account’s folders:
•Touch next to an account to display an account’s folders, and then touch
a folder to open it. Only folders containing messages are displayed.
11.1.1 account settings
To change an account‘s settings:
• From the Accounts screen, touch and hold the account whose settings you
want to change, then touch Account settings.
Account Settings
You can change any of the following account settings.
Account name Enter your account’s account name.
Your name Enter the name people see when you send a message from
this account.
Signature Enter the signature to append to messages sent from this
account.
Inbox check
frequency
Select how often the Email app checks this account for new
messages.
11.0 email
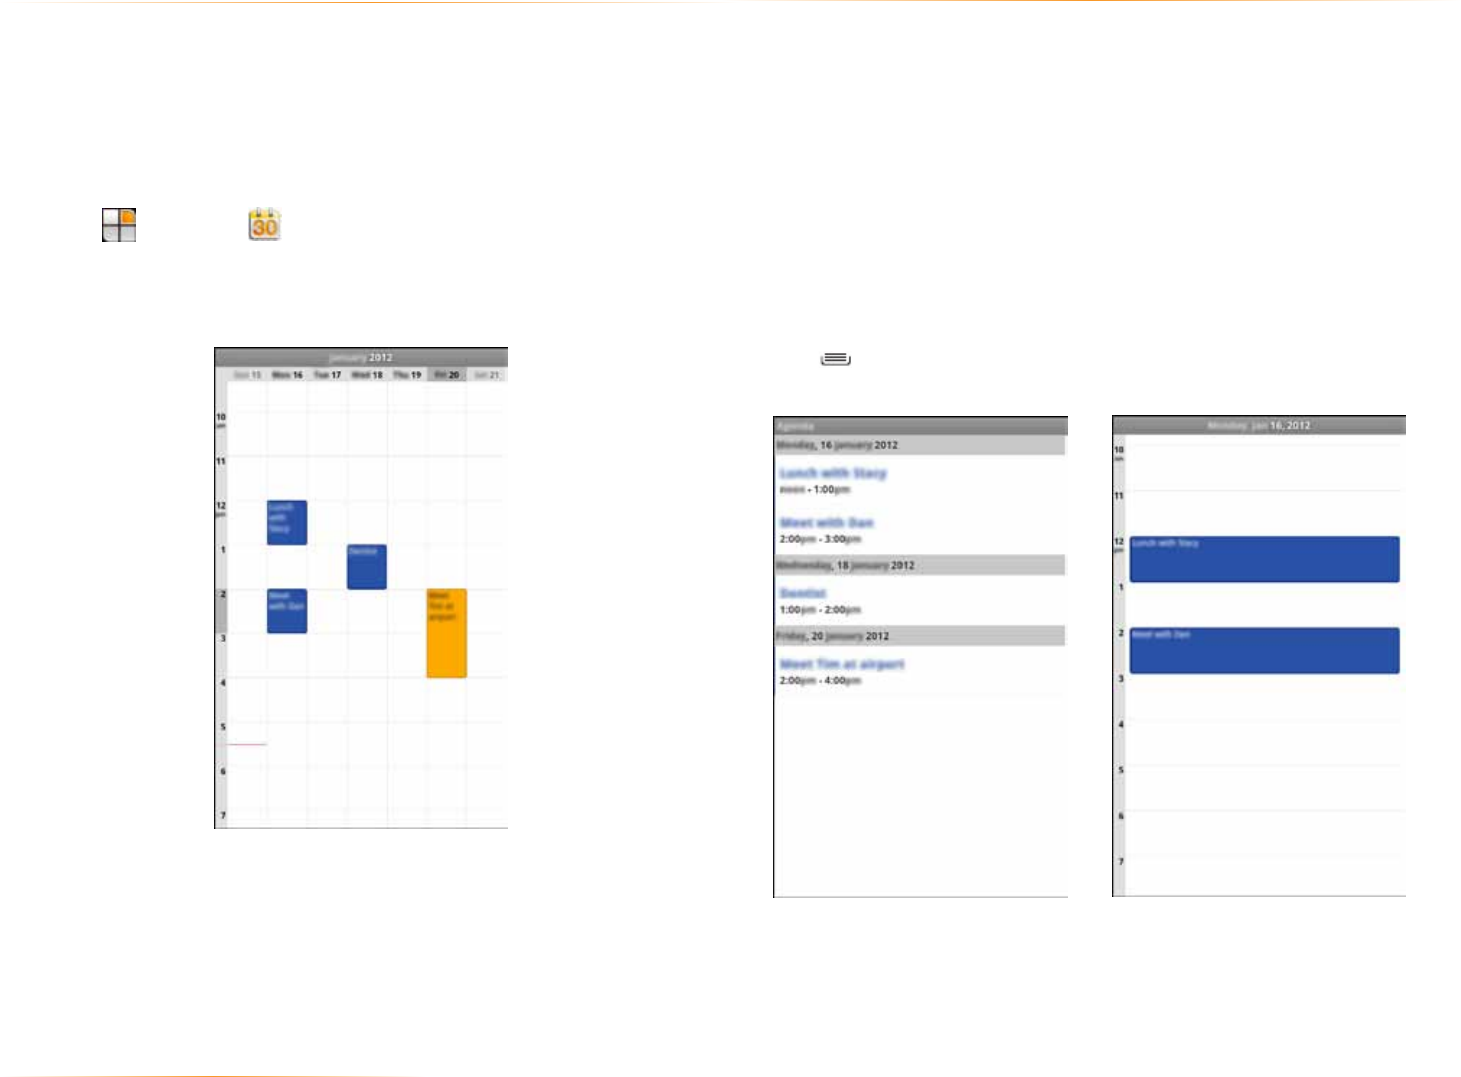
PAGE : 45
12.1 view your events
The Calendar has four views and you can touch to see a days events. All day
and multiday events display at the top of the agenda, day and week views.
Slide up and down to move backwards and forwards.
•Agenda: Lists an agenda of your events in chronological order.
• Day: Displays a calendar view of one day, with a red line indicating the current
time.
•Week: Displays a calendar view of one week.
• Month: Displays a calendar view of one month, with scheduled times marked
with a vertical colored bar.
To change the calendar view:
• Press and select a view option, or touch Today to return to today’s
events.
12 calendar
The Calendar app creates and manages events, meetings and appointments.
By default, your Calendar app automatically synchronizes with any Google or
Microsoft Exchange accounts you’ve added to your phone.
NOTE: See Accounts for information on how to add accounts to your phone,
and on how to configure the synchronization of existing accounts.
To use the Calendar app:
•Touch , then touch .
The Calendar app opens, displaying your events from all of your synchronized
accounts.
TIP: Events from each account display in a different color.
12.0 calendar
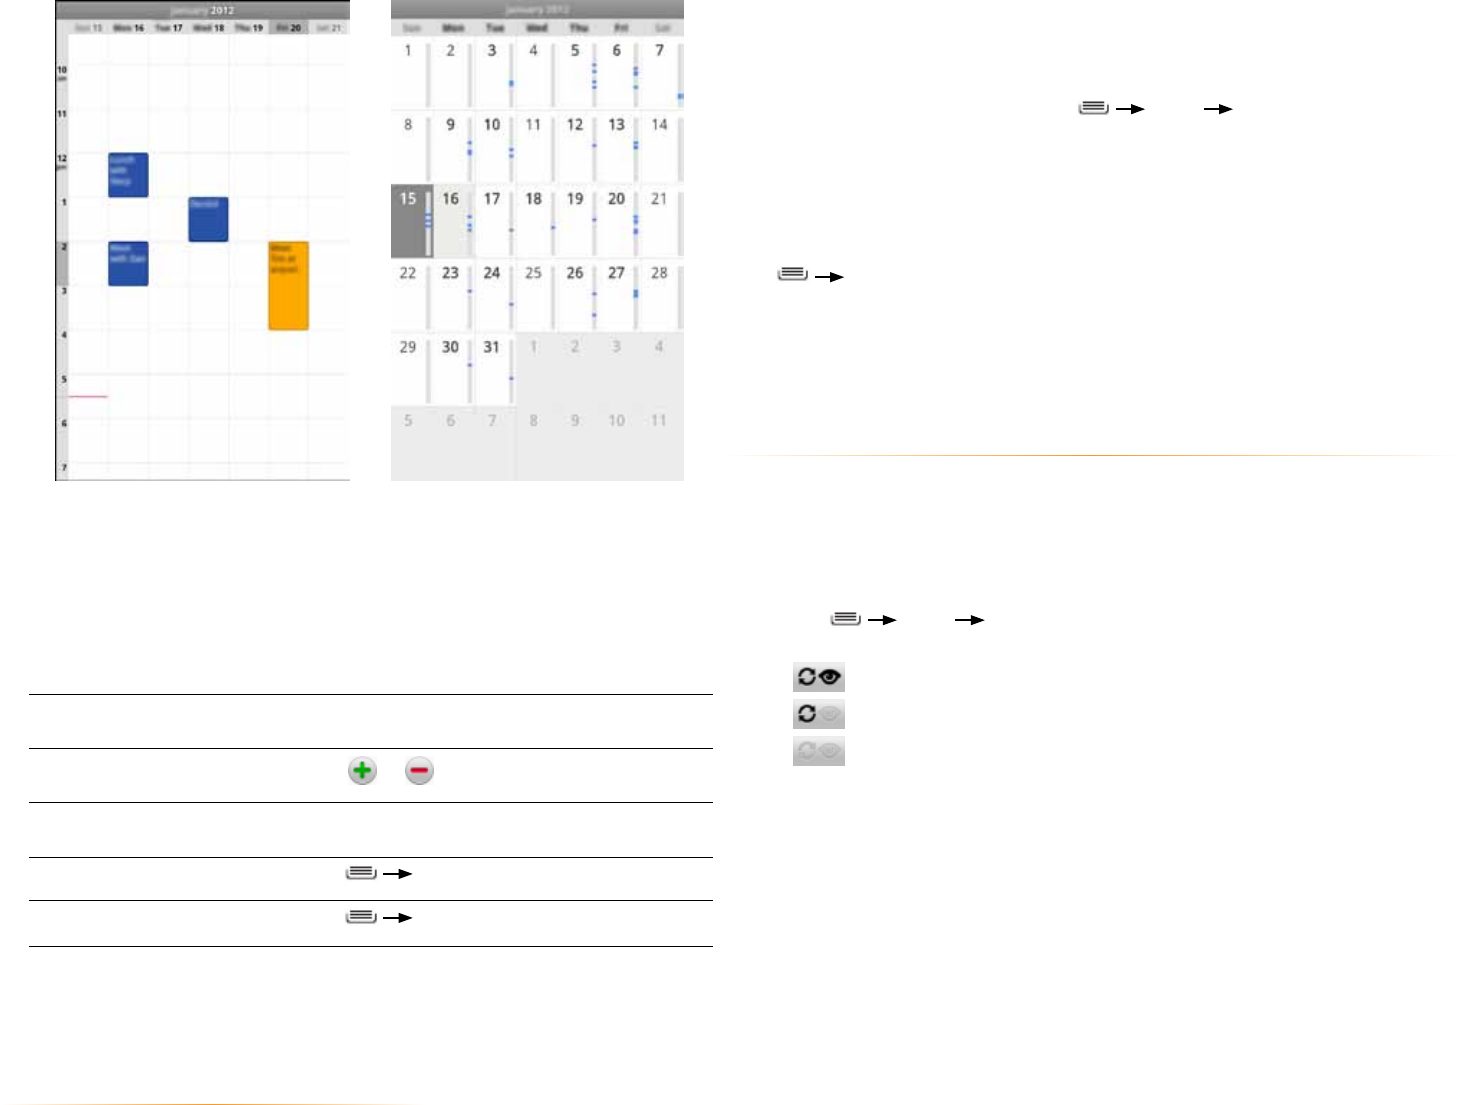
PAGE : 46
To create an event:
If you have more than one calendar, you can choose the calendar to which to
add the event.
1. In any of the calendar views, press More New Event.
ALTERNATE: In Day, Week, or Month view, touch and hold a spot on the
calendar, then touch New Event.
2. Specify the event name and time.
Enter any details, such as guest emails to invite to the event or a reminder
you want to set. View additional details by pressing
Show Extra Options.
3. Touch Done.
TIP: You can edit and delete events by touching and holding an event in the
calendar view.
12.2 store and display calendars
Each Calender account can be set to be stored and/or visible on the phone
individually.
NOTE: For information on adding and synchronizing accounts, see Accounts.
To specify whether calendars are stored and displayed:
1. Press More Calendars.
2. Touch each account to toggle through the three settings:
• Store on the phone and show.
• Store on the phone and hide.
• Don’t store or show.
NOTE: The Calendar app synchronizes events from the previous month
through one year in the future.
To view an event’s details:
•Touch an event to view its details.
The following actions are available while viewing an event’s details.
To respond to an
invitation
Touch the drop-down menu below Attending,
then touch Yes, No, Maybe or No Response.
To add or remove
reminders Touch or under Reminder.
To change a reminder Touch Reminder and choose when you want to
be reminded.
To edit an event Press Edit Event.
To delete an event Press Delete Event.
12.0 calendar
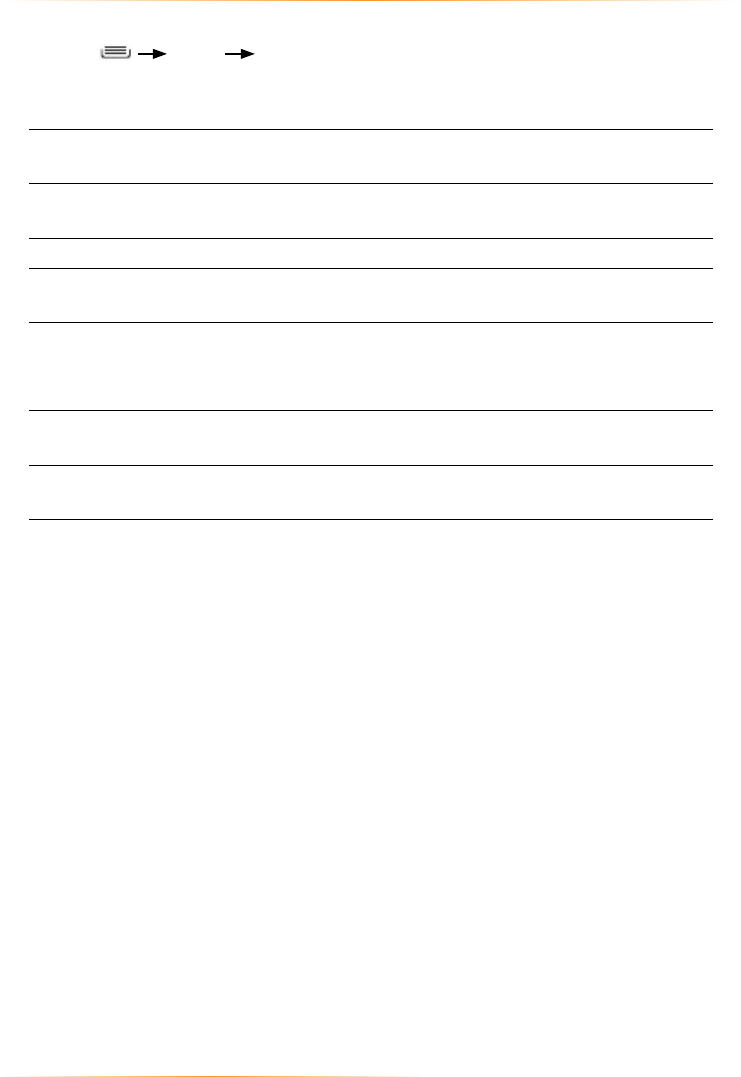
PAGE : 47
12.3 change calendar settings
To change calendar settings:
•Press More Settings.
You can change any of the following settings:
Hide declined
events
Hide events which you have declined to attend.
Use home
time zone
When travelling, continue to show events in your home
time zone rather than the local time zone.
Home time zone Specify the time zone to use for Use home time zone.
Set alerts &
notifications
Receive a notification for reminders, either as a ringtone
alert or status bar notification.
Select ringtone Select the ringtone for new event notifications.
TIP: Select the ringtone “silent” to turn off event
ringtones.
Vibrate Select to have the phone vibrate when you receive a new
event notification.
Default reminder
time
Select a default time to be reminded for events.
12.0 calendar
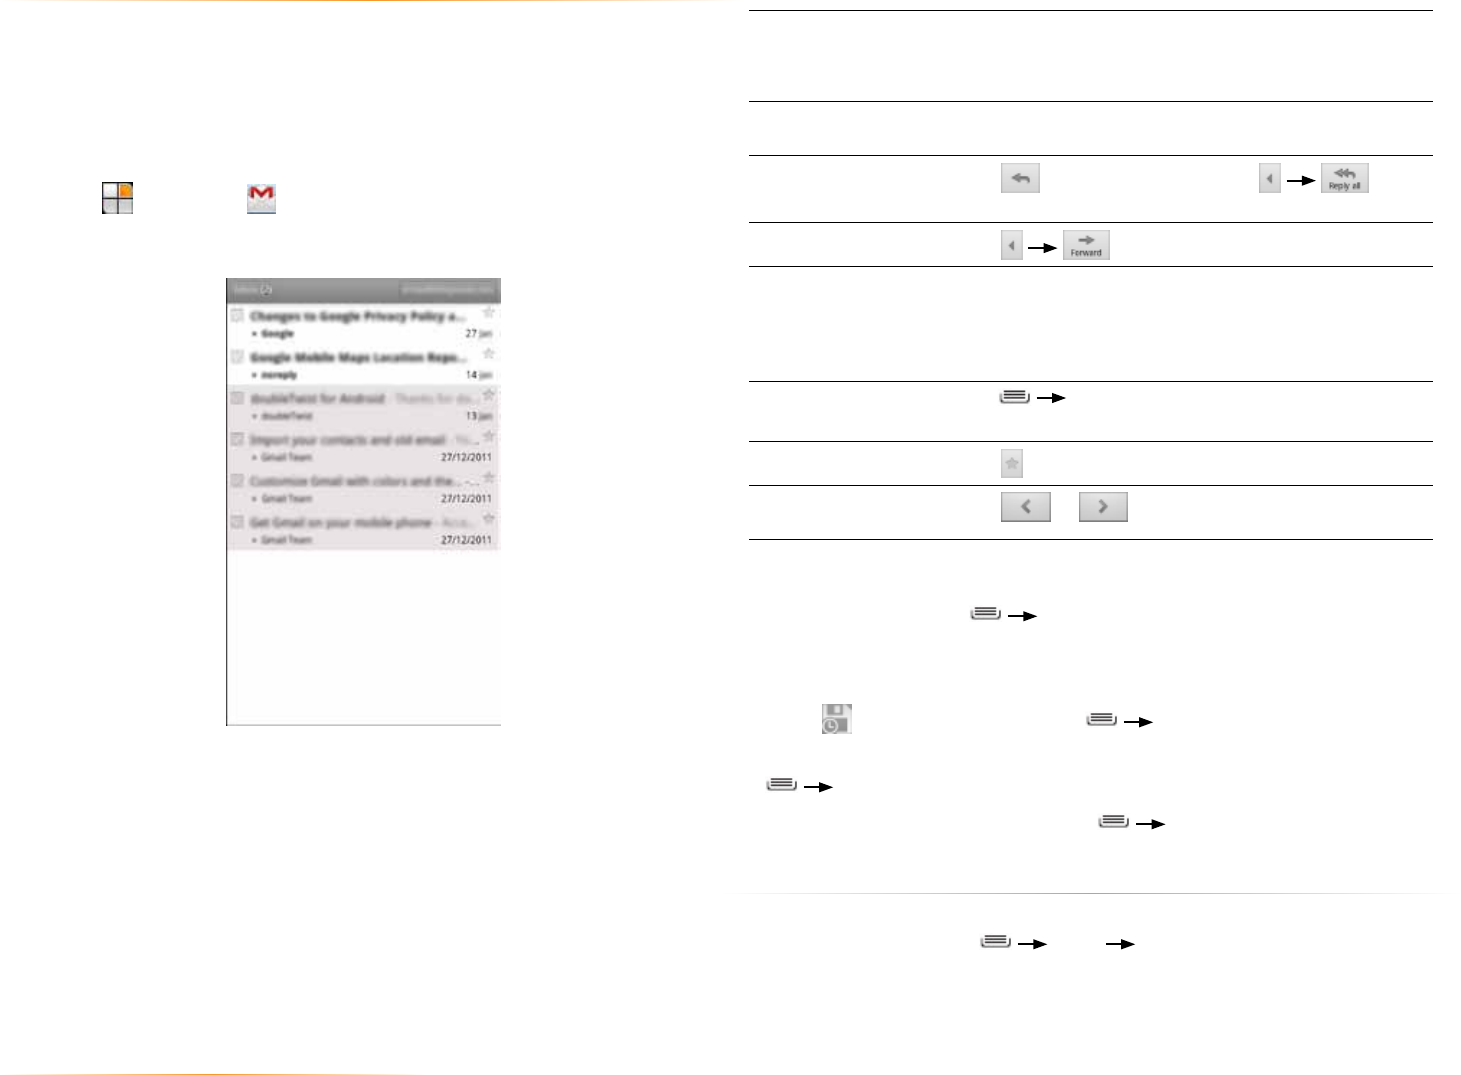
PAGE : 48
The following actions are available while working with a message.
To preview or
download an
attachment
Touch Preview or Download to open or save an
attachment.
To display images Touch Show Picture to display images within the text
of a message.
To reply Touch to reply to the sender, or to
reply to all recipients.
To forward Touch .
To delete Touch Delete.
NOTE: Deleted conversations are placed under the
Trash label, and are automatically deleted after thirty
days.
To mark a
message unread
Press Mark unread.
To star a message Touch .
To open next or
previous message Touch or at the bottom of the screen.
To send a message
1. From the inbox, Press Compose.
2. Enter the recipient, subject, and message text.
3. Touch Send to send the message.
•Touch to save the draft, or touch Discard to discard the draft.
•Add an attachment (such as a picture) to a message by pressing
Attach and selecting an attachment.
•Add a Cc or Bcc recipient by pressing Add Cc/Bcc.
13.1 Gmail settings
To open Gmail settings
1. From your Inbox, press More Settings.
2. Touch General preferences to set Gmail settings or touch an account to
configure that account.
13 Gmail
You can create a Gmail account for your phone, or sync your phone with your
existing Gmail account.
NOTE: Before using the Gmail app, first set up your accounts as described in
Accounts.
To use the Gmail app:
•Touch , then touch .
Your Gmail inbox displays.
For multiple Gmail accounts, touch the top-right corner (with the name of the
Gmail account) to switch to another account.
To view account folders:
• Touch the name of the currently-opened folder (in the upper right corner of
the screen), then touch a folder to open it.
To read a message:
•Touch a conversation.
TIP: To display older messages, touch x read messages at the top of the
screen.
13.0 gmail
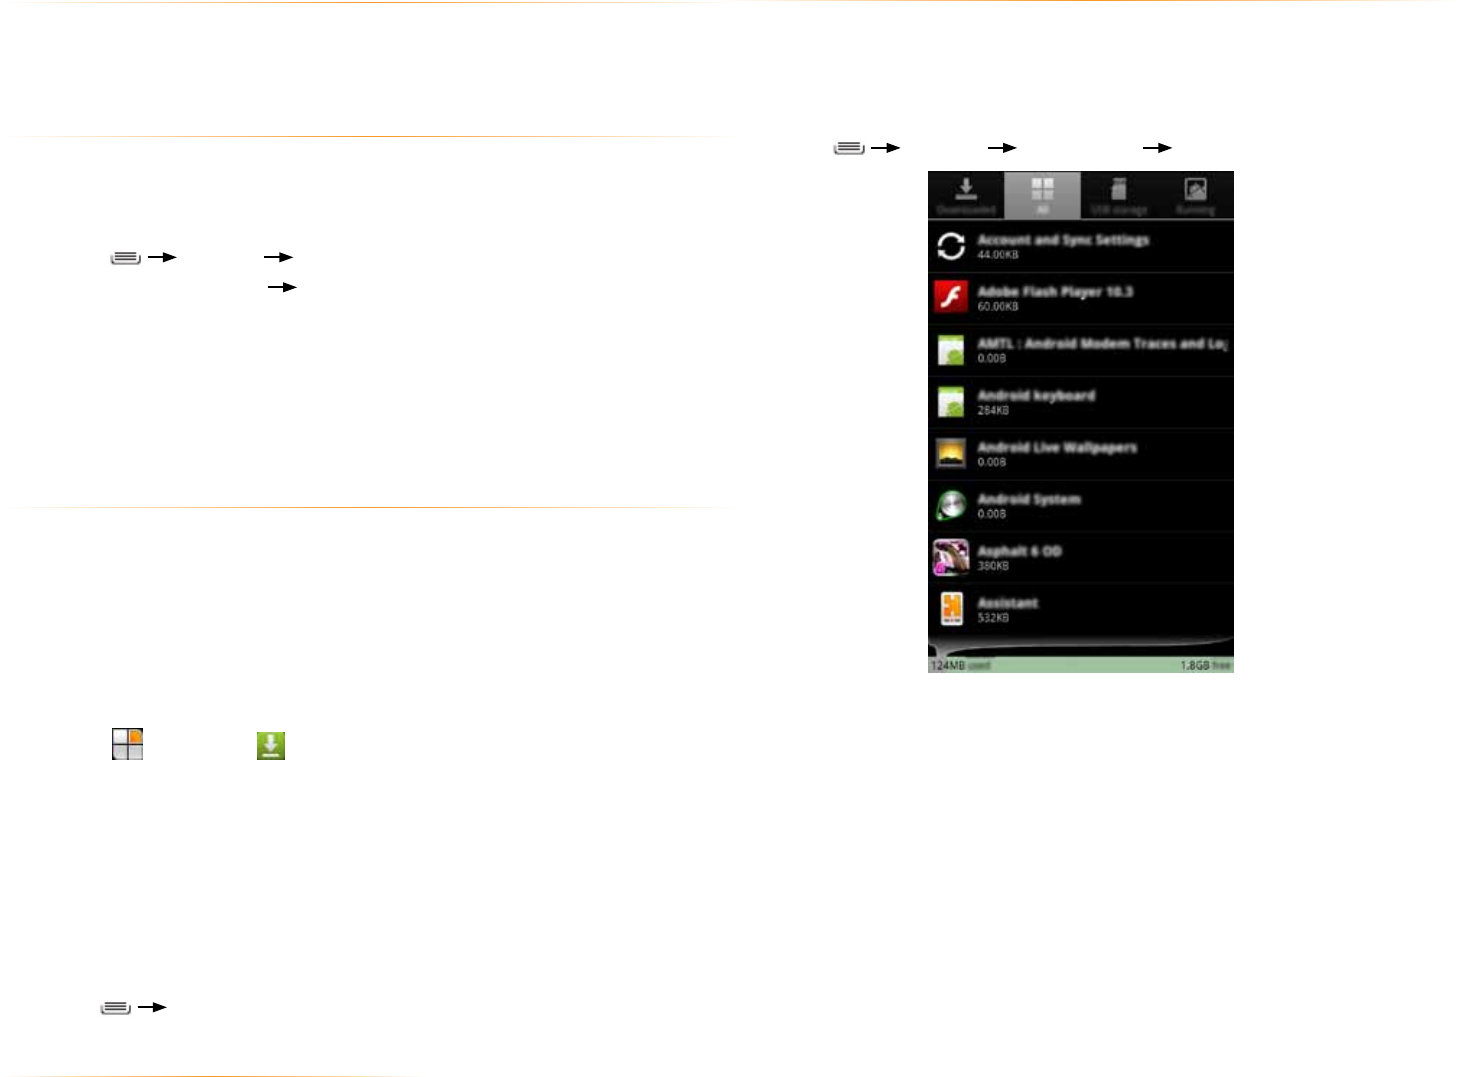
PAGE : 4914.0 other phone functions
14.3 manage applications
The Manage Applications screen manages all the installed applications in your
phone. You can install new applications, make the necessary changes to the
applications, and uninstall them as and when required.
To manage applications:
1. Touch Settings Applications Manage applications .
2. Touch the tabs at the top of the screen to select the list of applications
to display. The list contains various categories of applications such as
downloaded, runnable on your USB storage, currently running, and so on.
You can choose any one category of the applications or even select all the
applications.
NOTE: Apps currently installed on your USB storage are marked with a
checkmark.
3. Touch an app to display the corresponding storage usage, software version,
and actions it is permitted to perform.
14 other phone functions
Your phone has additional functions, including downloads, navigation, and
automatic updates.
14.1 update software
As updated versions of your phone’s software become available, you can
download them directly onto your phone.
To check for and install updates:
1. Press Settings About Phone.
2. Touch System updates Check for Updates.
3. If updated software is available, it will automatically begin downloading to
your phone.
You can monitor the download in the Notifications Panel.
4. When the update is finished downloading, touch Apply Update to install the
new software.
14.2 downloads
You can use the Downloads application to view, open, or delete your
downloaded items.
NOTE: All downloaded items are stored on your phone’s internal storage,
under the download directory. You can view and copy items from this folder
by connecting your phone to your computer, as described in Transfer Files
between your Phone and Computer.
To use the Downloads app:
1. Touch , then touch .
2. Touch an item to open it.
NOTE: You can touch a header (such as “Today” or “1 month ago”) to expand
or conceal all downloaded items under that header.
To delete a downloaded item:
•Touch the checkbox next to an item to select it, then touch Delete. Or you
can uncheck the selected checkboxes by touching Clear Selection.
To cancel downloads:
•Press Cancel All Downloads.
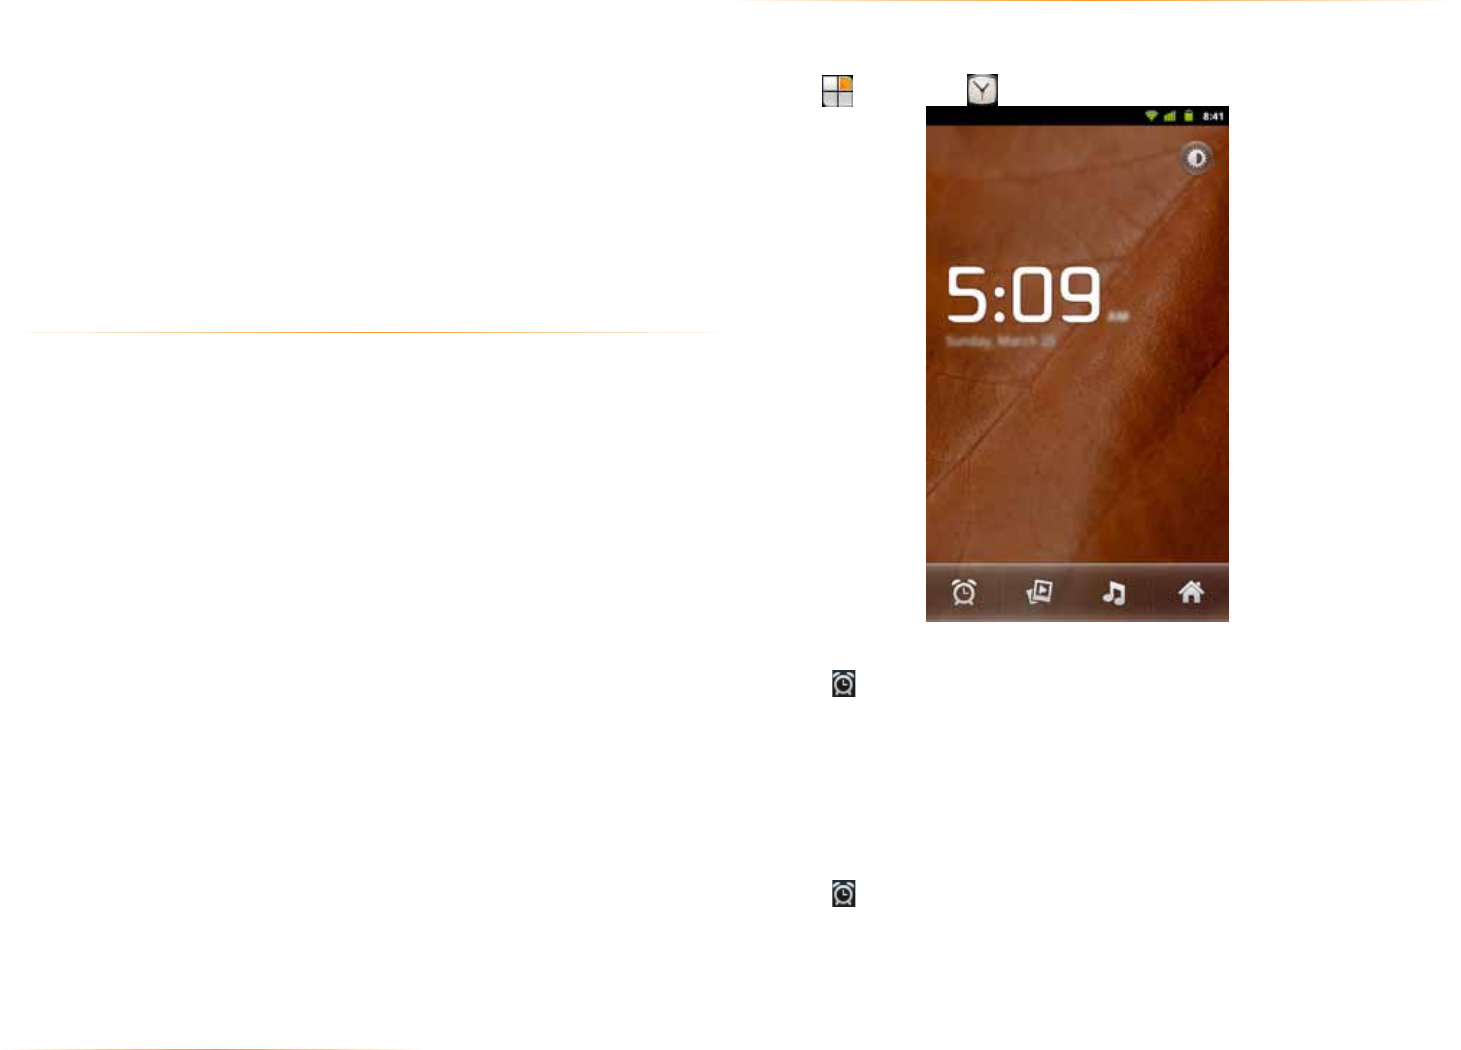
PAGE : 50
device memory.
14.4 clock
The Clock app displays the time and allows you to set alarms.
To open the Clock app:
•Touch , then touch .
To add an alarm:
1. Touch at the bottom of the clock screen.
2. Touch Add Alarm.
3. Set the alarm time.
4. Touch Set.
5. Customize any additional alarm settings, such as ringtone or repeat.
6. Touch Done.
To turn an alarm on and off:
1. Touch at the bottom of the clock screen.
2. Touch the bar in front of the alarm to turn it on or off.
To stop an application:
1. From the Manage Applications screen, touch the Downloaded tab to view all
applications you have downloaded.
2. Touch the application you want to stop.
3. Touch Force Stop.
Important. Forcibly stopping an application may cause temporary errors on
your phone, and require you to restart your phone to restore full functionality.
To uninstall an application:
1. From the Manage Applications screen, touch the Downloaded tab to view
all downloaded applications.
2. Touch the application you want to uninstall.
3. Touch Uninstall, then touch OK to confirm.
14.3.1 change App storage location
Apps can either be stored in the phone’s device memory or on the phone’s
USB storage. Since your phone’s device memory contains your private
information, it is tightly guarded by your phone’s operating system, and you
cannot directly access it when you connect your computer to your phone.
Storage space on your phone’s device memory is also very limited. You may
therefore wish to move an application from the phone’s device memory to the
USB storage.
To change where an app is stored:
1. From the Manage Applications screen, touch On your USB storage to
view all applications currently, or potentially, installed on your phone’s USB
storage.
2. Touch the application whose location you want to change.
3. Touch Move to USB storage to move the app from device memory to
your USB storage, or touch Move to Phone to move the app back to
14.0 other phone functions
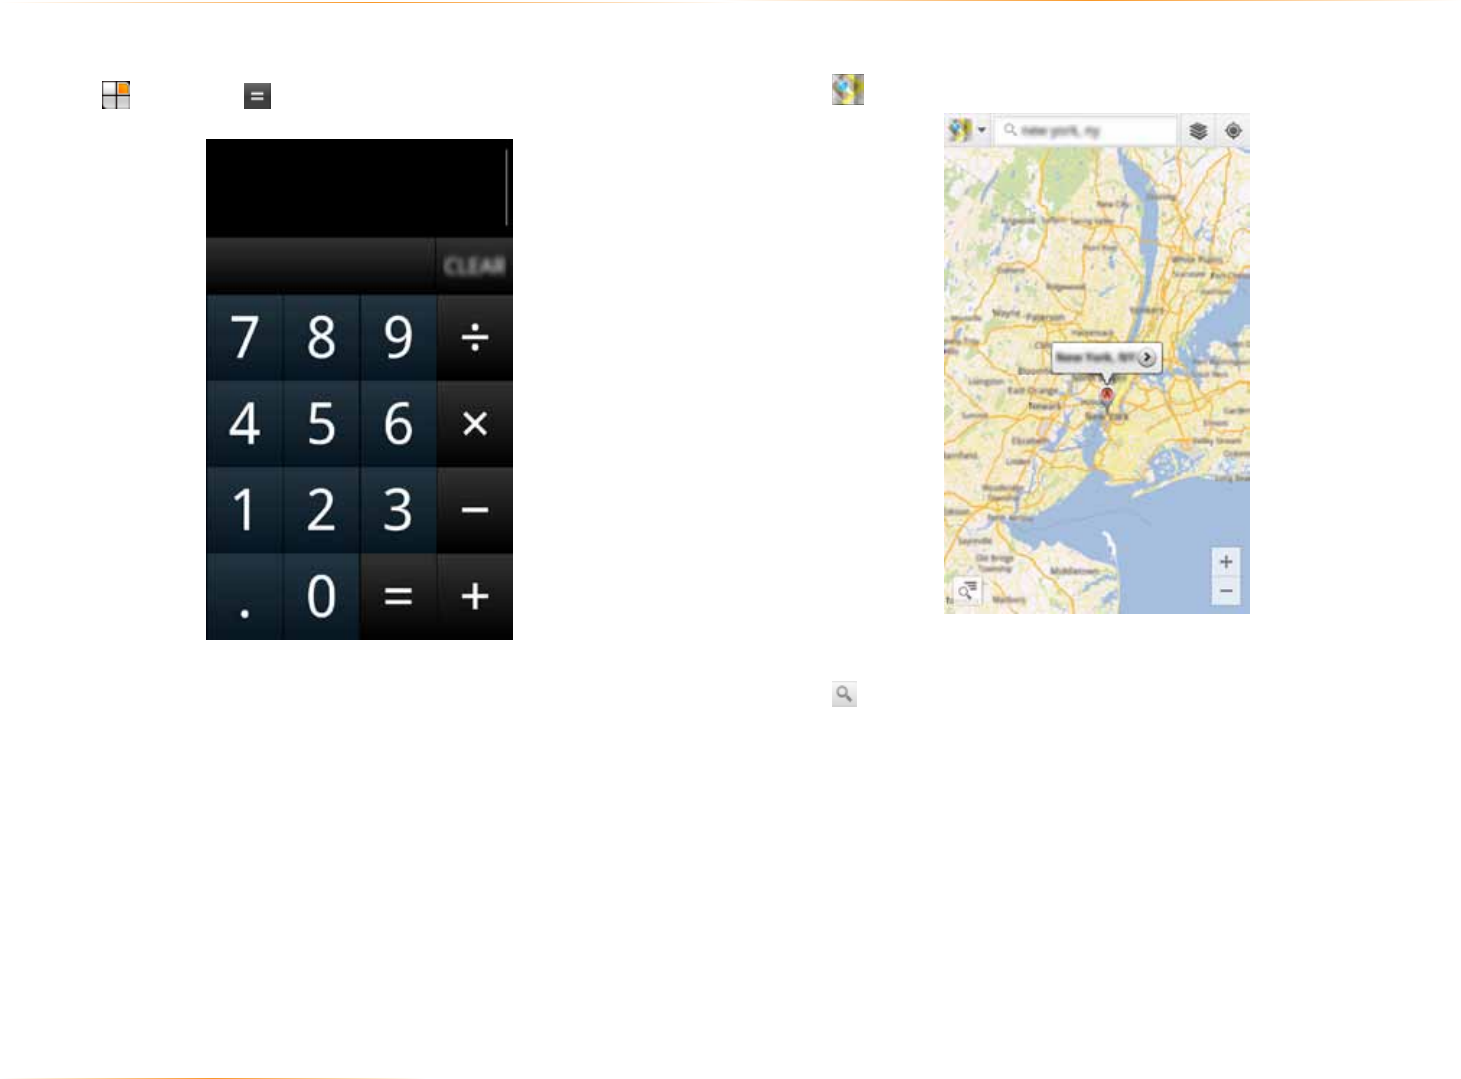
PAGE : 51
14.5.1 maps
Google Maps lets you find any location using your phone.
To use Google Maps:
1. Touch in the App Launcher.
2. Enter an address, a city, a business name, or a type of establishment in the
search box.
3. Touch or touch a suggested location.
TIP: You can get directions for a location by touching the location on the map
and then choosing Directions.
14.5 calculator
The calculator app lets you use your phone as a calculator.
To use the calculator app:
•Touch , then touch .
You can use the touchscreen to enter numbers, perform operations, and clear
the screen, just as you would on a basic calculator.
TIP: Slide the screen to the left to see more advanced functions, such as pi,
sin, log, square root, and left and right parentheses.
14.0 other phone functions
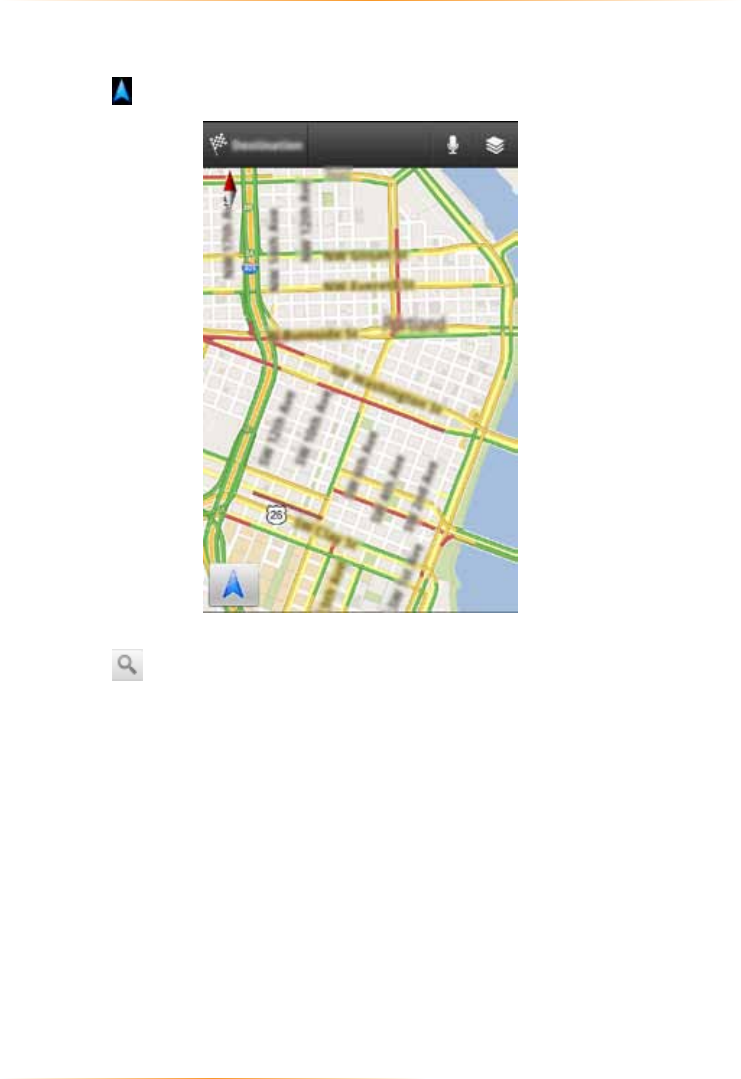
PAGE : 52
14.5.2 Nav
Google Nav turns your phone into a GPS navigation device.
To use Google Nav:
1. Touch in the App Launcher.
2. Enter an address.
3. Touch .
TIP: Select a contact or starred place to quickly navigate to a favorite location.
14.0 other phone functions
PAGE : 5315.0 changing phone settings
15.1 wireless & networks settings
The Wireless & networks section configures your phone’s connections, such as
Wi-Fi and Bluetooth wireless technology.
Airplane mode Disable all wireless connections, including Bluetooth
wireless technology and 3G.
Activating airplane mode greys out some other
settings, such as Call Settings.
Wi-Fi Turn on Wi-Fi, then configure any desired setting
under Wi-Fi Settings.
For information on using Wi-Fi, see Using Wi-Fi.
Wi-Fi settings Configure your Wi-Fi connection with the following
settings.
• Network notification. Receive a notification when
an open Wi-Fi network becomes available.
• Wi-Fi protected setup. Automatically connect to
a WPS access point using the WPS setup on the
device.
• Wi-Fi networks. Lists all networks you have
previously-added or connected to, as well as
nearby Wi-Fi networks.
TIP: Press Scan to rescan the available
networks.
• Add Wi-Fi network (at bottom of Wi-Fi networks
list). Add a Wi-Fi network by entering its SSID
(network name) and any required security
information.
Press Advanced in the Wi-Fi settings screen
to see additional Wi-Fi settings, such as Use Static IP
or MAC address.
Bluetooth Turn on Bluetooth wireless technology.
For more information on pairing your phone with a
Bluetooth wireless technology-enabled product, see
Wireless Bluetooth Connection.
15 changing phone settings
The settings window displays all of the settings that effect how your phone
looks and works.
To open the settings window:
•From the Homescreen, press Settings.
You can touch a section, such as Wireless & networks, to reveal the settings
in that section.
The rest of this section describes many of the settings available on your phone.

PAGE : 5415.0 changing phone settings
NFC Touch to enable Near Field Communications, which
allows you to exchange information with other nearby
smartphones and similar devices.
Mobile networks Configure your mobile network using the following
settings.
• Data enabled. Clear this checkbox to prevent
your phone from transmitting data on any mobile
network. This is useful when you’re traveling and
wish to avoid charges for data use on a local
carrier’s network, and can also decrease the
battery usage.
Disabling data does not prevent your phone from
transmitting data on other networks, such as
Wi-Fi or Bluetooth wireless technology-enabled
products.
• Data roaming. Clear this checkbox to prevent
your phone from using other carrier’s mobile
networks when your own is unavailable.
• Access Point Names: Select from the available
access points.
• Data usage. Displays your data usage.
Touch this setting to see more details about your
network’s data use policy. For more information
on your data use policy, please contact your
carrier.
• Network operators: Scan for and select a
network operator.
Bluetooth settings Configure your Bluetooth connection with the
following settings.
• Device name. Give your phone a custom
device name, visible on some Bluetooth wireless
technology-enabled products.
• Discoverable. Enable phone to be discoverable
by other Bluetooth wireless technology-enabled
products.
• Discoverable timeout. Set how long a device will
be discoverable.
• Scan for devices. Scan for any nearby Bluetooth
wireless technology-enabled products.
• Bluetooth devices. List Bluetooth wireless
technology-enabled products that are nearby or
have been previously connected.
TIP: Touch and hold a listed Bluetooth wireless
technology-enabled product to see other options,
such as Unpair.
Tethering & portable
hotspot
Configure your phone for tethering or for use as a
portable hotspot with the following settings.
• USB Tethering. Share your phone’s mobile data
network connection with your computer via a
USB connection.
• Portable Wi-Fi hotspot. Share your phone’s
mobile data network connection as a portable
Wi-Fi hotspot.
• Portable Wi-Fi hotspot settings. Configure your
phone’s Wi-Fi hotspot settings, such as its SSID
or security.
For more information on tethering and hotspots, see
Sharing Your Phone’s Data Connection.
VPN Settings Configure your Virtual Private Network using the
following settings.
• Add VPN. Add a VPN by selecting the type and
specifying any additional details, as provided by
your system administrator.
• VPNs. Lists previously added and connected
VPN’s. Touch a VPN to reconnect to it.
For more information on VPNs, see Sharing Your
Phone’s Data Connection.
PAGE : 55
15.2 call settings
Call settings let you configure features related to making calls, such as call
forwarding and voicemaill.
Fixed dialing
numbers
Touch to manage fixed dialing number settings.
Voicemail service Select the service to use for your voicemail.
Voicemail settings Configure your voicemail.
Call forwarding Configure call forwarding.
Additional settings Configure your calls with the following settings.
• Caller ID. Set whether your phone number is
displayed to the people you call.
• Call waiting. Enable call waiting on your phone.
Use Internet calling Specify when to use Internet calling.
15.3 sound settings
Sound settings let you configure your phone’s sounds.
Silent mode Silence all sounds except media (such as videos and
music) and alarms.
Vibrate Configure when the phone vibrates instead of ringing.
Volume Set the volume for each sound made by your phone,
such as media or incoming calls.
If you select “Use incoming call volume for
notifications,” you can use the “Ringtone” volume to
set the notification volume.
Phone ringtone Select the ringtone for a phone call.
You can also select a song as a ringtone through the
Music App. See Playing Music for more information.
Notification ringtone Select the notification ringtone.
Feedback Specify the kind of feedback your phone provides,
such as audible touch tones or haptic (vibration)
feedback.
15.4 display settings
The Display settings configure your phone’s screen, such as its brightness or
rotation.
Brightness Adjust the screen’s brightness automatically, or select
the desired brightness.
For the longest battery life, use the lowest
comfortable brightness.
Auto-rotate screen Check to automatically rotate the orientation of the
screen as you turn the phone sideways or upright.
Animation Select to display transition animations.
Screen timeout Set how long a phone will idle before the phone
enters sleep mode.
For the longest battery life, use the shortest timeout.
15.5 wireless display
The Wireless display settings screen streams your phone to a wireless display
enabled device. For more information, see Wireless Display.
Wireless display Turn on Wireless display.
Video extend mode Use video mode while playing videos.
15.6 location & security settings
The Location & security settings screen configures how your phone gathers
and uses information about your physical location, and how your phone is
locked and secured.
Use wireless
networks
Use information from Wi-Fi and mobile networks to
determine your approximate physical location.
You must consent to sharing your location
anonymously with Google’s location service to enable
this feature.
Use GPS satellites Use your phone’s global positioning system (GPS)
satellite receiver to pinpoint your physical location.
Set up screen lock/
Change screen lock
Secure your phone with a pattern, PIN, or password.
See Securing your phone for more information.
Set up SIM card lock Require a PIN to use your phone.
15.0 changing phone settings
PAGE : 56
15.8 accounts & sync settings
The Accounts & Sync settings screen adds, removes, and manages your
accounts (including Google and Microsoft Exchange accounts.) For more
information on working with accounts and synchronizing data, see Accounts.
Background data Permit applications to synchronize data in the
background. Applications can synchronize the data
even if you are not actively working with them.
Unchecking this setting can save battery life and
lower data use.
Auto-sync Permit applications to automatically synchronize
data.
Unchecking this setting requires manual
synchronization of data, either by opening an
account and touching Sync Now, or by opening
an application and synchronizing that application
manually.
Manage accounts Lists all of the accounts added to your phone.
Touch an account to open it and see more
information.
Add account Add an account to your phone.
Touch the kind of account you want to add, then
enter your account’s username and password.
Visible passwords Briefly display each character of your password.
Otherwise, only asterisks display.
Credential storage Store credentials for accessing VPNs or SSL web
servers.
15.7 applications settings
The Applications settings screen views and configures the applications installed
on your phone.
Unknown sources Permit installing applications from locations other
than Play Store, such as applications downloaded
from the web or received by email.
Warning! Malicious applications can access the
contents of your phone and seriously compromise
your phone’s security and privacy. Use caution
when downloading and installing an application from
anywhere other than the Play Store.
Manage applications List all the applications and software installed on your
phone.
Touch an application to view more details and
manage the application.
See Managing applications for more information.
Running services List applications, processes, or services currently
running or cached.
Storage and
battery use
See the storage and battery usage of applications.
15.0 changing phone settings
PAGE : 57
15.11 language & keyboard settings
The Language & keyboard settings sets the default language for your phone,
and configures how your Onscreen Keyboard displays and functions. For more
information, see Onscreen Keyboard Basics.
Select language Select the language for your onscreen keyboard.
User dictionary Displays the user dictions used to identify words as
you type.
Touch a word to edit or delete it, or press
Add to add a word.
Android Keyboard Configure your Android keyboard.
Swype Configure your Swype keyboard
From the Homescreen, press Settings Language & keyboard Swype
Select Input Method. Touch Swype or Android keyboard to select the
desired input method.
15.12 accessibility settings
Set the accessibility features of your phone.
Accessibility Enable all installed accessibility plug-ins.
Power button ends
call
Activates pressing the power button to end an active
call.
15.13 date & time settings
The Date & time settings screen configures how the date and time are
displayed on your phone. You can also use this screen to manually enter the
date and time, rather than obtaining the current time from the mobile network.
Automatic Uncheck to set the date, time, and time zone on the
phone manually, rather than obtaining the current
time from the mobile network.
Set Date/time zone/
time
Manually set the phone’s date, time zone, and time.
This setting is only available if the Automatic setting,
above, is unchecked.
Use 24-hour format Display the time using 24-hour time format—for
example, display 13:00 rather than 1:00 PM.
Select date format Select the date format.
15.9 privacy settings
Use the Privacy settings to manage your personal information.
Back up my data Back up certain personal data to Google servers. If
you replace your phone, you can restore the data
you’ve backed up.
The following data can be backed up and restored:
Wi-Fi passwords, Browser bookmarks, a list of the
applications you’ve installed, the words you’ve added
to the user dictionary, and most of your configured
settings. Some third-party applications may also take
advantage of this feature.
Unchecking this option stops backing up your data
and deletes any existing backups.
Automatic restore Restore your settings and other data when you
reinstall an application, using your current Google
account.
Factory Data Reset Erase all of your personal data from internal phone
storage. Resetting the phone does not erase any
software updates you’ve downloaded.
You can also erase data downloaded to USB
storage.
After resetting your phone, you’ll be returned to the
Google wizard when you next restart your phone.
15.10 storage settings
Use the storage settings to monitor your phones storage.
USB storage Lists the total and available space on your phone’s
USB storage.
Erase USB storage Permanently erases everything on your phone’s USB
storage.
Device memory Lists the available device memory.
15.0 changing phone settings

15.14 about phone
The About Phone settings screen displays information about your phone.
MobileCare Check for Android system software updates.
Status Touch to open the Status screen.
Battery use Touch to display a list of the applications and
operating system components that have used the
battery since you last charged it.
You can touch an item to see more detailed
information about its battery use. See Battery Tips for
tips about optimizing your battery use.
Legal information Display legal information about the software included
with your phone.
Other information Displays additional details about your phone.
Notice
The information contained herein is subject to change without notice. All statements,
information and recommendations contained herein do not constitute a warranty of any
kind, either expressed or implied. Please review this product guide thoroughly, with particular
attention paid to any safety sections, to make sure that you use your phone safely.
Copyright © 2011-2012 Intel Corporation. All rights reserved.
This publication is protected by copyright. No part of the publication may be used,
reproduced, or translated, in any form, without the prior written consent of Intel Corporation.
Intel, Intel Inside, and the Intel Inside logo are trademarks of Intel Corporation in the U.S. and/
or other countries.
doubleTwist is a trademark of doubleTwist Corp.
Google, Gmail, Google Maps, YouTube, Google Calendar, Android, and Play Store are
trademarks of Google, Inc. Use of this trademark is subject to Google permissions.
The Bluetooth® word mark and logos are registered trademarks owned by Bluetooth SIG,
Inc. and any use of such marks by Intel is under license.
* Other names and brands may be claimed as the property of others.
FCCRegulations:
Thismobilephonecomplieswithpart15oftheFCCRules.Operationissubjecttothe
followingtwoconditions:(1)Thisdevicemaynotcauseharmfulinterference,and(2)this
devicemustacceptanyinterferencereceived,includinginterferencethatmaycause
undesiredoperation.
ThismobilephonehasbeentestedandfoundtocomplywiththelimitsforaClassBdigital
device,pursuanttoPart15oftheFCCRules.Theselimitsaredesignedtoprovidereasonable
protectionagainstharmfulinterferenceinaresidentialinstallation.Thisequipment
generates,usesandcanradiatedradiofrequencyenergyand,ifnotinstalledandusedin
accordancewiththeinstructions,maycauseharmfulinterferencetoradiocommunications.
However,thereisnoguaranteethatinterferencewillnotoccurinaparticularinstallationIf
thisequipmentdoescauseharmfulinterferencetoradioortelevisionreception,whichcan
bedeterminedbyturningtheequipmentoffandon,theuserisencouragedtotrytocorrect
theinterferencebyoneormoreofthefollowingmeasures:
‐Reorientorrelocatethereceivingantenna.
‐Increasetheseparationbetweentheequipmentandreceiver.
‐Connecttheequipmentintoanoutletonacircuitdifferentfromthattowhichthereceiver
isconnected.
‐Consultthedealeroranexperiencedradio/TVtechnicianforhelp.
Changesormodificationsnotexpresslyapprovedbythepartyresponsibleforcompliance
couldvoidtheuser‘sauthoritytooperatetheequipment.
Operationonthe5.15‐5.25GHzfrequencybandisrestrictedtoindooruseonly.TheFCC
requiresindooruseforthe5.15‐5.25GHzbandtoreducethepotentialforharmful
interferencetoco‐channelMobileSatelliteSystems.

RF Exposure Information (SAR)
This mobile phone meets the government’s requirements for exposure to radio waves.
This phone is designed and manufactured not to exceed the emission limits for exposure to radio
frequency (RF) energy set by the Federal Communications Commission of the U.S. Government.
The exposure standard for wireless mobile phones employs a unit of measurement known as the
Specific Absorption Rate, or SAR. The SAR limit set by the FCC is 1.6W/kg. *Tests for SAR are conducted
using standard operating positions accepted by the FCC with the phone transmitting at its highest
certified power level in all tested frequency bands. Although the SAR is determined at the highest
certified power level, the actual SAR level of the phone while operating can be well below the maximum
value. This is because the phone is designed to operate at multiple power levels so as to use only the
poser required to reach the network. In general, the closer you are to a wireless base station antenna,
the lower the power output.
The highest SAR value for the model phone as reported to the FCC when tested for use at the ear is
0.893 W/kg and when worn on the body, as described in this user guide, is 1.28 W/kg (Body-worn
measurements differ among phone models, depending upon available accessories and FCC
requirements.)
While there may be differences between the SAR levels of various phones and at various positions, they
all meet the government requirement.
The FCC has granted an Equipment Authorization for this model phone with all reported SAR levels
evaluated as in compliance with the FCC RF exposure guidelines. SAR information on this model phone
is on file with the FCC and can be found under the Display Grant section of www.fcc.gov/oet/ea/fccid
after searching on FCC ID: O2Z-AZ210.
For body worn operation, this phone has been tested and meets the FCC RF exposure guidelines for use
with an accessory that contains no metal and the positions the handset a minimum of 1.Ϭ cm from the
body. Use of other accessories may not ensure compliance with FCC RF exposure guidelines. If you do
no t use a body-worn accessory and are not holding the phone at the ear, position the handset a
minimum of 1.Ϭ cm from your body when the phone is switched on.