Intermagic IMP400 MP3 Player User Manual
Intermagic Corp. MP3 Player
UserManual.wiki
>
Intermagic
>
IMP400 User Manual
User Manual
Navigation menu
Upload a User Manual
Namespaces
Wiki Guide
HTML
PDF
Info
Views
User Manual
Discussion / Help
Navigation
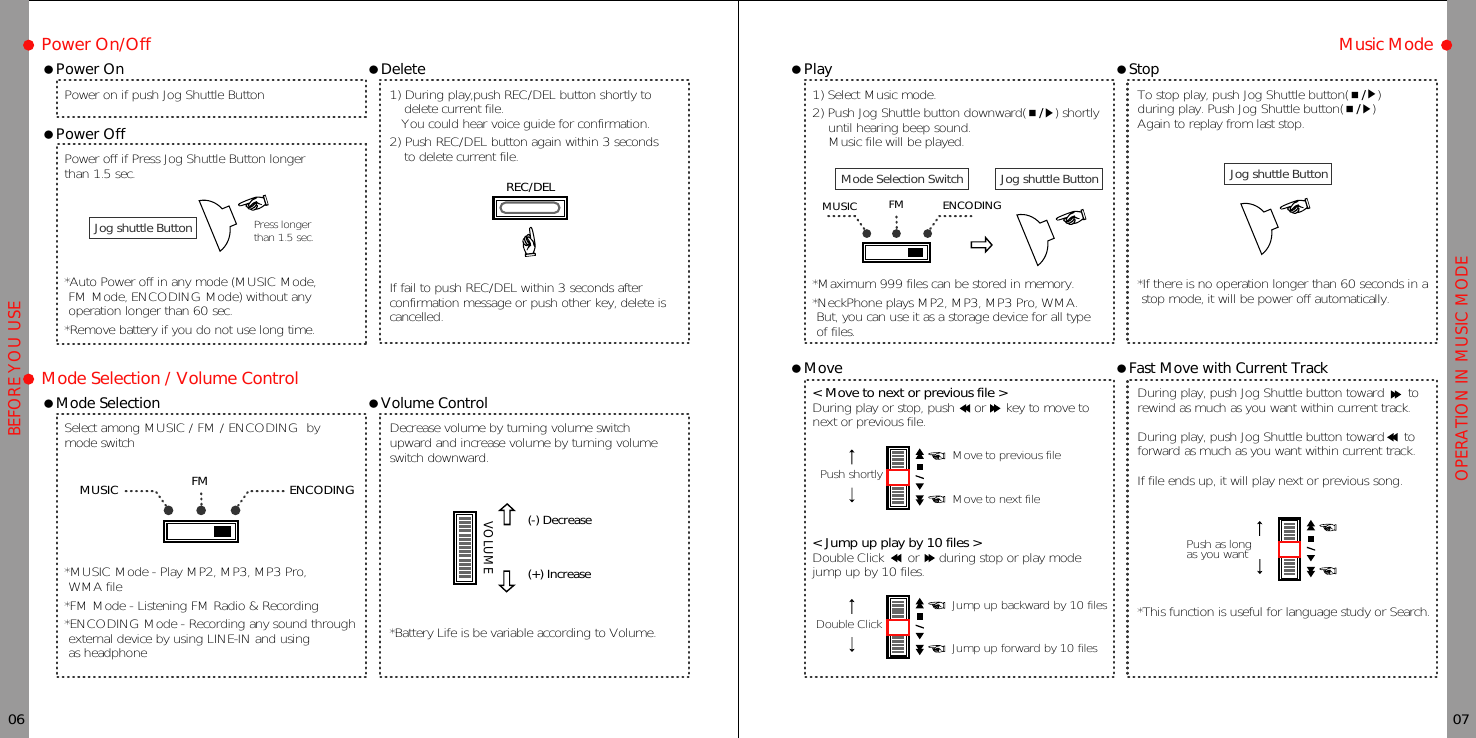
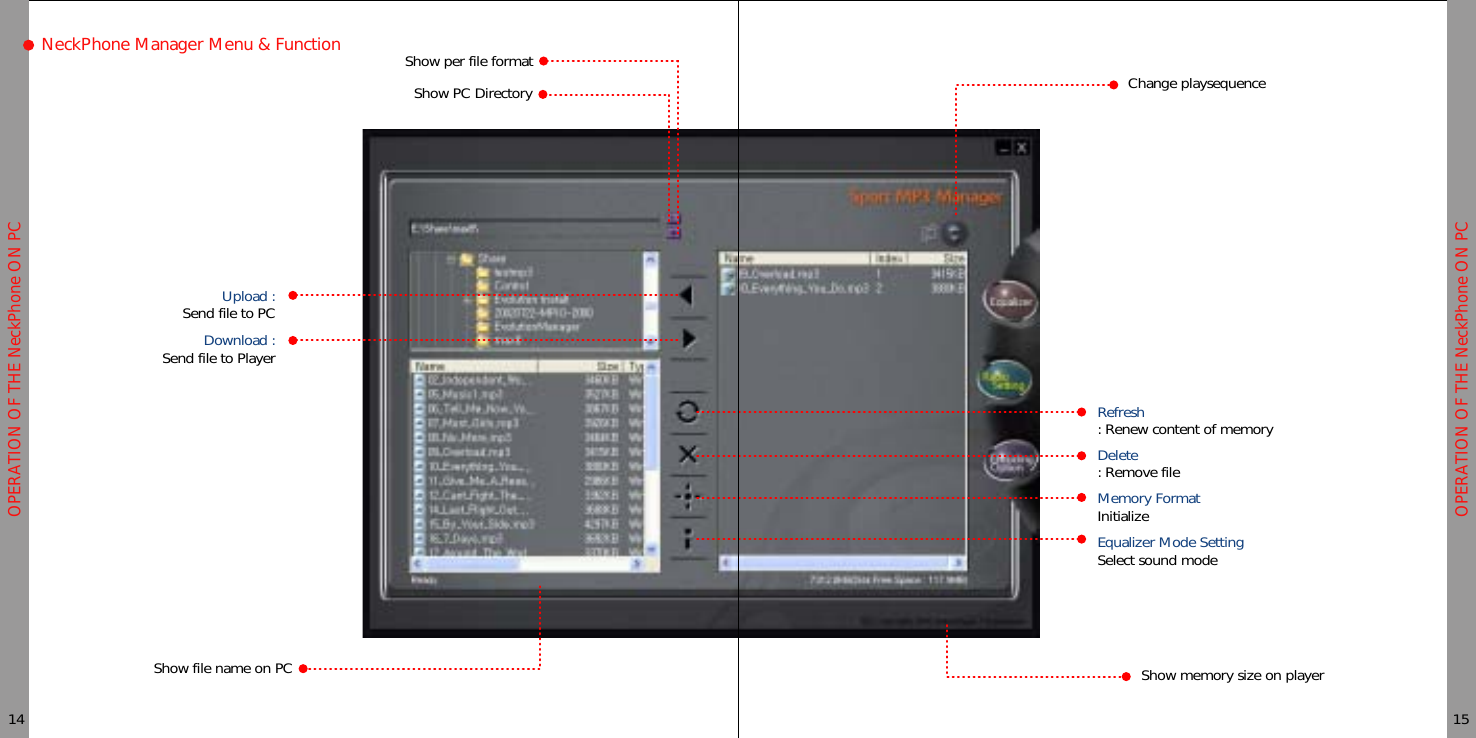
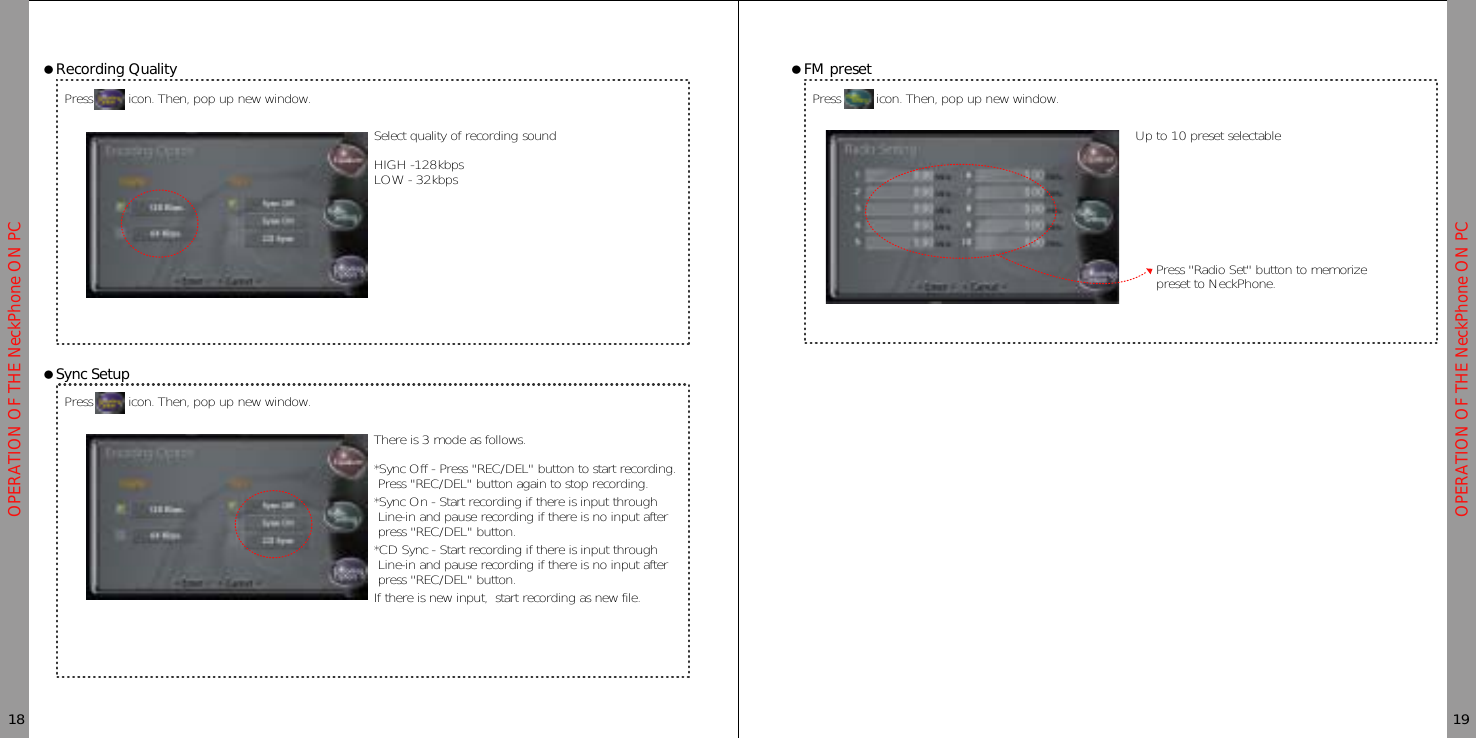
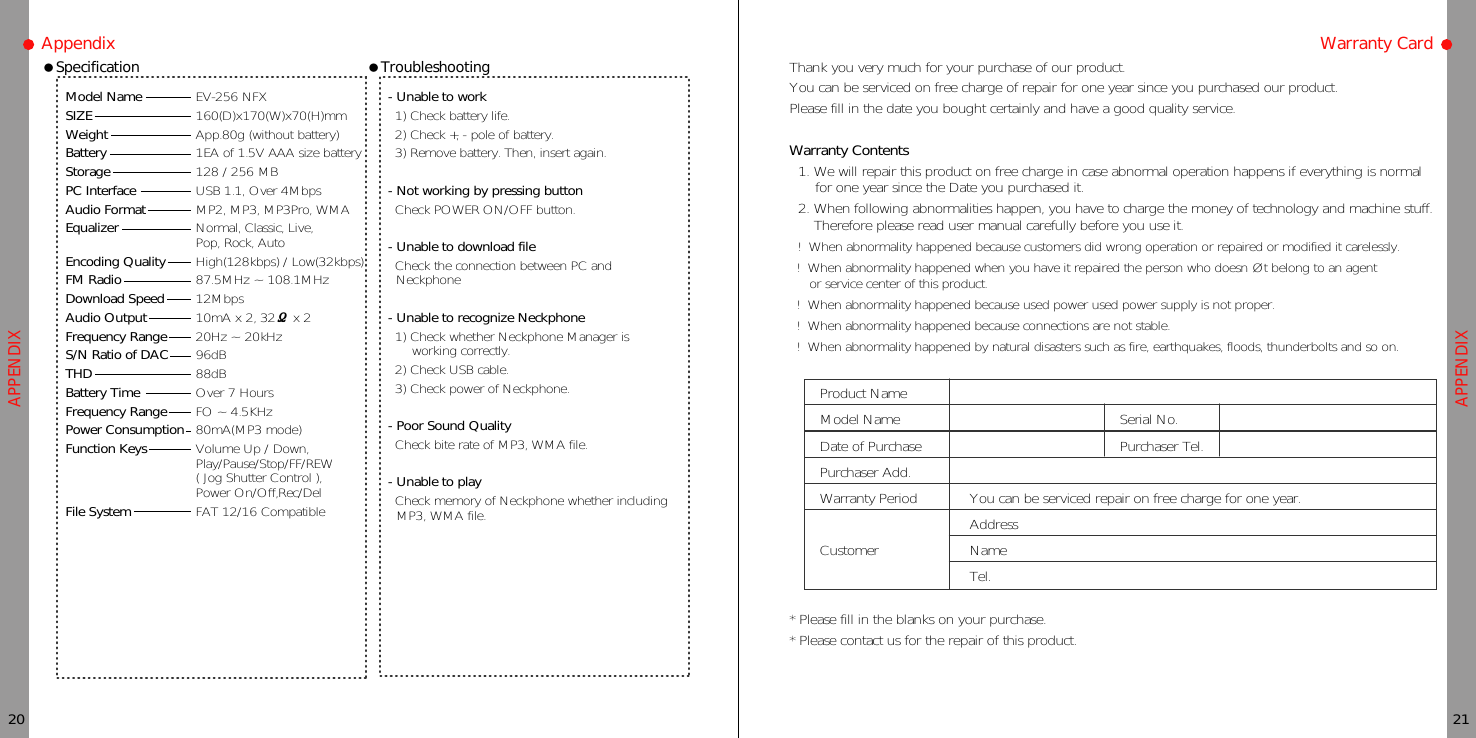
![BEFORE YOU USEBEFORE YOU USEFunctions of Buttons per mode & led display[ BUTTON FUNCTIONS PER MODE ]ƗMUSIC ModeƗFM ModeKeyȯ/ƜȯȯȭȭREC/DELFunctionPlay / Pause / StopMove to next fileMove to after 10 songFast Forward within fileMove to previous fileFast Backward before 10 songFast Back ward within fileDelete current playing fileControlPush one time shortlyPush one time shortlyPush two times shortlyAs much as pushedPush one time shortlyPush two times shortlyAs much as pushedPush one time shortly04 05Battery Installation[ LED DISPLAY ]ModePowerMUSICFMENCODINGLEDGREEN & REDGREEN & REDGREENREDGREEN & REDGREEN & REDGREENREDGREENREDGREEN & REDGREEN & REDGREENREDGREENREDGREEN & REDGREEN & REDLED DisplayOff after blinking 2~3 sec.OffOffOffOffOffBlinkOffOffBlinkOffOffOffBlinkBlinkOffOffOffStatusONOFFPLAYPAUSEWaitFM ListeningFM RecordingFM RecordingWaitingRecordingHeadphone FunctionHeadphone OFFWaitingKeyȯ/ƜȯȯȭȭREC/DELFunctionFM Radio ON / OFFStop FM recordingIncrease FM frequency(0.05MHz)Move to next PresetAuto Searching next FM frequencyDecrease FM frequency(0.05MHz)Move to previous PresetAuto Searching previous FM frequencyFM Radio Recording / PauseControlPush one time shortlyPush one time shortlyPush one time shortlyPush two times shortlyPush longer than 1.5 sec.Push one time shortlyPush two times shortlyPush longer than 1.5 sec.Push one time shortlyƗENCODING ModeKeyȯ/ƜREC/DELFunctionEncoding StopConverting to earphone / returnRecording / PauseControlPush one time shortlyPush one time shortlyPush one time shortly1. Open battery Cover.2. Insert 'AAA' Battery, after checking +, - and then cover up.ƗBattery Change IndicationIf you hear beep sound continually between track and track, please change battery.](https://usermanual.wiki/Intermagic/IMP400/User-Guide-329240-Page-3.png)