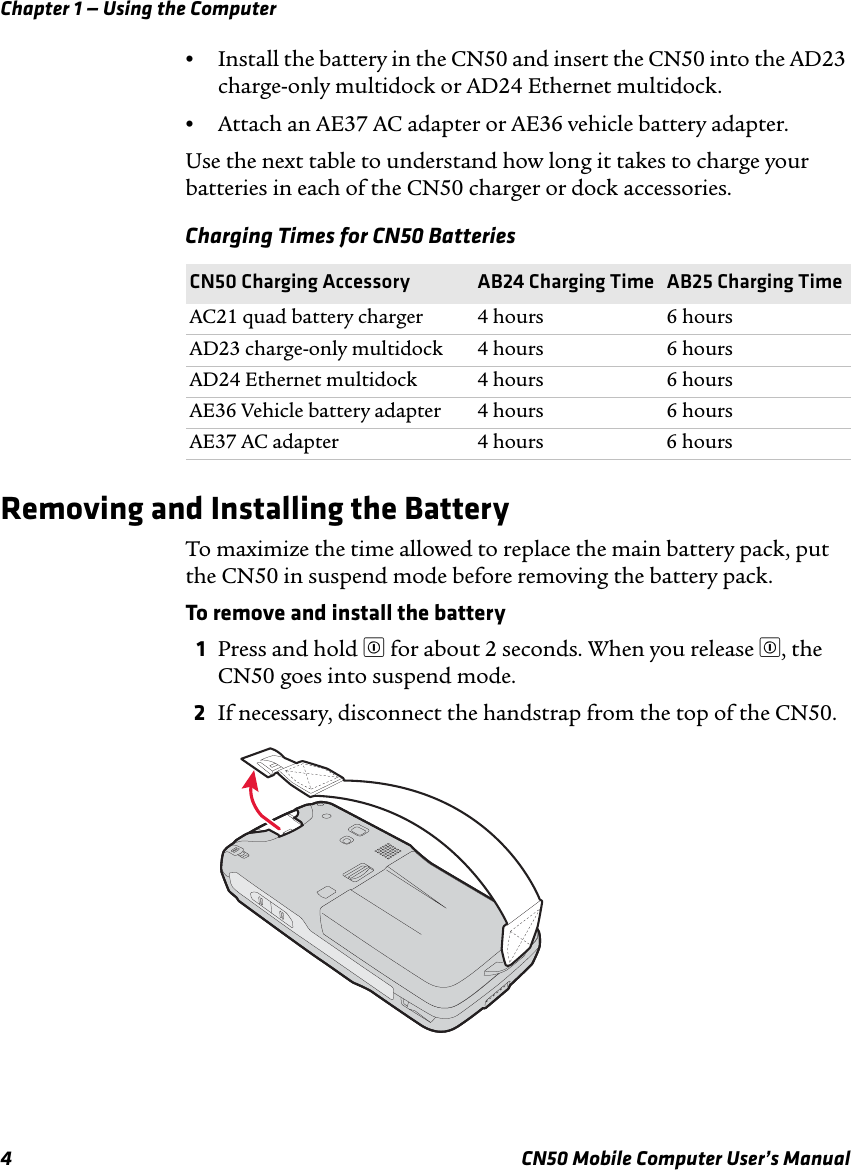
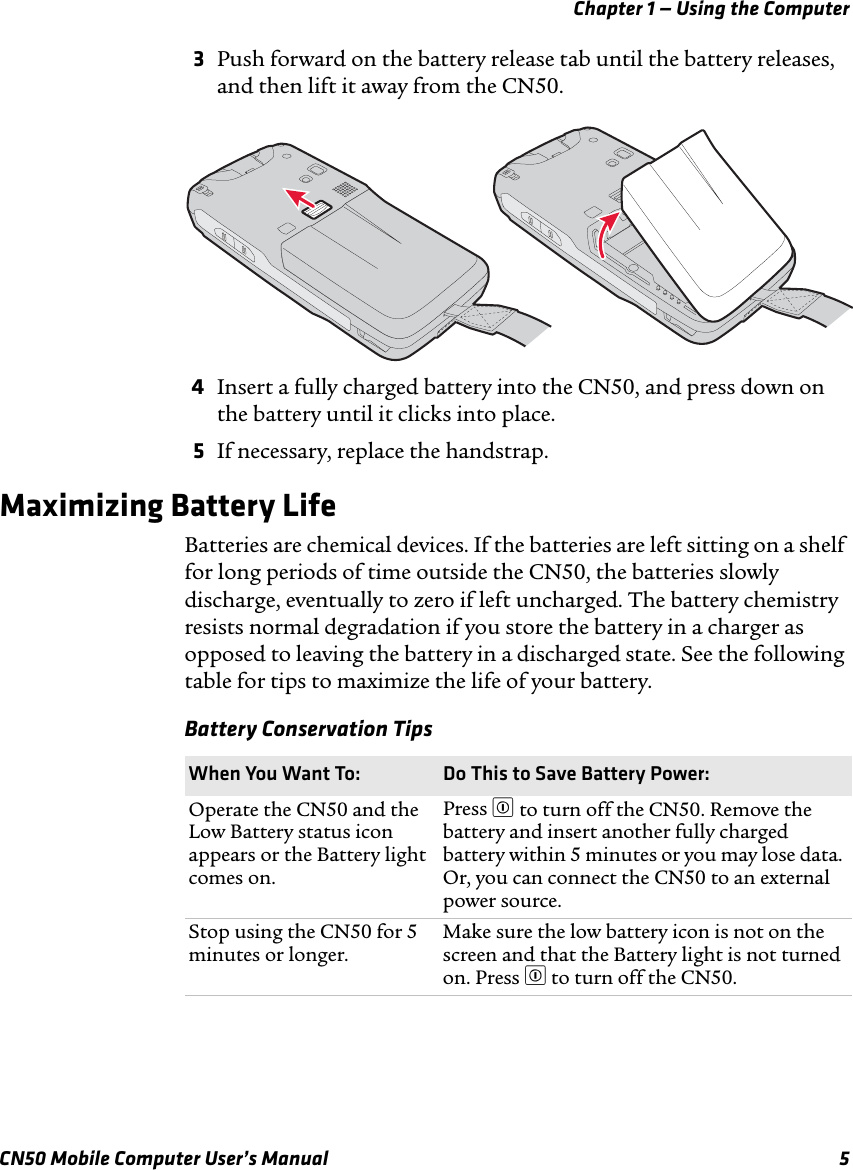
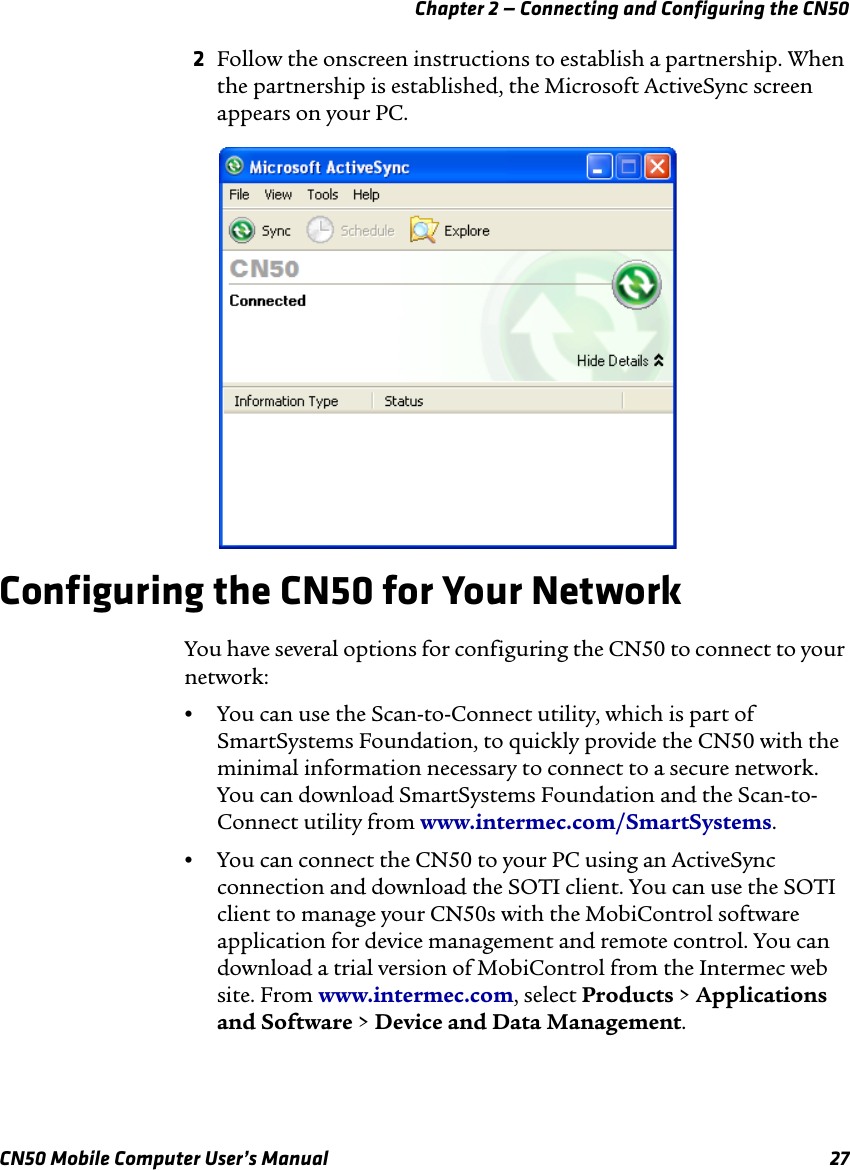
Intermec Technologies 01CN50 Handheld device WCDMA/GSM/GPRS/EDGE/802.11bg/BT User Manual CN50um01
Intermec Technologies Corporation Handheld device WCDMA/GSM/GPRS/EDGE/802.11bg/BT CN50um01
UserManual.wiki
>
Intermec Technologies
>
01CN50 User Manual
>
Users Manual
Contents
1.
Users Manual
2.
Compliance Insert
Users Manual
Navigation menu
Upload a User Manual
Namespaces
Wiki Guide
HTML
PDF
Info
Views
User Manual
Discussion / Help
Navigation


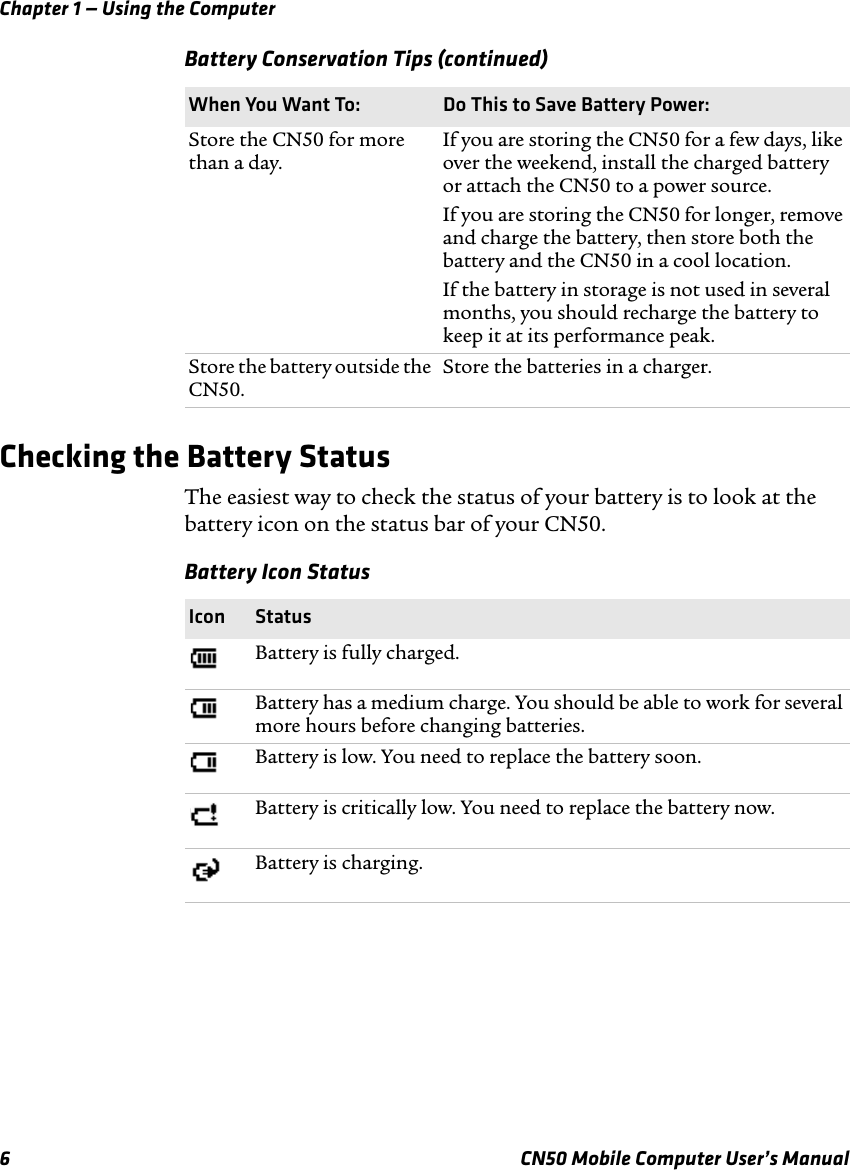

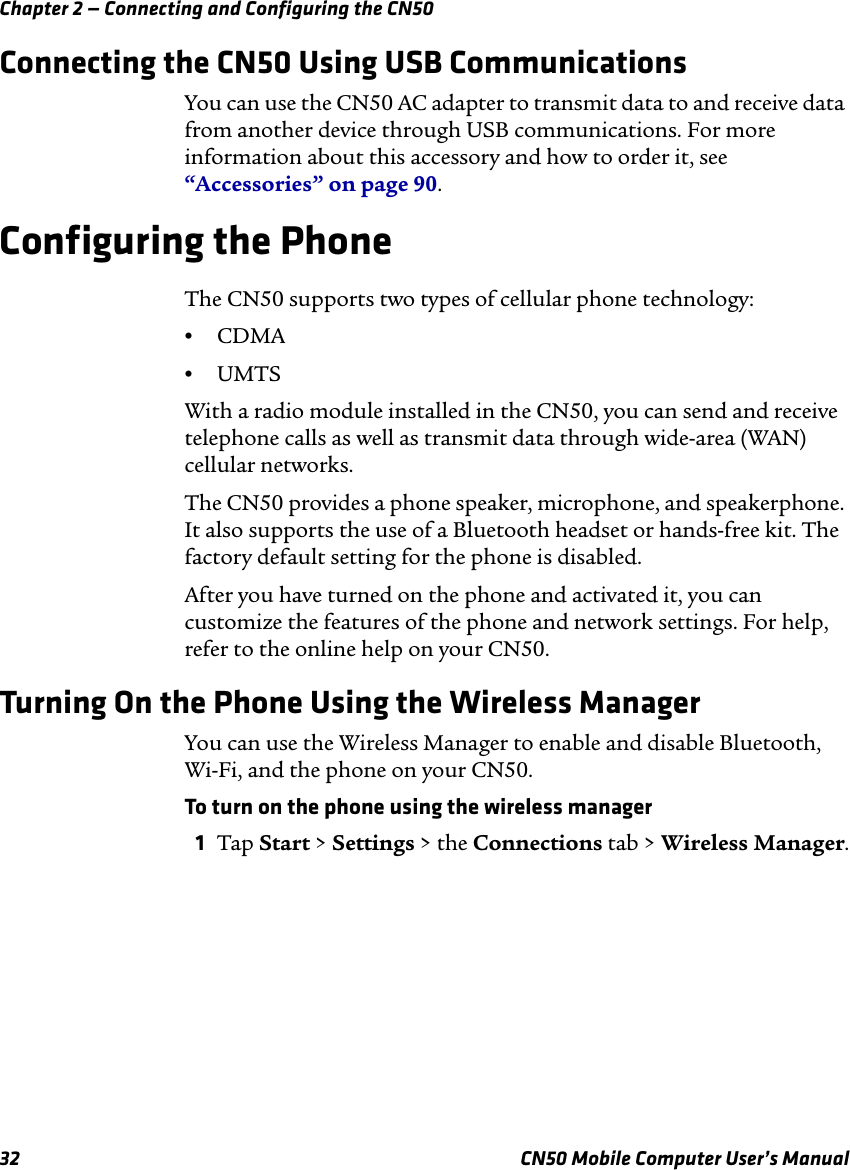
![Chapter 1 — Using the ComputerCN50 Mobile Computer User’s Manual 9There are two color-coded modifier keys on the numeric keypad: the orange [ key and the green § key. There is one orange [ color-coded modifier key on the QWERTY keypad.Capitalizing CharactersYou can capitalize characters individually, or you can type all capital letters by enabling Caps Lock.To capitalize a single character•On the QWERTY keypad, press the [ key, and then the A key to select the Shift function. Press the [ key, and the character. •On the numeric keypad, press the § key, and then the 1 key. Select the key with the letter you want to capitalize. Press 1 again to return to lowercase letters.To enable Caps Lock•On the QWERTY keypad, press [, then the up arrow key. Press [ again to disable the Caps Lock.•On the numeric keypad, press ] 1. Using the Color-Coded KeysYou Want to: Press: ExampleUse an orange character or function printed above a key.[ key (LED turns on) and then the key with the character or function printed above it (LED turns off).On the CN50 QWERTY keypad, press [ and then O to select the ! key.Use a green character or function printed above a key.] key (LED turns on) and then the key with the character or function printed above it (LED turns off).On the CN50 numeric keypad, press ] and then # to select the o function.Lock the orange or green key to stay on.[ or ] once. On the CN50 numeric keypad, press ] once. The green LED turns on and stays on.Unlock the green or orange key. [ or ] once. Press ¤ or § once to unlock the key. The LED turns off.](https://usermanual.wiki/Intermec-Technologies/01CN50.Users-Manual/User-Guide-1121624-Page-19.png)
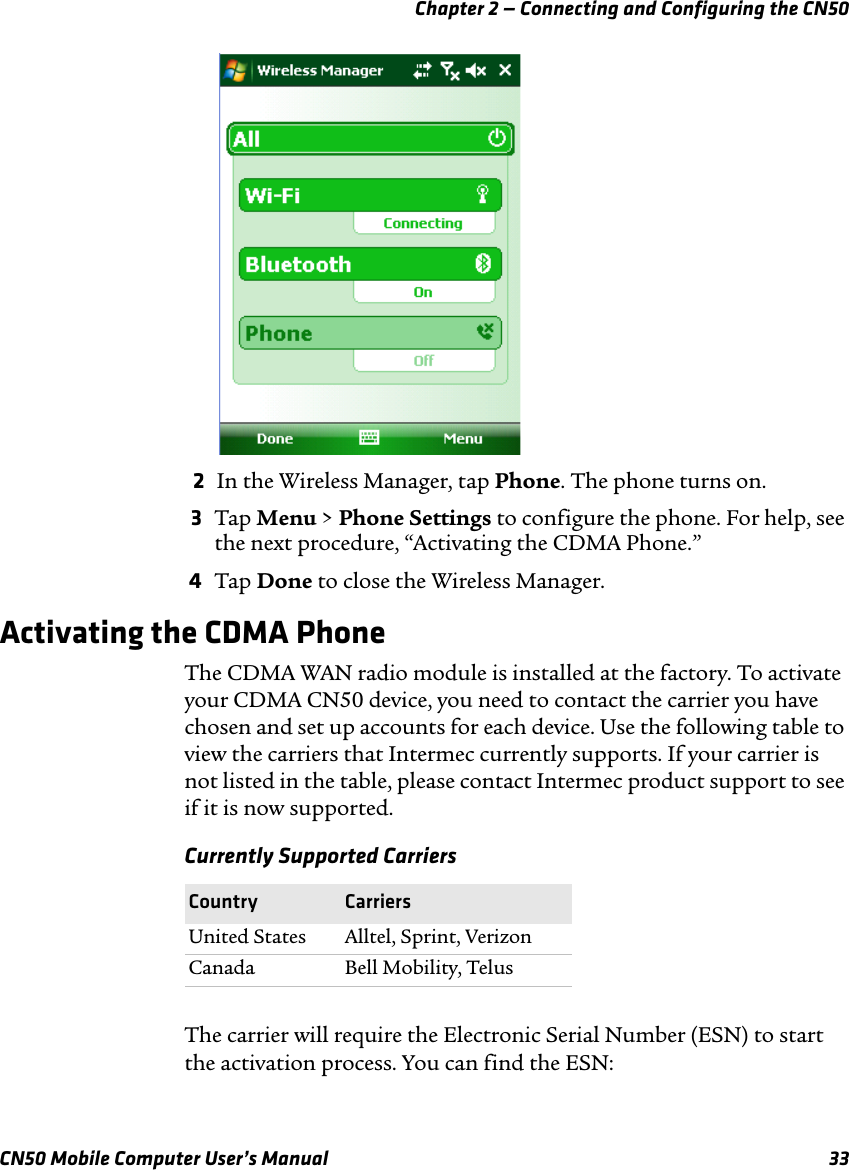
![Chapter 1 — Using the Computer10 CN50 Mobile Computer User’s ManualTo disable Caps Lock•On the QWERTY keypad, press the [ key again.•On the numeric keypad, press 1 again.For information on how to enter specific characters with keystrokes, see Appendix C, “Keypads and Keystrokes” on page 73.Using the Power ButtonWhen you press the Power button (^), you put the CN50 into suspend mode. In this lower power mode, the CN50 continues to supply power to all memory, but turns off power to most hardware such as the display. This power-saving feature is designed to prolong battery life.Entering Letters With the Numeric KeypadTo enter letters on the numeric keypad, you need to press the ] key and the number key as many times as necessary to access the letter you need since each number key has one to four letters or functions.For example, to type a lowercase z•Press ]9999.Configuring the Backlight SettingsBy default, the CN50 goes into Screen Off mode when there is no activity on the computer. Screen Off mode turns off the backlight and display. Press a key or tap the screen to resume activity.To configure the backlight1Tap Start > Settings > the System tab > the Backlight icon > the Battery Power tab.2With Turn off backlight if device is not used for checked, select the timeout value (10 seconds, 30 seconds, or 1 to 5 minutes).](https://usermanual.wiki/Intermec-Technologies/01CN50.Users-Manual/User-Guide-1121624-Page-20.png)

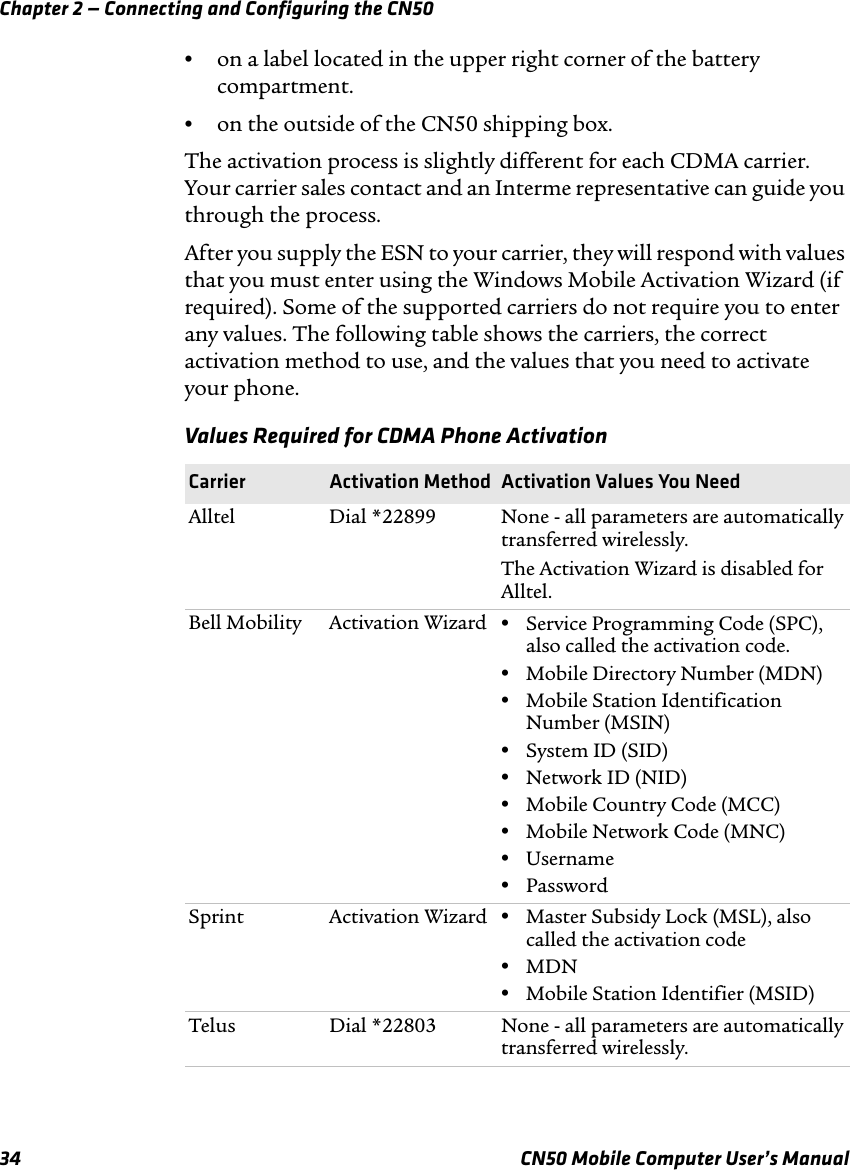
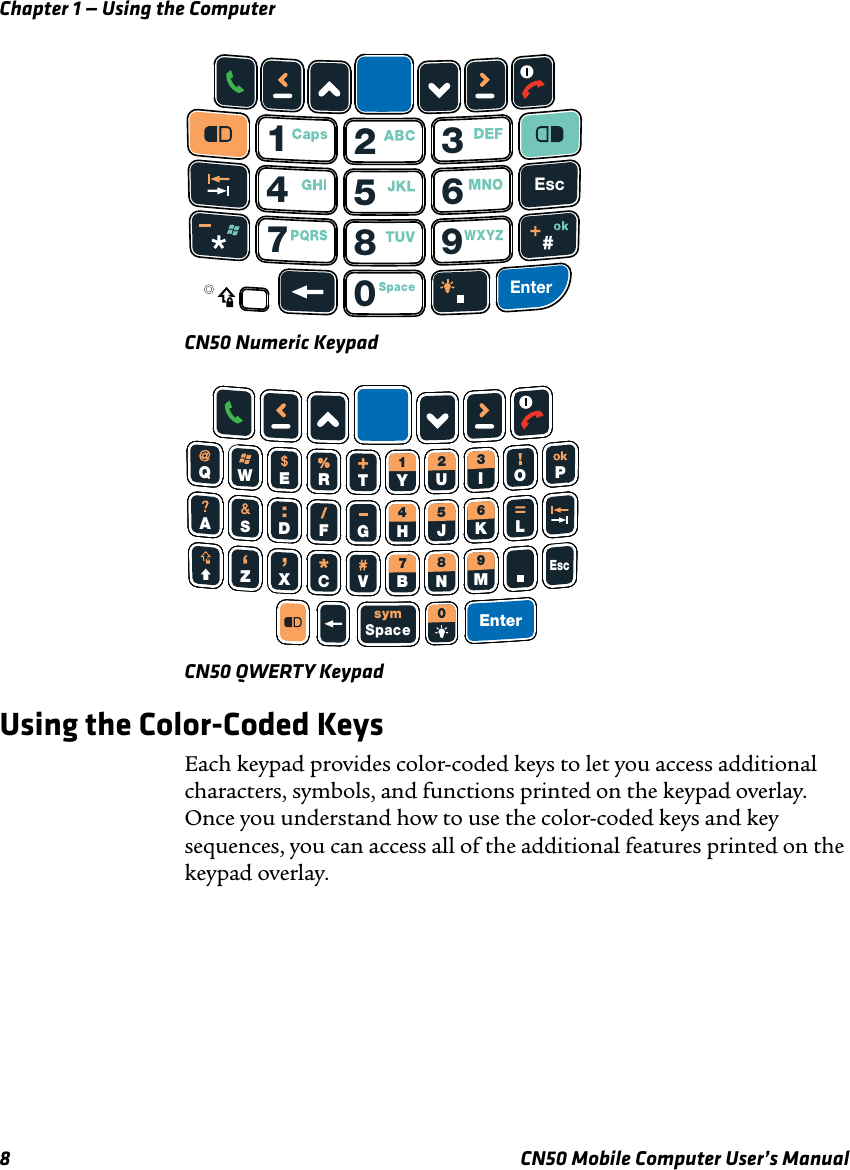
![Appendix C - Keypads and Keystrokes74 CN50 Mobile Computer User’s ManualStandard CharactersUse the following tables to learn how to enter standard and hidden characters and functions with the keypad.Alphanumeric CharactersCharacter QWERTY Keypad Numeric KeypadaA]2bB]22cC ]222dD]3eE]33fF ]333gG]4hH]44iI ]444jJ]5kK]55lL ]555mM]6nN]66oO]666pP]7qQ]77rR ]777sS ]7777tT]8uU]88vV]888wW]9xX]99](https://usermanual.wiki/Intermec-Technologies/01CN50.Users-Manual/User-Guide-1121624-Page-84.png)
![Appendix C - Keypads and KeystrokesCN50 Mobile Computer User’s Manual 75yY ]999zZ ]9999AuA ]12BuB ]122CuC ]1222DuD ]13EuE ]133FuF ]1333GuG ]14HuH ]144IuI ]1444JuJ ]15KuK ]155LuL ]1555MuM ]16NuN ]166OuO ]1666PuP ]17QuQ ]177RuR ]1777SuS ]17777TuT ]18UuU ]188VuV ]1888WuW ]19XuX ]199YuY ]1999ZuZ ]19999Alphanumeric Characters (continued)Character QWERTY Keypad Numeric Keypad](https://usermanual.wiki/Intermec-Technologies/01CN50.Users-Manual/User-Guide-1121624-Page-85.png)
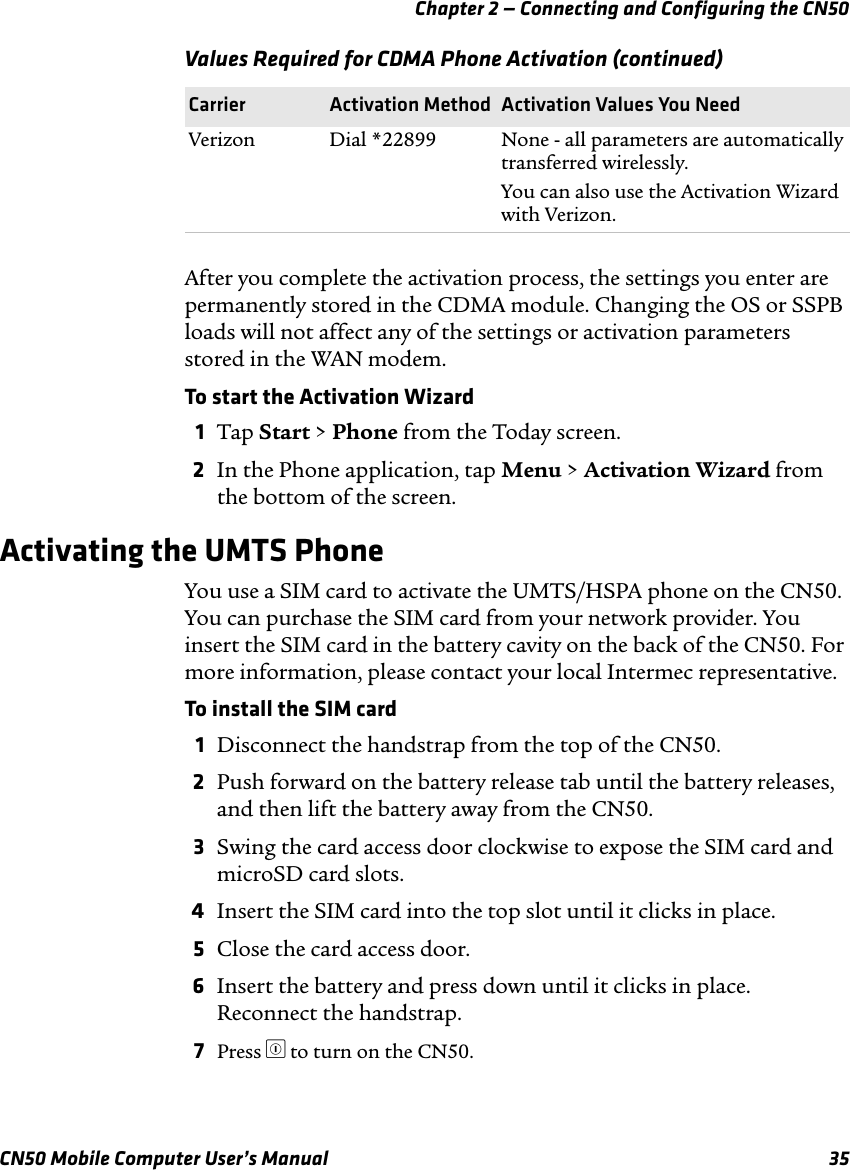
![Appendix C - Keypads and Keystrokes76 CN50 Mobile Computer User’s Manual0[l 01[Y 12[U 23[I 34[H 45[J 56[K 67[B 78[N 89[M 9Characters and FunctionsFunction QWERTY Keypad Numeric KeypadForward Tab __Back Tab [_ [_Space s]0Backspace rrShift u[ or ]Caps Lock [u ]1Up Arrow {{Down Arrow }}Left Arrow [( [(Right Arrow [) [)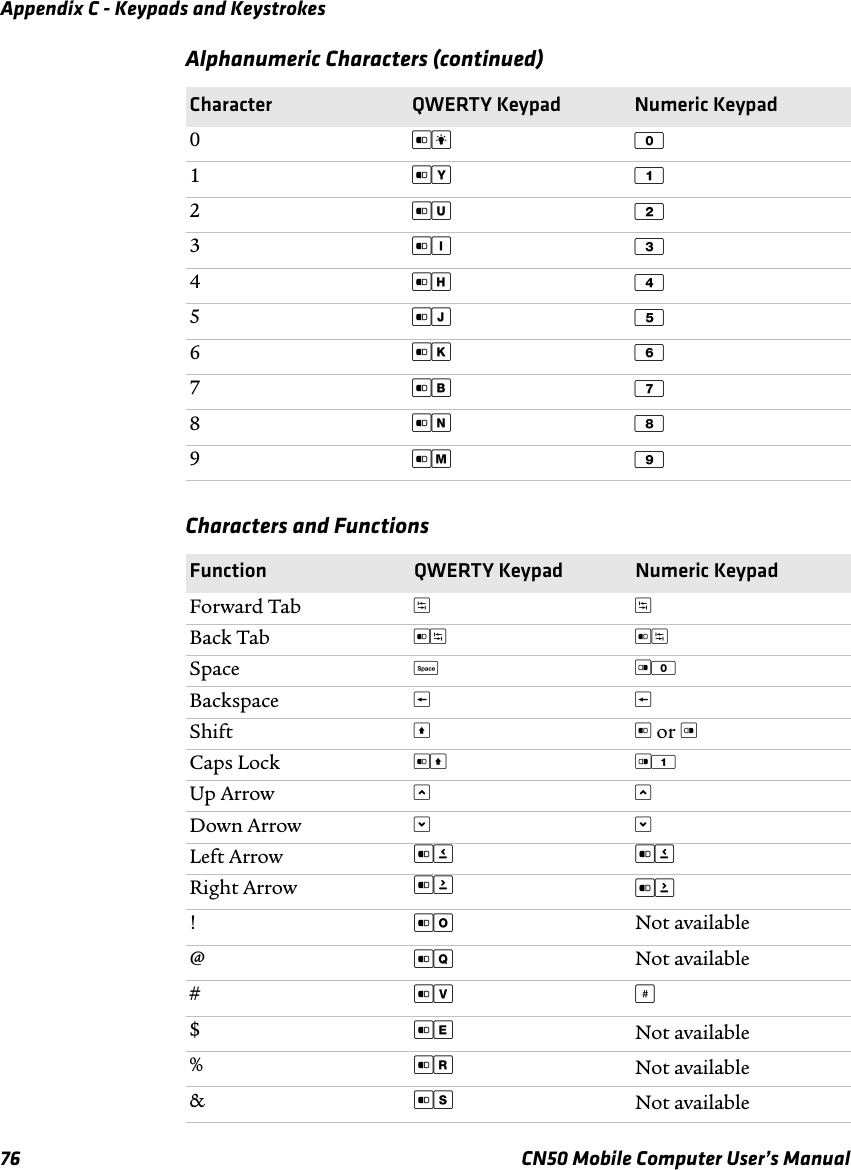
![Appendix C - Keypads and KeystrokesCN50 Mobile Computer User’s Manual 77*[C *+[T [#ok [P ]#-[G [*Start (Windows) [W ]*?[A Not available:[D Not available/[F Not available=[L Not available‘ (apostrophe) [Z Not available, (comma) [X Not available. (period) ..Esc ~~Backlight l[.Talk aaEnd call hhCharacters and Functions (continued)Function QWERTY Keypad Numeric Keypad](https://usermanual.wiki/Intermec-Technologies/01CN50.Users-Manual/User-Guide-1121624-Page-87.png)