Inventec Appliances R8 PANDIGITAL SUPERNOVA User Manual R80B400 SuperNova User Guide
Inventec Appliances Corp. PANDIGITAL SUPERNOVA R80B400 SuperNova User Guide
UserManual.wiki
>
Inventec Appliances
>
R8 User Manual
>
Users Manual 2
Contents
1.
Users Manual 1
2.
Users Manual 2
Users Manual 2
Navigation menu
Upload a User Manual
Namespaces
Wiki Guide
HTML
PDF
Info
Views
User Manual
Discussion / Help
Navigation
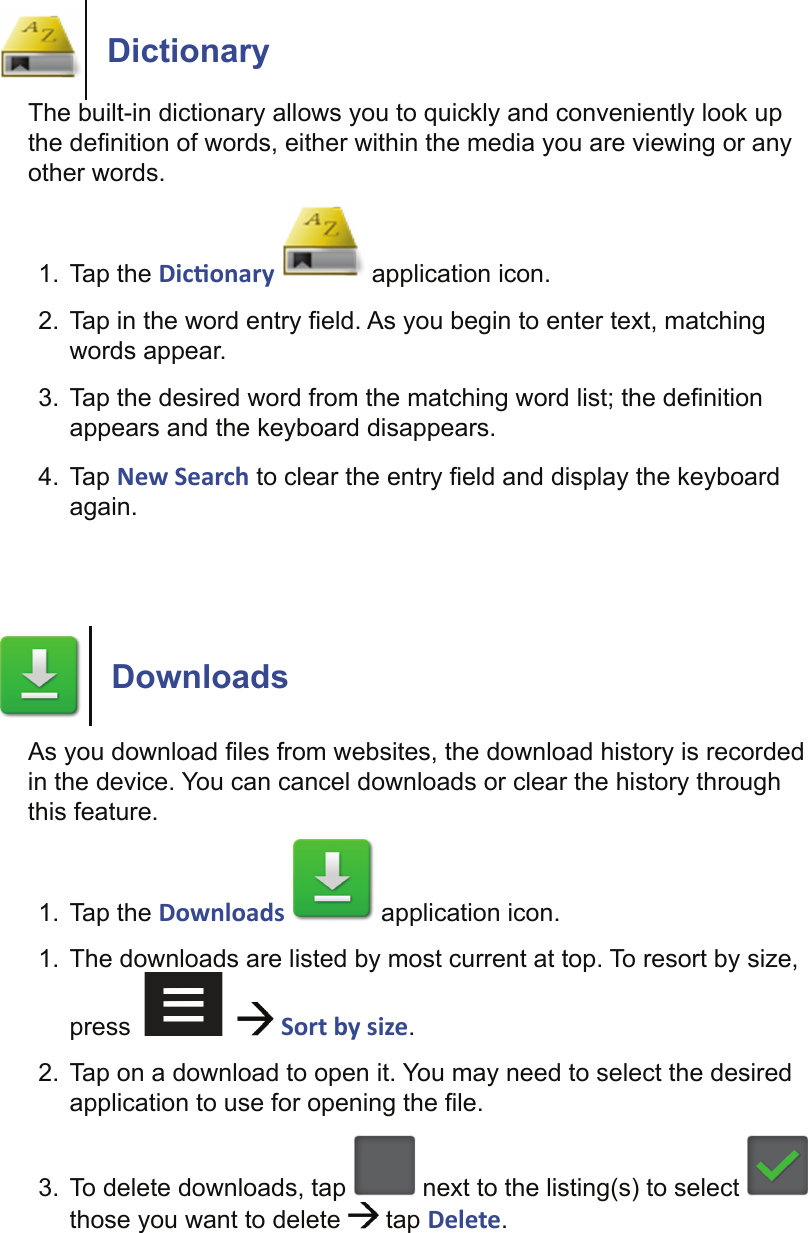

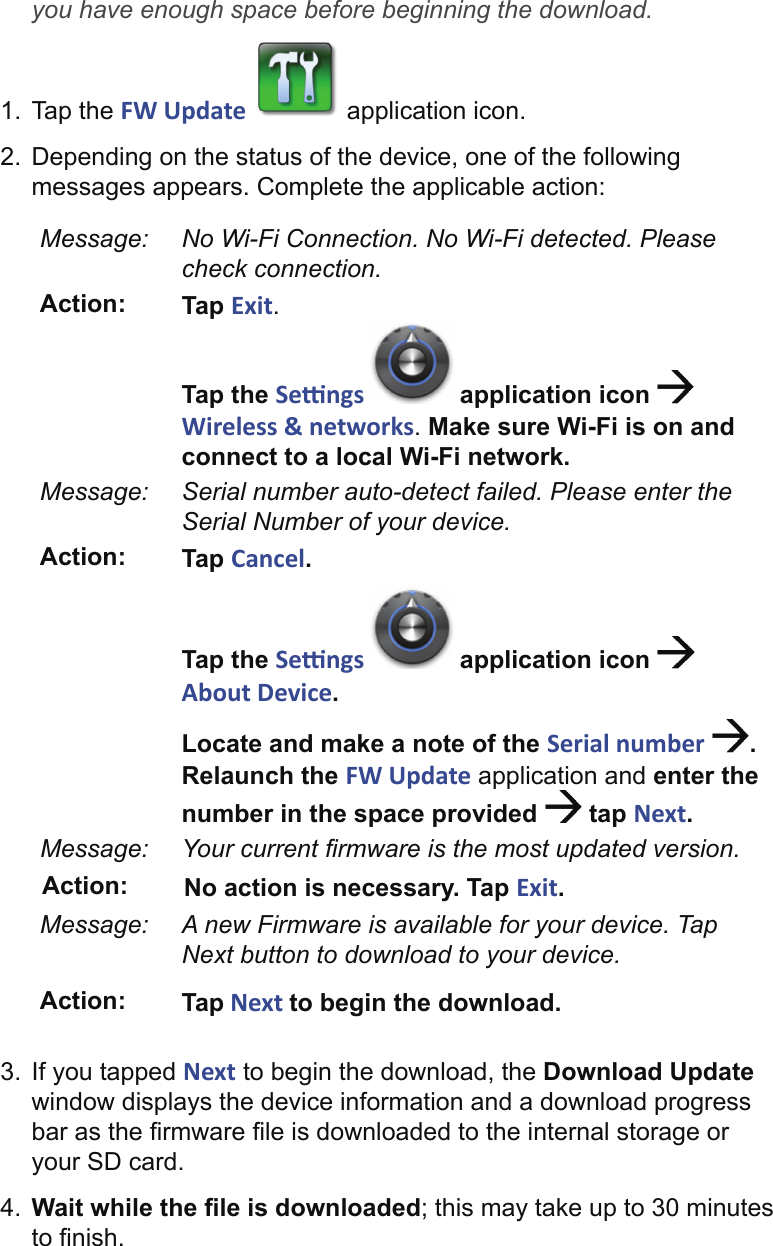
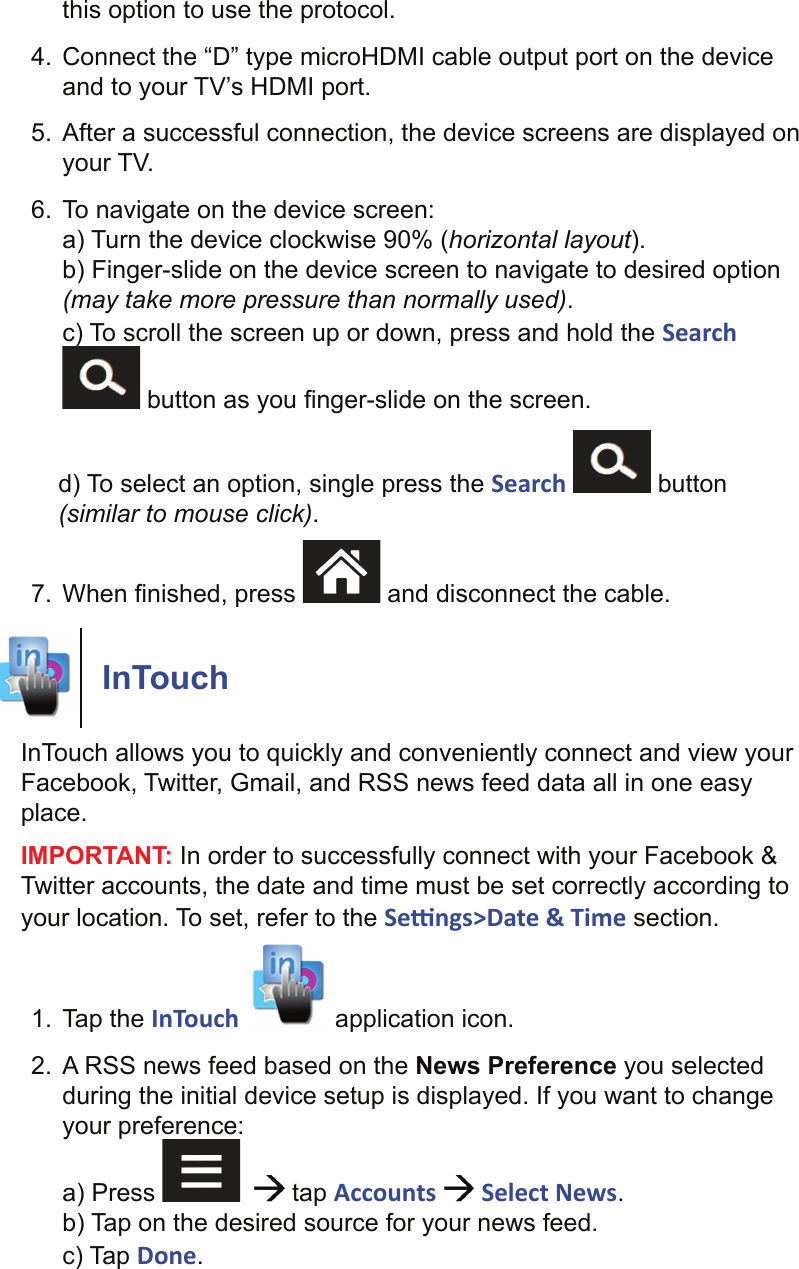
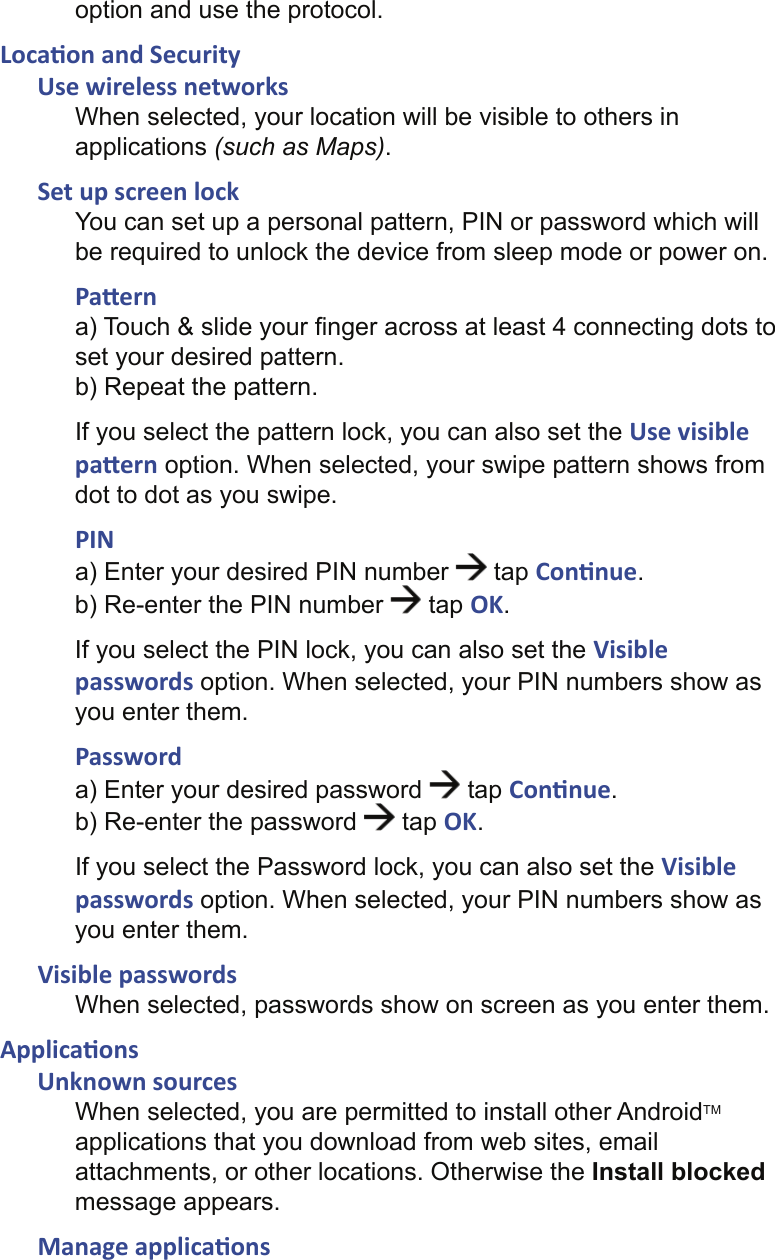
![IMPORTANT: If the download begins but doesn’t progress past 0% in 5 minutes, there may be a problem with the Pandigital server. Please contact customer support through the website: www.pandigital.net/support.5. If the download fails, tap Retry.If the download was successful, tap Next to begin the update process. The device automatically restarts, begins the fi rmware update process, and when complete the device restarts again.6. If you tapped Exit in step 4, follow these steps to manually start the update process at any other time:a) Turn the device off.b) IF applicable, insert the SD card onto which you downloaded the fi rmware.c) Press the Volume + key and power bu on simultaneously for 3 seconds.d) Release both buttons to start the fi rmware update process.e) When complete the device automatically restarts.Revert back to Previous Firmware VersionWhen you perform a fi rmware update, the update fi le is saved to the internal storage or your SD card. If you perform another fi rmware update, the existing update fi le will be moved into an \old fi rmware folder before the new update fi le is downloaded. After performing the new fi rmware update, if desired at a later time, you can revert back to the previous version by following these steps:1. Connect the device to your computer tap Turn on USB storage.2. In a Windows Explorer or Mac Finders window, locate and delete the fi rmware update fi le in the root of the internal storage or SD card (i.e., IR80_[letters]_[most recent date].zip).3. Move the previous fi rmware update fi le from the \old fi rmware folder to the root of the internal storage or SD card (i.e., PR70_[letters]_[older date].zip).4. Turn the device off.5. Press the Volume + key and power bu on simultaneously for 3 seconds.6. Release both buttons to start the fi rmware update process.](https://usermanual.wiki/Inventec-Appliances/R8.Users-Manual-2/User-Guide-1510181-Page-27.png)
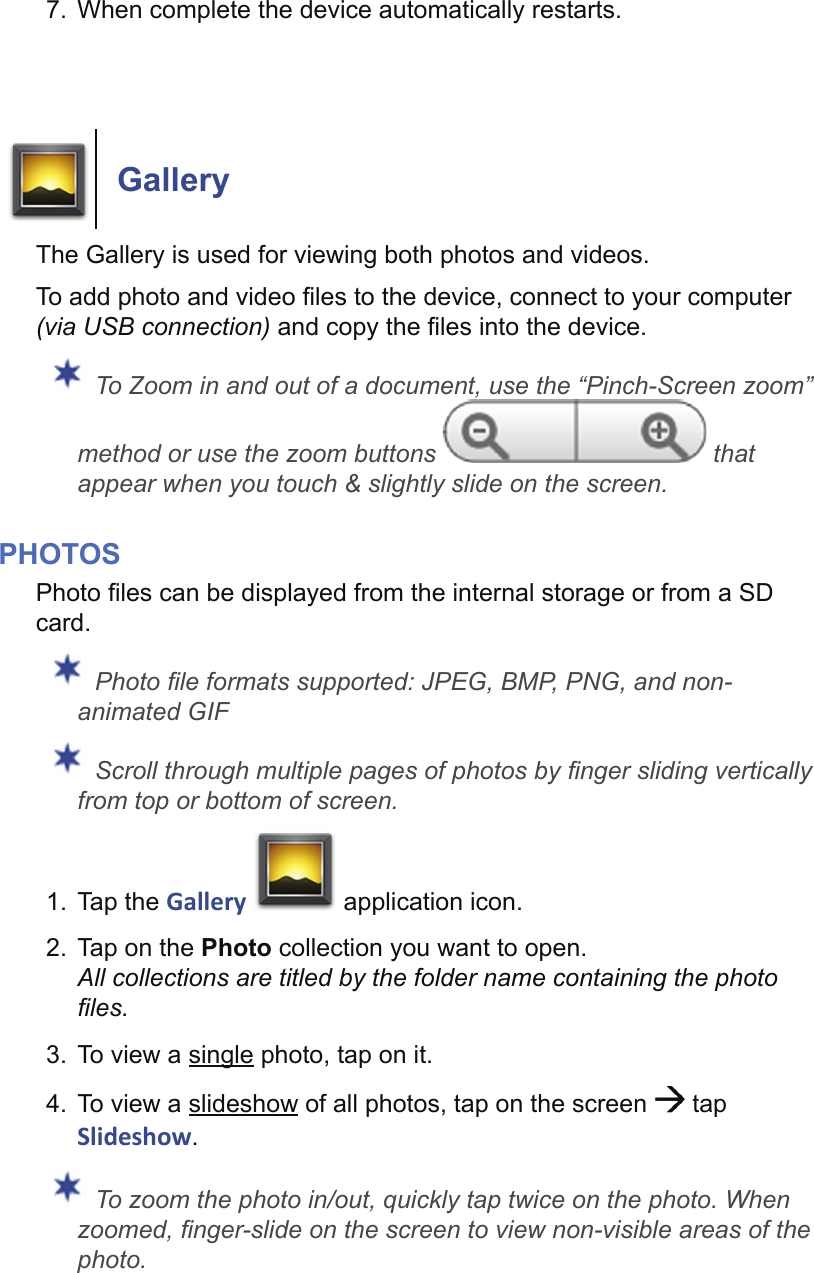
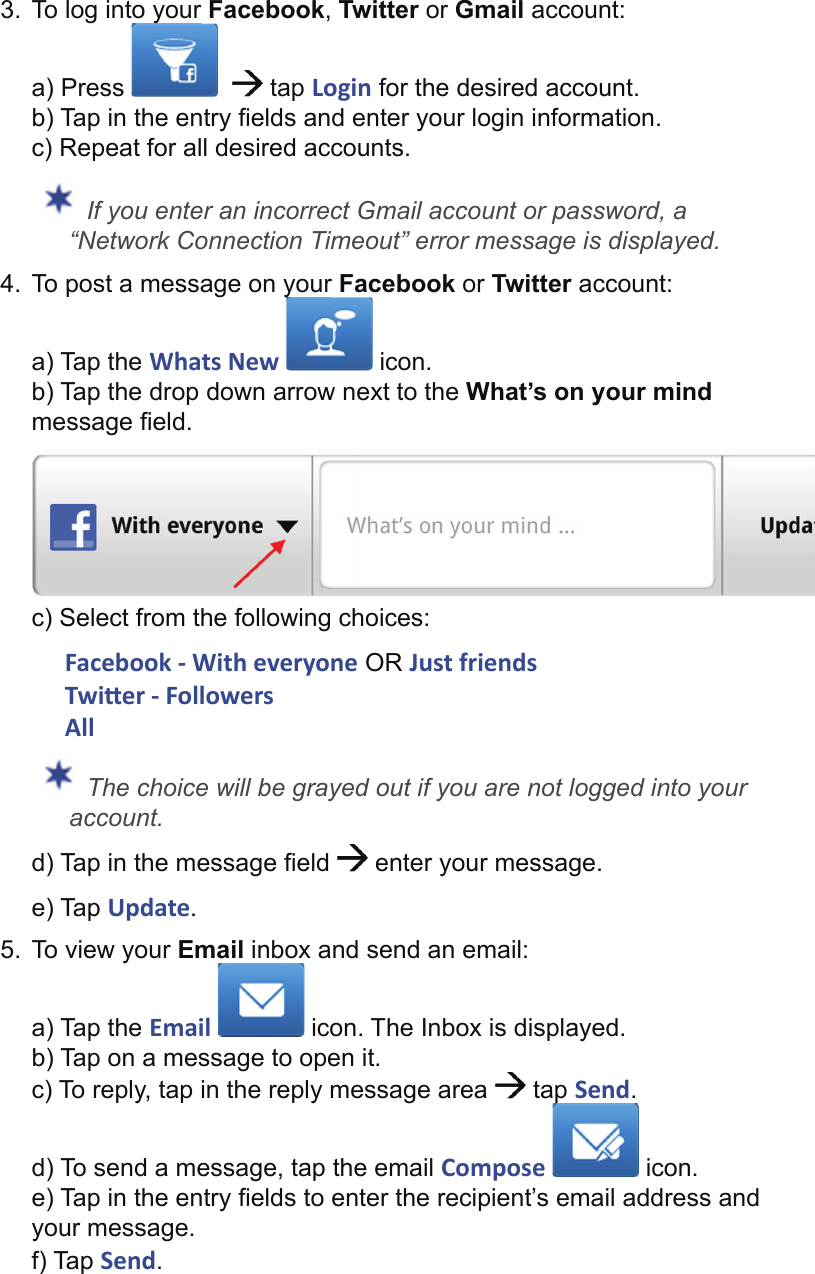

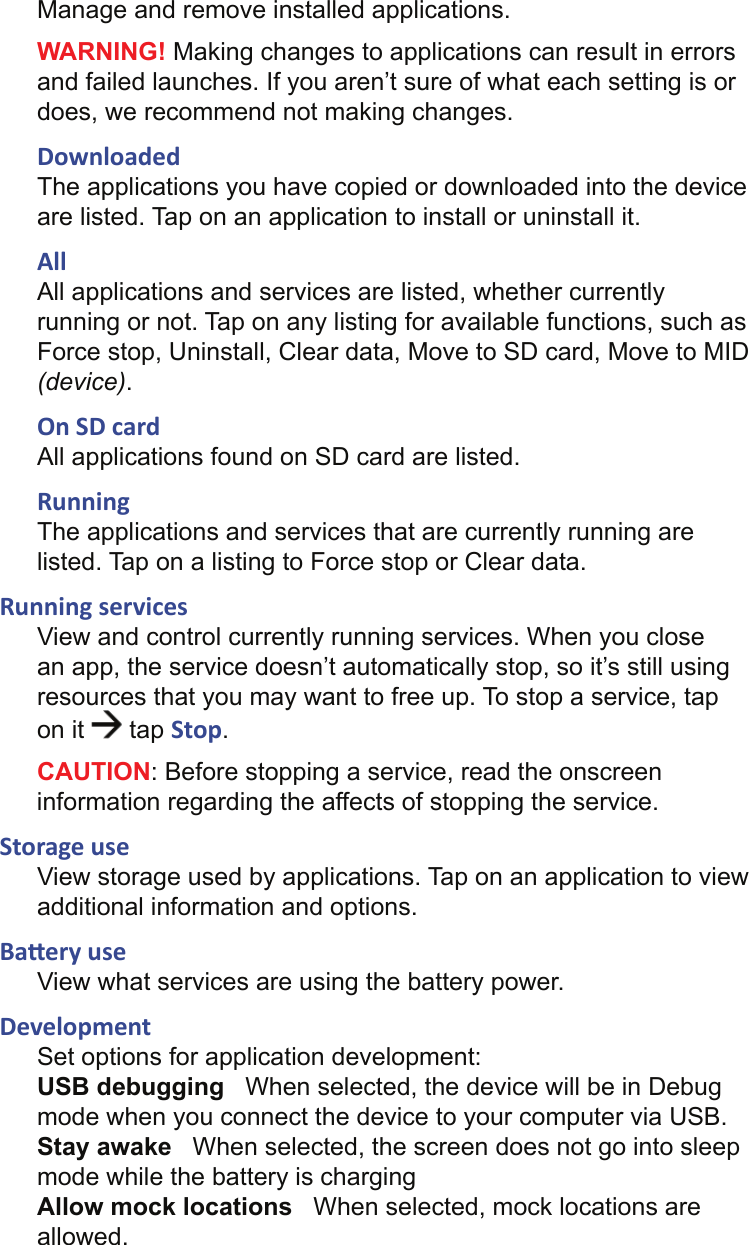
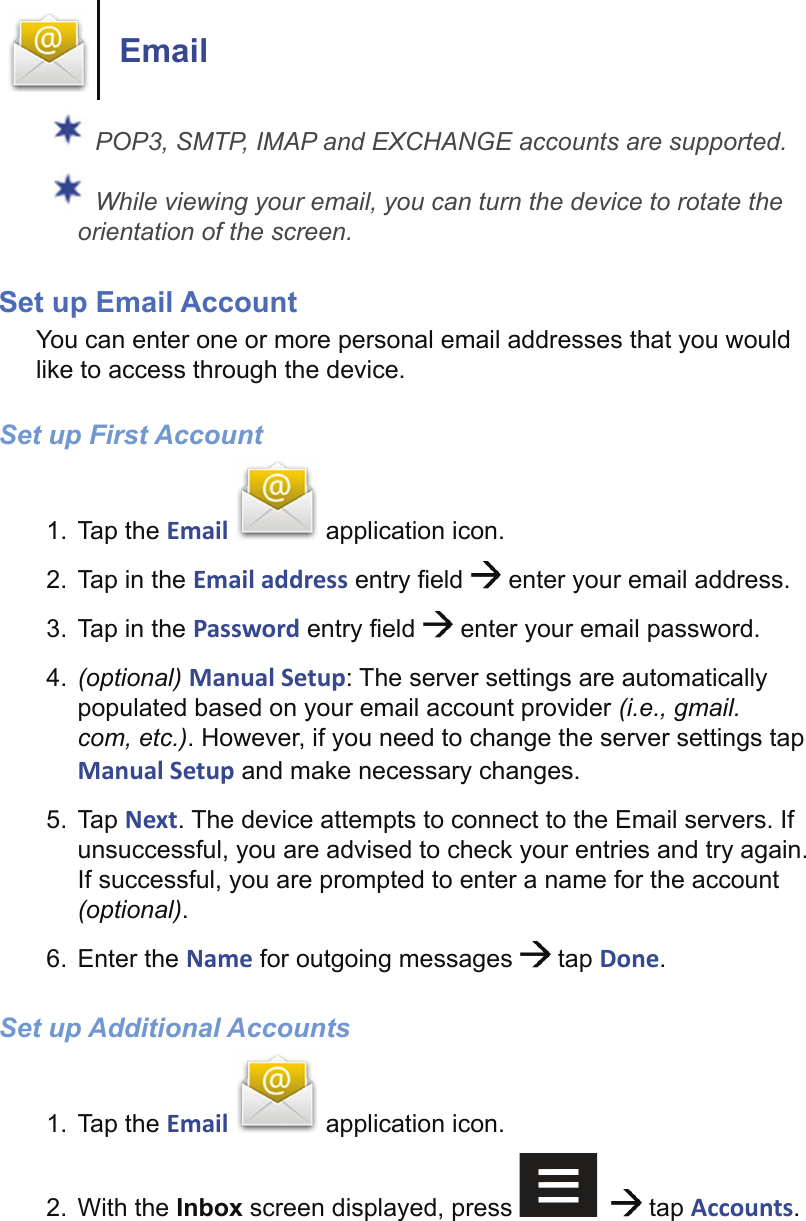
![1. Tap the Speech Recorder application icon.2. Select the type of WAV fi le you want to create, 11KHz or 8KHz.3. Select the type of “Utterances” you prefer.4. Tap Record and begin speaking into the microphone.5. When you stop speaking, the sound clip is saved in the \Recordings folder.Playback your Recording1. Press to exit the Speech Recorder application and return to the Home screen.2. Tap the Music application icon.3. If you have a microSD card inserted, select Internal.4. On the Artists list, tap Unknown ar st Records.5. Your recording will be listed as “call_[name]_varro” or “dial_[number]”. Tap on a listing to play the WAV clip. If you want to rename your WAV clip, connect the device to your computer and fi nd the WAV fi les in the PD_Universe\Recordings folder. U PlayerUse the U Player application to view popular YouTube videos.1. Tap the U Player application icon. Popular YouTube videos are listed by category.](https://usermanual.wiki/Inventec-Appliances/R8.Users-Manual-2/User-Guide-1510181-Page-53.png)
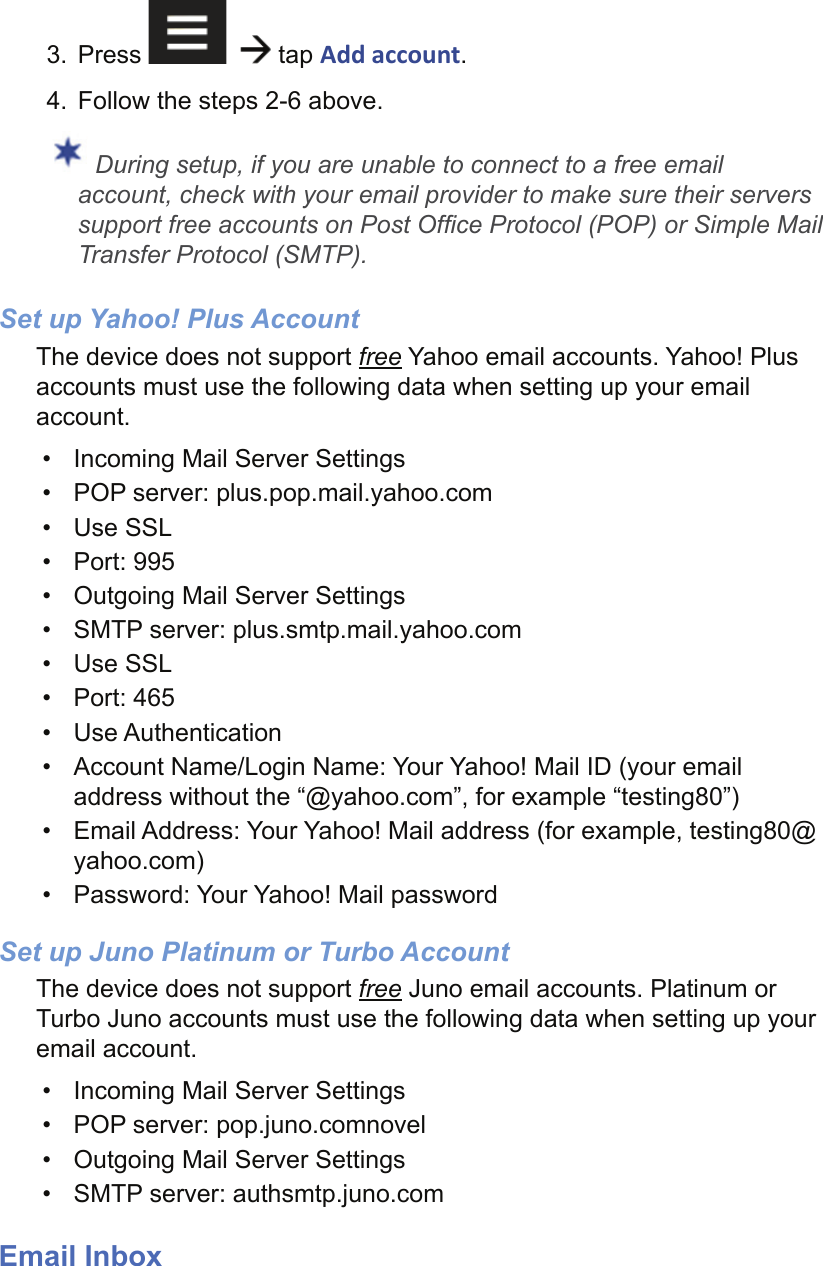
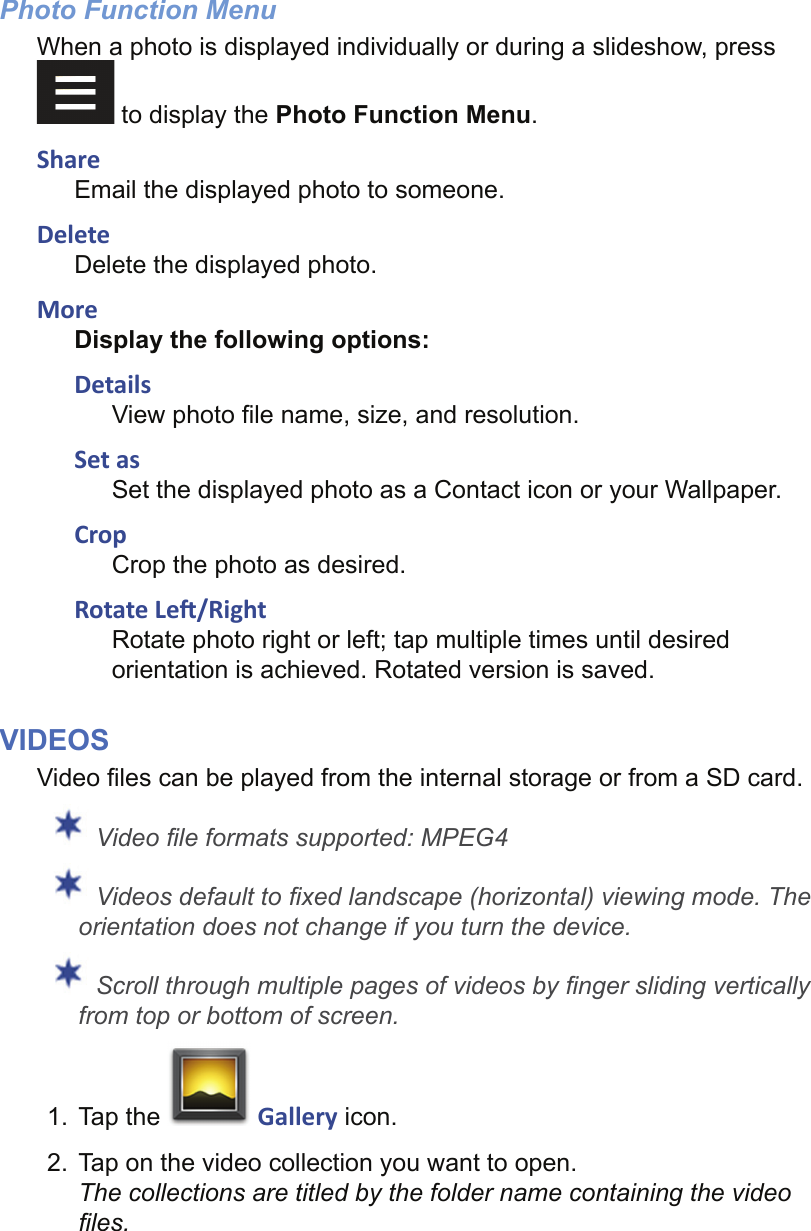
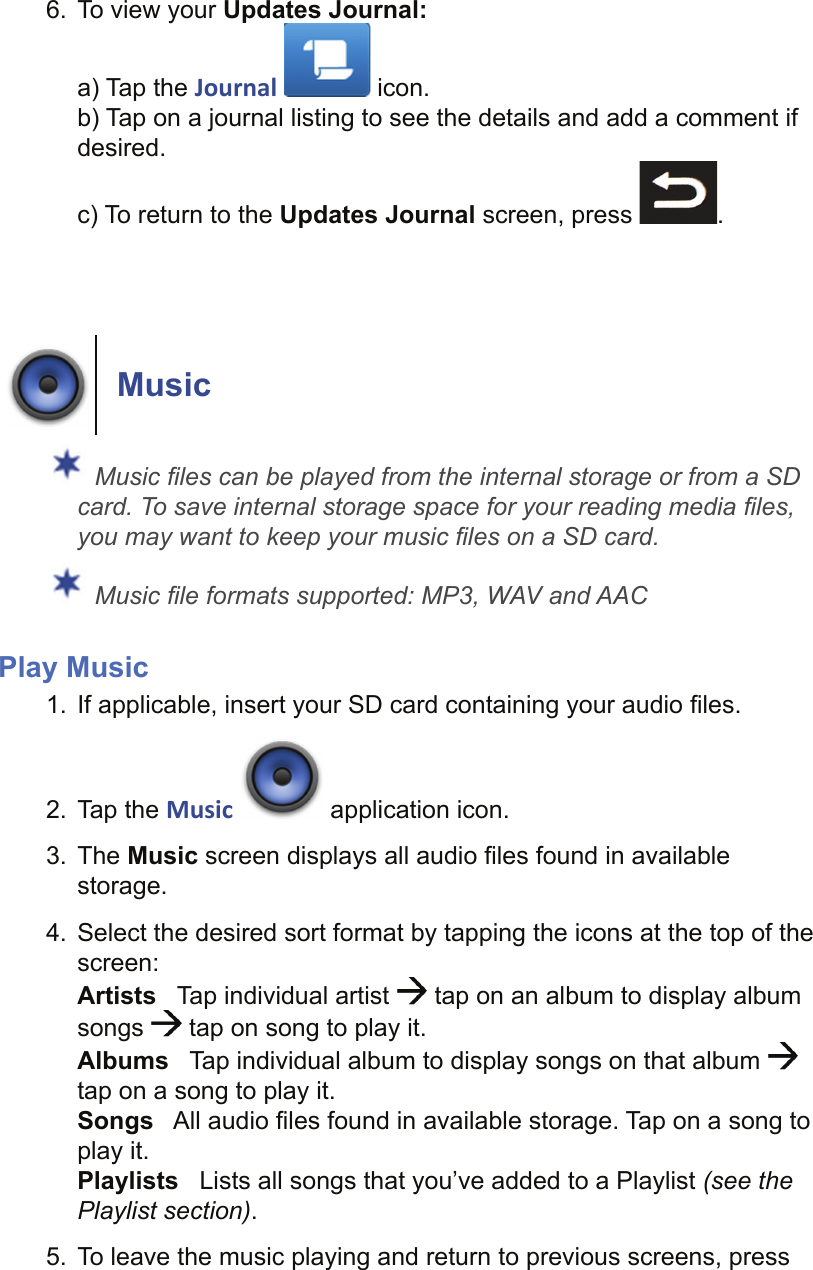
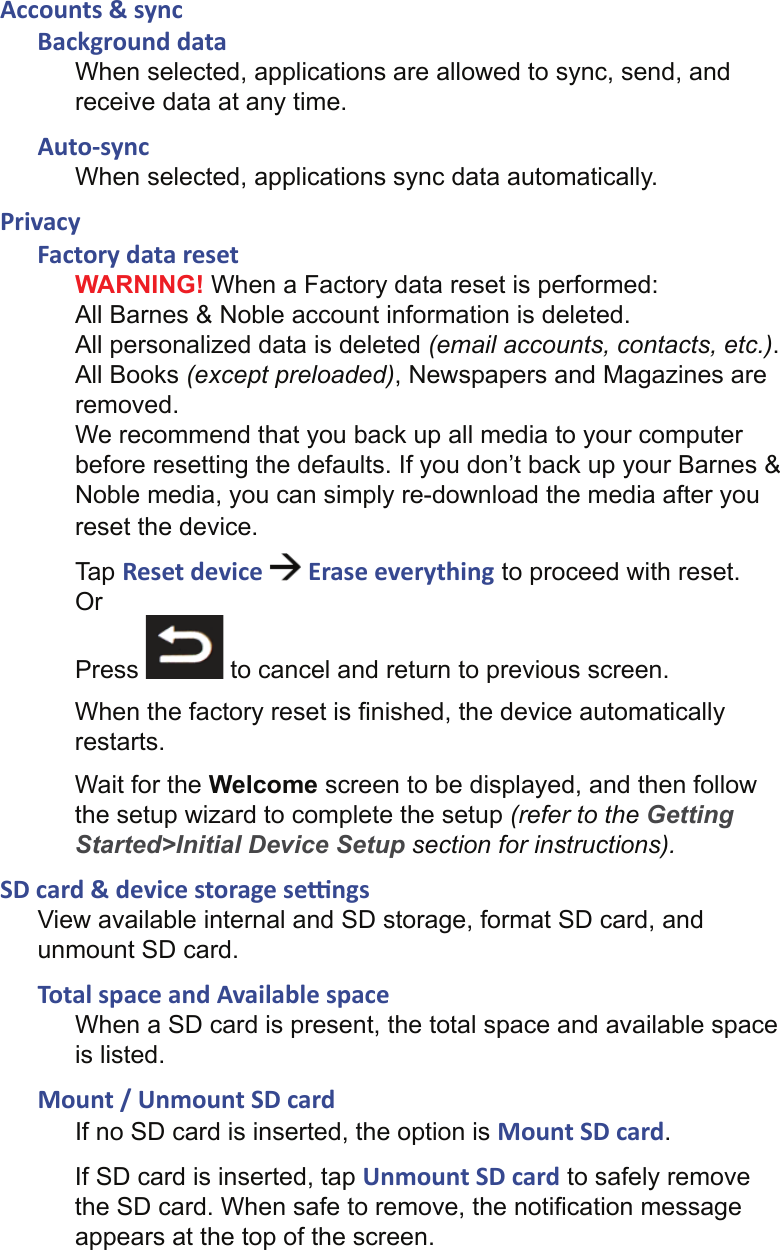
![CAUTION: Risk of explosion if battery is replaced by an incorrect type. Dispose of used batteries according to the instructions.Radiation Exposure StatementE=7.94851 V/m is the maximum E-Field strength when safety distance between the EUT and human body is maintained at least 20cm, which is below 61V/m as required in Annex III table 2 of EC Council Recommendation (1999/519/EC). This proves that the unit complies with the EN 62311 for RF exposure requirement.European Community Compliance StatementThis indicates compliance with the R&TTE Directive 1999/5/EC and meets the relevant parts of following technical specifications: EN 300 328 – Electromagnetic compatibility and Radio spectrum Matters (ERM); Wideband Transmission Systems; Data transmission equipment operating in the 2,4GHz ISM band and using wide band modulation techniques; Harmonized EN covering essential requirements under article 3.2 of the R&TTE directive. EN 301 489-1 - Electromagnetic compatibility and Radio spectrum Matters (ERM); ElectroMagnetic Compatibility (EMC) standard for radio equipment and services; Part 1: Common technical requirements.EN 301 489-17 - Electromagnetic Compatibility and Radio Spectrum Matters (ERM); Electromagnetic Compatibility (EMC) standard for radio equipment and services; Part 17 Specific Conditions for Broadband Data Transmission Systems.EN 60950 - Safety of Information Technology Equipment. EN 62311: 2008– Assessment of electronic and electrical equipment related to human exposure restrictions for electromagnetic fields (0 Hz - 300 GHz) Marking by the symbol indicates that usage restrictions apply. France - 2.4GHz for Metropolitan France :In all Metropolitan departments, wireless LAN frequencies can be used under the following conditions, either for public or private use:• Indoor use: maximum power (EIRP*) of 100 mW for the entire 2400-2483.5 MHz frequency band • Outdoor use: maximum power (EIRP*) of 100 mW for the 2400-2454 MHz band and with maximum power (EIRP*) of 10 mW for the 2454-2483 MHz band Certification information (SAR) The device meets guidelines for exposure to radio waves.The device is a radio transmitter and receiver. It is designed not to exceed the limits for exposure to radio waves recommended by international guidelines. These guidelines were developed by the independent scientific organization ICNIRP and include safety margins designed to assure the protection of all persons, regardless of age and health. The exposure guidelines for devices employ a unit of measurement known as the Specific Absorption Rate or SAR. The SAR limit stated in the ICNIRP guidelines is 2.0 watts/kilogram (W/kg) averaged over 10 grams of tissue. Tests for SAR are conducted using standard operating positions with the device transmitting at its highest certified power level in all tested frequency bands.This equipment complies with the European Council Recommendation of 12 July 1999 on the Limitation of Exposure of the General Public to Electromagnetic Fields [1999/519/EC].](https://usermanual.wiki/Inventec-Appliances/R8.Users-Manual-2/User-Guide-1510181-Page-75.png)