Inventec BC0153AAA000 PDA phone User Manual 08
Inventec Corporation PDA phone 08
UserManual.wiki
>
Inventec
>
BC0153AAA000 User Manual
>
08 User manual
Contents
1.
08 User manual
2.
08 user manual
3.
Manual
08 User manual
Navigation menu
Upload a User Manual
Namespaces
Wiki Guide
HTML
PDF
Info
Views
User Manual
Discussion / Help
Navigation


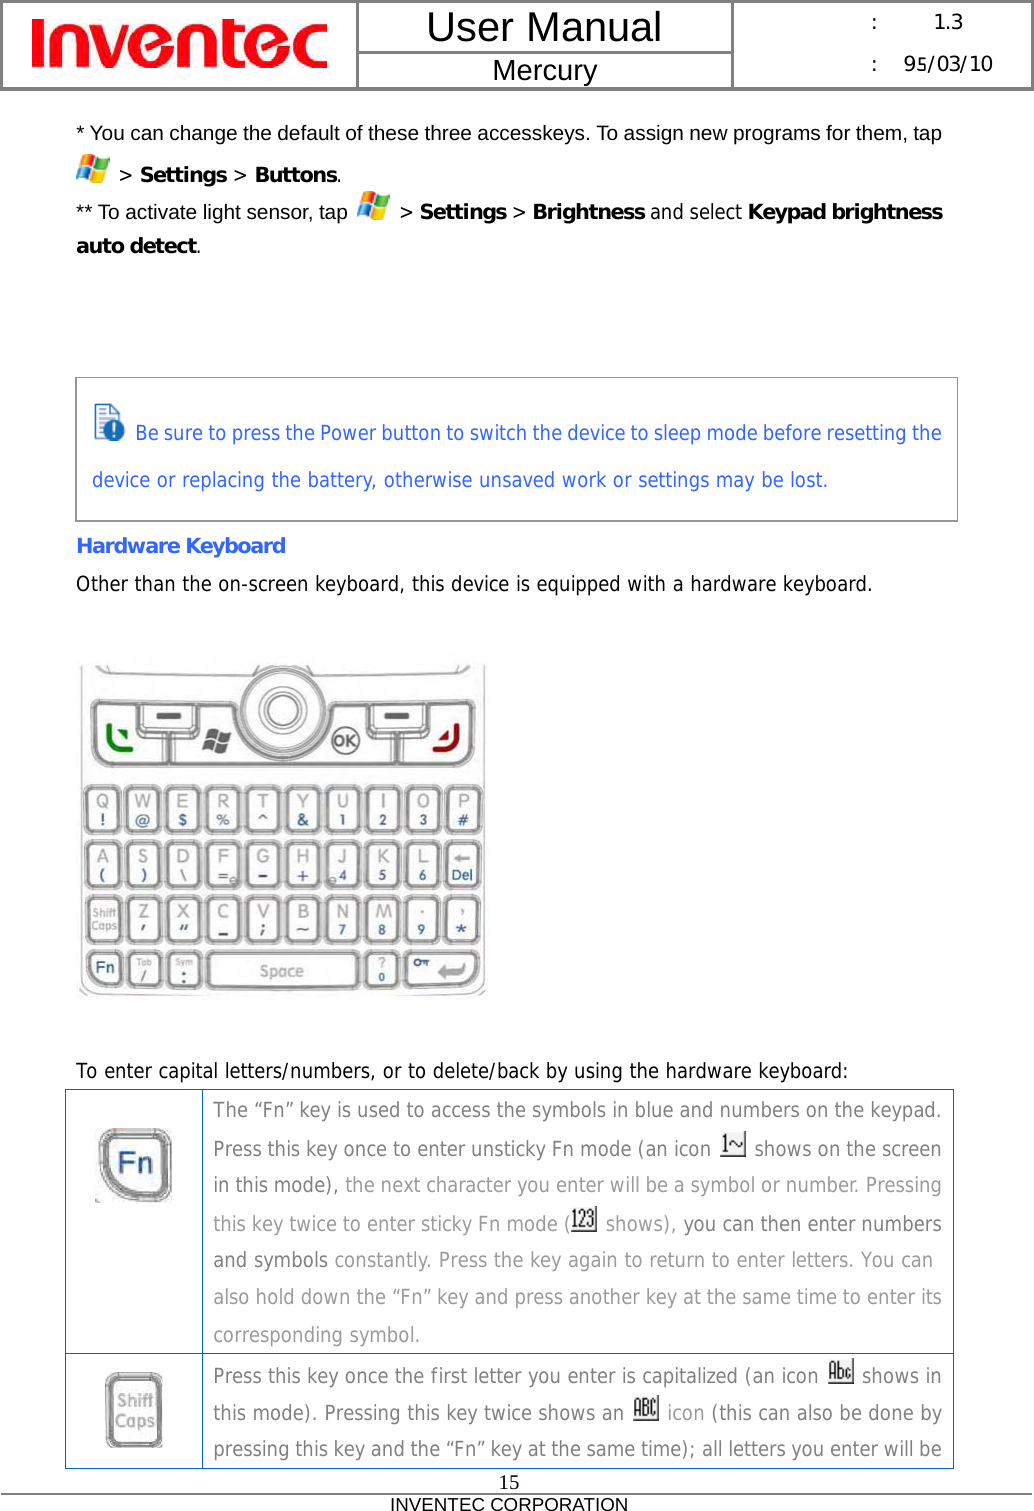

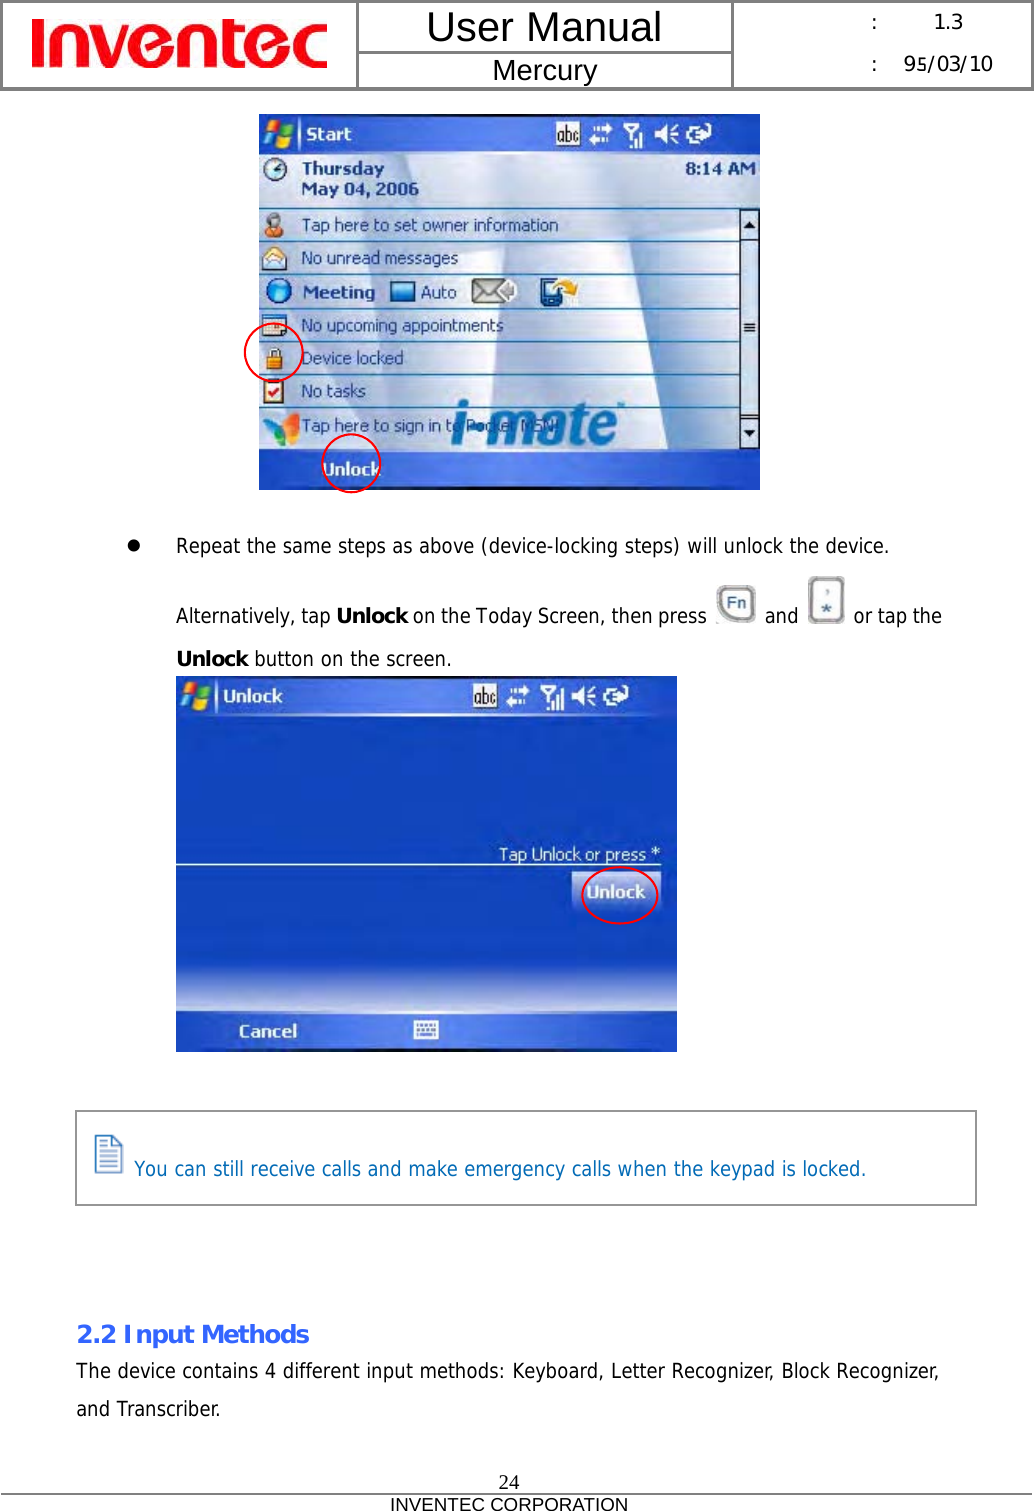
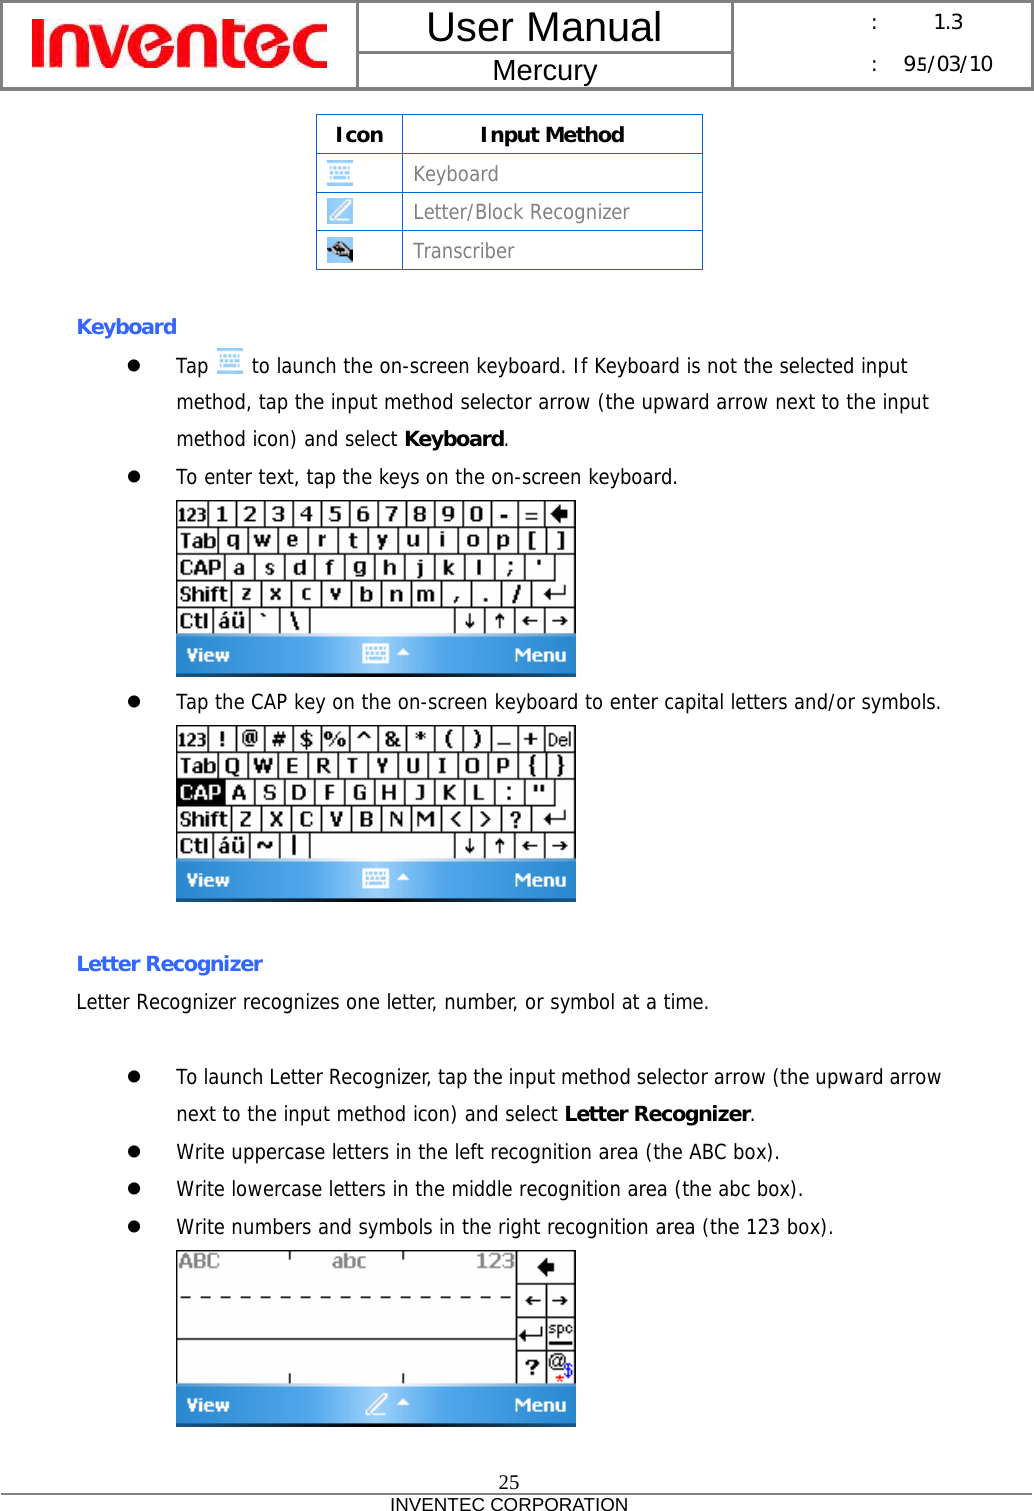
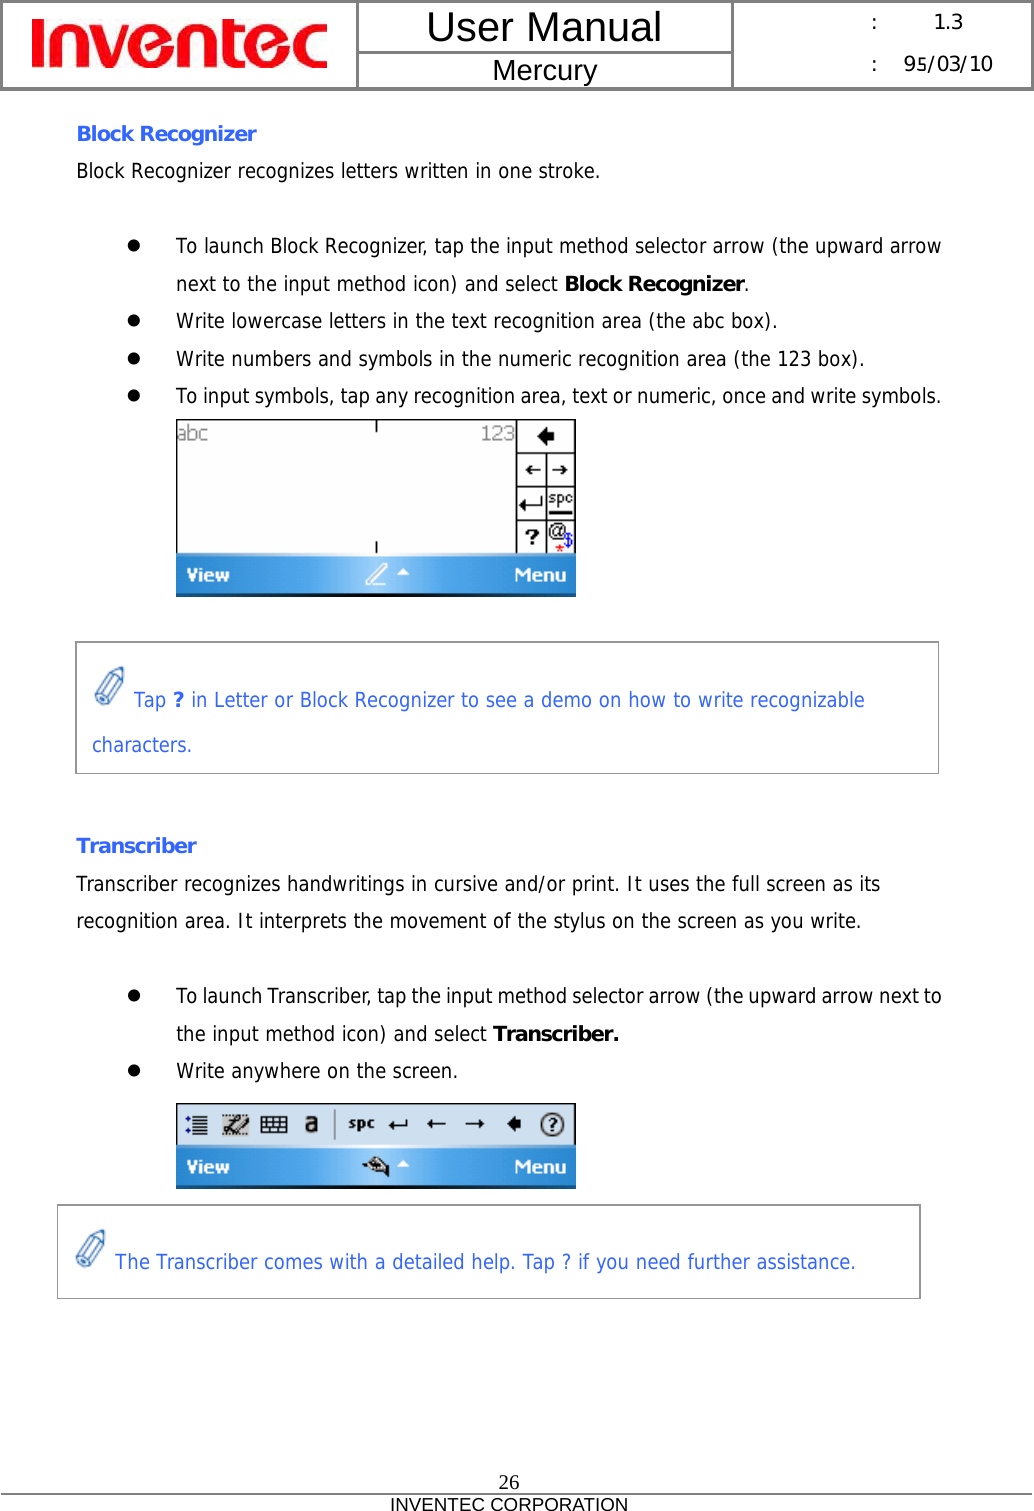
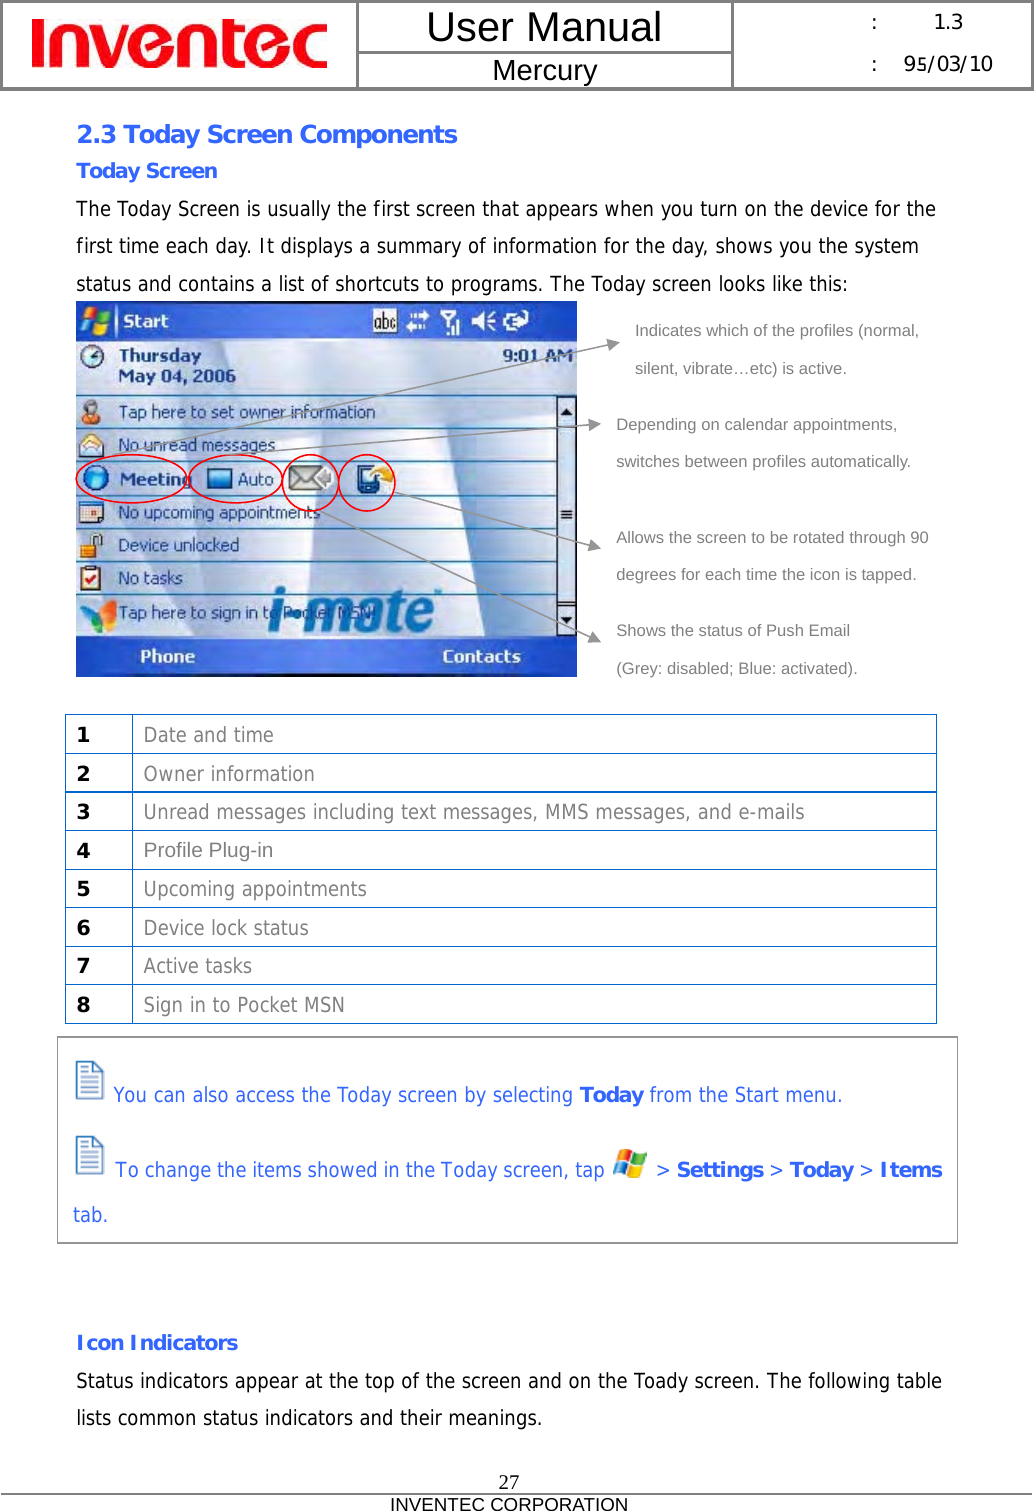
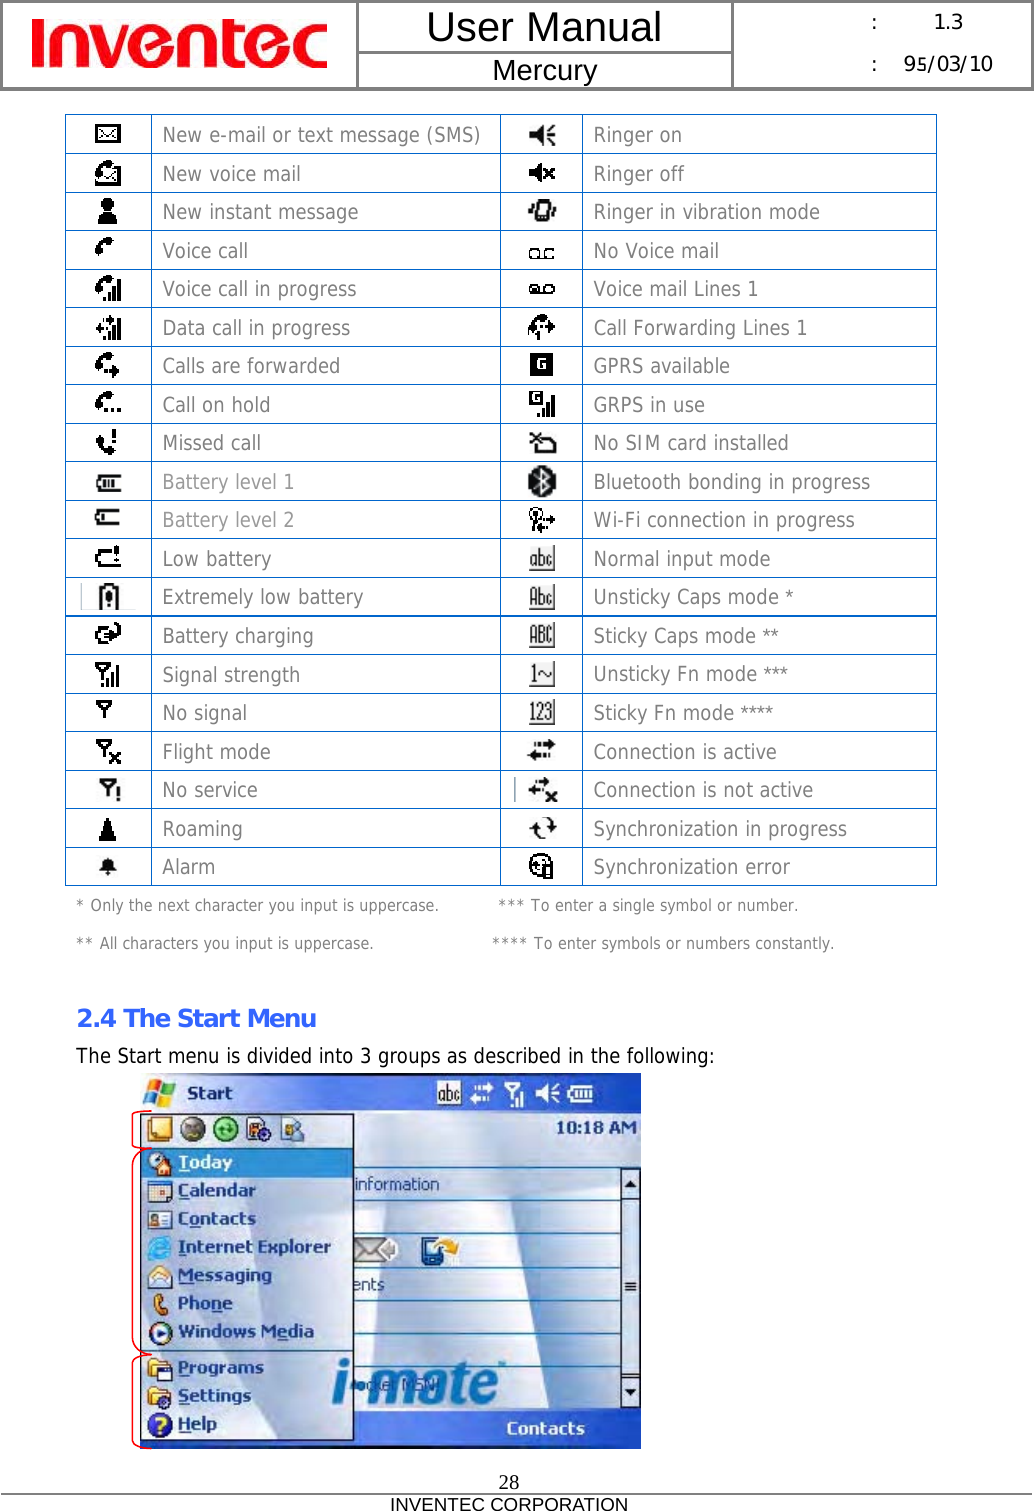
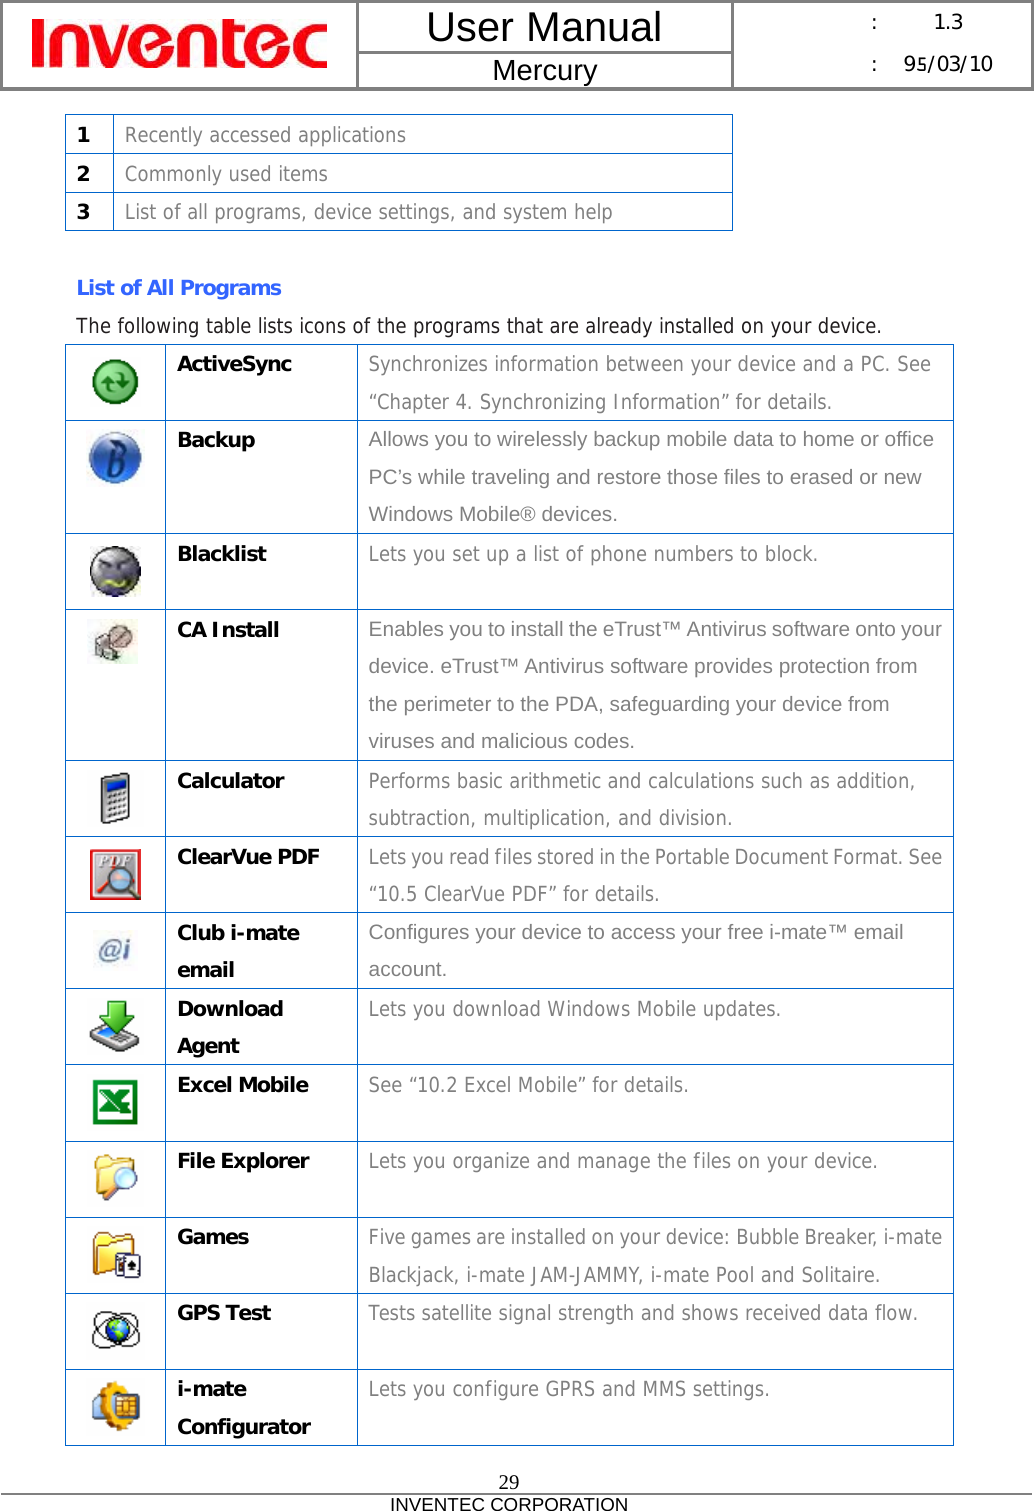
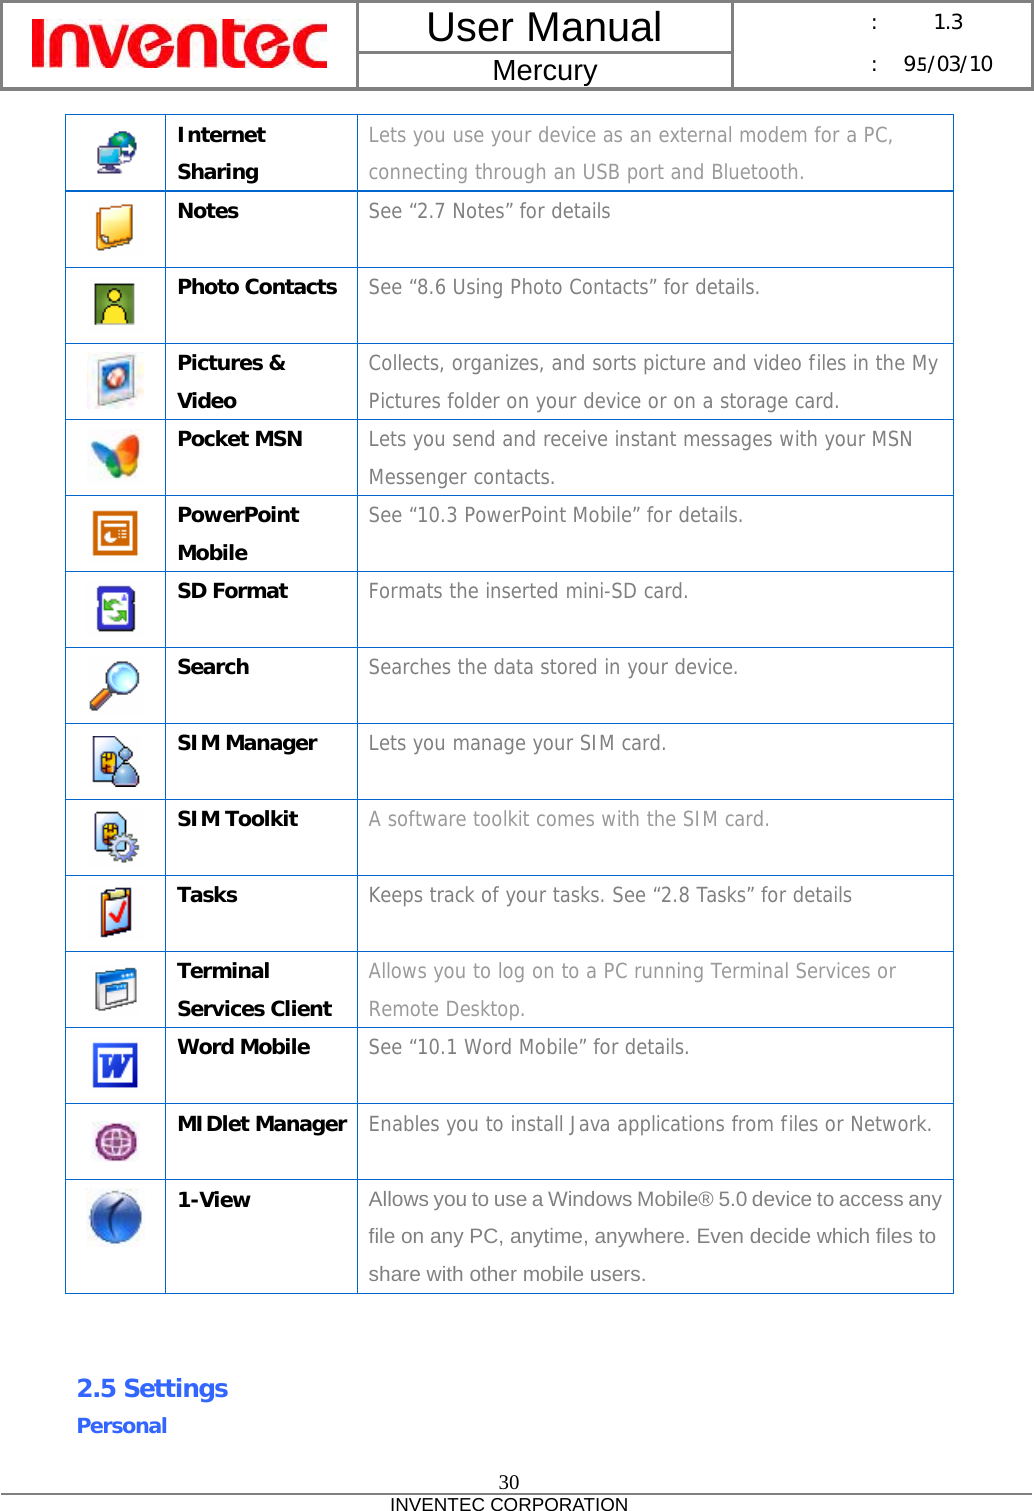
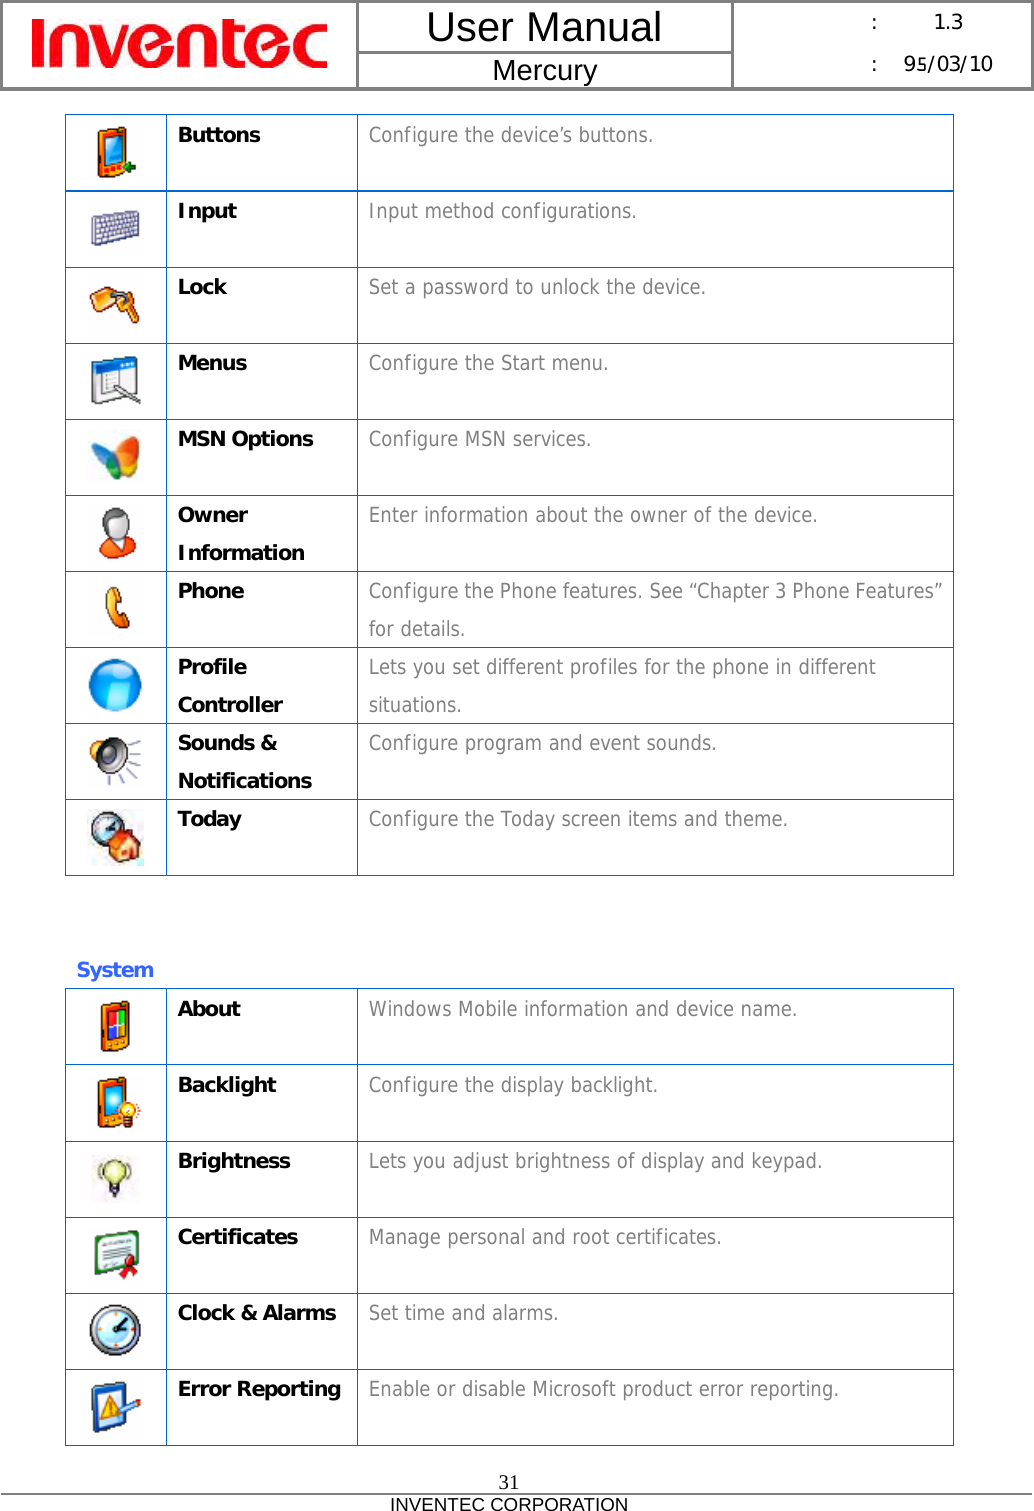
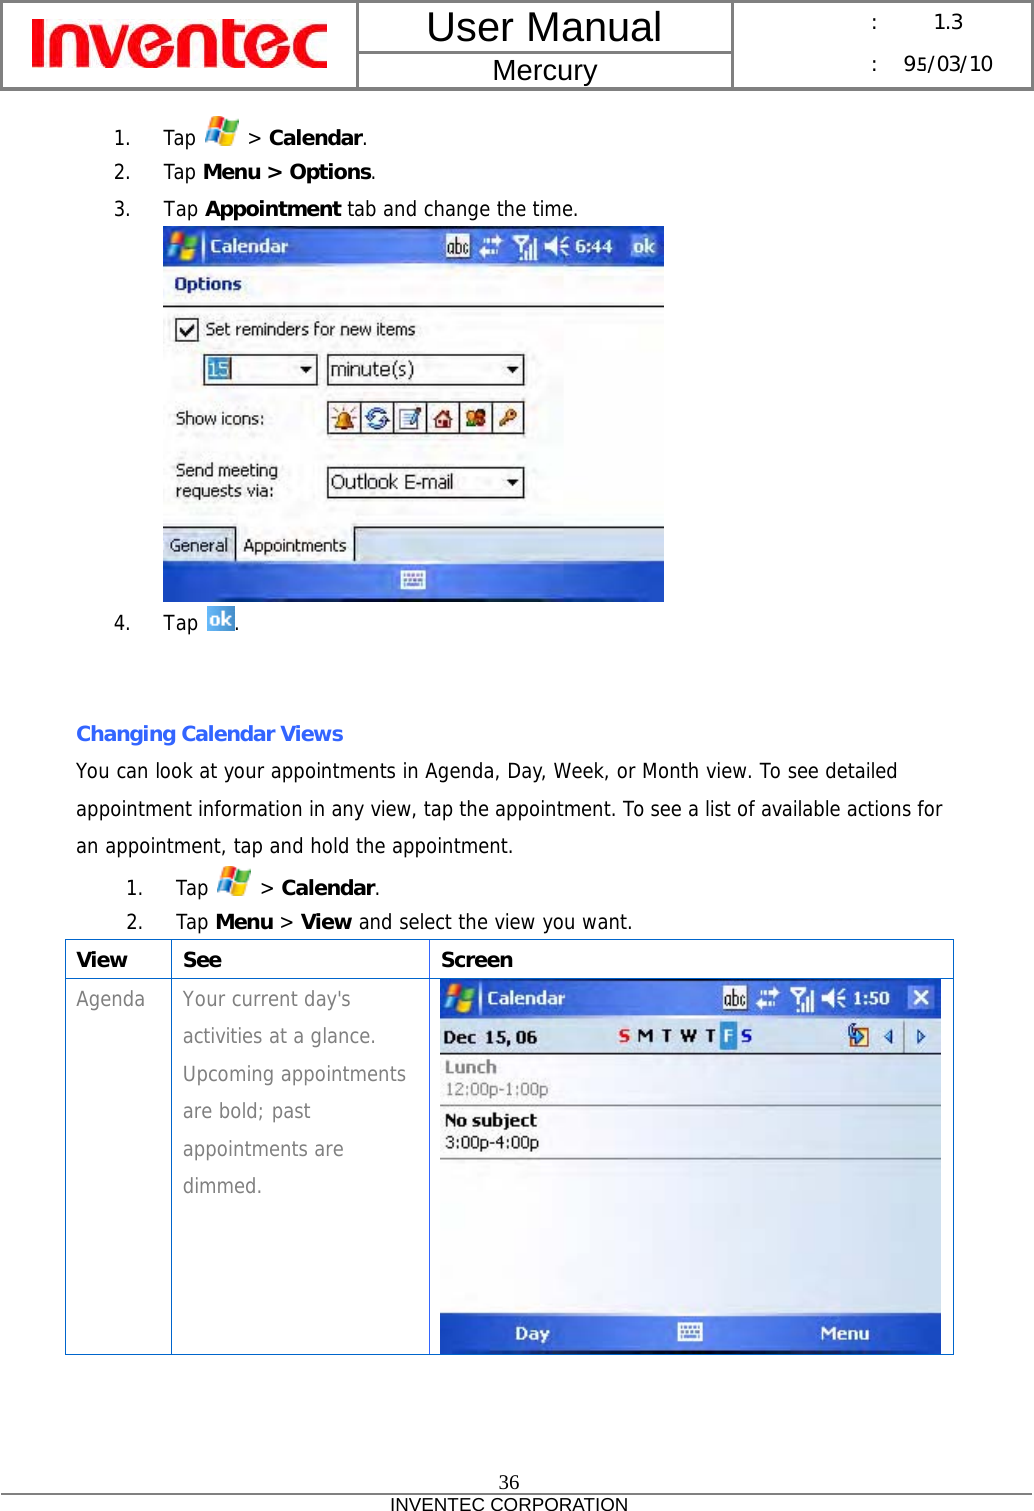
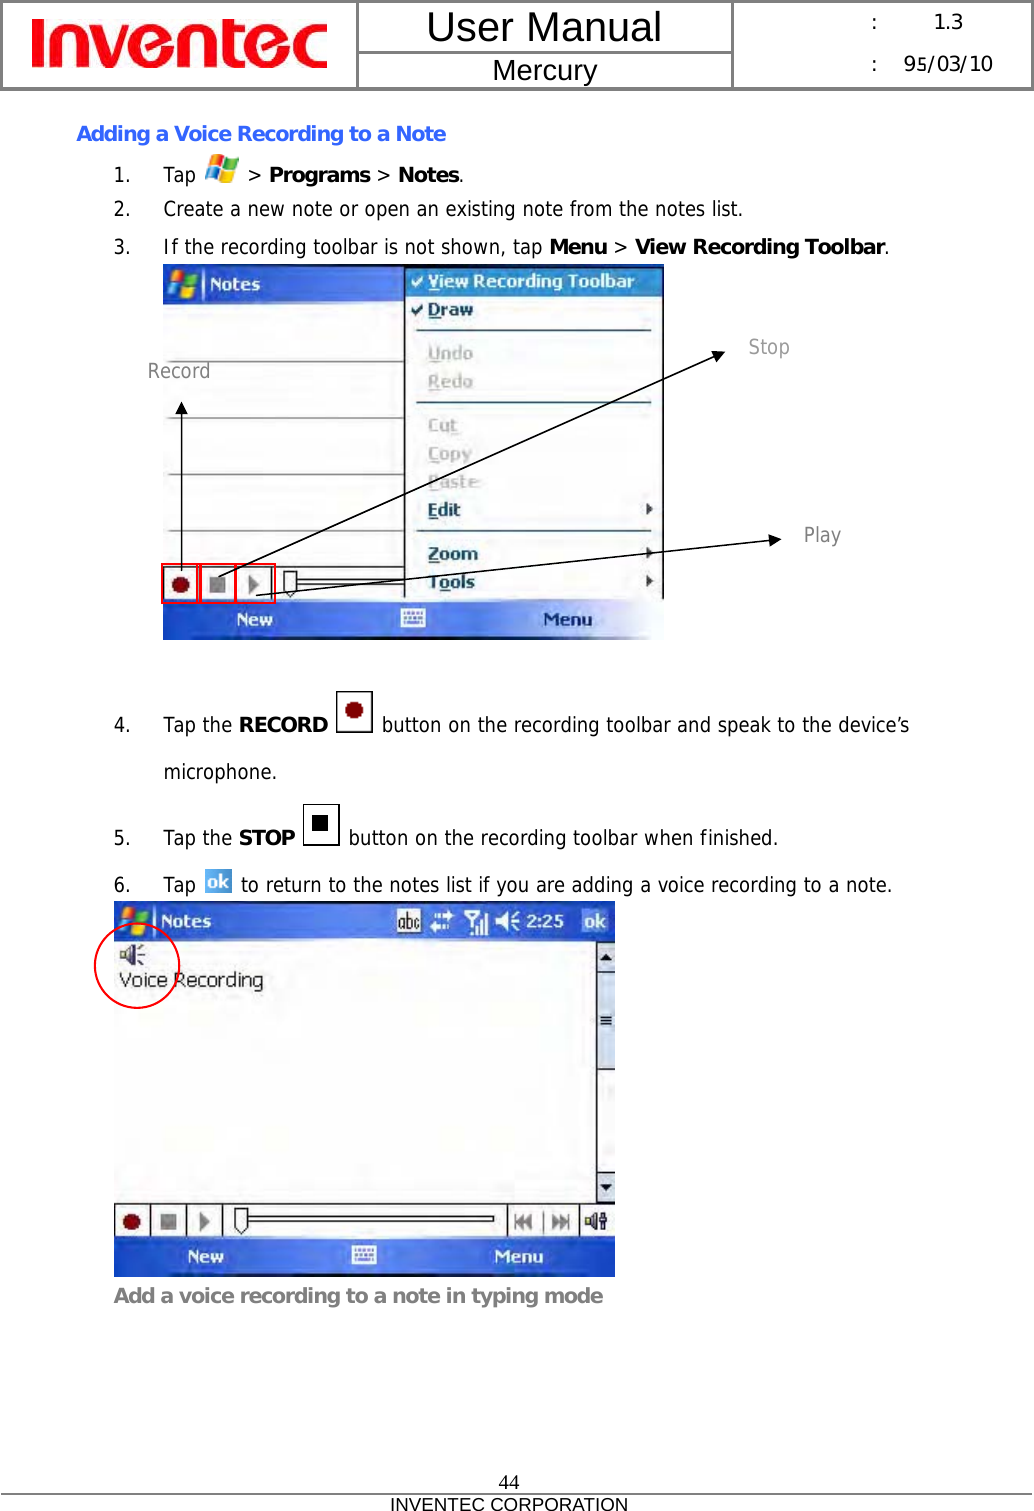
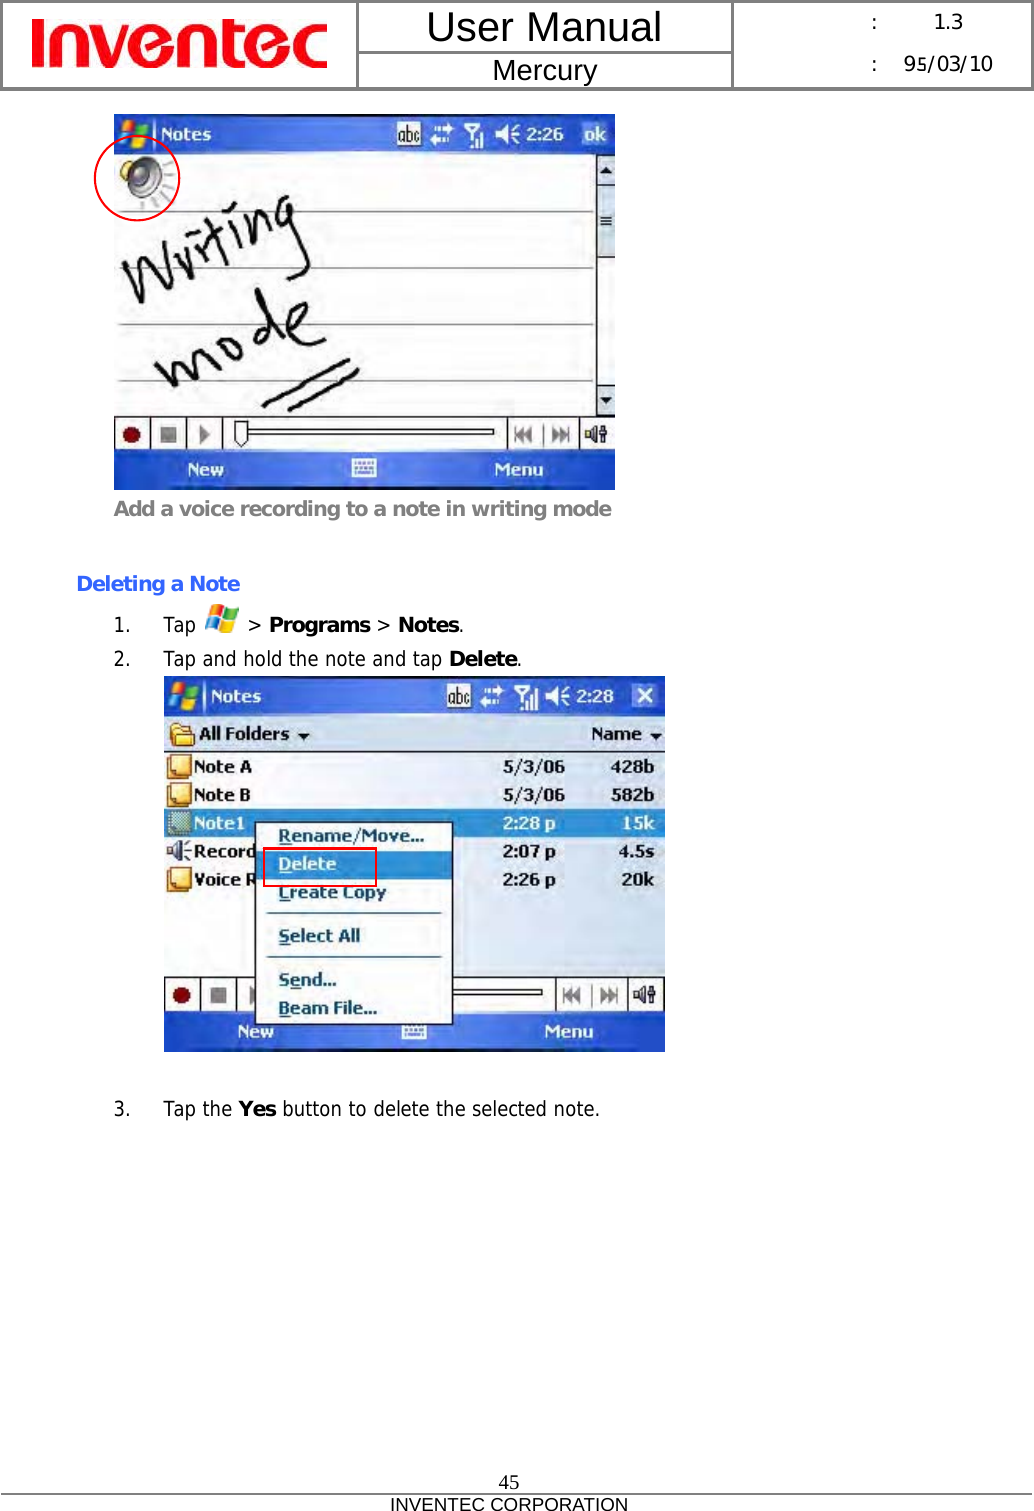
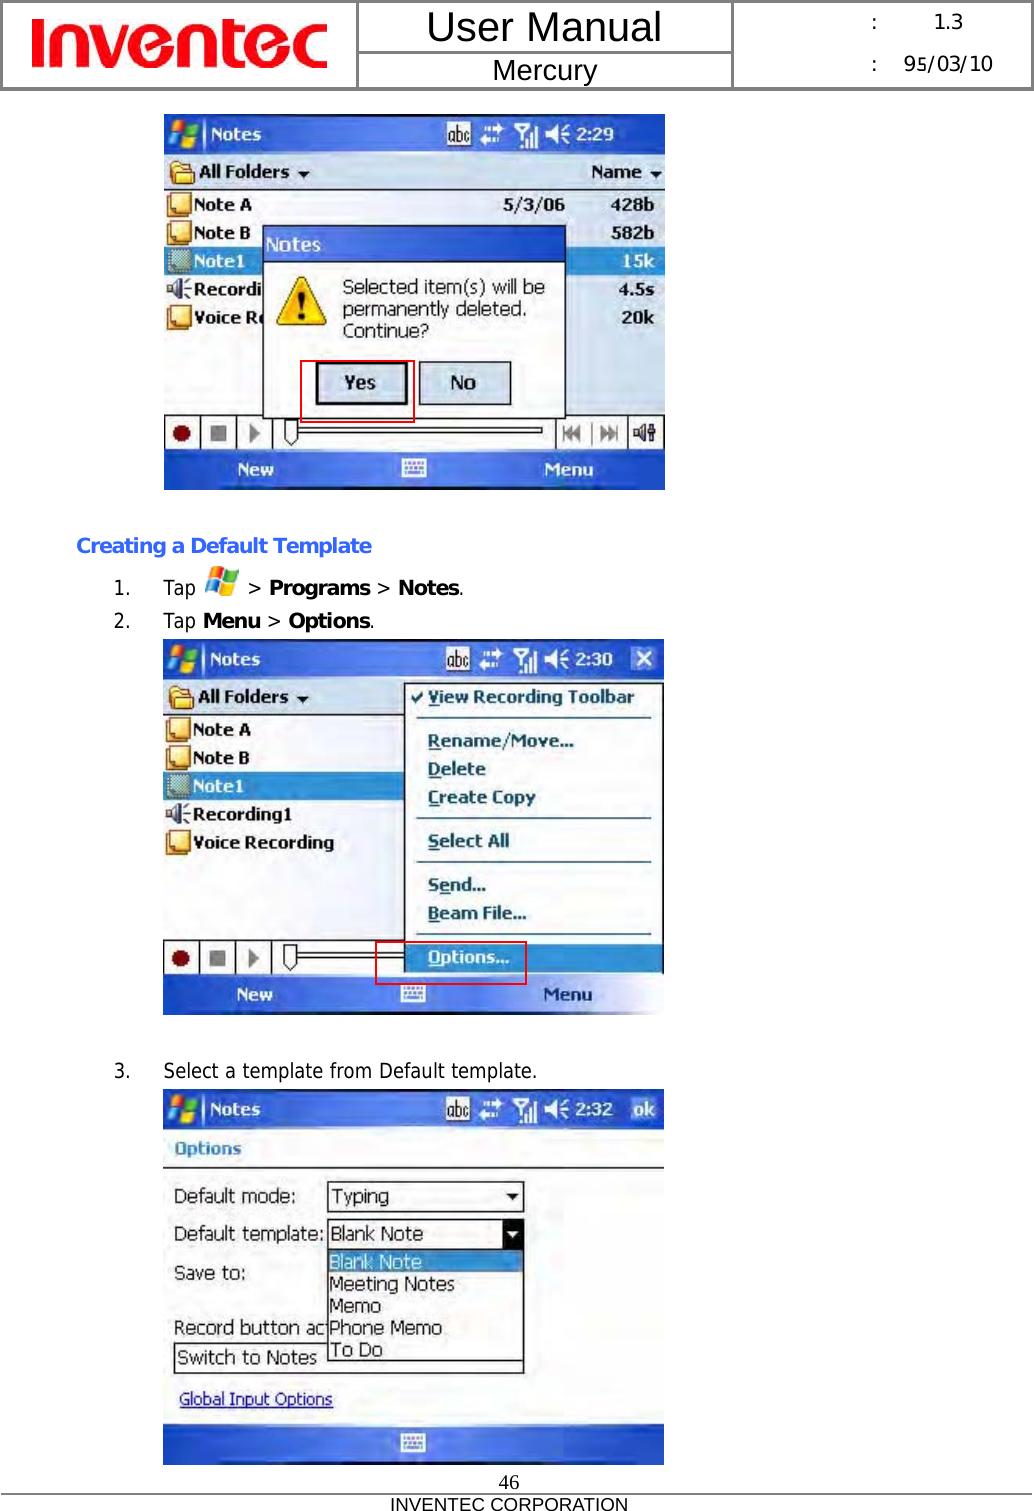
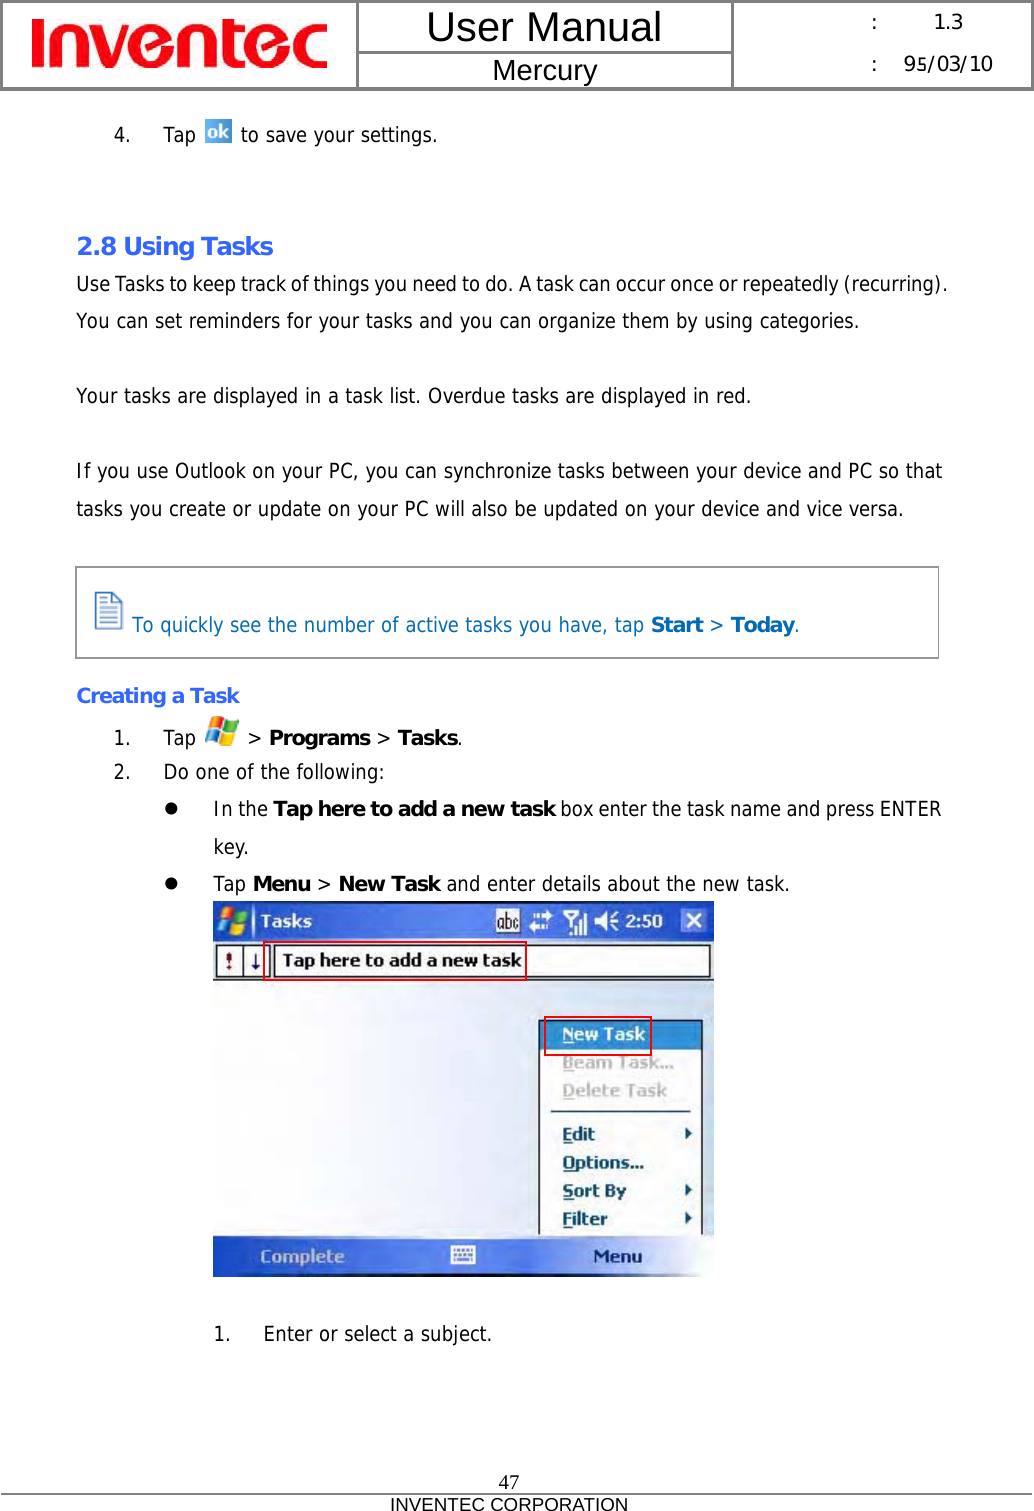
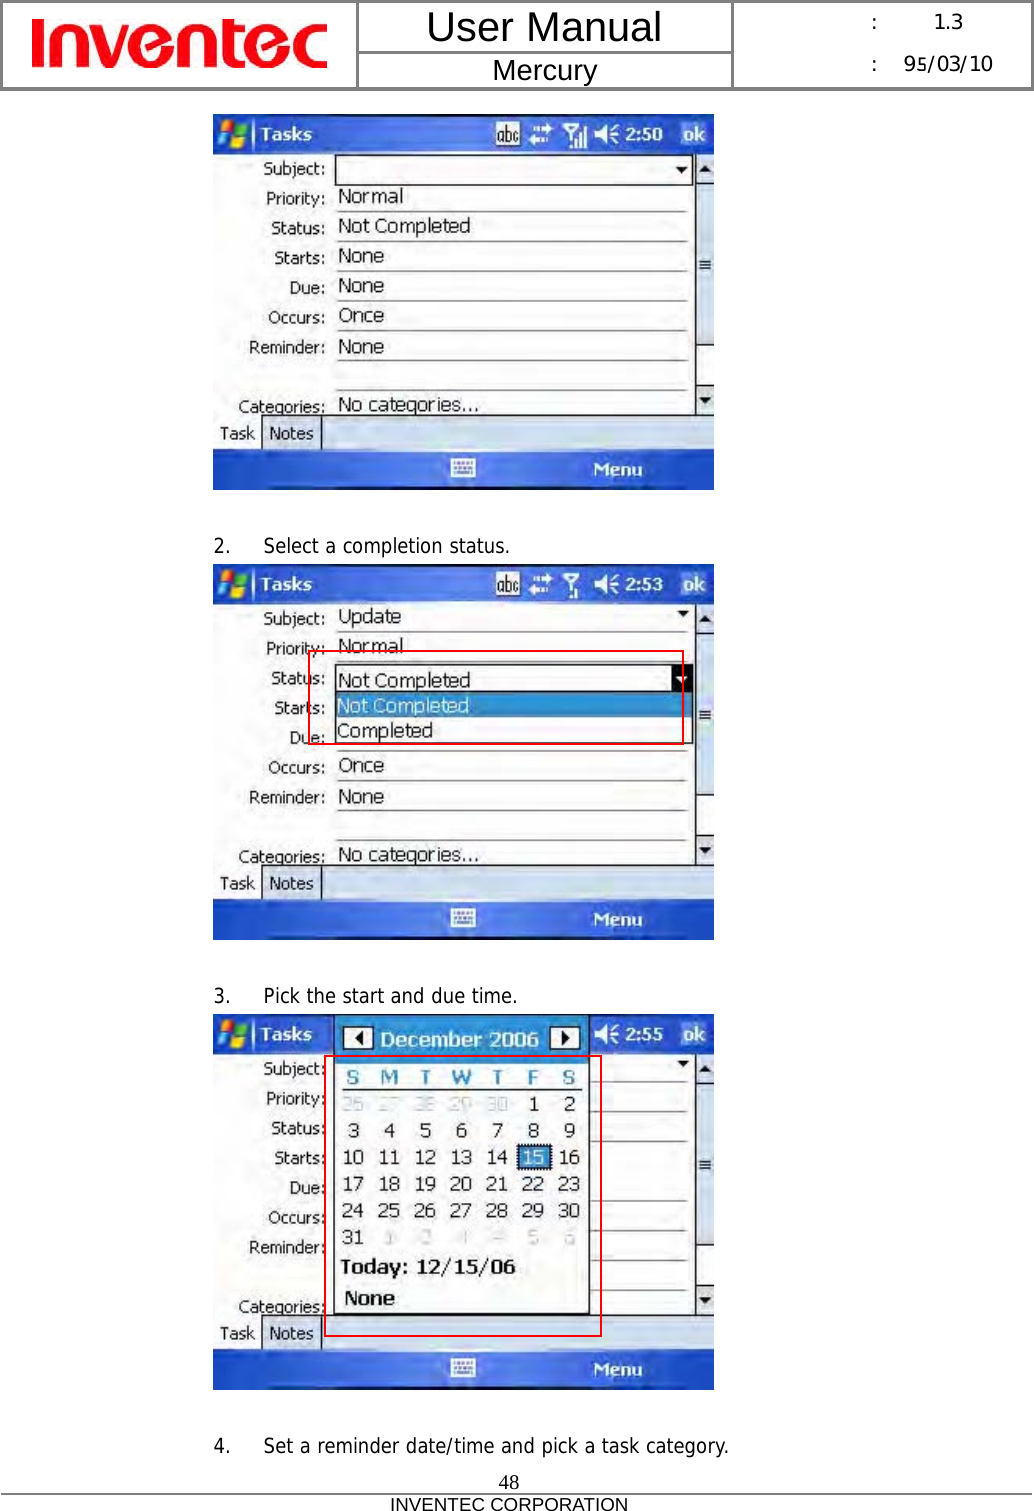
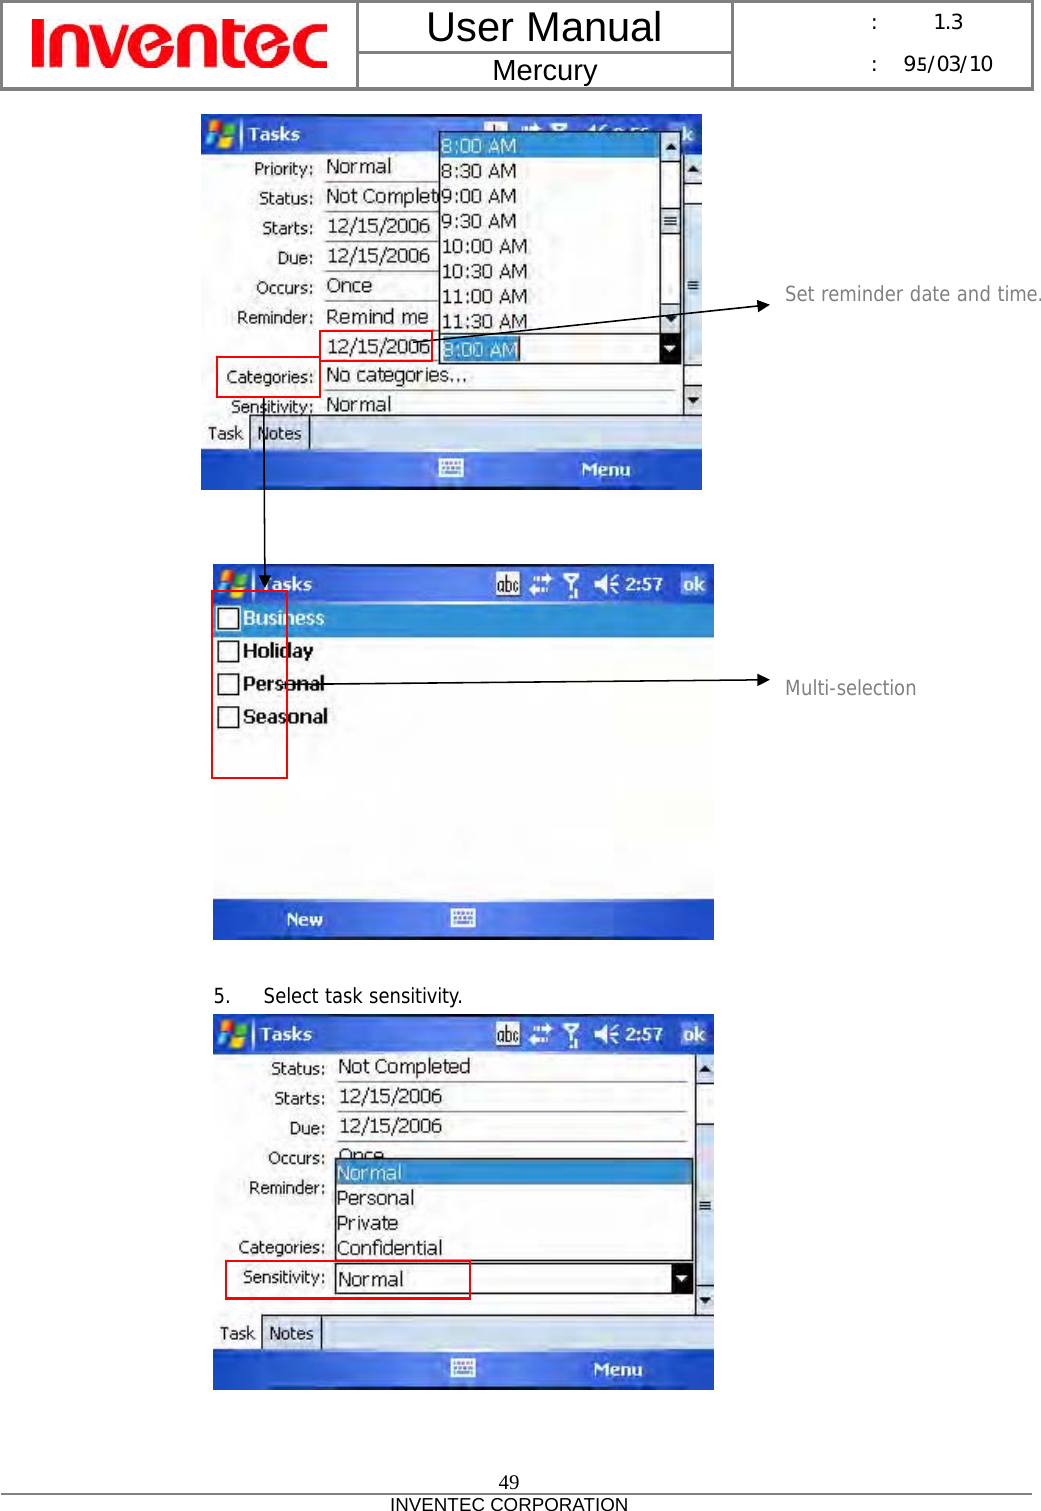
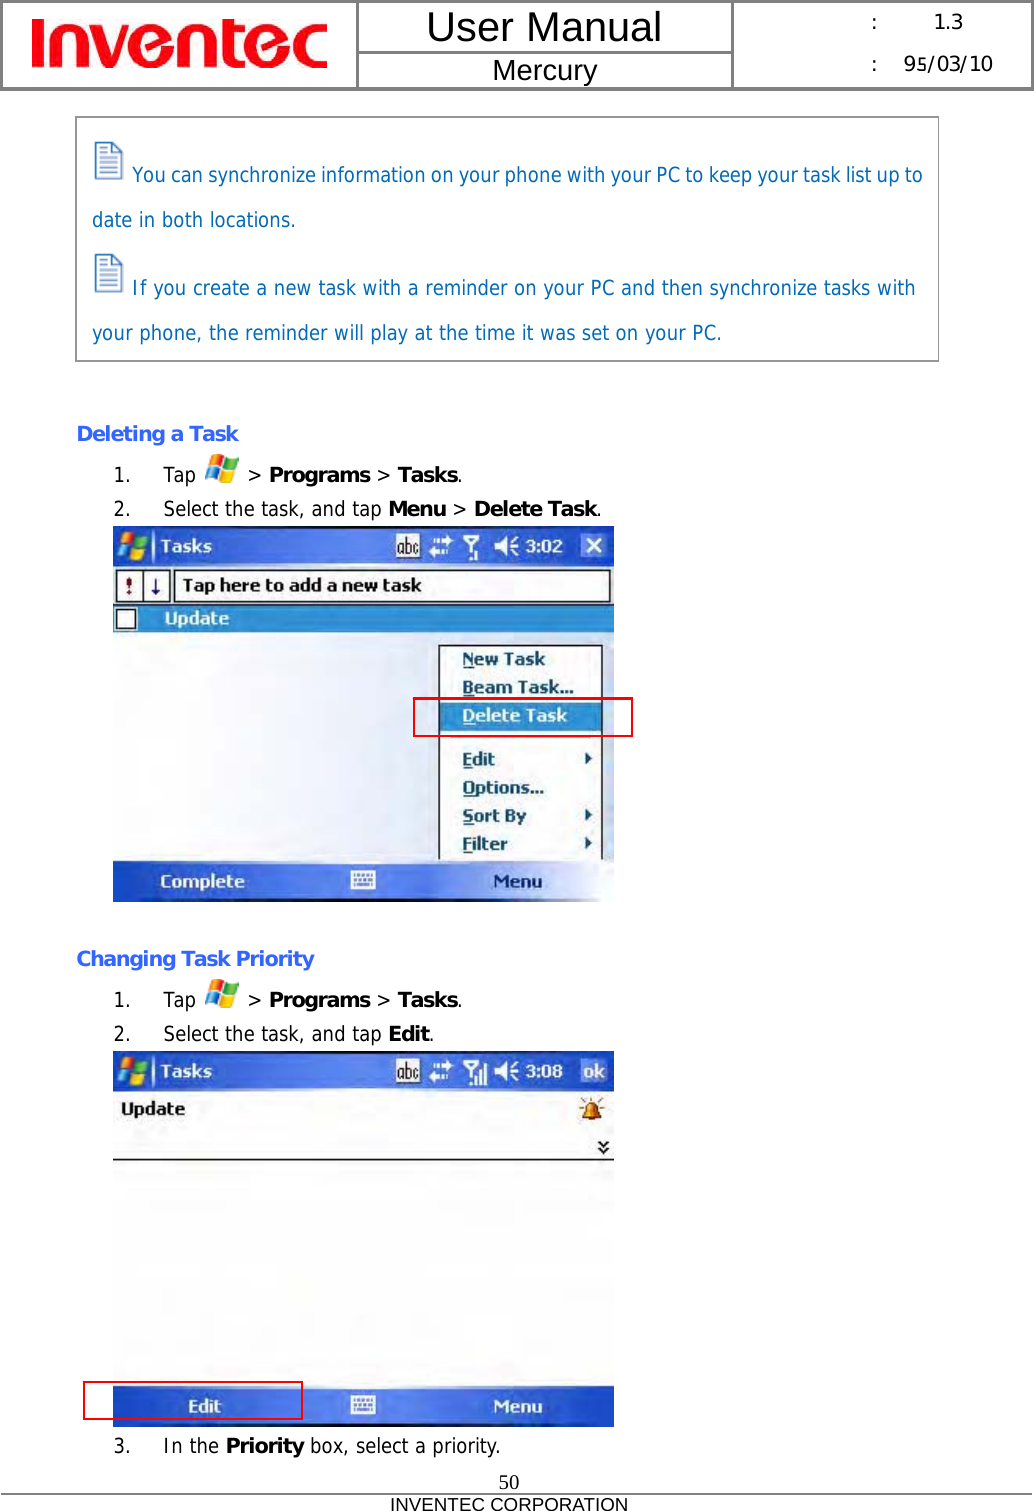
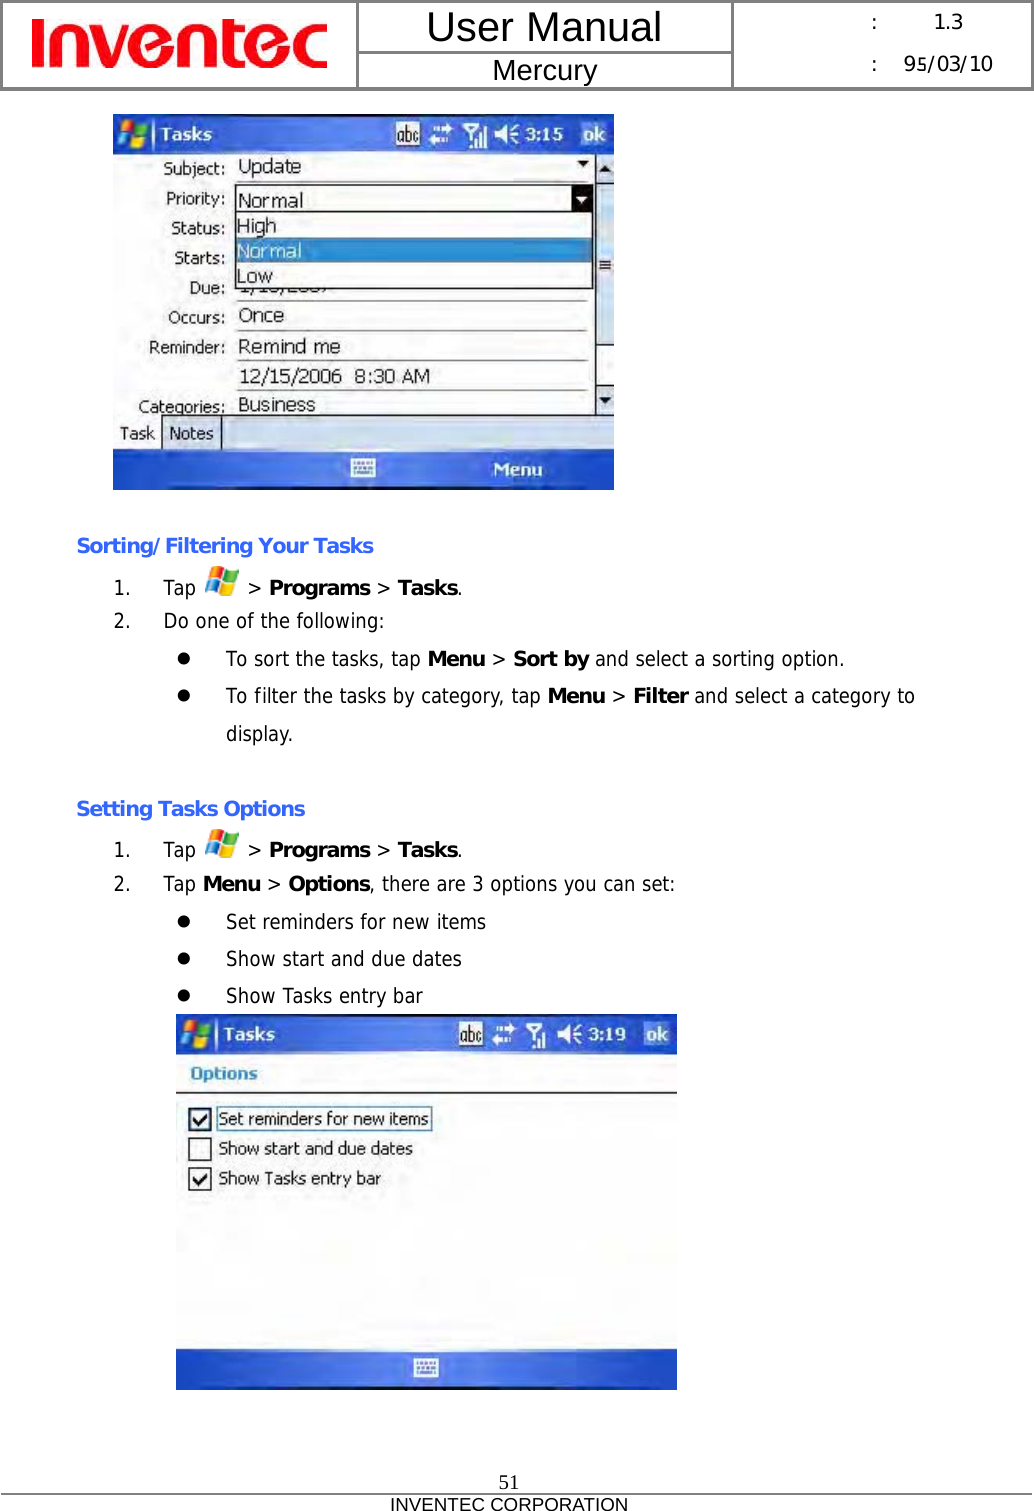
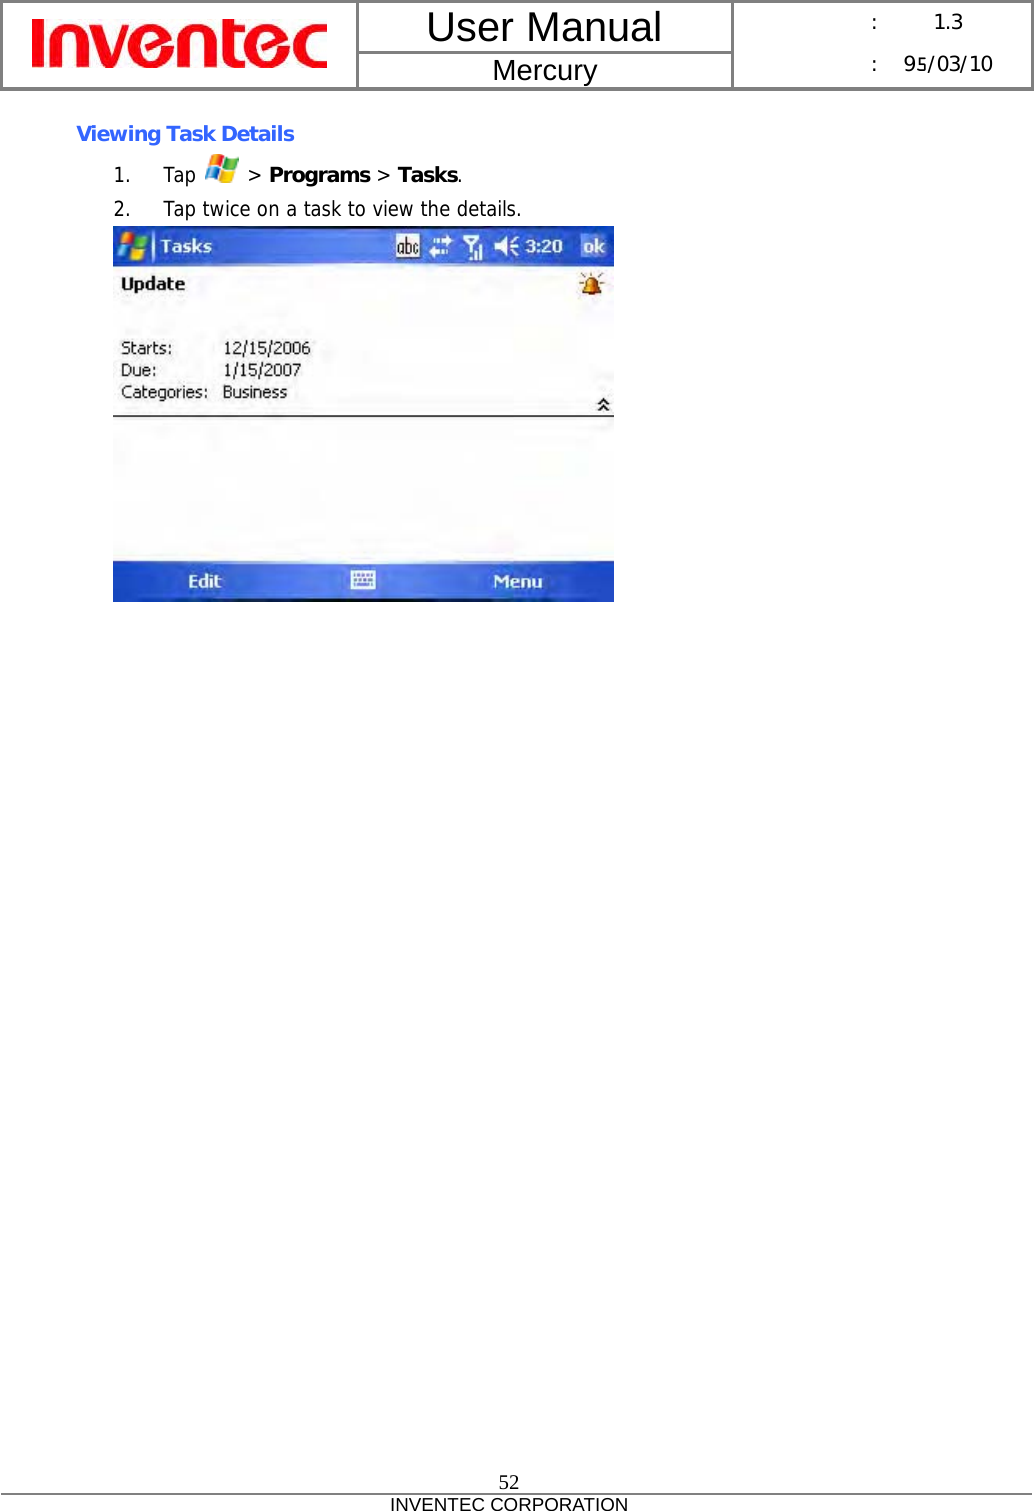
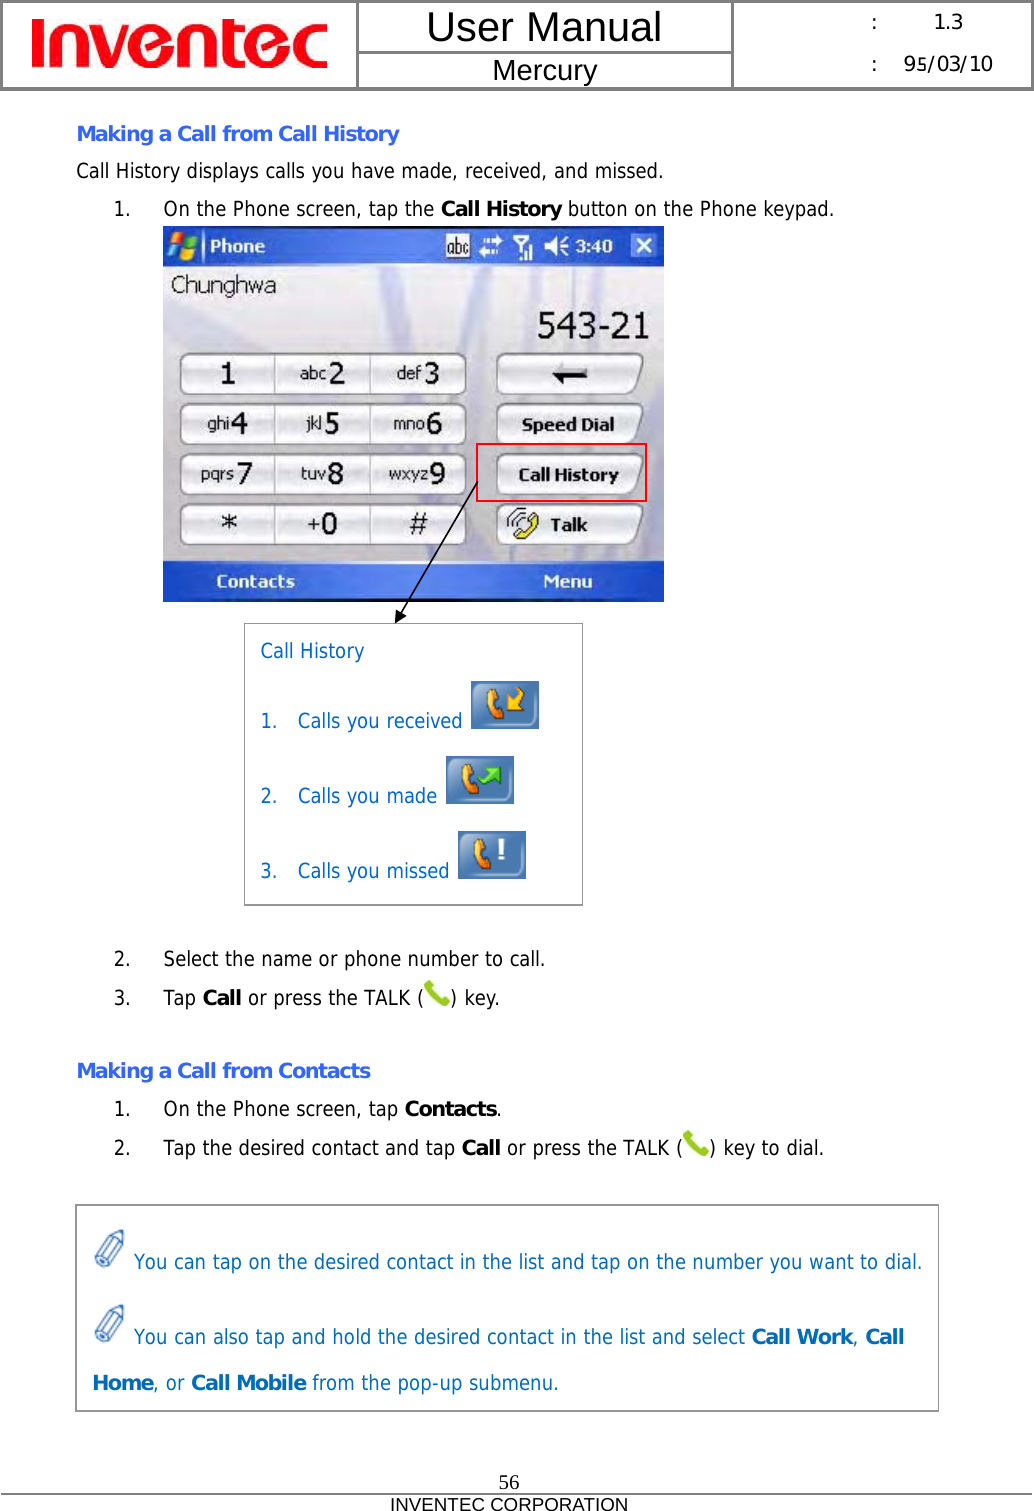
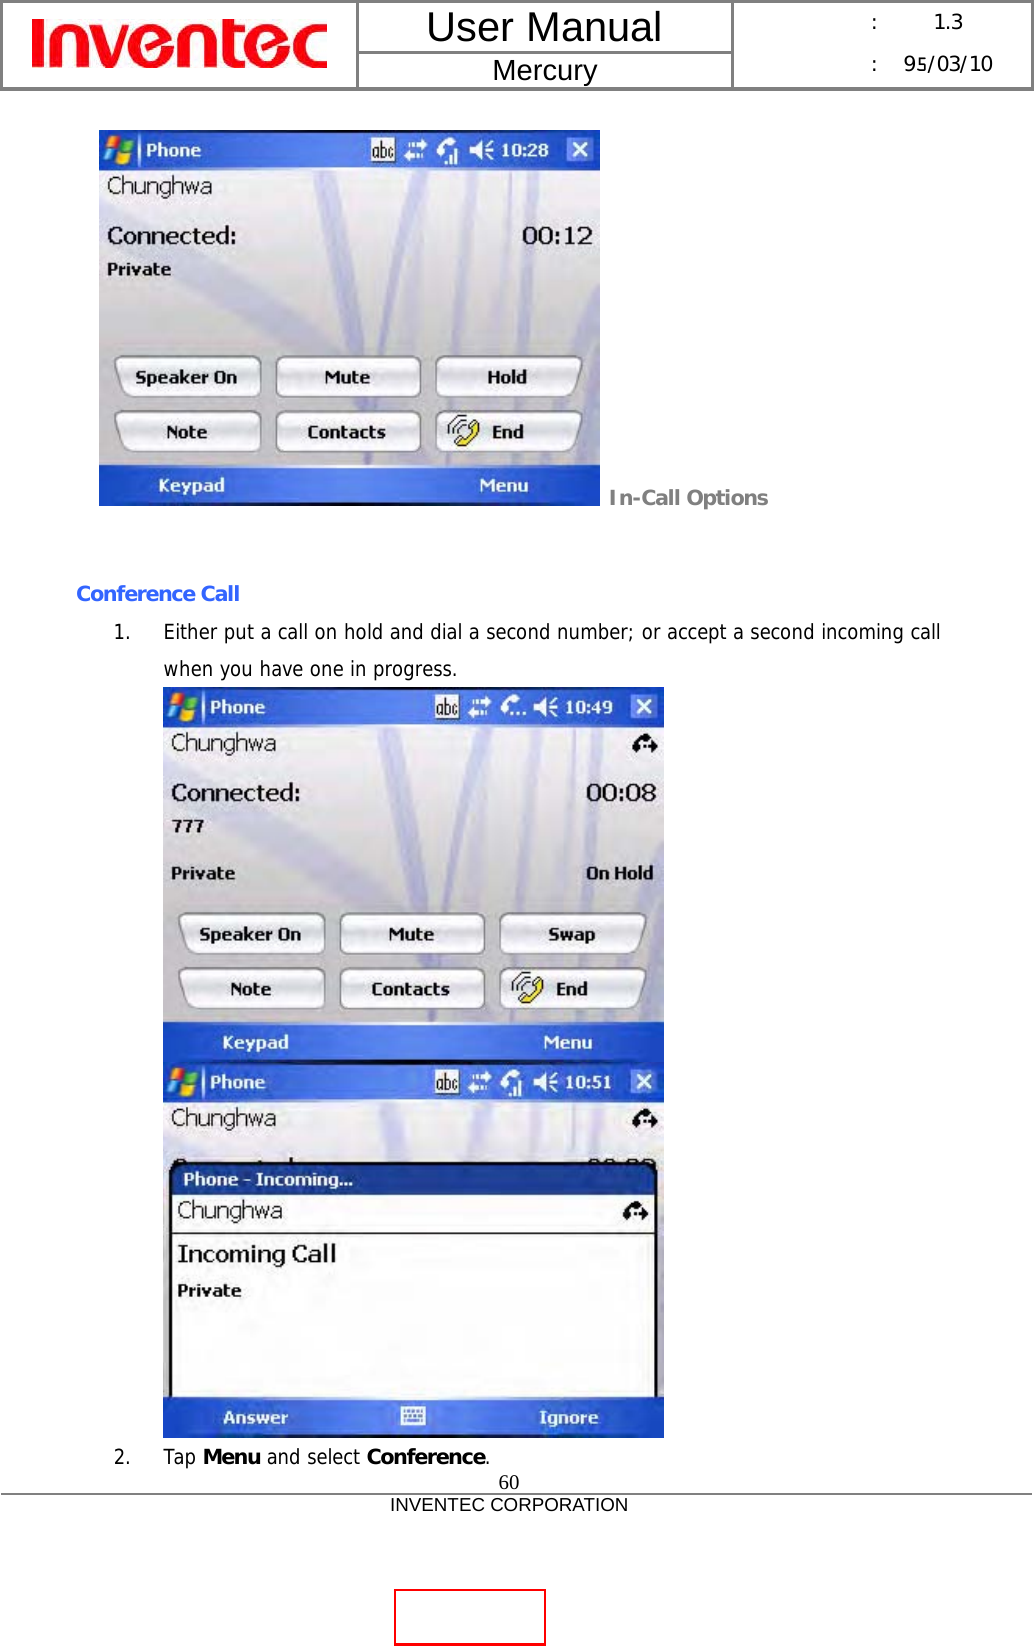
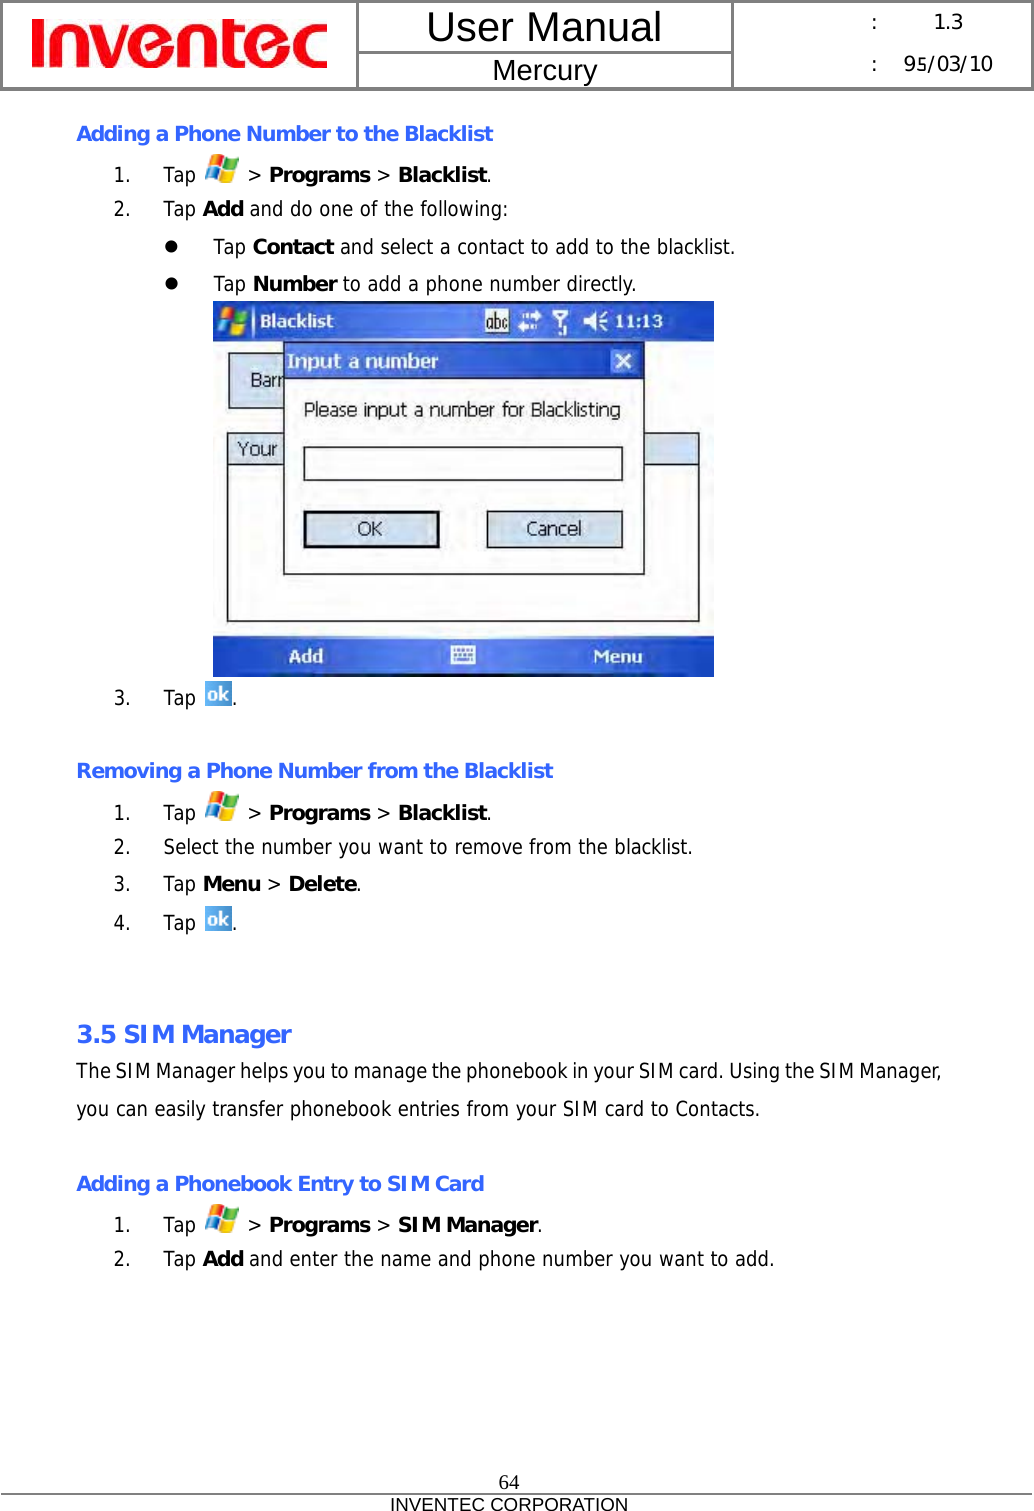
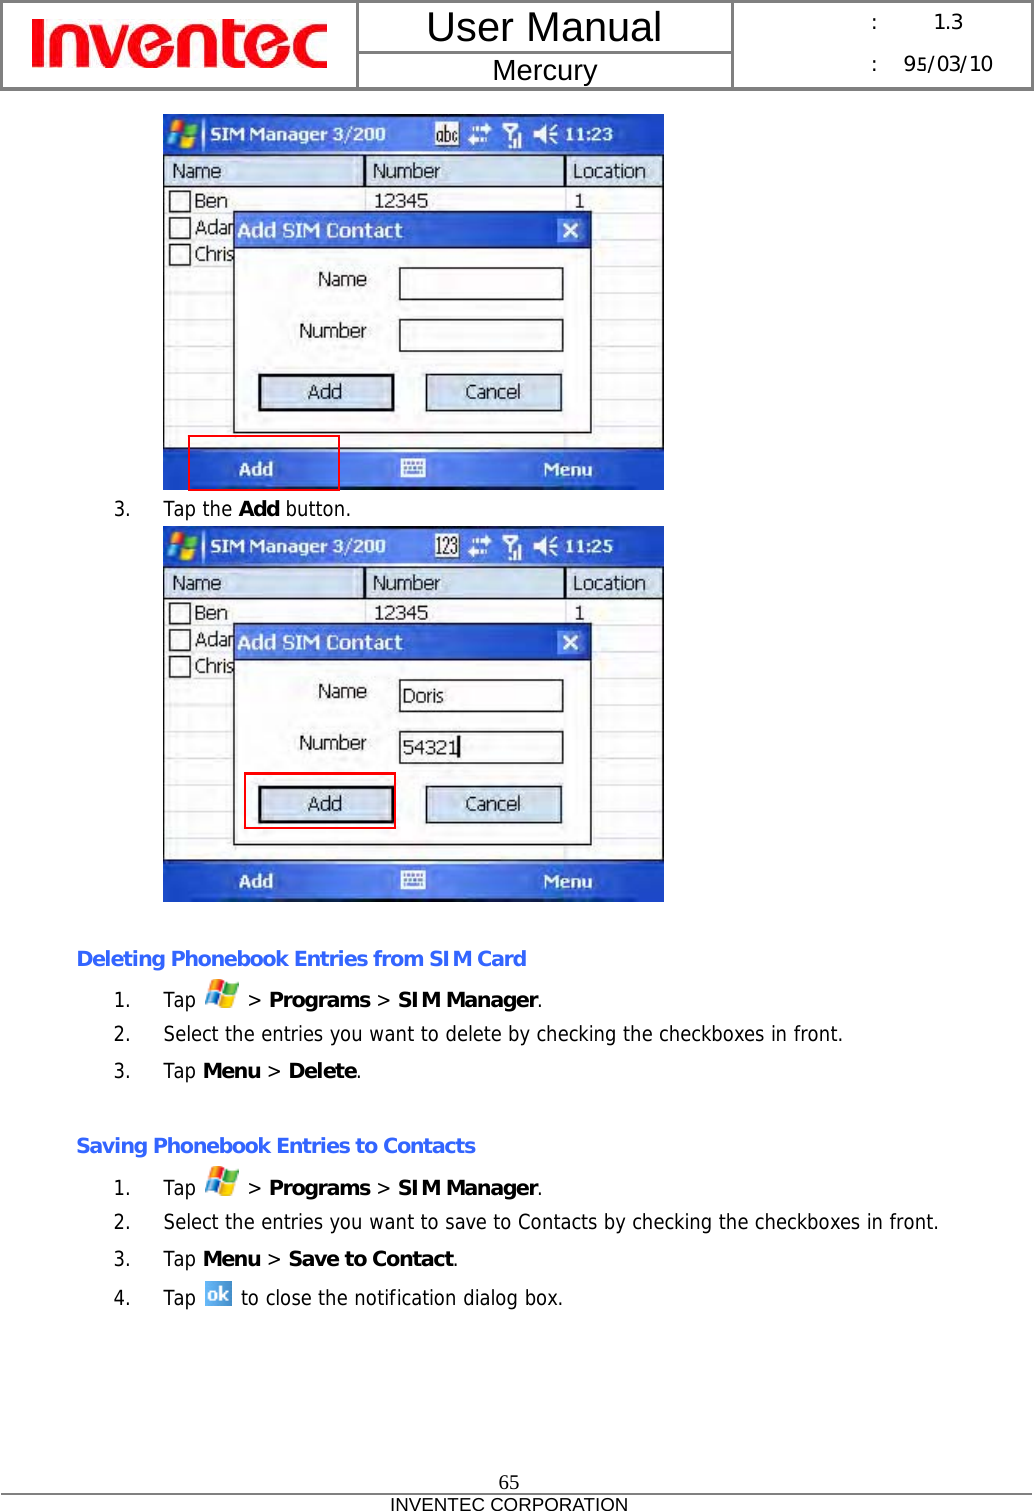
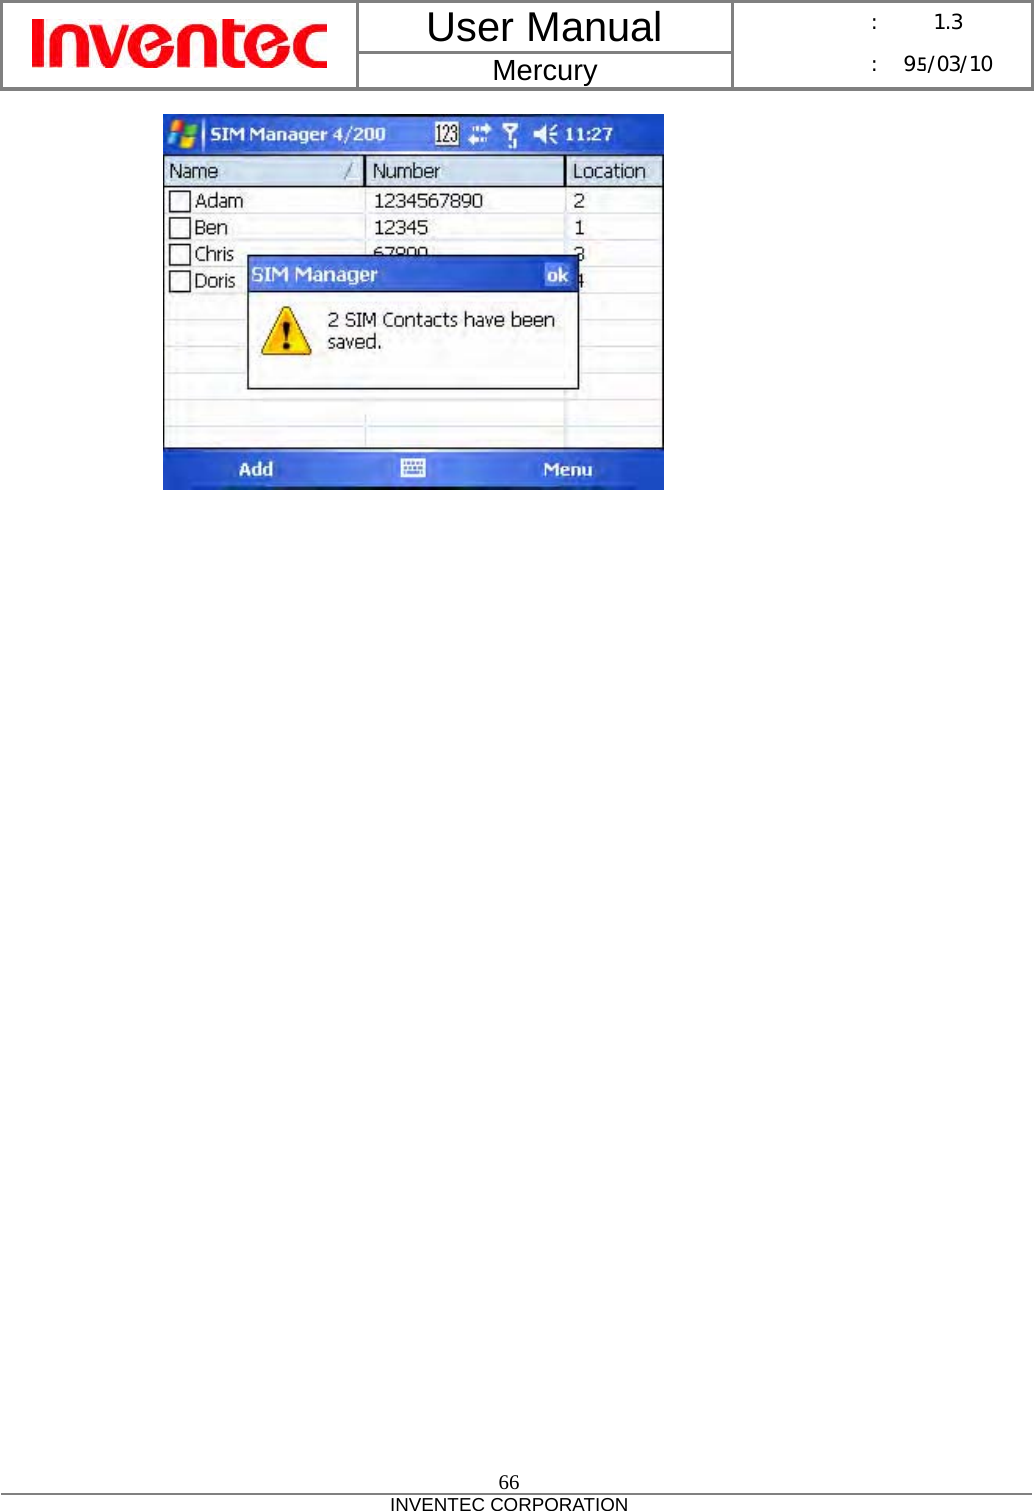
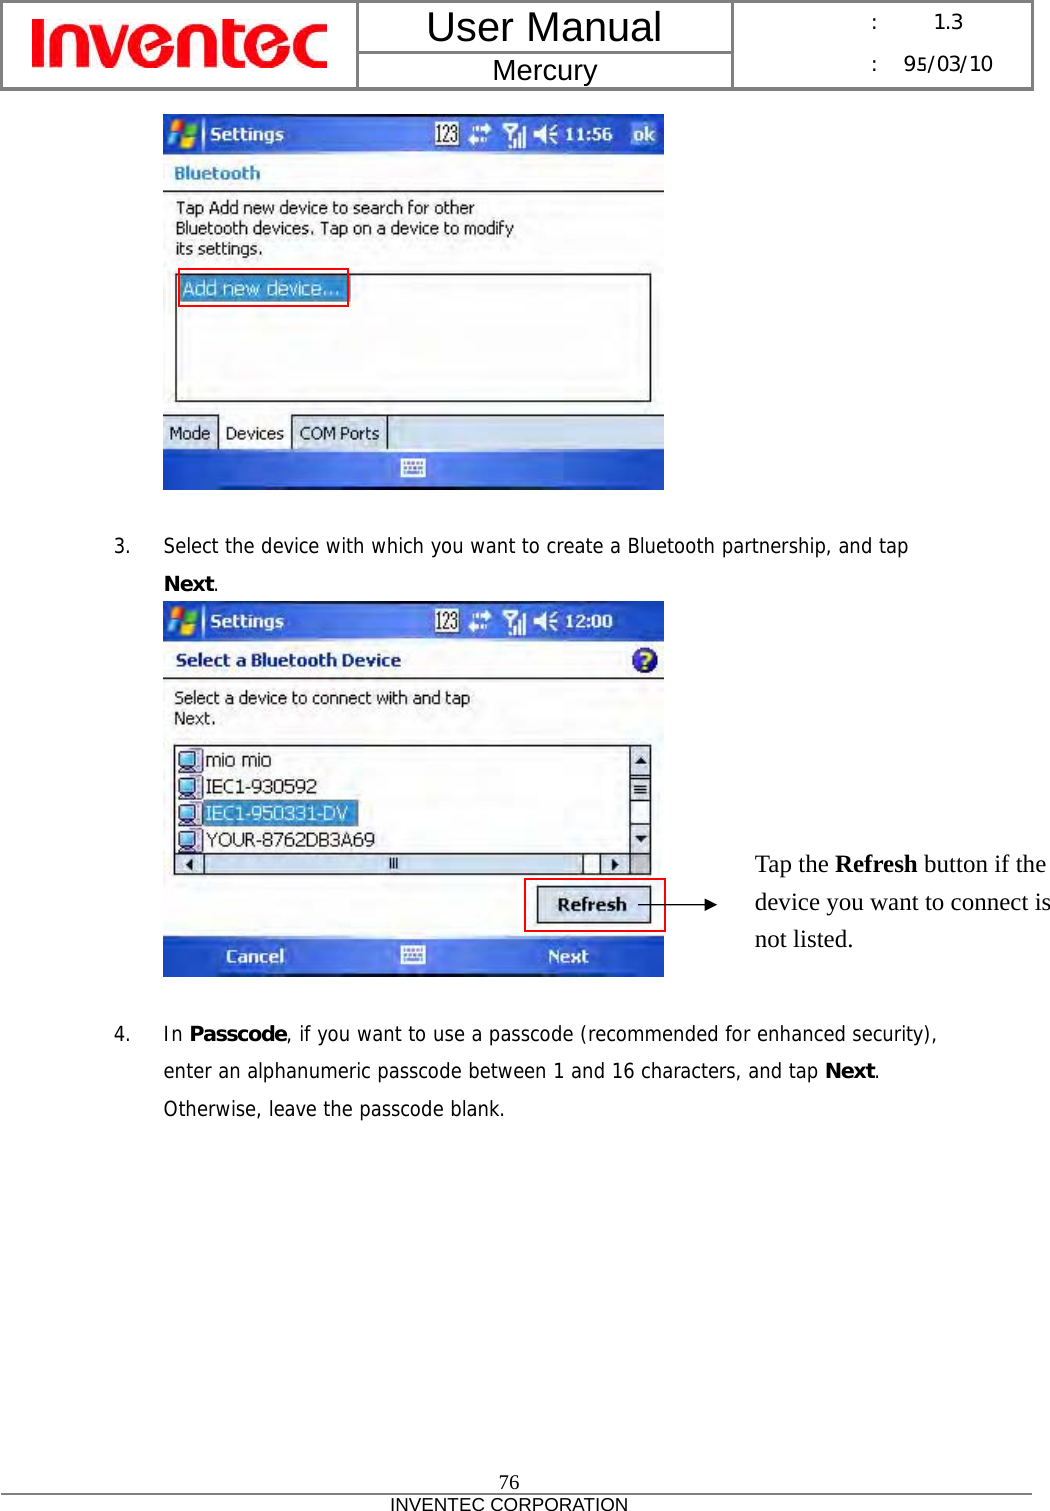
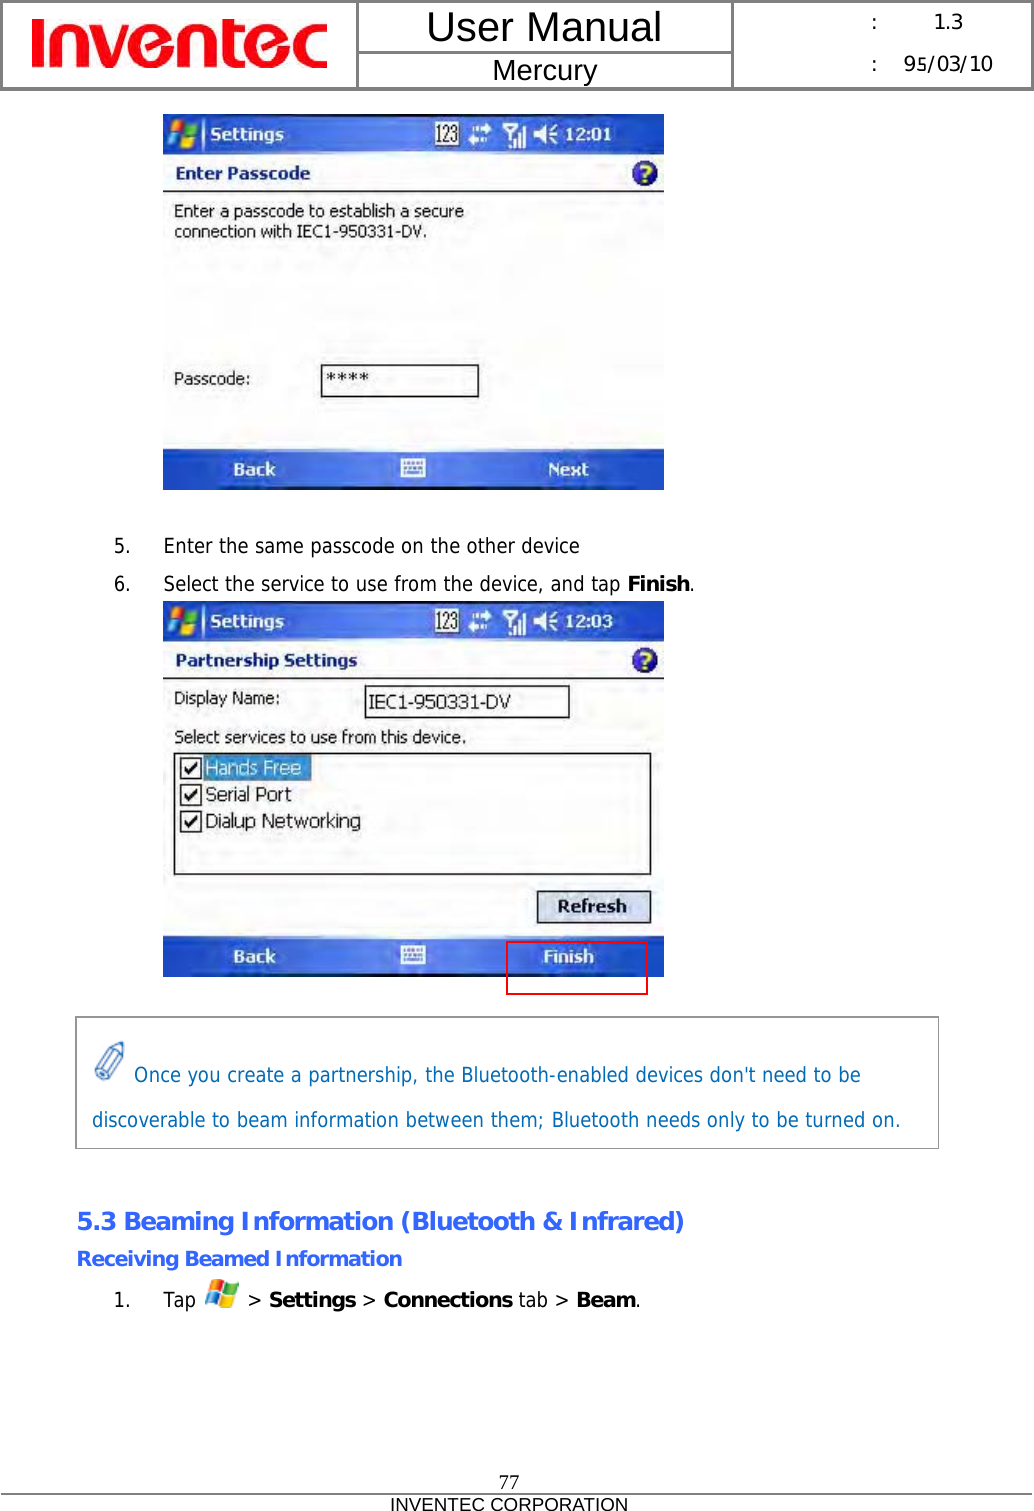
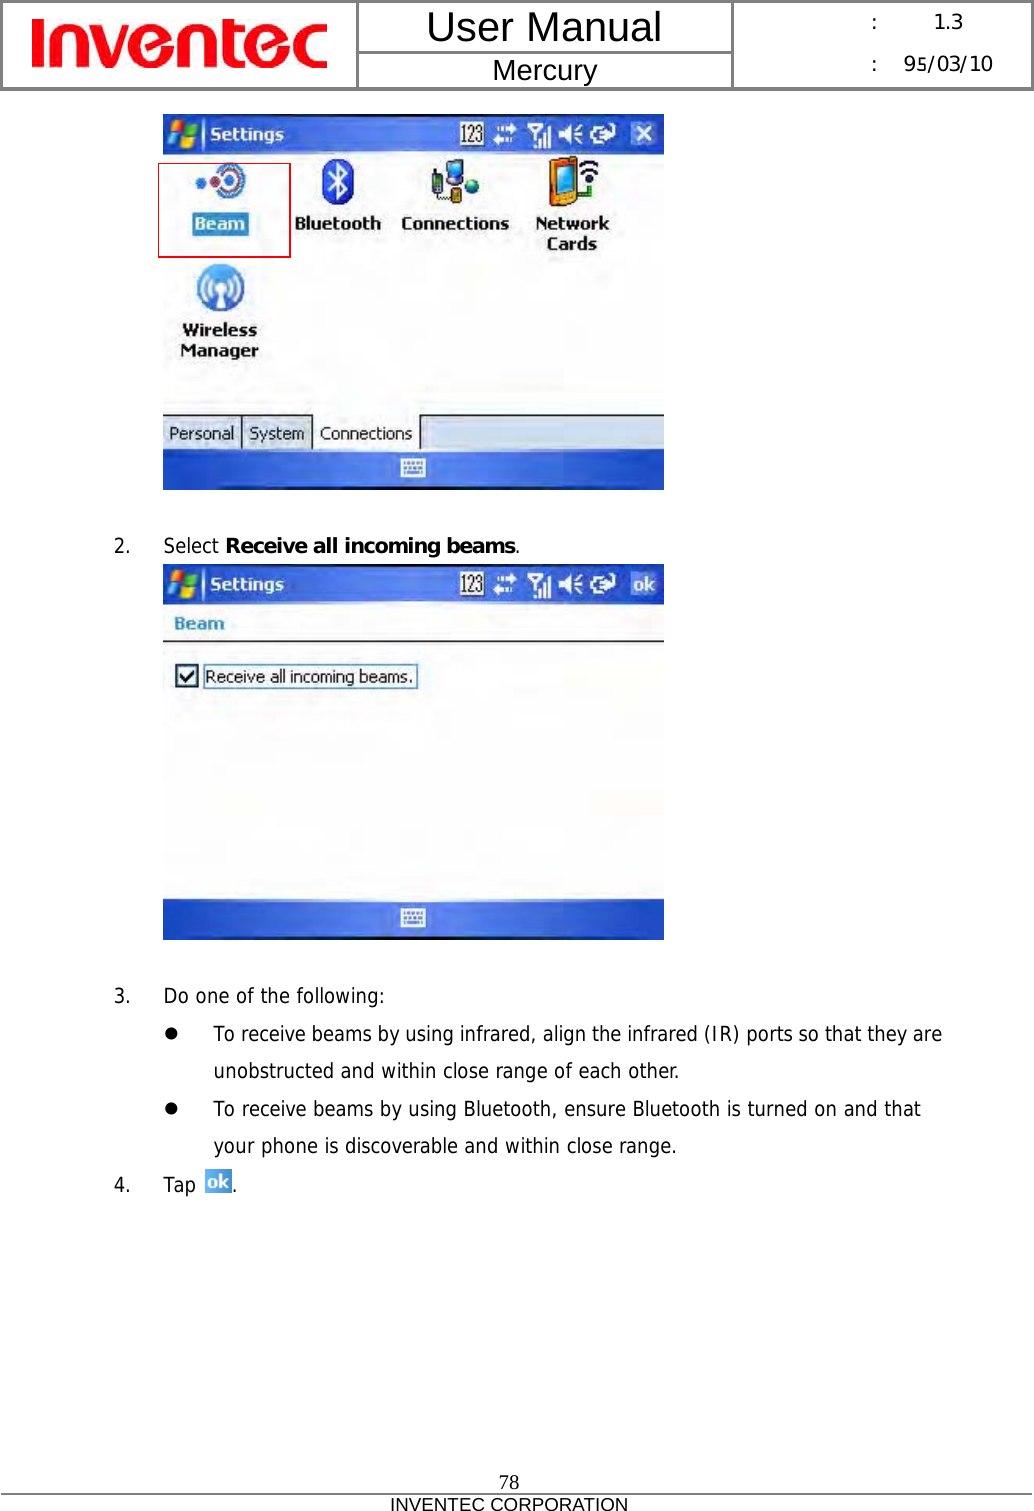
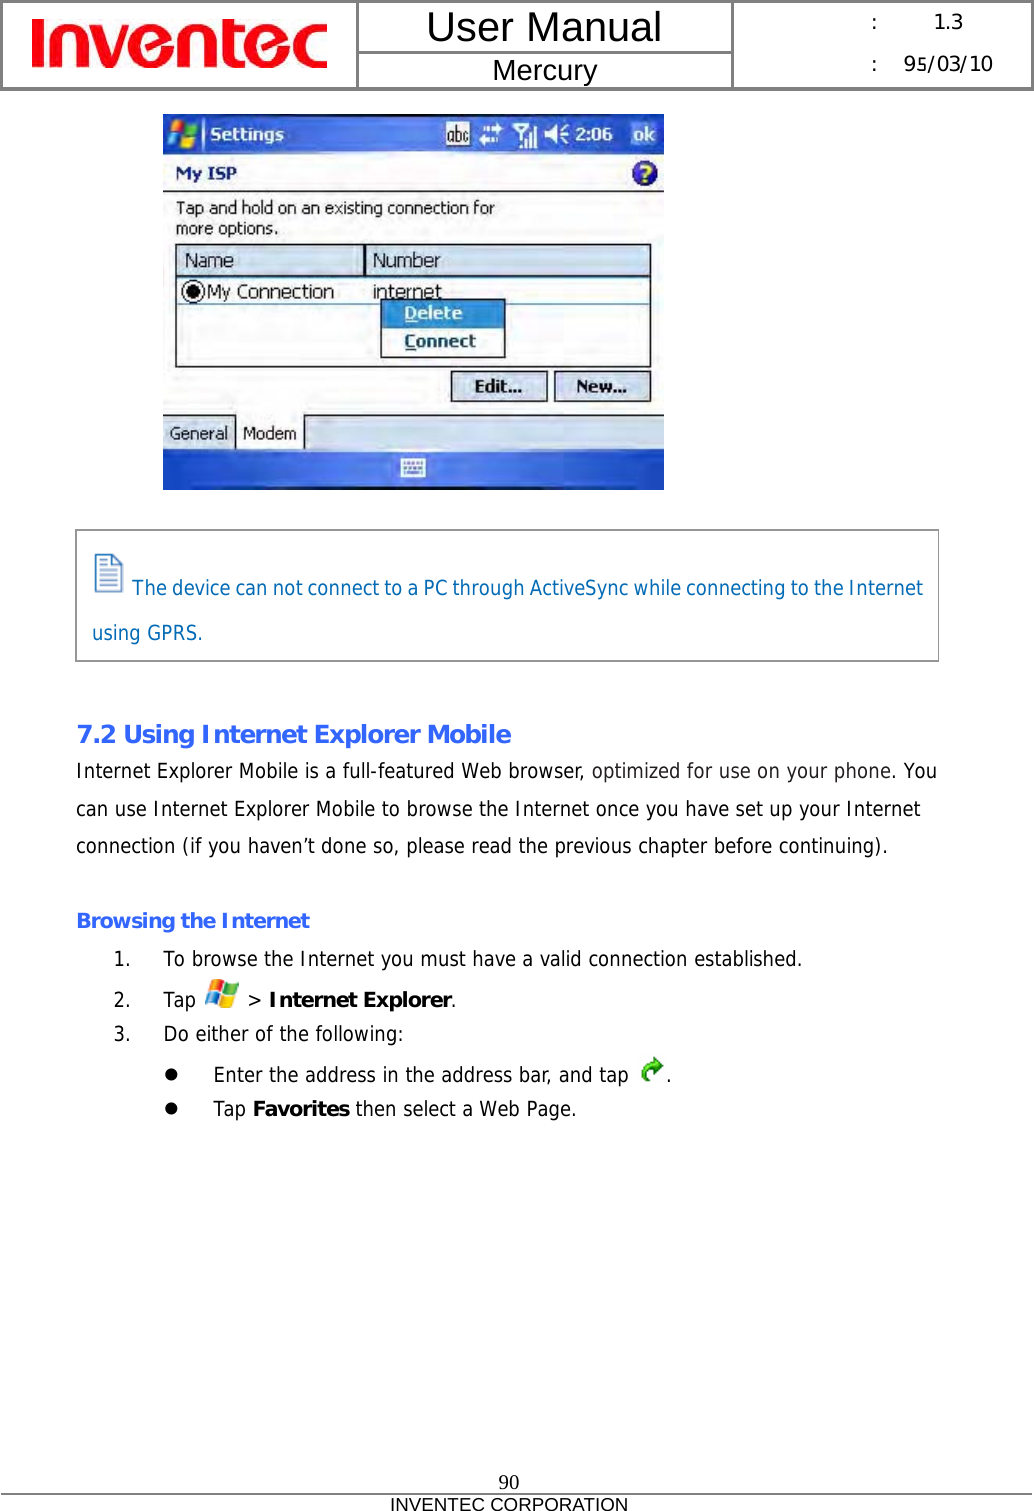
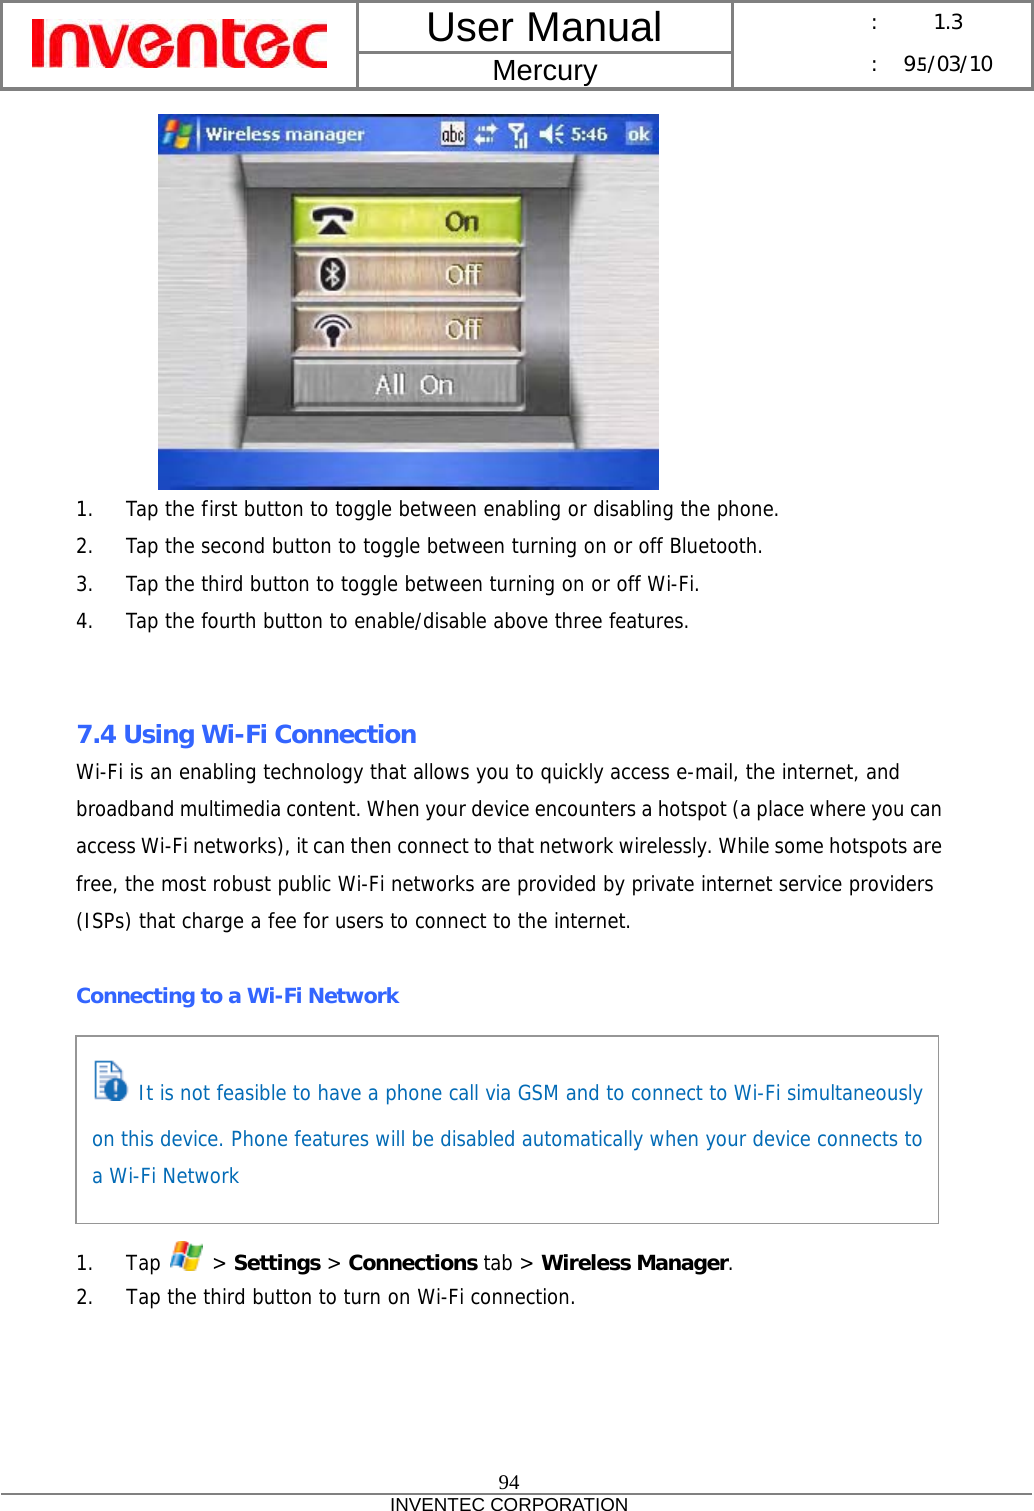
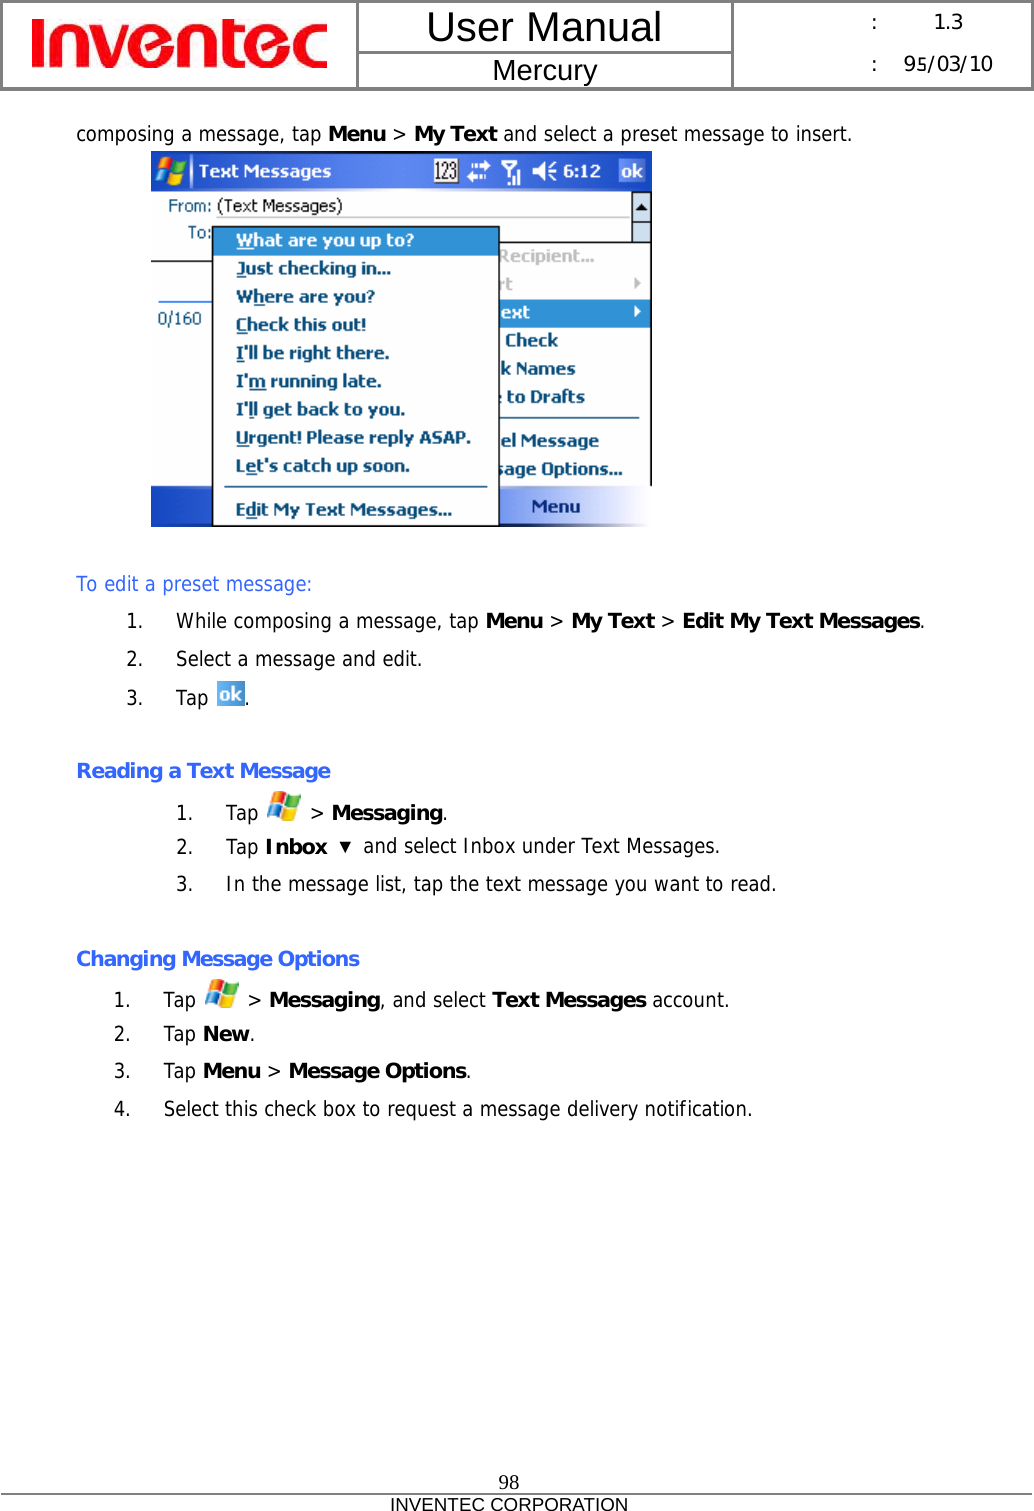
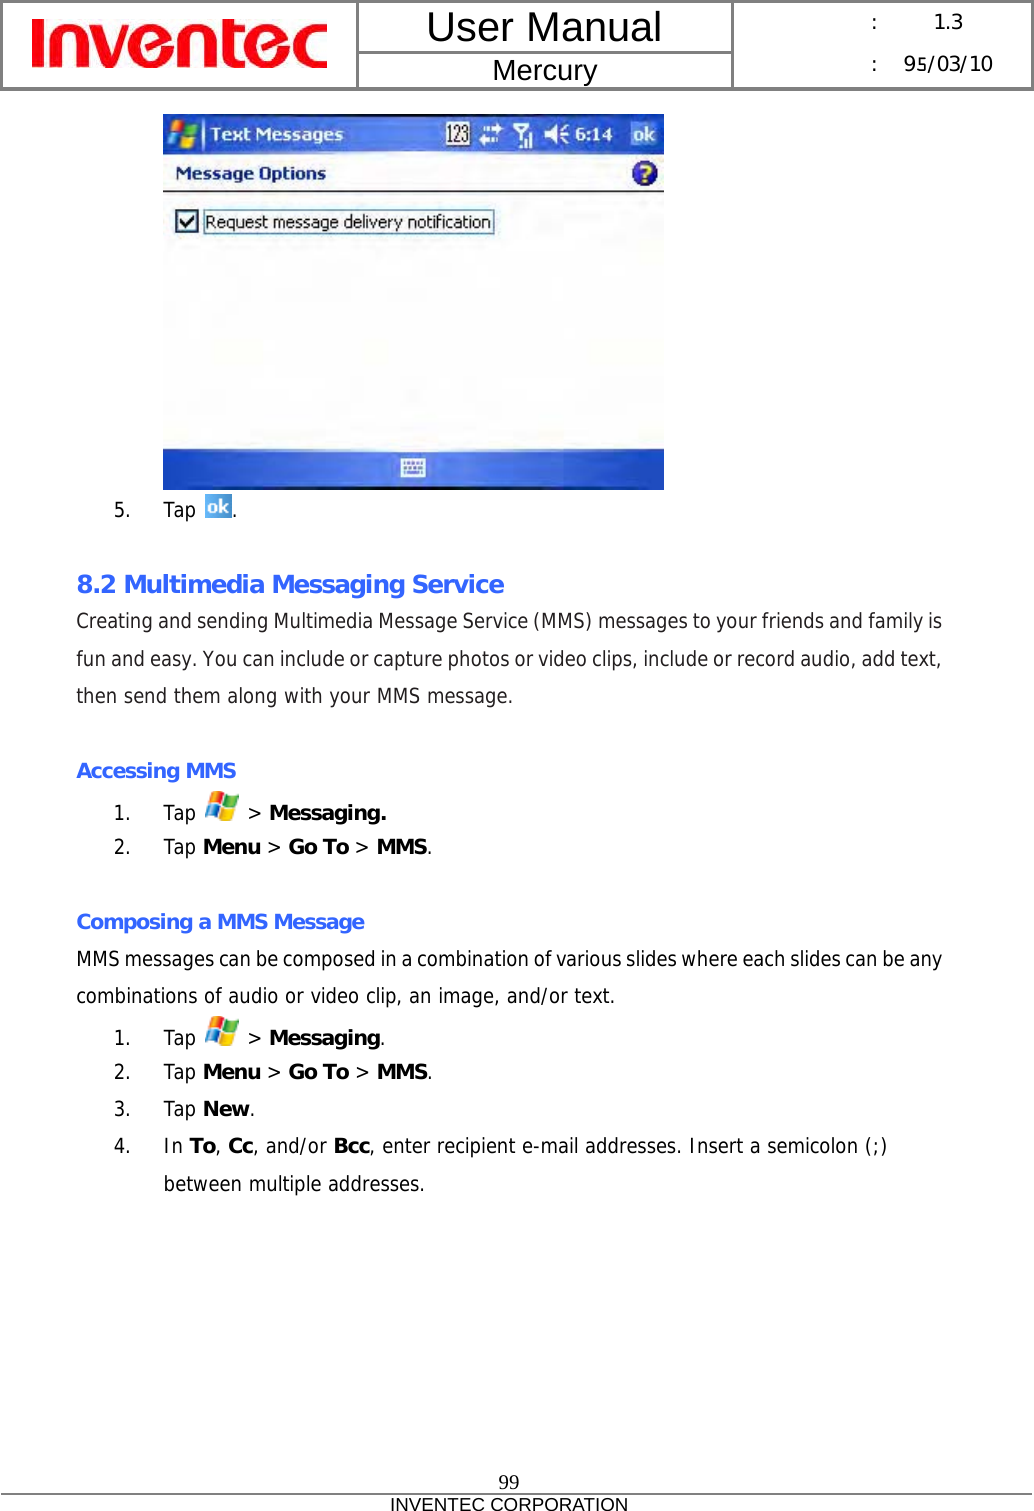
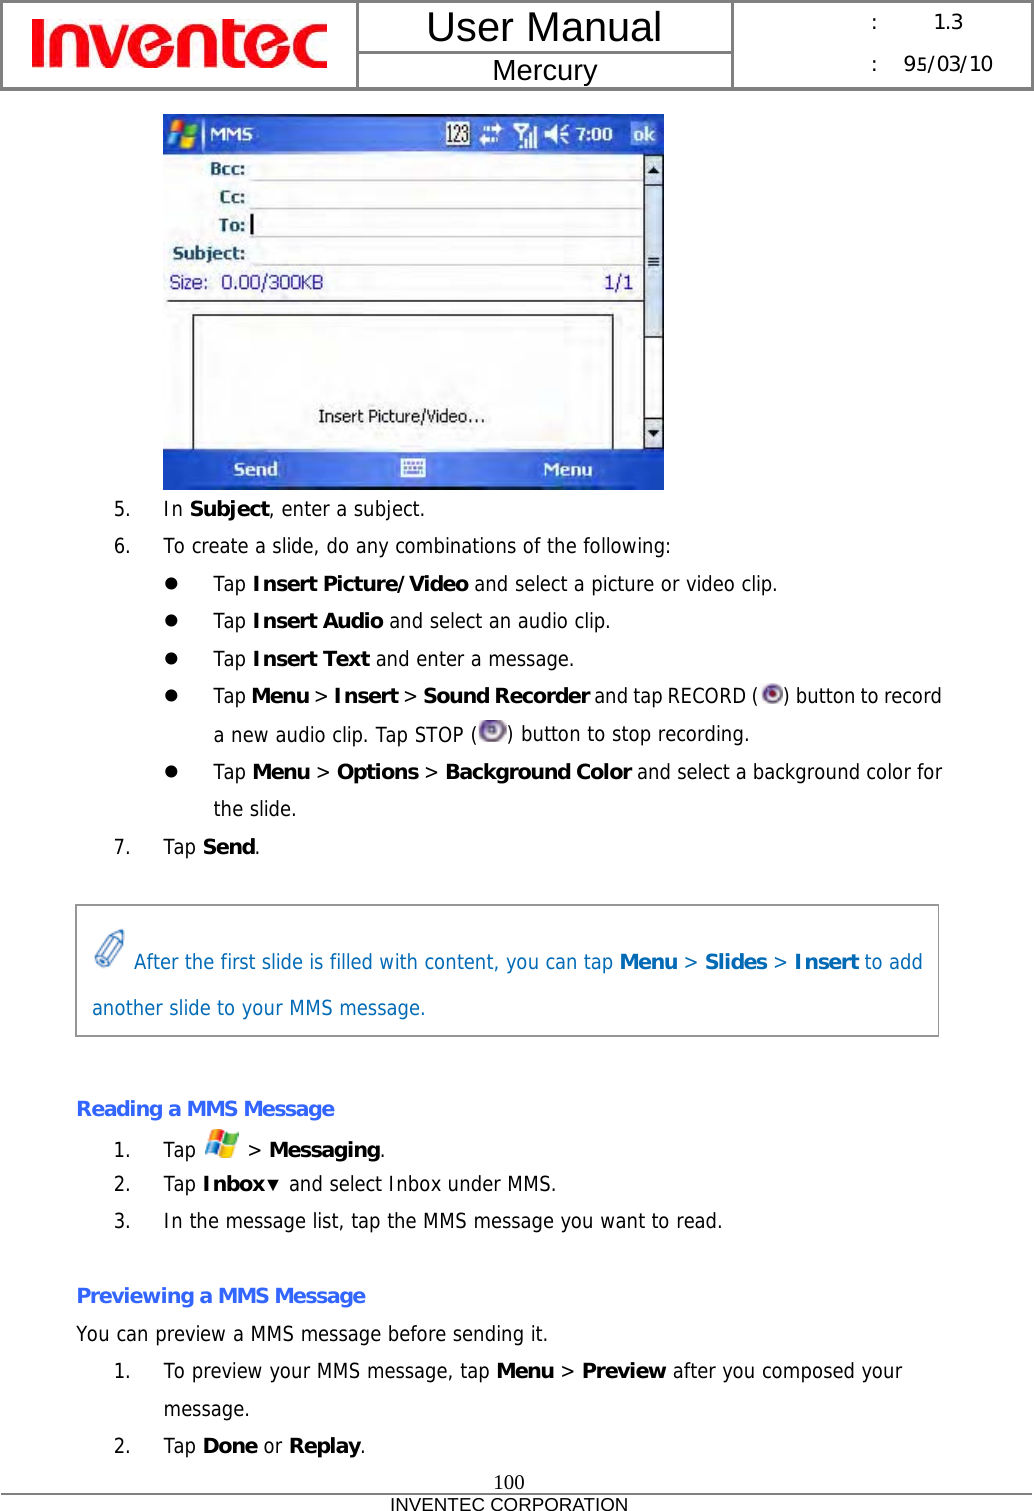
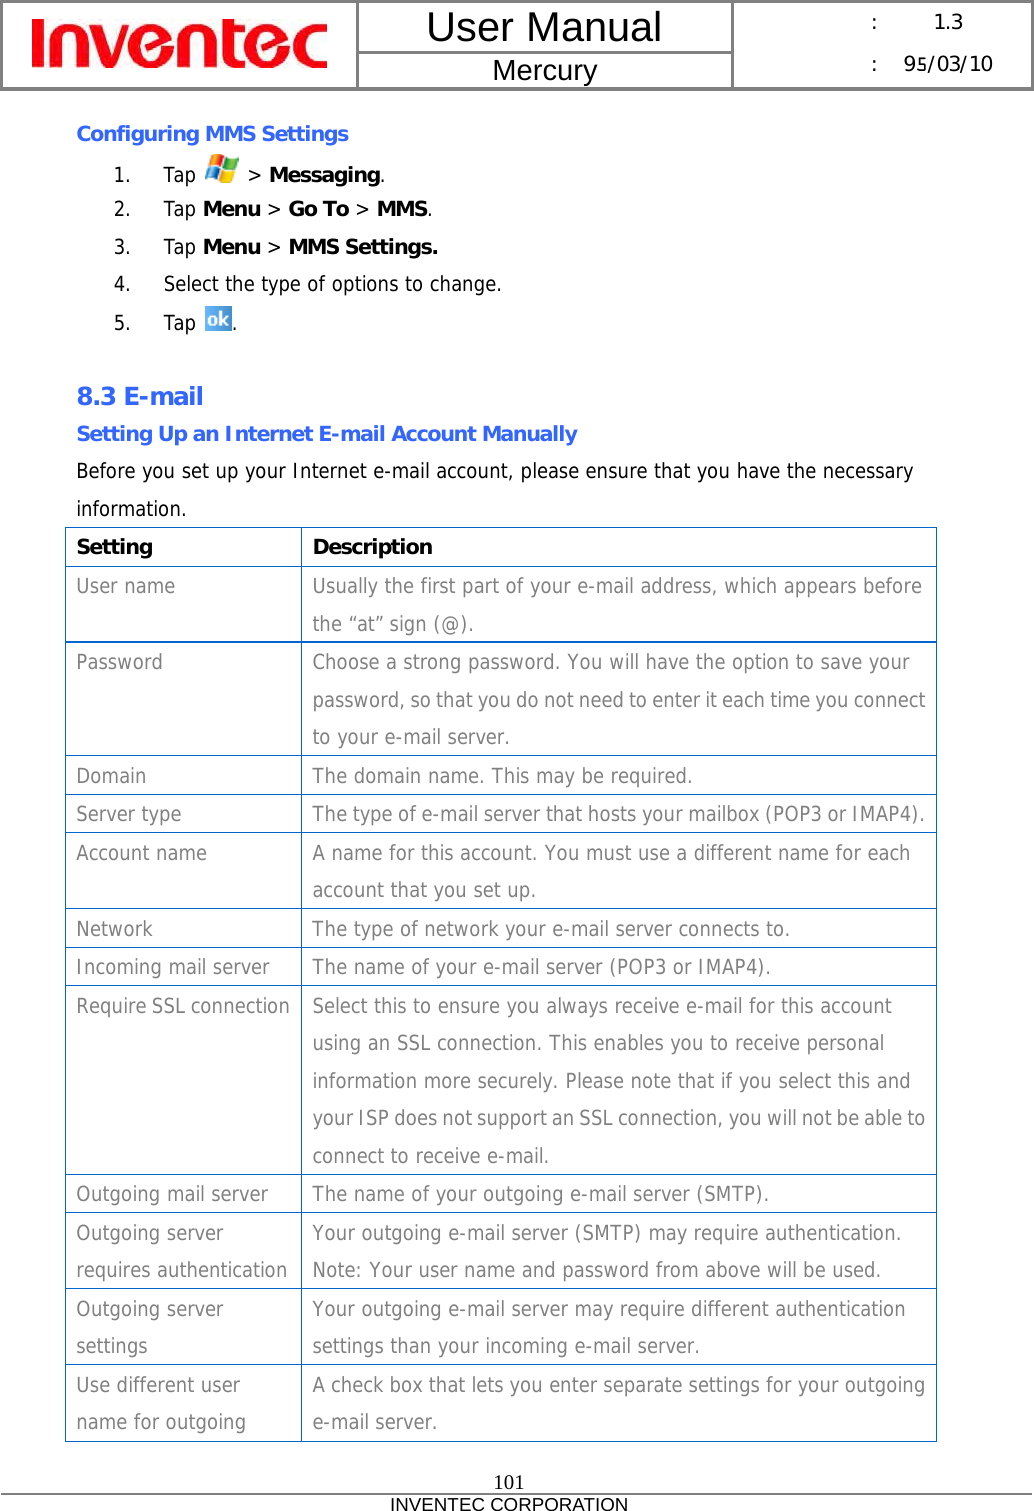
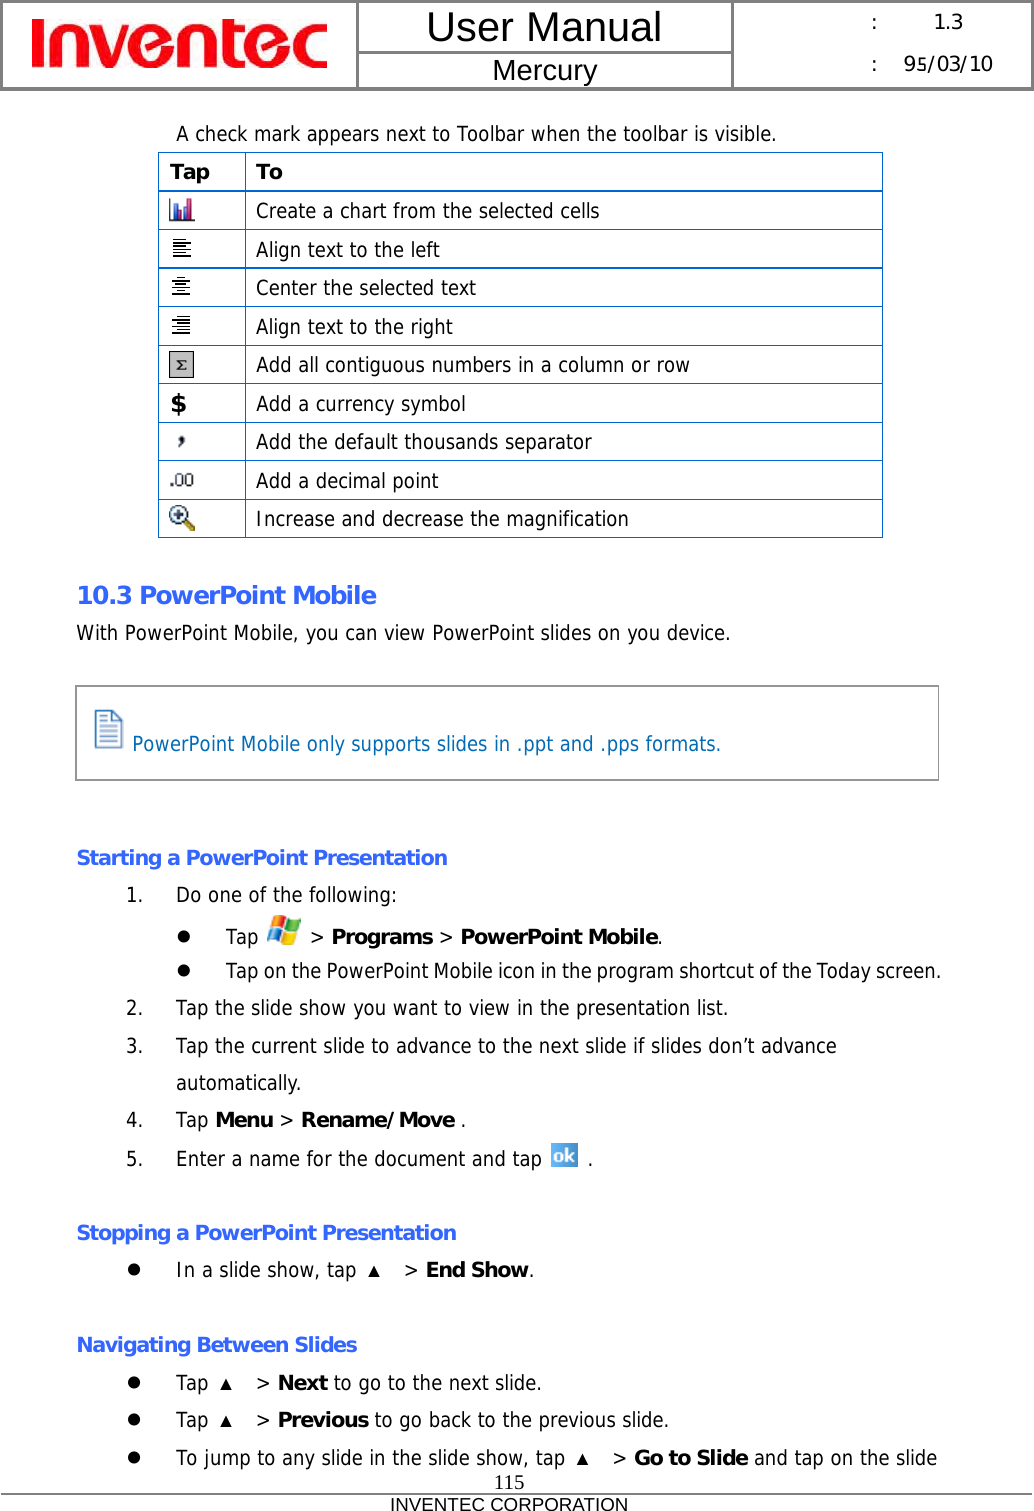
![User Manual Mercury : 1.3 : 95/03/10 79 INVENTEC CORPORATION Beaming an Item In the Calendar, Contacts, Notes, Tasks, and Pictures programs, you can beam files and information to other devices using Bluetooth or infrared. 1. From the program, select the item you want to beam, such as an appointment in Calendar, a task in Tasks, a contact card in Contacts, a picture in Pictures, a file in File Explorer. In Calendar, for example, first open the appointment in Agenda view. 2. Tap Menu > Beam [type of item]. 3. Do one of the following: z If using Bluetooth, select the device to which you want to send the item. z If using infrared, align the infrared (IR) ports at close range until the target device name appears, and then select the device to which you want to send the item. Once you select Receive incoming beams, your phone automatically receives beams until you clear this check box. Your phone can receive all types of beamed files, but you may not be able to view all types of files on the phone. You may need to copy some files to a PC for viewing. When using Bluetooth, if the device that you want to beam to doesn't appear in the list, ensure that the device is turned on, visible, and within close range of your phone. Also, ensure that Bluetooth is turned on.](https://usermanual.wiki/Inventec/BC0153AAA000.08-User-manual/User-Guide-768310-Page-79.png)