Contents
- 1. Users Manual 1
- 2. Users Manual 2
- 3. Users Manual 3
- 4. Users Manual 4
Users Manual 3

Chapter 5.
Bluetooth Connections
5.1 Bluetooth Modes
5.2 Bluetooth Partnership (Bonding)
5.3 Beaming Information (Bluetooth)
96
Chapter 5. Bluetooth Connections
Bluetooth is a short-range wireless communications technology. Devices with Bluetooth capabilities
can exchange information over a distance of about 10 metres without requiring a physical connection.
You can even beam information to a device in a different room, as long as it is within range.
The software included with your device allows you to use Bluetooth in the following ways:
• Beam information, such as files, appointments, tasks, and contact cards, between devices that have
Bluetooth capabilities.
• Create a connection between your device and a Bluetooth phone to use the phone as a modem.
5.1 Bluetooth Modes
Bluetooth on your device operates in three different modes:
1. On. Bluetooth is turned on and you can use Bluetooth features.
2. Off. Bluetooth is turned off. In this mode, you can neither send nor receive information using
Bluetooth. You might want to turn off the radio at times to conserve battery power, or in
situations where radio use is prohibited, such as onboard an aircraft and in hospitals.
3. Visible. Bluetooth is turned on, and all other Bluetooth-enabled devices within a range of 10
meters can detect your device.
By default, Bluetooth is turned off. If you turn it on, and then turn off your device, Bluetooth
also turns off. When you turn on your device again, Bluetooth automatically turns on.
97
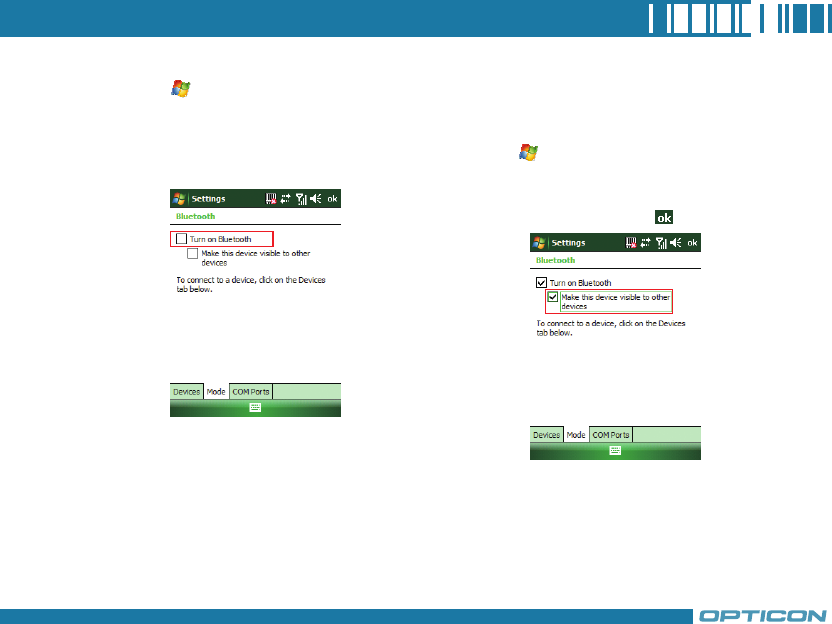
Turning Bluetooth On or Off
1. Tap > Settings > Connections
tab> Bluetooth.
2. Tap Mode tab, check or uncheck the
checkbox in front of Turn on Bluetooth
to turn on or off Bluetooth.
Making Your Device Visible
To receive beamed information, beaming
devices or computers must be able to detect
your device.
1. Tap > Settings > Connections tab
> Bluetooth.
2. Select Make this device visible to
other devices, and tap .
Other Bluetooth-enabled devices can now
detect your device and attempt to beam
information to it, establish a Bluetooth
partnership, or use a Bluetooth service.
98
Chapter 5. Bluetooth Connections
5.2 Bluetooth Partnership (Bonding)
A Bluetooth partnership is a relationship that you create between your device and another Bluetooth-
enabled device in order to exchange information in a secure manner. Creating a partnership between
two devices involves entering the same personal identification number (PIN) on both devices, and this
is a one-time process. Once a partnership is created, the devices can recognize the partnership and
exchange information without entering a PIN again. Make sure the two devices are within a range of
10 meters, and Bluetooth is turned on and in discoverable mode.
Selecting Make this device Visible to other devices also turns on Bluetooth.
Turning off Bluetooth will make your device not visible, and it will also prevent you from
sending a Bluetooth beam.
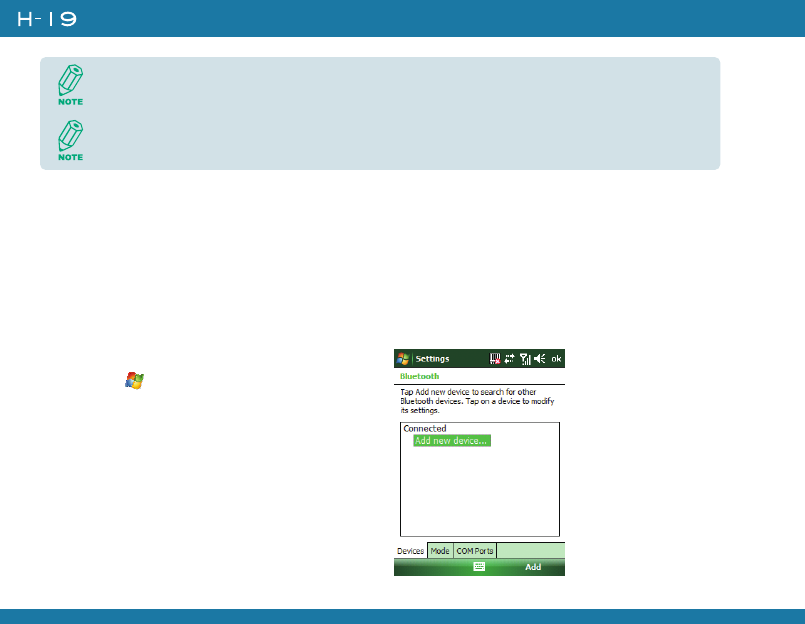
Creating a Bluetooth Partnership
1. Tap > Settings > Connections
tab> Bluetooth > Devices tab.
2. Tap Add new device. Your device
searches for other Bluetooth-enabled
devices and displays them in the list.
99
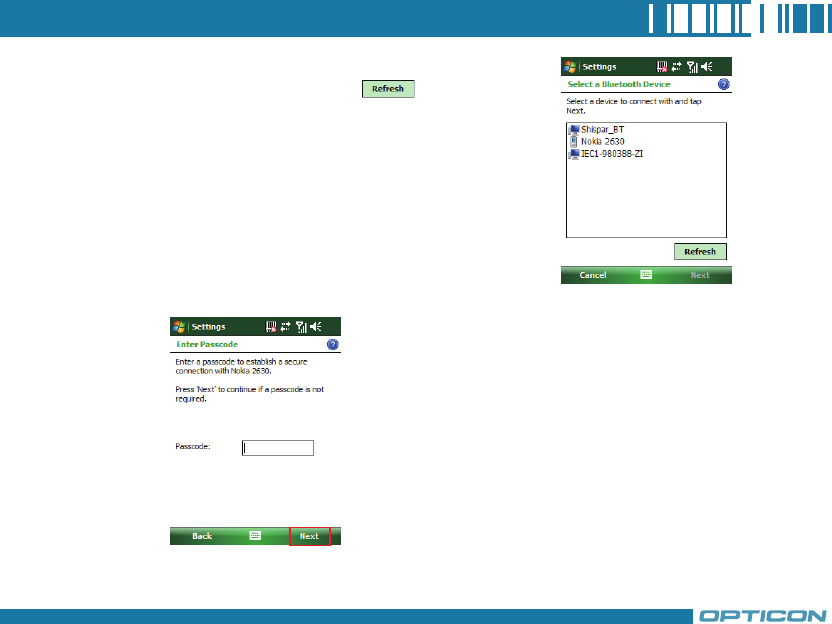
3. Select the device with which you want to create a Bluetooth
partnership, and tap Next. Tap if the device you
want to connect is not listed.
4. In Passcode, if you want to use a passcode (recommended
for enhanced security), enter an alphanumeric passcode
between 1 and 16 characters, and tap Next. Otherwise,
leave the passcode blank.
5. Enter the same passcode on the other device.
100
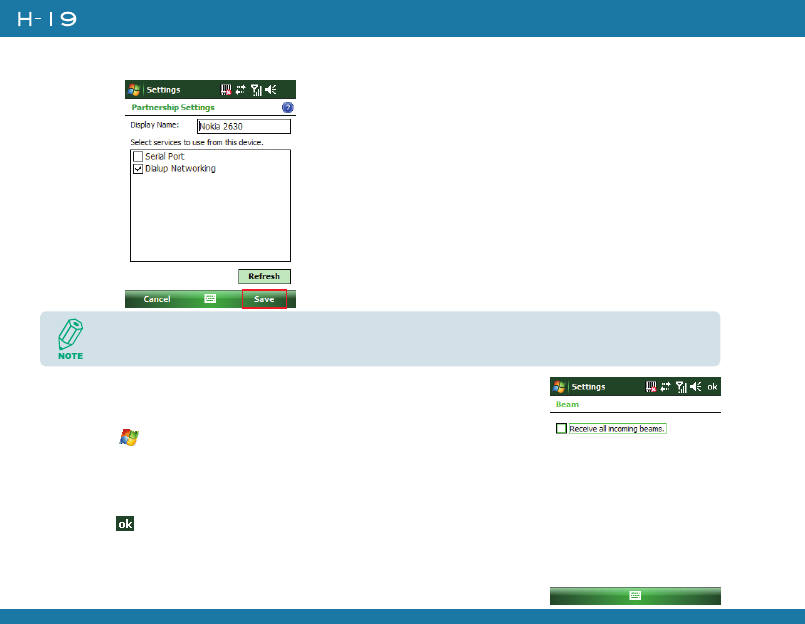
Chapter 5. Bluetooth Connections
6. Select the service to use from the device, and tap Save.
5.3 Beaming Information (Bluetooth)
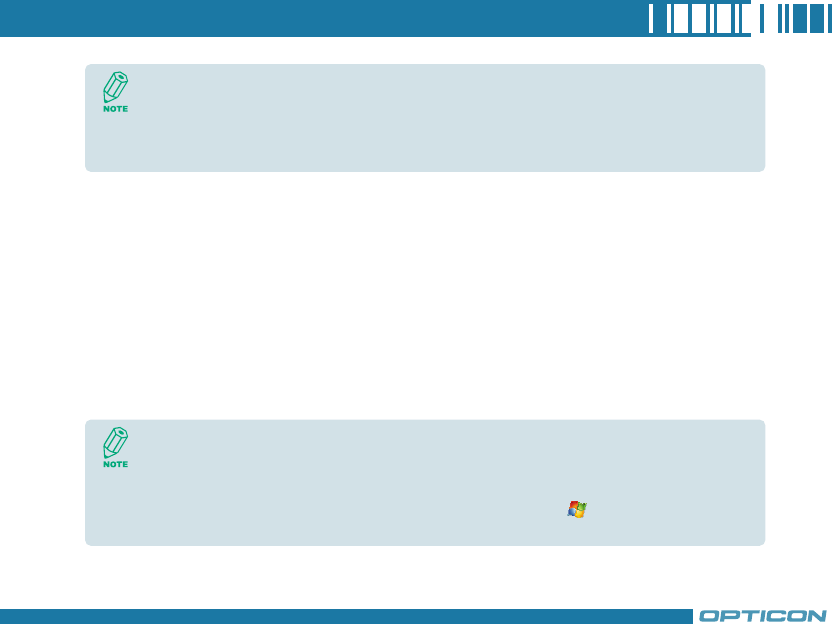
Receiving Beamed Information
1. Tap > Settings > Connections tab > Beam.
2. Select Receive all incoming beams.
3. To receive beams by using Bluetooth, ensure Bluetooth is turned on
and that your device is discoverable and within close range.
4. Tap .
Once you create a partnership, the Bluetooth-enabled devices don't need to be visible to
beam information between them; Bluetooth needs only to be turned on.
101
Beaming an Item
In the Calendar, Contacts, Notes, Tasks, and Pictures programs, you can beam files and
information to other devices using Bluetooth.
1. From the program, select the item you want to beam, such as an appointment in Calendar,
a task in Tasks, a contact card in Contacts, a picture in Pictures, a file in File Explorer. In
Calendar, for example, first open the appointment in Agenda view.
2. Tap Menu > Beam.
3. Your device will search and show visible devices, select the device to which you want to send
the item.
Once you select Receive incoming beams, your device automatically receives beams until
you clear this check box.
Your device can receive all types of beamed files, but you may not be able to view all types
of files on the device. You may need to copy some files to a PC for viewing.
When using Bluetooth, if the device that you want to beam to doesn't appear in the list,
ensure that the device is turned on, visible, and within close range of your device. Also,
ensure that Bluetooth is turned on.
You can obtain the Bluetooth BD Address of your device. Tap > Settings > System
tab > Device Info > Hardware tab.

102
Chapter 5. Bluetooth Connections

Chapter 6.
Transferring Files To and
From Your Device
6.1 Using ActiveSync
6.2 Transferring from Memory Cards
6.3 Using Bluetooth
6.4Transferring to a PC or Other
Devices
104
Chapter 6. Transferring Files To and From Your Device
You may need to transfer application data such as Word documents, Excel spreadsheets, PowerPoint
slides, and/or media files from your PC to your device. This section describes different methods to
transfer files from a PC to your device.
6.1 Using ActiveSync
1. Connect your device to the PC with the USB cable. Microsoft ActiveSync should be
automatically launched on the PC if it is set up correctly.
2. Select an information type under Synchronization Options in the Synchronization Setup Wizard
by checking the checkbox in front of it.
3. Click the Settings button and add the files you want to transfer.
Click the OK button when you finish.
4. Click Next, and then click Finish to start the synchronization
process.
5. On your device, tap > Programs > File Explorer. The files
should be saved to My Documents. Check to see if the files have
been transferred to your device successfully.
To transfer files from PC to your device with ActiveSync, you must install Microsoft
ActiveSync on the PC first. Please refer to Chapter 4 Synchronizing Information for detail on
how to install and set up ActiveSync.
105
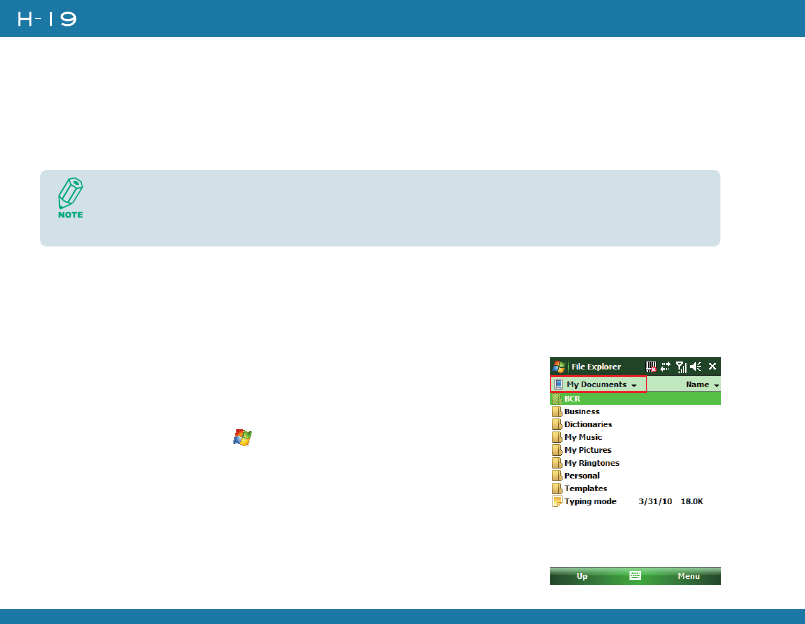
6.2 Transferring from Memory Cards
1. Insert your memory card into the device’s mini-SD card slot. (See “1.5 Mini-SD cards” for
details.)
2. Tap > Programs > File Explorer.
3. In the Show list, select Storage Card.
4. File Explorer should display all the files stored
in your memory card. Tap and hold the file
you want to transfer, and select Copy.
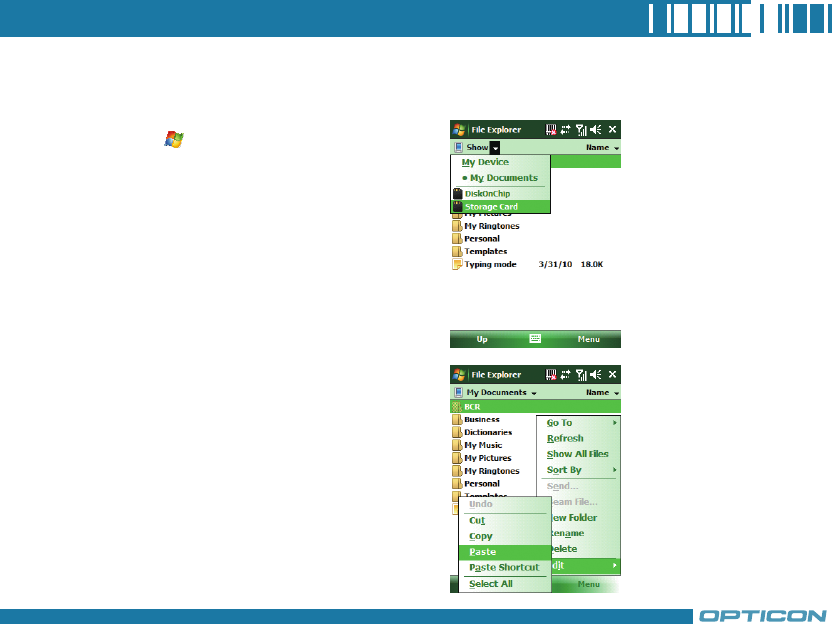
5. From the Show list in File Explorer, go to
destination folder. (For example, My Device
> My Documents.)
6. Tap Menu > Edit > Paste.
106
Chapter 6. Transferring Files To and From Your Device
6.3 Using Bluetooth
1. On your PC, locate the file you want to send using Bluetooth with Windows Explorer.
2. Right-click the file and select the device you want to transfer the file to under “Send To >
Bluetooth.”
3. Tap Yes when your device prompts about receiving a file.
4. After the transmission process is finished, the file should be saved in your device under My
Documents in the File Explorer.
6.4 Transferring to a PC or Other Devices
Please refer to Section 5.3 “Beaming Information (Bluetooth)” for details.
Before receiving files, you must turn Bluetooth on and establish a Bluetooth partnership
between your PC and your device. (See “Chapter 5. Bluetooth Connections” for details.)

Chapter 7.
Connecting to the
Internet
7.1 Setting up Internet connections
7.2 Using Internet Explorer Mobile
7.3 Using Wireless Manager
7.4 Using a Wi-Fi Connection

108
Chapter 7. Connecting to the Internet
7.1 Setting up Internet connections
Your device’s powerful networking capabilities allow you to access the Internet or your corporate
network at work through wireless and conventional connections. Specifically, you can configure
your device to establish a connection via GPRS or Proxy.
With an active connection on your device, you can browse the Web, download e-mails, or use
MSN Messenger. Check with your service provider to see if a connection has already been set up
for you, and if over-the-air configuration is supported.
If you need to manually set up a connection, it is important that you obtain the following
information from your Internet Service Provider (ISP) or the company whose intranet you are trying
to access:
• User name
• Password
• Access point name (required for GPRS connection)
• Domain name (required for accessing a corporate network or an intranet)
Creating a GPRS Connection
Every network connection is different. You should gather all of the relevant information or network
settings you need before starting this process.
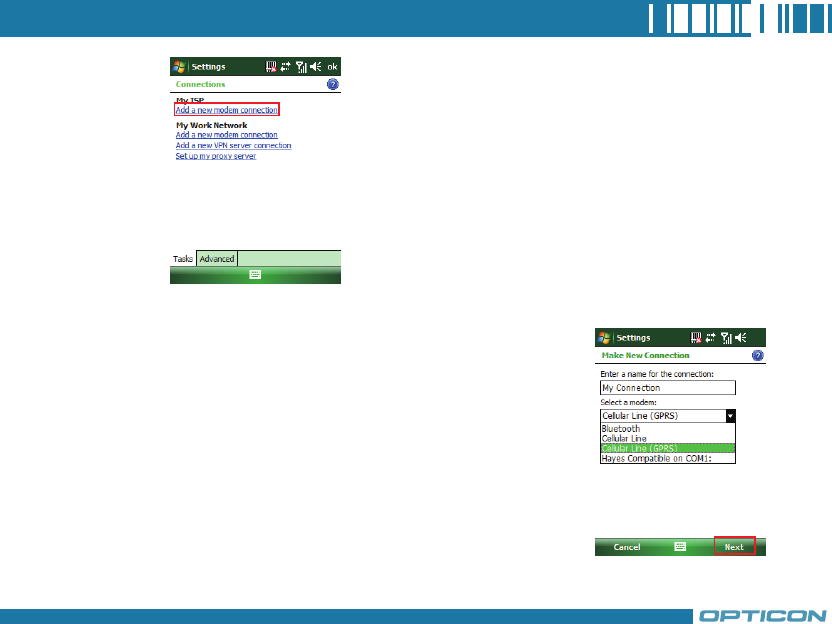
1. Tap > Settings > Connections tab > Connections.
2. Tap Add a new modem connection.
109
3. Enter the following information (you may or may not need to enter all of the following
information), and tap Finish.
• Enter a name for the connection.
• In Select a modem, select Cellular Line (GPRS). Then tap
Next.
110
Chapter 7. Connecting to the Internet
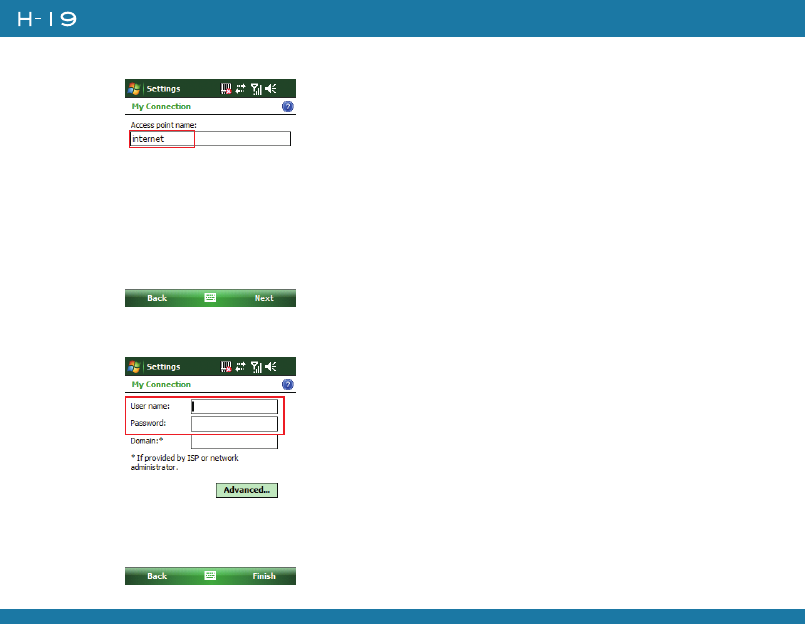
• In Access point name, enter the access point name, then tap Next.
• In User name, enter your user name for the GPRS network, if required.
• In Password, enter your password, if required.
111
• Tap Advanced > Servers tab. In DNS, enter the primary Domain Name System (DNS)
address, if required.
• In Alt DNS, enter the secondary DNS address, if required.
• Tap TCP/IP tab. In Use specific IP address, enter the Internet Protocol (IP) address for the
device, if required.
The device uses this connection when you open a program that connects to the Internet.
Creating a Proxy Connection
Every network connection is different. You should gather all of the relevant information or network
settings you need before starting this process.
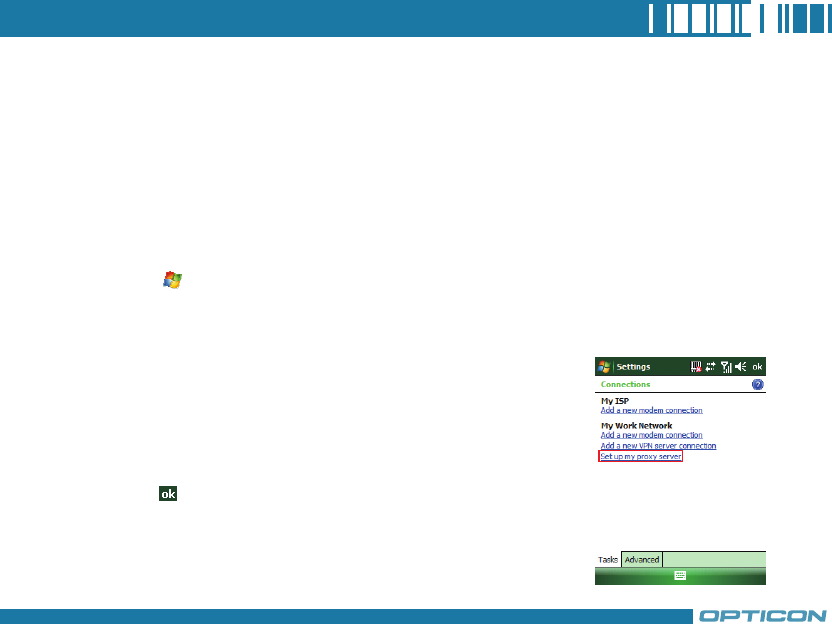
1. Tap > Settings > Connections tab > Connections.
2. Tap Set up my proxy server.
3. Check the checkbox in front of This network connects to the Internet.
4. Check the checkbox in front of This network uses a proxy server to connect to the
Internet.
5. Under Proxy server, enter the proxy server name.
6. If the proxy server uses a different port or requires a username
and password tap Advanced, select the proxy type to change its
settings, then enter username, password and/or port number in the
proper fields.
7. Tap .
112
Chapter 7. Connecting to the Internet
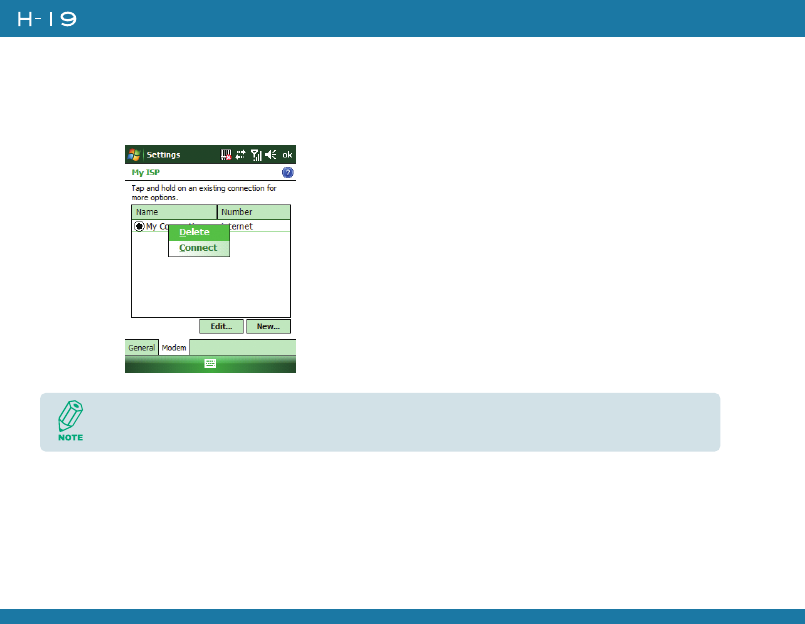
Deleting a Connection
1. Tap > Settings > Connections tab > connections.
2. Tap Manage existing connections.
3. Tap and hold on the connection you want to delete and select Delete.
The device cannot connect to a PC through ActiveSync while connecting to the Internet
using GPRS.
113
7.2 Using Internet Explorer Mobile
Internet Explorer Mobile is a full-featured Web browser, optimized for use on your device. You can use
Internet Explorer Mobile to browse the Internet once you have set up your Internet connection (if you
haven’t done so, please read the previous chapter before continuing).
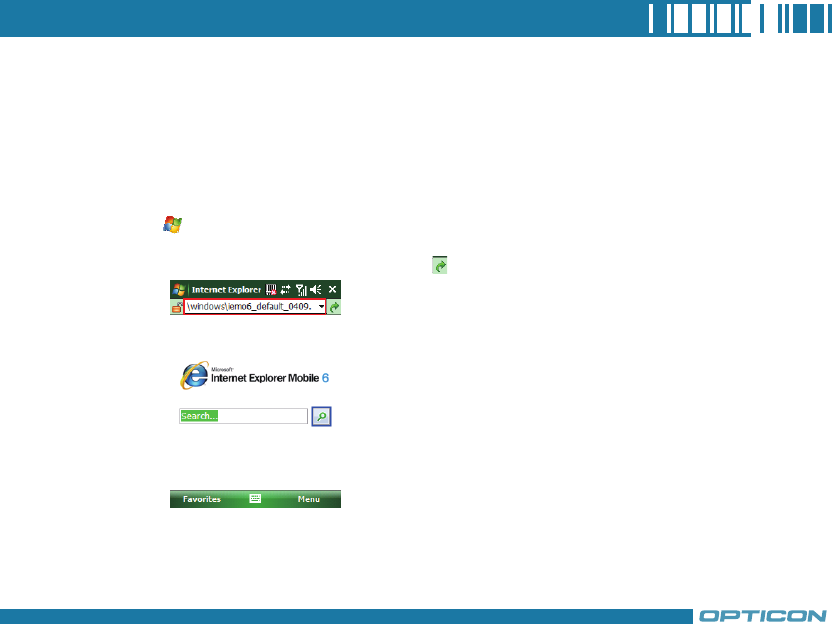
Browsing the Internet
1. To browse the Internet you must have a valid connection established.
2. Tap > Internet Explorer.
3. Do any of the following:
• Enter the address in the address bar, then tap .
114
Chapter 7. Connecting to the Internet
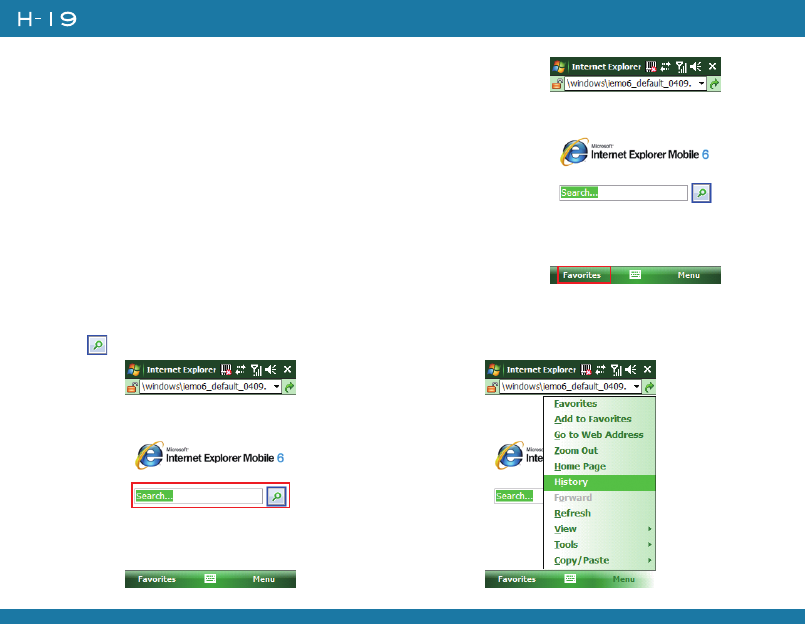
• Tap Favorites then select a Web Page. You can scroll down the
Favorites box and select one alternatively.
• Highlight the search box and type in a
term that you want to search for. Then tap
to begin search .
• Select Menu > History, then select a
Web Page. You can scroll down to the
History box and select one alternatively.
115
Adding a Web Page to the Favorite List
1. Tap > Internet Explorer.
2. Go to the page you want to add, tap Menu > Add to Favorites.
3. Confirm or change the name and Web page address.
4. In Folder, select a folder for this favorite.
5. Tap Add.
Deleting a Favorite
1. Tap > Internet Explorer.
2. Tap Menu > Favorites.
3. Select a favorite and then tap Menu > Delete.
4. Tap Yes to confirm the deletion.
To change the Home page, go to a Web page, tap Menu > Tools > Options. Tap
Home Page, select Current page, and then tap Done.
A quick way to add favorites to your device is to synchronize with your PC using ActiveSync.
For more information, see ActiveSync Help on your PC.
116
Chapter 7. Connecting to the Internet
Changing the Size of Text on Web Pages
1. Tap > Internet Explorer.
2. Tap Menu > View > Text size and select the size you want.
There are five zoom options you can select: Largest / Larger / Medium / Smaller / Smallest.
Showing or Hiding Pictures on Web Pages
1. Tap > Internet Explorer.
2. Tap Menu > Tools > Options > Other.
3. Select Show Pictures. Images on the Web pages that you visit will be downloaded. Un-check
this item if you do not want internet Explorer to show pictures.
Changing Web Page Display Options
1. Tap > Internet Explorer.
2. Tap Menu > View.
3. Select one of the following:
• Mobile : Arranges the content into one column that is as wide as the screen. This means that
you will rarely have to scroll horizontally.
• Desktop : Maintains a layout similar to what you see on a desktop computer, but makes
items smaller.
117
Viewing a Page in Full Screen Mode
1. Tap > Internet Explorer.
2. Do either of the following:
• Tap Menu > View > Full Screen.
• Tap and hold on the screen with stylus, and then tap Full Screen on the pop-up menu.
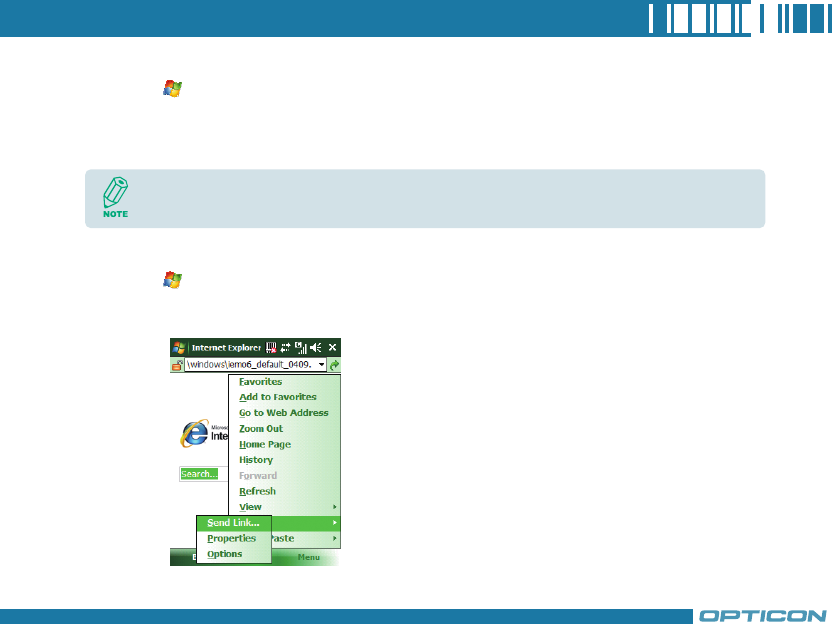
Sending a Link via E-mail
1. Tap > Internet Explorer.
2. Go to the page you want to send.
3. Tap Menu > Tools > Send Link.
To exit full screen mode, press either SOFT KEY, and then tap Menu > View > Full
Screen to cancel the selection.
118
Chapter 7. Connecting to the Internet
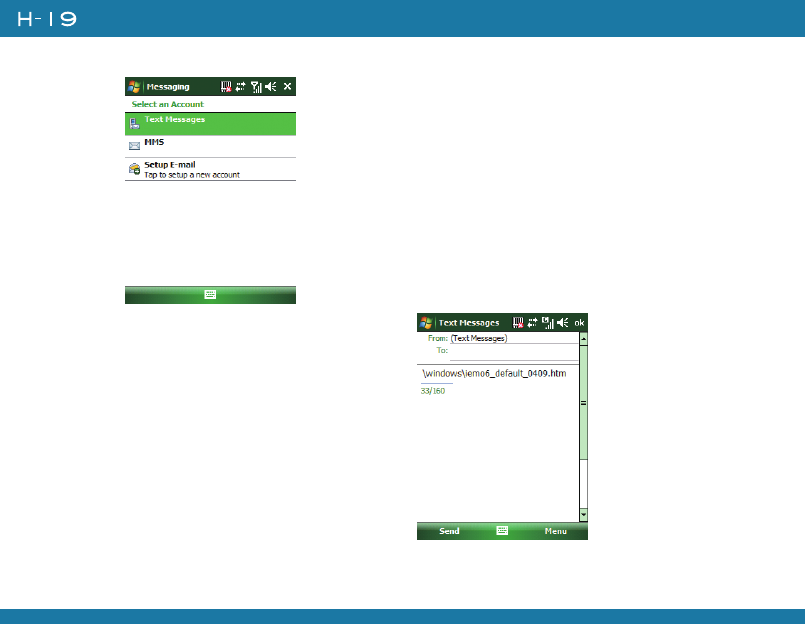
4. Select an account.
5. A new message is created with the page
address inserted in the message body. You can
then enter the recipient’s phone number and
edit the message.
6. Tap Send to send the message.

119
Clearing Temporary Files, Cookies or History
1. Tap > Internet Explorer.
2. Tap Menu > Tools > Options.
3. Tap Browsing History.
4. Select an item (Temporary Files, Cookies or History) and then tap Clear.
5. Tap Done when finished.
120
Chapter 7. Connecting to the Internet
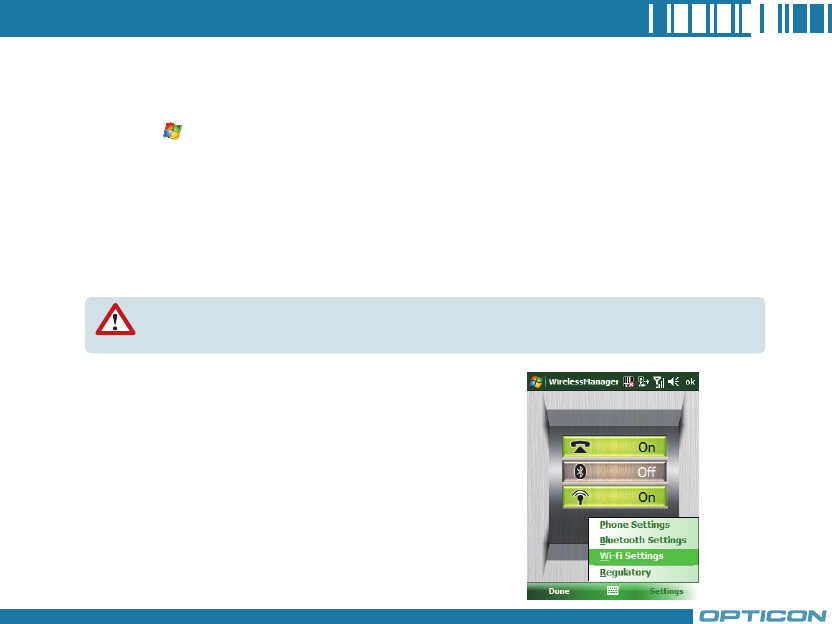
7.3 Using Wireless Manager
Wireless Manager is a program that allows you to conveniently turn on or off the various wireless
connections on the Windows Mobile-based device, including cellular phone, Bluetooth and Wi-Fi.
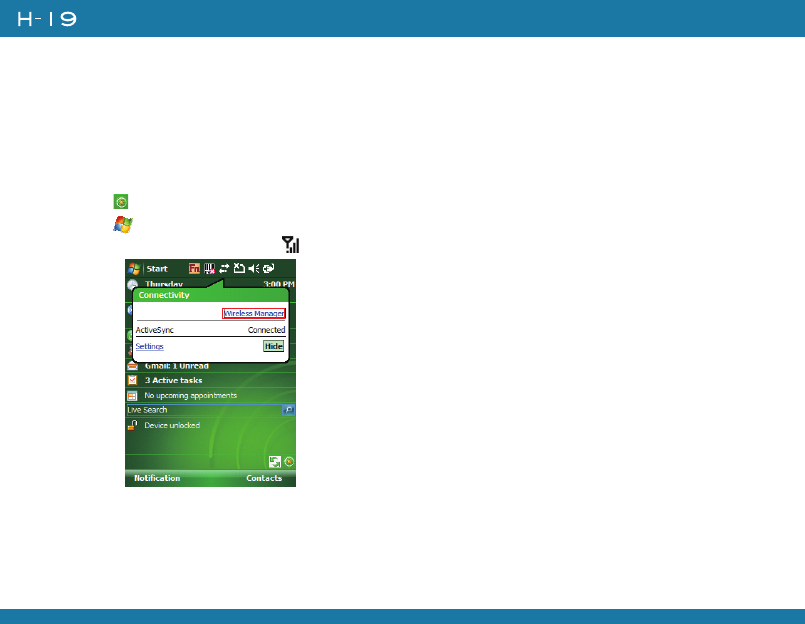
Opening Wireless Manager
To open the Wireless Manager, do one of the following:
• Tap icon on the screen to open the Wireless Manager directly.
• Tap > Settings > Connections tab > Wireless Manager.
• Tap the signal strength icon ( ) at the top of the screen, and tap Wireless Manager.
Enabling and Disabling a Feature
There are three buttons in the Wireless Manager; each of them represents one certain feature. You
can simply tap a button to activate its corresponding feature.
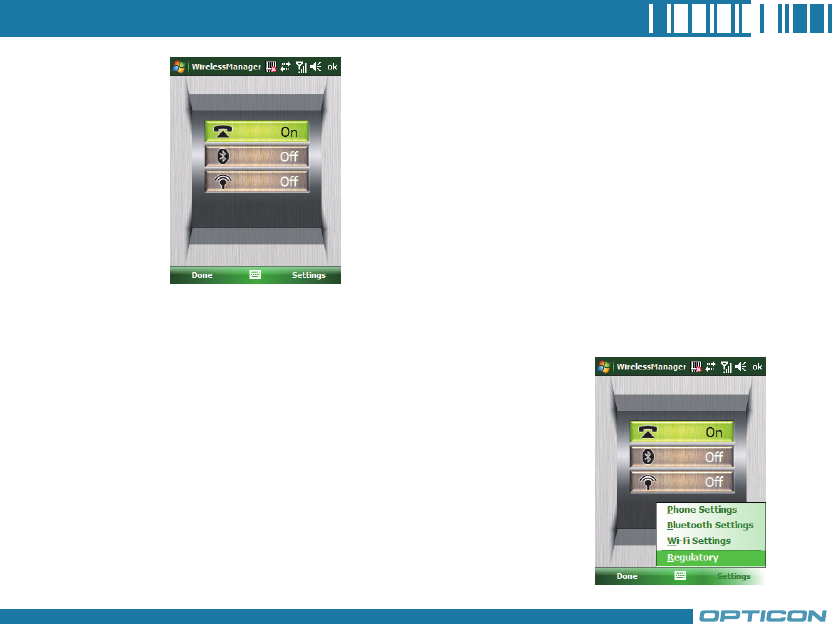
121
• Tap the first button to toggle between enabling or disabling the phone.
• Tap the second button to toggle between turning on or off Bluetooth.
• Tap the third button to toggle between turning on or off Wi-Fi.
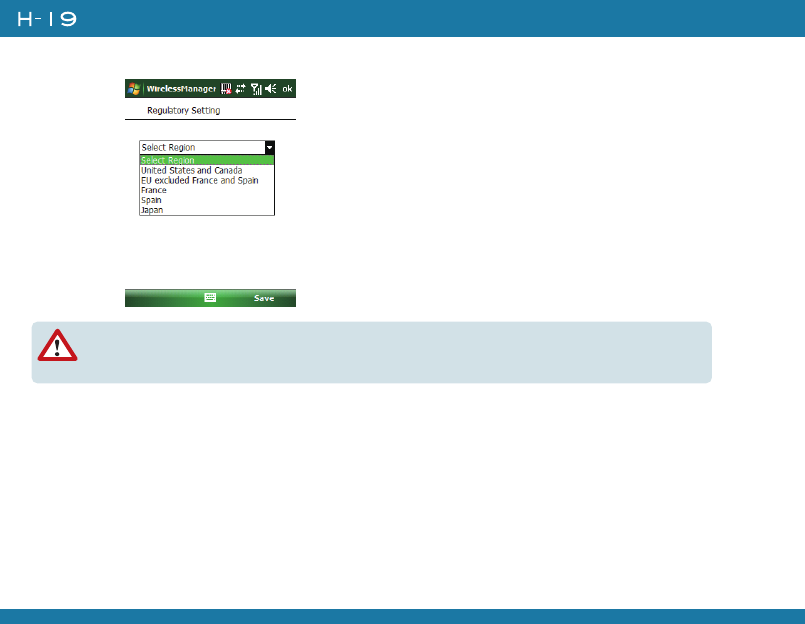
Changing Regulatory Setting
The regulations for the frequency, channel and power of Wi-Fi and
Bluetooth are varied in different regions. You can adapt a country’s
telecommunications regulatory settings while you use your device to
access wireless networks in the country.
1. Open Wireless Manager and then tap Settings > Regulatory.
122
Chapter 7. Connecting to the Internet
2. Select a country/region in which you use this device. Tap Save to confirm the setting.
Wi-Fi can not be turned on if the Regulatory Setting is not specified.
Your device will restart automatically after you change the regulatory setting.
123
7.4 Using a Wi-Fi Connection
Wi-Fi is an enabling technology that allows you to quickly access e-mail, the internet, and broadband
multimedia content. When your device encounters a hotspot (a place where you can access Wi-Fi
networks), it can then connect to that network wirelessly. While some hotspots are free, the most robust
public Wi-Fi networks are provided by private internet service providers (ISPs) that charge a fee for
users to connect to the internet.
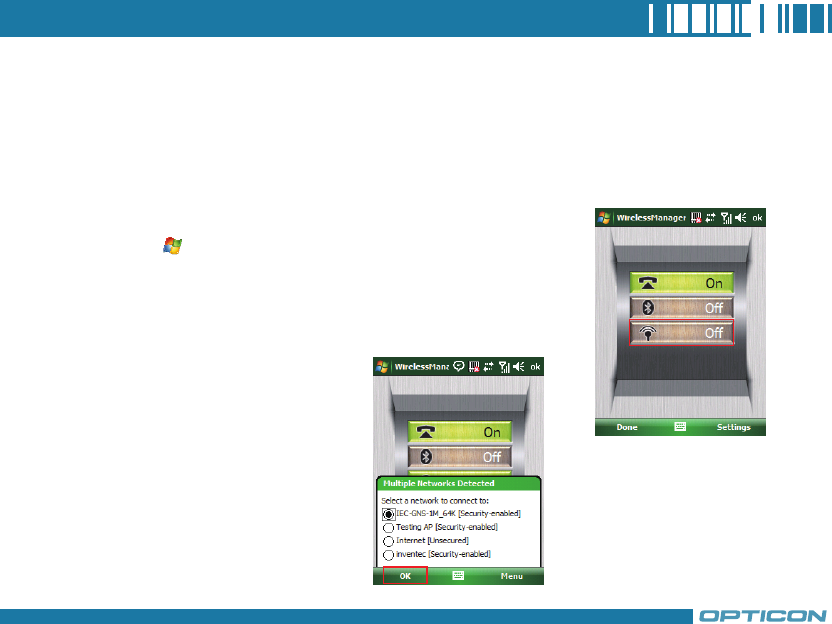
Connecting to a Wi-Fi Network
1. Tap > Settings > Connections tab > Wireless Manager.
2. Tap the third button to turn on Wi-Fi connection.
3. Available wireless networks will be
detected and showed on a pop-up
window. Select the desired wireless
network and tap OK.
124
Chapter 7. Connecting to the Internet
4. If required, select The Internet if the wireless network connects your device to the Internet;
select Work if the wireless network connects to a private network. Then tap Connect.
5. Enter a network key if required. Then tap Connect.
6. When Wi-Fi connection is activated, the icon shows on the title bar.
You may need to consult your ISP before you try to run this utility.
You can obtain the Wi-Fi address of your device. Tap > Settings > System tab >
Device Info > Hardware tab and refer to WiFi MAC Address.
125
Checking Wi-Fi Connection
You can check the current wireless connection status via Wi-Fi Network Manager after connecting
to a Wi-Fi Network.
1. Tap > Settings > Connections tab > Wi-Fi Network Manager.
2. In Status tab, you can see information of link status, SSID, Signal strength…etc.
3. In Info tab, you can check values of servers and IP address and renew IP if needed.
4. In Advanced tab, you can refer to MAC address and version information.
Configuring Wi-Fi Settings
You can configure wireless networks on your device by adding new Wi-Fi connections and editing
currently available networks.
Creating a Wireless Connection
1. Open Wireless Manager and then tap Settings > Wi-Fi
Settings.
The screen for wireless networks configuration can only be accessed after Wi-Fi is turned
on.

126
Chapter 7. Connecting to the Internet
2. In the Wireless tab, tap Add New… on the screen.
3. Enter the Network name and Network
type, then tap Next. If you want to
connect to another device instead of a
network through an access point, select
This is a device-to-device (ad-hoc)
connection.
127
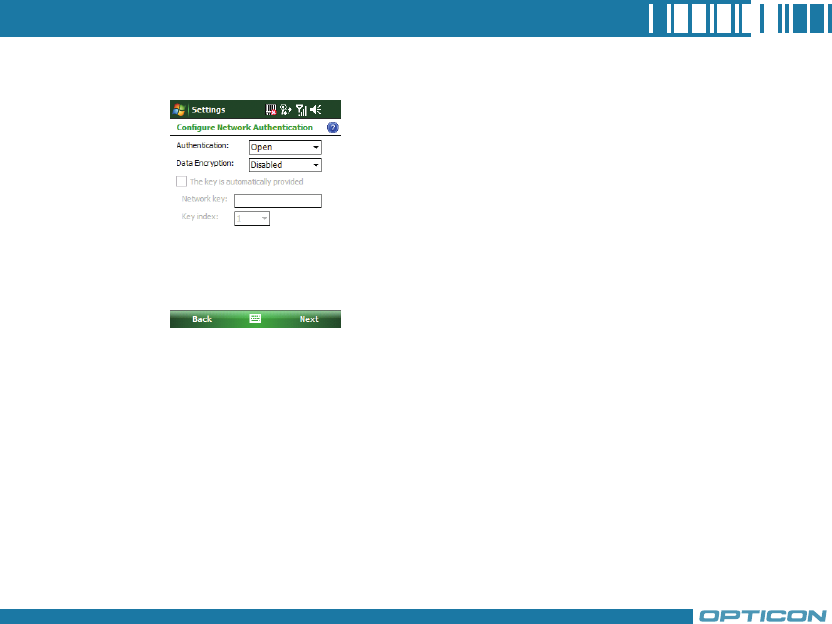
4. Select Authentication type and Data Encryption and enter the Network key and Key
index if needed. Tap Next.
5. Select Use IEEE 802.1x network access control to use EAP (Extensible Authentication
Protocol). Select EAP type: PEAP or Smart Card or Certificate.
6. Tap Finish.
128
Chapter 7. Connecting to the Internet
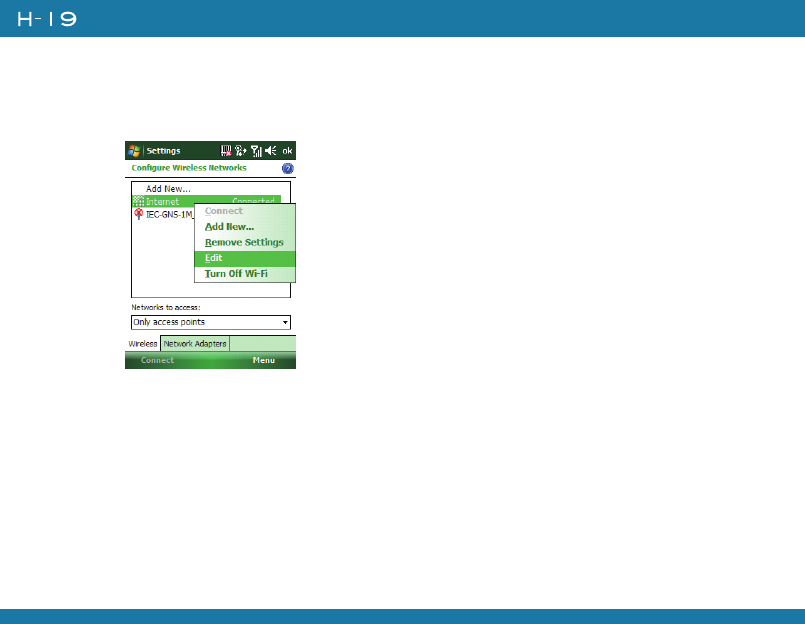
Editing a Wireless Network
1. Open Wireless Manager and then tap Settings > Wi-Fi Settings.
2. In Wireless tab, you can see currently available wireless networks. Tab and hold the network
you want to edit, and then tap Edit on the pop-up screen.
3. Changing settings of this wireless network and tap Finish to save them.

Chapter 8.
Messaging & Contacts
8.1 Text Messaging
8.2 Multimedia Messaging Service
8.3 E-mail
8.4 Using Contacts
130
Chapter 8. Messaging & Contacts
Messaging is the unified point of access for all message types within your device. With Messaging, you
can send and receive text messages, e-mails, and MMS messages.
Contacts helps you to manage your contact information. Using Contacts you can quickly communicate
with people.
This section describes the procedure on sending and receiving different kinds of messages, and using
Contacts to manage addresses and phone numbers.
8.1 Text Messaging
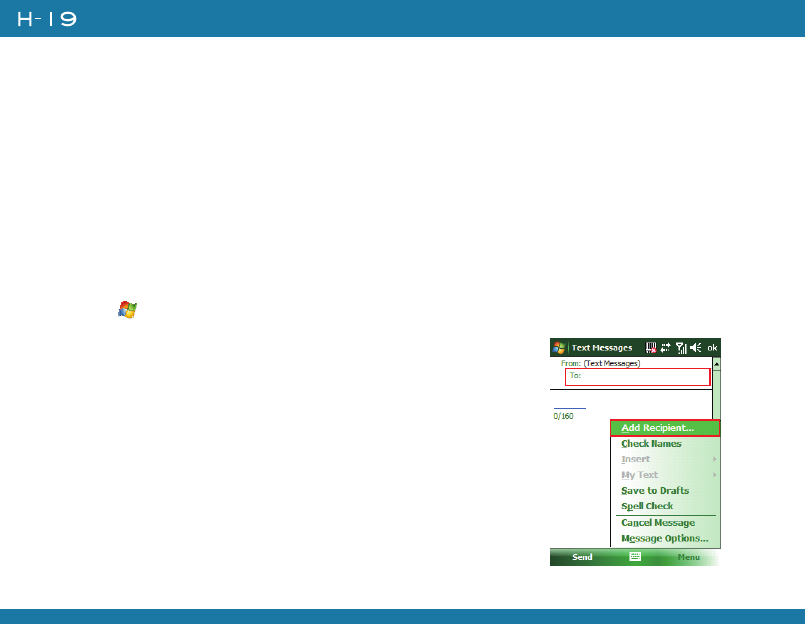
Creating a Text Message
1. Tap > Messaging > Text Messages.
2. In the message list, tap Menu > New.
3. Do either of the following:
• Enter the recipient’s text message number in the To field. Insert a
semicolon (;) between multiple text message numbers.
• Tapping Menu > Add Recipient, and then select a name.
• Enter your message and tap Send. Text messages are sent
immediately.

131
Using Preset Text Messages
You can quickly insert preset or frequently used messages into your text message. While
composing a message, tap Menu > My Text and select a preset message to insert.
To edit a preset message:
1. While composing a message, tap Menu > My Text > Edit My Text Messages.
2. Select a message and edit.
3. Tap .
Reading a Text Message
1. Tap > Messaging > Text Message.
2. Select Inbox under Text Messages.
3. In the message list, tap the text message you want to read.
132
Chapter 8. Messaging & Contacts
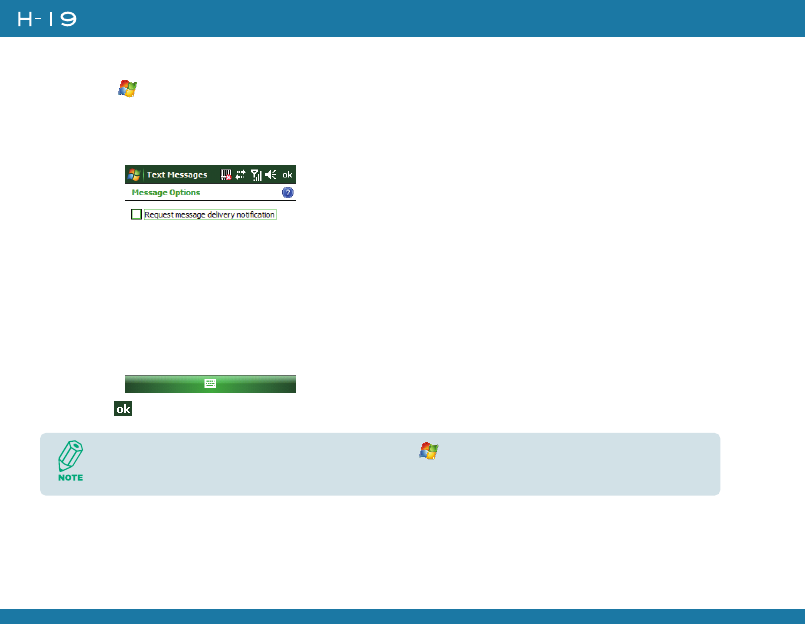
Requesting Message Delivery Notification
1. Tap > Messaging > Text Messages.
2. Tap Menu > New.
3. Tap Menu > Message Options.
4. Select this check box to request a message delivery notification.
5. Tap .
To change options for the Text Message, tap > Messaging > Menu > Tools >
Options, and select the type of options to change.
133
8.2 Multimedia Messaging Service
Creating and sending Multimedia Message Service (MMS) messages to your friends and family is fun
and easy. You can include or capture photos or video clips, include or record audio, add text, then
send them along with your MMS message.
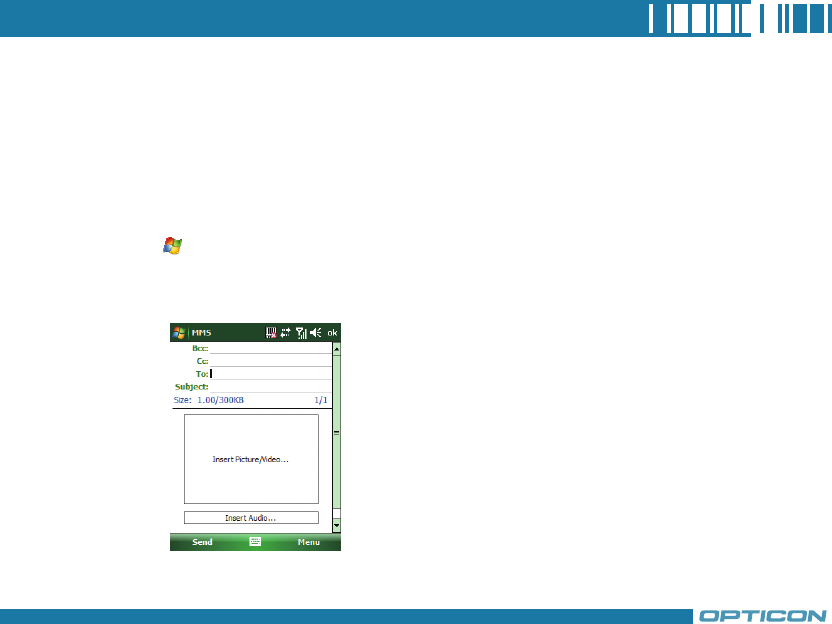
Composing a MMS Message
MMS messages can be composed in a combination of various slides where each of the slides can
be any combination of audio or video clip, an image, and/or text.
1. Tap > Messaging, and select MMS.
2. Tap Menu > New.
3. In To, Cc, and/or Bcc, enter recipient e-mail addresses. Insert a semicolon (;) between multiple
addresses. You can tap Menu > Add Recipient to add recipients.
134
Chapter 8. Messaging & Contacts
4. In Subject, enter a subject.
5. To create a slide, do any combinations of the following:
• Tap Insert Picture/Video and select an picture or video clip.
• Tap Insert Audio and select an audio clip.
• Tap Insert Text and enter a message.
• Tap Menu > Insert > Sound Recorder and tap RECORD ( ) button to record a new
audio clip. Tap STOP ( ) button to stop recording.
• Tap Menu > Options > Background Color and select a background color for the slide.
6. Tap Send.
Previewing a MMS Message
You can preview a MMS message before sending it.
1. To preview your MMS message, tap Menu > Preview after you composed your message.
2. Tap Done or Replay.
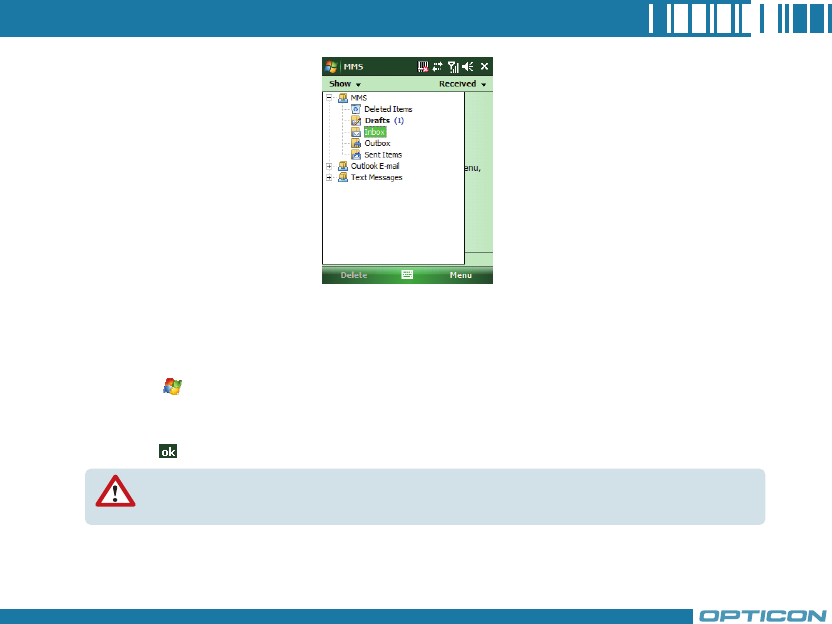
Reading a MMS Message
1. Tap > Messaging > MMS.
After the first slide is filled with content, you can tap Menu > Slides > Insert to add
another slide to your MMS message.
135
2. Select Inbox under MMS.
3. In the message list, tap the MMS message you want to read.
Configuring MMS Settings
1. Tap > Messaging > MMS.
2. Tap Menu > MMS Settings.
3. Select the type of options to change.
4. Tap .
Most of the time, you have to configure MMS settings in Messaging as well as a GPRS
connection in order to use MMS.
136
Chapter 8. Messaging & Contacts
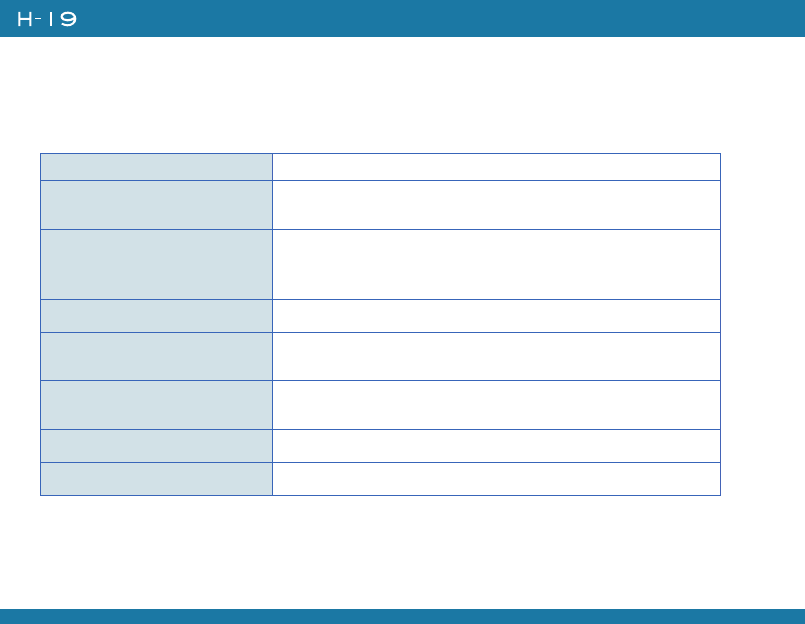
Setting Description
User name Usually the first part of your e-mail address, which appears be-
fore the “at” sign (@).
Password Choose a strong password. You will have the option to save
your password, so that you do not need to enter it each time
you connect to your e-mail server.
Domain The domain name. This may be required.
Server type The type of e-mail server that hosts your mailbox (POP3 or
IMAP4).
Account name A name for this account. You must use a different name for
each account that you set up.
Network The type of network your e-mail server connects to.
Incoming mail server The name of your e-mail server (POP3 or IMAP4).
8.3 E-mail
Setting Up an Internet E-mail Account Manually
Before you set up your Internet e-mail account, please ensure that you have the necessary
information.
137
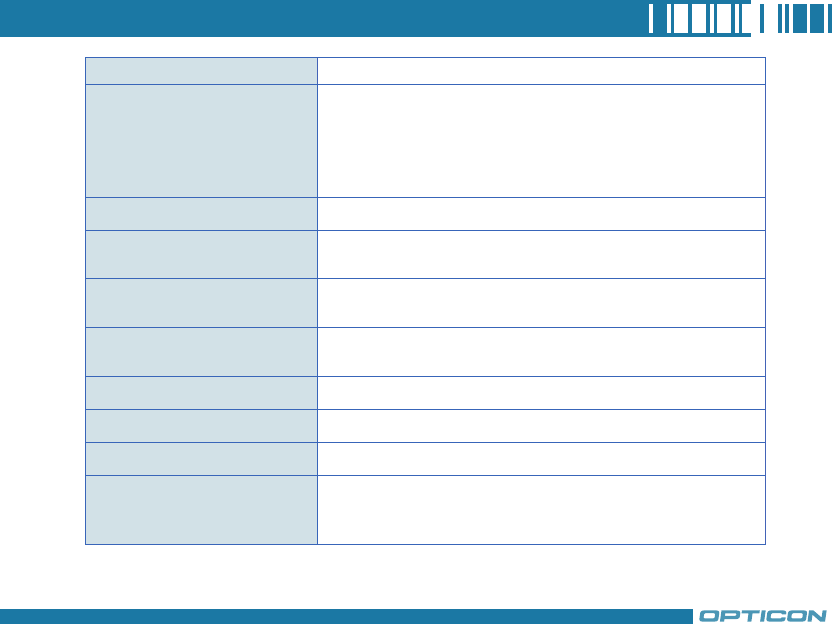
Setting Description
Require SSL connection Select this to ensure you always receive e-mail for this account
using an SSL connection. This enables you to receive personal
information more securely. Please note that if you select this and
your ISP does not support an SSL connection, you will not be
able to connect to receive e-mail.
Outgoing mail server The name of your outgoing e-mail server (SMTP).
Outgoing server requires au-
thentication
Your outgoing e-mail server (SMTP) may require authentication.
Note: Your user name and password from above will be used.
Outgoing server settings Your outgoing e-mail server may require different authentication
settings than your incoming e-mail server.
Use different user name for
outgoing server
A check box that lets you enter separate settings for your outgo-
ing e-mail server.
User name Your user name for the outgoing e-mail server.
Password Your password for the outgoing e-mail server.
Domain The domain name of the outgoing e-mail server.
Require SSL connection (Out-
going mail server only)
A connection that enables you to send personal information
more securely. Note that if you select this and your ISP does not
support an SSL connection, you will not be able to send e-mail.

138
Chapter 8. Messaging & Contacts
Now you are ready to set up your
account:
1. Tap > Messaging > Setup E-mail.
2. Enter your e-mail address and password.
Select Save password if you want, or
you can enter the password each time
you send and receive e-mails. Then tap
Next.
3. Tap Next. If the device is connected to
the internet, the Auto Setup feature will
attempt to retrieve settings for this e-mail
account, saving you the effort of typing in
all the required settings. If no matching
settings are found (or if no internet
connection exists), then you will need to
enter each setting manually.
139
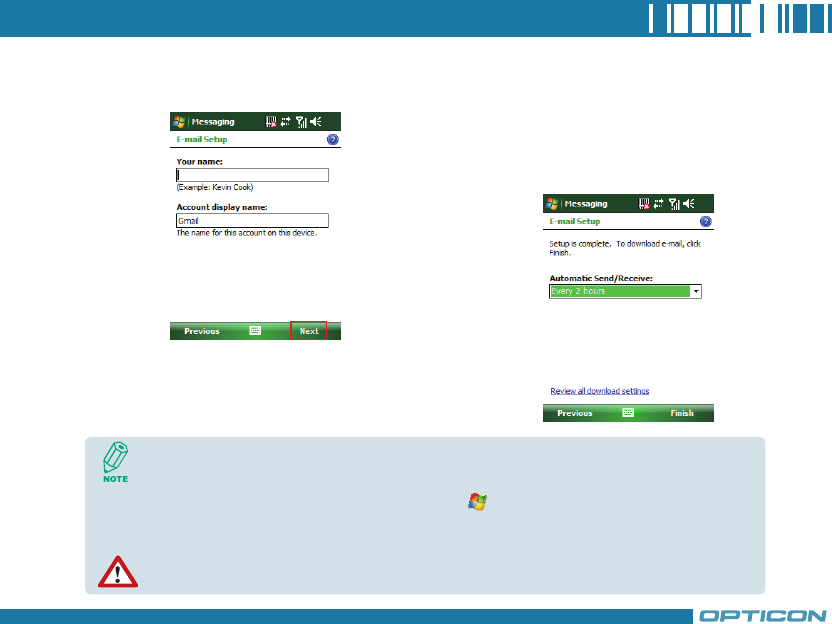
4. Enter the name you want to appear when
you send messages, then tap Next.
5. In Automatic Send/Receive, select
a fr equency for sending/ r eceiving
e-mails. Please note that data charges
will probably be incurred if you send
and receive e-mail outside of WiFi
or Bluetooth range. Tap Review all
download settings to change your
e-mail settings; otherwise, tap Finish to
start downloading messages.
If Auto Setup was not successful, enter required information (Incoming mail server, User
name, Password, Outgoing mail server) manually until setup is complete.
To change options for an e-mail account, tap > Messaging > Menu > Tools >
Options, and select the type of options to change.
If you save your password and then lose your device, someone finding your device might be
able to gain access to your e-mail.
140
Chapter 8. Messaging & Contacts
Composing an E-mail Message
1. Tap > Messaging.
2. Select an e-mail account.
3. Tap Menu > New.
4. In To, Cc and/or Bcc, enter recipient e-mail addresses. Insert a semicolon (;) between multiple
addresses.
5. In Subject, enter a subject.
6. Enter a message.
7. Tap Send. E-mail messages are stored in Outbox and are sent to recipients the next time you
synchronize or connect to your e-mail server and send and receive mail.
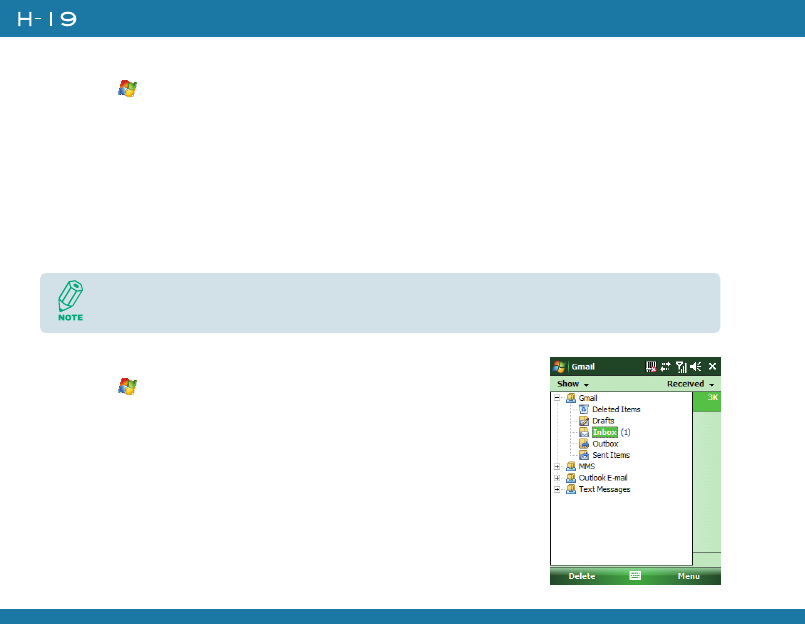
Reading an E-mail Message
1. Tap > Messaging.
2. Select an e-mail account.
3. Tap Inbox under this e-mail account.
4. In the message list, tap the e-mail message you want to read.
You can quickly enter e-mail addresses from your contact cards. Tap on To and select a
recipient from the list. Then, select the recipient’s e-mail address.
141
E-mail Message Options
1. Tap > Messaging, and select an e-mail account.
2. Tap Menu > New.
3. Tap Menu > Message Options.
4. Select the type of options to change.
5. Tap .
8.4 Using Contacts
Contacts is your address book and information storage for the people and businesses you
communicate with. It stores phone numbers, e-mail addresses, home addresses, and any other
information that relates to a contact, such as a birthday or an anniversary date. You can also add a
picture or assign a ring tone to a contact.
From the contact list, you can quickly communicate with people. Click a contact in the list for a
summary of contact information. From there, you can call or send a message.
If you use Outlook on your PC, you can synchronize contacts between your device and PC.
142
Chapter 8. Messaging & Contacts
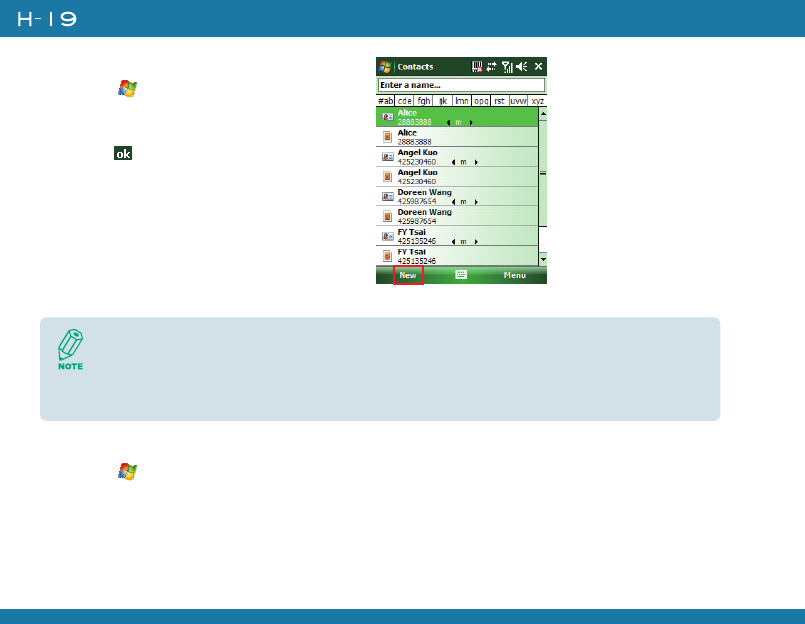
Creating a New Contact
1. Tap > Contacts > New.
2. Select Outlook Contact.
3. Enter information for the new contact.
4. Tap .
Viewing and Editing Contact Information
1. Tap > Contacts.
2. Tap the contact whose information you want to view. You can quickly search through Contacts
by entering the first letter of the contact.
If someone who isn't in your list of contacts calls you, you can create a contact from Call
History. Tap and hold the item and then select Save to Contacts on the pop-up submenu.
To save an existing contact to your SIM card, open the contact and tap Menu > Save to
SIM.
143
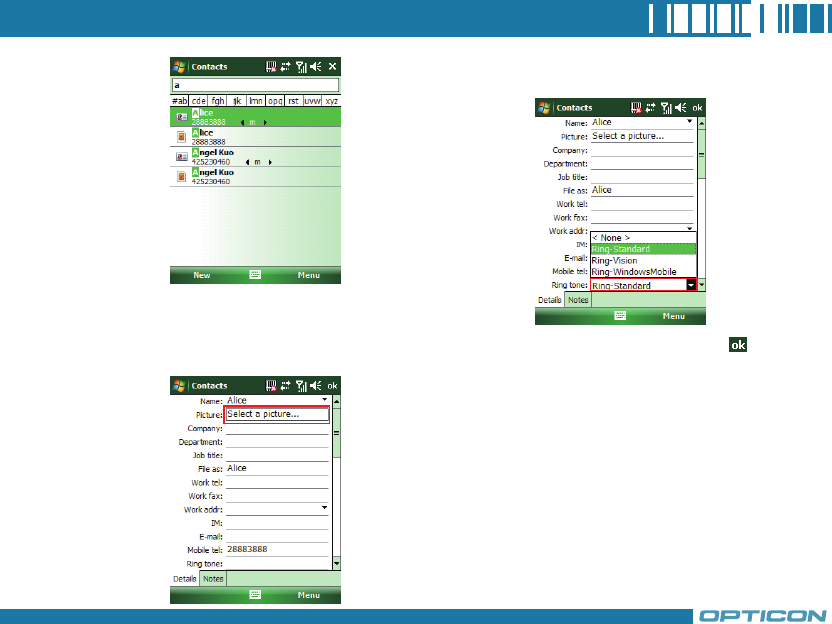
3. To edit the information, tap Menu > Edit.
4. Do any of the following:
• Tap Picture and select a picture you
want to add.
• Tap Ring tone and select the ring tone
you want.
5. When finished making changes, tap .
144
Chapter 8. Messaging & Contacts
Sending an E-mail to a Contact
1. Tap > Contacts.
2. Tap the contact you want to send an e-mail to.
3. Tap the e-mail address.
4. Select the e-mail account to use.
5. Enter a subject, compose your message, and then tap Send.
Sending a Text Message to a Contact
1. Tap > Contacts.
2. Tap the contact you want to send a text message to, and tap Menu > Send Text Message.
3. Compose your message, and tap Send.
Creating a SIM Contact
Contacts can be created and stored on a subscriber identity module (SIM.) If you move the SIM to
another device, your SIM contacts are moved as well.
1. Tap > Contacts.
2. Tap New > SIM Contact.
3. Enter the name and phone number of the contact and tap .
Remember to install a valid SIM to your device before creating a SIM Contact.