Iridium Satellite 9575N Iridium Satellite Phone User Manual irdm extreme usermanual eng lr jul2013pt1
Iridium Satellite LLC Iridium Satellite Phone irdm extreme usermanual eng lr jul2013pt1
UserManual.wiki
>
Iridium Satellite
>
9575N User Manual
>
User manual part1
Contents
1.
User manual part1
2.
User manual part2
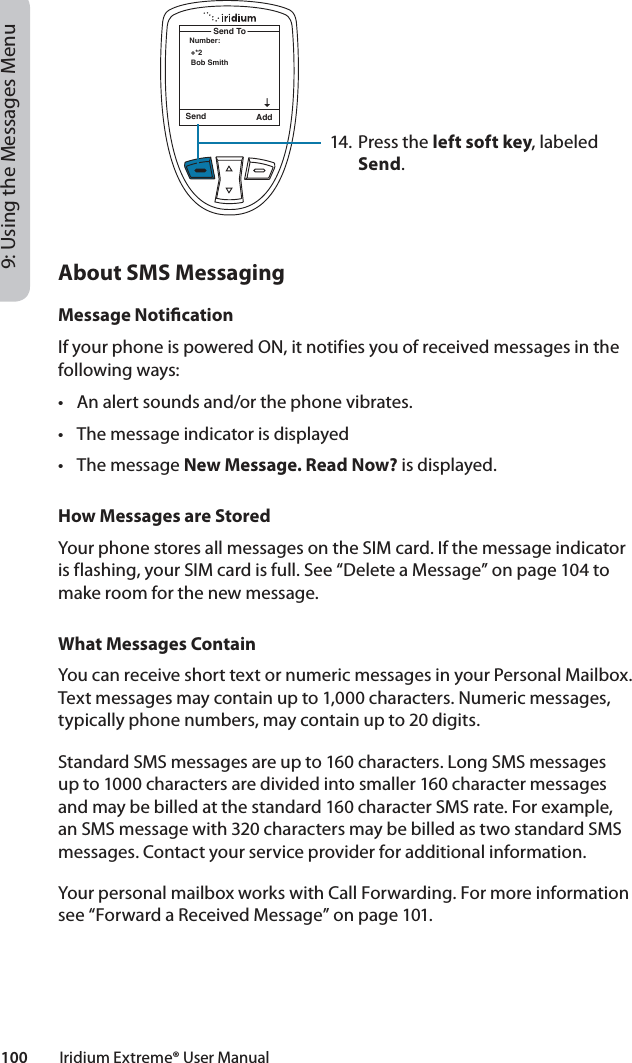
3.
9575A user manual part1
4.
9575A user manual part2
5.
9575A user manual part3
User manual part1
Navigation menu
Upload a User Manual
Namespaces
Wiki Guide
HTML
PDF
Info
Views
User Manual
Discussion / Help
Navigation


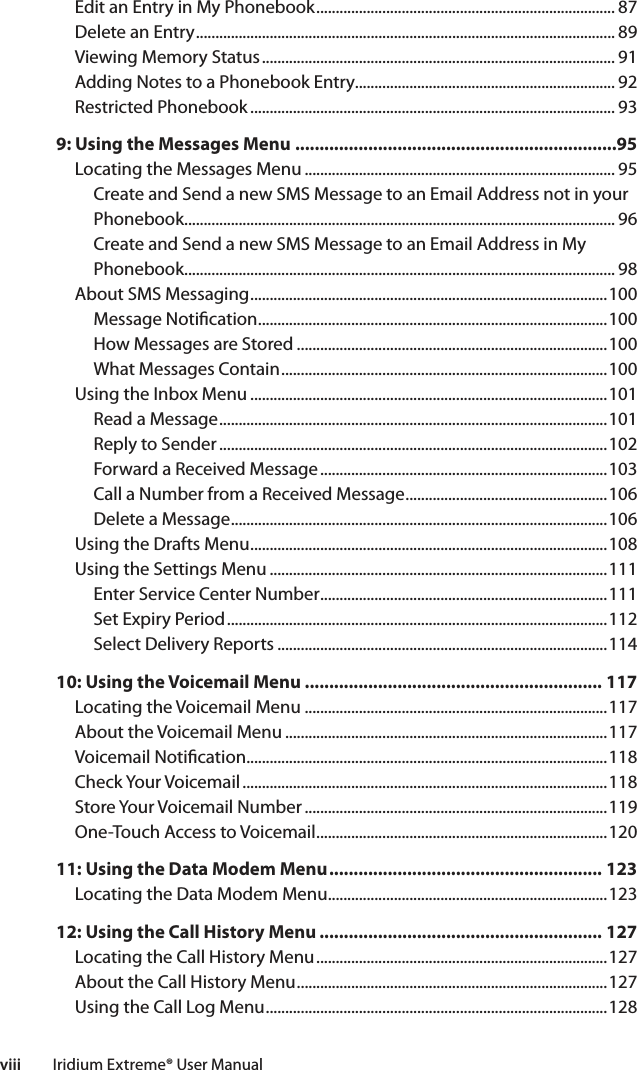


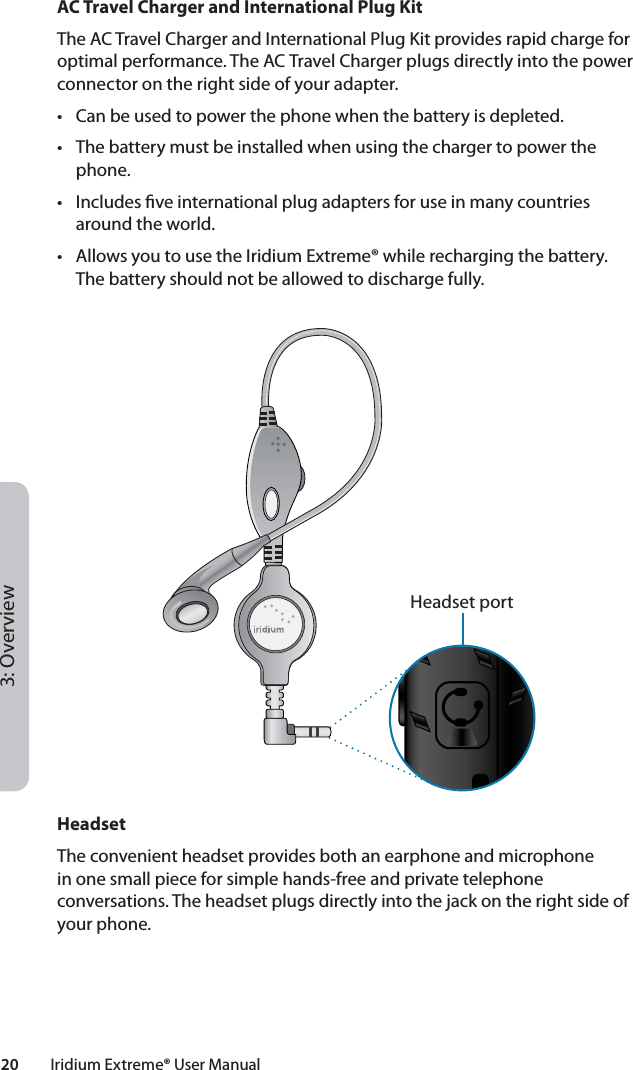


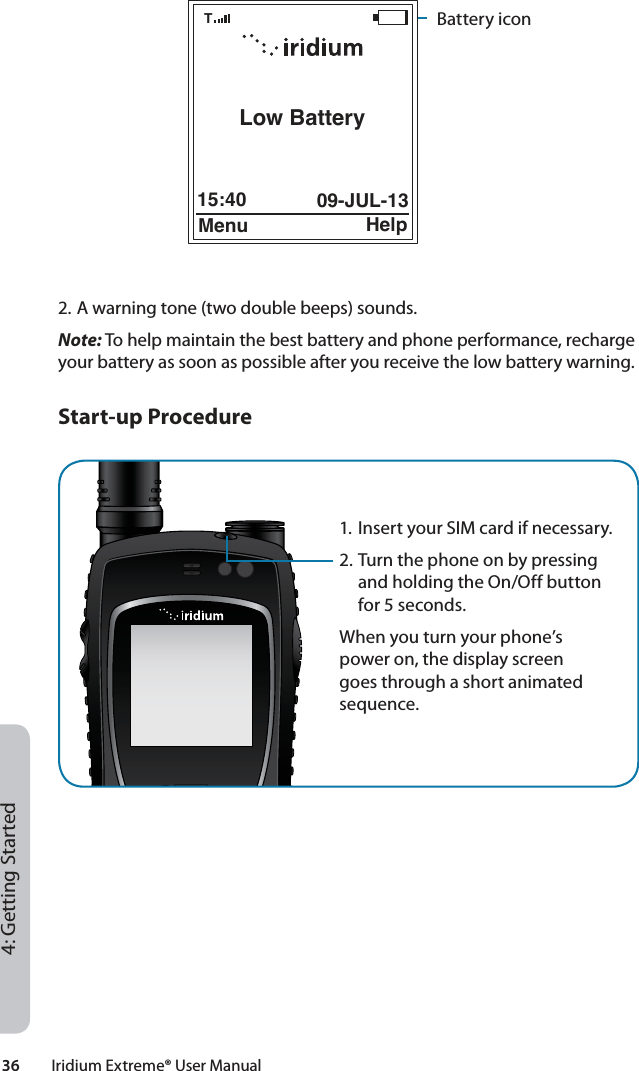

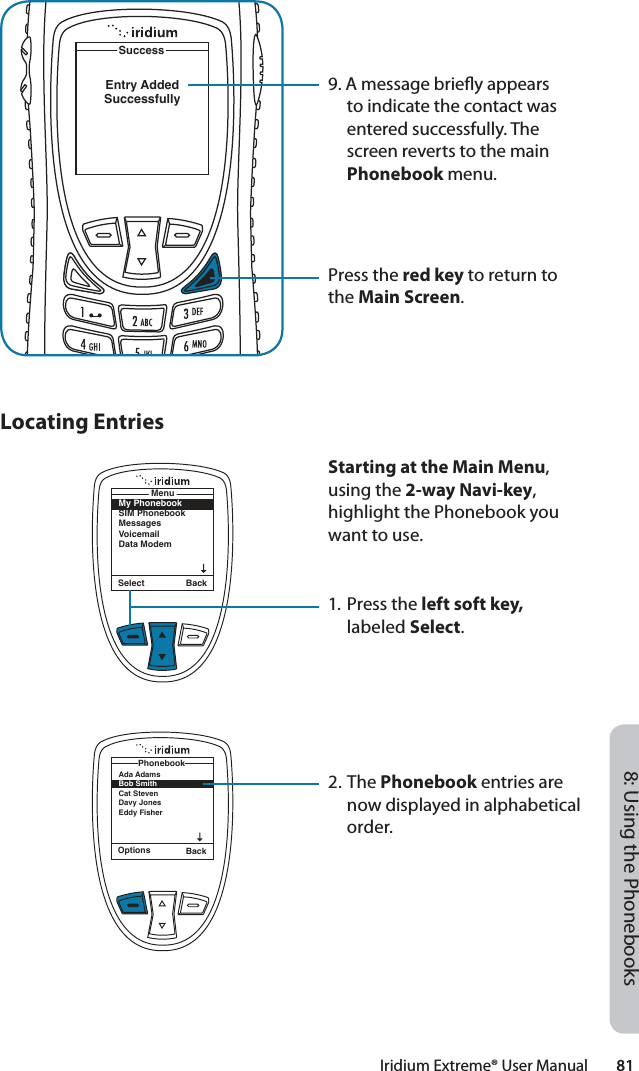
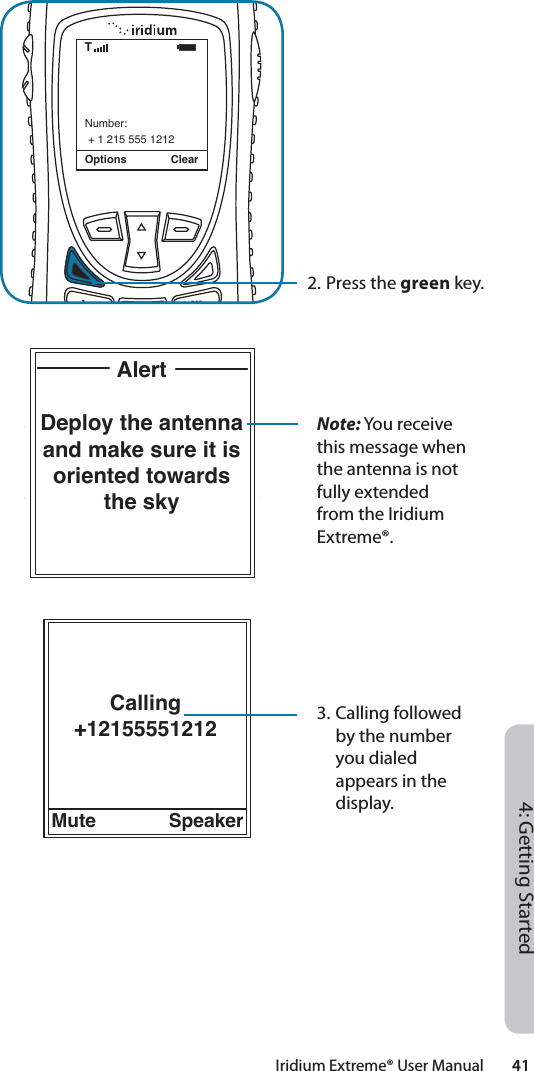
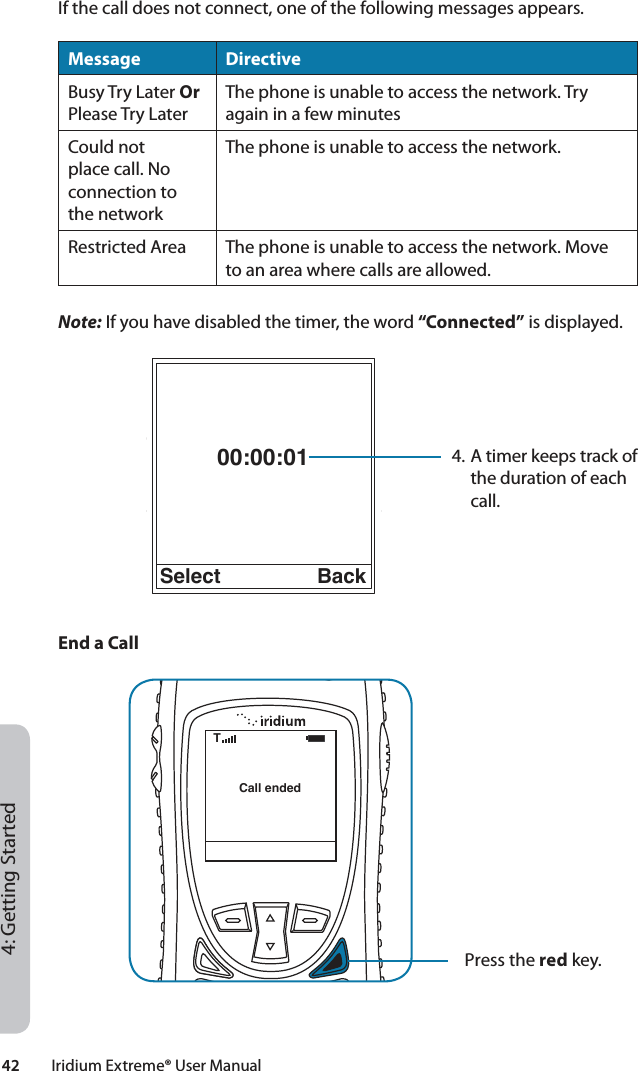
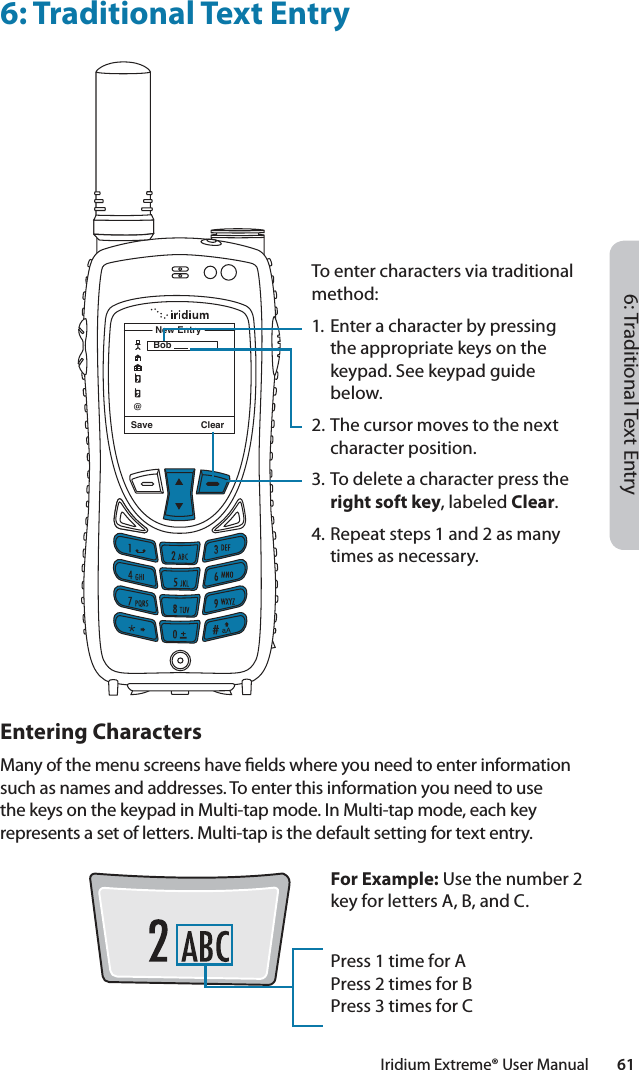
![40 Iridium Extreme® User Manual4: Getting StartedPlacing a CallBefore you place a call:1. The phone must be powered on.2. SIM card inserted.3. Phone is unlocked.4. Have a clear direct view of the sky to be in contact with the network.5. Antenna should be extended and pointed up towards the sky.Dial the NumberAs you enter a phone number, the digits are displayed on a single line that scrolls across the display.1. Enter the number using the key pad. As you begin entering digits, you see Options displayed above the left soft key and Clear displayed above the right soft key. The phone number must be entered in international format: + or 00 [country code][phone number]. Your Iridium Extreme® will automatically enter a + for the international access code so the only numbers that are required to add are the country code and phone number.Note: All Iridium subscriber numbers begin with county code of 8816 unless an alternative access number has been issued by your service provider.+ 1 215 555 1212Options ClearTCountry codePhone number including area code](https://usermanual.wiki/Iridium-Satellite/9575N.User-manual-part1/User-Guide-3463501-Page-52.png)
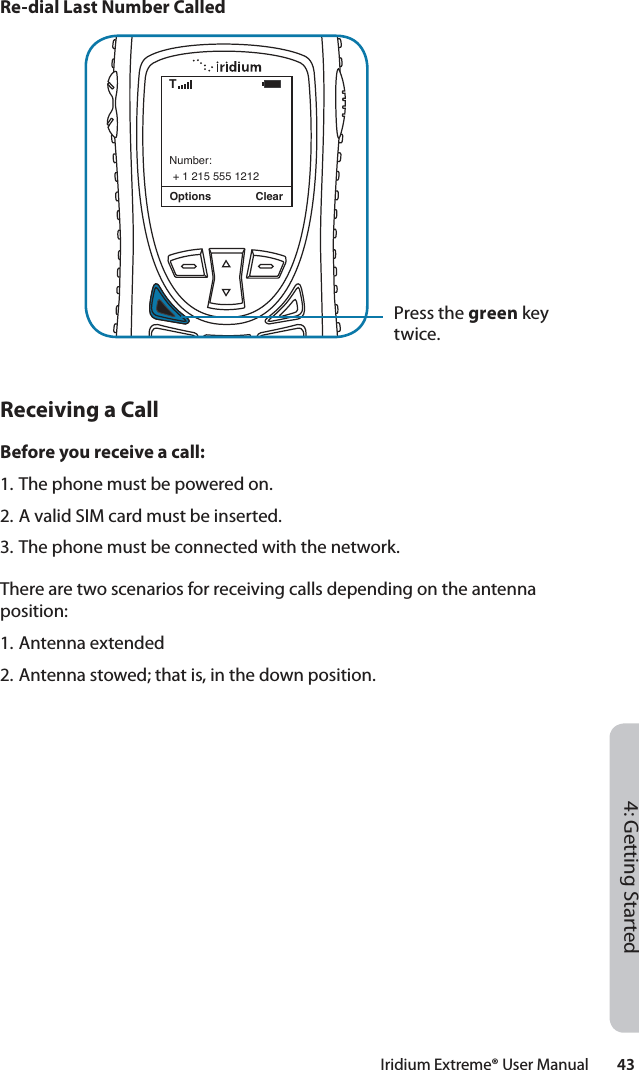


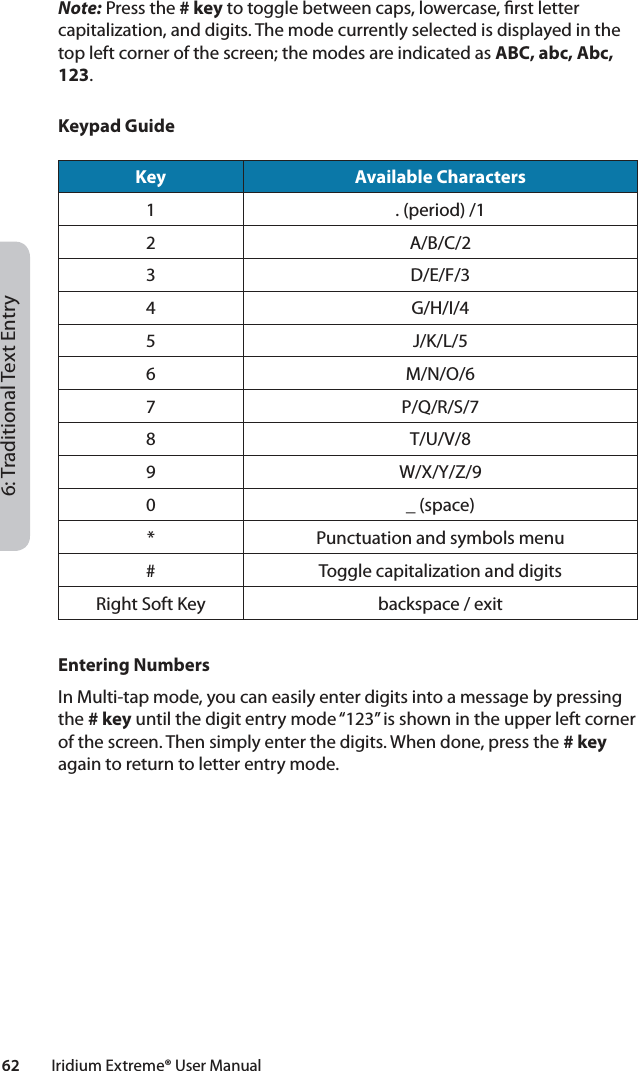
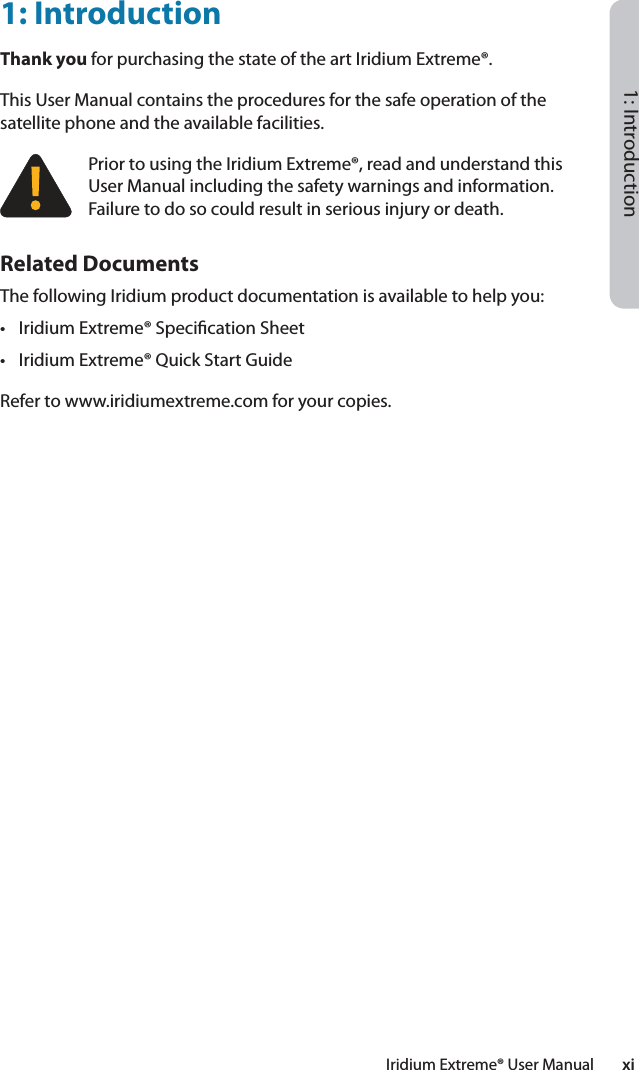
![6: Traditional Text EntryIridium Extreme® User Manual 63Entering Punctuation and SymbolsPressing * (star) key takes you to a symbols menu with a list of the most commonly used punctuation marks and symbols.Select BackEdit.@/,!?;Ҋ$?*%&()[]{}:˜-\-“#I<çèēêëòóöùú>+=àáA bracket [ ] indicates the current symbol selected. Use the 2-way Navi-key to scroll down through the listing.Press the left soft key labeled Select.2-way Navi-keyPress the * key to open the symbols menu.](https://usermanual.wiki/Iridium-Satellite/9575N.User-manual-part1/User-Guide-3463501-Page-75.png)