Iridium Satellite 9575N Iridium Satellite Phone User Manual 9575A part1
Iridium Satellite LLC Iridium Satellite Phone 9575A part1
Contents
- 1. User manual part1
- 2. User manual part2
- 3. 9575A user manual part1
- 4. 9575A user manual part2
- 5. 9575A user manual part3
9575A user manual part1
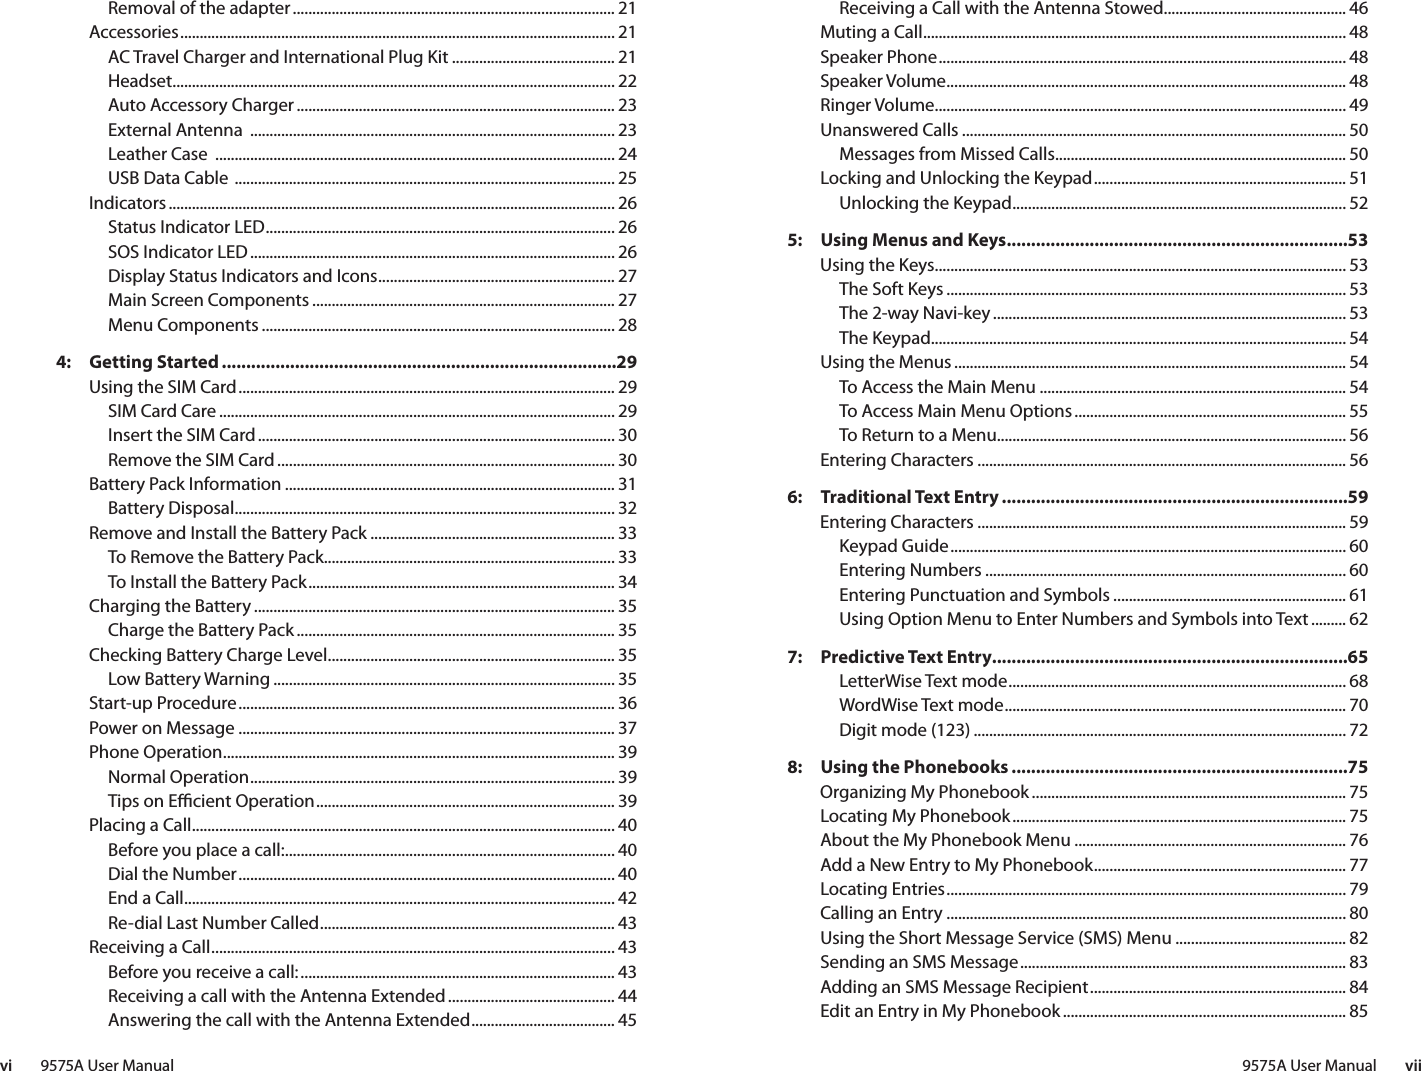

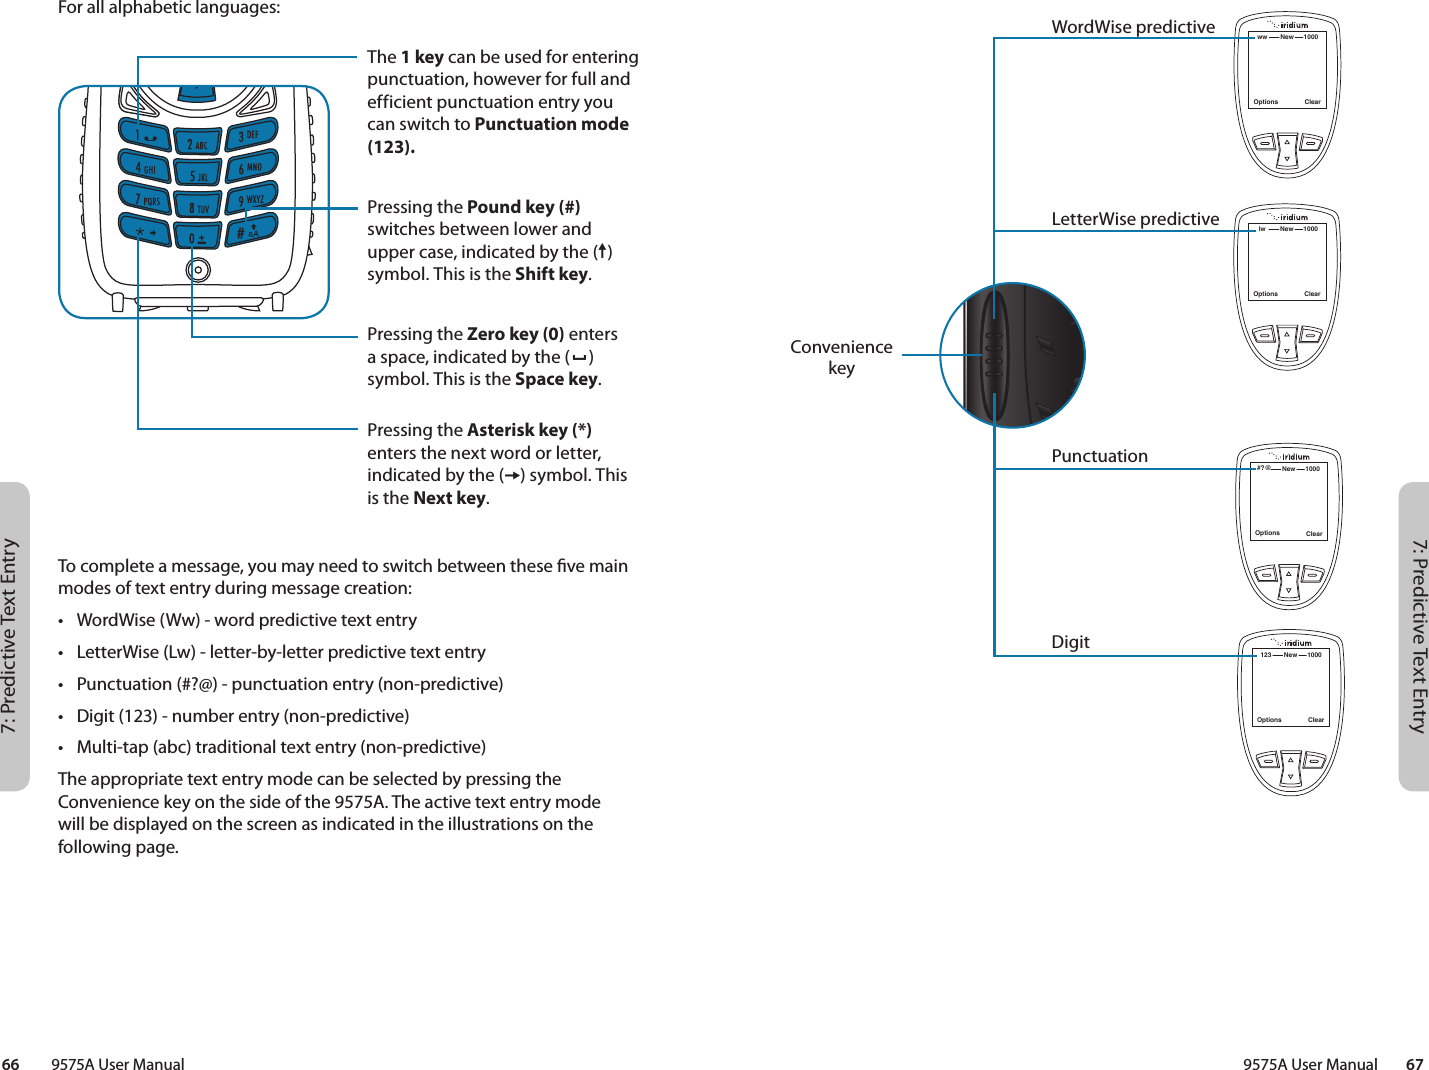
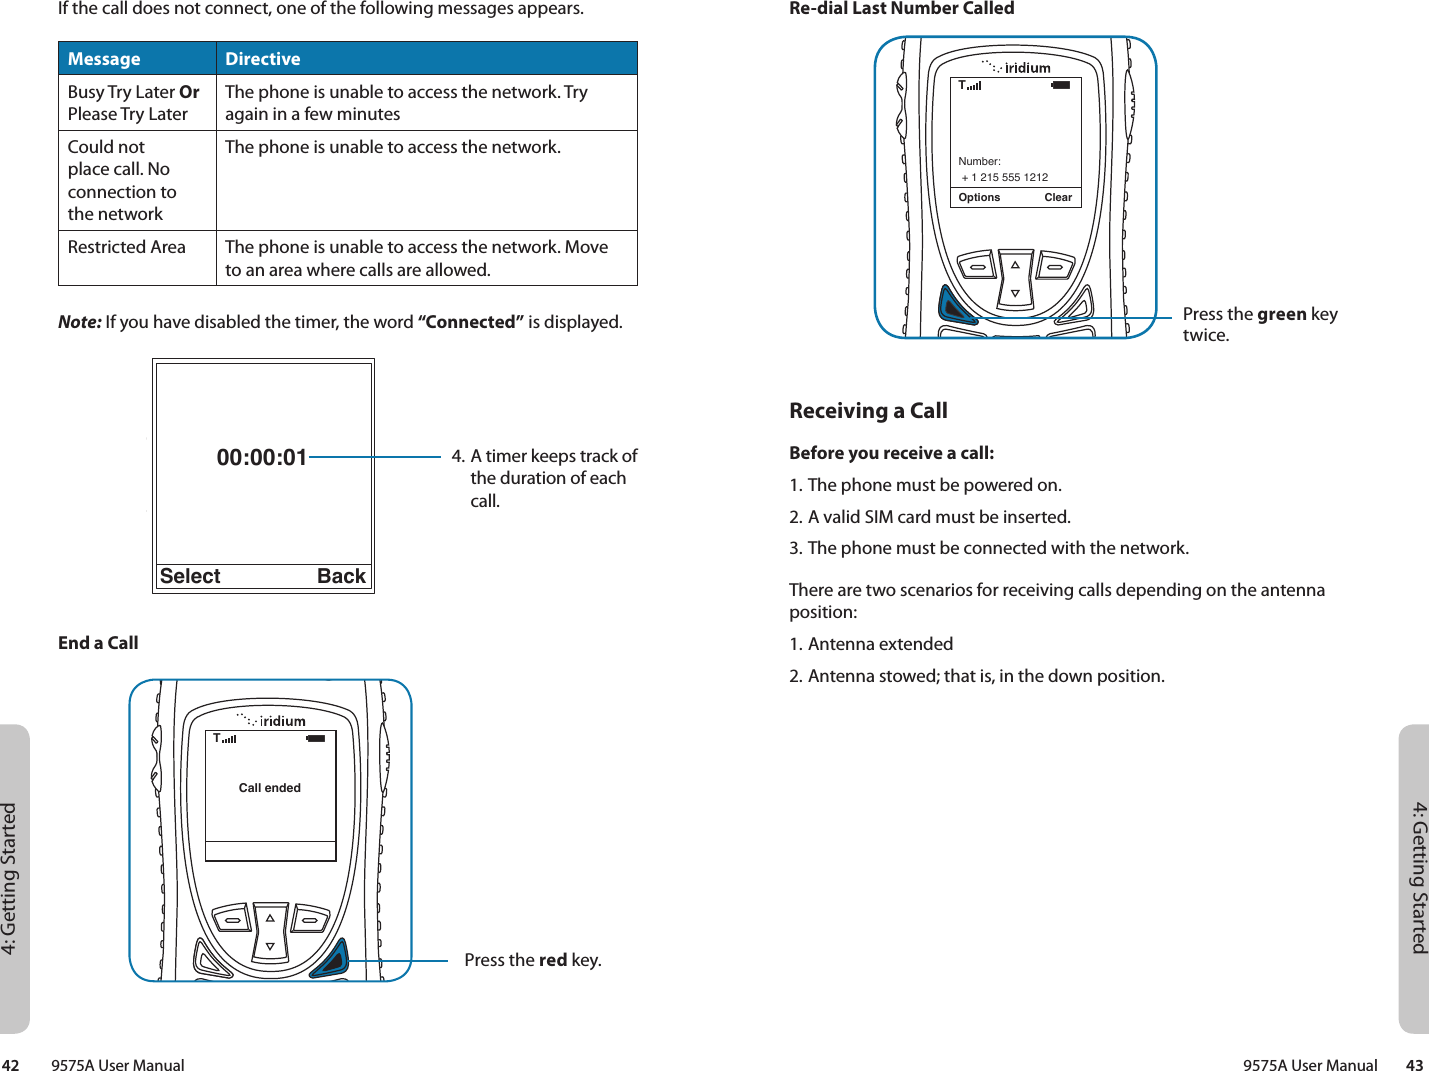
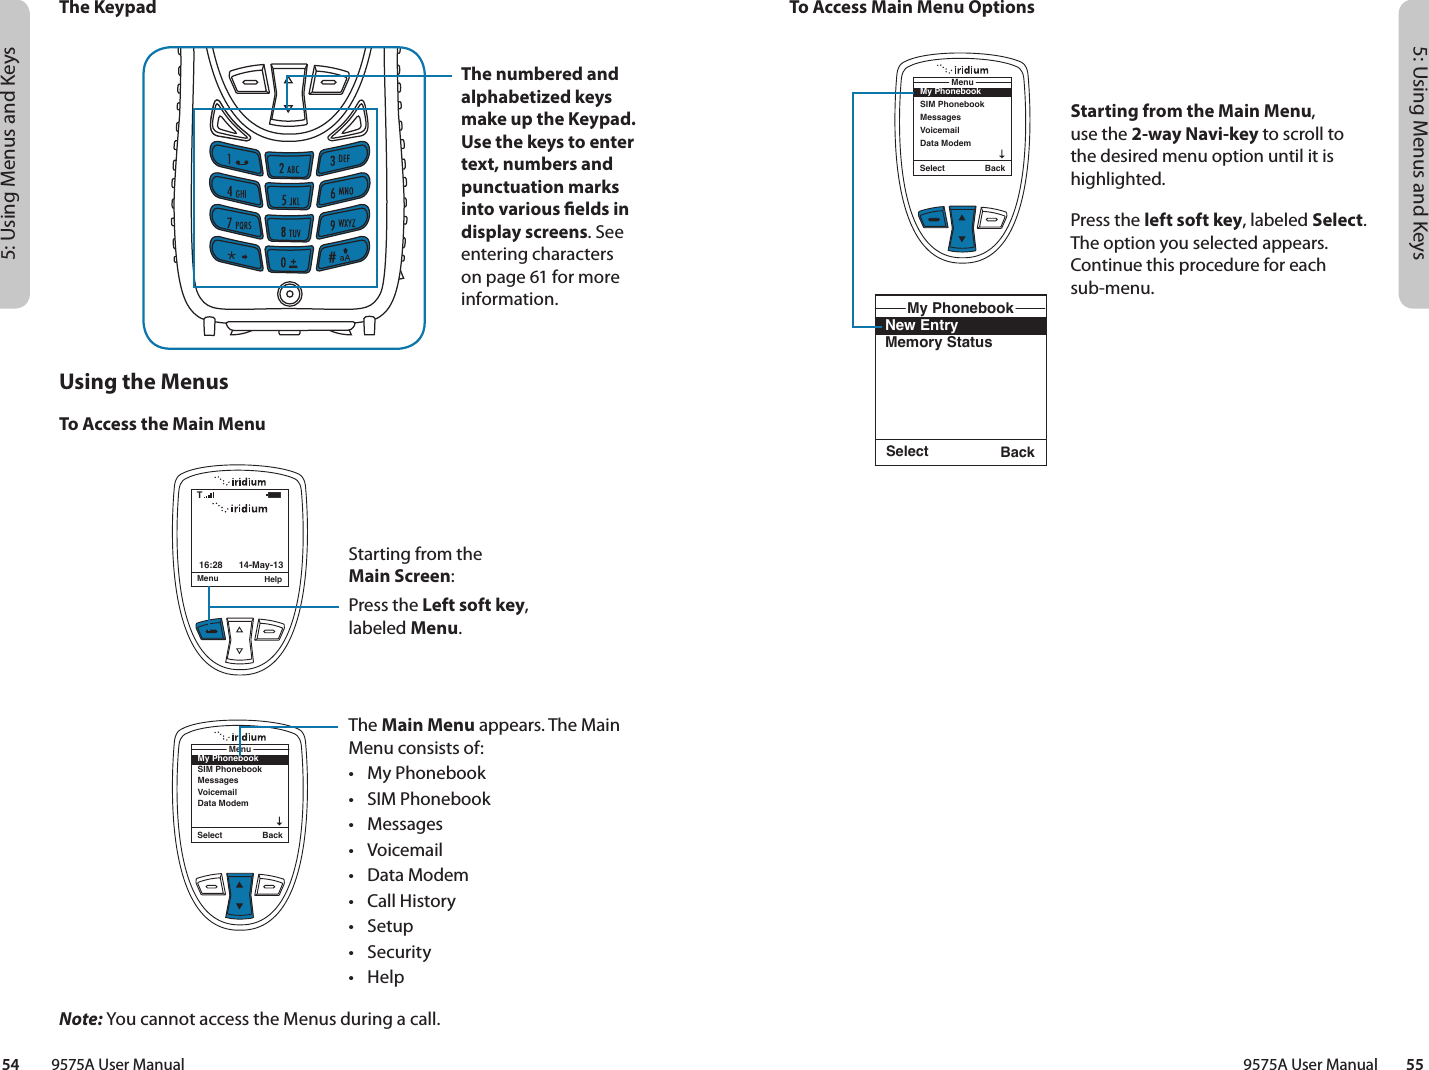
![4: Getting Started4: Getting Started9575A User Manual 4140 9575A User ManualPlacing a CallBefore you place a call:1. The phone must be powered on.2. SIM card inserted.3. Phone is unlocked.4. Have a clear direct view of the sky to be in contact with the network.5. Antenna should be extended and pointed up towards the sky.Dial the NumberAs you enter a phone number, the digits are displayed on a single line that scrolls across the display.1. Enter the number using the key pad. As you begin entering digits, you see Options displayed above the left soft key and Clear displayed above the right soft key. The phone number must be entered in international format: + or 00 [country code][phone number]. Your 9575A will automatically enter a + for the international access code so the only numbers that are required to add are the country code and phone number.Note: All Iridium subscriber numbers begin with country code of 8816 unless an alternative access number has been issued by your service provider.+ 1 215 555 1212Options ClearNumber:T2. Press the green key.3. Calling followed by the number you dialed appears in the display.Calling+12155551212Mute SpeakerNote: You receive this message when the antenna is not fully extended from the 9575A.12 ABC 3 DEF4 GHI 5 KL 6 MNO7 PQR 8 UVW 9 XYZ0 +#*AlertDeploy the antenna and make sure it is oriented towards the sky+ 1 215 555 1212Options ClearTCountry codePhone number including area code](https://usermanual.wiki/Iridium-Satellite/9575N.9575A-user-manual-part1/User-Guide-3463559-Page-26.png)

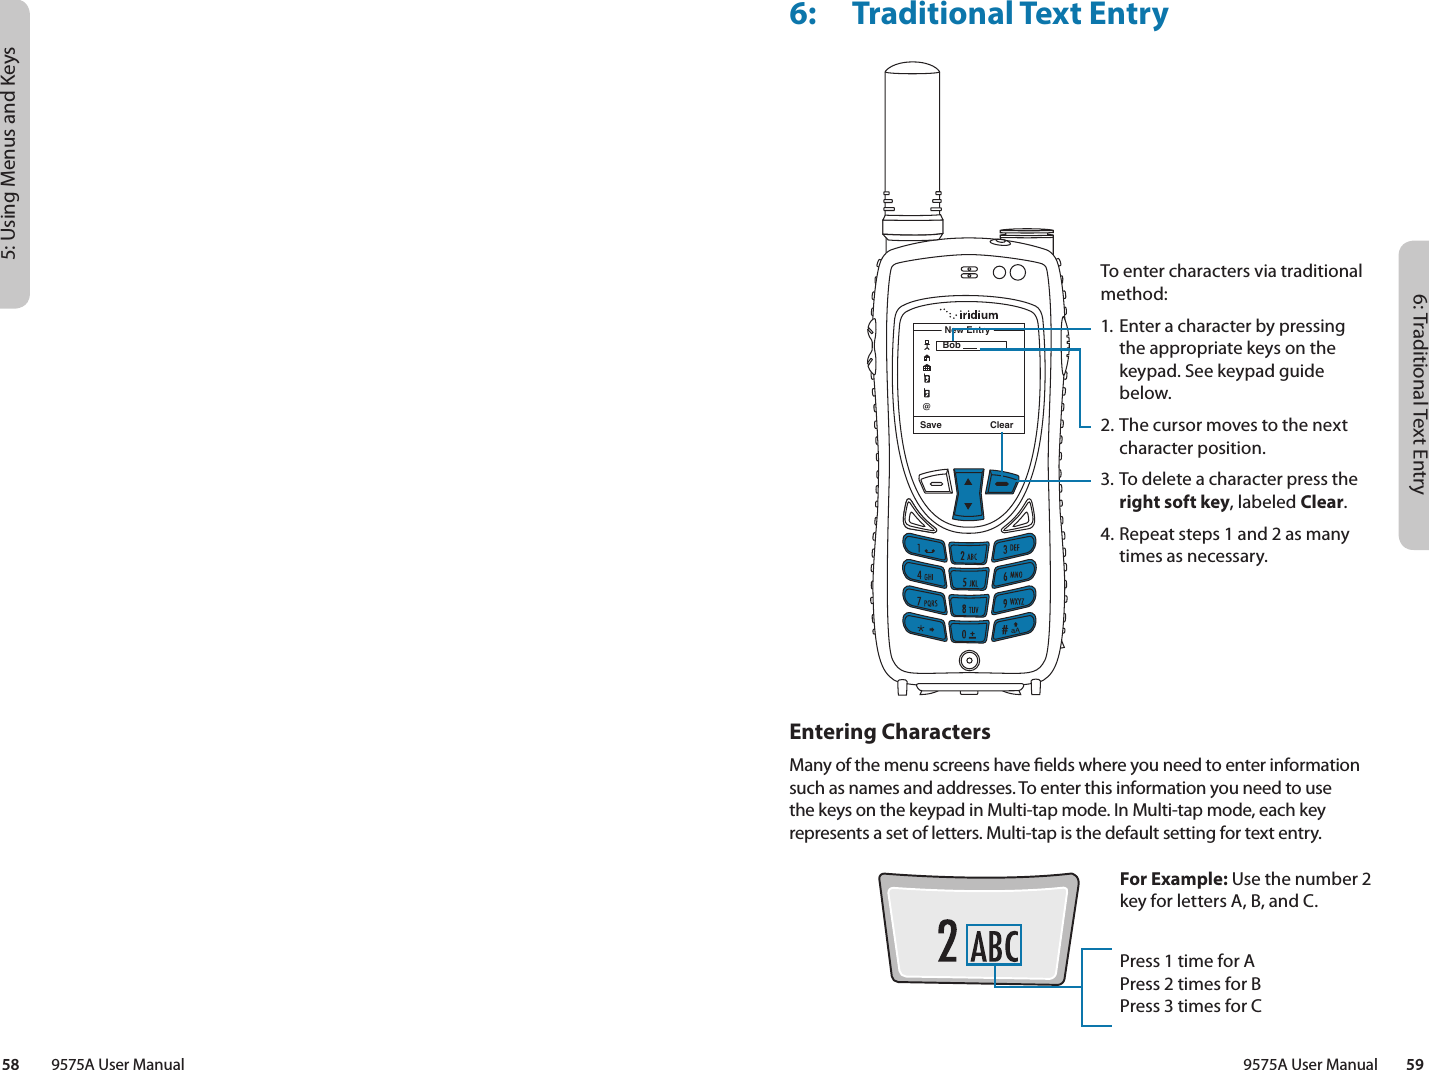
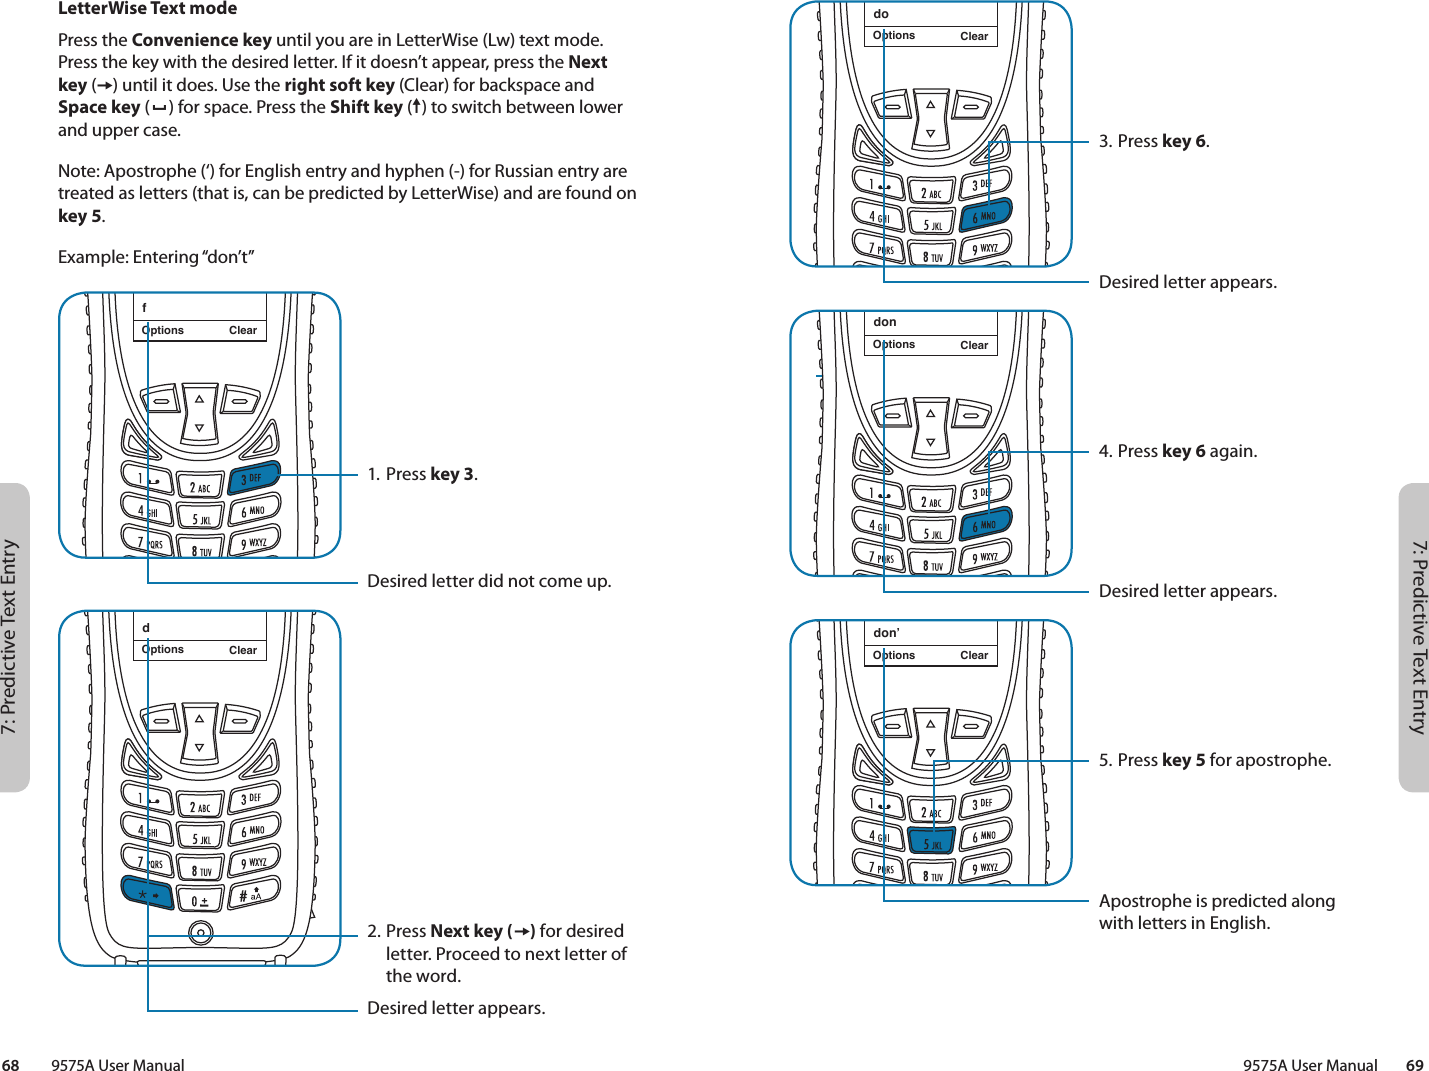
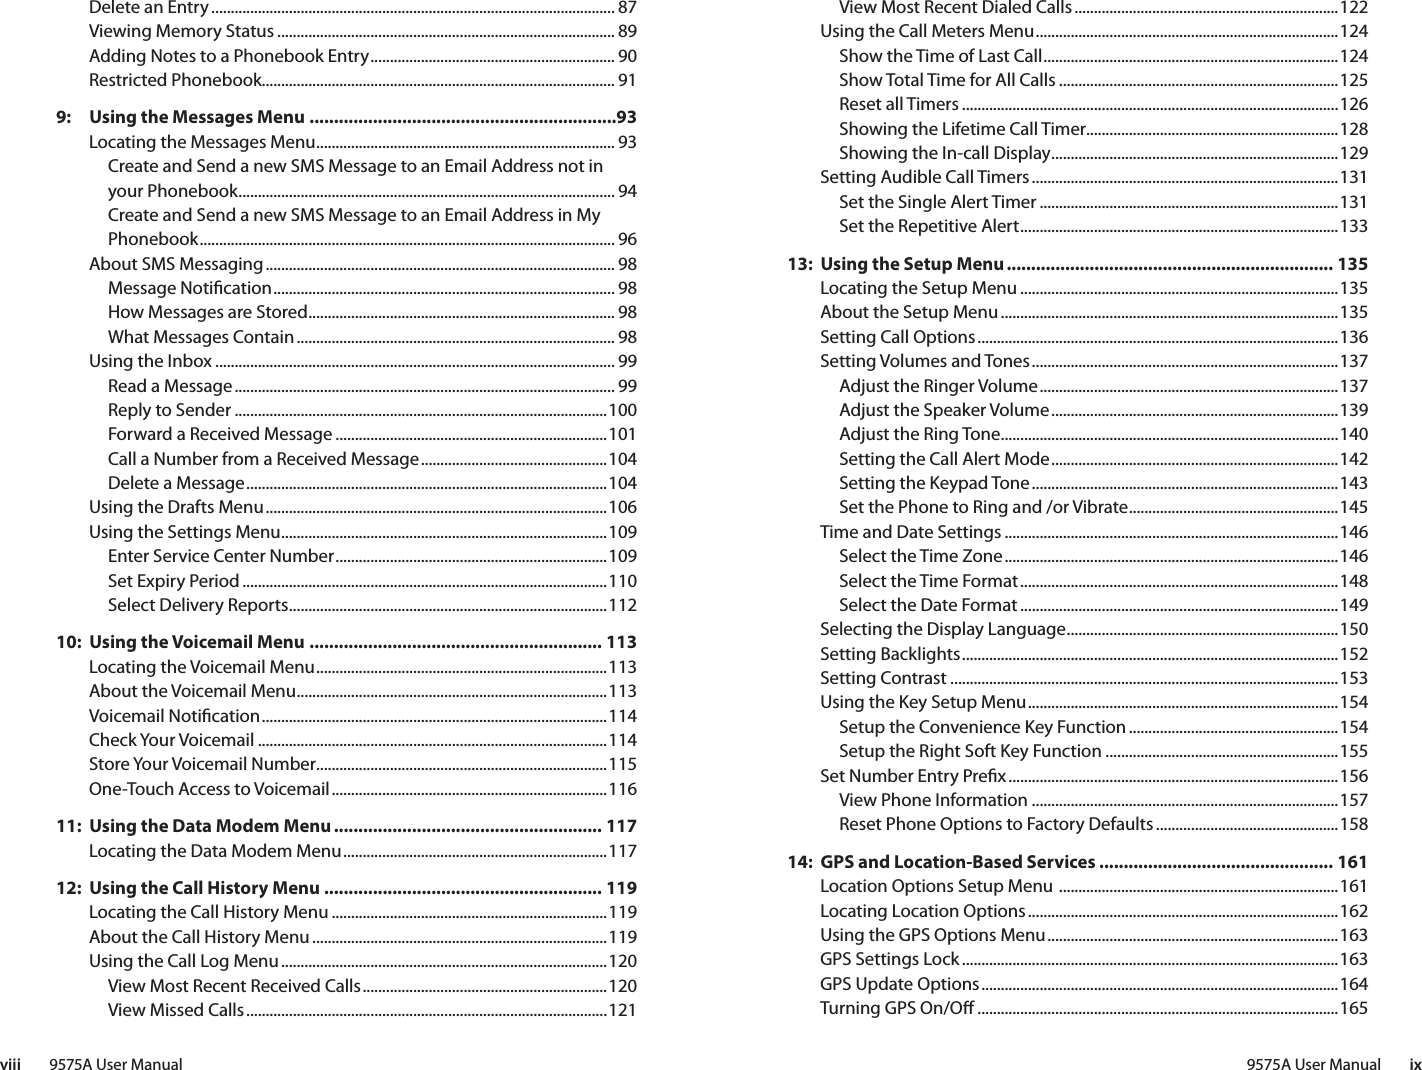
![6: Traditional Text Entry6: Traditional Text Entry9575A User Manual 6160 9575A User ManualEntering Punctuation and SymbolsPressing * (star) key takes you to a symbols menu with a list of the most commonly used punctuation marks and symbols.Select BackEdit.@/,!?;ʻ$?*%&()[]{}:˜-\-“#I<çèėêëòóöùú>+=àáA bracket [ ] indicates the current symbol selected. Use the 2-way Navi-key to scroll down through the listing.Press the left soft key labeled Select.2-way Navi-keyPress the * key to open the symbols menu.Note: Press the # key to toggle between caps, lowercase, rst letter capitalization, and digits. The mode currently selected is displayed in the top left corner of the screen; the modes are indicated as ABC, abc, Abc, 123.Keypad GuideKey Available Characters1 . (period) /12 A/B/C/23 D/E/F/34 G/H/I/45 J/K/L/56 M/N/O/67 P/Q/R/S/78 T/U/V/89 W/X/Y/Z/90 _ (space)* Punctuation and symbols menu# Toggle capitalization and digitsRight Soft Key backspace / exitEntering NumbersIn Multi-tap mode, you can easily enter digits into a message by pressing the # key until the digit entry mode “123” is shown in the upper left corner of the screen. Then simply enter the digits. When done, press the # key again to return to letter entry mode.](https://usermanual.wiki/Iridium-Satellite/9575N.9575A-user-manual-part1/User-Guide-3463559-Page-36.png)