Iridium Satellite 9575N Iridium Satellite Phone User Manual irdm extreme usermanual eng lr jul2013pt1
Iridium Satellite LLC Iridium Satellite Phone irdm extreme usermanual eng lr jul2013pt1
Contents
User manual part2
Iridium Extreme® User Manual 111
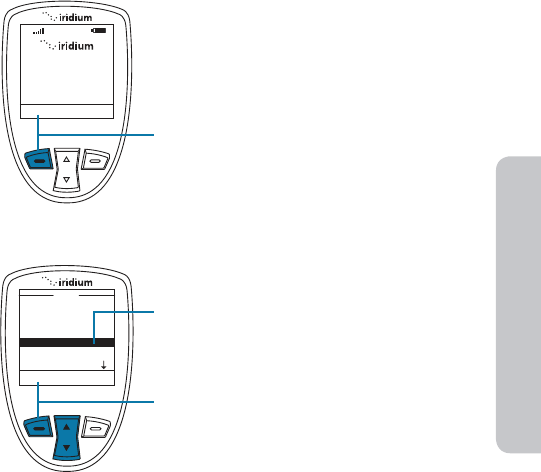
9: Using the Messages Menu
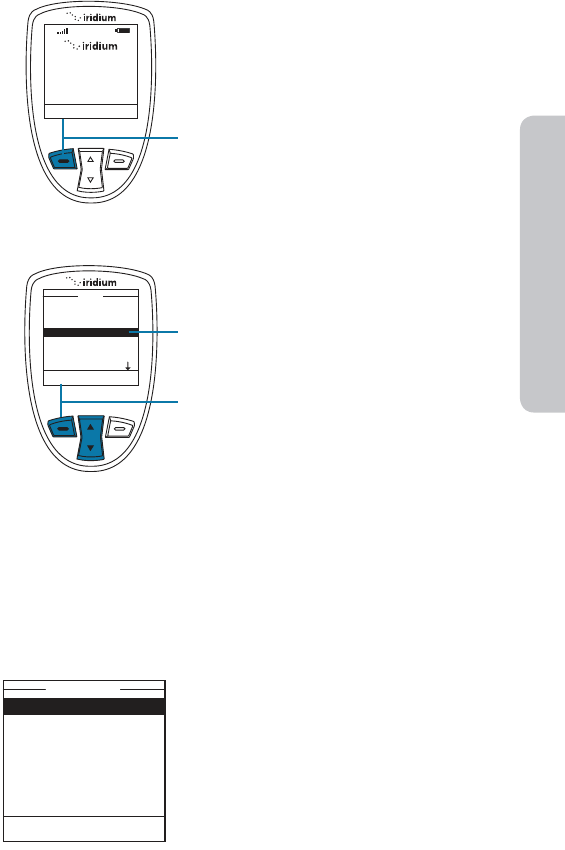
Using the Settings Menu
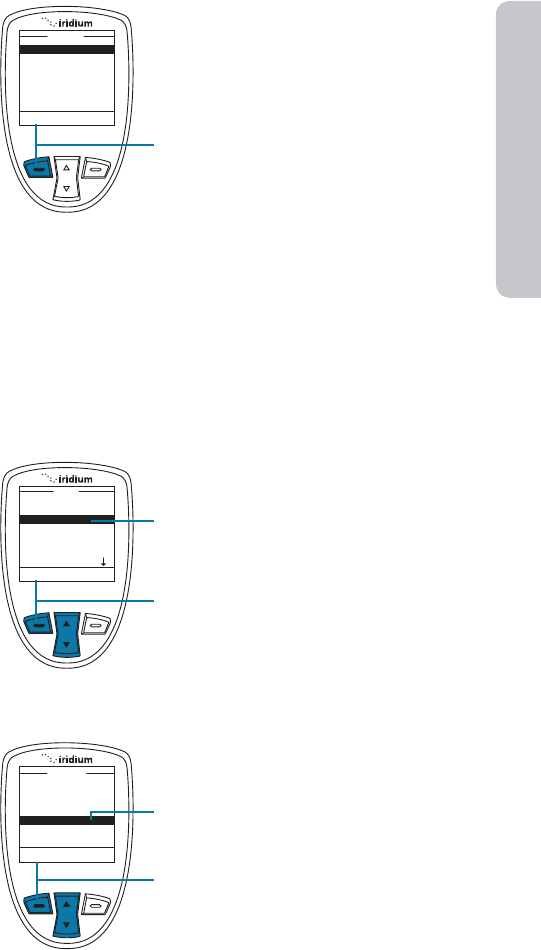
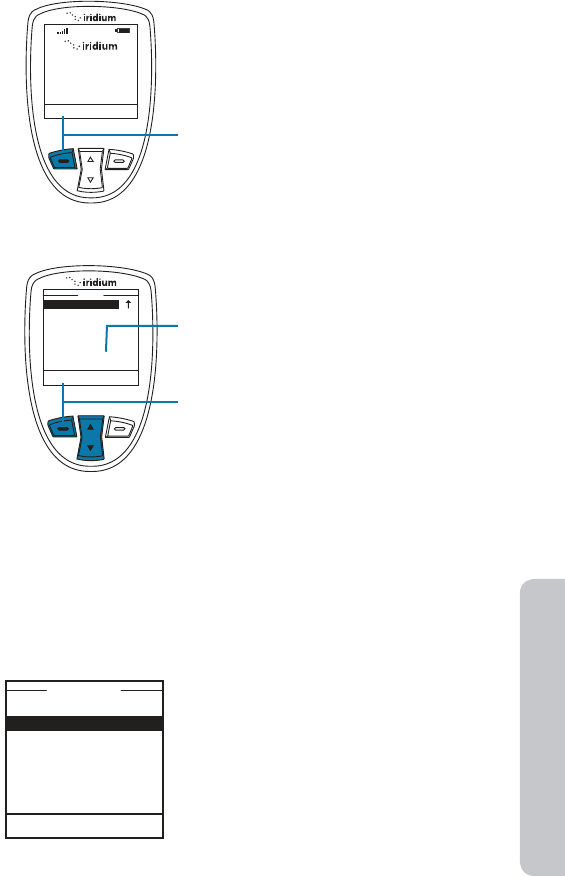
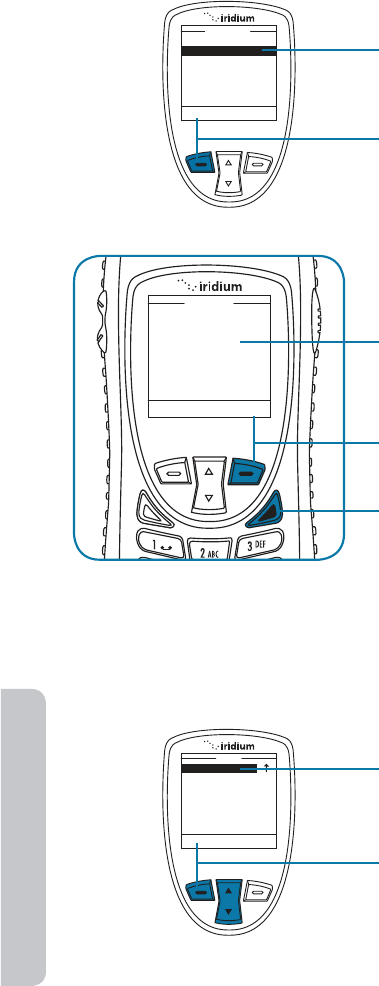
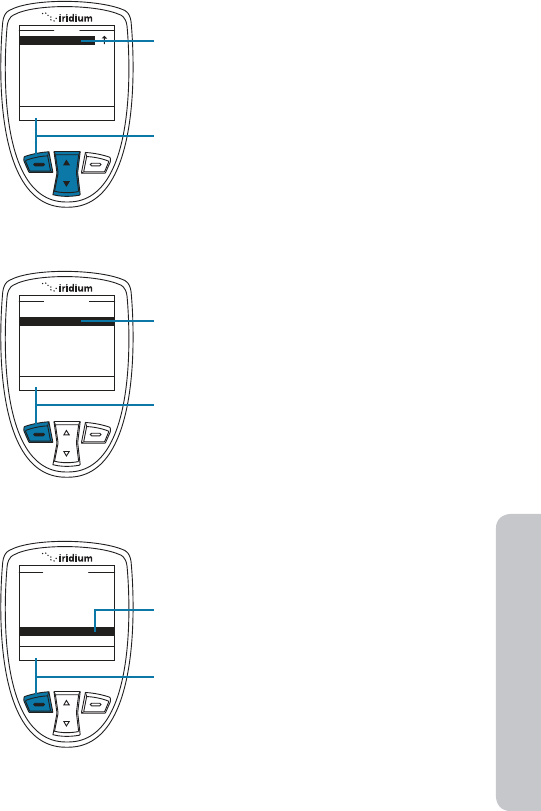
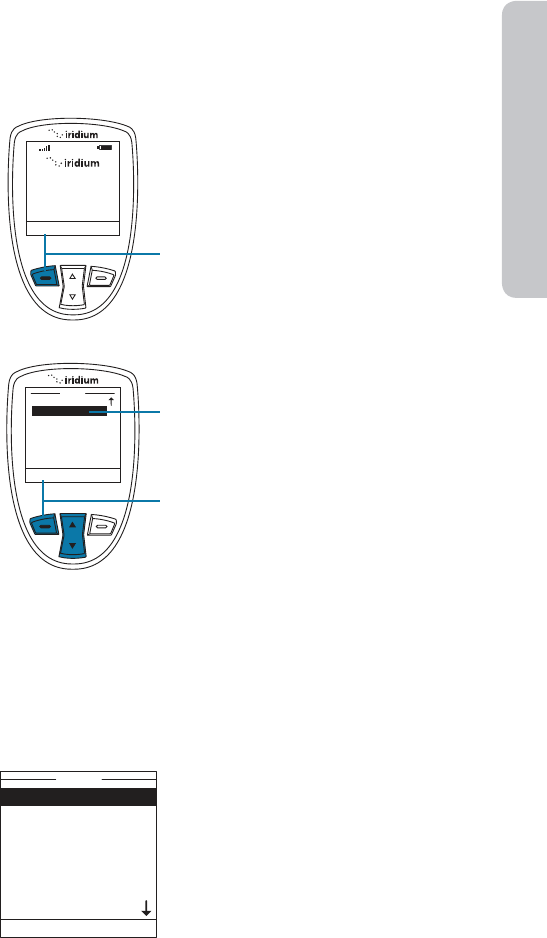
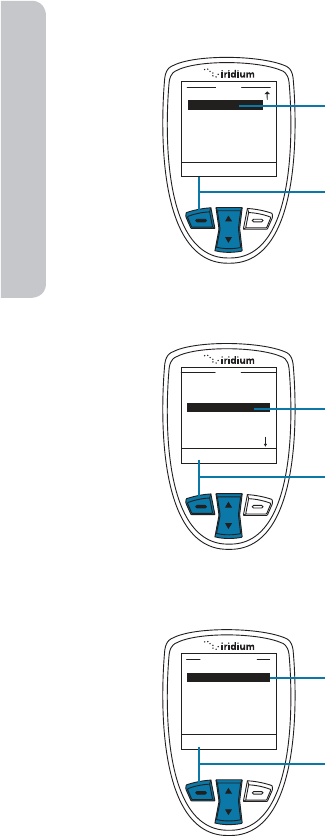
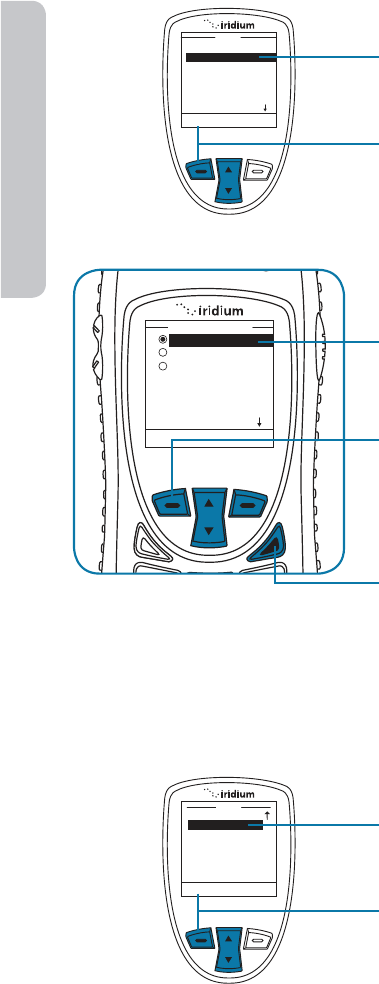
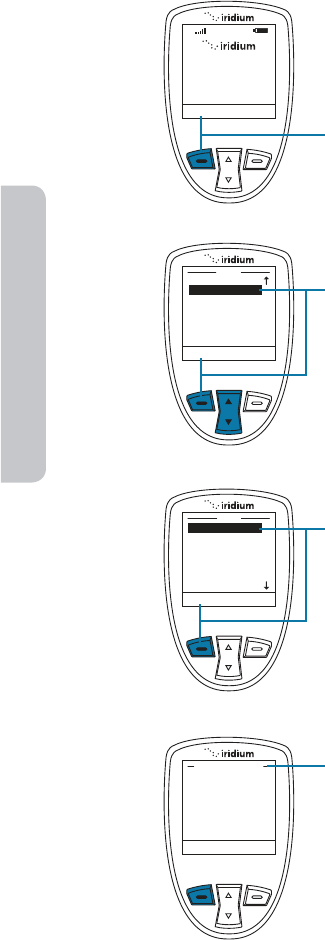
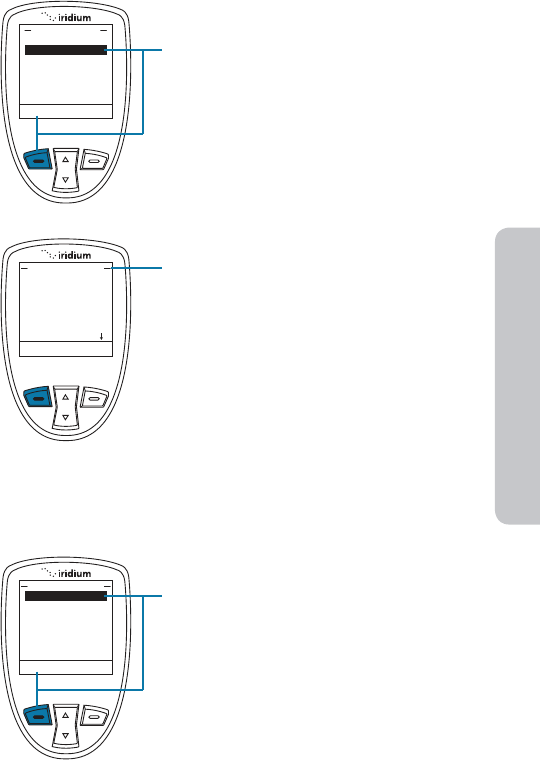
Enter Service Center Number
Use this capability to enter the number for the service center to which
you wish to forward your outgoing messages. The Iridium Extreme® will
use Iridium’s Service Center number by default if none has been explicitly
configured.
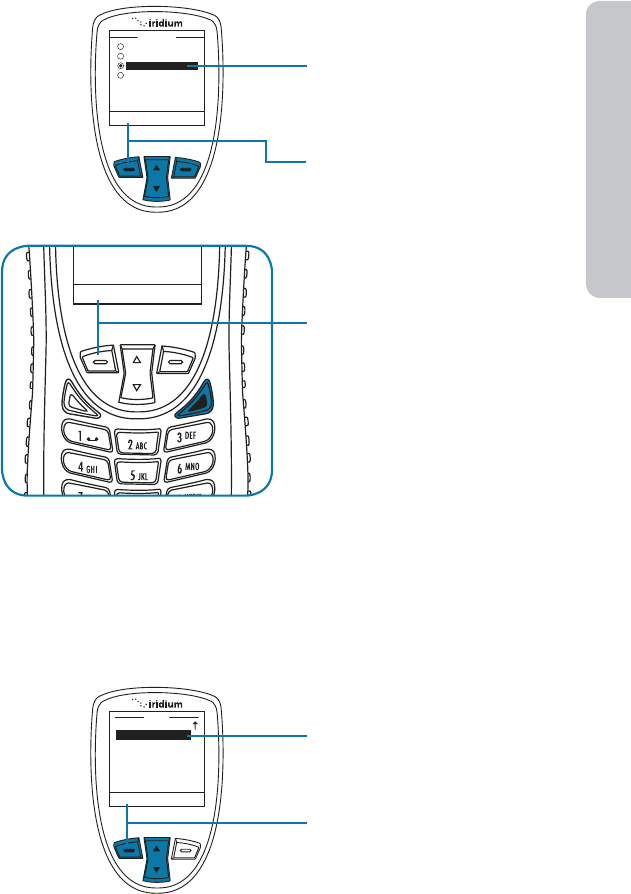
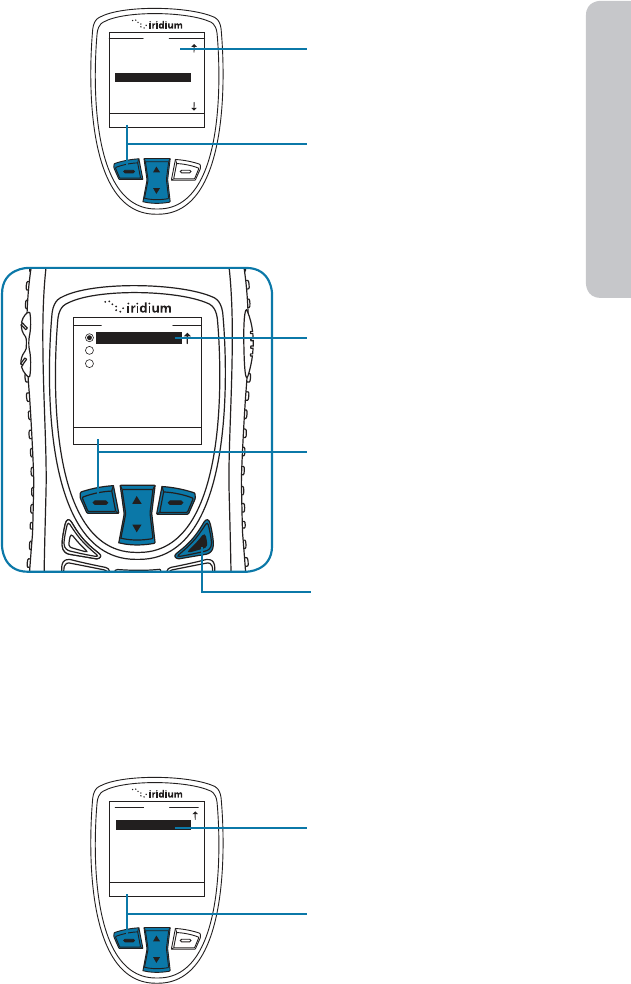
Send Add
Send To
New Recipient
Ada Adams
Bob Smith
Cat Stevens
Select Back
Create Message
Inbox (1 unread)
Drafts
Outbox
Settings
Messages
Select Back
My Phonebook
SIM Phonebook
Messages
Voicemail
Data Modem
Menu
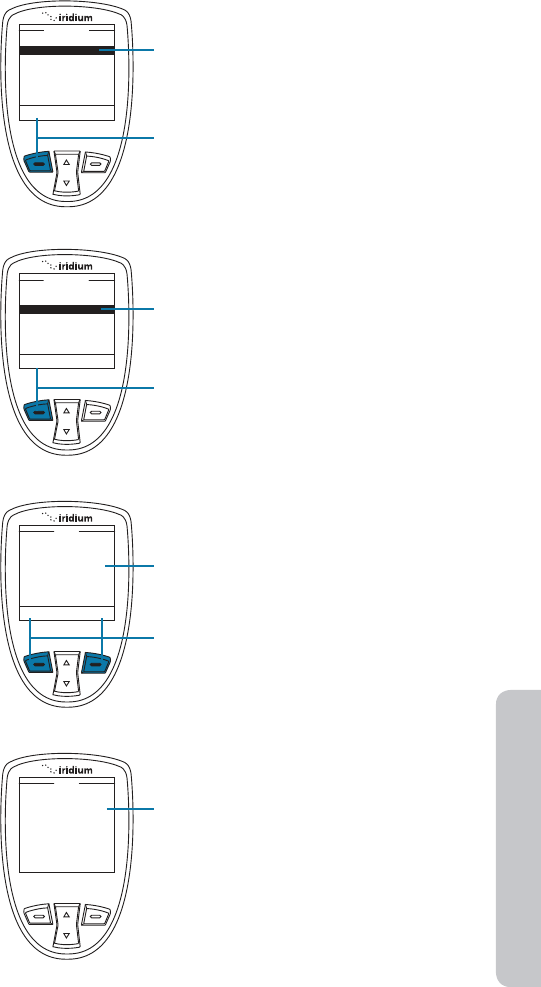
17. When finished selecting
recipients, press the
left soft key, labeled Send.
Start at the Main Menu with Messages
highlighted:
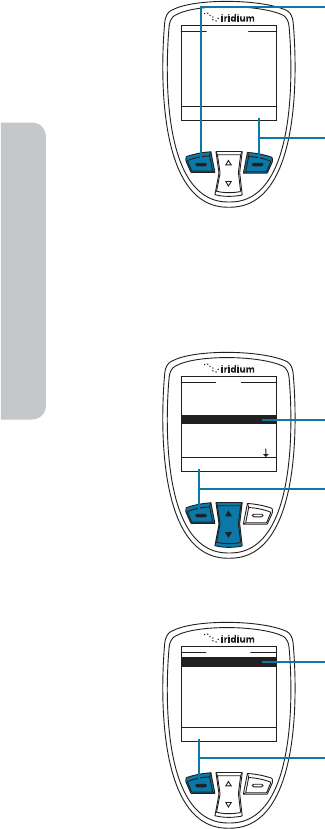
1. Press the left soft key, labeled Select.
2. Use the 2-way Navi-key to scroll until
the Settings option is highlighted.
3. Press the left soft key, labeled Select.
To remove an contact added to the
Send list, highlight the contact name
using the 2-way Navi key and use the
right soft button to select “Remove”.
112 Iridium Extreme® User Manual
9: Using the Messages Menu
4. The Service Center option should
be highlighted. If not use the
2-way Navi-key to scroll until it is
highlighted.
5. Press the left soft key, labeled
Select.
6. Enter the service number.
7. Press the left soft key, labeled OK.
The screen returns to the Settings
menu.
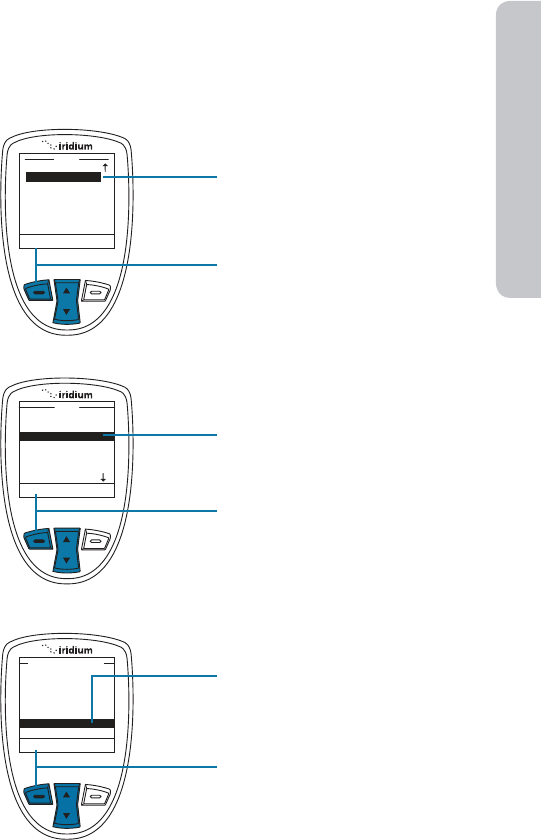
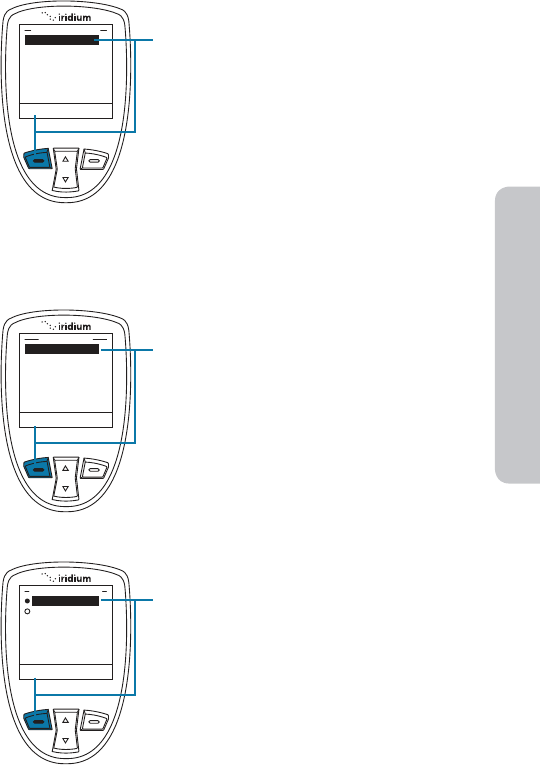
Select Back
Service Center
Expiry Period
Delivery Reports
Settings
OK Clear
Number:
Service Center
+881662900005
Select Back
My Phonebook
SIM Phonebook
Messages
Voicemail
Data Modem
Menu
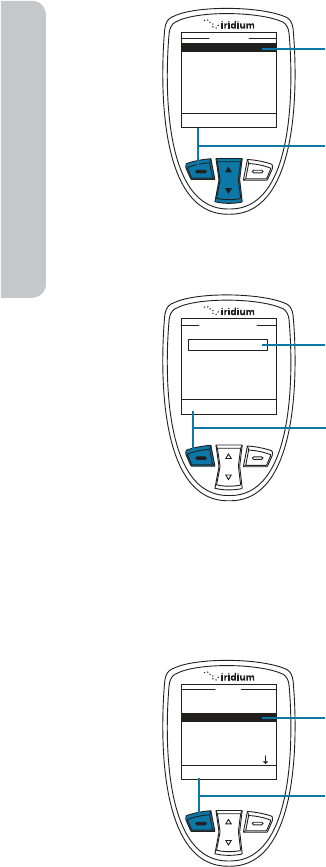
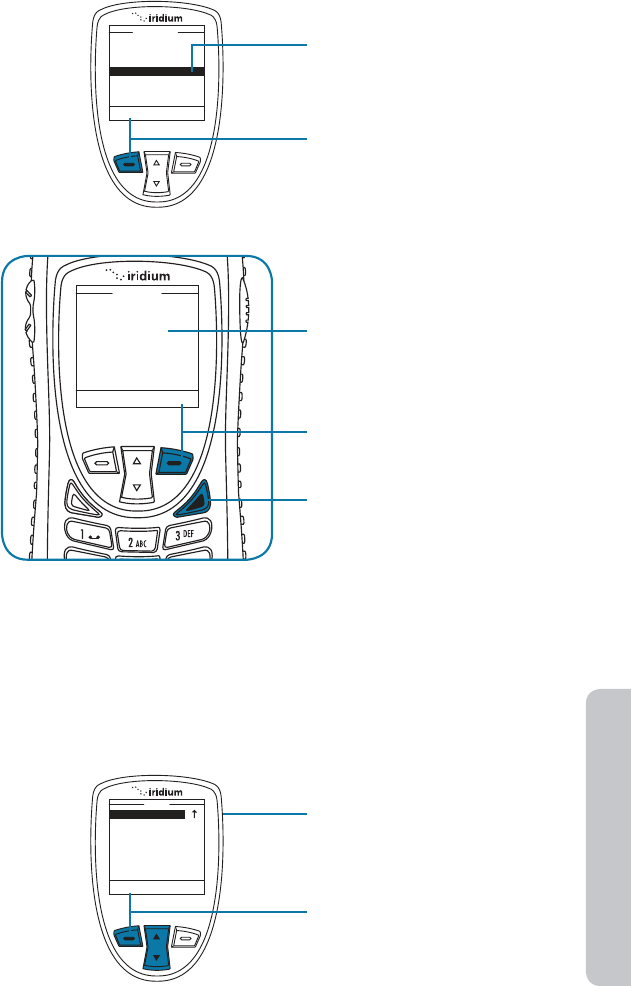
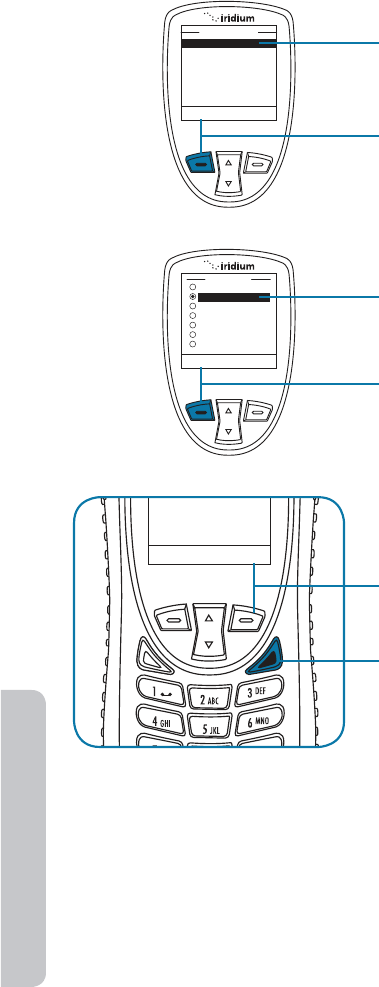
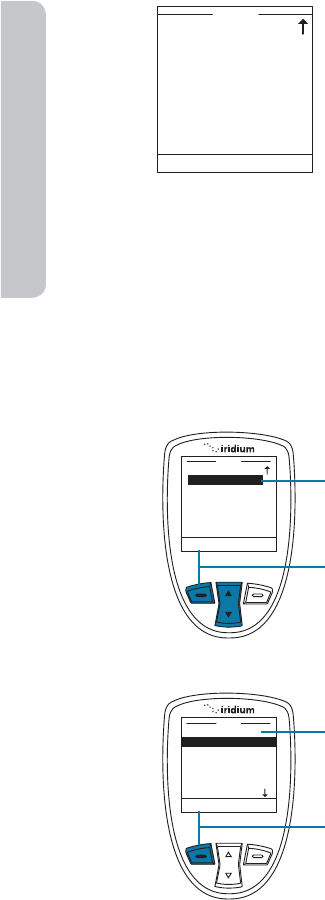
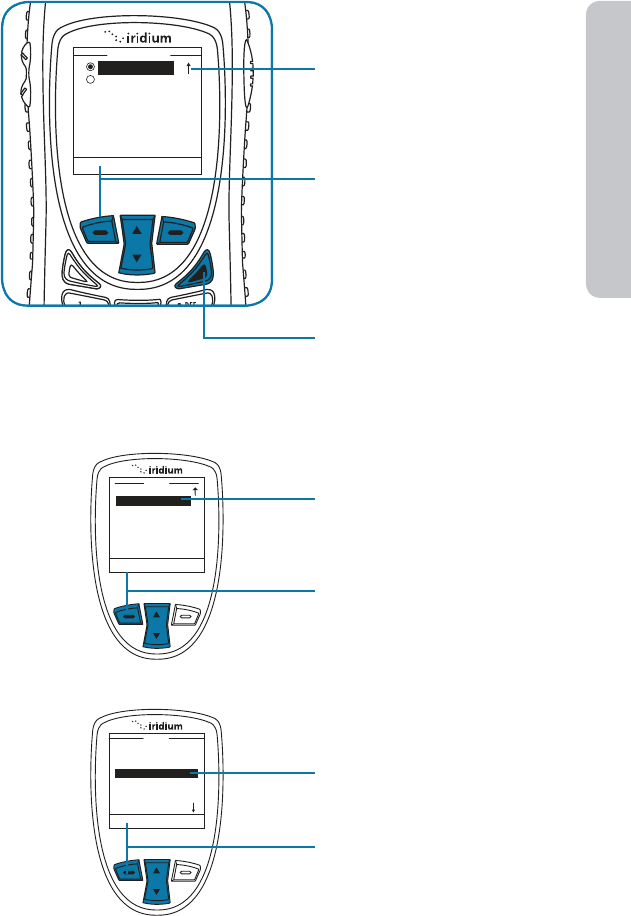
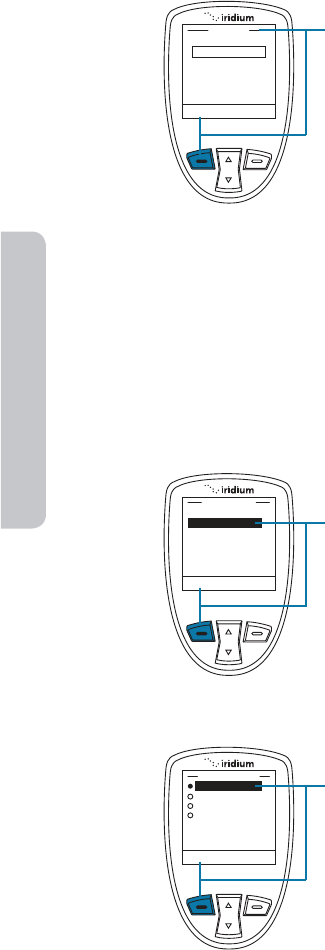
Set Expiry Period
Use this capability to specify the amount of time your un-delivered
messages should wait before auto-expiring.
Start at the Main Menu with Messages
highlighted:
1. Press the left soft key, labeled
Select.
Iridium Extreme® User Manual 113
9: Using the Messages Menu
Select Back
Create Message
Inbox (1 unread)
Drafts
Outbox
Settings
Messages
Select Back
1 hour
2 hours
4 hours
1 day
2 days
1 week
Expiry Period
Select Back
Service Center
Expiry Period
Delivery Reports
Settings
2. Use the 2-way Navi-key to scroll until
the Settings option is highlighted.
3. Press the left soft key, labeled Select.
4. Use the 2-way Navi-key to scroll
until the Expiry Period option is
highlighted.
5. Press the left soft key, labeled Select.
6. Use the 2-way Navi-key to scroll
until the desired period of time is
highlighted.
7. Press the left soft key, labeled Select.
The screen returns to the Settings
menu.
114 Iridium Extreme® User Manual
9: Using the Messages Menu
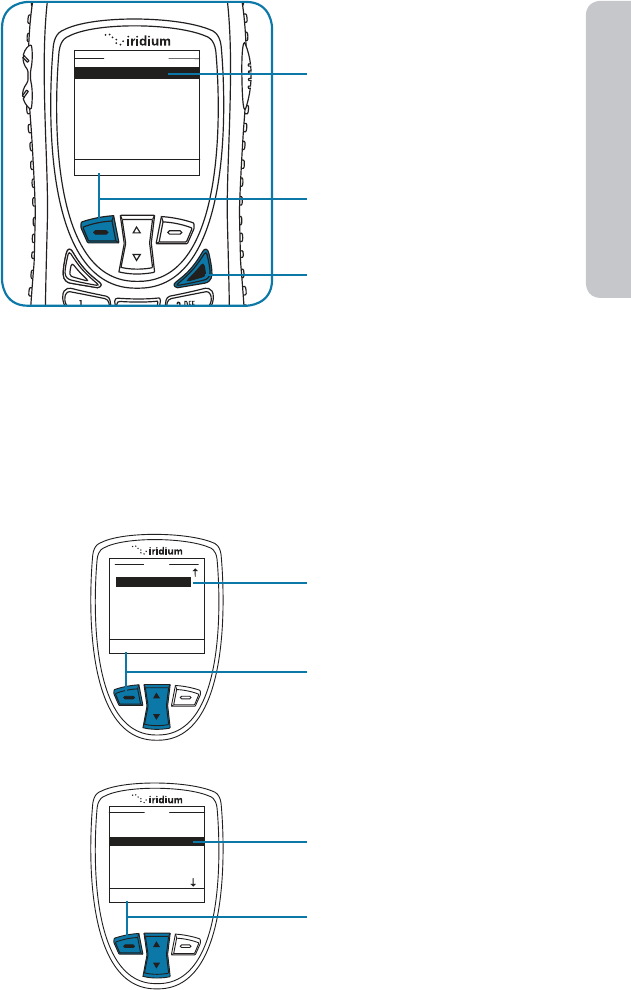
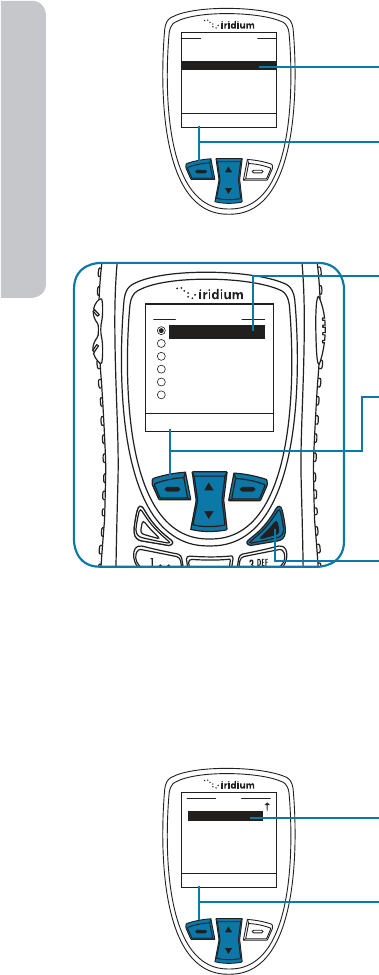
Select Delivery Reports
Use this capability to enable or disable message delivery reports.
Start at the Main Menu with Messages
highlighted:
1. Press the left soft key, labeled
Select.
2. Use the 2-way Navi-key to scroll until
the Settings option is highlighted.
3. Press the left soft key, labeled
Select.
4. Use the 2-way Navi-key to scroll
until the Delivery Reports option is
highlighted.
5. Press the left soft key, labeled
Select.
6. Use the 2-way Navi-key to turn the
Delivery Report OFF or ON.
7. Press the left soft key, labeled
Select. The screen returns to the
Settings menu.
Select Back
My Phonebook
SIM Phonebook
Messages
Voicemail
Data Modem
Menu
Select Back
Create Message
Inbox (1 unread)
Drafts
Outbox
Settings
Messages
Select Back
Off
On
Delivery Report
Select Back
Service Center
Expiry Period
Delivery Reports
Settings

Iridium Extreme® User Manual 115
10: Using the Voicemail Menu

116 Iridium Extreme® User Manual
10: Using the Voicemail Menu
Iridium Extreme® User Manual 117
10: Using the Voicemail Menu
10: Using the Voicemail Menu
Locating the Voicemail Menu
Note: All instructions for the Voicemail menu start from the Main Menu
as shown.
About the Voicemail Menu
You can do the following functions using the Voicemail menu:
Select Back
Call Voicemail
Voicemail Settings
Voicemail
Registered
Menu Help
16:28 14-May-13
T
Select Back
My Phonebook
SIM Phonebook
Messages
Voicemail
Data Modem
Menu
Starting from the Main Screen:
1. Press the left soft key, labeled Menu.
2. The Main Menu is displayed. Use the
2-way Navi-key to scroll until the
Voicemail is highlighted.
3. Press the left soft key, labeled Select.
• Listen to your voicemail
• Reply to a voicemail
• Store voicemail numbers
• Access and configure your voicemail
118 Iridium Extreme® User Manual
10: Using the Voicemail Menu
Voicemail Notification
When you receive a voicemail, an incoming voicemail notification message
automatically appears on your screen.
Check Your Voicemail
To listen to a voicemail that has been saved:
1. Use the 2-way Navi-key to scroll
until the Voicemail is highlighted.
2. Press the left soft key, labeled
Select.
3. Call Voicemail is highlighted.
4. Press the left soft key, labeled
Select.
Follow the audio prompts for
additional capabilities.
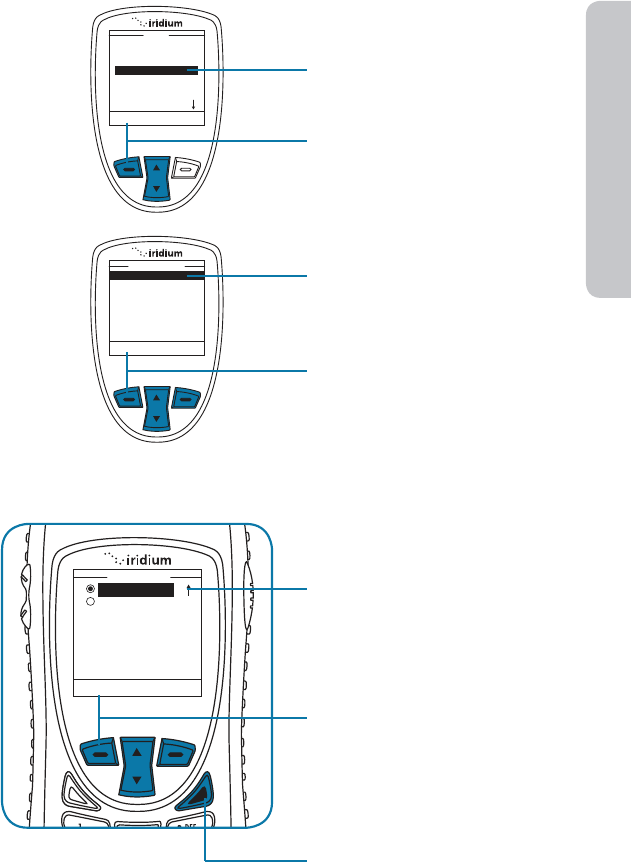
Call Cancel
Voicemail
New Voicemail. Call
Voicemail?
Press the left soft key, labeled Call to
call and retrieve voicemail.
OR
Press the right soft key, labeled
Cancel.
Select Back
My Phonebook
SIM Phonebook
Messages
Voicemail
Data Modem
Menu
Select Back
Call Voicemail
Voicemail Settings
Voicemail
Iridium Extreme® User Manual 119
10: Using the Voicemail Menu
Store Your Voicemail Number
If you have not previously stored a voicemail number, then you see No
Number Available on the display. You must store a voicemail number
before you can access the service for the first time.
Select Back
My Phonebook
SIM Phonebook
Messages
Voicemail
Data Modem
Menu
Select Back
Number
Voicemail Settings
Select Back
Call Voicemail
Voicemail Settings
Voicemail
1. Use the 2-way Navi-key to scroll until
the Voicemail is highlighted.
2. Press the left soft key, labeled Select.
3. Use the 2-way Navi-key to scroll
until Voicemail Settings option is
highlighted.
4. Press the left soft key, labeled Select.
5. The Number option is highlighted.
6. Press the left soft key, labeled Select.
120 Iridium Extreme® User Manual120 Iridium Extreme® User Manual
10: Using the Voicemail Menu
Select Back
7. Enter the voicemail number
given to you by your Service
Provider.
8. Press the left soft key,
labeled Save.
9. Press the right soft key,
labeled Back to return to
the previous menu.
10. Press the red key to exit to
the Main Screen.
+881662990000
Voicemail Number
Save Clear
One-Touch Access to Voicemail
The Iridium Extreme® provides one-touch access to voicemail for ease
of use. To use this feature, press and hold the 1 key for 2 seconds in
order to prompt a call to voicemail without having to navigate through
the phone menu.

Iridium Extreme® User Manual 121
11: Using the Data Modem Menu

11: Using the Data Modem Menu
Iridium Extreme® User Manual 123
11: Using the Data Modem Menu
11: Using the Data Modem Menu
In order to use the Iridium Extreme® as a modem for your computer, you
must first follow the installation instructions provided on the CD-ROM
included with your phone or use the instructions provided by your service
provider. The data modem menu is not required to initiate or use the
phone as a modem for data services, it only reports the connection status
of the USB. The instructions provided are optional and are to be followed
if desired prior to plugging in the USB cable to the phone and to your
computer.
Locating the Data Modem Menu
Note: All instructions for the Data Modem menu start from the Main
Menu as shown.
Registered
Menu Help
16:28 14-May-13
T
Select Black
Menu
My Phonebook
SIM Phonebook
Messages
Voicemail
Data Modem
Starting from the Main Screen:
1. Press the left soft key, labeled Menu.
2. The Main Menu is displayed. Use the
2-way Navi-key to scroll until Data
Modem is highlighted.
3. Press the left soft key, labeled Select.

124 Iridium Extreme® User Manual
11: Using the Data Modem Menu
Note: If you are not connected to
the USB cable you are prompted to
connect. While connected to the USB
cable it is important to not remove the
battery.
If you need to remove the battery, first
disconnect from the USB cable, power
down the Iridium Extreme® and then
remove the battery.
Cancel
Data Modem
Connect USB cable

Iridium Extreme® User Manual 125
12: Using the Call History Menu

126 Iridium Extreme® User Manual
12: Using the Call History Menu
Iridium Extreme® User Manual 127
12: Using the Call History Menu
12: Using the Call History Menu
Locating the Call History Menu
Note: All instructions for the Call History menu start from the Main Menu
as shown.
About the Call History Menu
You can perform the following functions using the Call History menu:
Select Back
Call Log
Call Meters
Call History
Registered
Menu Help
16:28 14-May-13
T
Select Back
Menu
Call History
Setup
Security
Help
Starting from the Main Screen:
1. Press the left soft key, labeled Menu.
2. The Main Menu is displayed. Use the
2-way Navi-key to scroll until Call
History is highlighted.
3. Press the left soft key, labeled Select.
• View the amount of time spent
talking on your phone
• View your most recent dialed, missed
and received calls
• Set phone alerts
128 Iridium Extreme® User Manual
12: Using the Call History Menu
Using the Call Log Menu
View Most Recent Received Calls
Your phone saves received calls. Use the Call Log menu to view those
numbers.
Starting from the Main Menu:
1. Use the 2-way Navi-key to scroll
until Call History is highlighted.
2. Press the left soft key, labeled
Select.
3. The Call History menu is displayed
with Call Log highlighted.
4. Press the left soft key, labeled
Select.
5. The Call Log menu is displayed with
Received Calls highlighted.
6. Press the left soft key, labeled
Select.
Select Back
Menu
Call History
Setup
Security
Help
Select Back
Call Log
Call Meters
Call History
Received Calls
Missed Calls
Dialed Calls
Call Log
Select Back
Iridium Extreme® User Manual 129
12: Using the Call History Menu
7. The Received Calls screen
is displayed with a list of
your last ten calls. Inbound
Caller ID to provide specific
numbers is not currently
supported by the network.
This feature may be enabled
in the future.
Press the right soft key labeled
Back to go back one level, or
the red key to return the Main
Screen.
+881225551212
+011225551212
+881425551212
+881765551212
+991445551212
+651225551212
+331225551212
+321225551212
Received Calls
Select Back
View Missed Calls
Your phone saves a list of calls you’ve missed when the phone is busy or
were not able to get to it. The phone does not show calls that you missed
when the phone is turned OFF or not registered on the network.
Starting from the Main Menu:
1. Use the 2-way Navi-key to
scroll until Call History is
highlighted.
2. Press the left soft key,
labeled Select.
3. The Call History menu is
displayed with Call Log
highlighted.
4. Press the left soft key,
labeled Select.
Select Back
Menu
Call History
Setup
Security
Help
Select Back
Call Log
Call Meters
Call History
130 Iridium Extreme® User Manual
12: Using the Call History Menu
10:20
30-Sep-11
00:37:45
+881655512121
08:54
29-Sep-11
00:12:32
+2405551212
Missed Calls
Select Back
Received Calls
Missed Calls
Dialed Calls
Call Log
Select Back
5. Using the 2-way Navi-key
scroll until Missed Calls is
highlighted.
6. Press the left soft key,
labeled Select.
7. The Missed Calls screen is
displayed with a list of your
last missed calls. Inbound
Caller ID to provide specific
numbers is not currently
supported by the network.
This feature may be enabled
in the future
Press the right soft key labeled
Back to go back one level, or
the red key to return the Main
Screen.
View Most Recent Dialed Calls
Your phone saves the last ten calls dialed. Use the Call Log menu to view
those numbers.
Starting from the Main Menu:
1. Use the 2-way Navi-key to
scroll until Call History is
highlighted.
2. Press the left soft key,
labeled Select.
Select Back
Menu
Call History
Setup
Security
Help
Iridium Extreme® User Manual 131
12: Using the Call History Menu
3. The Call History menu is
displayed with Call Log
highlighted.
4. Press the left soft key,
labeled Select.
5. Using the 2-way Navi-key
scroll until Dialed Calls is
highlighted.
6. Press the left soft key,
labeled Select.
7. The Dialed Calls screen is
displayed with a list of your
last ten calls.
Press the right soft key labeled
Back to go back one level, or
the red key to return the Main
Screen.
Select Back
Call Log
Call Meters
Call History
+881225551212
+011225551212
+881425551212
+881765551212
+991445551212
+651225551212
+331225551212
+321225551212
Dialed Calls
Select Back
Select Back
Received Calls
Missed Calls
Dialed Calls
Call Log
132 Iridium Extreme® User Manual
12: Using the Call History Menu
Using the Call Meters Menu
Call meters help you track your airtime, keep a running tab of your
monthly usage or view the air time of your most recent calls.
Show the Time of Last Call
Starting from the Main Menu:
1. Use the 2-way Navi-key to scroll
until Call History is highlighted.
2. Press the left soft key, labeled
Select.
3. Use the 2-way Navi-key to scroll until
Call Meters is highlighted.
4. Press the left soft key, labeled
Select.
5. Last call time is highlighted. If not,
use the 2-way Navi-key until it is.
6. Press the left soft key, labeled
Select.
Select Back
Menu
Call History
Setup
Security
Help
Select Back
Call Log
Call Meters
Call History
Last call time
Total call time
Reset call timer
Lifetime call time
In-call display
Audible timers
Call Meters
Select Back
Iridium Extreme® User Manual 133
12: Using the Call History Menu
The duration of the last call is
displayed.
7. Press the right soft key
labeled Back to return to the
previous menu.
8. Press the red key to return to
the Main Screen.
02:56:15
Call Time
Back
Note: The last call timer shows the elapsed time of the most recent call
made since your phone was turned on. This information is not saved
when you turn off the phone.
Show Total Time for All Calls
This capability displays your total airtime since you last reset the call timer.
Starting from the Main Menu:
1. Use the 2-way Navi-key to
scroll until Call History is
highlighted.
2. Press the left soft key,
labeled Select.
3. Use the 2-way Navi-key to
scroll until Call Meters is
highlighted.
4. Press the left soft key,
labeled Select.
Select Back
Menu
Call History
Setup
Security
Help
Select Back
Call Log
Call Meters
Call History
134 Iridium Extreme® User Manual
12: Using the Call History Menu
Select Back
Menu
Call History
Setup
Security
Help
5. Use the 2-way Navi-key to
scroll until Total call time is
highlighted.
6. Press the left soft key,
labeled Select.
The airtime accumulation
since the timer was last reset is
displayed on the screen.
7. Press the right soft key
labeled Back to return to the
previous menu.
8. Press the red key to return to
the Main Screen.
02:56:15
Call Time
Back
Last call time
Total call time
Reset call timer
Lifetime call time
In-call display
Audible timers
Call Meters
Select Back
Reset all Timers
Reset your timers at the beginning of each billing cycle to keep track of
your spending.
Starting from the Main Menu:
1. Use the 2-way Navi-key to
scroll until Call History is
highlighted.
2. Press the left soft key,
labeled Select.
Iridium Extreme® User Manual 135
12: Using the Call History Menu
Select Back
Call Log
Call Meters
Call History
3. Use the 2-way Navi-key to scroll until
Call Meters is highlighted.
4. Press the left soft key, labeled Select.
5. Use the 2-way Navi-key to scroll until
Reset call timer is highlighted.
6. Press the left soft key, labeled Select.
The screen displays: Reset call timers?
7. Press the left soft key for Yes or the
right soft key for No.
8. If you press Yes, the display reads Call
meters reset.
Reset call timers?
Reset
Yes No
Select Back
Last call time
Total call time
Reset call timer
Lifetime call time
In-call display
Audible timers
Call Meters
Call meters reset.
Reset
136 Iridium Extreme® User Manual
12: Using the Call History Menu
9. Press the right soft key
labeled Back to return to
the previous menu.
10. Press the red key to return
to the Main Screen.
Select Back
Showing the Lifetime Call Timer
This capability displays a running clock of the total call time for the phone
since being activated.
Starting from the Main Menu:
1. Use the 2-way Navi-key to
scroll until Call History is
highlighted.
2. Press the left soft key,
labeled Select.
3. Use the 2-way Navi-key to
scroll until Call Meters is
highlighted.
4. Press the left soft key,
labeled Select.
Select Back
Menu
Call History
Setup
Security
Help
Select Back
Call Log
Call Meters
Call History
Iridium Extreme® User Manual 137
12: Using the Call History Menu
3. Use the 2-way Navi-key to
scroll until Call Meters is
highlighted.
4. Press the left soft key,
labeled Select.
The total time of all calls is
displayed.
7. Press the right soft key
labeled Back to return to the
previous menu.
8. Press the red key to return to
the Main Screen.
02:56:15
Call Time
Back
Last call time
Total call time
Reset call meter. . .
Lifetime call time
In-call display
Audible timers
Call Meters
Select Back
Note: The Lifetime timer can not be reset.
Showing the In-call Display
This capability enables or disables the call timer that displays the amount
of time that has passed since placing a specific call.
Starting from the Main Menu:
1. Use the 2-way Navi-key to
scroll until Call History is
highlighted.
2. Press the left soft key,
labeled Select.
Select Back
Menu
Call History
Setup
Security
Help

138 Iridium Extreme® User Manual
12: Using the Call History Menu
3. Use the 2-way Navi-key to scroll until
Call Meters is highlighted.
4. Press the left soft key, labeled
Select.
5. Use the 2-way Navi-key to scroll
until In-call displ ay is highlighted.
6. Press the left soft key, labeled
Select.
7. Use the 2-way Navi-key to scroll to
Enabled or Disabled.
8. Press the left soft key, labeled
Select.
Select Back
Call Log
Call Meters
Call History
Last call time
Total call time
Reset call meter. . .
Lifetime call time
In-call display
Audible timers
Call Meters
Select Back
Select Back
Enabled
Disabled
Call Timer
Iridium Extreme® User Manual 139
12: Using the Call History Menu
Setting Audible Call Timers
This capability lets the phone watch the clock for you. At a set time or
interval, the call timers produce a beep that only you can hear. You can
choose No Alert, Single Alert or Repetitive Alert.
Set the Single Alert Timer
Starting from the Main Menu:
1. Use the 2-way Navi-key to scroll until
Call History is highlighted.
2. Press the left soft key, labeled Select.
3. Use the 2-way Navi-key to scroll until
Call Meters is highlighted.
4. Press the left soft key, labeled Select.
5. Use the 2-way Navi-key to scroll until
Audible timers is highlighted.
6. Press the left soft key, labeled Select.
Select Back
Menu
Call History
Setup
Security
Help
Select Back
Call Log
Call Meters
Call History
Last call time
Total call time
Reset call meter. . .
Lifetime call time
In-call display
Audible timers
Call Meters
Select Back
140 Iridium Extreme® User Manual
12: Using the Call History Menu
7. The Single Alert option
should be highlighted. If
not, use the 2-way Navi-key
to scroll until it is.
8. Press the left soft key,
labeled Select.
9. Use the 2-way Navi-key to
scroll to the desired single
alert.
10. Press the left soft key,
labeled Select.
11. Press the right soft key
labeled Back to return to
the previous menu.
12. Press the red key to return
to the Main Screen.
Select Back
Single Alert
Repetitive Alert
Audible Timers
Select Back
Select Back
Single Alert
Off
1 minute
5 minutes
10 minutes
15 minutes
30 minutes
60 minutes
Iridium Extreme® User Manual 141
12: Using the Call History Menu
Set the Repetitive Alert
This capability sets your phone to alert you at specific intervals, for
example every minute.
Starting from the Main Menu:
1. Use the 2-way Navi-key to scroll until
Call History is highlighted.
2. Press the left soft key, labeled Select.
3. Use the 2-way Navi-key to scroll until
Call Meters is highlighted.
4. Press the left soft key, labeled Select.
5. Use the 2-way Navi-key to scroll until
Audible timers is highlighted.
6. Press the left soft key, labeled Select.
Select Back
Menu
Call History
Setup
Security
Help
Select Back
Call Log
Call Meters
Call History
Last call time
Total call time
Reset call meter. . .
Lifetime call time
In-call display
Audible timers
Call Meters
Select Back
142 Iridium Extreme® User Manual
12: Using the Call History Menu
7. Use the 2-way Navi-key
to scroll to the Repetitive
Alert option.
8. Press the left soft key,
labeled Select.
9. Use the 2-way Navi-key
to scroll to the desired
repetitive alert.
10. Press the left soft key,
labeled Select.
11. Press the right soft key
labeled Back to return to
the previous menu.
12. Press the red key to return
to the Main Screen.
Select Back
Select Back
Single Alert
Repetitive Alert
Audible Timers
Repetitive Alert
Off
1 minute
5 minutes
10 minutes
15 minutes
30 minutes
60 minutes
Select Back

Iridium Extreme® User Manual 143
13: Using the Setup Menu

144 Iridium Extreme® User Manual
13: Using the Setup Menu
Iridium Extreme® User Manual 145
13: Using the Setup Menu
13: Using the Setup Menu
Locating the Setup Menu
Note: All instructions for the Setup menu start from the Main Menu as
shown.
About the Setup Menu
You can perform the following functions using the Setup menu:
Registered
Menu Help
16:28 14-May-13
T
Starting from the Main Screen:
1. Press the left soft key, labeled Menu.
2. The Main Menu is displayed. Use the
2-way Navi-key to scroll until Setup
is highlighted.
3. Press the left soft key, labeled Select.
Menu
Call History
Setup
Security
Help
Select Back
Location Options
Call Options
Volume and Tones
Time and Date
Language
Backlight
Contrast
Setup
Select Back
• Set Location Options
• Set call options
• Set volumes and tones for your ringer
speaker and alert
• Set time zone, time and date format
• Set language
• Set your phone lighting preferences
• Set the contrast on the display screen
146 Iridium Extreme® User Manual
13: Using the Setup Menu
Key Setup
Number Entry
Phone Information
Reset to defaults
Setup
Select Back
• Set preference for the convenience
key and right soft key
• Set your prefix preference for
entering phone numbers
• View phone information
• Reset phone settings to default
Menu
Call History
Setup
Security
Help
Select Back
Select Back
Setup
Location Options
Call Options
Volume and Tones
Time and Date
Language
Note: The Setup menu consists of three screens. Scroll past the Language
option using the 2-way Navi-key for more options.
Note: Location options will be covered in more detail on Chapter 14.
Setting Call Options
The Call Options menu allows you to enable or disable various call
capabilities.
Starting from the Main Menu:
1. Use the 2-way Navi-key to scroll
until Setup is highlighted.
2. Press the left soft key, labeled
Select.
3. Call Options is already displayed.
4. Press the left soft key, labeled
Select.
Iridium Extreme® User Manual 147
13: Using the Setup Menu
5. Highlight the call capability
you would like to enable.
6. Press the left soft key
labeled Select to return to
the previous menu.
7. Press the red key to return to
the Main Screen.
Call Waiting
Call Forwarding
Call Barring
Fixed Dialing
Call Options
Select Back
Menu
Call History
Setup
Security
Help
Select Back
Location Options
Call Options
Volume and Tones
Time and Date
Language
Setup
Select Back
Setting Volumes and Tones
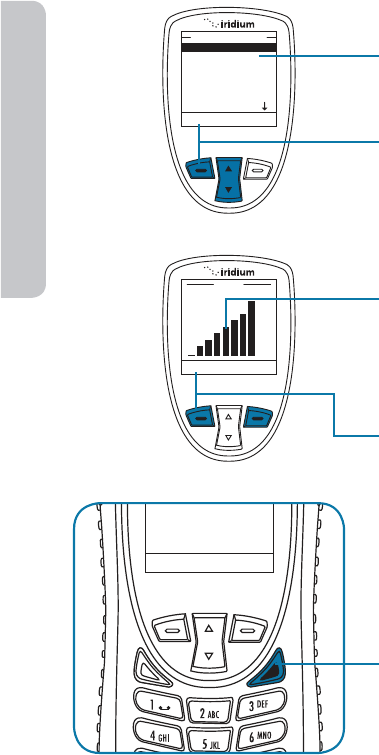
Adjust the Ringer Volume
The Volumes and Tones menu allows you to adjust the sound tone and
volume level as well as to set the phone to ring or vibrate for incoming
call notification.
Starting from the Main Menu:
1. Use the 2-way Navi-key
to scroll until Setup is
highlighted.
2. Press the left soft key,
labeled Select.
3. Use the 2-way Navi-key to
scroll until Volumes and
Tones is highlighted.
4. Press the left soft key,
labeled Select.
148 Iridium Extreme® User Manual
13: Using the Setup Menu
5. Ringer Volume is
highlighted. If not, use the
2-way Navi-key to scroll to it.
6. Press the left soft key,
labeled Select.
7. The volume bars increase
or decrease as you press
the 2-way Navi-key up
or down. You will hear the
selected audio level as part
of the selection process.
8. Press the left soft key,
labeled OK when you
have the desired setting
or you may cancel the
changes by pressing the
right soft key labeled
Back to return to the
Volume and Tones Menu.
9. You may exit the settings
and return to the Main
Screen by selecting the
red key.
Select Back
Ringer Volume
Speaker Volume
Ring Tone
Alert Tone
Keypad Tone
Vibrate
Volumes and Tones
Select Back
OK Back
Volume
Iridium Extreme® User Manual 149
13: Using the Setup Menu
Menu
Call History
Setup
Security
Help
Select Back
Location Options
Call Options
Volume and Tones
Time and Date
Language
Setup
Select Back
Adjust the Speaker Volume
This capability adjusts the volume of the speaker. The phone sounds the
new volume level as you adjust it.
Starting from the Main Menu:
1. Use the 2-way Navi-key
to scroll until Setup is
highlighted.
2. Press the left soft key,
labeled Select.
3. Use the 2-way Navi-key to
scroll until Volumes and
Tones is highlighted.
4. Press the left soft key,
labeled Select.
5. Use the 2-way Navi-key to
scroll to Speaker Volume.
6. Press the left soft key,
labeled Select.
Ringer Volume
Speaker Volume
Ring Tone
Alert Tone
Keypad Tone
Vibrate
Volumes and Tones
Select Back
150 Iridium Extreme® User Manual
13: Using the Setup Menu
7. The volume bars increase
or decrease as you press
the 2-way Navi-key up
or down. You will hear the
selected audio level as part
of the selection process.
8. Press the left soft key,
labeled OK when you
have the desired setting
or you may cancel the
changes by pressing the
right soft key labeled
Back to return to the
Volume and Tones Menu.
9. You may exit the settings
and return to the Main
Screen by selecting the
red key.
Select Back
OK Back
Volume
Menu
Call History
Setup
Security
Help
Select Back
Adjust the Ring Tone
This capability adjusts the tone of the ringer. The phone sounds the new
tone as you adjust it.
Starting from the Main Menu:
1. Use the 2-way Navi-key
to scroll until Setup is
highlighted.
2. Press the left soft key,
labeled Select.
Iridium Extreme® User Manual 151
13: Using the Setup Menu
3. Use the 2-way Navi-key to
scroll until Volumes and
Tones is highlighted.
4. Press the left soft key,
labeled Select.
5. Use the 2-way Navi-key
to scroll to Ring Tone.
6. Press the left soft key,
labeled Select.
7. Use the 2-way Navi-key to
select the desired tone. You
will hear the selected tone as
part of the selection process.
8. Press the left soft key,
labeled OK when you have
the desired setting or you
may cancel the changes by
pressing the right soft key
labeled Back to return to the
Volume and Tones Menu.
9. You may exit the settings and
return to the Main Screen by
selecting the red key.
Location Options
Call Options
Volume and Tones
Time and Date
Language
Setup
Select Back
Select Back
Ringer Volume
Speaker Volume
Ring Tone
Alert Tone
Keypad Tone
Vibrate
Volumes and Tones
Select Back
Select Back
Tone 1
Tone 2
Tone 3
Tone 4
Ring tone
152 Iridium Extreme® User Manual
13: Using the Setup Menu
Menu
Call History
Setup
Security
Help
Select Back
Location Options
Call Options
Volume and Tones
Time and Date
Language
Setup
Select Back
Setting the Call Alert Mode
This capability adjusts the alert tone. The phone sounds the new tone as
you adjust it.
Starting from the Main Menu:
1. Use the 2-way Navi-key
to scroll until Setup is
highlighted.
2. Press the left soft key,
labeled Select.
3. Use the 2-way Navi-key to
scroll until Volumes and
Tones is highlighted.
4. Press the left soft key,
labeled Select.
5. Use the 2-way Navi-key
to scroll until Alert Tone is
highlighted.
6. Press the left soft key,
labeled Select.
Select Back
Ringer Volume
Speaker Volume
Ring Tone
Alert Tone
Keypad Tone
Vibrate
Volumes and Tones
Iridium Extreme® User Manual 153
13: Using the Setup Menu
Menu
Call History
Setup
Security
Help
Select Back
7. Use the 2-way Navi key to
select the desired tone. You
will hear the selected tone as
part of the selection process.
8. Press the left soft key,
labeled OK when you have
the desired setting or you
may cancel the changes by
pressing the right soft key
labeled Back to return to the
Volume and Tones Menu.
9. You may exit the settings and
return to the Main Screen by
selecting the red key.
Select Back
Select Back
Tone 1
Tone 2
Tone 3
Tone 4
Alert tone
Setting the Keypad Tone
This capability selects the keypad tone. You can select to have a single
tone, DTMF tones or no tones when the keypad is pressed.
Starting from the Main Menu:
1. Use the 2-way Navi-key
to scroll until Setup is
highlighted.
2. Press the left soft key,
labeled Select.

154 Iridium Extreme® User Manual
13: Using the Setup Menu
3. Use the 2-way Navi-key to
scroll until Volumes and
Tones is highlighted.
4. Press the left soft key,
labeled Select.
5. Use the 2-way Navi-key to
scroll until Keypad Tone is
highlighted.
6. Press the left soft key,
labeled Select.
7. Use the 2-way Navi key to
select the desired tone. You
will hear the selected tone as
part of the selection process.
8. Press the left soft key,
labeled OK when you have
the desired setting or you
may cancel the changes by
pressing the right soft key
labeled Back to return to the
Volume and Tones Menu.
9. You may exit the settings and
return to the Main Screen by
selecting the red key.
Select Back
Message Deleted
Ringer Volume
Speaker Volume
Ring Tone
Alert Tone
Keypad Tone
Vibrate
Volumes and Tones
Select Back
Location Options
Call Options
Volume and Tones
Time and Date
Language
Setup
Select Back
Select Back
DTMF Tones
Single Tone
No Tone
Alert tone
Iridium Extreme® User Manual 155
13: Using the Setup Menu
Menu
Call History
Setup
Security
Help
Select Back
Location Options
Call Options
Volume and Tones
Time and Date
Language
Setup
Select Back
Set the Phone to Ring and /or Vibrate
This capability is ideal for situations where a ringing phone is
inappropriate or in a loud environment. The vibrate function notifies you
of incoming calls with discreet vibrations.
Starting from the Main Menu:
1. Use the 2-way Navi-key
to scroll until Setup is
highlighted.
2. Press the left soft key,
labeled Select.
3. Use the 2-way Navi-key to
scroll until Volumes and
Tones is highlighted.
4. Press the left soft key,
labeled Select.
5. Use the 2-way Navi-key
to scroll until Vibrate is
highlighted.
6. Press the left soft key,
labeled Select.
Select Back
Ringer Volume
Speaker Volume
Ring Tone
Alert Tone
Keypad Tone
Vibrate
Volumes and Tones
156 Iridium Extreme® User Manual
13: Using the Setup Menu
Menu
Call History
Setup
Security
Help
Select Back
7. Use the 2-way Navi-key to
scroll to the desired Vibrate
Option.
8. Press the left soft key, labeled
Select to confirm change
or press the right soft key
labeled Back to return to the
Volumes and Tones Menu.
9. You may exit the settings and
return to the Main Screen by
selecting the red key.
Select Back
Ring Only
Vibrate Only
Vibrate then Ring
No Ring or Vibrate
Vibrate Options
Time and Date Settings
Select the Time Zone
Your phone uses the satellite network to obtain the time and date
information. However, you need to select the time zone in which you are
located.
Starting from the Main Menu:
1. Use the 2-way Navi-key
to scroll until Setup is
highlighted.
2. Press the left soft key,
labeled Select.
Iridium Extreme® User Manual 157
13: Using the Setup Menu
3. Use the 2-way Navi-key to
scroll until Time & Date is
highlighted.
4. Press the left soft key,
labeled Select.
5. Use the 2-way Navi-key to
scroll until the desired Select
Time Zone is highlighted.
6. Press the left soft key,
labeled Select to confirm
or press the red key to return
to the Setup Menu.
7. Use the 2-way Navi-key until
the required time zone is
highlighted.
8. Press the left soft key,
labeled Select to confirm
or press the right soft key
labeled Back to return to the
Time and Date Menu.
9. You may exit the settings and
return to the Main Screen by
selecting the red key.
Select Back
Location Options
Call Options
Volume and Tones
Time and Date
Language
Setup
Select Back
Select Time Zone
Time format
Date format
Time and Date
24 hours
am/pm
Time Format
Select Back
158 Iridium Extreme® User Manual
13: Using the Setup Menu
Select the Time Format
Menu
Call History
Setup
Security
Help
Select Back
Starting from the Main Menu:
1. Use the 2-way Navi-key to scroll
until Setup is highlighted.
2. Press the left soft key, labeled
Select.
3. Use the 2-way Navi-key to scroll
until Time and Date is highlighted.
4. Press the left soft key, labeled
Select.
5. Use the 2-way Navi-key to scroll
until Time format is highlighted.
6. Press the left soft key, labeled
Select.
Select Back
Location Options
Call Options
Volume and Tones
Time and Date
Language
Setup
Select Back
Select time zone
Time format
Date format
Time and Date
Iridium Extreme® User Manual 159
13: Using the Setup Menu
24 hours
am/pm
Time Format
Select Back
7. Use the 2-way Navi-key
until the required time
format is highlighted.
8. Press the left soft key,
labeled Select to confirm
selection or press the right
soft key, labeled Back to
return to the Time and
Date Menu.
9. You may exit the settings
and return to the Main
Screen by selecting the
red key.
Select the Date Format
Menu
Call History
Setup
Security
Help
Select Back
Starting from the Main Menu:
1. Use the 2-way Navi-key
to scroll until Setup is
highlighted.
2. Press the left soft key,
labeled Select.
3. Use the 2-way Navi-key to
scroll until Time and Date
is highlighted.
4. Press the left soft key,
labeled Select.
Select Back
Location Options
Call Options
Volume and Tones
Time and Date
Language
Setup
160 Iridium Extreme® User Manual
13: Using the Setup Menu
5. Use the 2-way Navi-key to
scroll until Date format is
highlighted.
6. Press the left soft key,
labeled Select.
7. Use the 2-way Navi-key until
the required date format is
highlighted.
8. Press the left soft key,
labeled Select to confirm
change or press the right
soft key labeled Back to
return to the Time and Date
Menu.
9. You may exit the settings and
return to the Main Screen by
selecting the red key.
Select Back
Select time zone
Time format
Date format
Time and Date
Select Back
01-Jan-13
DD/MM/YY
DD-MM-YY
DD.MM.YY
MM/DD/YY
YY-DD-MM
Date Format
Selecting the Display Language
Your phone contains 23 languages. Use this capability to select the
language in which your phone displays menus and messages.
Menu
Call History
Setup
Security
Help
Select Back
Starting from the Main Menu:
1. Use the 2-way Navi-key
to scroll until Setup is
highlighted.
2. Press the left soft key,
labeled Select.
Iridium Extreme® User Manual 161
13: Using the Setup Menu
3. Use the 2-way Navi-key
to scroll until Language is
highlighted.
4. Press the left soft key,
labeled Select.
5. Use the 2-way Navi-key to
highlight Menu and press the
left soft key labeled Select to
access the available languages
6. Use the 2-way Navi-key
to scroll until the required
Language is highlighted.
7. Press the left soft key,
labeled Select to confirm the
selection or press the right
soft key, labeled Back to
return to the Setup Menu.
8. You may exit the settings and
return to the Main Screen by
selecting the red key.
Select Back
Location Options
Call Options
Volume and Tones
Time and Date
Language
Setup
English
Czech (Cestina)
Danish
Dutch
Finnish (Suomi)
French
German
Language
Select Back
Tip: If you accidentally select a language other than English and are unable
to read the phone menus, follow these steps to change back to English:
1. Press the red key three times.
2. Press the left soft key.
3. Scroll down six times.
4. Press the left soft key again.
5. Scroll down four times.
6. Press the left soft key and then press it a second time. The English
option is at the top so press the left soft key a final time to confirm
change back to English.
162 Iridium Extreme® User Manual
13: Using the Setup Menu
Setting Backlights
Enable, disable or adjust the length of time the backlight stays on after a
key press.
Menu
Call History
Setup
Security
Help
Select Back
Starting from the Main Menu:
1. Use the 2-way Navi-key
to scroll until Setup is
highlighted.
2. Press the left soft key,
labeled Select.
3. Use the 2-way Navi-key
to scroll until Backlight is
highlighted.
4. Press the left soft key,
labeled Select.
5. Use the 2-way Navi-key
to scroll until the required
Backlight is highlighted.
6. Press the left soft key,
labeled Select to confirm
selections or press the right
soft key labeled Back to
return to the Setup Menu.
7. You may exit the settings and
return to the Main Screen by
selecting the red key.
Select Back
Backlight
Contrast
Key Setup
Number Entry
Phone Information
Setup
Off
5 Seconds
10 Seconds
15 Seconds
20 Seconds
30 Seconds
Backlight
Select Back
Iridium Extreme® User Manual 163
13: Using the Setup Menu
Setting Contrast
This capability allows you to adjust the contrast on the display screen.
Menu
Call History
Setup
Security
Help
Select Back
Starting from the Main Menu:
1. Use the 2-way Navi-key
to scroll until Setup is
highlighted.
2. Press the left soft key,
labeled Select.
3. Use the 2-way Navi-key
to scroll until Contrast is
highlighted.
4. Press the left soft key,
labeled Select.
5. Use the 2-way Navi-key to
scroll until to increase or
decrease the contrast.
6. Press the left soft key,
labeled OK to confirm
selections or press the right
soft key labeled Back to
return to the Setup Menu.
7. You may exit the settings and
return to the Main Screen by
selecting the red key.
Backlight
Contrast
Key Setup
Number Entry
Phone Information
Setup
Select Back
Contrast
OK Back
164 Iridium Extreme® User Manual
13: Using the Setup Menu
Using the Key Setup Menu
This capability selects the function of the convenience key and the
right soft key when the Main Screen is displayed. The default function
is to display the Help screen which is useful for new users; however the
function can be changed to access the phonebook.
Setup the Convenience Key Function
Menu
Call History
Setup
Security
Help
Select Back
Starting from the Main Menu:
1. Use the 2-way Navi-key to scroll
until Setup is highlighted.
2. Press the left soft key, labeled
Select.
3. Use the 2-way Navi-key to scroll
until Key Setup is highlighted.
4. Press the left soft key, labeled
Select.
5. Convenience Key is highlighted.
6. Press the left soft key, labeled
Select.
Select Back
Backlight
Contrast
Key Setup
Number Entry
Phone Information
Setup
Convenience Key
Right Soft Key
Setup
Select Back
Iridium Extreme® User Manual 165
13: Using the Setup Menu
7. Use the 2-way Navi-key to
scroll until the desired action
is highlighted.
8. Press the left soft key,
labeled Select to confirm
selections or press the right
soft key labeled Back to
return to the Setup Menu.
9. You may exit the settings and
return to the Main Screen by
selecting the red key.
No Action
Start Call
End Call
Redial
Convenience Key
Select Back
Setup the Right Soft Key Function
Menu
Call History
Setup
Security
Help
Select Back
Starting from the Main Menu:
1. Use the 2-way Navi-key
to scroll until Setup is
highlighted.
2. Press the left soft key,
labeled Select.
3. Use the 2-way Navi-key
to scroll until Key Setup is
highlighted.
4. Press the left soft key,
labeled Select.
Select Back
Backlight
Contrast
Key Setup
Number Entry
Phone Information
Setup
166 Iridium Extreme® User Manual
13: Using the Setup Menu
Menu
Call History
Setup
Security
Help
Select Back
Convenience Key
Right Soft Key
Setup
Select Back
Show Help
SIM Phonebook
My Phonebook
Right key action
Select Back
5. Use the 2-way Navi-key until
Right Soft Key is highlighted.
6. Press the left soft key,
labeled Select.
7. Use the 2-way Navi-key to
scroll until the desired action
is highlighted.
8. Press the left soft key,
labeled Select to confirm
selections or press the right
soft key labeled Back to
return to the Setup Menu.
9. You may exit the settings and
return to the Main Screen by
selecting the red key.
Set Number Entry Prefix
This capability allows you to set your preferred international access code
and can automatically attach (00) or (+) to any phone number you enter.
Starting from the Main Menu:
1. Use the 2-way Navi-key
to scroll until Setup is
highlighted.
2. Press the left soft key,
labeled Select.
Iridium Extreme® User Manual 167
13: Using the Setup Menu
Select Back
Setup
Backlight
Contrast
Key Setup
Number Entry
Phone Information
Number Entry
Select Back
Prefix with +
Prefix with 00
Do not prefix
3. Use the 2-way Navi-key to
scroll past the Key Setup
option until Number Entry is
highlighted.
4. Press the left soft key,
labeled Select.
5. Use the 2-way Navi-key to
scroll until the desired action
is highlighted.
6. Press the left soft key,
labeled Select to confirm
selections or press the right
soft key labeled Back to
return to the Setup Menu.
7. You may exit the settings and
return to the Main Screen by
selecting the red key.
View Phone Information
This capability allows you to view technical information about the Iridium
Extreme® Satellite Phone software, hardware versions and the IMEI
number.
Menu
Call History
Setup
Security
Help
Select Back
Starting from the Main Menu:
1. Use the 2-way Navi-key
to scroll until Setup is
highlighted.
2. Press the left soft key,
labeled Select.
168 Iridium Extreme® User Manual
13: Using the Setup Menu
3. Use the 2-way Navi-key
to scroll past the Key
Setup option until Phone
Information is highlighted.
4. Press the left soft key,
labeled Select.
Information regarding your
phone appears on the display.
5. Press the right soft key,
labeled Back to return to the
Setup menu.
Setup
Backlight
Contrast
Key Setup
Number Entry
Phone Information
Select Back
Back
Phone Information
F/w:HT08001
IMEI:399999999999999
Reset Phone Options to Factory Defaults
This capability resets all settings to their original default settings.
Menu
Call History
Setup
Security
Help
Select Back
Starting from the Main Menu:
1. Use the 2-way Navi-key
to scroll until Setup is
highlighted.
2. Press the left soft key,
labeled Select.
Iridium Extreme® User Manual 169
13: Using the Setup Menu
Select Back
Setup
Reset to defaults
Yes No
Reset
Reset all phone
settings?
Reset
Phone settings reset
3. Use the 2-way Navi-key to
scroll past the Key Setup
option until Reset to
defaults is highlighted.
4. Press the left soft key,
labeled Select.
5. Press the left soft key,
labeled Yes.
6. A message appears briefly
indicating the phone settings
have been reset.
7. Press the red key to return to
the Main Screen.

170 Iridium Extreme® User Manual
13: Using the Setup Menu

Iridium Extreme® User Manual 171
14: GPS & Location Based Services
14: GPS and Location-Based Services
The Iridium Extreme® GPS and Location-Based Service features allow you
to view, send, or restrict your location information. There are four main
components to setup and use these features:
• Location Options Setup Menu: located in the Iridium Extreme® main
menu in the setup section, Location Options Options is where you
customize your GPS, emergency, message, and format options.
• Programmable SOS button: this red button is located on the top of
the phone, under a protective cover. By removing the cover and and
pressing the red button you can send your location information to your
designated contact in the event of an emergency.
• Location Convenience Key: located on the right side of the phone, you
can to press this key to view your location and share it via SMS to either
a pre-programmed “Quick GPS” contacts or a new message contact.
• Online portal integration with 3rd party providers: enables the
transmission of the phone’s location information on a scheduled
interval via short-burst data (SBD) to 3rd party portal providers for
online tracking
Note: Standard usage fees apply for sharing location via messaging or
placing a phone call via the programmable SOS button.
Location Options Setup Menu
The Location Options Setup Menu enables you to set up the following
options:
• GPS Options: Enable/disable GPS on your handset; determine how
frequently the GPS is updated when enabled; and lock your GPS
settings.
• Portal Options: Register/De-register with portal provider; check your
portal status
• Emergency Options: Set up Emergency Recipients; determine
Emergency Actions; configure Emergency settings; and enter/cancel
Emergency Mode; GEOS Service use/do not use.
• Message Options: Set up the recipient and frequency of your auto GPS
location update message.
• Format: Configure the format of GPS location information.
• Current Location: View and update your current GPS location.
172 Iridium Extreme® User Manual
14: GPS & Location Based Services
Locating Location Options
Registered
Menu Help
16:28 14-May-13
T
Starting from the main screen:
1. Press the left soft key, labeled
Menu.
2. The Main Menu is displayed. Use the
2-way Navi-key to scroll until Setup
is highlighted.
Press the left soft key to select
Setup.
3. With Location Options highlighted
press the left soft key, labeled
Select to enter the Location
Options menu.
4. Within the Location Options menu
are GPS Options, Portal Options,
Emergency Options, Message
Options, Format, and Current
Location.
Menu
Call History
Setup
Security
Help
Select Back
Select Back
Location Options
Call Options
Volume and Tones
Time & Date
Language
Setup
Select Back
GPS Options
Portal Options
Emergency Options
Message Options
Format
Current Location
Location Options
Iridium Extreme® User Manual 173
14: GPS & Location Based Services
Using the GPS Options Menu
GPS Settings Lock
Select Back
GPS Options
Emergency Options
Message Options
Format
Current Location
Location Options
Use the GPS Options menu to configure
the basic GPS settings on your handset.
Through this menu you can lock GPS
settings, set the GPS refresh frequency
rate, and turn GPS On or Off.
1. Press the left soft key, labeled Select
Within the GPS Options menu, enable
the GPS Settings Lock to prevent
modifications to GPS settings unless the
GPS Settings Lock PIN is entered.
1. Press the left soft key, labeled Select.
The default setting for GPS Settings
Lock is Disabled. To enable GPS
Settings Lock, move the 2-way
Navi-key until the Enabled option is
highlighted
2. Press the left soft key, labeled Select.
Select Back
GPS Settings Lock
Update Options
GPS On/Off
GPS Options
Select Back
Enabled
Disabled
GPS Settings Lock
174 Iridium Extreme® User Manual
14: GPS & Location Based Services
GPS Update Options
OK Clear
GPS Settings Lock
Enter PIN
To modify the GPS Settings Lock, you
will be prompted to enter the GPS
Settings Lock PIN. The default GPS
Settings Lock PIN is 3333 and can
be modified in the Security Menu by
navigating to Change PINs and then
GPS Settings Lock. If your phone has
been “Reset to defaults” or entered
the incorrect PIN multiple times, you
may require a GPS PIN unlock code
from customer support to restore this
capability.
3. Once the default or personalized
GPS Settings Lock PIN is entered,
press the left soft key, labeled OK.
Within the GPS Options menu, the
GPS Update Options will allow you
to set how frequently a GPS position
is updated for viewing the Current
Location on the phone screen. To
access Update Options, use the 2-way
Navi-key to scroll and highlight this
feature.
1. Press the left soft key, labeled
Select.
Within the Update Options menu, the
options are provided to have the GPS
location updated One Time, Real Time,
every 5 minutes, or every 10 minutes.
To modify this setting, use the 2-way
Navi-key to scroll and highlight the
desired update rate.
2. Press the left soft key, labeled
Select.
Select Back
GPS Settings Lock
Update Options
GPS On/Off
GPS Options
Select Back
One Time
Real Time
5 Minutes
10 minutes
Update Options
Iridium Extreme® User Manual 175
14: GPS & Location Based Services
Turning GPS On/Off
Note: the GPS receiver automatically saves your location to your phone
when the phone is turned on even if the GPS receiver is off.
Setting Emergency Options
The Emergency Options menu items are used to personalize your settings
for the programmable SOS button located on the top of your phone. The
programmable SOS button gives you the ability to flip open the protective
SOS button cover, press the red key located underneath, and initiate a
message and/or phone call to your dedicated contacts. These contacts could
be a family member, commercial safety service, safety office, or Iridium-
supported public emergency number (ex. 911 in U.S. or 000 in Australia).
Iridium has partnered with GEOS Travel Safety Group to provide an
emergency response coordination service for your Iridium Extreme®. Upon
power-up of your phone you will be presented with the option of using
this service by having the SOS button call and message a destination
automatically programmed for you in the phone through the menus. You
will also be prompted to register for service by visiting www.geosalliance.
com/iridium to review and accept the terms of use and enter your emergency
Within the GPS Options menu, the
GPS On/Off will allow you to turn the
built-in GPS receiver on or off in your
phone. Features that require GPS on
will prompt you to turn GPS on. Use
of the programmable SOS button will
automatically turn GPS on. To adjust
GPS On/Off, access the GPS Options
menu and use the 2-way Navi-key until
the GPS On/Off menu is selected.
1. Press the left soft key, labeled Select.
The default setting for GPS On/Off is
Disabled, meaning that GPS is off. It is
recommended that GPS is enabled for
frequent use of GPS (for example, use
with 3rd party online tracking portal)
and disabled for infrequent use to
conserve battery. To Enable GPS and
turn it on, use the 2-way Navi-key until
the Enabled option is highlighted.
2. Press the left soft key, labeled Select.
Select Back
GPS Settings Lock
Update Options
GPS On/Off
GPS Options
Select Back
Enabled
Disabled
GPS On/Off
176 Iridium Extreme® User Manual
14: GPS & Location Based Services
contact information. Registration, programming, and a valid Iridium
subscription is required for this service. Additional information on this
service can be found on www.iridium.com in the Iridium Extreme® section
by viewing the emergency service section. To view or modify your settings,
navigate to Emergency Options and then down to GEOS Service (the last
menu option after “Call Recipient”). From this menu option you will have
the option to “Use” or “Not Use”. If you select “Use”, you will be prompted to
“Please confirm you have registered at www.geosalliance.com/iridium”. You
will need to register and then your phone will be pre-programmed to send
your location with an emergency message to GEOS and will initiate a phone
call to the GEOS response coordination center. Standard airtime charges will
apply for emergency mode messages and/or calls to GEOS.
If you select to “Not Use” GEOS, then you will need to program your
emergency “Call Recipient” and “Message Recipient” information in order
for the SOS button to initiate contact with those dedicated contacts. To
view or modify your settings, navigate to Chapter 14: GPS and Location-
Based Services under the section “Setting Emergency Options”.
In addition to the peace of mind delivered through the included Emergency
Response service, GEOS also offers optional add-on Membership Benefits
to enhance your safety and security worldwide including GEOS Search
and Rescue (SAR) and GEOS MEDIVAC™ Plus service. The GEOS Emergency
Response Service, GEOS Search and Rescue (SAR) Membership and the
GEOS MEDIVAC™ Plus are services offered and provided exclusively by GEOS,
and not by Iridium which is a separate, unrelated company. Neither GEOS
nor Iridium will pay the cost of rescue efforts in the event that the Iridium
Extreme® user fails to register and contract separately with GEOS for SAR
and/or GEOS MEDIVAC™. Any issues, terms and conditions and limitations of
liability related to your Iridium Extreme® are outlined in this Iridium Extreme®
User Manual. The use of the GEOS Emergency Response service requires
agreement to GEOS’s emergency monitoring terms & conditions, registration
with GEOS on www.geosalliance.com/iridium, programming of your Iridium
Extreme®, a valid subscription, network service availability, proper orientation
and use of the phone, and standard usage fees that will apply.
Notice: the operation of the SOS button feature is limited by any
conditions affecting the GPS signal strength and GPS service availability.
WARNING
You must configure the Emergency Mode in order for the SOS button to
send an emergency message to a designated Call Recipient and Message
Recipient. Failure to configure the SOS button will result in no message
being sent when the SOS button is pressed. This could prevent or delay
an emergency response and result in serious injury or death.
Iridium Extreme® User Manual 177
14: GPS & Location Based Services
Emergency Mode
Select Back
GPS Options
Emergency Options
Message Options
Format
Current Location
Location Options
To access Emergency Options,
access Location Options and scroll
down with the 2-way Navi-key until
Emergency Options is highlighted.
Press the left soft key, labeled Select.
Within the Emergency Options menu
are Emergency Mode, Emergency
Actions, Emergency Beep, Message
Recipient, Call Recipient, and GEOS
Service.
In the Emergency Options menu, the
Emergency Mode allows you to initiate
an emergency call and/or message to
your programmed contacts. The more
direct way to initiate Emergency Mode
is to press the red SOS button located
on the top of your phone.
If Emergency Mode is active, this
menu item can be used to cancel
Emergency Mode. When Emergency
Mode is activated, the option to cancel
Emergency
To initiate Emergency Mode from the
menu, highlight “Emergency Mode”
and press the left soft key, labeled
Select.
Select Back
Emergency Mode
Emergency Actions
Emergency Beep
Message Recipient
Call Recipient
Emergency Options
Select Back
Emergency Mode
Emergency Actions
Emergency Beep
Message Recipient
Call Recipient
Emergency Options
178 Iridium Extreme® User Manual
14: GPS & Location Based Services
Additionally, the phone (if programmed) will send an SMS message to
your designated contact every five minutes in the following format:
EMERGENCY/Lat+38.950116(stdv 0075)/Lon-077.250050(stdv 0075)/Alt+964
ft(stdv 0075)/GPS sats 04/2012-06-15 15:37UTC/Batt 86%/Lang en/Iridium user
This message contains the following information:
• EMERGENCY notification
• The Latitude and standard deviation for accuracy
• The Longitude and standard deviation for accuracy
• The Altitude and standard deviation for accuracy
• The number of GPS satellites that were visible to the phone to assist with
gauging accuracy. If number of GPS satellites is generally greater than
4, the accuracy is generally good. If “NO GPS AVAIL” is displayed, the
location provided is an approximate location based on Iridium location
that is only an approximate location within an accuracy of ~90 miles.
• The date (year – month – day) and time (UTC)
• The % of phone battery charge remaining
• The language of the phone menu setting to give some indication of the
language of the user (ex. “en” is English)
• Iridium User
After selecting Enter Emergency Mode
the countdown screen appears. You will
have 20 seconds to press the right soft
key labeled Cancel to stop Emergency
Mode if initiated accidentally. This
feature is designed to help reduce
false notifications to your designated
emergency contacts.
Once in Emergency Mode the phone
will initiate a call and/or message to
your designated contacts. The phone
call (if programmed) will occur in
speakerphone mode and will retry if the
attempted call is unsuccessful.
Cancel
Entering Emergency
Mode in 20 seconds.
Deploy antenna and
make sure it is
oriented towards the
sky.
Menu Cancel
15:40 09-JUL-13
T
Registered
SOS
Iridium Extreme® User Manual 179
14: GPS & Location Based Services
Note: if you do not cancel Emergency Mode, your phone will continue to
remain in Emergency Mode even after you turn off and on the phone. If
you attempt to turn off power while in Emergency Mode, you will receive
a countdown warning timer that power down will commence and then
a notification that the phone is sending a power down notification to
emergency contacts. You will be provided the option prior to this screen
to immediately turn off the phone or you can wait for confirmation that
the power down notification was successfully sent and then the phone
will automatically power down.
Emergency Actions
In the Emergency Options menu, Emergency Actions will allow you
to determine the types of call and/or message actions that will occur
when Emergency Mode is initiated. The default setting is Message
and Call, which means that a message and call will be initiated to your
programmed contacts in the event that Emergency Mode is started
by pressing the red SOS button on the top of the phone or by selecting
Emergency Mode from the menu.
Yes No
Are you sure you
want to exit
emergency mode?
Cancel Emergency
While in Emergency Mode the
dedicated SOS LED will illuminate
and SOS icon on the phone screen
will appear. The SOS LED will change
colors from red to green depending
upon the transmission status and
an audible tone will also occur (if
programmed) when the Emergency
Mode message is being sent.
Emergency Mode can be cancelled
by pressing the right soft key, labeled
Cancel.
If you decide to cancel Emergency
Mode, the phone will prompt you with
a message asking you if “Are you sure
you want to exit emergency mode?”
If you select “No” by pressing the right
soft key, labeled No, Emergency
Mode will not be cancelled. If you
select “Yes” by pressing the left soft
key labeled “Yes”, Emergency Mode
will be cancelled. If Emergency Mode
is canceled, a cancellation message will
be sent to your designated contact.
Menu Cancel
15:40 09-JUL-13
T
Registered
SOS
Yes No
Are you sure you
want to exit
emergency mode?
Cancel Emergency
180 Iridium Extreme® User Manual
14: GPS & Location Based Services
Emergency Beep
Message Recipient
In the Emergency Options menu, Message Recipient will allow you
to program up to three (3) contacts that will receive Emergency Mode
notifications via messaging. In order for this feature to operate, “Message
and Call” or “Message Only” needs to be selected in Emergency Actions.
The default setting for Message Recipient is “empty”, meaning that
recipients need to be added in order to notify a designated contact
in the event of an emergency. Additionally you may configure the
Message Recipient to contact GEOS service by selecting “GEOS Service”,
the last menu option under “Emergency Options”. Details on GEOS
Service can be found in the written materials found in your phone box
or on Iridium.com.
It is recommended that message recipients are stored as email addresses.
If using mobile carrier SMS numbers, not all wireless carriers have
interoperability arrangements and therefore these numbers should
be tested prior to relying upon them for emergencies. Email addresses
should also be tested.
To change the default setting to either
Message Only or Call Only, use the
2-way Navi-key, highlight the preferred
option and press the left option key,
labeled Select.
Note: If the GPS Settings Lock is
enabled, you will be prompted for
the GPS Settings Lock PIN when
attempting to change this setting.
In the Emergency Options menu, if
Emergency Beep is enabled, the handset
will beep three (3) times every five (5)
minutes to enable responders to hear
where the handset is located. The default
setting is Disabled. To change the default
setting to Enabled, use the 2-way Navi-
key to highlight Enabled and press the
left option key, labeled Select.
Note: If the GPS Settings Lock is
enabled, you will be prompted for
the GPS Settings Lock PIN when
attempting to change this setting.
Select Back
Enabled
Disabled
Emergency Beep
Select Back
Message and Call
Message Only
Call Only
Emergency Actions
Iridium Extreme® User Manual 181
14: GPS & Location Based Services
Note: If the GPS Settings Lock is enabled, you will be prompted for the
GPS Settings Lock PIN when attempting to change this setting.
Options Back
(empty)
(empty)
(empty)
Recipient
To program a new Message Recipient,
use the 2-way Navi-key and highlight
the listing that you would like to Edit
or Delete. Press the left option key,
labeled Options.
Next, use the 2-way Navi-key to
highlight the desired option to
Edit, Delete, or Delete All. If Edit
is selected, the phone will allow
you to Edit or enter a new message
recipient. If Delete is selected, it will
delete the previously highlighted
Message Recipient listing. If Delete
All is selected, all Message Recipient
listings will be deleted.
Once the desired action is highlighted
using the 2-way Navi-key, press the
left option key, labeled Select.
Next, if Edit is selected, the Select
Recipient screen will appear providing
the options to Enter Number, Enter
Email, or select an existing address
from your Phonebook.
• To Enter Number, press the left
option key, labeled Select, and
enter the number.
• To Enter Email, use the 2-way Navi-
key to highlight Enter Email and
press the left option key, labeled
Select.
Select Back
Edit
Delete
Delete All
Recipient
Select Back
Enter Number
Enter Email
My Phonebook #1
My Phonebook #2
My Phonebook #3
Recipient
182 Iridium Extreme® User Manual
14: GPS & Location Based Services
Call Recipient
In the Emergency Options menu, Call Recipient will allow you to
program one (1) contact that will receive an Emergency Mode phone call.
In order for this feature to operate, “Message and Call” or “Phone Only”
needs to be selected in Emergency Actions.
The default setting for Message Recipient is blank, meaning that a call
recipient needs to be added in order to notify a designated contact in the
event of an emergency. Additionally you may configure the Call Recipient
to contact GEOS service by selecting “GEOS Service”, the last menu option
under “Emergency Options”. Details on GEOS Service can be found in your
phone box or on Iridium.com.
Note: a + sign is automatically added at the beginning of the dialing
string to automatically insert the international access code, therefore 00
is not required. The call recipient number must include the country code
and number (ex. +12125551212) or emergency number (ex. +911). Note
that Iridium only supports 911 in the US and 000 in Australia and these
numbers will not work in other geographies.
• To select an existing address, use the
2-way Navi-key to highlight the My
Phonebook listing and press the left
soft key, labeled Select.
Once the My Phonebook listing is
selected, you will need to use the 2-way
Navi-key to highlight which address to
use and then press the left option key,
labeled Select.
Once your recipient has been added, it
will appear in your Message Recipient
listing.
Save Clear
Call Recipient
To program a new Call Recipient, type
in the desired number and press the left
soft key, labeled Save.
Select Back
Ada Adams
Bob Smith
Cat Steven
Davy Jones
Eddy Fisher
Phonebook
Iridium Extreme® User Manual 183
14: GPS & Location Based Services
Message Options
In the Location Options menu, Message Options will allow you to
program settings for Regular Updates of location and also use of a Quick
GPS list feature.
In the Message Options menu, Regular Update will allow you to
program one (1) recipient to receive regularly scheduled messages from
you with your location. Once the recipient is programmed and a message
frequency is selected, your designated contact will receive Regular
Updates from you automatically.
Quick GPS will allow you to send one (1) single location update to up to
five (5) recipients programmed in your phone via messaging. To initiate a
Quick GPS, press the Convenience Key located on the right side of your
phone, obtain an updated location, select “Share” with the left soft key,
and select Quick GPS with the left soft key.
To program Message Options, press
the left soft key, labeled Select.
Select Back
GPS Options
Emergency Options
Message Options
Format
Current Location
Location Options
To program the Regular Updates from
the Message Options screen, select
Regular Updates with the left soft
key, labeled Select. Once selected,
Update Frequency and Update
Recipient will appear.
Select Back
Regular Updates
Quick GPS List
Message Options
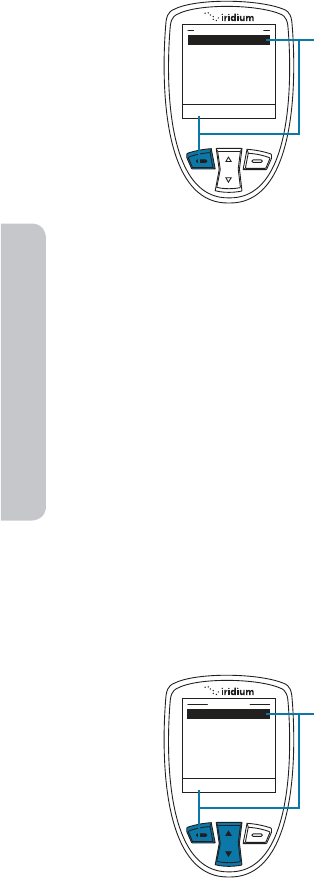
184 Iridium Extreme® User Manual
14: GPS & Location Based Services
• To modify the Update Frequency,
press the left soft key, labeled Select.
The default setting is No Update,
meaning that no update message will
be sent. The options are: No update,
Startup only, 2 minutes, 5 minutes,
10 minutes, 30 minutes, 1 hour,
4 hours, 8 hours, 12 hours, 18 hours,
1 day, 3 days, 1 week.
• To modify the default setting, use the
2-way Navi-key, highlight the desired
option and press the left soft key,
labeled Select.
• To modify the Update Recipient,
use the 2-way Navi-key to highlight
Update Recipient and press the left
soft key, labeled Select.
After selecting Update Recipient,
you will see one empty listing for
programming. Press the left soft
key, labeled Options in order to Edit,
Delete, or Delete All of the Update
Recipient listing. Next, if Edit is
selected, the Select Recipient screen
will appear providing the options to
Enter Number, Enter Email, or select an
existing address from your Phonebook.
• To Enter Number, press the left soft
key, labeled Select, and enter the
number.
• To Enter Email, use the 2-way Navi-
key to highlight Enter Email and
press the left soft key, labeled Select.
• To select an existing address, use the
2-way Navi-key to highlight the My
Phonebook listing and press the left
soft key, labeled Select. Once the My
Phonebook listing is selected, you
will need to use the 2-way Navi-key
Select Back
Update Frequency
Update Recipient
Regular Updates
Select Back
Enter Number
Enter Email
My Phonebook #1
My Phonebook #2
My Phonebook #3
Recipient
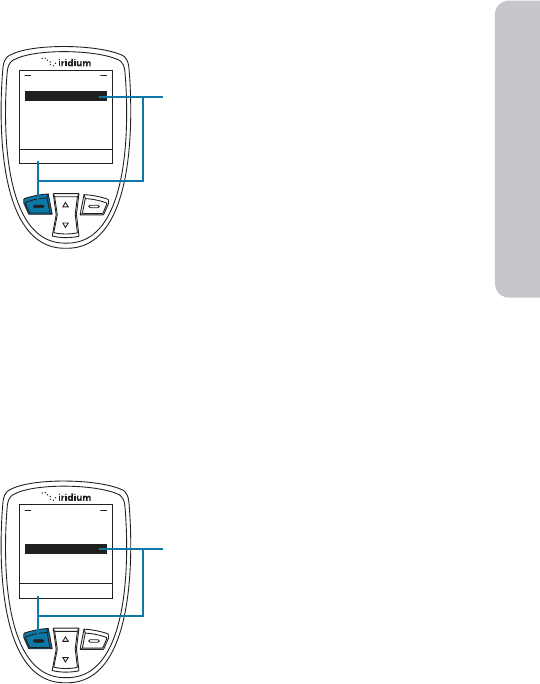
Iridium Extreme® User Manual 185
14: GPS & Location Based Services
Quick GPS List
Format
to highlight which address to use
and then press the left soft key,
labeled Select.
Once your recipient has been added, it
will appear in your Update Recipient
listing.
To program the Quick GPS List
from the Message Options screen,
use the 2-way Navi-key and select
Quick GPS List with the left soft key,
labeled Select. Once selected, five (5)
empty listings will appear. To add a
new recipient, highlight the empty
listing that you would like to change
and press the left soft key, labeled
Select. To Enter Number, Enter
Email, or select an existing address
from your phonebook, follow the
same instructions as programming an
Update Recipient as described above.
Select Back
Regular Updates
Quick GPS List
Message Options
Select Back
GPS Options
Emergency Options
Message Options
Format
Current Location
Location Options
The format of your GPS location
information can be modified.
The handset provides two (2) options
for position:
• Decimal degrees
• Deg Min Sec (default setting)

186 Iridium Extreme® User Manual
14: GPS & Location Based Services
Position Format
Altitude Format
From the Format screen, to modify the
setting for position format, press the
left soft key, labeled Select.
From the Position screen, to modify
the setting for position format, use the
2-way Navi-Key to highlight and the
preferred format and then use the left
soft key, labeled Select.
From the Format screen, to modify the
setting for Altitude format, press the
left soft key, labeled Select.
Select Back
Position
Altitude
Format
Select Back
Decimal Degree
Deg Min Sec
Position
Select Back
Position
Altitude
Format
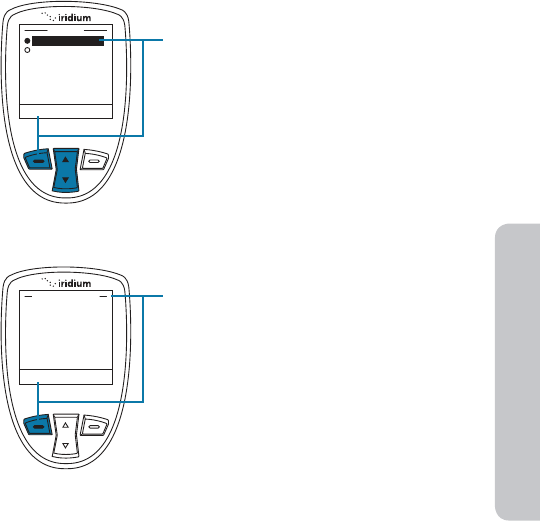
Iridium Extreme® User Manual 187
14: GPS & Location Based Services
Current Location
Select Back
Feet
Meters
Altitude
From the Altitude screen, to modify
the setting for Altitude format, use
the 2-way Navi-Key to highlight and
the preferred format and then use the
left soft key, labeled Select.
This screen is reached via the Location
Options menu or by pressing the
side Convenience Key which is
programmed to pull up Current
Location (to modify this setting, see
Chapter 13). When Current Location is
displayed:
• If GPS is enabled, your phone’s
location will appear on the screen.
The first fix will take longer (up to
2 minutes) and subsequent position
updates will appear in less than
30 seconds.
• If GPS and the GPS Settings Lock are
disabled, you will be asked if you want
to enable GPS; if so, the screen will be
loaded with blank position data and
with the message “Acquiring location”
in place of “Age of fix”.
• If you choose not to enable GPS,
or if GPS is disabled and the GPS
Settings Lock is on, then a “No
location information available”
message will be displayed
temporarily.
Select Back
Lat:
Lon:
Alt:
Age of Fix:
Updating...
Current Location
If location is available, it will be displayed in the configured format including
Latitude, Longitude, Altitude, Age of fix, and number of GPS satellites. The
screen will update automatically as frequently as you designated setting.
From this screen, you have the option to Share your location with other
people by sending it in a message. To Share, press the left soft key,
labeled Share.
188 Iridium Extreme® User Manual
14: GPS & Location Based Services
Online Portal Integration with 3rd Parties
Your Iridium Extreme® also supports integration with 3rd party online
portals using short burst data (SBD). These 3rd party online portals provide
the ability to track your phone’s location online, see location history,
two-way message, set-up geofences, and coordinate scheduled check-
ins. This capability is helpful if you are managing a fleet of phones and
need to monitor workflow and/or safety with a solution that provides
more robust capabilities than standard messaging. For more information
about 3rd party online portal integration, contact your service provider or
visit http://www.iridiumextreme.com/how-to-buy/partnerportals.php for
available Portal Partners.
Your Service Provider or designated portal provider will be able to advise
you on the appropriate service package required to enable this capability.
This service must be provisioned separately. Registration of the device
can be managed from the “Location Options” section of the menu under
“Portal Options” to “Register” or obtain “Portal Status” of the phone and
information on your designated provider.
If Share is selected, the Share Location
Options will appear. The available
options are:
• Quick GPS – to send your location
to your preconfigured list of up
to five (5) contacts (see Quick GPS
List section for programming
instructions).
• New message – to append your
location to a new message, allowing
you to add additional text and then
address the message to a new or
existing contact.
Select Back
Enter Number
Enter Email
My Phonebook #1
My Phonebook #2
My Phonebook #3
Recipient
To Share your location, use the 2-way Navi-key to select your desired
Share method and press the left soft key, labeled Select. This feature
will pre-populate a Web link to your location that will be sent to your
designated recipient(s). These recipients will be able to click this Web
link that is viewable on a smartphone, tablet, or computer’s Internet
browser. This information is not stored by Iridium and is subject to
Iridium’s Privacy Policy posted on Iridium.com and Google Maps’s Terms
of Service posted on the mapping page. Standard messaging rates
apply for use of this service and no additional fees will be charged for
use of the mapping feature.

Iridium Extreme® User Manual 189
15: Using the Security Menu

190 Iridium Extreme® User Manual
15: Using the Security Menu
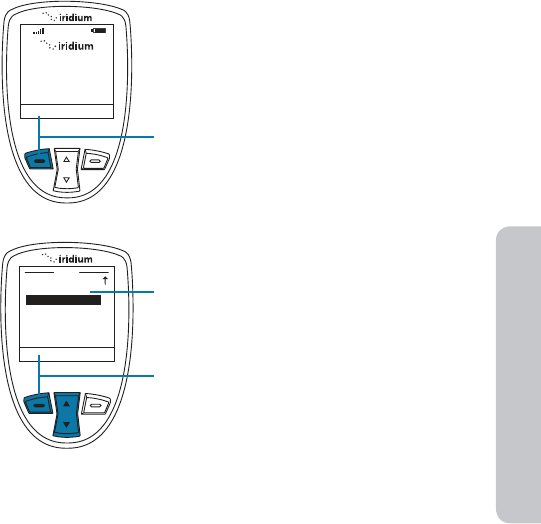
Iridium Extreme® User Manual 191
15: Using the Security Menu
15: Using the Security Menu
Important: Do not change the PIN/PUK/SIM settings unless you have your
original settings available. Your phone and/or SIM card may be disabled if
you don’t know the correct code and enter it incorrectly three times. If a
PIN becomes blocked, you must enter a Personal Unblocking Key (PUK) to
restore the SIM to service which is obtained from your service provider.
Locating the Security Menu
Registered
Menu Help
16:28 14-May-13
T
Starting from the Main Screen:
1. Press the left soft key, labeled Menu.
2. The Main Menu is displayed. Use
the 2-way Navi-key to scroll until
Security is highlighted.
3. Press the left soft key, labeled Select.
Menu
Call History
Setup
Security
Help
Select Back
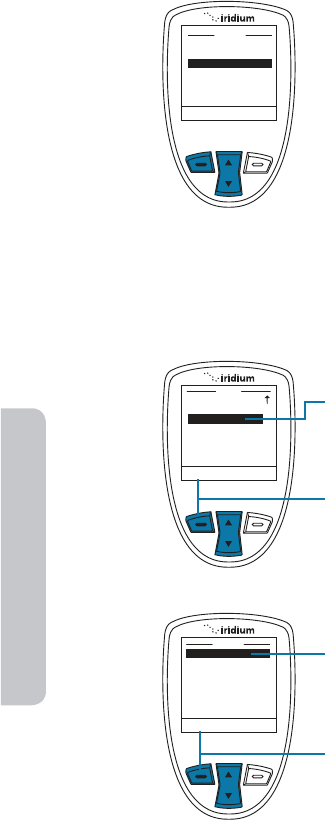
192 Iridium Extreme® User Manual
15: Using the Security Menu
Security
Select Back
Phone Lock
Sim lock
Change PINs
Security
About the Security Menu
You can perform the following
functions using the Security menu:
• Lock and unlock the phone
• Enable and disable the SIM lock
• Change PIN and block PIN codes
Locking and Unlocking Your Phone
This capability helps prevent unwanted use of your phone.
Menu
Call History
Setup
Security
Help
Select Back
Starting from the Main Menu:
1. Use the 2-way Navi-key to scroll
until Security is highlighted.
Note: Scroll one down from Setup to
view the Security option.
2. Press the left soft key, labeled
Select.
3. The Phone lock option is
highlighted. If not, use the 2-way
Navi-key to scroll until it is.
4. Press the left soft key, labeled
Select.
Phone lock
Sim lock
Change PINs
Security
Select Back
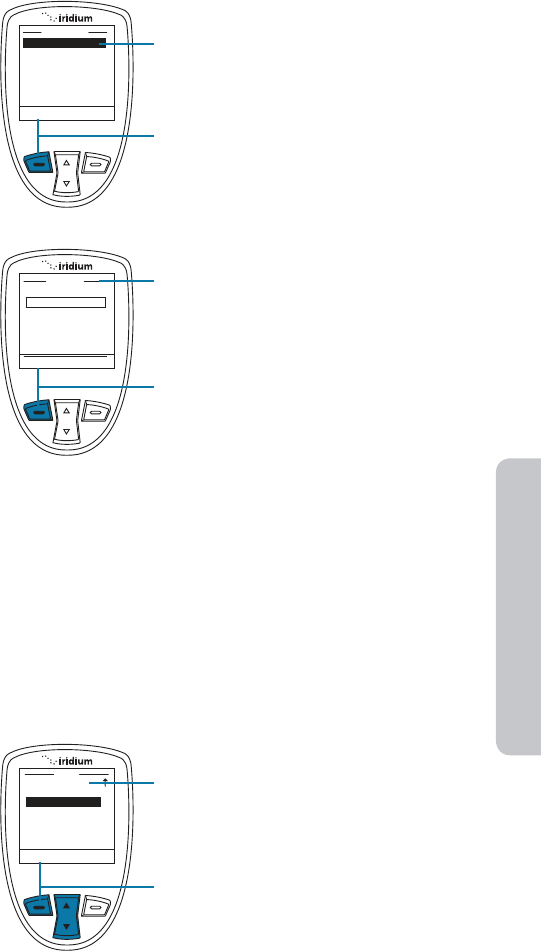
Iridium Extreme® User Manual 193
15: Using the Security Menu
5. The Enable phone lock option is
highlighted. If not, use the 2-way
Navi-key to scroll until it is.
6. Press the left soft key, labeled Select.
7. The Enter PIN screen appears. Using
the keypad enter the PIN number.
8. Press the left soft key, labeled Select.
The Phone lock capability takes effect
when you turn OFF your Iridium
Extreme®. Each time you restart the
phone, you are prompted to enter your
Phone PIN. Once you do, the phone is
fully operational.
Enable phone lock
Disable phone lock
Phone Lock
Select Back
Phone PIN
Enter PIN
Select Clear
* * * *
Enable or Disable the SIM lock
When you activate the SIM lock capability, your phone requests your SIM
PIN whenever your phone is powered on. To change this setting, you
need to enter the SIM PIN code that your service provider gave you.
Menu
Call History
Setup
Security
Help
Select Back
Starting from the Main Menu:
1. Use the 2-way Navi-key to scroll until
Security is highlighted.
Note: Scroll one down from Setup to
view the Security option.
2. Press the left soft key, labeled Select.
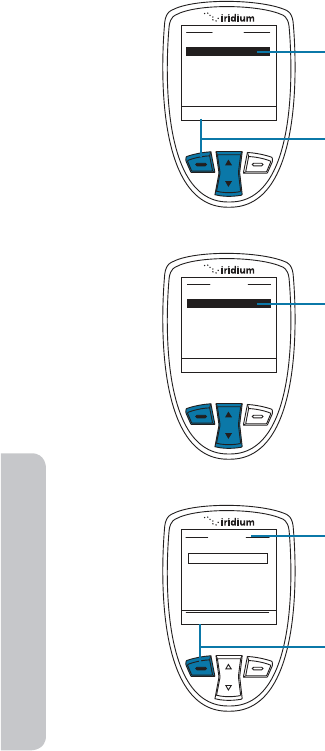
194 Iridium Extreme® User Manual
15: Using the Security Menu
Phone Lock
SIM lock
Change PINs
Security
Select Back
Enable SIM lock
Disable SIM lock
SIM Lock
Select Back
Phone PIN
Enter PIN
Select Clear
* * * *
3. Use the 2-way Navi-key to scroll
until SIM lock is highlighted.
4. Press the left soft key, labeled
Select.
5. Use the 2-way Navi-key until the
action you prefer is highlighted.
6. The Enter PIN screen appears. Using
the keypad enter the PIN number.
7. Press the left soft key, labeled
Select.
The message SIM lock disabled or
SIM lock enabled briefly appears,
then returns to the SIM Lock menu.
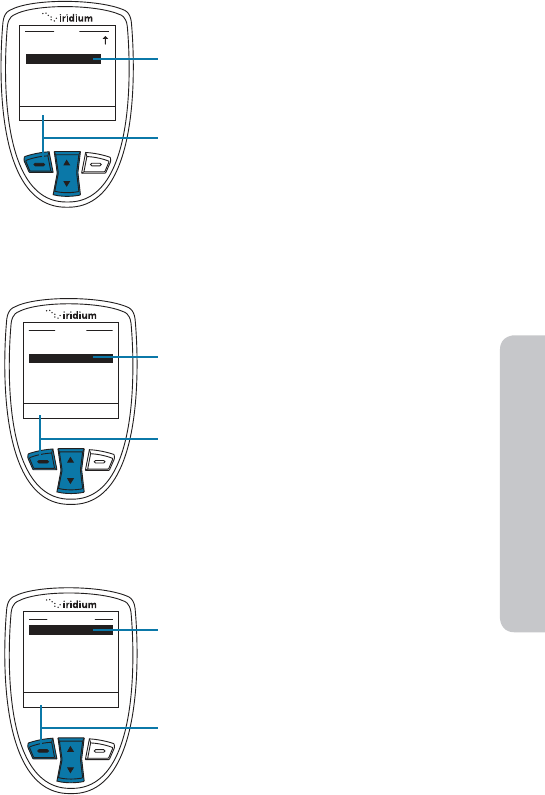
Iridium Extreme® User Manual 195
15: Using the Security Menu
Menu
Call History
Setup
Security
Help
Select Back
Using the Change PIN Menu
Change the Phone PIN Code
This capability allows you to modify the default PIN associated with your
phone.
Starting from the Main Menu:
1. Use the 2-way Navi-key to scroll until
Security is highlighted.
2. Press the left soft key, labeled Select.
3. Use the 2-way Navi-key to scroll until
Change PINs highlighted.
4. Press the left soft key, labeled Select.
5. The Change PIN menu appears.
Phone PIN is highlighted.
6. Press the left soft key, labeled Select.
Phone lock
Sim lock
Change PINs
Security
Select Back
Phone PIN
SIM PIN
SIM PIN 2
Call barring PIN
Change PIN
Select Back
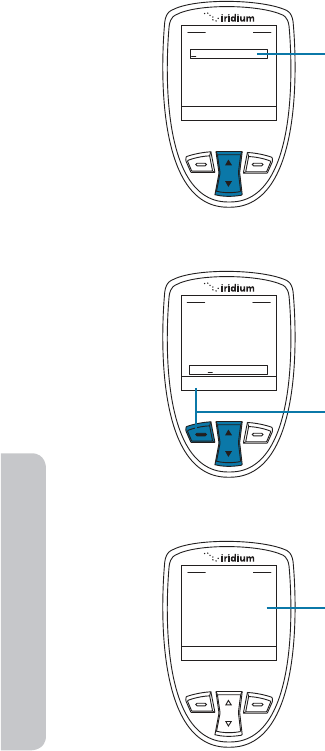
196 Iridium Extreme® User Manual
15: Using the Security Menu
Old PIN
Change PIN
OK Clear
New PIN
Verify PIN
Old PIN
Change PIN
OK Clear
New PIN
Verify PIN
****
****
****
PIN changed OK
Change PIN
Yes No
7. Enter your current PIN in the Old PIN
field (the default PIN is 1234). Use
the 2-way Navi-key to move to the
next field and enter your new PIN
into the New PIN field. Move to the
Verify PIN field and enter the new
PIN again.
8. When all fields are complete, press
the left soft key, labeled OK.
9. The screen displays PIN changed
OK then returns to the Change PIN
menu.
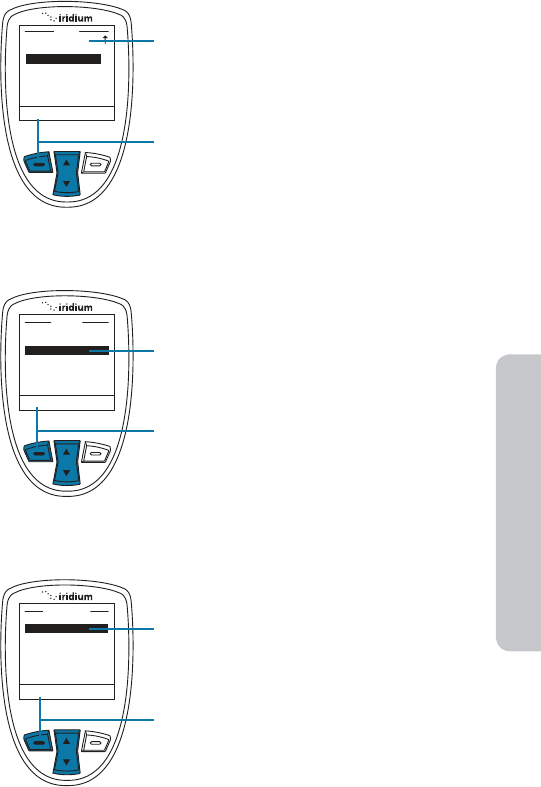
Iridium Extreme® User Manual 197
15: Using the Security Menu
Change the SIM PIN Code
This capability allows you to modify the default PIN associated with your
SIM card.
Menu
Call History
Setup
Security
Help
Select Back
Starting from the Main Menu:
1. Use the 2-way Navi-key to scroll until
Security is highlighted.
Note: Scroll one down from Setup to
view the Security option.
2. Press the left soft key, labeled Select.
3. Use the 2-way Navi-key to scroll until
Change PINs is highlighted.
4. Press the left soft key, labeled Select.
5. Use the 2-way Navi-key to scroll until
SIM PIN is highlighted.
6. Press the left soft key, labeled Select.
Phone lock
Sim lock
Change PINs
Security
Select Back
Phone PIN
SIM PIN
SIM PIN 2
Call barring PIN
Change PIN
Select Back
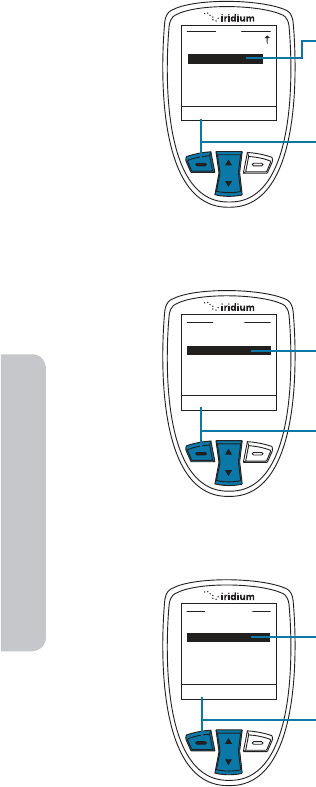
198 Iridium Extreme® User Manual
15: Using the Security Menu
Change the SIM Card PIN2 Code
Your SIM card PIN2 code is used to access fixed dialing settings. This four-
to eight-digit code is issued to you when you subscribe to the capability.
Menu
Call History
Setup
Security
Help
Select Back
Starting from the Main Menu:
1. Use the 2-way Navi-key to scroll until
Security is highlighted.
Note: Scroll one down from Setup to
view the Security option.
2. Press the left soft key, labeled Select.
3. Use the 2-way Navi-key to scroll until
Change PINs is highlighted.
4. Press the left soft key, labeled Select.
5. Use the 2-way Navi-key to scroll until
SIM PIN 2 is highlighted.
6. Press the left soft key, labeled Select.
Phone lock
Sim lock
Change PINs
Security
Select Back
Phone PIN
SIM PIN
SIM PIN 2
Call barring PIN
Change PIN
Select Back
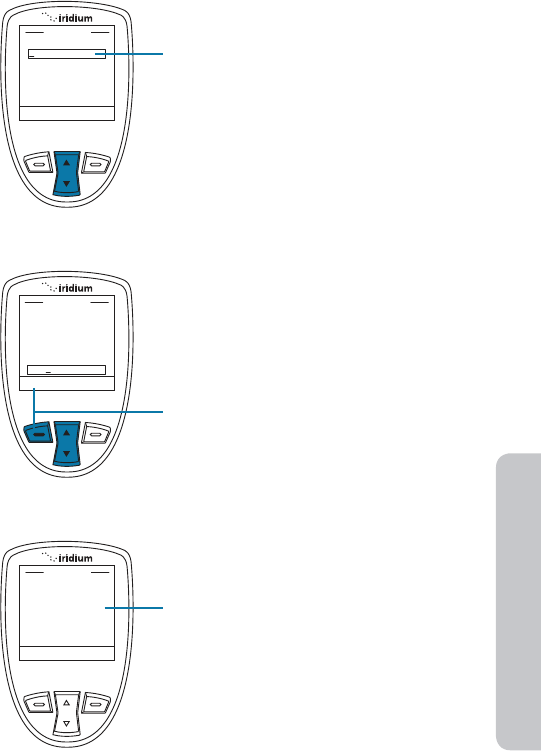
Iridium Extreme® User Manual 199
15: Using the Security Menu
Old PIN
Change PIN
OK Clear
New PIN
Verify PIN
Old PIN
Change PIN
OK Clear
New PIN
Verify PIN
****
****
****
PIN changed OK
Change PIN
Yes No
7. Enter your current PIN in the Old PIN
field (the default PIN is 1111). Use the
2-way Navi-key to move to the next
field and enter your new PIN into the
New PIN field. Move to the Verify
PIN field and enter the new PIN
again.
8. When all fields are complete, press
the left soft key, labeled OK.
9. The screen displays PIN changed
OK then returns to the Change PIN
menu.
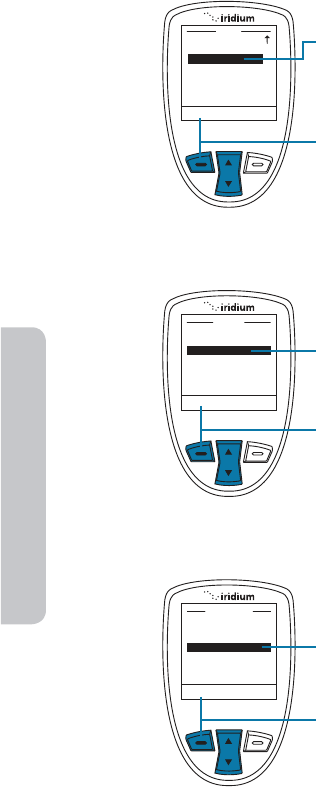
200 Iridium Extreme® User Manual
15: Using the Security Menu
Call Barring PIN
Call Barring may be enabled for incoming and/or outgoing calls in
the Setup, Call Options menu. When you enable Call Barring, you are
prompted for a PIN. The Call Barring PIN may be changed as follows.
Menu
Call History
Setup
Security
Help
Select Back
Starting from the Main Menu:
1. Use the 2-way Navi-key to scroll until
Security is highlighted.
Note: Scroll one down from Setup to
view the Security option.
2. Press the left soft key, labeled Select.
3. Use the 2-way Navi-key to scroll until
Change PINs is highlighted.
4. Press the left soft key, labeled Select.
5. Use the 2-way Navi-key to scroll until
Call barring PIN is highlighted.
6. Press the left soft key, labeled Select.
Phone lock
Sim lock
Change PINs
Security
Select Back
Phone PIN
SIM PIN
SIM PIN 2
Call barring PIN
Change PIN
Select Back
Iridium Extreme® User Manual 201
15: Using the Security Menu
Old PIN
Change PIN
OK Clear
New PIN
Verify PIN
Old PIN
Change PIN
OK Clear
New PIN
Verify PIN
****
****
****
PIN changed OK
Change PIN
Yes No
7. Enter your current PIN in the Old
PIN field. Use the 2-way Navi-key
to move to the next field and enter
your new PIN into the New PIN field.
Move to the Verify PIN field and
enter the new PIN again.
8. When all fields are complete, press
the left soft key, labeled OK.
9. The screen displays PIN changed
OK then returns to the Change PIN
menu.

202 Iridium Extreme® User Manual
16: Troubleshooting

Iridium Extreme® User Manual 203
16: Troubleshooting
Problem Solution
Phone won’t power
on.
• Did you press and hold the power button
for a minimum of three seconds to turn the
phone’s power on?
• Check the battery. Is it charged, properly
fitted, and are the contacts clean and dry?
You can’t make calls. • Check the antenna. Is it fully extended
and correctly angled? Do you have a clear
unobstructed view of the sky?
• Did you enter the number in international
format? All calls made from the Iridium
satellite system must be in international
format. See “Placing a Call” on page 32.
• Check the signal strength indicator. If the
signal is weak, ensure that you have a clear
line of sight to the sky and there are no
buildings, trees, or other objects interfering.
• Is Restricted displayed? Check the Call
Barring setting.
• Has a new SIM card been inserted? Check
that no new restrictions have been imposed.
• Check to see if your fixed dialing list is
enabled. If so, you can only make calls to
numbers or prefixes that are on the list.
You can’t receive
calls.
• Check to see that your phone is powered on.
• Check the antenna. Is it fully extended
and correctly angled? Do you have a clear
unobstructed view of the sky?
• Check the signal strength indicator. If the
signal is weak, ensure that you have a clear
line of sight to the sky and there are no
buildings, trees, or other objects around.
• Check the Call Forwarding and Call Barring
settings.
• Check the Ringer setting. If it is off, there is no
audible ringer.
• Check to see if your fixed dialing list is enabled.
16: Troubleshooting

204 Iridium Extreme® User Manual
16: Troubleshooting
You can’t make
international calls.
• Have you included the relevant codes? Enter
00 or + followed by the appropriate country
code and the phone number.
Your phone will not
unlock.
• Have you inserted a new SIM card? Enter the
new PIN code the default PIN is 1111).
• Enter the default phone unlock code: 1234
• Have you forgotten the unlock code?
Your PIN is blocked. • Enter the PIN unblocking code or contact
your service provider. See “Using the Security
Menu” on page 179 for more information.
Your PIN2 is blocked. • Enter the PIN2 unblocking code or contact
your service provider. See “Using the Security
Menu” on page 179 for more information.
Your SIM card will not
work.
• Is the SIM card inserted the correct way?
• Is the card visibly damaged or scratched?
Return the card to your service provider.
• Check the SIM and card contacts. If they are
dirty, clean them with an antistatic cloth.
You can’t cancel Call
Forwarding or Call
Barring.
Wait until you are in an area with good network
coverage and try again.
The message
indicator is flashing.
There is not enough memory available to store
another message. Use the messages menu to
delete one or more messages.
The battery won’t
charge.
• Check the charger. Is it properly connected?
Are its contacts clean and dry?
• Check the battery contacts. Are they clean
and dry?
• Check the battery temperature. If it is warm,
let it cool before charging.
• Is it an old battery? Battery performance
declines after several years of use. Replace
the battery.
• Make sure you have an Iridium approved
battery installed. If you see ? on the display
near the charging icon, you cannot charge
this battery.

Iridium Extreme® User Manual 205
16: Troubleshooting
The battery drains
faster than normal.
• Are you in an area of variable coverage? This
uses extra battery power.
• Is your antenna fully extended and correctly
angled? Do you have a clear unobstructed
view of the sky? This helps use less battery
power.
• Is it a new battery? A new battery needs two
to three charge/discharge cycles to attain
normal performance
• Is it an old battery? Battery performance
declines after several years of use. Replace
the battery.
• Is it a battery that hasn’t been completely
discharged? Allow the battery to fully
discharge (until the phone turns itself off)
and then charge the battery overnight.
• Are you using your phone in extreme
temperatures? At extreme hot or cold
temperatures, battery performance is
significantly reduced.
You find your phone
becoming warm
during use.
You may notice this during long calls or
during charging. The heat is produced by the
electronic components within your phone and
is quite normal.
Phone is not
responding to user
controls including
the power keys.
Remove the battery from the phone and then
reattach it to cycle power and reset.
Your SIM card is
inserted in the phone
but the display says:
Check Card or
Insert Card or
Blocked
Check Card or Insert Card
Check that the SIM card has been inserted
correctly. The contacts of the SIM card may be
dirty. Turn the phone off, remove the SIM card
and rub the contacts with a clean cloth. Replace
the card in the phone.
Blocked
Enter the PIN unblocking key or contact your
service provider. See “Call Barring PIN” on page
189 for additional information.

206 Iridium Extreme® User Manual
16: Troubleshooting
Your phone is
displaying an
unknown foreign
language and you
would like to restore
it to its original
setting.
• Power on the phone.
1. Press the red key three times
2. Press the left soft key.
3. Scroll down six times.
4. Press the left soft key again.
5. Scroll down four times
6. Press the left soft key and then press it a
second time. The English option is at the
top so press the left soft key a final time to
confirm change back to English.

Iridium Extreme® User Manual 207
17: Certification & Compliance Info
Phone states
“Searching for
Network”
• Ensure you are in an area with an open view
of the sky
• Extend the antenna and point upright
towards the sky directly above in order to
receive a signal
• If your phone was powered on inside of a
building or area with an obstructed view of
the sky just prior to attempting a call outside,
the phone may be temporarily in a power
saving mode to conserve battery life. You
may either wait for it to automatically exit
the power saving mode within a minute or
two on its scheduled interval or just simply
turn off your phone and turn it on again to
accelerate the registration process.

208 Iridium Extreme® User Manual
17: Certification & Compliance Info

Iridium Extreme® User Manual 209
17: Certification & Compliance Info
17: Certification and Compliance
Information
Export Compliance
The Iridium Extreme® is controlled by the export laws and regulations of
the United States of America. The U.S. Government may restrict the export
or re-export of this phone to certain individuals and/or destinations. For
further information, contact the U.S. Department of Commerce, Bureau of
Industry and Security or visit www.bis.doc.gov
Standards Compliance Information
The Iridium Extreme® is designed to comply with the standards for Radio
Emissions Compliance, Electromagnetic Compatibility, and AC Safety in
the United States, European Union, Canada and Mexico.
FCC Compliance
The Iridium Extreme® is certified under 47 CFR Part 25 as FCC ID: Q639575.
It also complies with Part 15 of the FCC Regulations. Operation is subject
to the condition that this device does not cause harmful interference. Any
unauthorized antennas, modifications or attachments could damage the
Iridium Extreme® and may violate FCC regulations and void your authority
to operate the phone.
EU Regulatory Conformity
The Iridium Extreme® complies with the essential requirements and other
relevant provisions of the EU Directive 1999/5/EC.
Canada Regulatory Conformity
The Iridium Extreme® complies with Industry Canada RSS-170.
Certification Number IC 4629A-9575.

210 Iridium Extreme® User Manual
17: Certification & Compliance Info

Iridium Extreme® User Manual 211
18: Warranty, Service and Support
18: Limited Warranty, Product and
Satellite Service Terms, Warranty
Support, and Software License
This Limited Warranty applies only to the Iridium branded Iridium
Extreme® (including hardware, software and firmware but excluding
leather case) and the Accessories listed in Chapter 3 of this User Manual
(collectively, “Product”) sold by Iridium or its authorized resellers and
distributors (collectively, “Service Providers”). This Limited Warranty
extends only to the first purchaser of the Product and is not assignable or
transferable.
Subject to the Exclusions contained below, Iridium warrants to you that
the Product will be free from defects in materials and workmanship under
normal usage for a period of one year from your date of purchase. You are
required to provide proof of purchase as a condition of receiving warranty
service as more fully described in “Warranty Claim Process” on page 202.
Any replacement products or parts may contain new and used materials
equivalent to new in performance and reliability. Any replacement
product or part will also have functionality at least equal to that of the
product or part being replaced. Replacement products and parts are
warranted to be free from defects in material or workmanship under
normal usage for the remainder of the applicable warranty period of the
original Product for which a replacement product or part is provided
under this Limited Warranty. A returned Product for which a replacement
has been provided shall become Iridium’s property.
If Iridium receives, during the warranty period and in accordance with
the instructions set out in this Limited Warranty, notice of a defect in the
Product covered by this Limited Warranty, Iridium will repair or replace
the Product or refund the purchase price of the Product, at Iridium’s sole
option. Iridium shall have no obligation to repair, replace, or refund unless
the defective Product is returned in accordance with the instructions set
out in this Limited Warranty and within the warranty period.
IRIDIUM DOES AND MAY CONTINUE, AT ITS SOLE DISCRETION, TO
SUBCONTRACT TO AND ENGAGE A THIRD PARTY TO PROVIDE THE
WARRANTY SERVICES PROVIDED FOR IN THIS USER MANUAL.

212 Iridium Extreme® User Manual
18: Warranty, Service and Support
If you acquired this Product and Accessories in Australia or in
New Zealand, this Product and Accessories come with guarantees that
cannot be excluded under the Australian Consumer Law or similar
legislation in New Zealand. Notwithstanding other express terms and
other limitations of this Limited Warranty (which other express terms
and other limitations are negated by this paragraph, but only to the
extend inconsistent with this paragraph, and will not be applied to limit
consumer rights under such guarantees), where such guarantees operate,
consumers are entitled to a replacement or a refund for a major failure
of this Product and Accessories and for compensation for any other
reasonably foreseeable loss or damage. Where such guarantees operate,
consumers are also entitled to have this Product and Accessories repaired
or replaced if this Product and Accessories fail to be of acceptable quality
and the failure does not amount to a major failure. Please follow the
instructions as to use and report problems promptly: problems caused
by use that is abnormal or contrary to instructions will generally not be
covered. You should contact your Product and Accessories provider in
relation to problems with the Product and Accessories and Iridium will
assist your Product and Accessories provider to resolve them, including
replacement where required.
Exclusions
This Limited Warranty does not apply in the following circumstances:
Normal wear and tear. Periodic maintenance, repair or replacement of
parts due to normal wear and tear are excluded from coverage.
Batteries. Only batteries whose fully charged capacity falls below 80%
of rated capacity and batteries that leak are covered by this Limited
Warranty. Batteries that are charged by other than an Iridium-approved
battery charger; having seals that are broken or show evidence of
tampering; are used in equipment other than the Product; or are charged
and stored at temperatures greater than 60 degrees centigrade, are not
covered by this Limited Warranty.
Abuse and Misuse. Defects or damage that result from improper
operation or storage, misuse or abuse, accident or neglect; exposure
to open, uncovered connectors including contact with liquid, water,
rain, extreme humidity or heavy perspiration, sand, dirt or the like,
extreme heat or spills of food; use of the Product for abnormal purposes;
stretching coil cords or breaking coil cord modular tabs; breakage or
damage to antennas or scratches or other damage to plastic surfaces or
other externally exposed parts caused by your use; or other acts which
are not the fault of Iridium, are excluded from coverage.

Iridium Extreme® User Manual 213
18: Warranty, Service and Support
Use of Non-Iridium Products and Accessories. Defects or damage that
result from the use of non-Iridium branded products (other than the
antenna supplied with your Product), accessories or software or other
ancillary or peripheral equipment are excluded from coverage.
Unauthorized Service or Modifications. Defects or damage resulting
from any service, testing, adjustment, integration, installation, operation,
maintenance, service, alteration, modification or integration with any
non-Iridium product in any manner other than in accordance with
Product user documentation and instructions and/or by someone other
than Iridium or a Service Provider are excluded from coverage.
Altered Products. Products that have been tampered with, altered, have
non-Iridium housings or parts, or have had the serial numbers or date
tags removed, altered or obliterated are excluded from coverage.
Communication Services. Defects, damages or failure of the Product
due to any non-Iridium communication service or signal or use of a
non-Iridium branded communication service or signal are excluded from
coverage.
Software Embodied in Physical Media. No warranty is made that any
software will meet your requirements or will work in combination with
any hardware or software applications provided by third parties, that the
operation of the software will be uninterrupted or error free, or that all
defects in the software will be corrected.
Privacy and Data Security. Privacy and data security are important
to everyone. Some features of your Product may affect your privacy
or data security. Therefore, it is important to monitor access to your
Product and not to leave it where others might have unmonitored access.
Lock your satellite phone’s keypad when not in use. Erase all personal
information or data before disposing of the satellite phone or recycling
it. See Chapter 8 of this User Manual for instructions on how to delete all
personal information. The satellite phone uses network-based positioning
technology, which may be used to obtain a user’s approximate location
and thereby affect a user’s privacy.
Limitations of Warranty/Local Laws
IRIDIUM MAKES NO REPRESENTATIONS, GUARANTEES, CONDITIONS
OR WARRANTIES, EITHER EXPRESS OR IMPLIED, INCLUDING
WITHOUT LIMITATION, ANY IMPLIED REPRESENTATIONS,
GUARANTEES, CONDITIONS OR WARRANTIES OF MERCHANTABILITY
AND FITNESS FOR A PARTICULAR PURPOSE, NON-INFRINGEMENT,
SATISFACTORY QUALITY, NON-INTERFERENCE, ACCURACY OF
INFORMATIONAL CONTENT, OR ARISING FROM A COURSE OF

214 Iridium Extreme® User Manual
18: Warranty, Service and Support
DEALING, LAW, USAGE, OR TRADE PRACTICE, USE, OR RELATED TO
THE PERFORMANCE OR NONPERFORMANCE OF ANY PRODUCTS,
ACCESSORIES, FACILITIES OR SERVICES OR USER INFORMATION,
EXCEPT AS EXPRESSLY STATED IN THIS LIMITED WARRANTY.
ANY OTHER STANDARDS OF PERFORMANCE, GUARANTEES,
CONDITIONS AND WARRANTIES ARE HEREBY EXPRESSLY EXCLUDED
AND DISCLAIMED TO THE FULLEST EXTENT PERMITTED BY LAW.
THIS DISCLAIMER AND EXCLUSION SHALL APPLY EVEN IF THE
EXPRESS LIMITED WARRANTY CONTAINED HEREIN FAILS OF ITS
ESSENTIAL PURPOSE. FURTHER, THIS LIMITED WARRANTY COVERS
THE PRODUCT ONLY, AND NO WARRANTY IS MADE AS TO USER
INFORMATION AND/OR COVERAGE, AVAILABILITY OR GRADE OF
SERVICE PROVIDED BY IRIDIUM SEPARATELY FOR IRIDIUM SATELLITE
SERVICES.
This Product is covered by a U.S.A. warranty. This Limited Warranty
is applicable in all countries and is enforceable in any country or region
where Iridium or its Service Provider offer warranty service for the
Product. Outside of the U.S.A., any different warranty terms, liabilities
and/or legal requirements of the country in which the Product is sold
are specifically disclaimed by Iridium. Warranty service availability and
response times may vary from country to country and may be subject to
registration requirements in the country of purchase. Your Iridium Service
Provider can provide details.
This Limited Warranty gives you specific legal rights. You may also have
other rights that may vary from state to state/country to country. Some
states/countries do not allow or acknowledge the existence, limitation
or exclusion of incidental or consequential damages, or limitation on
the length of an implied warranty, so some limitations or exclusions of
this Limited Warranty may not apply to you. You are advised to consult
applicable state/country laws for a full determination of your rights.
Conditions of Use and Limitations of Liability.
This Limited Warranty is your sole and exclusive remedy. These terms and
conditions supersede any prior agreements or representations, including
those made in Iridium sales literature or advice given to you by or on
behalf of Iridium in connection with your purchase.
ANY IMPLIED WARRANTIES THAT MAY BE IMPOSED BY LAW,
INCLUDING, WITHOUT LIMITATION, THE IMPLIED WARRANTIES OF
MERCHANTABILITY AND FITNESS FOR A PARTICULAR PURPOSE,
SHALL BE LIMITED TO THE DURATION OF THIS LIMITED WARRANTY.
OTHERWISE THE REPAIR, REPLACEMENT, OR REFUND AS PROVIDED
UNDER THIS EXPRESS LIMITED WARRANTY IS PROVIDED IN LIEU
OF ALL OTHER WARRANTIES, EXPRESS OR IMPLIED. IN NO EVENT

Iridium Extreme® User Manual 215
18: Warranty, Service and Support
SHALL IRIDIUM BE LIABLE, WHETHER IN CONTRACT OR TORT OR
ANY OTHER LEGAL THEORY, INCLUDING WITHOUT LIMITATION
STRICT LIABILITY, GROSS NEGLIGENCE OR NEGLIGENCE, FOR ANY
DAMAGES IN EXCESS OF THE PURCHASE PRICE OF THE PRODUCT
AND/OR THE COST OF IRIDIUM SATELLITE SERVICES PROVIDED. NOR
SHALL IRIDIUM BE LIABLE FOR ANY DIRECT, INDIRECT, INCIDENTAL,
SPECIAL, CONSEQUENTIAL, OR PUNITIVE DAMAGES OF ANY KIND,
OR LOSS OF REVENUE OR PROFITS, LOSS OF BUSINESS, LOSS OF
PRIVACY, LOSS OF USE, LOSS OF TIME OR INCONVENIENCE, LOSS OF
INFORMATION OR DATA, SOFTWARE OR APPLICATIONS OR OTHER
FINANCIAL LOSS CAUSED BY THE PRODUCT AND/OR THE IRIDIUM
SATELLITE SERVICES , OR ARISING OUT OF OR IN CONNECTION WITH
THE ABILITY OR INABILITY TO USE, OR THE USE OF THE PRODUCT
AND/OR THE IRIDIUM SATELLITE SERVICES TO THE FULLEST EXTENT
THESE DAMAGES MAY BE DISCLAIMED BY LAW AND REGARDLESS
OF WHETHER IRIDIUM WAS ADVISED OF THE POSSIBILITIES OF SUCH
DAMAGES. IRIDIUM IS NOT LIABLE FOR ANY CLAIM MADE BY A THIRD
PARTY OR MADE BY YOU FOR A THIRD PARTY.
USERS OF THE IRIDIUM SATELLITE PHONE SERVICES AND RELATED
EQUIPMENT, INCLUDING WITHOUT LIMITATION THOSE USING THE
SERVICE AND THE PRODUCT IN ANY MANNER IN CONJUNCTION
WITH EMERGENCY 911 (U.S.), EMERGENCY TRIPLE ZERO (000)/ 112
(AUSTRALIA) OR ANY OTHER DISTRESS CALLING OR EMERGENCY
SERVICES, BOTH PUBLIC OR PRIVATELY OPERATED, ACKNOWLEDGE
AND AGREE AS A CONDITION OF THE PROVISION OF SERVICE AND
PRODUCT BY IRIDIUM THAT THEY WILL MAKE NO CLAIM, WHETHER IN
CONTRACT, INDEMNITY, TORT OR ANY OTHER LEGAL THEORY AGAINST
IRIDIUM FOR BODILY INJURY, LOSS OF LIFE, DAMAGE TO PROPERTY OR
FOR ANY OTHER LOSS WHATSOEVER, OR FOR SPECIAL, INCIDENTAL,
INDIRECT, CONSEQUENTIAL OR PUNITIVE DAMAGES, BY REASON
OF ANY UNAVAILABILITY, DELAY, FAULTINESS OR FAILURES OF THE
IRIDIUM FACILITIES OR SERVICE, PRODUCT, OR EQUIPMENT OR FOR
INACCURACIES OR FAILURES WITH REGARD TO ANY USER INFORMATION
PROVIDED. THIS IS A WAIVER AND RELEASE AND DISCLAIMER OF
LIABILITY TO THE FULLEST EXTENT PERMITTED BY APPLICABLE LAW
AND APPLIES REGARDLESS OF THE CAUSE OF ANY LIABILITY, INCLUDING
WITHOUT LIMITATIONS, TO WRONGFUL CONDUCT, OMISSION OR FAULT
OF EMPLOYEES OR AGENTS OF IRIDIUM.
By your use of the Product and Iridium Satellite Services you consent
to Iridium’s disclosure of user information, including, but not limited
to name, address, telephone number and location information,
including, where available, the geographic coordinates of equipment, to
governmental and quasi-governmental agencies where Iridium deems
it necessary in its sole discretion to respond to an exigent circumstance.

216 Iridium Extreme® User Manual
18: Warranty, Service and Support
These governmental and quasi-governmental agencies shall be deemed
“users” for all purposes of this Limited Warranty.
You are permitted to use the Product only as described and specified in
this Limited Warranty. By using the Product, you are indicating that without
limitation you agree to comply with the terms of this Limited Warranty,
including without limitation this section describing permitted use of the
Product (the “Conditions of Use”). If you fail to comply with this Limited
Warranty and the Conditions of Use, Iridium may void certain protections
offered under the Limited Warranty and Iridium reserves the right to
terminate your right to use the Product on the Iridium system. If you do not
accept the terms of this Limited Warranty, do not use the Product on the
Iridium system.
You are permitted to use the Product only in connection with service on
the Iridium system using airtime purchased from your Service Provider.
You are required to comply with this Limited Warranty and the Conditions
of Use and Limitations of Liability, as well as all terms and conditions
that are provided separately by your Service Provider, as such terms and
conditions may change from time to time. Iridium or your Service Provider
may also establish additional terms and conditions from time to time. In
the event any Iridium term or condition conflicts with any Service Provider
term or condition, the Iridium term or condition shall govern. Service
provider will be provided with notice of any new terms and conditions or
any changes in these terms and conditions. All terms and conditions will
be effective as of your receipt of the notices of new or modified terms and
conditions, and your continued use of the Product after such receipt shall
constitute your acceptance of such new or modified terms.
You may not use the Product in connection with any third-party devices,
including but not limited to computers, cameras, batteries, GPS devices,
recorders or other devices which alter the information sent or received
by the Product, except to the extent that Iridium has tested those devices
and confirmed that their use will have no adverse effect on the Iridium
system. All devices approved by Iridium will be advertised and labeled
as being approved by Iridium and you may use only “Iridium Certified
Devices” with this Product and with the Iridium system.
You may not modify the Product or any component of the Product. You
may not reverse-engineer, or attempt to reverse-engineer, the Product,
any component of any Product or the manner in which the Product
connects to, sends information to, receives information from, or otherwise
interacts with the Iridium system.
You are required to comply with all applicable laws and regulations in
your use of the Product. To the extent that you: (i) violate this Limited
Warranty, the terms and conditions applicable to the Iridium system or

Iridium Extreme® User Manual 217
18: Warranty, Service and Support
other agreements between you and Iridium, or between you and your
Service Provider; (ii) utilize a product other than an Iridium-Approved
Device on the Iridium system; (iii) modify the Product or any Product
component, reverse-engineer the Product or any Product component
or attempt to do so; or (iv) violate any applicable laws or regulations
(collectively “Unauthorized Use”), you agree to defend, indemnify and
hold Iridium and your Service Provider harmless with respect to any
claims or actions by governmental entities or other third parties related
to your Unauthorized Use and to pay all costs, damages, fines and other
amounts incurred by us, or on our behalf, in the defense of any such
claims or actions. Further, we specifically disallow any liability and will not
credit back airtime charges related to any Unauthorized Use.
In addition to Iridium’s express reservation of other remedies available to
us, we reserve the right to discontinue providing Iridium Satellite Services
to you and/or to disable your Product’s access to the Iridium system. If
Iridium reasonably believes that you are in engaged in any Unauthorized
Use, we may seek equitable relief to prevent such Unauthorized Use
without having to wait to see if damage to the Iridium system occurs.
Warranty Claim Process
Should your Product require service within the warranty period or for
warranty questions, repairs or for the return of the Product, please
contact your Service Provider or any other Service Provider in your
country. Do not contact Iridium. For warranty claims, you will be
required to provide the following proof of purchase documentation:
your dated bill of sale or delivery receipt (including your name, address
and telephone number; the name and address of the Service Provider
who sold you the Product; the model number and International
Mobile Identification Number (IMEI); and the sale price of the Product),
together with a written description of the problem. You are responsible
for shipping the Product to the authorized warranty service center
designated by your Service Provider with freight and insurance prepaid.
Product that is repaired or replaced under this Limited Warranty shall
be shipped to your Service Provider who will work with you to arrange
transfer of the product. In certain states/countries, including Australia and
New Zealand, the law requires that manufacturers or sellers incur costs
relating to the warranty return and replacement of any products. In those
jurisdictions, Iridium and/or the Service Provider will pay the costs of
return and/or replacement, as required.
Refer to www.iridium.com for a list of Service Providers or contact your
Service Provider for warranty information.

218 Iridium Extreme® User Manual
18: Warranty, Service and Support
SOFTWARE LICENSE
The following terms govern your access and use of the Iridium or
Iridium-supplied software (“Software”) contained on the Product you
purchased.
License. Conditioned upon compliance with the terms and conditions
of this Limited Warranty, Iridium grants to you a nonexclusive and
nontransferable license to use for your internal purposes the Software
and the Documentation. “Documentation” means written information
(whether contained in user or technical manuals, training materials,
specifications or otherwise) pertaining to the Software and made
available by Iridium with the Software in any manner. You shall use the
Software solely as embedded in (or, if downloaded, as provided via
download), for execution on, and for communication via the Iridium
system.
No other licenses are granted by implication, estoppel or otherwise.
General Limitations. This is a license, not a transfer of title, to the
Software and Documentation, and Iridium retains ownership of all copies
of the Software and Documentation. You acknowledge that the Software
and Documentation contain trade secrets of Iridium or its suppliers or
licensors, including but not limited to the specific internal design and
structure of individual programs and associated interface information.
Except as otherwise expressly provided, you shall have no right, and you
specifically agree not to:
(i) transfer, assign or sublicense your license rights to any other person
or entity (other than in compliance with any Iridium relicensing/
transfer policy then in force), or use the Software on unauthorized
or secondhand Iridium equipment, and you acknowledge that any
attempted transfer, assignment, sublicense or use shall be void;
(ii) make error corrections to or otherwise modify or adapt the Software
or create derivative works based upon the Software, or permit third
parties to do the same;
(iii) reverse engineer or decompile, decrypt, disassemble or otherwise
reduce the Software to human-readable form, except to the extent
otherwise expressly permitted under applicable law notwithstanding
this restriction;
(iv) use or permit the Software to be on a service bureau or time sharing
basis or otherwise, without the express written authorization of
Iridium; or
(v) disclose, provide, or otherwise make available trade secrets contained
within the Software and Documentation in any form to any third party
without the prior written consent of Iridium. You shall implement

Iridium Extreme® User Manual 219
18: Warranty, Service and Support
reasonable security measures to protect such trade secrets.
To the extent required by law, and at your written request, Iridium
shall provide you with the interface information needed to achieve
interoperability between the Software and another independently
created program, on payment of Iridium’s applicable fee, if any. You
shall observe strict obligations of confidentiality with respect to such
information and shall use such information in compliance with any
applicable terms and conditions upon which Iridium makes such
information available.
Software, Upgrades and Additional Copies. “Software” shall include
computer programs, including firmware, as provided to you by Iridium
or a Service Provider, and any upgrades, updates, bug fixes or modified
versions thereto (collectively, “Upgrades”) or backup copies of any of
the foregoing. NOTWITHSTANDING ANY OTHER PROVISION OF THE
AGREEMENT: (1) UNLESS AUTHORIZED BY IRIDIUM, YOU HAVE NO LICENSE
OR RIGHT TO MAKE OR USE ANY ADDITIONAL COPIES OR UPGRADES.
IRIDIUM MAY MAKE SOFTWARE AVAILABLE BASED ON ADDITIONAL
TERMS; (2) USE OF UPGRADES IS LIMITED TO IRIDIUM EQUIPMENT FOR
WHICH YOU ARE THE ORIGINAL END USER PURCHASER OR OTHERWISE
HOLD A VALID LICENSE TO USE THE SOFTWARE WHICH IS BEING
UPGRADED; AND (3) THE MAKING AND USE OF ADDITIONAL COPIES IS
LIMITED TO NECESSARY BACKUP PURPOSES ONLY.
Proprietary Notices. You agree to maintain and reproduce all copyright
and other proprietary notices on all copies, in any form, of the Software
in the same form and manner that such copyright and other proprietary
notices are included on the Software. Except as expressly authorized, you
shall not make any copies or duplicates of any Software without the prior
written permission of Iridium.
Term and Termination. The license granted herein shall remain effective
until terminated. You may terminate the license at any time by destroying
all copies of Software and any Documentation. Your rights under the
license will terminate immediately without notice from Iridium if you fail
to comply with any provision of the license and Limited Warranty. Upon
termination, you shall destroy all copies of Software and Documentation
in your possession or control. All of your confidentiality obligations and
all limitations of liability and disclaimers and restrictions of warranty shall
survive termination.
Export, Re-Export, Transfer and Use Controls. The Software,
Documentation and technology or direct products thereof (hereafter
referred to as Software and Technology), supplied by Iridium are subject
to export controls under the laws and regulations of the United States
(U.S.). You shall comply with such laws and regulations governing export,

220 Iridium Extreme® User Manual
18: Warranty, Service and Support
re-export, transfer and use of Iridium Software and Technology and will
obtain all required U.S. and local authorizations, permits, or licenses.
Iridium and you each agree to provide the other information, support
documents, and assistance as may reasonably be required by the other in
connection with securing authorizations or licenses.
U.S. Government End User Purchasers. The Software and
Documentation qualify as “commercial items,” as that term is defined
at Federal Acquisition Regulation (“FAR”) (48 C.F.R.) 2.101, consisting of
“commercial computer software” and “commercial computer software
documentation” as such terms are used in FAR 12.212. Consistent with
FAR 12.212 and DoD FAR Supp. 227.7202-1 through 227.7202-4, and
notwithstanding any other FAR or other contractual clause to the contrary
in any agreement into which this Limited Warranty may be incorporated,
you may provide to Government end user or Government end user will
acquire, as applicable, the Software and Documentation with only those
rights set forth in this Limited Warranty. Use of either the Software or
Documentation or both constitutes agreement by the Government that
the Software and Documentation are “commercial computer software”
and “commercial computer software documentation,” and constitutes
acceptance of the rights and restrictions herein.

Iridium Extreme® User Manual 221
18: Warranty, Service and Support

222 Iridium Extreme® User Manual
18: Warranty, Service and Support