Iridium Satellite 9575N Iridium Satellite Phone User Manual 9575A part2
Iridium Satellite LLC Iridium Satellite Phone 9575A part2
Contents
- 1. User manual part1
- 2. User manual part2
- 3. 9575A user manual part1
- 4. 9575A user manual part2
- 5. 9575A user manual part3
9575A user manual part2
8: Using the Phonebooks
8: Using the Phonebooks
9575A User Manual 8584 9575A User Manual
Select Back
Enter Number
Quick GPS List
Ada Adams
Bob Smith
Cat Steven
Select Recipient
Note: Repeat this procedure if you want to send the same message to
more than one contact at a time.
Edit an Entry in My Phonebook
Send Add
Send To
New Recipient
+111222333444
Bob Smith
+444333222111
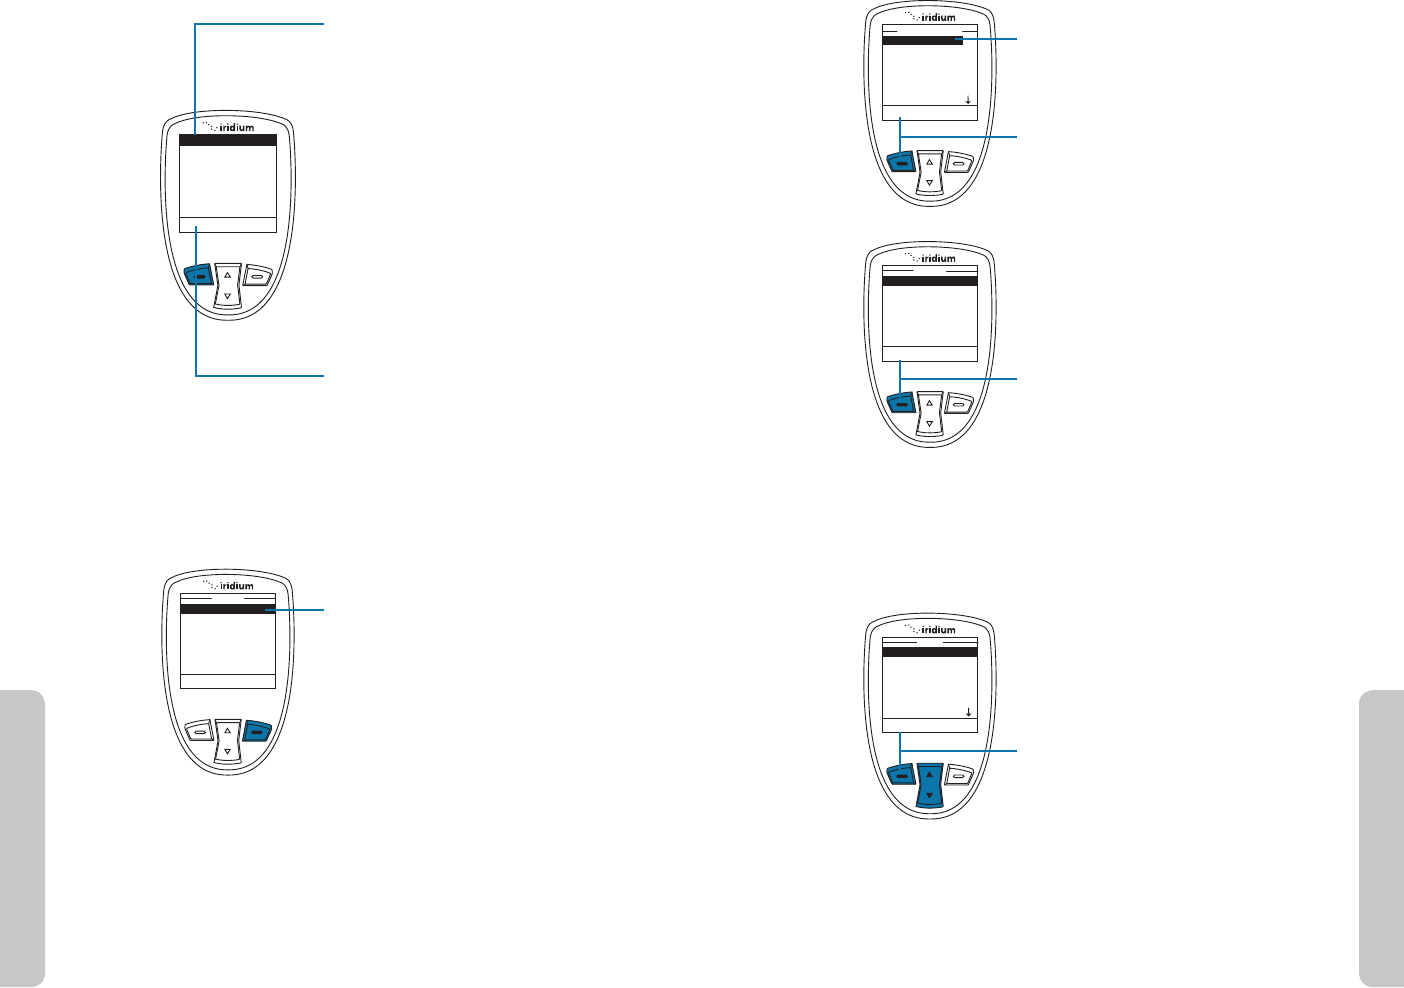
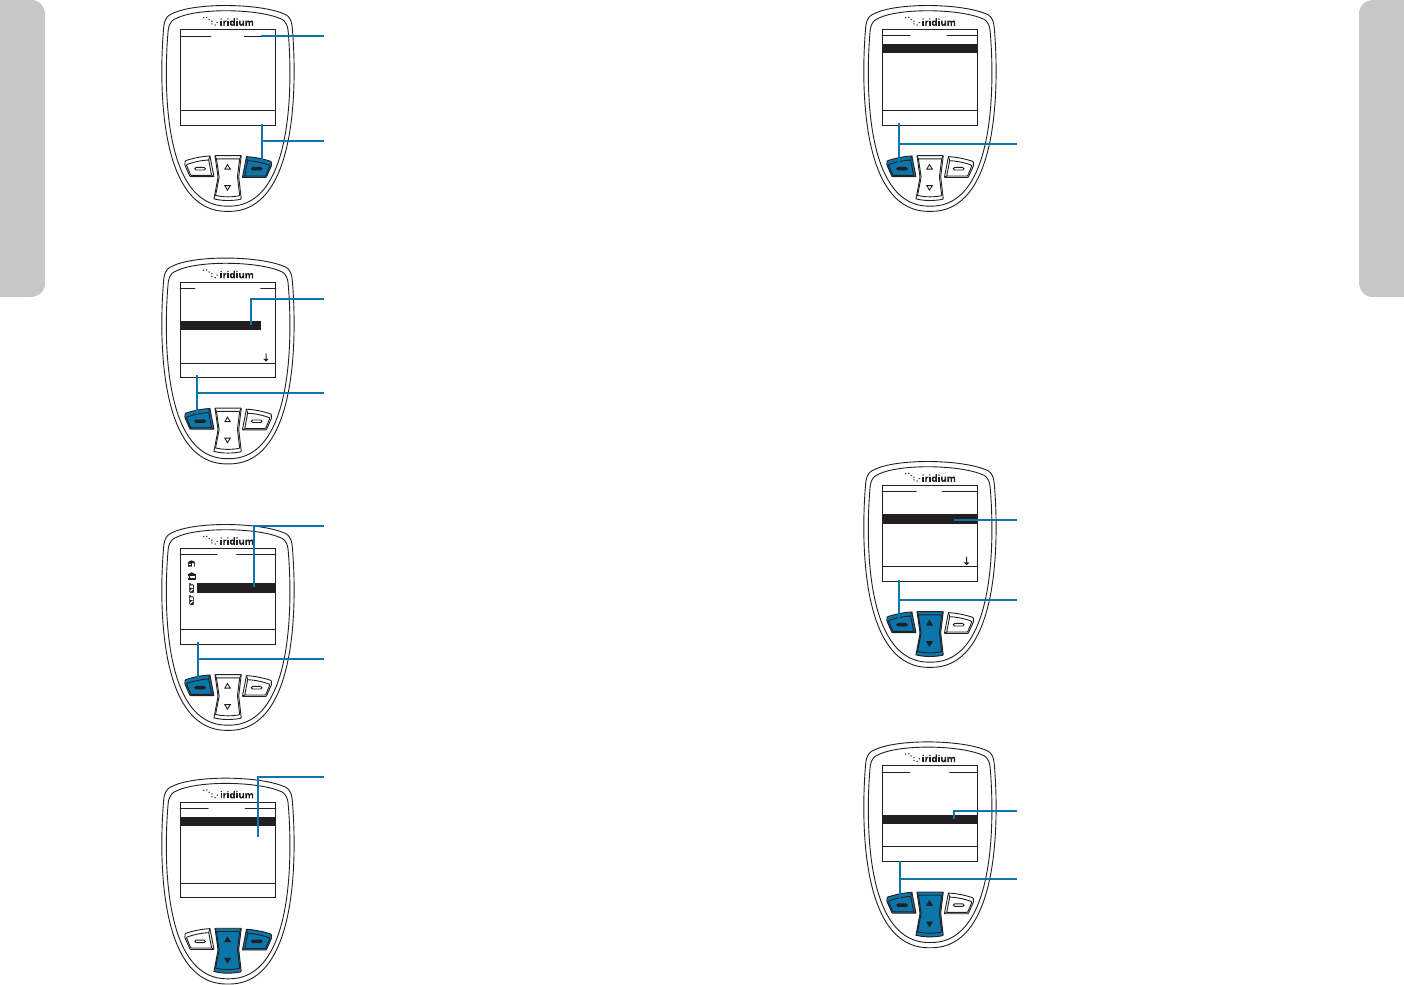
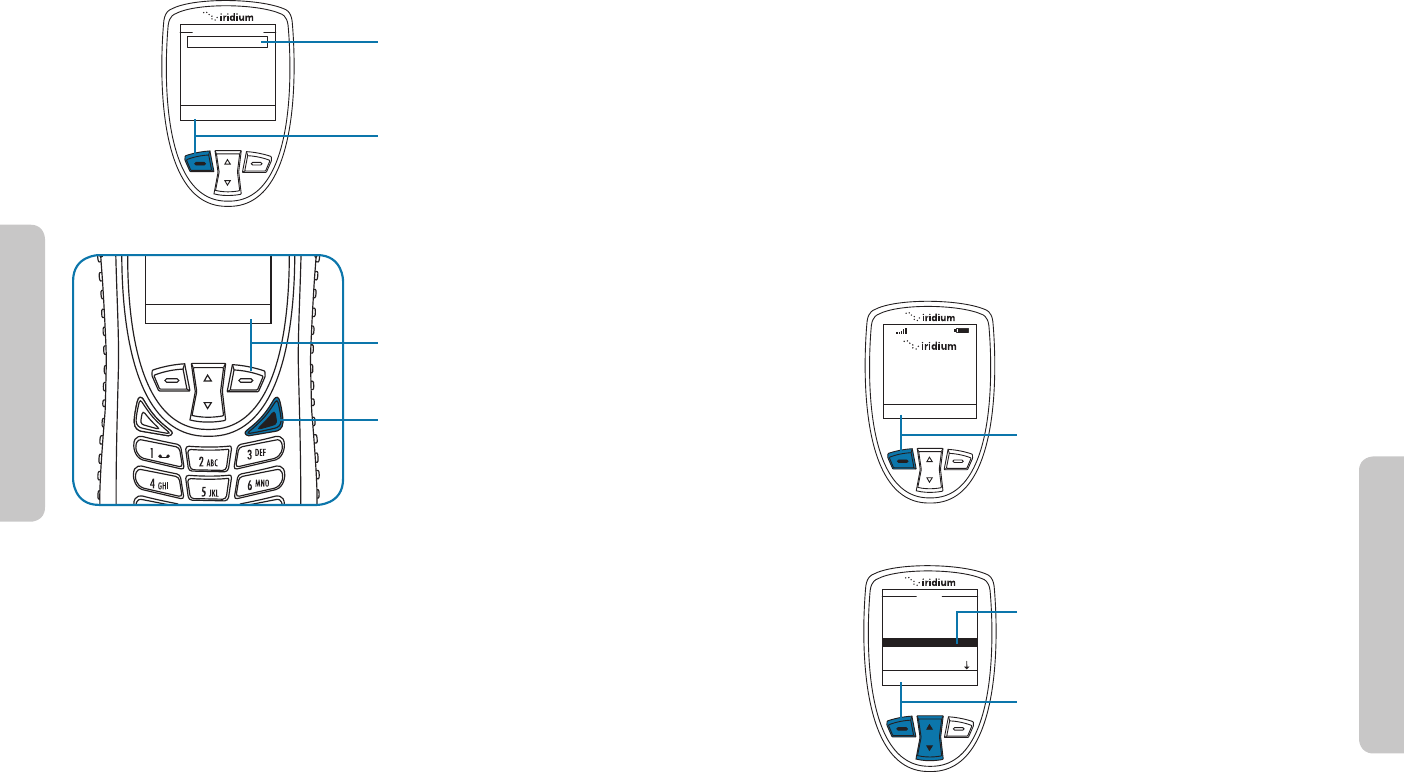
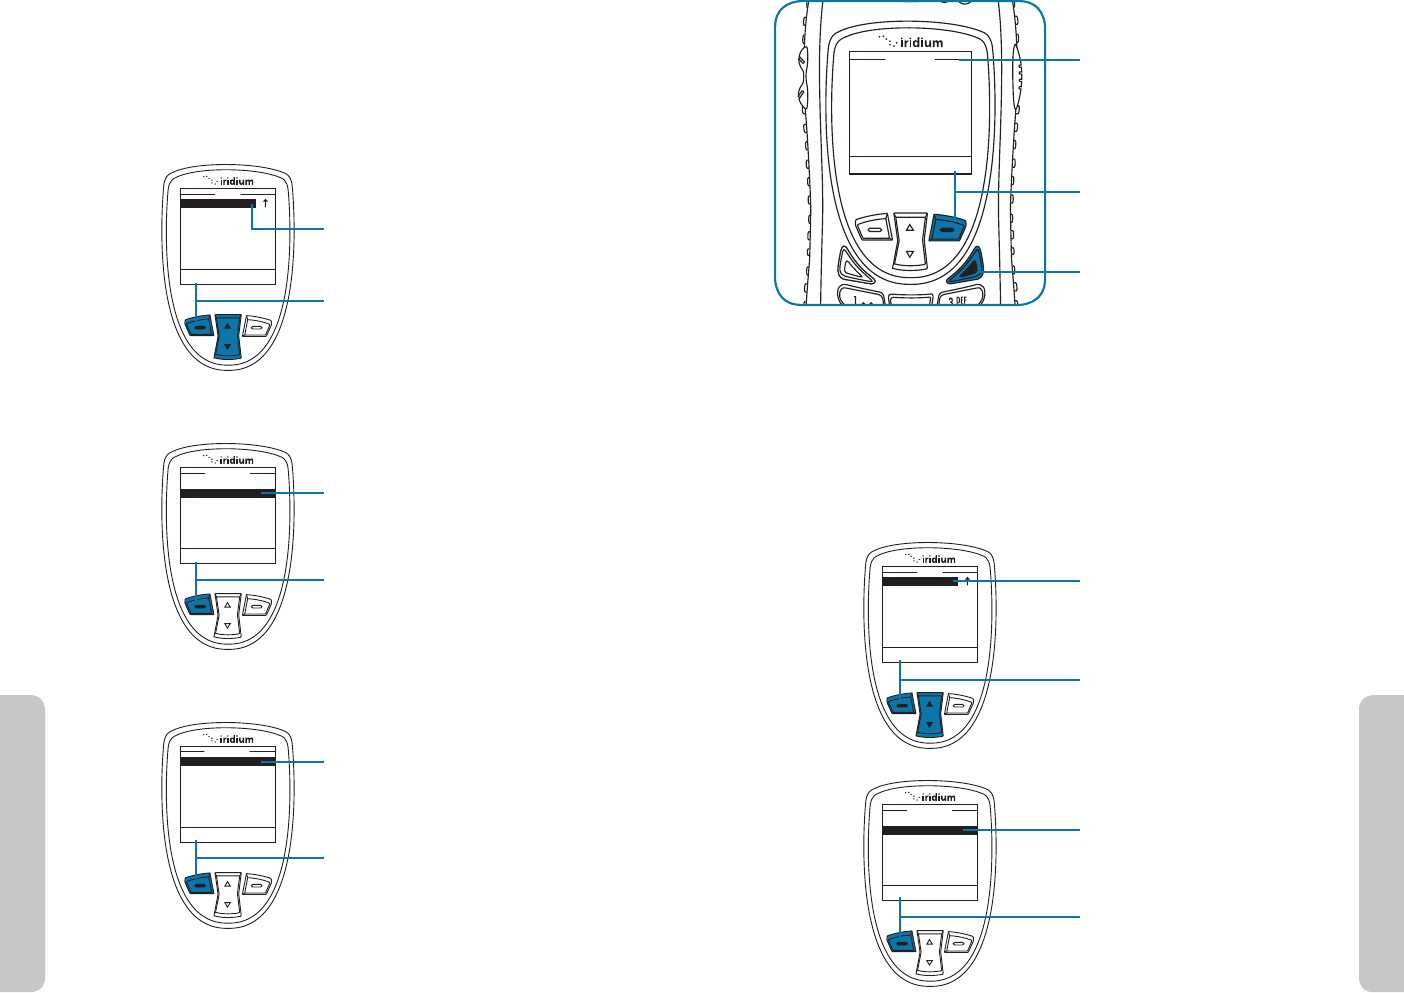
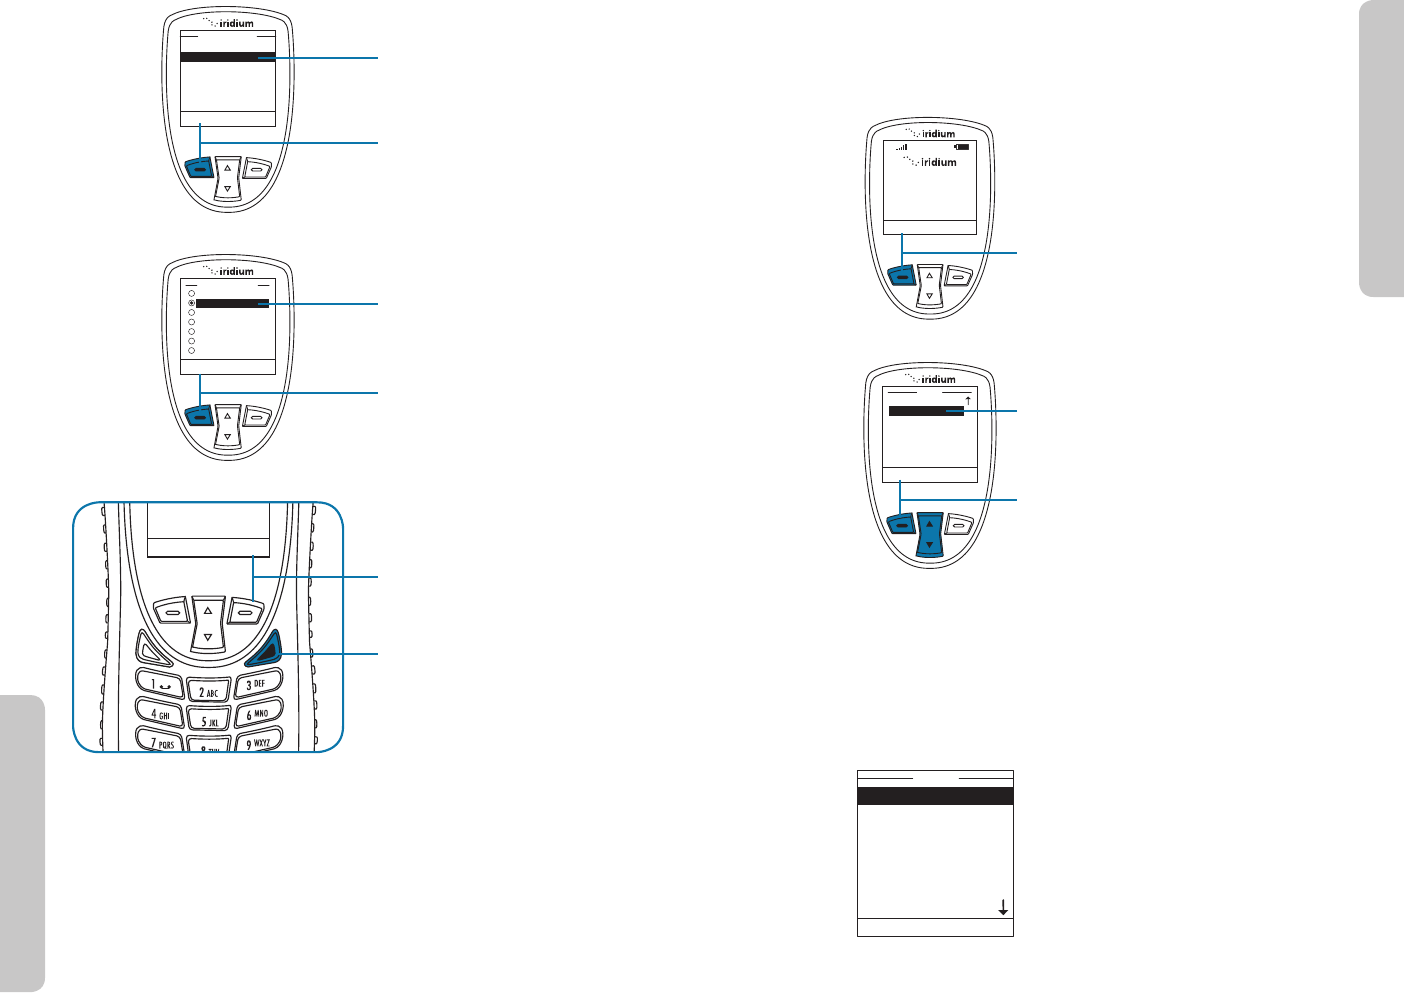
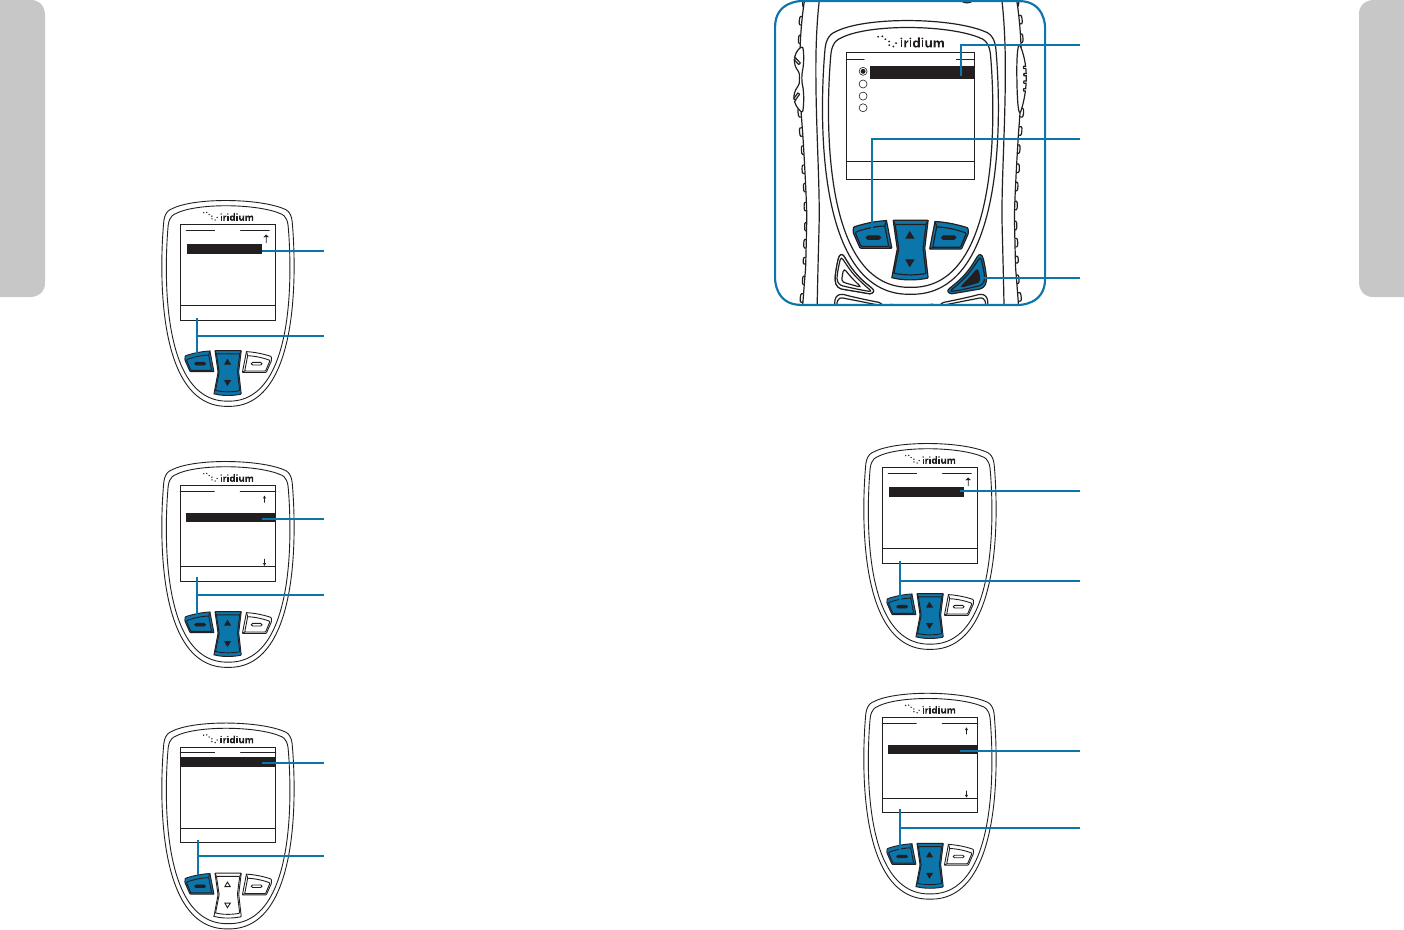
2. Use the 2-way Navi-key to scroll
through the list of options and press
the left soft key for the desired
selection.
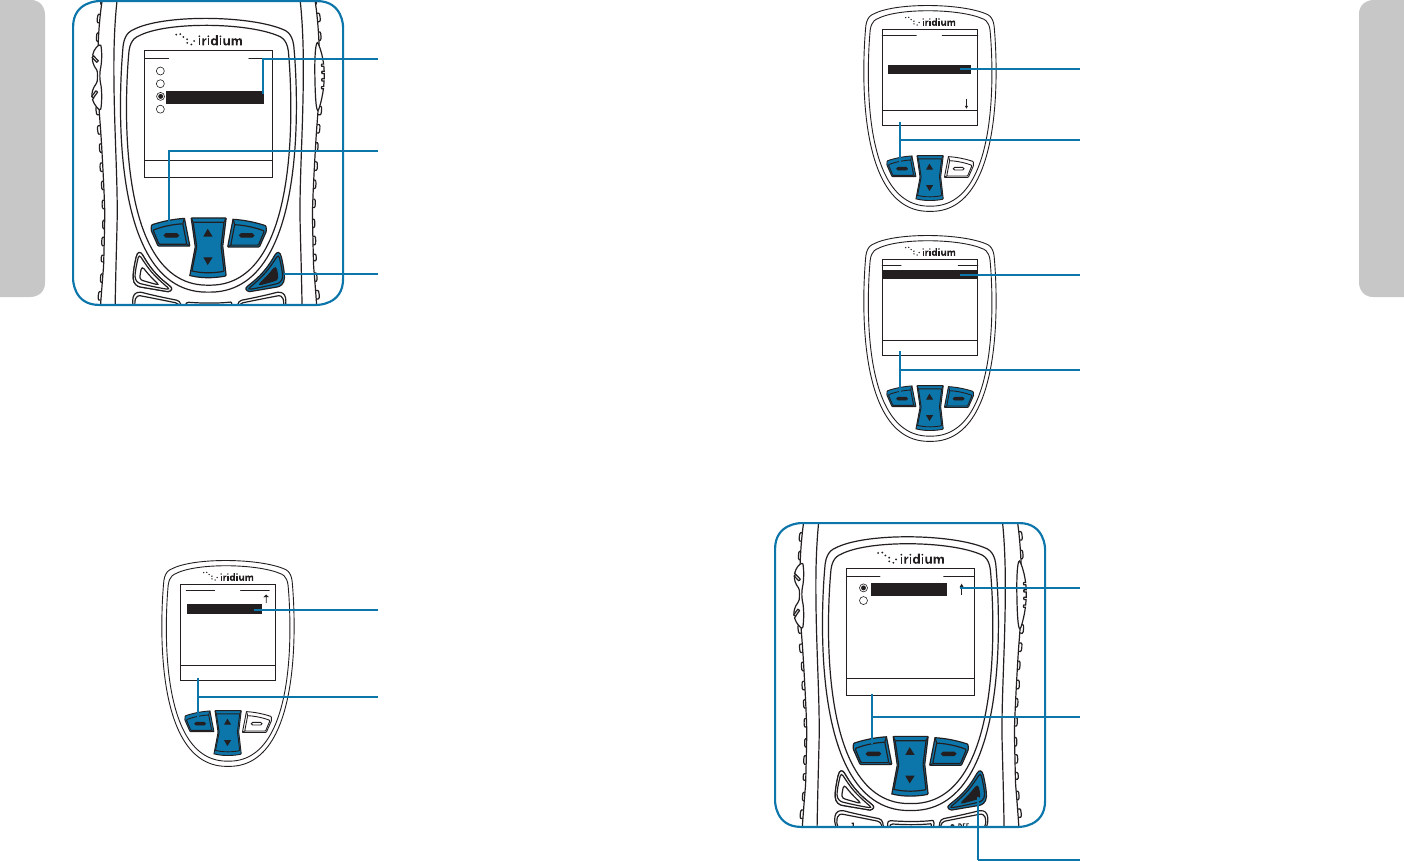
3. For a contact, select the desired
number if the contact has more than
one number listed. For manual entry,
enter the numbers direct. For Quick
GPS List, select the desired option.
Use the left soft key “Select” for all
selections.
4. Once you are satisfied with the
recipient(s) press left soft key,
labeled Send.
To change information in the
Phonebook, use the Edit Option.
Starting at the Main Menu, with My
Phonebook highlighted:
1. Press the left soft key, labeled Select.
My Phonebook
SIM Phonebook
Messages
Voicemail
Data Modem
Menu
Select Back
Send Add
Send To
New Recipient
+111222333444
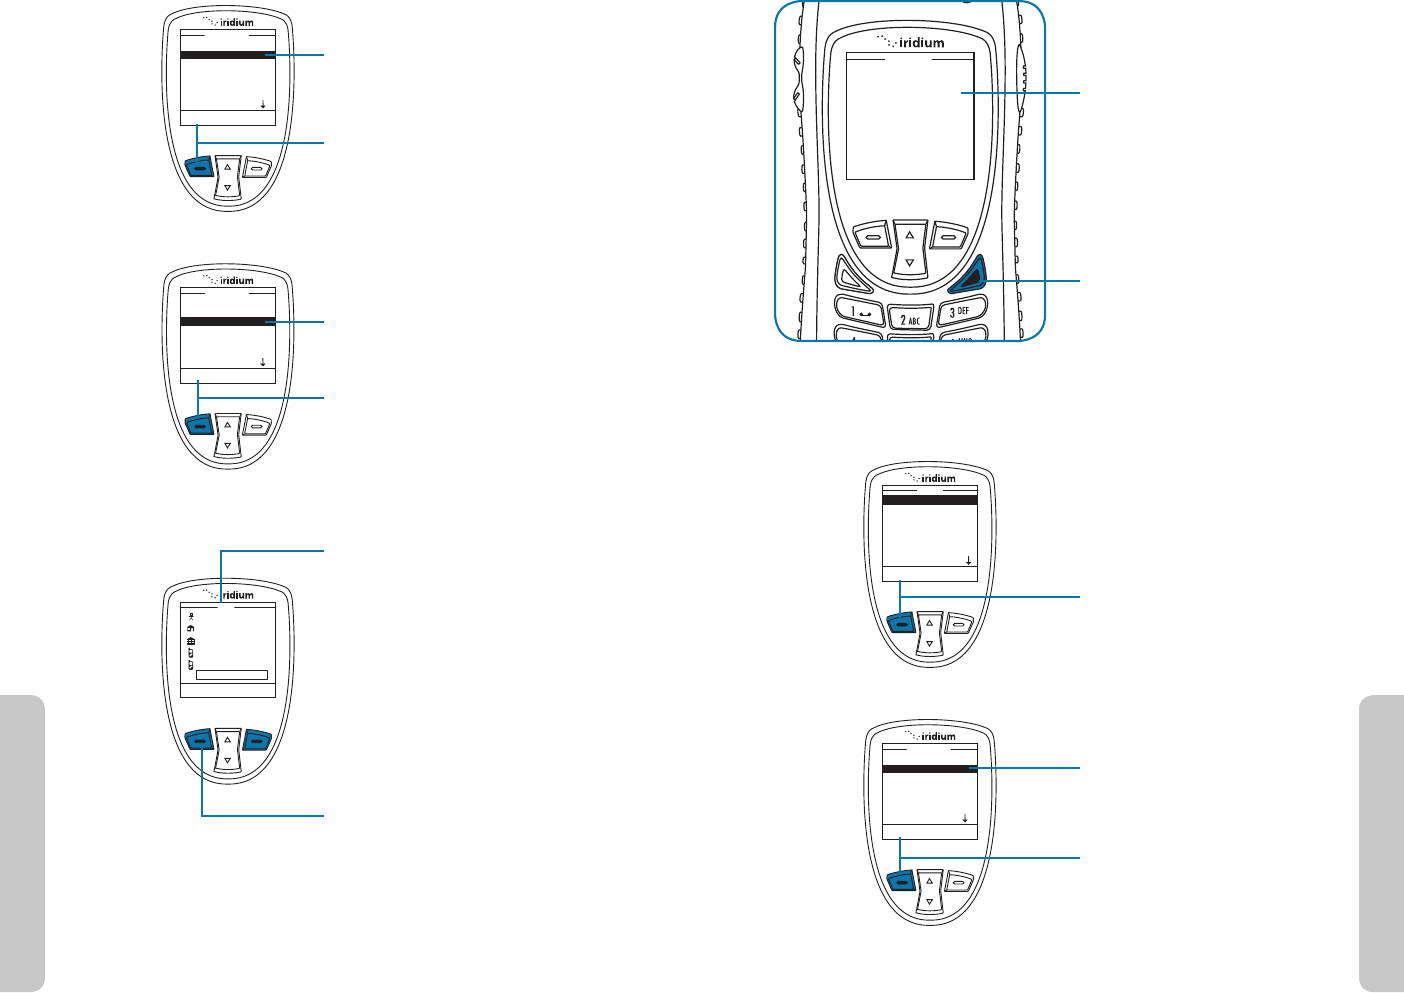
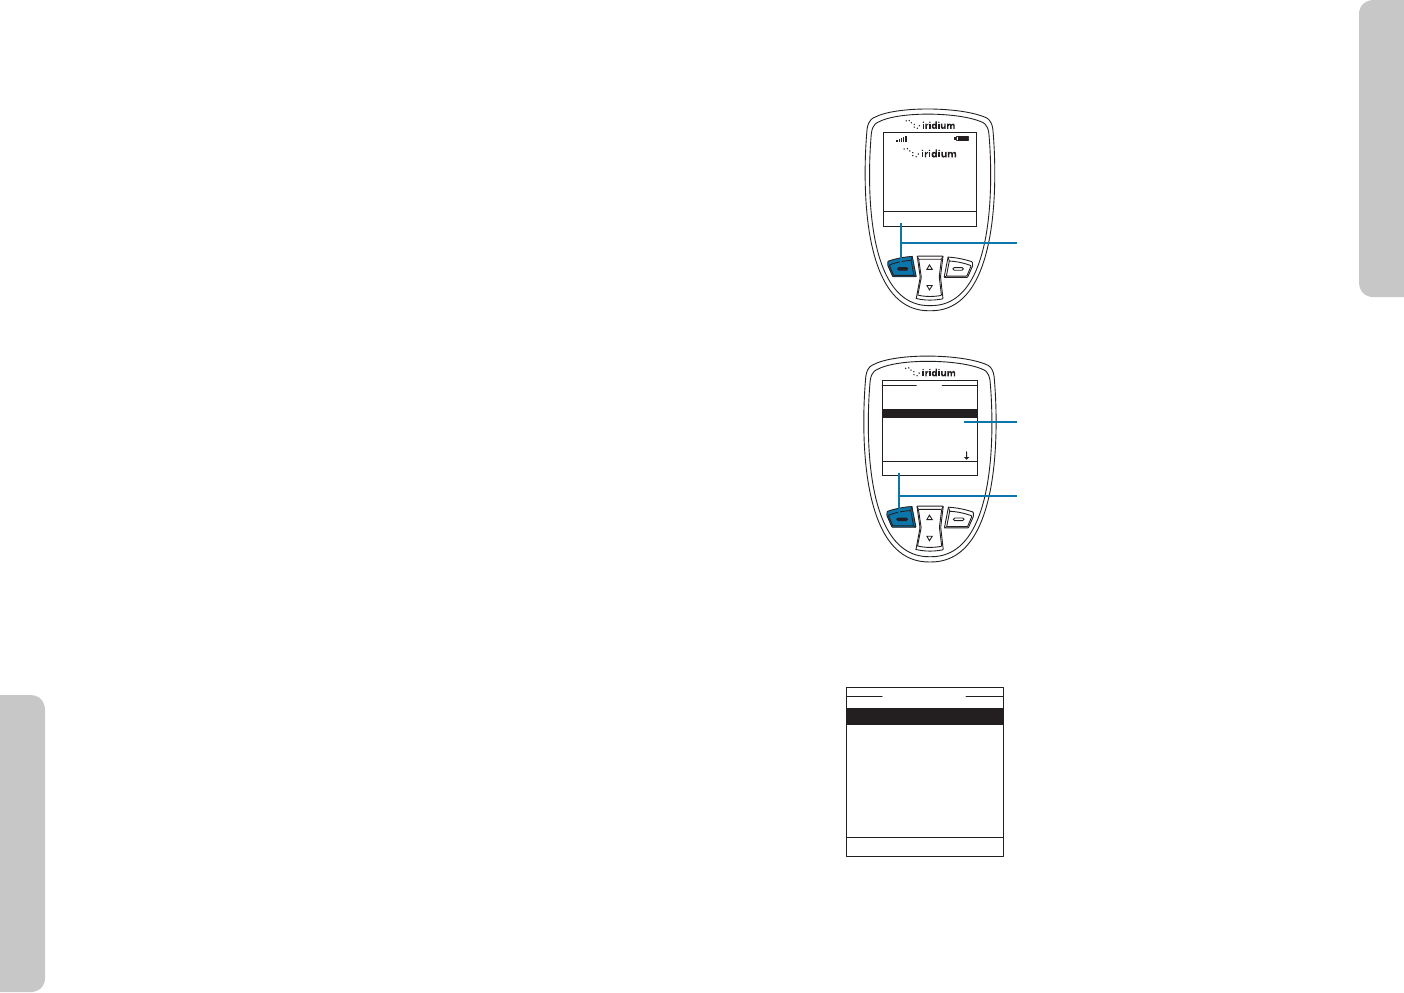
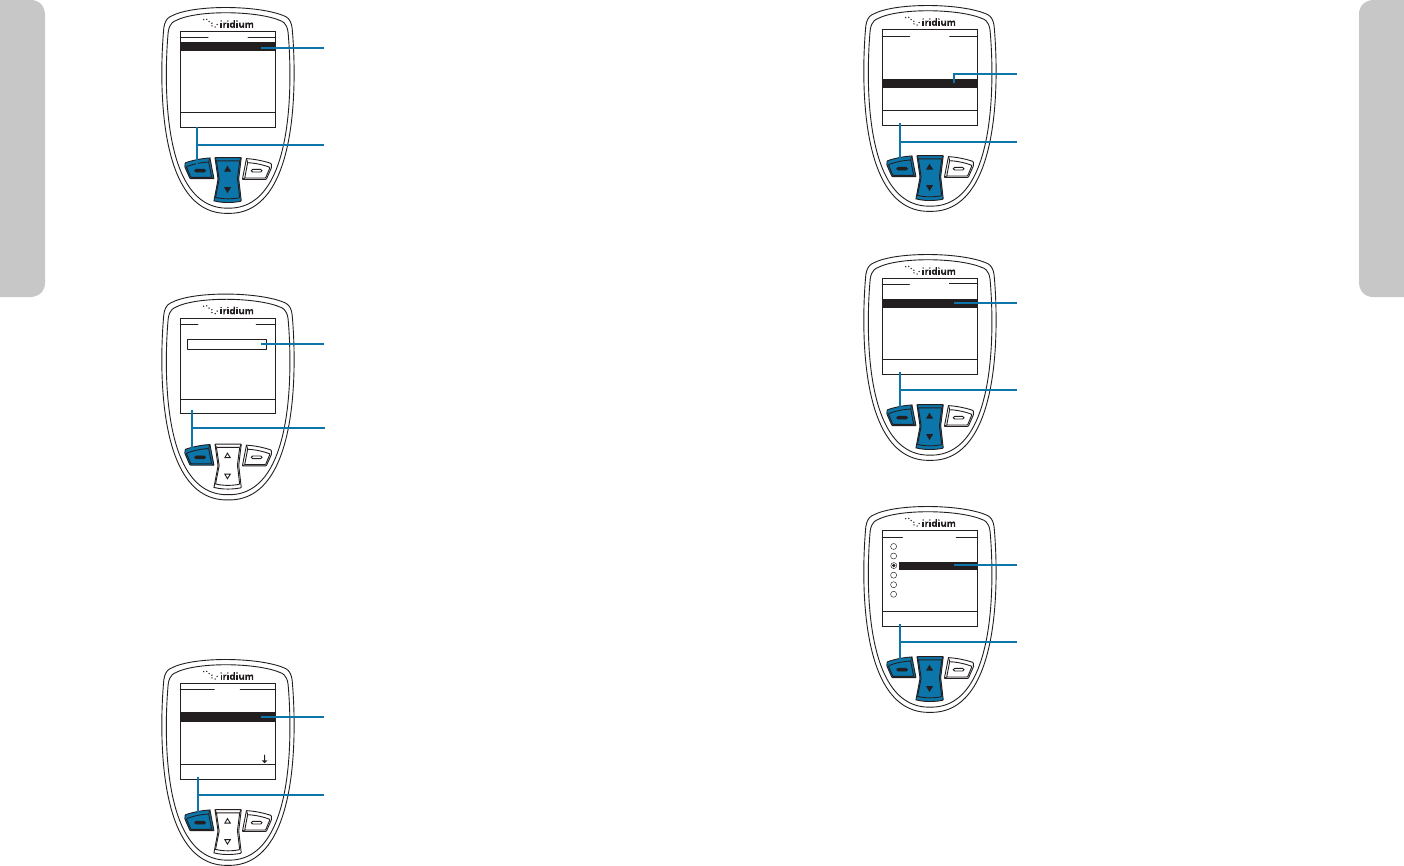
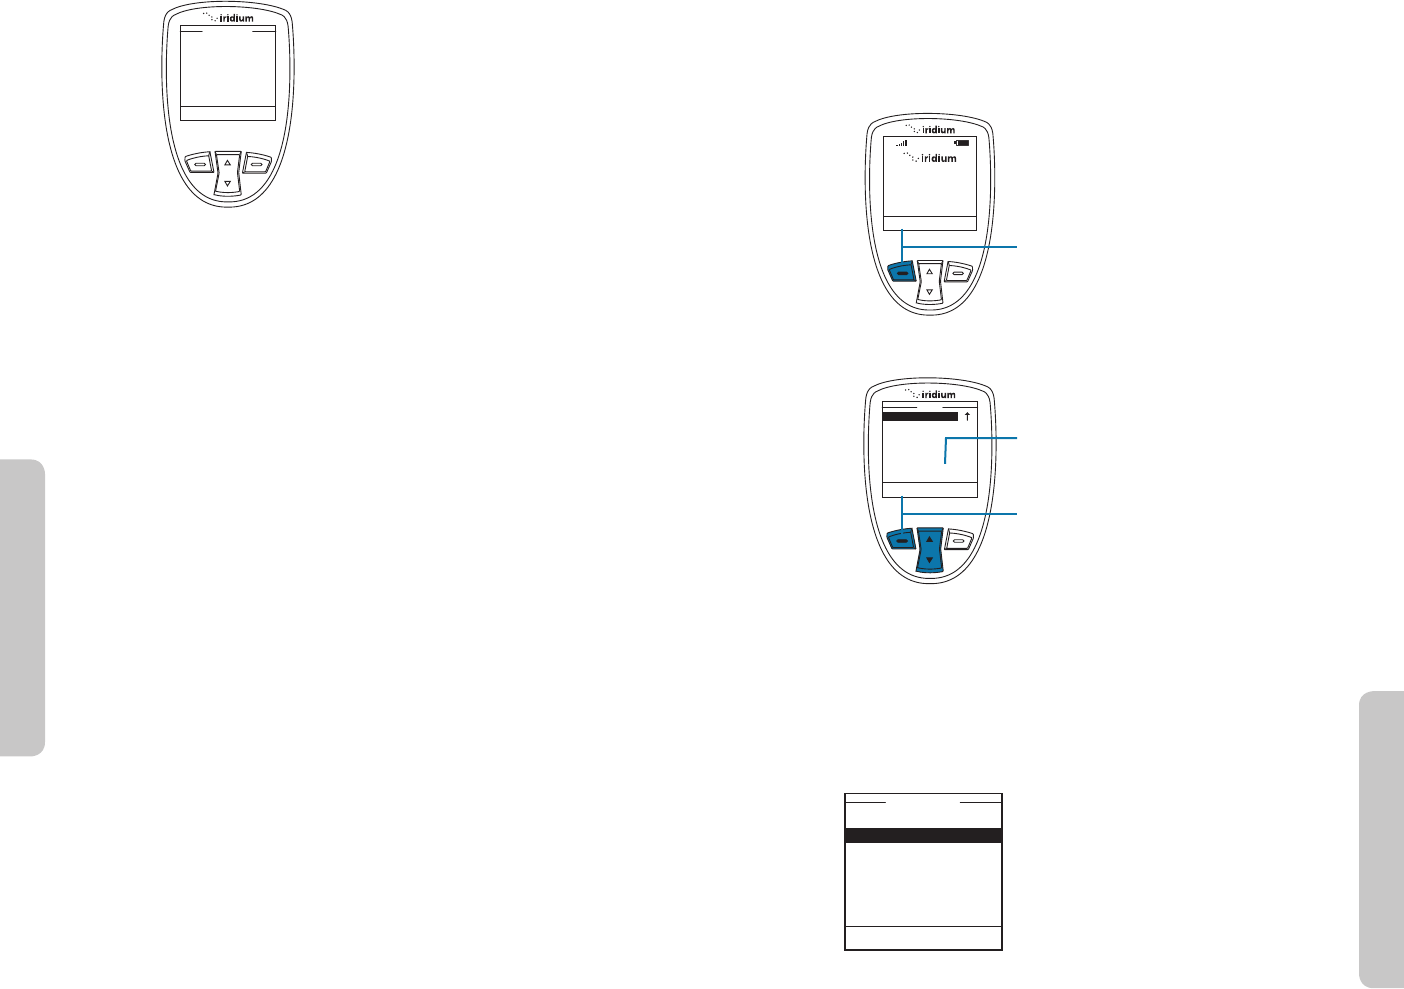
2. A Send To screen appears with
“New Recipient” highlighted. If you
previously selected a recipient, the
phone number or contact name
of your selected contact will be
displayed.
Note: You may elect to send the
message to additional recipients by
following the process covered on
this page in Adding an SMS Message
Recipient
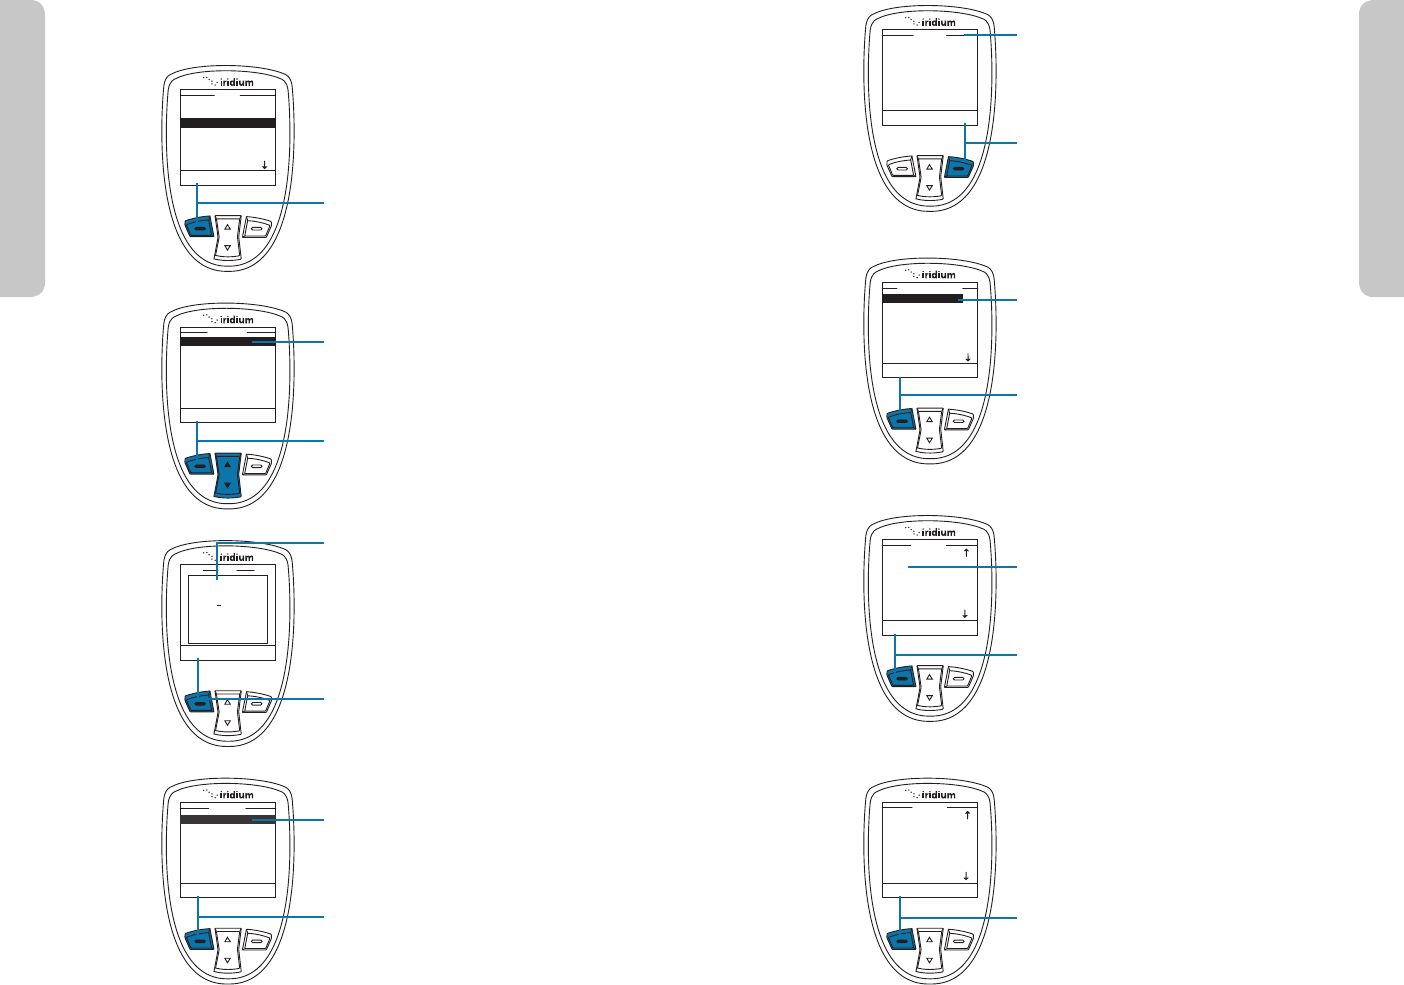
3. If no recipient is listed, you need to
add a recipient as covered on this
page in Adding an SMS Message
Recipient.
4. Press the left soft key “Send” to
send your message to your recipient.
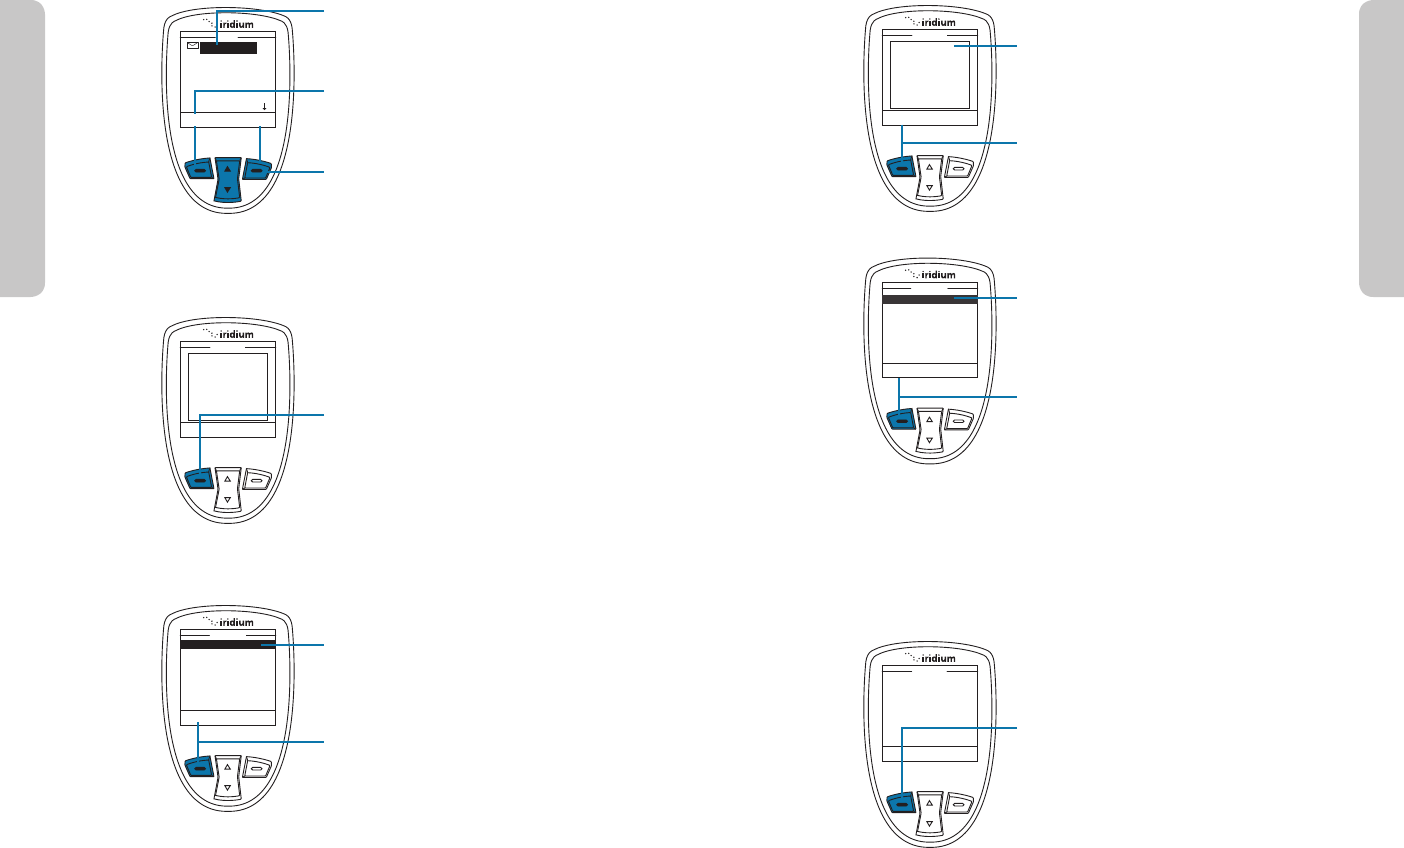
Adding an SMS Message Recipient
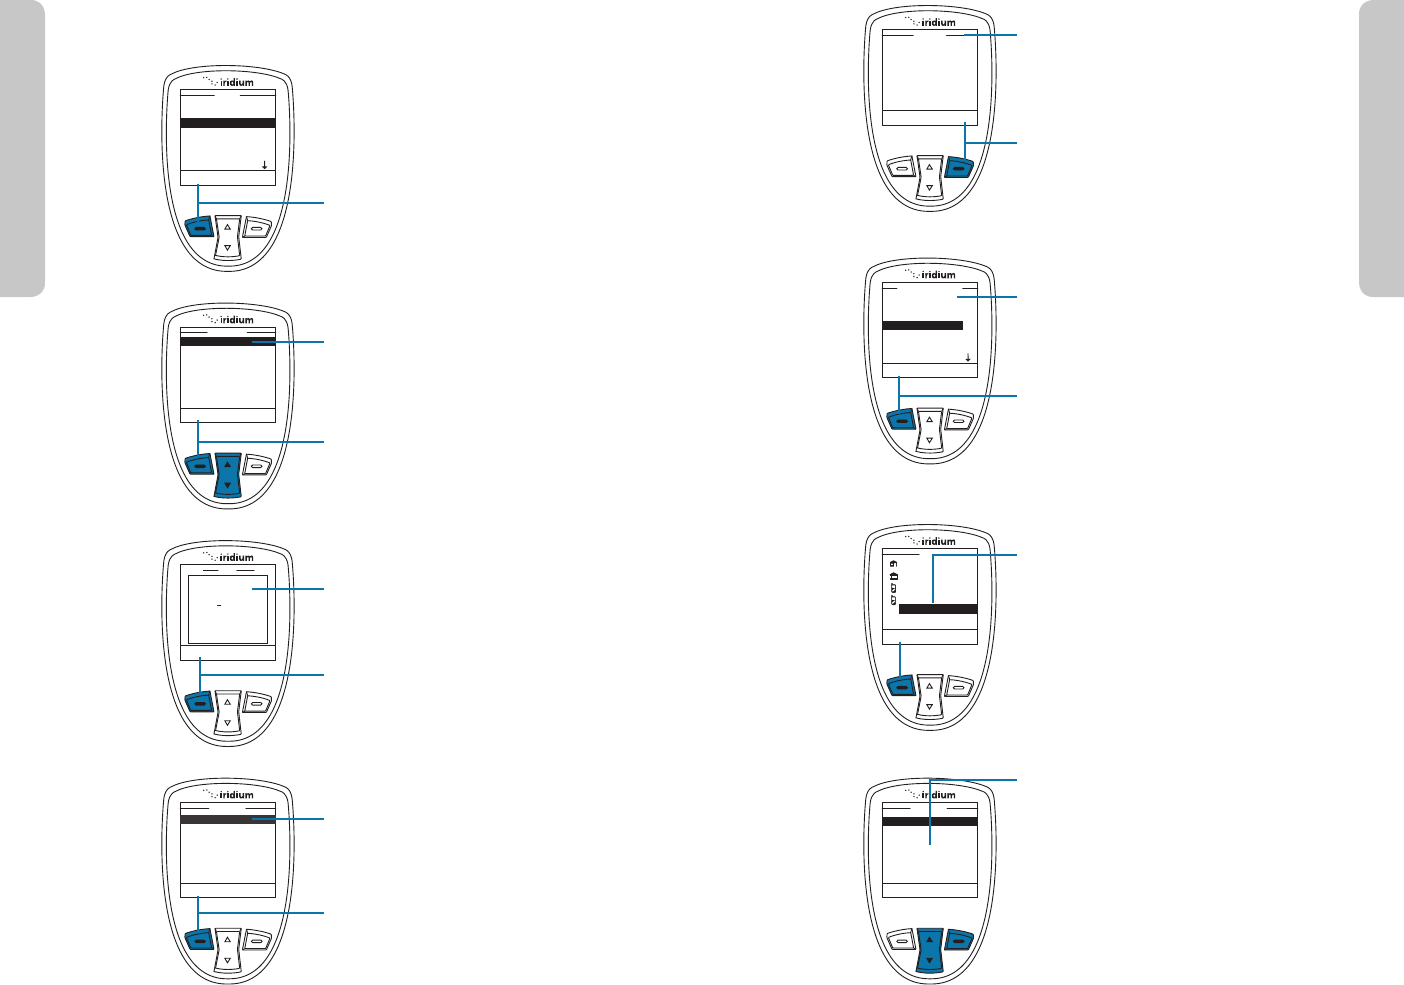
1. To add an SMS message recipient,
highlight the “New Recipient” on the
“Send To” screen. Select the right
soft key “Add” option.
Send Add
Send To
New Recipient
+111222333444
8: Using the Phonebooks
8: Using the Phonebooks
9575A User Manual 8786 9575A User Manual
Success
Entry updated
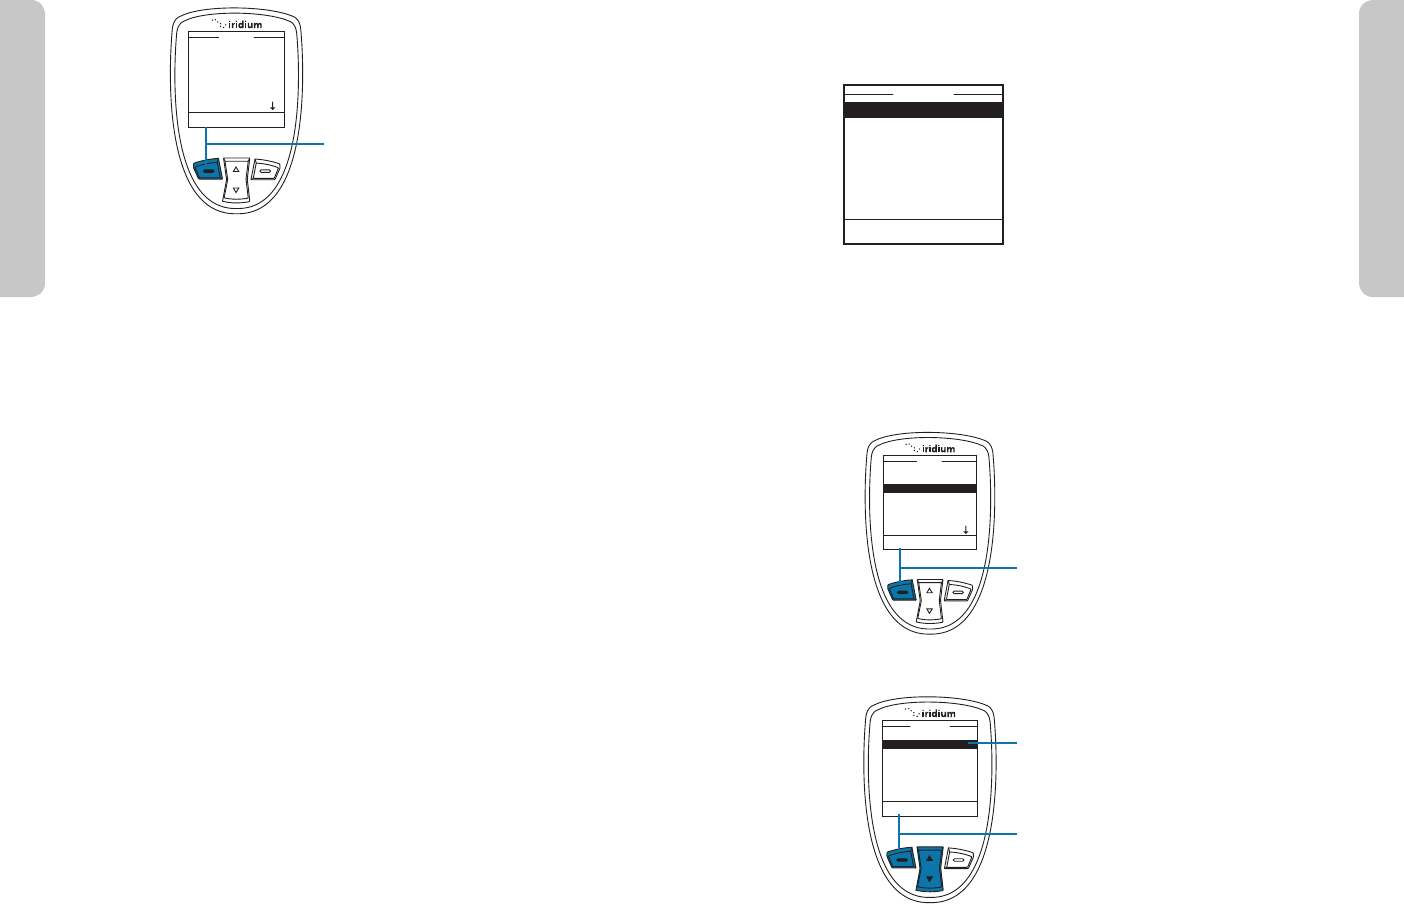
8. A message briefly appears
to indicate the entry was
updated. The screen
then returns to the main
Phonebook menu.
9. Press the red key to return to
the Main Screen.
Delete an Entry
My Phonebook
SIM Phonebook
Messages
Voicemail
Data Modem
Menu
Select Back
Options Back
Ada Adams
Bob Smith
Cat Steven
Davy Jones
Eddy Fisher
Phonebook
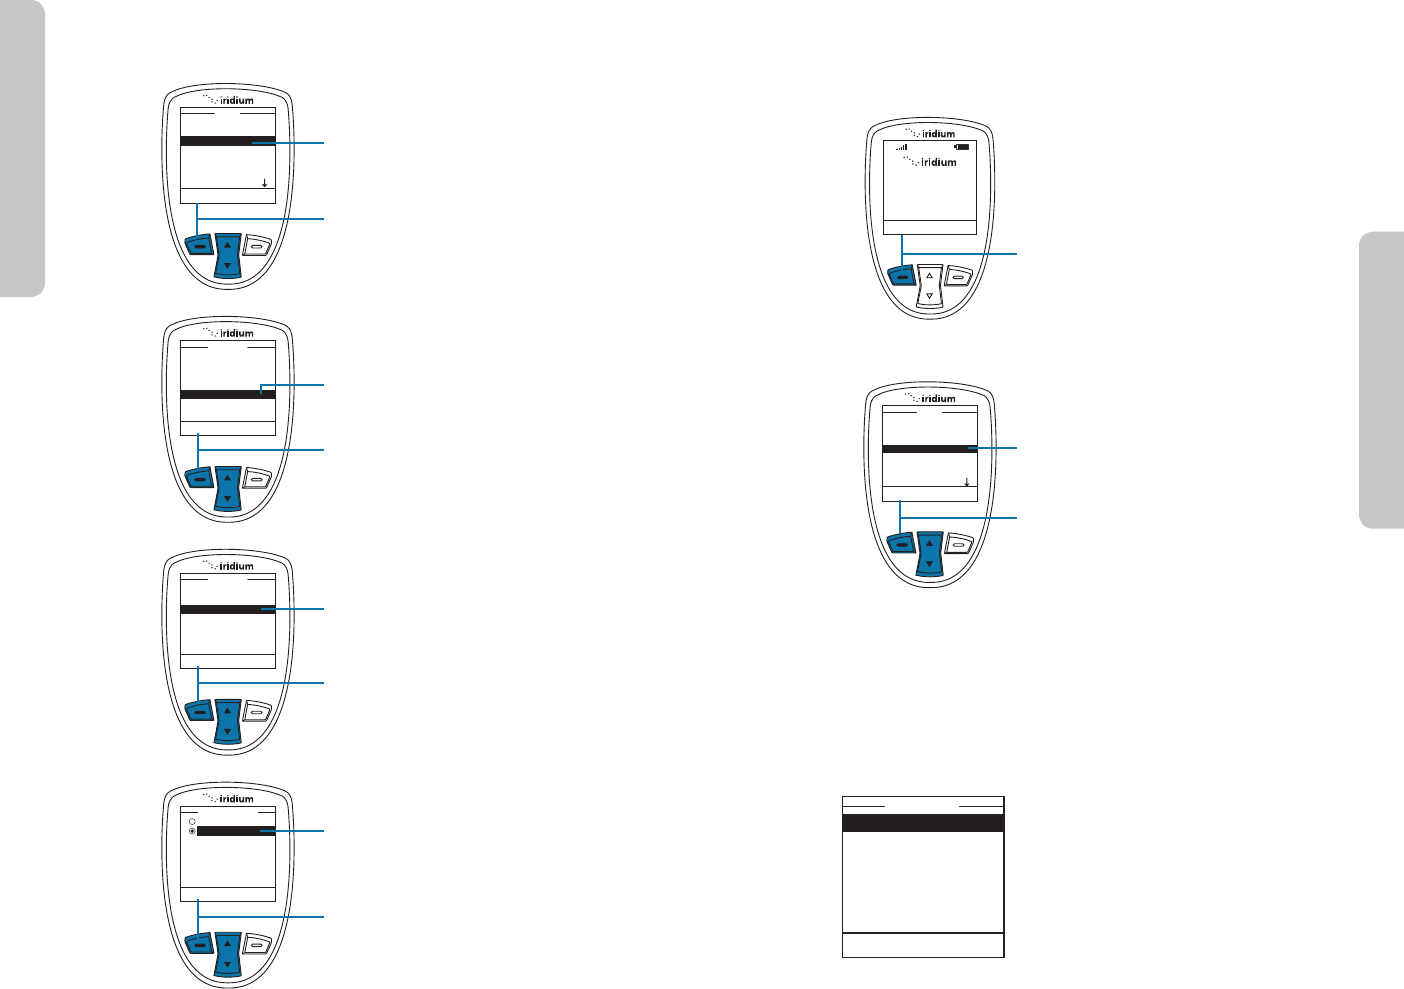
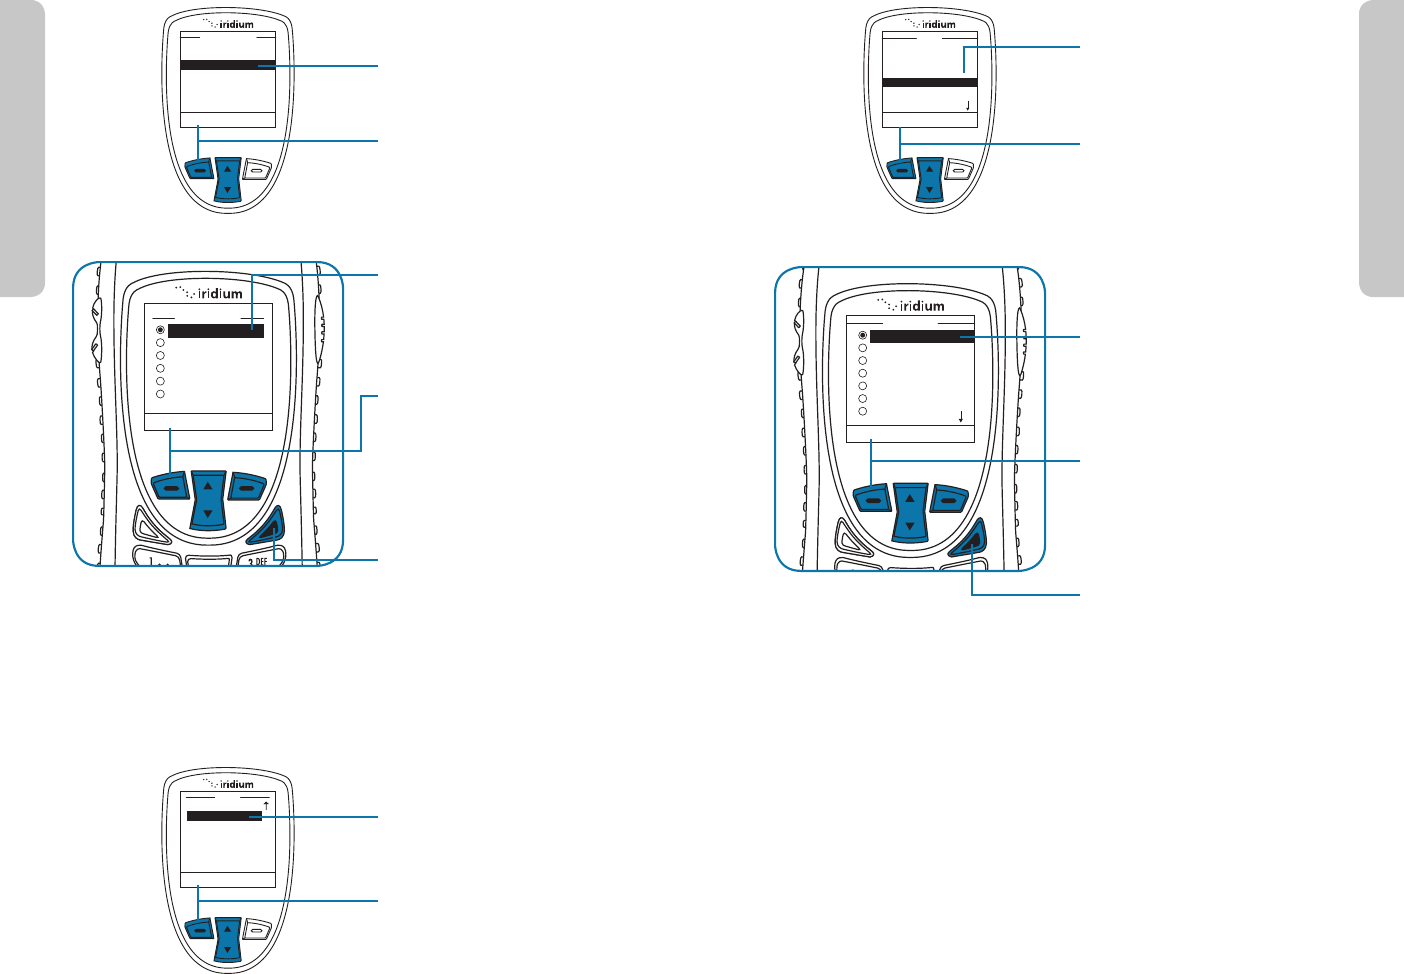
To remove an entry in the
Phonebook, use the Delete
option. Start at the Main Menu:
1. Press the left soft key,
labeled Select.
2. The Phonebook is displayed.
Use the 2-way Navi-key to
scroll until the desired entry
is highlighted.
3. Press the left soft key,
labeled Options.
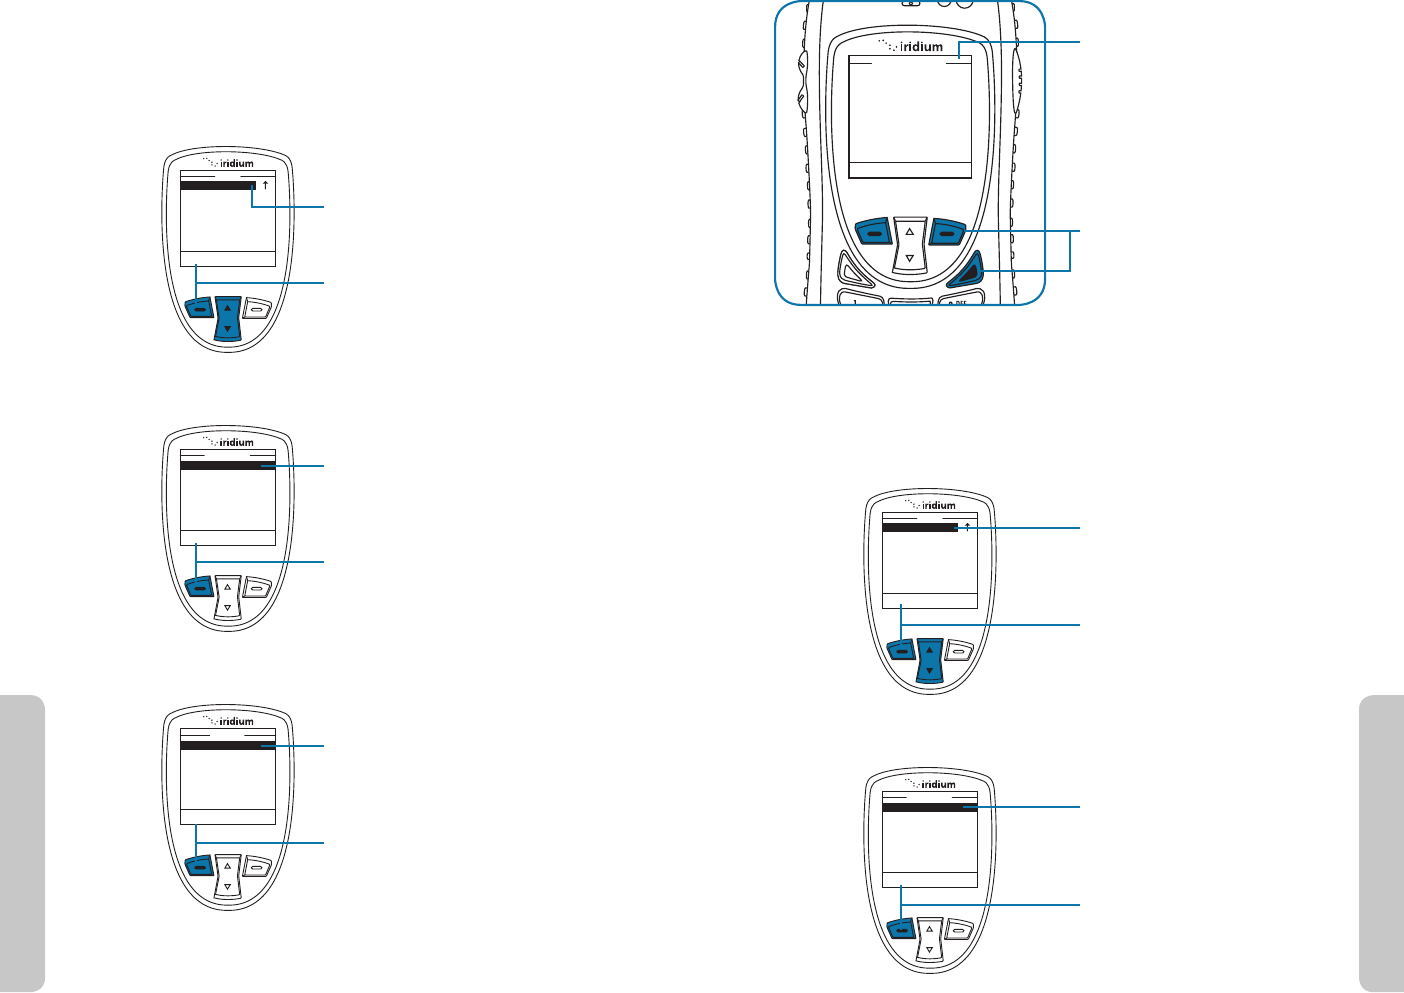
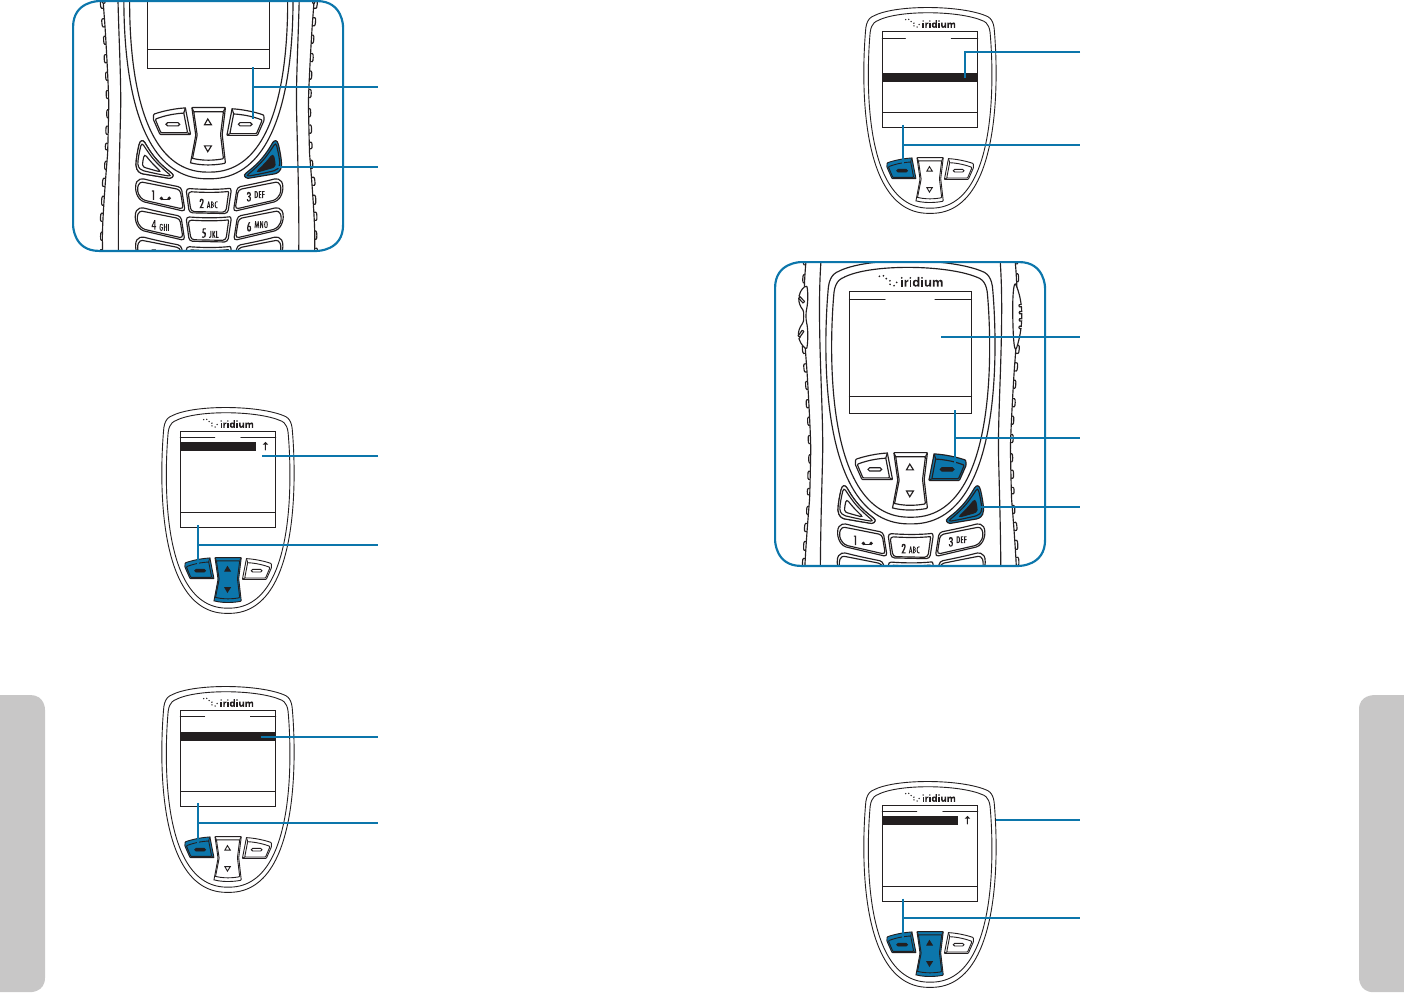
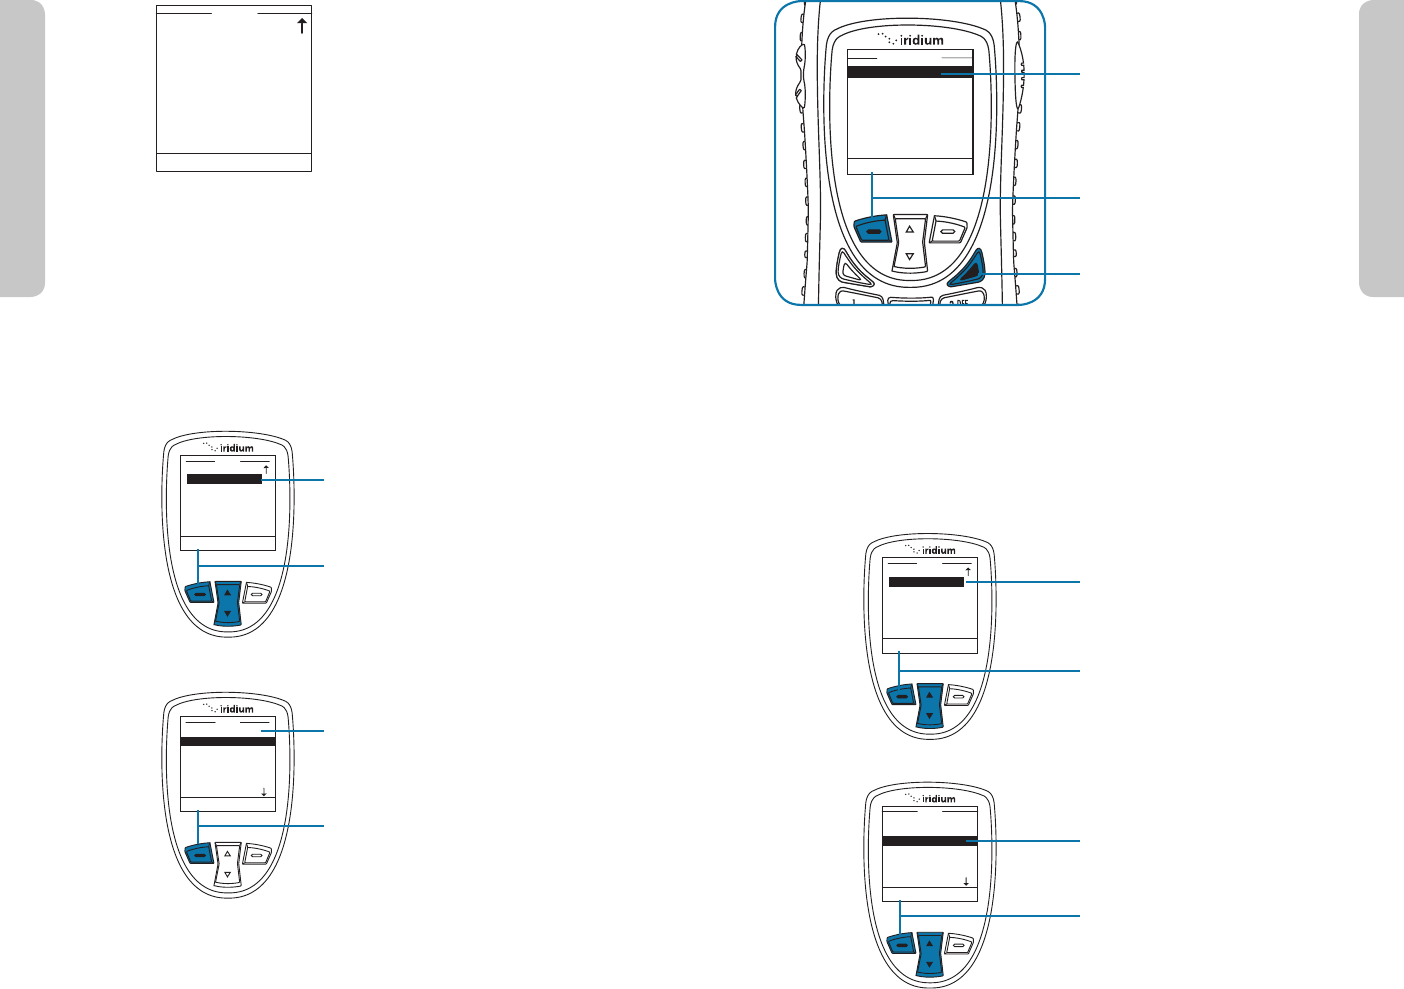
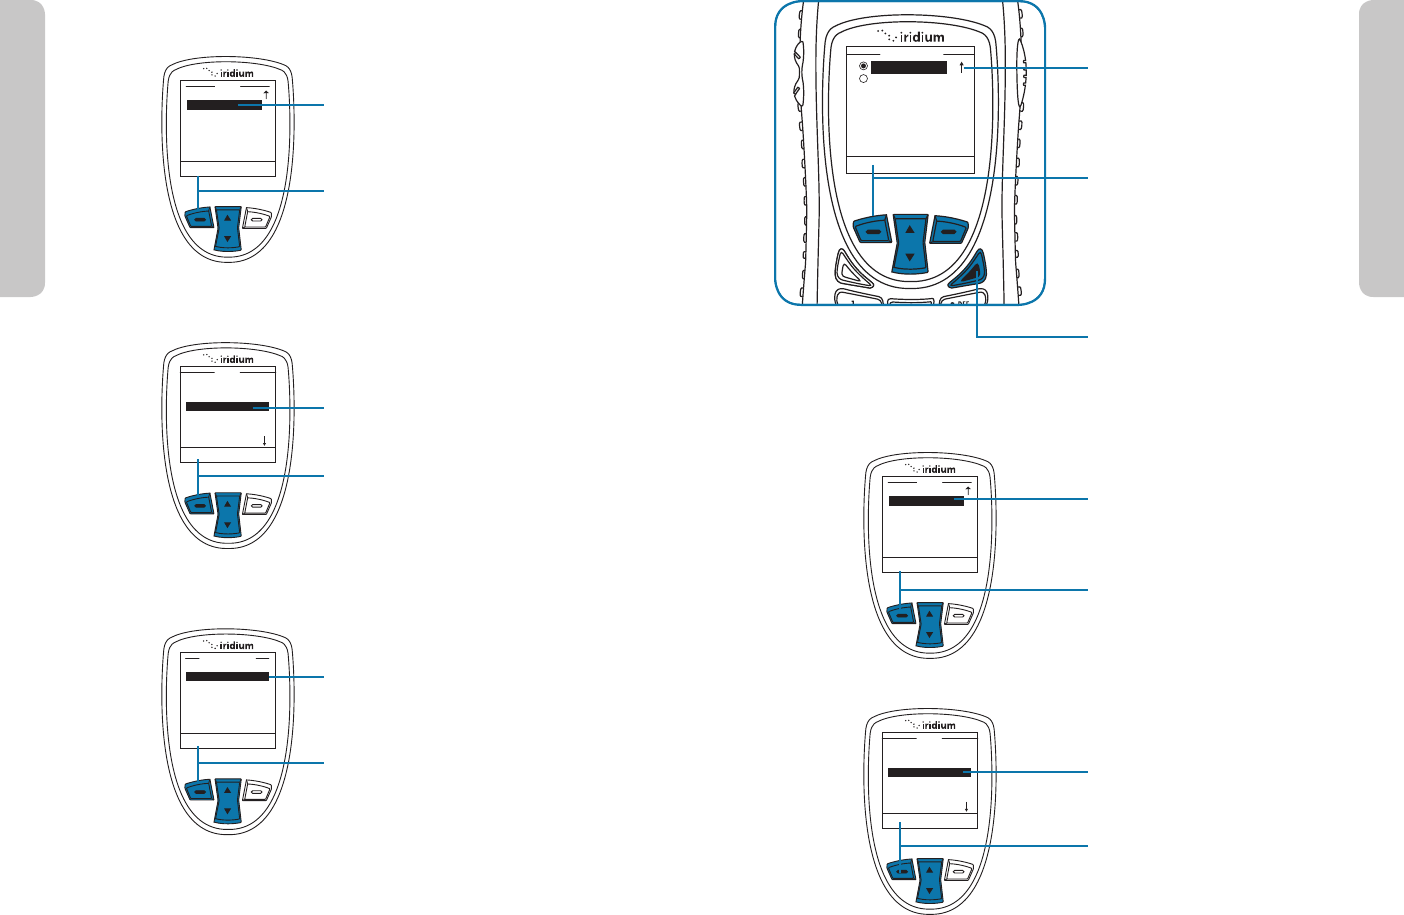
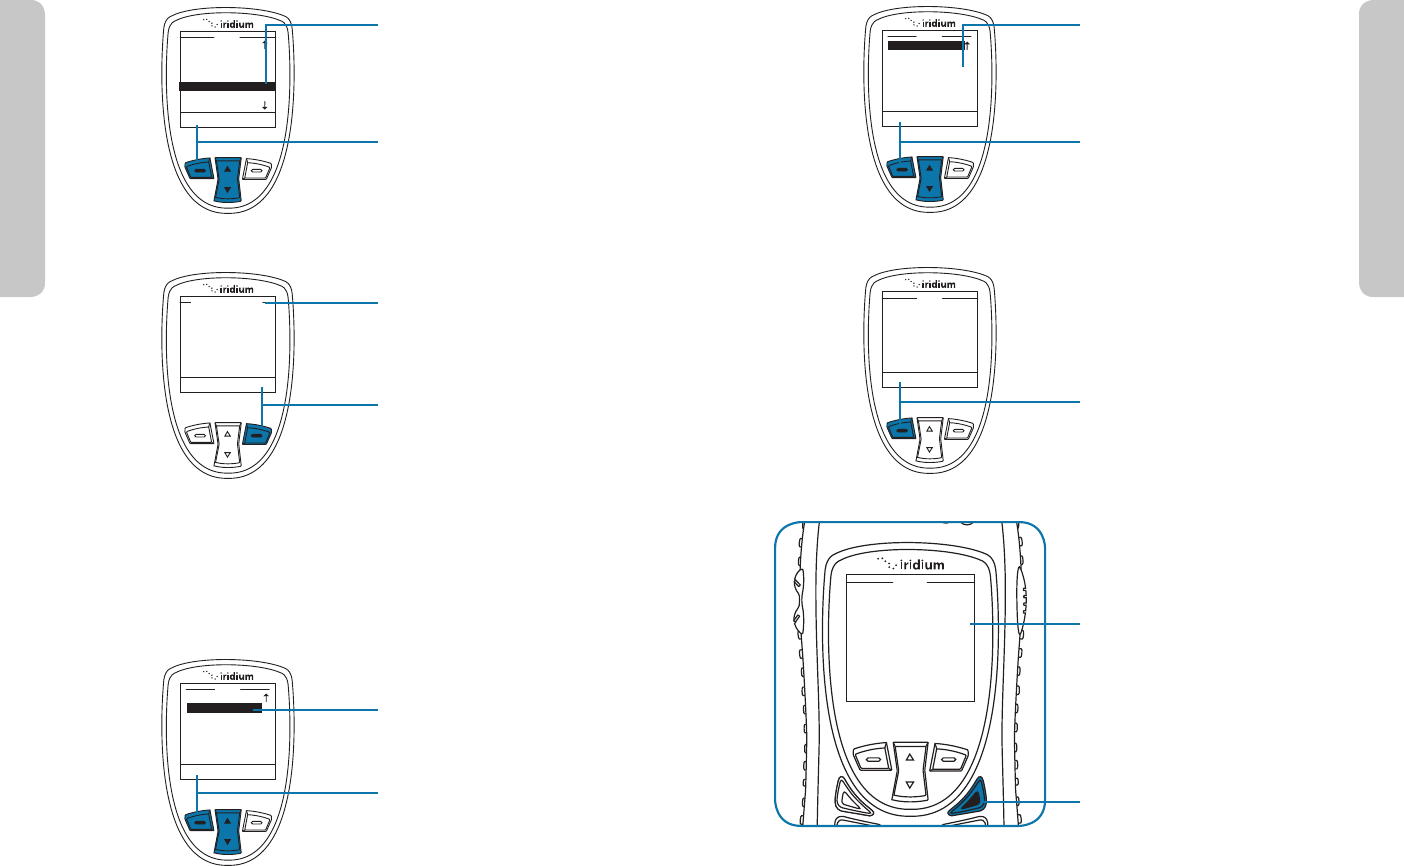
2. The Phonebook is displayed. Use the
2-way Navi-key to scroll until the
desired entry is highlighted.
3. Press the left soft key, labeled
Options.
4. Use the 2-way Navi-key until the
Edit option is highlighted.
5. Press the left soft key, labeled
Select to proceed.
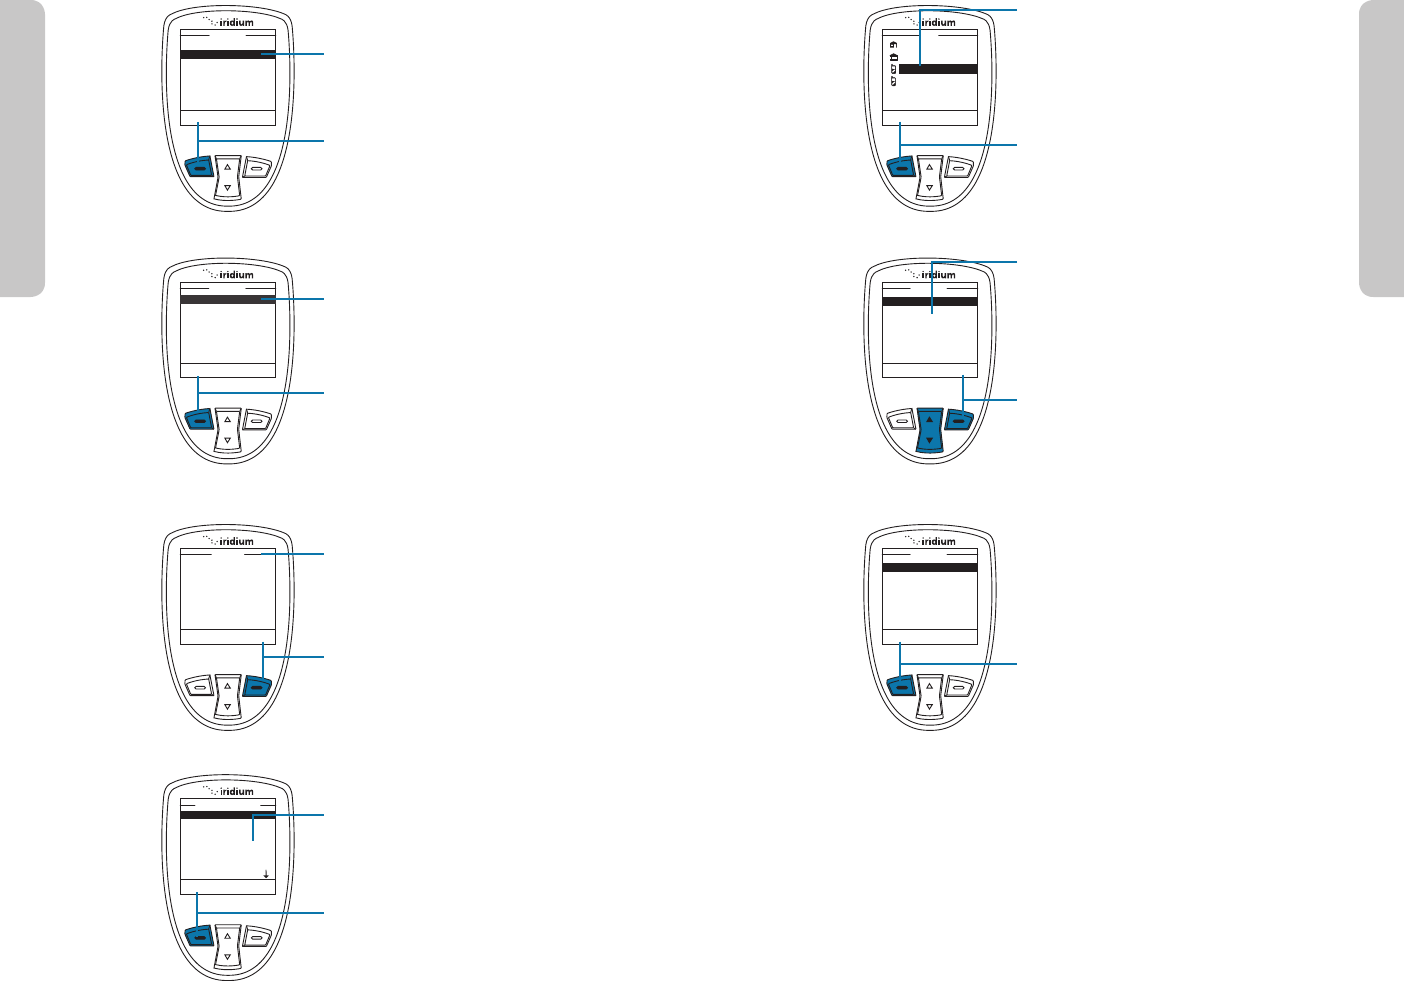
6. The Edit Screen appears. Edit the
entry as needed using the 2-way
Navi-key to scroll to the required
field(s). Use the side volume keys
to navigate backwards (up key)
and forwards (down key) without
deleting and the right soft key,
labeled Clear to delete characters.
Use the keypad to enter new
characters.
7. Press the left soft key, labeled Save.
Options Back
Ada Adams
Bob Smith
Cat Steven
Davy Jones
Eddy Fisher
Phonebook
Select Back
Call
SMS
Edit
Delete
New
Phonebook
Save Clear
Edit
@
Bob Smith
+9373354415
+9373321234
+123456789
+1112223333
bsmith@aol.com
8: Using the Phonebooks
8: Using the Phonebooks
9575A User Manual 8988 9575A User Manual
Viewing Memory Status
My Phonebook
SIM Phonebook
Messages
Voicemail
Data Modem
Menu
Select Back
Options Back
Ada Adams
Bob Smith
Cat Steven
Davy Jones
Eddy Fisher
Phonebook
Select Back
Bob Smith
Memory Status
Notes
Use this capability to see how many
Phonebook memory locations are
available in the SIM card memory and
phone memory. Start at the Main Menu:
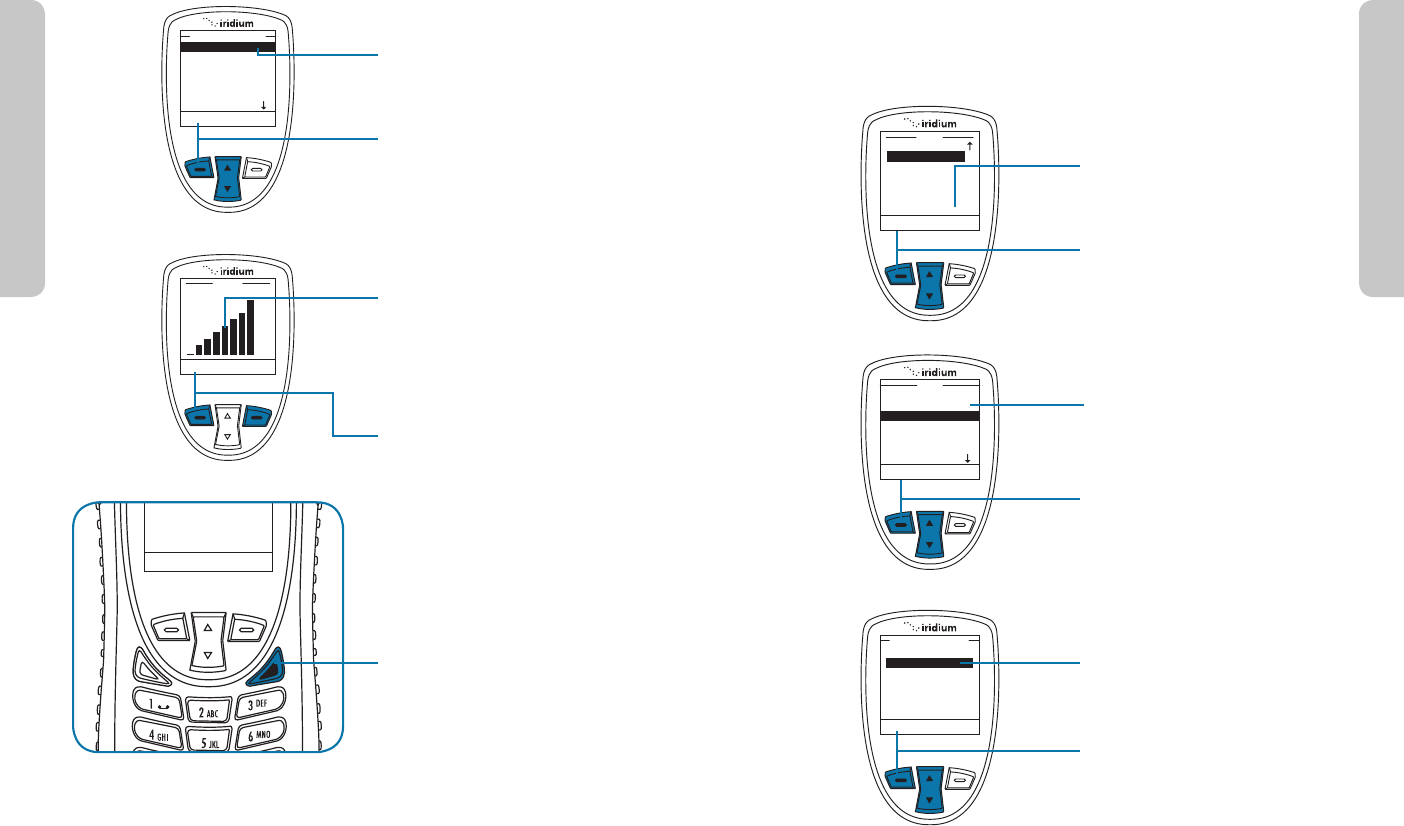
1. Press the left soft key, labeled Select.
2. The Phonebook is displayed.
3. Press the left soft key, labeled
Options.
4. Use the 2-way Navi-key until
Memory Status is highlighted.
5. Press the left soft key, labeled Select
to proceed.
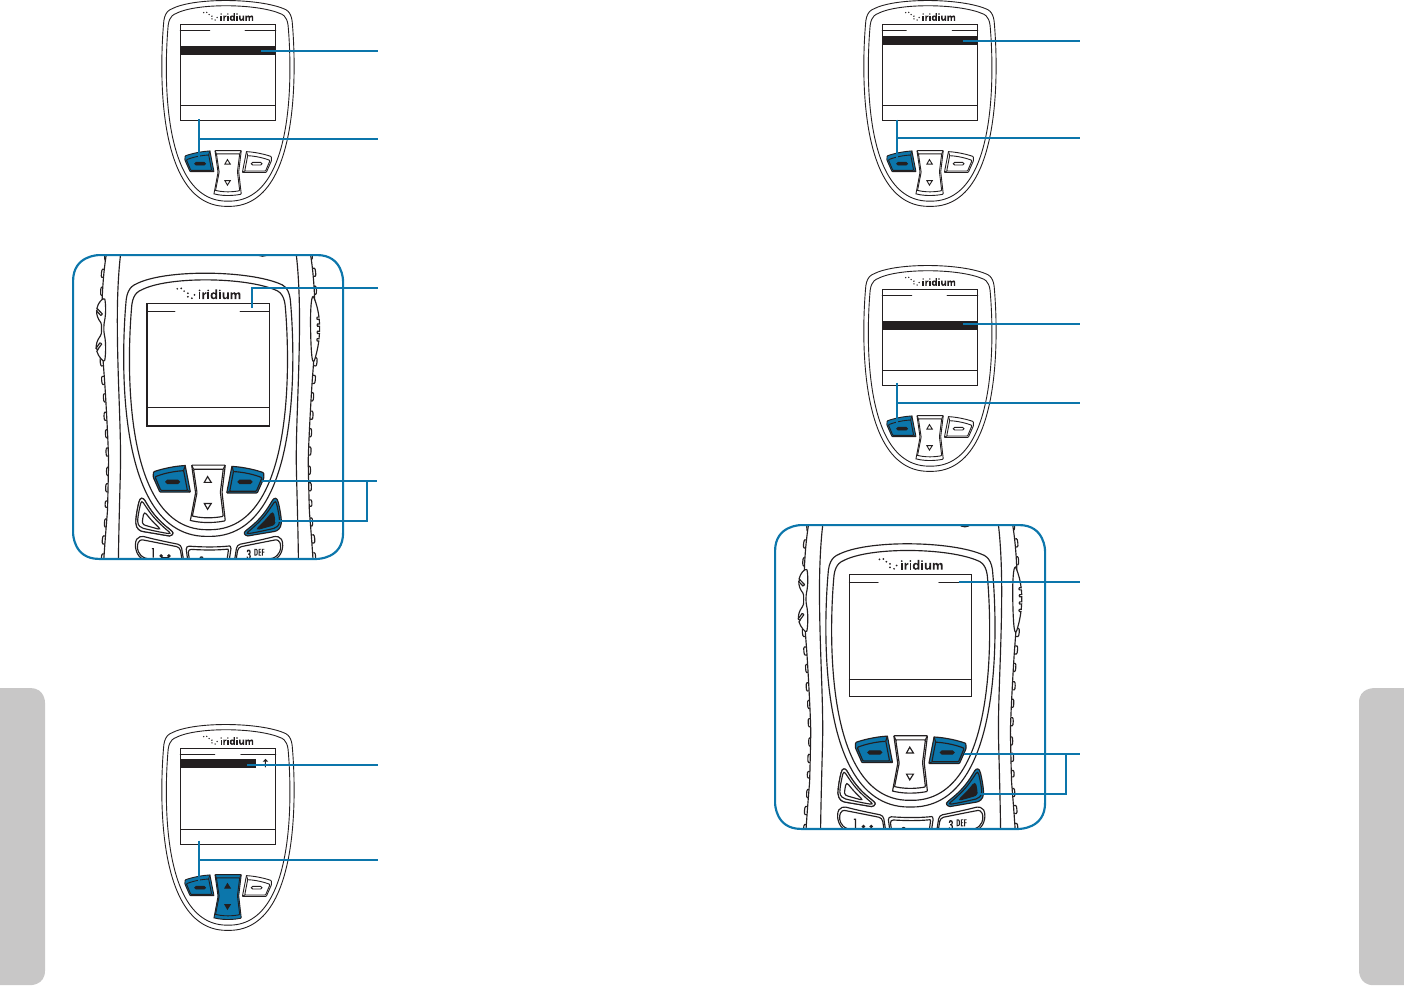
4. Use the 2-way Navi-key
until the Delete option is
highlighted.
5. Press the left soft key,
labeled Select to proceed.
6. You receive a message asking
if you want to delete the
entry. Press the left soft key,
labeled Yes. If you press No,
the screen reverts to the
previous menu.
7. A message briefly appears
to indicate the entry
was deleted. The main
Phonebook menu then
appears.
8. Press the red key to return to
the Main Screen.
Select Back
Phonebook
Call
SMS
Edit
Delete
New
Yes No
Delete Entry
Are you sure you
want to delete
Bob Smith?
Success
Entry Bob Smith
deleted
8: Using the Phonebooks
8: Using the Phonebooks
9575A User Manual 9190 9575A User Manual
Select Back
Bob Smith
Memory Status
Notes
Options Clear
Abc 45
Best time to reach
is in the am
Options Back
My Phonebook
Save
Cancel
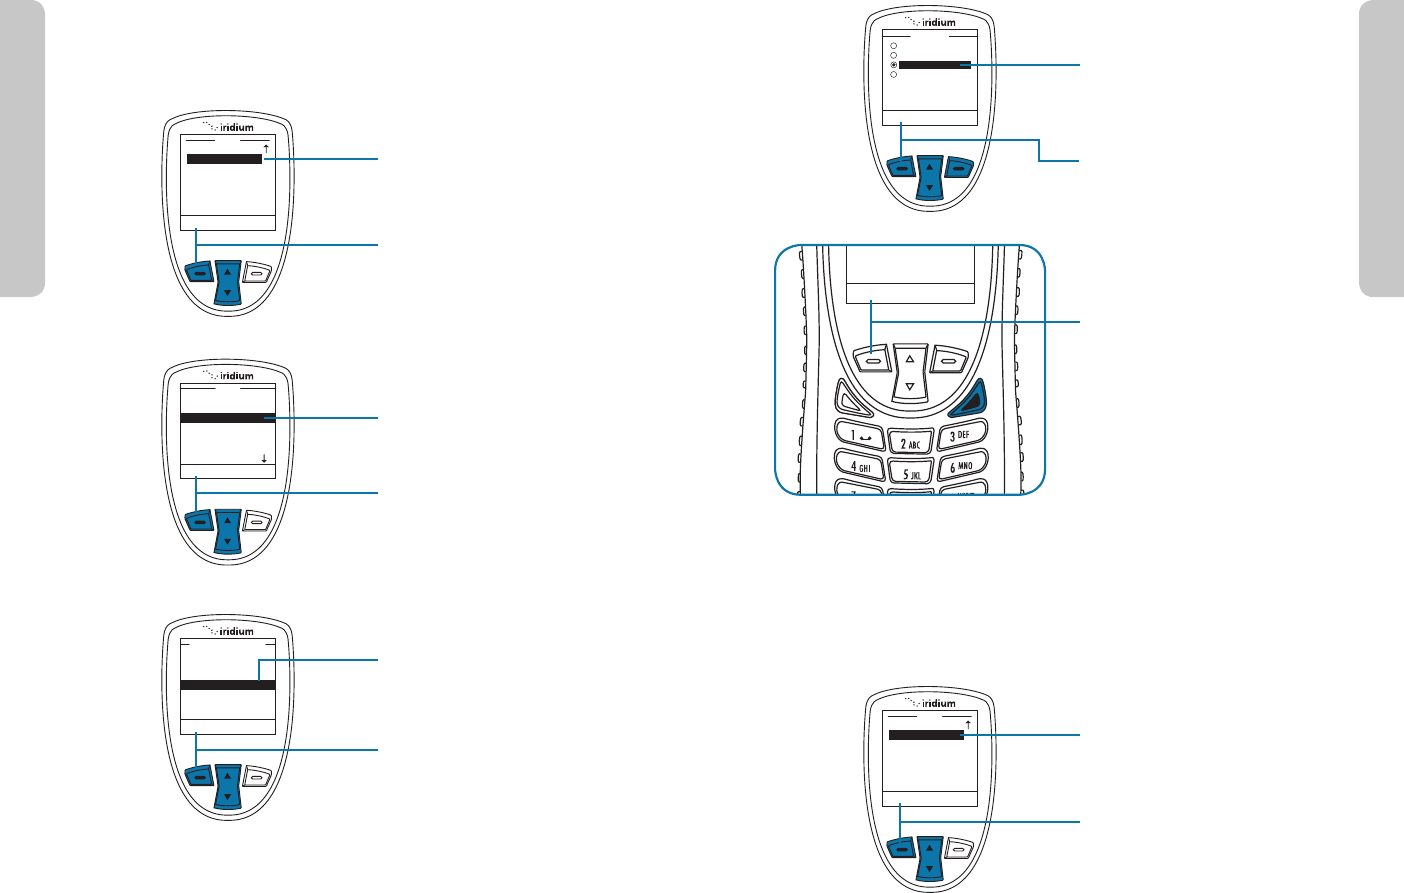
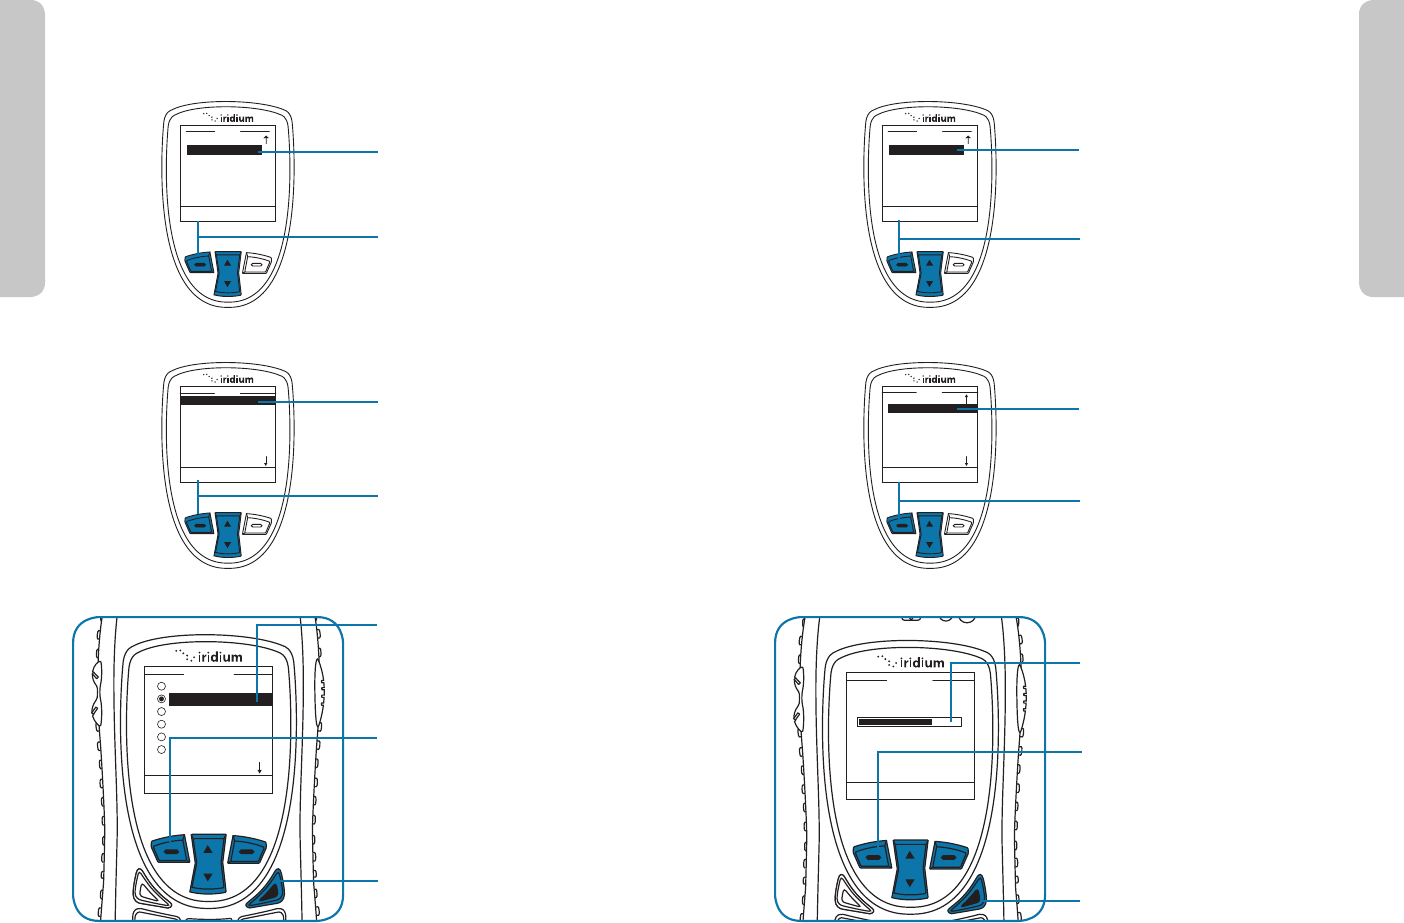
4. Use the 2-way Navi-key until Notes is
highlighted.
5. Press the left soft key, labeled Select
to proceed.
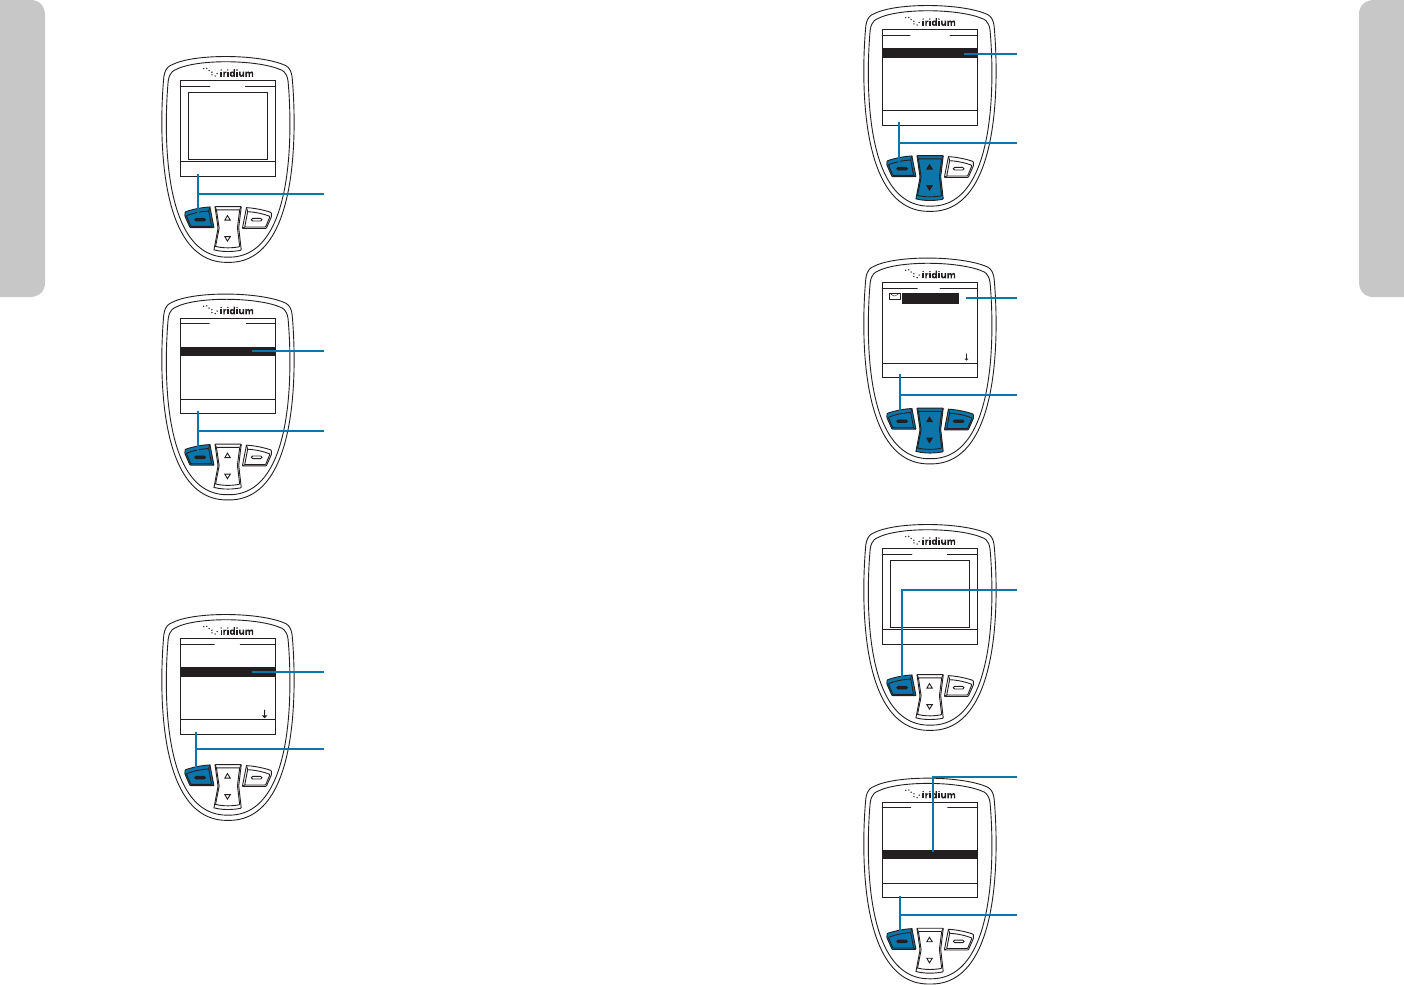
6. A text screen appears. Use the
Keypad to enter your text.
Note: you can enter up to 64 characters.
The character count in the top right
corner counts down as you enter text.
7. Press the left soft key, labeled
Options.
8. A My Phonebook screen appears with
Save highlighted.
9. Press the left soft key, labeled
Options and select Save when done
using 2-way Navi-key and left soft
key labeled Select.
Note: The text you entered is now
stored in the Note option for this entry.
Restricted Phonebook
When the Phonebook is restricted, My Phonebook and SIM Phonebook
do not appear. The main menu displays Fixed Phonebook only. The Fixed
Phonebook cannot be edited as it is programmed directly to the SIM card
using a PC software program.
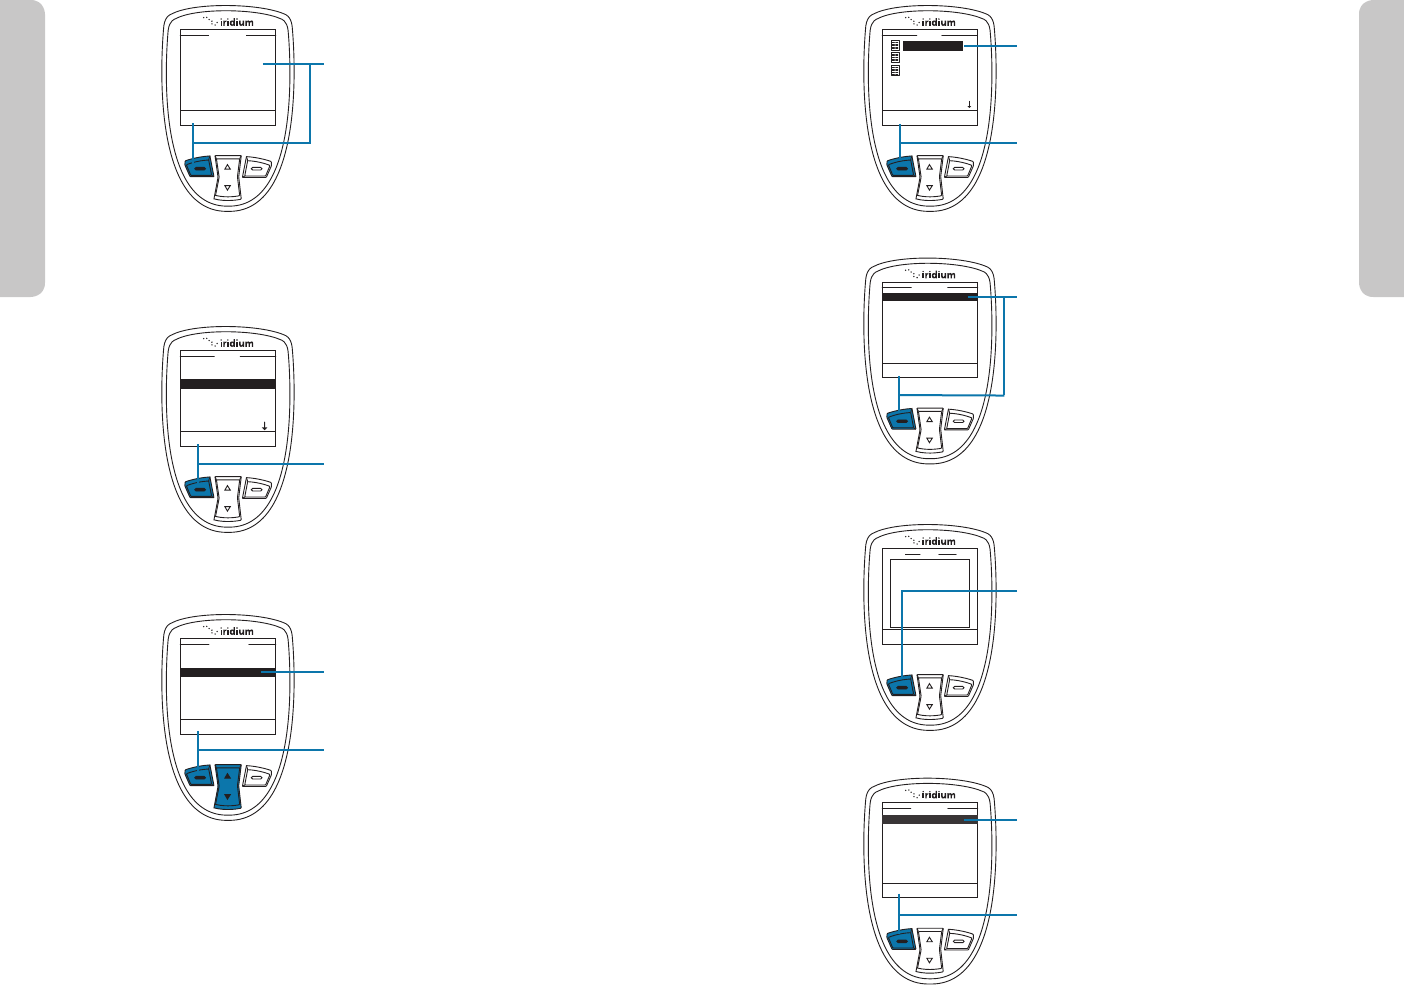
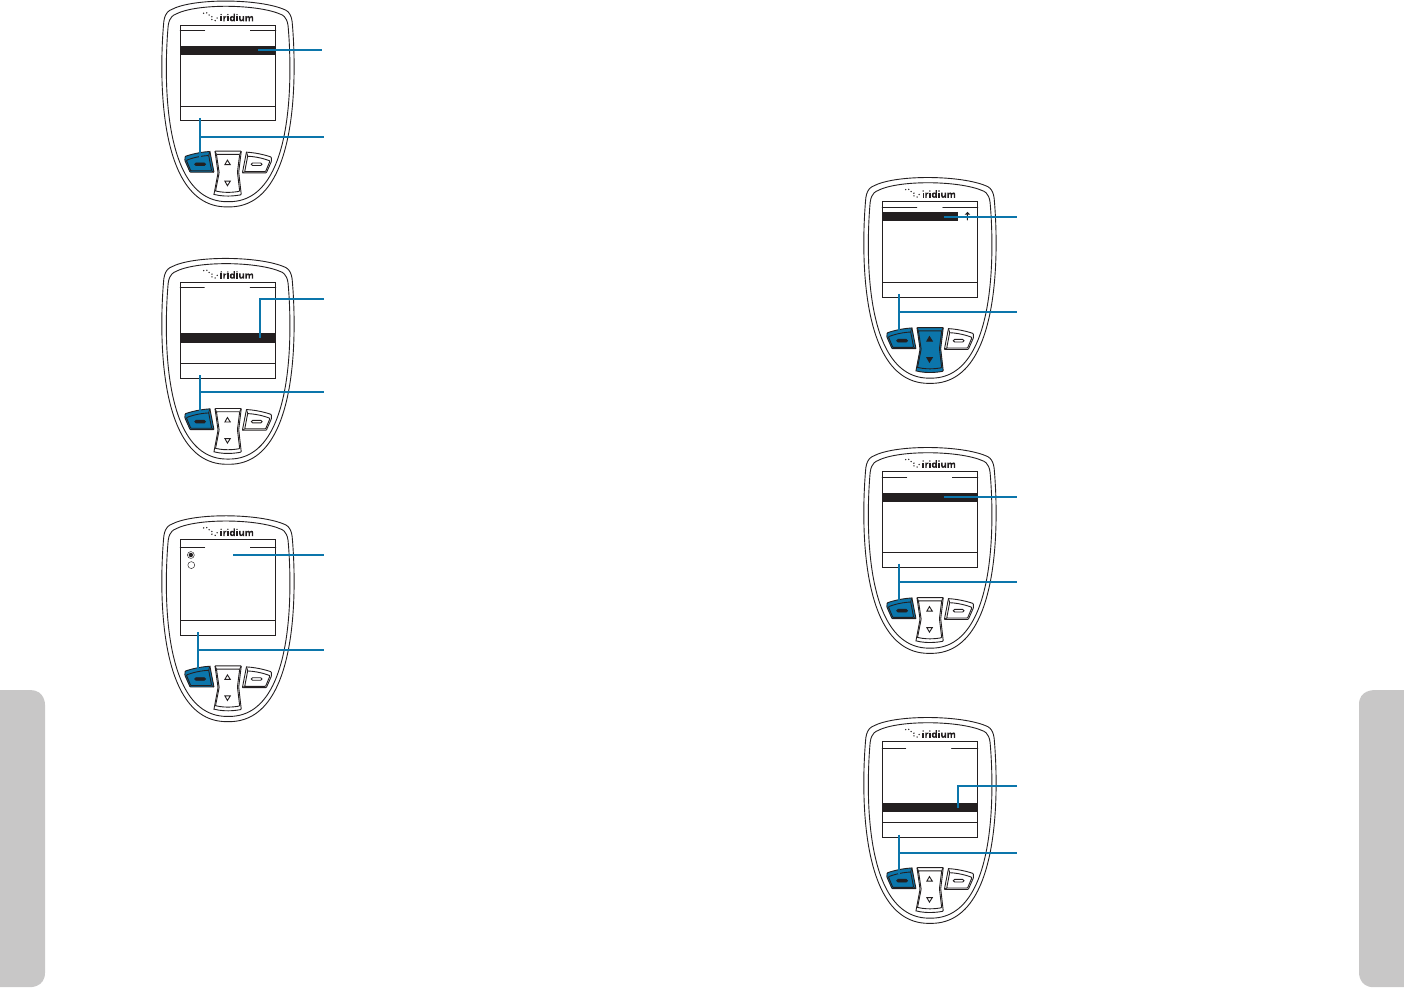
6. The Phonebook Status is
displayed, showing the space
on the SIM and the phone
memory.
7. Press the left soft key,
labeled OK or the right soft
key labeled Back to return to
the previous screen.
Press the red key to return to
the Main Screen.
OK Back
Space on SIM:
Used 0 out of 155
Space on phone:
Used 0 out of 100
Phonebook Status
Adding Notes to a Phonebook Entry
My Phonebook
SIM Phonebook
Messages
Voicemail
Data Modem
Menu
Select Back
Options Back
Ada Adams
Bob Smith
Cat Steven
Davy Jones
Eddy Fisher
Phonebook
Use this capability to add
information regarding an entry.
Start at the Main Menu:
1. Press the left soft key,
labeled Select.
2. The Phonebook is displayed.
Use the 2-way Navi-key to
scroll until the desired entry
is highlighted.
3. Press the left soft key,
labeled Options.
9: Using the Messages Menu
9575A User Manual 93
8: Using the Phonebooks
92 9575A User Manual
9: Using the Messages Menu
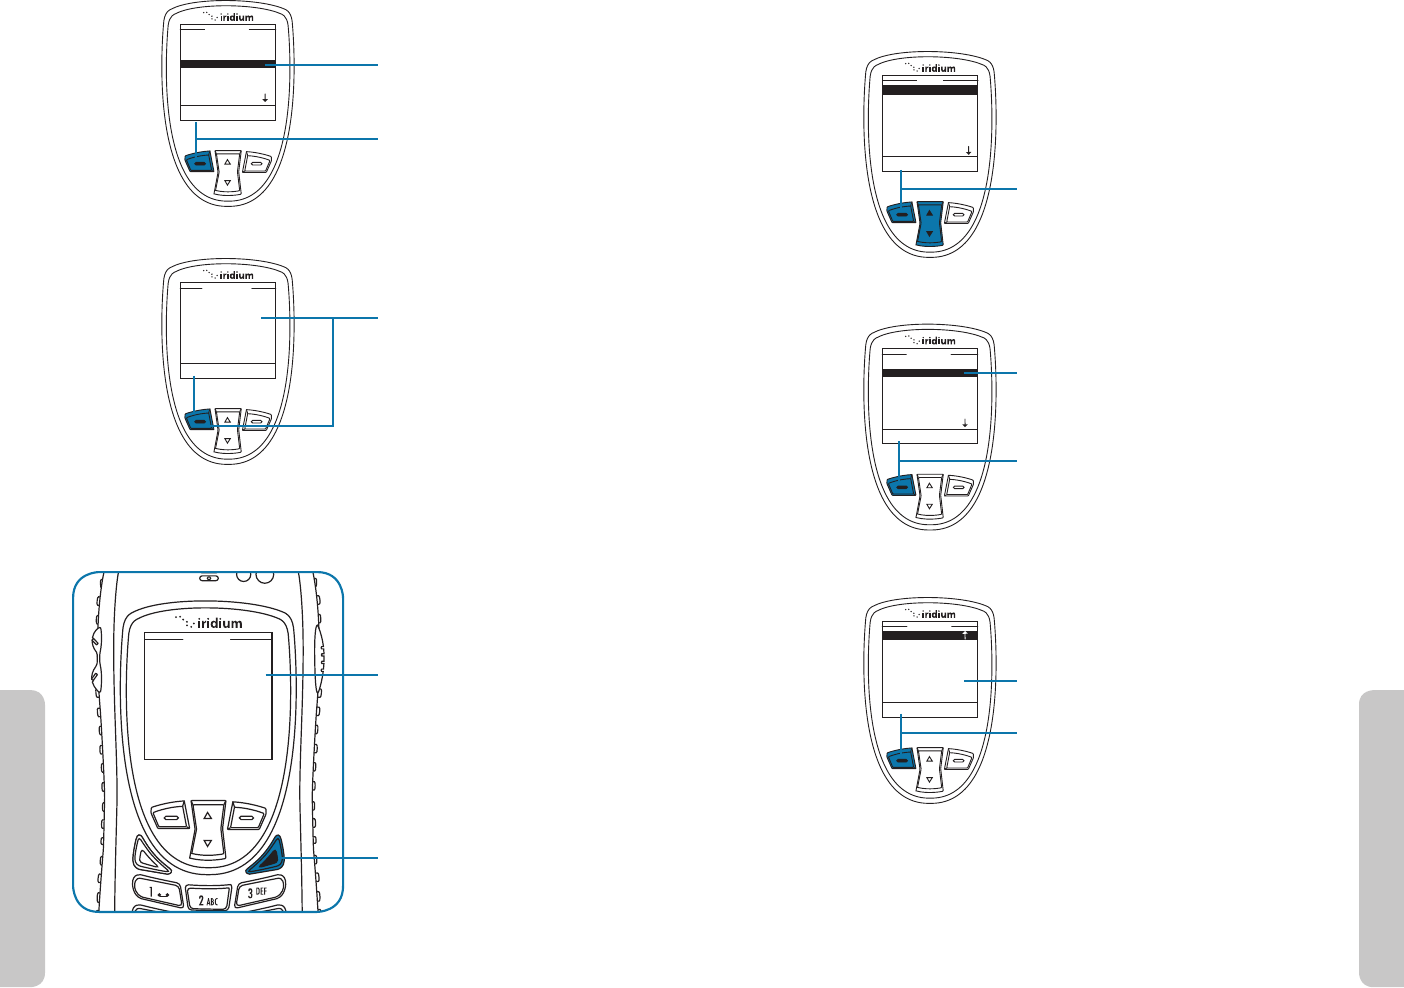
Locating the Messages Menu
Note: All instructions for the Messages menu start from the Main Menu
as shown.
Registered
Menu Help
16:28 14-May-13
T
Create Message
Inbox
Drafts
Outbox
Settings
Messages
Select Back
Select Back
My Phonebook
SIM Phonebook
Messages
Voicemail
Data Modem
Menu
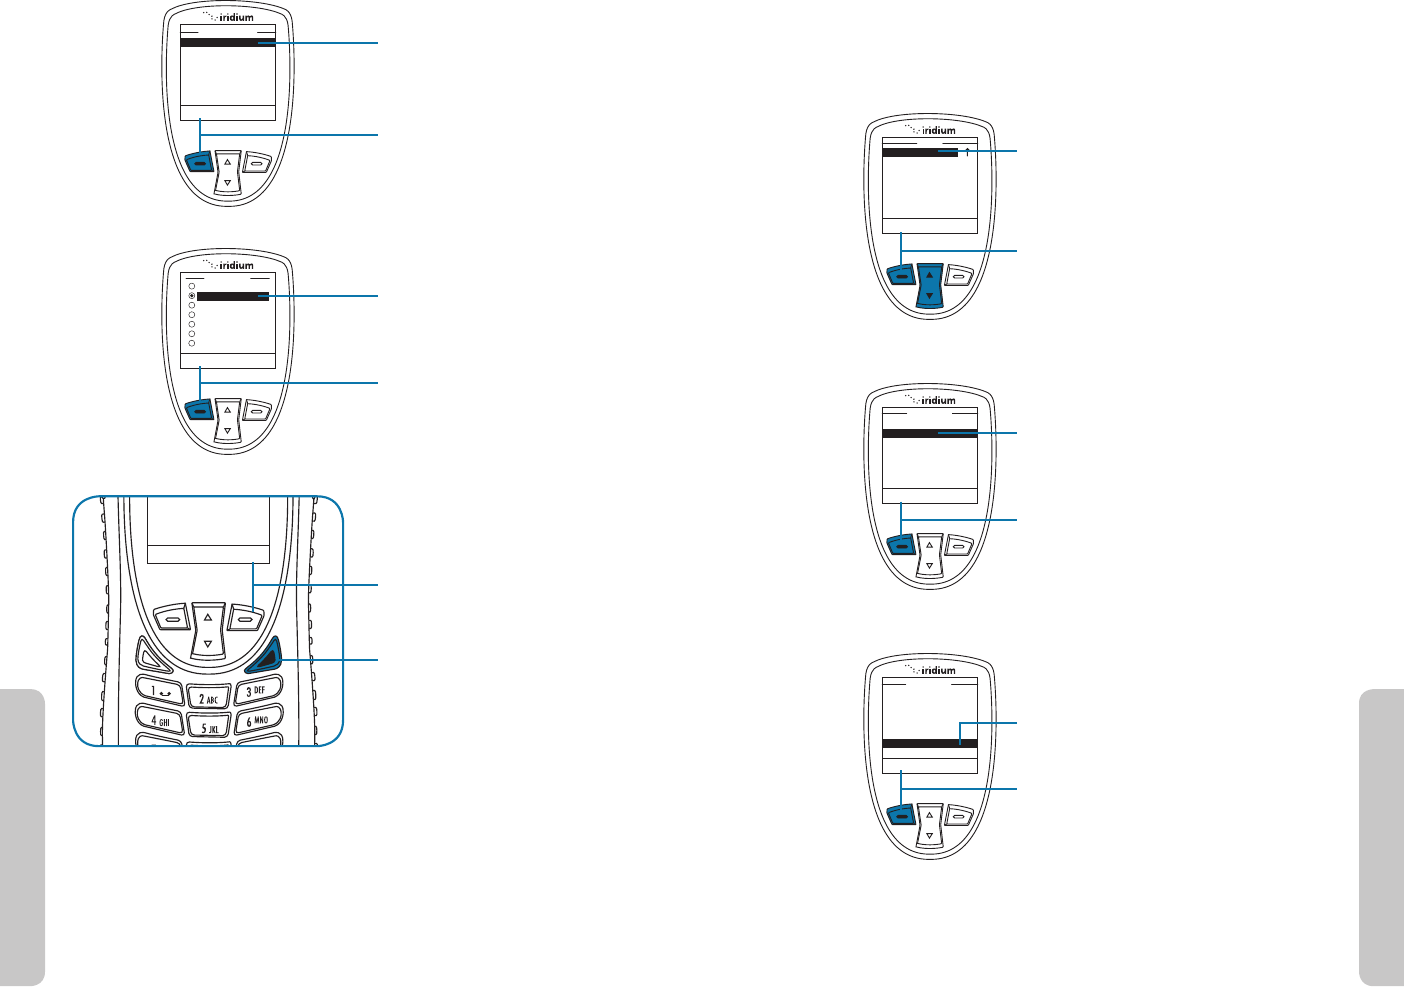
Starting from the Main Screen:
1. Press the left soft key, labeled Menu.
2. The Main Menu is displayed. Use
the 2-way Navi-key to scroll until
Messages is highlighted.
3. Press the left soft key, labeled Select.
You can perform the following
functions using the Messages menu:
• Create messages
• Read, reply, delete, call and forward
messages
• Edit stored messages and send
• Enter service center number, set
expiry period and enable or disable
delivery reports.
9: Using the Messages Menu
9: Using the Messages Menu
9575A User Manual 9594 9575A User Manual
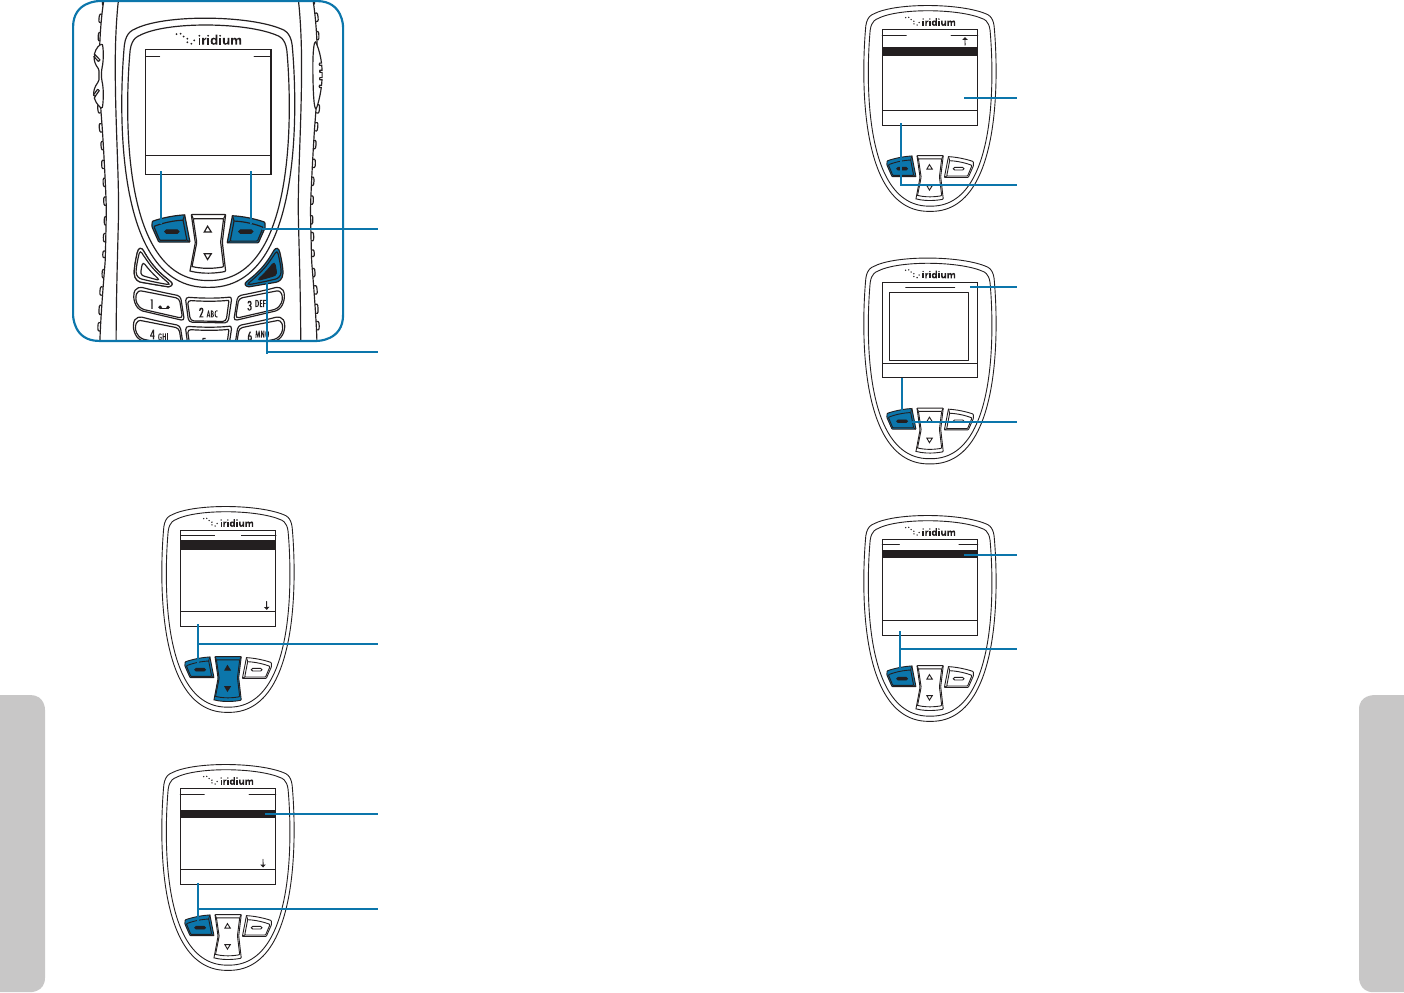
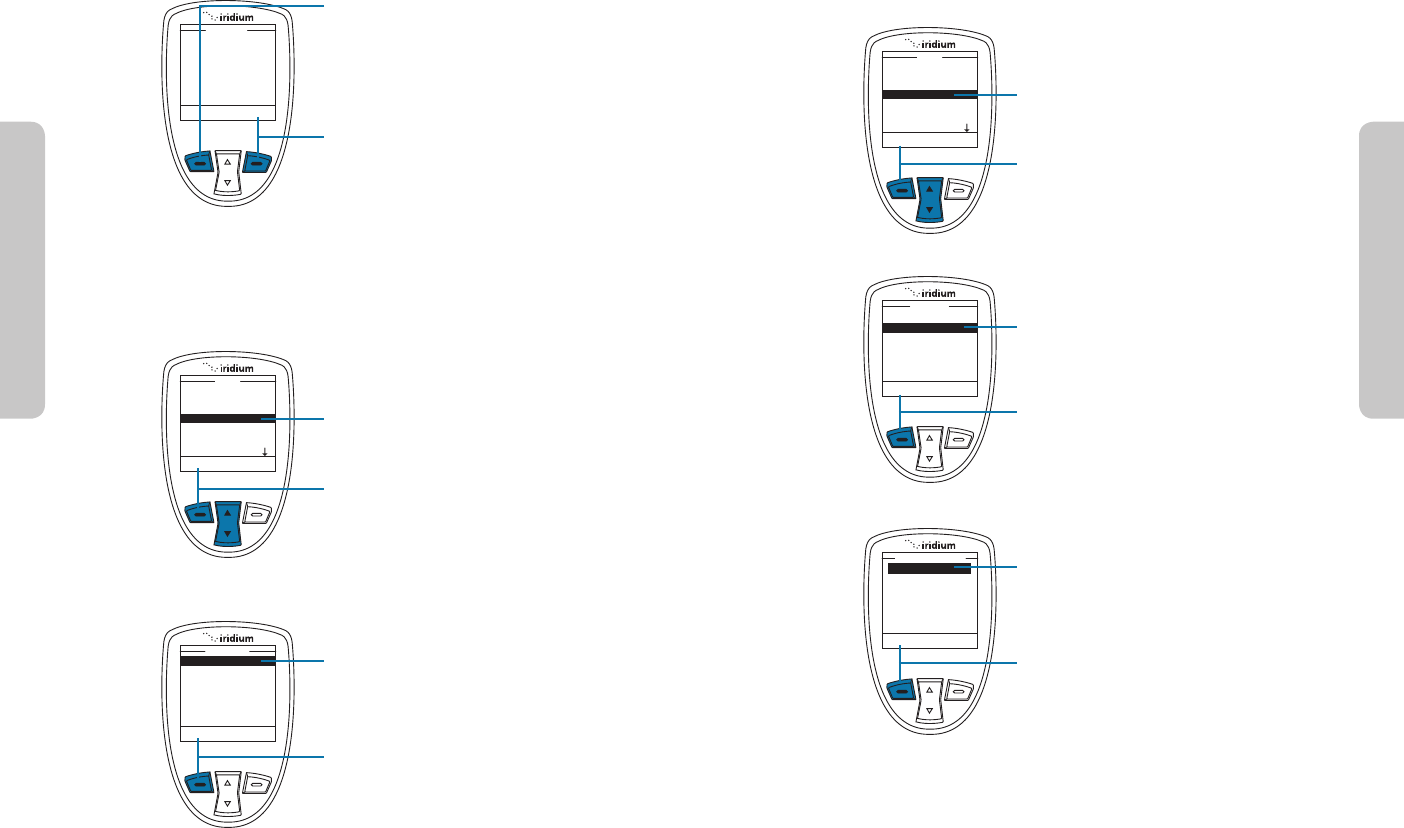
7. A Send To screen appears.
8. Press the right soft key, labeled
Add.
9. The Enter Number option should
be highlighted. If not use the
2-way Navi-key to scroll until it is
highlighted.
10. Press the left soft key, labeled
Select.
11. In the Number field, after the prefix
of 00 or +, enter *2.
12. Press the left soft key, labeled OK.
13. Press the left soft key, labeled Send
to send the message.
Add
Send To
New Recipient
Select Back
Enter Number
Quick GPS List
Ada Adams
Bob Smith
Cat Steven
Select Recipient
OK Clear
Number:
Send To
+*2
Send Add
Number:
Send To
+*2
Select Back
Send
Insert symbol
Enter digits
Save as draft
Exit
Options
Create and Send a new SMS Message to an Email Address not in your
Phonebook
Select Back
My Phonebook
SIM Phonebook
Messages
Voicemail
Data Modem
Menu
Create Message
Inbox (1 unread)
Drafts
Outbox
Settings
Messages
Select Back
Options Clear
New
abc 120
your email
message will
appear here
Start at the Main Menu with Messages
highlighted:
1. Press the left soft key, labeled
Select.
2. The Create Message option should
be selected. If not then use the
2-way Navi-key to scroll until it is
highlighted.
3. Press the left soft key, labeled
Select.
4. Enter your message.
Note: You must begin your text
message with the recipients email
address, leaving a space between
the email address and the beginning
of your message.
When your message is complete, press
the left soft key, labeled Options.
5. The Send option should be
highlighted. If not then use the
2-way Navi-key to scroll until it is
highlighted.
6. Press the left soft key, labeled
Select to send the message.
9: Using the Messages Menu
9: Using the Messages Menu
9575A User Manual 9796 9575A User Manual
8. A Send To screen appears.
9. Press the right soft key, labeled
Add.
10. Use the 2-way Navi-key to highlight
your selection.
11. Press the left soft key, labeled
Select.
Note: If the Contact’s email address is
the only information listed, the screen
returns you to the Send To screen.
12. If the Contact has an email address
as well as a phone number listed,
you are presented with their
phonebook entry. Use the 2-way
Navi-key to highlight their email
address and press the left soft key,
labeled Select.
13. The Select Recipient screen
appears with the recipient’s
name highlighted. To add another
recipient, use the 2-way Navi-key
to highlight the next recipient and
repeat step 10.
Add
Send To
New Recipient
Select Back
Enter Number
Quick GPS List
Ada Adams
Bob Smith
Cat Steven
Select Recipient
Select Clear
Bob
@
+9373354415
+9373321234
+123456789
+1112223333
bsmith@aol.com
Send Add
Send To
New Recipient
Ada Adams
Bob Smith
Cat Stevens
Select Back
Send
Insert symbol
Enter digits
Save as draft
Exit
Options
Create and Send a new SMS Message to an Email Address in My
Phonebook
Select Back
My Phonebook
SIM Phonebook
Messages
Voicemail
Data Modem
Menu
Create Message
Inbox (1 unread)
Drafts
Outbox
Settings
Messages
Select Back
Options Clear
New
abc 120
your email
message will
appear here
Start at the Main Menu with Messages
highlighted:
1. Press the left soft key, labeled
Select.
2. The Create Message option should
be selected. If not then use the
2-way Navi-key to scroll until it is
highlighted.
3. Press the left soft key, labeled
Select.
4. Enter your message.
5. When your message is complete,
press the left soft key, labeled
Options.
6. The Send option should be
highlighted. If not then use the
2-way Navi-key to scroll until it is
highlighted.
7. Press the left soft key, labeled
Select to send the message.
9: Using the Messages Menu
9: Using the Messages Menu
9575A User Manual 9998 9575A User Manual
Using the Inbox
You can do the following functions using the Inbox:
Note: If the message storage space on your SIM card is full, you cannot
store a message for later retrieval. See “Delete a Message” on page 104 to
make room for new messages on your SIM card.
Read a Message
Select Back
My Phonebook
SIM Phonebook
Messages
Voicemail
Data Modem
Menu
Select Back
Reply
Forward
Call
Delete
Delete All
Message
Select Back
Create Message
Inbox (1 unread)
Drafts
Outbox
Settings
Messages
• Reply to a message
• Forward a message
• Call the number that left the message
• Delete one or all messages
Start at the Main Menu with Messages
highlighted:
1. Press the left soft key, labeled Select.
2. Use the 2-way Navi-key to scroll until
Inbox is highlighted.
3. Press the left soft key, labeled Select.
14. Press the left soft key, labeled
Send.
Send Add
Number:
Send To
+*2
Bob Smith
About SMS Messaging
Message Notication
If your phone is powered ON, it notifies you of received messages in the
following ways:
• An alert sounds and/or the phone vibrates.
• The message indicator is displayed
• The message New Message. Read Now? is displayed.
How Messages are Stored
Your phone stores all messages on the SIM card. If the message indicator
is flashing, your SIM card is full. See “Delete a Message” on page 104 to
make room for the new message.
What Messages Contain
You can receive short text or numeric messages in your Personal Mailbox.
Text messages may contain up to 1,000 characters. Numeric messages,
typically phone numbers, may contain up to 20 digits.
Standard SMS messages are up to 160 characters. Long SMS messages
up to 1000 characters are divided into smaller 160 character messages
and may be billed at the standard 160 character SMS rate. For example,
an SMS message with 320 characters may be billed as two standard SMS
messages. Contact your service provider for additional information.
Your personal mailbox works with Call Forwarding. For more information
see “Forward a Received Message” on page 101.
9: Using the Messages Menu
9: Using the Messages Menu
9575A User Manual 101100 9575A User Manual
Note: If the sender’s phone number is not part of your phonebook, select
New Recipient to add the number.
Forward a Received Message
4. Enter your reply.
5. Press the left soft key, labeled
Options.
6. The Send option should be
highlighted. If not use the 2-way
Navi-key to scroll until Send is
highlighted.
7. Press the left soft key, labeled Select
to send the message.
Options Back
+18665551212
Message
Select Back
Send
Insert symbol
Enter digits
Save as draft
Exit
Options
Options Back
Text message will
appear here.
Message
While reading the Message:
1. Press the left soft key, labeled
Options.
4. Use the 2-way Navi-key to highlight
a message.
5. Press the left soft key, labeled Read
to view the selected message.
6. Press the right soft key, labeled
Back to return to the previous menu.
Read Back
Text message
Text message
Text message
Inbox
Reply to Sender
While reading the Message Screen:
1. Press the left soft key, labeled
Options.
2. Use the 2-way Navi-key to scroll
until Reply is highlighted.
3. Press the left soft key, labeled
Select.
Options Back
+18665551212
Message
Select Back
Reply
Forward
Call
Delete
Delete All
Message
9: Using the Messages Menu
9: Using the Messages Menu
9575A User Manual 103102 9575A User Manual
Select Clear
Bob
@
+9373354415
+9373321234
+123456789
+1112223333
bsmith@aol.com
Send Add
Send To
New Recipient
Ada Adams
Bob Smith
Cat Stevens
Send Add
Send To
New Recipient
Ada Adams
Bob Smith
Cat Stevens
11. If the recipient has more than
one number listed, the recipient’s
information screen appears. Use
the 2-way Navi-key to scroll to the
number you would like to forward to.
12. Press the left soft key, labeled
Select. The number is added to a
recipient list.
13. The Select Recipient screen
appears with the recipient’s
name highlighted. To add another
recipient, use the 2-way Navi-key,
highlight the next recipient and
repeat step 8.
14. Once all recipients have been
selected, press the right soft key,
labeled Back.
15 . Press the left soft key, labeled Send.
2. Use the 2-way Navi-key to scroll
until Forward is highlighted.
3. Press the left soft key, labeled
Select.
4. The user is returned to the message.
Press the left soft key “Options”
5. The Send option should be
highlighted. If not use the 2-way
Navi-key to scroll until Send is
highlighted.
6. Press the left soft key, labeled
Select to send the message.
7. A Send To screen appears.
8. Press the right soft key, labeled
Add.
9. Use the 2-way Navi-key until
the desired recipient from your
phonebook is highlighted.
10. Press the left soft key, labeled
Options.
Reply
Forward
Call
Save number
Delete
Delete All
Message
Select Back
Select Back
Send
Insert symbol
Enter digits
Save as draft
Exit
Options
Add
Send To
New Recipient
Options Back
Enter Number
Quick GPS List
Ada Adams
Bob Smith
Cat Steven
Select Recipient
9: Using the Messages Menu
9: Using the Messages Menu
9575A User Manual 105104 9575A User Manual
2. Use the 2-way Navi-key to scroll until
Inbox is highlighted.
3. Press the left soft key, labeled Select.
4. Use the 2-way Navi-key to scroll to
the message.
5. Press the left soft key, labeled Read
to view the selected message.
6. Press the left soft key, labeled
Options.
7. Use the 2-way Navi-key to scroll until
Delete is highlighted. To delete all
messages highlight Delete All.
8. Press the left soft key, labeled Select.
Select Back
Create Message
Inbox (1 unread)
Drafts
Outbox
Settings
Messages
Read Back
Text message
Text message
Text message
Inbox
Options Back
+18665551212
Message
Select Back
Reply
Forward
Call
Save number
Delete
Delete All
Message
Call a Number from a Received Message
Options Back
+18665551212
Message
Select Back
Reply
Forward
Call
Save number
Delete
Delete All
Message
Select Back
My Phonebook
SIM Phonebook
Messages
Voicemail
Data Modem
Menu
While reading the Message Screen:
1. Press the left soft key, labeled
Options.
2. Use the 2-way Navi-key to scroll
until Call is highlighted.
3. Press the left soft key, labeled
Select.
Delete a Message
Start at the Main Menu with Messages
highlighted:
1. Press the left soft key, labeled
Select.
9: Using the Messages Menu
9: Using the Messages Menu
9575A User Manual 107106 9575A User Manual
4. Use the 2-way Navi-key to scroll until
the draft message you want to send is
highlighted.
5. Press the left soft key, labeled
Options.
6. Highlight Edit and press the left soft
key, labeled Select.
7. When you are finished editing press
the left soft key, labeled Options.
8. The Send option should be
highlighted. If not use the 2-way
Navi-key to scroll until Send is
highlighted.
9. Press the left soft key, labeled Select
to send the message.
Options Back
Draft message
Draft message
Draft message
Drafts
Select Back
Edit
Delete
Delete All
Message
Options Clear
Edit
abc 120
Edit your message
here
Select Back
Send
Insert symbol
Enter digits
Save as draft
Exit
Options
9. The menu prompts you to ensure
you want to proceed. Press the left
soft key, labeled Yes to delete the
message.
The screen flashes Message
Deleted, and automatically returns
to the Message mailbox.
Yes No
Message
Delete message?
Using the Drafts Menu
To edit and send a stored message,
use the Draft menu. Start at the Main
Menu with Messages highlighted:
1. Press the left soft key, labeled
Select.
2. Use the 2-way Navi-key to
scroll until the Drafts option is
highlighted.
3. Press the left soft key, labeled
Select.
Select Back
My Phonebook
SIM Phonebook
Messages
Voicemail
Data Modem
Menu
Select Back
Create Message
Inbox (1 unread)
Drafts
Outbox
Settings
Messages
9: Using the Messages Menu
9: Using the Messages Menu
9575A User Manual 109108 9575A User Manual
Using the Settings Menu
Enter Service Center Number
Use this capability to enter the number for the service center to which
you wish to forward your outgoing messages. The 9575A will use Iridium’s
Service Center number by default if none has been explicitly configured.
Send Add
Send To
New Recipient
Ada Adams
Bob Smith
Cat Stevens
Select Back
Create Message
Inbox (1 unread)
Drafts
Outbox
Settings
Messages
Select Back
My Phonebook
SIM Phonebook
Messages
Voicemail
Data Modem
Menu
17. When finished selecting
recipients, press the
left soft key, labeled Send.
Start at the Main Menu with Messages
highlighted:
1. Press the left soft key, labeled Select.
2. Use the 2-way Navi-key to scroll until
the Settings option is highlighted.
3. Press the left soft key, labeled Select.
10. A Send To screen appears with the
entry name and number.
11. Press the right soft key, labeled
Add.
12. Use the 2-way Navi-key until
the desired recipient from your
phonebook is highlighted.
13. Press the left soft key, labeled
Select.
14. If the recipient has more than
one number listed, the recipient’s
information screen appears. Use
the 2-way Navi-key to scroll to the
number you would like to forward
to.
15. Press the left soft key, labeled
Select. The number is added to a
recipient list.
16. As you select recipients, they
will be listed on the Send To
screen. Continue to add recipients
as outlined in step 10 until all
recipients have been added.
Add
Send To
New Recipient
Select Back
Enter Number
Quick GPS List
Ada Adams
Bob Smith
Cat Steven
Select Recipient
Select Clear
Bob
@
+9373354415
+9373321234
+123456789
+1112223333
bsmith@aol.com
Send Add
Send To
New Recipient
Ada Adams
Bob Smith
Cat Stevens
To remove a contact added to the
Send list, highlight the contact name
using the 2-way Navi key and use the
right soft button to select “Remove”.
9: Using the Messages Menu
9: Using the Messages Menu
9575A User Manual 111110 9575A User Manual
Select Back
Create Message
Inbox (1 unread)
Drafts
Outbox
Settings
Messages
Select Back
1 hour
2 hours
4 hours
1 day
2 days
1 week
Expiry Period
Select Back
Service Center
Expiry Period
Delivery Reports
Settings
2. Use the 2-way Navi-key to scroll until
the Settings option is highlighted.
3. Press the left soft key, labeled Select.
4. Use the 2-way Navi-key to scroll
until the Expiry Period option is
highlighted.
5. Press the left soft key, labeled Select.
6. Use the 2-way Navi-key to scroll
until the desired period of time is
highlighted.
7. Press the left soft key, labeled Select.
The screen returns to the Settings
menu.
4. The Service Center option should
be highlighted. If not use the
2-way Navi-key to scroll until it is
highlighted.
5. Press the left soft key, labeled
Select.
6. Enter the service number.
7. Press the left soft key, labeled OK.
The screen returns to the Settings
menu.
Select Back
Service Center
Expiry Period
Delivery Reports
Settings
OK Clear
Number:
Service Center
+881662900005
Select Back
My Phonebook
SIM Phonebook
Messages
Voicemail
Data Modem
Menu
Set Expiry Period
Use this capability to specify the amount of time your undelivered
messages should wait before auto-expiring.
Start at the Main Menu with Messages
highlighted:
1. Press the left soft key, labeled
Select.
10: Using the Voicemail Menu
9575A User Manual 113
9: Using the Messages Menu
112 9575A User Manual
Select Delivery Reports
Use this capability to enable or disable message delivery reports.
Start at the Main Menu with Messages
highlighted:
1. Press the left soft key, labeled
Select.
2. Use the 2-way Navi-key to scroll until
the Settings option is highlighted.
3. Press the left soft key, labeled
Select.
4. Use the 2-way Navi-key to scroll
until the Delivery Reports option is
highlighted.
5. Press the left soft key, labeled
Select.
6. Use the 2-way Navi-key to turn the
Delivery Report OFF or ON.
7. Press the left soft key, labeled
Select. The screen returns to the
Settings menu.
Select Back
My Phonebook
SIM Phonebook
Messages
Voicemail
Data Modem
Menu
Select Back
Create Message
Inbox (1 unread)
Drafts
Outbox
Settings
Messages
Select Back
Off
On
Delivery Report
Select Back
Service Center
Expiry Period
Delivery Reports
Settings
10: Using the Voicemail Menu
Locating the Voicemail Menu
Note: All instructions for the Voicemail menu start from the Main Menu
as shown.
About the Voicemail Menu
You can do the following functions using the Voicemail menu:
Select Back
Call Voicemail
Voicemail Settings
Voicemail
Registered
Menu Help
16:28 14-May-13
T
Select Back
My Phonebook
SIM Phonebook
Messages
Voicemail
Data Modem
Menu
Starting from the Main Screen:
1. Press the left soft key, labeled Menu.
2. The Main Menu is displayed. Use the
2-way Navi-key to scroll until the
Voicemail is highlighted.
3. Press the left soft key, labeled Select.
• Listen to your voicemail
• Reply to a voicemail
• Store voicemail numbers
• Access and configure your voicemail
10: Using the Voicemail Menu
10: Using the Voicemail Menu
9575A User Manual 115114 9575A User Manual
Store Your Voicemail Number
If you have not previously stored a voicemail number, then you see No
Number Available on the display. You must store a voicemail number
before you can access the service for the rst time.
Select Back
My Phonebook
SIM Phonebook
Messages
Voicemail
Data Modem
Menu
Select Back
Number
Voicemail Settings
Select Back
Call Voicemail
Voicemail Settings
Voicemail
1. Use the 2-way Navi-key to scroll until
the Voicemail is highlighted.
2. Press the left soft key, labeled Select.
3. Use the 2-way Navi-key to scroll
until Voicemail Settings option is
highlighted.
4. Press the left soft key, labeled Select.
5. The Number option is highlighted.
6. Press the left soft key, labeled Select.
Voicemail Notication
When you receive a voicemail, an incoming voicemail notication message
automatically appears on your screen.
Check Your Voicemail
To listen to a voicemail that has been saved:
1. Use the 2-way Navi-key to scroll
until the Voicemail is highlighted.
2. Press the left soft key, labeled
Select.
3. Call Voicemail is highlighted.
4. Press the left soft key, labeled
Select.
Follow the audio prompts for
additional capabilities.
Call Cancel
Voicemail
New Voicemail. Call
Voicemail?
Press the left soft key, labeled Call to
call and retrieve voicemail.
OR
Press the right soft key, labeled
Cancel.
Select Back
My Phonebook
SIM Phonebook
Messages
Voicemail
Data Modem
Menu
Select Back
Call Voicemail
Voicemail Settings
Voicemail
9575A User Manual 117116 9575A User Manual116 9575A User Manual
10: Using the Voicemail Menu
Select Back
Message Deleted
Message
7. Enter the voicemail number
given to you by your Service
Provider.
8. Press the left soft key,
labeled Save.
9. Press the right soft key,
labeled Back to return to
the previous menu.
10. Press the red key to exit to
the Main Screen.
+881662990000
Voicemail Number
Save Clear
One-Touch Access to Voicemail
The 9575A provides one-touch access to voicemail for ease
of use. To use this feature, press and hold the 1 key for 2 seconds in
order to prompt a call to voicemail without having to navigate through
the phone menu.
9575A User Manual 117
11: Using the Data Modem Menu
11: Using the Data Modem Menu
In order to use the 9575A as a modem for your computer, you must first
follow the installation instructions provided on the CD-ROM included
with your phone or use the instructions provided by your service provider.
The data modem menu is not required to initiate or use the phone as a
modem for data services, it only reports the connection status of the USB.
The instructions provided are optional and are to be followed if desired
prior to plugging in the USB cable to the phone and to your computer.
Locating the Data Modem Menu
Note: All instructions for the Data Modem menu start from the Main
Menu as shown.
Registered
Menu Help
16:28 14-May-13
T
Select Black
Menu
My Phonebook
SIM Phonebook
Messages
Voicemail
Data Modem
Starting from the Main Screen:
1. Press the left soft key, labeled Menu.
2. The Main Menu is displayed. Use the
2-way Navi-key to scroll until Data
Modem is highlighted.
3. Press the left soft key, labeled Select.
12: Using the Call History Menu
9575A User Manual 119
11: Using the Data Modem Menu
118 9575A User Manual
Note: If you are not connected to
the USB cable you are prompted to
connect. While connected to the USB
cable it is important to not remove the
battery.
If you need to remove the battery, first
disconnect from the USB cable, power
down the 9575A and then remove the
battery.
Cancel
Data Modem
Connect USB cable
12: Using the Call History Menu
Locating the Call History Menu
Note: All instructions for the Call History menu start from the Main Menu
as shown.
About the Call History Menu
You can perform the following functions using the Call History menu:
Select Back
Call Log
Call Meters
Call History
Registered
Menu Help
16:28 14-May-13
T
Select Back
Menu
Call History
Setup
Security
Help
Starting from the Main Screen:
1. Press the left soft key, labeled Menu.
2. The Main Menu is displayed. Use the
2-way Navi-key to scroll until Call
History is highlighted.
3. Press the left soft key, labeled Select.
• View the amount of time spent
talking on your phone
• View your most recent dialed, missed
and received calls
• Set phone alerts
12: Using the Call History Menu
12: Using the Call History Menu
9575A User Manual 121120 9575A User Manual
7. The Received Calls screen
is displayed with a list of
your last ten calls. Inbound
Caller ID to provide specific
numbers is not currently
supported by the network.
This feature may be enabled
in the future.
Press the right soft key labeled
Back to go back one level, or
the red key to return the Main
Screen.
+881225551212
+011225551212
+881425551212
+881765551212
+991445551212
+651225551212
+331225551212
+321225551212
Received Calls
Select Back
View Missed Calls
Your phone saves a list of calls you’ve missed when the phone is busy or
were not able to get to it. The phone does not show calls that you missed
when the phone is turned OFF or not registered on the network.
Starting from the Main Menu:
1. Use the 2-way Navi-key to
scroll until Call History is
highlighted.
2. Press the left soft key,
labeled Select.
3. The Call History menu is
displayed with Call Log
highlighted.
4. Press the left soft key,
labeled Select.
Select Back
Menu
Call History
Setup
Security
Help
Select Back
Call Log
Call Meters
Call History
Using the Call Log Menu
View Most Recent Received Calls
Your phone saves received calls. Use the Call Log menu to view those
numbers.
Starting from the Main Menu:
1. Use the 2-way Navi-key to scroll
until Call History is highlighted.
2. Press the left soft key, labeled
Select.
3. The Call History menu is displayed
with Call Log highlighted.
4. Press the left soft key, labeled
Select.
5. The Call Log menu is displayed with
Received Calls highlighted.
6. Press the left soft key, labeled
Select.
Select Back
Menu
Call History
Setup
Security
Help
Select Back
Call Log
Call Meters
Call History
Received Calls
Missed Calls
Dialed Calls
Call Log
Select Back
12: Using the Call History Menu
12: Using the Call History Menu
9575A User Manual 123122 9575A User Manual
3. The Call History menu is
displayed with Call Log
highlighted.
4. Press the left soft key,
labeled Select.
5. Using the 2-way Navi-key
scroll until Dialed Calls is
highlighted.
6. Press the left soft key,
labeled Select.
7. The Dialed Calls screen is
displayed with a list of your
last ten calls.
Press the right soft key labeled
Back to go back one level, or
the red key to return the Main
Screen.
Select Back
Call Log
Call Meters
Call History
+881225551212
+011225551212
+881425551212
+881765551212
+991445551212
+651225551212
+331225551212
+321225551212
Dialed Calls
Select Back
Select Back
Received Calls
Missed Calls
Dialed Calls
Call Log
10:20
30-Sep-11
00:37:45
+881655512121
08:54
29-Sep-11
00:12:32
+2405551212
Missed Calls
Select Back
Received Calls
Missed Calls
Dialed Calls
Call Log
Select Back
5. Using the 2-way Navi-key
scroll until Missed Calls is
highlighted.
6. Press the left soft key,
labeled Select.
7. The Missed Calls screen is
displayed with a list of your
last missed calls. Inbound
Caller ID to provide specific
numbers is not currently
supported by the network.
This feature may be enabled
in the future
Press the right soft key labeled
Back to go back one level, or
the red key to return the Main
Screen.
View Most Recent Dialed Calls
Your phone saves the last ten calls dialed. Use the Call Log menu to view
those numbers.
Starting from the Main Menu:
1. Use the 2-way Navi-key to
scroll until Call History is
highlighted.
2. Press the left soft key,
labeled Select.
Select Back
Menu
Call History
Setup
Security
Help
12: Using the Call History Menu
12: Using the Call History Menu
9575A User Manual 125124 9575A User Manual
The duration of the last call is
displayed.
7. Press the right soft key
labeled Back to return to the
previous menu.
8. Press the red key to return to
the Main Screen.
02:56:15
Call Time
Back
Note: The last call timer shows the elapsed time of the most recent call
made since your phone was turned on. This information is not saved
when you turn off the phone.
Show Total Time for All Calls
This capability displays your total airtime since you last reset the call timer.
Starting from the Main Menu:
1. Use the 2-way Navi-key to
scroll until Call History is
highlighted.
2. Press the left soft key,
labeled Select.
3. Use the 2-way Navi-key to
scroll until Call Meters is
highlighted.
4. Press the left soft key,
labeled Select.
Select Back
Menu
Call History
Setup
Security
Help
Select Back
Call Log
Call Meters
Call History
Using the Call Meters Menu
Call meters help you track your airtime, keep a running tab of your
monthly usage or view the air time of your most recent calls.
Show the Time of Last Call
Starting from the Main Menu:
1. Use the 2-way Navi-key to scroll
until Call History is highlighted.
2. Press the left soft key, labeled
Select.
3. Use the 2-way Navi-key to scroll until
Call Meters is highlighted.
4. Press the left soft key, labeled
Select.
5. Last call time is highlighted. If not,
use the 2-way Navi-key until it is.
6. Press the left soft key, labeled
Select.
Select Back
Menu
Call History
Setup
Security
Help
Select Back
Call Log
Call Meters
Call History
Last call time
Total call time
Reset call timer
Lifetime call time
In-call display
Audible timers
Call Meters
Select Back

12: Using the Call History Menu
12: Using the Call History Menu
9575A User Manual 127126 9575A User Manual
Select Back
Menu
Call History
Setup
Security
Help
Select Back
Call Log
Call Meters
Call History
3. Use the 2-way Navi-key to scroll until
Call Meters is highlighted.
4. Press the left soft key, labeled Select.
5. Use the 2-way Navi-key to scroll until
Reset call timer is highlighted.
6. Press the left soft key, labeled Select.
The screen displays: Reset call timers?
7. Press the left soft key for Yes or the
right soft key for No.
8. If you press Yes, the display reads Call
meters reset.
Reset call timers?
Reset
Yes No
Select Back
Last call time
Total call time
Reset call timer
Lifetime call time
In-call display
Audible timers
Call Meters
Call meters reset.
Reset
5. Use the 2-way Navi-key to
scroll until Total call time is
highlighted.
6. Press the left soft key,
labeled Select.
The airtime accumulation
since the timer was last reset is
displayed on the screen.
7. Press the right soft key
labeled Back to return to the
previous menu.
8. Press the red key to return to
the Main Screen.
02:56:15
Call Time
Back
Last call time
Total call time
Reset call timer
Lifetime call time
In-call display
Audible timers
Call Meters
Select Back
Reset all Timers
Reset your timers at the beginning of each billing cycle to keep track of
your spending.
Starting from the Main Menu:
1. Use the 2-way Navi-key to
scroll until Call History is
highlighted.
2. Press the left soft key,
labeled Select.
12: Using the Call History Menu
12: Using the Call History Menu
9575A User Manual 129128 9575A User Manual
3. Use the 2-way Navi-key to
scroll until Call Meters is
highlighted.
4. Press the left soft key,
labeled Select.
The total time of all calls is
displayed.
7. Press the right soft key
labeled Back to return to the
previous menu.
8. Press the red key to return to
the Main Screen.
02:56:15
Call Time
Back
Last call time
Total call time
Reset call meter. . .
Lifetime call time
In-call display
Audible timers
Call Meters
Select Back
Note: The Lifetime timer can not be reset.
Showing the In-call Display
This capability enables or disables the call timer that displays the amount
of time that has passed since placing a specific call.
Starting from the Main Menu:
1. Use the 2-way Navi-key to
scroll until Call History is
highlighted.
2. Press the left soft key,
labeled Select.
Select Back
Menu
Call History
Setup
Security
Help
9. Press the right soft key
labeled Back to return to
the previous menu.
10. Press the red key to return
to the Main Screen.
Select Back
Message Deleted
Message
Showing the Lifetime Call Timer
This capability displays a running clock of the total call time for the phone
since being activated.
Starting from the Main Menu:
1. Use the 2-way Navi-key to
scroll until Call History is
highlighted.
2. Press the left soft key,
labeled Select.
3. Use the 2-way Navi-key to
scroll until Call Meters is
highlighted.
4. Press the left soft key,
labeled Select.
Select Back
Menu
Call History
Setup
Security
Help
Select Back
Call Log
Call Meters
Call History
12: Using the Call History Menu
12: Using the Call History Menu
9575A User Manual 131130 9575A User Manual
Setting Audible Call Timers
This capability lets the phone watch the clock for you. At a set time or
interval, the call timers produce a beep that only you can hear. You can
choose No Alert, Single Alert or Repetitive Alert.
Set the Single Alert Timer
Starting from the Main Menu:
1. Use the 2-way Navi-key to scroll until
Call History is highlighted.
2. Press the left soft key, labeled Select.
3. Use the 2-way Navi-key to scroll until
Call Meters is highlighted.
4. Press the left soft key, labeled Select.
5. Use the 2-way Navi-key to scroll until
Audible timers is highlighted.
6. Press the left soft key, labeled Select.
Select Back
Menu
Call History
Setup
Security
Help
Select Back
Call Log
Call Meters
Call History
Last call time
Total call time
Reset call meter. . .
Lifetime call time
In-call display
Audible timers
Call Meters
Select Back
3. Use the 2-way Navi-key to scroll until
Call Meters is highlighted.
4. Press the left soft key, labeled
Select.
5. Use the 2-way Navi-key to scroll
until In-call display is highlighted.
6. Press the left soft key, labeled
Select.
7. Use the 2-way Navi-key to scroll to
Enabled or Disabled.
8. Press the left soft key, labeled
Select.
Select Back
Call Log
Call Meters
Call History
Last call time
Total call time
Reset call meter. . .
Lifetime call time
In-call display
Audible timers
Call Meters
Select Back
Select Back
Enabled
Disabled
Call Timer
12: Using the Call History Menu
12: Using the Call History Menu
9575A User Manual 133132 9575A User Manual
Set the Repetitive Alert
This capability sets your phone to alert you at specific intervals, for
example every minute.
Starting from the Main Menu:
1. Use the 2-way Navi-key to scroll until
Call History is highlighted.
2. Press the left soft key, labeled Select.
3. Use the 2-way Navi-key to scroll until
Call Meters is highlighted.
4. Press the left soft key, labeled Select.
5. Use the 2-way Navi-key to scroll until
Audible timers is highlighted.
6. Press the left soft key, labeled Select.
Select Back
Menu
Call History
Setup
Security
Help
Select Back
Call Log
Call Meters
Call History
Last call time
Total call time
Reset call meter. . .
Lifetime call time
In-call display
Audible timers
Call Meters
Select Back
7. The Single Alert option
should be highlighted. If
not, use the 2-way Navi-key
to scroll until it is.
8. Press the left soft key,
labeled Select.
9. Use the 2-way Navi-key to
scroll to the desired single
alert.
10. Press the left soft key,
labeled Select.
11. Press the right soft key
labeled Back to return to
the previous menu.
12. Press the red key to return
to the Main Screen.
Select Back
Message Deleted
Message
Single Alert
Repetitive Alert
Audible Timers
Select Back
Select Back
Single Alert
Off
1 minute
5 minutes
10 minutes
15 minutes
30 minutes
60 minutes
13: Using the Setup Menu
9575A User Manual 135
12: Using the Call History Menu
134 9575A User Manual
7. Use the 2-way Navi-key
to scroll to the Repetitive
Alert option.
8. Press the left soft key,
labeled Select.
9. Use the 2-way Navi-key
to scroll to the desired
repetitive alert.
10. Press the left soft key,
labeled Select.
11. Press the right soft key
labeled Back to return to
the previous menu.
12. Press the red key to return
to the Main Screen.
Select Back
Message Deleted
Message
Select Back
Single Alert
Repetitive Alert
Audible Timers
Repetitive Alert
Off
1 minute
5 minutes
10 minutes
15 minutes
30 minutes
60 minutes
Select Back
13: Using the Setup Menu
Locating the Setup Menu
Note: All instructions for the Setup menu start from the Main Menu as
shown.
About the Setup Menu
You can perform the following functions using the Setup menu:
Registered
Menu Help
16:28 14-May-13
T
Starting from the Main Screen:
1. Press the left soft key, labeled Menu.
2. The Main Menu is displayed. Use the
2-way Navi-key to scroll until Setup
is highlighted.
3. Press the left soft key, labeled Select.
Menu
Call History
Setup
Security
Help
Select Back
Location Options
Call Options
Volume and Tones
Time and Date
Language
Backlight
Contrast
Setup
Select Back
Key Setup
Number Entry
Phone Information
Reset to defaults
Setup
Select Back
• Set Location Options
• Set call options
• Set volumes and tones for your ringer
speaker and alert
• Set time zone, time and date format
• Set language
• Set your phone lighting preferences
• Set the contrast on the display screen
13: Using the Setup Menu
13: Using the Setup Menu
9575A User Manual 137136 9575A User Manual
5. Highlight the call capability
you would like to enable.
6. Press the left soft key
labeled Select to return to
the previous menu.
7. Press the red key to return to
the Main Screen.
Call Waiting
Call Forwarding
Call Barring
Fixed Dialing
Call Options
Select Back
Menu
Call History
Setup
Security
Help
Select Back
Location Options
Call Options
Volume and Tones
Time and Date
Language
Setup
Select Back
Setting Volumes and Tones
Adjust the Ringer Volume
The Volumes and Tones menu allows you to adjust the sound tone and
volume level as well as to set the phone to ring or vibrate for incoming
call notification.
Starting from the Main Menu:
1. Use the 2-way Navi-key
to scroll until Setup is
highlighted.
2. Press the left soft key,
labeled Select.
3. Use the 2-way Navi-key to
scroll until Volumes and
Tones is highlighted.
4. Press the left soft key,
labeled Select.
Location Options
Call Options
Volume and Tones
Time and Date
Language
Backlight
Contrast
Setup
Select Back
Key Setup
Number Entry
Phone Information
Reset to defaults
Setup
Select Back
• Set preference for the convenience
key and right soft key
• Set your prefix preference for
entering phone numbers
• View phone information
• Reset phone settings to default
Menu
Call History
Setup
Security
Help
Select Back
Select Back
Setup
Location Options
Call Options
Volume and Tones
Time and Date
Language
Note: The Setup menu consists of three screens. Scroll past the Language
option using the 2-way Navi-key for more options.
Note: Location options will be covered in more detail on Chapter 14.
Setting Call Options
The Call Options menu allows you to enable or disable various call
capabilities.
Starting from the Main Menu:
1. Use the 2-way Navi-key to scroll
until Setup is highlighted.
2. Press the left soft key, labeled
Select.
3. Call Options is already displayed.
4. Press the left soft key, labeled
Select.
13: Using the Setup Menu
13: Using the Setup Menu
9575A User Manual 139138 9575A User Manual
Menu
Call History
Setup
Security
Help
Select Back
Location Options
Call Options
Volume and Tones
Time and Date
Language
Setup
Select Back
Adjust the Speaker Volume
This capability adjusts the volume of the speaker. The phone sounds the
new volume level as you adjust it.
Starting from the Main Menu:
1. Use the 2-way Navi-key
to scroll until Setup is
highlighted.
2. Press the left soft key,
labeled Select.
3. Use the 2-way Navi-key to
scroll until Volumes and
Tones is highlighted.
4. Press the left soft key,
labeled Select.
5. Use the 2-way Navi-key to
scroll to Speaker Volume.
6. Press the left soft key,
labeled Select.
Ringer Volume
Speaker Volume
Ring Tone
Alert Tone
Keypad Tone
Vibrate
Volumes and Tones
Select Back
5. Ringer Volume is
highlighted. If not, use the
2-way Navi-key to scroll to it.
6. Press the left soft key,
labeled Select.
7. The volume bars increase
or decrease as you press
the 2-way Navi-key up
or down. You will hear the
selected audio level as part
of the selection process.
8. Press the left soft key,
labeled OK when you
have the desired setting
or you may cancel the
changes by pressing the
right soft key labeled
Back to return to the
Volume and Tones Menu.
9. You may exit the settings
and return to the Main
Screen by selecting the
red key.
Select Back
Message Deleted
Message
Ringer Volume
Speaker Volume
Ring Tone
Alert Tone
Keypad Tone
Vibrate
Volumes and Tones
Select Back
OK Back
Volume

13: Using the Setup Menu
13: Using the Setup Menu
9575A User Manual 141140 9575A User Manual
3. Use the 2-way Navi-key to
scroll until Volumes and
Tones is highlighted.
4. Press the left soft key,
labeled Select.
5. Use the 2-way Navi-key
to scroll to Ring Tone.
6. Press the left soft key,
labeled Select.
7. Use the 2-way Navi-key to
select the desired tone. You
will hear the selected tone as
part of the selection process.
8. Press the left soft key,
labeled OK when you have
the desired setting or you
may cancel the changes by
pressing the right soft key
labeled Back to return to the
Volume and Tones Menu.
9. You may exit the settings and
return to the Main Screen by
selecting the red key.
Location Options
Call Options
Volume and Tones
Time and Date
Language
Setup
Select Back
Select Back
Ringer Volume
Speaker Volume
Ring Tone
Alert Tone
Keypad Tone
Vibrate
Volumes and Tones
Select Back
Message Deleted
Message
Select Back
Tone 1
Tone 2
Tone 3
Tone 4
Ring tone
7. The volume bars increase
or decrease as you press
the 2-way Navi-key up
or down. You will hear the
selected audio level as part
of the selection process.
8. Press the left soft key,
labeled OK when you
have the desired setting
or you may cancel the
changes by pressing the
right soft key labeled
Back to return to the
Volume and Tones Menu.
9. You may exit the settings
and return to the Main
Screen by selecting the
red key.
Select Back
Message Deleted
Message
OK Back
Volume
Menu
Call History
Setup
Security
Help
Select Back
Adjust the Ring Tone
This capability adjusts the tone of the ringer. The phone sounds the new
tone as you adjust it.
Starting from the Main Menu:
1. Use the 2-way Navi-key
to scroll until Setup is
highlighted.
2. Press the left soft key,
labeled Select.
13: Using the Setup Menu
13: Using the Setup Menu
9575A User Manual 143142 9575A User Manual
Menu
Call History
Setup
Security
Help
Select Back
7. Use the 2-way Navi key to
select the desired tone. You
will hear the selected tone as
part of the selection process.
8. Press the left soft key,
labeled OK when you have
the desired setting or you
may cancel the changes by
pressing the right soft key
labeled Back to return to the
Volume and Tones Menu.
9. You may exit the settings and
return to the Main Screen by
selecting the red key.
Select Back
Message Deleted
Message
Select Back
Tone 1
Tone 2
Tone 3
Tone 4
Alert tone
Setting the Keypad Tone
This capability selects the keypad tone. You can select to have a single
tone, DTMF tones or no tones when the keypad is pressed.
Starting from the Main Menu:
1. Use the 2-way Navi-key
to scroll until Setup is
highlighted.
2. Press the left soft key,
labeled Select.
Menu
Call History
Setup
Security
Help
Select Back
Location Options
Call Options
Volume and Tones
Time and Date
Language
Setup
Select Back
Setting the Call Alert Mode
This capability adjusts the alert tone. The phone sounds the new tone as
you adjust it.
Starting from the Main Menu:
1. Use the 2-way Navi-key
to scroll until Setup is
highlighted.
2. Press the left soft key,
labeled Select.
3. Use the 2-way Navi-key to
scroll until Volumes and
Tones is highlighted.
4. Press the left soft key,
labeled Select.
5. Use the 2-way Navi-key
to scroll until Alert Tone is
highlighted.
6. Press the left soft key,
labeled Select.
Select Back
Ringer Volume
Speaker Volume
Ring Tone
Alert Tone
Keypad Tone
Vibrate
Volumes and Tones

13: Using the Setup Menu
13: Using the Setup Menu
9575A User Manual 145144 9575A User Manual
Menu
Call History
Setup
Security
Help
Select Back
Location Options
Call Options
Volume and Tones
Time and Date
Language
Setup
Select Back
Set the Phone to Ring and /or Vibrate
This capability is ideal for situations where a ringing phone is
inappropriate or in a loud environment. The vibrate function notifies you
of incoming calls with discreet vibrations.
Starting from the Main Menu:
1. Use the 2-way Navi-key
to scroll until Setup is
highlighted.
2. Press the left soft key,
labeled Select.
3. Use the 2-way Navi-key to
scroll until Volumes and
Tones is highlighted.
4. Press the left soft key,
labeled Select.
5. Use the 2-way Navi-key
to scroll until Vibrate is
highlighted.
6. Press the left soft key,
labeled Select.
Select Back
Ringer Volume
Speaker Volume
Ring Tone
Alert Tone
Keypad Tone
Vibrate
Volumes and Tones
3. Use the 2-way Navi-key to
scroll until Volumes and
Tones is highlighted.
4. Press the left soft key,
labeled Select.
5. Use the 2-way Navi-key to
scroll until Keypad Tone is
highlighted.
6. Press the left soft key,
labeled Select.
7. Use the 2-way Navi key to
select the desired tone. You
will hear the selected tone as
part of the selection process.
8. Press the left soft key,
labeled OK when you have
the desired setting or you
may cancel the changes by
pressing the right soft key
labeled Back to return to the
Volume and Tones Menu.
9. You may exit the settings and
return to the Main Screen by
selecting the red key.
Select Back
Message Deleted
Message
Ringer Volume
Speaker Volume
Ring Tone
Alert Tone
Keypad Tone
Vibrate
Volumes and Tones
Select Back
Location Options
Call Options
Volume and Tones
Time and Date
Language
Setup
Select Back
Select Back
DTMF Tones
Single Tone
No Tone
Alert tone
13: Using the Setup Menu
13: Using the Setup Menu
9575A User Manual 147146 9575A User Manual
Menu
Call History
Setup
Security
Help
Select Back
3. Use the 2-way Navi-key to
scroll until Time & Date is
highlighted.
4. Press the left soft key,
labeled Select.
5. Use the 2-way Navi-key to
scroll until the desired Select
Time Zone is highlighted.
6. Press the left soft key,
labeled Select to confirm
or press the red key to return
to the Setup Menu.
7. Use the 2-way Navi-key until
the required time zone is
highlighted.
8. Press the left soft key,
labeled Select to confirm
or press the right soft key
labeled Back to return to the
Time and Date Menu.
9. You may exit the settings and
return to the Main Screen by
selecting the red key.
Select Back
Location Options
Call Options
Volume and Tones
Time and Date
Language
Setup
Select Back
Select Time Zone
Time format
Date format
Time and Date
24 hours
am/pm
Time Format
Select Back
7. Use the 2-way Navi-key to
scroll to the desired Vibrate
Option.
8. Press the left soft key, labeled
Select to confirm change
or press the right soft key
labeled Back to return to the
Volumes and Tones Menu.
9. You may exit the settings and
return to the Main Screen by
selecting the red key.
Select Back
Ring Only
Vibrate Only
Vibrate then Ring
No Ring or Vibrate
Vibrate Options
Time and Date Settings
Select the Time Zone
Your phone uses the satellite network to obtain the time and date
information. However, you need to select the time zone in which you are
located.
Starting from the Main Menu:
1. Use the 2-way Navi-key
to scroll until Setup is
highlighted.
2. Press the left soft key,
labeled Select.
13: Using the Setup Menu
13: Using the Setup Menu
9575A User Manual 149148 9575A User Manual
24 hours
am/pm
Time Format
Select Back
7. Use the 2-way Navi-key
until the required time
format is highlighted.
8. Press the left soft key,
labeled Select to confirm
selection or press the right
soft key, labeled Back to
return to the Time and
Date Menu.
9. You may exit the settings
and return to the Main
Screen by selecting the
red key.
Select the Date Format
Menu
Call History
Setup
Security
Help
Select Back
Starting from the Main Menu:
1. Use the 2-way Navi-key
to scroll until Setup is
highlighted.
2. Press the left soft key,
labeled Select.
3. Use the 2-way Navi-key to
scroll until Time and Date
is highlighted.
4. Press the left soft key,
labeled Select.
Select Back
Location Options
Call Options
Volume and Tones
Time and Date
Language
Setup
Select the Time Format
Menu
Call History
Setup
Security
Help
Select Back
Starting from the Main Menu:
1. Use the 2-way Navi-key to scroll
until Setup is highlighted.
2. Press the left soft key, labeled
Select.
3. Use the 2-way Navi-key to scroll
until Time and Date is highlighted.
4. Press the left soft key, labeled
Select.
5. Use the 2-way Navi-key to scroll
until Time format is highlighted.
6. Press the left soft key, labeled
Select.
Select Back
Location Options
Call Options
Volume and Tones
Time and Date
Language
Setup
Select Back
Select time zone
Time format
Date format
Time and Date
13: Using the Setup Menu
13: Using the Setup Menu
9575A User Manual 151150 9575A User Manual
3. Use the 2-way Navi-key
to scroll until Language is
highlighted.
4. Press the left soft key,
labeled Select.
5. Use the 2-way Navi-key to
highlight Menu and press the
left soft key labeled Select to
access the available languages
6. Use the 2-way Navi-key
to scroll until the required
Language is highlighted.
7. Press the left soft key,
labeled Select to confirm the
selection or press the right
soft key, labeled Back to
return to the Setup Menu.
8. You may exit the settings and
return to the Main Screen by
selecting the red key.
Select Back
Location Options
Call Options
Volume and Tones
Time and Date
Language
Setup
English
Czech (Cestina)
Danish
Dutch
Finnish (Suomi)
French
German
Language
Select Back
Tip: If you accidentally select a language other than English and are unable
to read the phone menus, follow these steps to change back to English:
1. Press the red key three times.
2. Press the left soft key.
3. Scroll down six times.
4. Press the left soft key again.
5. Scroll down four times.
6. Press the left soft key and then press it a second time. The English
option is at the top so press the left soft key a final time to confirm
change back to English.
5. Use the 2-way Navi-key to
scroll until Date format is
highlighted.
6. Press the left soft key,
labeled Select.
7. Use the 2-way Navi-key until
the required date format is
highlighted.
8. Press the left soft key,
labeled Select to confirm
change or press the right
soft key labeled Back to
return to the Time and Date
Menu.
9. You may exit the settings and
return to the Main Screen by
selecting the red key.
Select Back
Select time zone
Time format
Date format
Time and Date
Select Back
01-Jan-13
DD/MM/YY
DD-MM-YY
DD.MM.YY
MM/DD/YY
YY-DD-MM
Date Format
Selecting the Display Language
Your phone contains 23 languages. Use this capability to select the
language in which your phone displays menus and messages.
Menu
Call History
Setup
Security
Help
Select Back
Starting from the Main Menu:
1. Use the 2-way Navi-key
to scroll until Setup is
highlighted.
2. Press the left soft key,
labeled Select.
13: Using the Setup Menu
13: Using the Setup Menu
9575A User Manual 153152 9575A User Manual
Setting Contrast
This capability allows you to adjust the contrast on the display screen.
Menu
Call History
Setup
Security
Help
Select Back
Starting from the Main Menu:
1. Use the 2-way Navi-key
to scroll until Setup is
highlighted.
2. Press the left soft key,
labeled Select.
3. Use the 2-way Navi-key
to scroll until Contrast is
highlighted.
4. Press the left soft key,
labeled Select.
5. Use the 2-way Navi-key to
scroll until to increase or
decrease the contrast.
6. Press the left soft key,
labeled OK to confirm
selections or press the right
soft key labeled Back to
return to the Setup Menu.
7. You may exit the settings and
return to the Main Screen by
selecting the red key.
Backlight
Contrast
Key Setup
Number Entry
Phone Information
Setup
Select Back
Contrast
OK Back
Setting Backlights
Enable, disable or adjust the length of time the backlight stays on after a
key press.
Menu
Call History
Setup
Security
Help
Select Back
Starting from the Main Menu:
1. Use the 2-way Navi-key
to scroll until Setup is
highlighted.
2. Press the left soft key,
labeled Select.
3. Use the 2-way Navi-key
to scroll until Backlight is
highlighted.
4. Press the left soft key,
labeled Select.
5. Use the 2-way Navi-key
to scroll until the required
Backlight is highlighted.
6. Press the left soft key,
labeled Select to confirm
selections or press the right
soft key labeled Back to
return to the Setup Menu.
7. You may exit the settings and
return to the Main Screen by
selecting the red key.
Select Back
Backlight
Contrast
Key Setup
Number Entry
Phone Information
Setup
Off
5 Seconds
10 Seconds
15 Seconds
20 Seconds
30 Seconds
Backlight
Select Back
13: Using the Setup Menu
13: Using the Setup Menu
9575A User Manual 155154 9575A User Manual
7. Use the 2-way Navi-key to
scroll until the desired action
is highlighted.
8. Press the left soft key,
labeled Select to confirm
selections or press the right
soft key labeled Back to
return to the Setup Menu.
9. You may exit the settings and
return to the Main Screen by
selecting the red key.
No Action
Start Call
End Call
Redial
Convenience Key
Select Back
Setup the Right Soft Key Function
Menu
Call History
Setup
Security
Help
Select Back
Starting from the Main Menu:
1. Use the 2-way Navi-key
to scroll until Setup is
highlighted.
2. Press the left soft key,
labeled Select.
3. Use the 2-way Navi-key
to scroll until Key Setup is
highlighted.
4. Press the left soft key,
labeled Select.
Select Back
Backlight
Contrast
Key Setup
Number Entry
Phone Information
Setup
Using the Key Setup Menu
This capability selects the function of the convenience key and the
right soft key when the Main Screen is displayed. The default function
is to display the Help screen which is useful for new users; however the
function can be changed to access the phonebook.
Setup the Convenience Key Function
Menu
Call History
Setup
Security
Help
Select Back
Starting from the Main Menu:
1. Use the 2-way Navi-key to scroll
until Setup is highlighted.
2. Press the left soft key, labeled
Select.
3. Use the 2-way Navi-key to scroll
until Key Setup is highlighted.
4. Press the left soft key, labeled
Select.
5. Convenience Key is highlighted.
6. Press the left soft key, labeled
Select.
Select Back
Backlight
Contrast
Key Setup
Number Entry
Phone Information
Setup
Convenience Key
Right Soft Key
Setup
Select Back

13: Using the Setup Menu
13: Using the Setup Menu
9575A User Manual 157156 9575A User Manual
Menu
Call History
Setup
Security
Help
Select Back
Select Back
Setup
Backlight
Contrast
Key Setup
Number Entry
Phone Information
Number Entry
Select Back
Prefix with +
Prefix with 00
Do not prefix
3. Use the 2-way Navi-key to
scroll past the Key Setup
option until Number Entry is
highlighted.
4. Press the left soft key,
labeled Select.
5. Use the 2-way Navi-key to
scroll until the desired action
is highlighted.
6. Press the left soft key,
labeled Select to confirm
selections or press the right
soft key labeled Back to
return to the Setup Menu.
7. You may exit the settings and
return to the Main Screen by
selecting the red key.
View Phone Information
This capability allows you to view technical information about the 9575A
Satellite Phone software, hardware versions and the IMEI number.
Menu
Call History
Setup
Security
Help
Select Back
Starting from the Main Menu:
1. Use the 2-way Navi-key
to scroll until Setup is
highlighted.
2. Press the left soft key,
labeled Select.
Convenience Key
Right Soft Key
Setup
Select Back
Show Help
SIM Phonebook
My Phonebook
Right key action
Select Back
5. Use the 2-way Navi-key until
Right Soft Key is highlighted.
6. Press the left soft key,
labeled Select.
7. Use the 2-way Navi-key to
scroll until the desired action
is highlighted.
8. Press the left soft key,
labeled Select to confirm
selections or press the right
soft key labeled Back to
return to the Setup Menu.
9. You may exit the settings and
return to the Main Screen by
selecting the red key.
Set Number Entry Prex
This capability allows you to set your preferred international access code
and can automatically attach (00) or (+) to any phone number you enter.
Starting from the Main Menu:
1. Use the 2-way Navi-key
to scroll until Setup is
highlighted.
2. Press the left soft key,
labeled Select.
13: Using the Setup Menu
13: Using the Setup Menu
9575A User Manual 159158 9575A User Manual
Select Back
Setup
Reset to defaults
Yes No
Reset
Reset all phone
settings?
Reset
Phone settings reset
3. Use the 2-way Navi-key to
scroll past the Key Setup
option until Reset to
defaults is highlighted.
4. Press the left soft key,
labeled Select.
5. Press the left soft key,
labeled Yes.
6. A message appears briefly
indicating the phone settings
have been reset.
7. Press the red key to return to
the Main Screen.
3. Use the 2-way Navi-key
to scroll past the Key
Setup option until Phone
Information is highlighted.
4. Press the left soft key,
labeled Select.
Information regarding your
phone appears on the display.
5. Press the right soft key,
labeled Back to return to the
Setup menu.
Setup
Backlight
Contrast
Key Setup
Number Entry
Phone Information
Select Back
Back
Phone Information
F/w:HT08001
IMEI:399999999999999
Reset Phone Options to Factory Defaults
This capability resets all settings to their original default settings.
Menu
Call History
Setup
Security
Help
Select Back
Starting from the Main Menu:
1. Use the 2-way Navi-key
to scroll until Setup is
highlighted.
2. Press the left soft key,
labeled Select.

14: GPS & Location Based Services
9575A User Manual 161
13: Using the Setup Menu
160 9575A User Manual
14: GPS and Location-Based Services
The 9575A GPS and Location-Based Service features allow you to
view, send, or restrict your location information. There are four main
components to set up and use these features:
• Location Options Setup Menu: located in the 9575A main menu in
the setup section, Location Options is where you customize your GPS,
emergency, message, and format options.
• Programmable SOS button: this red button is located on the top
of the phone, under a protective cover. By removing the cover and
pressing the red button you can send your location information to your
designated contact in the event of an emergency.
• Location Convenience Key: located on the right side of the phone, you
can press this key to view your location and share it via SMS to either a
pre-programmed “Quick GPS” contact or a new message contact.
• Online portal integration with 3rd party providers: enables the
transmission of the phone’s location information on a scheduled
interval via short-burst data (SBD) to 3rd party portal providers for
online tracking
Note: Standard usage fees apply for sharing location via messaging or
placing a phone call via the programmable SOS button.
Location Options Setup Menu
The Location Options Setup Menu enables you to set up the following
options:
• GPS Options: Enable/disable GPS on your handset; determine how
frequently the GPS is updated when enabled; and lock your GPS
settings.
• Portal Options: Register/De-register with portal provider; check your
portal status
• Emergency Options: Set up Emergency Recipients; determine
Emergency Actions; configure Emergency settings; and enter/cancel
Emergency Mode; GEOS Service use/do not use.
• Message Options: Set up the recipient and frequency of your auto GPS
location update message.
• Format: Configure the format of GPS location information.
• Current Location: View and update your current GPS location.
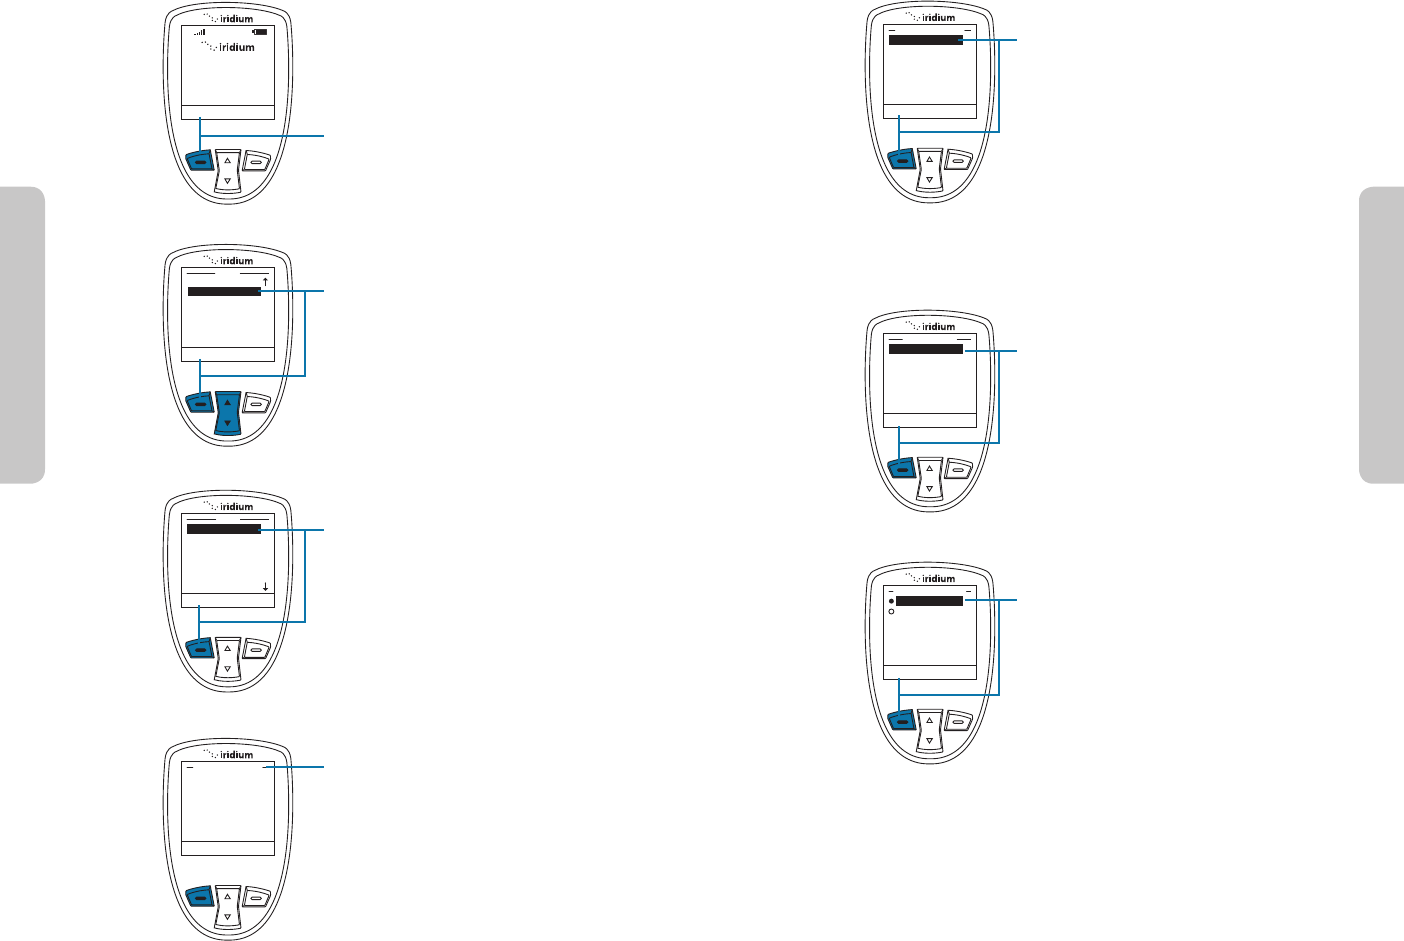
14: GPS & Location Based Services
14: GPS & Location Based Services
9575A User Manual 163162 9575A User Manual
Using the GPS Options Menu
GPS Settings Lock
Locating Location Options
Select Back
GPS Options
Emergency Options
Message Options
Format
Current Location
Location Options
Use the GPS Options menu to configure
the basic GPS settings on your handset.
Through this menu you can lock GPS
settings, set the GPS refresh frequency
rate, and turn GPS On or Off.
1. Press the left soft key, labeled Select
Within the GPS Options menu, enable
the GPS Settings Lock to prevent
modifications to GPS settings unless the
GPS Settings Lock PIN is entered.
1. Press the left soft key, labeled Select.
The default setting for GPS Settings
Lock is Disabled. To enable GPS
Settings Lock, move the 2-way
Navi-key until the Enabled option is
highlighted
2. Press the left soft key, labeled Select.
Select Back
GPS Settings Lock
Update Options
GPS On/Off
GPS Options
Select Back
Enabled
Disabled
GPS Settings Lock
Registered
Menu Help
16:28 14-May-13
T
Starting from the main screen:
1. Press the left soft key, labeled
Menu.
2. The Main Menu is displayed. Use the
2-way Navi-key to scroll until Setup
is highlighted.
Press the left soft key to select
Setup.
3. With Location Options highlighted
press the left soft key, labeled
Select to enter the Location
Options menu.
4. Within the Location Options menu
are GPS Options, Portal Options,
Emergency Options, Message
Options, Format, and Current
Location.
Menu
Call History
Setup
Security
Help
Select Back
Select Back
Location Options
Call Options
Volume and Tones
Time & Date
Language
Setup
Select Back
GPS Options
Portal Options
Emergency Options
Message Options
Format
Current Location
Location Options
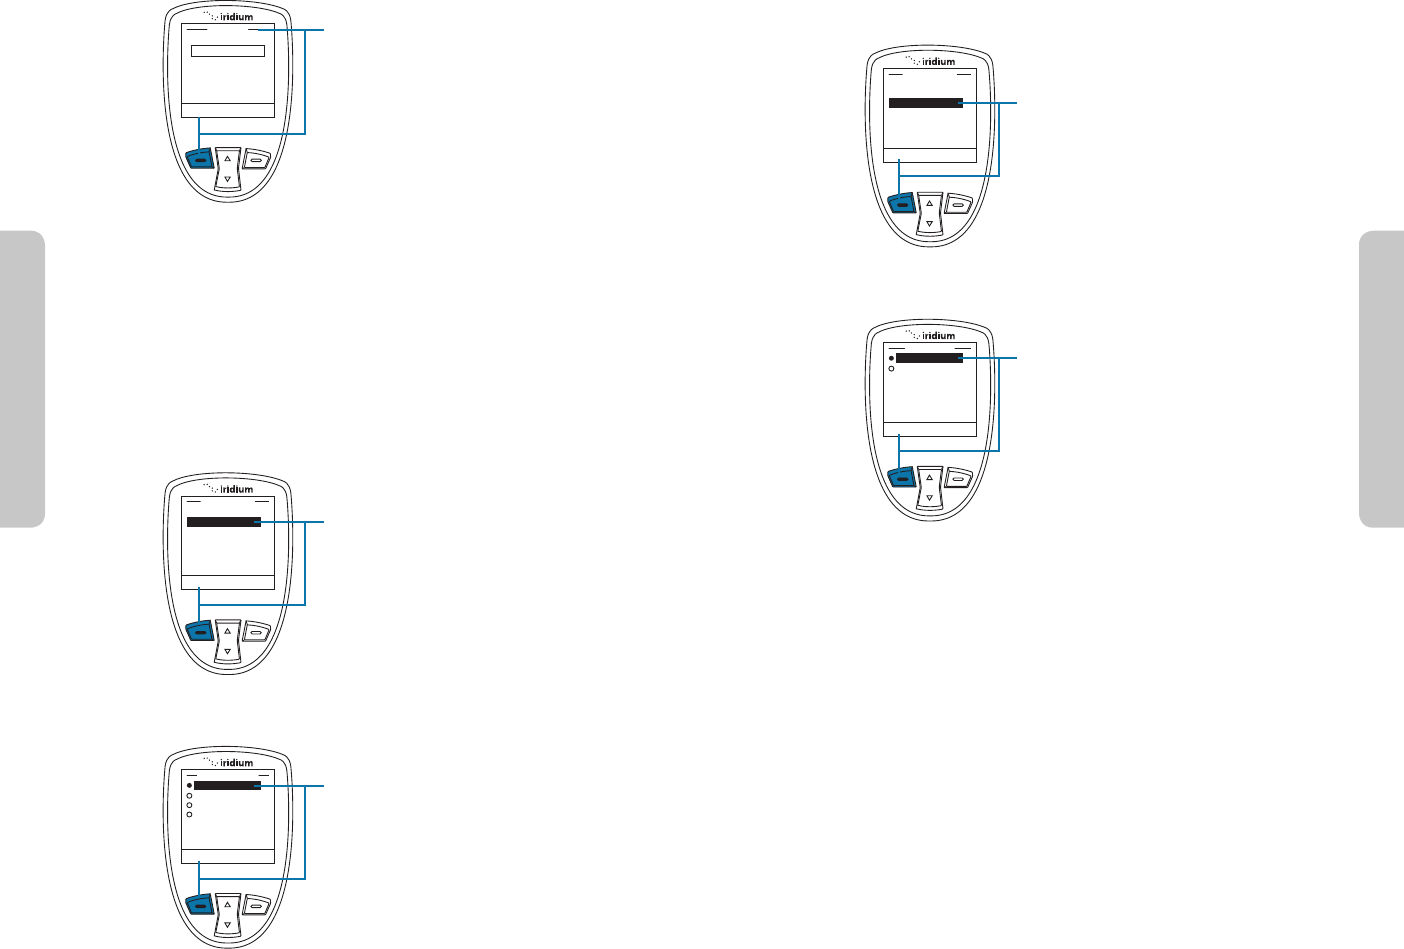
14: GPS & Location Based Services
14: GPS & Location Based Services
9575A User Manual 165164 9575A User Manual
Turning GPS On/O
Note: the GPS receiver automatically saves your location to your phone
when the phone is turned on even if the GPS receiver is o.
Setting Emergency Options
The Emergency Options menu items are used to personalize your settings
for the programmable SOS button located on the top of your phone. The
programmable SOS button gives you the ability to flip open the protective
SOS button cover, press the red key located underneath, and initiate a
message and/or phone call to your dedicated contacts. These contacts could
be a family member, commercial safety service, safety office, or Iridium-
supported public emergency number (ex. 911 in U.S. or 000 in Australia).
Iridium has partnered with GEOS Travel Safety Group to provide an
emergency response coordination service for your 9575A. Upon power-up
of your phone you will be presented with the option of using this service
by having the SOS button call and message to a destination automatically
programmed for you in the phone through the menus. You will also be
prompted to register for service by visiting www.geosalliance.com/iridium
to review and accept the terms of use and enter your emergency contact
GPS Update Options
Within the GPS Options menu, the
GPS On/O will allow you to turn the
built-in GPS receiver on or off in your
phone. Features that require GPS on
will prompt you to turn GPS on. Use
of the programmable SOS button will
automatically turn GPS on. To adjust
GPS On/O, access the GPS Options
menu and use the 2-way Navi-key until
the GPS On/O menu is selected.
1. Press the left soft key, labeled Select.
The default setting for GPS On/O is
Disabled, meaning that GPS is off. It is
recommended that GPS is enabled for
frequent use of GPS (for example, use
with 3rd party online tracking portal)
and disabled for infrequent use to
conserve battery. To Enable GPS and
turn it on, use the 2-way Navi-key until
the Enabled option is highlighted.
2. Press the left soft key, labeled Select.
Select Back
GPS Settings Lock
Update Options
GPS On/Off
GPS Options
Select Back
Enabled
Disabled
GPS On/Off
OK Clear
GPS Settings Lock
Enter PIN
To modify the GPS Settings Lock, you
will be prompted to enter the GPS
Settings Lock PIN. The default GPS
Settings Lock PIN is 3333 and can
be modified in the Security Menu by
navigating to Change PINs and then
GPS Settings Lock. If your phone has
been “Reset to defaults” or entered
the incorrect PIN multiple times, you
may require a GPS PIN unlock code
from customer support to restore this
capability.
3. Once the default or personalized
GPS Settings Lock PIN is entered,
press the left soft key, labeled OK.
Within the GPS Options menu, the
GPS Update Options will allow you
to set how frequently a GPS position
is updated for viewing the Current
Location on the phone screen. To
access Update Options, use the 2-way
Navi-key to scroll and highlight this
feature.
1. Press the left soft key, labeled
Select.
Within the Update Options menu, the
options are provided to have the GPS
location updated One Time, Real Time,
every 5 minutes, or every 10 minutes.
To modify this setting, use the 2-way
Navi-key to scroll and highlight the
desired update rate.
2. Press the left soft key, labeled
Select.
Select Back
GPS Settings Lock
Update Options
GPS On/Off
GPS Options
Select Back
One Time
Real Time
5 Minutes
10 minutes
Update Options
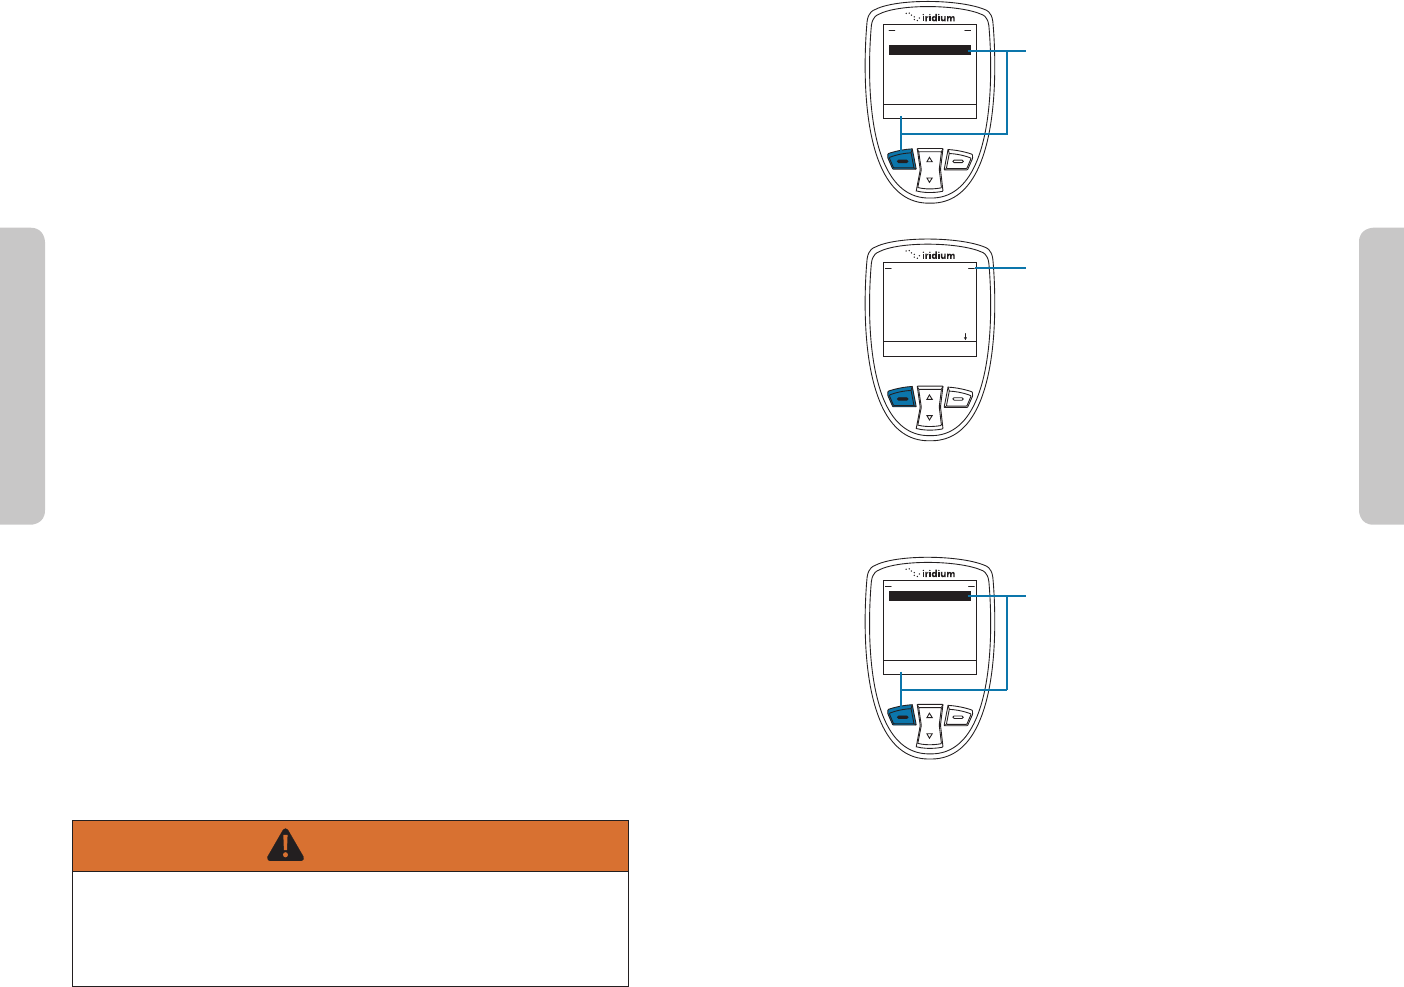
14: GPS & Location Based Services
14: GPS & Location Based Services
9575A User Manual 167166 9575A User Manual
Emergency Mode
information. Registration, programming, and a valid Iridium subscription is
required for this service. Additional information on this service can be found
on www.iridium.com in the 9575A section by viewing the emergency service
section. To view or modify your settings, navigate to Emergency Options and
then down to GEOS Service (the last menu option after “Call Recipient”). From
this menu option you will have the option to “Use” or “Not Use”. If you select
“Use”, you will be prompted to “Please confirm you have registered at www.
geosalliance.com/iridium”. You will need to register and then your phone will
be pre-programmed to send your location with an emergency message to
GEOS and will initiate a phone call to the GEOS response coordination center.
Standard airtime charges will apply for emergency mode messages and/or
calls to GEOS.
If you select to “Not Use” GEOS, then you will need to program your
emergency “Call Recipient” and “Message Recipient” information in order
for the SOS button to initiate contact with those dedicated contacts. To
view or modify your settings, navigate to Chapter 14: GPS and Location-
Based Services under the section “Setting Emergency Options”.
In addition to the peace of mind delivered through the included Emergency
Response service, GEOS also offers optional add-on Membership Benefits
to enhance your safety and security worldwide including GEOS Search
and Rescue (SAR) and GEOS MEDIVAC™ Plus service. The GEOS Emergency
Response Service, GEOS Search and Rescue (SAR) Membership and the GEOS
MEDIVAC™ Plus are services offered and provided exclusively by GEOS, and
not by Iridium which is a separate, unrelated company. Neither GEOS nor
Iridium will pay the cost of rescue efforts in the event that the 9575A user
fails to register and contract separately with GEOS for SAR and/or GEOS
MEDIVAC™. Any issues, terms and conditions and limitations of liability related
to your 9575A are outlined in this 9575A User Manual. The use of the GEOS
Emergency Response service requires agreement to GEOS’s emergency
monitoring terms & conditions, registration with GEOS on www.geosalliance.
com/iridium, programming of your 9575A, a valid subscription, network
service availability, proper orientation and use of the phone, and standard
usage fees that will apply.
Notice: the operation of the SOS button feature is limited by any
conditions affecting the GPS signal strength and GPS service availability.
WARNING
You must configure the Emergency Mode in order for the SOS button to
send an emergency message to a designated Call Recipient and Message
Recipient. Failure to configure the SOS button will result in no message
being sent when the SOS button is pressed. This could prevent or delay
an emergency response and result in serious injury or death.
Select Back
GPS Options
Emergency Options
Message Options
Format
Current Location
Location Options
To access Emergency Options,
access Location Options and scroll
down with the 2-way Navi-key until
Emergency Options is highlighted.
Press the left soft key, labeled Select.
Within the Emergency Options menu
are Emergency Mode, Emergency
Actions, Emergency Beep, Message
Recipient, Call Recipient, and GEOS
Service.
In the Emergency Options menu, the
Emergency Mode allows you to initiate
an emergency call and/or message to
your programmed contacts. The more
direct way to initiate Emergency Mode
is to press the red SOS button located
on the top of your phone.
If Emergency Mode is active, this
menu item can be used to cancel
Emergency Mode. When Emergency
Mode is activated, the option to cancel
Emergency Mode also appears on the
main screen.
To initiate Emergency Mode from the
menu, highlight “Emergency Mode”
and press the left soft key, labeled
Select.
Select Back
Emergency Mode
Emergency Actions
Emergency Beep
Message Recipient
Call Recipient
Emergency Options
Select Back
Emergency Mode
Emergency Actions
Emergency Beep
Message Recipient
Call Recipient
Emergency Options